This is our GIT extensions tutorial for beginners. Here’s what you are going to learn:
- Introduction to Git Extensions
- Managing Repository
- Generating SSH Keys as a One-Time Activity
- How to Clone a Repository?
- How to Open a Repository?
- How to Traverse into the Repository?
- How to Track the Changes using Git Extensions?
- How to Perform Commit & Push?
Introduction to Git Extensions
GIT Extensions is a distributed version control system enabling a user to robustly manage a collection of source files and the changes made in them. The changes made are shown in the History of changes. Users can make changes by accessing a Central repository called remote repository and committing the changes to it. It implements classic GIT by using GUI (Graphical user interface), basically driven by a set of dedicated commands, hence maintaining the version control system intuitively. So, let us go through a glimpse of functionalities provided by GIT Extensions so that our version control system can be maintained.
Managing Repository
There are many options to manage the repository through GIT Extensions. It includes viewing the committed logs and changes made in comparison to the previous commit, cloning a repository, traversing through the file directory and filtering the committed logs by using custom search input, etc.
GIT Extensions can be downloaded from https://github.com/gitextensions/gitextensions/releases/tag/v2.48.05
Generating SSH Keys as a One-time Activity
SSH Keys should be loaded as a one-time activity. SSH keys can be generated while setting up the GIT Extensions.
In order to use a safe development environment with SSH, you need to get PuTTY installed as a preferred SSH client. PuTTY can be downloaded from http://www.putty.org/
The first thing is to check that Git Extensions is properly configured to use PuTTY, as well as all paths, are given correctly.
In the Remotes Tab just choose Generate or import key to start the key generator.

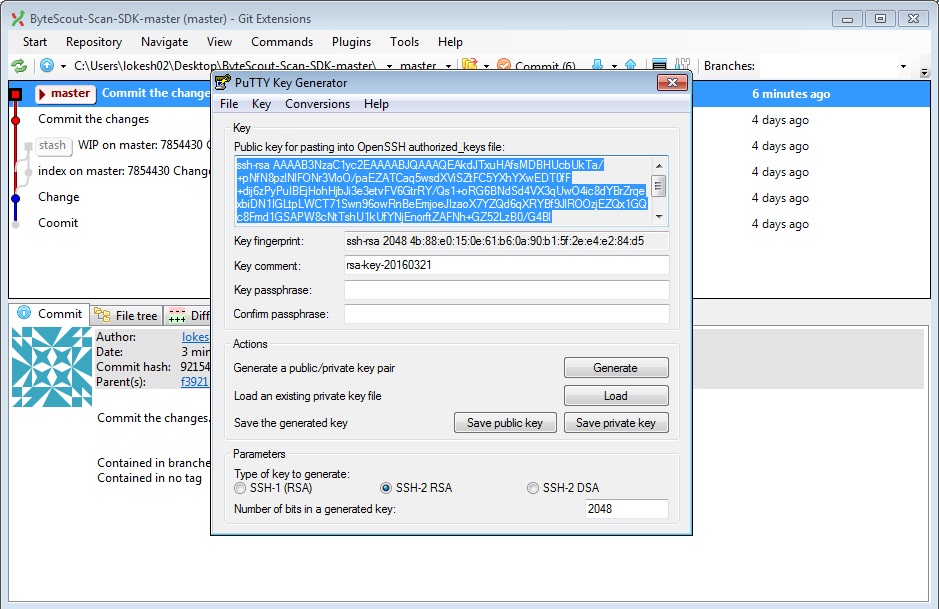
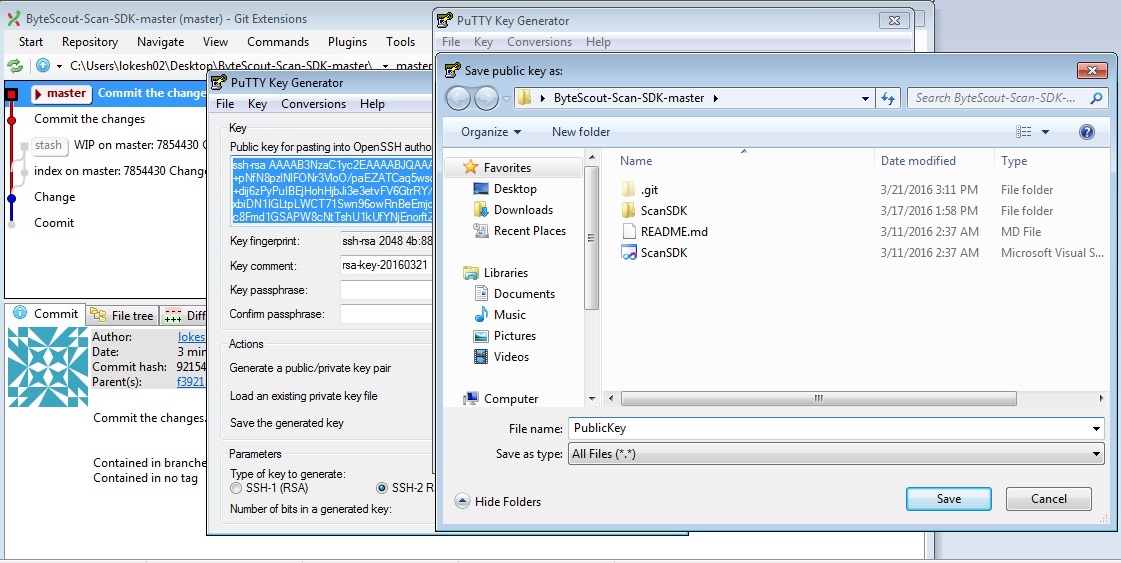
It will ask you to move around the mouse in order to generate more random keys. When the key gets generated, save the public and private key in a text file by clicking the Save Public key button.
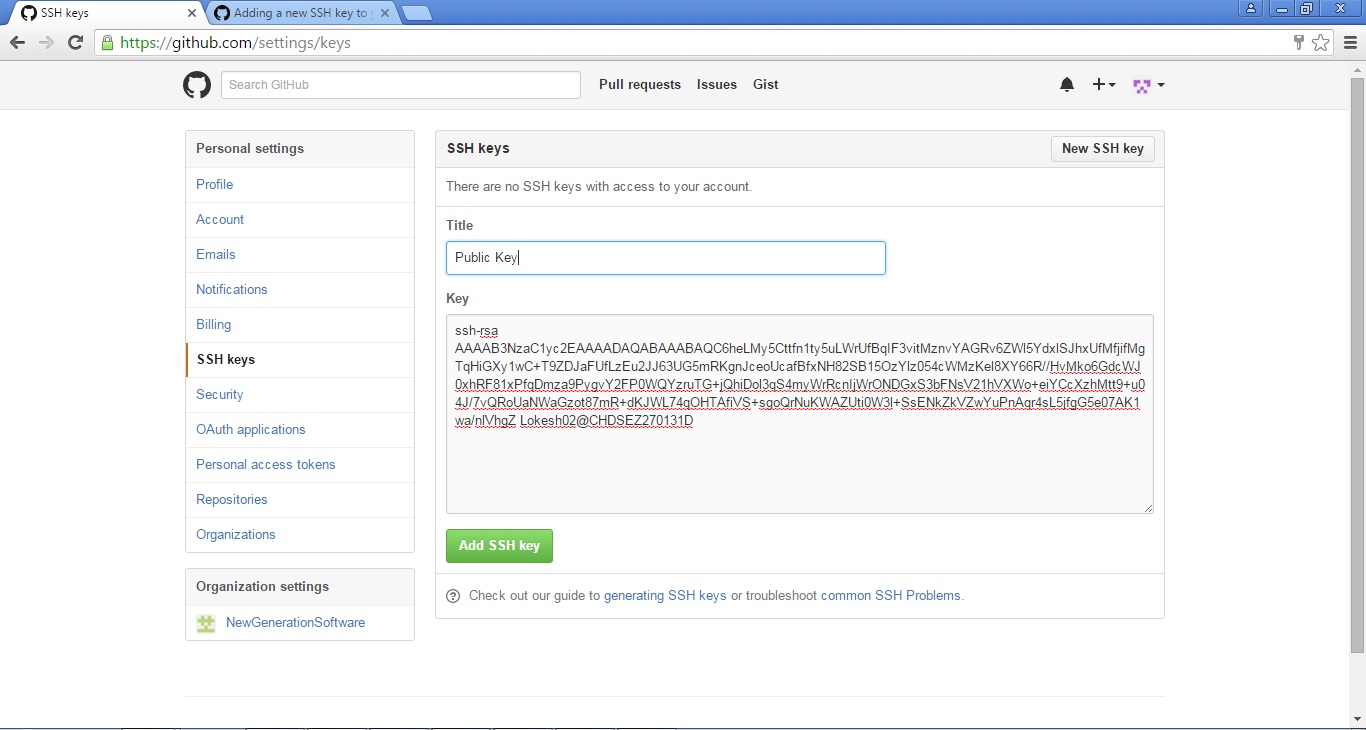
Since now you are having a key pair, provide the public key to the Github account by copying the Key from the file which you just saved above at your desired location.
Then open your Github account and click on the profile image, followed by Account settings and going to the SSH Keys tab. Finally, paste the public key over there.
You can create a Github account at https://github.com/join?source=header
Now GitHub will get to know which public key it has to use to decrypt. Now you also need to provide the private key to GitExtensions to encrypt. You will find a Load SSH key button in the clone dialog where you can load the private key in PuTTY authentication.
Note: This is a one-time activity and you don’t need to repeat these steps again.
How to Clone a Repository?
Cloning a repository will create a local copy of the repository being cloned by this action.
It’s possible that the repository you want to clone is located on a network share or is accessible via an internet or intranet connection. You may need to load an SSH key into PuTTY depending on the protocol (http or ssh). You must also indicate the location of the cloned repository and the branch that will be checked out first. If the cloned repository has submodules, they can be initialized with their default values if necessary.
When making a clone, you can create two different sorts of repositories. A personal repository stores all of the histories as well as a functioning copy of the source tree. A central (bare) repository serves as a public repository to which developers push updates that they want to share with others. A central repository holds the entire history but does not have a working directory, unlike personal repositories.
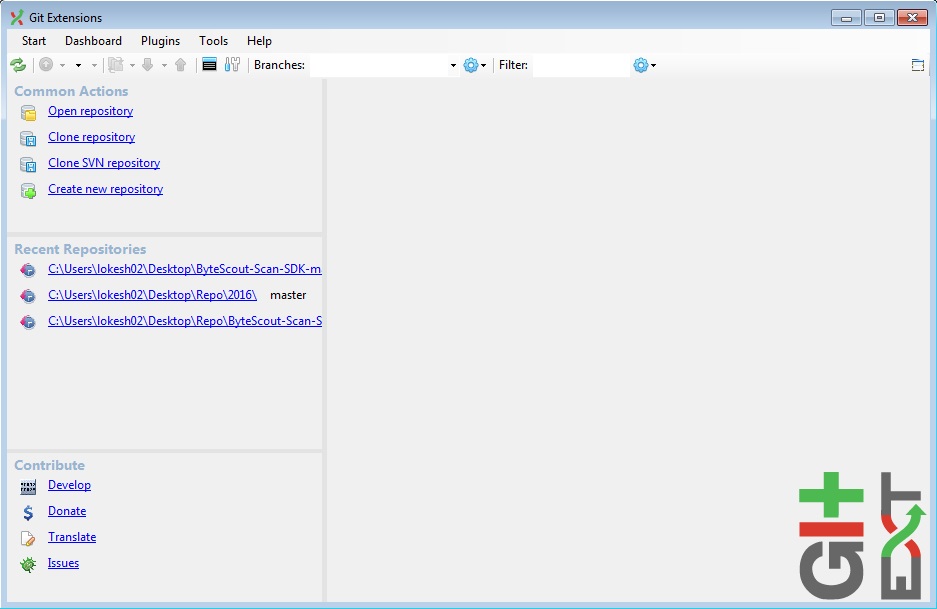
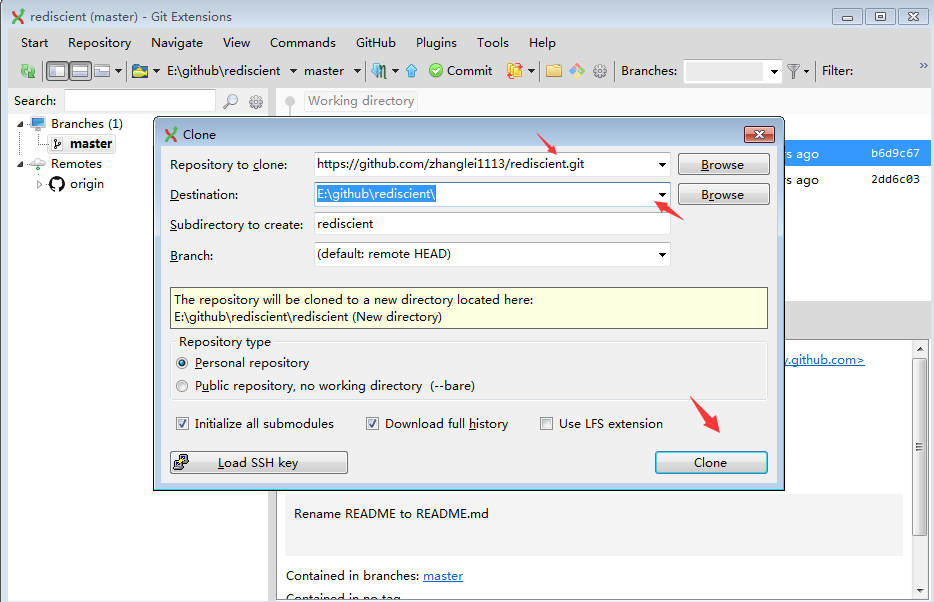
- Click the ’Clone repository’ link from the Common Actions section on the left to clone a repository.

- Provide the necessary inputs as Repository to clone (highlighted URL at the top tells which repository needs to be cloned), Destination (local hard drive location), Branch (automatically loaded when the local repository address is provided), and Repository type, and then click ‘Clone’.

- The process of cloning starts and the remote files are checked-out to the specified destination i.e. local directory. A green tick mark indicating completion of the process will be displayed.


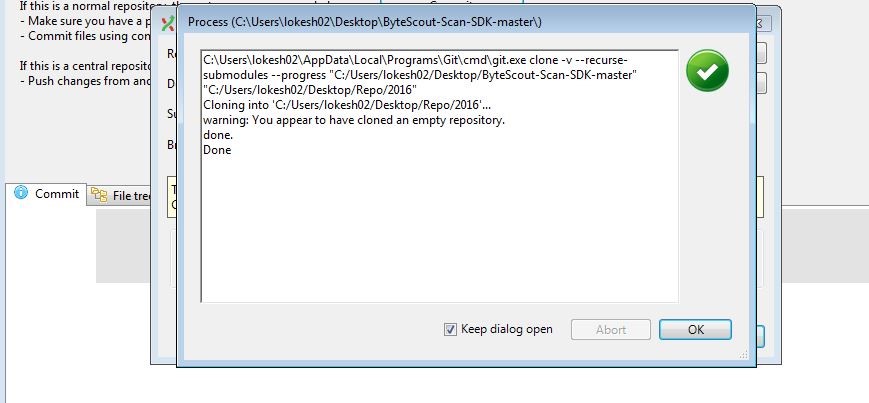
Note: A Red Cross mark with respective errors will be displayed too during the occurrence of errors in the process if any.
Errors in Cloning – Troubleshooting
You’ll likely get some issues when cloning a repository. If you’re having trouble cloning a repository, make sure:
- You can use HTTPS to connect.
- You have access to the repository you’d like to clone.
- The default branch that you’d like to clone is still available.
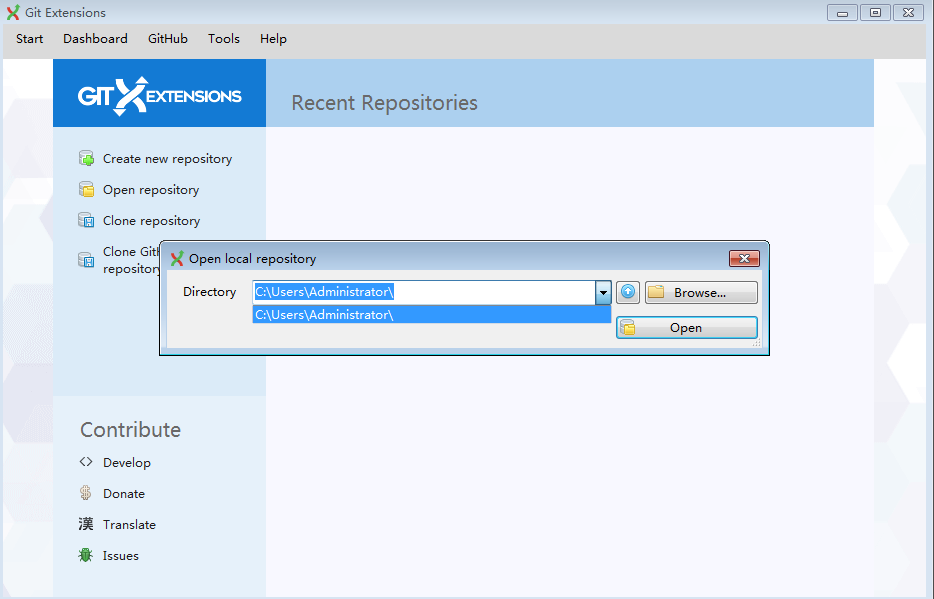
How to Open a Repository?
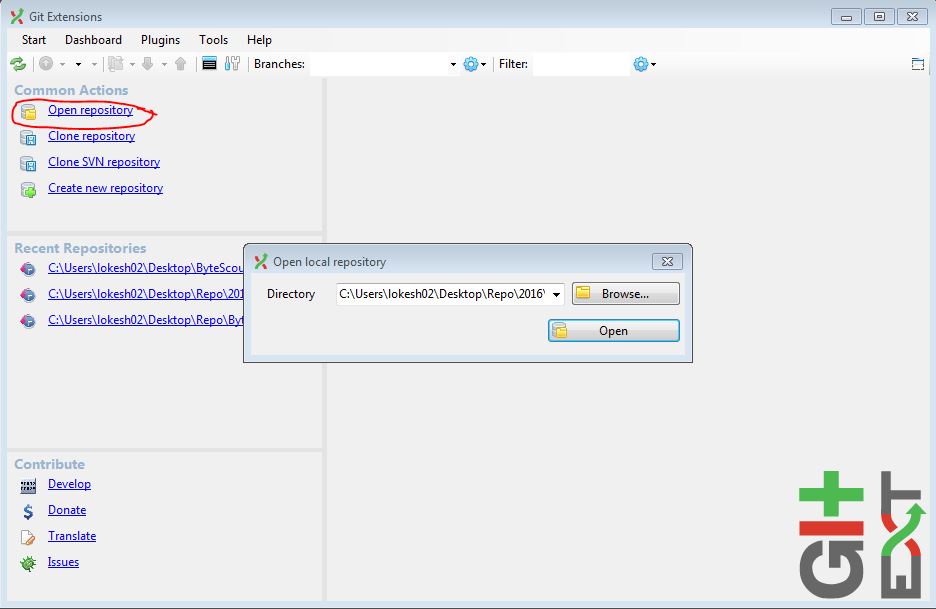
From the Common Actions section at the left click the ‘Open Repository’ link and give the directory address for opening a repository. Then click the ‘Open’ button as highlighted in the figure.
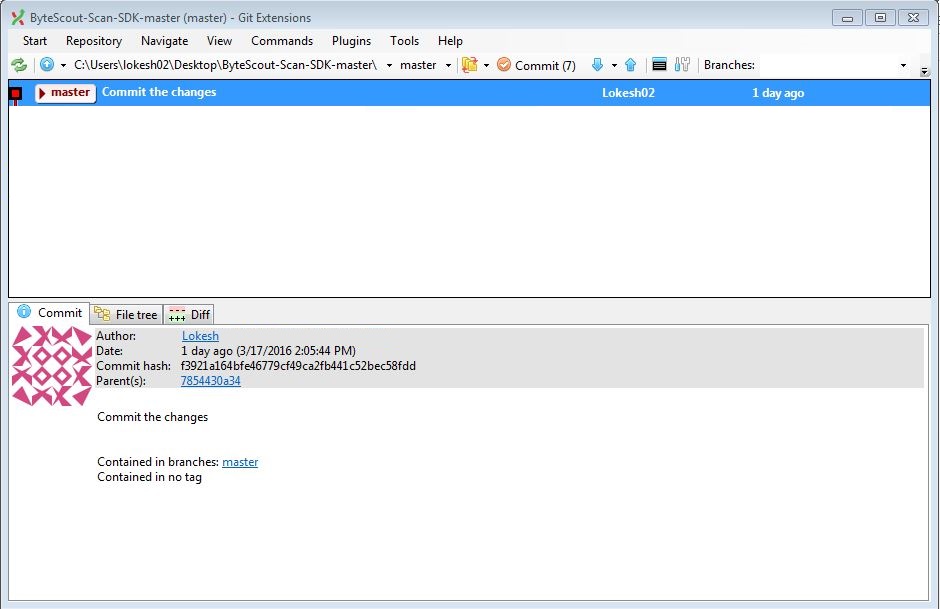
It opens the repository and all committed logs will be shown with an abstract message associated with them, committed user, and the time elapsed when the commit was done (Refer figure). Also, the details like Author, date are shown at the bottom in the commit section.
How to Traverse into the Repository?
Initially click the ‘File Tree’ tab. It will show the whole repository in the form of a file tree and intended files and directories can be viewed easily. This is the step-wise procedure to traverse a repository by a user.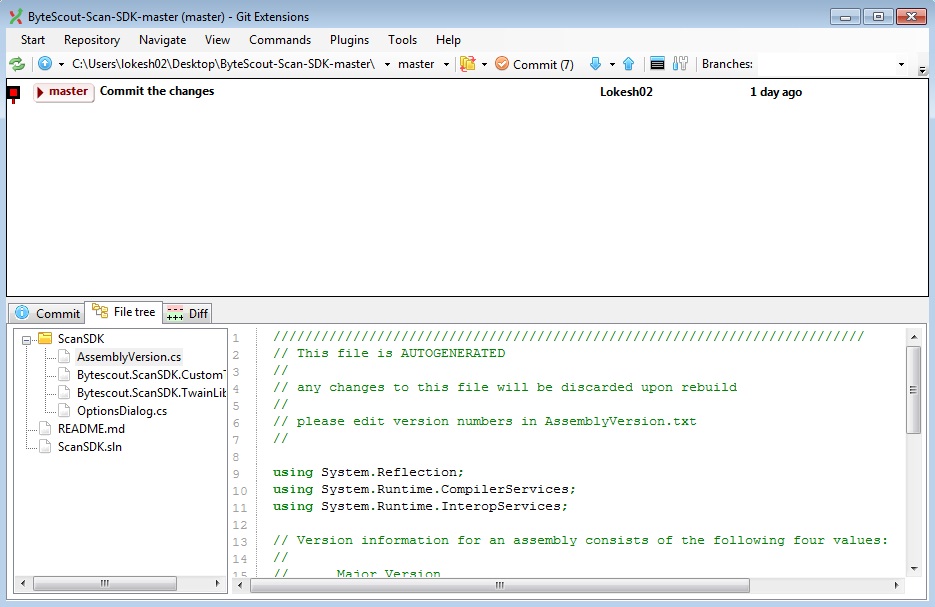
Using libgit2
Let’s have a peek at the source code.
#include <git2.h>
This header file must be included in any program that uses libgit2.
The first step is to use git libgit2 init to get libgit2 and its resources up
int main(int argc, char * argv[])
{
    git_libgit2_init();
   const char * REPO_PATH = "/path/to/your/repo/";
   git_repository * repo = nullptr;
   git_repository_open(&repo, REPO_PATH);
You open a repository with git repository open, which creates an object that you may use in your code to interact with a repository.
git_revwalk * walker = nullptr;
git_revwalk_new(&walker, repo);
The next step is to develop a revision walker, which is an object that iterates over a git repository. The git revwalk new function handles this.
git_revwalk_sorting(walker, GIT_SORT_NONE);
Once we’ve created a revision walker, we’ll need to provide a few parameters to manage the traverse. One example is the sorting mode when iterating over the repository. This is accomplished by invoking git_revwalk_sorting with one of the following values as the second parameter:
GIT SORT NONE – the default reverse chronological order (beginning with the most recent) of commits as in git
GIT SORT NONE – the default reverse chronological order (beginning with the most recent) of commits as in git
GIT SORT TIME – order of commit timestamps
GIT SORT REVERSE – performs commits in reverse order.
An OR can also be used to combine topological and temporal ordering.
It’s worth noting that you don’t need to use this function to set GIT_SORT_NONE because that’s the default setting.
git_revwalk_push_head(walker);
We are now ready to begin the traversal after the setup stage. This is accomplished by the method git revwalk next, which obtains the ID of the next commit to visit.
Calling git_revwalk_push_head changes the root to the HEAD of the repository.
git_oid oid;

    while(!git_revwalk_next(&oid, walker))
    {
Once we have used the commit, it’s time to release the object calling git_commit_free.
git_revwalk_free(walker);
git_repository_free(repo);
We are now ready to begin the traversal after the setup stage. This is accomplished by the method git_revwalk_next, which obtains the ID of the next commit to visit.
git_commit * commit = nullptr;
git_commit_lookup(&commit, repo, &oid);
Once we have an ID, we can use git commit lookup to retrieve a git commit object. This object will be used to retrieve information about the commit.
std::cout   << git_oid_tostr_s(&oid)
                    << " "
                    << git_commit_summary(commit)
                    << std::endl;
This is where we collect the necessary information from the ID and the commit.
After we’ve utilized the commit, we’ll call git_commit_free to release the object.
git_revwalk_free(walker);
git_repository_free(repo);
We can extract the hash of the commit from the ID using git_oid_tostr_s and the short summary of the commit using
git_commit_summary.
git_commit_free(commit);
    }
Then we may call git_revwalk_free to free the revision walker and git_repository_free to free the repository.
git_revwalk_free(walker);
git_repository_free(repo);
git_libgit2_shutdown();
return 0;
}
Finally, we shut down libgit2 with git_libgit2_shutdown.
How to Track the Changes using Git Extensions?
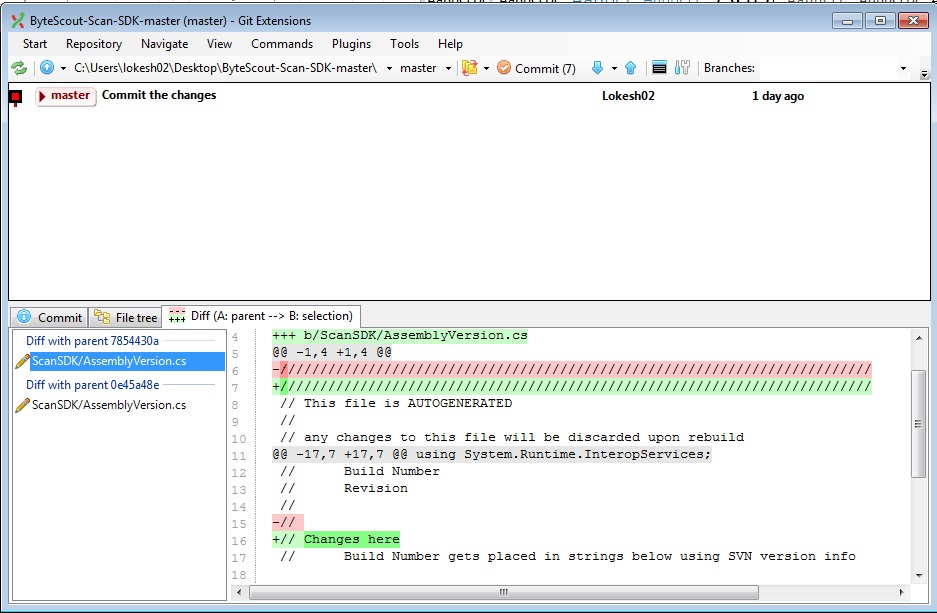
By clicking the ‘Diff’ tab comparison can be made with respect to the previous commit as shown in the figure.
Press Ctrl+click commits to see all changes between them in the Git Extensions GUI. Because the first pick is handled as the base, choose an older commit first to show the change direction in diff view (additions/deletions) appropriately.
AFAIK, Git Extensions does not offer a GUI option to send a directory diff to an external tool (just file by file); therefore, you must do it from Git shell to obtain all changes at once to Beyond Compare (assuming you have configured it as a diff tool for Git).
git difftool -d <commit1> <commit2>
If you want to compare your current checked-out version to <commit1>, omit <commit2>. For instance, if you are on your local master and use fetch rather than pull
git difftool -d origin/master
will display the modifications that will be made when your local branch is merged with the origin branch.
Note: Newly added lines are marked as ’+’sign and shown with green color and the deleted ones as ’-’ sign and presented with red color.
How to Perform Commit & Push?
This action of committing and then pushing the given code to a remote repository is divided into two operations:
- Committing to Local Repository
- Committing to Remote Repository
Committing to Local Repository with Git Extensions
This process of committing involves various steps:
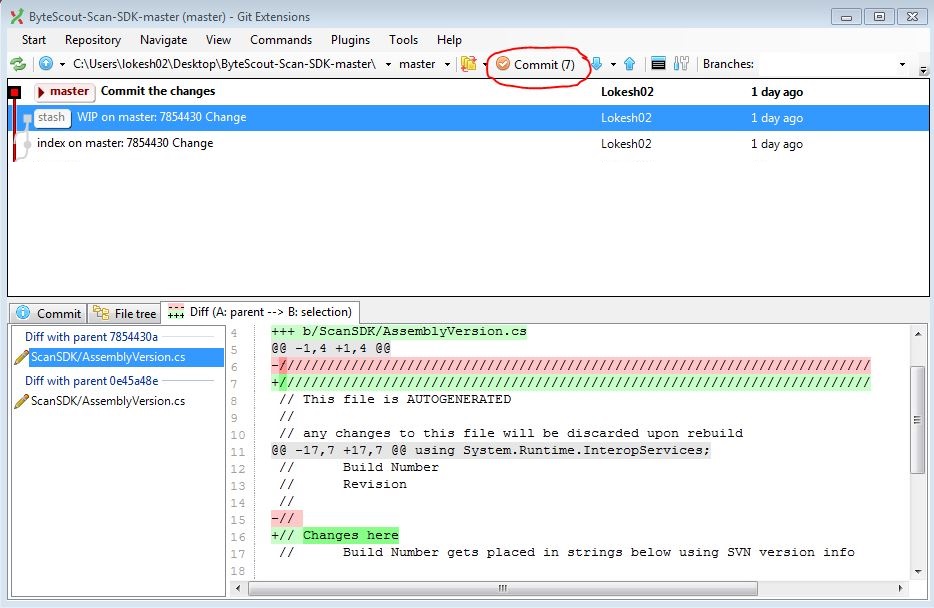
- To start the process click the ’Commit’ icon.

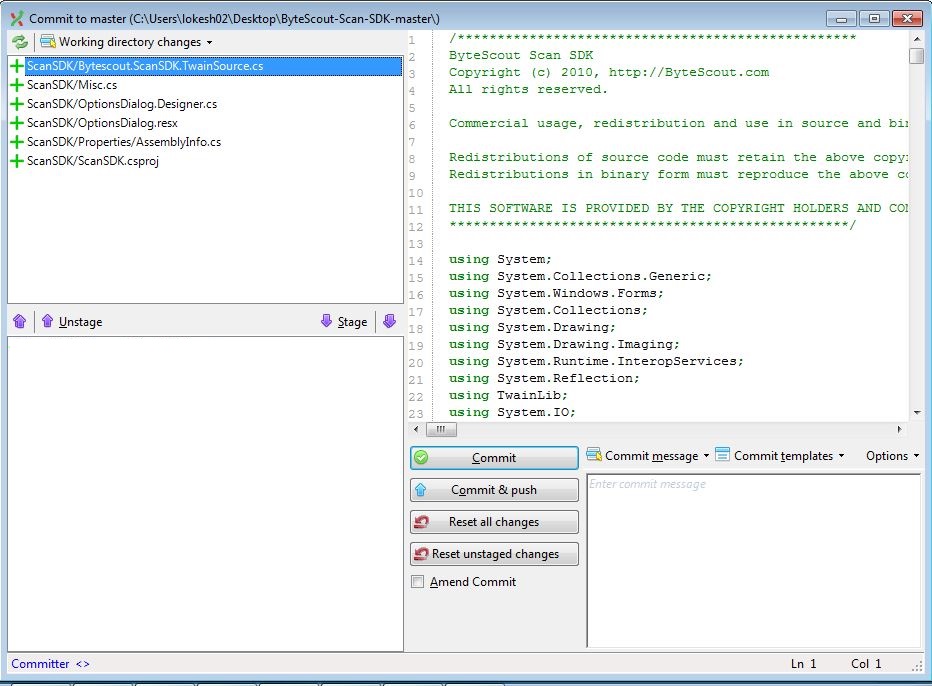
- The respective fields are displayed in the newly opened commit window (Refer figure):
- Working directory files.
- Staged files.
- Details of the modifications compared to the respective repo code.
- Input box for the commit message to be entered by the user.

The top left section will show the working directory files which were modified since the last commit:- Click any file from the working directory file list. The files with their modified changes (highlighted in Red and Green) are displayed on the right section. This way we can identify file-wise discrete changes.
- When the changes are verified, files can be staged by using the ‘Stage’ option (Refer Figure). These Staged files are ready to commit and provide an easy way for filtering certain files not committed during the previous stage for the users.

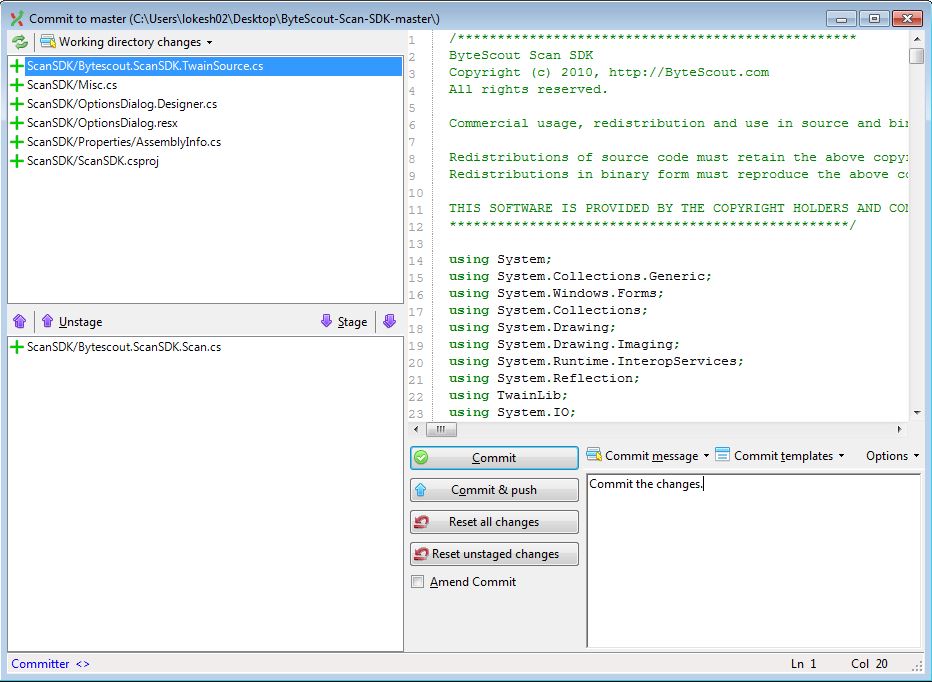
Note: Users can also Unstage a staged file by using the ‘Unstage’ option opposite to Stage icon. - When the verification and staging of all required files are done, you have to provide a suitable message to show the current commit action. The Commit History screen will show this message. The purpose of committing an action can be easily interpreted in an appropriate message is given.
- Commit the files using the ‘Commit’ button. The status of the commit operation is displayed in a dialog window. It will also show all the run-time errors of the process, displaying them with the appropriate stage of the whole process.
Note: Clicking ‘Commit’ lets the files be committed into the local repository and not into the remote repository.
Committing to Remote Repository
‘Push’ action is used to move the files of the local repository into a remote repository. It needs to be ensured by the user that the code which was taken lastly from the remote repository is not modified before you perform push action. There is every possibility that a repository could have been modified when it has been pulled or cloned by another person. This generally happens in a multi-user environment where a lot of branching and merging happens. Hence, it is necessary for a user to perform a Pull before opting for a Pushing action for the committed code.
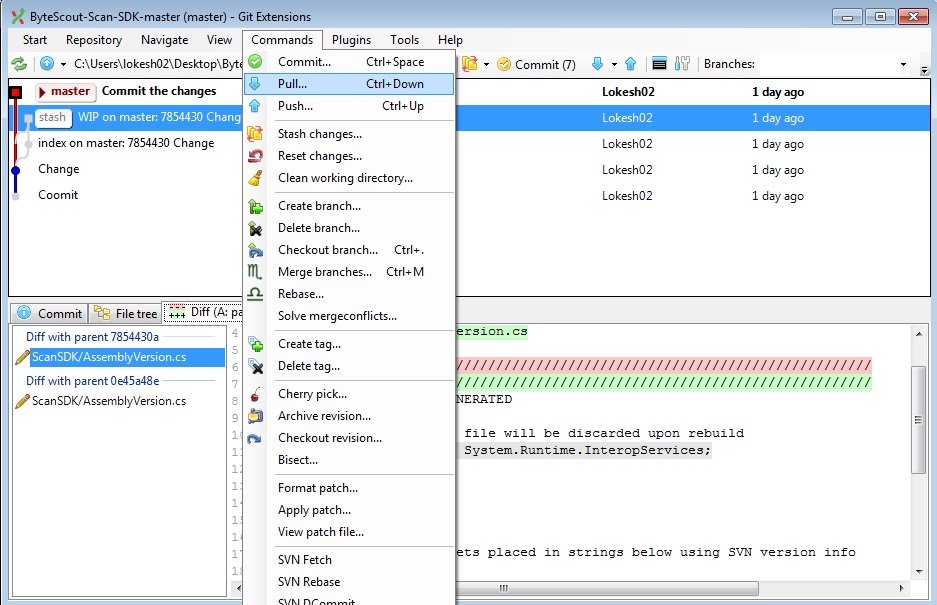
Pulling the Code
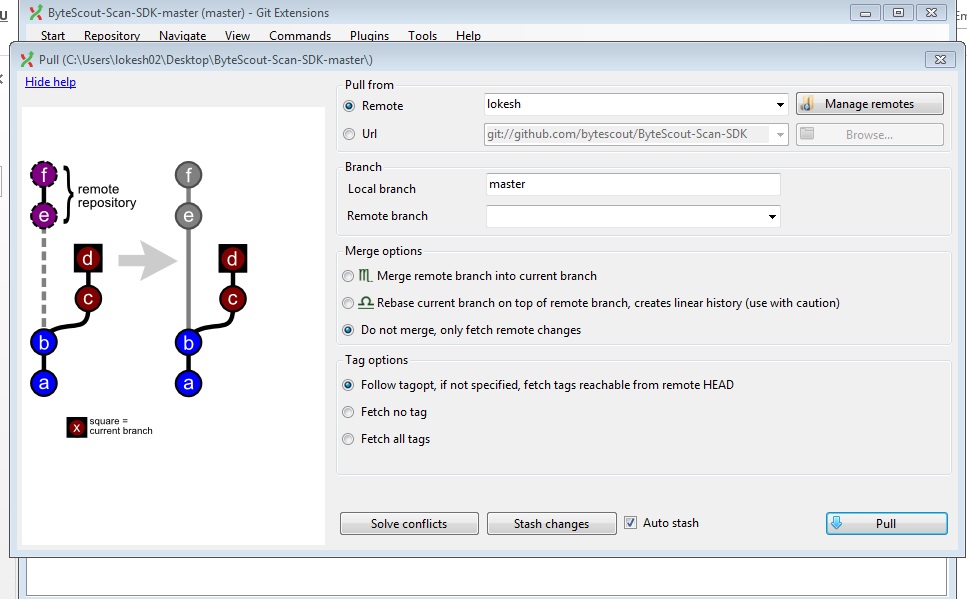
- Open the pull Window by clicking on the ‘Pull’ icon as shown in the figure. Provide the remote repo URL and select the remote branch from there.
- It is necessary to select the Do Not Merge Option (Do not merge, only fetch remote changes) and ‘Auto Stash’ option.
- Lastly, click the ‘Pull’ button.


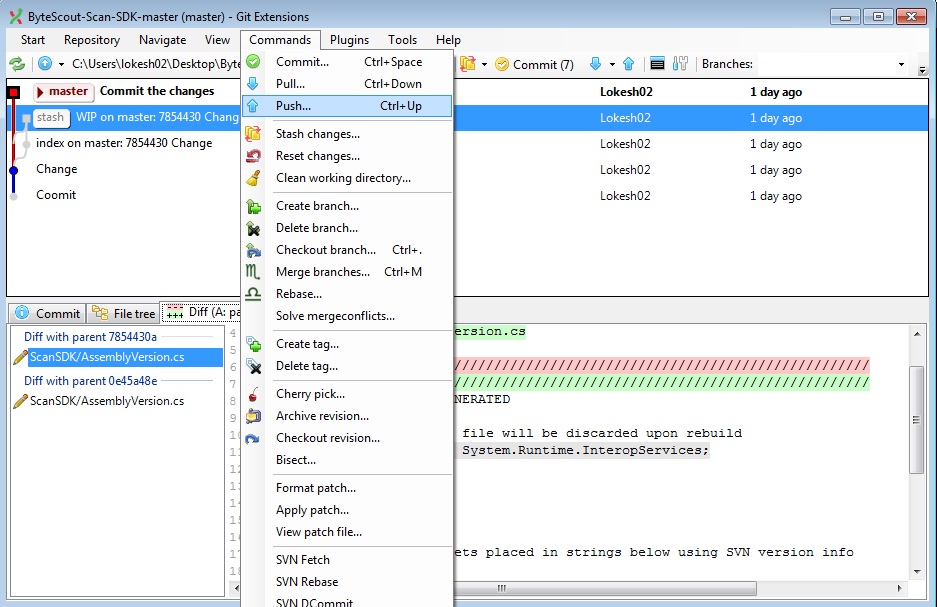
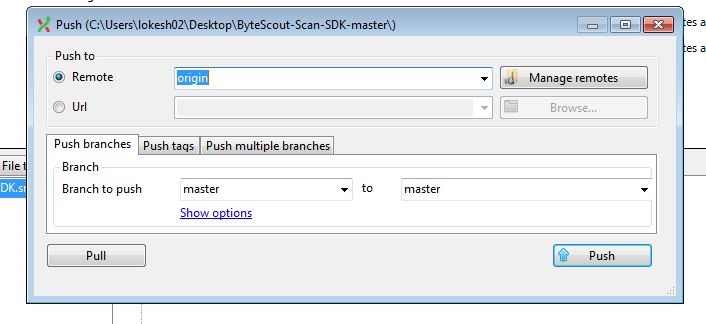
Pushing the Code
As of now, the local repository and the remote repository are in sync, so the user now has to click the ‘Push’ button as shown in the figure so that all the locally committed changes can be pushed to the remote repository.
We hope that this tutorial helps you in getting familiarized with the use of Git using the tool Git Extensions.
About the Author

ByteScout Team of Writers
ByteScout has a team of professional writers proficient in different technical topics. We select the best writers to cover interesting and trending topics for our readers. We love developers and we hope our articles help you learn about programming and programmers.
Git Extensions Manual
This repository contains the new Git extensions Manual. Feel free to help us improve this manual by sending pull requests
or by opening issues.
Refer to the Wiki here: https://github.com/gitextensions/gitextensions/wiki for details on how to update the documentation.
View Online
The current documentation can be viewed here: https://git-extensions-documentation.readthedocs.org/
PDF and other formats can be downloaded here: https://readthedocs.org/projects/git-extensions-documentation/downloads/
Note: Only the HTML format is «supported» (i.e. from the display point of view). Other formats might have layout issues
but the content remains the same for all formats, whether or not you build it locally (provided your local clone is
up to date).
Build
To generate the documentation, you need to have Sphinx installed: https://www.sphinx-doc.org/en/master/usage/installation.html#windows
The following installs and build the GE html documentation for any Python package with PIP included:
- pip install -U sphinx
- sphinx-build -b html -d build/doctrees source build/html
If you have docker installed, you could also generate the documentation using the command in a cmd prompt (or run the file make-html_docker.cmd):
docker run --rm -v %CD%:/docs sphinxdoc/sphinx sphinx-build -b html -d build/doctrees source build/html
HTML
Simply run make-html.cmd. You can also use make-singlehtml.cmd to generate a single HTML
file. The make_and_start_Browser.cmd is an alias of make-html.cmd that will open in your
default browser the documentation main index.
HTML Help Files
Warning: This format is not completely supported (i.e. you can generate it but we don’t
guarantee as good a display quality as for HTML).
Download HTML Help Workshop (https://www.microsoft.com/en-us/download/details.aspx?id=21138).
To build the file, use make-HTMLHelp.cmd
Warning: This format is not completely supported (i.e. you can generate it but we don’t
guarantee as good a display quality as for HTML).
To use the PDF builder, you’ll need to install:
- rst2pdf
easy_install rst2pdf - pil
easy_install pil
Also add ,'rst2pdf.pdfbuilder' to the source/conf.py file at the line 28. Then run make.cmd pdf.
Version update
- Set version in source/conf.py
- Create release branch release/x.y (this is the default from the GE About menu for released versions, ‘master’ for development builds).
- When releasing final, push ‘latest’ branch to release/x.y commit (this branch is the default when browsing https://git-extensions-documentation.readthedocs.io/).
- Edit versions in https://readthedocs.org/projects/git-extensions-documentation/versions/ (admin privileges needed). Keep relevant versions active.
- Trigger a build for changed versions
One, introduction:
Git Extensions is a toolkit designed to make Git under Windows more intuitive. The shell extension will be integrated in Windows Explorer and display a context menu on files and directories. There is also a Visual Studio extension to use Git from the Visual Studio IDE.
Features
- Git’s Windows Explorer integration
- Feature-rich Git user interface
- 32-bit and 64-bit support
- Visual Studio Extension (2015-2017)
Specifically in the 2.5x version:
- Visual Studio (2010-2015) add-on
- useMonoRun under Linux or Mac OS X
- Basic SVN functions
Second, install
Before installing Git Extensions, you need to install Git for Windows:https://git-scm.com/download/win
allowableGitHubFind the Git Extensions installer.
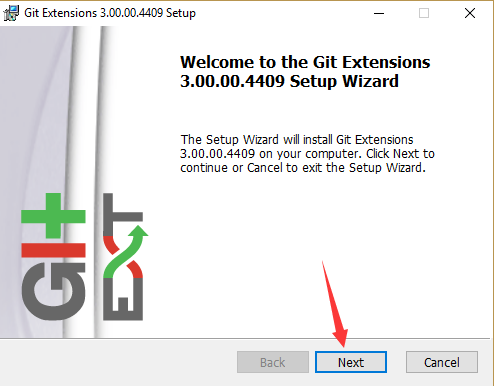
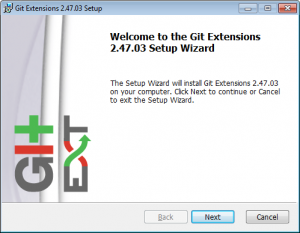
1. Start the installation
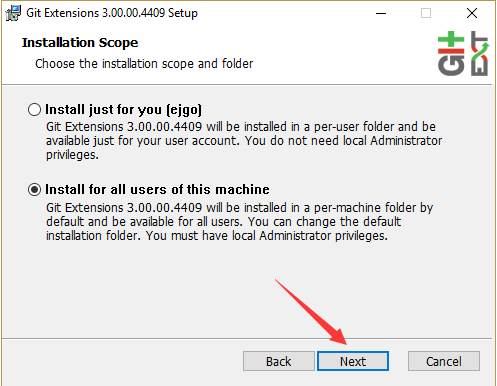
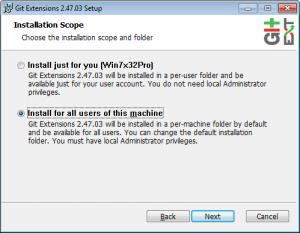
2. Installation range
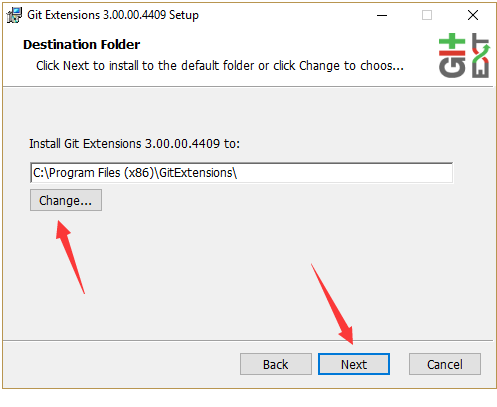
3. Destination folder
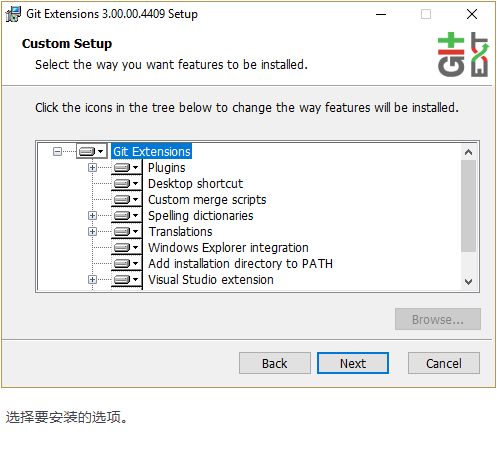
4. Choose the installation option
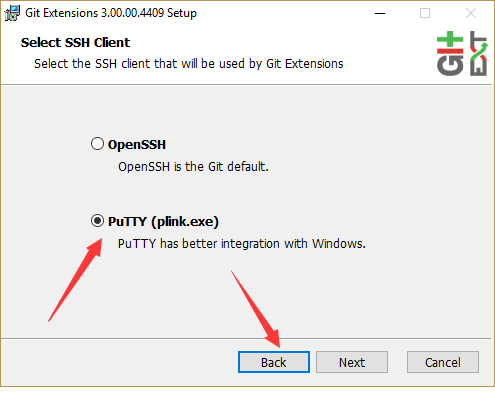
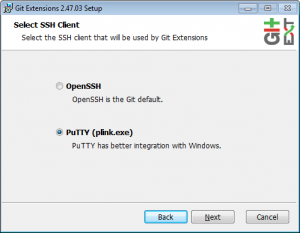
5,Select the SSH client to use. PuTTY is the default setting because it has better Windows integration, but Pageant must be running.

Three, portable
Git Extensions is also distributed as a portable .zip file, just unzip it. This package does not provide functions such as Windows shell integration and Visual Studio integration.
Four, set
Git must be installed before starting Git Extensions: .. image :: /images/install/git_missing.png

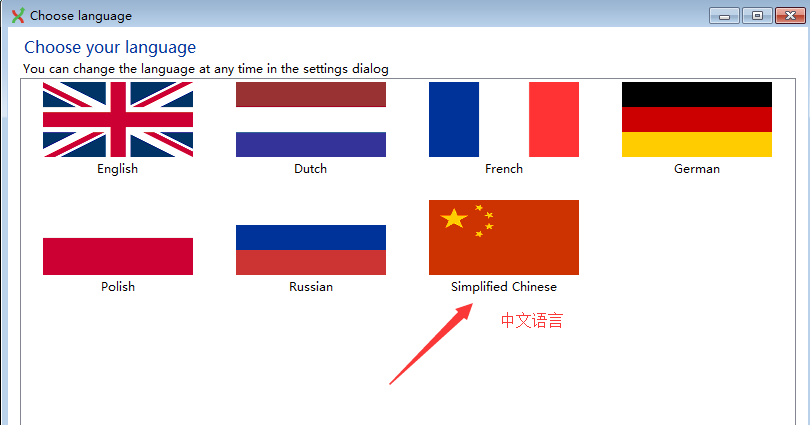
The preferred language is (depending on the language installed): .. image :: /images/install/language.png
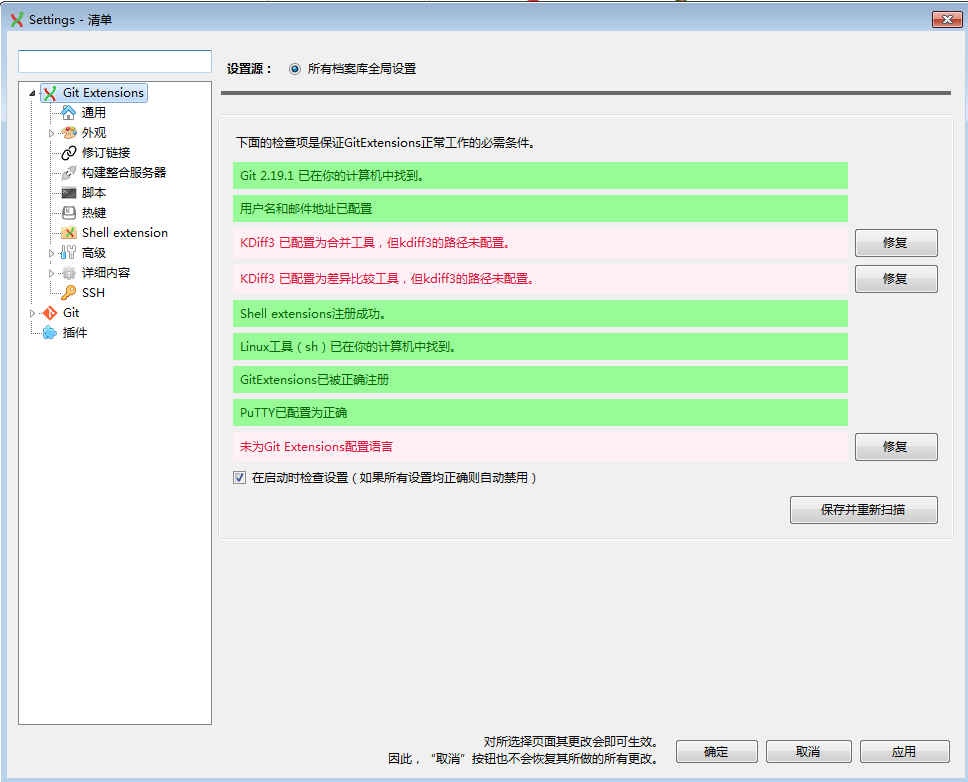
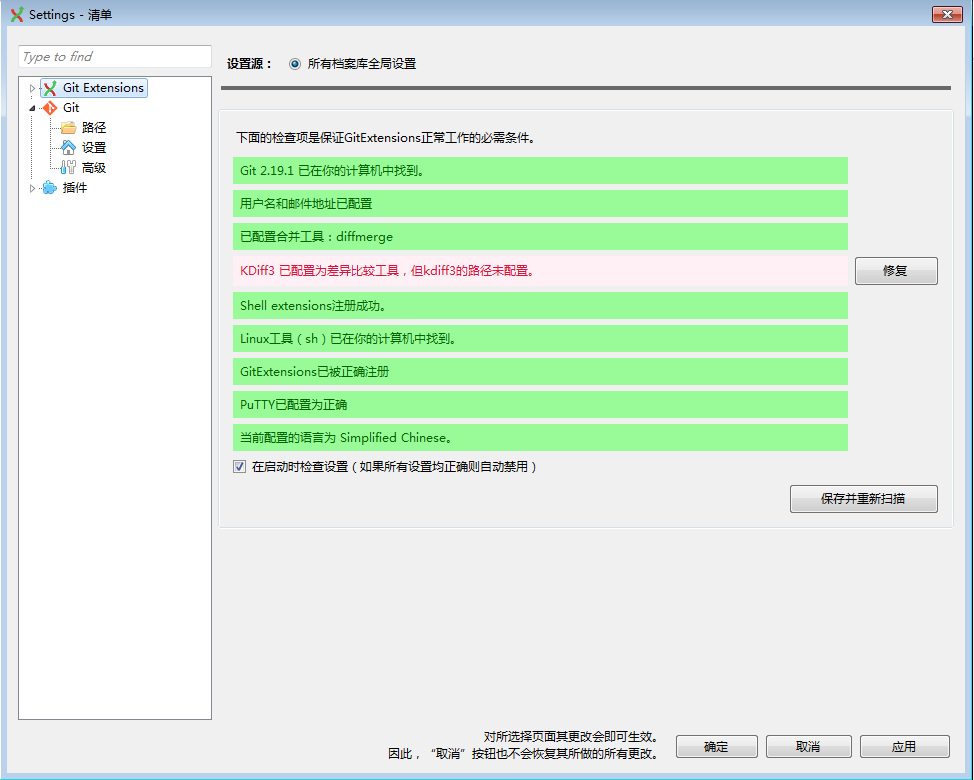
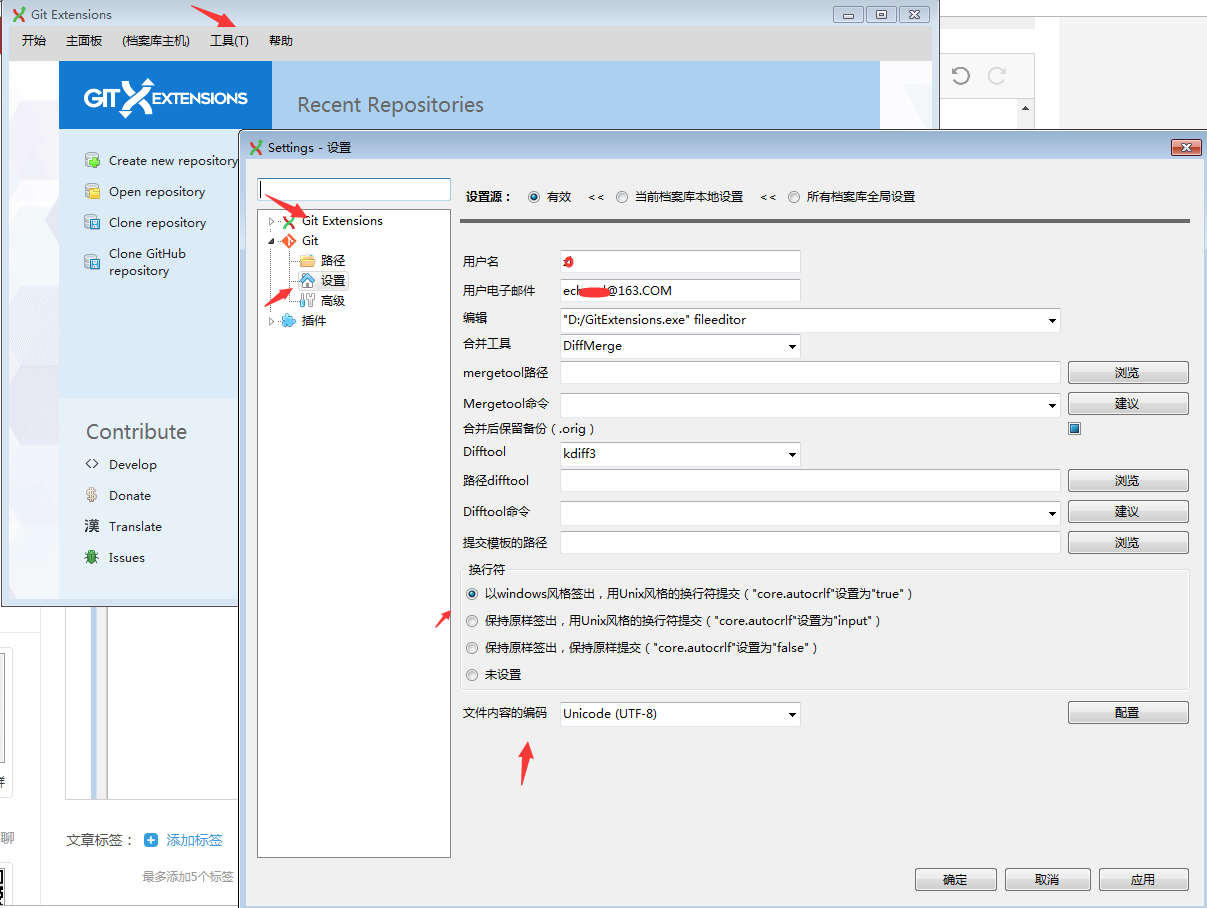
The first time you start Git Extensions, all settings will be verified. If Git Extensions needs to change any settings, the «Settings» dialog box will be displayed. All incorrect settings will be marked asred(For example, if the Git version is not supported), orange indicates a setting that is not recommended (for example, the Git version is earlier than the recommended value). You can let Git Extensions try to repair your settings by clicking on it. When installing Git Extensions for the first time, you usually need to configure a username and email address.
bySettingsFromToolsChoose from the menu options, you can call the settings dialog at any time.
Chinese settings
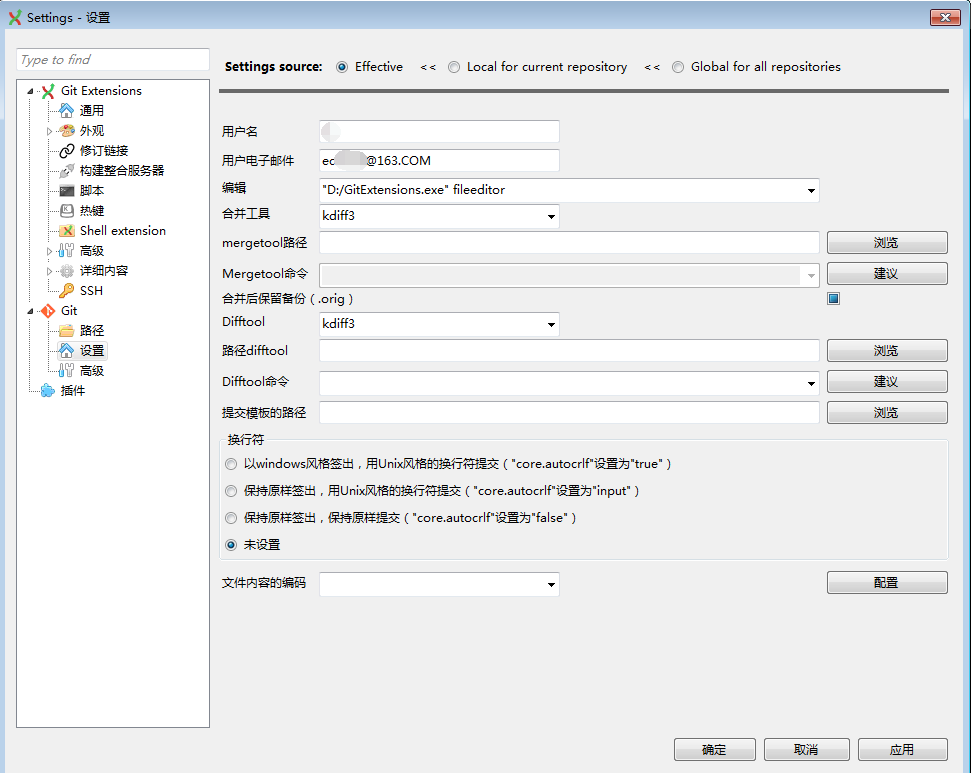
Configuration
This page contains some settings used by Git, so it can be changed in Git Extensions.
If you use the Git command line to change Git settings, you can see the same setting changes in Git Extensions. If you change Git settings from Git Extensions, you can use that change.git configgit config --get
Git configuration can be global configuration or local configuration. Global configuration applies to all repositories. The local configuration overrides the current global configuration of the repository.
User name
The username displayed in the submission and patch.
User email
User emails are displayed in submissions and patches.
Editor
An editor opened by git.exe (for example, for editing commit messages). Git Extensions will only use it when you call git.exe from the command line. By default, Git will use the built-in editor.
Mergetool
A merge tool used to resolve merge conflicts. Git Extensions will search for common merge tools on your system.
Path to mergetool
The path of the merge tool. Git Extensions will search for common merge tools on your system.
Mergetool command
The command used by Git to start the merge tool. When selecting the merge tool, Git Extensions will try to set it automatically. When Git supports mergetool (such as kdiff3), thisThe setting can be left blank.
Keep backup (.orig) after merge
Before modifying to resolve the merge conflict, please check to save the status of the original file. See Git configuration settings`mergetool.keepBackup`。
Difftool
Difference tool for displaying differences between source files. Git Extensions will search for common difference tools on your system.
Path to difftool
The path of the diff tool. Git Extensions will search for common difference tools on your system.
DiffTool command
The command used by Git to start the diff tool. This setting should only be filled in if Git does not support the diff tool.
Path to commit template
The path of the file, whose content is used to pre-populate the submission message in the submission dialog.
Line endings
Checkout/commit radio buttons
How should git handle line endings when choosing to check out and check in files. Seehttps://help.github.com/articles/dealing-with-line-endings/#platform-all
Files content encoding
The default encoding of the file content.
English setting

The settings used by Git are stored in the Git configuration file. Global settings are stored in.gitconfigIn the file called in the user directory. Local settings are stored in.git\configFiles in the repository.
path
This page contains the settings needed to access the git repository. An external tool will be used to access the repository. For Windows, «Git for Windows» is usually used. Git Extensions will try to configure these settings automatically.
Git
Command used to run git (git.cmd or git.exe)
Git Extensions need to run Git commands. Set up a complete command for running git («Git for Windows»). useBrowseButton to find executable files on the file system. (Cygwin Git may work, but it is not officially supported.)
Path to Linux tools (sh).
Git Extensions uses some Linux tools. When installing Git for Windows, these tools are located in the bin directory of Git for Windows. useBrowseButton to find a directory on the file system. Leave it blank when it is in the path.
Environment
Change HOME
This button opens a dialog where you can change the HOME directory.
The global configuration file used by git will be placed in the HOME directory. On some systems, the home directory is not set or points to a network drive. Git Extensions will try to detect the best settings for your environment. This location will be used when there is a global git configuration file. If you need to relocate git’s home directory, click the button to change this setting. Otherwise, leave this setting at the default value.Change HOME
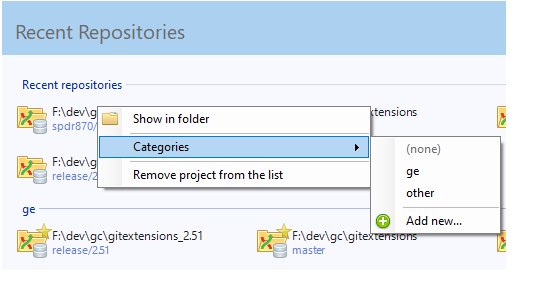
Dashboard
The dashboard contains the most common tasks, recently opened repositories and favorites. You can add favorite repositories and group them under «Category Title» on the right panel.

You can use the repository context menu to move the nearest repository to favorites. Choose to create a new category and add a repository to it, or you can add the repository to an existing category (for example, «Currents» as shown below).Categories / Add new
To open an existing repository, simply click the link to the repository, or choose to open the repository (from which you can select the repository to open from the local file system).
To create a new repository, you can select one of the following options under «Common Operations».
Create a new repository
If you do not want to work on existing projects, you can use this option to create your own repository.
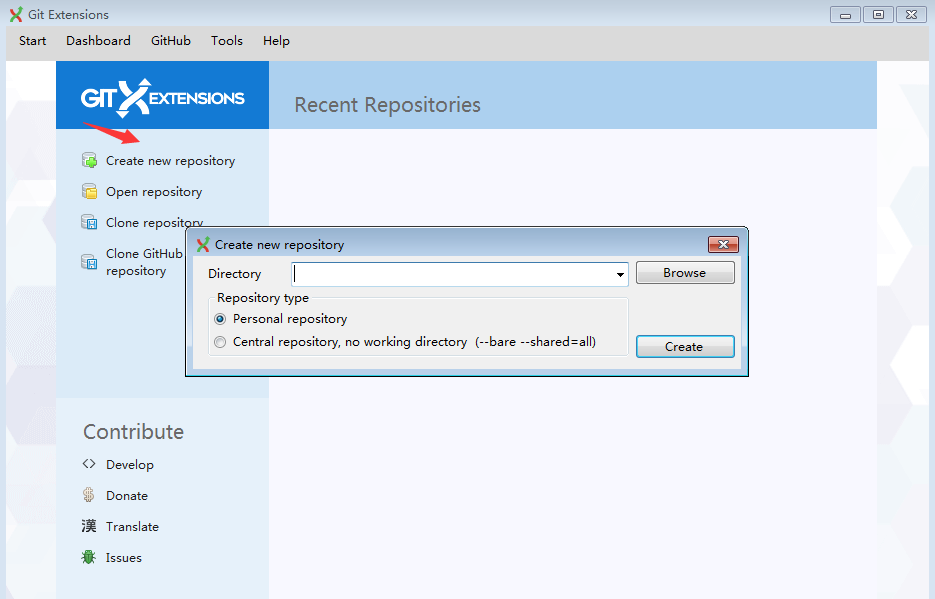
Select the directory where you want to create the repository. You can choose to create a personal repository or a central repository.
The personal repository looks the same as the normal working directory, but there is a.gitA directory named at the root level, which contains version history. This is the most common repository.
The central repository contains only version history. Because the central repository does not have a working directory, you cannot check out revisions in the central repository. It is also impossible to merge or extract changes in the central repository. This repository type can be used as a public repository where developers can push changes to or extract changes from it.
Open repository
Open the existing Git repository on the file system.
Clone the repository
You can use this option to clone an existing repository.
The repository to be cloned can be located on a network share, or it can be a repository accessed through an Internet or intranet connection. Depending on the protocol (http or ssh), you may need to load the SSH key into PuTTY. You also need to specify where the clone repository is created and the initial branch checked out. If the cloned repository contains submodules, you can initialize these submodules with their default settings as needed.
When cloning, you can create two different types of repositories. The personal repository contains a complete history and also contains a working copy of the source tree. The central (naked) repository is used as a public repository, and developers push the changes to be shared with others to the public repository. The central repository contains complete historical records, but there is no working directory like a personal repository.
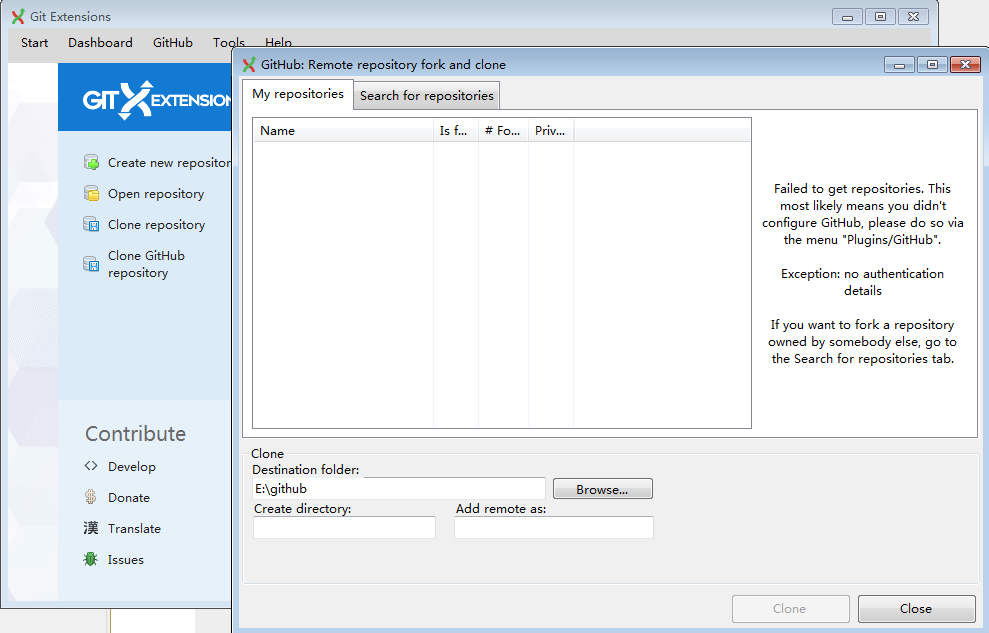
Clone Github repository
This option allows you
- Split the repository on GitHub to create it in your personal space on GitHub.
- Clone any repository in your personal space on GitHub, making it a local repository on your computer.
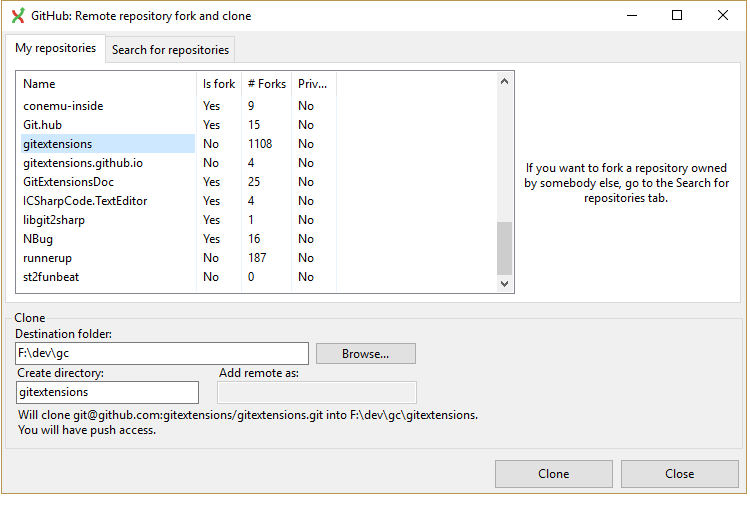
You can view your personal repositories on GitHub, and you can also use this tab to search for repositories.Search for repositories
git reference documentation:
https://git-extensions-documentation.readthedocs.io/en/latest/getting_started.html
GIT и GitExtension
Установка клиента
Скачиваем установочный пакет (около 36 МБ) и устанавливаем программу:
При установке выбираем “Устанавливать для всех пользователей”:
Выбираем установку всех дополнительных элементов:
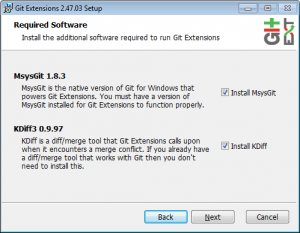
MsysGit требуется для корректной работы GitExtension, KDiff– для поиска различий в файлах и корректного их слияния.
Если планируется интеграция этого расширения с VisualStudio, устанавливаем соответствующие элементы:
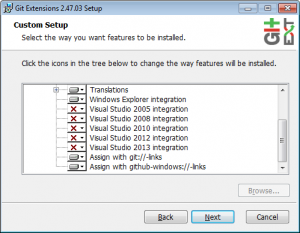
GitExtension – единственный клиент, напрямую интегрирующийся в VisualStudio. Поскольку я не особо его тестировал, пропущу это дело. Я как-то предпочитаю вручную отслеживать изменения.
Точно так же, как и для SourceTree, устанавливаем в качестве SSH-клиента PuTTY:
При установке самого MsysGit следует обратить внимание на несколько моментов:
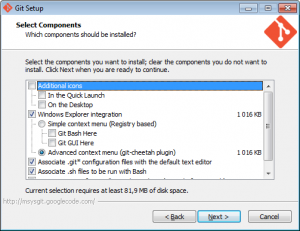
- Дополнительные иконки я ставил – вреда от них никакого, а удалить их можно в любой момент.
- Интеграцию с WindowsExplorerя не менял, посчитав, что расширенное меню лучше упрощенного
- Я устанавливал самую нижнюю галочку (Использовать TrueType-шрифты для консоли), чтобы не получить в консоли (если она понадобится) непонятные символы в качестве сообщений.
Следом идет запрос на метод запуска GIT:
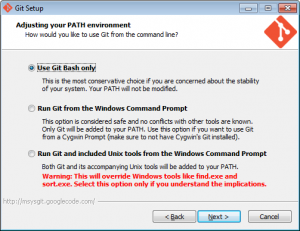
Фактически идет выбор между первым и вторым вариантами. Первый – использование только командной строки git, без изменения переменной PATH. Если не пугает достаточно большое количество текста, которое придется вводить вручную – можно и эту опцию выбрать. Но я предпочел вторую: использовать git внутри командной строки Windows.
Следом идет выбор, что делать с символами окончания и перевода строк (как в исходниках, так и в коммитах):

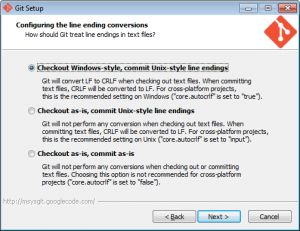
Учитывая, что будут отслеживаться не только исходные файлы, но и битовые (те же самые dwg), лучше оставить все «без изменений», т.е. третья опция.
Все, на этом выбор опций завершен, продолжаем установку.
После установки необходимо выполнить некоторую настройку GitExtension:
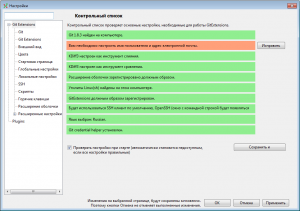
Для начала установим имя пользователя и адрес электронной почты (по уже установившейся привычке я ставлю реальные значения).
После окончания установки, как обычно, выполняем substдля подключения виртуального диска, а также внутри этого диска создаем каталог VersionControlдля центрального репозитория.
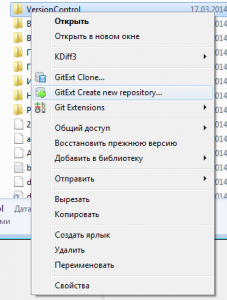
Создание центрального репозитория
Центральный репозиторий в GitExtensionможно создать несколькими способами. Первый – это выбрать каталог, вызвать контекстное меню и в нем – GitExtCreatenewrepository…:
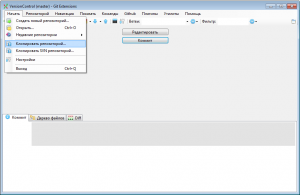
Второй состоит в вызове окна GitExtensionи выборе в нем соответствующего действия:
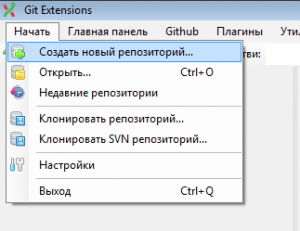
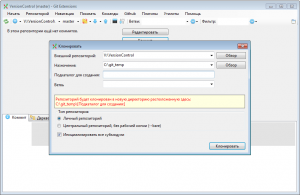
В принципе, разницы никакой – просто во втором случае понадобится указывать каталог, в котором будет создаваться репозиторий. Оба варианта приведут к окошку вида
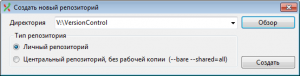
Особое внимание стоит обратить на “Тип репозитория”. Сейчас мы создаем именно центральный репозиторий, т.е. надо выбирать второй вариант.
После нажатия кнопки ОК появится сообщение о том, что пустой репозиторий в каталоге v:\VersionControl успешно создан и инициализирован.
Помещение в центральный репозиторий данных с сетевого диска
Казалось бы, тут тоже ничего сложного быть не должно: создаем репозиторий, в качестве каталога указываем диск v: и выполняем коммит. Но, к сожалению, и здесь не все гладно: русские символы в названиях каталогов не дадут выполнить первоначальный коммит. Поэтому русские каталоги временно придется либо переименовывать, либо переносить куда-то «в сторону», а потом уже перетаскивать обратно.
В принципе, неважно, каким путем идти – главное добиться хотя бы готовности GitExtension к выполнению коммита.
И вот тут я обнаружил момент, которого в SourceTree, например, не было.
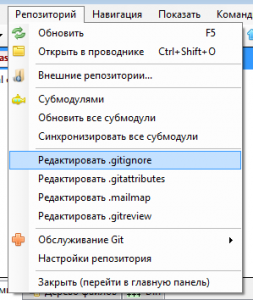
GitExtension предоставляет встроенный модуль редактирования .gitignore. После нажатия соответствующего пункта меню появится окно вида:
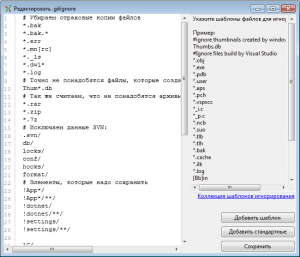
Здесь я показал уже отредактированный .gitignore (по аналогии с тем, который создавался в SourceTree).
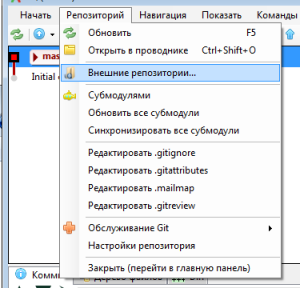
Подключение внешнего репозитория (который центральный) выполняется очень просто (не сложнее чем в SourceTree):
В диалоговом окне указываем псевдоним репозитория и каталог его расположения.
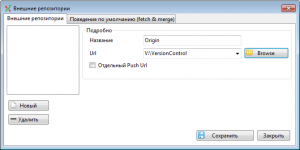
Нажимаем “Сохранить”.
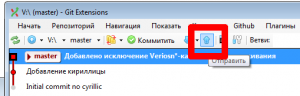
Теперь осталось только “Отправить” нашу рабочую копию в центральный репозиторий:
Создание локальной рабочей копии на компьютере разработчика
Теперь на диске C: создадим каталог, например, git_temp и в этот каталог выполним клонирование центрального репозитория:
Устанавливаем все настройки:
Обязательно устанавливаем “Подкаталог для создания” – у меня при пустом значении ничего не срабатывало. Может, я еще где накосячил, но разбираться было некогда.
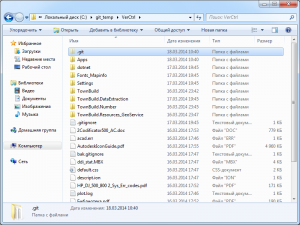
Итак, если все сделано верно, в каталоге c:\git_temp\ВашПодкаталог появятся все файлы и каталоги, которые были установлены для отслеживания.
Внесение изменений в центральный репозиторий
Добавим в локальную рабочую копию несколько каталогов и файлов:
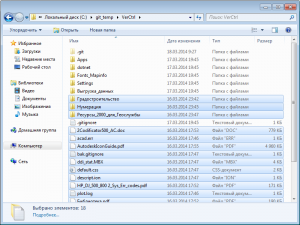
Каталоги и файлы включают в себя неанглийские символы. Вернемся в GitExtension – и при попытке выполнить коммит получим вылет программы.
Значит, придется переименовывать каталоги по аналогии с тем, как мы делали в SourceTree. При этом следует учесть: если в SourceTree было достаточно поменять первый символ, то в GitExtension надо менять наименование каталога полностью, без вариантов.
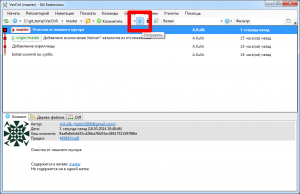
Удалим некоторые файлы и каталоги и вызовем GetExtension. Выберем наш локальный репозиторий:
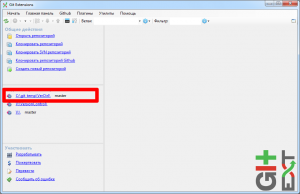
Вверху окна видно, что требуется выполнить коммит:
Ну раз так просят, сделаем:
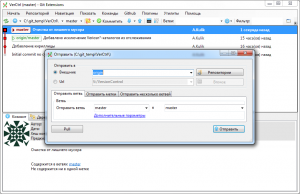
Отправляем изменения в центральный репозиторий:
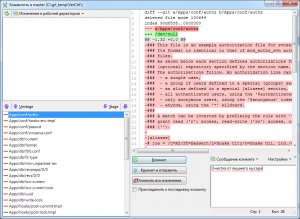
При выполнении Push (отправка изменений в репозиторий) проверьте ветку, из которой и в которую выполняется перенос данных.
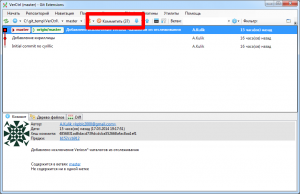
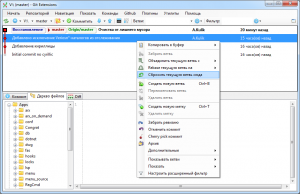
После выполнения Push’a открываем репозиторий V:\VersionControl (для проверки, что же там сейчас творится). Открываем закладку “Дерево файлов” и видим, что каталогов db, config и т.п. уже нет.
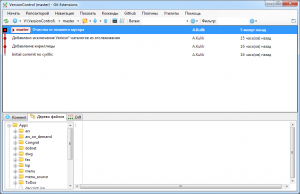
В то же время, если активировать предыдущий коммит, все файлы и каталоги будут на месте:

Синхронизация изменений с рабочими копиями
Теперь осталось фактически только выполнить синхронизацию репозитория с серверной копией. В GitExtension открываем репозиторий на диске v: и выполняем импорт данных из репозитория (Pull):
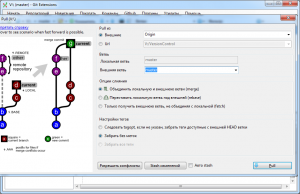
Обратите внимание: выполняется вливание, указана ветка, которая обрабатывается, ветки объединяются.
Синхронизация изменений с рабочими копиями
В окне GetExtension выделим ревизию, которую надо восстановить, и вызовем для нее контекстное меню:
В принципе, пояснения и так вполне внятны. Учитывая условия моей работы, я использую Hard (отменяются все изменения в рабочей копии).
Выводы
Достаточно мощный клиент, в некоторых вопросах превосходит SourceTree. К минусам могу отнести только не очень удобное переключение между ревизиями. А так, в целом – весьма и весьма.