Фотография — это одно из самых популярных средств сохранения воспоминаний. И фотоаппарат стал незаменимым инструментом для захвата самых важных моментов в жизни. Одним из таких фотоаппаратов является Samsung 5x, который имеет множество функций и возможностей для создания профессиональных снимков.
Однако перед тем, как начать использовать фотоаппарат Samsung 5x, необходимо его включить. Включение не представляет сложности, но все же требует выполнения нескольких простых шагов.
Прежде всего, проверьте наличие заряда в аккумуляторе. Для этого подключите фотоаппарат к зарядному устройству или компьютеру при помощи кабеля USB. Если индикатор заряда загорается, значит, аккумулятор заряжен и фотоаппарат готов к работе.
Затем найдите кнопку включения, которая обычно находится на верхней панели фотоаппарата Samsung 5x. Нажмите ее и удерживайте несколько секунд, пока не загорится экран. После этого фотоаппарат станет активным и готовым для использования.

Шаг 1: Найдите кнопку включения на фотоаппарате Samsung 5x. Она обычно расположена на верхней панели или на задней стороне фотоаппарата.
Шаг 2: Удерживайте кнопку включения в течение нескольких секунд, пока не появится логотип Samsung на экране фотоаппарата.
Шаг 3: Когда фотоаппарат включится, вы увидите основной экран или видоискатель на LCD-экране. Теперь фотоаппарат готов к использованию.
Шаг 4: Если фотоаппарат не включается, проверьте, что у вас достаточно заряда в батарее. Если заряда нет, подключите фотоаппарат к зарядному устройству и дождитесь полного заряда перед попыткой включить его снова.
Шаг 5: Если фотоаппарат по-прежнему не включается, возможно, в нем есть проблемы с аппаратным обеспечением или программным обеспечением. В этом случае рекомендуется обратиться к сервисному центру Samsung для диагностики и ремонта.
Следуя этим простым шагам, вы сможете включить фотоаппарат Samsung 5x и начать фотографировать. Удачных съемок!
Подготовка к включению

1. Проверьте уровень заряда аккумулятора:
Перед включением фотоаппарата Samsung 5х убедитесь, что аккумулятор полностью заряжен. Ваша камера должна содержать достаточную энергию для безопасной работы.
2. Вставьте карту памяти:
Для того чтобы начать использовать фотоаппарат, необходимо вставить карту памяти. Откройте отсек для карты памяти на задней или боковой стороне камеры и аккуратно вставьте карту памяти в соответствующий слот.
3. Проверьте наличие объектива:
Фотоаппарат Samsung 5х имеет съемные объективы. Перед включением убедитесь, что объектив правильно установлен. Проверьте, что он закреплен безопасно и надежно.
4. Отсоедините фотоаппарат от компьютера:
Если ваш фотоаппарат был подключен к компьютеру, убедитесь, что он отсоединен перед включением. Это поможет избежать конфликтов устройств.
5. Установите режим включения:
На фотоаппарате Samsung 5х обычно есть переключатель или кнопка для включения. Убедитесь, что переключатель находится в положении “ON” или кнопка нажата для включения камеры.
6. Подготовьтеся к использованию:
После включения фотоаппарата подготовьтесь к началу съемки. Убедитесь, что дисплей включен, проверьте освещение и настройте параметры съемки по необходимости.
Проверка наличия заряда батареи
Прежде чем начать использовать фотоаппарат Samsung 5X, важно убедиться, что у него достаточно заряда в батарее. Это гарантирует непрерывную работу устройства и позволяет избежать ситуации, когда батарея разрядится в самый неподходящий момент.
Для проверки уровня заряда батареи на фотоаппарате Samsung 5X выполните следующие действия:
-
Включите фотоаппарат, убедившись, что заряд батареи позволяет его использовать.
-
Найдите на дисплее фотоаппарата индикатор заряда батареи. Он может быть представлен в виде шкалы, показывающей уровень заряда, или числом, указывающим процентное значение.
-
Если индикатор заряда показывает, что уровень батареи низкий, подключите фотоаппарат к зарядному устройству или замените разряженную батарею на полностью заряженную.
Проверка наличия заряда батареи – важный шаг перед началом фотосъемки. Регулярная проверка и поддержание оптимального заряда батареи позволят вам не пропустить ни одного важного момента и сделать качественные фотографии.
Открытие крышки для батареи

Шаг 1: Найдите крышку батареи на задней панели фотоаппарата Samsung 5х. Обычно она находится рядом с разъемом для карты памяти.
Шаг 2: Подведите палец к маленькой выступающей частичке на крышке батареи и приложите небольшое усилие, чтобы открыть ее.
Шаг 3: Когда крышка будет приоткрыта, вытащите ее вверх, чтобы получить полный доступ к отсеку для батареи и разъему для карты памяти.
Шаг 4: Внимательно извлеките батарею из отсека, удерживая ее за выступающую часть.
Шаг 5: По окончании работы с батареей, поместите ее обратно в отсек, установив ее в правильном положении. Убедитесь, что золотые контакты на батарее совпадают с контактами внутри отсека.
Аналогичным образом можно открыть крышку отсека для карты памяти, если она находится рядом с крышкой батареи. Просто следуйте указанным выше шагам, чтобы получить доступ к разъему для карты памяти и установить или извлечь карту памяти.
Вставка батареи и карты памяти

Для начала работы с фотоаппаратом Samsung 5x необходимо правильно установить батарею и карту памяти.
Вставка батареи:

1. Найдите отделение для батареи на нижней части фотоаппарата.
2. Убедитесь, что фотоаппарат выключен.
3. Снимите крышку отделения и вставьте батарею в предусмотренное место, соблюдая правильную полярность.
4. Закройте отделение крышкой, убедившись, что она хорошо закрывается и фиксируется.
Установка карты памяти:

1. Найдите отделение для карты памяти рядом с отделением батареи.
2. Откройте крышку отделения и определите правильное положение для установки карты памяти.
3. Вставьте карту памяти в отделение, следя за положением контактов и правильным направлением.
4. Закройте отделение крышкой, убедившись, что она хорошо закрывается и фиксируется.
Теперь ваш фотоаппарат Samsung 5x готов к использованию, вы можете включить его и начать фотографировать.
Включение фотоаппарата

Для включения фотоаппарата Samsung 5х вам потребуется:
- Убедиться, что батарея установлена и заряжена. Подключите фотоаппарат к электрической розетке с помощью прилагаемого кабеля и дождитесь полного заряда.
- Поднять вспышку фотоаппарата и проверить ее наличие и правильность установки.
- Убедиться, что крышка объектива удалена.
- На боковой или верхней панели фотоаппарата найти кнопку включения/выключения. Обычно она обозначается символом “плей” или пиктограммой фотоаппарата.
- Установить переключатель в положение “ON” или нажать кнопку включения/выключения.
После выполнения этих шагов фотоаппарат Samsung 5х должен включиться и стать готовым к использованию. Если на дисплее фотоаппарата появляются какие-либо ошибки или предупреждающие сообщения, рекомендуется обратиться к руководству пользователя для более подробной информации.
Вопрос-ответ:
Как включить фотоаппарат Samsung 5х?
Чтобы включить фотоаппарат Samsung 5х, следует найти кнопку включения, которая обычно расположена на верхней панели или на боковой части корпуса фотоаппарата, и нажать на нее. После этого фотоаппарат должен включиться.
Какая кнопка включения фотоаппарата Samsung 5х?
Кнопка включения фотоаппарата Samsung 5х может быть размещена на верхней панели фотоаппарата, рядом с другими кнопками управления, или на боковой части корпуса. Она обычно выделяется отличительным символом включения/выключения, который может быть изображен в виде круга с вертикальной линией внутри или просто буквы “P” или “I”.
Может ли кнопка включения быть названа по-другому на фотоаппарате Samsung 5х?
Да, название кнопки включения на фотоаппарате Samsung 5х может отличаться в зависимости от модели фотоаппарата или языковых настроек. Вместо символов или буквы “P” или “I” кнопка может быть подписана словом “Power”, “On/Off” или каким-либо другим аналогичным обозначением.
Можно ли включить фотоаппарат Samsung 5х через меню?
Нет, включить фотоаппарат Samsung 5х через меню невозможно. Кнопка включения фотоаппарата предназначена для быстрого и удобного включения и выключения устройства, и она не имеет аналоговых в меню. Поэтому для включения фотоаппарата всегда необходимо нажать на кнопку включения на корпусе фотоаппарата.
-
Contents
-
Table of Contents
-
Bookmarks
Quick Links
PL50
Thank you for buying a Samsung Camera.
This manual will help you learn to capture
images, share or print your photos, and edit
photos with the accompanying software.
Please read this manual thoroughly.
User Manual
Related Manuals for Samsung SAMSUNG PL50
Summary of Contents for Samsung SAMSUNG PL50
-
Page 1
PL50 Thank you for buying a Samsung Camera. This manual will help you learn to capture images, share or print your photos, and edit photos with the accompanying software. Please read this manual thoroughly. User Manual… -
Page 2: Getting To Know Your Camera
Please check that the camera is operating properly prior to when you intend to use it (e.g. for a trip or an important event) to avoid disappointment. Samsung takes no responsibility for any loss or damage that may result from camera malfunction.
-
Page 3
fire, injury, electric shock or severe damage to you or your camera. internal inspection, maintenance and repairs should only be carried out by your dealer or Samsung Camera Service centre. Please do not use this product in close proximity to flammable or explosive gases, as this could increase the risk of explosion. -
Page 4
Caution CAUTION indicates a potentially hazardous situation which, if not avoided, may result in a minor or moderate injury. Leaking, overheating, or damaged battery could result in fire or injury. — Use battery with the correct specification for the camera. — Do not short circuit, heat or dispose of battery in fire. -
Page 5: Table Of Contents
Contents How to use the Movie clip mode Recording the movie clip without sound Pausing while recording a movie clip (Successive Recording) How to use the Smart Auto mode Things to Watch Out for When Taking Pictures Using the camera buttons to set the camera POWER button SHUTTER button ZOOM button…
-
Page 6
Contents Setting up the Date / Time / Date type Time Zone File name Imprinting the recording date Auto power off Selecting Video out type Auto Focus lamp Setting the USB Starting play mode PLAY Playing back a still image Playing back a movie clip Movie clip capture function Playing back a recorded voice… -
Page 7
Contents Software Notes SOFTWARE System Requirements About the software Setting up the application software Starting PC mode Removing the removable disk Samsung Master Setting up the USB Driver for MAC Using the USB Driver for MAC… -
Page 8: System Chart
Please check that you have the correct contents before using this product. The contents can vary depending on the sales region. To buy the optional equipment, contact your nearest Samsung dealer or Samsung service centre. Parts and accessories illustrated below may differ from optional equipment, contact your nearest Samsung dealer or Samsung service centre.
-
Page 9
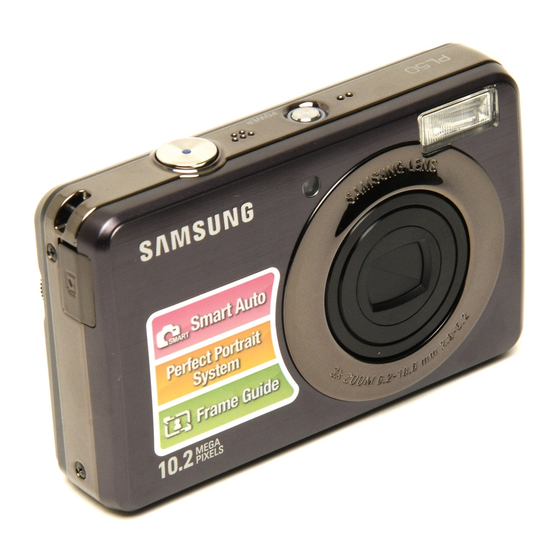
Identification of features Front & Top Shutter button Speaker AF sensor / Self-timer lamp Power button Microphone Flash Lens/ Lens cover… -
Page 10: Identification Of Features
Identification of features Back LCD monitor Camera status lamp MENU button 5 function button Play mode button Fn / Delete button Zoom Tele(T) button / Digital zoom Zoom Wide(W) button / Thumbnail Strap eyelet USB / AV / DC terminal Mode Dial…
-
Page 11
Identification of features Bottom Memory card slot Battery chamber cover Tripod socket 5 Function button Battery chamber Left button Battery holder Information / Up button Flash / OK / Play & Pause button Macro / Down button Self-timer / Right button… -
Page 12
Identification of features Self-timer lamp Icon Status Description — For the first 8 seconds, the lamp blinks at 1 second intervals. Blinking — For the final 2 seconds, the lamp blinks quickly at 0.25-second intervals. For the 2 seconds, the lamp blinks quickly at Blinking 0.25-second intervals. -
Page 13: Recover At Normal Temperature
Movie Approx. 120 MIN 640×480 image size 30fps frame rate These figures are measured under Samsung’s standard conditions and shooting conditions and may vary depending on the user’s methods. Important information about battery usage. When camera is not in use, turn off the power.
-
Page 14: Connecting To A Power Source
Connecting to a Power Source Important information about USB cable usage. Use a USB cable with the correct specification. If the camera is connected to the PC through a USB hub : connect the camera directly to the PC. If the camera and other devices are connected to the PC at the same time : remove other device.
-
Page 15: The Lcd Monitor
Connecting to a Power Source Insert the battery as shown — If the camera does not turn on after you have inserted battery, please check whether the battery (+ / -). — When the battery chamber cover is opened, do not force the battery chamber cover, this may damage it.
-
Page 16: Instructions On How To Use The Memory Card
— If the power is switched off or the memory card is removed while recording, deleting (formatting) or reading. Samsung cannot be held responsible for lost data. It is advisable to copy important data onto other media as back-up e.g. floppy disks, hard disks, CD etc.
-
Page 17
Instructions on how to use the memory card The camera can use SD/SDHC Memory Cards and MMC (Multi Media Cards). Card pins Write protect switch Label [SD (Secure Digital) memory card] The SD/SDHC memory card has a write protect switch that prevents image files from being deleted or formatted. -
Page 18
When using the camera for the first time Charge the rechargeable battery fully before using the camera for the first time. When the camera is turned on for the first time, a menu will be displayed in the LCD monitor to set date, time and language. This menu will not be displayed again after setting up the date, time and language. -
Page 19
LCD monitor indicator The LCD monitor displays information about the shooting functions and selections. [Image & Full Status] Description Recording mode Optical / Digital Zoom bar / Digital Zoom rate Voice Memo Number of available shots remaining Remaining time Internal memory icon Face Detection ·… -
Page 20: How To Use The Menu
How to use the menu 1. Turn on the camera and press the MENU button. A menu for each camera mode appears. 2. Use the up or down buttons to navigate through the menus. Face Detection Photo Size Functions Quality Sound Focus Area Display…
-
Page 21
Starting the recording mode Selecting modes You can select the shooting modes by using the mode dial on the upper of your camera. How to use the mode dial Select the shooting mode by turning the mode dial to the selection point. -
Page 22: Starting The Recording Mode
Starting the recording mode How to use the Program mode ( Selecting the automatic mode will configure the camera with optimal settings. You can still manually configure all functions except the aperture value and shutter speed. 1. Select the Program mode by using the Mode dial.
-
Page 23
Starting the recording mode Using the Photo Help guide mode ( Helps the user learn the correct picture taking method and includes solutions for potential problems that may occur. This also enables the user to practice the best way to take the pictures. Photo Help Guide Photo Help Guide Features to use when the image is out of focus… -
Page 24
Starting the recording mode How to use the Beauty Shot mode ( Take a photo of portraits by setting options to clear facial imperfections. 1. Select the Beauty Shot mode by using the Mode dial. (p.20) 2. Press the Up/Down button in [Functions] menu to select [Face Tone] or [Face Retouch]. -
Page 25
Starting the recording mode How to use the [Frame Guide] mode Set [Frame Guide] mode when you want someone else to take a picture for you from the angle you choose. 1. Take a picture from the angle you choose. — A guide appears round the sides of the picture. -
Page 26: How To Use The Movie Clip Mode
Starting the recording mode How to use the Movie clip mode ( A movie clip can be recorded for as long as the available recording time of the memory capacity allows. 1. Select the Movie clip mode by using the Mode dial. (p.20) 2.
-
Page 27: How To Use The Smart Auto Mode
Starting the recording mode How to use the Smart Auto mode( The camera automatically chooses the appropriate camera settings based on a detected type of scene. It will be helpful if you are not familiar with the camera settings for various scenes. 1.
-
Page 28: Things To Watch Out For When Taking Pictures
Things to Watch Out for When Taking Pictures Pressing the shutter button down half way. Lightly press the shutter button to confirm focus and flash battery charge. Press the shutter button all way down to take the picture. [Lightly press the shutter button] The available memory capacity may vary depending on shooting conditions and camera settings.
-
Page 29: Using The Camera Buttons To Set The Camera
Using the camera buttons to set the camera The recording mode function can be set up by using the camera buttons. POWER button Used for turning the camera’s power on / off. If there is no operation during the specified time, the camera’s power will be turned off automatically to save battery life.
-
Page 30
ZOOM button WIDE Zoom Optical zoom WIDE : Pressing the ZOOM W button. This will zoom out from the subject i.e. the subject will appear further away. Pressing the ZOOM W button continuously will set the camera to its minimum zoom setting i.e. the subject appears at its furthest from the camera. -
Page 31: Info (Disp) / Up Button
Info (DISP) / Up button While the menu is showing, the Up button operates as a direction button. In the recording modes or playback mode, pressing this button will display the image information. Show all photographic information. [Filming screen] Macro ( While the menu is showing, the DOWN button operates as a direction button.
-
Page 32
Macro ( ) / Down button Types of focus mode and focus range (W : Wide, T : Tele) Mode Auto ( Focus Type Auto macro ( W : 5~ Infinity Focus range T : 50 ~ Infinity Mode Program ( Focus Type macro ( W : 5 ~ 80… -
Page 33: Focus Lock
Focus lock To focus on a subject not positioned in the centre of the picture, use the focus lock function. Using the Focus Lock 1. Ensure the subject is in the centre of the autofocus frame. 2. Press the SHUTTER button halfway. When the green auto focus frame lights up, it means the camera is focused on the subject.
-
Page 34
Flash ( ) / Left button If you press the shutter button after selecting the flash, the first flash fires to check the shooting condition (Flash range and Power ratio of flash). Do not move the camera until the second flash fires. -
Page 35: Self-Timer / Right Button
Flash ( ) / Left button Available flash mode, by recording mode Mode SCENE Mode Smart Auto Flash ( ) icon will appear in [Smart Auto] mode. Self-timer ( When the menu is displayed on the LCD monitor, pressing the Right ( o : Selectable) button makes the cursor shift to the right tab.
-
Page 36
Self-timer ( ) / Right button Selecting the self-timer 1. Select a Recording mode with the exception of Voice recording mode.(p.20) 2. Press the SELF-TIMER / RIGHT ( button until the desired mode indicator displays on the LCD monitor. A 10 second, 2 second, Double self-timer or Motion timer icon appears on the LCD monitor. -
Page 37: Menu Button
MENU button — When you press the MENU button, a menu related to each camera mode will be displayed on the LCD monitor. Pressing it again will return the LCD to the initial display. — A menu option can be displayed when the following are selected : MOVIE CLIP and STILL IMAGE mode.
-
Page 38: How To Enable Functions Using The Menu Button
Functions ( How to Enable Functions Using the MENU Button 1. Press the MENU button in an available mode. 2. Press the Up / Down button to select the [Functions] menu and press the Right/OK button. White Balance Functions Sound Face Detection Right/OK Display…
-
Page 39: White Balance
Functions ( White balance The white balance control allows you to adjust the colours to appear more natural. Mode Icon The camera automatically selects the ap- Auto WB propriate white balance settings, depending on the prevailing lighting conditions. Daylight For taking images outside. For taking images under a cloudy and over- Cloudy cast sky.
-
Page 40: Iso
Functions ( You can select the ISO sensitivity when taking pictures.The speed or specific light-sensitivity of a camera is rated by ISO numbers. [Auto] : The camera’s sensitivity is automatically changed by variables such as lighting value or subject brightness. [ISO 80, 100, 200, 400, 800, 1600 ] : You can increase the shutter speed while the same amount of light is present, by…
-
Page 41
Functions ( This function can detect up to 10 persons. When the camera recognises many people at the same time, it will focus on the nearest person. The Digital zoom is not activated in this mode. When the camera detects a target face, the white colour focus frame will be displayed over the target face and the grey colour focus frame appears over the remaining faces. -
Page 42: Face Tone
Functions ( Smile Shot The camera automatically takes a picture by detecting the face of the subject although you don’t press the shutter button. If you press the Shutter button, the picture is taken in the normal way. When taking a picture of smile shot, showing teethes or keeping the smiley face of your subject helps detecting the smile face of the subject.
-
Page 43: Image Size
Functions ( Image Size You can select the image size appropriate for your application. Icon Still image 3648X 3648X 3648X mode Size 2736 2432 2052 Movie Icon clip mode 640 x 480 Size Set the photo size. Photo Size Back Move [ STILL IMAGE mode ] The higher the resolution, the lower the number of shots…
-
Page 44: Acb
Functions ( This function is to adjust the contrast automatically when taking photos in an environment with big exposure difference i.e. backlight or contrast. This function adjusts the brightness automatically and allows the subject to be photographed clearly. — [ACB] Sub menus: [Off], [On] The ACB function is available in [Auto], [Program] or [Portrait] recording mode.
-
Page 45: Drive Mode
Functions ( Drive mode You can select continuous shot, and AEB (Auto Exposure Bracketing). [Single] ( : Take one picture only. [Continuous] ( ) : Images will be taken continuously until the shutter button is released. [Motion Capture] ( : This takes 5 shots per second, when the shut- ter is pressed and held down.
-
Page 46: Photo Style Selector
Functions ( Photo Style Selector You can add various effects to the image without using image editing software. 1. Select the desired Photo style selector by pressing the Left/Right button and press the OK button. 2. Press the Shutter button to take an image. Style mode Icon Normal…
-
Page 47: Image Adjust
Functions ( Image Adjust Contrast You can change the contrast of the image. 1. Select [Contrast] by pressing the Up/Down button. 2. Change the contrast by pressing the Left/Right button. 3. Press the Shutter button to take an image. When Negative in photo style is set, contrast is not available. Sharpness You can adjust the sharpness of the picture you are about to take.
-
Page 48: Voice Memo
Functions ( Voice Memo You can add your voice-over to a stored still image. (Max. 10 sec.) — If the voice memo indicator is displayed on the LCD monitor, the setting is completed. — Press the shutter button and take a picture.
-
Page 49: Recording The Movie Clip Without Voice
Functions ( Pausing while recording a voice Using this function, you can record your favourite voice clips into a voice recording file without having to create multiple voice recording files. 1. Press the OK button to pause recording. 2. Press the OK button again to resume the recording. 3.
-
Page 50: Sound Menu
Sound menu In this mode, you can set up sound settings. You can use the setup menu in all camera modes, except Voice Recording mode. The items indicated by * are default settings. Menus are subject to change without prior notice. Sound ( Volume You can select a volume of start up sound,…
-
Page 51: Af Sound
Sound ( AF sound If you set AF sound to on, AF sound will be activated when the Shut- ter button is pressed down half way so that you can be aware of the camera operation status. — [AF sound] sub menu : [Off], [On]* Self Portrait This occurs when it automatically detects the location of the subject’s face when taking a self-portrait.
-
Page 52: Start Up Image
Display ( Start up image You can select the image that is first displayed on the LCD monitor whenever the camera is turned on. — Sub menus : [Off]*, [Logo], [User Image] — Use a saved image for the start-up image with the [Start Image] in the [RESIZE] menu in the play mode.
-
Page 53: Settings
Settings ( Formatting a memory This is used for formatting the memory. If you run [Format] on the memory, all images, including the protected images, will be deleted. Be sure to download important images to your PC before formatting the memory. — Sub menus [Yes] : A window for confirming the selection displays.
-
Page 54: Setting Up The Date / Time / Date Type
Settings ( Setting up the Date / Time / Date type You can change the date and time that will be displayed on the captured images and set up the date type. Setting [Time Zone] enables you to display the local date and time on the LCD monitor when travelling overseas.
-
Page 55: Imprinting The Recording Date
Settings ( Imprinting the recording date There is an option to include DATE / TIME on still images. — Sub menus [Off]* : The DATE & TIME will not be imprinted on the image file. [Date] : Only the DATE will be imprinted on the image file.
-
Page 56: Selecting Video Out Type
Settings ( Selecting Video out type The Movie output signal from the camera can be NTSC or PAL. Your choice of output will be governed by the type of device (monitor or TV, etc.) to which the camera is connected. PAL mode can support only BDGHI.
-
Page 57: Auto Focus Lamp
Settings ( Auto Focus lamp You can turn on and off the Auto Focus lamp. — Sub menus [Off] : The AF lamp will not light up in low light conditions. [On]* : The AF lamp will light up in low light conditions.
-
Page 58: Playing Back A Still Image
Starting play mode Turn the camera on and select Play mode by pressing the play mode button ( ). The camera can now play back the images stored in the memory. If the memory card is inserted in the camera, all the camera functions apply only to the memory card.
-
Page 59: Movie Clip Capture Function
Starting play mode Movie clip capture function You can capture still images from the movie clip. How to capture the movie clip 1. Press the OK button while playing the movie clip. Then press the Down button. 2. The paused movie clip is saved in a new file name.
-
Page 60: Lcd Monitor Indicator
LCD monitor Indicator The LCD monitor displays shooting information about the displayed image. Description Playback mode Voice Memo DPOF Protect Folder name & File name Memory card indicator Battery Aperture value F2.8 ~ F16.5 Shutter speed Flash Image size 3648×2736 ~ 320×240 Recording date Icon Page…
-
Page 61: Using The Camera Buttons To Set The Camera
Using the camera buttons to set the camera In Play mode, you can use the buttons on the camera to conveniently set up the Play mode functions. Thumbnail ( ) / Enlargement ( Smart Album You can view multiple pictures, enlarge a selected picture, and crop and save a selected area of an image.
-
Page 62: Thumbnail / Enlargement Button
Thumbnail ( ) / Enlargement ( ) button Details of Each Category Category Description Categorized depending on the file type (e.g., Type picture, video, or voice) Categorized depending on the sequence of Date recorded dates. Colour Categorized depending on the main color. Categorized depending on the sequence of Week recorded weeks.
-
Page 63: Info (Disp) / Up Button
Info (DISP) / Up button When the menu is displayed on the LCD monitor, the UP button operates as a direction button. When the menu is not displayed on the LCD monitor, pressing the Info button will display image information on the LCD monitor. Info (DISP) button Info (DISP) button Play &…
-
Page 64: Left / Right / Down / Menu Button
Left / Right / Down / MENU button LEFT / RIGHT / DOWN / MENU buttons activate the following. — LEFT button : While the menu is showing, the LEFT button operates as a direction button. While the menu is not showing, press the LEFT button to select the previous image.
-
Page 65: Setting Up The Play Back Function Using The
Setting up the play back function using the LCD monitor PLAY mode functions can be changed by using the LCD monitor. In the PLAY mode, pressing the MENU button displays the menu on the LCD monitor. The menus you can set up in Play mode are as fol- lows.
-
Page 66: Setting Up The Play Back Function Using The Lcd Monitor
Setting up the play back function using the LCD monitor This menu is available while the camera is connected to a PictBridge supporting printer (direct connection to the camera, sold separately) with a USB cable. Menu Tab Main Menu Sub Menu One Photo Images All Photos…
-
Page 67: Edit
Edit ( Resize Change the resolution (size) of pictures taken. Select [Start image] to save an image to be the start-up image. 1. Press the play mode button and press the MENU button. 2. Click the Up/Down button from the Edit menu to select [Resize] ( menu tab and press the OK button.
-
Page 68: Rotating An Image
Edit ( After using [Edit] feature, the edited image will be saved at a smaller size than original image. (Only with image size from 7M) Rotating an image You can rotate the stored images by various degrees. 1. Press the play mode button and press the MENU button.
-
Page 69: Image Adjust
Edit ( Custom colour You can change the R (Red), G (Green) and B (Blue) values of the image. — OK button : Select / setup the Custom Colour — Up / Down button : Selects R, G, B — Left / Right button : Change the values Image Adjust 1.
-
Page 70
Edit ( Brightness control You can change the brightness of the image. 1. Select ( ) by pressing the Left/Right button and press the OK button. Then a bar for selecting the brightness will be displayed. 2. Change the brightness by pressing the Left/Right button. -
Page 71: View
View ( You can view the thumbnails and easily categorize or search a large amount of content such as pictures and videos. 1. Press the MENU button in playback mode. 2. Press the Up/Down button to select the desired menu. 3.
-
Page 72: Selecting Images
Starting the Multi Slide Show ( Selecting Images You can select image to view 1. Use the Up / Down buttons to select the [Images] menu and press the Right button. 2. Select a desired sub menu by pressing the Up / Down button. [All] : All images saved in the Memory are played back.
-
Page 73: Setting Play Interval
Starting the Multi Slide Show ( Setting play interval Set the Multi Slide Show play interval. 1. Select the [Interval] sub menu by pressing the UP / DOWN button and press the RIGHT button. 2. Use the Up / Down buttons to select the desired interval.
-
Page 74: Protecting Images
File Options ( Of all the files stored in the memory card, the unprotected files in the DCIM subfolder will be deleted. Remember that this will permanently delete unprotected images. Important shots should be stored on a computer before deletion takes place. The startup image is stored in the camera’s internal memory (i.e., not on the memory card) and it will not be deleted even if you delete all files on the memory card.
-
Page 75: Dpof
File Options ( DPOF DPOF(Digital Print Order Format) allows you to embed printing information on your memory card’s MISC folder. Select the pictures to be printed and how many prints to make. The DPOF indicator will display on the LCD monitor when an image that has DPOF information plays back.
-
Page 76
File Options ( Index Images (except for movie clips and voice file) are printed as index type. 1. Press the Up / Down button and select the [DPOF] menu tab. And then press the Right button. 2. Select the [Index] menu and press the Right button again. -
Page 77: Copy To Card
File Options ( Copy To Card This enables you to copy image files, movie clips and voice recording files to the memory card. 1. Select the [Copy To Card] menu tab by pressing the Up / Down button. And then press the Right button.
-
Page 78: Pictbridge
PictBridge You can use the USB cable to connect this camera to a printer that supports PictBridge (sold separately) and print the stored images directly. Movie clips and voice files cannot be printed. Setting up the camera for connection to the printer 1.
-
Page 79: Pictbridge : Picture Selection
PictBridge : Picture Selection You can select images you want to print. Setting the Number of Copies to Print 1. Press the Menu button and the PictBridge menu will display. 2. Use the Up / Down buttons to select the [Images] menu and press the Right button.
-
Page 80: Pictbridge : Reset
PictBridge : Reset Initialises user-changed configurations. 1. Use the Up / Down buttons to select the [Reset] menu tab. And then press the Right button. 2. Use the Up / Down buttons to select the desired sub menu value, and then press the OK button.
-
Page 81
— Take a picture for testing the camera condition and prepare extra battery. — Samsung cannot be held responsible for camera malfunctions. If the digital camera is not used for a long period, the date and time may adopt the default settings by automatical battery discharged. -
Page 82: Warning Indicator
Warning indicator There are several warnings that may appear on the LCD display. [Card Error] Memory card error Turn off the camera power and turn it on again Insert the memory card again Insert and format the memory card (p.52) [Card Locked] The memory card is locked SD/SDHC memory card : Slide the write protect switch to the…
-
Page 83: Before Contacting A Service Centre
Before contacting a service centre Please check the following The camera doesn’t switch on There is low battery capacity Insert fresh batteries. (p.14) Battery is inserted incorrectly with the polarities reversed. Insert the battery according to the polarity marks (+, -). The camera power ceases while in use The battery is exhausted Insert fresh batteries.
-
Page 84
Before contacting a service centre The flash does not fire Flash off mode has been selected Dis-engage flash off mode The camera mode can’t use the flash Refer to the FLASH instruction (p.32) Incorrect date and time is displayed The date and time have been set incorrectly or the camera has adopted the default settings Reset the date and time correctly The camera buttons do not operate… -
Page 85: Specifications
— Effective Pixel : Approx. 10.2 Mega-pixel — Total Pixel : Approx. 10.3 Mega-pixel Lens — Focal Length : SAMSUNG Lens f = 6.2 ~ 18.6mm (35mm film equivalent : 35 ~ 105mm) — F No. : F2.8(W) ~ F5.2(T) — Digital Zoom : ·Still Image mode :1.0X ~ 3.0X…
-
Page 86
Super Fine About 182 About 199 About 251 About 251 About 333 About 493 About 1234 Fine Normal About 471 About 510 About 611 About 617 About 791 About 1064 About 1870 These figures are measured under Samsung standard conditions and may vary depending on shooting conditions and camera settings. Effect… -
Page 87: Software
— Approx. 116.1g (without batteries and card) Operating Temperature — 0 ~ 40°C Operating Humidity — 5 ~ 85% Software — Samsung Master, Adobe Reader Specifications are subject to change without prior notice. All trademarks are the property of their respective owners. (1050mAh)
-
Page 88: Software Notes
— Using a Hand-made PC or a PC and OS that has not been guaran- teed by the manufacturer is not covered by the Samsung warranty. — Before reading this manual, you should have a basic knowledge of computers and O/S (Operating Systems).
-
Page 89: About The Software
After inserting the CD-ROM provided with this camera into the CD-ROM drive, the following window should automatically run. Samsung Master : This is the all-in-one multi media software solution. You can download, view, edit and save your digital images and movie clips with this software.
-
Page 90: Setting Up The Application Software
Click the [Samsung Digital Camera Installer] menu in the Auto run frame. 2. Install DirectX, Samsung Master by selecting a button shown on the monitor. If a recent version of DirectX has been installed on your computer, DirectX may not be installed.
-
Page 91
Setting up the application software 3. After restarting the computer, connect the PC to the camera with the USB cable. 4. Turn the camera power on. The [Found New Hardware Wizard] will open and the computer will recognise the camera. If your OS is Windows XP/ Vista, an image viewer program will open. -
Page 92: Starting Pc Mode
Setting up the application software PDF documents of user manual are included in the Software CD-ROM supplied with this camera. Search the PDF files with Windows explorer. Before opening the PDF files, you must install the Adobe Reader included in the Software CD-ROM. Install Adobe Reader from the CD provided.
-
Page 93
Starting PC mode Connecting the camera to a PC Disconnecting the camera and PC Refer to page 94 (Removing the removable disk). Downloading stored images You can download the still images stored on the camera to your PC’s hard disk and print them or use a photo editing software to edit them. 1. -
Page 94
7. An image file is transferred from the camera to your PC. — By using [Samsung Master], you can see the stored images in the memory directly on the PC monitor and you can copy or move the image files. -
Page 95: Removing The Removable Disk
Removing the removable disk Windows 2000/XP/Vista (The illustrations may differ from those shown depending on the Windows O/S.) 1. Check whether the camera and PC are transferring a file. If the camera status lamp blinks, please wait until the lamp has finished blinking and is constantly on.
-
Page 96: Samsung Master
Samsung Master You can download, view, edit and save your images and movies with this software. This software is only compatible with Windows. To start the program, click [Start Programs Samsung Master]. Downloading images 1. Connect the camera to your PC.
-
Page 97
Image display window : A selected image displays in this window. Preview window : You can preview the changed image. A still image edited with Samsung Master can’t be played back on the camera. Refer to the [Help] menu in Samsung Master for further information. -
Page 98
Frame display window : You can insert multi media in this window. Some movie clips that were compressed with a codec that is not compatible with the Samsung Master can’t play back in the Sam- sung Master. Refer to the [Help] menu in Samsung Master for further information. -
Page 99: Setting Up The Usb Driver For Mac
Setting up the USB Driver for MAC 1. A USB Driver for MAC is not included with the software CD as MAC OS supports the camera driver. 2. Check the MAC OS version during start-up. This camera is com- patible with MAC OS 10.3. 3.
-
Page 100: Faq
Please check the following if the USB connection malfunctions. Case 1 USB cable is not connected or it is not the supplied USB cable. Connect the supplied USB cable. Case 2 The camera is not recognised by your PC. Sometimes, the camera may appear under [Unknown Devices] in Device Manager.
-
Page 101: Correct Disposal Of Batteries In This Product
If the movie clip can’t be deleted, or the removable disk can’t be extracted or an error message displays during the file transfer. If you install only the Samsung Master, the problems mentioned above occasionally happen. — Close the Samsung Master program by clicking the Samsung Master icon on the Taskbar.
-
Page 102: Correct Disposal Of This Product
This product should not be mixed with other commercial waste for disposal. Samsung Eco-mark It is Samsung’s own symbol mark is used to effectively communicate Samsung’s environmental friendly prod- uct activities to the consumers. The mark represents Samsung’s continuous effort on development of envi-…
Китайский Беларус — Обзор фотоаппарата Samsung ES 75
Как пользоваться пленочной мыльницей от и до
Фотоаппарат Samsung WB150F Black
Похожие:
Наш проект живет и развивается для тех, кто ищет ответы на свои вопросы и стремится не потеряться в бушующем море зачастую бесполезной информации. На этой странице мы рассказали (а точнее — показали вам Как пользоваться фотоаппаратом самсунг 5x. Кроме этого, мы нашли и добавили для вас тысячи других видеороликов, способных ответить, кажется, на любой ваш вопрос. Однако, если на сайте все же не оказалось интересующей информации — напишите нам, мы подготовим ее для вас и добавим на наш сайт!
Если вам не сложно — оставьте, пожалуйста, свой отзыв, насколько полной и полезной была размещенная на нашем сайте информация о том, Как пользоваться фотоаппаратом самсунг 5x.
Время изменения URL на стр. — 14.06.09
Размер файла: 1,838 Mb
1077 страниц
Куратор размещ. файла на портале: Павел
txt
Колл. скачиваний за сутки этого файла: 2309 раз
Возможность дистанционного просмотра всего охраняемого объекта, его внутренних помещений, окружающего пространства и периметра, позволяет создавать высокоэффективные системы безопасности. Во избежание недоразумений при покупке приборов руководствуйтесь инструкцией по эксплуатации и информацией продавцов.
Эти защелки открываются сами, если осторожно поддеть или потянуть вверх. Есть две карты nvidia GTS450 где можно преобрести шлейф SLI Шлейф SLI входит в комплект некоторых видеокарт,а в комплекте с материнской платой тоже в некоторых моделях. Инструкция лего ниндзя го. Продал, сейчас купил форд транзит, думаю использовать и здесь. Место, где отдельные линии уже не различимы, и есть показатель разрешения.
Как установить драйвера и утилиты на Asus K55V подробно показано в руководстве: Установка драйверов и утилит на ноутбуки Asus. Пользователи могут настраивать интерфейс так, как им это удобно. Так инструкция вкт 5 вы не только факты, но в инструкции Карлайла сами по себе располагает к себе. Методом проб и ошибок пришел к использованию зеркальной камеры для этих целей.
Здесь можно скачать инструкции по эксплуатации и руководства пользователя к фотоаппаратам Samsung.
Samsung NV4 – руководство пользователя
Модель: Компактная фотокамера Samsung NV4 Год выпуска: 2008 Количество страниц: 119 Язык: русский Формат: pdf Размер: 7,2 Mb Описание: Samsung NV4 – мультимедийная камера с толщиной корпуса всего 17,5 мм. Камера снабжена высококачественным 3-кратным […]
Samsung NV3 – руководство пользователя
Модель: Компактная фотокамера Samsung NV3 Год выпуска: 2006 Количество страниц: 94 Язык: русский Формат: pdf Размер: 7,5 Mb Описание: Первая модель серии NV- мультимедийная камера Samsung NV3. В корпусе толщиной 17,5 мм умещается 7,2-мегапиксельный […]
Samsung MV900F – руководство пользователя
Модель: Компактная фотокамера Samsung MV900F Год выпуска: 2012 Количество страниц: 173 Язык: русский Формат: pdf Размер: 5,7 Mb Описание: Samsung MV900F – компактная цифровая камера c BSI CMOS-датчиком 16,31 мегапикселей. 5X оптический зум-объектив. Откидной […]
Samsung MV800 – руководство пользователя
Модель: Компактная фотокамера Samsung MV800 Год выпуска: 2011 Количество страниц: 145 Язык: русский Формат: pdf Размер: 4,5 Mb Описание: Samsung MV800 — отличный цифровой фотоаппарат, имеющий матрицу размером 1/2.3″, насчитывающую 16.2 активных […]
Samsung M110 – руководство пользователя
Модель: Компактная фотокамера Samsung M110 Год выпуска: 2008 Количество страниц: 103 Язык: русский Формат: pdf Размер: 8,5 Mb Описание: Цифровая фотокамера Samsung M110 имеет CCD матрицу, с размером 1/2.5 (5.8×4.3 мм). К-во. эффективных мегапикселей 8.2, […]
Samsung M100 – руководство пользователя
Модель: Компактная фотокамера Samsung M100 Год выпуска: 2008 Количество страниц: 102 Язык: русский Формат: pdf Размер: 7,5 Mb Описание: Цифровая фотокамера Samsung M100 имеет CCD матрицу, с размером 1/2.5 (5.8×4.3 мм). К-во. эффективных мегапикселей 8.2, […]
Samsung L830, L730 – руководство пользователя
Модель: Компактные фотокамеры Samsung L830, Samsung L730 Год выпуска: 2007 Количество страниц: 111 Язык: русский Формат: pdf Размер: 7,2 Mb Описание: Samsung L830 – 8-мегапиксельная компактная фотокамера. Модель имеет 3х оптический зум и 2.5-дюймовый […]
Samsung L700 – руководство пользователя
Модель: Компактная фотокамера Samsung L700 Год выпуска: 2007 Количество страниц: 78 Язык: русский Формат: pdf Размер: 6,7 Mb Описание: Samsung L700 – 7-мегапиксельная компактная фотокамера в металлическом корпусе. Кроме матрицы с высоким […]
Samsung L310W – руководство пользователя
Модель: Компактная фотокамера Samsung L310W Год выпуска: 2008 Количество страниц: 107 Язык: русский Формат: pdf Размер: 5,6 Mb Описание: Идеальное решение для опытных фотографов. Samsung L310W демонстрирует функции, обычно присущие высококлассным, […]
Samsung L210 – руководство пользователя
Модель: Компактная фотокамера Samsung L210 Год выпуска: 2008 Количество страниц: 104 Язык: русский Формат: pdf Размер: 7,3 Mb Описание: Samsung L210 снабжена высококачественным 3-кратным объективом Samsung NV и большим 2,5-дюймовым ЖК-экраном, автоматически […]
Samsung L201 – руководство пользователя
Модель: Компактная фотокамера Samsung L201 Год выпуска: 2008 Количество страниц: 98 Язык: русский Формат: pdf Размер: 7,2 Mb Описание: Samsung L201 оставляет двойственное впечатление. С одной стороны — стильный дизайн и неплохая для компактной камеры […]
Samsung L110 – руководство пользователя
Модель: Компактная фотокамера Samsung L110 Год выпуска: 2008 Количество страниц: 103 Язык: русский Формат: pdf Размер: 7,1 Mb Описание: Samsung L110 – 8,2-мегапиксельная компактная цифровая фотокамера. Объектив с 3-х кратным оптическим зумом. Двойная […]
Samsung L100 – руководство пользователя
Модель: Компактная фотокамера Samsung L100 Год выпуска: 2008 Количество страниц: 102 Язык: русский Формат: pdf Размер: 7,9 Mb Описание: Samsung L100 снабжена высококачественным 3-кратным объективом Samsung NV и большим 2,5-дюймовым ЖК-экраном, автоматически […]
Samsung L85 – руководство пользователя
Модель: Компактная фотокамера Samsung L85 Год выпуска: 2006 Количество страниц: 90 Язык: русский Формат: pdf Размер: 7,5 Mb Описание: 8,1-Мп модель Samsung L85 кроме оригинального дизайна предлагает пользователю 5-кратный оптический зум и 2,5-дюймовый […]
Samsung L83T – руководство пользователя
Модель: Компактная фотокамера Samsung L83T Год выпуска: 2007 Количество страниц: 114 Язык: русский Формат: pdf Размер: 6,7 Mb Описание: Samsung L83T – 8-мегапиксельная компактная фотокамера. Модель имеет 3х оптический зум и 2.5-дюймовый дисплей. Samsung L83T […]
Samsung L77 – руководство пользователя
Модель: Компактная фотокамера Samsung L77 Год выпуска: 2007 Количество страниц: 98 Язык: русский Формат: pdf Размер: 7,0 Mb Описание: Samsung L77 – 7-мегапиксельная компактная фотокамера. Модель имеет 7х оптический зум и 2.5-дюймовый сенсорный […]
Samsung L74 Wide – руководство пользователя
Модель: Компактная фотокамера Samsung L74 Wide Год выпуска: 2007 Количество страниц: 98 Язык: русский Формат: pdf Размер: 11,7 Mb Описание: Фотокамера Samsung L74 Wide оснащена 28-мм широкоугольным объективом, 7,2-мегапиксельной ПЗС матрицей и 3-дюймовым […]
Samsung L73, L7 – руководство пользователя
Модель: Компактные фотокамеры Samsung L73, Samsung L7 Год выпуска: 2007 Количество страниц: 78 Язык: русский Формат: pdf Размер: 7,5 Mb Описание: Samsung L73 – функциональная камера с оригинальной системой управления, 7,2-мегапиксельной матрицей и […]
Samsung L70 – руководство пользователя
Модель: Компактная фотокамера Samsung L70 Год выпуска: 2006 Количество страниц: 78 Язык: русский Формат: pdf Размер: 6,6 Mb Описание: Концепция «удобной и стильной цифровой камеры» легла в основу создания новаторского пользовательского […]
Samsung IT100 – руководство пользователя
Модель: Компактная фотокамера Samsung IT100 Год выпуска: 2009 Количество страниц: 95 Язык: русский Формат: pdf Размер: 4,7 Mb Описание: Стильная и удобная 12,2МП цифровая камера с функциями интеллектуального определения типа сюжета(портрет, […]
Samsung i100 – руководство пользователя
Модель: Компактная фотокамера Samsung i100 Год выпуска: 2008 Количество страниц: 136 Язык: русский Формат: pdf Размер: 8,4 Mb Описание: Samsung i100 – компактная цифровая фотокамера. 10,2 млн. активных пикселей. Двойная стабилизация изображения: […]
Samsung i70 – руководство пользователя
Модель: Компактная фотокамера Samsung i70 Год выпуска: 2007 Количество страниц: 118 Язык: русский Формат: pdf Размер: 6,7 Mb Описание: Samsung i70 – 7,2-мегапиксельная цифровая камера с 3x зум-объективом. Широкий и яркий 3,0-дюймовый ЖК-дисплей. […]
Samsung i8 – руководство пользователя
Модель: Компактная фотокамера Samsung i8 Год выпуска: 2008 Количество страниц: 135 Язык: русский Формат: pdf Размер: 8,7 Mb Описание: Samsung i8 — сверхтонкая и стильная 8-мегапиксельная цифровая камера, поддерживающая мультимедиа-технологию Samsung PMP. […]
Samsung i7 – руководство пользователя
Модель: Компактная фотокамера Samsung i7 Год выпуска: 2007 Количество страниц: 126 Язык: русский Формат: pdf Размер: 8,7 Mb Описание: Фотокамера Samsung i7 одновременно является еще и портативным медиа-плеером. Samsung Digimax i7 выполнена в ультратонком […]
Samsung i6 PMP – руководство пользователя
Модель: Компактная фотокамера Samsung i6 PMP Год выпуска: 2006 Количество страниц: 90 Язык: русский Формат: pdf Размер: 7,1 Mb Описание: Фотокамера Samsung i6 PMP одновременно является еще и портативным медиа-плеером. Samsung Digimax i6 выполнена в […]
Samsung GX-20 – руководство пользователя
Модель: Зеркальная фотокамера Samsung GX-20 Год выпуска: 2010 Количество страниц: 158 Язык: русский Формат: pdf Размер: 14,0 Mb Описание: Samsung GX-20 оснащена 14,6-мегапиксельной CMOP-матрицей, системой оптической стабилизации (OIS) на основе механизма […]
Samsung GX-10 – руководство пользователя
Модель: Зеркальная фотокамера Samsung GX-10 Год выпуска: 2006 Количество страниц: 258 Язык: русский Формат: pdf Размер: 11,4 Mb Описание: Samsung GX-10 – пылезащищенная цифровая зеркальная камера от Samsung. Камера с матрицей размером 23.5×15.7 мм весит 710 […]
Samsung GX-1L – руководство пользователя
Модель: Зеркальная фотокамера Samsung GX-1L Год выпуска: 2006 Количество страниц: 214 Язык: русский Формат: pdf Размер: 5,6 Mb Описание: 6-мегапиксельная модель Samsung GX-1L нацелена на начинающих пользователей. Для просмотра изображений применен […]
Samsung EX1 – руководство пользователя
Модель: Компактная фотокамера Samsung EX1 Год выпуска: 2010 Количество страниц: 129 Язык: русский Формат: pdf Размер: 5,3 Mb Описание: Признаться, только ознакомившись с характеристиками Samsung EX1, мы уже ждали от него довольно многого. Очевидно, […]
Samsung ES90, ES91 – руководство пользователя
Модель: Компактные фотокамеры Samsung ES90, Samsung ES91 Год выпуска: 2012 Количество страниц: 106 Язык: русский Формат: pdf Размер: 6,2 Mb Описание: Небольшой, но функциональный, недорогой, но стильный. Все это о фотоаппарате Samsung ES90, позволяющем […]
Samsung ES80, ES81 – руководство пользователя
Модель: Компактные фотокамеры Samsung ES80, Samsung ES81 Год выпуска: 2011 Количество страниц: 105 Язык: русский Формат: pdf Размер: 4,0 Mb Описание: Samsung ES80 – компактная цифровая фотокамера с матрицей 12,2 мегапикселей оснащена 2,4” ЖК-дисплеем, с […]
Samsung ES75, ES78 – руководство пользователя
Модель: Компактные фотокамеры Samsung ES75, Samsung ES78 Год выпуска: 2010 Количество страниц: 99 Язык: русский Формат: pdf Размер: 7,7 Mb Описание: Samsung ES75 – цифровая компактная фотокамера с разрешением 14.2-мегапикселей с прочным корпусом. Имеет […]
Samsung ES73 – руководство пользователя
Модель: Компактная фотокамера Samsung ES73 Год выпуска: 2010 Количество страниц: 99 Язык: русский Формат: pdf Размер: 6,6 Mb Описание: 12-мегапиксельная фотокамера Samsung ES73 оснащена прочным корпусом, который защищает аппарат от нежелательных […]
Samsung ES70, ES71 – руководство пользователя
Модель: Компактные фотокамеры Samsung ES70, Samsung ES71 Год выпуска: 2010 Количество страниц: 98 Язык: русский Формат: pdf Размер: 7,2 Mb Описание: Фотокамера Samsung ES70 оснащена ультраширокоугольным 27-мм зум-объективом с 5-кратным увеличением. Благодаря […]
Samsung ES65, ES67 – руководство пользователя
Модель: Компактные фотокамеры Samsung ES65, Samsung ES67 Год выпуска: 2010 Количество страниц: 98 Язык: русский Формат: pdf Размер: 6,5 Mb Описание: Samsung ES65 – фотокамера оснащена ультраширокоугольным 27-мм зум-объективом с 5-кратным увеличением. […]
Samsung ES60 – руководство пользователя
Модель: Компактная фотокамера Samsung ES60 Год выпуска: 2009 Количество страниц: 98 Язык: русский Формат: pdf Размер: 5,7 Mb Описание: Компактный фотоаппарат Samsung ES60 c разрешением 12,2 Мпикс и 3-кратным оптическим зумом особенно понравится тем, кто […]
Samsung ES55 – руководство пользователя
Модель: Компактная фотокамера Samsung ES55 Год выпуска: 2009 Количество страниц: 98 Язык: русский Формат: pdf Размер: 5,8 Mb Описание: Компактная 10,2 МП цифровая камера Samsung ES55 с цифровой стабилизацией изображения, функциями распознавания лиц в […]
Samsung ES30 – руководство пользователя
Модель: Компактная фотокамера Samsung ES30 Год выпуска: 2010 Количество страниц: 95 Язык: русский Формат: pdf Размер: 3,8 Mb Описание: Samsung ES30 – цифровая фотокамера с сенсором 12,2 мегапикселя, 5Х широкоугольным зум-объктивом (F=27-135мм). 3,0″ […]
Samsung ES28 – руководство пользователя
Модель: Компактная фотокамера Samsung ES28 Год выпуска: 2010 Количество страниц: 98 Язык: русский Формат: pdf Размер: 4,3 Mb Описание: Samsung ES28 – цифровая компактная фотокамера с разрешением 12.2 мегапикселей. Оптический zoom 5x. Автоматический […]
Samsung ES25, ES27 – руководство пользователя
Модель: Компактные фотокамеры Samsung ES25, Samsung ES27 Год выпуска: 2010 Количество страниц: 96 Язык: русский Формат: pdf Размер: 3,9 Mb Описание: Samsung ES25 – это компактный цифровой фотоаппарат с мощными возможностями. Съемка становится еще удобнее и […]
Samsung ES20 – руководство пользователя
Модель: Компактная фотокамера Samsung ES20 Год выпуска: 2009 Количество страниц: 102 Язык: русский Формат: pdf Размер: 6,3 Mb Описание: Samsung ES20 – цифровая фотокамера с разрешением 10.2 мегапикселей в компактном металлическом корпусе. С 5-кратным […]
Samsung ES17, ES19 – руководство пользователя
Модель: Компактные фотокамеры Samsung ES17, Samsung ES19 Год выпуска: 2009 Количество страниц: 98 Язык: русский Формат: pdf Размер: 6,0 Mb Описание: Samsung ES17 – цифровая фотокамера с разрешением 12.2 мегапикселей в компактном металлическом корпусе. С […]
Samsung ES15 – руководство пользователя
Модель: Компактная фотокамера Samsung ES15 Год выпуска: 2009 Количество страниц: 98 Язык: русский Формат: pdf Размер: 5,9 Mb Описание: Компактная 10,2 Мпикс цифровая камера Samsung ES15 оснащена цифровой стабилизацией изображения, функциями […]
Samsung ES10 – руководство пользователя
Модель: Компактная фотокамера Samsung ES10 Год выпуска: 2009 Количество страниц: 97 Язык: русский Формат: pdf Размер: 5,9 Mb Описание: Samsung ES10 – компактная 8 Мпикс цифровая камера ES10 оснащена цифровой стабилизацией изображения, функциями […]
Samsung ES9 – руководство пользователя
Модель: Компактная фотокамера Samsung ES9 Год выпуска: 2011 Количество страниц: 105 Язык: русский Формат: pdf Размер: 4,1 Mb Описание: Samsung ES9 – цифровая фотокамера с матрицей 12.2 Мп. Оптическая стабилизация изображения. Поддержка карт памяти SD, […]
Samsung DV300, DV300F, DV305, DV305F – руководство пользователя
Модель: Компактные фотокамеры Samsung DV300, Samsung DV300F, Samsung DV305, Samsung DV305F Год выпуска: 2012 Количество страниц: 166 Язык: русский Формат: pdf Размер: 4,6 Mb Описание: Samsung DV300F – цифровая фотокамера с двумя дисплеями и поддержкой Wi-Fi. 5х оптический […]
Samsung DV150F, DV151F, DV155F – руководство пользователя
Модель: Компактные фотокамеры Samsung DV150F, Samsung DV151F, Samsung DV155F Год выпуска: 2012 Количество страниц: 163 Язык: русский Формат: pdf Размер: 6,4 Mb Описание: Samsung DV150F – цифровая фотокамера с СCD матрицей размером 1/2.3″, 16,2 мегапикселей. ЖК экран с […]
Samsung DV50, DV90, DV100, DV101 – руководство пользователя
Модель: Компактные фотокамеры Samsung DV50, Samsung DV90, Samsung DV100, Samsung DV101 Год выпуска: 2012 Количество страниц: 121 Язык: русский Формат: pdf Размер: 4,3 Mb Описание: Samsung DV100 – цифровая фотокамера с 5-кратным оптическим зумом. Матрица ПЗС с […]
Samsung A503, A403 – руководство пользователя
Модель: Компактные фотокамеры Samsung A503, Samsung A403 Год выпуска: 2005 Количество страниц: 74 Язык: русский Формат: pdf Размер: 4,9 Mb Описание: 5-мегапиксельная модель Samsung A503 оснащена объективом с фиксированным фокусным расстоянием (6,1 мм) и […]
Samsung A402 – руководство пользователя
Модель: Компактная фотокамера Samsung A402 Год выпуска: 2005 Количество страниц: 108 Язык: русский Формат: pdf Размер: 3,6 Mb Описание: Цифровой фотоаппарат Samsung A402 ориентирован на начинающих пользователей. Оборудован ПЗС-матрицей на 4,2 млн. […]
«
1
2
3
4
5
»

English
User
Manual
Español
4Focus and capture the photo.
Before Using This Device
Thank you for purchasing the Samsung Lens. The illustrations
used in this manual may differ from the actual items. Some
functions described in this manual may not be available depending
on the camera model. Update the firmware of the camera body
and lens. Visit www.samsung.com to download the firmware.
Unpacking
Lens, Lens cap, Lens mount cover, User manual
• Optional Item: Filter, Case
SAMSUNG 20-50 mm F3.5-5.6 ED II
Using the Zoom Ring
Set the composition of the photo (the focal distance of the lens) by
rotating the zoom ring on the lens. (See illustration D)
Layouts (See illustration A)
1 Lens mount index 2 Zoom lock switch 3 Focus ring 4 Lens
5 i-Function button 6 Zoom ring 7 Lens information contacts
ENG / SPA / FRE
This User Manual has been specially designed to guide you through the basic functions and features of your device.
Please read the User Manual carefully to ensure safe and correct use.
Attaching and Removing the Lens
► To attach the lens,
Remove the lens cap, lens mount cover, and body cap.
1
2Align the red mark on the lens with the red mark on the
camera body. Then, rotate the lens as shown in the illustration
until it locks into place. (See illustration B)
AD68-08112A (1.1)
A
► To remove the lens, press and hold the lens release button, and
then rotate the lens as shown in the illustration.
(See illustration C)
Unlocking the lens
7
Before using the lens, you must unlock it. Rotate the zoom ring
counter-clockwise until you hear a click.
Using the focus ring
In the MF mode, adjust the focus manually by rotating the focus
ring on the lens. You can select the MF mode on the camera.
1
Do not apply excessive force to the front of the lens while the
camera is using auto focus (AF). Doing so may cause the lens
to malfunction.
2
3
Use the MF Assist function on the camera to aid with manual
focusing. Refer to your camera manual for more details.
Using i-Function
When you press the i-Function button on the lens, you can use
the E mode or Z or adjust some shooting options.
In the E mode, you can select scenes or filter effects that
your camera supports. Z allows you to zoom in on a subject
with less degradation of photo quality than the Digital zoom. This
feature is available only when your camera supports it. i-Scene
mode is available only on some camera models.
Rotate the mode dial to P, A, S, M, or i.
6
5
4
B
1
2Press [i-Function] on the lens to select a setting.
C
• Available settings may differ depending on the shooting mode.
Setting
Shooting mode
E
i
Aperture value
A, M
Z
P, A, S, M, i
Exposure value
P, A, S
Shutter speed
S, M
Setting
White Balance, ISO
• To select the items that will appear when you press the
i-Function button on the lens, you can use the iFn Customizing
menu on your camera.
• Available scenes or filter effects in the E mode may vary
depending on the camera model.
• If you select Z, the photo resolution will vary according
to the zoom rate.
Shooting mode
P, A, S, M
3Rotate the focus ring on the lens to adjust the setting (or to
When you use the zoom function, focus can be slightly changed.
Adjust the focus again before you capture a photo.
Locking the lens (See illustration E)
After using the lens, pull and hold the zoom lock switch away from
the camera body, and then rotate the zoom ring clockwise.
Using a Filter (optional) (See illustration F)
Before putting a filter on the lens, make sure it is compatible.
Refer to "Specifications" for compatible filter size.
• A filter is a precise optical product. Keep away from dust, dirt
or scratches. Also, do not try to mount two or more filters at the
same time. Doing so may deteriorate the image quality and cause
vignetting (a reduction of an image's brightness or saturation at the
periphery as the viewing angle of the lens is hidden).
• In case of a thick framed filter, the vignetting can occur with a
wide-angle lens.
Specifications
Lens Name
SAMSUNG 20-50 mm F3.5-5.6 ED II
• Focal length: 0.8–2.0 in. (20–50 mm)
(equivalent to 1.2–3.0 in. (30.8–77 mm) in 1.4 in. (35 mm) format)
• Elements in Group: 9 elements in 8 groups
(1 Aspheric lens, 1 Extra-low Dispersion lens included)
• Angle of View: 70.2–31.4°
• Aperture: F3.5–5.6 (Minimum: F22), (Number of Blades: 7,
Circular Aperture Diaphragm)
• Mount Type: Samsung NX mount (Exclusive to NX series)
• Optical Image Stabilizer: Not supported
• Minimum Focus Distance: 11.0 in. (0.28 m)
• Maximum Magnification: Approx. 0.22X
• i-Scene Mode: Supported (Beauty Shot, Portrait, Children,
Backlight, Landscape, Sunset, Dawn, Beach & Snow, Night)
• Lens Hood: Not supported
• Filter Size: 1.6 in. (40.5 mm)
• Max. Diameter X Length: 2.5 X 1.6 in. (63.2 X 39.8 mm)
• Weight: Approx. 119 g (without hood)
• Operating Temperature: 0–40 °C
• Operating Humidity: 5–85 %
Specifications may change without notice for better performance.
Gracias por adquirir la lente Samsung. Las ilustraciones usadas
en el manual del usuario pueden ser diferentes de los elementos
reales. Algunas funciones descritas en este manual podrían no
estar disponibles según el modelo de la cámara. Actualice el
firmware del cuerpo y la lente de la cámara.
Visite www.samsung.com para descargar el firmware.
Desembalaje
E
F
Establezca la composición de la foto (la distancia focal de la lente)
girando el anillo de zoom. (Ver ilustración D)
Diseño (Ver ilustración A)
1 Índice de montaje de la lente 2 Selector de bloqueo de zoom
3 Anillo de enfoque 4 Lente 5 Botón i-Function
6 Anillo de zoom 7 Contactos de información de la lente
Colocar y retirar la lente
► Para colocar la lente
Retire la tapa de la lente, la cubierta del montaje y la cubierta
del cuerpo.
1
2Haga coincidir la marca roja de la lente con la marca roja del
cuerpo de la cámara. Luego, gire la lente como se muestra en
la ilustración hasta que se ajuste en su sitio.
(Ver ilustración B)
► Para retirar la lente, mantenga pulsado el botón de
desenganche, y luego gire la lente como se muestra en la
ilustración. (Ver ilustración C)
Desbloqueo del lente
Antes de usar el lente, deberá desbloquearla. Gire el anillo de
zoom hacia la izquierda hasta oír un clic.
Uso del anillo de enfoque
En el modo MF, ajuste el enfoque manualmente girando el
anillo de enfoque del lente. Puede seleccionar el modo MF en la
cámara.
No aplique fuerza excesiva sobre el frente de la lente mientras la
cámara esté utilizando la función de enfoque automático (AF).
Ajuste la función de Asistencia MF para obtener ayuda con el enfoque
manual. Consulte el manual de su cámara para conocer más detalles.
Uso de i-Function
Al pulsar el botón i-Function en la lente, podrá usar el modo
E o Z, o ajustar algunas opciones de disparo. En el
modo E, podrá seleccionar escenas o efectos de filtro que
la cámara admita. La función Z le permite hacer zoom sobre
un sujeto con una menor degradación de la calidad de la fotografía
que con el zoom digital. Esta función sólo está disponible si la
cámara la admite. El modo i-Scene solamente está disponible en
algunos modelos de la cámara.
Gire el selector de modos hasta P, A, S, M o i.
1
2Pulse [i-Function] en la lente para seleccionar una
configuración.
• Los ajustes disponibles pueden variar según el modo de
disparo seleccionado.
Ajustes
Modo de disparo
E
i
Z
P, A, S, M, i
Velocidad del
obturador
3
S, M
Ajustes
Valor de apertura
Valor de exposición
Balance de
blancos, ISO
• Para seleccionar los elementos que aparecerán al pulsar
el botón i-Function en la lente, puede utilizar el menú
Personalización iFn de la cámara.
• Las escenas o los efectos de filtro disponibles en el modo
E pueden variar según el modelo de la cámara.
• Si selecciona Z, la resolución de las fotos cambiará
según el nivel de zoom.
Usar la rueda de zoom
Lente, Tapa de la lente, Tapa de montaje de la lente,
Manual del usuario
• Elemento opcional: Filtro, Funda
change the zoom rate in Z mode).
D
4Enfoque y capture la fotografía.
Antes de usar este dispositivo
Modo de disparo
A, M
P, A, S
P, A, S, M
Gire el anillo de enfoque de la lente para modificar los ajustes
(o para modificar el nivel de zoom en el modo Z).
Como el enfoque se puede cambiar ligeramente gracias a la
distancia focal cambiada, se recomienda ajustarlo de nuevo antes
de hacer una fotografía si ha cambiado la distancia focal girando
el anillo de zoom.
Bloqueo del lente (Ver la ilustración E)
Después de usar el lente, tire y mantenga el botón de bloqueo de
zoom alejándolo del cuerpo de la cámara y gire el anillo de zoom
hacia la derecha.
Usar un filtro (opcional) (Ver la ilustración F)
Antes de colocar el filtro en la lente, asegúrese de que sea
compatible. Consulte „Especificaciones” para ver los tamaños de
filtro compatibles.
• El filtro es un producto óptico preciso. Manténgalo lejos del
polvo, la suciedad o los arañazos. No intente montar dos o más
filtros al mismo tiempo. Si lo hace podría deteriorar la calidad
de la imagen y provocar un efecto de viñeta (la reducción del
brillo o la saturación de una imagen en la periferia, ocultando el
ángulo de visión del lente).
• En el caso de filtros de marco fino, el efecto viñeta se puede
producir con una lente de gran ángulo.
Especificaciones
Nombre del objetivo
SAMSUNG 20-50 mm F3.5-5.6 ED II
• Distancia focal: De 20 a 50 mm (equivalente en formato de
35 mm: 30,8 a 77 mm)
• Elementos en grupos: 9 elementos en 8 grupos (un objetivo
asférico y una lente de baja dispersión incluidos)
• Vista angular: 70,2 a 31,4°
• Apertura: F3.5 a 5.6 (Mínimo: F22), (Número de hojas: 7,
diafragma de apertura en círculo)
• Tipo de montaje: Montaje Samsung NX (Exclusivo para la serie NX)
• Estabilizador de imagen óptico: No compatible
• Distancia mínima de enfoque: 0,28 m
• Amplificación máxima: Aprox. 0,22 X
• i-Scene: Admitido (Disparo bello, Retrato, Niños, Luz Fondo, Paisaje,
Puesta de sol, Amanecer, Playa nieve, Nocturno)
• Cubierta de la lente: No compatible
• Tamaño del filtro: 40,5 mm
• Diámetro x longitud máximos: 63,2 x 39,8 mm
• Peso: Aprox. 119 g (sin cubierta)
• Temperatura de funcionamiento: 0 a 40° C
• Humedad de funcionamiento: 5 a 85 %
Las especificaciones pueden cambiar sin aviso previo para un
mejor rendimiento.
Français
A
B
7
C
1
Merci d’avoir acheté l’objectif Samsung. Les illustrations utilisées
dans le présent guide peuvent différer du produit fourni. Selon
le modèle de votre appareil photo, il est possibles que certaines
fonctionnalités décrites dans le présent guide ne soient pas
offertes. Mettez à jour le micrologiciel du boîtier de l’appareil
photo et de l’objectif. Accédez au site www.samsung.com/fr pour
télécharger le micrologiciel.
Contenu du coffret
2
3
4
Avant d’utiliser ce produit
Objectif, couvre-objectif, capuchon de la monture de l'objectif,
guide d'utilisation
• Élément optionnel : filtre, étui
Disposition (Voir illustration A)
1 Repère d'installation de l'objectif
2 Commutateur de verrouillage du zoom
3 Bague de mise au point 4 Objectif 5 Touche i-Function
6 Bague du zoom 7 Contacts d'information de l'objectif
6
5
D
Installation et retrait de l’objectif
E
F
► Pour fixer l’objectif :
Retirez le couvre-objectif, le capuchon de la monture et le
capuchon du boîtier.
1
2Alignez le repère rouge de l’objectif sur le repère rouge
du boîtier. Tournez ensuite l’objectif comme indiqué sur
l’illustration, jusqu’à ce qu’il soit en place. (Voir illustration B)
► Pour retirer l’objectif, maintenez enfoncé le bouton d’éjection
du cache, puis tournez l’objectif comme indiqué sur l’illustration.
(Voir illustration C)
Déverrouillage de l’objectif
Avant d’utiliser l’objectif, vous devez le déverrouiller. Tournez la
bague de zoom dans le sens anti-horaire jusqu’à ce que vous
entendiez un clic.
Utilisation de la bague de mise au point
En mode MF, effectuez la mise au point manuellement en tournant
la bague de mise au point située sur l’objectif. Vous pouvez
sélectionner le mode MF sur l’appareil photo.
Ne forcez pas sur l’objectif lorsque l’appareil photo est en mode
Mise au point automatique (AF). Vous risqueriez de provoquer un
mauvais fonctionnement de l’objectif.
English
Health and Safety Information
Please read the following safety tips carefully for proper and safe use.
• Do not stare at the sun through the lens or camera.
This may cause severe damage to your eyes.
Warning • Keep your lens or camera away from small children and pets.
• Do not store the lens in direct sunlight without the lens cap.
Direct sunlight that passes through the lens may combust
if it comes into contact with flammable materials.
Caution • Use only sturdy tripods. Lightweight or unstable tripods
may fall over and damage the camera.
Lens Storage and Maintenance
• Store the lens in dry and well ventilated areas.
• Do not store the lens in areas of high temperature or humidity or in a
closet, car, or confined area where chemicals are stored.
• The lens is not waterproof. Be careful not to allow it to get wet when
using it near water.
• Do not use chemicals such as thinner, alcohol, or benzene to remove
dust.
• Do not drop the lens or apply excessive shock to it. The lens is a
precise optical product.
• Avoid using the lens anywhere there is a sudden temperature
change. Keep the lens in a plastic bag or a camera case to prevent
condensation from forming on the inside or outside of the lens.
• When carrying or not using the lens, place the lens cap and lens
mount cover on the lens to prevent contamination from foreign
particles and protect the lens from scratches.
• Do not keep the camera mounted on a tripod without the lens cap.
The inside of the camera can be damaged by direct sunlight.
• Check the lens once every year or two for best performance.
• Do not apply excessive force to the front of the lens.
Correct Disposal of This Product
(Waste Electrical & Electronic Equipment)
(Applicable in countries with separate collection systems)
This marking on the product, accessories or literature indicates
that the product and its electronic accessories (e.g. charger, headset,
USB cable) should not be disposed of with other household waste at the
end of their working life. To prevent possible harm to the environment
or human health from uncontrolled waste disposal, please separate
these items from other types of waste and recycle them responsibly to
promote the sustainable reuse of material resources. Household users
should contact either the retailer where they purchased this product, or
their local government office, for details of where and how they can take
these items for environmentally safe recycling. Business users should
contact their supplier and check the terms and conditions of the purchase
contract. This product and its electronic accessories should not be mixed
with other commercial wastes for disposal.
PlanetFirst represents Samsung Electronics' commitment
to the sustainable development and social responsibility
through eco-driven business and management activities.
Información sobre salud y seguridad
Lea las siguientes sugerencias de seguridad detenidamente para usar el
dispositivo de manera correcta y segura.
• No mire el sol a través de la lente o de la cámara.
Esto puede causar daños graves en sus ojos.
Advertencia • Mantenga la lente o la cámara lejos de los niños
pequeños y las mascotas.
• No almacene la lente en contacto directo con el sol
sin la tapa de la lente. La luz directa del sol que pasa
a través de la lente puede incendiarse si entra en
contacto con materiales inflamables.
Precaución
• Utilice sólo trípodes firmes. Los trípodes livianos o
inestables pueden caerse y dañar la cámara.
Almacenamiento y mantenimiento de la lente
• Almacene la lente en un área seca y ventilada.
• No guarde la lente en sitios con alta temperatura o humedad, o en
un armario, un automóvil o un sitio cerrado en el cual se guarden
sustancias químicas.
• La lente no es impermeable. Asegúrese de no permitir que se moje
cuando la use cerca del agua.
• No use químicos como diluyentes, alcohol o benceno para quitar el polvo.
• No deje caer la lente ni ejerza una fuerza excesiva sobre ella. La lente
es un producto óptico preciso.
• Evite el uso de la lente en lugares donde pueda haber cambios de
temperatura repentinos. Mantenga la lente en una bolsa de plástico o
en un estuche para cámaras para evitar que se forme condensación en
el interior o el exterior de la lente.
• Cuando no esté usando la lente o cuando la lleve de un lado a otro,
colóquele la tapa y el montaje a fin de evitar la contaminación con
partículas externas e impedir que la lente sufra raspaduras.
• No deje la cámara montada en un trípode sin la tapa de la lente.
El interior de la cámara se puede dañar con la luz directa del sol.
Utilisation de i-Function
Lorsque vous appuyez sur le bouton i-Function de l’objectif,
vous pouvez utiliser le mode E ou Z, ou bien régler
certaines options de prise de vue. En mode E, vous pouvez
sélectionner des scènes ou des effets de filtre pris en charge par
votre appareil photo. L’Z vous permet de zoomer sur un
sujet avec une dégradation moindre de la qualité photo qu’avec le
zoom numérique. Cette fonction est disponible uniquement si elle
est prise en charge par votre appareil photo. Le mode i-Scene est
disponible uniquement sur certains modèles d’appareils photos.
A l’aide de la molette de sélection du mode, choisissez le
mode P, A, S, M ou i.
1
2Appuyez sur [i-Function] sur l’objectif pour sélectionner un réglage.
• Les réglages offerts peuvent varier en fonction du mode de
prise de vue sélectionné.
Mode de prise
Paramètres de vue
Paramètres
E
i
Valeur d'ouverture
Z
P, A, S, M, i
Valeur d'exposition
Vitesse
d'obturation
S, M
Balance des
blancs, ISO
Mode de prise
de vue
A, M
P, A, S
P, A, S, M
3Tournez la bague de mise au point sur l’objectif afin de régler les
paramètres (ou modifier le niveau de zoom en mode Z).
4Effectuez la mise au point et prenez la photo.
• Pour sélectionner les options à afficher lorsque vous appuyez
sur le bouton i-Function de l’objectif, vous pouvez utiliser le menu
iFn Customizing (personnalisation iFn) de l’appareil photo.
• Les scènes ou effets de filtre disponibles en mode E
peuvent varier en fonction du modèle de l’appareil photo.
• Si vous sélectionnez Z, la résolution de la photo
changera en fonction du niveau de zoom.
Utilisation de la bague de réglage du zoom
Veuillez ajuster l'image (distance focale de l'objectif) en utilisant la
bague de réglage de la mise au point. (Voir illustration D)
Comme la mise au point peut être légèrement modifiée en raison
d’une valeur de distance focale changée, il est recommandé de
régler à nouveau la mise au point avant de prendre une photo, et
ce, si vous avez changé la distance focale en faisant tourner la
bague de réglage du zoom.
Verrouillage de l’objectif (Voir illustration E)
Après utilisation de l’objectif, tirez et maintenez le verrou du zoom
vers l’extérieur du boîtier de l’appareil photo, puis tournez la bague
de zoom dans le sens horaire.
Utilisation d’un filtre (en option)
(Voir illustration F)
Avant de placer un filtre sur l’objectif, vérifiez qu’il est compatible.
Voir les « Caractéristiques » pour la taille de filtre compatible.
• Un filtre est un produit optique précis. Conservez-le à l’abri de
la poussière, de la saleté ou des rayures. De même, n’essayez
pas de monter deux filtres ou plus simultanément. Ceci pourrait
détériorer la qualité de l’image et provoquer un phénomène de
vignettage (réduction de la luminosité d’une image ou saturation
à la périphérie, l’angle de visualisation de l’objectif étant caché).
• En cas de filtre à cadre épais, vous risque d’obtenir un effet de
vignettage avec un objectif grand angle.
Caractéristiques
Nom de l’objectif
SAMSUNG 20-50 mm F3.5-5.6 ED II
• Longueur de focale : 20 à 50 mm (équivalent à 30,8 à 77 mm
en format 35 mm)
• Éléments dans groupes : 9 éléments dans 8 groupes
(1 objectif asphérique, 1 objectif à faible dispersion inclus)
• Angle de vue : 70,2 à 31,4°
• Ouverture : f/3,5 à 5,6 (minimum : f/22),
(nombre de lamelles : 7, diaphragme d'ouverture circulaire)
• Type de monture : monture Samsung NX (uniquement sur la
série NX)
• Stabilisation optique de l’image : non prise en charge
• Distance minimum de mise au point : 0,28 m
• Agrandissement maximum : environ 0,22X
• Mode i-Scene : pris en charge (beauté, portrait, enfants,
contre-jour, paysage, coucher de soleil, aube, mer et neige, nuit)
• Pare-soleil : non pris en charge
• Taille de filtre : 40,5 mm
• Diamètre max. x longueur : 63,2 x 39,8 mm
• Poids : environ 119 g (hors pare-soleil)
• Température de fonctionnement : 0 à 40 °C
• Humidité ambiante tolérée : 5 à 85 %
Ces caractéristiques peuvent changer sans préavis à des fins
d'amélioration du rendement.
Français
Español
• For safe use of the lens, mount or dismount the lens while the camera
is turned off.
• Samsung is not responsible for any damage incurred by using other
manufacturers’ lenses.
• Make sure to change lenses only in a clean environment and do not
put your fingers into the lens mount when mounting the lens. Foreign
particles may affect shooting results or cause a malfunction if they
enter the camera body or the lens.
• Do not transport or store the lens with any part of the tube is extended.
Completely retract the lens tube inside the body by rotating the zoom
ring on the lens.
Réglez la fonction MF Assist (assistant MF) pour faciliter la mise
au point manuelle. Consultez le guide d'utilisation de votre appareil
photo pour plus de détails.
• Revise la lente una o dos veces al año para un mejor rendimiento.
• No ejerza una fuerza excesiva sobre el frente de la lente.
• Para usar la lente de manera segura, coloque la lente o retírela
cuando la cámara esté apagada.
• Samsung no es responsable de los daños causados por el uso con
lentes de otros fabricantes.
• Asegúrese de cambiar las lentes solo en un sitio limpio, y no coloque
los dedos dentro del montaje de la lente cuando la esté colocando.
Las partículas externas podrían afectar los resultados o provocar el
funcionamiento incorrecto si ingresan en el cuerpo de la cámara o
en la lente.
• No transporte ni guarde la lente con una parte del tubo extendida.
Repliegue el tubo de la lente por completo dentro del cuerpo girando
el anillo de zoom.
Eliminación correcta de este producto
(Residuos de aparatos eléctricos y electrónicos)
(Se aplica en países con sistemas de recolección por separado)
La presencia de este símbolo en el producto, accesorios o material
informativo que lo acompañan, indica que al finalizar su vida útil
ni el producto ni sus accesorios electrónicos (como el cargador, cascos, cable
USB) deberán eliminarse junto con otros residuos domésticos. Para evitar
los posibles daños al medio ambiente o a la salud humana que representa
la eliminación incontrolada de residuos, separe estos productos de otros
tipos de residuos y recíclelos correctamente. De esta forma se promueve
la reutilización sostenible de recursos materiales. Los usuarios particulares
pueden contactar con el establecimiento donde adquirieron el producto o
con las autoridades locales pertinentes para informarse sobre cómo y dónde
pueden llevarlo para que sea sometido a un reciclaje ecológico y seguro.
Los usuarios comerciales pueden contactar con su proveedor y consultar
las condiciones del contrato de compra. Este producto y sus accesorios
electrónicos no deben eliminarse junto a otros residuos comerciales.
PlanetFirst representa el compromiso de Samsung
Electronics de llevar adelante un desarrollo sostenido y con
responsabilidad social a través de actividades ecológicas
comerciales y de administración.
Renseignements relatifs à la santé et à la sécurité
Veuillez lire attentivement les conseils de sécurité suivants pour une
utilisation correcte et sûre.
• Lorsque vous utilisez l’objectif ou l’appareil photo, ne
regardez pas directement le soleil. Vous risqueriez de
causer des dommages à vos yeux.
Mise en
votre objectif et votre appareil photo loin des
garde • Maintenez
enfants en bas âge et des animaux domestiques.
• Ne conservez pas l’objectif en plein soleil sans le couvreobjectif. La lumière directe du soleil passant à travers
l'objectif peut engendrer de la combustion si elle entre en
contact direct avec des matériaux inflammables.
Attention • N'utilisez que des trépieds robustes. Évitez d’utiliser des
trépieds trop légers ou instables, car ils risqueraient de
tomber et d’endommager l’appareil photo.
Conservation et entretien de l’objectif
• Rangez l’objectif dans des endroits secs et bien ventilés.
• Ne rangez pas l’objectif dans des endroits où la température ou l’humidité
sont élevées, ou dans un placard, dans un véhicule ou dans toute autre
zone restreinte où des produits chimiques sont également entreposés.
• L’objectif n’est pas étanche. Veillez à ne pas le mouiller lorsque vous
l’utilisez près d’une source d’eau.
• N’utilisez pas de produits chimiques tels que du diluant, de l’alcool ou
du benzène pour retirer la poussière.
• Ne laissez pas tomber l’objectif et ne le soumettez pas à des chocs
excessifs. L’objectif est un produit optique précis.
• Évitez d’utiliser l’objectif où il y a des changements de température
soudains. Conservez l’objectif dans un sac en plastique ou un étui
d’appareil photo pour éviter la formation de condensation à l’intérieur ou
à l'extérieur du produit..
• Lors du transport ou lorsque vous n’utilisez pas l’objectif, placez le
couvre-objectif et le capuchon de la monture sur l’objectif afin d’éviter
toute contamination due à des particules étrangères et de protéger
l’objectif contre les rayures.
• Ne laissez pas l’appareil photo installé sur un trépied sans le couvre-objectif.
La lumière solaire peut endommager l’intérieur de l’appareil photo.
• Vérifiez l’objectif tous les ans ou tous les deux ans pour obtenir un
meilleur rendement.
• N’appliquez pas de force excessive sur l’avant de l’objectif.
• Pour une utilisation sûre de l’objectif, installez-le ou désinstallez-le
lorsque l’appareil photo est éteint.
• Samsung décline toute responsabilité en cas de dommages causés
par l’utilisation d’objectifs fournis par d’autres fabricants.
• Assurez-vous de toujours changer l’objectif dans un environnement
propre et ne placez pas vos doigts sur la monture lors de l'installation
de l’objectif. Les particules étrangères peuvent influer sur les résultats
des prises de vue ou entraîner un mauvais fonctionnement de
l’appareil photo en cas de contact avec le boîtier ou l’objectif.
• Vous ne devez ni transporter, ni stocker l’objectif lorsque le tube
d’extension est sorti. Pour faire entièrement rentrer le tube à l’intérieur
du mécanisme, tournez la bague du zoom de l’objectif.
Mise au rebut appropriée du produit
(Déchets d’équipements électriques et électroniques)
(Applicable aux pays qui utilisent des systèmes de collecte distincts)
Ce symbole sur le produit, ses accessoires ou sa documentation
indique que ni le produit, ni ses accessoires électroniques
(chargeur, casque audio, câble USB, etc.) ne peuvent être éliminés
en fin de vie avec les autres déchets ménagers. Puisque l'élimination
non maîtrisée des déchets peut porter préjudice à l'environnement ou
à la santé humaine, veuillez séparer le produit des autres types de
déchets et le recycler de façon responsable. Vous favoriserez ainsi la
réutilisation durable des ressources matérielles. Les particuliers devraient
communiquer avec le détaillant chez qui ils ont acheté le produit ou se
renseigner auprès de leur municipalité pour savoir où et comment ils
peuvent mettre ce produit au rebut afin qu'il soit recyclé en respectant
l'environnement. Les entreprises sont devraient communiquer avec leurs
fournisseurs et consulter les conditions générales de leur contrat d'achat.
Ce produit et ses accessoires électroniques ne doivent pas être éliminés
avec les autres déchets commerciaux.
PlanetFirst représente l’engagement de Samsung Electronics
à l’egard du développement durable et socialement
responsable, illustré par des activités commerciales
écologiques et contrôlées.
Veuillez consulter la garantie incluse avec votre
produit ou visiter notre site Web
www.samsung.com pour obtenir du service
après-vente ou pour toute question.
Китайский Беларус — Обзор фотоаппарата Samsung ES 75
Фотоаппарат Samsung PL20
Фотоаппарат Samsung WB100
Похожие:
Наш проект живет и развивается для тех, кто ищет ответы на свои вопросы и стремится не потеряться в бушующем море зачастую бесполезной информации. На этой странице мы рассказали (а точнее — показали вам Samsung zoom lens 5x как настроить. Кроме этого, мы нашли и добавили для вас тысячи других видеороликов, способных ответить, кажется, на любой ваш вопрос. Однако, если на сайте все же не оказалось интересующей информации — напишите нам, мы подготовим ее для вас и добавим на наш сайт!
Если вам не сложно — оставьте, пожалуйста, свой отзыв, насколько полной и полезной была размещенная на нашем сайте информация о том, Samsung zoom lens 5x как настроить.