- Manuals
- Brands
- Ford Manuals
- Automobile
- 1997 Expedition
- Manual
-
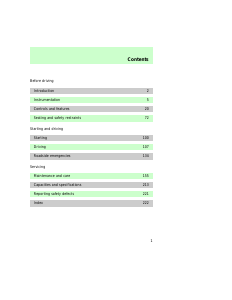
Contents
-
Table of Contents
-
Bookmarks
Quick Links
Before driving
Starting
Servicing
Contents
2
5
20
72
100
107
134
155
213
221
222
1
Related Manuals for Ford 1997 Expedition
Summary of Contents for Ford 1997 Expedition
-
Page 1
Before driving Introduction Instrumentation Controls and features Seating and safety restraints Starting and driving Starting Driving Roadside emergencies Servicing Maintenance and care Capacities and specifications Reporting safety defects Index Contents… -
Page 2: Introduction
Introduction ICONS AND WARNINGS ICONS Indicates a warning. Read the following section on Warnings for a full explanation of them. Indicates that vehicle information related to recycling and other environmental concerns will follow. We must all play our part in protecting the environment.
-
Page 3
INFORMATION ABOUT THIS GUIDE The information found in this guide was in effect at the time of printing. Ford may change the contents without notice and without incurring obligation. SPECIAL NOTICES Using your vehicle as an ambulance Do not use this vehicle as an ambulance. -
Page 4
Introduction Using your vehicle as a snowplow Do not use this vehicle for snowplowing. -
Page 5: Instrumentation
Instrumentation Engine oil pressure gauge Engine (pg. 16) coolant temperature gauge Charging (pg. 15) system gauge (pg. 16) PANEL AUTO LAMP Headlamp control (pg. 20) Instrument panel dimmer switch (pg. 22) Speed control Fuel gauge (pg. 41) (pg. 15) Speedometer (pg.
-
Page 6
Vents (pg. 28) HIGH Auxiliary power point (pg. 63) * if equipped VOL – PUSH ON FM 1 FM BASS TREB SEEK SCAN DOLBY SYSTEM TUNE DISCS SIDE 1-2 COOL WARM 4WD Control* (pg. 119) Instrumentation Electronic sound system (pg. 24) BAL FADE AUTO TAPE CD… -
Page 7: Low Fuel
Instrumentation INSTRUMENT CLUSTER WARNING LIGHTS AND CHIMES FUEL FUEL DOOR AJAR BRAKE Your vehicle is equipped with the following instrument cluster: Low fuel Illuminates when the fuel level is low. Engine coolant temperature Illuminates briefly when the ignition key is turned to On. Illuminates when the engine coolant temperature is high.
-
Page 8
Instrumentation Low washer fluid Illuminates briefly when the ignition is turned to On. Also illuminates when the windshield WASH washer fluid is low. Oil pressure Illuminates briefly when the ignition key is turned to On. Illuminates when the oil pressure is low. -
Page 9
Instrumentation Brake system warning Extinguishes when the parking brake is released. Illumination after BRAKE releasing the parking brake indicates low brake fluid level. Safety belt Illuminates when the ignition is switched on to remind you to fasten your safety belts. For more information, refer to Using the safety restraints properly in the Seating and safety restraints… -
Page 10
The TCIL (OFF), located on the end of the gearshift lever, may flash steadily if a malfunction has been detected. If the TCIL is flashing, contact your Ford dealer as soon as possible. If this OVERDRIVE OFF condition persists, damage to the transmission could occur. -
Page 11
Instrumentation Anti-lock brake system (ABS) Momentarily illuminates when the ignition is turned on and the engine is off. If the light stays on or continues to flash, the ABS needs to be serviced. Fuel reset Illuminates when the ignition key FUEL is turned to the ON position and the fuel pump shut-off switch has… -
Page 12
Check air suspension Illuminates briefly when the ignition is turned to the ON position and the engine is OFF. The light also illuminates when the air suspension system requires servicing. Testing warning lights FUEL FUEL DOOR AJAR BRAKE Turn the ignition key to ON without starting the vehicle. -
Page 13
Instrumentation Key-in-ignition warning chime Sounds when the key is left in the ignition in the OFF/LOCK or ACC position and the driver’s door is opened. Headlamps on warning chime Sounds when the headlamps are on, the ignition is off (and the key is not in the ignition) and the driver’s door is opened. -
Page 14
Tachometer Indicates the engine speed in revolutions per minute. Engine coolant temperature gauge Indicates the temperature of the engine coolant. At normal operating temperature, the needle remains within the normal zone. If it enters the red section, the engine is overheating. Switch off the engine and allow it to cool. -
Page 15
Instrumentation The fuel gauge indicator may vary slightly when the vehicle is in motion. The most accurate reading is obtained with the vehicle on level ground. With ignition switch OFF, the fuel gage indicator may drift from the ignition switch ON position. Refer the Ignition information in the Controls and features chapter for more information on the… -
Page 16: Trip Odometer
checked by your dealer or qualified service technician. Odometer Registers the total number of miles the vehicle has traveled. Trip odometer Registers thenumber of miles traveled on individual journeys. To reset, depress the control. TRIP COMPUTER (IF EQUIPPED) With the ignition control in the ON position, the trip computer displays important vehicle information through a constant…
-
Page 17
Instrumentation refer to trip computer information in the Controls and features chapter. Selectable features English/metric display Press the E/M control to change to message center display from metric to English units or vice versa. Compass Press the mode control once for compass only display. -
Page 18
Instrumentation Fuel economy Press the mode control to display your vehicle’s average fuel economy in liters/100 kilometers (miles/gallon). Press the mode control to display the instantaneous fuel economy of your running vehicle. Distance to empty display may be inaccurate if the vehicle is started while parked on an incline. -
Page 19: Controls And Features
Controls and features Headlamp/foglamp control Rotate the headlamp control to the desired position: — OFF. — Parking lamps on. — Headlamps on. PANEL Foglamp control (if equipped) The headlamp control also operates the foglamps. The foglamps can be turned on only PANEL PULL when the headlamps are in the…
-
Page 20: Controls And Features
Autolamp control (if equipped) The autolamp system provides light sensitive automatic on-off control of the exterior lights normally controlled by the headlamp control. The autolamp system also keeps the lights on for a preselected period of time after the ignition switch is turned to Off.
-
Page 21
Controls and features The Daytime Running Light (DRL) system will not illuminate the tail lamps and parking lamps. Turn on your headlamps at dusk. Failure to do so may result in a collision. Panel dimmer control Turn the control up to brighten the panel. -
Page 22
4WD control (if equipped) This control operates the Control Trac 4WD. Refer to Control trac system in the Driving chapter for more information. Auxiliary power point This 12V power point is an additional power source for electrical accessories. Do not plug optional electrical accessories into the cigarette lighter. -
Page 23
Controls and features Audio system Refer to the “Audio Guide” in your Owner Portfolio. Fuel pump shut-off switch Refer to the Roadside emergencies chapter for information on operating the fuel pump shut-off switch. VOL – PUSH ON FM 1 FM BASS TREB BAL FADE AUTO SEEK… -
Page 24
Controls and features Air suspension load leveling on/off switch (if equipped) Your vehicle is equipped with an air suspension system that levels your vehicle when carrying heavy loads. Refer to Air suspension load leveling in the Driving chapter for more information. -
Page 25
Controls and features Rear window defroster Press the defroster control to clear the rear window of thin ice and fog. The small LED will illuminate when the defroster is activated. The ignition must be in the ON position to operate the rear window defroster. -
Page 26: Parking Brake
Parking brake For information on the parking brake, refer to Preparing to start the vehicle in the Driving chapter. CLIMATE CONTROL Operating the instrument panel controls Controls and features VOL – PUSH ON FM BASS TREB SEEK TUNE DISCS PANEL *MAX COOL WARM…
-
Page 27
Controls and features Instrument panel vents There are four vents on the instrument panel. These vents are equipped with dials to adjust the amount and direction of air passing through them. Temperature Turn temperature control to the desired temperature. COOL WARM… -
Page 28
Fan speed Turn the fan speed control to the desired speed. Airflow and air conditioning Turn the mode control to the desired airflow position. Controlling airflow Select PANEL for air to flow through these vents: The PANEL position allows outside air to flow through the instrument panel vents. -
Page 29
Controls and features Select PANEL & FLOOR for air to flow through these vents: The PANEL & FLOOR position directs outside air to flow between the panel and floor vents. The air conditioning system will function in this mode provided the outside temperature is above 10°C (50°F). -
Page 30
Select FLR & DEF for air to flow through these vents: The FLR & DEF position directs outside air to flow through the floor vents and the windshield defroster vents. The air conditioning system will function in this mode provided the outside temperature is above 10°C (50°F). -
Page 31
Controls and features Air conditioning Select A/C for air conditioned air to flow through these vents: The A/C mode directs outside air conditioned air to flow through the instrument panel vents. The A/C mode can be used for heating, ventilating and defogging the windows or air conditioning. -
Page 32: Maximum Cooling
OFF position Select the OFF position for all climate control functions to cease. The outside inlet door will close and the fan is shut off. Maximum heating Set mode control to FLOOR, turn temperature control to maximum heat (red) and set fan speed control to HI.
-
Page 33: Defrosting Windshield
Controls and features Ventilating with outside air Set mode control to any mode except MAX A/C, turn the temperature control to the desired temperature and turn fan speed control to the desired speed. Defrosting windshield Set mode control to DEF, turn temperature control to maximum heat (red) and set fan speed control to HI.
-
Page 34
Controls and features Auxiliary A/C controls (if equipped) The auxiliary air conditioning feature provides increased capacity to quickly heat or cool the vehicle. Besides the overhead control panel for the front seat occupants,the auxiliary air conditioning controls allow the rear passengers to control the temperature in the rear of the vehicle through a second control panel above the second… -
Page 35
Controls and features The instrument panel climate controls must be on in order for the auxiliary air conditioning to operate. COOL WARM PANEL FLOOR When the auxiliary air conditioning control is set to FLOOR, airflow only occurs from the third row seat floor vent located in the driver’s side rear quarter trim panel. -
Page 36
Turn the temperature control to the desired temperature. Turn the mode control to the desired airflow position: Far left for airflow to the overhead panel registers. Far right for airflow to the rear floor vent. Anywhere between PANEL and FLOOR to vary airflow between the outlets. -
Page 37
Controls and features Turn the fan speed dial to the desired position. – VOLUME BAND SEEK MEMORY Select for air to flow through these vents: – VOLUME BAND SEEK MEMORY… -
Page 38
Controls and features Select for air to flow through these vents: – VOLUME BAND SEEK MEMORY… -
Page 39
Controls and features Positions of the ignition switch 1(Accessory) — allows electrical accessories such as the audio system and wiper/washer to operate when the engine is not running. 2(Lock) — locks the steering wheel and automatic gearshift lever. 3(Off) — shuts off the engine and all accessories without locking the steering wheel. -
Page 40
Speed control (if equipped) To turn speed control on Press ON To turn speed control off Press OFF or Turn off the vehicle ignition. Once speed control is switched off, the previously programmed set speed will be erased. To set a speed Press SET ACCEL. -
Page 41
Controls and features your vehicle speed is faster than the set speed while driving on a downhill in Overdrive, you may want to shift to the next lower gear to reduce your vehicle speed. If your vehicle slows downs more than 16 km/h (10 mph) below your set speed on an uphill, your speed control will disengage. -
Page 42
To set a lower set speed Press and hold COAST. Release the switch when the desired vehicle speed is reached, or Press and release COAST. Each press will decrease the set speed by 1.6 km/h (1 mph) or Depress the brake pedal. When the desired vehicle speed is reached press SET ACCEL. -
Page 43
Controls and features Front windshield wiper/washer controls Front wipers Rotate the windshield wiper control to the desired interval, low or high speed position. -
Page 44
Controls and features Front washer For front window washer fluid operation, push (and hold as desired) the front washer control on the end of the stalk. -
Page 45
Controls and features Rear window wiper/washer controls Rear washer Rotate (and hold as desired) the rear wiper/washer control to either position. From either position, the control will automatically return to the INT2 or OFF position. Rear wipers For rear wiper operation, rotate the rear window wiper and washer control to the desired position. -
Page 46
Controls and features Flash to pass Pull the stalk towards you to activate the “flash to pass” function. Turn signals Push the stalk down to activate the left turn signal; push the stalk up to activate the right turn signal. -
Page 47
Controls and features Overdrive control Activating overdrive (Overdrive) is the normal drive position for the best fuel economy. The overdrive function allows automatic upshifts to second, third and fourth gear. OVERDRIVE OFF Deactivating overdrive Press the transmission control switch on the end of the gearshift lever. -
Page 48
The TCIL (OFF), located on the end of the gearshift lever, may flash steadily if a malfunction has been detected. If the TCIL is flashing, contact your Ford or Lincoln/Mercury dealer as soon as possible. If this condition persists, damage to the transmission could occur. -
Page 49
Controls and features Tilt steering Pull the lever to adjust the steering column angle. Push the lever back up to lock the steering wheel into position. Never adjust the steering wheel when the vehicle is moving. -
Page 50
The front overhead console and overhead controls provide a variety of available features including: compass display trip computer overhead lamps storage compartment garage door opener stowage moon roof control auxiliary A/C controls power quarter window switches The appearance of your vehicle’s overhead console will vary according to your option package. -
Page 51
Controls and features Compass zone adjustment 1. Determine which time zone you are in by referring to the zone map. 2. Locate compass sensor mounted at base of mirror. 3. Turn ignition to the On position. 4. Insert a paperclip into the small hole on the bottom of the compass sensor. -
Page 52
Controls and features 1. Start the vehicle. 2. Locate compass sensor mounted at base of mirror. 3. Insert a paperclip into the small hole on the bottom of the compass sensor. Hold down until ZONE appears in the trip computer display Continue to hold down until ZONE disappears and CAL is displayed. -
Page 53
Controls and features Overhead lamps Map lamps (if equipped) Press the left or right control to turn the lamp on. Press again to turn the lamp off. Courtesy lamps (if equipped) Press the right portion of the lamp control to turn on. Press the left portion of the control to turn off. -
Page 54
they have been turned on with the dimmer control or any door is open. Forward storage bin (if equipped) Press the release control to open the storage compartment. The door will open slightly and can be moved to full open. The storage compartment may be used to secure sunglasses or a like object. -
Page 55
Controls and features Place Velcro hook onto back side of aftermarket transmitter opposite of actuator control. Place transmitter into storage compartment, control down. Place the provided height adaptors onto the back of the storage bin door as needed. Press the storage compartment door to activate the transmitter. -
Page 56
Power quarter rear windows (if equipped) Press the portion of the VENT control to open the power rear quarter windows. Press the portion of the VENT control to close the power rear quarter windows. Controls and features MODE RESET… -
Page 57
Controls and features Power windows Driver—side window control Press rear of switch to open window. Press front of switch to close window. The driver—side power window has a one-touch down feature. When AUTO is fully pressed and released (two clicks will be heard), the driver-side window will move completely down. -
Page 58
Passenger-side window controls Press rear of switches to open passenger window. Press front of switches to close passenger window. Accessory delay With accessory delay, the window switches may be used for up to ten minutes after the ignition switch is turned to the Off position or until either door is opened. -
Page 59
Controls and features Power door locks Driver and passenger controls Press L to lock all doors. Press U to unlock all doors. Childproof locks The rear doors can be set to prevent children from opening the doors from the inside. The childproof locks must be set separately for each door. -
Page 60
Controls and features Power mirrors To adjust the power outside mirrors: 1. Select the mirror you want to adjust: L Driver side mirror MIRRORS R Passenger side mirror 2. Move the mirror control in the desired direction. 3. Lock the mirror by moving the control to the center position. -
Page 61
Controls and features Rear liftgate To open the rear window, turn the liftgate handle to the right. To open the liftgate, turn the liftgate handle to the left. Do not open the liftgate or liftgate glass in a garage or other enclosed area with a low ceiling. -
Page 62
The floor console and floor console controls incorporate a variety of available features including: air vents audio system controls rear seat climate controls auxiliary power point For information on the rear console audio system, refer to the “Audio Guide”. Auxiliary power point The first auxiliary power point is located on the instrument panel, next to the cigar lighter. -
Page 63
Controls and features A second auxiliary power point is located on the left side of the rear console at the rear of the driver seat. The power point is accessible from the rear seats. PANEL Your vehicle may be equipped with a variety of console features. -
Page 64
Controls and features Replacing the tissue box To replace the center console tissue box: 1. Lift the console door lid. 2. Slide out the empty tissue box by pulling it up and out. 3. Slide in the new tissue box. Hooking floor mat Installing the floor mats 1. -
Page 65
Controls and features Removing the floor mat 1. To remove mat, pull up on rear of mat to release from locator post. Compact disc changer (if equipped) OPEN The compact disc changer is located inside the center console. For information on the compact disc changer, refer to the “Audio Guide”. -
Page 66
Additional spare keys can be purchased through your dealer or selected retailers. Be sure to purchase coded keys with the Ford logo to ensure proper functionality. If both supplied keys are lost or stolen, the vehicle and any other keys must be reinitialized by the dealer. -
Page 67
Controls and features Insert a coded key into the ignition and turn to the On position. Wait until the THEFT light in the instrument cluster illuminates and then turns off. Within 15 seconds, insert a new key into the ignition and turn the ignition to On or Start. -
Page 68
Controls and features Unlocking the doors Press UNLOCK to unlock the driver door. The interior lamps will illuminate. Press UNLOCK a second time within five seconds to unlock all doors. Locking the doors Press LOCK to lock all doors. To confirm that all doors are closed and locked, press the LOCK control a second time. -
Page 69
Controls and features Replacing the batteries The transmitter is powered by two coin type three-volt lithium batteries. A decrease in operating range can be caused by: battery failure weather conditions structures around the vehicle To replace the batteries: 1. Twist a thin coin between the two halves of the transmitter. -
Page 70
Controls and features cause harmful interference, and (2) This device must accept any interference received, including interference that may cause undesired operation. Replacement batteries for the remote entry transmitters may be purchased at pharmacies, watch stores or at authorized dealers. If a transmitter is lost, a new one may be programmed by your dealer. -
Page 71: Seating And Safety Restraints
Seating and safety restraints FRONT SEATS Manually adjusting the front seats Split bench seats (if equipped) Lift the lever on the door side of the cushion to recline the seat. Lift the bar in front of the seat cushion to move the seat forward or backward.
-
Page 72: Seating And Safety Restraints
Seating and safety restraints Using the armrest (if equipped) Pull the strap to move the armrest down. To move the armrest up, lift until it latches in the upright position. Manually adjusting the captain’s chair (if equipped) Lift the bar on the front of the seat, then move the seat forward or backward.
-
Page 73
Seating and safety restraints Adjusting the power driver’s front seat (if equipped) Adjusting the power captain’s chair (if equipped) Press to raise or lower the front portion of the seat cushion. Press to raise or lower the rear portion of the seat cushion. Press the control to move the seat forward, backward, up or down. -
Page 74
Seating and safety restraints Rear fold seat (if equipped) Folding down the rear seats Insure that no objects such as books, purses or briefcases are on the floor in front of the second row seats before actuating them down. Move front passengers seat forward so that the second row seat headrest clears the front seat. -
Page 75
Seating and safety restraints 3. Pull on the seatback while lifting the handle to lift the seat into the upright position. The levers mounted to your second row seats have multiple functions which, if the seat levers are used while the vehicle is in motion, could cause a condition where the seat is not properly latched. -
Page 76
Seating and safety restraints To minimize the risk of personal injury, the EZ entry seat should not be left in the forward, stowed position while the vehicle is in motion. Please ensure that the seat is in the upright, fully latched position before putting the vehicle in motion. -
Page 77
Seating and safety restraints 2. Before removing the seat, be sure that the seatbelt anchor is stowed flat into the vehicle floor. 3. Use the black plastic clip (located just above the buckle) to stow the loose seat belt up at the top, near of the shoulder belt take off point. -
Page 78
6. With assistance, lift the seat out of the vehicle. Installing the third row seat Before installing your thrid row seat, ensure that the seat belt anchors are stowed into the floor and the loose belts are stored out of the way. For proper latching, ensure that the floor tubs are clear of debris. -
Page 79
Seating and safety restraints 4. Push up on the seat to verify that it is latched into the floor. 5. Verify that the safety belts can move freely on either side of the seat. SAFETY RESTRAINTS PRECAUTIONS The use of safety belts helps to restrain both driver and passengers in case of a collision. -
Page 80
It is extremely dangerous to ride in a cargo area, inside or outside of a vehicle. In a collision, people riding in these areas are more likely to be seriously injured or killed. Do not allow people to ride in any area of your vehicle that is not equipped with seats and safety belts. -
Page 81
Seating and safety restraints Vehicle sensitive (emergency) locking mode The vehicle sensitive mode is the normal retractor mode which locks the belts in response to vehicle movement. For example, if the driver brakes suddenly or turns a corner sharply or if the vehicle receives an impact of approximately 8 km/h (5 mph) or more, the combination safety belts… -
Page 82
Seating and safety restraints Using automatic locking mode The automatic locking mode must be used when installing a child safety seat in any outboard passenger seat. 1. Buckle the combination lap and shoulder belt. 2. Grasp the shoulder belt portion and pull downward until the entire belt is extracted. -
Page 83
Seating and safety restraints To shorten the belt: Buckle the belt. Pull the loose end of the belt until snug. To lengthen the belt: Tip and pull the tongue. Do not wear the lap belt around your waist, keep it low around your hips. -
Page 84
To raise the height of the shoulder belt: Slide up. Pull down on the height adjuster to make sure that it is locked in place. Safety belt maintenance Check the safety belt systems periodically to make sure that they work properly and are not damaged. -
Page 85
Seating and safety restraints belt extensions are available at no cost from your Ford or Lincoln/Mercury dealer. Use only extensions manufactured by the same supplier as the safety belt. Manufacturer identification is located at the end of the webbing on the label. Also, use the safety… -
Page 86
SUPPLEMENTAL RESTRAINT SYSTEM (SRS) Important supplemental restraint system (SRS) precautions The supplemental restraint system is designed to: work with the safety belt to protect the driver and right front passenger reduce certain upper body injuries Failure to follow these instructions will affect the performance of the safety belts and increase the risk of personal injury. -
Page 87
Do not attempt to service, repair, or modify the Air Bag Supplemental Restraint System or its fuses. See your Ford or Lincoln-Mercury dealer. Children and air bags For additional important safety information, read all information on safety restraints in this guide. -
Page 88
How does the air bag supplemental restraint system work? The SRS is designed to activate when the vehicle sustains sufficient longitudinal deceleration, similar to hitting a fixed barrier head on at 12–24 km/h (8–14 mph). The fact that the air bags did not inflate in a collision does not mean that something is wrong with the system. -
Page 89
Seating and safety restraints If the air bag is inflated, the air bag will not function again and must be replaced immediately. If the air bag is not replaced, the unrepaired area will increase the risk of injury in a collision. The SRS consists of: driver and passenger air bag modules (which include the… -
Page 90
A difficulty with the system is indicated by one or more of the following: The readiness light will either flash or stay lit. The readiness light will not illuminate immediately after ignition is turned on. A group of five beeps will be heard. -
Page 91
Seating and safety restraints safety seats made especially for children. Check your local and state laws for specific requirements regarding the safety of children in your vehicle. Never let a passenger hold a child on his or her lap while the vehicle is moving. The passenger cannot protect the child from injury in a collision. -
Page 92
To improve the fit of lap and shoulder belts on children who have outgrown child safety seats, Ford recommends use of a belt-positioning booster seat that is labelled as conforming to all Federal motor vehicle safety standards. -
Page 93
Seating and safety restraints way back on the seat cushion when the lower legs hang over the edge of the seat cushion. You may wish to discuss the special needs of your child with your pediatrician. INSTALLING CHILD SAFETY SEATS IN THE REAR SEATING POSITIONS To install a child safety seat in a center rear seating position:… -
Page 94
Installing child safety seats in combination lap and shoulder belt seating positions 1. Position the child safety seat in a seat with a combination lap and shoulder belt. If you choose to install a child safety seat in the front passenger seat, move the seat as far back as possible. -
Page 95
Seating and safety restraints 3. While holding the shoulder and lap belt portions together, route the tongue through the child seat according to the child seat manufacturers’ instructions. Be sure the belt webbing is not twisted. 4. Insert the belt tongue into the proper buckle for that seating position until you hear and feel the latch engage. -
Page 96
Seating and safety restraints 7. Pull the lap belt portion across the child seat toward the buckle and pull up on the shoulder belt while pushing down with knee on the child seat. 8. Allow the safety belt to retract to remove any slack in the belt. -
Page 97
Ford recommends the use of a child safety seat having a top tether strap. Install the child safety seat in a seating position which is capable of providing a tether anchorage. -
Page 98
The anchor bracket must be installed using the instructions provided with the kit. Contact your Ford dealer for a free tether anchor kit (613D74). Carefully follow the instructions provided with the kit. -
Page 99
Starting BEFORE STARTING YOUR VEHICLE Important safety precautions A computer system controls the engine’s idle revolutions per minute (RPM). When the engine starts, the idle RPM runs faster to warm the engine. If the engine idle speed does not slow down automatically, have the vehicle checked. -
Page 100: Starting
If you smell exhaust fumes inside your vehicle, have your dealer inspect your vehicle immediately. Do not drive if you smell exhaust fumes. Preparing to start the vehicle Engine starting is controlled by the spark ignition system. This system meets all Canadian Interference-Causing Equipment standard requirements regulating the impulse electrical field strength…
-
Page 101
Starting 2. Make sure the headlamps and vehicle accessories are off. Make sure the parking brake is set. Make sure the gearshift is in P (Park). 3. Turn the key to the ON position (without turning the key to START.) -
Page 102: Starting Your Vehicle
FUEL FUEL DOOR AJAR BRAKE Make sure the corresponding lights illuminate briefly. If a light fails to illuminate, have the vehicle serviced. If the driver’s safety belt icon is fastened, the illuminate. STARTING YOUR VEHICLE Starting the engine 1. Turn the key to 5 (Start) without pressing the accelerator.
-
Page 103
Starting is below —12°C (10°F), depress accelerator and start the engine while holding the accelerator down. Release accelerator when engine starts. 4. After idling for a few seconds, apply the brake and release the parking brake. Using the engine block heater (if equipped) An engine block heater warms the engine coolant, which improves… -
Page 104
Starting Important ventilating information If the engine is idling while the vehicle is stopped in an open area for long periods of time, open the windows at least 2.5 cm (one inch). PANEL PANEL & FLOOR FLOOR & DEF COOL WARM Adjust the heating or air conditioning (if equipped) to bring… -
Page 105
Starting Guarding against exhaust fumes Although odorless and colorless, carbon monoxide is present in exhaust fumes. Take precautions to avoid its dangerous effects. If you ever smell exhaust fumes of any kind inside your vehicle, have your dealer inspect and fix your vehicle immediately. -
Page 106
BRAKES Brakes Your brakes are self-adjusting. Refer to the “Service Guide” for maintenance scheduling. Anti-lock brake system (ABS) (if equipped) The ABS operates by detecting the onset of wheel lock up during brake applications and compensating for this tendency. The front wheels are prevented from locking even when the brakes are firmly applied. -
Page 107: Driving
Driving Braking with ABS On vehicles with ABS, the wheels will not lock and slide when you press down hard on the brake pedal. The ABS automatically releases and reapplies the front and rear brakes independently whenever the wheels start to lock. When this happens, you will feel the brake pedal pulse.
-
Page 108
Parking brake To engage the parking brake: To disengage the parking brake: Always set the parking brake fully and make sure that the gearshift is securely latched in P (Park) (automatic transmission) or in 1 (First) (manual transmission). STEERING Your vehicle is equipped with power steering. -
Page 109
Driving Never hold the steering wheel to the extreme right or the extreme left for more than a few seconds when the engine is running. This action could damage the power steering pump. Speed sensitive steering The steering in your vehicle is speed sensitive. -
Page 110
UNDERSTANDING THE TRACTION-LOK REAR AXLE (IF EQUIPPED) This axle provides added traction on slippery surfaces, particularly when one or more wheels are on a surface with poor traction. Extended use of other than matching size tires on a Traction-Lok rear axle could result in a permanent reduction in effectiveness. -
Page 111
Driving and selection of two or four-wheel drive modes. The air suspension system places the vehicle at its lowest height to provide easy entry and exit when the vehicle is parked, the ignition is turned off and all doors are closed. -
Page 112
An on board air compressor and solenoids are used to raise and lower the vehicle. It is normal to occasionally hear a buzz or clicking from the vehicle even when the ignition is turned off. The system stays energized for 40 minutes after the ignition is turned off to compensate for any load changes made after the vehicle is parked. -
Page 113
Driving If the light is displayed while driving and the air suspension system service switch is not turned off, safely pull off the road at your earliest convenience. Turn the ignition switch from 4(On) to 3 (Off) and 4(On) again. If the warning light reappears, turn the air suspension switch off and have the vehicle serviced by your dealer… -
Page 114
Pull the gearshift lever towards you and downward to move the automatic gearshift. P(Park) — Always come to a complete stop before shifting into or out of P (Park). When you leave your vehicle, place the gearshift lever in P (Park). Set the parking brake fully, and shut off the engine. -
Page 115
Driving (Overdrive) — The normal driving position for the best fuel economy. Transmission operates in gears one through four. (Overdrive) can be deactivated by pressing the transmission control switch on the end of the gearshift lever. The transmission control indicator light (TCIL) (OFF) on the end of the gearshift lever will remain off. -
Page 116
Driving 2(Second) — Use 2(Second) to start-up on slippery roads or to provide additional engine braking on downgrades. Transmission operates in first and second gears. 1(Low) — Use 1(Low) to provide maximum engine braking on steep downgrades. Upshifts can be made by shifting to 2(Second) or to (Overdrive). -
Page 117
Driving 3. Turn ignition key to Lock (2) and remove the key. 4. Re-insert the ignition key and turn it to Off (3). 5. Shift the transmission to N(Neutral). 6. Start the vehicle. If you need to use the above procedure, it is possible that a fuse has blown and your brakelamps may not be functioning. -
Page 118
CONTROL TRAC-AUTOMATIC FOUR-WHEEL DRIVE SYSTEM (IF EQUIPPED) Your 4×4 features a heavy-duty Control Trac system, includes a computer-operated transfer case. Coupled with a center-disconnected front axle, this unique system is interactive with the road, continually monitoring and adjusting torque delivery to the front and rear wheels to optimize vehicle control. -
Page 119
Driving Utility and four-wheel drive vehicles are not designed for cornering at speeds as high as passenger cars any more than low-slung sports cars are designed to perform satisfactorily under off-road conditions. Avoid sharp turns or abrupt maneuvers in these vehicles. -
Page 120
Shifting from 4H to 4L (and 4L to 4H) 1. Bring the vehicle to a stop. 2. Depress the brake. 3. Place the gearshift in N (Neutral). 4. Move the 4WD control to the 4H (or 4L) position. Shifting from A4WD to 4H Move the 4WD control from A4WD to 4H at any forward speed. -
Page 121
Driving Driving off-road with 4WD Your vehicle is specially equipped for driving on snow, sand, mud or other rough terrain and has operating characteristics that differ from those of other conventional vehicles. When using 4WD, maintain steering wheel control at all times, especially in rough terrain. -
Page 122
LOADING YOUR VEHICLE It is extremely dangerous to ride in a cargo area, inside or outside of a vehicle. In a collision, people riding in these areas are more likely to be seriously injured or killed. Do not allow people to ride in any area of your vehicle that is not equipped with seats and safety belts. -
Page 123
Driving Rating): Carrying capacity for each axle system (front and rear). The GAWR is specific to each vehicle and is listed on the Safety Compliance Certification Label on the driver’s door. GCWR (Gross combined weight rating ): Maximum combined weight of the towing vehicle (including passengers and cargo) and the trailer. -
Page 124
weight limit than the originals do not increase the GVWR or the GAWR limitations. In high altitudes, engines will lose power at a rate of 3% power per 1000 ft increase in elevation. A reduction in GVW and GCW is recommended for maximum vehicle performance. -
Page 125
Driving Using the luggage rack if equipped) Load luggage at the front crossbar and adjust the rear crossbar as necessary. Do not exceed 90.7 kg (200 lb) of luggage if the weight is placed directly on the crossbars. Do not exceed 68 kg (150 lb) of luggage if the weight is resting on the roof itself. -
Page 126
TRAILER TOWING Trailer towing with your vehicle may require the use of a trailer tow option package. Trailer towing puts additional loads on your vehicle’s engine, transmission, axle, brakes, tires, and suspension. For your safety and to maximize vehicle performance, be sure to use the proper equipment while towing. -
Page 127
Driving Trailer towing table (with heavy duty trailer tow option) GCWR (Gross Combined Weight Rating)/trailer weights Rear axle Engine ratio 4.6 L 3.31 5.4 L 3.31 5.4 L 3.73 4.6 L 3.55 4.6 L 3.55 5.4 L 3.31 5.4 L 3.73 5.4 L 3.73… -
Page 128
with all of the vehicle wheels on the ground. Towing trailers beyond the maximum recommended gross trailer weight exceeds the limit of the vehicle and could result in engine damage, transmission damage, structural damage, loss of control and personal injury. Preparing to tow Use the proper equipment for towing a trailer and make sure that… -
Page 129
Driving Weigh your vehicle as you customarily operate the vehicle without cargo. Subtract the total weight of passengers, driver and aftermarket equipment and the obtained weight (in the step above) from the GCWR to determine the trailer weight your vehicloe can tow. Trailer weight range The trailer weight range is the specified range by weight that the… -
Page 130
(not the bumper). Make sure there is enough slack to allow the vehicle to turn corners. For more information, refer to “Ford Recreational Vehicle and Trailer Towing Guide” available from your Ford dealer. Using trailer lamps See your local trailer retailer or… -
Page 131
Driving should the vehicle weight ratings per axle or combination truck and trailer exceed the weight ratings listed on the Safety Compliance Certification label located on the driver’s side door. When connecting a trailer hitch: 1. Turn off the air suspension switch. -
Page 132
Servicing while towing If you tow a trailer for long distances, your vehicle requires more frequent service than a vehicle not used for towing. Refer to the “Service Guide” Severe Duty Schedule for more information on maintenance intervals. Using a step bumper The rear bumper is equipped with an intregal hitch and requires only a ball with a 1 inch shank… -
Page 133: Roadside Emergencies
Roadside emergencies HAZARD LIGHTS CONTROL Use only in an emergency to warn traffic of vehicle breakdown, approaching danger, etc. Depress to activate all indicators simultaneously. Depress again to switch off. The warning lights can be operated when the ignition is off.
-
Page 134: Roadside Emergencies
1. Turn the ignition switch to the OFF position. 2. Check fuel system for leaks. 3. If no fuel leak is apparent, reset the fuel pump shut-off switch by pushing in the button on the switch. 4. Turn the ignition switch to the ON position.
-
Page 135
Roadside emergencies Even after a fuse is replaced, it will continue to blow if the cause of the overload is not identified and corrected. If the fuse continues to blow, have the vehicle’s electrical system checked by a qualified service technician. Fuse ratings Fuse rating 5 amp… -
Page 136
Power network box Slot number amperage 20 amp 10 amp 30 amp 15 amp 20 amp 30 amp 15 amp 30 amp 15 amp 25 amp 25 amp 10 amp Roadside emergencies Fuse rating Trailer tow backup & tail lamps Airbag diagnostic monitor Engine minifuse box fuses #3 and #5 Auxiliary instrument panel (I/P) power… -
Page 137
Roadside emergencies Slot number amperage 30 amp 60 amp 50 amp 40 amp 30 amp 30 amp 20 amp 50 amp 50 amp 50 amp 40 amp 30 amp 30 C.B. 40 amp 30 amp 30 amp Slot number Slot number Fuse rating Four wheel anti-lock brake system… -
Page 138
Slot number amperage Engine mini fuse box Slot number amperage 20 amp 10 amp 10 amp 20 amp Roadside emergencies Fuse rating Horn relay PCM power relay Fuse rating 5 amp Powertrain control module (PCM) Trailer tow stop/turn lamps Audio rear integrated control panel (RICP), compact disc changer, radio Amplifier, subwoofer amplifier Circuits protected… -
Page 139
Roadside emergencies Primary battery fuses Location Amperage Description Power network box megause Alternator megafuse Alternator field minifuse… -
Page 140
Junction box Slot number Roadside emergencies Amperage 15 amp 5 amp 25 amp 5 amp 15 amp Description Stop/turn lamps Instrument cluster, trip computer Cigar lighter Autolamp module, head lamp relay, remote entry anti-theft with personality module (RAP), power mirrors Air condition (A/C) clutch, hybrid fan relay, backup lamps, speed control,… -
Page 141
Roadside emergencies Slot number Amperage 5 amp 5 amp 5 amp 30 amp 5 amp 15 amp 15 amp 5 amp 20 amp 10 amp 5 amp 10 amp 5 amp 15 amp Description Generic electronic module (GEM), shift interlock, air suspension module, heated backlite (HBL) relay, steering sensor, trip… -
Page 142
Slot number Slot number Roadside emergencies Amperage 10 amp 10 amp 10 amp 5 amp 10 amp 5 amp 10 amp 5 amp 30 amp Amperage Description Airbag diagnostic monitor Electronic flasher, 4WD vacuum solenoids, trailer tow battery charge relay, console climate door actuator, auxiliary blend and mode door actuators,… -
Page 143
Roadside emergencies CHANGING THE TIRES If you get a flat tire while driving, do not apply the brake heavily. Instead, gradually decrease your speed. Hold the steering wheel firmly and slowly move to a safe place on the side of the road: Park on a level spot. -
Page 144
Removing the jack handle 1. Open the hood. 2. Un-snap the end of the handle that is retained by the clip on the top of the windshield washer bottle. 3. Un-snap the shaft of the handle from the two retaining clips attached to the top of the radiator shroud. -
Page 145
Roadside emergencies 4. Remove the end of the cable from the wheel and slide the spare out from under the vehicle. To re-install the spare tire or tools, reverse the removal procedure. On vehicles equipped with Air Suspension, turn OFF the Air Suspension switch prior to jacking, hoisting or towing your vehicle. -
Page 146
Removing flat tire and installing spare 6. Use the tip of the lug wrench to remove any wheel trim. Insert the tapered end of the lug wrench behind the wheel covers or hubcaps and twist off. 7. Loosen the wheel nuts with the lug wrench. -
Page 147
Roadside emergencies Front (4×2) Front (4×4) -
Page 148
Roadside emergencies Rear NEVER USE THE FRONT OR REAR DIFFERENTIAL AS A JACKING POINT. 1. Remove the lug nuts with the lug nut wrench. 2. Replace the flat tire with the spare tire. 3. Thread the lug nuts on the wheel studs with the beveled face toward the wheel. -
Page 149
Roadside emergencies wrench to screw the lug nut snug against the wheel, but do not tighten. 4. Lower the vehicle by turning the jack handle counterclockwise. 5. Remove the jack and fully tighten the lug nuts to the proper torque specifications in the order shown. -
Page 150
10. On vehicles equipped with air suspension, turn ON the air suspension switch. 11. Retighten the wheel lug nuts to the specified torque at 800 km (500 miles) of new vehicle operation, after any wheel change or any time the lug nuts are loosened. -
Page 151
Roadside emergencies Connecting the jumper cables 1. Position the vehicles so that they do not touch one another. 2. Switch off the engine. Switch off any unnecessary electrical equipment. 3. Connect the positive (+) terminal of the discharged battery (1) to the positive (+) terminal of the booster battery (2). -
Page 152
3. Once the engine has been started, run both vehicles for a further three minutes before disconnecting the leads. Removing the jumper cables 1. Remove the jumper cables in reverse order. Take the cable off the metallic surface (1) first, followed by the cable on the negative (-) booster battery terminal (2). -
Page 153
If towing is necessary, it is recommended that your vehicle be towed with wheel lift or flatbed equipment. Do not tow with slingbelt equipment. Ford Motor Company has not developed or approved a slingbelt towing procedure. On 4×2 vehicles, it is acceptable to… -
Page 154: Maintenance And Care
Precautions when servicing your vehicle Be especially careful when inspecting or servicing your vehicle. Here are some general precautions for your safety: Do not work on a hot engine. If you must work with the engine running, avoid wearing loose clothing or jewelry that could get caught in moving parts.
-
Page 155: Maintenance And Care
Maintenance and care We provide you with a “Service Guide” which makes tracking routine service for your vehicle easy. If your vehicle requires professional service, your dealership can provide necessary parts and service. Check your “Warranty Information Booklet” to find out which parts and services are covered.
-
Page 156
Maintenance and care 1. Inside the vehicle, pull the hood release handle located under the bottom left corner of the instrument panel. 2. Outside the vehicle, release the auxiliary latch located under the center of the hood. 3. Lift the hood. 4. -
Page 157
Maintenance and care Working with the engine on 1. Set the parking brake fully and ensure the gearshift is securely latched in P (Park). 2. Block the wheels to prevent your vehicle from moving unexpectedly. Do not start your engine with the air cleaner removed and do not remove it while the engine is running. -
Page 158
3. Engine oil dipstick (For more information on the engine oil dipstick location and maintenance, refer to Checking and adding engine oil in this chapter.) 4. Brake fluid reservoir 5. Engine compartment fuse panel 6. Engine coolant reservoir 7. Air cleaner filter 8. -
Page 159
Maintenance and care are never needed and could, under certain conditions, lead to engine damage which is not covered by your Ford warranty. Synthetic engine oils which are CERTIFIED and of the preferred viscosity may be used in your engine. The engine oil and oil filter must still be changed according to the “Service Guide”. -
Page 160
4. Locate and carefully remove the engine oil dipstick. 5. Wipe the dipstick clean. Insert the dipstick fully, then remove it again. The oil level should be in the range shown on the dipstick. 6. If the oil level is below the minimum line, add engine oil as necessary. -
Page 161
Ford production and aftermarket (Motorcraft) oil filters are designed for added engine protection and long life. If a replacement oil filter is used that does not meet Ford material and design specifications, startup engine noises or knock may be experienced. -
Page 162
Visually inspect the fluid level. If necessary, add brake fluid until the level reaches MAX. Do not fill above this line. Use only a DOT 3 brake fluid certified to meet Ford specifications. Refer to Lubricant specifications in the Capacities and specifications chapter. -
Page 163
1. Lift the washer fluid reservoir cover. 2. Add washer fluid until the level reaches the FULL line. Use only fluid that meets Ford Specifications. Refer to Capacities and specifications. The addition of a bug shield to the front of the vehicle may adversely affect the washer system from delivering fluid to the windshield. -
Page 164
Washer fluid in the liftgate reservoir Washer fluid for liftgate wiper and washer operation is supplied by the washer fluid reservoir located in the engine compartment. For information on adding fluid to this main reservoir, refer to Washer fluid in the windshield reservoir in this chapter. -
Page 165
Motorcraft CXC-8–B) or an equivalent premium engine coolant that meets Ford Specification ESE-M97B44–A. Ford Premium Engine Coolant is an optimized formula that will protect all metals and rubber elastomers used in Ford cooling systems for 4 years or 80,000 km(50,000 miles). -
Page 166
The use of an improper coolant may void the warranty of your vehicle’s engine cooling system. Recycled engine coolant Ford Motor Company recommends that Ford and Lincoln-Mercury dealers use recycled engine coolant produced by Ford-approved processes. Not all coolant recycling… -
Page 167
Maintenance and care Severe winter climate If you drive in extremely cold climates [less than 36°C (34°F)], it may be necessary to increase the coolant concentration above 50%. Refer to the chart on the coolant container to ensure the coolant concentration in your vehicle is such that the coolant will not freeze at the temperature level in which you… -
Page 168
deterioration leaks loose hose clamps What you should know about fail-safe cooling Vehicles equipped with 4.6L, and 5.4L engines have a fail-safe cooling mode. If the engine coolant supply is depleted, this feature allows the vehicle to be driven temporarily before incremental component damage is incurred. -
Page 169
Maintenance and care How fail-safe cooling works If the engine overheats, the engine will automatically switch from eight to alternating four cylinder operation. Each disabled cylinder acts as an air pump and cools the engine. When this occurs, the engine coolant temperature gauge will move into the red area and the light illuminates. -
Page 170
3. Visually inspect the fluid level in the power steering fluid reservoir. 4. Add power steering fluid until the fluid level reaches MAX. Use only fluid that meets Ford specifications. Refer to Capacities and specifications. Maintenance and care… -
Page 171
Maintenance and care CHECKING AND ADDING TRANSMISSION FLUID Checking and adding automatic transmission fluid (if equipped) Service the automatic transmission according to the scheduled intervals in the Service Guide. Before adding any fluid, make sure the correct type will be used. This information is indicated on the dipstick. -
Page 172
Maintenance and care approximately 32 km (20 miles) of driving. However, you can check the fluid level without driving to obtain a normal operating temperature if the outside temperature is above 10°C (50°F). If your vehicle has been operated for an extended period at high speeds, in city traffic during hot weather or pulling a trailer, the vehicle should be turned off for… -
Page 173
Maintenance and care For 4R70W transmissions, the fluid level should be within the crosshatched area, or if the vehicle has not been driven, between the holes near the bottom of the indicator. DON’T ADD IF IN CROSSHATCHED AREA • CHECK WHEN HOT IDLING IN PARK… -
Page 174
Maintenance and care For E4OD transmissions, the fluid level should be within the HOT area, or if the vehicle has not been driven, within the COLD area. 7. If necessary, add fluid in .25L (.5 pint) increments through the filler tube until the level is at the correct area on the dipstick. -
Page 175
Maintenance and care TRACTION-LOK REAR AXLE (IF EQUIPPED) This axle provides added drive away traction on slippery surfaces, particularly when one or more wheels are on a surface with poor traction. Extended use of other than matching size tires on a Traction-Lok rear axle could result in a permanent reduction in effectiveness. -
Page 176
Batteries contain sulfuric acid which burns skin, eyes, and clothing. Servicing your battery A low-maintenance replacement battery has removable vent caps for checking the electrolyte level and adding water. Check the electrolyte level every 24 months or 40,000 km (24,000 miles) in average temperatures below 32°C (90°F). -
Page 177
Maintenance and care Relearning idle conditions Because your vehicle’s engine is electronically controlled by a computer, some control conditions are maintained by power from the battery. When the battery is disconnected or a new battery is installed, the computer must “relearn”… -
Page 178
AIR CLEANER FILTER MAINTENANCE Refer to the “Service Guide” for the appropriate intervals for changing the air cleaner filter. Do not start your engine with the air cleaner removed and do not remove it while the engine is running. CHANGING THE AIR FILTER 1. -
Page 179
Maintenance and care treatments used by commercial car washes can reduce the effectiveness of wiper blades. To make reaching the wiper blades easier, simply: 1. Turn the ignition to the 3(On) position. 2. Turn the wipers on. 3. Wait for the wipers to reach a vertical position and turn the ignition to 2(Lock). -
Page 180
To replace the wiper blades: 1. Pull the wiper arm away from the windshield and lock into service position (front wiper only). 2. Turn the blade at an angle from the wiper arm. Push the lock pin with a screwdriver to release the blade and pull the wiper blade down toward the windshield to remove it from the wiper arm. -
Page 181
Title 49 Code of Federal Regulations Part 575.104(c)(2). U.S. Department of Transportation-Tire quality grades: The U.S. Department of Transportation requires Ford to give you the following information about tire grades exactly as the government has written it. Treadwear The treadwear grade is a… -
Page 182
Maintenance and care 100. The relative performance of tires depends upon the actual conditions of their use, however, and may depart significantly from the norm due to variations in driving habits, service practices, and differences in road characteristics and climate. Traction A B C The traction grades, from highest to lowest are A, B, and C, and they… -
Page 183
Maintenance and care performance on the laboratory test wheel than the minimum required by law. The temperature grade for this tire is established for a tire that is properly inflated and not overloaded. Excessive speed, underinflation, or excessive loading, either separately or in combination, can cause heat buildup and possible tire failure. -
Page 184
Four tire rotation Five tire rotation Replacing the tires Replace the tires when the wear band is visible through the tire treads. Maintenance and care… -
Page 185
Make sure that all replacement tires are of the same size, type, load-carrying capacity and tread design (e.g., “All Terrain”, etc.), as originally offered by Ford. Do not replace your tires with “high performance“ tires or larger size tires. Failure to follow these… -
Page 186
Ford recommends only tires of this type and size for your vehicle. When purchasing replacement tires for your vehicle, consult your dealer or qualified service technician to ensure that the correct tire types are used. Using snow tires and traction… -
Page 187
Do not exceed 48 km/h (30 mph) with tire cables on your vehicle. Consult your dealer for information on other Ford approved methods of traction control. FUEL INFORMATION The ignition key must be turned to 3 (Off) or 1 (Acc) during refueling to obtain accurate fuel gauge ratings. -
Page 188
Important safety precautions Do not overfill the fuel tank. The pressure in an overfilled tank may cause leakage and lead to fuel spray and fire. If you do not use the proper fuel cap, the pressure in the fuel tank can damage the fuel system or cause it to work improperly in a collision. -
Page 189
Maintenance and care apparent. The toxic affects of fuel may not be visible for hours. Fuels can also be harmful if absorbed through the skin. If fuel is splashed on the skin, promptly remove contaminated clothing and wash skin thoroughly with soap and water. If fuel is splashed in the eyes, remove contact lenses, flush with water for 15 minutes and… -
Page 190
Maintenance and care vehicle can be operated on non-California fuels. However, even though your engine will perform adequately on other gasolines, the performance of the emission control devices and systems may be adversely affected. Repair of damage caused by using a fuel that your vehicle was not designed for may not be covered by your warranty. -
Page 191
Cleaner air Ford approves the use of gasolines to improve air quality, including reformulated gasolines, that contain oxygenates such as a maximum of 10% ethanol or 15% MTBE. -
Page 192
The help reduce early nozzle shut offs and fuel spillage, park your vehicle so that the fuel filler door is level. Avoid excessively fast fuel dispensing rates (over 38 L [10 gallons] per minute). If you spill any fuel on the body of your vehicle, clean it off immediately. -
Page 193
Maintenance and care 3. After at least three to five fuel tank fill-ups, fill the fuel tank and record the current mileage reading. 4. Use one of the following equations to calculate fuel economy. Liters used x 100 kilometers traveled Total miles traveled gallons used Keep a record for at least one… -
Page 194
Do not turn off the ignition while your vehicle is in motion. Have maintenance performed according to intervals in the “Service Guide”. If you notice one or more of the following, the emission system may not be functioning properly; have the vehicle serviced as soon as possible: Fluid leaks… -
Page 195
Maintenance and care Important emission control information By law, anyone who manufacturers, repairs, services, leases, trades vehicles or supervises a fleet of vehicles is not permitted to intentionally remove an emission control device or prevent it from working. Do not make any unauthorized changes to the vehicle or engine. -
Page 196
specifies that additional city and highway driving is necessary to complete the check of the OBD II system. The driving modes required to reach the ready condition consist of a minimum of 30 minutes of city and highway driving: At least 20 minutes driving in stop and go city-type traffic with at least four idle periods. -
Page 197
Maintenance and care REPLACING THE EXTERIOR BULBS Check the operation of the following exterior lamps frequently: headlamps foglamps high-mount brakelamp license plate lamp tail lamps back-up lamps Do not remove lamp bulbs unless they may be replaced immediately with new ones. If a bulb is removed for an extended period of time, contaminants may enter the lamp housings and affect lamp… -
Page 198
Handle a halogen headlamp bulb carefully and keep out of children’s reach. Grasp the bulb only by its plastic base and do not touch the glass. The oil from your hand could cause the bulb to break the next time the headlamps are operated. -
Page 199
Maintenance and care 3. At the back of the headlamp, pull clips rearward and up (about ¾”) to release the headlamp assembly. 4. Slide headlamp assembly forward and off of guide ribs to expose the back of the bulb and wiring connector. -
Page 200
Maintenance and care 11. Straighten alignment pins, making them parallel with the outer edges of the attachment standoff. 12. Carefully insert the headlamp assembly into the vehicle making sure the alignment pins are inserted into the proper holes and into the guide ribs. 13. -
Page 201
Maintenance and care 3. Remove the electrical connector from the bulb by grasping the wire and pulling it rearward. 4. Remove bulb retainer ring by turning it counterclockwise about 1/4 turn, then slide the ring off the plastic base. 5. Without turning, carefully pull bulb assembly out of parking lamp assembly. -
Page 202
Maintenance and care Replacing foglamp bulbs 1. Disconnect the electrical connector from the back of the foglamp assembly. 2. Twist, then pull the bulb from the foglamp assembly. 3. Install the new bulb. 4. Connect the electrical connector to the back of the foglamp assembly. -
Page 203
Maintenance and care Replacing tail lamp/backup lamp bulbs The tail lamp/backup lamp assemblies are located in the same portion of the vehicle rear, one just below the other. Follow the same steps to replace either bulb: 1. Open the liftgate to expose the lamp assemblies. -
Page 204
4. Replace the connector by placing it back into the assembly and turning it ⁄ turn clockwise. REPLACING THE INTERIOR BULBS Check the operation of the following interior bulbs frequently: interior overhead lamp map lamp courtesy and cargo lamps hazard flasher Map lamps To change the map lamp bulbs: 1. -
Page 205
Maintenance and care AIMING THE HEADLAMPS The alignment of your headlamps should be checked by a qualified service technician if: Oncoming motorists frequently signal you to deactivate your high beams, and your high beams are not activated. The headlamps do not seem to provide enough light for clear night vision. -
Page 206
Minor scratches or paint damage from road debris may be repaired with touch-up paint, paint repair foil or aerosol paint spray from the Ford accessory line. Observe the application instructions on the products. Remove particles such as bird droppings, tree sap, insect remains, tar spots, road salt and industrial fallout immediately. -
Page 207
Maintenance and care Cleaning the wheels Wash the wheels with the same detergent you use to clean the body of your vehicle. Do not use acid-based wheel cleaners, steel wool, fuel or strong detergents. Never use abrasives that will damage the finish of special wheel surfaces. -
Page 208
Cover the highlighted areas to prevent water damage when cleaning the engine. Never wash or rinse the engine while it is running; water in the running engine may cause internal damage. Cleaning plastic exterior parts Use a vinyl cleaner for routine cleaning of plastic. -
Page 209
Maintenance and care Cleaning the exterior lamps Wash the exterior lamps with the same detergent you used to wash the exterior of your vehicle. Use glass cleaner or tar remover if necessary. To avoid scratching the lamps, do not use a dry paper towel, chemical solvents or abrasive cleaners to clean the lamps. -
Page 210
Maintenance and care Cleaning the instrument panel Clean instrument panel with a damp cloth, then dry with a dry cloth. Any cleaner or polish that increases the gloss of the upper portion of the instrument panel should be avoided. The dull finish in this area is to help protect the driver from undesirable windshield reflection. -
Page 211
(slide bar if equipped), child safety seat tether bracket assemblies (if equipped) and attaching hardware should be inspected after any collision. Ford recommends that all safety belt assemblies used in vehicles involved in a collision be replaced. However, if the collision… -
Page 212: Capacities And Specifications
MOTORCRAFT PART NUMBERS Component Air filter Battery — standard — optional Fuel filter Oil filter PCV valve Spark plug* — platinum * Replacement double platinum spark plug EE will replace E and EG and P will replace P and PG suffixed plugs. Refer to the Engine data chart for spark plug gap specifications.
-
Page 213: Capacities And Specifications
5.4 L Engine coolant Engine oil Power steering fluid Capacites — pints Axle (rear) Ford 8.8 / 9.75 Ring Gear Conventional and Traction-Lok Axle (front) Ford 8.8 Ring Gear Add 4 oz. of additive friction modifier C8AZ-19B546–A, Ford specification EST-M2C118–A, for complete fill of 8.8 inch and 9.75…
-
Page 214
SPECIFICATIONS Lubricant specifications Item Ford part name Windshield washer fluid reservoir Body hinges, latches, door striker plates and rotors, seat tracks, fuel filler door hinge and spring, hood latch, auxiliary latch Lock cylinders, swing-away spare tire carrier padlock Parking brake… -
Page 215
Capacities and specifications Item Ford part name Driveshaft, slip sline, double Carden joint center ball Door weather-strips Engine coolant Steering linkage Engine oil Motorcraft Motor 4×4 front wheel bearings, 4×4 spindle needle bearings, spindle thrust bearings & front drive axle… -
Page 216
Item Ford part name Speedometer, parking brake Cable Lubricant cable Engine oil filter Motorcraft Long Life Disc brake caliper rails Accelerator Premium Long throttle lever transmission kickdown lever ball studs Ford Motorcraft High conventional and traction lock Synthetic Rear rear axle… -
Page 217
Capacities and specifications ENGINE DATA Component Required fuel grade Induction system Firing order/ijection timing Spark plug gap Ignition system VEHICLE DIMENSIONS 4.6 L engine 87 octane tuned runner & plenum 1-3-7-2-6-5-4-8 .054 E.I. DIS 5.4 L engine coil on plug… -
Page 218
Dimensions 1 — Overall length 2 — Overall width 3 — Maximum height 4 — Wheelbase 5 — Front track IDENTIFYING YOUR VEHICLE Vehicle identification tag The vehicle identification tag is located on the front panel of the engine compartment. This tag bears technical information on your vehicle and identifies various components. -
Page 219
Capacities and specifications Vehicle identification number The vehicle identification number (VIN) is attached to a metal tag and is located on the front driver’s side of the instrument panel. The VIN tag may be seen by looking through the windshield from the outside of the vehicle. -
Page 220: Reporting Safety Defects
National Highway Traffic Safety Administration (NHTSA) in addition to Ford Motor Company. If NHTSA receives similar complaints, it may open an investigation, and if it finds that a safety defect exists in a group of vehicles, it may order a recall and remedy campaign.
-
Page 221
Index Air bag supplemental restraint system …87 and child safety seats …88 description …87 disposal …91 indicator light …90 passenger air bag …89 Air cleaner filter …179 Air conditioning auxiliary heater and air conditioner …37 Air suspension …111 Anti-theft system …67 Battery …176 jumping a disabled battery …151 Brakes …107… -
Page 222: Index
Idle relearning …178 Ignition …68 Instrument panel …20 Jack …66 Jump-starting your vehicle 151,152 attaching cables …152 disconnecting cables …153 Lamps interior lamps …54 parking lamps …201 Lights, warning and indicator anti-lock brakes (ABS) …12 brake …10 charging system …9 high beam …12 safety belt …10,86 Message center …17…
-
Page 223
Index Trailer towing calculating maximum trailer weight …127 Transfer case (see Differential fluid) …175,176 Transmission …114,172 Transmission control switch …49 Trip odometer …17 Turn signal …47 indicator lights …12 Vehicle dimensions …218 Vehicle headlamp aiming device (VHAD) …206 Ventilating your vehicle …105 Voltmeter (see Battery voltage gauge) …16 Warning chimes… -
Page 224: Filling Station Information
Filling station information FILLING STATION INFORMATION Fuel Fuel tank capacity (standard suspension) Fuel tank capacity — 4×2 (with air suspension) Fuel tank capacity — 4×4 Engine oil Hood release * Use only oil displaying the American Petroleum Institute certification mark — SAE 5W-30 preferred.
This manual is also suitable for:
Expedition 1997
Need a manual for your Ford Expedition (1997)? Below you can view and download the PDF manual for free. There are also frequently asked questions, a product rating and feedback from users to enable you to optimally use your product. If this is not the manual you want, please contact us.
Is your product defective and the manual offers no solution? Go to a Repair Café for free repair services.
Manual

Rating
Let us know what you think about the Ford Expedition (1997) by leaving a product rating. Want to share your experiences with this product or ask a question? Please leave a comment at the bottom of the page.
Are you satisfied with this Ford product?
Yes No
Be the first to rate this product
0 votes
Frequently Asked Questions
Our support team searches for useful product information and answers to frequently asked questions. If you find an inaccuracy in our frequently asked questions, please let us know by using our contact form.
My car has a timing chain, what is the replacement interval for it? Verified
With normal use, a timing chain should last the entire lifespan of the car and does not need to be replaced.
This was helpful (2409)
I can’t open one or more of the doors from the inside, why is that? Verified
The child safety lock is probably activated. This can often be deactivated with a mechanism in the door.
This was helpful (761)
How often should I change my oil? Verified
Almost every car has its own exact guideline, but in general it’s wise to change your oil every 10.000 to 15.000 kilometers or once every year. Polluted oil can cause serious damage to the engine over time.
This was helpful (643)
When should the airbag on the side of the passenger seat be switched off? Verified
When driving with a child in a car seat on the passenger seat, the airbag on that side should be switched off. This is also advisable for children up to 12 years old that take place in the passenger seat. This is to prevent injuries in case of an accident.
This was helpful (582)
The car keys won’t unlock the car from a distance anymore, why is that? Verified
Car keys that can unlock from a distance generally work with a battery. When it runs out, the key won’t work anymore. Replace the battery and try again.
This was helpful (576)
Will a lower tire pressure result in more grip when driving in the snow? Verified
No, although the tires will have more surface in contact with the road with a lower pressure, it will nevertheless result in less stability. Always drive with the correct tire pressure!
This was helpful (330)
I filled my car with the wrong fuel, what should I do? Verified
Do not drive! It does not matter wether you put diesel in a gasoline car or gasoline in a diesel car. In both cases it can cause damage to the enige and/or other parts of the car. Contact roadside assistance.
This was helpful (219)
Where can I find the VIN number of my car? Verified
This can vary between brands and models, but on many cars the VIN number can be found on the door jamb, under the hood or on the metal flooring at the front seat.
This was helpful (184)
How often should I replace the blades on my windscreen wipers? Verified
It’s advisable to replace the wiper blades at least once a year. Signs that the blades need to be replaced are streaking, leaving a haze, making noise or the rubber coming off.
This was helpful (160)
How many miles is one kilometer? Verified
One kilometer equals 0,621 mile. Ten kilometers makes 6,21 miles. One mile equals 1,609 kilometer. Ten miles makes 16,09 kilometers.
This was helpful (137)
What is the VIN number? Verified
VIN stands for Vehicle Identification Number and is a unique number that every car has. This makes the car indentifyable after for example a crash or in the case of a recall. It also allows a car to be identified in the case the number plates are missing.
This was helpful (135)
Can I use the windscreen wipers while there is ice on the windscreen? Verified
No, this is not advisable. Ice is sharp and can damage the rubber on the wiper blades.
This was helpful (132)

Руководство на английском языке по техническому обслуживанию и ремонту Ford Expedition, Ford Pick-Up F-150/F-250 и Lincoln Navigator 1997-2002 годов выпуска.
- Автор: —
- Издательство: Chilton
- Год издания: 2004
- Страниц: —
- Формат: HTML
- Размер: 89,9 Mb
Руководство по эксплуатации Ford Expedition и Lincoln Navigator с 2006 годов выпуска.
- Автор: —
- Издательство: Монолит
- Год издания: —
- Страниц: 301
- Формат: —
- Размер: —
Руководство по техническому обслуживанию и ремонту автомобилей Ford Expedition 1997-2014, Ford F-150 1997-2003, F-250 1997-1999 и Lincoln Navigator 1998-2014 годов выпуска с бензиновыми двигателями объемом 4,2/4,6/5,4 л.
- Автор: —
- Издательство: Легион-Автодата
- Год издания: —
- Страниц: 344
- Формат: —
- Размер: —
Руководство по эксплуатации и ремонту автомобилей Ford Expedition, Ford Pick-Up F-150/F-250 и Lincoln Navigator 1997-2002 годов выпуска с бензиновыми двигателями объемом 4,2/4,6/5,4.
- Автор: —
- Издательство: Монолит
- Год издания: —
- Страниц: 449
- Формат: PDF
- Размер: 467,8 Mb
Руководство по эксплуатации и ремонту автомобилей Ford Expedition, Ford Pick-Up F-150/F-250 и Lincoln Navigator 1997-2002 годов выпуска с бензиновыми двигателями объемом 4,2/4,6/5,4 л.
- Автор: —
- Издательство: Монолит
- Год издания: —
- Страниц: 472
- Формат: —
- Размер: —
Руководство по эксплуатации и ремонту автомобилей Ford Expedition и Lincoln Navigator 2003-2006 годов выпуска с бензиновыми двигателями объемом 4,6/5,4 л.
- Автор: —
- Издательство: Монолит
- Год издания: —
- Страниц: 412
- Формат: —
- Размер: —

Руководство по техническому обслуживанию и ремонту Ford Expedition и Lincoln Navigator с 2007 годов выпуска с бензиновым двигателем объемом 5.4 л.
- Автор: —
- Издательство: Монолит
- Год издания: —
- Страниц: 428
- Формат: —
- Размер: —


mbnn
Старожил форума
Народ, всем привет!
Недавно наконец получил книжку по указанным моделям (Экспедишен, F-150 и F250, Линкольн Навигатор) на русском языке.
Руководство по ремонту и эксплуатации Ford Expedition / Ford F-150. Модели с 1997 по 2002 год выпуска, оборудованные бензиновыми двигателями
Тем кто желает приобрести — в монолит или в интернет магазин, книга мне обошлась около 2000 руб.
Выложу фотки с оглавлением и обложной, всю книгу в раз класть не буду (авторские права и т.д.). Если есть у кого вопросы — спрашивайте конкретно то, что вас будет интересовать….
Если, кто то, хочет запросить, что то, подробнее (не читается и т.д.) то, пишите четко номер раздела (указан в верху каждой страницы).
Пример: иллюстрации раздела #10•14 и #10•15
P.S. за качество простите — фотоаппарат однако…  скачать все можно тут
старые ссылки сдохли, вот активная (кто то перевыложил)
https://ford-trucks.club/resources/…cii-expedition-f-150-f-250-navigator-1996.67/
судя по поступившей инфе монолит выпустил новый тираж
https://buyautobook.ru/ford/ford-expedition/remont-ford-expedition-1997g-monolit
там есть и иные книги по нашим авто ( на все модельные года)
https://buyautobook.ru/ford/ford-expedition/
Руководство по ремонту и эксплуатации Ford Expedition / Linkoln Navigator (Форд Форд Expedition / Линкольн Навигатор) с 2003-2006 годов выпуска. Модели оборудованные бензиновыми двигателями
Руководство по ремонту и эксплуатации Ford Expedition / Lincoln Navigator. Модели с 2007 года выпуска, оборудованные бензиновыми двигателями
Руководство по техническому обслуживанию и эксплуатации Ford Expedition / Lincoln Navigator. Модели с 2006 года выпуска, оборудованные бензиновыми двигателями
Руководство по ремонту и эксплуатации Ford Expedition / Ford F-150. Модели с 1997 по 2014 год выпуска, оборудованные бензиновыми двигателями
ps если кому что нужно — пишите в личку я ветку в онлайн не мониторю
-

155.8 КБ
Просмотры: 641 -
133.3 КБ
Просмотры: 618 -
137.9 КБ
Просмотры: 634


Последнее редактирование:
mbnn
Старожил форума
вот еще фоты, так из разных мест, что бы понятно что там в книге и о чем….
-
119.5 КБ
Просмотры: 389 -
235.2 КБ
Просмотры: 436 -
218.5 КБ
Просмотры: 321 -
237.6 КБ
Просмотры: 265 -
216.5 КБ
Просмотры: 274


Я тоже такую купил, качество фоток по ремонту газетное. Электросхемы цветные на русском языке.
Покупал в Москве, Южный порт, торговый центр «Автомобили», павильончик «Издательства Третий Рим» (вроде №168), стоимость 1000 рублей.

Руководство по ремонту сказал(а):
«Табличка с данными о системе контроля токсичности выхлопа.
Эта табличка расположена в моторном отсеке. В главе 6 данного руководства приведена более детальная информация, относящаяся к данным, которые содержатся в табличке»
Заинтересовала Глава 6. Давно бьюсь над разгадкой данных таблички моторного отсека. Если несложно, просветите, выложите скан, пжлста [/url]
mbnn
Старожил форума
Vetervox
Руководство по ремонту сказал(а):
Табличка с данными о системе…..
выложил что просил… на будущее давайте по точнее ниже брошу подробное оглавление…
-
133.2 КБ
Просмотры: 212 -
227.6 КБ
Просмотры: 263 -
254.3 КБ
Просмотры: 218 -
230.8 КБ
Просмотры: 173 -
228 КБ
Просмотры: 264 -
263.8 КБ
Просмотры: 147 -
268.5 КБ
Просмотры: 142 -
249.3 КБ
Просмотры: 150 -
236.1 КБ
Просмотры: 145 -
241.1 КБ
Просмотры: 153


mbnn
Старожил форума
продолжение 6 гл.
-
219.5 КБ
Просмотры: 107

mbnn
Старожил форума
ВНИМАНИЕ!
всвязи с тем что объем каждой главы не малый, а так же в связи с тем что я не коим образом не хочу нарушать авторские права и основная цель — помочь посетителям форума с их проблемами. я размещею ниже оглавление книги и прошу задавать вопросы точнее. (конкретнее)
ps спасибо за понимание, не стесняйтесь спрашивайте. 
-
103 КБ
Просмотры: 72 -
133.2 КБ
Просмотры: 76 -
159.9 КБ
Просмотры: 66 -
154.4 КБ
Просмотры: 65 -
124.7 КБ
Просмотры: 61 -
160.3 КБ
Просмотры: 62 -
154.3 КБ
Просмотры: 59 -
128.3 КБ
Просмотры: 69 -
185.2 КБ
Просмотры: 64 -
85.3 КБ
Просмотры: 66


mbnn
Старожил форума
ЧАСТЬ 2
ПРОДОЛЖЕНИЕ ОГЛАВЛЕНИЯ
-
117.9 КБ
Просмотры: 41 -
129.1 КБ
Просмотры: 42 -
151 КБ
Просмотры: 46 -
116 КБ
Просмотры: 49 -
157.4 КБ
Просмотры: 51 -
94.1 КБ
Просмотры: 54 -
110.2 КБ
Просмотры: 64


2mbnn:
Спасиб. Респект за проделанную работу.
ПРО КНИЖКУ:
Сцуко, когда у нас технические писатели и переводчики будут русскоязычные??? А то англиций выучили, а по-русски с трудом изъясняются. Не, ну надо додуматся назвать пластмассовую накладку, пусть даже крышку под капотом «кронштейном радиатора»! 
И, мля, может мне сказать кто-нибудь, что это за «направленные» вакуумные шланги пременены на наших машинах??
mbnn
Старожил форума
ну положим что возможно книжку переводил не чеговек а програма?! я не утверждаю но возможно….
так что ищи другой перевод слова направленный…
и про направленные: может это шланг со встроенным клапаном…. ну типа что бы тока в одну сторону текло…
ps в сантехнике точно знаю что есть направленные шланги
Кстати, небезынтересно было бы взглянуть на раздел 0-5: «Знакомство с модификациями F-150, F-250, Expedition и Navigator»
mbnn
Старожил форума
лови
-
159.5 КБ
Просмотры: 100 -
178.5 КБ
Просмотры: 131 -
161 КБ
Просмотры: 201


а есть в книжке как менять свечи (спешл тул, особый порядок) и борьба со штатной сигнализацией (не выполняет охранных функций, в смысле закрывает, но не орёт)
Юджин, в смысле сигналка не орёт? у меня орёт только если поставить на сигналку, а потом каким-то образом открыть дверь, не снимая с сигналки. или если кнопку паник нажать. тогда орёт так, что хоть святых выноси. а на каждую пролетающую кошку не эрегирует, чем и ценна.
Вот у меня тоже. Машину кнопкой закрыл, пиликнуло. Жамкаешь панику, орёт и светит всё что может включая бибикалку. А вот пинаешь-качаешь её, молчит как немой пленный. Думал что то не то, понимаю что так и задумано
А так вроде работает даже автозапуск. Причём читал что он должен работать с ключом в замке, однако работает и так.
Юджин, автозапуск это нештатная фича, не было на дишенах такой опции. отсюда пляши в сторону предыдущего хозяина.
инструкцияFord Expedition (1997)

Audio systems 2
Controls and features 6
Display 24
Care and cleaning 25
Radio frequency information 26
Warranties and service 28
Index 29
All rights reserved. Reproduction by any means, electronic or mechanical
including photocopying, recording or by any information storage
and retrieval system or translation in whole or part is not permitted without
written authorization from Ford Motor Company.
Copyright
r
1997 Ford Motor Company
Elemental Chlorine Free
Table of contents
1
Посмотреть инструкция для Ford Expedition (1997) бесплатно. Руководство относится к категории автомобили, 11 человек(а) дали ему среднюю оценку 9. Руководство доступно на следующих языках: английский. У вас есть вопрос о Ford Expedition (1997) или вам нужна помощь? Задайте свой вопрос здесь
- Audio systems 2
- Controls and features 6
- Display 24
- Care and cleaning 25
- Radio frequency information 26
- Warranties and service 28
Главная
| Ford | |
| Expedition (1997) | |
| автомобиль | |
| английский | |
| Руководство пользователя (PDF), Руководство по эксплуатации и уходу (PDF) |
Не можете найти ответ на свой вопрос в руководстве? Вы можете найти ответ на свой вопрос ниже, в разделе часто задаваемых вопросов о Ford Expedition (1997).
Как перевести мили в километры?
1 миля равна 1,609344 километрам, а 1 километр — 0,62137119 милям.
Где я могу узнать идентификационный номер транспортного средства Ford?
Место размещения идентификационного номера транспортного средства зависит от марки и типа транспортного средства. Номер может быть выбит на раме транспортного средства или указан на номерном знаке. Чтобы узнать место расположения идентификационного номера транспортного средства лучше всего ознакомиться с руководством по эксплуатации Ford Expedition (1997).
Что такое идентификационный номер транспортного средства (VIN)?
Идентификационный номер транспортного средства — уникальный для каждого транспортного средства идентификационный номер. Аббревиатура VIN расшифровывается как «Vehicle Identification Number» (Идентификационный номер транспортного средства).
Когда транспортному средству Ford требуется техническое обслуживание?
Регулярное техническое обслуживание необходимо всем транспортным средствам. С информацией о том, как часто необходимо проходить техническое обслуживание и чему именно стоит уделять особое внимание можно ознакомиться в инструкции по техническому обслуживанию. Как правило, транспортное средство требует технического обслуживания каждые 2 года или 30 000 километров пробега.
Когда следует заменять тормозную жидкость на Ford?
Тормозную жидкость рекомендуется менять каждые два года.
В чем разница между топливом E10 и E5?
В топливе E10 содержится до десяти процентов этанола, в то время как в E5 содержится менее пяти процентов. Соответственно, топливо E10 менее вредит окружающей среде.
Одна или несколько дверей не открываются изнутри. Что мне делать?
Скорее всего, замок оснащен защитой от детей и поэтому не может быть открыт изнутри. Процедура открытия замка с защитой от детей зависит от марки и типа замка.
Автомобильный радиоприемник не включается, что делать?
Если автомобильный радиоприемник не включен, на него не будет подаваться питание. Убедитесь, что красный провод подключен к контактному источнику питания, а желтый провод — к источнику питания постоянной мощности.
Инструкция Ford Expedition (1997) доступно в русский?
К сожалению, у нас нет руководства для Ford Expedition (1997), доступного в русский. Это руководство доступно в английский.
Не нашли свой вопрос? Задайте свой вопрос здесь