Начало работы с Express
Последнее обновление: 15.02.2022
В этой главе мы рассмотрим создание сервера с помощью фреймворка Express. Казалось бы, зачем нам нужен дополнительный фреймворк,
если мы можем воспользоваться готовым модулем http, который есть в Node.js API. Однако Express сам использует модуль http, но вместе с тем предоставляет
ряд готовых абстракций, которые упрощают создание сервера и серверной логики, в частности, обработка отправленных форм, работа с куками, CORS и т.д.
Исходный код фреймворка можно посмотреть в репозитории на гитхабе по адресу https://github.com/expressjs/express.
Создадим для проекта новый каталог, который назовем, к примеру, expressapp. Для хранения информации обо всех зависимостях проекта определим в
этом каталоге новый файл package.json:
{
  "name": "expressapp",
  "version": "1.0.0",
  "dependencies": {
    "express": "^4.17.0"
  }
}
Далее перейдем к этому каталогу в командной строке/терминале и для добавления всех нужных пакетов выполним команду:

Создадим в каталоге проекта новый файл app.js:
// подключение express
const express = require("express");
// создаем объект приложения
const app = express();
// определяем обработчик для маршрута "/"
app.get("/", function(request, response){

	// отправляем ответ
	response.send("<h2>Привет Express!</h2>");
});
// начинаем прослушивать подключения на 3000 порту
app.listen(3000);
Для использования Express в начале надо создать объект, который будет представлять приложение:
const app = express();
Для обработки запросов в Express определено ряд встроенных функций, и одной из таких является функция app.get(). Она обрабатывает GET-запросы протокола
HTTP и позволяет связать маршруты с определенными обработчиками. Для этого первым параметром передается маршрут, а вторым — обработчик,
который будет вызываться, если запрос к серверу соответствует данному маршруту:
app.get("/", function(request, response){

	// отправляем ответ
	response.send("<h2>Привет Express!</h2>");
});
Маршрут «/» представляет корневой маршрут.
Для запуска сервера вызывается метод app.listen(), в который передается номер порта.
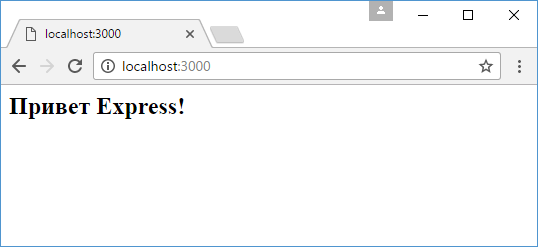
Запустим проект и обратимся в браузере по адресу http://localhost:3000/:
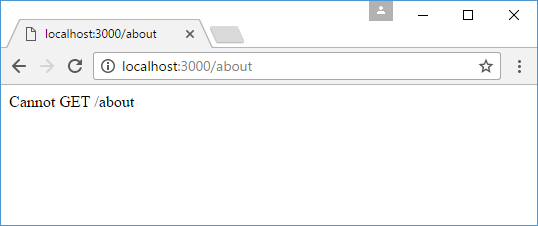
И что важно, Express опирается на систему маршрутов, поэтому все другие запросы, которые не соответствуют корневому маршруту «/», не будут обрабатываться:
Теперь изменим файл app.js:
const express = require("express");

const app = express();
app.get("/", function(request, response){

	response.send("<h1>Главная страница</h1>");
});
app.get("/about", function(request, response){

	response.send("<h1>О сайте</h1>");
});
app.get("/contact", function(request, response){

	response.send("<h1>Контакты</h1>");
});
app.listen(3000);
Теперь в приложении определено три маршрута, которые будут обрабатываться сервером:

Express: веб-фреймворк для Node.js. Руководство пользователя
Express: веб—фреймворк для Node.js. Руководство пользователя
var app = express.createServer();
app.get('/', function(req, res) {
    res.send('Hello World');
});
app.listen(3000);
Возможности
- Понятная маршрутизация
- Помощники перенаправления (redirect helpers)
- Динамические помощники представлений
- Опции представлений уровня приложения
- Взаимодействие с контентом
- Монтирование приложений
- Ориентированность на высокую производительность
- Рендеринг шаблонов и поддержка фрагментных шаблонов (view partials)
- Конфигурации, быстро переключаемые под разные задачи (
development,production, и т.д.) - Хранимые в сессии всплывающие сообщения (flash messages)
- Сделано на основе Connect
- Скрипт
expressдля быстрой генерации каркаса приложения - Высокое покрытие тестами
Установка
npm install express
или, чтобы иметь доступ к команде express, установите глобально:
npm install -g express
Быстрый старт
Проще всего начать работу с Express можно выполнив команду express, которая сгенерирует приложение:
Создание приложения:
npm install -g express
express /tmp/foo && cd /tmp/foo
Установка зависимостей:
npm install -d
Запуск сервера:
node app.js
Создание сервера
Чтобы создать экземпляр express.HTTPServer, просто вызовите метод createServer(). С помощью нашего экземпляра приложения мы можем задавать маршруты, основанные на HTTP-методах, в данном примере app.get().
var app = require('express').createServer();

app.get('/', function(req, res){
    res.send('hello world');
});

app.listen(3000);
Создание HTTPS-сервера
Чтобы инициализировать express.HTTPSServer, мы совершаем те же действия, что и выше, но к тому де передаем объект опций, содержащий ключ, сертификат и другие параметры, о которых написано в документации модуля https NodeJS.
var app = require('express').createServer({ key: ... });
Конфигурирование
Express поддерживает произвольные окружения (environments), как например, production и development. Разработчики могут использовать метод configure(), чтобы добавить нужные для данного окружения функции. Когда configure() вызывается без имени окружения, он будет срабатывать в любом окружении прежде чем сработает любой configure, в котором окружение задано.
В приведенном ниже примере мы просто используем опцию dumpExceptions и в режиме разработки выдаем клиенту в ответ стек-трейс исключения. В обоих же режимах мы используем прослойку methodOverride и bodyParser. Обратите внимание на использование app.router, который сам по себе позволяет монтировать маршруты — в противном случае они монтируются при первом вызове app.get(), app.post() и т.д.
app.configure(function(){
    app.use(express.methodOverride());
    app.use(express.bodyParser());
    app.use(app.router);
});

app.configure('development', function(){
    app.use(express.static(__dirname + '/public'));
    app.use(express.errorHandler({ dumpExceptions: true, showStack: true }));
});

app.configure('production', function(){
    var oneYear = 31557600000;
    app.use(express.static(__dirname + '/public', { maxAge: oneYear }));
    app.use(express.errorHandler());
});
Для окруженией со схожими настройками можно передавать несколько имен окружений:
app.configure('stage', 'prod', function(){
    // config
});
Для внутренних и произвольных настроек в Express есть методы set(key[, val]), enable(key), disable(key):
app.configure(function () {
    app.set('views', __dirname + '/views');
    app.set('views');
    // => "/absolute/path/to/views"
    app.enable('some feature');
    // все равно что app.set('some feature', true);
    app.disable('some feature');
    // все равно что app.set('some feature', false);
    app.enabled('some feature')
    // => false
});
Чтобы задать окружение мы можем установить переменную окружения NODE_ENV. Например:
NODE_ENV=production node app.js
Это очень важно, потому что множество механизмов кэширования включаются только в окружении production.
Настройки
Из коробки Express поддерживает следующие настройки:
home— базовый путь приложения, который используется для res.redirect(), а также для прозрачной поддержки примонтированных приложений.viewsкорневая директория представлений. По умолчаниютекущая_папка/viewsview engine— шаблонизатор по умолчанию для представлений, вызываемых без расширения файла.view options— объект, отражающий глобальные опции представленийview cache— включить кэширование представлений (включается в окруженииproduction)case sensitive routes— включить маршруты, чувствительные к региструstrict routing— если включено, то завершающие слэши больше не игннорируютсяjsonp callback— разрешить методуres.send()прозрачную поддержку JSONP
Маршрутизация
Express использует HTTP-методы для обеспечения осмысленного, выразительного API маршрутизации. Например, мы хотим, чтобы по запросу /user/12 отображался профиль пользователя с id=12. Для этого мы определяем привелденный ниже маршрут. Значения, связанные с именованными полями, доступны в объекте res.params.
app.get('/user/:id', function(req, res){
    res.send('user ' + req.params.id);
});
Маршрут это просто строка, которая внутри движка компилируется в регулярное выражение. Например, когда компилируется /user/:id, то получается регулярное выражение вроде такого:
\/user\/([^\/]+)\/?
Также можно сразу передавать регулярное выражение. Но поскольку группы в регулярных выражениях не именуются, к ним можно добраться в req.params по номерам. Так первая группа попадает в req.params[0], вторая в req.params[1] и т.д.
app.get(/^\/users?(?:\/(\d+)(?:\.\.(\d+))?)?/, function(req, res){
    res.send(req.params);
});
Теперь возьмем curl и пошлем запрос на вышеупомянутый маршрут:
curl http://dev:3000/user
# [null,null]
curl http://dev:3000/users
# [null,null]
curl http://dev:3000/users/1
# ["1",null]
curl http://dev:3000/users/1..15
# ["1","15"]
Ниже приведены несколько примеров маршрутов и пути, которые могут им соответствовать:
	"/user/:id"
	/user/12
	"/users/:id?"
	/users/5
	/users
	"/files/*"
	/files/jquery.js
	/files/javascripts/jquery.js
	"/file/*.*"
	/files/jquery.js
	/files/javascripts/jquery.js
	"/user/:id/:operation?"
	/user/1
	/user/1/edit
	"/products.:format"
	/products.json
	/products.xml
	"/products.:format?"
	/products.json
	/products.xml
	/products
	"/user/:id.:format?"
	/user/12
	/user/12.json
Например, мы можем послать POST-ом некоторый JSON и ответить тем же JSON-ом, используя прослойку bodyParser, который умеет парсить JSON запрос (как впрочем и другие запросы) и помещать ответ в req.body:
var express = require('express'),
    app = express.createServer();
app.use(express.bodyParser());
app.post('/', function(req, res) {
    res.send(req.body);
});
app.listen(3000);
Как правило мы используем «глупое» поле (например, /user/:id), у которого нет ограничений. Но если мы, к примеру, хотим ограничить ID пользователя только числовыми символами, можно использовать /user/:id([0-9]+). Такая конструкция не будет срабатывать, если значение поля содержит нечисловые символы.
Передача управления на другой маршрут
Вызвав третий аргумент — next(), можно передать управление на следующий маршрут. Если соответствие не найдено, управление передается назад в Connect, и прослойки продолжают вызываться в порядке, в котором они были включены с помощью use(). Так же работают несколько маршрутов, имеющих один и тот же путь. Они просто вызываются по очереди, до того момента, когда один их них ответит вместо того, чтобы вызвать next().
app.get('/users/:id?', function(req, res, next) {
    var id = req.params.id;
    if (id) {
        // делаем что-то
    } else {
        next();
    }
});

app.get('/users', function(req, res) {
    // делаем что-то другое
});
Метод app.all() полезен, если нужно выполнить одну и ту же логику для всех HTTP-методов. Ниже мы используем этот метод для извлечения юзера из базы данных и назначения его в req.user.
var express = require('express'),
    app = express.createServer();
var users = [{
    name: 'tj'
}];
app.all('/user/:id/:op?', function(req, res, next) {
    req.user = users[req.params.id];
    if (req.user) {
        next();
    } else {
        next(new Error('cannot find user ' + req.params.id));
    }
});

app.get('/user/:id', function(req, res) {
    res.send('viewing ' + req.user.name);
});

app.get('/user/:id/edit', function(req, res) {
    res.send('editing ' + req.user.name);
});

app.put('/user/:id', function(req, res) {
    res.send('updating ' + req.user.name);
});

app.get('*', function(req, res) {
    res.send('what???', 404);
});

app.listen(3000);
Прослойки
Прослойки фреймворка Connect можно передавать в express.createServer() точно так же, как если бы использовался обычный Connect-сервер. Например:
var express = require('express');
var app = express.createServer(
    express.logger(),
    express.bodyParser());
Так же можно использовать use(). Так удобнее добавлять прослойки внутри блоков configure(), что более прогрессивно.
app.use(express.logger({ format: ':method :url' }));
Обычно с прослойками Connect мы можем подключить Connect следующим образом:
var connect = require('connect');
app.use(connect.logger());
app.use(connect.bodyParser());
Это не совсем удобно, поэтому Express повторно экспортирует Connect-овские прослойки:
app.use(express.logger());
app.use(express.bodyParser());
Порядок прослоек имеет значение. Так, когда Connect получает запрос, выполняется первая прослойка, добавленная через createServer() или use(). Она вызывается с тремя параметрами: request, response и callback-функция, обычно называемая next. когда вызывается next(), управление передается на вторую прослойку и т.д. Это важно учитывать, так так множество прослоек зависят друг от друга. Например methodOverride() обращается к req.body.method для перегрузки HTTP-метода, а bodyParser() парсит тело запроса, чтобы заполнить req.body. Другой пример — парсинг cookies и поддержка сессий — вначале необходимо вызывать use() для cookieParser(), затем для session().
Множество Express-приложений может иметь строчку app.use(app.router). Это может показаться странным, но это нужно просто для того, чтобы явным образом указать прослойку, которая включает в себя все созданные нами маршруты. Эту прослойку можно включать в любом порядке, хотя по умолчанию она включается в конце. Изменяя ее позицию, можно управлять очередностью ее выполнения. Например, нам нужен обработчик ошибок, который будет срабатывать после всех других прослоек и отображать любое исключение, переданное в него с помощью next(). Или же может понадобиться понизить очередность выполнения прослойки, обслуживающей статические файлы, чтобы позволить другим маршрутам перехватывать запросы к таким файлам и, например, считать количество скачиваний и т.д. Вот как это может выглядеть:
app.use(express.logger(...));
app.use(express.bodyParser(...));
app.use(express.cookieParser(...));
app.use(express.session(...));
app.use(app.router);
app.use(express.static(...));
app.use(express.errorHandler(...));
Сначала мы добавляет logger() — он будет оборачивать метод req.end(), чтобы предоставлять нам данные о скорости ответа. Потом мы парсим тело запроса (если таковое имеется), затем куки, далее сессию, чтобы req.session был уже определен, когда мы доберемся до маршрутов в app.router. Если, например, запрос GET /javascripts/jquery.js будет обрабатываться маршрутами, и мы не вызовем next(), то прослойа static() никогда не получит этот запрос. Однако, если мы определим маршрут, как показано ниже, можно будет записывать статистику, отклонять загрузки, списывать оплату за загрузки, и т.д.
var downloads = {};
app.use(app.router);
app.use(express.static(__dirname + '/public'));
app.get('/*', function(req, res, next) {
    var file = req.params[0];
    downloads[file] = downloads[file] || 0;
    downloads[file]++;
    next();
});
Маршруты-прослойки
Маршруты могут использовать маршрутные прослойки путем передачи методу дополнительных коллбэков (или массивов). Это полезно, если нужно ограничить доступ либо подгружать какие-либо данные перед использованием маршрута, и т.д.
Обычно асинхронное получение данных может выглядеть примерно как показано ниже (тут мы берем параметр :id и грузим данные юзера).
app.get('/user/:id', function(req, res, next) {
    loadUser(req.params.id, function(err, user) {
        if (err) return next(err);
        res.send('Viewing user ' + user.name);
    });
});
Чтобы придерживаться принципа DRY и повысить читабельность кода, можно организовать такую логику с помощью прослоек. Как можно заметить, абстрагируя логику с помощью прослоек, можно как добиться повторного использования прослоек, так и сделать код маршрута более красивым.
function loadUser(req, res, next) {
    // тут мы грузим юзера из базы данных
    var user = users[req.params.id];
    if (user) {
        req.user = user;
        next();
    } else {
        next(new Error('Failed to load user ' + req.params.id));
    }
}
app.get('/user/:id', loadUser, function(req, res) {
    res.send('Viewing user ' + req.user.name);
});
Можно добавлять несколько маршрутных прослоек, и они будут выполняться последовательно, чтобы обеспечить различную логику, как, например, ограничение доступа к пользовательскому аккаунту. В нижеприведенном примере только авторизованный юзер может редактировать свой аккаунт.
function andRestrictToSelf(req, res, next) {
    req.authenticatedUser.id == req.user.id ? next() : next(new Error('Unauthorized'));
}
app.get('/user/:id/edit', loadUser, andRestrictToSelf, function(req, res) {
    res.send('Editing user ' + req.user.name);
});
Принимая во внимание тот факт, что прослойки — это просто функции, можно написать функцию, которая бы возвращала прослойку (чтобы обеспечить еще более выразительное и гибкое решение), как показано ниже.
function andRestrictTo(role) {
    return function(req, res, next) {
        req.authenticatedUser.role == role ? next() : next(new Error('Unauthorized'));
    }
}
app.del('/user/:id', loadUser, andRestrictTo('admin'), function(req, res) {
    res.send('Deleted user ' + req.user.name);
});
Часто используемые «стеки» прослоек можно передавать как массивы произвольной глубины и древовидности (они будут применяться рекурсивно):
var a = [middleware1, middleware2],
    b = [middleware3, middleware4],
    all = [a, b];
app.get('/foo', a, function() {});
app.get('/bar', a, function() {});
app.get('/', a, middleware3, middleware4, function() {});
app.get('/', a, b, function() {});
app.get('/', all, function() {});
Полный пример можно посмотреть в репозитории.
Бывают случаи, когда надо пропустить остальные прослойки маршрута в стеке, но продолжить выполнение следующих маршрутов. Для этого надо вызывать next() с аргументом route: next("route"). Если не осталось маршрутов для выполнения, Express ответит ошибкой 404 Not Found.
HTTP-методы
Мы уже неоднократно пользовались app.get(), однако Express также предоставляет прочие HTTP-методы — app.post(), app.del() и т.д.
Самый распространенный пример использования POST — это отправка формы. В примере ниже мы просто делаем HTML-форму. А потом управление будет передаваться маршруту, который мы определим в следующем примере.
<form method="post" action="/">
    <input type="text" name="user[name]" />
    <input type="text" name="user[email]" />
    <input type="submit" value="Submit" />
</form>
По умолчанию Express не знает, что ему делать с телом запроса, поэтому мы должны добавить прослойку bodyParser(), которая будет парсить тело запроса, закодированное в application/x-www-form-urlencoded или application/json, и помещать результаты парсинга в req.body. Для этого мы должны сказать use(), как показано ниже:
app.use(express.bodyParser());
Теперь нижеприведенный маршрут будет иметь доступ к объекту req.body.user, у которого будут свойства name и email:
app.post('/', function(req, res) {
    console.log(req.body.user);
    res.redirect('back');
});
В случае использования формой таких методов как PUT, можно использовать скрытый инпут по имени _method, который позволяет изменить HTTP-метод. Чтобы этого добиться, нужно сначала задействовать прослойку methodOverride(), которая будет помещена после bodyParser(), что позволит ей использовать req.body, содержащий поля переданной формы.
app.use(express.bodyParser());
app.use(express.methodOverride());
Эти прослойки не задействованы по умолчанию, потому что Express не обязательно должен сразу обладать полным функционалом. В зависимости от нужд приложения, можно и не использовать их. И тогда методы PUT и DELETE все так же будут доступны, но уже напрямую. В то же вреям methodOverride — это отличное решение для HTML-форм. Ниже показан пример использования метода PUT:
<form method="post" action="/">
    <input type="hidden" name="_method" value="put" />
    <input type="text" name="user[name]" />
    <input type="text" name="user[email]" />
    <input type="submit" value="Submit" />
</form>
app.put('/', function() {
    console.log(req.body.user);
    res.redirect('back');
});
Обработка ошибок
У Express есть метод app.error(), который принимает все исключения, брошенные маршрутами, или переданные в виде next(err). Ниже пример, как обслуживать несколько страниц с использованием самодельного исключения NotFound:
function NotFound(msg) {
    this.name = 'NotFound';
    Error.call(this, msg);
    Error.captureStackTrace(this, arguments.callee);
}
NotFound.prototype.__proto__ = Error.prototype;
app.get('/404', function(req, res) {
    throw new NotFound;
});
app.get('/500', function(req, res) {
    throw new Error('keyboard cat!');
});
Можно вызывать app.error() несколько раз, как показано ниже. Тут мы проверяем instanceof NotFound и показываем страницу 404, или же передаем управление следующему обработчику ошибок.
Заметьте, что эти обработчики могут быть определены где угодно, поскольку они все равно будут помещены ниже обработчиков маршрутов в listen(). Это позволяет их определять внутри блоков configure(), так что можно обрабатывать исключения по-разному в зависимости от текущего окружения.
app.error(function(err, req, res, next) {
    if (err instanceof NotFound) {
        res.render('404.jade');
    } else {
        next(err);
    }
});
Для просто ты мы принимаем здесь, что все ошибки имеют код 500, но вы можете это изменить как угодно. Например когда Node делает операции с файловой системой, можно получить объект ошибки с полем error.code = ENOENT, что означает «не найден файл или директория», мы можем использовать это в обработчике ошибок и показывать соответствующую страницу.
app.error(function(err, req, res) {
    res.render('500.jade', {
        error: err
    });
});
Также приложения могут использовать для обработки исключений Connect-овскую прослойку errorHander. Например, если нужно в окружении development показывать исключения в stderr, можно сделать так:
app.use(express.errorHandler({ dumpExceptions: true }));
Также в ходе разработки нам могут понадобиться клевые HTML-странички, показывающие переданные или брошенные исключения. В таком случае нужно установить showStack в true:
app.use(express.errorHandler({ showStack: true, dumpExceptions: true }));
Прослойка errorHandler также отвечает в JSON, если клиентом передан заголовок Accept: application/json, что полезно для разработки AJAX-приложений.
Пред-обработки параметров маршрута
Пред-обработки параметров маршрута могут существенно улучшить читабельность приложения, через явную загрузку данных и валидацию URL запроса. Например, если вы постоянно извлекаете какие-то данные для определенных запросов (например грузите пользовательские данные для /user/:id), можно сделать что-то вроде этого:
app.get('/user/:userId', function(req, res, next) {
    User.get(req.params.userId, function(err, user) {
        if (err) return next(err);
        res.send('user ' + user.name);
    });
});
С пред-условиями на наши параметры запроса можно навесить callback-функции, которые бы выполняли валидацию, ограничене доступа, или даже загрузку данных из базы данных. В примере ниже мы вызываем app.param() с именем параметра, на который хотим навесить callback. Как можно заметить мы получаем аргумент id, который содержит имя поля. Таким образом мы загружаем объект пользователя и выполняем обычную обработку ошибок и простой вызов next(), чтобы передать управление на следующее пред-условие либо уже на обработчик маршрута.
app.param('userId', function(req, res, next, id) {
    User.get(id, function(err, user) {
        if (err) return next(err);
        if (!user) return next(new Error('failed to find user'));
        req.user = user;
        next();
    });
});
Вышеуказанные действия, как уже говорилось, значительно улучшают читабельность кода и позволяют легко использовать одну логику в разных местах приложения:
app.get('/user/:userId', function(req, res) {
    res.send('user ' + req.user.name);
});
Рендеринг представлений
Имена файлов представлений образуются по схеме {имя}.{движок}, где {движок} — это название модуля шаблонизатора, который должен быть подключен. Например представление layout.ejs говорит системе представлений, что надо сделать require('ejs'). Чтобы интегрироваться в Express, загружаемый модуль должен экспортировать метод exports.compile(str, options), и возвращать функцию. Чтобы изменить это поведение, можно пользоваться методом app.register() — он позволяет проассоциировать расширения файлов с определенными движками. Например можно сделать, чтобы foo.html рендерился движком ejs.
Ниже — пример, использующий Jade для рендеринга index.html. И поскольку мы не используем layout:false, отрендеренный контент представления index.jade будет передан как локальная переменная body в представление layout.jade.
app.get('/', function(req, res) {
    res.render('index.jade', {
        title: 'My Site'
    });
});
Настройка view engine позволяет указать шаблонизатор по умолчанию. Так например при использовании Jade можно сделать так:
app.set('view engine', 'jade');
что позволит нам рендерить так:
res.render('index');
, а не так:
res.render('index.jade');
Когда шаблонизатор установлен через view engine, расширения файлов не нужны. Однако мы по-прежнему можем использовать сразу несколько шаблонизаторов:
res.render('another-page.ejs');
В Express также есть настройка view options, которая будет накладываться при каждом рендеринге представления. Например если вы не так часто используете лэйауты, можно написать так:
app.set('view options', {
    layout: false
});
Что можно при необходимости потом перегрузить в вызове res.render():
res.render('myview.ejs', { layout: true });
Когда же нужен другой лэйаут, можно также указать путь. Например, если у нас view engine установлен в jade, и файл лэйаута называется ./views/mylayout.jade, можно просто передать:
res.render('page', { layout: 'mylayout' });
В противном случае можно передать расширение файла:
res.render('page', { layout: 'mylayout.jade' });
Пути могут быть также абсолютными:
res.render('page', { layout: __dirname + '/../../mylayout.jade' });
Хороший пример — это указание нестандартных открывающих и закрывающих тегов движка ejs:
app.set('view options', {
    open: '{{',
    close: '}}'
});
Фрагменты представлений
Система представлений Express имеет встроенную поддержку фрагментов и коллекций, своего рода мини-представлений. Например, вместо того, чтобы итерировать в представлении циклом для отображения списка комментариев, можно просто использовать фрагмент collection:
partial('comment', { collection: comments });
Если другие опции или локальные переменные не нужны, то можно пропустить объект и просто передать массив данных. Пример ниже равносилен предыдущему:
partial('comment', comments);
В случае использовании коллекций мы имеем несколько «волшебных» локальных переменных:
firstInCollection—true, если это первый объектindexInCollection— индекс объекта в коллекцииlastInCollection—true, если это последний объектcollectionLength— длина коллекции
Переданные или сгенерированные локальные переменные имеет более высокий приоритет, однако локальные переменные, переданные в родительское представление, также доступны и в дочернем. Так например, если мы рендерим представление с помощью partial('blog/post', post) и оно породит локальную переменную post, а представление, вызвавшее эту функцию, имело локальную переменную user, то user также будет виден в представлении blog/post.
Дополнительную документацию см в разделе res.partial().
Примечание: используйте коллекции осторожно, так как рендеринг массива в 100 элементов означает рендеринг 100 представлений. Для простых коллекций лучше итерировать циклом внутри представления, а не использовать коллекции. Так нагрузка будет меньше.
Поиск представлений
Поиск представлений производится относительно родительского преставления. Например если у нас есть представление views/user/list.jade и внутри него мы вызываем фрагмент partial('edit'), система попытается загрузить представление views/user/edit.jade, тогда как partial('../messages') приведет к загрузке views/messages.jade
Система представлений также позволяет делать index-файлы. Например, мы можем вызвать res.render('users'), и это может загрузить как views/users.jade, так и views/users/index.jade.
Использовать index-файлы можно также из представления в той же директории. Так вызовом partial('users') можно обратиться к представлению ../users/index вместо того чтобы вызывать partial('index').
Шаблонизаторы
Ниже представлены несколько шаблонизаторов, часто используемых с Express:
- Haml
- Jade
- EJS — встроенный JavaScript
- CoffeeKup — шаблонизация на основе CoffeeScript
- jQuery Templates для Node
Поддержка сессий
Поддержку сессий можно включить используя Connect-овскую прослойку session. Также для этого нам нужна вышележащая прослойка cookieParser, которая будет парсить куки и помещать их в req.cookies.
app.use(express.cookieParser());
app.use(express.session({ secret: "keyboard cat" }));
По умолчанию прослойка session использует Connect-овское хранилище в памяти, однако существует множество других решений. Например connect-redis поддерживает хранилище сессий в Redis. Вот как им пользоваться:
var RedisStore = require('connect-redis')(express);
app.use(express.cookieParser());
app.use(express.session({
    secret: "keyboard cat",
    store: new RedisStore
}));
Теперь свойства req.session и req.sessionStore будут доступны из всех маршрутов и последующих прослоек. Свойства req.session автоматически сохраняются при ответе. Вот как можно организовать корзину:
var RedisStore = require('connect-redis')(express);
app.use(express.bodyParser());
app.use(express.cookieParser());
app.use(express.session({
    secret: "keyboard cat",
    store: new RedisStore
}));
app.post('/add-to-cart', function(req, res) {
    // допустим мы передали из формы несколько объектов
    // используем для этого bodyParser()
    var items = req.body.items;
    req.session.items = items;
    res.redirect('back');
});
app.get('/add-to-cart', function(req, res) {
    // Когда мы редиректим назат на GET /add-to-cart
    // мы можем проверить req.session.items && req.session.items.length
    // чтобы распечатать наше сообщение
    if (req.session.items && req.session.items.length) {
        req.flash('info', 'You have %s items in your cart', req.session.items.length);
    }
    res.render('shopping-cart');
});
Объект req.session также имеет методы Session.touch(), Session.destroy(), Session.regenerate() для манипуляции сессиями. Для более полной информации см. документацию Connect Session.
Руководство по миграции
Разработчики, работавшие с Express 1.x могут обращаться к руководству по миграции, чтобы научить свои приложения работать с Express 2.x, Connect 1.x, и Node 0.4.x.
Request
req.header(key[, defaultValue])
Получить заголовок запроса key (нечувствительно к регистру) с необязательным значением по умолчанию DefaultValue:
req.header('Host');
req.header('host');
req.header('Accept', '*/*');
Заголовки Referrer и Referer — особый случай, обе конструкции будут работать:
// послан заголовок "Referrer: http://google.com"
req.header('Referer');
// => "http://google.com"
req.header('Referrer');
// => "http://google.com"
req.accepts(type)
Проверяет передан ли заголовок Accept, и подходит ли он под данный тип.
Когда заголовок Accept отсутствует, возвращается true. В противном случае проверяется соответствие типа, а потом подтипов. Можно передавать 'html' которое внутренне конвертируется в 'text/html', используя таблицу соответствия MIME.
// Accept: text/html
req.accepts('html');
// => true
// Accept: text/*; application/json
req.accepts('html');
req.accepts('text/html');
req.accepts('text/plain');
req.accepts('application/json');
// => true
req.accepts('image/png');
req.accepts('png');
// => false
req.is(type)
Проверяет входящий запрос на наличие заголовка Content-Type и соответствие заданному MIME-типу.
// Пусть Content-Type: text/html; charset=utf-8
req.is('html');
req.is('text/html');
// => true
// Пусть Content-Type теперь application/json
req.is('json');
req.is('application/json');
// => true
req.is('html');
// => false
В Express можно регистрировать собственные коллбэки для различных проверок запроса. Например, пусть нам нужно сделать красивую проверку является ли входящий запрос изображением. Для этого можно зарегистрировать коллбэк 'an image':
app.is('an image', function(req) {
    return 0 == req.headers['content-type'].indexOf('image');
});
Теперь внутри обработчиков маршрутов можно использовать его, чтобы проверять Content-Type вида 'image/jpeg', 'image/png' и т.д.
app.post('/image/upload', function(req, res, next) {
    if (req.is('an image')) {
        // выполняем определенные действия
    } else {
        next();
    }
});
Не забывайте, что этот метод распространяется не только на Content-Type — вы можете делать любые проверки.
Также можно использовать подстановочные символы. Это упростит наш пример с изображением. Тут мы будем проверять только тип:
req.is('image/*');
Мы также можем также проверять подтип, как показано ниже. Тут проверка вернет true в случаях 'application/json', и 'text/json'.
req.is('*/json');
req.param(name[, default])
Возвращает значение параметра name или — если оно не существует — default.
Проверяет параметры маршрута (req.params), например, /user/:id
Проверяет параметры строки запроса (req.query), например, ?id=12
Проверяет urlencoded-параметры тела запроса (req.body), например, id=12
Чтобы получать urlencoded-параметры тела запроса, должен существовать объект req.body. Для этого включите прослойку bodyParser().
req.get(field, param)
Получает параметр поля заголовка. По умолчанию — пустая строка.
req.get('content-disposition', 'filename');
// => "something.png"
req.get('Content-Type', 'boundary');
// => "--foo-bar-baz"
req.flash(type[, msg])
Помещает всплывающее сообщение в очередь.
req.flash('info', 'email sent');
req.flash('error', 'email delivery failed');
req.flash('info', 'email re-sent');
// => 2
req.flash('info');
// => ['email sent', 'email re-sent']
req.flash('info');
// => []
req.flash();
// => { error: ['email delivery failed'], info: [] }
Всплывающие сообщения также могут использовать форматные строки. По умолчанию доступна строка '%s':
req.flash('info', 'email delivery to _%s_ from _%s_ failed.', toUser, fromUser);
req.isXMLHttpRequest
Также имеет сокращение req.xhr. Проверяет заголовок X-Requested-With на предмет того, что запрос сделан с помощью XMLHttpRequest:
req.xhr
req.isXMLHttpRequest
Response
res.header(key[, val])
Получает или устанавливает заголовок ответа.
res.header('Content-Length');
// => undefined
res.header('Content-Length', 123);
// => 123
res.header('Content-Length');
// => 123
res.charset
Устанавливает кодировку следующих заголовков Content-Type. Например, res.send() и res.render() по умолчанию будут "utf8", а мы можем явно задать кодировку перед тем как рендерить шаблон:
res.charset = 'ISO-8859-1';
res.render('users');
или перед тем, как отвечать с помощью res.send():
res.charset = 'ISO-8859-1';
res.send(str);
или с помощью встроенного в Node res.end():
res.charset = 'ISO-8859-1';
res.header('Content-Type', 'text/plain');
res.end(str);
res.contentType(type)
Устанавливает заголовок ответа Content-Type.
var filename = 'path/to/image.png';
res.contentType(filename);
// Content-Type теперь "image/png"
Можно задавать Content-Type и строкой:
res.contentType('application/json');
Или просто расширением файла (без ведущей точки):
res.contentType('json');
res.attachment([filename])
Устанавливает заголовок ответа Content-Disposition в "attachment". Опционально может быть передано имя файла.
res.attachment('path/to/my/image.png');
res.sendfile(path[, options[, callback]])
Используется в res.download() для передачи произвольного файла.
res.sendfile('path/to/my.file');
Этод метод принимает необязательный параметр callback, который вызывается в случае ошибки или успеха передачи файла. По умолчанию вызывается next(err), однако если передан callback, то надо это делать явно, или обрабатывать ошибку.
res.sendfile(path, function(err) {
    if (err) {
        next(err);
    } else {
        console.log('transferred %s', path);
    }
});
Также можно передавать опции вызову fs.createReadStream(). Например, чтобы изменить размер буфера:
res.sendfile(path, {
    bufferSize: 1024
}, function(err) {
    // обработка...
});
res.download(file[, filename[, callback[, callback2]]])
Передать данный файл как вложение (можно задать необязательное альтернативное имя файла).
res.download('path/to/image.png');
res.download('path/to/image.png', 'foo.png');
Это эквивалентно следующему:
res.attachment(file);
res.sendfile(file);
Опционально можно задать callback вторым или третьим аргументом res.sendfile(). Внутри него вы можете отвечать, как если бы заголовок еще не был передан.
res.download(path, 'expenses.doc', function(err) {
    // обработка...
});
Также можно опционально передать второй коллбэк — callback2. В нем обрабатываются ошибки, связанные с соединением. Однако в нем не следует пытаться посылать ответ.
res.download(path, function(err) {
    // ошибка или завершение
}, function(err) {
    // ошибка соединения
});
res.send(body|status[, headers|status[, status]])
Метод res.send() — высокоуровневое средство ответа, позволяющее передавать объекты (для JSON-ответа), строки (для HTML-ответа), экземпляры Buffer, или целые числа, определяющие статус-код (404, 500 и т.д.). Вот как это используется:
res.send(); // 204
res.send(new Buffer('wahoo'));
res.send({
    some: 'json'
});
res.send('<p>some html</p>');
res.send('Sorry, cant find that', 404);
res.send('text', {
    'Content-Type': 'text/plain'
}, 201);
res.send(404);
По умолчанию заголовок Content-Type устанавливается автоматически. Однако если он был вручную, явным образом задан в res.send() или перед этим с помощью res.header(), или с помощью res.contentType(), то автоматической установки не произойдет.
Заметьте, что в этом методе происходит завершение ответа (аналогично res.end()), поэтому, если нужно выдать множественный ответ, или поток, то нужнопользоваться res.write().
res.json(obj[, headers|status[, status]])
Посылает JSON-ответ с необязательными заголовками и статус-кодом. Этот метод идеален для организации JSON-API, однако JSON можно посылать также с помощью res.send(obj) (что впрочем не идеально, если нужно послать только строку, закодированную в JSON, так как res.send(string) отправит HTML)
res.json(null);
res.json({
    user: 'tj'
});
res.json('караул!', 500);
res.json('Ничего не найдено', 404);
res.redirect(url[, status])
Перенаправляет на заданный URL. Статус-код по умолчанию — 302.
res.redirect('/', 301);
res.redirect('/account');
res.redirect('http://google.com');
res.redirect('home');
res.redirect('back');
Express поддерживает сокращения для редиректов — по умолчанию это 'back' и 'home'. При этом 'back' перенаправляет на URL, заданный в заголовке Referrer (или Referer), а 'home' использует настройку "home" (по умолчанию "/").
res.cookie(name, val[, options])
Устанавливает значение cookie с именем name в val. Опции: httpOnly, secure, expires, и т.д. Опция path по умолчанию принимает значение, установленное в настройке "home", обычно это "/".
// "Запомнить меня" на 15 минут
res.cookie('rememberme', 'yes', {
    expires: new Date(Date.now() + 900000),
    httpOnly: true
});
Свойством maxAge можно задавать expire относительно Date.now() в миллисекундах. Таким образом наш вышеупомянутый пример теперь можно переписать так:
res.cookie('rememberme', 'yes', { maxAge: 900000 });
Чтобы парсить входящие куки, использйте прослойку cookieParser, которая формирует объект req.cookies:
app.use(express.cookieParser());
app.get('/', function(req, res) {
    // используем req.cookies.rememberme
});
res.clearCookie(name[, options])
Очищаем cookie по имени name, присваивая параметру expires дату в далеком прошлом. Опции те же, что у res.cookie(), path точно так же по умолчанию равен настройке "home".
res.clearCookie('rememberme');
res.render(view[, options[, fn]])
Рендерит представление view с заданными опциями options и необязательным коллбеком fn. Когда задана fn, ответ клиенту не происходит автоматически, в противном же случае делается ответ text/html с кодом 200.
Передаваемые опции являются по совместительству локальными переменными представления. Например, если мы хотим передать переменую user и запретить лэйаут, мы делаем это в одном объекте:
var user = {
    name: 'tj'
};
res.render('index', {
    layout: false,
    user: user
});
Также объект options служит для передачи опций. Например, если вы передаете свойство status, то оно не только становится доступно представлению, а также устанавливает статус-код ответа. Это также полезно, если шаблонизатор принимает определенные опции, например debug или compress. Ниже — пример того, как можно отрендерить страницу ошибки — тут передается status как для его отображения, так и для установки статус-кода res.statusCode.
res.render('error', { status: 500, message: 'Internal Server Error' });
res.partial(view[, options])
Рендерит фрагмент с заданными опциями. Этот метод всегда доступен из представления как локальная переменная.
object— объект, передаваемый в представлениеas— имя переменной, которая будет представлять объектobjectили каждый элемент коллекцииcollection, переданных в представление. По умолчанию — имя представления.as: 'something'— добавит локальную переменную somethingas: this— будет использовать элемент коллекции как контекст представления (this)as: global— сольёт воедино свойства элемента колекции и локальные переменные представленияcollection— массив объектов. Имя его происходит из имени представления. Например video.html будет имметь внутри объект video.
Следующие конструкции эквивалентны друг другу и имя коллекции, переданное фрагменту, везде будет "movie".
partial('theatre/movie.jade', {
    collection: movies
});
partial('theatre/movie.jade', movies);
partial('movie.jade', {
    collection: movies
});
partial('movie.jade', movies);
partial('movie', movies);
// Внутри представления: moovie.director
Чтобы сменить имя локальной переменной с 'movie' на 'video', можно использовать опцию as:
partial('movie', {
    collection: movies,
    as: 'video'
});
// Внутри представления: video.director
Также мы можем сделать movie значением this внутри нашего представления, чтобы вместо movie.director можно было обращаться this.director.
partial('movie', {
    collection: movies,
    as: this
});
// Внутри представления: this.director
Альтернативное решение — это развернуть свойства элемента коллекции в псевдо-глобальные (на самом деле локальные) переменные, используя as: global, такой вот «синтаксический сахар»:
partial('movie', {
    collection: movies,
    as: global
});
// Внутри представления: director
Такая же логика применима не только к коллекциям, но и к объекту внутри фрагментного представления:
partial('movie', {
    object: movie,
    as: this
});
// Внутри представления: this.director
partial('movie', {
    object: movie,
    as: global
});
// Внутри представления: director
partial('movie', {
    object: movie,
    as: 'video'
});
// Внутри представления: video.director
partial('movie', {
    object: movie
});
// movie.director
Когда второй аргумент — не-коллекция (про признаку отсутствия .length), он считается объектом. При этом имя локальной переменной для этого объекта образуется из имени представления.
var movie = new Movie('Nightmare Before Christmas', 'Tim Burton')
partial('movie', movie)
// => Внутри представления: movie.director
Исключение из этого правила — это когда передается простой объект ("{}" или "new Object"), тогда он считается объектом с локальными переменными (прим перев.: и недоступен по имени внутри фрагментного представления). Например в следующем примере можно ожидать, что будет локальная переменная "movie", однако поскольку это простой объект, локальные переменные уже "director" и "title", то есть его свойства:
var movie = {
    title: 'Nightmare Before Christmas',
    director: 'Tim Burton'
};
partial('movie', movie)
Для таких случаев, когда нужно передавать именно простой объект, просто присвойте его какому-нибудь свойству, или используйте свойства object, которое унаследует имя объекта из имени файла. Перечисленные ниже примеры эквивалентны:
partial('movie', {
    locals: {
        movie: movie
    }
})
    partial('movie', {
    movie: movie
})
    partial('movie', {
    object: movie
})
Такой же самый API может быть использован из маршрута, чтобы можно было ответить HTML-фрагментом через AJAX или WebSockets, например можно отрендерить коллекцию пользователей напрямую из маршрута:
app.get('/users', function(req, res) {
    if (req.xhr) {
        // передаем в ответ каждого юзера из коллекции
        // переданной в представление "user"
        res.partial('user', users);
    } else {
        // отвечаем полным лэйаутом со страницей списка пользователей
        // шаблон которой внутри себя делает partial('user', users)
        // ну и добавляет какой-то интерфейс
        res.render('users', {
            users: users
        });
    }
});
res.local(name[, val])
Получить или установить заданную локальную переменную. Под локальными переменными в данном случае имеются в виду переменные, передаваемые в методы рендеринга представления, например в res.render().
app.all('/movie/:id', function(req, res, next) {
    Movie.get(req.params.id, function(err, movie) {
        // Делает присваивание res.locals.movie = movie
        res.local('movie', movie);
    });
});
app.get('/movie/:id', function(req, res) {
    // локальная переменная movie уже есть
    // , но мы можем ее дополнить, если нужно
    res.render('movie', {
        displayReviews: true
    });
});
res.locals(obj)
Присвоить несколько локальных переменных с помощью данного объекта obj. Следующее эквивалентно:
res.local('foo', bar);
res.local('bar', baz);
res.locals({
    foo: bar,
    bar,
    baz
});
Server
app.set(name[, val])
Установить настройку приложение name в значение val, или получить значение настройки name, если val отсутствует:
app.set('views', __dirname + '/views');
app.set('views');
// => ...path...
Также можно добраться до настроек через appsettings:
app.settings.views
// => ...path...
app.enable(name)
Устанавливает настройку name в true:
app.enable('some arbitrary setting');
app.set('some arbitrary setting');
// => true
app.enabled('some arbitrary setting');
// => true
app.enabled(name)
Проверяет, равна ли true настройка name:
app.enabled('view cache');
// => false
app.enable('view cache');
app.enabled('view cache');
// => true
app.disable(name)
Установить настройку name в false:
app.disable('some setting');
app.set('some setting');
// => false
app.disabled('some setting');
// => false
app.disabled(name)
Проверяет, равна ли false настройка name:
app.enable('view cache');
app.disabled('view cache');
// => false
app.disable('view cache');
app.disabled('view cache');
// => true
app.configure(env|function[, function])
Задает коллбэк-функцию callback для окружения env (или для всех окружений):
app.configure(function() {
    // выполняется для всех окружений
});
app.configure('development', function() {
    // выполняется только для окружения 'development'
});
app.redirect(name, val)
Для res.redirect() мы можем определить сокращения (в области видимости приложения), как показано ниже:
app.redirect('google', 'http://google.com');
Теперь в маршруте мы можем вызвать:
res.redirect('google');
Также можно делать динамические сокращения:
app.redirect('comments', function(req, res) {
    return '/post/' + req.params.id + '/comments';
});
Теперь можно сделать следующее и редирект динамически построится в соответствие с контекстом запроса. Если мы вызвали маршрут с помощью GET /post/12, наш редирект будет /post/12/comments.
app.get('/post/:id', function(req, res) {
    res.redirect('comments');
});
В случае монтированного приложения res.redirect() будет учитывать точку монтирования приложения. Например, если блог-приложение смонтировано в /blog, следующий пример сделает редирект в /blog/posts:
res.redirect('/posts');
app.error(function)
Добавляет функцию-обработчик ошибок, которая первым параметром будет принимать все исключения, как показано ниже. Заметьте, что можно устанавливать несколько обработчиков ошибок, путем нескольких вызовов этого метода, однако метод должен вызывать next(), если он не хочет сам обрабатывать исключение:
app.error(function(err, req, res, next) {
    res.send(err.message, 500);
});
app.helpers(obj)
Регистрирует статические помощники представлений.
app.helpers({
    name: function(first, last) {
        return first + ', ' + last
    },
    firstName: 'tj',
    lastName: 'holowaychuk'
});
Наше представление может теперь пользоваться переменными firstName и lastName и функцией name().
<%= name(firstName, lastName) %>
Также Express предоставляет по умолчанию несколько локальных переменных:
settings— объект настроек приложенияlayout(path)указать лэйаут прямо изнутри представления
Этот метод имеет псевдоним app.locals().
app.dynamicHelpers(obj)
Регистрирует динамические помощники представлений. Динамические помощники представлений — это просто функции, принимающие res, req и выполняемые в контексте экземпляра Server перед тем, как отрендерить любое представление. Возвращаемое значение такой функции становится локальной переменной, с которой функция ассоциирована.
app.dynamicHelpers({
    session: function(req, res) {
        return req.session;
    }
});
Теперь все наши представления будут иметь доступ к сессии — данные сессии будут доступны на манер session.name и т.д.:
<%= session.name %>
app.lookup
Возвращает обработчики маршрута, связанные с заданным путем path.
Допустим, есть такие маршруты:
app.get('/user/:id', function() {});
app.put('/user/:id', function() {});
app.get('/user/:id/:op?', function() {});
Можно использовать функционал lookup для проверки того, какие мрашруты заданы. Это может пригодиться для фреймворков более высокого уровня, построенных на Express.
app.lookup.get('/user/:id');
// => [Function]
app.lookup.get('/user/:id/:op?');
// => [Function]
app.lookup.put('/user/:id');
// => [Function]
app.lookup.all('/user/:id');
// => [Function, Function]
app.lookup.all('/hey');
// => []
Псевдонимом для app.lookup.HTTP_МЕТОД() является просто app.HTTP_МЕТОД() — без аргумента callback. Такое вот сокращение. Например следующее эквивалентно:
app.lookup.get('/user');
app.get('/user');
Каждая возвращенная функция дополняется полезными свойствами:
var fn = app.get('/user/:id/:op?')[0];
fn.regexp
// => /^\/user\/(?:([^\/]+?))(?:\/([^\/]+?))?\/?$/i
fn.keys
// => ['id', 'op']
fn.path
// => '/user/:id/:op?'
fn.method
// => 'GET'
app.match
Возвращает массив коллбэк-функций, срабатывающих на заданный URL, который может содержатьстроку запроса, и т.д. Это может пригодиться, чтобы понять какие маршруты имеют возможность ответить.
Допустим, есть следующие маршруты:
app.get('/user/:id', function() {});
app.put('/user/:id', function() {});
app.get('/user/:id/:op?', function() {});
Вызов match для GET вернет две функции, поскольку :op в последнем маршруте необязательный параметр.
app.match.get('/user/1');
// => [Function, Function]
А следующий вызов вернет только один коллбэк для /user/:id/:op?.
app.match.get('/user/23/edit');
// => [Function]
Можно использовать и all(), если нам не важен HTTP-метод
app.match.all('/user/20');
// => [Function, Function, Function]
Каждая функция снабжается следующими свойствами:
var fn = app.match.get('/user/23/edit')[0];
fn.keys
// => ['id', 'op']
fn.params
// => { id: '23', op: 'edit' }
fn.method
// => 'GET'
app.mounted(fn)
Назначить коллбэк fn, который вызывается, когда этот Server передается в Server.use().
var app = express.createServer(),
    blog = express.createServer();
blog.mounted(function(parent) {
    //parent  - это app
    // this - это blog
});
app.use(blog);
app.register(ext, exports)
Ассоциирует заданные экспортируемые свойства (exports) шаблонизатора с расширением ext файла шаблона.
app.register('.html', require('jade'));
Также это может пригодиться в случае с библиотеками, имя которых не совпадает в точности с расширением файла шаблона. Живой пример — Haml.js, который устанавливается npm-ом как "hamljs", а мы можем зарегистрировать его на шаблоны ".haml", а не ".hamljs", как было бы по умолчанию:
app.register('.haml', require('haml-js'));
Кроме того app.register очень помогает в случае с шаблонизаторами, API которых не соответствует спецификациям Express. В примере ниже мы ассоциируем расширение .md с рендерером markdown-файлов. Рендерить в HTML будем только первый раз — для большей производительности — и будем поддерживать подстановку переменных вида "{name}".
app.register('.md', {
    compile: function(str, options) {
        var html = md.toHTML(str);
        return function(locals) {
            return html.replace(/\{([^}]+)\}/g, function(_, name) {
                return locals[name];
            });
        };
    }
});
app.listen([port[, host]])
Биндим сокет сервера app к адресу host:port. Порт по умолчанию 3000, хост — INADDR_ANY.
app.listen();
app.listen(3000);
app.listen(3000, 'n.n.n.n');
Аргумент port может быть также строкой, представляющей собой путь к unix domain socket:
app.listen('/tmp/express.sock');
Теперь попробуем:
telnet /tmp/express.sock
# GET / HTTP/1.1
# HTTP/1.1 200 OK
# Content-Type: text/plain
# Content-Length: 11
# Hello World
Участники проекта
Основной вклад в проект внесли следующие лица:
- TJ Holowaychuk (visionmedia)
- Ciaran Jessup (ciaranj)
- Aaron Heckmann (aheckmann)
- Guillermo Rauch (guille)
Сторонние модули
Следующие модули работают с Express или построены на его основе:
- express-resource обеспечивает ресурсную маршрутизацию
- express-messages рендеринг всплывающих уведомлений
- express-configure поддержка асинхронной конфигурации (загрузка данных из Redis, и т.д.)
- express-namespace — пространства имен в маршрутах
- express-expose простая публикация JS-кода в клиентскую часть приложения
- express-params — расширения
app.param() - express-mongoose — плагин для простого рендеринга результатов запросов Mongoose (ORM для MongoDB)
Прочая информация
#expressна freenode- Следите за tjholowaychuk в Твиттере
- Google Group
- Wiki
- 日本語ドキュメンテーション by hideyukisaito
- Русскоязычная документация
express()
Creates an Express application. The express() function is a top-level function exported by the express module.
var express = require('express')
var app = express()
Methods
express.json([options])
This middleware is available in Express v4.16.0 onwards.
This is a built-in middleware function in Express. It parses incoming requests
with JSON payloads and is based on
body-parser.
Returns middleware that only parses JSON and only looks at requests where
the Content-Type header matches the type option. This parser accepts any
Unicode encoding of the body and supports automatic inflation of gzip and
deflate encodings.
A new body object containing the parsed data is populated on the request
object after the middleware (i.e. req.body), or an empty object ({}) if
there was no body to parse, the Content-Type was not matched, or an error
occurred.
As req.body’s shape is based on user-controlled input, all properties and
values in this object are untrusted and should be validated before trusting.
For example, req.body.foo.toString() may fail in multiple ways, for example
foo may not be there or may not be a string, and toString may not be a
function and instead a string or other user-input.
The following table describes the properties of the optional options object.
| Property | Description | Type | Default |
|---|---|---|---|
inflate |
Enables or disables handling deflated (compressed) bodies; when disabled, deflated bodies are rejected. | Boolean | true |
limit |
Controls the maximum request body size. If this is a number, then the value specifies the number of bytes; if it is a string, the value is passed to the bytes library for parsing. | Mixed | "100kb" |
reviver |
The reviver option is passed directly to JSON.parse as the second argument. You can find more information on this argument in the MDN documentation about JSON.parse. |
Function | null |
strict |
Enables or disables only accepting arrays and objects; when disabled will accept anything JSON.parse accepts. |
Boolean | true |
type |
This is used to determine what media type the middleware will parse. This option can be a string, array of strings, or a function. If not a function, type option is passed directly to the type-is library and this can be an extension name (like json), a mime type (like application/json), or a mime type with a wildcard (like */* or */json). If a function, the type option is called as fn(req) and the request is parsed if it returns a truthy value. |
Mixed | "application/json" |
verify |
This option, if supplied, is called as verify(req, res, buf, encoding), where buf is a Buffer of the raw request body and encoding is the encoding of the request. The parsing can be aborted by throwing an error. |
Function | undefined |
express.raw([options])
This middleware is available in Express v4.17.0 onwards.
This is a built-in middleware function in Express. It parses incoming request
payloads into a Buffer and is based on
body-parser.
Returns middleware that parses all bodies as a Buffer and only looks at requests
where the Content-Type header matches the type option. This parser accepts
any Unicode encoding of the body and supports automatic inflation of gzip and
deflate encodings.
A new body Buffer containing the parsed data is populated on the request
object after the middleware (i.e. req.body), or an empty object ({}) if
there was no body to parse, the Content-Type was not matched, or an error
occurred.
As req.body’s shape is based on user-controlled input, all properties and
values in this object are untrusted and should be validated before trusting.
For example, req.body.toString() may fail in multiple ways, for example
stacking multiple parsers req.body may be from a different parser. Testing
that req.body is a Buffer before calling buffer methods is recommended.
The following table describes the properties of the optional options object.
| Property | Description | Type | Default |
|---|---|---|---|
inflate |
Enables or disables handling deflated (compressed) bodies; when disabled, deflated bodies are rejected. | Boolean | true |
limit |
Controls the maximum request body size. If this is a number, then the value specifies the number of bytes; if it is a string, the value is passed to the bytes library for parsing. | Mixed | "100kb" |
type |
This is used to determine what media type the middleware will parse. This option can be a string, array of strings, or a function. If not a function, type option is passed directly to the type-is library and this can be an extension name (like bin), a mime type (like application/octet-stream), or a mime type with a wildcard (like */* or application/*). If a function, the type option is called as fn(req) and the request is parsed if it returns a truthy value. |
Mixed | "application/octet-stream" |
verify |
This option, if supplied, is called as verify(req, res, buf, encoding), where buf is a Buffer of the raw request body and encoding is the encoding of the request. The parsing can be aborted by throwing an error. |
Function | undefined |
express.Router([options])
Creates a new router object.
var router = express.Router([options])
The optional options parameter specifies the behavior of the router.
You can add middleware and HTTP method routes (such as get, put, post, and
so on) to router just like an application.
For more information, see Router.
express.static(root, [options])
This is a built-in middleware function in Express.
It serves static files and is based on serve-static.
NOTE: For best results, use a reverse proxy cache to improve performance of serving static assets.
The root argument specifies the root directory from which to serve static assets.
The function determines the file to serve by combining req.url with the provided root directory.
When a file is not found, instead of sending a 404 response, it calls next()
to move on to the next middleware, allowing for stacking and fall-backs.
The following table describes the properties of the options object.
See also the example below.
| Property | Description | Type | Default |
|---|---|---|---|
dotfiles |
Determines how dotfiles (files or directories that begin with a dot “.”) are treated.
See dotfiles below. |
String | “ignore” |
etag |
Enable or disable etag generation
NOTE: |
Boolean | true |
extensions |
Sets file extension fallbacks: If a file is not found, search for files with the specified extensions and serve the first one found. Example: ['html', 'htm']. |
Mixed | false |
fallthrough |
Let client errors fall-through as unhandled requests, otherwise forward a client error.
See fallthrough below. |
Boolean | true |
immutable |
Enable or disable the immutable directive in the Cache-Control response header. If enabled, the maxAge option should also be specified to enable caching. The immutable directive will prevent supported clients from making conditional requests during the life of the maxAge option to check if the file has changed. |
Boolean | false |
index |
Sends the specified directory index file. Set to false to disable directory indexing. |
Mixed | “index.html” |
lastModified |
Set the Last-Modified header to the last modified date of the file on the OS. |
Boolean | true |
maxAge |
Set the max-age property of the Cache-Control header in milliseconds or a string in ms format. | Number | 0 |
redirect |
Redirect to trailing “/” when the pathname is a directory. | Boolean | true |
setHeaders |
Function for setting HTTP headers to serve with the file.
See setHeaders below. |
Function |
For more information, see Serving static files in Express.
and Using middleware — Built-in middleware.
dotfiles
Possible values for this option are:
- “allow” — No special treatment for dotfiles.
- “deny” — Deny a request for a dotfile, respond with
403, then callnext(). - “ignore” — Act as if the dotfile does not exist, respond with
404, then callnext().
NOTE: With the default value, it will not ignore files in a directory that begins with a dot.
fallthrough
When this option is true, client errors such as a bad request or a request to a non-existent
file will cause this middleware to simply call next() to invoke the next middleware in the stack.
When false, these errors (even 404s), will invoke next(err).
Set this option to true so you can map multiple physical directories
to the same web address or for routes to fill in non-existent files.
Use false if you have mounted this middleware at a path designed
to be strictly a single file system directory, which allows for short-circuiting 404s
for less overhead. This middleware will also reply to all methods.
For this option, specify a function to set custom response headers. Alterations to the headers must occur synchronously.
The signature of the function is:
fn(res, path, stat)
Arguments:
res, the response object.path, the file path that is being sent.stat, thestatobject of the file that is being sent.
Example of express.static
Here is an example of using the express.static middleware function with an elaborate options object:
var options = {
  dotfiles: 'ignore',
  etag: false,
  extensions: ['htm', 'html'],
  index: false,
  maxAge: '1d',
  redirect: false,
  setHeaders: function (res, path, stat) {
    res.set('x-timestamp', Date.now())
  }
}

app.use(express.static('public', options))
express.text([options])
This middleware is available in Express v4.17.0 onwards.
This is a built-in middleware function in Express. It parses incoming request
payloads into a string and is based on
body-parser.
Returns middleware that parses all bodies as a string and only looks at requests
where the Content-Type header matches the type option. This parser accepts
any Unicode encoding of the body and supports automatic inflation of gzip and
deflate encodings.
A new body string containing the parsed data is populated on the request
object after the middleware (i.e. req.body), or an empty object ({}) if
there was no body to parse, the Content-Type was not matched, or an error
occurred.
As req.body’s shape is based on user-controlled input, all properties and
values in this object are untrusted and should be validated before trusting.
For example, req.body.trim() may fail in multiple ways, for example
stacking multiple parsers req.body may be from a different parser. Testing
that req.body is a string before calling string methods is recommended.
The following table describes the properties of the optional options object.
| Property | Description | Type | Default |
|---|---|---|---|
defaultCharset |
Specify the default character set for the text content if the charset is not specified in the Content-Type header of the request. |
String | "utf-8" |
inflate |
Enables or disables handling deflated (compressed) bodies; when disabled, deflated bodies are rejected. | Boolean | true |
limit |
Controls the maximum request body size. If this is a number, then the value specifies the number of bytes; if it is a string, the value is passed to the bytes library for parsing. | Mixed | "100kb" |
type |
This is used to determine what media type the middleware will parse. This option can be a string, array of strings, or a function. If not a function, type option is passed directly to the type-is library and this can be an extension name (like txt), a mime type (like text/plain), or a mime type with a wildcard (like */* or text/*). If a function, the type option is called as fn(req) and the request is parsed if it returns a truthy value. |
Mixed | "text/plain" |
verify |
This option, if supplied, is called as verify(req, res, buf, encoding), where buf is a Buffer of the raw request body and encoding is the encoding of the request. The parsing can be aborted by throwing an error. |
Function | undefined |
express.urlencoded([options])
This middleware is available in Express v4.16.0 onwards.
This is a built-in middleware function in Express. It parses incoming requests
with urlencoded payloads and is based on body-parser.
Returns middleware that only parses urlencoded bodies and only looks at
requests where the Content-Type header matches the type option. This
parser accepts only UTF-8 encoding of the body and supports automatic
inflation of gzip and deflate encodings.
A new body object containing the parsed data is populated on the request
object after the middleware (i.e. req.body), or an empty object ({}) if
there was no body to parse, the Content-Type was not matched, or an error
occurred. This object will contain key-value pairs, where the value can be
a string or array (when extended is false), or any type (when extended
is true).
As req.body’s shape is based on user-controlled input, all properties and
values in this object are untrusted and should be validated before trusting.
For example, req.body.foo.toString() may fail in multiple ways, for example
foo may not be there or may not be a string, and toString may not be a
function and instead a string or other user-input.
The following table describes the properties of the optional options object.
| Property | Description | Type | Default |
|---|---|---|---|
extended |
This option allows to choose between parsing the URL-encoded data with the querystring library (when false) or the qs library (when true). The “extended” syntax allows for rich objects and arrays to be encoded into the URL-encoded format, allowing for a JSON-like experience with URL-encoded. For more information, please see the qs library. |
Boolean | true |
inflate |
Enables or disables handling deflated (compressed) bodies; when disabled, deflated bodies are rejected. | Boolean | true |
limit |
Controls the maximum request body size. If this is a number, then the value specifies the number of bytes; if it is a string, the value is passed to the bytes library for parsing. | Mixed | "100kb" |
parameterLimit |
This option controls the maximum number of parameters that are allowed in the URL-encoded data. If a request contains more parameters than this value, an error will be raised. | Number | 1000 |
type |
This is used to determine what media type the middleware will parse. This option can be a string, array of strings, or a function. If not a function, type option is passed directly to the type-is library and this can be an extension name (like urlencoded), a mime type (like application/x-www-form-urlencoded), or a mime type with a wildcard (like */x-www-form-urlencoded). If a function, the type option is called as fn(req) and the request is parsed if it returns a truthy value. |
Mixed | "application/x-www-form-urlencoded" |
verify |
This option, if supplied, is called as verify(req, res, buf, encoding), where buf is a Buffer of the raw request body and encoding is the encoding of the request. The parsing can be aborted by throwing an error. |
Function | undefined |
Application
The app object conventionally denotes the Express application.
Create it by calling the top-level express() function exported by the Express module:
var express = require('express')
var app = express()

app.get('/', function (req, res) {
  res.send('hello world')
})

app.listen(3000)
The app object has methods for
- Routing HTTP requests; see for example, app.METHOD and app.param.
- Configuring middleware; see app.route.
- Rendering HTML views; see app.render.
- Registering a template engine; see app.engine.
It also has settings (properties) that affect how the application behaves;
for more information, see Application settings.
The Express application object can be referred from the request object and the response object as req.app, and res.app, respectively.
Properties
app.locals
The app.locals object has properties that are local variables within the application,
and will be available in templates rendered with res.render.
console.dir(app.locals.title)
// => 'My App'

console.dir(app.locals.email)
// => 'me@myapp.com'
Once set, the value of app.locals properties persist throughout the life of the application,
in contrast with res.locals properties that
are valid only for the lifetime of the request.
You can access local variables in templates rendered within the application.
This is useful for providing helper functions to templates, as well as application-level data.
Local variables are available in middleware via req.app.locals (see req.app)
app.locals.title = 'My App'
app.locals.strftime = require('strftime')
app.locals.email = 'me@myapp.com'
app.mountpath
The app.mountpath property contains one or more path patterns on which a sub-app was mounted.
A sub-app is an instance of express that may be used for handling the request to a route.
var express = require('express')

var app = express() // the main app
var admin = express() // the sub app

admin.get('/', function (req, res) {
  console.log(admin.mountpath) // /admin
  res.send('Admin Homepage')
})

app.use('/admin', admin) // mount the sub app
It is similar to the baseUrl property of the req object, except req.baseUrl
returns the matched URL path, instead of the matched patterns.
If a sub-app is mounted on multiple path patterns, app.mountpath returns the list of
patterns it is mounted on, as shown in the following example.
var admin = express()

admin.get('/', function (req, res) {
  console.dir(admin.mountpath) // [ '/adm*n', '/manager' ]
  res.send('Admin Homepage')
})

var secret = express()
secret.get('/', function (req, res) {
  console.log(secret.mountpath) // /secr*t
  res.send('Admin Secret')
})

admin.use('/secr*t', secret) // load the 'secret' router on '/secr*t', on the 'admin' sub app
app.use(['/adm*n', '/manager'], admin) // load the 'admin' router on '/adm*n' and '/manager', on the parent app
Events
app.on(‘mount’, callback(parent))
The mount event is fired on a sub-app, when it is mounted on a parent app. The parent app is passed to the callback function.
NOTE
Sub-apps will:
- Not inherit the value of settings that have a default value. You must set the value in the sub-app.
- Inherit the value of settings with no default value.
For details, see Application settings.
var admin = express()

admin.on('mount', function (parent) {
  console.log('Admin Mounted')
  console.log(parent) // refers to the parent app
})

admin.get('/', function (req, res) {
  res.send('Admin Homepage')
})

app.use('/admin', admin)
Methods
app.all(path, callback [, callback …])
This method is like the standard app.METHOD() methods,
except it matches all HTTP verbs.
Arguments
| Argument | Description | Default |
|---|---|---|
path |
The path for which the middleware function is invoked; can be any of:
For examples, see Path examples. |
‘/’ (root path) |
callback |
Callback functions; can be:
You can provide multiple callback functions that behave just like middleware, except
Since router and app implement the middleware interface, For examples, see Middleware callback function examples. |
None |
Examples
The following callback is executed for requests to /secret whether using
GET, POST, PUT, DELETE, or any other HTTP request method:
app.all('/secret', function (req, res, next) {
  console.log('Accessing the secret section ...')
  next() // pass control to the next handler
})
The app.all() method is useful for mapping “global” logic for specific path prefixes or arbitrary matches. For example, if you put the following at the top of all other
route definitions, it requires that all routes from that point on
require authentication, and automatically load a user. Keep in mind
that these callbacks do not have to act as end-points: loadUser
can perform a task, then call next() to continue matching subsequent
routes.
app.all('*', requireAuthentication, loadUser)
Or the equivalent:
app.all('*', requireAuthentication)
app.all('*', loadUser)
Another example is white-listed “global” functionality.
The example is similar to the ones above, but it only restricts paths that start with
“/api”:
app.all('/api/*', requireAuthentication)
app.delete(path, callback [, callback …])
Routes HTTP DELETE requests to the specified path with the specified callback functions.
For more information, see the routing guide.
Arguments
| Argument | Description | Default |
|---|---|---|
path |
The path for which the middleware function is invoked; can be any of:
For examples, see Path examples. |
‘/’ (root path) |
callback |
Callback functions; can be:
You can provide multiple callback functions that behave just like middleware, except
Since router and app implement the middleware interface, For examples, see Middleware callback function examples. |
None |
Example
app.delete('/', function (req, res) {
  res.send('DELETE request to homepage')
})
app.disable(name)
Sets the Boolean setting name to false, where name is one of the properties from the app settings table.
Calling app.set('foo', false) for a Boolean property is the same as calling app.disable('foo').
For example:
app.disable('trust proxy')
app.get('trust proxy')
// => false
app.disabled(name)
Returns true if the Boolean setting name is disabled (false), where name is one of the properties from
the app settings table.
app.disabled('trust proxy')
// => true

app.enable('trust proxy')
app.disabled('trust proxy')
// => false
app.enable(name)
Sets the Boolean setting name to true, where name is one of the properties from the app settings table.
Calling app.set('foo', true) for a Boolean property is the same as calling app.enable('foo').
app.enable('trust proxy')
app.get('trust proxy')
// => true
app.enabled(name)
Returns true if the setting name is enabled (true), where name is one of the
properties from the app settings table.
app.enabled('trust proxy')
// => false

app.enable('trust proxy')
app.enabled('trust proxy')
// => true
app.engine(ext, callback)
Registers the given template engine callback as ext.
By default, Express will require() the engine based on the file extension.
For example, if you try to render a “foo.pug” file, Express invokes the
following internally, and caches the require() on subsequent calls to increase
performance.
app.engine('pug', require('pug').__express)
Use this method for engines that do not provide .__express out of the box,
or if you wish to “map” a different extension to the template engine.
For example, to map the EJS template engine to “.html” files:
app.engine('html', require('ejs').renderFile)
In this case, EJS provides a .renderFile() method with
the same signature that Express expects: (path, options, callback),
though note that it aliases this method as ejs.__express internally
so if you’re using “.ejs” extensions you don’t need to do anything.
Some template engines do not follow this convention. The
consolidate.js library maps Node template engines to follow this convention,
so they work seamlessly with Express.
var engines = require('consolidate')
app.engine('haml', engines.haml)
app.engine('html', engines.hogan)
app.get(name)
Returns the value of name app setting, where name is one of the strings in the
app settings table. For example:
app.get('title')
// => undefined

app.set('title', 'My Site')
app.get('title')
// => "My Site"
app.get(path, callback [, callback …])
Routes HTTP GET requests to the specified path with the specified callback functions.
Arguments
| Argument | Description | Default |
|---|---|---|
path |
The path for which the middleware function is invoked; can be any of:
For examples, see Path examples. |
‘/’ (root path) |
callback |
Callback functions; can be:
You can provide multiple callback functions that behave just like middleware, except
Since router and app implement the middleware interface, For examples, see Middleware callback function examples. |
None |
For more information, see the routing guide.
Example
app.get('/', function (req, res) {
  res.send('GET request to homepage')
})
app.listen(path, [callback])
Starts a UNIX socket and listens for connections on the given path.
This method is identical to Node’s http.Server.listen().
var express = require('express')
var app = express()
app.listen('/tmp/sock')
app.listen([port[, host[, backlog]]][, callback])
Binds and listens for connections on the specified host and port.
This method is identical to Node’s http.Server.listen().
If port is omitted or is 0, the operating system will assign an arbitrary unused
port, which is useful for cases like automated tasks (tests, etc.).
var express = require('express')
var app = express()
app.listen(3000)
The app returned by express() is in fact a JavaScript
Function, designed to be passed to Node’s HTTP servers as a callback
to handle requests. This makes it easy to provide both HTTP and HTTPS versions of
your app with the same code base, as the app does not inherit from these
(it is simply a callback):
var express = require('express')
var https = require('https')
var http = require('http')
var app = express()

http.createServer(app).listen(80)
https.createServer(options, app).listen(443)
The app.listen() method returns an http.Server object and (for HTTP) is a convenience method for the following:
app.listen = function () {
  var server = http.createServer(this)
  return server.listen.apply(server, arguments)
}
NOTE: All the forms of Node’s
http.Server.listen()
method are in fact actually supported.
app.METHOD(path, callback [, callback …])
Routes an HTTP request, where METHOD is the HTTP method of the request, such as GET,
PUT, POST, and so on, in lowercase. Thus, the actual methods are app.get(),
app.post(), app.put(), and so on. See Routing methods below for the complete list.
Arguments
| Argument | Description | Default |
|---|---|---|
path |
The path for which the middleware function is invoked; can be any of:
For examples, see Path examples. |
‘/’ (root path) |
callback |
Callback functions; can be:
You can provide multiple callback functions that behave just like middleware, except
Since router and app implement the middleware interface, For examples, see Middleware callback function examples. |
None |
Routing methods
Express supports the following routing methods corresponding to the HTTP methods of the same names:
|
|
|
The API documentation has explicit entries only for the most popular HTTP methods app.get(),
app.post(), app.put(), and app.delete().
However, the other methods listed above work in exactly the same way.
To route methods that translate to invalid JavaScript variable names, use the bracket notation. For example, app['m-search']('/', function ....
The app.get() function is automatically called for the HTTP HEAD method in addition to the GET
method if app.head() was not called for the path before app.get().
The method, app.all(), is not derived from any HTTP method and loads middleware at
the specified path for all HTTP request methods.
For more information, see app.all.
For more information on routing, see the routing guide.
app.param([name], callback)
Add callback triggers to route parameters, where name is the name of the parameter or an array of them, and callback is the callback function. The parameters of the callback function are the request object, the response object, the next middleware, the value of the parameter and the name of the parameter, in that order.
If name is an array, the callback trigger is registered for each parameter declared in it, in the order in which they are declared. Furthermore, for each declared parameter except the last one, a call to next inside the callback will call the callback for the next declared parameter. For the last parameter, a call to next will call the next middleware in place for the route currently being processed, just like it would if name were just a string.
For example, when :user is present in a route path, you may map user loading logic to automatically provide req.user to the route, or perform validations on the parameter input.
app.param('user', function (req, res, next, id) {
  // try to get the user details from the User model and attach it to the request object
  User.find(id, function (err, user) {
    if (err) {
      next(err)
    } else if (user) {
      req.user = user
      next()
    } else {
      next(new Error('failed to load user'))
    }
  })
})
Param callback functions are local to the router on which they are defined. They are not inherited by mounted apps or routers. Hence, param callbacks defined on app will be triggered only by route parameters defined on app routes.
All param callbacks will be called before any handler of any route in which the param occurs, and they will each be called only once in a request-response cycle, even if the parameter is matched in multiple routes, as shown in the following examples.
app.param('id', function (req, res, next, id) {
  console.log('CALLED ONLY ONCE')
  next()
})

app.get('/user/:id', function (req, res, next) {
  console.log('although this matches')
  next()
})

app.get('/user/:id', function (req, res) {
  console.log('and this matches too')
  res.end()
})
On GET /user/42, the following is printed:
CALLED ONLY ONCE
although this matches
and this matches too
app.param(['id', 'page'], function (req, res, next, value) {
  console.log('CALLED ONLY ONCE with', value)
  next()
})

app.get('/user/:id/:page', function (req, res, next) {
  console.log('although this matches')
  next()
})

app.get('/user/:id/:page', function (req, res) {
  console.log('and this matches too')
  res.end()
})
On GET /user/42/3, the following is printed:
CALLED ONLY ONCE with 42
CALLED ONLY ONCE with 3
although this matches
and this matches too
The following section describes app.param(callback), which is deprecated as of v4.11.0.
The behavior of the app.param(name, callback) method can be altered entirely by passing only a function to app.param(). This function is a custom implementation of how app.param(name, callback) should behave — it accepts two parameters and must return a middleware.
The first parameter of this function is the name of the URL parameter that should be captured, the second parameter can be any JavaScript object which might be used for returning the middleware implementation.
The middleware returned by the function decides the behavior of what happens when a URL parameter is captured.
In this example, the app.param(name, callback) signature is modified to app.param(name, accessId). Instead of accepting a name and a callback, app.param() will now accept a name and a number.
var express = require('express')
var app = express()

// customizing the behavior of app.param()
app.param(function (param, option) {
  return function (req, res, next, val) {
    if (val === option) {
      next()
    } else {
      next('route')
    }
  }
})

// using the customized app.param()
app.param('id', 1337)

// route to trigger the capture
app.get('/user/:id', function (req, res) {
  res.send('OK')
})

app.listen(3000, function () {
  console.log('Ready')
})
In this example, the app.param(name, callback) signature remains the same, but instead of a middleware callback, a custom data type checking function has been defined to validate the data type of the user id.
app.param(function (param, validator) {
  return function (req, res, next, val) {
    if (validator(val)) {
      next()
    } else {
      next('route')
    }
  }
})

app.param('id', function (candidate) {
  return !isNaN(parseFloat(candidate)) && isFinite(candidate)
})
The ‘.’ character can’t be used to capture a character in your capturing regexp. For example you can’t use '/user-.+/' to capture 'users-gami', use [\\s\\S] or [\\w\\W] instead (as in '/user-[\\s\\S]+/'.
Examples:
// captures '1-a_6' but not '543-azser-sder'
router.get('/[0-9]+-[[\\w]]*', function (req, res, next) { next() })

// captures '1-a_6' and '543-az(ser"-sder' but not '5-a s'
router.get('/[0-9]+-[[\\S]]*', function (req, res, next) { next() })

// captures all (equivalent to '.*')
router.get('[[\\s\\S]]*', function (req, res, next) { next() })
app.path()
Returns the canonical path of the app, a string.
var app = express()
var blog = express()
var blogAdmin = express()

app.use('/blog', blog)
blog.use('/admin', blogAdmin)

console.dir(app.path()) // ''
console.dir(blog.path()) // '/blog'
console.dir(blogAdmin.path()) // '/blog/admin'
The behavior of this method can become very complicated in complex cases of mounted apps:
it is usually better to use req.baseUrl to get the canonical path of the app.
app.post(path, callback [, callback …])
Routes HTTP POST requests to the specified path with the specified callback functions.
For more information, see the routing guide.
Arguments
| Argument | Description | Default |
|---|---|---|
path |
The path for which the middleware function is invoked; can be any of:
For examples, see Path examples. |
‘/’ (root path) |
callback |
Callback functions; can be:
You can provide multiple callback functions that behave just like middleware, except
Since router and app implement the middleware interface, For examples, see Middleware callback function examples. |
None |
Example
app.post('/', function (req, res) {
  res.send('POST request to homepage')
})
app.put(path, callback [, callback …])
Routes HTTP PUT requests to the specified path with the specified callback functions.
Arguments
| Argument | Description | Default |
|---|---|---|
path |
The path for which the middleware function is invoked; can be any of:
For examples, see Path examples. |
‘/’ (root path) |
callback |
Callback functions; can be:
You can provide multiple callback functions that behave just like middleware, except
Since router and app implement the middleware interface, For examples, see Middleware callback function examples. |
None |
Example
app.put('/', function (req, res) {
  res.send('PUT request to homepage')
})
app.render(view, [locals], callback)
Returns the rendered HTML of a view via the callback function. It accepts an optional parameter
that is an object containing local variables for the view. It is like res.render(),
except it cannot send the rendered view to the client on its own.
Think of app.render() as a utility function for generating rendered view strings.
Internally res.render() uses app.render() to render views.
The local variable cache is reserved for enabling view cache. Set it to true, if you want to
cache view during development; view caching is enabled in production by default.
app.render('email', function (err, html) {
  // ...
})

app.render('email', { name: 'Tobi' }, function (err, html) {
  // ...
})
app.route(path)
Returns an instance of a single route, which you can then use to handle HTTP verbs with optional middleware.
Use app.route() to avoid duplicate route names (and thus typo errors).
var app = express()

app.route('/events')
  .all(function (req, res, next) {
    // runs for all HTTP verbs first
    // think of it as route specific middleware!
  })
  .get(function (req, res, next) {
    res.json({})
  })
  .post(function (req, res, next) {
    // maybe add a new event...
  })
app.set(name, value)
Assigns setting name to value. You may store any value that you want,
but certain names can be used to configure the behavior of the server. These
special names are listed in the app settings table.
Calling app.set('foo', true) for a Boolean property is the same as calling
app.enable('foo'). Similarly, calling app.set('foo', false) for a Boolean
property is the same as calling app.disable('foo').
Retrieve the value of a setting with app.get().
app.set('title', 'My Site')
app.get('title') // "My Site"
Application Settings
The following table lists application settings.
Note that sub-apps will:
- Not inherit the value of settings that have a default value. You must set the value in the sub-app.
- Inherit the value of settings with no default value; these are explicitly noted in the table below.
Exceptions: Sub-apps will inherit the value of trust proxy even though it has a default value (for backward-compatibility);
Sub-apps will not inherit the value of view cache in production (when NODE_ENV is “production”).
app.use([path,] callback [, callback…])
Mounts the specified middleware function or functions
at the specified path:
the middleware function is executed when the base of the requested path matches path.
Arguments
| Argument | Description | Default |
|---|---|---|
path |
The path for which the middleware function is invoked; can be any of:
For examples, see Path examples. |
‘/’ (root path) |
callback |
Callback functions; can be:
You can provide multiple callback functions that behave just like middleware, except
Since router and app implement the middleware interface, For examples, see Middleware callback function examples. |
None |
Description
A route will match any path that follows its path immediately with a “/”.
For example: app.use('/apple', ...) will match “/apple”, “/apple/images”,
“/apple/images/news”, and so on.
Since path defaults to “/”, middleware mounted without a path will be executed for every request to the app.
For example, this middleware function will be executed for every request to the app:
app.use(function (req, res, next) {
  console.log('Time: %d', Date.now())
  next()
})
NOTE
Sub-apps will:
- Not inherit the value of settings that have a default value. You must set the value in the sub-app.
- Inherit the value of settings with no default value.
For details, see Application settings.
Middleware functions are executed sequentially, therefore the order of middleware inclusion is important.
// this middleware will not allow the request to go beyond it
app.use(function (req, res, next) {
  res.send('Hello World')
})

// requests will never reach this route
app.get('/', function (req, res) {
  res.send('Welcome')
})
Error-handling middleware
Error-handling middleware always takes four arguments. You must provide four arguments to identify it as an error-handling middleware function. Even if you don’t need to use the next object, you must specify it to maintain the signature. Otherwise, the next object will be interpreted as regular middleware and will fail to handle errors. For details about error-handling middleware, see: Error handling.
Define error-handling middleware functions in the same way as other middleware functions, except with four arguments instead of three, specifically with the signature (err, req, res, next)):
app.use(function (err, req, res, next) {
  console.error(err.stack)
  res.status(500).send('Something broke!')
})
Path examples
The following table provides some simple examples of valid path values for
mounting middleware.
Middleware callback function examples
The following table provides some simple examples of middleware functions that
can be used as the callback argument to app.use(), app.METHOD(), and app.all().
Even though the examples are for app.use(), they are also valid for app.use(), app.METHOD(), and app.all().
| Usage | Example |
|---|---|
| Single Middleware |
You can define and mount a middleware function locally. A router is valid middleware. An Express app is valid middleware. |
| Series of Middleware |
You can specify more than one middleware function at the same mount path. |
| Array |
Use an array to group middleware logically. |
| Combination |
You can combine all the above ways of mounting middleware. |
Following are some examples of using the express.static
middleware in an Express app.
Serve static content for the app from the “public” directory in the application directory:
// GET /style.css etc
app.use(express.static(path.join(__dirname, 'public')))
Mount the middleware at “/static” to serve static content only when their request path is prefixed with “/static”:
// GET /static/style.css etc.
app.use('/static', express.static(path.join(__dirname, 'public')))
Disable logging for static content requests by loading the logger middleware after the static middleware:
app.use(express.static(path.join(__dirname, 'public')))
app.use(logger())
Serve static files from multiple directories, but give precedence to “./public” over the others:
app.use(express.static(path.join(__dirname, 'public')))
app.use(express.static(path.join(__dirname, 'files')))
app.use(express.static(path.join(__dirname, 'uploads')))
Request
The req object represents the HTTP request and has properties for the
request query string, parameters, body, HTTP headers, and so on. In this documentation and by convention,
the object is always referred to as req (and the HTTP response is res) but its actual name is determined
by the parameters to the callback function in which you’re working.
For example:
app.get('/user/:id', function (req, res) {
  res.send('user ' + req.params.id)
})
But you could just as well have:
app.get('/user/:id', function (request, response) {
  response.send('user ' + request.params.id)
})
The req object is an enhanced version of Node’s own request object
and supports all built-in fields and methods.
Properties
In Express 4, req.files is no longer available on the req object by default. To access uploaded files
on the req.files object, use multipart-handling middleware like busboy, multer,
formidable,
multiparty,
connect-multiparty,
or pez.
req.app
This property holds a reference to the instance of the Express application that is using the middleware.
If you follow the pattern in which you create a module that just exports a middleware function
and require() it in your main file, then the middleware can access the Express instance via req.app
For example:
// index.js
app.get('/viewdirectory', require('./mymiddleware.js'))
// mymiddleware.js
module.exports = function (req, res) {
  res.send('The views directory is ' + req.app.get('views'))
}
req.baseUrl
The URL path on which a router instance was mounted.
The req.baseUrl property is similar to the mountpath property of the app object,
except app.mountpath returns the matched path pattern(s).
For example:
var greet = express.Router()

greet.get('/jp', function (req, res) {
  console.log(req.baseUrl) // /greet
  res.send('Konichiwa!')
})

app.use('/greet', greet) // load the router on '/greet'
Even if you use a path pattern or a set of path patterns to load the router,
the baseUrl property returns the matched string, not the pattern(s). In the
following example, the greet router is loaded on two path patterns.
app.use(['/gre+t', '/hel{2}o'], greet) // load the router on '/gre+t' and '/hel{2}o'
When a request is made to /greet/jp, req.baseUrl is “/greet”. When a request is
made to /hello/jp, req.baseUrl is “/hello”.
req.body
Contains key-value pairs of data submitted in the request body.
By default, it is undefined, and is populated when you use body-parsing middleware such
as express.json() or express.urlencoded().
As req.body’s shape is based on user-controlled input, all properties and values in this object are untrusted and should be validated before trusting. For example, req.body.foo.toString() may fail in multiple ways, for example foo may not be there or may not be a string, and toString may not be a function and instead a string or other user-input.
The following example shows how to use body-parsing middleware to populate req.body.
var express = require('express')

var app = express()

app.use(express.json()) // for parsing application/json
app.use(express.urlencoded({ extended: true })) // for parsing application/x-www-form-urlencoded

app.post('/profile', function (req, res, next) {
  console.log(req.body)
  res.json(req.body)
})
req.cookies
When using cookie-parser middleware, this property is an object that
contains cookies sent by the request. If the request contains no cookies, it defaults to {}.
// Cookie: name=tj
console.dir(req.cookies.name)
// => 'tj'
If the cookie has been signed, you have to use req.signedCookies.
For more information, issues, or concerns, see cookie-parser.
req.fresh
When the response is still “fresh” in the client’s cache true is returned, otherwise false is returned to indicate that the client cache is now stale and the full response should be sent.
When a client sends the Cache-Control: no-cache request header to indicate an end-to-end reload request, this module will return false to make handling these requests transparent.
Further details for how cache validation works can be found in the
HTTP/1.1 Caching Specification.
console.dir(req.fresh)
// => true
req.hostname
Contains the hostname derived from the Host HTTP header.
When the trust proxy setting
does not evaluate to false, this property will instead get the value
from the X-Forwarded-Host header field. This header can be set by
the client or by the proxy.
If there is more than one X-Forwarded-Host header in the request, the
value of the first header is used. This includes a single header with
comma-separated values, in which the first value is used.
Prior to Express v4.17.0, the X-Forwarded-Host could not contain multiple
values or be present more than once.
// Host: "example.com:3000"
console.dir(req.hostname)
// => 'example.com'
req.ip
Contains the remote IP address of the request.
When the trust proxy setting does not evaluate to false,
the value of this property is derived from the left-most entry in the
X-Forwarded-For header. This header can be set by the client or by the proxy.
console.dir(req.ip)
// => '127.0.0.1'
req.ips
When the trust proxy setting does not evaluate to false,
this property contains an array of IP addresses
specified in the X-Forwarded-For request header. Otherwise, it contains an
empty array. This header can be set by the client or by the proxy.
For example, if X-Forwarded-For is client, proxy1, proxy2, req.ips would be
["client", "proxy1", "proxy2"], where proxy2 is the furthest downstream.
req.method
Contains a string corresponding to the HTTP method of the request:
GET, POST, PUT, and so on.
req.originalUrl
req.url is not a native Express property, it is inherited from Node’s http module.
This property is much like req.url; however, it retains the original request URL,
allowing you to rewrite req.url freely for internal routing purposes. For example,
the “mounting” feature of app.use() will rewrite req.url to strip the mount point.
// GET /search?q=something
console.dir(req.originalUrl)
// => '/search?q=something'
req.originalUrl is available both in middleware and router objects, and is a
combination of req.baseUrl and req.url. Consider following example:
app.use('/admin', function (req, res, next) { // GET 'http://www.example.com/admin/new?sort=desc'
  console.dir(req.originalUrl) // '/admin/new?sort=desc'
  console.dir(req.baseUrl) // '/admin'
  console.dir(req.path) // '/new'
  next()
})
req.params
This property is an object containing properties mapped to the named route “parameters”. For example, if you have the route /user/:name, then the “name” property is available as req.params.name. This object defaults to {}.
// GET /user/tj
console.dir(req.params.name)
// => 'tj'
When you use a regular expression for the route definition, capture groups are provided in the array using req.params[n], where n is the nth capture group. This rule is applied to unnamed wild card matches with string routes such as /file/*:
// GET /file/javascripts/jquery.js
console.dir(req.params[0])
// => 'javascripts/jquery.js'
If you need to make changes to a key in req.params, use the app.param handler. Changes are applicable only to parameters already defined in the route path.
Any changes made to the req.params object in a middleware or route handler will be reset.
NOTE: Express automatically decodes the values in req.params (using decodeURIComponent).
req.path
Contains the path part of the request URL.
// example.com/users?sort=desc
console.dir(req.path)
// => '/users'
When called from a middleware, the mount point is not included in req.path. See app.use() for more details.
req.protocol
Contains the request protocol string: either http or (for TLS requests) https.
When the trust proxy setting does not evaluate to false,
this property will use the value of the X-Forwarded-Proto header field if present.
This header can be set by the client or by the proxy.
console.dir(req.protocol)
// => 'http'
req.query
This property is an object containing a property for each query string parameter in the route.
When query parser is set to disabled, it is an empty object {}, otherwise it is the result of the configured query parser.
As req.query’s shape is based on user-controlled input, all properties and values in this object are untrusted and should be validated before trusting. For example, req.query.foo.toString() may fail in multiple ways, for example foo may not be there or may not be a string, and toString may not be a function and instead a string or other user-input.
The value of this property can be configured with the query parser application setting to work how your application needs it. A very popular query string parser is the qs module, and this is used by default. The qs module is very configurable with many settings, and it may be desirable to use different settings than the default to populate req.query:
var qs = require('qs')
app.setting('query parser', function (str) {
  return qs.parse(str, { /* custom options */ })
})
Check out the query parser application setting documentation for other customization options.
req.res
This property holds a reference to the response object
that relates to this request object.
req.route
Contains the currently-matched route, a string. For example:
app.get('/user/:id?', function userIdHandler (req, res) {
  console.log(req.route)
  res.send('GET')
})
Example output from the previous snippet:
{ path: '/user/:id?',
  stack:
   [ { handle: [Function: userIdHandler],
       name: 'userIdHandler',
       params: undefined,
       path: undefined,
       keys: [],
       regexp: /^\/?$/i,
       method: 'get' } ],
  methods: { get: true } }
req.secure
A Boolean property that is true if a TLS connection is established. Equivalent to:
console.dir(req.protocol === 'https')
// => true
req.signedCookies
When using cookie-parser middleware, this property
contains signed cookies sent by the request, unsigned and ready for use. Signed cookies reside
in a different object to show developer intent; otherwise, a malicious attack could be placed on
req.cookie values (which are easy to spoof). Note that signing a cookie does not make it “hidden”
or encrypted; but simply prevents tampering (because the secret used to sign is private).
If no signed cookies are sent, the property defaults to {}.
// Cookie: user=tobi.CP7AWaXDfAKIRfH49dQzKJx7sKzzSoPq7/AcBBRVwlI3
console.dir(req.signedCookies.user)
// => 'tobi'
For more information, issues, or concerns, see cookie-parser.
req.stale
Indicates whether the request is “stale,” and is the opposite of req.fresh.
For more information, see req.fresh.
console.dir(req.stale)
// => true
req.subdomains
An array of subdomains in the domain name of the request.
// Host: "tobi.ferrets.example.com"
console.dir(req.subdomains)
// => ['ferrets', 'tobi']
The application property subdomain offset, which defaults to 2, is used for determining the
beginning of the subdomain segments. To change this behavior, change its value
using app.set.
req.xhr
A Boolean property that is true if the request’s X-Requested-With header field is
“XMLHttpRequest”, indicating that the request was issued by a client library such as jQuery.
console.dir(req.xhr)
// => true
Methods
req.accepts(types)
Checks if the specified content types are acceptable, based on the request’s Accept HTTP header field.
The method returns the best match, or if none of the specified content types is acceptable, returns
false (in which case, the application should respond with 406 "Not Acceptable").
The type value may be a single MIME type string (such as “application/json”),
an extension name such as “json”, a comma-delimited list, or an array. For a
list or array, the method returns the best match (if any).
// Accept: text/html
req.accepts('html')
// => "html"

// Accept: text/*, application/json
req.accepts('html')
// => "html"
req.accepts('text/html')
// => "text/html"
req.accepts(['json', 'text'])
// => "json"
req.accepts('application/json')
// => "application/json"

// Accept: text/*, application/json
req.accepts('image/png')
req.accepts('png')
// => false

// Accept: text/*;q=.5, application/json
req.accepts(['html', 'json'])
// => "json"
For more information, or if you have issues or concerns, see accepts.
req.acceptsCharsets(charset [, …])
Returns the first accepted charset of the specified character sets,
based on the request’s Accept-Charset HTTP header field.
If none of the specified charsets is accepted, returns false.
For more information, or if you have issues or concerns, see accepts.
req.acceptsEncodings(encoding [, …])
Returns the first accepted encoding of the specified encodings,
based on the request’s Accept-Encoding HTTP header field.
If none of the specified encodings is accepted, returns false.
For more information, or if you have issues or concerns, see accepts.
req.acceptsLanguages(lang [, …])
Returns the first accepted language of the specified languages,
based on the request’s Accept-Language HTTP header field.
If none of the specified languages is accepted, returns false.
For more information, or if you have issues or concerns, see accepts.
req.get(field)
Returns the specified HTTP request header field (case-insensitive match).
The Referrer and Referer fields are interchangeable.
req.get('Content-Type')
// => "text/plain"

req.get('content-type')
// => "text/plain"

req.get('Something')
// => undefined
Aliased as req.header(field).
req.is(type)
Returns the matching content type if the incoming request’s “Content-Type” HTTP header field
matches the MIME type specified by the type parameter. If the request has no body, returns null.
Returns false otherwise.
// With Content-Type: text/html; charset=utf-8
req.is('html')
// => 'html'
req.is('text/html')
// => 'text/html'
req.is('text/*')
// => 'text/*'

// When Content-Type is application/json
req.is('json')
// => 'json'
req.is('application/json')
// => 'application/json'
req.is('application/*')
// => 'application/*'

req.is('html')
// => false
For more information, or if you have issues or concerns, see type-is.
req.param(name [, defaultValue])
Deprecated. Use either req.params, req.body or req.query, as applicable.
Returns the value of param name when present.
// ?name=tobi
req.param('name')
// => "tobi"

// POST name=tobi
req.param('name')
// => "tobi"

// /user/tobi for /user/:name
req.param('name')
// => "tobi"
Lookup is performed in the following order:
req.paramsreq.bodyreq.query
Optionally, you can specify defaultValue to set a default value if the parameter is not found in any of the request objects.
Direct access to req.body, req.params, and req.query should be favoured for clarity — unless you truly accept input from each object.
Body-parsing middleware must be loaded for req.param() to work predictably. Refer req.body for details.
req.range(size[, options])
Range header parser.
The size parameter is the maximum size of the resource.
The options parameter is an object that can have the following properties.
| Property | Type | Description |
|---|---|---|
combine |
Boolean | Specify if overlapping & adjacent ranges should be combined, defaults to false. When true, ranges will be combined and returned as if they were specified that way in the header. |
An array of ranges will be returned or negative numbers indicating an error parsing.
-2signals a malformed header string-1signals an unsatisfiable range
// parse header from request
var range = req.range(1000)

// the type of the range
if (range.type === 'bytes') {
  // the ranges
  range.forEach(function (r) {
    // do something with r.start and r.end
  })
}
Response
The res object represents the HTTP response that an Express app sends when it gets an HTTP request.
In this documentation and by convention,
the object is always referred to as res (and the HTTP request is req) but its actual name is determined
by the parameters to the callback function in which you’re working.
For example:
app.get('/user/:id', function (req, res) {
  res.send('user ' + req.params.id)
})
But you could just as well have:
app.get('/user/:id', function (request, response) {
  response.send('user ' + request.params.id)
})
The res object is an enhanced version of Node’s own response object
and supports all built-in fields and methods.
Properties
res.app
This property holds a reference to the instance of the Express application that is using the middleware.
res.app is identical to the req.app property in the request object.
Boolean property that indicates if the app sent HTTP headers for the response.
app.get('/', function (req, res) {
  console.dir(res.headersSent) // false
  res.send('OK')
  console.dir(res.headersSent) // true
})
res.locals
Use this property to set variables accessible in templates rendered with res.render.
The variables set on res.locals are available within a single request-response cycle, and will not
be shared between requests.
In order to keep local variables for use in template rendering between requests, use
app.locals instead.
This property is useful for exposing request-level information such as the request path name,
authenticated user, user settings, and so on to templates rendered within the application.
app.use(function (req, res, next) {
  // Make `user` and `authenticated` available in templates
  res.locals.user = req.user
  res.locals.authenticated = !req.user.anonymous
  next()
})
Methods
res.append(field [, value])
res.append() is supported by Express v4.11.0+
Appends the specified value to the HTTP response header field. If the header is not already set,
it creates the header with the specified value. The value parameter can be a string or an array.
Note: calling res.set() after res.append() will reset the previously-set header value.
res.append('Link', ['<http://localhost/>', '<http://localhost:3000/>'])
res.append('Set-Cookie', 'foo=bar; Path=/; HttpOnly')
res.append('Warning', '199 Miscellaneous warning')
res.attachment([filename])
Sets the HTTP response Content-Disposition header field to “attachment”. If a filename is given,
then it sets the Content-Type based on the extension name via res.type(),
and sets the Content-Disposition “filename=” parameter.
res.attachment()
// Content-Disposition: attachment

res.attachment('path/to/logo.png')
// Content-Disposition: attachment; filename="logo.png"
// Content-Type: image/png
res.cookie(name, value [, options])
Sets cookie name to value. The value parameter may be a string or object converted to JSON.
The options parameter is an object that can have the following properties.
| Property | Type | Description |
|---|---|---|
domain |
String | Domain name for the cookie. Defaults to the domain name of the app. |
encode |
Function | A synchronous function used for cookie value encoding. Defaults to encodeURIComponent. |
expires |
Date | Expiry date of the cookie in GMT. If not specified or set to 0, creates a session cookie. |
httpOnly |
Boolean | Flags the cookie to be accessible only by the web server. |
maxAge |
Number | Convenient option for setting the expiry time relative to the current time in milliseconds. |
path |
String | Path for the cookie. Defaults to “/”. |
priority |
String | Value of the “Priority” Set-Cookie attribute. |
secure |
Boolean | Marks the cookie to be used with HTTPS only. |
signed |
Boolean | Indicates if the cookie should be signed. |
sameSite |
Boolean or String | Value of the “SameSite” Set-Cookie attribute. More information at https://tools.ietf.org/html/draft-ietf-httpbis-cookie-same-site-00#section-4.1.1. |
All res.cookie() does is set the HTTP Set-Cookie header with the options provided.
Any option not specified defaults to the value stated in RFC 6265.
For example:
res.cookie('name', 'tobi', { domain: '.example.com', path: '/admin', secure: true })
res.cookie('rememberme', '1', { expires: new Date(Date.now() + 900000), httpOnly: true })
You can set multiple cookies in a single response by calling res.cookie multiple times, for example:
res
  .status(201)
  .cookie('access_token', 'Bearer ' + token, {
    expires: new Date(Date.now() + 8 * 3600000) // cookie will be removed after 8 hours
  })
  .cookie('test', 'test')
  .redirect(301, '/admin')
The encode option allows you to choose the function used for cookie value encoding.
Does not support asynchronous functions.
Example use case: You need to set a domain-wide cookie for another site in your organization.
This other site (not under your administrative control) does not use URI-encoded cookie values.
// Default encoding
res.cookie('some_cross_domain_cookie', 'http://mysubdomain.example.com', { domain: 'example.com' })
// Result: 'some_cross_domain_cookie=http%3A%2F%2Fmysubdomain.example.com; Domain=example.com; Path=/'

// Custom encoding
res.cookie('some_cross_domain_cookie', 'http://mysubdomain.example.com', { domain: 'example.com', encode: String })
// Result: 'some_cross_domain_cookie=http://mysubdomain.example.com; Domain=example.com; Path=/;'
The maxAge option is a convenience option for setting “expires” relative to the current time in milliseconds.
The following is equivalent to the second example above.
res.cookie('rememberme', '1', { maxAge: 900000, httpOnly: true })
You can pass an object as the value parameter; it is then serialized as JSON and parsed by bodyParser() middleware.
res.cookie('cart', { items: [1, 2, 3] })
res.cookie('cart', { items: [1, 2, 3] }, { maxAge: 900000 })
When using cookie-parser middleware, this method also
supports signed cookies. Simply include the signed option set to true.
Then res.cookie() will use the secret passed to cookieParser(secret) to sign the value.
res.cookie('name', 'tobi', { signed: true })
Later you may access this value through the req.signedCookie object.
res.clearCookie(name [, options])
Clears the cookie specified by name. For details about the options object, see res.cookie().
Web browsers and other compliant clients will only clear the cookie if the given
options is identical to those given to res.cookie(), excluding
expires and maxAge.
res.cookie('name', 'tobi', { path: '/admin' })
res.clearCookie('name', { path: '/admin' })
res.download(path [, filename] [, options] [, fn])
Transfers the file at path as an “attachment”. Typically, browsers will prompt the user for download.
By default, the Content-Disposition header “filename=” parameter is derrived from the path argument, but can be overridden with the filename parameter.
If path is relative, then it will be based on the current working directory of the process or
the root option, if provided.
This API provides access to data on the running file system. Ensure that either (a) the way in
which the path argument was constructed is secure if it contains user input or (b) set the root
option to the absolute path of a directory to contain access within.
When the root option is provided, Express will validate that the relative path provided as
path will resolve within the given root option.
The following table provides details on the options parameter.
The optional options argument is supported by Express v4.16.0 onwards.
The method invokes the callback function fn(err) when the transfer is complete
or when an error occurs. If the callback function is specified and an error occurs,
the callback function must explicitly handle the response process either by
ending the request-response cycle, or by passing control to the next route.
res.download('/report-12345.pdf')

res.download('/report-12345.pdf', 'report.pdf')

res.download('/report-12345.pdf', 'report.pdf', function (err) {
  if (err) {
    // Handle error, but keep in mind the response may be partially-sent
    // so check res.headersSent
  } else {
    // decrement a download credit, etc.
  }
})
res.end([data] [, encoding])
Ends the response process. This method actually comes from Node core, specifically the response.end() method of http.ServerResponse.
Use to quickly end the response without any data. If you need to respond with data, instead use methods such as res.send() and res.json().
res.end()
res.status(404).end()
res.format(object)
Performs content-negotiation on the Accept HTTP header on the request object, when present.
It uses req.accepts() to select a handler for the request, based on the acceptable
types ordered by their quality values. If the header is not specified, the first callback is invoked.
When no match is found, the server responds with 406 “Not Acceptable”, or invokes the default callback.
The Content-Type response header is set when a callback is selected. However, you may alter
this within the callback using methods such as res.set() or res.type().
The following example would respond with { "message": "hey" } when the Accept header field is set
to “application/json” or “*/json” (however if it is “*/*”, then the response will be “hey”).
res.format({
  'text/plain': function () {
    res.send('hey')
  },

  'text/html': function () {
    res.send('<p>hey</p>')
  },

  'application/json': function () {
    res.send({ message: 'hey' })
  },

  default: function () {
    // log the request and respond with 406
    res.status(406).send('Not Acceptable')
  }
})
In addition to canonicalized MIME types, you may also use extension names mapped
to these types for a slightly less verbose implementation:
res.format({
  text: function () {
    res.send('hey')
  },

  html: function () {
    res.send('<p>hey</p>')
  },

  json: function () {
    res.send({ message: 'hey' })
  }
})
res.get(field)
Returns the HTTP response header specified by field.
The match is case-insensitive.
res.get('Content-Type')
// => "text/plain"
res.json([body])
Sends a JSON response. This method sends a response (with the correct content-type) that is the parameter converted to a
JSON string using JSON.stringify().
The parameter can be any JSON type, including object, array, string, Boolean, number, or null,
and you can also use it to convert other values to JSON.
res.json(null)
res.json({ user: 'tobi' })
res.status(500).json({ error: 'message' })
res.jsonp([body])
Sends a JSON response with JSONP support. This method is identical to res.json(),
except that it opts-in to JSONP callback support.
res.jsonp(null)
// => callback(null)
res.jsonp({ user: 'tobi' })
// => callback({ "user": "tobi" })
res.status(500).jsonp({ error: 'message' })
// => callback({ "error": "message" })
By default, the JSONP callback name is simply callback. Override this with the
jsonp callback name setting.
The following are some examples of JSONP responses using the same code:
// ?callback=foo
res.jsonp({ user: 'tobi' })
// => foo({ "user": "tobi" })
app.set('jsonp callback name', 'cb')
// ?cb=foo
res.status(500).jsonp({ error: 'message' })
// => foo({ "error": "message" })
res.links(links)
Joins the links provided as properties of the parameter to populate the response’s
Link HTTP header field.
For example, the following call:
res.links({
next: 'http://api.example.com/users?page=2',
last: 'http://api.example.com/users?page=5'
})
Yields the following results:
Link: <http://api.example.com/users?page=2>; rel="next",
<http://api.example.com/users?page=5>; rel="last"
res.location(path)
Sets the response Location HTTP header to the specified path parameter.
res.location('/foo/bar')
res.location('http://example.com')
res.location('back')
A path value of “back” has a special meaning, it refers to the URL specified in the Referer header of the request. If the Referer header was not specified, it refers to “/”.
After encoding the URL, if not encoded already, Express passes the specified URL to the browser in the Location header,
without any validation.
Browsers take the responsibility of deriving the intended URL from the current URL
or the referring URL, and the URL specified in the Location header; and redirect the user accordingly.
res.redirect([status,] path)
Redirects to the URL derived from the specified path, with specified status, a positive integer
that corresponds to an HTTP status code .
If not specified, status defaults to “302 “Found”.
res.redirect('/foo/bar')
res.redirect('http://example.com')
res.redirect(301, 'http://example.com')
res.redirect('../login')
Redirects can be a fully-qualified URL for redirecting to a different site:
res.redirect('http://google.com')
Redirects can be relative to the root of the host name. For example, if the
application is on http://example.com/admin/post/new, the following
would redirect to the URL http://example.com/admin:
res.redirect('/admin')
Redirects can be relative to the current URL. For example,
from http://example.com/blog/admin/ (notice the trailing slash), the following
would redirect to the URL http://example.com/blog/admin/post/new.
res.redirect('post/new')
Redirecting to post/new from http://example.com/blog/admin (no trailing slash),
will redirect to http://example.com/blog/post/new.
If you found the above behavior confusing, think of path segments as directories
(with trailing slashes) and files, it will start to make sense.
Path-relative redirects are also possible. If you were on
http://example.com/admin/post/new, the following would redirect to
http://example.com/admin/post:
res.redirect('..')
A back redirection redirects the request back to the referer,
defaulting to / when the referer is missing.
res.redirect('back')
res.render(view [, locals] [, callback])
Renders a view and sends the rendered HTML string to the client.
Optional parameters:
locals, an object whose properties define local variables for the view.callback, a callback function. If provided, the method returns both the possible error and rendered string, but does not perform an automated response. When an error occurs, the method invokesnext(err)internally.
The view argument is a string that is the file path of the view file to render. This can be an absolute path, or a path relative to the views setting. If the path does not contain a file extension, then the view engine setting determines the file extension. If the path does contain a file extension, then Express will load the module for the specified template engine (via require()) and render it using the loaded module’s __express function.
For more information, see Using template engines with Express.
NOTE: The view argument performs file system operations like reading a file from disk and evaluating Node.js modules, and as so for security reasons should not contain input from the end-user.
The local variable cache enables view caching. Set it to true,
to cache the view during development; view caching is enabled in production by default.
// send the rendered view to the client
res.render('index')
// if a callback is specified, the rendered HTML string has to be sent explicitly
res.render('index', function (err, html) {
res.send(html)
})
// pass a local variable to the view
res.render('user', { name: 'Tobi' }, function (err, html) {
// ...
})
res.req
This property holds a reference to the request object
that relates to this response object.
res.send([body])
Sends the HTTP response.
The body parameter can be a Buffer object, a String, an object, Boolean, or an Array.
For example:
res.send(Buffer.from('whoop'))
res.send({ some: 'json' })
res.send('<p>some html</p>')
res.status(404).send('Sorry, we cannot find that!')
res.status(500).send({ error: 'something blew up' })
This method performs many useful tasks for simple non-streaming responses:
For example, it automatically assigns the Content-Length HTTP response header field
(unless previously defined) and provides automatic HEAD and HTTP cache freshness support.
When the parameter is a Buffer object, the method sets the Content-Type
response header field to “application/octet-stream”, unless previously defined as shown below:
res.set('Content-Type', 'text/html')
res.send(Buffer.from('<p>some html</p>'))
When the parameter is a String, the method sets the Content-Type to “text/html”:
res.send('<p>some html</p>')
When the parameter is an Array or Object, Express responds with the JSON representation:
res.send({ user: 'tobi' })
res.send([1, 2, 3])
res.sendFile(path [, options] [, fn])
res.sendFile() is supported by Express v4.8.0 onwards.
Transfers the file at the given path. Sets the Content-Type response HTTP header field
based on the filename’s extension. Unless the root option is set in
the options object, path must be an absolute path to the file.
This API provides access to data on the running file system. Ensure that either (a) the way in
which the path argument was constructed into an absolute path is secure if it contains user
input or (b) set the root option to the absolute path of a directory to contain access within.
When the root option is provided, the path argument is allowed to be a relative path,
including containing ... Express will validate that the relative path provided as path will
resolve within the given root option.
The following table provides details on the options parameter.
The method invokes the callback function fn(err) when the transfer is complete
or when an error occurs. If the callback function is specified and an error occurs,
the callback function must explicitly handle the response process either by
ending the request-response cycle, or by passing control to the next route.
Here is an example of using res.sendFile with all its arguments.
app.get('/file/:name', function (req, res, next) {
var options = {
root: path.join(__dirname, 'public'),
dotfiles: 'deny',
headers: {
'x-timestamp': Date.now(),
'x-sent': true
}
}
var fileName = req.params.name
res.sendFile(fileName, options, function (err) {
if (err) {
next(err)
} else {
console.log('Sent:', fileName)
}
})
})
The following example illustrates using
res.sendFile to provide fine-grained support for serving files:
app.get('/user/:uid/photos/:file', function (req, res) {
var uid = req.params.uid
var file = req.params.file
req.user.mayViewFilesFrom(uid, function (yes) {
if (yes) {
res.sendFile('/uploads/' + uid + '/' + file)
} else {
res.status(403).send("Sorry! You can't see that.")
}
})
})
For more information, or if you have issues or concerns, see send.
res.sendStatus(statusCode)
Sets the response HTTP status code to statusCode and sends the registered status message as the text response body. If an unknown status code is specified, the response body will just be the code number.
res.sendStatus(404)
Some versions of Node.js will throw when res.statusCode is set to an
invalid HTTP status code (outside of the range 100 to 599). Consult
the HTTP server documentation for the Node.js version being used.
More about HTTP Status Codes
res.set(field [, value])
Sets the response’s HTTP header field to value.
To set multiple fields at once, pass an object as the parameter.
res.set('Content-Type', 'text/plain')
res.set({
'Content-Type': 'text/plain',
'Content-Length': '123',
ETag: '12345'
})
Aliased as res.header(field [, value]).
res.status(code)
Sets the HTTP status for the response.
It is a chainable alias of Node’s response.statusCode.
res.status(403).end()
res.status(400).send('Bad Request')
res.status(404).sendFile('/absolute/path/to/404.png')
res.type(type)
Sets the Content-Type HTTP header to the MIME type as determined by the specified type. If type contains the “/” character, then it sets the Content-Type to the exact value of type, otherwise it is assumed to be a file extension and the MIME type is looked up in a mapping using the express.static.mime.lookup() method.
res.type('.html')
// => 'text/html'
res.type('html')
// => 'text/html'
res.type('json')
// => 'application/json'
res.type('application/json')
// => 'application/json'
res.type('png')
// => 'image/png'
res.vary(field)
Adds the field to the Vary response header, if it is not there already.
res.vary('User-Agent').render('docs')
Router
A router object is an isolated instance of middleware and routes. You can think of it
as a “mini-application,” capable only of performing middleware and routing
functions. Every Express application has a built-in app router.
A router behaves like middleware itself, so you can use it as an argument to
app.use() or as the argument to another router’s use() method.
The top-level express object has a Router() method that creates a new router object.
Once you’ve created a router object, you can add middleware and HTTP method routes (such as get, put, post,
and so on) to it just like an application. For example:
// invoked for any requests passed to this router
router.use(function (req, res, next) {
// .. some logic here .. like any other middleware
next()
})
// will handle any request that ends in /events
// depends on where the router is "use()'d"
router.get('/events', function (req, res, next) {
// ..
})
You can then use a router for a particular root URL in this way separating your routes into files or even mini-apps.
// only requests to /calendar/* will be sent to our "router"
app.use('/calendar', router)
Methods
router.all(path, [callback, …] callback)
This method is just like the router.METHOD() methods, except that it matches all HTTP methods (verbs).
This method is extremely useful for
mapping “global” logic for specific path prefixes or arbitrary matches.
For example, if you placed the following route at the top of all other
route definitions, it would require that all routes from that point on
would require authentication, and automatically load a user. Keep in mind
that these callbacks do not have to act as end points; loadUser
can perform a task, then call next() to continue matching subsequent
routes.
router.all('*', requireAuthentication, loadUser)
Or the equivalent:
router.all('*', requireAuthentication)
router.all('*', loadUser)
Another example of this is white-listed “global” functionality. Here
the example is much like before, but it only restricts paths prefixed with
“/api”:
router.all('/api/*', requireAuthentication)
router.METHOD(path, [callback, …] callback)
The router.METHOD() methods provide the routing functionality in Express,
where METHOD is one of the HTTP methods, such as GET, PUT, POST, and so on,
in lowercase. Thus, the actual methods are router.get(), router.post(),
router.put(), and so on.
The router.get() function is automatically called for the HTTP HEAD method in
addition to the GET method if router.head() was not called for the
path before router.get().
You can provide multiple callbacks, and all are treated equally, and behave just
like middleware, except that these callbacks may invoke next('route')
to bypass the remaining route callback(s). You can use this mechanism to perform
pre-conditions on a route then pass control to subsequent routes when there is no
reason to proceed with the route matched.
The following snippet illustrates the most simple route definition possible.
Express translates the path strings to regular expressions, used internally
to match incoming requests. Query strings are not considered when performing
these matches, for example “GET /” would match the following route, as would
“GET /?name=tobi”.
router.get('/', function (req, res) {
res.send('hello world')
})
You can also use regular expressions—useful if you have very specific
constraints, for example the following would match “GET /commits/71dbb9c” as well
as “GET /commits/71dbb9c..4c084f9”.
router.get(/^\/commits\/(\w+)(?:\.\.(\w+))?$/, function (req, res) {
var from = req.params[0]
var to = req.params[1] || 'HEAD'
res.send('commit range ' + from + '..' + to)
})
router.param(name, callback)
Adds callback triggers to route parameters, where name is the name of the parameter and callback is the callback function. Although name is technically optional, using this method without it is deprecated starting with Express v4.11.0 (see below).
The parameters of the callback function are:
req, the request object.res, the response object.next, indicating the next middleware function.- The value of the
nameparameter. - The name of the parameter.
Unlike app.param(), router.param() does not accept an array of route parameters.
For example, when :user is present in a route path, you may map user loading logic to automatically provide req.user to the route, or perform validations on the parameter input.
router.param('user', function (req, res, next, id) {
// try to get the user details from the User model and attach it to the request object
User.find(id, function (err, user) {
if (err) {
next(err)
} else if (user) {
req.user = user
next()
} else {
next(new Error('failed to load user'))
}
})
})
Param callback functions are local to the router on which they are defined. They are not inherited by mounted apps or routers. Hence, param callbacks defined on router will be triggered only by route parameters defined on router routes.
A param callback will be called only once in a request-response cycle, even if the parameter is matched in multiple routes, as shown in the following examples.
router.param('id', function (req, res, next, id) {
console.log('CALLED ONLY ONCE')
next()
})
router.get('/user/:id', function (req, res, next) {
console.log('although this matches')
next()
})
router.get('/user/:id', function (req, res) {
console.log('and this matches too')
res.end()
})
On GET /user/42, the following is printed:
CALLED ONLY ONCE
although this matches
and this matches too
The following section describes router.param(callback), which is deprecated as of v4.11.0.
The behavior of the router.param(name, callback) method can be altered entirely by passing only a function to router.param(). This function is a custom implementation of how router.param(name, callback) should behave — it accepts two parameters and must return a middleware.
The first parameter of this function is the name of the URL parameter that should be captured, the second parameter can be any JavaScript object which might be used for returning the middleware implementation.
The middleware returned by the function decides the behavior of what happens when a URL parameter is captured.
In this example, the router.param(name, callback) signature is modified to router.param(name, accessId). Instead of accepting a name and a callback, router.param() will now accept a name and a number.
var express = require('express')
var app = express()
var router = express.Router()
// customizing the behavior of router.param()
router.param(function (param, option) {
return function (req, res, next, val) {
if (val === option) {
next()
} else {
res.sendStatus(403)
}
}
})
// using the customized router.param()
router.param('id', '1337')
// route to trigger the capture
router.get('/user/:id', function (req, res) {
res.send('OK')
})
app.use(router)
app.listen(3000, function () {
console.log('Ready')
})
In this example, the router.param(name, callback) signature remains the same, but instead of a middleware callback, a custom data type checking function has been defined to validate the data type of the user id.
router.param(function (param, validator) {
return function (req, res, next, val) {
if (validator(val)) {
next()
} else {
res.sendStatus(403)
}
}
})
router.param('id', function (candidate) {
return !isNaN(parseFloat(candidate)) && isFinite(candidate)
})
router.route(path)
Returns an instance of a single route which you can then use to handle HTTP verbs
with optional middleware. Use router.route() to avoid duplicate route naming and
thus typing errors.
Building on the router.param() example above, the following code shows how to use
router.route() to specify various HTTP method handlers.
var router = express.Router()
router.param('user_id', function (req, res, next, id) {
// sample user, would actually fetch from DB, etc...
req.user = {
id: id,
name: 'TJ'
}
next()
})
router.route('/users/:user_id')
.all(function (req, res, next) {
// runs for all HTTP verbs first
// think of it as route specific middleware!
next()
})
.get(function (req, res, next) {
res.json(req.user)
})
.put(function (req, res, next) {
// just an example of maybe updating the user
req.user.name = req.params.name
// save user ... etc
res.json(req.user)
})
.post(function (req, res, next) {
next(new Error('not implemented'))
})
.delete(function (req, res, next) {
next(new Error('not implemented'))
})
This approach re-uses the single /users/:user_id path and adds handlers for
various HTTP methods.
NOTE: When you use router.route(), middleware ordering is based on when the route is created, not when method handlers are added to the route. For this purpose, you can consider method handlers to belong to the route to which they were added.
router.use([path], [function, …] function)
Uses the specified middleware function or functions, with optional mount path path, that defaults to “/”.
This method is similar to app.use(). A simple example and use case is described below.
See app.use() for more information.
Middleware is like a plumbing pipe: requests start at the first middleware function defined
and work their way “down” the middleware stack processing for each path they match.
var express = require('express')
var app = express()
var router = express.Router()
// simple logger for this router's requests
// all requests to this router will first hit this middleware
router.use(function (req, res, next) {
console.log('%s %s %s', req.method, req.url, req.path)
next()
})
// this will only be invoked if the path starts with /bar from the mount point
router.use('/bar', function (req, res, next) {
// ... maybe some additional /bar logging ...
next()
})
// always invoked
router.use(function (req, res, next) {
res.send('Hello World')
})
app.use('/foo', router)
app.listen(3000)
The “mount” path is stripped and is not visible to the middleware function.
The main effect of this feature is that a mounted middleware function may operate without
code changes regardless of its “prefix” pathname.
The order in which you define middleware with router.use() is very important.
They are invoked sequentially, thus the order defines middleware precedence. For example,
usually a logger is the very first middleware you would use, so that every request gets logged.
var logger = require('morgan')
var path = require('path')
router.use(logger())
router.use(express.static(path.join(__dirname, 'public')))
router.use(function (req, res) {
res.send('Hello')
})
Now suppose you wanted to ignore logging requests for static files, but to continue
logging routes and middleware defined after logger(). You would simply move the call to express.static() to the top,
before adding the logger middleware:
router.use(express.static(path.join(__dirname, 'public')))
router.use(logger())
router.use(function (req, res) {
res.send('Hello')
})
Another example is serving files from multiple directories,
giving precedence to “./public” over the others:
router.use(express.static(path.join(__dirname, 'public')))
router.use(express.static(path.join(__dirname, 'files')))
router.use(express.static(path.join(__dirname, 'uploads')))
The router.use() method also supports named parameters so that your mount points
for other routers can benefit from preloading using named parameters.
NOTE: Although these middleware functions are added via a particular router, when
they run is defined by the path they are attached to (not the router). Therefore,
middleware added via one router may run for other routers if its routes
match. For example, this code shows two different routers mounted on the same path:
var authRouter = express.Router()
var openRouter = express.Router()
authRouter.use(require('./authenticate').basic(usersdb))
authRouter.get('/:user_id/edit', function (req, res, next) {
// ... Edit user UI ...
})
openRouter.get('/', function (req, res, next) {
// ... List users ...
})
openRouter.get('/:user_id', function (req, res, next) {
// ... View user ...
})
app.use('/users', authRouter)
app.use('/users', openRouter)
Even though the authentication middleware was added via the authRouter it will run on the routes defined by the openRouter as well since both routers were mounted on /users. To avoid this behavior, use different paths for each router.
Время на прочтение
7 мин
Количество просмотров 35K
Если вы занимались разработкой для платформы node.js, то вы, наверняка, слышали об express.js. Это — один из самых популярных легковесных фреймворков, используемых при создании веб-приложений для node.

Автор материала, перевод которого мы сегодня публикуем, предлагает изучить особенности внутреннего устройства фреймворка express через анализ его исходного кода и рассмотрение примера его использования. Он полагает, что изучение механизмов, лежащих в основе популярных опенсорсных библиотек, способствует более глубокому их пониманию, снимает с них завесу «таинственности» и помогает создавать более качественные приложения на их основе.
Возможно, вы сочтёте удобным держать под рукой исходный код express в процессе чтения этого материала. Здесь использована эта версия. Вы вполне можете читать эту статью и не открывая код express, так как здесь, везде где это уместно, даются фрагменты кода этой библиотеки. В тех местах, где код сокращён, используются комментарии вида // ...
Базовый пример использования express
Для начала взглянем на традиционный в деле освоения новых компьютерных технологий «Hello World!»-пример. Его можно найти на официальном сайте фреймворка, он послужит отправной точкой в наших исследованиях.
const express = require('express')
const app = express()
app.get('/', (req, res) => res.send('Hello World!'))
app.listen(3000, () => console.log('Example app listening on port 3000!'))
Этот код запускает новый HTTP-сервер на порту 3000 и отправляет ответ Hello World! на запросы, поступающие по маршруту GET /. Если не вдаваться в подробности, то можно выделить четыре стадии происходящего, которые мы можем проанализировать:
- Создание нового приложения express.
- Создание нового маршрута.
- Запуск HTTP-сервера на заданном номере порта.
- Обработка поступающих к серверу запросов.
Создание нового приложения express
Команда var app = express() позволяет создать новое приложение express. Функция createApplication из файла lib/express.js является функцией, экспортируемой по умолчанию, именно к ней мы обращаемся, выполняя вызов функции express(). Вот некоторые важные вещи, на которые тут стоит обратить внимание:
// ...
var mixin = require('merge-descriptors');
var proto = require('./application');
// ...
function createApplication() {
// Это возвращаемая переменная приложения, о которой мы поговорим позже.
// Обратите внимание на сигнатуру функции: `function(req, res, next)`
var app = function(req, res, next) {
app.handle(req, res, next);
};
// ...
// Функция `mixin` назначает все методы `proto` методам `app`
// Один из этих методов - метод `get`, который был использован в примере.
mixin(app, proto, false);
// ...
return app;
}
Объект app, возвращённый из этой функции — это один из объектов, используемых в коде нашего приложения. Метод app.get добавляется с использованием функции mixin библиотеки merge-descriptors, которая ответственна за назначение app методов, объявленных в proto. Сам объект proto импортируется из lib/application.js.
Создание нового маршрута
Взглянем теперь на код, который ответственен за создание метода app.get из нашего примера.
var slice = Array.prototype.slice;
// ...
/**
* Делегирование вызовов `.VERB(...)` `router.VERB(...)`.
*/
// `methods` это массив методов HTTP, (нечто вроде ['get','post',...])
methods.forEach(function(method){
// Это сигнатура метода app.get
app[method] = function(path){
// код инициализации
// создание маршрута для пути внутри маршрутизатора приложения
var route = this._router.route(path);
// вызов обработчика со вторым аргументом
route[method].apply(route, slice.call(arguments, 1));
// возврат экземпляра `app`, что позволяет объединять вызовы методов в цепочки
return this;
};
});
Интересно отметить, что, помимо семантических особенностей, все методы, реализующие действия HTTP, вроде app.get, app.post, app.put и подобных им, в плане функционала, можно считать одинаковыми. Если упростить вышеприведённый код, сведя его к реализации лишь одного метода get, то получится примерно следующее:
app.get = function(path, handler){
// ...
var route = this._router.route(path);
route.get(handler)
return this
}
Хотя у вышеприведённой функции 2 аргумента, она похожа на функцию app[method] = function(path){...}. Второй аргумент, handler, получают, вызывая slice.call(arguments, 1).
Если в двух словах, то app.<method> просто сохраняет маршрут в маршрутизаторе приложения, используя его метод route, а затем передаёт handler в route.<method>.
Метод маршрутизатора route() объявлен в lib/router/index.js:
// proto - это прототип объявления объекта `_router`
proto.route = function route(path) {
var route = new Route(path);
var layer = new Layer(path, {
sensitive: this.caseSensitive,
strict: this.strict,
end: true
}, route.dispatch.bind(route));
layer.route = route;
this.stack.push(layer);
return route;
};
Неудивительно то, что объявление метода route.get в lib/router/route.js похоже на объявление app.get:
methods.forEach(function (method) {
Route.prototype[method] = function () {
// `flatten` конвертирует вложенные массивы, вроде [1,[2,3]], в одномерные массивы
var handles = flatten(slice.call(arguments));
for (var i = 0; i < handles.length; i++) {
var handle = handles[i];
// ...
// Для каждого обработчика, переданного маршруту, создаётся переменная типа Layer,
// после чего её помещают в стек маршрутов
var layer = Layer('/', {}, handle);
// ...
this.stack.push(layer);
}
return this;
};
});
У каждого маршрута может быть несколько обработчиков, на основе каждого обработчика конструируется переменная типа Layer, представляющая собой слой обработки данных, которая потом попадает в стек.
Объекты типа Layer
И _router, и route используют объекты типа Layer. Для того чтобы разобраться в сущности такого объекта, посмотрим на его конструктор:
function Layer(path, options, fn) {
// ...
this.handle = fn;
this.regexp = pathRegexp(path, this.keys = [], opts);
// ...
}
При создании объектов типа Layer им передают путь, некие параметры, и функцию. В случае нашего маршрутизатора этой функцией является route.dispatch (подробнее о ней мы поговорим ниже, в общих чертах, она предназначена для передачи запроса отдельному маршруту). В случае с самим маршрутом, эта функция является функцией-обработчиком, объявленной в коде нашего примера.
У каждого объекта типа Layer есть метод handle_request, который отвечает за выполнение функции, переданной при инициализации объекта.
Вспомним, что происходит при создании маршрута с использованием метода app.get:
- В маршрутизаторе приложения (
this._router) создаётся маршрут. - Метод маршрута
dispatchназначается в качестве метода-обработчика соответствующего объектаLayer, и этот объект помещают в стек маршрутизатора. - Обработчик запроса передаётся объекту
Layerв качестве метода-обработчика, и этот объект помещается в стек маршрутов.
В итоге все обработчики хранятся внутри экземпляра app в виде объектов типа Layer, которые находятся внутри стека маршрутов, методы dispatch которых назначены объектам Layer, которые находятся в стеке маршрутизатора:
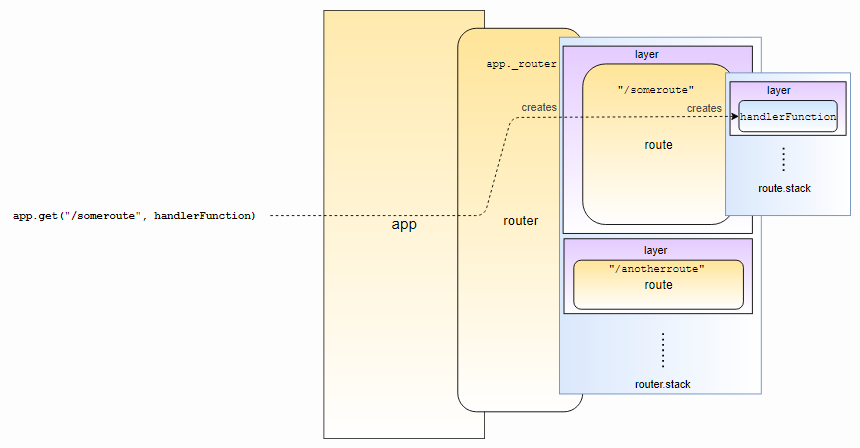
Объекты типа Layer в стеке маршрутизатора и в стеке маршрутов
Поступающие HTTP-запросы обрабатываются в соответствии с этой логикой. Мы поговорим о них ниже.
Запуск HTTP-сервера
После настройки маршрутов надо запустить сервер. В нашем примере мы обращаемся к методу app.listen, передавая ему в качестве аргументов номер порта и функцию обратного вызова. Для того чтобы понять особенности этого метода, мы можем обратиться к файлу lib/application.js:
app.listen = function listen() {
var server = http.createServer(this);
return server.listen.apply(server, arguments);
};
Похоже, что app.listen — это просто обёртка вокруг http.createServer. Такая точка зрения имеет смысл, так как если вспомнить то, о чём мы говорили в самом начале, app — это просто функция с сигнатурой function(req, res, next) {...}, которая совместима с аргументами, необходимыми для http.createServer (сигнатурой этого метода является function (req, res) {...}).
После понимания того, что, в итоге, всё, что даёт нам express.js, может быть сведено к весьма интеллектуальной функции-обработчику, фреймворк выглядит уже не таким сложным и таинственным, как раньше.
Обработка HTTP-запроса
Теперь, когда мы знаем, что app — это всего лишь обработчик запросов, проследим за путём, который проходит HTTP-запрос внутри приложения express. Этот путь ведёт его в объявленный нами обработчик.
Сначала запрос поступает в функцию createApplication (lib/express.js):
var app = function(req, res, next) {
app.handle(req, res, next);
};
Потом он идёт в метод app.handle (lib/application.js):
app.handle = function handle(req, res, callback) {
// `this._router` - это место, где мы объявили маршрут, используя `app.get`
var router = this._router;
// ...
// Запрос попадает в метод `handle`
router.handle(req, res, done);
};
Метод router.handle объявлен в lib/router/index.js:
proto.handle = function handle(req, res, out) {
var self = this;
//...
// self.stack - это стек, в который были помещены все
//объекты Layer (слои обработки данных)
var stack = self.stack;
// ...
next();
function next(err) {
// ...
// Получение имени пути из запроса
var path = getPathname(req);
// ...
var layer;
var match;
var route;
while (match !== true && idx < stack.length) {
layer = stack[idx++];
match = matchLayer(layer, path);
route = layer.route;
// ...
if (match !== true) {
continue;
}
// ... ещё некоторые проверки для методов HTTP, заголовков и так далее
}
// ... ещё проверки
// process_params выполняет разбор параметров запросов, в данный момент это не особенно важно
self.process_params(layer, paramcalled, req, res, function (err) {
// ...
if (route) {
// после окончания разбора параметров вызывается метод `layer.handle_request`
// он вызывается с передачей ему запроса и функции `next`
// это означает, что функция `next` будет вызвана снова после того, как завершится обработка данных в текущем слое
// в результате, когда функция `next` будет вызвана снова, запрос перейдёт к следующему слою
return layer.handle_request(req, res, next);
}
// ...
});
}
};
Если описать происходящее в двух словах, то функция router.handle проходится по всем слоям в стеке, до тех пор, пока не найдёт тот, который соответствует пути, заданному в запросе. Затем будет произведён вызов метода слоя handle_request, который выполнит заранее заданную функцию-обработчик. Эта функция-обработчик является методом маршрута dispatch, который объявлен в lib/route/route.js:
Route.prototype.dispatch = function dispatch(req, res, done) {
var stack = this.stack;
// ...
next();
function next(err) {
// ...
var layer = stack[idx++];
// ... проверки
layer.handle_request(req, res, next);
// ...
}
};
Так же, как и в случае с маршрутизатором, при обработке каждого маршрута осуществляется перебор слоёв, которые есть у этого маршрута, и вызов их методов handle_request, которые выполняют методы-обработчики слоёв. В нашем случае это обработчик запроса, который объявлен в коде приложения.
Здесь, наконец, HTTP-запрос попадает в область кода нашего приложения.

Путь запроса в приложении express
Итоги
Здесь мы рассмотрели лишь основные механизмы библиотеки express.js, те, которые ответственны за работу веб-сервера, но эта библиотека обладает и многими другими возможностями. Мы не останавливались на проверках, которые проходят запросы до поступления их в обработчики, мы не говорили о вспомогательных методах, которые доступны при работе с переменными res и req. И, наконец, мы не затрагивали одну из наиболее мощных возможностей express. Она заключается в использовании промежуточного программного обеспечения, которое может быть направлено на решение практически любых задача — от разбора запросов до реализации полноценной системы аутентификации.
Надеемся, этот материал помог вам разобраться в основных особенностях устройства express, и теперь вы, при необходимости, сможете понять всё остальное, самостоятельно проанализировав интересующие вас части исходного кода этой библиотеки.
Уважаемые читатели! Пользуетесь ли вы express.js?

Express.js — это быстрый, непринужденный и минималистичный веб-фреймворк для Node.js, который облегчает создание веб-приложений и API. В данной статье мы познакомимся с основами работы с Express.js и научимся использовать его для создания простого веб-приложения.
Установка Express.js
Для начала работы с Express.js вам потребуется установить Node.js на вашем компьютере. Затем, чтобы установить Express.js, выполните следующую команду:
npm install express --save
Создание простого веб-приложения
Теперь, когда Express.js установлен, давайте создадим простое веб-приложение. Создайте файл с именем app.js и добавьте в него следующий код:
const express = require('express');
const app = express();
const port = 3000;
app.get('/', (req, res) => {
res.send('Hello World!');
});
app.listen(port, () => {
console.log(`Example app listening at http://localhost:${port}`);
});
Этот код создает базовое веб-приложение, которое отвечает «Hello World!» на запросы к главной странице. Запустите приложение, выполнив следующую команду:
node app.js
Теперь откройте веб-браузер и перейдите по адресу http://localhost:3000. Вы увидите сообщение «Hello World!».
Веб-разработчик: новая работа через 9 месяцев
Получится, даже если у вас нет опыта в IT
Получить
программу

Работа с роутами
Express.js позволяет легко управлять маршрутами вашего веб-приложения. Давайте добавим новый маршрут в наше приложение:
app.get('/about', (req, res) => {
res.send('This is the About page');
});
Теперь, если вы перейдете по адресу http://localhost:3000/about, увидите сообщение «This is the About page».
Использование мидлвар (промежуточных обработчиков)
Мидлвары — это функции, которые имеют доступ к объектам запроса (req) и ответа (res) в вашем приложении. Они могут использоваться для выполнения различных задач, таких как логирование, аутентификация и т.д. Давайте создадим простой мидлвар для логирования времени запроса:
app.use((req, res, next) => {
console.log(`Time: ${Date.now()}`);
next();
});
Теперь при каждом запросе к вашему веб-приложению в консоль будет выводиться текущее время.
😉 В заключение, Express.js — это мощный и гибкий веб-фреймворк для Node.js, который позволяет быстро и легко создавать веб-приложения и API. В этой статье мы рассмотрели основы работы с Express.js, но это лишь начало. Рекомендуем изучить дополнительные материалы и продолжить практиковаться для более глубокого понимания возможностей Express.js.