Правильная заточка ножа — дело непростое. По запросу «как точить нож» поисковики выдают массу информации, зачастую противоречивой. Даже чтобы просто разобраться в ней, потребуется немало времени. С заточкой поможет специальный инструмент — электрическая ножеточка. Она приведет в порядок кухонные ножи без лишних трат времени. Подробнее — в нашем материале.
Устройство электрической ножеточки
Корпус ножеточки имеет несколько косых прорезей.

Под корпусом находится электродвигатель. На валу двигателя расположены точильные круги: два или больше.

Если опустить тонкости, заточка ножей строится на двух принципах.
- В процессе надо менять точильные камни от грубых к мелким.
- Следует точно выдерживать угол заточки.
При использовании инструмента нож по очереди по очереди помещается в различные прорези. Под ними расположены камни разной зернистости. Этим обеспечивается постепенная доводка лезвия. Обычно прорези на корпусе пронумерованы — чтобы не перепутать последовательность заточки.

К каждому точильному камню подходят две прорези. Это позволяет точить обе стороны лезвия, не переворачивая инструмент. Некоторые ножи точатся только с одной стороны. Например, зубчатые ножи для резки хлеба и мягких продуктов. Их нужно опускать только в одну из пар прорезей.

При заточке на камне или станке держать нож под правильным углом непросто. Это умение приходит только с опытом. При использовании электрической ножеточки опыт не нужен. Нож сам встанет под правильным углом благодаря направляющим прорезям.

Нужно только плавно и равномерно провести нож несколько раз по каждой прорези.
Перед использованием ножеточки прочитайте инструкцию. В ней будут подробно описаны тонкости работы с инструментом.

Различия разных моделей ножеточек
Углы заточки у ножей разных типов отличаются. Чем меньше угол заточки, тем лучше нож режет при минимальном усилии. Но и тупиться он будет быстрее.
Наиболее универсальной считается заточка лезвия под углом 20° к поверхности точила. При этом полный угол заточки ножа составляет 40°. Для недорогих ножей это оптимальный вариант. Они сделаны из довольно мягкой стали. При меньшем угле заточки их лезвие будет тупиться слишком быстро.

А вот профессиональные ножи из хорошей стали можно точить и с меньшим углом заточки — 17° 15° и 12° (35°, 30° и 25° полного угла).
Некоторые ножеточки могут регулировать угол наклона, но это заметно увеличивает цену прибора.
Толщина ножей бывает разная. Если нож толще прорези, он в нее не полезет.

Если прорезь слишком широкая, нож будет в ней болтаться: так правильный угол выдержать не получится. Для большей универсальности на некоторых ножеточках предусмотрена регулировка ширины прорези. Это позволяет выдержать правильный угол для ножа с любой толщиной лезвия.

В разных моделях применяются различные виды камней. Бюджетные ножеточки оснащены карбидными точильными камнями. Они быстрее изнашиваются. Из-за неравномерного износа качество заточки будет со временем падать.

Карбидные камни при работе образуют мелкую абразивную пыль. Она будет разлетаться вокруг, оседая на корпусе ножеточки и близлежащих поверхностях. Кроме того, пыль будет попадать на двигатель и подшипники ножеточки, ускоряя износ.

В моделях подороже используются диски с алмазным напылением. Они менее подвержены износу и деликатнее воздействуют на лезвие. Алмазные диски лучше справляются с твердыми сталями. Кроме того, керамические ножи можно точить только на алмазном диске.

Несмотря на рекламные утверждения, керамические ножи тоже тупятся и их тоже надо точить. Делать это можно только на камнях с алмазным напылением.
Некоторые ножеточки оснащены мусатом. Мусат — это инструмент для правки кромки ножа. Вещь полезная, но пользоваться ей тоже надо уметь. Главное — правильный угол и степень нажатия.

На ножеточке мусат сразу установлен под нужным углом. Так что опасность повреждения режущей кромки минимальна.

Ножеточки различаются количеством дисков разной зернистости. Обычно хватает двух дисков. Крупнозернистый камень подготавливает лезвие, выравнивая его. Мелкозернистый — точит до нужной остроты режущую кромку.
Но у некоторых моделей бывает и полировальный диск для окончательной доводки лезвия. Он позволяет убрать все неровности режущей кромки, сделав ее максимально гладкой и острой.

Третья ступень может использоваться также для увеличения угла заточки к самой кромке. При таком способе основная режущая кромка заточена под острым углом — 30-25°. К самому острию угол увеличивается до 35-40°. Это позволяет дольше сохранить нож острым. При этом резать он будет лучше, чем нож с обычной заточкой кромки на 40°.

Вручную добиться такой заточки очень сложно. А при наличии ножеточки ее можно выполнить самому, не обращаясь к помощи профессионалов.
Качество заточки ножеточкой
Цена на разные модели ножеточек может отличаться в десятки раз. Соответствует ли качество заточки ножей этой разнице?

Попробуем провести эксперимент. Возьмем два тупых кухонных ножа.

Один заточим на дорогой профессиональной ножеточке, второй — на бюджетной.

При рассмотрении под микроскопом разница видна сразу. У первого ножа кромка гладкая. У второго — зазубренная, пилообразная.
Однако при повседневном использовании особой разницы вы не заметите. Оба ножа хорошо справляются с нежной кожицей помидора и свежим хлебом.
Тест с разрезанием бумаги оба ножа также проходят почти одинаково.
Разница будет заметна только при резке плотных материалов. Подмороженного мяса, твердых овощей, вяленых продуктов. Здесь второй нож будет намного эффективнее. Но только если сталь ножа качественная и он хорошо держит заточку. Иначе он довольно скоро затупится — и разница с первым ножом сойдет на нет.
Выводы
Электрическая ножеточка поможет поддерживать ножи острыми без лишних усилий. Даже самая простая ножеточка способна обеспечить неплохой результат для среднего кухонного ножа. Ну а для заточки ножей из высококачественной стали лучше применять профессиональные модели. Они стоят дороже, но относятся к лезвию бережнее и точат острее.
Chef’s Choice Electric 325 Knife Sharpener Manual
IMPORTANT SAFEGUARDS
When using electrical appliances, basic safety precautions should always be followed including the following:
- Read all instructions.
- To protect against electrical hazards do not immerse the Chef’sChoice® in water or other liquid.
- Make sure that only clean knife blades are inserted in the Chef’sChoice®.
- Unplug from outlet when not in use, before putting on or taking off parts and before cleaning.
- Avoid contacting moving parts.
Do not operate any appliance with a damaged cord or plug or after the appliance malfunctions, or is dropped or damaged in any manner.
U.S. customers: You may return your sharpener to The Legacy Companies’ factory for service where the cost of repair or electrical or mechanical adjustment can be estimated. When the electrical cord on this appliance is damaged, it must be replaced by the Chef’sChoice distributor or other qualified service to avoid the danger of electrical shock.
Outside the U.S.: Please return your sharpener to your local distributor where the cost of repair or electrical or mechanical adjustment can be estimated. If the supply cord of this appliance is damaged, it must be replaced by a repair facility appointed by the manufacturer because special tools are required. Please consult your Chef’sChoice distributor.
«This appliance may be fitted with a polarized plug (one blade is wider than the other). To reduce the risk of electric shock, this plug will fit in a polarized outlet only one way. If the plug does not fit fully in the outlet, reverse the plug. If it still does not fit, contact a qualified electrician. Do not modify the plug in anyway.»
The use of attachments not recommended or sold by The Legacy Companies may cause fire, electric shock, or injury.- The Chef’sChoice® Model 325 is designed to sharpen kitchen knives, pocket knives and most sports knives. Do not attempt to sharpen scissors, ax blades or any blade that does not fit freely in the slots.
- Do not let the cord hang over edge of table or counter or touch hot surfaces.
- When in the «ON» position (Red flash on switch is exposed when «on») the Chef’sChoice® should always be on a stable countertop or table.
KNIVES PROPERLY SHARPENED ON YOUR CHEF’SCHOICE® WILL BE SHARPER THAN YOU EXPECT. TO AVOID INJURY, USE AND HANDLE THEM WITH EXTREME CARE. DO NOT CUT TOWARD ANY PART OF YOUR FINGERS, HAND OR BODY. DO NOT RUN FINGER ALONG EDGE. STORE IN A SAFE MANNER.- Do not use outdoors.
- Close supervision is necessary when any appliance is used by or near children.
- Do not use honing oils, water or any other lubricant with the Chef’sChoice®.
SAVE THESE INSTRUCTIONS.
UNDERSTANDING THE DEVICE
The unique Chef’sChoice® Diamond Hone® Sharpener is designed to sharpen knives with either straight or serrated edges. This two (2) stage sharpener has a precision conical sharpening / honing stage with fine 100% diamond abrasives and a unique polishing/ stropping stage using proprietary flexible abrasive disks. This combination can be used to create either an astonishingly sharp, smooth faceted edge for effortless cutting and presentations or one with a selected amount of residual «bite» along the facets.
The sharpening and honing actions are controlled by using precisely angled guides for the blade and precisely matched conically surfaced abrasive disks. The sharpening angle is slightly larger in Stage 2 than in Stage 1.
Fine diamond-coated conical disks in Stage 1 create microgrooves along the facets on each side of the edge establishing the first angled bevel of the edge.
In Stage 2 ultrafine abrasive disks polish and strop the facets immediately adjacent to the edge creating a microbevel and establish a microscopically thin straight and super polished edge of astonishing sharpness. The stropping action simultaneously polishes and sharpens the boundaries of those microgrooves created by the diamond abrasives in Stage 1 adjacent to the edge until they become sharp micro flutes that will assist the cutting action with «difficult to cut» materials.
This unique two stage design gives you an edge of remarkable sharpness and because of the second angle bevel it creates, you will note knives stay sharp longer than those sharpened by conventional means.
The following sections describe the general procedures for optimal sharpening. One of the important advantages of using the Model 325 is that you can strop and polish your knives to razor sharp edges as often as needed and yet experience little knife wear compared to older sharpening methods. Resharpening can commonly be done by using just the stropping action of Stage 2. (See Resharpening Section).
The Chef’sChoice Model 325 Sharpener is equipped with manually activated diamond dressing pads that can be used if necessary to clean any accumulated food or sharpening debris off the surface of the polishing/stropping disks. We strongly urge you to clean knives before sharpening them. You will find you can go months or over a year before you need to dress these disks. Only if you sense a distinct decrease in polishing efficiency will there by any need to use this convenient feature described further in a subsequent section.
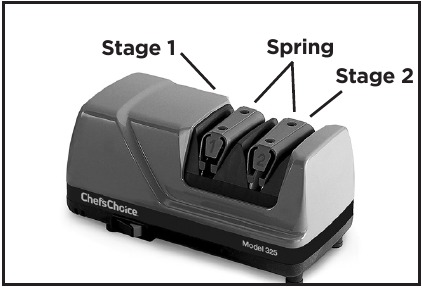
Each sharpening Stage is equipped with elastomeric guide springs positioned over the sharpening disks to provide a spring action that holds the face of your knife securely against the precision guides in the right and left slots of each stage during sharpening.
Unless you have special blades designed to be sharpened primarily on one side of the edge (such as Asian Kataba blades) you will want to sharpen equally in the right and left slots of each stage you use. This will ensure that the facets on each side of the edge are of equal size and that the edge will cut straight at all times.
When sharpening in either stage, the knife should, on sequential strokes, be pulled alternately through the left slot and the right slot of that Stage. Generally only one or two pairs of pulls (alternating in the left and right slots) will be adequate in each stage (see subsequent sections for more detail). Always operate the sharpener from the front side. Hold the blade horizontal and level and slide it down between the plastic spring and the guide plane while pulling it toward you at a uniform rate as it contacts the sharpening or stropping disk. You will be able to feel and hear the contact with the disk as it is made. Always keep the blade moving uniformly through each stage; do not stop the pull in mid stroke. Consistently pull at a speed of about 5 seconds per stroke for an eight (8) inch
Never operate the sharpener from the back side.
Use just enough downward pressure when sharpening to ensure uniform and consistent contact of the blade with the abrasive disks on each stroke. Additional pressure is unnecessary and will not speed the sharpening process. Avoid cutting into the plastic enclosure. Accidental cutting into the enclosure will not functionally impact operations of the sharpener or damage the edge.
Figure 1 below identifies each of the two stages as described further in the following sections.
Figure 1. Model 325 Diamond Hone ® Sharpener.
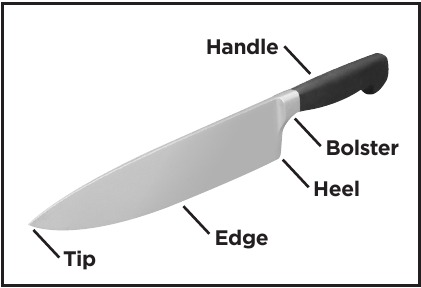
Figure 2. Typical kitchen knife.
INSTRUCTIONS
READ THIS BEFORE YOU START TO SHARPEN
The Chef’sChoice® Model 325 is designed to sharpen either Straight edge or Serrated edge blades.
- Sharpen Serrated Blades Only in Stage 2. Do not sharpen serrated blades in Stage 1 until you read section titled Procedure for Sharpening Serrated Blades.
- Straight Edge Blades are sharpened in Stages 1 and 2. Start in Stage 1 if the knife is being sharpened for the first time or if the knife is very dull. See following Section for more details.
PROCEDURE FOR SHARPENING STRAIGHT EDGE BLADES
STRAIGHT EDGE BLADES SHARPENING FIRST TIME
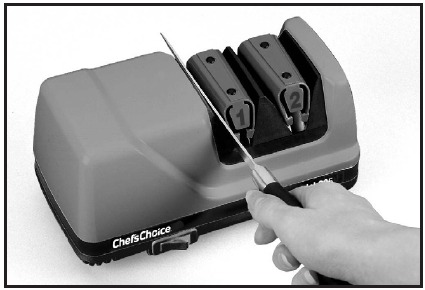
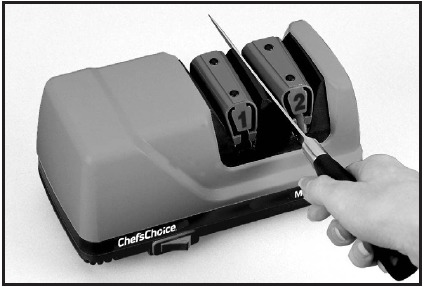
Before you turn on the power, slip a knife blade smoothly into the slot between the left angle guide of Stage 1 and the elastomeric spring. Do not twist the knife. (See Figure 3.)
Move the blade down in the slot until you feel it contact the diamond disk. Pull it towards you lifting the handle slightly as you approach the tip. This will give you a feel for the spring tension. Remove the knife and press the Power Switch. A red «indicator» on the switch appears when this switch is turned «ON.»
Stage 1
If you are sharpening a straight-edge knife for the first time, start in Stage 1. Pull the knife once through the left slot of Stage 1 (Figure 3) by slipping the blade between the left angle guide and the polymeric spring while pulling the blade toward you and simultaneously moving the blade downward in the slot until it engages the diamond coated disk. You will hear it make contact with the disk. Insert the blade as close as possible to its bolster or handle. If the blade is curved, lift the handle slightly as you sharpen near the tip of the knife, keeping the blade edge approximately parallel to the table. Sharpen the entire blade length. For an eight (8) inch blade each pull should take about 5 seconds. Pull shorter blades through in 2-3 seconds and longer blades in 6 seconds. Next, repeat with one full length pull in the right slot of Stage 1.
Note: Each time you insert the blade, simultaneously pull the blade toward you. Never push the blade away from you. Apply just enough downward pressure to make contact with the wheel – added pressure does not speed up the sharpening process.
Figure 3. Stage 1. Inserting blade in slot between guide and elastomeric spring. Alternate individual pulls in left and right slots.
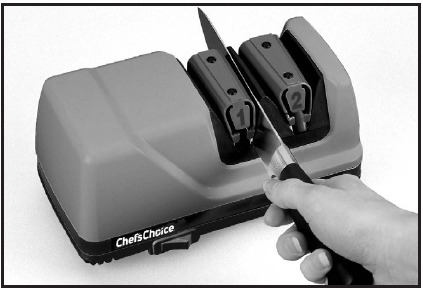
Figure 4. Inserting blade in right slot of Stage 1.
To ensure uniform sharpening along the entire blade length, insert the blade near its bolster or handle and pull it at a steady rate until it exits the slot. Always make an equal number of pulls alternating one pull in the left slot and then one pull in the right slot in order to keep the edge facets symmetrical. Generally in Stage 1 you will find that only one or two pairs of pulls is adequate.
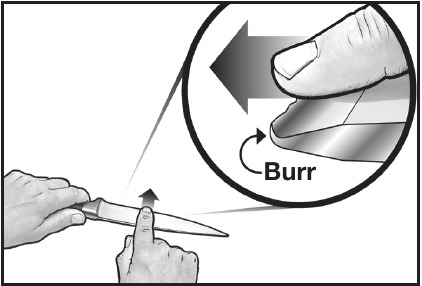
Before moving to Stage 2 you will find it helpful to confirm that a burr (see Figure 5) exists along one side of the edge. To check for the burr, move your forefinger carefully across the edge as shown. (Do not move your finger along the edge – to avoid cutting your finger). If the last pull was in the right slot, the burr will appear only on the right side of the blade (as you hold it) and vice versa. The burr, when present, feels like a rough and bent extension of the edge; the opposite side of the edge feels very smooth by comparison. If a burr exists along the entire edge, proceed to Stage 2.
If no burr exists, make one (1) additional pull in the left and right slots of Stage 1 before proceeding to Stage 2. Slower pulls will help you develop the burr. Confirm the presence of the burr and proceed to Stage 2. It is always necessary to create the burr in Stage 1 before stropping in Stage 2.
If the knife is extremely dull, additional pulls in Stage 1 may be needed before proceeding to Stage 2.
Figure 5. Develop a distinct burr along knife edge before stropping in stage 2. Burr can be detected by sliding finger across and away from the edge.
See text.
Stage 2
In general only one or two pairs of pulls in Stage 2 will be necessary to obtain a razor sharp edge. Make alternate pulls in left (Figure 6) and right slots pulling the knife through the slots at the same speed used in Stage 1.
Figure 6. Inserting blade in left slot of Stage 2. Alternate individual pulls in left and right slots.
Added pulls in Stage 2 will refine the edge further, creating an edge ideal for gourmet preparations. Fewer pulls in Stage 2 may be preferable if you will be cutting fibrous foods as discussed in more detail in the following sections.
OPTIMIZING THE KNIFE EDGE
GOURMET FOOD PREPARATION
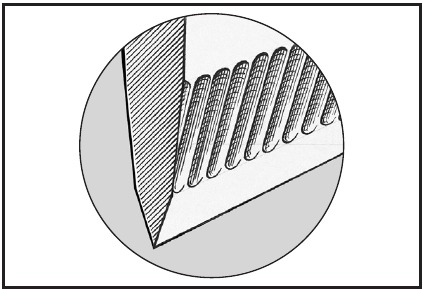
Where the finest and smoothest cuts are preferred in preparing smooth, unmarked sections of fruits or vegetables, sharpen in Stage 1 and 2 as described above and make extra pulls through Stage 2. Three or more pairs of pulls with each pull alternating in the left and right slots of Stage 2 will refine the second facet and create remarkably smooth and sharp edges, (Figure 7) ideal for the gourmet chef.
Figure 7. A larger polished facet adjacent to edge is ideal for gourmet preparations.
When resharpening the Gourmet edge, use Stage 2, (alternating left and right slots). If after a number of resharpenings, it is taking too long to resharpen, you can speed the process by resharpening first in Stage 1 following the procedures detailed, and then resharpen in Stage 2. This procedure, unlike conventional sharpening, will give you extraordinarily sharp knives every day while removing very little metal and prolonging the life of your knives.
FOR GAME, FISH AND FIBROUS MATERIALS
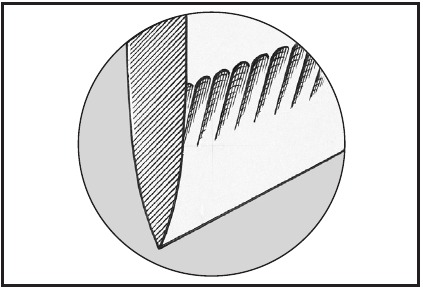
For cutting more fibrous materials you may find it advantageous to sharpen in Stage 1 – followed directly by only one alternating pair of pulls in Stage 2. This will leave sharpened microflutes along the facets nearer to each side of the edge (Figure 
Figure 8. Retention of larger microflutes adjacent to edge helps when cutting fibrous foods.
To prepare this type edge, sharpen in Stage 1 until a burr is developed along the entire edge. Then move to Stage 2 and make just one pair of pulls.
To resharpen this type of edge, sharpen in Stage 1 until you develop a burr and then make one pair of pulls in Stage 2.
PROCEDURE FOR SHARPENING SERRATED BLADES
Serrated blades are similar to small saw blades with scalloped depressions and a series of pointed teeth. In normal use the pointed teeth do most of the cutting.
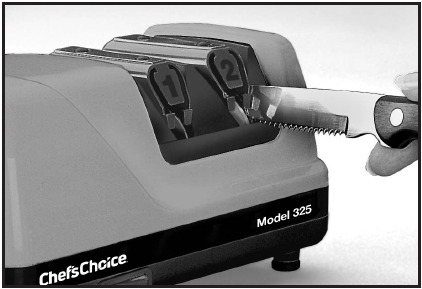
Serrated blades of all types can be sharpened in the Chef’sChoice® Model 325. However, use only Stage 2 (Figure 9), which will sharpen the teeth of the serrations and develop microblades along the edge of these teeth. Generally five (5) to ten (10) pairs of alternating pulls in Stage 2 will be adequate. If the serrated knife is very dull more pulls will be needed. If the knife edge has been severely damaged through use, make just one fast pull (2-3 seconds for an 8″ blade) in each of the right and left slots in Stage 1, then make a series of pulls in Stage 2, alternating right and left slots. Excessive use of Stage 1 will remove more metal along the edge than is necessary in order to sharpen the teeth.
Figure 9. Sharpen serrated blades only in Stage 2. (See instructions).
Because serrated blades are saw-like structures, the edges will never appear to be as «sharp» as the edge on a straight edge knife. However, their tooth-like structure can help break the skin on hard crusty foods.
DRESSING TOOL FOR CLEANING OF STROPPING/POLISHING DISKS – STAGE 2
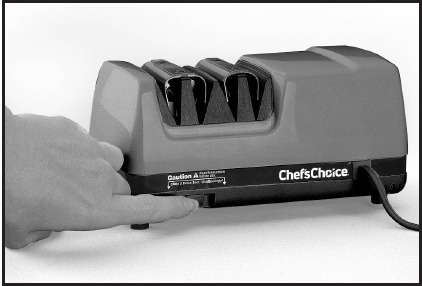
The Chef’sChoice® Model 325 is equipped with a built-in accessory to manually clean/ dress the stropping disks in Stage 2. In the event these disks become glazed with grease, food or sharpening debris, they can be cleaned and reshaped by actuating the manual lever on the rear of the sharpener. This lever is located within a recess as shown in Figure 10 on the left lower corner as you face the rear of Model 325.
Figure 10. Stage 2 disks can be cleaned if necessary. Use infrequently. (See instructions).
To actuate the cleaning/dressing tool, make sure the power is on and simply press the small lever in the recess to the right or left and hold for 3 seconds. Then press the lever in opposite direction and hold for 3 seconds. When the lever is moved in one direction, the dressing tool cleans and reshapes the active surface of one stropping/polishing disk. By moving in the opposite direction you clean the other disk.
Use this clean/dress accessory only if and when Stage 2 no longer appears to be sharpening well or when it takes too many pulls to obtain a razor sharp edge. Using this tool removes material from the surface of the Stage 2 disk and hence if used excessively will unnecessarily remove too much of the abrasive surface – wearing the disks out prematurely. If that should occur, factory replacement of the disks will become necessary.
If you clean knives regularly before sharpening, you will need to clean or dress the Stage 2 disks only about once a year or perhaps less frequently.
RESHARPENING
SEE PREVIOUS SECTIONS
Resharpen straight edge knives whenever practical using Stage 2. When that fails to quickly resharpen, return to Stage 1 and make one or two pairs of alternating pulls. Check for a burr along the edge and then return to Stage 2 where only one to two alternating pair of pulls will be adequate to put a new razor-like edge on the knife.
Resharpen serrated blades in Stage 2. See sections above.
SUGGESTIONS
- Always clean all food, fat, and foreign materials from knife before sharpening or resharpening. If soiled, wash the blade before sharpening.
- Use only light downward pressure when sharpening – just enough to establish secure contact with the abrasive disk.
- Always pull the blades at the recommended speed and at a constant rate over length of blade. Never interrupt or stop the motion of the blade when in contact with the abrasive disks.
- Always alternate individual pulls in right and left slots (of any stage used). Specialized Japanese blades are an exception and are sharpened primarily on one side of the blade.
- The edge of the knife blade, while sharpening, should be held in a level position relative to the top of the counter or table. To sharpen the blade near the tip of a curved blade, lift the handle up slightly as you approach the tip so that each section along the curved length of the edge as it is being sharpened is maintained «level» to the table.
- There is no need or advantage to using a «sharpening steel» on knives sharpened on the Chef’sChoice® Model 325. Consider resharpening with the manual Chef’sChoice® sharpener Model 450 if you are using knives at a remote location away from electrical power. It is recommended that you keep the Model 325 readily accessible and resharpen often, as described in the Sections above.
- Used correctly, you will find you can sharpen the entire blade to within 1/8″ of the bolster or handle. This is a major advantage of the Chef’sChoice® Model 325 compared to other sharpening methods – especially important when sharpening chef’s knives where you need to sharpen the entire blade length in order to maintain the curvature of the edge line. If your chef’s knives have a heavy bolster near the handle extending to the edge, a commercial grinder can modify or remove the lower portion of the bolster so that it will not interfere with the sharpening action allowing you to sharpen the entire blade length.
- To increase your proficiency with the Chef’sChoice® Model 325, learn how to detect a burr along the edge (as described above). While you can sharpen well without using this technique, it is the best and fastest way to determine when you have sharpened sufficiently in Stage 1. This will help you avoid oversharpening and ensure incredibly sharp edges every time. Cutting a tomato or a piece of paper is a convenient method of checking for blade sharpness.
NORMAL MAINTENANCE
NO lubrication is required for any moving parts, motor, bearings or sharpening surfaces. There is no need for water on abrasives. The exterior of the sharpener may be cleaned by carefully wiping with a damp cloth. Do not use detergents or abrasives.
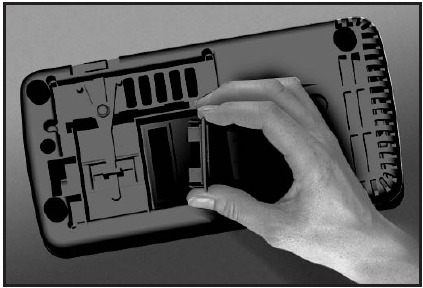
Once a year or so as needed, you can remove metal dust that will accumulate inside the sharpener from repeated sharpenings. Remove the small rectangular clean-out cover (Figure 11) that covers an opening on the underside of the sharpener. You will find metal particles adhered to a magnet attached to the inside of that cover. Simply rub off or brush off accumulated filings from the magnet with a paper towel or tooth brush and reinsert the cover in the opening. If larger amounts of metal dust have been created or if the Stage 2 disk has been cleaned (using the cleaning/dressing tool) you can shake out any remaining dust through the bottom opening when the cover is removed. After cleaning, replace the cover securely with its magnet in place.
Figure 11. Clean-out cover.
SERVICE
In the event post-warranty service is needed, return your sharpener to The Legacy Companies’ factory where the cost of repair can be estimated before the repair is undertaken. Outside the USA, contact your retailer or national distributor.
Please include your return address, daytime telephone number and a brief description of the problem or damage on a separate sheet inside the box. Retain a shipping receipt as evidence of shipment and as your protection against loss in shipment.
Documents / Resources
Download manual
Here you can download full pdf version of manual, it may contain additional safety instructions, warranty information, FCC rules, etc.
Download Chef’s Choice Electric 325 Knife Sharpener Manual
Точилки Lansky значительно упрощают процесс обработки ножей благодаря своей продуманной конструкции, отличающейся простотой.
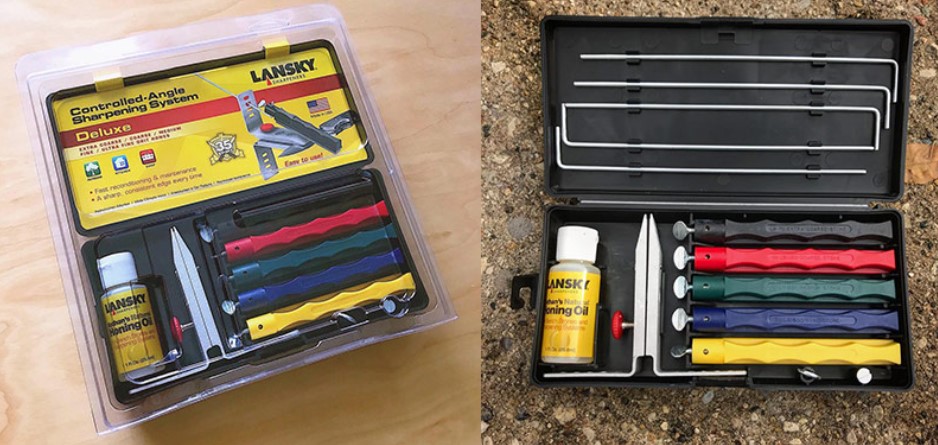
В этой статье вы найдете пошаговое описание процесса заточки и нюансы, влияющие на качество процесса. Пользоваться будем точилкой Lansky Deluxe, поэтому вначале коротко с ней познакомимся.
5%скидка
Для читателей нашего блога
скидка 5% на весь
ассортимент
Ваш промокод:BLOGСмотреть все товары
Описание точилки
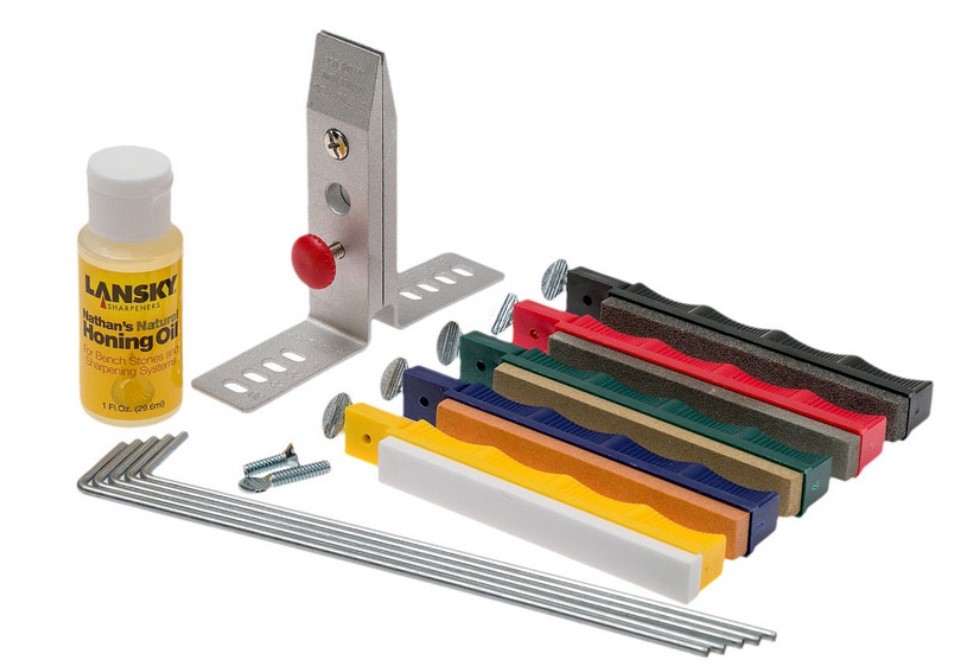
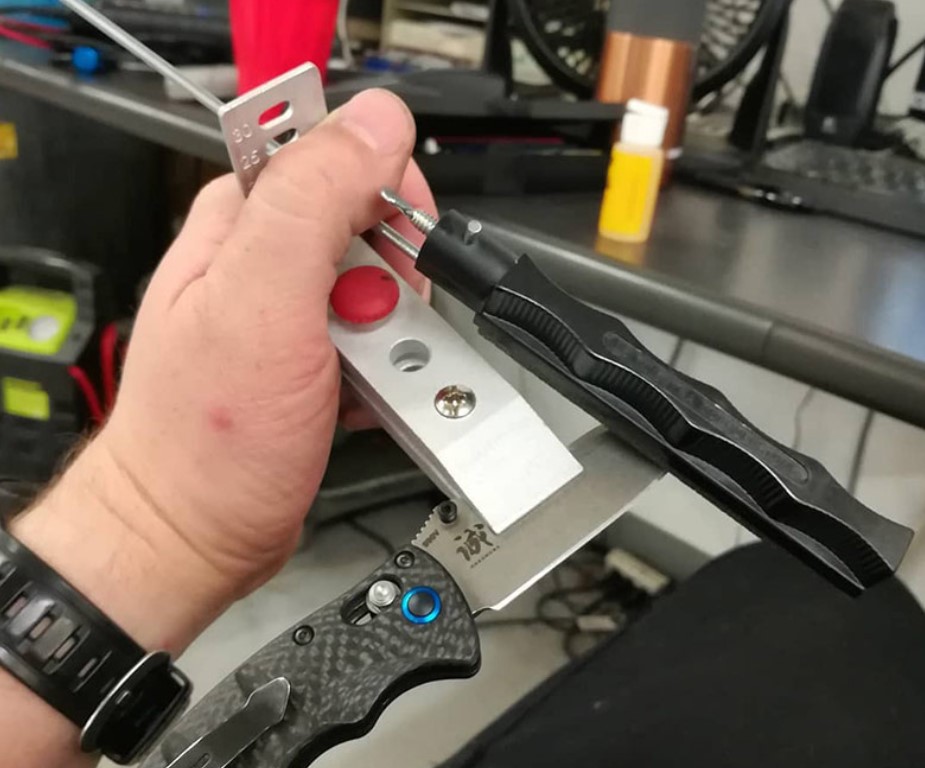
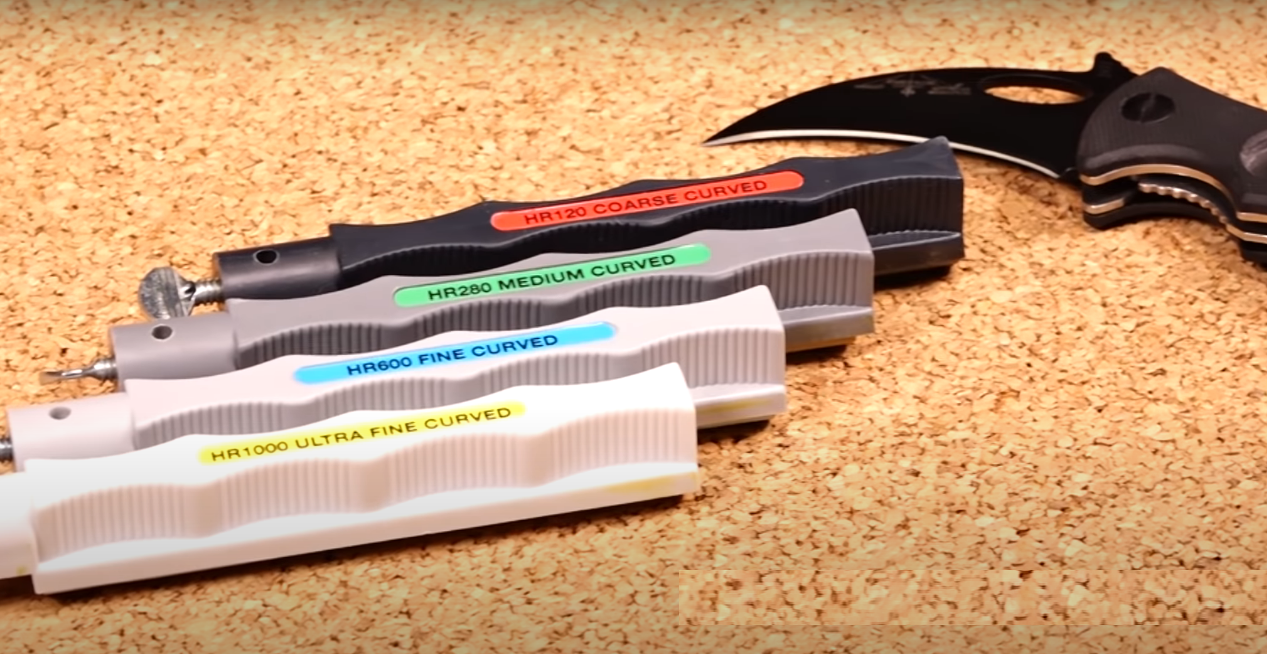
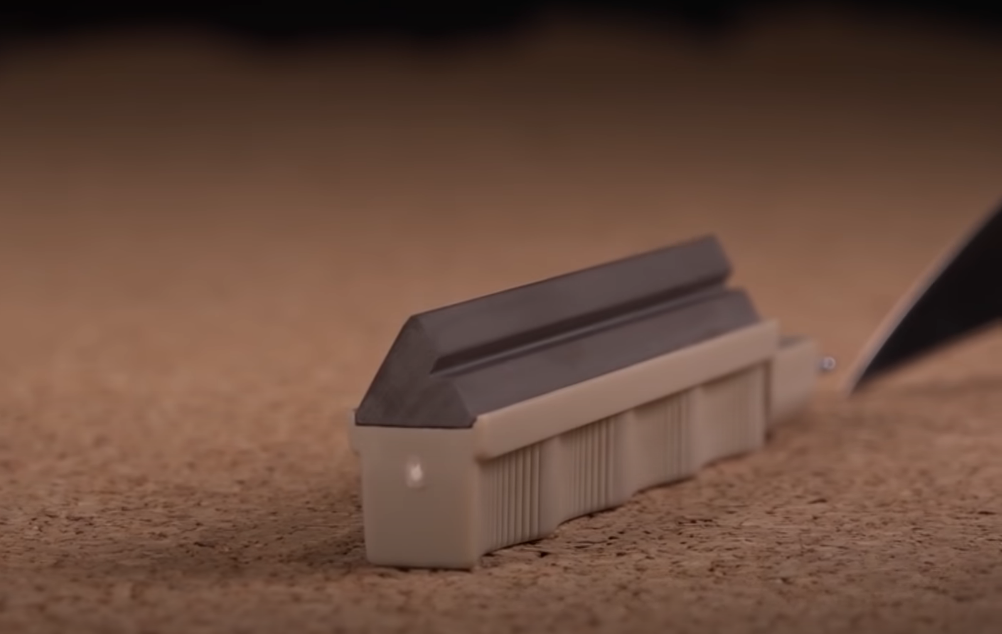
Набор поставляется в квадратной пластиковой коробке с защелкой спереди. В комплект входят: 5 камней (зернистость 70, 120, 280, 600, 1000), 5 отдельных стержней из нержавеющей стали, двусторонний зажим с угловыми пазами, крепежный винт с плоской головкой для зажима и дополнительный винт с накатанной головкой для стержней. Также есть небольшая бутылочка масла для шлифовки.
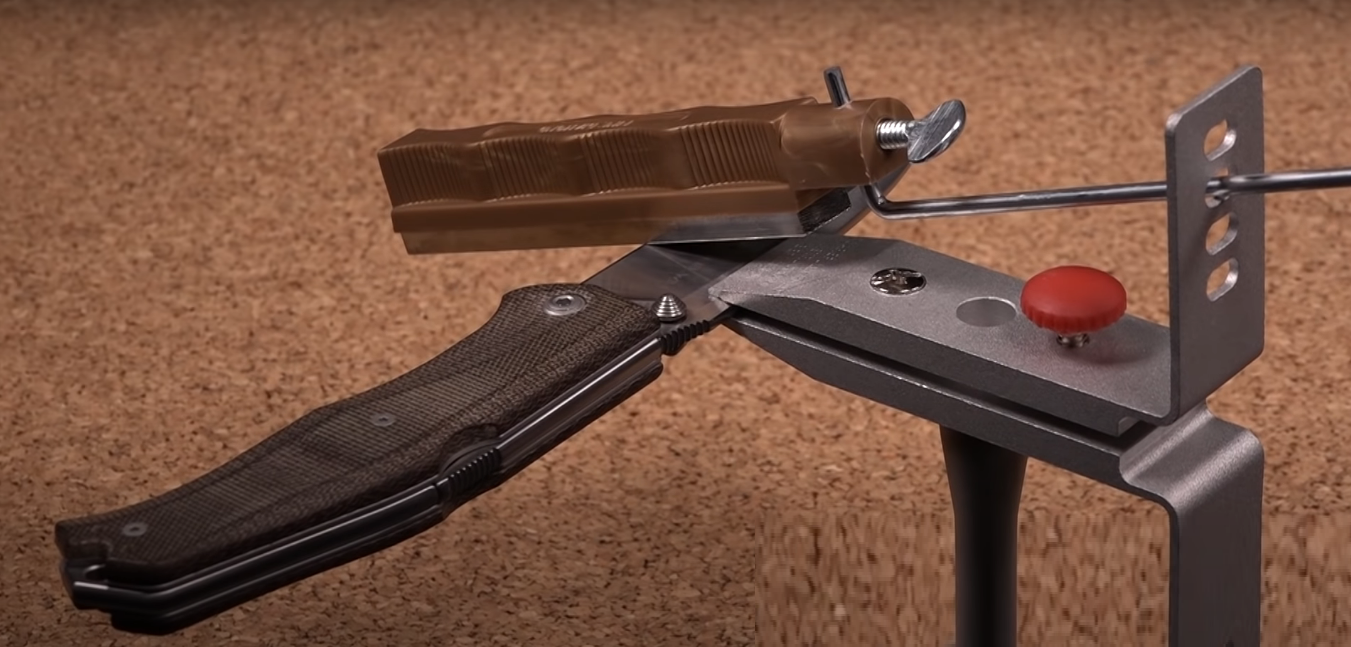
Камни вставлены в пластиковые ручки и приклеены (предположительно, с помощью клея) на место. Рукоятки разного цвета для разных зернистостей: черные для 70, красные для 120, зеленые для 280, синие для 600 и желтые для 1000. Все они имеют формованную «зажимную рукоятку» сзади с 4 отдельными точками, где вы можете зажать ручку между большим и указательным пальцами, чтобы удерживать ее.
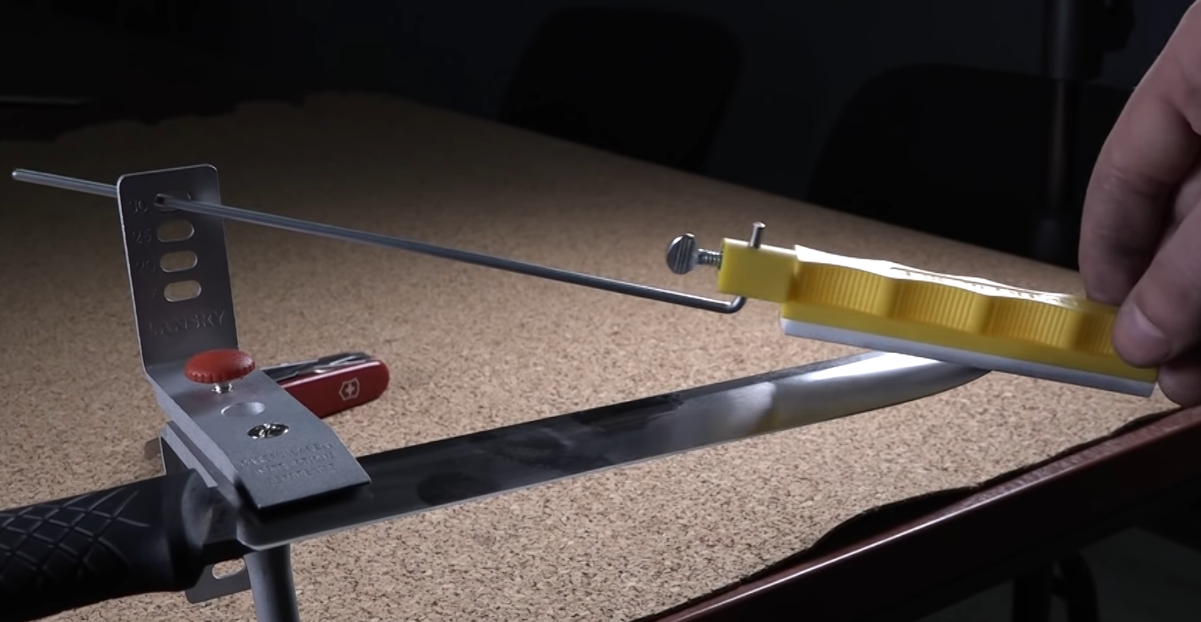
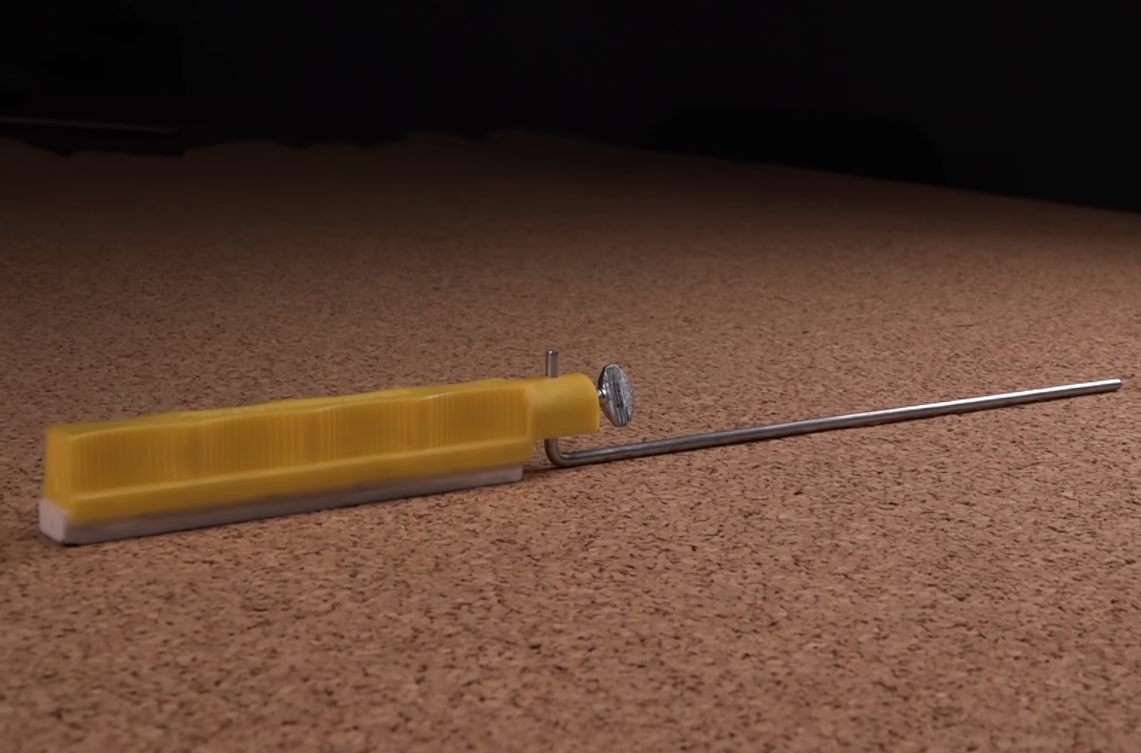
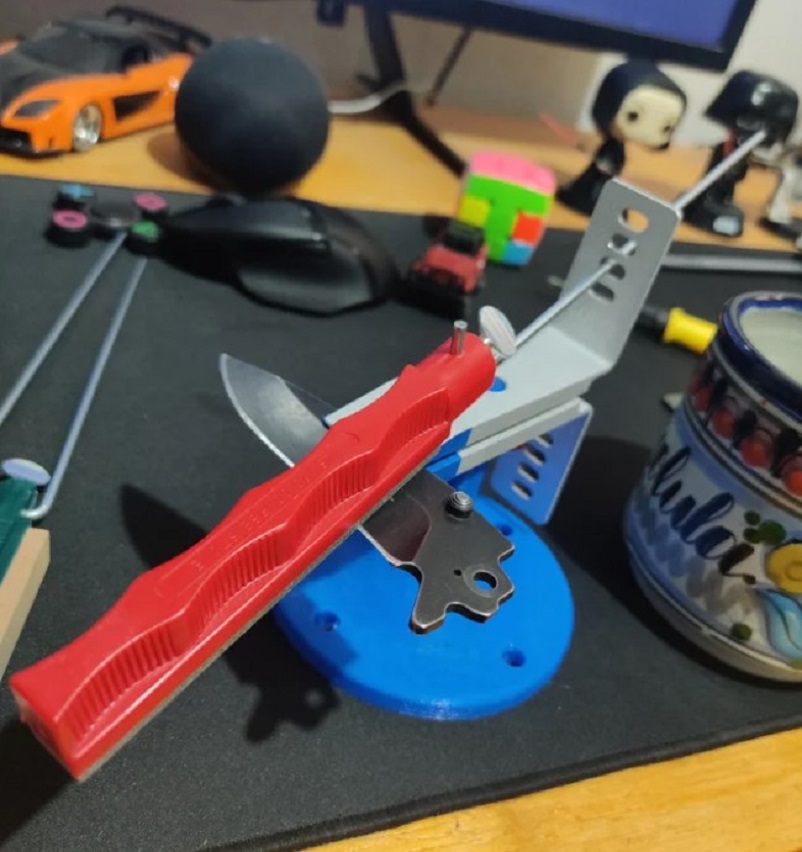
В задней части каждой ручки (на одной линии с камнем) есть резьбовая вставка и вертикальное отверстие, через которое вы продеваете перевернутый на 90 градусов конец стержня, а затем затягиваете винт с накатанной головкой, чтобы закрепить его.
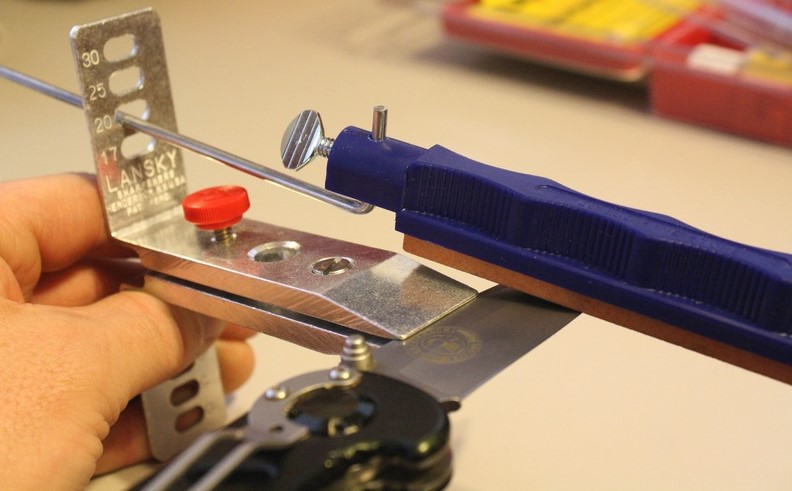
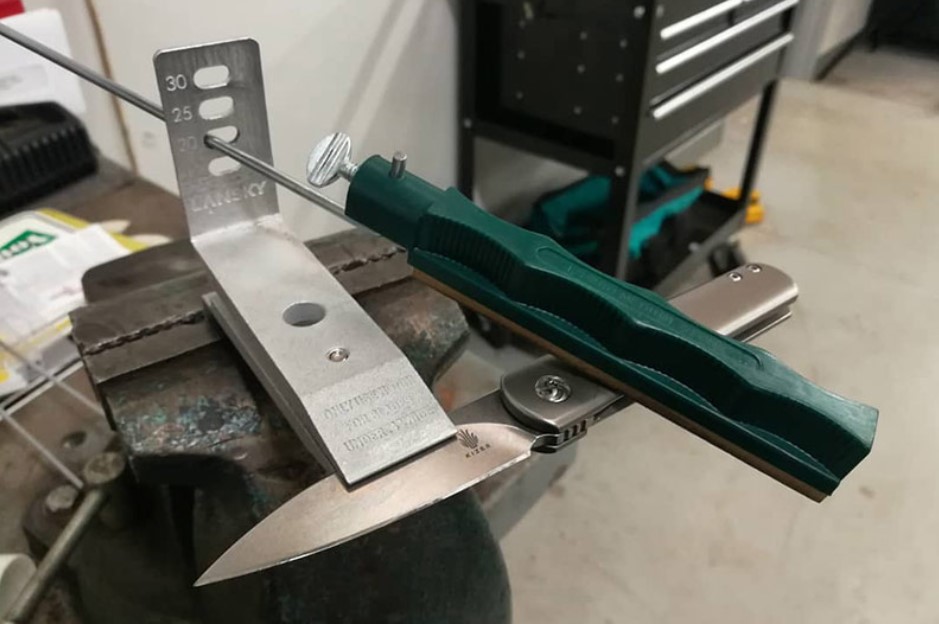
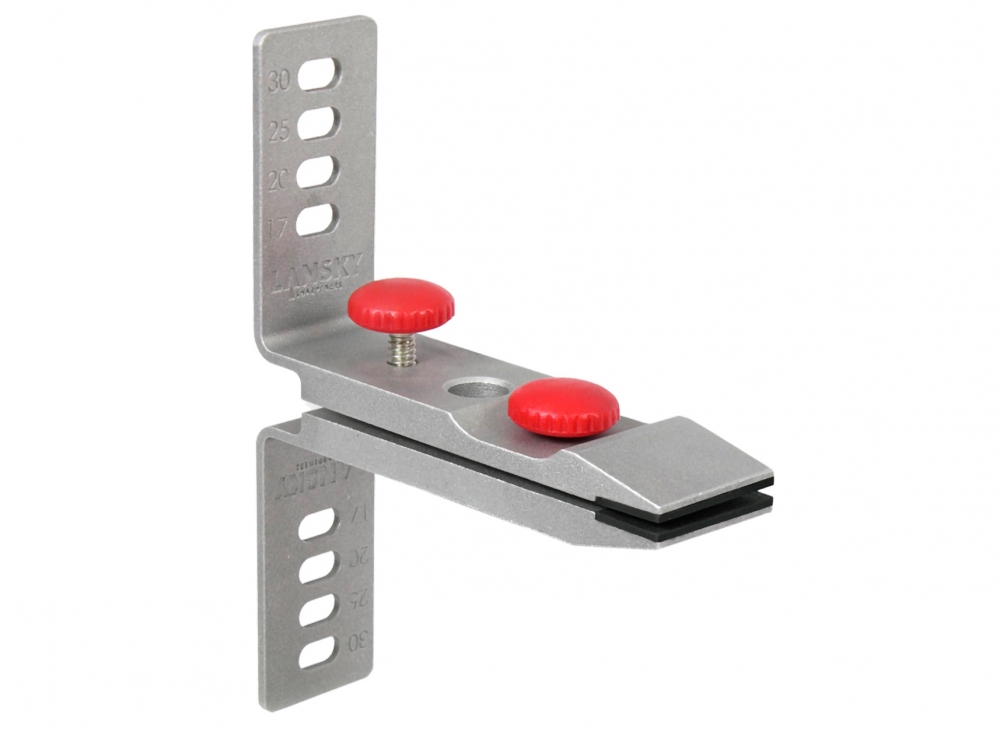
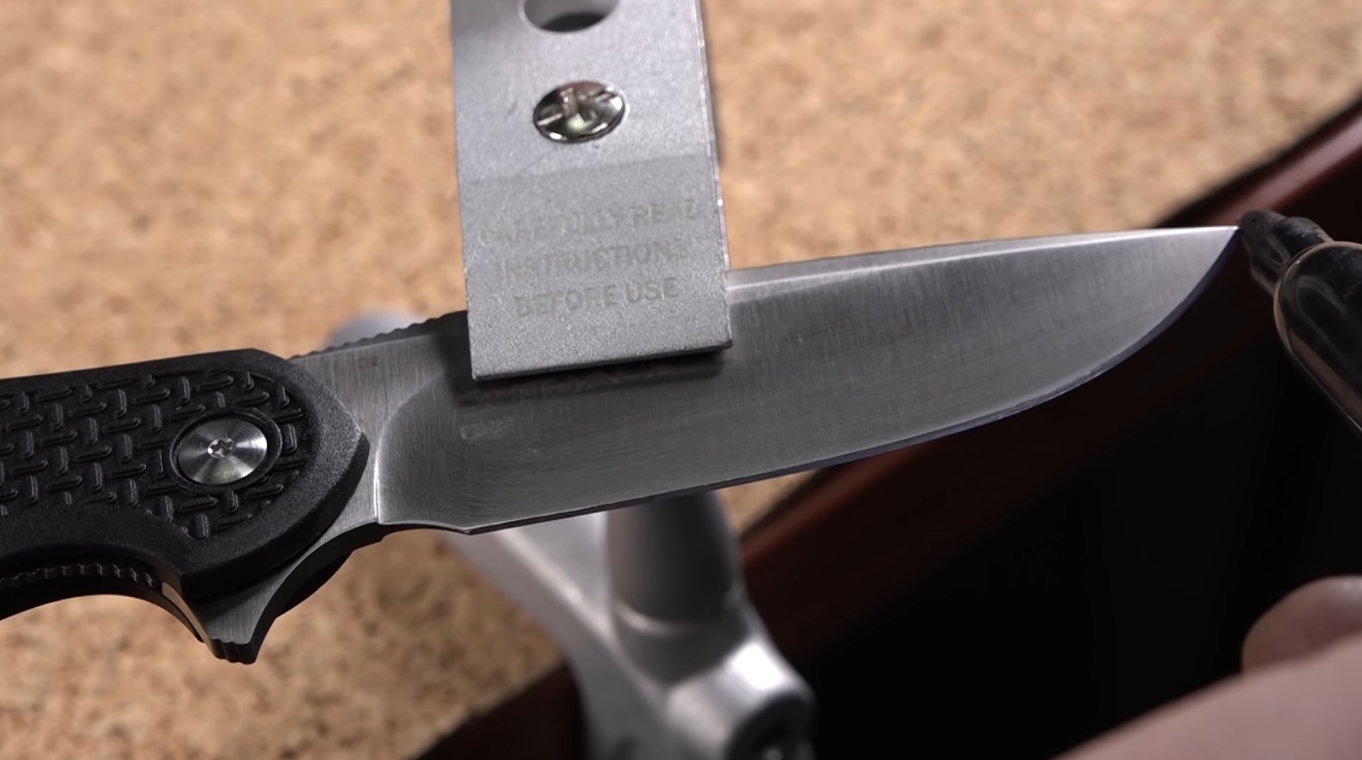
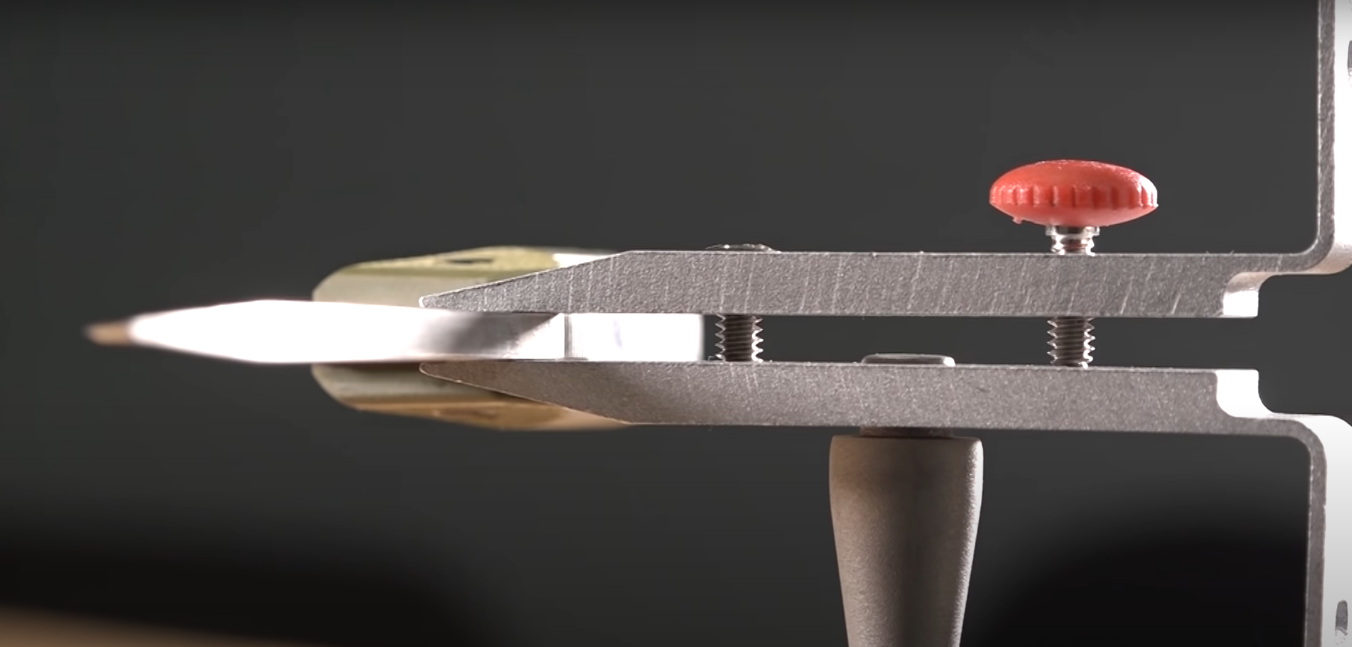
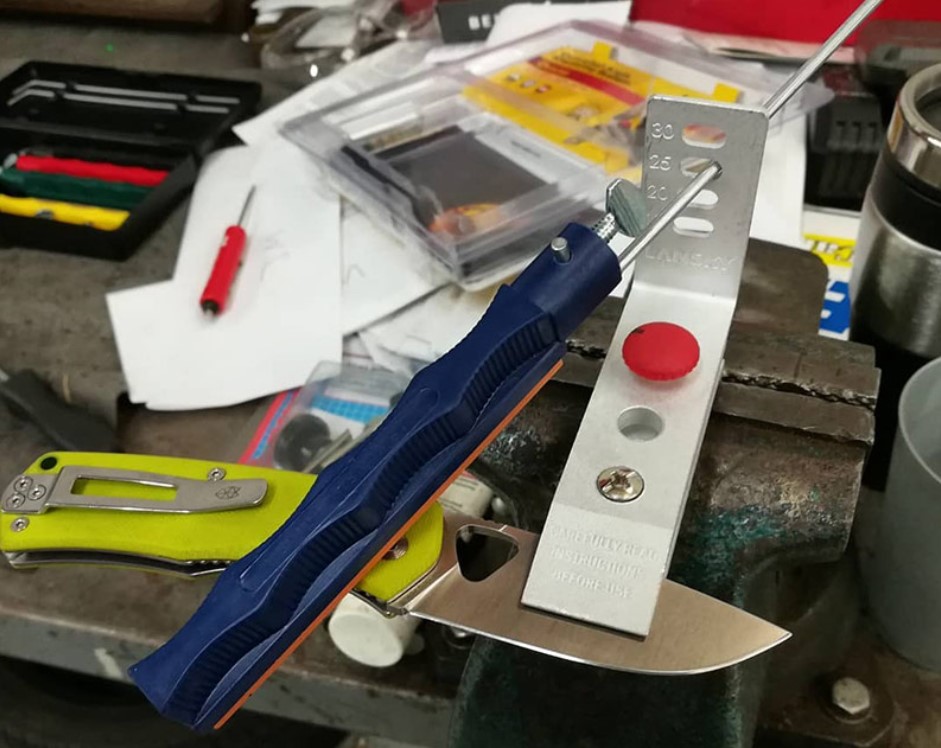
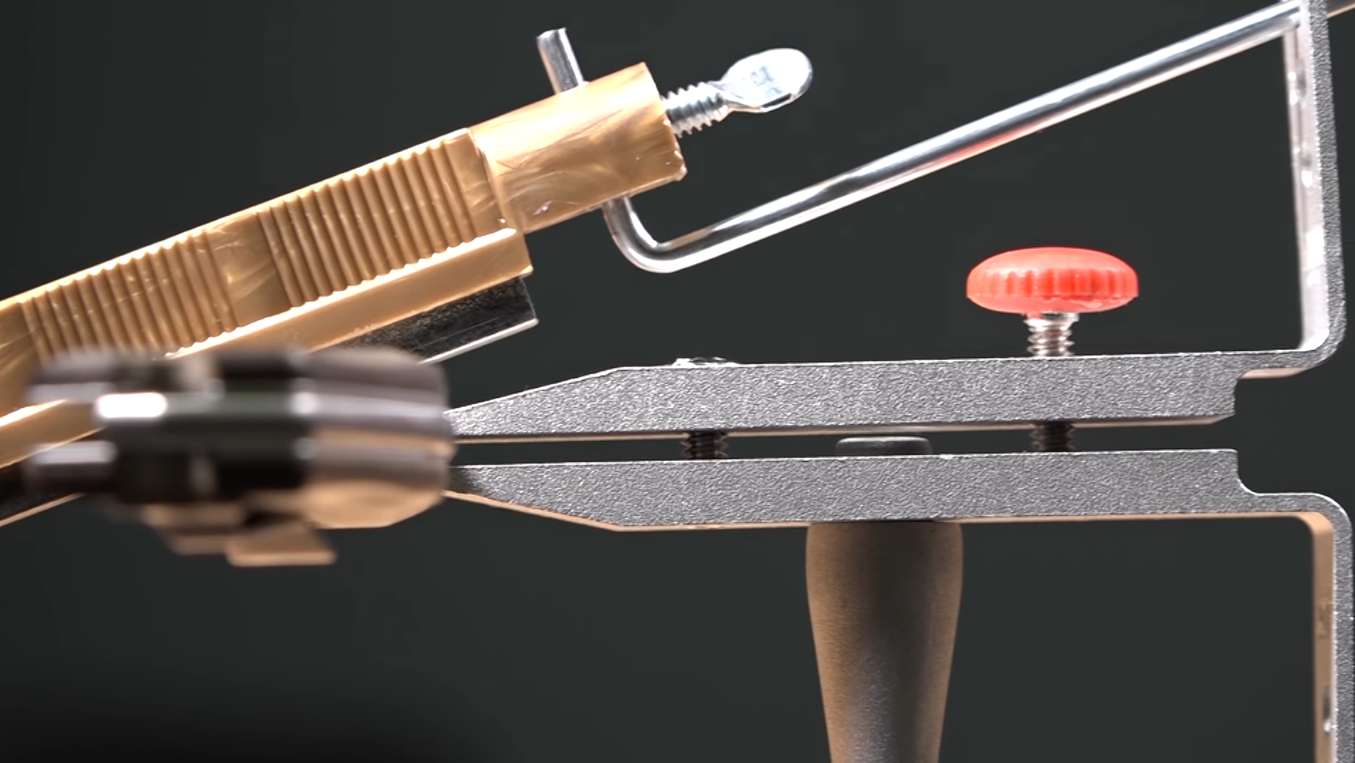
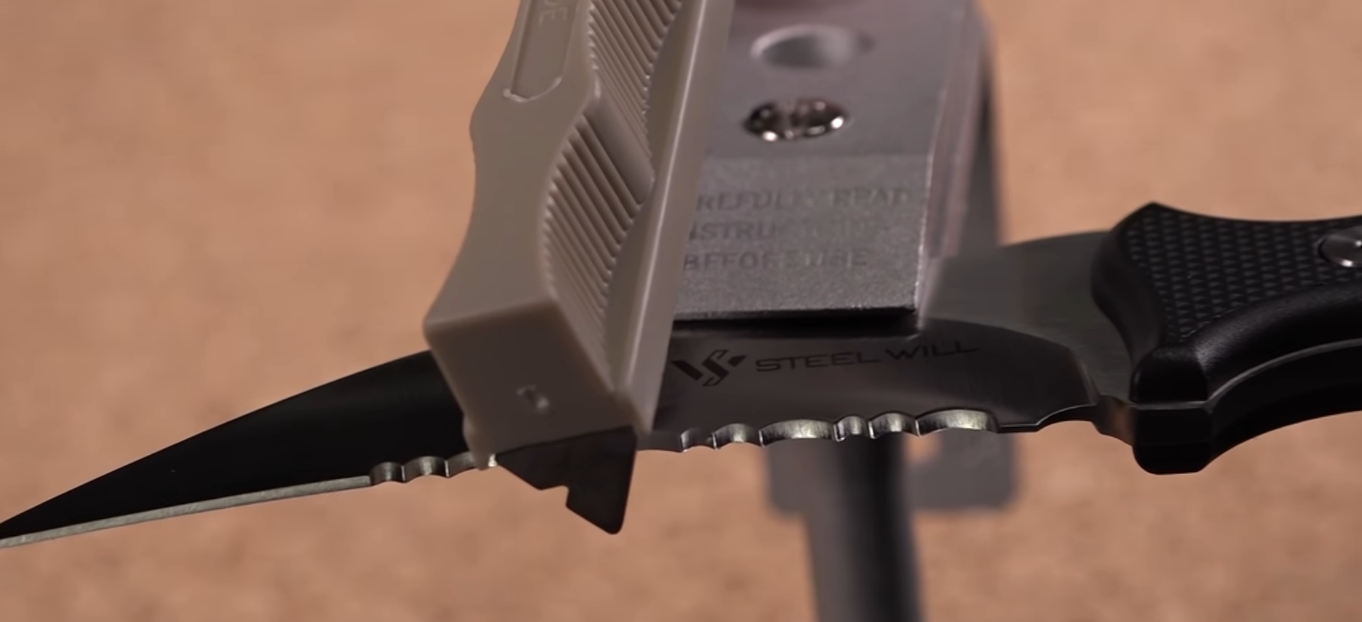
Зажим, являющийся сердцем системы, имеет две симметричные стороны L-образной формы. Сзади есть винт с накатанной головкой, а спереди — винт с крестообразным шлицем с круглой головкой. Между ними находится монтажное отверстие для подставки.
Передний винт ввинчивается в нижнюю половину зажима, поэтому затягивает зажим на лезвии. Задний винт (с накатанной головкой) ввинчивается в верхнюю половину и вдавливается в нижнюю половину, регулируя угол зажима.
Шаг 1. Выровнять стержни
Если вы не настроите эту конструкцию правильно, то не получите удовлетворительных результатов. Система построена на точном значении постоянного угла на лезвии ножа, поэтому все, что нарушает эту точность, приведет к плохому итогу.
Сначала вы должны выровнять сами стержни, а затем — стержни с камнями, прежде чем затягивать их.
Инструкция:
1. Положите стержни длинной стороной вниз на стол и убедитесь, что они не согнуты и не изогнуты дугой — так бывает с некоторыми из них, хотя и крайне редко.
2. Выпрямите их, чтобы они полностью лежали на столе — можно использовать резиновый молоток и нанести несколько легких ударов.
3. Затем проденьте короткий, загнутый вверх конец стержня через вертикальное отверстие в ручке так, чтобы он был направлен вверх — от камня.
4. Ослабив винт с накатанной головкой, положите камень и стержень на плоскую поверхность и, удерживая ручку горизонтально, нажимайте на верхнюю часть последнего, пока он и камень не лягут на поверхность стола.
5. Затем затяните винт с накатанной головкой как можно туже, чтобы между стержнем и камнем действительно была прямая линия.
Повторимся, в большинстве случаев эта процедура не требуется, ведь продукция бренда Lansky отличается качеством. Однако со временем стержни могут погнуться, так что периодически нужно удостоверяться в их прямоте.
Шаг 2. Закрепите нож в зажиме
В зависимости от длины клинка эта операция может варьироваться.
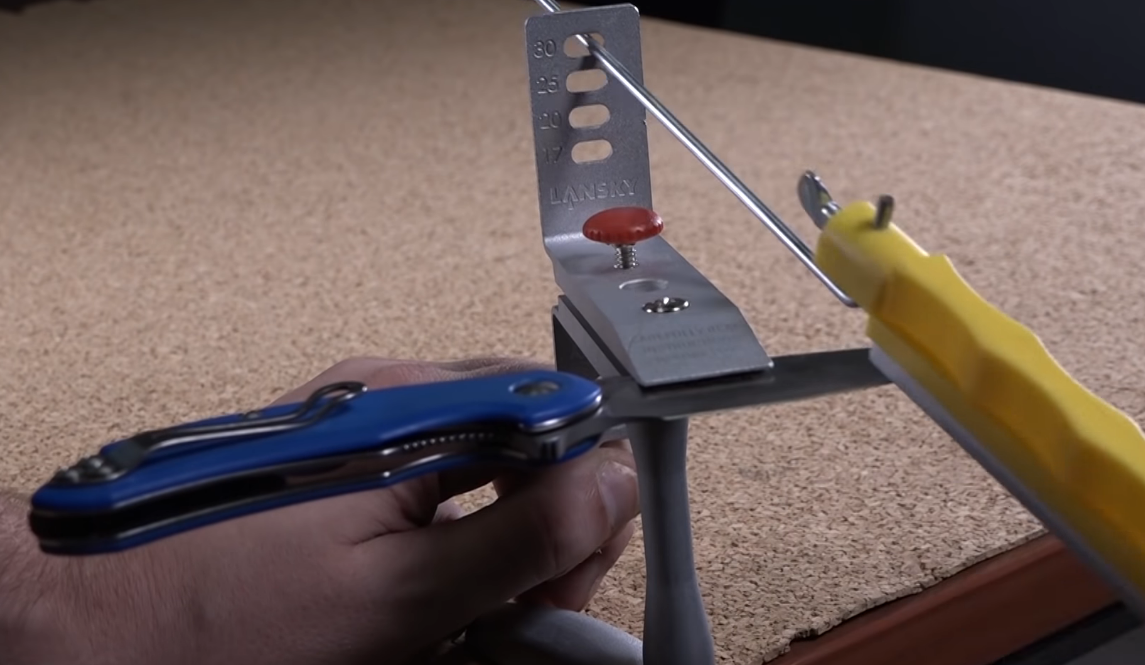
Если лезвие длиной 178 мм или меньше, то его нужно зажимать посередине длины.
Но когда оно длиннее 178 мм, то операция несколько сложнее:
1. Выберите конец лезвия, с которого вы хотите начать заточку, и поместите зажим на расстоянии двух пальцев от него.
2. Поместите 2 пальца по обеим сторонам зажима ножа. Область, покрытая вашими пальцами (по обеим сторонам зажима), является целевой зоной заточки. Старайтесь не точить за ее пределами, так как это изменит угол заточки.
3. Когда вы закончите с первой зоной на обеих сторонах лезвия, отмерьте ширину еще на два пальца, начиная с края только что заточенного участка, и поместите зажим рядом с пальцами.
Использование этого метода сведет к минимуму пробелы и перекрытия между целевыми зонами, помогая обеспечить непрерывный острый край даже на очень длинном ноже.
Шаг 3. Выберите нужный камень
Всегда переходите к камням в порядке уменьшения грубости, то есть начинайте с наиболее грубой заточки и продвигайтесь вниз к самой тонкой. В нашем случае вначале идет черный камень (70 грит), а заканчивается все шлифовкой желтым (1000 грит).
Точильный камень, с которого вы начнете, будет варьироваться в зависимости от того, какой тип заточки хотите сделать:
- для агрессивных задач, таких как изменение угла лезвия или заточка очень тупой кромки, начните с самого грубого камня в наборе, а затем переходите к среднему, тонкому и т.д.;
- для более легких работ, таких как уход за углом, начните со среднего камня.
В случае надобности можно отдельно купить дополнительные камни — например, для сверхтонкой шлифовки.
Шаг 4. Определите необходимый угол заточки
В зависимости от типа ножа и его предназначения выбирают и угол заточки:
- 17° — для бритвенных лезвий и самых тонких клинков, в которых нужна максимальная острота, таких как филировочные ножи;
- 20° — оптимальный выбор для кухонных ножей — например, предназначенных для резки овощей;
- 25° — для крепких охотничьих и рабочих ножей, которые не должны быстро тупиться;
- 30° — подходит для охотничьих тесаков и ножей, которыми нужно резать провода, пластик и прочие твердые вещества.
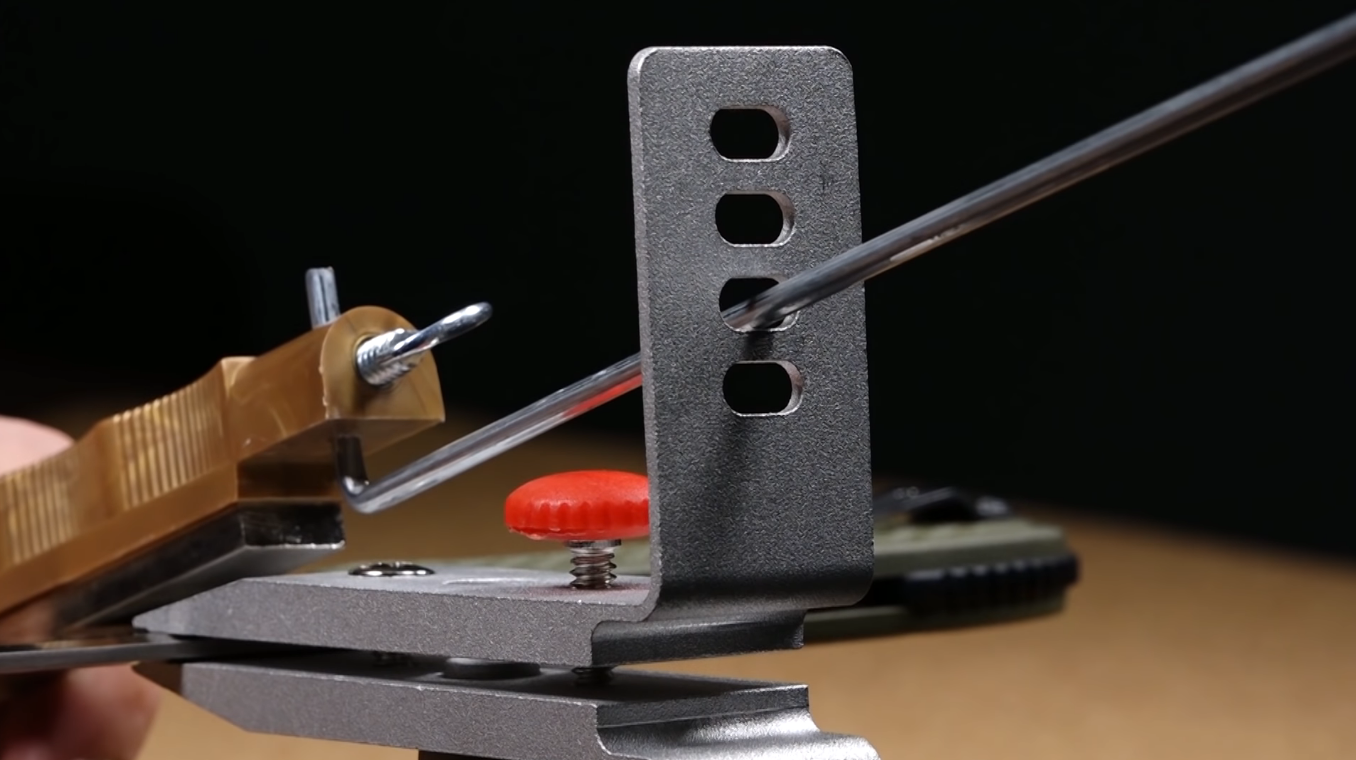
Чтобы выбрать угол, достаточно лишь просунуть стержень в соответствующее отверстие.
Шаг 5. Выполняйте точные движения камнем
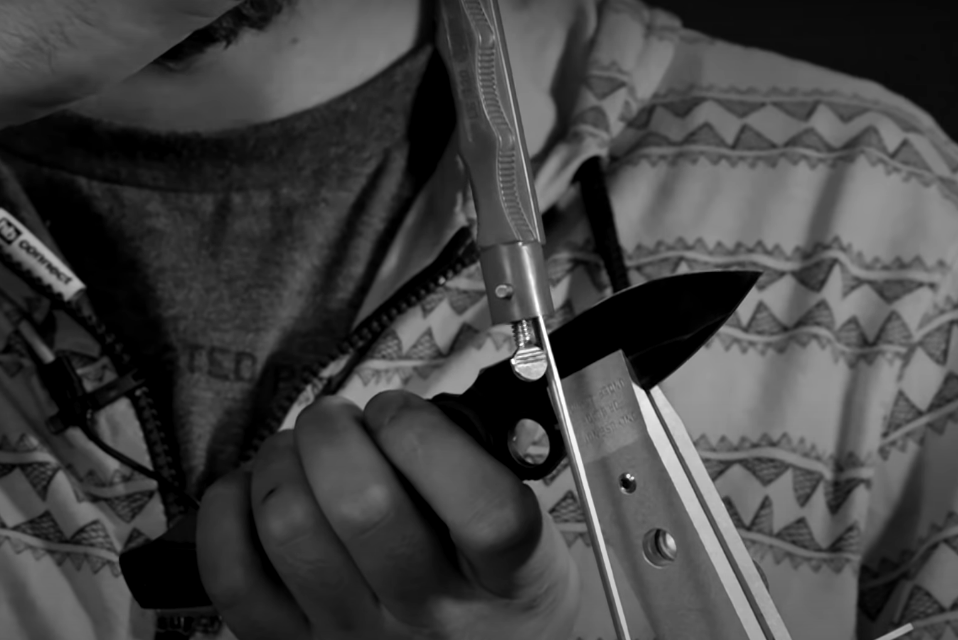
Для достижения наилучших результатов ваши движения должны осуществляться по диагонали вперед (к направляющему отверстию в зажиме) и по небольшому участку лезвия. Нужно использовать всю длину точила при каждом проходе.
Важно, чтобы вы сделали примерно одинаковое количество движений для каждой целевой зоны, так как это поможет обеспечить равномерную заточку лезвия.
Когда работаете с камнем для грубой заточки, есть смысл слегка прижимать его к лезвию. Но по мере увеличения зернистости усилие должно сходить на нет.
Шаг 6. Используйте масло Lansky
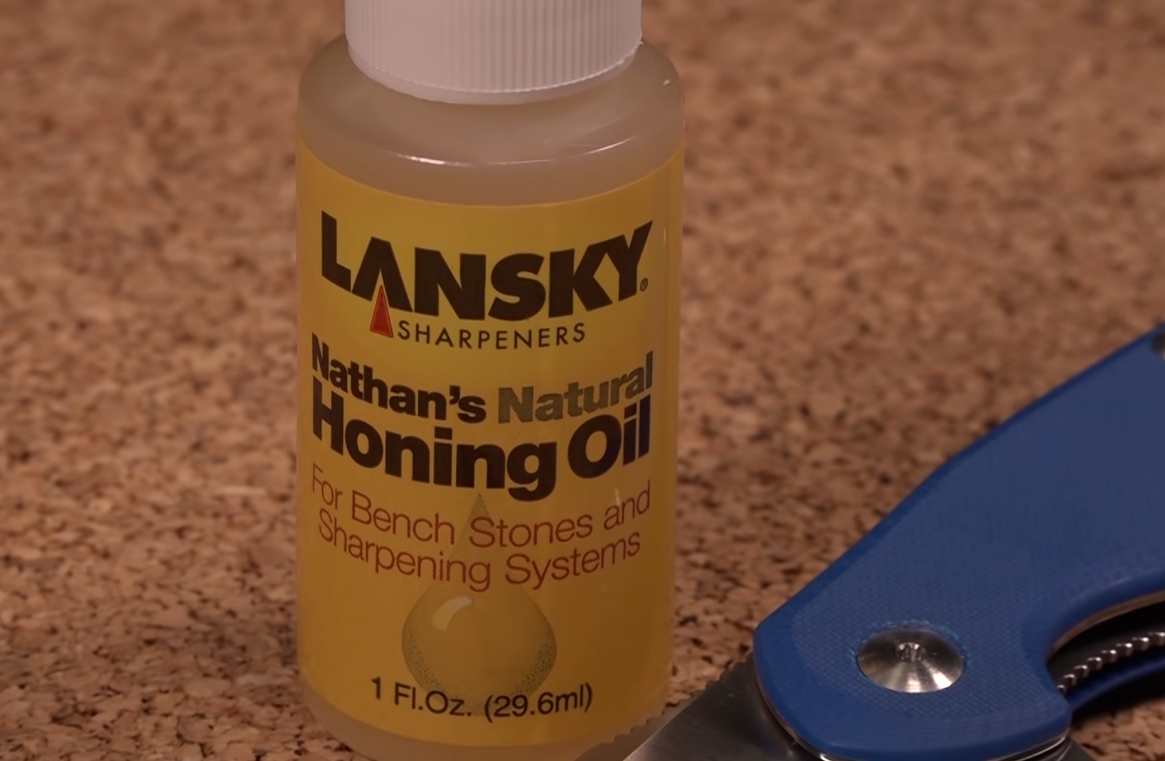
В случае c натуральными камнями «Арканзас» специальное масло из комплекта нужно использовать всегда, не давая им высыхать. Точилам из оксида алюминия (как в Lansky Deluxe) смазка изначально не нужна.
Однако вы заметите, что по мере заточки камни начнут двигаться более плавно. Это указывает на то, что их поры могут быть забиты опилками, снижающими эффективность.
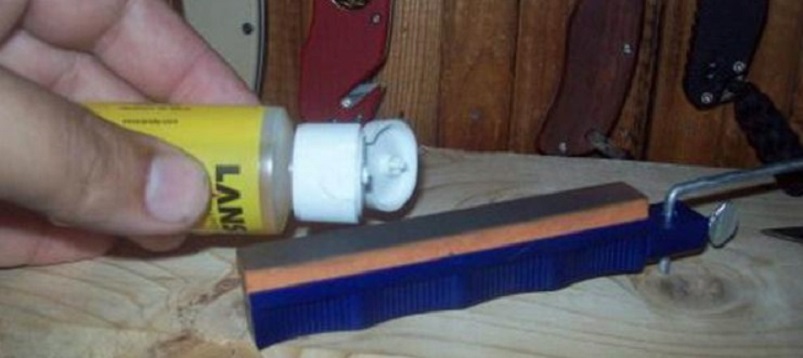
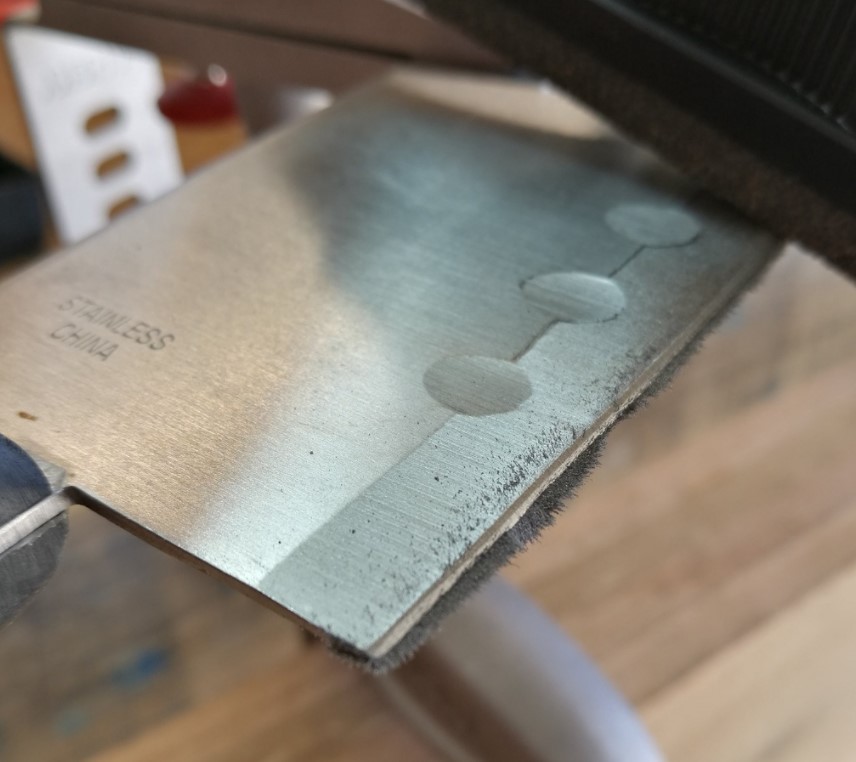
Очистите камень, нанеся несколько капель масла. Оно поднимет металлическую стружку с поверхности, после чего ее можно будет стереть тряпкой.
А вот на алмазные камни масло наносить нельзя. Очистите их водой и вытрите стружку тряпкой. Алмазные камни должны быть полностью сухими перед следующим использованием.
Нюансы
Если вы хотите заточить коллекционный нож, то лучше обернуть зону зажима клинка тканью или двусторонним куском кожи. Это убережет изделие от мельчайших царапин, появляющихся при контакте с металлом зажима.
Если у вас одностороннее или зубчатое лезвие, несколько раз проведите точилом по всей длине незаточенной стороны, чтобы счистить случайные металлические заусенцы, которые могли скопиться во время заточки.
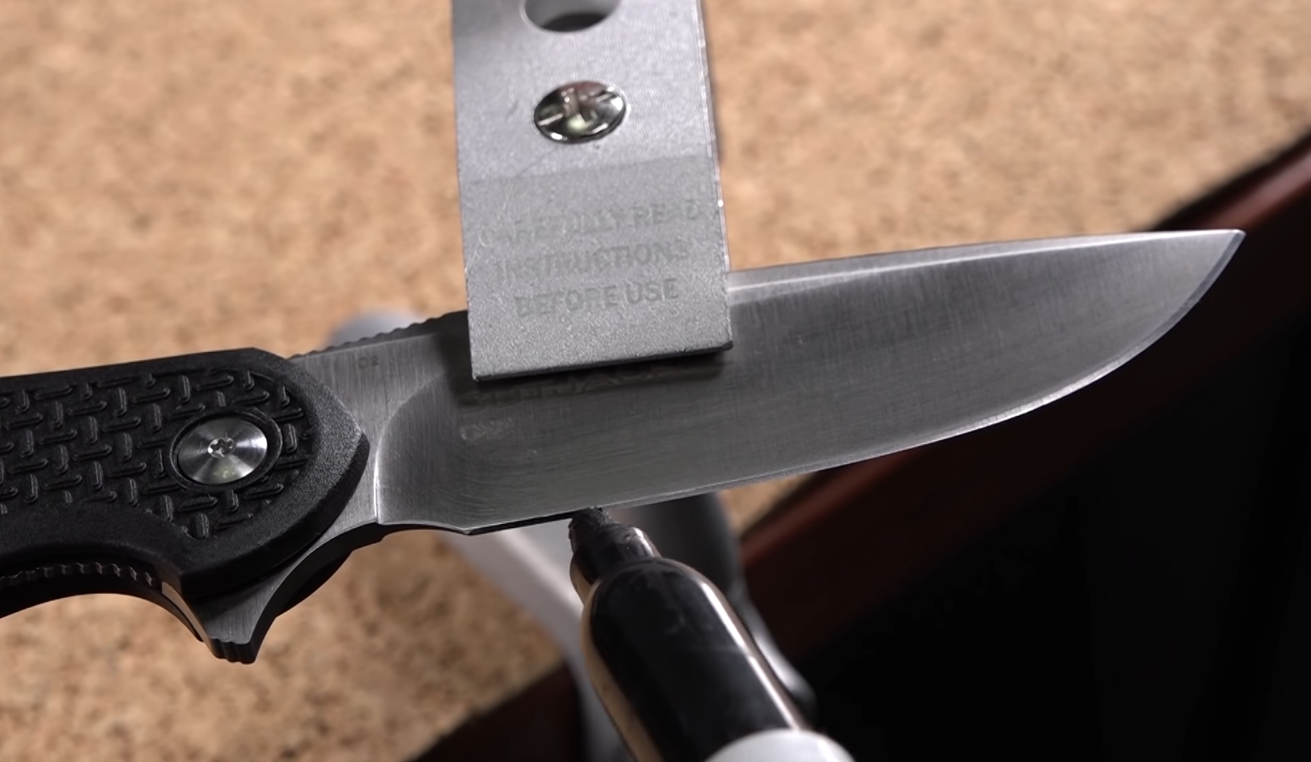
Для проверки соблюдения точного угла заточки можно использовать маркер:
- Сделайте им полосу на протяжении всей кромки лезвия.
- Вставьте стержень в предполагаемый угол и сделайте пробное движение камня.
- Сравните оставленный след с отметкой маркера.
- Если есть несовпадение, попробуйте другое отверстие для направляющей.
Следуя этой инструкции, вы всегда сможете держать свои ножи в полном порядке.


