-
Contents
-
Table of Contents
-
Bookmarks
Quick Links
age 2
LECTRONICS CANADA, INC.
HEADQUARTERS
ississauga, Ontario L5R 4B2 Canada
EL: 1-905-542-3535
www.samsung.ca
ERVICE DIVISION
ississauga, Ontario L5R 4B2 Canada
MSUNG (1-800-726-7864)
AH68-01852S
5.1Ch Stylish Home
Theater System
HT-XQ100
Instruction Manual
COMPACT
DIGITAL AUDIO
Related Manuals for Samsung HT-XQ100
Summary of Contents for Samsung HT-XQ100
-
Page 1: Instruction Manual
SAMSUNG ELECTRONICS CANADA, INC. HEADQUARTERS 55 Standish Court Mississauga, Ontario L5R 4B2 Canada TEL: 1-905-542-3535 www.samsung.ca SERVICE DIVISION 55 Standish Court Mississauga, Ontario L5R 4B2 Canada 1-800-SAMSUNG (1-800-726-7864) Instruction Manual AH68-01852S 5.1Ch Stylish Home Theater System HT-XQ100 COMPACT DIGITAL AUDIO…
-
Page 2: Precautions
Safety Warnings Note to CATV system installer : CLASS 1 LASER PRODUCT This reminder is provided to call the CATV system KLASSE 1 LASER PRODUKT installer’s attention to Section 820~40 of the NEC LUOKAN 1 LASER LAITE which provides guidelines for proper grounding and, KLASS 1 LASER APPARAT in particular, specifies that the cable ground shall be PRODUCTO LASER CLASE 1…
-
Page 3: Table Of Contents
HDMI transmits DVD video and audio signals simultaneously, and provides a clearer picture. Optional Wireless receiver amplifier Samsung ’s optional rear-channel wireless module does away with cables running between your DVD receiver and rear-channel speakers. Instead,the rear speakers connect to a com- pact wireless module that communicates with your DVD receiver.
-
Page 4
Notes on Discs DVD (Digital Versatile Disc) offers fantastic audio and video, thanks to Dolby Digital sur- round sound and MPEG-2 video compression technology. Now you can enjoy these realistic effects in the home, as if you were in a movie theater or concert hall. DVD players and the discs are coded by region. -
Page 5: Front/Rear/Side Panel
Description —Front Panel— Eject button Disc Insert Hole Display Power ( ) button —Rear Panel— 5.1 Channel Speaker Cooling Fan Output Terminals Cooling Fan —Side Panel— Function button Volume control External Digital Optical button Use this to connect external equipment Component Video Output Connect a TV with component video FM Antenna Connector…
-
Page 6
Description —Remote Control— TV button DVD Receiver button POWER button Number(0~9) buttons REMAIN button STEP button SEARCH buttons VOLUME button MENU button INFO button PL II EFFECT button PL II MODE button TUNER MEMORY button ZOOM button SLEEP button SLOW, MO/ST button DIMMER button Insert Remote Batteries DVD button… -
Page 7
Before Connecting the Speakers Speaker Packages Please confirm that all the following contents are included in the package. Front Speaker (2EA) Rear Speaker (2EA) Subwoofer Speaker Center Speaker Assembling the Speakers Set the front speaker on the front stand. To mount the speakers on the wall Drive a screw into the wall for each speaker and then hook the front speaker over them. -
Page 8: Connecting The Optional Wireless Receiving Amplifier
Close the rear cover(A). Connecting the optional Wireless Receiving Amplifier To connect the rear speakers wirelessly, you have to additionally purchase the wireless receiving module and TX card from your Samsung retailer. Rear Speaker (L) Connect the front, center and subwoofer speakers, referring to page 12.
-
Page 9: Connecting The Video Out To Tv
When you have purchased the wireless receiving module (SWA-3000) Resetting Wireless Communication Reset the system if a communication failure occurs, or if the Link indicator (blue LED) on the wireless receiver does not light up and the «REAR CHK» message blinks on the main unit’s display. Reset the system while the main unit and the wireless receiver module (SWA-3000) are in Power Standby mode.
-
Page 10: Hdmi Function
HDMI Function What is HDMI (High Definition Multimedia Interface)? This device transmits DVD video signal digitally without the process of converting to analog. You can get sharper digital pictures by connecting the video to your TV using an HDMI connection cable. HDMI Audio ON/OFF function •…
-
Page 11: Connecting The Fm Antenna
Connecting External Components Connecting an External Digital / Analog Component Example: Digital signal components such as a Set-Top Box or CD Recorder. Analog signal components such as a VCR. If the external analog compo- Optical Cable nent has only one Audio Out, (not supplied) Connect the Digital Input (OPTICAL) to the Digital Output on the external digital component.
-
Page 12: Your Home Theater
Buttons Enabled for TV Operation: POWER, CHANNEL, VOLUME, TV/VIDEO, and Numeric (0-9) buttons. • By default, the remote control is set to work with Samsung TVs. See page 68 for more information about remote control operation with other manufacturer’s TVs.
-
Page 13: Disc Playback
Before Using Your Home Theater Disc terminology Groups and tracks (DVD-AUDIO) • DVD-audio is divided into several large sections called «groups» and smaller sections called «tracks». Numbers are allotted to these sections. These numbers are called «group numbers» and «track numbers». GROUP 1 GROUP 2 TRACK 1…
-
Page 14: Displaying Disc Information
MP3/WMA-CD Playback Data CDs (CD-ROM, CD-R, CD-RW) encoded in MP3/WMA format can be played. Load the MP3/WMA disc. • The MP3/WMA menu screen will appear and playback will start. • The appearance of the menu depends on the MP3/WMA disc. •…
-
Page 15
JPEG File Playback Images captured with a digital camera or camcorder, or JPEG files on a PC can be stored on a CD and then played back with this Home Theater. Slide Mode Load the JPEG disc. Press SLIDE MODE button. •… -
Page 16
DivX Playback • The functions on this page apply to DIVX disc playback. Skip Forward/Back During playback, press the button. • Goes to the next file whenever you press button, if there are over 2 files in the disk. • Goes to the previous file whenever you press button, if there are over 2 files in the disk. -
Page 17: Fast/Slow Playback
Checking the Remaining Time Press the REMAIN button. • For checking the total and remaining time of a title or chapter being played. Each time the REMAIN button is pressed DVD- DVD- VIDEO AUDIO TITLE ELAPSED GROUP ELAPSED TITLE REMAIN GROUP REMAIN CHAPTER ELAPSED TRACK ELAPSED…
-
Page 18: Repeat Playback
Repeat Playback Repeat playback allows you to repeatedly play a chapter, title, track (song), or directory (MP3 file). JPEG Press REPEAT button. • Each time the button is pressed during playback, the repeat playback mode changes as follows: DVD- DVD- VIDEO AUDIO JPEG…
-
Page 19: Zoom (Screen Enlarge) Function
Step Function Press STEP button. • The picture moves forward one frame each time the button is pressed during playback. • Note No sound is heard during slow playback and step motion playback. Angle Function This function allows you to view the same scene in different angles. Press Cursor Press INFO button.
-
Page 20: Bonus Group / Navigating
Bonus Group / Navigating Pages Bonus Group DVD- AUDIO Some DVD-Audio discs have an extra ‘bonus’ group that requires a 4-digit key number to access. See the disc packaging for details and the-key number. When you play a DVD-Audio disc that has a bonus group, the key number input screen appears automatically.
-
Page 21
Playing Media Files using the USB HOST feature You can enjoy media files such as pictures, movies and music saved in an MP3 player, USB memory or digital camera in high quality video with 5.1 channel home theater sound by connecting the storage device to the USB port of the home theater. Press the FUNCTION Connect the USB button on the main… -
Page 22: Using Disc Menu
Moving Directly to a Scene/Song Moving to a Title/Track Press Cursor , buttons or numeric buttons to select Press INFO button. the desired title/track and then press ENTER button. 01/05 001/040 0:00:37 03/05 001/002 0:00:01 Moving to a Chapter Moving to a Specific Time Press Cursor Press Cursor , buttons or numeric buttons…
-
Page 23
Setting the Language OSD (On-Screen Display) language is set to English by default. In Stop mode, press MENU button. MOVE ENTER EXIT Note • To select another language, select OTHER and enter the language code of your country. (See page 72 for language codes) AUDIO, SUB TITLE and DISC MENU language can be selected. -
Page 24
Setting TV Screen type Depending on your TV type (Wide Screen or conventional 4:3), you can select the TV’s aspect ratio. In Stop mode, press MENU button. MOVE ENTER EXIT Press Cursor button to move to ‘TV DISPLAY’ and then press ENTER button. -
Page 25: Setting The Password
Setting Parental Controls (Rating Level) Use this to restrict playback of adult or violent DVDs you do not want children to view. In Stop mode, press MENU button. MOVE ENTER EXIT Press Cursor Press Cursor , button button to move to to select the desired rating ‘PARENTAL’…
-
Page 26
MOVE SELECT RETURN EXIT Select this to set the Select this to set the desired Samsung Logo image as image as your wallpaper. your wallpaper. JPEG To select one of the 3 wallpaper settings you’ve made In Stop mode, press MENU button. -
Page 27: Setting The Speaker Mode
DVD Playback Mode Some DVD-Audio discs contain DVD-Video as well as DVD-Audio. To play back the DVD-Video portion of the DVD-Audio disc, set the unit to DVD-Video mode. Press the EJECT button and then press the MENU button. MOVE ENTER EXIT Press Cursor button to move to…
-
Page 28
Setting the Delay Time If the speakers cannot be placed at equal distances from the listening position, you can adjust the delay time of the audio signals from the center and rear speakers. In Stop mode, press MENU button. MOVE ENTER EXIT Setting up the Speaker Delay Time… -
Page 29: Setting The Drc (Dynamic Range Compression)
Setting the Test Tone Use the Test Tone feature to check the speaker connections. In Stop or no Press Cursor button to move to disc mode, ‘Audio’ and then press MENU press ENTER button. button. MOVE ENTER EXIT MOVE ENTER EXIT Press RETURN button to return to the previous level.
-
Page 30
Setting the Audio You can adjust the balance and level for each speaker. When adjusting the audio quality using the setup screen Method 1 In Stop mode, press MENU button. MOVE ENTER EXIT Press Cursor button to move to ‘SOUND EDIT’… -
Page 31: Sound Field (Dsp)/Eq Function
AV SYNC Setup Video may look slower than the audio if it is connected to a digital TV. If this occurs, adjust the audio delay time to to match the video. Press Cursor Press the MENU button. to move to ‘Audio’ and then press ENTER button.
-
Page 32: Dolby Pro Logic Ii Effect
Dolby Pro Logic II Mode You can select the desired Dolby Pro Logic II audio mode. Press PL II MODE button. • Each time the button is pressed, the mode changes as follows. PRO LOGIC II • MUSIC: When listening to music, you can experience sound effects as if you are listening to the actual performance.
-
Page 33: Presetting Stations
Listening to Radio Remote Control Unit Press the TUNER Tune in to the button and select desired station. the FM band. Automatic Tuning 1 When is pressed, a preset broadcast station is selected. Press and hold TUNING/CH to Automatic Tuning 2 automatically search for active broadcasting stations.
-
Page 34: Mute Function
Convenient Functions Sleep Timer Function You can set the time that the Home Theater will shut itself off. Press SLEEP button. • » » will be displayed. Each time the button is pressed, the preset time changes as follows: 10 To confirm the sleep timer setting, press SLEEP button.
-
Page 35
TV. • If you do not set the remote control with the code for your brand of TV, the remote control will work on a Samsung TV by default. TV Brand Code List Brand… -
Page 36
Refer to the chart below when this unit does not function properly. If the problem you are experiencing is not listed below or if the instruction below does not help, turn off the unit, disconnect the power cord, and contact the nearest authorized dealer or Samsung Electronics Service Center. Symptom Check/Remedy •… -
Page 37: Language Code List
Cautions on Handling and Storing Discs Small scratches on the disc may reduce sound and picture quality or cause skipping. Be especially careful not to scratch discs when handling them. Handling discs Do not touch the playback side of the disc. Hold the disc by the edges so that fingerprints will not get on the surface.
-
Page 38: Specifications
Optio-S50 Pentax Digital Camera Optio 33LF Pentax Digital Camera YP-T5 VB Optio MX Pentax Digital Camera YP-53 Digimax-420 Samsung Digital Camera Digimax-400 Samsung Digital Camera Sora PDR-T30 Toshiba Digital Camera Multi Card Reader Coolpix 5900 Nikon Digital Camera Coolpix S1…
-
Page 39
Memo Samsung Limited Warranty Samsung Electronics Canada Inc. (SECA), warrants that this product is free from defective material and workmanship. SECA further warrants that if this product fails to operate properly within the specified warranty period and the failure is due to improper workmanship or defective material SECA will repair or replace the product at its option.
Выберите свое местоположение и язык.
Посмотреть инструкция для Samsung HT-XQ100 бесплатно. Руководство относится к категории домашние кинотеатры, 11 человек(а) дали ему среднюю оценку 9. Руководство доступно на следующих языках: английский. У вас есть вопрос о Samsung HT-XQ100 или вам нужна помощь? Задайте свой вопрос здесь
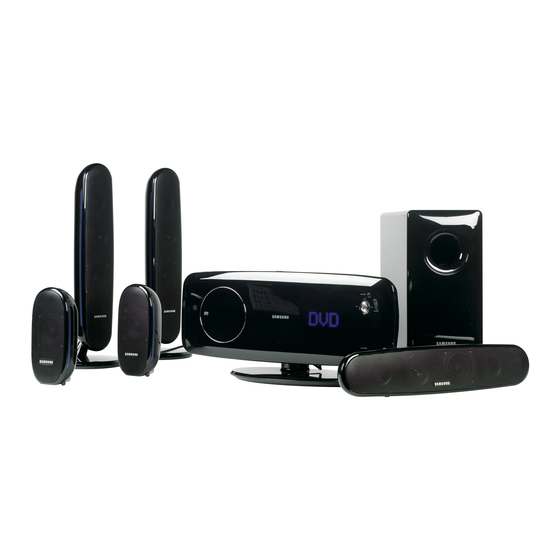
Домашний кинотеатр Samsung HT-XQ100 — это устройство, работающее на 5.1 каналах. Комплект включает в себя спутниковые колонки (каждая с мощностью 4 Вт), центральную колонку (мощность 80 Вт) и сабвуфер (мощность 100 Вт). Дисплей выполнен на технологии LED. Рейтинг мощности RMS составляет 500 Вт, а количество предустановленных станций равно 30. Тип оптического привода — DVD.
Samsung HT-XQ100 включает в себя встроенный дисплей. Он может обеспечить зрителей кинофильмов глубокой, эмоциональной звуковой дорожкой с низкочастотной поддержкой. Компанию мощному и чистому звуку добавляет напольный сабвуфер. Помимо сильного баса, вы получаете ясный и детализированный звук на всех уровнях громкости.
Samsung HT-XQ100 — надежное и прочное устройство, выполненное из премиальных материалов. Съемные кабели делают его легким для настройки и подключения. Кроме того, устройство очень удобное для использования. Это идеальное решение для настоящих ценителей качественного звука в домашней кинотеатре.
Аудио
| Выходные звуковые каналы | 5.1 канала |
| Номинальная RMS-мощность | 500 W |
Окружающие колонки
| Среднеквадратичная мощность сателлитов | 4 W |
Сабвуфер
| Номинальная мощность сабвуфера | 100 W |
Центральная колонка
| Мощность центральной колонки | 80 W |
Прочие свойства
Порты и интерфейсы
| Порты ввода/вывода | HDMI Out\nUSB\nDigital in\nComponent-out \nComposiet-out\nOptical jack: in (Digital in)\nHeadphone Jack (3.5Φ) |
Радио
| Предварительно установленное количество станций | 30 |
Оптический привод
| Тип проигрывателя оптический дисков | DVD проигрыватель |
Экран
показать больше
Не можете найти ответ на свой вопрос в руководстве? Вы можете найти ответ на свой вопрос ниже, в разделе часто задаваемых вопросов о Samsung HT-XQ100.
Что такое HDMI?
HDMI расшифровывается как «интерфейс для мультимедиа высокой четкости». Кабель HDMI используется для передачи аудио- и видеосигналов между устройствами.
Как лучше всего выполнять чистку домашний кинотеатр?
Для удаления отпечатков пальцев лучше всего использовать слегка влажную салфетку для уборки или мягкую чистую ткань. Пыль в труднодоступных местах лучше всего удаляется потоком сжатого воздуха.
Что такое Dolby Atmos?
Dolby Atmos — это технология, которая обеспечивает отражение звука от потолка к месту нахождения слушателя. Это позволяет создать эффект 5.1 при помощи всего лишь одного динамика.
Инструкция Samsung HT-XQ100 доступно в русский?
К сожалению, у нас нет руководства для Samsung HT-XQ100, доступного в русский. Это руководство доступно в английский.
Не нашли свой вопрос? Задайте свой вопрос здесь
Samsung HT-XQ100 Home Theater System PDF User Guides and Manuals for Free Download: Found (7) Manuals for Samsung HT-XQ100 Device Model (Instruction Manual, Manual De Instrucciones)
More Home Theater System Device Models:
-
JVC
CA-UXP7R
GVT0055-008A[B]For Customer Use:Enter below the Model No. and Serial No.which are located either on the rear, bot-tom or side of the cabinet. Retain thisinformation for future reference.Model No. Serial No. …
CA-UXP7R Home Theater System, 28
-
Onkyo
HT RC160 — AV Receiver
EnAV ReceiverHT-RC160Instruction ManualThank you for purchasing an Onkyo AV Receiver. Please read this manual thoroughly before making connections and plugging in the unit.Following the instructions in this manual will enable you to obtain optimum performance and listening enjoyment from your new AV Receiver. Please re …
HT RC160 — AV Receiver Receiver, 121
-
Sony
KDL-23S2010 — 23″ Bravia™ Lcd Hdtv
LCD DIGITAL COLOR TELEVISION SERVICE MANUAL WAX2 CHASSIS MODEL NAME REMOTE COMMANDER DESTINATION 9-883-714-02KDL-23S2010 RM-YD005 CANADA KDL-23S2010 RM-YD005 US KDL-26S2010 RM-YD005 CANADA KDL-26S2010 RM-YD005 US KDL-32S2010 RM-YD005 CANADA KDL-32S2010 RM-YD005 US KDL-40S2010 RM-YD005 CANADA KDL-40S2010 RM-Y …
KDL-23S2010 — 23″ Bravia™ Lcd Hdtv LCD TV, 84
-
Epson
PowerLite Home Cinema 5020UBe
Quick SetupBefore using the projector, make sure you read the safety instructions in the online User’s Guide.Choose a locationKeep the projector level and place it at a height so its lens is even with the top or bottom of the screen and is centered horizontally. If this isn’t possible, use the keystone correction b …
PowerLite Home Cinema 5020UBe Home Theater System, 4
Recommended Documentation:
HT-DS1000

Samsung HT-DS1000 User manual,
84 pages
MX-J630
Samsung MX-J630,
22 pages
MX-J630
Samsung MX-J630,
22 pages
MX-F630B
Samsung MX-F630B User manual,
19 pages
MX-H630
Samsung MX-H630 User manual,
20 pages
MM-E320
Samsung MM-E320,
16 pages
MM-E330D
Samsung MM-E320 User manual,
16 pages
MX-F830B
Samsung MX-F830B User manual,
19 pages
MX-D750
Samsung MX-D750 User manual,
23 pages
MX-H835
Samsung MX-H835 User manual [en] ,
20 pages
MX-H730
Samsung MX-H630 User manual,
18 pages
MX-J630
Samsung MX-J630 User manual,
22 pages
YP-R2AB
Samsung YP-R2AS User manual,
59 pages
TW-H5500
Samsung TW-H5500 User manual [en] ,
20 pages
TW-H5500
Samsung TW-H5500 User manual,
20 pages
MX-H830
Samsung MX-H830 User manual,
19 pages
MX-J630
Samsung MX-J630 User manual,
23 pages
MM-J320
Samsung 20 W 2.2Ch Mini Audio System J320 Benutzerhandbuch,
20 pages
MM-J430D
Samsung 120 W 2.2Ch Mini Audio System J430D Benutzerhandbuch [en] ,
30 pages
MX-J630
Samsung 230 W 2Ch Mini Audio System J630 Benutzerhandbuch,
22 pages