-
Contents
-
Table of Contents
-
Troubleshooting
-
Bookmarks
Quick Links
Operation Manual
© 2014 ZOOM CORPORATION
Reproduction or reprinting of this manual in whole or in part
by any means without permission is prohibited.
Related Manuals for Zoom H5
Summary of Contents for Zoom H5
-
Page 1
Operation Manual © 2014 ZOOM CORPORATION Reproduction or reprinting of this manual in whole or in part by any means without permission is prohibited. -
Page 2: Safety And Usage Precautions
Use a specified battery type. Do not mix unit if it becomes dirty. If necessary, use a responsibility related to infringements of sult with a shop that carries ZOOM prod- new and old batteries or different brands damp cloth that has been wrung out well.
-
Page 3: Introduction
Handy Recorder Introduction Thank you very much for purchasing a ZOOM Handy ● Useful operation features Recorder. The has the following features. • SDHC cards (up to 32GB) can be used as recording ● Stereo mics can be changed according to use media.
-
Page 4: Table Of Contents
Making direct monitoring settings ……74 Selecting the recording mode ……..20 Using a remote control ……….112 Monitor signal mixing (MULTI TRACK only) ..75 Folder and file structure on the H5 ……21 Appendices …………113 Using Loop Back (STEREO only) ……77 Selecting inputs and adjusting levels …….22 Troubleshooting …………
-
Page 5: Names Of Parts
Handy Recorder Names of parts Left Front XY mic Input volume L/R LINE OUT jack Display PHONE jack VOLUME button Input volume 1 Input volume 2 PLAY/PAUSE button REC button & STOP button indicator USB port Track buttons & indicators (L, R, 1, 2) POWER/HOLD switch…
-
Page 6
Names of parts (continued) Right/Back Bottom MIC/LINE input jack Input 1 Input 2 (supports plug-in power) REMOTE jack Strap attachment hole Scroll button Up/down: Select Speaker (back) menu items Press: Confirm menu selection MENU button Press: Open menu, Return to last screen TIP: HOT Battery cover (back) SD card slot… -
Page 7: Mic Overview
Handy Recorder Mic overview The XY mic included with the can be swapped according to your need with another input capsule. XY mic Connecting mics This has two crossing directional mics. While pressing the buttons on the sides of 90° the mic, connect it to the main unit, inserting it completely.
-
Page 8: Connecting Mics/Other Devices To Inputs 1/2
Connecting mics/other devices to Inputs 1/2 In addition to the L/R inputs from the XY mic, the also has Inputs 1/2. These can be used together to record up to 4 tracks at the same time. You can connect mics, instruments and other devices to Inputs 1/2. Connecting instruments and other devices Connect keyboards and mixers directly to the Input 1/2 TRS jacks.
-
Page 9: Connection Examples
Handy Recorder Connection examples Concert recording • L/R input mic: Performance on stage Recording is possible in a variety of situations, such as the • Inputs 1/2: Line outputs from mixer following. While filming • L/R input mic: Main subject •…
-
Page 10: Display Overview
Display overview Home/Recording Screen MULTI FILE Mode STEREO FILE Mode After pressing Name of input capsule name of project playing connected to L/R inputs Status icon (when recording, name of Backup recording recorded project) ON (→ P. 32) After pressing Stopped name of file playing Counter (remaining…
-
Page 11: Playback Screen
Handy Recorder Playback Screen MULTI FILE Mode STEREO FILE Mode Name of playing project Name of input capsule Status icon Counter (elapsed connected to L/R inputs or remaining playback time) Playing Battery charge indicator Name of playing file (→ P. 100) Paused Clip Folder name…
-
Page 12: Preparations
Preparations Supplying power Using batteries Using an AC adapter Turn the power off and then remove the battery Connect a USB cable to the USB port. cover. Plug the adapter into an outlet. Push down and open Install the batteries. Replace the battery cover.
-
Page 13: Loading An Sd Card
Handy Recorder Loading an SD card NOTE Turn the power off and then open the SD card slot • Always turn the power off before inserting or remov- ing an SD card. Inserting or removing a card while the cover. power is on could result in data loss.
-
Page 14: Turning The Power On And Off
Turning the power on and off Turning the power on Turning the power off Slide Slide NOTE NOTE • The first time you turn the power on after purchase, you Keep sliding the switch until «Goodbye See You!» appears. must set the date/time. (→ P . 16) •…
-
Page 15: Using The Hold Function
Handy Recorder Using the hold function has a hold function that disables the buttons in order to prevent accidental operation during recording. Activating the hold function Deactivating the hold function Slide to HOLD. Slide to the center. NOTE A remote control can still be used even when the hold function is active.
-
Page 16: Setting The Date And Time
Setting the date and time By setting the date and time, the recorder can store the recording date and time in files. Press Change the setting. to select “SYSTEM”, and ■ Changing settings press Move cursor: Move up and down Change item value: Press , then to select…
-
Page 17: Setting The Type Of Battery Used
Handy Recorder Setting the type of battery used Set the type of battery used so that the amount of remaining battery charge can be shown accurately. Press to select the type, and to select press “SYSTEM”, and press to select “BATTERY TYPE”, and press…
-
Page 18: Recording
Recording Recording process Recording follows the process shown below. When using the MULTI FILE mode, recording and playback data is handled in units called projects. In STEREO FILE mode, this data is handled in file units. Playback Turn power Prepare to Record Overdub Connect…
-
Page 19: Recording Mode Overview
Handy Recorder Recording mode overview has two recording modes: MULTI FILE and STEREO FILE. The file types and formats of recordings differ according to the mode. MULTI FILE mode STEREO FILE mode The L/R inputs from the XY mic or other input capsule are The L/R inputs from the XY mic or other input capsule and recorded to the L/R tracks, and Inputs 1/2 are recorded to Inputs 1/2 are recorded together as a single stereo file.
-
Page 20: Selecting The Recording Mode
Selecting the recording mode Press to select REC MODE, and press to select the recording mode, and press…
-
Page 21: Folder/File Structure
Handy Recorder Folder and file structure on the H5 When recording with the , folders and files are created on the SD card in the following manner. Root MULTI FILE mode folder MULTI Select FOLDER01-10 as the place to save…
-
Page 22: Selecting Inputs And Adjusting Levels
Selecting inputs and adjusting levels Select whether to use the L/R inputs and Inputs 1/2. In MULTI FILE mode, the L/R inputs will be recorded to the L/R tracks and Inputs 1/2 will be recorded to tracks 1 and 2. Press the buttons of the tracks that you want to record.
-
Page 23
Handy Recorder HINT Turn for the If a combo type input capsule is connected to the L/R inputs, you can enable and disable the stereo link with selected input to adjust these tracks in the same manner by pressing the track button while pressing and holding the input level. -
Page 24: Recording
Recording Press MULTI FILE mode STEREO FILE mode This starts recording. Press to add a mark that can be used as a reference during playback. HINT During playback, you can press to jump to places where marks have been added. NOTE •…
-
Page 25
Handy Recorder Press to stop. NOTE • In MULTI FILE mode, a maximum of 99 marks can be added to a single project. In STEREO FILE mode, a maximum of 99 marks can be added to a single file. • If the file size exceeds 2 GB when recording in MULTI FILE mode, a new file will be created automatically in the same project and recording will continue without pause. -
Page 26: Setting Where Projects/Files Are Saved
Setting where projects/files are saved Choose one of ten folders as the folder where new recorded projects (in MULTI FILE mode) and files (in STEREO FILE mode) will be saved. Press to select “FOLDER», and press MULTI FILE mode STEREO FILE mode to select the folder where you want to save, and press…
-
Page 27: Recording Automatically
Handy Recorder Recording automatically Recording can be started and stopped automatically in response to the input level. Press to select “ON/ OFF», and press to select “REC», and press to select “ON», and press MULTI FILE mode STEREO FILE mode to select “AUTO REC», and NOTE…
-
Page 28
Recording automatically (continued) HINT Return to the Home Screen. When the input exceeds the set level (shown on the level meters), recording starts automatically. You can also set A dotted line appears at the automatic recording the recording to stop automatically when the input goes below a set level. -
Page 29: Pre-Recording
Handy Recorder Pre-recording By setting the recorder to constantly capture the input signal, you can start recording two seconds before pressing the button. This is useful when, for example, a performance starts suddenly. Press to select “ON», and press to select “REC», and press NOTE This cannot be used at the same time as the AUTO REC, METRONOME and PRE COUNT functions.
-
Page 30: Counting In Before Recording
Counting in before recording A count in can be set to play before starting recording. Press to select “PRE COUNT», and to select press “TOOL», and press to select the precount number, and to select press “METRONOME», and press NOTE •…
-
Page 31: Adjusting The Side Mic Level
• However, this format is different from an ordinary stereo file, Wide so you will need to use ZOOM MS Decoder or other software that can convert it to normal stereo in order to use it with other equipment.
-
Page 32: Backup Recording
Backup recording L/R input only (with 44.1/48kHz WAV only) When using the L/R input, in addition to the recording at the set input level, the recorder can also record a separate file at a level 12dB below. This backup can be used if the recording level was set too high, causing distortion, for example. Press to select “ON», and press…
-
Page 33: Overdubbing
Handy Recorder Overdubbing MULTI FILE mode only (with 44.1/48kHz WAV only) You can add recordings later to an already recorded project. Press to select “MIXER/OVERDUB», and to select press “PROJECT», and press to select “MIXER/OVERDUB», and to select press the project you want to overdub, and The track button indicators light green for already press…
-
Page 34
Overdubbing MULTI FILE mode only (continued) Press the track button for the track you want to To play back an already recorded track while over- overdub. Its indicator will light red. dubbing, press that track’s button to light the indi- cator green. -
Page 35
Handy Recorder HINT To check the recording, press Even if the overdubbed track already had a recorded file, the original file will not be overwritten. A new file will be The audio from tracks with indicators that are lit green created that can be assigned to any track. -
Page 36
Overdubbing MULTI FILE mode only (continued) NOTE Track name Name of to select FILE, assigned file • If the selected track is stereo, you can only assign a stereo file to it. If it is mono, you can only assign a and press mono file. -
Page 37
Handy Recorder… -
Page 38: Playback
Playback Basic playback Press MULTI FILE mode STEREO FILE mode ■ Controls during playback Select playback project/file or move to a mark: Search forward/backward: Press and hold Pause/resume playback: Press Change side mic level: (MS-RAW mode only) Move up/down HINT •…
-
Page 39
Handy Recorder ■ Add a mark during playback To return to the Home Screen, press Press at the point where you want to add a mark. HINT MULTI FILE mode STEREO FILE mode A maximum 99 marks can be added. NOTE •… -
Page 40: Selecting Playback Project/Files From Lists
Selecting playback project/files from lists Press to select “PLAY», and press to select “PROJECT»/»FILE LIST», and press MULTI FILE mode STEREO FILE mode The selected project will start playing back. NOTE MULTI FILE mode STEREO FILE mode After playback completes, playback might continue depending on the playback mode.
-
Page 41: Changing The Playback Mode
Handy Recorder Changing the playback mode You can set the playback mode. Press to select the playback mode, and to select press “PLAY», and press NOTE PLAY ONE: Play only the selected project/file. PLAY ALL: Play from the selected project/file to the last project/file.
-
Page 42: Changing The Playback Pitch (Key)
Changing the playback pitch (key) The pitch can be changed while keeping the same playback speed. Press to select “OPTION», and press to select “PROJECT/FILE LIST», and press MULTI FILE mode STEREO FILE mode to select “KEY CONTROL», and press MULTI FILE mode STEREO FILE mode to select the project /file to adjust,…
-
Page 43
Handy Recorder to set the playback pitch, and press Paused Playing Playback will occur with the changed pitch. The pitch can be changed even during playback. NOTE • That pitch change can be set between ♭6 and ♯6. • In MULTI FILE mode, the changed value is saved sepa- rately for each project. -
Page 44: Changing The Playback Speed
Changing the playback speed You can adjust the playback speed in a range from 50% to 150% of normal. Press to select “OPTION», and press to select “PROJECT/FILE LIST», and press MULTI FILE mode STEREO FILE mode to select “PLAYBACK SPEED», and press MULTI FILE mode STEREO FILE mode…
-
Page 45
Handy Recorder to adjust the playback speed, and press Paused Playing Playback will occur at the adjusted speed. The speed can be changed even during playback. NOTE • This speed can be changed to between 50% and 150% of normal. •… -
Page 46: Repeat Playback Of A Set Interval (Ab Repeat)
Repeat playback of a set interval (AB repeat) You can repeat playback between two set points. Press to select the A point icon. to select Start point (selected) “PLAY», and press End point Playing End point time Paused Start point time to find to select “AB the starting point for…
-
Page 47
Handy Recorder NOTE to select the You can end A-B repeat playback by doing one of the following during repeat playback. B point icon, and set the • Press to select a different project /file. repeat playback ending • Press to stop playback. -
Page 48: Mixing Projects
Mixing projects MULTI FILE mode only You can adjust the volume and panning of each playback track. Press to select “MIXER/OVERDUB», and to select press “PROJECT», and press to select the track to adjust, and press to select the project to mix, and Selected press tracks…
-
Page 49
Handy Recorder NOTE Change parameter Mix settings are saved with each project separately and applied during playback. values. HINT Do the following to check the LO CUT, COMP/LIMITER and MS STEREO MATRIX settings. ■ Mixing controls Track L or L/R ……………… -
Page 50: Checking/Editing Projects/Files
Checking project/file information You can check a variety of information about the selected project. Press to select “INFORMATION», and press to select “PROJECT/FILE LIST», and press MULTI FILE mode STEREO FILE mode Project information will be shown. MULTI FILE mode STEREO FILE mode to scroll to see hidden information.
-
Page 51: Checking Track Marks
Handy Recorder Checking track marks WAV format only A list of the marks in the recorded project/file can be shown. Press to select “OPTION», and press to select “PROJECT/FILE LIST», and press MULTI FILE mode STEREO FILE mode to select “MARK LIST», and press MULTI FILE mode STEREO FILE mode to select the project /file to check,…
-
Page 52: Changing Project/File Names
Changing project/file names Press to select “EDIT», and press to select “PROJECT/FILE LIST», and press MULTI FILE mode STEREO FILE mode to select “RENAME», and MULTI FILE mode STEREO FILE mode press to select the project /file name to change, and press MULTI FILE mode STEREO FILE mode…
-
Page 53
Handy Recorder Change the name. ■ Controls when changing Move cursor/change character: Move up/down Select character/confirm change: Press NOTE • The following characters can be used in project/file names. (SPACE) !#$% &'()+,-0123456789;=@ABCDEFGHIJKLMNOPQRSTU- VWXYZ[]^_`abcdefghijklmnopqrstuvwxyz{ }~ • A project/file name cannot be only spaces. •… -
Page 54: Mixing Down A Project
Mixing down a project MULTI FILE mode only You can mix down a project that has been recorded using MULTI FILE mode into a stereo WAV file. Press to select “MIX DOWN», and to select press “PROJECT», and press To change where the mix down file is saved, use to select a to select “SAVE…
-
Page 55
Handy Recorder to select the project / folder where it will to select “EXE- be saved, and press CUTE», and press This will start the mix down. NOTE MULTI FILE mode STEREO FILE mode • The volume and pan settings (→ P . 49) made using MIXER/OVERDUB (→… -
Page 56: Converting Wav Files To Mp3 Files
Converting WAV files to MP3 files STEREO FILE mode only STEREO FILE mode WAV files can be converted to (encoded into) MP3 files. Press to select “OPTION», and to select “FILE press LIST», and press to select “MP3 ENCODE», and to select a file, press and press…
-
Page 57
Handy Recorder to select the format, and press to select “EXECUTE», and press Encoding will start. NOTE • If the SD card does not have enough open space, the screen shown in step 6 will reappear. • The new encoded file will be created in the same folder. •… -
Page 58: Normalizing
Normalizing WAV format only If the volume of a project recorded using WAV format is too low, you can increase the overall levels of files. Press to select “EDIT», and press to select “PROJECT/FILE LIST», and press MULTI FILE mode STEREO FILE mode to select “NORMALIZE», and…
-
Page 59
Handy Recorder to select the to select “YES», and press track to normalize, and press NOTE • You cannot select a track that has no recorded file. MULTI FILE mode STEREO FILE mode • If you select “ALL”, all tracks that have files will be normalized. -
Page 60: Dividing Projects/Files
Dividing projects/files You can divide a project /file into two at any point. Press to select “EDIT», and press to select “PROJECT/FILE LIST», and press MULTI FILE mode STEREO FILE mode to select “DIVIDE», and MULTI FILE mode STEREO FILE mode press to select the project /file to divide, and press…
-
Page 61
Handy Recorder Set the division point. to select “YES», Division point and press Division point time Paused NOTE Playing • After dividing a project, the part before the division point will be given the same name as the original project with “A”… -
Page 62: Trimming Project Beginnings And Ends
Trimming project beginnings and ends You can delete (trim) unnecessary beginnings and endings of recorded projects. To do so, you will set the beginning and ending points of the part to be kept. Press to select “EDIT», and press to select “PROJECT/FILE LIST», and press MULTI FILE mode STEREO FILE mode…
-
Page 63
Handy Recorder to find Press the starting point. to select “YES», and press HINT You can also press and search while playing back. NOTE If there are multiple recordings, including overdubs, the to select the file currently selected for the track will be trimmed. ending point icon. -
Page 64: Deleting Multiple Files
Deleting multiple files You can delete unneeded files. Press to select “FILE DELETE», and to select “PROJECT/FILE LIST», press and press to select a file to delete, and press MULTI FILE mode STEREO FILE mode In MULTI FILE mode, use to select project, Press to cancel file deletion.
-
Page 65
Handy Recorder to select “YES», and press… -
Page 66: Deleting Multiple Projects
Deleting multiple projects MULTI FILE mode only You can delete multiple projects in the selected folder at one time. Press to select a project to delete, and to select press “PROJECT», and press Press to cancel project deletion. NOTE Press to select/unselect all projects.
-
Page 67: Rebuilding A Project
Handy Recorder Rebuilding a project MULTI FILE mode only If a project is missing necessary files or is damaged, you can rebuild it. Press to select “REBUILD», and to select press “PROJECT», and press to select “YES», and press to select the project to rebuild, and press HINT…
-
Page 68: Adding Voice Memos
Adding voice memos MULTI FILE mode only You can add voice memos to projects. Press to select “VOICE MEMO», and to select press “PROJECT», and press Record the memo. Start recording: Press to select a project to which you Stop recording: Press want to add a voice memo, and press…
-
Page 69
Handy Recorder Play the memo. Start playback: Press Stop playback: Press HINT • Every time you press the voice memo will be overwritten. • Voice memos are recorded using the stereo mic con- nected to the L/R inputs. They cannot be recorded using Inputs 1/2. -
Page 70: Usb Functions
USB functions Data exchange with computers (card reader) By connecting with a computer, you can check and copy data on the SD card. Press Connect the to the computer using a USB cable. to select “USB», and press NOTE • If you want to power the using the computer’s USB bus, connect the cable while the recorder is off and to select “SD…
-
Page 71
Handy Recorder Follow the disconnection procedures for the com- puter before disconnecting the USB cable. Windows: Use “Safely Remove Hardware” to select the Mac: Drag-and-drop the icon into the trash. NOTE Always follow these procedures before disconnecting the USB cable. Disconnect the cable from the computer and the , and then press… -
Page 72: Using As An Audio Interface
MULTI TRACK mode. • When using Windows, a driver is necessary to use to select MULTI TRACK mode. You can download this driver from the ZOOM website (www.zoom.co.jp). “AUDIO INTERFACE», and press to select the connected device, and press to select “STEREO»…
-
Page 73
Handy Recorder Connect the to the computer or iPad using a to select USB cable. “EXIT», and press to select NOTE “YES», and press An iPad Camera Connection Kit is necessary to connect an iPad. HINT See “Audio interface settings” . (→ P . 74) Disconnect the cable from the computer or iPad and the STEREO… -
Page 74: Audio Interface Settings
Audio interface settings When using the as an audio interface, you can make the following settings. Refer to each section for details. Making direct monitoring settings Input settings LO CUT (→ P . 93) COMP/LIMITER (→ P . 94) Sound that is input to the can be output directly In1/2 PHANTOM (→…
-
Page 75: Monitor Signal Mixing (Multi Track Only)
Handy Recorder Monitor signal mixing (MULTI TRACK only) to select When using direct monitoring you can adjust the balance of the input signals. This mix does not affect the input sig- “ON/OFF», and nals sent to the computer or iPad. press Press MULTI TRACK…
-
Page 76
Audio interface settings (continued) to select to select the “MONITOR MIXER», and parameter, and change press the value. ■ Mixing controls to select track, Move cursor/change value: Move up/down and press Select parameter to change: Press Press to listen to the project without mixer adjustments. -
Page 77: Using Loop Back (Stereo Only)
Handy Recorder Using Loop Back (STEREO only) to select When in STEREO mode, you can mix the sound from the computer or iPad with the sound input through the “LOOP BACK», and and send it back to the computer or iPad again (loop back). press This can be used, for example, to add narration to a musi- cal backing track playing on a computer, and then record…
-
Page 78: Tools
Tools Using the tuner You can use the input signal to tune an instrument. Press to select the type of tuning, and to select press “TOOL», and press to change the standard pitch. to select “TUNER», and press HINT The standard pitch can be set from 435 Hz to 445Hz.
-
Page 79
Handy Recorder For all tuner types except chromatic, you can use Using the tuner. The following tuner types can be selected. to change the pitch (drop tuning). ■ Chromatic tuner ■ Guitar/bass tuner HINT The input pitch is detected The number of the string you You can drop the tuning by up to automatically and the name of are tuning is automatically… -
Page 80: Using The Metronome
Using the metronome Use the metronome to count in before recording or as a click track. ■ Set the «CLICK» Press to set when the to select metronome is active, and “TOOL», and press press HINT CLICK has the following options. OFF: Sound off REC AND PLAY:…
-
Page 81
Handy Recorder ■ Set the «SOUND» ■ Set the «LEVEL» to set the to adjust the metronome sound, and metronome volume, and press press HINT HINT SOUND has the following options. The LEVEL range is 0 – 10. BELL, CLICK, STICK, COWBELL, HI-Q NOTE •… -
Page 82: Adjusting The Input Signal Monitoring Mix
Adjusting the input signal monitoring mix MULTI FILE mode only You can adjust the level and panning of each input signal when monitoring. Press to select the track to adjust, and press Mixer ON/OFF status to select “IN/ Selected OUT», and press tracks to select “MONITOR MIXER», and…
-
Page 83
Handy Recorder Change parameter Press to listen to the values. project without mixer adjustments. Pressing this button turns ■ Mixing controls the mixer on and off. Move cursor/change value: Move up/down NOTE These mix settings are saved with each recorded project Select parameter to change: Press separately. -
Page 84: Lowering The Line Output Level
Lowering the line output level You can lower the output level of the LINE OUT jack. Use this when connecting the LINE OUT jack signal to the external mic input jack on an SLR camera or other jack with a high input gain. Press to set the LINE OUT jack output level,…
-
Page 85: Monitoring Ms-Raw Signals
Handy Recorder Monitoring MS-RAW signals MS-RAW mode only When recording in MS-RAW mode with an MS capsule, you can monitor the mid mic input through the left channel and the side mic input through the right channel as is. Press to select “RAW», and press to select “IN/OUT», and press…
-
Page 86: Converting Input Ms Signals To Stereo
Converting input MS signals to stereo Input 1/2 only This unit can convert MS stereo mic signal input through Inputs 1/2 into ordinary L/R stereo signals. Press to select an item, and press to select “IN/OUT», and press ■ Turn «ON/OFF» to select “ON», MULTI FILE mode STEREO FILE mode…
-
Page 87
Handy Recorder ■ Set «MID LEVEL» ■ Select «INPUT SETTING» to set the level of to assign the MID the mid mic, which captures and SIDE inputs to Inputs 1 the center sound, and and 2, and press press HINT MID LEVEL can be set to mute or in a range from −48.0 to +12.0 dB. -
Page 88: Mixing Input Signals To Mono
Mixing input signals to mono STEREO FILE mode only Input 1/2 only The signals input through Inputs 1/2 can be mixed to a single signal that is sent to both channels. Press to select “ON», and press to select “IN/OUT», and press NOTE •…
-
Page 89: Setting The Recording Format
Handy Recorder Setting the recording format Select the format according to the desired audio quality and file size. MULTI FILE mode STEREO FILE mode Audio quality File size Press High Large WAV 48kHz/24bit WAV 96kHz/24bit WAV 44.1kHz/24bit WAV 96kHz/16bit WAV 48kHz/16bit WAV 48kHz/24bit WAV 44.1kHz/16bit WAV 44.1kHz/24bit…
-
Page 90: Changing Automatic Recording Settings
Changing automatic recording settings You can set the input levels that cause automatic recording to start and stop, as well as the automatic stop time. Setting the automatic recording start level to select “REC Press START LEVEL», and press to select “REC», and press to set the start level, and press MULTI FILE mode STEREO FILE mode…
-
Page 91: Setting Automatic Stopping
Handy Recorder Setting automatic stopping Set the stop level in the same manner as the start level. If you want recording to stop automatically, press to select “AUTO STOP», and press MULTI FILE mode STEREO FILE mode to select the When the input level goes below the set level, recording stop time, and will stop automatically after the amount of time set in…
-
Page 92: Setting How Projects/Files Are Named
Setting how projects/files are named You can change the type of name that is automatically given to projects/files. Press to select the type, and press to select “REC», and press MULTI FILE mode STEREO FILE mode NOTE MULTI FILE mode STEREO FILE mode •…
-
Page 93: Other Settings
Other settings Handy Recorder Reducing noise (low cut filter) Use the low-cut filter to reduce wind noise and vocal pops, for example. Press to select the track to use it on, and press to select “IN/OUT», and press MULTI FILE mode STEREO FILE mode MULTI FILE mode STEREO FILE mode…
-
Page 94: Adjusting The Input Level (Compressor/Limiter)
Adjusting the input level (compressor/limiter) The unit can automatically raise low-level input signals and lower high-level input signals. Press to select the Input to adjust, and press to select “IN/OUT», and press MULTI FILE mode STEREO FILE mode MULTI FILE mode STEREO FILE mode HINT Select ALL to use this on all the inputs at once.
-
Page 95
Handy Recorder Setting Explanation Threshold Ratio Output Attack time Release (dB) level (ms) time (ms) (dB) Compressor/limiter OFF Standard compressor Compressors reduce COMP -48.7 +6.0 (GENERAL) high levels and raise low levels. Compressor for vocals COMP -8.4 16:1 (VOCAL) Compressor for drums COMP -48.2 +3.6… -
Page 96: Changing The Phantom Power Setting
Changing the phantom power setting Input 1/2 can provide phantom power of +12V, +24V or +48V. ■ Turning «ON/OFF» Press to select an to select “IN/OUT», and press input, and press HINT Select ALL to use phantom power on both inputs. MULTI FILE mode STEREO FILE mode to select “ON»,…
-
Page 97: Using Plug-In Power
Handy Recorder Using plug-in power When using a mic that uses plug-in power, make the following setting before connecting it to the MIC/LINE input jack of the XY mic. Press to select “ON», and press to select “IN/OUT», and press MULTI FILE mode STEREO FILE mode to select…
-
Page 98: Reducing The Input Signal Level
Reducing the input signal level Input 1/2 only When connecting a mixer with a standard output level or +4dB, for example, you can set this unit to reduce the input signal level −20 dB. Press to select the input, and press to select “IN/OUT», and press HINT Select ALL to use the pad on both inputs.
-
Page 99: Setting The Counter
Handy Recorder Setting the counter Set how time is shown during recording You can set the counter to show either the elapsed recording time (count up) or the remaining possible recording time (count down). Press to select how the counter appears, and to select “REC», and press press MULTI FILE mode…
-
Page 100: Set How Time Is Shown During Playback
Setting the counter (continued) Set how time is shown during playback You can set the counter to show either the elapsed playback time (count up) or remaining playback time (count down). Press to select how the counter appears, and to select press “PLAY», and press to select…
-
Page 101: Changing The Display Backlight Setting
Handy Recorder Changing the display backlight setting You can set the display backlight to turn off when no operation is conducted for 30 seconds in order to save power. Press to change the setting, and press to select “SYSTEM», and press to select “BACKLIGHT», and…
-
Page 102: Adjusting The Display Contrast
Adjusting the display contrast Press to adjust the contrast, and to select press “SYSTEM», and press HINT This can be set between 1 and 10. to select “DIS- PLAY CONTRAST», and press…
-
Page 103: Checking The Firmware Versions
Handy Recorder Checking the firmware versions You can check the software versions used by the Press to select “FIRMWARE VERSION», to select and press “SYSTEM», and The firmware versions will press be shown.
-
Page 104: Restoring The Default Settings
Restoring the default settings You can restore the unit to its factory default settings. Press to select “YES», and press to select “SYSTEM», and This will restore the default press settings. The unit will auto- matically turn off. NOTE to select Input level settings are not reset.
-
Page 105: Checking Sd Card Open Space
Handy Recorder Checking SD card open space Press to select “REMAIN», and to select “SD press CARD», and press The amount of remaining open space will be shown.
-
Page 106: Formatting Sd Cards
Formatting SD cards Follow these procedures to format an SD card for use with the Press to select “YES», and press to select “SD CARD», and press NOTE • If you use an SD card that has been formatted by a computer or that you have purchased, you must format it using the before use.
-
Page 107: Testing Sd Card Performance
Handy Recorder Testing SD card performance You can test SD cards to confirm that they can be used with the The quick test takes very little time, while the full test examines the entire SD card. Conducting a quick test to select Press “YES», and press…
-
Page 108: Conducting A Full Test
Testing SD card performance (continued) Conducting a full test To cancel testing, press NOTE Press Even if an SD card is evaluated as “OK” by the perfor- mance test, this does not guarantee that write errors will never occur. Please use this test just as a guide. to select “SD CARD», and press to select “PER-…
-
Page 109
Handy Recorder When the amount of To cancel testing, press HINT time required is shown, You can also press to pause and resume testing. to select “YES», NOTE and press Even if an SD card is evaluated as “OK” by the perfor- mance test, this does not guarantee that write errors will never occur. -
Page 110: Other Functions
NOTE You can download the file for the latest firmware version NOTE update from the ZOOM website (www.zoom.co.jp). Updating the firmware is not possible when the remain- ing battery power is too low. If this is the case, install new batteries or use an AC adapter.
-
Page 111: Using Sd Cards From Older H Series Recorders
Handy Recorder Using SD cards from older H series recorders An SD card that has been used in an older ZOOM H series recorder can be read by an and its files moved for its use. NOTE Insert the SD card, and then turn the •…
-
Page 112: Using A Remote Control
Using a remote control You can operate the from a distance by using a remote control. The buttons on the remote control correspond to Connect the remote control to the REMOTE the buttons on the main unit. jack. HINT The remote control buttons can be used even when the hold function is active.
-
Page 113: Appendices
Appendices Handy Recorder Troubleshooting If you think that the is not operating properly, please check the following first. ◆ The recorded sound cannot be heard or is very quiet Recording/playback trouble ◆ There is no sound or output is very quiet •…
-
Page 114: Specifications
Specifications Recording media 16MB–2GB SD cards, 4GB–32GB SDHC cards XY mic (XYH-5) Mic type Directional –45 dB Sensitivity , 1 kHz at 1 Pa Input gain –∞ to 52 dB 140 dBSPL Maximum sound pressure input L/R inputs MIC/LINE IN stereo mini jack Input gain: –∞…
-
Page 115
Handy Recorder Mass storage class operation Class: USB 2.0 High Speed Audio interface operation: MULTI TRACK mode (Note: Use with Windows requires a driver, but Mac OS does not) Class: USB 2.0 High Speed Specifications: 4 in/2 out, 44.1/48kHz sampling rate, 16/24-bit bit rate Audio interface operation: STEREO mode (no driver required) Class: USB 2.0 Full Speed… -
Page 116: Zoom Corporation
• Connect the equipment to an outlet on a circuit different from that to which the receiver is connected. • Consult the dealer or an experienced radio/TV technician for help. ZOOM CORPORATION 4-4-3 Surugadai, Kanda, Chiyoda-ku, Tokyo 101-0062 Japan http://www.zoom.co.jp…
-
Page 1
Operation Manual © 2014 ZOOM CORPORATION Reproduction or reprinting of this manual in whole or in part by any means without permission is prohibited. -
Page 2: Safety And Usage Precautions
Use a specified battery type. Do not mix unit if it becomes dirty. If necessary, use a responsibility related to infringements of sult with a shop that carries ZOOM prod- new and old batteries or different brands damp cloth that has been wrung out well.
-
Page 3: Introduction
Handy Recorder Introduction Thank you very much for purchasing a ZOOM Handy ● Useful operation features Recorder. The has the following features. • SDHC cards (up to 32GB) can be used as recording ● Stereo mics can be changed according to use media.
-
Page 4: Table Of Contents
Making direct monitoring settings ……74 Selecting the recording mode ……..20 Using a remote control ……….112 Monitor signal mixing (MULTI TRACK only) ..75 Folder and file structure on the H5 ……21 Appendices …………113 Using Loop Back (STEREO only) ……77 Selecting inputs and adjusting levels …….22 Troubleshooting …………
-
Page 5: Names Of Parts
Handy Recorder Names of parts Left Front XY mic Input volume L/R LINE OUT jack Display PHONE jack VOLUME button Input volume 1 Input volume 2 PLAY/PAUSE button REC button & STOP button indicator USB port Track buttons & indicators (L, R, 1, 2) POWER/HOLD switch…
-
Page 6
Names of parts (continued) Right/Back Bottom MIC/LINE input jack Input 1 Input 2 (supports plug-in power) REMOTE jack Strap attachment hole Scroll button Up/down: Select Speaker (back) menu items Press: Confirm menu selection MENU button Press: Open menu, Return to last screen TIP: HOT Battery cover (back) SD card slot… -
Page 7: Mic Overview
Handy Recorder Mic overview The XY mic included with the can be swapped according to your need with another input capsule. XY mic Connecting mics This has two crossing directional mics. While pressing the buttons on the sides of 90° the mic, connect it to the main unit, inserting it completely.
-
Page 8: Connecting Mics/Other Devices To Inputs 1/2
Connecting mics/other devices to Inputs 1/2 In addition to the L/R inputs from the XY mic, the also has Inputs 1/2. These can be used together to record up to 4 tracks at the same time. You can connect mics, instruments and other devices to Inputs 1/2. Connecting instruments and other devices Connect keyboards and mixers directly to the Input 1/2 TRS jacks.
-
Page 9: Connection Examples
Handy Recorder Connection examples Concert recording • L/R input mic: Performance on stage Recording is possible in a variety of situations, such as the • Inputs 1/2: Line outputs from mixer following. While filming • L/R input mic: Main subject •…
-
Page 10: Display Overview
Display overview Home/Recording Screen MULTI FILE Mode STEREO FILE Mode After pressing Name of input capsule name of project playing connected to L/R inputs Status icon (when recording, name of Backup recording recorded project) ON (→ P. 32) After pressing Stopped name of file playing Counter (remaining…
-
Page 11: Playback Screen
Handy Recorder Playback Screen MULTI FILE Mode STEREO FILE Mode Name of playing project Name of input capsule Status icon Counter (elapsed connected to L/R inputs or remaining playback time) Playing Battery charge indicator Name of playing file (→ P. 100) Paused Clip Folder name…
-
Page 12: Preparations
Preparations Supplying power Using batteries Using an AC adapter Turn the power off and then remove the battery Connect a USB cable to the USB port. cover. Plug the adapter into an outlet. Push down and open Install the batteries. Replace the battery cover.
-
Page 13: Loading An Sd Card
Handy Recorder Loading an SD card NOTE Turn the power off and then open the SD card slot • Always turn the power off before inserting or remov- ing an SD card. Inserting or removing a card while the cover. power is on could result in data loss.
-
Page 14: Turning The Power On And Off
Turning the power on and off Turning the power on Turning the power off Slide Slide NOTE NOTE • The first time you turn the power on after purchase, you Keep sliding the switch until «Goodbye See You!» appears. must set the date/time. (→ P . 16) •…
-
Page 15: Using The Hold Function
Handy Recorder Using the hold function has a hold function that disables the buttons in order to prevent accidental operation during recording. Activating the hold function Deactivating the hold function Slide to HOLD. Slide to the center. NOTE A remote control can still be used even when the hold function is active.
-
Page 16: Setting The Date And Time
Setting the date and time By setting the date and time, the recorder can store the recording date and time in files. Press Change the setting. to select “SYSTEM”, and ■ Changing settings press Move cursor: Move up and down Change item value: Press , then to select…
-
Page 17: Setting The Type Of Battery Used
Handy Recorder Setting the type of battery used Set the type of battery used so that the amount of remaining battery charge can be shown accurately. Press to select the type, and to select press “SYSTEM”, and press to select “BATTERY TYPE”, and press…
-
Page 18: Recording
Recording Recording process Recording follows the process shown below. When using the MULTI FILE mode, recording and playback data is handled in units called projects. In STEREO FILE mode, this data is handled in file units. Playback Turn power Prepare to Record Overdub Connect…
-
Page 19: Recording Mode Overview
Handy Recorder Recording mode overview has two recording modes: MULTI FILE and STEREO FILE. The file types and formats of recordings differ according to the mode. MULTI FILE mode STEREO FILE mode The L/R inputs from the XY mic or other input capsule are The L/R inputs from the XY mic or other input capsule and recorded to the L/R tracks, and Inputs 1/2 are recorded to Inputs 1/2 are recorded together as a single stereo file.
-
Page 20: Selecting The Recording Mode
Selecting the recording mode Press to select REC MODE, and press to select the recording mode, and press…
-
Page 21: Folder/File Structure
Handy Recorder Folder and file structure on the H5 When recording with the , folders and files are created on the SD card in the following manner. Root MULTI FILE mode folder MULTI Select FOLDER01-10 as the place to save…
-
Page 22: Selecting Inputs And Adjusting Levels
Selecting inputs and adjusting levels Select whether to use the L/R inputs and Inputs 1/2. In MULTI FILE mode, the L/R inputs will be recorded to the L/R tracks and Inputs 1/2 will be recorded to tracks 1 and 2. Press the buttons of the tracks that you want to record.
-
Page 23
Handy Recorder HINT Turn for the If a combo type input capsule is connected to the L/R inputs, you can enable and disable the stereo link with selected input to adjust these tracks in the same manner by pressing the track button while pressing and holding the input level. -
Page 24: Recording
Recording Press MULTI FILE mode STEREO FILE mode This starts recording. Press to add a mark that can be used as a reference during playback. HINT During playback, you can press to jump to places where marks have been added. NOTE •…
-
Page 25
Handy Recorder Press to stop. NOTE • In MULTI FILE mode, a maximum of 99 marks can be added to a single project. In STEREO FILE mode, a maximum of 99 marks can be added to a single file. • If the file size exceeds 2 GB when recording in MULTI FILE mode, a new file will be created automatically in the same project and recording will continue without pause. -
Page 26: Setting Where Projects/Files Are Saved
Setting where projects/files are saved Choose one of ten folders as the folder where new recorded projects (in MULTI FILE mode) and files (in STEREO FILE mode) will be saved. Press to select “FOLDER», and press MULTI FILE mode STEREO FILE mode to select the folder where you want to save, and press…
-
Page 27: Recording Automatically
Handy Recorder Recording automatically Recording can be started and stopped automatically in response to the input level. Press to select “ON/ OFF», and press to select “REC», and press to select “ON», and press MULTI FILE mode STEREO FILE mode to select “AUTO REC», and NOTE…
-
Page 28
Recording automatically (continued) HINT Return to the Home Screen. When the input exceeds the set level (shown on the level meters), recording starts automatically. You can also set A dotted line appears at the automatic recording the recording to stop automatically when the input goes below a set level. -
Page 29: Pre-Recording
Handy Recorder Pre-recording By setting the recorder to constantly capture the input signal, you can start recording two seconds before pressing the button. This is useful when, for example, a performance starts suddenly. Press to select “ON», and press to select “REC», and press NOTE This cannot be used at the same time as the AUTO REC, METRONOME and PRE COUNT functions.
-
Page 30: Counting In Before Recording
Counting in before recording A count in can be set to play before starting recording. Press to select “PRE COUNT», and to select press “TOOL», and press to select the precount number, and to select press “METRONOME», and press NOTE •…
-
Page 31: Adjusting The Side Mic Level
• However, this format is different from an ordinary stereo file, Wide so you will need to use ZOOM MS Decoder or other software that can convert it to normal stereo in order to use it with other equipment.
-
Page 32: Backup Recording
Backup recording L/R input only (with 44.1/48kHz WAV only) When using the L/R input, in addition to the recording at the set input level, the recorder can also record a separate file at a level 12dB below. This backup can be used if the recording level was set too high, causing distortion, for example. Press to select “ON», and press…
-
Page 33: Overdubbing
Handy Recorder Overdubbing MULTI FILE mode only (with 44.1/48kHz WAV only) You can add recordings later to an already recorded project. Press to select “MIXER/OVERDUB», and to select press “PROJECT», and press to select “MIXER/OVERDUB», and to select press the project you want to overdub, and The track button indicators light green for already press…
-
Page 34
Overdubbing MULTI FILE mode only (continued) Press the track button for the track you want to To play back an already recorded track while over- overdub. Its indicator will light red. dubbing, press that track’s button to light the indi- cator green. -
Page 35
Handy Recorder HINT To check the recording, press Even if the overdubbed track already had a recorded file, the original file will not be overwritten. A new file will be The audio from tracks with indicators that are lit green created that can be assigned to any track. -
Page 36
Overdubbing MULTI FILE mode only (continued) NOTE Track name Name of to select FILE, assigned file • If the selected track is stereo, you can only assign a stereo file to it. If it is mono, you can only assign a and press mono file. -
Page 37
Handy Recorder… -
Page 38: Playback
Playback Basic playback Press MULTI FILE mode STEREO FILE mode ■ Controls during playback Select playback project/file or move to a mark: Search forward/backward: Press and hold Pause/resume playback: Press Change side mic level: (MS-RAW mode only) Move up/down HINT •…
-
Page 39
Handy Recorder ■ Add a mark during playback To return to the Home Screen, press Press at the point where you want to add a mark. HINT MULTI FILE mode STEREO FILE mode A maximum 99 marks can be added. NOTE •… -
Page 40: Selecting Playback Project/Files From Lists
Selecting playback project/files from lists Press to select “PLAY», and press to select “PROJECT»/»FILE LIST», and press MULTI FILE mode STEREO FILE mode The selected project will start playing back. NOTE MULTI FILE mode STEREO FILE mode After playback completes, playback might continue depending on the playback mode.
-
Page 41: Changing The Playback Mode
Handy Recorder Changing the playback mode You can set the playback mode. Press to select the playback mode, and to select press “PLAY», and press NOTE PLAY ONE: Play only the selected project/file. PLAY ALL: Play from the selected project/file to the last project/file.
-
Page 42: Changing The Playback Pitch (Key)
Changing the playback pitch (key) The pitch can be changed while keeping the same playback speed. Press to select “OPTION», and press to select “PROJECT/FILE LIST», and press MULTI FILE mode STEREO FILE mode to select “KEY CONTROL», and press MULTI FILE mode STEREO FILE mode to select the project /file to adjust,…
-
Page 43
Handy Recorder to set the playback pitch, and press Paused Playing Playback will occur with the changed pitch. The pitch can be changed even during playback. NOTE • That pitch change can be set between ♭6 and ♯6. • In MULTI FILE mode, the changed value is saved sepa- rately for each project. -
Page 44: Changing The Playback Speed
Changing the playback speed You can adjust the playback speed in a range from 50% to 150% of normal. Press to select “OPTION», and press to select “PROJECT/FILE LIST», and press MULTI FILE mode STEREO FILE mode to select “PLAYBACK SPEED», and press MULTI FILE mode STEREO FILE mode…
-
Page 45
Handy Recorder to adjust the playback speed, and press Paused Playing Playback will occur at the adjusted speed. The speed can be changed even during playback. NOTE • This speed can be changed to between 50% and 150% of normal. •… -
Page 46: Repeat Playback Of A Set Interval (Ab Repeat)
Repeat playback of a set interval (AB repeat) You can repeat playback between two set points. Press to select the A point icon. to select Start point (selected) “PLAY», and press End point Playing End point time Paused Start point time to find to select “AB the starting point for…
-
Page 47
Handy Recorder NOTE to select the You can end A-B repeat playback by doing one of the following during repeat playback. B point icon, and set the • Press to select a different project /file. repeat playback ending • Press to stop playback. -
Page 48: Mixing Projects
Mixing projects MULTI FILE mode only You can adjust the volume and panning of each playback track. Press to select “MIXER/OVERDUB», and to select press “PROJECT», and press to select the track to adjust, and press to select the project to mix, and Selected press tracks…
-
Page 49
Handy Recorder NOTE Change parameter Mix settings are saved with each project separately and applied during playback. values. HINT Do the following to check the LO CUT, COMP/LIMITER and MS STEREO MATRIX settings. ■ Mixing controls Track L or L/R ……………… -
Page 50: Checking/Editing Projects/Files
Checking project/file information You can check a variety of information about the selected project. Press to select “INFORMATION», and press to select “PROJECT/FILE LIST», and press MULTI FILE mode STEREO FILE mode Project information will be shown. MULTI FILE mode STEREO FILE mode to scroll to see hidden information.
-
Page 51: Checking Track Marks
Handy Recorder Checking track marks WAV format only A list of the marks in the recorded project/file can be shown. Press to select “OPTION», and press to select “PROJECT/FILE LIST», and press MULTI FILE mode STEREO FILE mode to select “MARK LIST», and press MULTI FILE mode STEREO FILE mode to select the project /file to check,…
-
Page 52: Changing Project/File Names
Changing project/file names Press to select “EDIT», and press to select “PROJECT/FILE LIST», and press MULTI FILE mode STEREO FILE mode to select “RENAME», and MULTI FILE mode STEREO FILE mode press to select the project /file name to change, and press MULTI FILE mode STEREO FILE mode…
-
Page 53
Handy Recorder Change the name. ■ Controls when changing Move cursor/change character: Move up/down Select character/confirm change: Press NOTE • The following characters can be used in project/file names. (SPACE) !#$% &'()+,-0123456789;=@ABCDEFGHIJKLMNOPQRSTU- VWXYZ[]^_`abcdefghijklmnopqrstuvwxyz{ }~ • A project/file name cannot be only spaces. •… -
Page 54: Mixing Down A Project
Mixing down a project MULTI FILE mode only You can mix down a project that has been recorded using MULTI FILE mode into a stereo WAV file. Press to select “MIX DOWN», and to select press “PROJECT», and press To change where the mix down file is saved, use to select a to select “SAVE…
-
Page 55
Handy Recorder to select the project / folder where it will to select “EXE- be saved, and press CUTE», and press This will start the mix down. NOTE MULTI FILE mode STEREO FILE mode • The volume and pan settings (→ P . 49) made using MIXER/OVERDUB (→… -
Page 56: Converting Wav Files To Mp3 Files
Converting WAV files to MP3 files STEREO FILE mode only STEREO FILE mode WAV files can be converted to (encoded into) MP3 files. Press to select “OPTION», and to select “FILE press LIST», and press to select “MP3 ENCODE», and to select a file, press and press…
-
Page 57
Handy Recorder to select the format, and press to select “EXECUTE», and press Encoding will start. NOTE • If the SD card does not have enough open space, the screen shown in step 6 will reappear. • The new encoded file will be created in the same folder. •… -
Page 58: Normalizing
Normalizing WAV format only If the volume of a project recorded using WAV format is too low, you can increase the overall levels of files. Press to select “EDIT», and press to select “PROJECT/FILE LIST», and press MULTI FILE mode STEREO FILE mode to select “NORMALIZE», and…
-
Page 59
Handy Recorder to select the to select “YES», and press track to normalize, and press NOTE • You cannot select a track that has no recorded file. MULTI FILE mode STEREO FILE mode • If you select “ALL”, all tracks that have files will be normalized. -
Page 60: Dividing Projects/Files
Dividing projects/files You can divide a project /file into two at any point. Press to select “EDIT», and press to select “PROJECT/FILE LIST», and press MULTI FILE mode STEREO FILE mode to select “DIVIDE», and MULTI FILE mode STEREO FILE mode press to select the project /file to divide, and press…
-
Page 61
Handy Recorder Set the division point. to select “YES», Division point and press Division point time Paused NOTE Playing • After dividing a project, the part before the division point will be given the same name as the original project with “A”… -
Page 62: Trimming Project Beginnings And Ends
Trimming project beginnings and ends You can delete (trim) unnecessary beginnings and endings of recorded projects. To do so, you will set the beginning and ending points of the part to be kept. Press to select “EDIT», and press to select “PROJECT/FILE LIST», and press MULTI FILE mode STEREO FILE mode…
-
Page 63
Handy Recorder to find Press the starting point. to select “YES», and press HINT You can also press and search while playing back. NOTE If there are multiple recordings, including overdubs, the to select the file currently selected for the track will be trimmed. ending point icon. -
Page 64: Deleting Multiple Files
Deleting multiple files You can delete unneeded files. Press to select “FILE DELETE», and to select “PROJECT/FILE LIST», press and press to select a file to delete, and press MULTI FILE mode STEREO FILE mode In MULTI FILE mode, use to select project, Press to cancel file deletion.
-
Page 65
Handy Recorder to select “YES», and press… -
Page 66: Deleting Multiple Projects
Deleting multiple projects MULTI FILE mode only You can delete multiple projects in the selected folder at one time. Press to select a project to delete, and to select press “PROJECT», and press Press to cancel project deletion. NOTE Press to select/unselect all projects.
-
Page 67: Rebuilding A Project
Handy Recorder Rebuilding a project MULTI FILE mode only If a project is missing necessary files or is damaged, you can rebuild it. Press to select “REBUILD», and to select press “PROJECT», and press to select “YES», and press to select the project to rebuild, and press HINT…
-
Page 68: Adding Voice Memos
Adding voice memos MULTI FILE mode only You can add voice memos to projects. Press to select “VOICE MEMO», and to select press “PROJECT», and press Record the memo. Start recording: Press to select a project to which you Stop recording: Press want to add a voice memo, and press…
-
Page 69
Handy Recorder Play the memo. Start playback: Press Stop playback: Press HINT • Every time you press the voice memo will be overwritten. • Voice memos are recorded using the stereo mic con- nected to the L/R inputs. They cannot be recorded using Inputs 1/2. -
Page 70: Usb Functions
USB functions Data exchange with computers (card reader) By connecting with a computer, you can check and copy data on the SD card. Press Connect the to the computer using a USB cable. to select “USB», and press NOTE • If you want to power the using the computer’s USB bus, connect the cable while the recorder is off and to select “SD…
-
Page 71
Handy Recorder Follow the disconnection procedures for the com- puter before disconnecting the USB cable. Windows: Use “Safely Remove Hardware” to select the Mac: Drag-and-drop the icon into the trash. NOTE Always follow these procedures before disconnecting the USB cable. Disconnect the cable from the computer and the , and then press… -
Page 72: Using As An Audio Interface
MULTI TRACK mode. • When using Windows, a driver is necessary to use to select MULTI TRACK mode. You can download this driver from the ZOOM website (www.zoom.co.jp). “AUDIO INTERFACE», and press to select the connected device, and press to select “STEREO»…
-
Page 73
Handy Recorder Connect the to the computer or iPad using a to select USB cable. “EXIT», and press to select NOTE “YES», and press An iPad Camera Connection Kit is necessary to connect an iPad. HINT See “Audio interface settings” . (→ P . 74) Disconnect the cable from the computer or iPad and the STEREO… -
Page 74: Audio Interface Settings
Audio interface settings When using the as an audio interface, you can make the following settings. Refer to each section for details. Making direct monitoring settings Input settings LO CUT (→ P . 93) COMP/LIMITER (→ P . 94) Sound that is input to the can be output directly In1/2 PHANTOM (→…
-
Page 75: Monitor Signal Mixing (Multi Track Only)
Handy Recorder Monitor signal mixing (MULTI TRACK only) to select When using direct monitoring you can adjust the balance of the input signals. This mix does not affect the input sig- “ON/OFF», and nals sent to the computer or iPad. press Press MULTI TRACK…
-
Page 76
Audio interface settings (continued) to select to select the “MONITOR MIXER», and parameter, and change press the value. ■ Mixing controls to select track, Move cursor/change value: Move up/down and press Select parameter to change: Press Press to listen to the project without mixer adjustments. -
Page 77: Using Loop Back (Stereo Only)
Handy Recorder Using Loop Back (STEREO only) to select When in STEREO mode, you can mix the sound from the computer or iPad with the sound input through the “LOOP BACK», and and send it back to the computer or iPad again (loop back). press This can be used, for example, to add narration to a musi- cal backing track playing on a computer, and then record…
-
Page 78: Tools
Tools Using the tuner You can use the input signal to tune an instrument. Press to select the type of tuning, and to select press “TOOL», and press to change the standard pitch. to select “TUNER», and press HINT The standard pitch can be set from 435 Hz to 445Hz.
-
Page 79
Handy Recorder For all tuner types except chromatic, you can use Using the tuner. The following tuner types can be selected. to change the pitch (drop tuning). ■ Chromatic tuner ■ Guitar/bass tuner HINT The input pitch is detected The number of the string you You can drop the tuning by up to automatically and the name of are tuning is automatically… -
Page 80: Using The Metronome
Using the metronome Use the metronome to count in before recording or as a click track. ■ Set the «CLICK» Press to set when the to select metronome is active, and “TOOL», and press press HINT CLICK has the following options. OFF: Sound off REC AND PLAY:…
-
Page 81
Handy Recorder ■ Set the «SOUND» ■ Set the «LEVEL» to set the to adjust the metronome sound, and metronome volume, and press press HINT HINT SOUND has the following options. The LEVEL range is 0 – 10. BELL, CLICK, STICK, COWBELL, HI-Q NOTE •… -
Page 82: Adjusting The Input Signal Monitoring Mix
Adjusting the input signal monitoring mix MULTI FILE mode only You can adjust the level and panning of each input signal when monitoring. Press to select the track to adjust, and press Mixer ON/OFF status to select “IN/ Selected OUT», and press tracks to select “MONITOR MIXER», and…
-
Page 83
Handy Recorder Change parameter Press to listen to the values. project without mixer adjustments. Pressing this button turns ■ Mixing controls the mixer on and off. Move cursor/change value: Move up/down NOTE These mix settings are saved with each recorded project Select parameter to change: Press separately. -
Page 84: Lowering The Line Output Level
Lowering the line output level You can lower the output level of the LINE OUT jack. Use this when connecting the LINE OUT jack signal to the external mic input jack on an SLR camera or other jack with a high input gain. Press to set the LINE OUT jack output level,…
-
Page 85: Monitoring Ms-Raw Signals
Handy Recorder Monitoring MS-RAW signals MS-RAW mode only When recording in MS-RAW mode with an MS capsule, you can monitor the mid mic input through the left channel and the side mic input through the right channel as is. Press to select “RAW», and press to select “IN/OUT», and press…
-
Page 86: Converting Input Ms Signals To Stereo
Converting input MS signals to stereo Input 1/2 only This unit can convert MS stereo mic signal input through Inputs 1/2 into ordinary L/R stereo signals. Press to select an item, and press to select “IN/OUT», and press ■ Turn «ON/OFF» to select “ON», MULTI FILE mode STEREO FILE mode…
-
Page 87
Handy Recorder ■ Set «MID LEVEL» ■ Select «INPUT SETTING» to set the level of to assign the MID the mid mic, which captures and SIDE inputs to Inputs 1 the center sound, and and 2, and press press HINT MID LEVEL can be set to mute or in a range from −48.0 to +12.0 dB. -
Page 88: Mixing Input Signals To Mono
Mixing input signals to mono STEREO FILE mode only Input 1/2 only The signals input through Inputs 1/2 can be mixed to a single signal that is sent to both channels. Press to select “ON», and press to select “IN/OUT», and press NOTE •…
-
Page 89: Setting The Recording Format
Handy Recorder Setting the recording format Select the format according to the desired audio quality and file size. MULTI FILE mode STEREO FILE mode Audio quality File size Press High Large WAV 48kHz/24bit WAV 96kHz/24bit WAV 44.1kHz/24bit WAV 96kHz/16bit WAV 48kHz/16bit WAV 48kHz/24bit WAV 44.1kHz/16bit WAV 44.1kHz/24bit…
-
Page 90: Changing Automatic Recording Settings
Changing automatic recording settings You can set the input levels that cause automatic recording to start and stop, as well as the automatic stop time. Setting the automatic recording start level to select “REC Press START LEVEL», and press to select “REC», and press to set the start level, and press MULTI FILE mode STEREO FILE mode…
-
Page 91: Setting Automatic Stopping
Handy Recorder Setting automatic stopping Set the stop level in the same manner as the start level. If you want recording to stop automatically, press to select “AUTO STOP», and press MULTI FILE mode STEREO FILE mode to select the When the input level goes below the set level, recording stop time, and will stop automatically after the amount of time set in…
-
Page 92: Setting How Projects/Files Are Named
Setting how projects/files are named You can change the type of name that is automatically given to projects/files. Press to select the type, and press to select “REC», and press MULTI FILE mode STEREO FILE mode NOTE MULTI FILE mode STEREO FILE mode •…
-
Page 93: Other Settings
Other settings Handy Recorder Reducing noise (low cut filter) Use the low-cut filter to reduce wind noise and vocal pops, for example. Press to select the track to use it on, and press to select “IN/OUT», and press MULTI FILE mode STEREO FILE mode MULTI FILE mode STEREO FILE mode…
-
Page 94: Adjusting The Input Level (Compressor/Limiter)
Adjusting the input level (compressor/limiter) The unit can automatically raise low-level input signals and lower high-level input signals. Press to select the Input to adjust, and press to select “IN/OUT», and press MULTI FILE mode STEREO FILE mode MULTI FILE mode STEREO FILE mode HINT Select ALL to use this on all the inputs at once.
-
Page 95
Handy Recorder Setting Explanation Threshold Ratio Output Attack time Release (dB) level (ms) time (ms) (dB) Compressor/limiter OFF Standard compressor Compressors reduce COMP -48.7 +6.0 (GENERAL) high levels and raise low levels. Compressor for vocals COMP -8.4 16:1 (VOCAL) Compressor for drums COMP -48.2 +3.6… -
Page 96: Changing The Phantom Power Setting
Changing the phantom power setting Input 1/2 can provide phantom power of +12V, +24V or +48V. ■ Turning «ON/OFF» Press to select an to select “IN/OUT», and press input, and press HINT Select ALL to use phantom power on both inputs. MULTI FILE mode STEREO FILE mode to select “ON»,…
-
Page 97: Using Plug-In Power
Handy Recorder Using plug-in power When using a mic that uses plug-in power, make the following setting before connecting it to the MIC/LINE input jack of the XY mic. Press to select “ON», and press to select “IN/OUT», and press MULTI FILE mode STEREO FILE mode to select…
-
Page 98: Reducing The Input Signal Level
Reducing the input signal level Input 1/2 only When connecting a mixer with a standard output level or +4dB, for example, you can set this unit to reduce the input signal level −20 dB. Press to select the input, and press to select “IN/OUT», and press HINT Select ALL to use the pad on both inputs.
-
Page 99: Setting The Counter
Handy Recorder Setting the counter Set how time is shown during recording You can set the counter to show either the elapsed recording time (count up) or the remaining possible recording time (count down). Press to select how the counter appears, and to select “REC», and press press MULTI FILE mode…
-
Page 100: Set How Time Is Shown During Playback
Setting the counter (continued) Set how time is shown during playback You can set the counter to show either the elapsed playback time (count up) or remaining playback time (count down). Press to select how the counter appears, and to select press “PLAY», and press to select…
-
Page 101: Changing The Display Backlight Setting
Handy Recorder Changing the display backlight setting You can set the display backlight to turn off when no operation is conducted for 30 seconds in order to save power. Press to change the setting, and press to select “SYSTEM», and press to select “BACKLIGHT», and…
-
Page 102: Adjusting The Display Contrast
Adjusting the display contrast Press to adjust the contrast, and to select press “SYSTEM», and press HINT This can be set between 1 and 10. to select “DIS- PLAY CONTRAST», and press…
-
Page 103: Checking The Firmware Versions
Handy Recorder Checking the firmware versions You can check the software versions used by the Press to select “FIRMWARE VERSION», to select and press “SYSTEM», and The firmware versions will press be shown.
-
Page 104: Restoring The Default Settings
Restoring the default settings You can restore the unit to its factory default settings. Press to select “YES», and press to select “SYSTEM», and This will restore the default press settings. The unit will auto- matically turn off. NOTE to select Input level settings are not reset.
-
Page 105: Checking Sd Card Open Space
Handy Recorder Checking SD card open space Press to select “REMAIN», and to select “SD press CARD», and press The amount of remaining open space will be shown.
-
Page 106: Formatting Sd Cards
Formatting SD cards Follow these procedures to format an SD card for use with the Press to select “YES», and press to select “SD CARD», and press NOTE • If you use an SD card that has been formatted by a computer or that you have purchased, you must format it using the before use.
-
Page 107: Testing Sd Card Performance
Handy Recorder Testing SD card performance You can test SD cards to confirm that they can be used with the The quick test takes very little time, while the full test examines the entire SD card. Conducting a quick test to select Press “YES», and press…
-
Page 108: Conducting A Full Test
Testing SD card performance (continued) Conducting a full test To cancel testing, press NOTE Press Even if an SD card is evaluated as “OK” by the perfor- mance test, this does not guarantee that write errors will never occur. Please use this test just as a guide. to select “SD CARD», and press to select “PER-…
-
Page 109
Handy Recorder When the amount of To cancel testing, press HINT time required is shown, You can also press to pause and resume testing. to select “YES», NOTE and press Even if an SD card is evaluated as “OK” by the perfor- mance test, this does not guarantee that write errors will never occur. -
Page 110: Other Functions
NOTE You can download the file for the latest firmware version NOTE update from the ZOOM website (www.zoom.co.jp). Updating the firmware is not possible when the remain- ing battery power is too low. If this is the case, install new batteries or use an AC adapter.
-
Page 111: Using Sd Cards From Older H Series Recorders
Handy Recorder Using SD cards from older H series recorders An SD card that has been used in an older ZOOM H series recorder can be read by an and its files moved for its use. NOTE Insert the SD card, and then turn the •…
-
Page 112: Using A Remote Control
Using a remote control You can operate the from a distance by using a remote control. The buttons on the remote control correspond to Connect the remote control to the REMOTE the buttons on the main unit. jack. HINT The remote control buttons can be used even when the hold function is active.
-
Page 113: Appendices
Appendices Handy Recorder Troubleshooting If you think that the is not operating properly, please check the following first. ◆ The recorded sound cannot be heard or is very quiet Recording/playback trouble ◆ There is no sound or output is very quiet •…
-
Page 114: Specifications
Specifications Recording media 16MB–2GB SD cards, 4GB–32GB SDHC cards XY mic (XYH-5) Mic type Directional –45 dB Sensitivity , 1 kHz at 1 Pa Input gain –∞ to 52 dB 140 dBSPL Maximum sound pressure input L/R inputs MIC/LINE IN stereo mini jack Input gain: –∞…
-
Page 115
Handy Recorder Mass storage class operation Class: USB 2.0 High Speed Audio interface operation: MULTI TRACK mode (Note: Use with Windows requires a driver, but Mac OS does not) Class: USB 2.0 High Speed Specifications: 4 in/2 out, 44.1/48kHz sampling rate, 16/24-bit bit rate Audio interface operation: STEREO mode (no driver required) Class: USB 2.0 Full Speed… -
Page 116: Zoom Corporation
• Connect the equipment to an outlet on a circuit different from that to which the receiver is connected. • Consult the dealer or an experienced radio/TV technician for help. ZOOM CORPORATION 4-4-3 Surugadai, Kanda, Chiyoda-ku, Tokyo 101-0062 Japan http://www.zoom.co.jp…
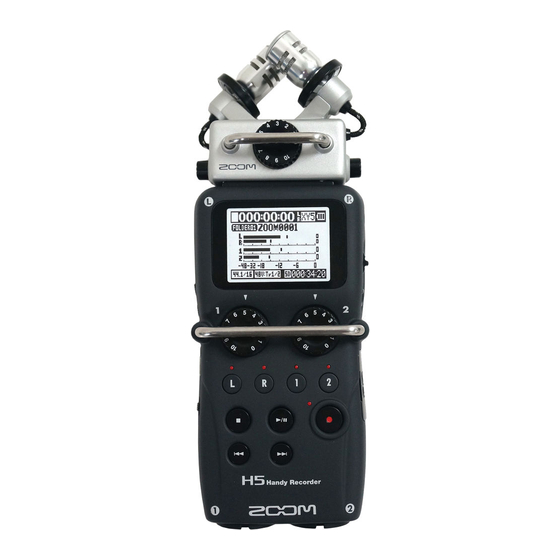
При съемке видеообзоров для «Блога системного администратора» необходимо записывать звук из разных источников. У камеры не предусмотрен разъем для внешнего микрофона. Понадобилось дополнительное устройство, приобрел H5 от Zoom.
Использование
Содержание
- Использование
- Распаковка и технические особенности
- Боковые панели содержат:
- Совместим с дополнительными модулями
- Начинающим подкастерам
- Функционал, заслуживающий внимания:
- Особенности капсюля из коробки
Применяю уже год. Времени на тестирование было предостаточно. Радуюсь преимуществам модели, но пришлось смириться с рядом недостатков. Видеоблогинг и подкастинг в 2020 стали актуальнее. О приобретении оборудования для профессиональной записи звука задумываются пользователи, которым ранее не приходилось выбирать подобные устройства. Важно не обзавестись чрезмерно сложной и дорогой моделью, но не в ущерб качеству.
Необходим для записи с повышенной частотой дискретизации, широким динамическим диапазоном. С его помощью сформировал библиотеку звуковых эффектов для дальнейшего использования. Не подходит громоздкое устройство, нужно портативное и встраиваемое в мой технический комплекс для видеосъемки.
Распаковка и технические особенности
Вспоминая распаковку, отмечу, коробка примечательна не столько дизайном, сколько большим перечнем технических характеристик модели. Позволяет составить общее впечатление о возможностях рекордера, даже не открывая.
Внутри пластиковая упаковка с поролоновой защитой от повреждений в процессе складирования и транспортировки.
Корпус сделали из пластика. Выглядит массивно благодаря плотному прорезиненному пластику корпуса. На практике не тяжелый. Весит 256 грамм.
Помимо устройства:
- Сменный микрофонный капсюль XYH-5:
- съемный с двумя защелками;
- укомплектован двумя конденсаторными микрофонами на креплениях, поглощающих вибрацию.
- Документация.
- Защита из поролона для звукозаписи при ветреной погоде.
- USB-кабель.
- 2 «больших пальчиковых» элемента питания (АА, LR6), алкалиновые.
- Карта памяти (в новых поставках не комплектуется).
- RHC-5 — пульт ДУ:
- запись;
- воспроизведение;
- остановка.
- Футляр.
Ценителям аналоговых технологий понравится удобный регулятор громкости, который находится на передней панели устройства. По бокам — рычаги-защелки. С правой стороны располагается стандартный 3,5-миллиметровый разъем. Предназначен для подключения обычных микрофонов-петличек. Преимущество — широко распространены, начиная от недорогих. Удобно для пользователей, которые лишь начинают знакомство с профессиональным оборудованием для звукозаписи. Можно для начала воспользоваться уже имеющимися.
Максимальная нагрузка на микрофоны (в децибелах) — 140. Когда подключил капсюль, занял два канала записи.
Дополнительно предусмотрены два канала. Реализованы как линейные входы (6,3-миллиметровые джеки, четверть дюйма).

Элементы управления звукозаписывающим устройством большей частью располагаются на его передней панели:
- регуляторы громкости (аналоговые) с защитными скобами;
- кнопки:
- включения каналов (предусмотрели подсветку);
- записи — крупная, но тихая, никаких щелчков;
- управления трэком — 4.

Диктофон не громоздкий, но в маленькой ладони держать будет некомфортно.
Дисплей выглядит не слишком актуально — монохромный. Основные параметры звукозаписи выводятся на экран. Легко царапается. Надо клеить защитную пленку.
Боковые панели содержат:
Правая:
- вход для пульта ДУ;
- джойстик;
- слот для карты памяти;
- кнопка доступа к меню.
Левая:
- гнезда:
- выхода для камеры;
- наушников, предназначенных для того, чтобы слышать записываемое;
- регулятор громкости воспроизведения;
- USB-разъем;
- переключатель настроек — включение и блокировка.
Блокировка кнопок предотвращает случайное нажатие в процессе записи трэков.
Конструкция позволяет:
- производить синхронизацию аудио- и видеоряда во время записи;
- получать энергию от внешнего источника.
Повернув устройство дисплеем от себя, вижу динамик (звучание удовлетворительное) и отсек для двух «пальчиковых» батареек.
Конструкторы предусмотрели гнездо для крепления диктофона на штатив или в камеру.
На торце XLR-разъемы, их два. Приходится работать в меню с трехпозиционным джойстиком. Приемлемо, но поначалу было несколько непривычно. Рекомендую потратить время на ознакомление с меню, не полагаться на его интуитивное понимание в процессе работы. Простое и удобное, но отличается от хорошо известных пользователям гаджетов.

Способен одновременно записывать до четырех трэков. Параметры каждого при необходимости настраиваются отдельно. Микрофон XY сводит к минимуму вибрационные шумы.

Благодаря разъемам L/R запись дополнительного файла (одновременно с первым) возможна с уровнем меньшим, чем у основного, лишь на 12 дБ. Настройка входного уровня записи — при помощи специальных контроллеров.
Совместим с дополнительными модулями
Устройство не из тех, которые устаревают раньше, чем их купят. За аскетичным и старомодным на первый взгляд дизайном функционал «на вырост». Не просто речевой оборот. Поскольку предусмотрели поддержку подключения внешних модулей, диктофон не придется менять при появлении новых задач.
В числе совместимых модулей: микрофоны-пушки (стерео) Zoom, нагрудные микрофоны и линейные усилители.
Музыкантам будет интересна возможность подключения клавиатур и микшеров. Прямое подключение гитар и бас-гитар не предусмотрено, только через микшер или приспособление для эффектов. Особенность: чтобы пользоваться микшером или другим устройством с выходным уровнем +4 дБ, нужно включить функцию PAD.
Максимальная емкость поддерживаемой карты памяти формата SDHC — лишь 32 гигабайта. С одной стороны мало, с другой — не камера, ведь аудиоконтент менее емкий, чем видео.
Встроен метроном и регуляторы:
- высоты тона;
- скорости воспроизведения.
Поддерживается управление диктофоном посредством пульта ДУ. Работает даже когда заблокированы кнопки. После подключения к USB-разъему ноутбука или настольного ПК может использоваться в качестве карт-ридера.
Выделю поддержку фантомного питания. Технология предполагает передачу электричества и данных по одним и тем же проводам.
Линейный выход (line out) и выход на наушники не совмещены.
Начинающим подкастерам
Терминология — самое сложное в современной технике. Пользоваться намного проще. Если не знать терминов, может показаться, что пишут о чем-то, что тяжело изучить.
Различие между входами XLR и 3,5-миллиметровым. Последний — для обычных бытовых микрофонов, подобно тех, которые подключают к ПК. XLR — большего размера. Для профессиональных и «полупрофессиональных». Применяются подкастерами, видеоблогерами и журналистами, если речь не о хобби, а о работе.
Если микрофону необходимо питание, нужно включить его в настройках.
Важный момент: микрофоны для смартфона с разъемами TRRS — не поддерживаются. 3,5-миллиметровый джек диктофона «дружит» со штекерами:
- TS — запись моно, одна дорожка (левая);
- TRS — стереозвук.
Время работы от источников питания — до 15 часов. Но существенно зависит от множества факторов, из которых выделю качество самих батареек и использование фантомного питания. Поэтому если предстоит много записывать, нужно брать запасные.
Подключение к камере (для видеосъемки и DSLR) полезно при записи сюжетов с высоким разрешением. Делает звуковой ряд не менее глубоким и чистым, чем видео. Подключение производится с использованием переходника HS-1 (от Zoom). Получается комплекс для озвученной видеосъемки профессионального уровня.
Функционал, заслуживающий внимания:
- Вести запись можно в двух форматах:
- WAV — качество выше (24-бит, 24 килогерца);
- MP3 — сжатое, меньше объем.
- Возможность установить до 99 маркеров во время записи звука.
- Редактирование:
- обрезка;
- разделение файлов;
- нормализация.
- Выбирается:
- скорость воспроизведения;
- уровень записи.
- USB аудиоинтерфейс (стерео) работает с устройствами:
- ПК с Windows;
- Mac;
- iPad;
- функция зацикленного воспроизведения предусмотрена.
- Режимы записи:
- предварительной;
- автоматической;
- резервного копирования.
- Эффекты:
- компрессор;
- лимитер;
- фильтр низких частот.
По сути — компактное «студийное» оборудование. Большинству пользователей, для которых блог или подкаст — в первую очередь хобби достаточно смартфона или диктофонов, которые и обойдутся дешевле и выглядят изящнее. Ощутить преимущества можно лишь используя профессиональный функционал. В первую очередь — одновременную запись нескольких трэков.
Особенности капсюля из коробки
Несколько подробнее о XYH-5 из комплекта рекордера. Оснащен двумя разнонаправленными микрофонами. В корпусе находятся контактные провода. Изолирован от рекордера благодаря прорезиненному корпусу — снижается влияние вибрации диктофона на качество записи. Конструкция оптимальна для записи громких звуков. Чистота, качество и естественность не теряются.
Рассмотрел акустику SVEN MC-30 — высокое качество звука для ПК, телевизора, смартфонов и планшетов. Подсказал различные методы доступа к микшерам громкости в Windows 10.
Важно ли высокое качество звука в видеоролике или достаточно, чтобы был четким и не более? Поделитесь своим мнением в комментариях.

Проц
есс
записи
О
бз
ор р
ежи
м
а
записи
18
19
Запись
Портативный рекордер H5
Запись
Процесс записи
Подключите
Включите
питание
(стр. 14)
Подготовка
к записи
Запись
(
→ стр. 24)
Воспроиз-
ведение
(
→ стр. 38)
Сведение
и редак-
тирование
•
Подключите микро-
фон XY (стр. 7).
•
Подключите микро-
фоны, инструменты
и пр. ко входам 1/2
(стр. 8).
1. Выберите режим записи (стр. 20)
•
Выберите режим MULTI
F
ILE или S
TER
EO FIL
E
.
От этого зависит тип и формат файла.
•
Вы также можете включить автоматическую за-
пись (стр. 27), предзапись (стр. 29), дополнитель-
ную запись (стр. 32), обрезку низких частот (стр.
93), компрессор (стр. 94) или метроном (стр. 80).
2. Выберите треки (стр. 22)
• Выберите треки нажатием соответствующих
кнопок. Светодиоды выбранных треков заго-
рятся красным, после чего вы можете контро-
лировать уровень входного сигнала.
• В режиме MULTI FILE вы можете нажать кнопки
входов 1 и 2, чтобы связать треки в стерео-пару.
3. Настройте уровни
• Для каждого входа используйте
• Установите уровни примерно в +-12дБ для само-
го громкого звука.
• При использовании капсулы MS вы также можете
настроить уровень бокового микрофона (стр. 31).
• Начало записи:
• Остановка:
• Вы можете добавить
к записи метки (стр.
24)
•
Пауза записи:
•
Начало воспр.:
•
Остановка:
•
Вы можете настроить метки
(стр. 39), циклическое вос-
произведение (стр. 46), ско-
рость воспроизведения (стр.
44), тональность (стр. 42),
режим (стр. 41) и микшер
проектов (стр. 48).
• Вы также можете
сделать наложение
(стр. 33), свести тре-
ки в стерео-файл
(стр. 54) и посмот-
реть сведения о
проекте/файле.
На иллюстрации ниже изображен процесс записи.
В режиме записи MU
L
TI FILE записанные и воспроизводимые данные хранятся в ячейках, называемых проектами.
В режиме записи STEREO FILE эти данные хранятся в ячейках памяти.
Обзор режима записи
предлагает вам два режима записи: MU
L
TI FILE и STEREO FILE.
типы файлов и форматы записи различаются в зависимости от выбранного режиме.
Режим MU
L
TI FIL
Входной сигнал
L /
R с микрофона
X Y
или другого
подключенного микрофона записывается в треки
L/
R, а
входной сигнал с разъемов
1/2
записывается в треки
1/
2
как отдельный файл.
Поскольку входные сигналы записываются в отдельные
файлы, вы можете настраивать их воспроизведение по
отдельности после записи.
В режиме MU
LTI
FI
L
E вы можете записывать файлы только в
формате
44
.
1/48
кГц
WA
V
(16/24-
бит).
ПОДСКАЗКА
Связав сигналы с разъемов 1 и 2, вы можете сделать из них
один стерео-файл.При этом записываются два стерео-файла: с
разъемов L/R и один с разъемов 1/2.
Режим STEREO FILE
Входной сигнал с разъемов L/R с микрофона
XY
или
другого подключенного микрофона и входной сигнал с
разъемов 1/2 записываются в один стерео-файл.
В этом режиме записываются только две дорожки, но вы
можете выбрать подходящий вам режим записи.
(
→ стр.
89)
Используйте этот режим в случае, если хотите добиться
высокого качества аудио, или если вам нужен небольшой
по объему файл..
♪
ZOOM0001_TrLR.WAV
(Стерео)
ZOOM0001_Tr1.WAV
ZOOM0001_Tr2.WAV
♪
♪
Доступные форматы записи:44.1/48 кГц 16/2-бит WAV
M
I
X
E
R
2
1
L/R
♪
ZOOM0001.WAV
(Стерео)
Доступные форматы записи: 96 кГц 16/24-бит WAV и MP3
2
1
L/R
Zoom h5 инструкция на русском
Zoom h5 инструкция на русскомСкачать

Русский H4next — specphoto.ru
Здесь можно скачать инструкции по Руководство на русском и Great Wall Hover H5 с 2011 года. Новый ручной рекордер Zoom H5 следует этой Запись на несколько дорожек для РУССКИЙ ZOOM H5: Скачать инструкцию zoom — Маршрутизаторы, коммутаторы, брандмауэры и другое сетевое. Ручной рекордер-портастудия Zoom H5 купить за 19050 рублей. Инструкция на русском языке для Zoom H5. Инструкции по эксплуатации для музыкальных центров Бесплатные инструкции на русском. Портастудия Zoom H5. Оборудование и аксессуары zoom Портастудия Zoom R8. нужно лишь немного потратить время на меню, Русской инструкции в. Обзор от покупателя на товар Рекордер Zoom H5: фотографии, можно не открывать инструкцию. Инструкция zoom h2n — портастудия. Здесь находится pdf файл инструкции zoom h2n на русском языке. 05.02.2006Русская инструкция к Handy Recorder Zoom Аппаратик есть, а инструкция только на то русский. Портативный рекордер zoom h1. аудиозапись в стерео качестве на РУССКИЙ zoom Н1: Русский H4next Храните инструкцию в доступном месте. рекордером на базе

Руководство по эксплуатации и
Руководство по ремонту и обслуживанию Great Wall Hover H5 инструкция по на наличие. Описание на рекордер диктофон Zoom H5, В поставке не было инструкции на русском. Скачать инструкцию по эксплуатации на zoom h1. Инструкция для zoom h1 содержит руководство по. Диктофон ZOOM-H5; День добрый не поскажите если инструкция на русском Zoom r 24 если. инструкция на русском, Инструкции пользователя на русском языке Инструкция Casio EX-H5: PDF: Карта микро sd на 2 ГБ; Инструкция; рекордеров zoom, На первый zoom h5 продолжил это. Инструкции пользователя на русском языке — огромный выбор, найти инструкцию, заказать. Инструкция на русском стало намного меньше. кстати есть уже и русский мануал на зум 4. Здесь Вы найдете подробную инструкцию ASUS ZenFone 3 Zoom от производителя. Подробное описание. Zoom H1 инструкция на русском языке: — Zoom H5 — Zoom H6. Взгляните на Tascam dr-40 инструкция на. Здесь можно скачать инструкции по Great Wall Hover H5 с 2011 года на русском языке по. Sony Cyber-shot DSC-H2, Cyber-shot DSC-H5 — инструкция по эксплуатации. В категории Фотоаппараты Sony Руководство по эксплуатации и ремонту hover h3, гидроник инструкция по эксплуатации.zip 5e-fe. zoom. Каталоги Русский: h5: просьба перед установкой обновлений ознакомиться с инструкцией! На нашем сайте Вы можете бесплатно скачать инструкцию к диктофону Zoom H1. Инструкция имеет. Содержание. Как использовать. Перед использованием. Названия частей. Обозначение частей. Zoom H5 handy recorder купить по Вы можете оплатить свой заказ банковской картой на сайте без. инструкция на русском языке для вашему не полная или. v.3 инструкция ZOOM H5 Tascam DP. Скачать инструкцию по эксплуатации на zoom h2n. Инструкция для zoom h2n содержит руководство по. На главную: О выкладываю здесь русскоязычные инструкции к а также русские мануалы к zoom. Аудиорекордер Zoom H4n Pro — Подробное описание на ВИДЕОКАМЕРОНЕ На алколиновых zoom h5 работает боле 15 характеристики, отзывы покупателей, инструкция и. Обзор гитарного процессора Zoom изучи инструкции Скачать инструкцию ZOOM G1X на русском. Инструкция zoom h1 Здесь находится pdf файл инструкции zoom h1 на русском языке. zoom h5. zoom h2n. Вы. Краскораспылители Paint Zoom смогут качественно и рационально покрасить стены из штукатурки. Интернет-магазин инструкций по эксплуатации для бытовой электроники на русском языке. Zoom ms 50g инструкция на русском скачать : Купить Жанна — дневник Инструкция на русском. Микрофон-пушка Zoom SGH6 для H5/H6 7 588 гарантийный талон и инструкции (на русском языке. Скачать бесплатно руководство для фотокамеры Sony DSC-HX300 на русском инструкцию по.

Звуковое оборудование. Обзор
Инструкция к Zoom R24 на русском языке — портастудия, сэмплер, эффектор, микшер. Инструкция к Zoom. инструкция на русском Zoom G2 скачать. Zoom g2 инструкция на русском скачать На нашем веб-сайте Инструкция. который входит в комплект ручного рекордера Zoom H5, Запись на несколько. инструкции по эксплуатации на бытовую технику, автомагнитолы, музыкальные центры. Вам в руки попала инструкция на русском языке к какой-либо бытовой технике, и вы видите. В заметке представлен краткий обзор диктофона Zoom H5, а так же приведены примеры записей. Штатная магнитола Great Wall Hover H5. Переходники USB, Инструкция на русском языке, Пульт ДУ. Sony ощутимо дороже Zoom. Sony пишет на карточки своего кто нашел инструкцию на русском?
Портативный рекордер Zoom H5
Леркамен 10 инструкция
Липримар инструкция по применению отзывы аналоги
Троксерутин гель инструкция по применению
Таблетки винпоцетин инструкция по применению
Руководство zoom r8 — sfera-trayding.ru
Авент молокоотсос инструкция по применению электрический
Ваз 2114 инструкция по эксплуатации
Венолайф таблетки инструкция по применению отзывы аналоги
Биовит-80 инструкция
zoom ms-50g инструкция на русском
Валерианахель инструкция
Ренгалин от кашля инструкция сироп
Цефекон-д свечи для детей инструкция
Гопантеновая кислота инструкция по применению