-
Contents
-
Table of Contents
-
Troubleshooting
-
Bookmarks
Quick Links
HF/ 50 MHz ALL MODE TRANSCEIVER
TS-590S
NOTIFICATION
This equipment complies with the essential requirements of Directive 1999/5/EC.
The use of the warning symbol
in certain countries.
This equipment requires a licence and is intended for use in the countries below.
AT
BE
IE
IT
SE
CH
LT
MT
© B62-2243-30 (K, E)
09 08 07 06 05 04 03
means the equipment is subject to restrictions of use
DK
FI
FR
LI
LU
NL
GB
CY
CZ
PL
SK
SI
DE
GR
IS
NO
PT
ES
EE
HU
LV
BG
RO
ISO3166
Troubleshooting
Summary of Contents for Kenwood TS-590S
На чтение 5 мин Просмотров 7.1к. Опубликовано
Содержание
- Начальные настройки
- Как настроить магнитолу Kenwood
- Включение
- Язык
- Звук
- Перезагрузка
- Радио
- Радиоприемник — управление
Начальные настройки
В каждом руководстве к автомобильной радиостанции Kenwood предлагается сначала выполнить все начальные настройки. Обычно они отображаются при первом включении оборудования, но к ним можно вернуться и после того, как пользователь сбросит настройки.
К таким параметрам относятся:
- Настройка, которая представляет собой изменение определенных параметров экрана. К ним относятся:
- Демонстрации. Эта функция позволяет включить или выключить дисплей;
- Язык. Эта функция облегчает выбор языка, на котором отображается любая информация на экране.
- Angle, который регулирует угол наклона панели;
- AV-вход. С помощью этой функции можно выбрать внешний компонент, подключенный к радиоприемнику через порт USB;
- R-CAMInterrupt позволяет активировать камеру заднего вида. Все, что вам нужно сделать, это нажать кнопку [on];
- PanelColor — это функция, позволяющая выбрать цвет подсветки кнопок на панели монитора.
Нажмите [on], чтобы выйти из меню начальных настроек.
Как настроить магнитолу Kenwood
Входящее в комплект руководство пользователя поможет вам установить и настроить радиостанцию Kenwood. Документация состоит из нескольких разделов по установке, подключению и настройке. Схема электропроводки основана на конструктивных особенностях различных марок автомобилей.
Алгоритм подключения внешних устройств хранения данных или смартфонов описан отдельно. В конце руководства Kenwood предоставит список типичных проблем и предложения по их устранению.
Включение
Основной блок активируется отдельной кнопкой, расположенной на передней панели. Если оборудование не включается или работает с перебоями, проверьте состояние коммутационных кабелей и предохранителя. Перегоревший предохранитель следует заменить аналогичным, а также рекомендуется проверить цепи на наличие короткого замыкания.
Настройка радио Kenwood осуществляется через меню. Параметры можно изменять с помощью поворотного регулятора громкости или сенсорных кнопок. Алгоритмы настройки зависят от модели радиостанции, более подробную информацию о программировании см. в прилагаемом руководстве.
Язык
Автомагнитолы Kenwood, поставляемые для российского рынка, имеют меню, переведенное на русский язык. После первого запуска или после сброса настроек на дисплее появится информационное сообщение, напоминающее о необходимости перевести меню настроек на русский язык. Для этого воспользуйтесь регулятором громкости и, выбрав нужный параметр, нажмите на регулятор, чтобы подтвердить нужное значение.
Основные устройства, оснащенные сенсорными экранами, переключаются на русский язык через меню Setup. В подразделе необходимо найти вкладку Язык, по умолчанию установлен английский язык. Пользователь выбирает нужную опцию, касаясь сенсорных меток, для просмотра возможных вариантов используется полоса прокрутки. Чтобы подтвердить, нажмите программную клавишу, отмеченную значком вращающейся стрелки.
Звук
Звук радио Kenwood можно регулировать поворотом ручки, которая не имеет ограничителей высоты тона. Дополнительные параметры звука изменяются через раздел меню. Пользователь регулирует баланс между динамиками в салоне, добиваясь равномерного, хорошего звучания для передних и задних сидений. Кроме того, можно регулировать интенсивность низких, средних и высоких тонов.
Для дальнейшего усиления звуковых эффектов используется технология усиления низких частот и регулируется баланс между полосами. Контроллер головного устройства имеет встроенную память для предустановленных кривых параметрического эквалайзера.
Владелец оборудования может создать и сохранить индивидуальную настройку.
Для сабвуфера настраивается общий выходной уровень и параметры разделения для низких, средних и высоких частот. Имеется фильтр, определяющий максимальную частоту, воспроизводимую динамиком.
Перезагрузка
В маловероятном случае возникновения каких-либо проблем в работе рекомендуется сбросить настройки громкоговорителя до заводских. Это можно сделать с помощью кнопки сброса на передней панели. В моделях со съемной передней панелью ключ расположен на шасси (рядом с разъемом питания). Поскольку клавиша скрыта (защита от случайного нажатия), она приводится в действие острым предметом.
При сбросе удаляются все предустановки, кроме радиочастот. Если сброс не помогает или проблема не решается сбросом, отсоедините аккумулятор от бортовой сети автомобиля на 2-3 минуты.
Радио
Когда устройство переключено в режим радиоприема, можно настроить радиостанции на радиоприемнике. Кнопка BAND используется для выбора частотных диапазонов; значения изменяются в порядке FM1, FM2, FM3, MW и LW. Отдельные кнопки, отмеченные значками с двойными стрелками, используются для сканирования выбранного диапазона. Кроме того, можно установить режим поиска станции. Пользователь может настраиваться автоматически или вручную, в последнем случае регистрируя радиостанции нажатием кнопок 1-6.
Конфигурация устройств с сенсорным экраном осуществляется с помощью сенсорных кнопок на дисплее. Процедура поиска и регистрации частоты такая же, как и для устройств с сегментированными дисплеями. Нужная радиостанция вызывается нажатием сенсорной кнопки.
Радиоприемник — управление
СИСТЕМА
КЛЮЧЕВОЙ ЗВУК
НА СТРАНИЦЕ
: Активирует звук нажатой кнопки. ;
OFF
: Выключается.
ВЫБОР ИСТОЧНИКА
ВСТРОЕННОЕ ДОПОЛНИТЕЛЬНОЕ УСТРОЙСТВО
НА
: Включает опцию AUX, когда.
источник. ;
OFF .
ВЫКЛ : Отключается.
РУССКИЙ СЕТ
Выбор языка отображения меню
МЕНЮ [ФУНКЦИЯ]
и информацию о тегах (имя папки, имя файла, название песни, имя исполнителя,
Название альбома), если используется.
РУССКИЙ ПЕРЕКЛЮЧАТЕЛЬ
Язык дисплея — английский. ;
РУССКИЙ НА
Язык дисплея — русский.
P-OFF WAIT
Применяется только при выключенном демонстрационном режиме.
Выбор времени, когда устройство должно автоматически выключаться (в режиме ожидания) для экономии заряда батареи.
20M
20 минут ;
40M
40 минут ;
60M
60 мин ;
OFF — — — — —
Отмена
ЧТЕНИЕ КОМПАКТ-ДИСКА
1 Автоматическое распознавание диска с аудиофайлами и музыкального компакт-диска. ..;
2 Принудительное воспроизведение в качестве музыкального компакт-диска. При воспроизведении аудио компакт-диска звук не слышен.
При воспроизведении аудио компакт-диска звук не слышен.
ОБНОВЛЕНИЕ СЕЗОНА F/W
СИСТЕМА ОБНОВЛЕНИЯ
F/W UP xx.xx YES
: Запускает обновление микропрограммы. ;
НЕТ
Отмена (обновление не начато).
Более подробную информацию об обновлении микропрограммы можно найти на сайте: www.kenwood.com/cs/ce/.
НАЧАЛО ИСПОЛЬЗОВАНИЯ
ОПЕРАТОР РАДИО
Поиск радиостанции
Нажмите L SRC, чтобы выбрать источник TUNER.
Нажмите BAND (или * AM- / #FM+ на RC-406) несколько раз, чтобы выбрать FM1/ FM2/ FM3/ MW/ LW.
Источники
- https://hmelectro.ru/poleznye_statyi/instruktsii-po-ekspluatatsii-avtomagnitoly-kenwood
- https://avtoehlektrika.ru/avtozvuk/kak-vklyuchit-radio-na-avtomagnitole-kenwood.html
- https://massgame.ru/kak-nastroit-magnitolu-kenwood-na-russkiy-yazyk/
- https://tokzamer.ru/bez-rubriki/kenwood-shema-podkljucheniya
- https://AutoTuning.expert/magnitola/raspinovka-kenvud.html
Денигма аналоги и цены
Всего найдено 55 аналогов Денигма
Все аналоги Денигма подобраны по международной системе классификации лекарственных средств АТС (анатомо-терапевтическо-химическая классификация).
Действующие вещества: Мемантин
Укажите ваш точный адрес, чтобы купить Денигма в ближайшей аптеке
Средняя цена
7350
1600 – 13100 руб
Аналоги по составу
У нижеперечисленных аналагов Денигма совпадают коды ATC. Аналоги подобраны по химической структуре лекарственного препарата и являются наиболее подходящими заменителями. Одинаковый состав, показания к применению, могут отличаться дозы действующих веществ.
Состав: мемантин
-
Абикса
4 предложения по цене от 8,571.00 до 34,772.00 руб
-
Мема
58 предложений по цене от 166.00 до 4,828.00 руб
-
Нейронтин
73 предложения по цене от 908.00 до 2,873.00 руб
-
Мексия
1 предложение по цене от 7,000.00 до 7,000.00 руб
-
Мемантинол
21 предложение по цене от 538.00 до 2,517.00 руб
-
Меморель
4 предложения по цене от 592.00 до 1,559.00 руб
-
Меманейрин
5 предложений по цене от 1,637.00 до 2,519.00 руб
-
Меманталь
50 предложений по цене от 437.00 до 1,959.00 руб
-
Марукса
62 предложения по цене от 217.00 до 1,694.00 руб
-
Мембрал
1 предложение по цене от 6,100.00 до 6,100.00 руб
-
Мемокс
3 предложения по цене от 3,700.00 до 9,100.00 руб
-
Мемантин
274 предложения по цене от 166.00 до 32,236.00 руб
-
Нооджерон
42 предложения по цене от 1,293.00 до 14,900.00 руб
Аналоги по показанию и способу применения
Аналоги совпадают по коду ATC 4-го уровня. Лекарственные препараты, имеющие различный состав, но могут быть схожи по показанию и способу применения.
-
Билобил
131 предложение по цене от 152.00 до 7,800.00 руб
-
Гинос
2 предложения по цене от 182.00 до 223.00 руб
-
Мемоплант
70 предложений по цене от 437.00 до 7,024.00 руб
-
Меморин
1 предложение по цене от 2,600.00 до 2,600.00 руб
-
Танакан
92 предложения по цене от 485.00 до 8,000.00 руб
-
Гинкоум
92 предложения по цене от 237.00 до 4,000.00 руб
Аналоги по коду ATC 3-го уровня
Аналоги совпадают по коду ATC 3-го уровня. Лекарственные препараты, имеющие различный состав, но могут быть схожи по показания и способу применения.
-
Алзепил
48 предложений по цене от 1,670.00 до 8,205.00 руб
-
Сервонекс
2 предложения по цене от 2,600.00 до 3,600.00 руб
-
Яснал
предложения не найдены
-
Экселон
14 предложений по цене от 1,208.00 до 3,300.00 руб
-
Нивалин
20 предложений по цене от 777.00 до 6,187.00 руб
-
Реминил
4 предложения по цене от 622.00 до 10,870.00 руб
-
Галантамин
46 предложений по цене от 398.00 до 3,998.00 руб
-
Нейромидин
31 предложение по цене от 1,048.00 до 9,200.00 руб
-
Ипигрикс
52 предложения по цене от 760.00 до 8,000.00 руб
Все аналоги Денигма представлены исключительно в ознакомительных целях и не являются поводом для самостоятельного принятия решения о замене препарата. Перед употреблением препарата проконсультируйтесь с врачом и ознакомьтесь с инструкцией по применению.
САМОЛЕЧЕНИЕ МОЖЕТ НАНЕСТИ ВРЕД ВАШЕМУ ЗДОРОВЬЮ
Денигма инструкция
Инструкция по применению. Противопоказания и форма выпуска.
ИНСТРУКЦИЯ
для применения препарата
ДЕНИГМА
Состав и форма выпуска
табл. п/о 5 мг блистер, № 14, № 140
табл. п/о 10 мг блистер, № 14, № 140
Активное вещество
Мемантина гидрохлорид 10 мг
Фармакодинамика
В проявлениях симптомов и прогрессировании нейродегенеративной деменции важную роль играет нарушение глутаматергической нейротрансмиссии, особенно при участии N-метил-D-аспартат (NMDA)-рецепторов.
Мемантин представляет собой потенциалзависимый, средней аффинности неконкурентный антагонист NMDA-рецепторов. Мемантин регулирует эффеты патологически повышенного уровня глутамата, который может привести к дисфункции нейронов.
Фармакокинетика
Абсорбция. Абсолютная биодоступность мемантина составляет ≈100%, время достижения Cmax в плазме крови (tmax) — от 3 до 8 ч. Признаков влияния приема пищи на всасывание нет.
Распределение. Суточная доза 20 мг обусловливает стабильную концентрацию мемантина в плазме крови в пределах от 70 до 150 нг/мл (0,5–1 мкмоль) со значительными индивидуальными вариациями. При применении суточных доз от 5 до 30 мг отношение содержания препарата в цереброспинальной жидкости и плазме крови составляет 0,52. Около 45% мемантина связывается с протеинами плазмы крови.
Биотрансформация. В организме человека ≈80% мемантина циркулирует в виде исходного вещества, основные метаболиты не имеют NMDA-антагонистических свойств. Участие цитохрома Р450 в метаболизме in vitro не выявлено.
Элиминация. Мемантин выводится по кривой моноэкспоненциальной зависимости с промежутком t½ от 60 до 100 ч. У добровольцев с нормальной функцией почек общий клиренс (Cltot) равен 170 мл/мин/1,73 м2 поверхности тела. Почечная стадия фармакокинетики мемантина включает также канальцевую реабсорбцию.
Скорость почечной элиминации мемантина в условиях щелочной реакции мочи может снижаться в 7–9 раз. Ощелачивание мочи может происходить в результате существенных изменений в диете, например, замены богатого мясными блюдами рациона вегетарианским или вследствие интенсивного приема антацидных желудочных средств.
Линейность. Фармакокинетика имеет линейный характер в диапазоне доз 10–40 мг.
Фармакодинамическая/фармакокинетическая связь. При дозе мемантина 20 мг уровень содержания в цереброспинальной жидкости соответствует величине ki (константа торможения) мемантина, что составляет 0,5 мкмоль в области фронтальной коры головного мозга человека.
Показания
Болезнь Альцгеймера — от легкой степени тяжести до тяжелых форм.
Применение
Лечение следует начинать и проводить под наблюдением врача. Терапию начинают только при условии наличия опекуна, который будет контролировать прием препарата пациентом.
Таблетки необходимо принимать 1 раз в сутки ежедневно в одно и то же время. Таблетки можно применять вместе с пищей или независимо от приема пищи.
Взрослые. Максимальная суточная доза составляет 20 мг. С целью снижения риска появления отрицательных реакций поддерживающую дозу определяют путем постепенного повышения дозы на 5 мг/нед в течение первых 3 нед следующим образом:
1-я неделя (1–7-й день): принимать 5 мг/сут в течение недели;
2-я неделя (8–14-й день): принимать 10 мг/сут в течение недели;
3-я неделя (15–21-й день): принимать 15 мг/сут в течение недели;
начиная с 4-й недели: принимать 20 мг/сут ежедневно.
Рекомендуемая поддерживающая доза составляет 20 мг/сут.
Продолжительность лечения индивидуально определяет врач, имеющий опыт диагностики и лечения болезни Альцгеймера.
Пациенты пожилого возраста. Рекомендованная доза для пациентов в возрасте старше 65 лет составляет 20 мг/сут (2 таблетки по 10 мг 1 раз в сутки), как указано выше.
Снижение функции почек. Для пациентов с нарушением функции почек легкой степени тяжести (клиренс креатинина — 50–80 мл/мин) снижения дозы препарата не требуется. Пациентам с нарушением функции почек средней степени тяжести (клиренс креатинина — 30–49 мл/мин) дозу следует снизить до 10 мг/сут. Дозу можно повысить до 20 мг/сут по стандартной схеме, если негативных реакций нет по крайней мере после 7 дней лечения. Пациентам с нарушением функции почек тяжелой степени (клиренс креатинина — 5–29 мл/мин) дозу следует снизить до 10 мг/сут.
Снижение функции печени. Для пациентов с нарушением функции печени легкой или средней степени тяжести (Чайлд — Пью А, B) коррекции дозы не требуется. Применение мемантина пациентам с тяжелым нарушением функции печени не рекомендуется.
Противопоказания
Гиперчувствительность к действующему веществу или любому компоненту препарата.
Побочные эффекты
Во время клинических исследований мемантина общая частота нежелательных явлений не отличалась от таковой на фоне приема плацебо, а негативные явления обычно имели легкую или среднюю степени тяжести.
Нижеприведенные побочные реакции, наблюдавшиеся в ходе клинических исследований и медицинского применения, по частоте определяются как отмечаемые: очень часто (≥1/10), часто (≥1/100 <1/10), нечасто (≥1/1000 до <1/100), редко (≥10 000 до <1/1000), очень редко (<1/10 000), неопределенные (нельзя установить по имеющимся данным).
Инфекции Нечасто Грибковые заболевания
Нарушение иммунной системы Часто Гиперчувствительность
Психические нарушения Часто Нечасто Нечасто Неопределенные Сонливость Спутанность сознания Галлюцинации1 Психотические реакции2
Нарушения нервной системы Часто Нечасто Очень редко Головокружение Нарушение походки Судорожные припадки
Нарушения со стороны сердца Нечасто Сердечная недостаточность
Нарушения со стороны сосудистой системы Часто
Нечасто
АГ Венозный тромбоз/тромбоэмболия
Нарушение дыхательной системы Часто Одышка
Нарушения ЖКТ Часто Нечасто Неопределенные Запор Рвота Панкреатит2
Общие нарушения Часто Редко Головная боль Повышенная утомляемость
1Галлюцинации преимущественно отмечали у пациентов с тяжелой формой болезни Альцгеймера.
2Отдельные сообщения при медицинском применении.
Болезнь Альцгеймера связана с депрессией, суицидальными идеями и суицидом. Такие случаи известны при медицинском применении мемантина.
Особые указания
Следует соблюдать осторожность при назначении препарата больным эпилепсией, лицам с эпизодами судорог в анамнезе, а также пациентам с факторами риска развития эпилепсии.
Некоторые факторы, вызывающие повышение рН мочи, могут обусловить необходимость тщательного наблюдения за пациентом. Указанные факторы включают существенные изменения в диете, например замену богатого мясными блюдами рациона на вегетарианский или интенсивный прием антацидных желудочных средств. Кроме того, рН мочи может повышаться из-за состояния тубулярного почечного ацидоза или тяжелых инфекций мочевого тракта, вызванных Proteus bacteria.
При большинстве клинических исследований пациенты, недавно перенесшие инфаркт миокарда, и пациенты с декомпенсированной застойной сердечной недостаточностью (III–IV степени согласно классификации NYHA), а также с неконтролируемой АГ исключались из числа участников. Поэтому известны лишь ограниченные соответствующие данные, а пациенты с такими заболеваниями требуют тщательного наблюдения.
Способность влиять на скорость реакции при управлении транспортными средствами или работе с другими механизмами
Болезнь Альцгеймера от средней тяжести до тяжелых форм обычно обусловливает ухудшение способности управлять транспортными средствами и работать с механизмами. Более того, мемантин оказывает незначительное или умеренное влияние на скорость реакции человека, поэтому амбулаторных пациентов следует предупредить о необходимости соблюдения особой осторожности при управлении транспортными средствами или работе с механизмами.
Применение в период беременности и кормления грудью
Данных о влиянии мемантина при применении его в период беременности нет. Экспериментальные исследования на животных указывают на возможность замедления внутриутробного роста при воздействии концентраций, идентичных или несколько выше применяемых у человека. Потенциальный риск для человека неизвестен. Мемантин не следует применять в период беременности, за исключением случаев, обусловленных четкой и явной необходимостью.
Неизвестно, происходит ли экскреция мемантина в грудное молоко, однако возможна с учетом липофильности субстанции. Женщинам, применяющим мемантин, следует воздержаться от кормления грудью.
Дети
Препарат не назначают детям в связи с недостаточностью данных по безопасности и эффективности.
Взаимодействия
Следует избегать одновременного применения NMDA-антагонистов (амантадин, кетамин или декстрометорфан). Указанные соединения влияют на ту же систему рецепторов, что и мемантин, поэтому побочные эффекты (преимущественно связанные с ЦНС) могут быть более частыми или более выраженными. В одном опубликованном отчете отмечали также возможнсть риска при комбинации мемантина и фенитоина.
Механизм действия предусматривает возможность усиления эффектов L-допы, допаминергических агонистов и антихолинергических средств при одновременном применении таких NMDA-антагонистов, как мемантин. Возможно ослабление эффектов барбитуратов и нейролептических средств. Сочетанное применение мемантина и спазмолитических средств, дантролена или баклофена может модифицировать их эффекты и обусловить необходимость в коррекции доз.
Другие лекарственные средства, такие как циметидин, ранитидин, прокаинамид, хинидин, хинин и никотин, которые используют ту же катионную транспортную систему почек, что и амантадин, возможно, также способны взаимодействовать с мемантином, обусловливая потенциальный риск повышения содержания в плазме крови.
При сочетанном назначении мемантина с гидрохлоротиазидом или любым комбинированным препаратом, который содержит гидрохлоротиазид, возможно снижение уровня содержания последнего в плазме крови.
Были сообщения об отдельных случаях повышения международного нормализованного отношения (МНО) при применении мемантина у пациентов, принимающих варфарин. Хотя причинная связь не установлена, необходим тщательный мониторинг протромбинового времени или МНО у пациентов, одновременно принимающих пероральные антикоагулянты.
В ходе фармакокинетических исследований среди здоровых пациентов существенных эффектов взаимодействия мемантина с глибуридом/метформином, донепезилом или галантамином не выявили.
Мемантин in vitro не является ингибитором CYP 1A2, 2A6, 2C9, 2D6, 2E1, 3A, флавинсодержащей монооксигеназы, эпоксид гидролазы или сульфатиона.
Передозировка
Опыт ограничен.
Симптомы. Относительно значительные передозировки (200 и 105 мг/сут в течение 3 дней соответственно) были либо связаны с симптомами утомления, слабости и/или диареей, или имели бессимптомное течение. При передозировке в 140 мг или неустановленной дозой наблюдали симптомы нарушения ЦНС, например спутанность сознания, сонливость, головокружение, возбуждение, агрессия, галлюцинации, нарушения походки и/или желудочно-кишечные нарушения (рвота и диарея).
После приема 2000 мг мемантина у пациента развилась кома (10 дней), латеральная диплопия и возбуждение. После симптоматического лечения и плазмафереза пациент выздоровел без последствий.
Лечение. Симптоматическое, специфического антидота не существует. Следует применить стандартные клинические процедуры для выведения действующего вещества из организма, например промывание желудка, прием активированного угля, методы подкисления реакции мочи, форсированный диурез.
В случае чрезмерной общей стимуляции ЦНС симптоматические лечебные мероприятия следует применять с осторожностью.
Условия хранения
При температуре не выше 25 °С.
-
Contents
-
Table of Contents
-
Troubleshooting
-
Bookmarks
Quick Links
HF/ 50 MHz ALL MODE TRANSCEIVER
TS-590S
NOTIFICATION
This equipment complies with the essential requirements of Directive 1999/5/EC.
The use of the warning symbol
in certain countries.
This equipment requires a licence and is intended for use in the countries below.
AT
BE
IE
IT
SE
CH
LT
MT
© B62-2243-30 (K, E)
09 08 07 06 05 04 03
means the equipment is subject to restrictions of use
DK
FI
FR
LI
LU
NL
GB
CY
CZ
PL
SK
SI
DE
GR
IS
NO
PT
ES
EE
HU
LV
BG
RO
ISO3166
Troubleshooting
Summary of Contents for Kenwood TS-590S

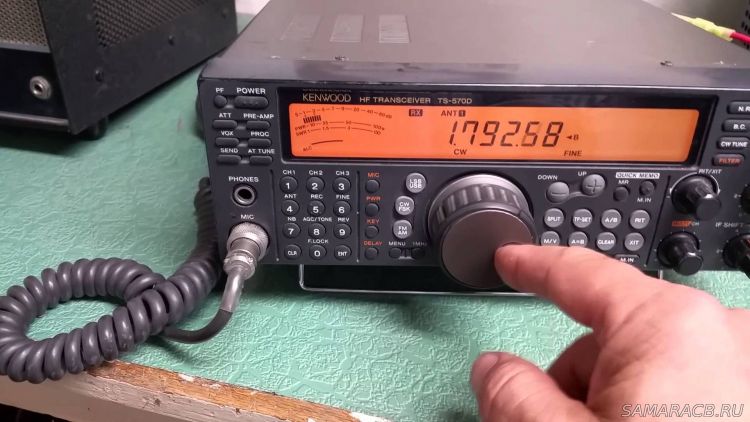
В середине 2010 года Компания Kenwood объявила о запуске в производство нового трансивера Kenwood TS-590S. Новый трансивер Kenwood TS-590, работает на диапазонах КВ + 50 МГц со всеми видами модуляции с двухканальным приемником.
Трансивер Kenwood TS-590S разработан, чтобы позволить широкому кругу пользователей — от начинающих до опытных DX-менов — наслаждаться любительским радио.
Скачать русский мануал можно здесь [8.5Мб, формат DjVU]
ПОХОЖИЕ СТАТЬИ ПО ТЕМЕ:
- Мануал, руководство пользователя, инструкция к трансиверу Kenwood TS-480S TS-480HX на русском языке Разработанный для DX работы, новый трансивер TS-480HX нарушил существовавшие до сих пор пределы мощности для мобильных трансиверов. Несмотря на компактные размеры, он обеспечивает выходную мощность 200 Вт при напряжении питания 13,8 В. А вместе с отделяемой передней панелью оптимально подходит также и для стационарной радиостанции….
- Мануал, руководство пользователя, инструкция к трансиверу Icom IC-7600 на русском языке Полное руководство пользователя (user manual) ICOM IC-7600 на русском языке….
- Выбор современного трансивера Для многих радиолюбителей при выборе модели трансивера определяющим фактором является его цена, для других, менее стесненных в средствах, — высокие параметры и удобство пользования. Есть любители «поиграть» с новой моделью, а затем продать ее, есть «профессиональные» контестмены, которым требуются трансиверы с «супердинамикой», есть фанаты определенных…
- Обзор трансивера Kenwood TS-480SAT, TS-480HX Можно было ожидать, что внешний вид трансивера семейства Kenwood наследует характерные черты своих предшественников — TS-50, TS-570 и TS-2000. Однако TS-480 представляет собой нечто совершенно иное. Это — первый из трансиверов Kenwood, являющийся сочетанием двух блоков — панели дистанционного управления и основного блока приемопередатчика….
- Обзор трансивера Kenwood TS-870S Трансивер TS-870S полностью цифровой DSP трансивер, выходной мощностью 100 Ватт. Наличие буквы S видетельсвует о наличии в трансивере встроенного антенного тюнера. Использование «цифры», дало определенные преимущества, но и приводит к проблемам, например к помехам от тактовой частоты. Раньше трудно было поверить, что DSP так прочно…
|
|
поиск в базе ГРЧЦ:
|


Перейти к контенту
-
Contents
-
Table of Contents
-
Bookmarks
Quick Links
TS-590S
KENWOOD NETWORK
COMMAND SYSTEM
Setting Manual
© October/15/2010
Related Manuals for Kenwood TS-590S
Summary of Contents for Kenwood TS-590S
- Page 1
TS-590S KENWOOD NETWORK COMMAND SYSTEM Setting Manual © October/15/2010… -
Page 2: Table Of Contents
However, there is a possibility of misprints and of descriptions that may cause misunderstanding. Kenwood Corporation bears absolutely no responsibility for damages arising thereof. Kenwood Corporation may revise and amend the product information described in this document without notice. Kenwood Corporation bears absolutely no responsibility for damages arising thereof.
-
Page 3: Relevant Models
Important To configure the system, knowledge not only of transceivers but also of PCs and networks is required. Kenwood does not offer support for customer computers and Networks. Furthermore, for operations relating to actual transmitting, note that procedures according to the Radio Act are also required.
-
Page 4: Outline
3. Outline 3.1. Overall Configuration TS-590S Host station Remote station Fig. 3.1.1: Example of internal LAN configuration (In this diagram, the modem, router, and hub have been omitted.) As shown in the diagram, the configuration uses a host station (where the transceiver is installed;…
-
Page 5: Outline Of Host Station (Transmitter) Operations
Fig. 3.1.2: Example of KNS configuration via the internet The host station and remote station can be installed in any location with an internet connection. 3.2. Outline of Host Station (Transmitter) Operations The host station is configured using a transceiver and a PC connected to the network. Data signals that control the transceiver are connected to the PC using either RS-232C or USB.
-
Page 6: Host Station (Transmitter) Configuration
Audio transmission Transceiver TS-590S The TS-590S transceiver is supported. The ARCP-590 and ARHP-590 are specialized for the TS-590S, and so other transceivers cannot be used to configure the system. Connection Controls that change the frequency or mode are performed by…
- Page 7
Proxy servers cannot be used. Note 1: Support for selecting, installing, and operating VoIP software is not available from Kenwood Corporation. Note 2: Make sure to refer to the user manual for the broadband router to be used before performing the settings. -
Page 8: Overview Of Remote Station (Operator) Operations
3.4. Overview of Remote Station (Operator) Operations The remote station is configured using a PC connected to the network, and a microphone and speaker connected to the PC sound function. The audio transmissions for the host station transceiver are input and output using the microphone and speaker connected to the sound function of the remote station PC via the network.
-
Page 9: Remote Station (Operator) Configuration
This software remote controls the transceivers. Refer to the software help for the settings and operation methods. Download the software from the download page, and install on the PC. http://www.kenwood.com/i/products/info/amateur/software_download.html VoIP software To transmit and receive audio, VoIP telephone software is required. (See Note 1.)
- Page 10
Same as host station. environment Modem Same as host station. Firewall Same as host station. Internet Provider Same as host station. environment Proxy Same as host station. Note 1: Support for selecting, installing, and operating VoIP software is not available from Kenwood Corporation. -
Page 11: Settings
To transmit and receive audio, an audio cable is required. Create an audio cable using the 13-pin DIN plug enclosed with the TS-590S with reference to the following diagram. For details of the terminal specifications, refer to the TS-590S user manual.
- Page 12
Fig. 4.2.2: Connecting audio cables Reference: If the TS-590S is connected to the PC using a USB cable, audio transmission input and output are possible using the USB audio function, but the many signal conversions cause inherently unavoidable delays. Furthermore, during KNS operations, network delays will occur. -
Page 13: Transceiver Settings
PC sound settings on the host station. ● Data VOX settings With the TS-590S, VOX functions can be implemented using either audio input to the ACC2 connector or USB audio signals input to the USB connector, but to prevent unintentional transmission during KNS operations, turn OFF the function using the menu settings.
- Page 14
Adjust the PC sound function volume as necessary. ● Mixed beep setting to external audio outputs With the TS-590S default mode, only received audio signals that do not include beeps or side tones are output as audio signals from the ACC2 connector and the USB connector as USB audio signals. - Page 15
Note: Select from 3/ 5/ 10/ 20/ 30(minutes) excepting OFF, depending on the situation to use. ● Prohibit transmission setting If using the host station as a receive-only station, set to transmission inhibited. Make the settings using the following menu. Menu No. -
Page 16: Setting Transmission Methods For Audio Input To The Rear Terminal
4.4. Setting Transmission Methods for Audio Input to the Rear Terminal The [SEND] keys on the PTT of the microphone connected to the TS-590S, and on the TS-590S control panel, are the method for transmitting audio input to the microphone connected to the TS-590S, so even if these operations are implemented, audio entered as audio signals from ACC2 cannot be transmitted.
-
Page 17: Setting Broadband Routers
For the broadband router settings, refer to the broadband router user manual. Incorrect broadband router settings may stop the network or enable illegal external access to the network. Take thorough precautions when changing the settings. Kenwood does not offer support for customer computers and networks.
-
Page 18: Software Installation And Settings
Make the COM settings, network settings, optional settings, and user settings used to connect to the TS-590S by selecting the «Tools» menu and then «Settings» in the ARHP-590. For the settings methods, refer to the ARHP-590 help file. To transmit and receive audio, download and install separate VoIP software.
-
Page 19: Windows Firewall Settings
4.7. Windows Firewall Settings With the host station PC, receiving connections from networks and the internet using the ARHP-590 are blocked by the Windows firewall. When blocked, KNS operations are disabled, so remove the block. Reference: Add the ARHP-590 to «exceptions» using the Windows firewall settings to release the block.
-
Page 20: Limitations Caution
5. Limitations Caution! 5.1. PC Environment Limitations Check that the ARCP-590 and ARHP-590 operations use Windows XP SP3 or later, Windows Vista SP1 or later, or Windows 7. Earlier versions, and other operating systems, cannot be used. Use the operating systems described above for both the host and remote stations.
-
Page 21: Program Limitations
5.4. Limitations if Using USB Audio Functions If the PC and TS-590S are connected via a USB cable, audio transmissions can be transmitted using the USB audio function. In principle, however, there is a delay with USB audio, so sound may be lost depending on the PC performance and load status.
-
Page 22: Frequently Asked Questions
6. Frequently Asked Questions This section introduces questions that have been asked to date, and subjects verified by Kenwood Corporation. Question Answer Installation With internet routing, is KNS With internet routing, a global IP disabled unless I obtain a global IP address is required.
- Page 23
Question Answer Installation I want to use headsets, USB You can use them, but in principle, USB headsets, and Bluetooth headsets headsets and Bluetooth headsets have on the remote station PC. Will there unavoidable delays, so entering be any problems? standby will take considerable time. - Page 24
Answer Operations Why can’t I use the ARCP-480? The ARCP-480 is for the TS-480 only. Use the ARCP-590 with the TS-590S. Why can’t I use the ARHP-10? The ARHP-10 is for the TS-480 only. Use the ARHP-590 with the TS-590S. - Page 25
Check that an existing device is PC and transceiver cannot be specified as the device connected to the performed correctly. TS-590S using the host station PC sound settings. Modulation is not performed even Check that the same path as the when the ARCP-590 «SEND»… - Page 26
Question Answer Operations Cannot transmit audio correctly Refer to the VoIP software user manual, between the remote station and and check the settings. host station. Check that an existing device has been specified for the PC speakers, microphone, and headset currently in use, using the remote station PC OS sound settings. - Page 27
Other After implementing KNS It is possible that the device operations on the PC used as the connected to the TS-590S has been host station, the sound has selected as the existing device using vanished from the PC during the PC sound functions. - Page 28
(Supplement): FAQ: Explaining the Internet «Cannot operate transceiver» Modem Internet Fig. 1 As shown in Fig. 1, even though only one broadband router (BBR) is visible on the network, in reality there are two. (Duplex router phenomenon.) There are multiple modem modes with built-in BBR functions, so when connecting such a modem as described above, there must not be two BBR paths connecting the PC to the internet.
В середине 2010 года Компания Kenwood объявила о запуске в производство нового трансивера Kenwood TS-590S. Новый трансивер Kenwood TS-590, работает на диапазонах КВ + 50 МГц со всеми видами модуляции с двухканальным приемником.
Трансивер Kenwood TS-590S разработан, чтобы позволить широкому кругу пользователей — от начинающих до опытных DX-менов — наслаждаться любительским радио.
Скачать русский мануал можно здесь [8.5Мб, формат DjVU]
ПОХОЖИЕ СТАТЬИ ПО ТЕМЕ:
- Мануал, руководство пользователя, инструкция к трансиверу Kenwood TS-480S TS-480HX на русском языке Разработанный для DX работы, новый трансивер TS-480HX нарушил существовавшие до сих пор пределы мощности для мобильных трансиверов. Несмотря на компактные размеры, он обеспечивает выходную мощность 200 Вт при напряжении питания 13,8 В. А вместе с отделяемой передней панелью оптимально подходит также и для стационарной радиостанции….
- Мануал, руководство пользователя, инструкция к трансиверу Icom IC-7600 на русском языке Полное руководство пользователя (user manual) ICOM IC-7600 на русском языке….
- Выбор современного трансивера Для многих радиолюбителей при выборе модели трансивера определяющим фактором является его цена, для других, менее стесненных в средствах, — высокие параметры и удобство пользования. Есть любители «поиграть» с новой моделью, а затем продать ее, есть «профессиональные» контестмены, которым требуются трансиверы с «супердинамикой», есть фанаты определенных…
- Обзор трансивера Kenwood TS-480SAT, TS-480HX Можно было ожидать, что внешний вид трансивера семейства Kenwood наследует характерные черты своих предшественников — TS-50, TS-570 и TS-2000. Однако TS-480 представляет собой нечто совершенно иное. Это — первый из трансиверов Kenwood, являющийся сочетанием двух блоков — панели дистанционного управления и основного блока приемопередатчика….
- Обзор трансивера Kenwood TS-870S Трансивер TS-870S полностью цифровой DSP трансивер, выходной мощностью 100 Ватт. Наличие буквы S видетельсвует о наличии в трансивере встроенного антенного тюнера. Использование «цифры», дало определенные преимущества, но и приводит к проблемам, например к помехам от тактовой частоты. Раньше трудно было поверить, что DSP так прочно…
Мануал, руководство пользователя, инструкция к трансиверу Kenwood TS-590S на русском языке
| 08.09.2017, 21:49 | |
|
В середине 2010 года Компания Kenwood объявила о запуске в производство нового трансивера Kenwood TS-590S. Новый трансивер Kenwood TS-590, работает на диапазонах КВ + 50 МГц со всеми видами модуляции с двухканальным приемником. Трансивер Kenwood TS-590S разработан, чтобы позволить широкому кругу пользователей — от начинающих до опытных DX-менов — наслаждаться любительским радио. |
|
| Категория: KENWOOD | | |
| Просмотров: 1892 | Загрузок: 2 | Рейтинг: 5.0/1 |
-
Contents
-
Table of Contents
-
Bookmarks
Quick Links
HF / 50MHz ALL MODE TRANSCEIVER
TS-590S
SERVICE MANUAL
Phone jack (9P)
(E11-0705-15)
Key top (8key)
(K29-9466-02)
Foot (Front)
Key top (25key)
(J02-0442-04)x2
(K29-9467-02)
RF coaxial receptacle (Round)
(E06-0858-25)
RF coaxial receptacle (M)
(E04-0167-15)x2
Sub socket (D)
(E58-0529-05)
Rectangular receptacle
(E58-0537-05)
RoHS
This product complies with the
Panel
Front glass
(A62-1176-02)
(B10-2799-02)
Knob (Main knob)
(K21-1107-13)
Foot (Front)
(J02-0440-04)
Lead wire with connector (EXT.AT)
(E37-0891-25)
3.5D phone
DIN socket
jack (3P)
(E06-0752-15)
(E11-0414-15)
DIN socket
3.5D phone jack (3P)
(E56-0408-15)
(E11-0455-05)
directive for the European market.
© 2010-9 PRINTED IN JA PAN
B51-8941-00 ( N ) 283
Key top (5key)
(K29-9469-02)
Key top (20key)
Knob (Inside/HI)
(K29-9468-02)
(K29-9477-03)
Knob (Outside/LO)
(K29-9478-03)
Lead wire with terminal
(E37-1480-05)
Foot (Back)
Phone jack (9P)
(J02-0475-05)x2
(E11-0705-15)
Pin jack
(E13-0166-25)x2
Knob (RIT)
(K29-9471-03)
Knob (MULTI)
(K29-9456-23)
Knob (Outside/SQL, RF)
(K29-9391-13)x2
Knob (Inside/NOTCH, AF)
(K29-9390-03)x2
This product uses Lead Free solder.
Summary of Contents for Kenwood TS-590S
Смотреть руководство для Kenwood TS-590S ниже. Все руководства на ManualsCat.com могут просматриваться абсолютно бесплатно. Нажав кнопку «Выбор языка» вы можете изменить язык руководства, которое хотите просмотреть.

MANUALSCAT | RU
Вопросы и ответы
У вас есть вопрос о Kenwood TS-590S, но вы не можете найти ответ в пользовательском руководстве? Возможно, пользователи ManualsCat.com смогут помочь вам и ответят на ваш вопрос. Заполните форму ниже — и ваш вопрос будет отображаться под руководством для Kenwood TS-590S. Пожалуйста, убедитесь, что вы опишите свои трудности с Kenwood TS-590S как можно более детально. Чем более детальным является ваш вопрос, тем более высоки шансы, что другой пользователь быстро ответит на него. Вам будет автоматически отправлено электронное письмо, чтобы проинформировать вас, когда кто-то из пользователей ответит на ваш вопрос.
Задать вопрос о Kenwood TS-590S
- Бренд:
- Kenwood
- Продукт:
- Радио
- Модель/название:
- TS-590S
- Тип файла:
- Доступные языки:
- английский
Сопутствующие товары Kenwood TS-590S
Инструкция по эксплуатации (мануал) на русском языке, для любительского КВ трансивера Kenwood TS-590S.
Инструкция выполнена профессиональным переводчиком — радиолюбителем, в оригинальном качестве.
Инструкция поставляется в виде книги — распечатана на листах формата А4 и сшита пружинным переплетом.
Инструкция содержит 103 страницы.
Внимание!!!
Приобретая в нашей компании любительский трансивер Kenwood TS-590S, вы получаете данную инструкцию бесплатно!!
Предупреждение!!!
Все права защищены! Все права на данный перевод инструкции по эксплуатации трансивера Kenwood TS-590S, являются собственностью компании «Радиоэксперт»! Ничто из нее, приобретенной или полученной бесплатно от компании «Радиоэксперт», не может быть перепечатано, заложено в компьютерную память или скопировано в любой форме — электронной, механической, фотокопии или какой-то другой — без письменного разрешения компании «Радиоэксперт». Распространение данной инструкции всей или любых ее частей, платное или бесплатное, в любой форме ЗАПРЕЩЕНО!!!
-
Страница 1
© B62-2243-00 (K, E) 09 08 07 06 05 04 03 02 00 HF/ 50 MHz ALL MODE TRANSCEIVER TS-590S INSTRUCTION MANUAL NOTIFIC A TION This eq uipment c omplie s with the esse ntial requirement s of Direc tive 1 999/5/ EC. The use of the warnin g symbo l means the eq uipment is subje ct to restr ict ions of use in cer tain countries. This eq uipment re quires […]
-
Страница 2
[…]
-
Страница 3
i 7+$1.<28 Thank you for choosing this Kenwood TS-590S transceiver. It has been developed by a team of engineers determined to continue the tradition of excellence and innovation in Kenwood transceivers. This transceiver features a Digital Signal Processing (DSP) unit to process IF and AF signals. By taking maximum advantage of DSP technology[…]
-
Страница 4
ii :5,7,1*&219(17,216)2//2:(‘ The writing conventions described below have been followed to simplify instructions and avoid unnecessary repetition. Instruction Action Press [KEY] . Press and release KEY. Press Mic [KEY] . Press and release KEY on the microphone. Press and hold [KEY] . Press and hold KEY down for a moment, then releas[…]
-
Страница 5
iii 35(&$87,216 Please observe the following precautions to prevent fire, personal injury, and transceiver damage: • Connect the transceiver only to a power source as described in this manual or as marked on the transceiver itself. • Route all power cables safely. Ensure the power cables can neither be stepped upon nor pinched by items plac[…]
-
Страница 6
iv &217(176 TX SIDETONE/ RX PITCH FREQUENCY …….. 23 CARRIER LEVEL ………………………………………….. 23 POWER ON MESSAGE …………………………………. 23 CHAPTER 6 ENHANCED COMMUNICATIONS SPLIT-FREQUENCY OPERATION………………….. 24 TF-SET (TRANSMISSION FREQUENCY SET) 24 FM REPEATER OPERATION …………..[…]
-
Страница 7
v &217(176 PROGRAM SCAN PARTIALLY SLOWED …….. 47 SCAN HOLD …………………………………………….. 48 MEMORY SCAN …………………………………………… 48 SCAN RESUME ………………………………………… 48 ALL-CHANNEL SCAN………………………………… 48 GROUP SCAN …………………….[…]
-
Страница 8
vi &217(176 RECORDING MESSAGES …………………………. 59 MESSAGE PLAYBACK………………………………. 59 Checking Messages ………………………………. 59 Sending Messages ………………………………… 59 Erasing a Recorded Message …………………. 59 Changing Inter-message Interval Time …….. 59 Ch[…]
-
Страница 9
1 ,167$//$7,21 TS-590S Fuse (25 A) Red (+) Black ( ï ) DC Power supply (20.5 A or more) E-type only $17(11$&211(&7,21 An antenna system consists of an antenna, feed line, and ground. The transceiver can give excellent results if the antenna system and its installation are JLYHQFDUHIXODWWHQWLRQ8VHDSURSHUODGMXVWHG[…]
-
Страница 10
2 ,167$//$7,21 87,/,=,1*7+(%$,/ This transceiver is equipped with a bail so that you can angle the transceiver. The bail is located on the bottom of the transceiver. Pull the bail forward to the limit as shown. 5(3/$&,1*)86(6 The following fuses are used in the TS-590S transceiver. If a fuse blows, determine the cause then […]
-
Страница 11
3 ,167$//$7,21 2 : > B = @ . ; GND (STBY) GND (MIC) NC 8 V (10 mA max) MIC PTT DOWN UP Microphone External speaker MIC connector (Front view) Headphones • Paddle • Straight key • Bug key • Electronic keyer • PC keyer output Front Panel Rear Panel[…]
-
Страница 12
4 *(77,1*$&48$,17(‘ )52173$1(/ —— C —— [METER (DRV)] Press to switch the meter type. Press and hold to turn the Drive Out function ON or OFF {page 50}. [PF B] You can assign a function to this Programmable Function key {page 54}. [MIC (CAR)] Press to adjust the microphone gain {page 13}. While the Speech Processor function is[…]
-
Страница 13
5 *(77,1*$&48$,17(‘ [21 (7)] Press to select the 21 MHz band memory {page 11} or enter keypad number 7. [24 (8)] Press to select the 24 MHz band memory {page 11} or enter keypad number 8. [28 (9)] Press to select the 28 MHz band memory {page 11} or enter keypad number 9. [50 (0)] Press to select the 50 MHz band memory {page 11}[…]
-
Страница 14
6 *(77,1*$&48$,17(‘ [CH1 (REC)] Press to play back a CW {page 34} or voice message (requires VGS-1 option) {page 58}. Press and hold to record a CW {page 34} or voice message (requires VGS-1 option) {page 59}. [CH2 (REC)] Press to play back a CW {page 34} or voice message (requires VGS-1 option) {page 59}. Press and hold to rec[…]
-
Страница 15
7 *(77,1*$&48$,17(‘ —— A —— While receiving, the meter serves as an S-meter to measure and display the received signal strength. While transmitting, it serves as a power meter plus an ALC meter, an SWR meter, or a Speech Processor compression meter. The Peak Hold function holds each reading for approximately half a seco[…]
-
Страница 16
8 *(77,1*$&48$,17(‘ Appears when the VOX (Voice Operated Transmission) function is ON or the Break-in function is ON for CW mode {page 30}. Appears when the Frequency Lock function is ON {page 53}. Appears when the Speech Processor function is ON {page 31}. Appears when the constant recording function is ON {page 60}. Reserved […]
-
Страница 17
9 *(77,1*$&48$,17(‘ ANT 1 and ANT 2 connectors Connect your primary HF/ 50 MHz antenna to ANT 1 connector. If you are using 2 antennas for the HF/ 50 MHz band, connect the secondary antenna to the ANT 2 connector {page 1}. GND post Connect a heavy gauge wire or copper strap between the ground post and the nearest earth ground {[…]
-
Страница 18
10 23(5$7,1*%$6,&6 6:,7&+,1*32:(5212)) 1 Switch the DC power supply ON. 2 Press [ ] to switch the transceiver ON. • If you hold the power switch for more than approximately 2 seconds, the transceiver will switch back OFF. • Upon power up, “HELLO” appears on the main display, followed by the current frequency and other[…]
-
Страница 19
11 23(5$7,1*%$6,&6 6(/(&7,1*$%$1′ Press [1.8 (1)] ~ [50 (0)] or [GENE] to select your desired band. • Press each key to cycle through the 3 default settings as shown in the table below. • Each setting can be modified with your personal preference for frequency and mode. After modifying the setting, pressing the ke[…]
-
Страница 20
23(5$7,1*%$6,&6 12 08/7,)81&7,210(7(5 The multi-function meter measures the parameters in the table below. The S-meter and FILTER scales appears when the transceiver is in receive mode, and the PWR meter appears when it is in transmit mode. Each press of [METER (DRV)] cycles between the ALC, COMP, and SWR meters. Peak read[…]
-
Страница 21
23(5$7,1*%$6,&6 13 75$160,77,1* For voice communications, press and hold Mic [PTT] and speak into the microphone in your normal voice. When you finish speaking, release Mic [PTT] to receive. To transmit CW, press [VOX (REV)] to turn the Break- in function ON. “ ” appears. Close the key or keyer paddle. Connect a key or keyer pad[…]
-
Страница 22
14 0(186(783 :+$7,6$0(18″ Many functions on this transceiver are selected or configured via a software-controlled Menu, rather than through the physical controls of the transceiver. Once familiar with the Menu system, you will appreciate the versatility it offers. You can customize the various timings, settings, and programming fun[…]
-
Страница 23
15 0(186(783 0(18&21),*85$7,21 Category No. Description Settings** Ref. Page Display* Default** Operator Interface 00 Display brightness Off, 1: minimum, 6: maximum OFF/ 1 ~ 6 53 DISPLAY BRIGHTNE SS 4 01 Display backlight color 1: amber, 2: green 1/ 2 53 BACKLIGHT COLOR 1 02 Panel key response for double function 1: 0.2 second, 2[…]
-
Страница 24
16 0(186(783 Category No. Description Settings** Ref. Page Display* Default** Tuning (continued) 15 Frequency step size for the MULTI/CH control in AM mode 5/ 6.25/ 10/ 12.5/ 15/ 20/ 25/ 30/ 50/ 100 [kHz] 28 AM MULTI/ CH CONTROL 5 16 Frequency step size for the MULTI/CH control in FM mode 5/ 6.25/ 10/ 12.5/ 15/ 20/ 25/ 30/ 50/ 100 [kHz][…]
-
Страница 25
17 0(186(783 Category No. Description Settings** Ref. Page Display* Default** CW 32 Electric keyer mode A/ B 33 ELECTRIC KEYER MO DE B 33 Keying priority over playback OFF/ ON 34 KEYING P RIORITY OVER PLAYBACK OFF 34 CW RX pitch/ TX sidetone frequency 300 ~ 1000 (50 [Hz] step) 23 CW RX PI TCH/TX SIDETONE FREQUENCY 800 35 CW rise time 1/[…]
-
Страница 26
18 0(186(783 Category No. Description Settings** Ref. Page Display* Default** Antenna Tuner 51 TX hold when AT completes the tuning OFF/ ON 50 ANTENNA TUNER TX HOLD OFF 52 In-line AT while receiving OFF/ ON 50 ANTENNA TUNER FO R RECEPTION OFF Linear Amp 53 Linear amplifier control relay for HF band OFF/ 1/ 2/ 3 53 HF LINEA R AMPLIFIER C[…]
-
Страница 27
19 0(186(783 Category No. Description Settings** Ref. Page Display* Default** External Accessory Control 69 Data VOX OFF/ ON 30 VOX OPERATION WITH DAT A INPUT OFF 70 Data VOX delay time 0 ~ 100 (5 step) 30 DATA VOX DELA Y TIME 50 71 Data VOX gain for the USB audio input 0 ~ 9 (1 step) 31 USB VOX GAIN 4 72 Data VOX gain for the ACC2 term[…]
-
Страница 28
20 0(186(783 &+$5$&7(5(175< When character entry is required, a cursor will appear on the display. 1 Move the cursor to the left or right by pressing [Q- M.IN] or [Q-MR] . 2 Turn the MULTI/CH control or press [M.IN] / [SCAN (SG.SEL)] to select your desired character. • You can delete the selected character by pressing [C[…]
-
Страница 29
21 %$6,&&20081,&$7,216 66%75$160,66,21 SSB is the most commonly-used mode on the HF Amateur radio bands. Compared with other voice modes, SSB requires only a narrow bandwidth for communications. SSB also allows long distance communications with minimum transmission power. If necessary, refer to “OPERATING BASICS”, beginning on[…]
-
Страница 30
%$6,&&20081,&$7,216 22 $075$160,66,21 Each mode used on the HF Amateur bands has its own advantages. Although long distance DX contacts may be less common while using AM, the superior audio quality characteristic of AM operation is one reason why some hams prefer this mode. If necessary, refer to “OPERATING BASICS”, b[…]
-
Страница 31
23 %$6,&&20081,&$7,216 $872=(52%($7 Use Auto Zero-beat before transmitting to tune in a CW station. Auto Zero-beat automatically and exactly matches your transmit frequency with the station you are receiving. Neglecting to do this will reduce your chances of being heard by the other station. 1 Tune to the CW signal usi[…]
-
Страница 32
(1+$1&(‘&20081,&$7,216 24 63/,7)5(48(1&<23(5$7,21 Usually you can communicate with other stations using a single frequency for receiving and transmitting. In this case, you select only one frequency on either VFO A or VFO B. However, there are cases where you must select one frequency for receiving and a different f[…]
-
Страница 33
25 (1+$1&(‘&20081,&$7,216 )05(3($7(523(5$7,21 Most Amateur radio voice repeaters use a separate reception and transmission frequency. The transmission frequency may be higher or lower than the reception frequency. In addition, some repeaters may require the transceiver to transmit a subtone before the repeater can[…]
-
Страница 34
26 (1+$1&(‘&20081,&$7,216 721()5(48(1&<,’6&$1 This function scans through all tone frequencies to identify the incoming tone frequency on a received signal. You may find this useful when you do not know the tone frequency that the repeater uses. 1 While the Tone function is ON (“ ” is visibl[…]
-
Страница 35
27 (1+$1&(‘&20081,&$7,216 • Press [SCAN (SG.SEL)] or [CLR] to stop scanning while the CTCSS frequency ID scan is active. • Press [SCAN (SG.SEL)] again to resume scanning. Note: Received signals are audible while scanning is in progress. &5266721( Use this feature when using different uplink and downlink tones[…]
-
Страница 36
&20081,&$7,1*$,’6 28 5(&(37,21 6(/(&7,1*<285)5(48(1&< In addition to turning the Tuning control or pressing Mic [UP] / [DWN] , there are several other ways to select your frequency. This section describes additional methods of frequency selection that may save you time and effort. Q ‘LUHFW)UHTXHQF[…]
-
Страница 37
29 &20081,&$7,1*$,’6 Q )LQH7XQLQJ The default frequency step size when turning the Tuning control to change the frequency is 10 Hz for SSB/ CW/ FSK, and 100 Hz for AM/ FM. However, you can change the frequency step size to 1 Hz for SSB/ CW/ FSK, and 10 Hz for AM/ FM. 1 Press [FINE (F.LOCK)] . •“ ” appears. 2 Tu[…]
-
Страница 38
30 &20081,&$7,1*$,’6 75$160,66,21 92;92,&(23(5$7(‘75$160,66,21 VOX eliminates the necessity of manually switching to the transmission mode each time you want to transmit. The transceiver automatically switches to transmission mode when VOX senses that you have begun speaking into the microphone. When[…]
-
Страница 39
31 &20081,&$7,1*$,’6 Q ‘DWD92;’HOD7LPH Select an appropriate delay time for after the audio signal input to the ACC2 or USB connector ends. 1 Press [MENU] , then press [Q-M.IN] / [Q-MR] or turn the MULTI/CH control to select Menu No. 70. 2 Press [M.IN] / [SCAN (SG.SEL)] to set your desired delay time[…]
-
Страница 40
32 &20081,&$7,1*$,’6 &86720,=,1*75$160,66,216,*1$/ &+$5$&7(5,67,&6 The quality of your transmission signal is important, regardless of which on-air activity you pursue. However, it is easy to be casual and overlook this fact since you don’t listen to your own signal. The following sub-sections pro[…]
-
Страница 41
33 &20081,&$7,1*$,’6 &:%5($.,1 Break-in allows you to transmit CW without manually switching between transmission and reception modes. Two types of Break-ins are available: Semi Break-in and Full Break-in. Semi Break-in: When the key contacts open, the transceiver automatically waits for the duration of the time p[…]
-
Страница 42
34 &20081,&$7,1*$,’6 5,6(7,0(2)&: The rise time of a CW signal is the time for the RF output to rise to its maximum power after the key is closed. 1 Press [MENU] , then press [Q-M.IN] / [Q-MR] or turn the MULTI/CH control to select Menu No. 35. 2 Press [M.IN] / [SCAN (SG.SEL)] to select “1”, “2”, “4?[…]
-
Страница 43
35 &20081,&$7,1*$,’6 Q &KHFNLQJ&:0HVVDJHVZLWKRXW7UDQVPLWWLQJ 1 Press [CW/FSK (REV)] until you select CW mode. • “CW” appears. 2 If Break-in is ON, press [VOX (LEV)] to turn VOX OFF. 3 Press [CH1 (REC)] , [CH2 (REC)] , [CH3 (REC)] , or [RX/4 (REC)] to select the channel to be played back. • Th[…]
-
Страница 44
36 &20081,&$7,1*$,’6 $872&:7;,166%02′( If you operate both SSB and CW modes, you can configure the transceiver to change the operating mode from SSB (USB or LSB) to CW and then transmit in CW mode automatically when you operate the CW keyers. The mode automatically changes from USB to CW and LSB to C[…]
-
Страница 45
37 ‘$7$&20081,&$7,216 5$’,27(/(7<3(577< RTTY is the data communications mode with the longest history. It was originally designed for use with mechanical teletypewriters which were often used before personal computers became common. Now you can easily start operating RTTY with a personal computer and MCP. Unli[…]
-
Страница 46
38 5(-(&7,1*,17(5)(5(1&( Q &:)6.0RGH 1 Select CW or FSK mode. 2 Turn the LO / WIDTH control clockwise to increase the bandwidth (wide), or counterclockwise to decrease the bandwidth (narrow). Before Interfering signal Interfering signal After Desired signal Mode Bandwidth Selection (Hz) Default CW 50, 80, 100, 150, 200, […]
-
Страница 47
39 5(-(&7,1*,17(5)(5(1&( Press and hold [IF FIL] to momentarily display each setting value of the DSP filter band as follows: SSB/ AM/ FM mode: High cut Frequency > Low cut Frequency CW/ SSB data mode: Shift Frequency > Bandwidth FSK mode: Bandwidth only $872127&+),/7(566% The Auto Notch filter automatic[…]
-
Страница 48
40 5(-(&7,1*,17(5)(5(1&( Q 6HWWLQJWKH15/HYHO$GMXVWPHQW NR1 uses an adaptive filter to reduce the noise element from the received signals. When the S/N ratio is reasonably good in SSB, using NR1 will improve the S/N further. While NR1 is ON, you can further adjust the noise reduction level by pressing and holdi[…]
-
Страница 49
41 0(025<)($785(6 0(025<&+$11(/6 This transceiver provides you with 110 memory channels, numbered 00 to 99 and P0 to P9, for storing operating frequency data, modes, and other information. Memory channels 00 to 99 are called Conventional Memory Channels. Memory channels P0 to P9 are designed for programming VFO tuning ranges and sca[…]
-
Страница 50
42 0(025<)($785(6 Q 7HPSRUDU)UHTXHQF&KDQJHV After retrieving frequencies and associated data in Memory Recall mode, you can temporarily change the data without overwriting the contents of the memory channel. 1 Access Menu No. 18 and select “on”. • Skip this step when changing only the associated data (not the[…]
-
Страница 51
43 0(025<)($785(6 Channel 00 ~ 99 ° Channel 00 ~ 99 RX frequency ° RX frequency TX frequency ° TX frequency Mode for RX ° Mode for RX Mode for TX ° Mode for TX Tone frequency ° Tone frequency CTCSS frequency ° CTCSS frequency Tone/ CTCSS ON/ OFF status ° Tone/ CTCSS ON/ OFF status Memory Name ° Memory Name Memory Channel […]
-
Страница 52
44 0(025<)($785(6 Q &RQILUPLQJ6WDUW(QG)UHTXHQFLHV Use this procedure to check the start and end frequencies that you stored in channels P0 to P9. 1 Press [M>V] to enter Memory Recall mode. 2 Turn the MULTI/CH control or press Mic [UP] / [DWN] to select a memory channel from P0 to P9. 3 Press [A/B (A=B)] to c[…]
-
Страница 53
45 0(025<)($785(6 180%(52)48,&.0(025<&+$11(/6 This transceiver provides up to 10 Quick Memory channels. You can adjust the number of available channels by accessing Menu No. 17 and selecting “3”, “5” (default), or “10”. 6725,1*,17248,&.0(025< Each time you store a new frequency, a[…]
-
Страница 54
46 6&$1 Scan is a useful function for hands-off monitoring of your favorite frequencies. By becoming comfortable with all types of Scan, you will increase your operating efficiency. This transceiver provides the following types of scans: Scan Type Purpose Normal Scan VFO Scan Scans the entire frequency range of the transceiver. Program Scan Sca[…]
-
Страница 55
47 6&$1 352*5$06&$13$57,$//<6/2:(‘ You can specify a maximum of 5 frequency points for each memory channel from P0 to P9 so that Program Scan slows down the scanning speed. To specify the slow down frequency points, first program the start and end frequencies into a memory channel (P0 ~ P9). 1 Access Menu No. 19[…]
-
Страница 56
48 6&$1 6&$1+2/’ This function stops Program Scan for approximately 5 seconds, then resumes Scan when you jump to the desired frequency by turning the Tuning control or the MULTI/CH control, or by pressing Mic [UP] / [DWN] . To use this function, access Menu No. 21, and select “on”. The default is OFF. 0(025<6&[…]
-
Страница 57
49 6&$1 *52836&$1 110 memory channels are divided into 11 groups so that you can select one or more groups to be scanned, depending on the situation. Q 0HPRU*URXS When you store frequency data in a memory channel, the memory channel belongs to one of 11 groups as shown below. MGROUP-0 Memory Channel Nos. 00 ~ 09 MGROU[…]
-
Страница 58
50 23(5$725&219(1,(1&(6 Note: X The APO function works even if the transceiver is scanning. X The APO timer starts counting down when no key presses, no control adjustments, and no command (COM connector) sequences are detected. $8720$7,&$17(11$781(5 As explained in “ANTENNA CONNECTION” {page 1}, matching the impedance of t[…]
-
Страница 59
51 23(5$725&219(1,(1&(6 Note: X The internal antenna tuner will not tune outside the available transmission frequency limits. X Pressing [AT (TUNE)] for more than 1 second while transmitting interrupts transmitting and starts tuning. X While using CW Full Break-in, the internal antenna tuner will be in-line for both transmiss[…]
-
Страница 60
52 23(5$725&219(1,(1&(6 %((3)81&7,21 The Beep function provides you confirmation of entry, error status, and malfunctions of the transceiver. Although you can turn the beep function OFF by accessing Menu No. 03, we recommend you leave it ON in order to detect unexpected errors and malfunctions. You can also change the […]
-
Страница 61
53 23(5$725&219(1,(1&(6 ‘,63/$< %5,*+71(66 The brightness of the LCD display can be selected from OFF, and 1 to 6 . 1 Press [MENU] , then press [Q-M.IN] / [Q-MR] or turn the MULTI/CH control to access Menu No. 00. 2 Press [M.IN] / [SCAN (SG.SEL)] to select “oFF”, “1”, “2”, “3”, “4”, “5”, or “[…]
-
Страница 62
54 23(5$725&219(1,(1&(6 Key Comments Band direct key [M>V] [LSB/USB] [CW/FSK] [FM/AM] Still operates to change between FM and FM Narrow (press and hold). [DATA] [MHz] [FINE] Still operates to cancel Frequency Lock (press and hold). [CWT] Still operates to turn AGC ON/ OFF (press and hold). [CLR] Still operates to turn Memo[…]
-
Страница 63
55 23(5$725&219(1,(1&(6 5;021,725 RX monitor temporarily disables the squelch function to monitor the current frequency activities. To use the RX Monitor function, first assign the function to a PF key (either on the front panel or the microphone). 1 Press [MENU] , then press [Q-M.IN] / [Q-MR] or turn the MULTI/CH control […]
-
Страница 64
56 23(5$725&219(1,(1&(6 Note: X When using a transverter, not all the functions of this transceiver are available. X When turning the transverter ON, the frequency entry history is cleared, thus you cannot use the frequency entry history function. X When using an antenna tuner in the IN state and the transverter is turned ON,[…]
-
Страница 65
57 23(5$725&219(1,(1&(6 &20387(5&21752/ By connecting this transceiver to a computer, you can change the computer into an electronic console from which you can remotely control functions of the transceiver. This capability makes remote operation of your transceiver possible from across the room, from another room, […]
-
Страница 66
58 23(5$725&219(1,(1&(6 software misdetects a busy signal, set Menu No. 76 to “OPEN”. • When not using the USB terminal, besides a serial cable, create and connect a sound input/output cable. In this case when connecting to sound equipment and the audio output level is too high, change the level setting in Menu No. 66. […]
-
Страница 67
59 23(5$725&219(1,(1&(6 5(&25′,1*0(66$*(6 This section explains how to record a single message. 1 Select SSB, FM, or AM mode. • Select a mode that you wish to transmit. 2 Press and hold [CH1 (REC)] to record the message for channel 1. • BT in Morse code sounds and “AP 1 –” appears. • To quit recording […]
-
Страница 68
60 23(5$725&219(1,(1&(6 Q &KDQJLQJ0HVVDJH3ODEDFN9ROXPH Turning the AF control does not change the volume for the message playback. To change the message playback volume , access Menu No. 05 to select the playback volume level from “1” to “9” or “oFF”. &2167$175(&25′,1* By utilizin[…]
-
Страница 69
61 23(5$725&219(1,(1&(6 Operation Announcement Carrier level adjustment “Carrier” + Setting value 1 AGC constant time AGC setting (FAST) “Fast” + Setting value 1 AGC constant time AGC setting (SLOW) “Slow” + Setting value 1 While in Menu mode “Menu” + Menu number + Setting value 1 1 During continuous operation[…]
-
Страница 70
62 23(5$725&219(1,(1&(6 VOICE3 Announcements SWR meter ALC meter Dot position Announcement Dot position Announcement 1 R 1.0 0 A 0 2~6 R1 . 5 1 A1 7 ~ 11 R 2.0 2 A 2 12 ~ 16 R 3.0 ~ ~ 17 ~ 24 R 5.0 13 A 13 2 5~3 0 R OVER 14 A 14 15 ~ A OVER COMP meter Dot position Announcement 0 C0d B 1 ~ 10 C 10 dB 1 1~2 0 C2 0d B 2 1~3 0 C […]
-
Страница 71
63 23(5$725&219(1,(1&(6 Note: X RIT/XIT turns OFF automatically when entering Emergency mode. X The transceiver will not switch to the Emergency channel if you are using the constant recorder and are either transmitting, receiving a voice call, or receiving a CW call. &5266%$1’5(3($7(5 If you have a Kenwood FM […]
-
Страница 72
64 23(5$725&219(1,(1&(6 6.<&200$1’,, Sky Command II allows you to remotely control the TS-590S transceiver from a separate location. If you have more than 2 TH-D7A/ TH-D72A/E/ TM-D710A/ TM-V71A + RC-D710/ TM-D700A transceivers (K type), yo u c an perform Sky Command II operation to remotely control the HF/ 5[…]
-
Страница 73
65 &211(&7,1*3(5,3+(5$/(48,30(17 7(50,1$/'(6&5,37,216 &20&211(&725 Pin No. Pin Name Function I/O 1 NC No connection — 2 RXD Transmit data O 3 TXD Receive data I 4 NC No connection — 5 GND Ground — 6 NC No connection — 7 RTS Receive enable I 8 CTS Transmit enable O 9 NC No connection — $&&?[…]
-
Страница 74
66 &211(&7,1*3(5,3+(5$/(48,30(17 5(027(&211(&725 Pin No. Pin Name Function I/O 1 SPO Speaker output O 2 COM Common terminal I/O 3S S Standby; when grounded, the transceiver enters TX mode. I 4 MKE When connected with the common terminal, the amplifier enters TX mode. I/O 5 BRK When connected with the common term[…]
-
Страница 75
67 &211(&7,1*3(5,3+(5$/(48,30(17 Note: Use a USB/ RS-232C cable shorter than 3 meters. &20387(5 The USB connector allows you to directly connect a computer by using a USB (AB type) or RS-232 cable. By connecting a USB cable to the PC, you can enable the input and output of the transmission and reception of sound. You m[…]
-
Страница 76
68 &211(&7,1*3(5,3+(5$/(48,30(17 577<23(5$7,21 Use the ACC 2 connector to interface with your MCP. If your MCP supports RTTY keying output, connect the output to pin 2 of the ACC 2 connector. Connect the demodulation input line of the MCP to pin 3 of the ACC 2 connector. Also, connect the transmission control line of[…]
-
Страница 77
69 &211(&7,1*3(5,3+(5$/(48,30(17 $17(11$781(5 Use the ANT 1 and AT connectors to connect an AT-300 external antenna tuner. If you connect the external antenna tuner to the ANT 2 connector, it will not function. Note: The AT-300 cannot be used for 50 MHz operation. TS-590S AT-300 ANT 1 connector (The AT-300 Antenna Tuner[…]
-
Страница 78
70 &211(&7,1*3(5,3+(5$/(48,30(17 ‘;3$&.(7&/867(5781( If you have a TH-D72A/E/ TM-D710A/E/ RC-D710/ TM-D700A/E, you can connect the TH-D72A/E/ TM-D710A/E/ RC-D710/ TM-D700A/E to the TS-590S transceiver to use the DX PacketCluster Tune function. Connect the 2 transceivers with a cross-wired RS-232C cable a[…]
-
Страница 79
71 ,167$//,1*237,216 You will require a #1 Philips screwdriver to install the VGS-1 or SO-3 TCXO. You will also need a soldering iron (approx. 30 watts) to install the SO-3 TCXO. Switch OFF the transceiver power and unplug the DC power cable before performing any installations. 5(029,1*7+(%27720&$6( When installing the optional VGS-[…]
-
Страница 80
,167$//,1*237,216 72 627&;2 The SO-3 option improves the transceiver frequency stability to ±0.5 ppm. 1 Remove the CN503 connector and TCXO PCB screw, as shown below. TCXO PCB CN503 TCXO PCB CN503 2 Remove the TCXO PCB. 3 Insert the SO-3 TCXO. 4 Solder all pins on the reverse side of the PCB. 5 Re-insert the TCXO PCB in[…]
-
Страница 81
73 ,167$//,1*237,216 0%02%,/(%5$&.(7 ATTENTION: When installing the MB-430, use the SEMS Screws provided with the TS-590S. When installing the MB-430, attach the supplied plastic spacers to the transceiver in advance. This is necessary to protect the TS-590S transceiver from scratches. Make sure the tab faces ou[…]
-
Страница 82
74 7528%/(6+227,1* 6(59,&(127( If you desire to correspond on a technical or operational problem, please make your note short, complete, and to the point. Help us help you by providing the following: • Model and serial number of equipment • Question or problem you are having • Other equipment in your station pertaining to the problem ?[…]
-
Страница 83
75 7528%/(6+227,1* 7528%/(6+227,1* The problems described in this table are commonly encountered operational malfunctions. These types of difficulties are usually caused by improper hook-up, accidental incorrect control settings, or operator error due to incomplete programming. These problems are usually not caused by circuit failure. P[…]
-
Страница 84
76 7528%/(6+227,1* Problem Probable Cause Corrective Action Page No signals are received or receive sensitivity seems poor; S-meter is reading full scale. The RF gain was set too low. Turn the RF control clockwise to increase the RF gain. 10 Received signals are completely unintelligible The wrong modulation was selected. Select the cor[…]
-
Страница 85
77 7528%/(6+227,1* Problem Probable Cause Corrective Action Page VOX does not operate. The VOX gain is set too low. Increase the VOX gain. 30 HF/ 50 MHz Linear amplifier does not operate. 1 The linear amplifier control is OFF. 2 The REMOTE connector wiring is wrong or faulty. 1 Set Menu No. 53 (HF) or 54 (50 MHz) to 1, 2, or 3. 2 Inspec[…]
-
Страница 86
78 7528%/(6+227,1* Problem Probable Cause Corrective Action Page A message cannot be recorded/ played back or no announcement can be heard. There is a communication error between the transceiver and the VGS-1. Confirm that the connector of the VGS-1 is securely connected to the transceiver. Perform the Full reset. If the problem persist[…]
-
Страница 87
79 7528%/(6+227,1* 23(5$7,21127,&(6 The transceiver has been designed and engineered to avoid possible hardware glitches. However, you may notice the following symptoms when you operate the transceiver. These symptoms are not malfunctions. ‘&32:(56833/< As stated in the SPECIFICATIONS {page 80}, this transceiver[…]
-
Страница 88
237,21$/$&&(6625,(6 80 PS-60 Regulated DC Power Supply (22.5 A) HS-6 Small Headphones SP-50B Mobile Speaker MC-47 Multi-function Microphone ARCP-590/ ARHP-590 Remote control software PG-20 DC cable (7 m/ 23 ft) SO-3 TCXO unit MC-60A Desk-top Microphone SP-23 External Speaker VGS-1 Voice Guide and Storage unit HS-5 Delux Headphones MC-43S[…]
-
Страница 89
81 63(&,),&$7,216 General Mode J3E (LSB, USB)/ A1A (CW)/ A3E (AM)/ F3E (FM)/ F1B (FSK) Number of memory channels 110 + 10 (Quick memory channels) Antenna impedance 160 m ~ 6 m band ZLWKEXLOWLQDQWHQQDWXQHUa Supply Voltage ‘&9 Grounding[…]
-
Страница 90
82 63(&,),&$7,216 Transmitter XIT shift frequency range N+] Microphone impedance Receiver Circuit type 5;0+] EDQG,)EDQGZLGWKRIN+] or less (SSB/CW/FSK)) RX2 (Other) Double conversion […]
-
Страница 91
[…]
-
Страница 92
Bu ürün 26891sayılı Resmi Gazete ’ de yayımlanan Elektrikli ve Elektronik Eşyalar da Bazı Zararlı Maddelerin Kullanımının Sınırlandırılmasına Dair Y önetmeliğe uygun olarak üretilmiştir . This product complies with Directive , Number 26891 regarding «REGULA TION ON THE RESTRICTION OF THE USE OF CERT AIN HAZARDOUS SUBST AN[…]