
Данный раздел представляет большой выбор инструкций по эксплуатации мини-печей фирмы DeLonghi. Если Вы утратили инструкцию из комплекта, то, надеемся, без труда сможете найти ее на нашем сайте и бесплатно скачать.
Если, по каким-то причинам, Вы не смогли найти нужное руководство, не стесняясь пишите запрос нам.
Инструкции по моделям
Вернуться

Мини-печи
- Manuals
- Brands
- DeLonghi Manuals
- Oven
- ELECTRIC OVEN
- Instructions for use manual
-
Contents
-
Table of Contents
-
Bookmarks
Quick Links
ELECTRIC OVEN
FORNO ELÉTRICO
Instructions for use
Instruções de uso
Related Manuals for DeLonghi ELECTRIC OVEN
Summary of Contents for DeLonghi ELECTRIC OVEN
-
Page 1: Electric Oven
ELECTRIC OVEN FORNO ELÉTRICO Instructions for use Instruções de uso…
-
Page 2: Electrical Connection
ELECTRICAL CONNECTION BEFORE PLUGGING INTO THE MAINS, MAKE SURE THAT THE MAINS VOLTAGE CORRESPONDS TO THE VOLTAGE INDICATED ON THE RATING LABEL Only use a three-pin, power socket GROUNDING INSTRUCTIONS MAKE SURE THAT THE PLUG IS CORRECTLY GROUNDED This appliance must be grounded: in the event of short circuits, the ground connection reduces the risk of elec- tric shock, allowing the electrical current to be dispersed.
-
Page 3: Description Of The Appliance
DESCRIPTION OF THE APPLIANCE crumb tray A thermostat knob M top heating element B timer knob N interior light (if supplied) C indicator light O cookie sheet (if supplied) D function selector knob muffin pan (if supplied) glass door Q broil rack (if supplied) bottom heating element R rubber pad (if supplied) G 12”…
-
Page 4
the mains socket has a minimum rating of 15A and an earth wire. The manufacturer declines all liability in the event that this important accident-prevention rule is not respected. • Before using the oven for the first time, remove any paper and other material inside the oven such as pro- tective cardboard, booklets, plastic bags, etc. -
Page 5: Summary Table
SUMMARY TABLE Thermostat knob Wire rack and Function selector Program Notes/Tips knob position position accessory position • Defrost (*) Delicate cooking 60°-230° Keeping food warm 60° Ideal lasagna, meat, pizza, cakes in general, foods that should be crunchy on the surface (“au gra- tin”) and bread.
-
Page 6: Using The Controls
USING THE CONTROLS Thermostat knob (A) Select the desired temperature, as follows: • To defrost (*) (see page 7): ….Thermostat knob in the “•” position. •…
-
Page 7: Using The Oven
USING THE OVEN General tips • When cooking with the convection oven, traditional oven and grilling, always preheat the oven for 5 minutes to the set temperature, so as to achieve best results. • The cooking times depend on the quality of the products, on the temperature of the food and on perso- nal tastes.
-
Page 8
Thermostat wire rack Program Times Comments and tips knob position Macaroni “au gratin” 1 Kg. 230° 20 min. lower Turn the baking pan halfway through cooking Lasagna 1 kg. 230° 20 min. “ Use an ovenproof dish, turn after 10 min. Pizza 500 g 225°… -
Page 9
Toast • The dimensions of the wire rack (G) allow six slices of bread to be toasted at the same time. Best results are achieved, however, with four slices at a time. • To toast the bread, place the slices as shown below: Toasting one slice Toasting two slices Toasting four slices… -
Page 10
Grilling • Place the flat wire rack (G) in the upper guide. • Turn the function selector knob (D) to the position. • If your oven features the broil rack (O): place the food to be grilled on the broil rack (O) inserted on the dripping pan (H), and place them together on the flat wire rack (G). -
Page 11: Cleaning And Maintenance
CLEANING AND MAINTENANCE Frequent cleaning prevents the formation of smoke and bad odors during cooking. Do not let fat accumulate inside the appliance. Before any maintenance or cleaning operation, unplug the oven and wait for it to cool down. Clean the door, the inside walls and the enamel or painted surfaces of the oven with a soap and water solution;…
-
Page 12: Warranty
WARRANTY Everyone opening the box containing the De’Longhi product should read the entire instruction manual care- fully before performing any operation involving the product. Most importantly, you should make sure the vol- tage of the appliance is compatible with the voltage of the mains socket.All De’Longhi electrical appliances are guaranteed free of all material and manufacturing defects.
Узнавай о новинках и акциях первым
Вы успешно зарегистрированы на сайте.
Вам доступен личный кабинет пользователя.
Перейти к покупкам
Ваш пароль воcстановлен!
Теперь вы можете полноценно пользоваться
всеми возможностями нашего интернет-магазина.
Здравствуйте, Ваша претензия принята и зарегистрирована.
В течение 3-х рабочих дней Вам, на электронную почту, будет дан письменный ответ. В случае возникновения дополнительных вопросов, менеджер претензионного отдела свяжется с Вами.
Перейти к покупкам

Ваше сообщение об ошибке на сайте успешно отправлено.
Большое спасибо!
Добавить отзыв о магазине
Торг для данного товара сейчас не возможен!
Сколько вы готовы заплатить за этот товар?
Введите ваше ценовое предложение
Мы согласны с вашим предложением
Мы принимаем вашу цену, и вы можете купить товар по цене:
0 руб.
-
De’Longhi Appliances
via Seitz, 47
31100 Treviso Italia
5711811091/01.13
10
-
Istruzioni per l’uso   Forno eLeTTrIco
Instruction for use  eLecTrIc oVen
FoUr ELecTrIQUe
Mode d’emploi
Istruzioni per l’uso   Forno eLeTTrIco
Istruzioni per l’uso
eLeKTroBAcKoFen
Bedienungsanleitung  Forno eLeTTrIco
Gebruiksaanwijzingen eLecTrIc oVen
Instructions for use
eLeKTrIScHe oVen
eLecTrIc oVen
Instructions for use
Instrucciones para el uso  Horno eLEcTrIco
Mode d’emploi
FoUr ELecTrIQUe
Mode d’emploi
Forno eLEcTrIco
Instrucoes de utilizacao  FoUr ELecTrIQUe
?????????? ???????
??????? ??????
Bedienungsanleitung  eLeKTroBAcKoFen
Bedienungsanleitung
ЭЛЕКТРИЧЕСКАЯ ПЕЧЬ
Инструкции по эксплуатации  eLeKTroBAcKoFen
Hasznalati utmutato eLeKTrIScHe oVen
Gebruiksaanwijzingen  VILLAnySuTo
eLeKTrIScHe oVen
Gebruiksaanwijzingen
navod k pouziti  eLeKTrIcKa TroUBA
navod na pouzitie  eLeKTrIcKa pec
Instrukcja obslugi  pIeKArnIK eLeKTrycZny
Bruksanvisning Horno eLEcTrIco
Instrucciones para el uso  eLeKTrISK oVn
Instrucciones para el uso Horno eLEcTrIco
Bruksanvisning
Brugsanvisning Forno eLEcTrIco
Instrucoes de utilizacao  eLeKTrISK UGn
eLeKTrISK oVn
Instrucoes de utilizacao Forno eLEcTrIco
SaHKoUUnI
Kayttoohjeet
??????? ?????? ?????????? ???????
??????? ?????? ?????????? ???????
Upute za uporabu  eLeKTrIcnA pecnIcA
eLeKTrIcnA pecIcA
navodila za uporabo
Инструкции по эксплуатации  ЭЛЕКТРИЧЕСКАЯ ПЕЧЬ
Инструкции по эксплуатации  ЭЛЕКТРИЧЕСКАЯ ПЕЧЬ
ЕЛЕКТРИЧЕСКА фуРнА
Инструкции за употреба
Instructiuni de utilizare eLeKTrIKLI FIrIn
cUpTor eLecTrIc
Kullan?m talimatlar?
Kullan?m talimatlar?  eLeKTrIKLI FIrIn
Kullan?m talimatlar?  eLeKTrIKLI FIrIn
?????? ??????? ???? ??
?????? ??????? ???? ??
????????? ??????? ??????? ???
????????? ??????? ??????? ???
-
electrical connection (uk only)
A)   If your appliance comes fitted with a plug, it will incorporate a 13 Amp fuse. If it does not fit your socket, the plug
should be cut off from the mains lead, and an appropriate plug fitted, as below.
WArnInG: Very carefully dispose of the cut off plug after removing the fuse: do not insert in a 13 Amp socket
elsewhere in the house as this could cause a shock hazard.
With alternative plugs not incorporating a fuse, the circuit must be protected by a 15 Amp fuse. If the plug is a
moulded-on type, the fuse cover must be re-fitted when changing the fuse using a 13 Amp Asta approved fuse
to BS 1362. In the event of losing the fuse cover, the plug must noT be used until a replacement fuse cover can be
obtained from your nearest electrical dealer. The colour of the correct replacement fuse cover is that as marked on
the base of the plug.
B)  If your appliance is not fitted with a plug, please follow the instructions provided below:
WARNING - THIS AppLIAnce MUST Be eArTHeD
ImpoRtANt
The wires in the mains lead are coloured in accordance with the following code:
Green and yellow:   earth
Blue:   neutral
Brown:   Live
As the colours of the wires in the mains lead  may not correspond with the coloured markings identifying the terminals
in your plug, proceed as follows:
The green and yellow wire must be connected to the terminal in the plug marked with the letter e or the earth symbol
or coloured green or green and yellow.
The blue wire must be connected to the terminal marked with the letter n or coloured black.
The brown wire must be connected to the terminal marked with the letter L or coloured red.
2                                                                                3
Страницы и текст этой инструкции
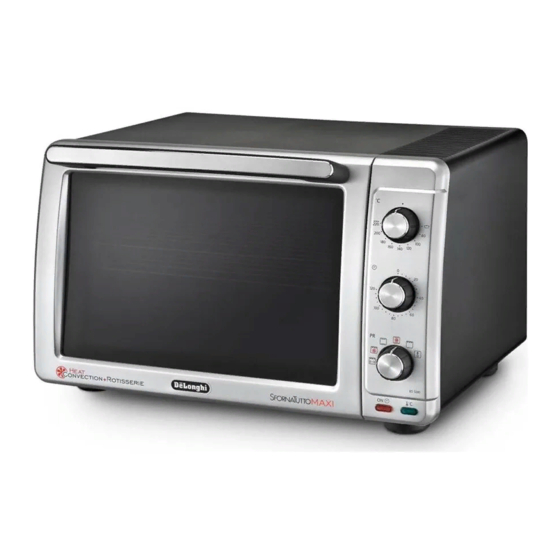
 Инструкция электрической печи DeLonghi EO 3850
 Информация отображена на картинке
 Информация отображена на картинке
 Информация отображена на картинке
 Информация отображена на картинке
Как использовать наш сайт инструкций OnlineManuals.ru
Наша цель состоит в том, чтобы предоставить вам быстрый доступ к содержанию инструкции для электрической печи DeLonghi EO 3850.
С помощью онлайн просмотра, Вы можете быстро просмотреть содержимое инструкции и найти решение проблемы с электрической печи DeLonghi EO 3850.
Для Вашего удобства
Если листать руководство пользователя электрической печи DeLonghi EO 3850 прямо на сайте, не очень удобно для Вас, есть два возможных решения:
• Просмотр в полноэкранном режиме — легко просмотреть руководство пользователя (без загрузки его на свой компьютер), Вы можете использовать режим полноэкранного просмотра.
Для просмотра инструкции пользователя электрической печи DeLonghi EO 3850 на полном экране, используйте кнопку «Открыть в Pdf-viewer».
• Загрузка на компьютер — Вы можете также скачать Инструкция электрической печи DeLonghi EO 3850 на свой компьютер и сохранить его в файлах.
Многие люди предпочитают читать документы не на экране, а в печатной версии.
Возможность печати руководства пользователя также была предусмотрена на нашем сайте,
и вы можете использовать ее, нажав на иконку «печать» в Pdf-viewer.
Нет необходимости печатать все руководство электрической печи DeLonghi EO 3850, можно выбрать только нужные страницы инструкции.