-
Contents
-
Table of Contents
-
Troubleshooting
-
Bookmarks
Quick Links
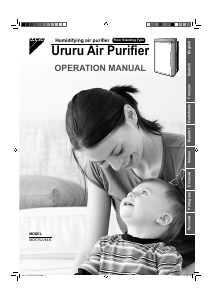
Humidifying air purifi er
Floor Standing Type
Ururu Air Purifi er
OPERATION MANUAL
MODEL
MCK75JVM-K
Related Manuals for Daikin MCK75JVM-K
Summary of Contents for Daikin MCK75JVM-K
-
Page 1: Operation Manual
Humidifying air purifi er Floor Standing Type Ururu Air Purifi er OPERATION MANUAL MODEL MCK75JVM-K…
-
Page 2
Features Features The strong decomposition capacity of streamer discharge assuredly removes unpleasant Deodorization odor-causing components in cigarette smoke, formaldehyde, etc. Dust collection A high airfl ow rate nimbly catches pollen, house dust, etc. Humidifi cation The room is quickly humidifi ed by the humidifying with “Vaporization system of high airfl ow rate”. Streamer discharge nimbly decomposes odors and harmful gases by generating fast-moving electrons of high oxidising strength inside the air purifi… -
Page 3: Table Of Contents
READ FIRST ■ Safety Precautions ………. 3 ■ Names and Operation of Each Parts ….. 7 ■ Sensitivity Settings of the Dust Sensor ..13 PREPARATIONS BEFORE USE ■ Installation …………. 14 ■ Preparation of Remote Controller ….15 ■ Attach the Filter ……….
-
Page 4: Read First
READ FIRST Safety Precautions Before use, read these Safety Precautions to ensure proper use. The precautions used in this manual are classifi ed into the following two types. Both contain important safety information, therefore observe them at all times. Improper handling may lead to injury or property Improper handling may lead to serious injury or damage.
-
Page 5: Power Supply
WARNING • Do not use the unit anywhere there is airborne oil such as machine oil. Airborne oils may lead to cracking, electric shock or ignition. • Do not use the unit anywhere there are abundant oil vapours such as in kitchens, combustible or corrosive gases, or metallic dust. These kinds of environments may lead to fi…
-
Page 6
Safety Precautions CAUTION • Do not use the unit anywhere it is exposed to direct sunlight, rain or wind. Overheating or contact with water may lead to fi re or electric shock. • Do not use the unit anywhere that is hot such as near to heaters. High temperatures may discolour or deform the unit. -
Page 7
CAUTION • If used where pets are kept, be careful that pets do not urinate on the unit or bite the power supply cord. This may lead to electric shock or fi re. In the event of abuse by pets, stop operation, unplug the power supply cord and contact the service shop. -
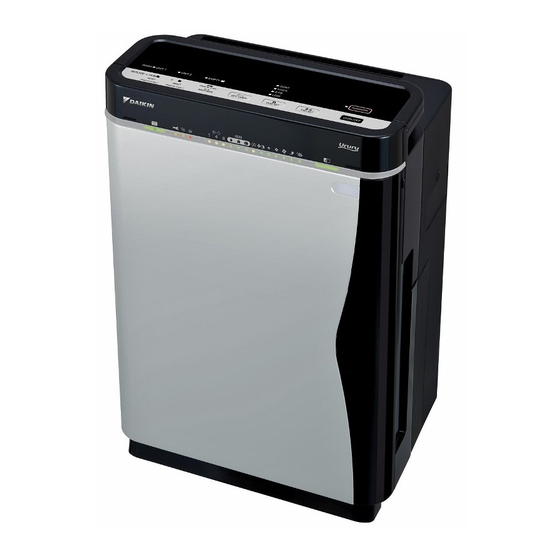
Page 8: Names And Operation Of Each Parts
Names and Operation of Each Parts Main unit Odor sensor Dust sensor Humidity sensor · Temperature sensor Filter container Holds 6 replacement pleated filters. UNIT2 (Streamer unit) UNIT1 (Plasma ionizer) Ionizing frame Pre-filter (green) Safety guard Removes large dust particles. Deodorizing catalyst unit Absorbs airborne odors and harmful gases using a deodorizing…
-
Page 9: Humidifying Filter
Operating panel Handle Side panel Front indicator Pocket lock lamps Prevents streamer pocket from opening inadvertently. Use a coin to open. Unlock How to use the pocket lock Coin Lock Unlock Lock Pocket lock To lock, turn to where the meet.
-
Page 10
Names and Operation of Each Parts Operating panel Brightness adjustment Use to set lamp brightness for sleeping or as you prefer. Each time the button is pressed, the brightness of the operating panel lamps and front indicator lamps change as follows. Page 13. -
Page 11
ATTENTION OFF TIMER button ● The operating panel is covered in a protective sheet to protect against scratching. Each time pressing this button, the OFF Peel the sheet off before use. time changes as follows. ● If the front panel is opened during operation, the unit stops for safety reasons. If the unit malfunctions during operation <Front indicator lamps>… -
Page 12
Names and Operation of Each Parts Front indicator lamps The readings of room hygrometers and the unit’s humidity indicator lamp may differ. • This is because air currents cause temperature and humidity drifts even in the same room. Consider the humidity indicator lamp as just a reference reading. Child proof lock lamp Regeneration lamp •… -
Page 13
Humidity indicator lamp (For reference only) This lamp indicates the room humidity detected by humidity sensor. :Humidity: 40% or less :Humidity: Approx. 50% :Humidity: 60% or more In case running the unit just to air purifying operation, the lamp also indicates the humidity level. Odor sensor lamp Odor sensor detects the changes in airborne odors. -
Page 14: Sensitivity Settings Of The Dust Sensor
Sensitivity Settings of the Dust Sensor If dust sensor sensitivity is not how you want it, change the setting. Operating panel Press for 10 seconds. While holding down , press • After a short beep sound is emitted and the airfl ow (“ ”…
-
Page 15: Preparations Before Use
PREPARATIONS BEFORE USE Installation How to install Set the unit in a preferred location. Observe the following installation clearances to ensure unit performance. Min. 100cm from ceilings Airflow Min. 10cm from walls Min. 50cm from walls Min. 50cm from walls NOTE ●…
-
Page 16: Preparation Of Remote Controller
Preparation of Remote Controller Remote controller setup Remote controller preparations • Battery is already set in the remote controller. To use the remote controller, pulling out the clear sheet from the battery cover. Receiver Using the remote controller • Point the transmitter of the remote controller towards the receiver of the main unit. If an obstruction to the signal, such as a curtain, exists, the remote controller will not operate.
-
Page 17: Attach The Filter
CAUTION Attach the Filter • Do the following before plugging in the power supply cord. Attach the pleated fi lter Remove the deodorizing catalyst unit. • Holding the deodorizing catalyst unit by the handle, pull the deodorizing catalyst unit upwards and out of the unit. Be sure to attach the pleated fi…
-
Page 18: Water Tank Preparations
Water Tank Preparations Water tank preparations Air purifying operation can be operated even without water in the tank. Open the cap on the water tank. Add water to the tank and close the cap. Use only tap water. • Add water somewhere that can be wet if spilled. •…
-
Page 19
After attaching the fi lter Restore the front panel. Restore the deodorizing catalyst unit. • Fit the tabs (2 locations) at the bottom of the panel into the • Holding the deodorizing catalyst unit by the handle, fi t the grooves at the bottom of the main unit, and close the projections on the unit into the grooves (4 locations) at the panel. -
Page 20: How To Operate
HOW TO OPERATE Air Purifying Operation Socket Plug the power supply cord NOTE Power plug into an electrical socket. ● Do not insert or remove the power plug to turn the unit on/off. Abusive handling may lead to electric shock or fi re because of overheating. Humidification lamp Press •…
-
Page 21: Humidify And Air Purifying Operations
Humidify and Air Purifying Operations Air purifying operation is in active while humidifying operation. (Humidifi cation cannot run by itself.) ● Do not move the unit while it is running. Displacements may cause water leaks, damage or malfunctions. Humidification lamp Press Press to light the humidifi…
-
Page 22: How To Operate With Remote Controller
How to Operate with Remote Controller How to operate with remote controller 1. ON/OFF button 2. Auto fan button 3. Fan setting button 4. Turbo button 5. Anti-pollen button 6. Humidify ON/OFF button 7. Humidify setting button 8. OFF TIMER button 9.
-
Page 23
To switch the humidifying operation ON/OFF Press “ ”. • Each time it is pressed, the humidifying operation ON/OFF will switch. • When the humidifying operation ON/OFF is switched humidity indicator lamp indicate temporarily as shown below. • In case the humidifying operation is turned ON: the humidity indicator lamp will be changed and indicate the setting. •… -
Page 24: How To Use The Recyclable Deodorizing Cartridge
How to Use the Recyclable Deodorizing Cartridge The recyclable deodorizing cartridge can be removed from the air purifi er and used to deodorize remote locations. Deodorizing capacity can be regenerated with the streamer pocket so as to use the cartridge time and time again. Uses The deodorizing cartridge can be used in the below places.
-
Page 25
After about 2 months (reference only), regenerate the recyclable deodorizing cartridge inside How to regenerate the recyclable the streamer pocket. deodorizing cartridge Suffi cient deodorizing effect may not be obtained if the cartridge is not regenerated periodically. Recyclable deodorizing cartridge regeneration is started and stopped by opening and closing the streamer pocket. -
Page 26: Quick Reference Table Of Maintenance
CARE and CLEANING Quick Reference Table WARNING of Maintenance • Before performing maintenance, stop the unit and unplug the power supply cord. If the check lamp lights, check the location that requires attention on the operating panel. • Any of the humidifying filter lamp( ), Air-purifying filter lamp( ), UNIT1/2 lamps, or water supply lamp( ) will light or…
-
Page 27
• Air inlets for Dust/Odor sensors and Temperature/ Humidity sensors Page 27. UNIT2 (Streamer unit) Page 33, 34. Deodorizing catalyst unit Page 28. Pleated filter (front: white, back: blue) Page 30, 31. Front panel Page 27. UNIT1 (Plasma ionizer) Page 33, 34. Pre-filter (green) Page 29. -
Page 28: Care & Cleaning
Care & Cleaning Front panel cleaning Wipe • Wipe off dirt with a piece of cloth or tissue moistened with water. • For stubborn dirt, wipe with a cloth moistened with a neutral liquid detergent. CAUTION • Do not use hard bristle brushes, etc. Tools of the sort may scratch the front panel.
-
Page 29
Recyclable deodorizing cartridge Deodorizing catalyst unit Streamer pocket Recyclable deodorizing cartridge cleaning Cannot be washed with detergent Vacuum cleaner Soak, drain and dry • If dust has accumulated, suck it up with a vacuum cleaner. • If bothered by dirt on the cartridge, soak the cartridge in warm or plain water for about 10 minutes, drain thoroughly and dry in a well- ventilated shade for about 1 day. -
Page 30
Care & Cleaning Pre-fi lter cleaning (About once every 2 weeks) Vacuum cleaner Rinse with water Remove the front panel. Restore the pre-fi lter. • Push the 2 projections (left and right) inwards, and pull the • Align the tabs (4 locations) on the left and right of the front panel upwards and remove. -
Page 31
Pleated fi lter replacement Cannot be rinsed in water WARNING The pleated fi lter does not need • Before performing maintenance, stop the replacing until the Air-purifying fi lter unit and unplug the power supply cord. lamp lights or fl ashes. Replace If the Air-purifying filter lamp lights or flashes Remove the front panel. -
Page 32
Care & Cleaning Restore the deodorizing catalyst unit. Restore the front panel. Page 29. • Holding the deodorizing catalyst unit by the handle, fi t the projections on the unit into the grooves (4 locations) at the bottom of the main unit and press the deodorizing catalyst unit into the main unit. -
Page 33
UNIT1 (Plasma ionizer) removing and attaching CAUTION • Wear rubber gloves to remove and attach the opposite pole plates. Hands can be cut on the opposite pole plates and ionized wires. Remove Attach Remove the front panel. Attach the opposing pole plates. Page 29. -
Page 34
Care & Cleaning Cleaning UNIT1 (plasma ionizer) and UNIT2 (streamer unit) CAUTION • Before performing maintenance, stop the unit and unplug the power supply cord. • Wear rubber gloves to when wiping or rubbing the units. Soak, drain and dry If UNIT lamps light Hands can be cut on the opposite pole plates and ionized wires. -
Page 35
UNIT1 UNIT2 CAUTION (Plasma ionizer) (Streamer unit) There are ionized wires to the rear of the opposite pole plates. Be (1) Ionizing frame careful not to snap these wires when removing and attaching the units. • If the unit is run with broken ionized wires, the “UNIT1” lamp lights. -
Page 36
Care & Cleaning Humidifying fi lter cleaning (About once every 1 week) Soak, drain and dry WARNING How quickly the humidifying fi lter becomes dirty depends on the environment of use. If odors are emitted from the air outlet or if humidifi cation capacity is low (the •… -
Page 37
Attach the humidifying Restore the humidifying tray. filter and waterwheel. Waterwheel Press inward until • Reattach the humidifying fi lter and waterwheel to hearing clicking the humidifying tray, and push the humidifying tray sound. back into the unit until hearing clicking sound. Humidifi… -
Page 38
Care & Cleaning Humidifying fi lter replacement (About every 2 years [2 seasons]) Using the unit without replacing the WARNING humidifying fi lter causes mildew, foul odors and humidifi cation loss. • Before performing maintenance, stop the unit and unplug the power supply cord. Replace If the humidifying filter lamp lights or flashes Remove the front panel and water tank. -
Page 39
Options ATTENTION ● For replacement pleated fi lters, humidifying fi lters or recyclable deodorizing Part Model cartridges contact the service shop. Pleated fi lter (7) KAC998A4E ● If the unit is used with dirty parts Humidifying fi lter (Without frame) (1) KNME998A4E •… -
Page 40: Troubleshooting
TROUBLESHOOTING Frequently Asked Questions Questions & Answers Question: Question: The dust sensor does not change from the Does the deodorizing effect of the recyclable orange or red colour. deodorizing cartridge disappear entirely in 2 months time? Answer: This is due to dusts built up in the dust sensor. Answer: Suck up dust accumulated in the dust sensor hole with a The effect should not completely disappear in 2 months time.
-
Page 41: If These Lamps Light Or Flash
If These Lamps Light or Flash Front indicator lamps If a long beep sound repeat 3 times is emitted and the dust and odor lamps flash (red) at the same time The lamps will blink if the unit is leaned in excess or toppled. Set the unit on a flat floor and press the ON/OFF button.
-
Page 42: Troubleshooting
The following situations have logical explanations. Troubleshooting Before requesting servicing, make the following checks. If this happens Check Humidity in rooms facing north or rooms near plumbing fi xtures such as bathrooms is normally The current humidity remains high. high because moisture readily accumulates. The readings of the room hygrometer and This is because air currents cause temperature and humidity drifts even in the same room.
-
Page 43: During Operation
If this happens Check How to resolve Crackling, buzzing, and Securely set it. Page 18. Is the UNIT1 set securely? fi zzes sounds are audible during operation. Has dust accumulated on the ionized wires of the Page 33, 34. Clean it. ionizing frame? A hissing sound heard from UNIT2 during operation.
-
Page 44
The following situations have logical explanations. Troubleshooting Before requesting servicing, make the following checks. If this happens Check How to resolve The unit does not humidify Press if the lamp is out. Is the humidifi er ON/OFF lamp is lit? despite having added water to the water tank. -
Page 45
MEMO… -
Page 46
Two-dimensional bar code is a code for manufacturing. 3P234570-1 M08B113 (0811) HT…
(Ocr-Read Summary of Contents of some pages of the Daikin MCK75JVM-K Document (Main Content), UPD: 07 February 2023)
-
41, Daikin MCK75JVM-K 40 English If These Lamps Light or Flash Operating panel Front indicator lamps Contact the service shop. If a long beep sound repeat 3 times is emitted and the 4 lamps flash at the same time Trouble has occurred in the temperature or humidity sensor. If a long beep sound repeat 3 times is emitted and the dust and odor lamps flash (red) at the same time The lamps will blink if the unit is leaned in excess or toppled. Set the unit on a flat floor and press the ON/OFF button…
-
11, 10 English OFF TIMER button Each time pressing this button, the OFF time changes as follows. <Front indicator lamps> OFF The timer setting indicator lights depending • on the remaining time. The set time can be changed while the timer • is running. Humidify setting button Each time pressing this button, the humidify setting changes as follows. Page 20. The humidify setting cannot …
-
30, Daikin MCK75JVM-K 29 Care & Cleaning 1 Remove the front panel. Push the 2 projections (left and right) inwards, and pull the • front panel upwards and remove. Front panel Projection (1 each on left and right) Push 2 Remove the water tank. Holding the water tank by the handle, pull the tank • upwards and out of the unit. (1) Pull Water tank (2) Up 3 Clean the pre-fi lter. Suck up dust with a vacuum cleaner. • 4 For…
-
1, OPERATION MANUAL Humidifying air purifi er Floor Standing Type Ururu Air Purifi er MODEL MCK75JVM-K EnglishDeutschFrançaisNederlandsEspañolItalianoEλληνικάPortuguesPycckий 00_CV_3P234570-1.indd 100_CV_3P234570-1.indd 1 10/29/2008 9:04:24 AM10/29/2008 9:04:24 AM
… -
38, 37 Care & Cleaning 1 Remove the front panel and water tank. Page 29. 2 Pull out the humidifying tray and remove the waterwheel and humidifying fi lter. Page 35. 3 Remove the shaft that locks the humidifying fi lter and waterwheel. Turn the shaft to the left. Pull the shaft out. 4 Remove the humidifying fi lter from the waterwheel, and attach a new fi lter. Humidifying filter Waterwheel Do not discard the waterwheel. T• uck the h…
-
19, Daikin MCK75JVM-K 18 English After attaching the fi lter 1 Restore the deodorizing catalyst unit. Holding the deodorizing catalyst unit by the handle, fi t the • projections on the unit into the grooves (4 locations ) at the bottom of the main unit and press the deodorizing catalyst unit into the main unit. (1) Fit here. (2)Press inward until hearing clicking sound. Deodorizing catalyst unit 2 Restore …
-
23, 22 English 6 To switch the humidifying operation ON/OFF Press “ ”. Each time it is pressed, the humidifying operation ON/OFF will switch.• When the humidifying operation ON/OFF is switched humidity indicator lamp indicate temporarily as shown below.• In case the humidifying operation is turned ON: the humidity indicator lamp will be changed and indicate the setting.• In case the humidifying operation is turned OFF: the humidity indicator lamp wil…
-
9, 8 English Rear Side panel Power supply cord hook Winds the cord for storing unit. Recyclable deodorizing cartridge Use to regenerate the recyclable deodoriz- ing cartridge. Inserting into the streamer pocket decom- poses absorbed odors and enables reuse. Streamer pocket Streamer pocket Unlock Lock How to use the pocket lock Prevents streamer pocket from opening inadvertently. Use a coin to open. Pock…
-
4, 3 READ FIRST Before use, read these Safety Precautions to ensure proper use. The precautions used in this manual are classifi ed into the following two types. Both contain important safety information, therefore observe them at all times. WARNING Improper handling may lead to serious injury or even death. CAUTION Improper handling may lead to injury or property damage. In some situat…
-
3, 2 English READ FIRST Safety Precautions ■ …………………………………… 3 Names and Operation of Each Parts ■ …………. 7 Sensitivity Settings of the Dust Sensor ■ …… 13 PREPARATIONS BEFORE USE Installation ■ …………………………………………….. 14 Preparation of Remote Controller ■ ……………. 15 Attach the Filter ■ ………………………..…
-
22, 21 How to operate with remote controller 1 3 5 7 9 10 2 4 6 8 1. ON/OFF button 2. Auto fan button 3. Fan setting button 4. Turbo button 5. Anti-pollen button 6. Humidify ON/OFF button 7. Humidify setting button 8. OFF TIMER button 9. Brightness adjustment button 10. Child proof lock button 1 To start operation Press “ ”. Pressing again will stop.• 2 To automatically switch the airfl ow rate Pre…
-
25, 24 English How to regenerate the recyclable deodorizing cartridge After about 2 months (reference only), regenerate the recyclable deodorizing cartridge inside the streamer pocket. Suffi cient deodorizing effect may not be obtained if the cartridge is not regenerated periodically. Recyclable deodorizing cartridge regeneration is started and stopped by opening and closing the streamer pocket. Procedure Note 1 Open the streamer p…
-
43, 42 English If this happens Check How to resolve Crackling, buzzing, and fi zzes sounds are audible during operation. Is the UNIT1 set securely? Securely set it. Page 18. Has dust accumulated on the ionized wires of the ionizing frame? Clean it. Page 33, 34. A hissing sound heard from UNIT2 during operation. There is nothing wrong with the unit. — Odor is coming from the air outlet. Is a large amount of odor being generated temporarily? (Many people smoking or gril…
-
45, 44 English MEMO 01_EN_3P234570-1.indd 4401_EN_3P234570-1.indd 44 10/28/2008 12:02:58 PM10/28/2008 12:02:58 PM
… -
26, Daikin MCK75JVM-K 25 CARE and CLEANING If the check lamp lights, check the location that requires attention on the operating panel. • Any of the humidifying filter lamp( ), Air-purifying filter lamp( ), UNIT1/2 lamps, or water supply lamp( ) will light or flash together with the check lamp( ). Air inlets for Dust/Odor sensors and Temperature/ Humidity sensors If clogged Recyclable deodorizing cartridge If dust has accumulated If bothered by dirt Vacuum …
-
42, 41 Troubleshooting The following situations have logical explanations. Before requesting servicing, make the following checks. If this happens Check How to resolve Does not operate. The dust and odor sensor lamps are fl ashing? Set the unit on a fl at fl oor and press the ON/OFF button. Is the humidifying tray out of place? (The water supply lamp is fl ashing.) Set the humidifying tray properly. Is the front panel or UNIT1 impr…
-
15, 14 English PREPARATIONS BEFORE USE How to install Set the unit in a preferred location. Observe the following installation clearances to ensure unit performance. Min. 10cm from walls Min. 50cm from walls Min. 100cm from ceilings Min. 50cm from walls Airflow NOTE Depending on the type of wall, the wall may dirty even at the above installation clearance. ● In such case, move the unit a safe distance away from the wall. ATTEN…
-
24, 23 The recyclable deodorizing cartridge can be removed from the air purifi er and used to deodorize remote locations. Deodorizing capacity can be regenerated with the streamer pocket so as to use the cartridge time and time again. Uses The deodorizing cartridge can be used in the below places. Inside shoe cabinets Inside carsFoyers Inside closets Inside refrigerators Toilets • Do not use or store the recyclable deodorizing cartridge anywhe…
-
46, 3P234570-1 M08B113 (0811) HT Two-dimensional bar code is a code for manufacturing. 00_CV_3P234570-1.indd 200_CV_3P234570-1.indd 2 10/29/2008 9:04:25 AM10/29/2008 9:04:25 AM
… -
40, 39 TROUBLESHOOTING Frequently Asked Questions Question: The dust sensor does not change from the orange or red colour. Answer: This is due to dusts built up in the dust sensor. Suck up dust accumulated in the dust sensor hole with a vacuum cleaner. Page 27. Normal operation is restored shortly after sucking up dust and running air purifi cation. Page 19. Question: The sensitivity of the dust sensor seems to be bad. Answer: This is because react time of the dust sensor diffe…
More products and manuals for Air filters Daikin
| Models | Document Type |
|---|---|
|
MC70L3VM L-Series |
Service Manual
59 pages |
|
MC70LPVM |
Operations Instructions
28 pages |
|
MC70L3VM L-Series |
Specifications
108 pages |
|
ACEF 3AV1-(C)(H) |
Specifications
32 pages |
|
MC401VE |
User Manual
18 pages |
|
MC70L3VM L-Series |
Service Manual
414 pages |
|
MC707VM-W |
User Manual
19 pages |
|
MC401VE |
Service Manual
61 pages |
|
MC704VM |
User Manual
14 pages |
|
MC704VM |
User Manual
14 pages |
|
MC401VE |
Service Manual
53 pages |
|
ACEF 4AV1-(C)(H) |
Service Manual
66 pages |
|
ACEF 3AVE |
Service Manual
58 pages |
|
MC70L3VM L-Series |
User Manual
2 pages |
|
EDBE81-327 |
Installation Manual
94 pages |


Features
Features
Deodorization
Dust collection
Humidifi cation
Streamer discharge nimbly decomposes odors and harmful gases by generating fast-moving electrons of high
oxidising strength inside the air purifi er. (Because the fast-moving electrons are generated and consumed inside
the unit, it is absolutely safe.)
About
During operation, the fi zzing sound of streamer discharge can be heard, but there is nothing wrong with the unit.
streamer discharge…
Also, depending on the conditions of use, the sound may be quieter or change in tone, but again there is nothing
wrong with the unit.
Air is delivered to
all parts of room at
a high airflow rate.
Rotating
Water tank
Humidifying tray
1
The strong decomposition capacity of streamer discharge assuredly removes unpleasant
odor-causing components in cigarette smoke, formaldehyde, etc.
A high airfl ow rate nimbly catches pollen, house dust, etc.
The room is quickly humidifi ed by the humidifying with «Vaporization system of high airfl ow rate».
About air purifying
Air is sucked
in on both sides.
How air is humidifi ed
Humid air
(2) Humidifying
filter
Moisture adheres to
the humidifying filter.
(1) Waterwheel
Water is scooped from
the humidifying tray.
The powerful suction of a high airflow
rate captures dust, pollen, etc.
Streamer discharge decomposes
formaldehyde and odors.
• Purifying capacity increases
alongside airflow rate.
Strong against pollen
Owing to a high airflow rate, even pollen that
readily settles because of its large particle size
is quickly caught.
Adoption of vaporization system
This is the system to vaporize water by air-blow.
• Vapours and mist are unseen to the eye.
• Humidifying capacity increases alongside
airflow rate.
Water supply system by waterwheel
Waterwheel scoops up water only when needed
and humidifying filter is not soaked to water. This
specific system keeps the humidifying filter clean
and prevent molds.
• As water is supplied from the water tank to the
humidifying tray, the sound may be heard, but
there is nothing wrong with the unit.
Need a manual for your Daikin MCK75JVM-K Air Purifier? Below you can view and download the PDF manual for free. There are also frequently asked questions, a product rating and feedback from users to enable you to optimally use your product. If this is not the manual you want, please contact us.
Is your product defective and the manual offers no solution? Go to a Repair Café for free repair services.
Manual

Rating
Let us know what you think about the Daikin MCK75JVM-K Air Purifier by leaving a product rating. Want to share your experiences with this product or ask a question? Please leave a comment at the bottom of the page.
Are you satisfied with this Daikin product?
Yes No
Be the first to rate this product
0 votes
Frequently Asked Questions
Our support team searches for useful product information and answers to frequently asked questions. If you find an inaccuracy in our frequently asked questions, please let us know by using our contact form.
Does an air purifier also remove regular dust from the air? Verified
Yes, air purifiers also remove dust from the air that otherwise would need to be removed by dusting and cleaning. It depends on the air purifier up to what size of dust can be removed from the air.
This was helpful (141)