Независимо от того, в каком направлении искусства вы работаете, в Corel Painter вы сможете найти все необходимое, чтобы реализовать свой творческий потенциал. К вашим услугам сотни настраиваемых кистей, текстур бумаги, красок и сухих пигментных материалов, которые не отличаются от своих реальных аналогов! Технология RealBristle™ воспроизводит ощущение работы с традиционными материалами как ни одно другое программное обеспечение. Painter меняет представление о границах возможного в искусстве.
Страницы
- 1
- 2
- 3
- 4
- 5
- ›
- »
Corel Painter

Jeremiah Trammell
USERGUIDE

2 | Corel Painter 2022 User Guide
(c) 2021 Corel Corporation. All rights reserved.
Corel® Painter® 2022 User Guide
Corel, the Corel logo, Painter, Brush Accelerator, CorelDRAW, Natural-Media, PaintShop, RealBristle, VideoStudio, WinDVD, WinZip, and
WordPerfect are trademarks or registered trademarks of Corel Corporation in Canada, the United States and/or Canada. Apple, Apple Pencil,
Core ML, Mac, MacBook Pro, macOS, Sidecar, and Touch Bar are trademark of Apple Inc.
All other company, product and service names, logos, brands and any registered or unregistered trademarks mentioned are used for
identification purposes only and remain the exclusive property of their respective owners. Use of any brands, names, logos or any other
information, imagery or materials pertaining to a third party does not imply endorsement. We disclaim any proprietary interest in such
third-party information, imagery, materials, marks and names of others. A non-exhaustive list of those issued patents is available at
www.corel.com/patent.
Original sample artwork is provided by third parties and is used, and/or modified, by permission, unless otherwise agreed with such parties.
Product specifications, pricing, packaging, technical support and information («specifications») reefer to the retail English version only. The
specifications for all other versions (including other language versions) may vary.
205301

Contents | 1
Contents
Welcome to Corel Painter………………………………………………………………………………………………………………………………………………..21
Using the documentation…………………………………………………………………………………………………………………………………………………21
Adjusting the Help window text size………………………………………………………………………………………………………………………………….24
Hints and tooltips……………………………………………………………………………………………………………………………………………………………24
Welcome Screen…………………………………………………………………………………………………………………………………………………………….. 25
Additional resources……………………………………………………………………………………………………………………………………………………….. 26
Feedback………………………………………………………………………………………………………………………………………………………………………..26
Registration…………………………………………………………………………………………………………………………………………………………………… 26
About Corel Corporation…………………………………………………………………………………………………………………………………………………. 26
What’s new in Corel Painter 2022…………………………………………………………………………………………………………………………………… 27
What was new in earlier versions of Corel Painter………………………………………………………………………………………………………………..34
Workspace tour…………………………………………………………………………………………………………………………………………………………….. 57
Corel Painter terms…………………………………………………………………………………………………………………………………………………………. 57
Exploring the Document window……………………………………………………………………………………………………………………………………… 59
Choosing a workspace layout……………………………………………………………………………………………………………………………………………61
Exploring the toolbox……………………………………………………………………………………………………………………………………………………… 62
Displaying the toolbox……………………………………………………………………………………………………………………………………………………..66
Displaying the Media Selector bar…………………………………………………………………………………………………………………………………….. 67
Displaying the property bars……………………………………………………………………………………………………………………………………………..68
Exploring the Navigator panel………………………………………………………………………………………………………………………………………….. 69
Displaying and customizing the Brush Selector…………………………………………………………………………………………………………………….70
Displaying the command bars………………………………………………………………………………………………………………………………………….. 76
Rearranging panels and palettes………………………………………………………………………………………………………………………………………..77
Exploring panels…………………………………………………………………………………………………………………………………………………………….. 81
Working with sliders………………………………………………………………………………………………………………………………………………………..84
Creating and modifying custom palettes……………………………………………………………………………………………………………………………. 85
Renaming and deleting custom palettes……………………………………………………………………………………………………………………………..87
Saving, exporting, and importing custom palettes………………………………………………………………………………………………………………..87

2 | Corel Painter 2022 User Guide
Working with libraries…………………………………………………………………………………………………………………………………………………….. 88
Creating, importing, exporting, and deleting workspaces……………………………………………………………………………………………………… 89
Restoring the default Corel Painter settings………………………………………………………………………………………………………………………… 90
A short tour of Corel Painter for users of Adobe Photoshop………………………………………………………………………………………………..93
Creating, navigating, and manipulating documents…………………………………………………………………………………………………………… 97
Creating documents……………………………………………………………………………………………………………………………………………………….. 98
Understanding resolution………………………………………………………………………………………………………………………………………………. 100
Opening and placing files……………………………………………………………………………………………………………………………………………….101
Creating and opening templates…………………………………………………………………………………………………………………………………….. 104
Switching document views…………………………………………………………………………………………………………………………………………….. 104
Navigating images and viewing image information……………………………………………………………………………………………………………. 106
Zooming images……………………………………………………………………………………………………………………………………………………………108
Rotating images and the canvas………………………………………………………………………………………………………………………………………111
Flipping images……………………………………………………………………………………………………………………………………………………………. 112
Repositioning images……………………………………………………………………………………………………………………………………………………..114
Cropping images………………………………………………………………………………………………………………………………………………………….. 115
Resizing images and the canvas……………………………………………………………………………………………………………………………………… 115
Saving and backing up files…………………………………………………………………………………………………………………………………………… 118
Choosing a file format………………………………………………………………………………………………………………………………………………….. 119
Emailing documents……………………………………………………………………………………………………………………………………………………… 120
Closing documents and quitting the application……………………………………………………………………………………………………………….. 121
Using two monitors……………………………………………………………………………………………………………………………………………………….121
Support for tablets and other devices……………………………………………………………………………………………………………………………… 121
Multi-touch support……………………………………………………………………………………………………………………………………………………… 122
Trackpad support (macOS)………………………………………………………………………………………………………………………………………………123
Touch Bar support (macOS)…………………………………………………………………………………………………………………………………………….124
Wacom Intuos support…………………………………………………………………………………………………………………………………………………..124
Drag-and-drop features…………………………………………………………………………………………………………………………………………………. 125
Using the Brush Accelerator to achieve optimal performance……………………………………………………………………………………………. 127
Evaluating your system…………………………………………………………………………………………………………………………………………………..127

Contents | 3
Understanding test results……………………………………………………………………………………………………………………………………………… 128
Adjusting GPU settings…………………………………………………………………………………………………………………………………………………..129
Keyboard shortcuts………………………………………………………………………………………………………………………………………………………. 131
Customizing keys…………………………………………………………………………………………………………………………………………………………..132
Toolbox commands………………………………………………………………………………………………………………………………………………………..134
Panel commands………………………………………………………………………………………………………………………………………………………….. 136
Corel Painter menu commands (macOS)……………………………………………………………………………………………………………………………137
File menu commands……………………………………………………………………………………………………………………………………………………. 137
Edit menu commands…………………………………………………………………………………………………………………………………………………… 138
Canvas menu commands………………………………………………………………………………………………………………………………………………..138
Layers menu commands………………………………………………………………………………………………………………………………………………… 139
Select menu commands………………………………………………………………………………………………………………………………………………… 139
Shapes menu commands………………………………………………………………………………………………………………………………………………..140
Effects menu commands……………………………………………………………………………………………………………………………………………….. 140
Window menu commands…………………………………………………………………………………………………………………………………………….. 140
Help menu commands………………………………………………………………………………………………………………………………………………….. 141
Screen navigation…………………………………………………………………………………………………………………………………………………………. 141
Panel navigation…………………………………………………………………………………………………………………………………………………………… 141
Panel menu commands…………………………………………………………………………………………………………………………………………………. 141
Brush tools………………………………………………………………………………………………………………………………………………………………….. 142
Selection tools……………………………………………………………………………………………………………………………………………………………… 144
Adjuster tools………………………………………………………………………………………………………………………………………………………………. 144
Shape tools…………………………………………………………………………………………………………………………………………………………………. 146
Animation…………………………………………………………………………………………………………………………………………………………………….147
Lighting………………………………………………………………………………………………………………………………………………………………………. 147
Layer selection tools……………………………………………………………………………………………………………………………………………………… 147
Mosaics………………………………………………………………………………………………………………………………………………………………………. 147
Other commands…………………………………………………………………………………………………………………………………………………………..148

4 | Corel Painter 2022 User Guide
Painting……………………………………………………………………………………………………………………………………………………………………….151
Choosing a painting workflow……………………………………………………………………………………………………………………………………….. 151
Brush tracking and calibration…………………………………………………………………………………………………………………………………………153
Exploring painting media………………………………………………………………………………………………………………………………………………..157
Working with the canvas and layers…………………………………………………………………………………………………………………………………157
Displaying reference images…………………………………………………………………………………………………………………………………………… 158
Clearing the canvas………………………………………………………………………………………………………………………………………………………. 159
Setting up the drawing cursor……………………………………………………………………………………………………………………………………….. 159
Using a stylus vs. a mouse…………………………………………………………………………………………………………………………………………….. 159
Applying freehand and straight brushstrokes……………………………………………………………………………………………………………………..164
Constraining, fading, and undoing strokes………………………………………………………………………………………………………………………..165
Aligning brushstrokes to paths and shapes………………………………………………………………………………………………………………………. 166
Making 360° strokes………………………………………………………………………………………………………………………………………………………166
Erasing image areas……………………………………………………………………………………………………………………………………………………… 167
Letting media pool……………………………………………………………………………………………………………………………………………………….. 168
Recording and playing back brushstrokes………………………………………………………………………………………………………………………….168
Reference: Troubleshooting……………………………………………………………………………………………………………………………………………..170
Working with paper texture and grain…………………………………………………………………………………………………………………………….171
Applying paper texture…………………………………………………………………………………………………………………………………………………..171
Creating and deleting paper textures………………………………………………………………………………………………………………………………..172
Managing paper textures………………………………………………………………………………………………………………………………………………. 173
Rotating paper texture……………………………………………………………………………………………………………………………………………………174
Inverting and scaling paper grain……………………………………………………………………………………………………………………………………. 174
Controlling brightness and contrast of paper grain……………………………………………………………………………………………………………. 175
Adjusting grain direction and behavior……………………………………………………………………………………………………………………………..176
Photo art……………………………………………………………………………………………………………………………………………………………………..179
Applying AI styles………………………………………………………………………………………………………………………………………………………….180
Creating underpaintings………………………………………………………………………………………………………………………………………………… 185
Auto-painting photos……………………………………………………………………………………………………………………………………………………. 187
Restoring detail to paintings……………………………………………………………………………………………………………………………………………189

Contents | 5
Image cloning and sampling…………………………………………………………………………………………………………………………………………. 191
Cloning workflows…………………………………………………………………………………………………………………………………………………………192
Using embedded images as clone sources…………………………………………………………………………………………………………………………196
Using textures as clone sources……………………………………………………………………………………………………………………………………….200
Using patterns as clone sources……………………………………………………………………………………………………………………………………… 202
Working with embedded clone sources…………………………………………………………………………………………………………………………….203
Setting cloning preferences……………………………………………………………………………………………………………………………………………. 204
Cloning brushes and controls…………………………………………………………………………………………………………………………………………. 205
Cloning image areas………………………………………………………………………………………………………………………………………………………212
Multi-point cloning………………………………………………………………………………………………………………………………………………………..214
Using selections and transformations when sampling………………………………………………………………………………………………………….225
Filling an area with a sampled image……………………………………………………………………………………………………………………………….226
Working with composition tools, symmetry tools, rulers, and guides…………………………………………………………………………………..229
Using the Layout Grid…………………………………………………………………………………………………………………………………………………… 229
Using the Mirror Painting mode………………………………………………………………………………………………………………………………………232
Using the Kaleidoscope Painting mode……………………………………………………………………………………………………………………………..234
Using perspective guides……………………………………………………………………………………………………………………………………………….. 236
Using the Divine Proportion tool…………………………………………………………………………………………………………………………………….. 242
Using rulers…………………………………………………………………………………………………………………………………………………………………. 245
Using guides…………………………………………………………………………………………………………………………………………………………………246
Using Snap to Guides…………………………………………………………………………………………………………………………………………………….247
Using the grid……………………………………………………………………………………………………………………………………………………………… 247
Using Snap to Virtual Grid…………………………………………………………………………………………………………………………………………….. 248
Color………………………………………………………………………………………………………………………………………………………………………….. 249
Choosing colors from the Color panel………………………………………………………………………………………………………………………………250
Resizing the Color panel…………………………………………………………………………………………………………………………………………………253
Showing or hiding Color panel components…………………………………………………………………………………………………………………….. 253
Using the color selector………………………………………………………………………………………………………………………………………………….253
Changing the canvas color…………………………………………………………………………………………………………………………………………….. 257

6 | Corel Painter 2022 User Guide
Sampling colors from images…………………………………………………………………………………………………………………………………………. 258
Cloning color………………………………………………………………………………………………………………………………………………………………..259
Creating two-color brushstrokes……………………………………………………………………………………………………………………………………… 259
Exploring the Mixer panel and mixing controls…………………………………………………………………………………………………………………..260
Displaying and resizing the Mixer panel…………………………………………………………………………………………………………………………… 261
Mixing, sampling, and applying colors from the Mixer pad…………………………………………………………………………………………………. 262
Opening images in the Mixer panel………………………………………………………………………………………………………………………………… 264
Changing and saving the Mixer color swatches………………………………………………………………………………………………………………….265
Saving Mixer panel colors to a color set……………………………………………………………………………………………………………………………265
Clearing and resetting Mixer panel colors………………………………………………………………………………………………………………………….266
Saving the Mixer pad……………………………………………………………………………………………………………………………………………………. 266
Loading color swatches and Mixer pad files……………………………………………………………………………………………………………………… 267
Working with color sets………………………………………………………………………………………………………………………………………………… 267
Customizing the layouts of color sets……………………………………………………………………………………………………………………………….269
Creating and exporting color sets…………………………………………………………………………………………………………………………………….269
Editing color sets…………………………………………………………………………………………………………………………………………………………..270
Working with color harmonies……………………………………………………………………………………………………………………………………….. 271
Setting color variability………………………………………………………………………………………………………………………………………………….. 273
Setting Color Expression………………………………………………………………………………………………………………………………………………… 274
Loading multiple colors…………………………………………………………………………………………………………………………………………………. 274
Working with color fills…………………………………………………………………………………………………………………………………………………. 274
Applying a color as a fill……………………………………………………………………………………………………………………………………………….. 275
Limiting and preventing leakage………………………………………………………………………………………………………………………………………276
Color management………………………………………………………………………………………………………………………………………………………. 279
Understanding color management………………………………………………………………………………………………………………………………….. 279
Specifying the default RGB color profile…………………………………………………………………………………………………………………………… 282
Embedding color profiles when saving files……………………………………………………………………………………………………………………….283
Specifying the default CMYK color profile for converting CMYK images to RGB……………………………………………………………………….283
Previewing and soft-proofing color profiles………………………………………………………………………………………………………………………. 284
Assigning or removing color profiles……………………………………………………………………………………………………………………………….. 285
Converting color profiles……………………………………………………………………………………………………………………………………………….. 285

Contents | 7
Working with color profile policies………………………………………………………………………………………………………………………………….. 286
Working with presets……………………………………………………………………………………………………………………………………………………. 287
Correcting and adjusting colors…………………………………………………………………………………………………………………………………….. 289
Correcting colors using curves…………………………………………………………………………………………………………………………………………289
Adjusting brightness and contrast…………………………………………………………………………………………………………………………………… 290
Using the curve to correct colors……………………………………………………………………………………………………………………………………. 293
Drawing freehand curves to adjust colors………………………………………………………………………………………………………………………….294
Specifying the curve values to adjust colors……………………………………………………………………………………………………………………….295
Adjusting hue, saturation, and value………………………………………………………………………………………………………………………………..296
Adjusting selected colors……………………………………………………………………………………………………………………………………………….. 299
Equalizing images………………………………………………………………………………………………………………………………………………………….301
Matching color and brightness across images…………………………………………………………………………………………………………………… 303
Inverting colors……………………………………………………………………………………………………………………………………………………………..303
Posterizing an image…………………………………………………………………………………………………………………………………………………….. 304
Applying video legal colors……………………………………………………………………………………………………………………………………………..305
Dodging and burning…………………………………………………………………………………………………………………………………………………….305
Libraries……………………………………………………………………………………………………………………………………………………………………….307
Importing and exporting libraries……………………………………………………………………………………………………………………………………. 307
Creating and removing libraries……………………………………………………………………………………………………………………………………….308
Modifying the display of media panels……………………………………………………………………………………………………………………………..309
Moving, renaming, and deleting library resources……………………………………………………………………………………………………………… 310
Restoring default libraries………………………………………………………………………………………………………………………………………………. 311
Selecting, managing, and creating brushes…………………………………………………………………………………………………………………….. 313
Understanding brushes…………………………………………………………………………………………………………………………………………………..313
Searching and selecting brushes………………………………………………………………………………………………………………………………………314
Filtering brushes…………………………………………………………………………………………………………………………………………………………… 315
Marking brushes as favorite…………………………………………………………………………………………………………………………………………… 317
Acquiring brushes………………………………………………………………………………………………………………………………………………………….318
Setting basic brush attributes………………………………………………………………………………………………………………………………………….320

8 | Corel Painter 2022 User Guide
Working with brushes using the property bars…………………………………………………………………………………………………………………..323
Renaming brush categories and variants………………………………………………………………………………………………………………………….. 326
Saving and deleting brush variants…………………………………………………………………………………………………………………………………..327
Restoring default brush variants……………………………………………………………………………………………………………………………………… 328
Creating and deleting brush categories……………………………………………………………………………………………………………………………. 329
Creating and deleting brush libraries………………………………………………………………………………………………………………………………..329
Importing and exporting brush libraries, categories, and variants…………………………………………………………………………………………. 330
Importing Photoshop brush images………………………………………………………………………………………………………………………………….333
Saving a brush look……………………………………………………………………………………………………………………………………………………….333
Creating and managing brush dabs………………………………………………………………………………………………………………………………… 334
Adjusting brushes with brush controls…………………………………………………………………………………………………………………………….337
Exploring Brush Controls……………………………………………………………………………………………………………………………………………….. 338
Expression settings…………………………………………………………………………………………………………………………………………………………339
Audio Expression………………………………………………………………………………………………………………………………………………………….. 340
Previewing brushstrokes and brush dabs………………………………………………………………………………………………………………………….. 342
Calibrating brush variants……………………………………………………………………………………………………………………………………………….343
General controls…………………………………………………………………………………………………………………………………………………………… 344
General controls: Dab types…………………………………………………………………………………………………………………………………………… 344
General controls: Stroke types………………………………………………………………………………………………………………………………………… 348
General controls: Methods and subcategories…………………………………………………………………………………………………………………… 349
General controls: Source…………………………………………………………………………………………………………………………………………………353
Performance controls……………………………………………………………………………………………………………………………………………………..353
Opacity controls…………………………………………………………………………………………………………………………………………………………… 354
Grain controls……………………………………………………………………………………………………………………………………………………………….356
Stroke Attributes controls……………………………………………………………………………………………………………………………………………….358
Size controls………………………………………………………………………………………………………………………………………………………………… 360
Angle controls……………………………………………………………………………………………………………………………………………………………… 364
Spacing controls…………………………………………………………………………………………………………………………………………………………… 367
Changing dab profiles…………………………………………………………………………………………………………………………………………………… 368
Captured dab controls……………………………………………………………………………………………………………………………………………………371
Jitter controls………………………………………………………………………………………………………………………………………………………………..373

Contents | 9
Real Watercolor controls…………………………………………………………………………………………………………………………………………………374
Real Wet Oil controls……………………………………………………………………………………………………………………………………………………..378
Computed Circular controls……………………………………………………………………………………………………………………………………………. 382
Hard Media controls………………………………………………………………………………………………………………………………………………………383
Bristle controls……………………………………………………………………………………………………………………………………………………………… 383
RealBristle controls…………………………………………………………………………………………………………………………………………………………384
Static Bristle controls…………………………………………………………………………………………………………………………………………………….. 384
Airbrush controls………………………………………………………………………………………………………………………………………………………….. 387
Artists’ Oils controls……………………………………………………………………………………………………………………………………………………… 390
Impasto controls……………………………………………………………………………………………………………………………………………………………392
Digital Watercolor controls…………………………………………………………………………………………………………………………………………….. 392
Water controls………………………………………………………………………………………………………………………………………………………………392
Liquid Ink controls…………………………………………………………………………………………………………………………………………………………396
Stroke Jitter controls………………………………………………………………………………………………………………………………………………………401
Blending controls…………………………………………………………………………………………………………………………………………………………..402
Mouse controls……………………………………………………………………………………………………………………………………………………………..405
Smoothing controls………………………………………………………………………………………………………………………………………………………. 406
Image Hose controls………………………………………………………………………………………………………………………………………………………407
Rake controls………………………………………………………………………………………………………………………………………………………………..407
Multi controls………………………………………………………………………………………………………………………………………………………………. 410
Color Variability controls…………………………………………………………………………………………………………………………………………………410
Color Expression controls………………………………………………………………………………………………………………………………………………..412
Dynamic Speckles controls………………………………………………………………………………………………………………………………………………413
Dab Stencil controls……………………………………………………………………………………………………………………………………………………… 416
Glazing controls…………………………………………………………………………………………………………………………………………………………… 421
Airbrushes…………………………………………………………………………………………………………………………………………………………………… 427
Adjusting airbrush spread and flow………………………………………………………………………………………………………………………………….428
Watercolor………………………………………………………………………………………………………………………………………………………………….. 431
Working with the Watercolor layer…………………………………………………………………………………………………………………………………..432

10 | Corel Painter 2022 User Guide
Watercolor brushes and paper texture interaction……………………………………………………………………………………………………………… 433
Working with Real watercolor brushes…………………………………………………………………………………………………………………………….. 433
Working with Pigment watercolor brushes……………………………………………………………………………………………………………………….. 434
Working with Fringe watercolor brushes………………………………………………………………………………………………………………………….. 434
Particle brushes…………………………………………………………………………………………………………………………………………………………….437
Gravity Particle dab types………………………………………………………………………………………………………………………………………………. 438
Flow Particle dab types…………………………………………………………………………………………………………………………………………………..440
Spring Particle dab types……………………………………………………………………………………………………………………………………………….. 442
Common Particle brush controls………………………………………………………………………………………………………………………………………445
Particles — Thin Lines brush controls………………………………………………………………………………………………………………………………….448
Using Dynamic Speckles with Particle brushes…………………………………………………………………………………………………………………… 450
Texture painting……………………………………………………………………………………………………………………………………………………………453
Painting with textures…………………………………………………………………………………………………………………………………………………….455
Customizing Texture brushes………………………………………………………………………………………………………………………………………….. 457
Textures………………………………………………………………………………………………………………………………………………………………………. 463
Creating textures………………………………………………………………………………………………………………………………………………………….. 464
Transforming and editing textures…………………………………………………………………………………………………………………………………… 469
Applying textures as fills…………………………………………………………………………………………………………………………………………………470
Using textures in photo painting and image compositing…………………………………………………………………………………………………… 472
Working with Texture libraries………………………………………………………………………………………………………………………………………… 472
Applying and adjusting flow maps………………………………………………………………………………………………………………………………… 475
Getting started with flow maps……………………………………………………………………………………………………………………………………… 475
Choosing flow maps and compatible brush variants………………………………………………………………………………………………………….. 476
Enabling flow maps and controlling flow resistance……………………………………………………………………………………………………………477
Customizing flow maps………………………………………………………………………………………………………………………………………………….478
Hard Media………………………………………………………………………………………………………………………………………………………………….481
Choosing a Hard Media variant……………………………………………………………………………………………………………………………………….481
Modifying Hard Media profiles……………………………………………………………………………………………………………………………………….. 482
Controlling the behavior of Hard Media variants……………………………………………………………………………………………………………….. 483

Contents | 11
Previewing Hard Media dabs…………………………………………………………………………………………………………………………………………..484
Markers………………………………………………………………………………………………………………………………………………………………………. 485
Getting started with markers…………………………………………………………………………………………………………………………………………..485
Customizing markers…………………………………………………………………………………………………………………………………………………….. 486
Image hose…………………………………………………………………………………………………………………………………………………………………. 487
Painting with the Image hose………………………………………………………………………………………………………………………………………….487
Adjusting the opacity and color of image hose elements……………………………………………………………………………………………………. 489
Adjusting the size and spacing of image hose elements………………………………………………………………………………………………………490
Indexing nozzle files……………………………………………………………………………………………………………………………………………………… 491
Understanding nozzles, ranks, and indexing………………………………………………………………………………………………………………………492
Creating a 1-Rank nozzle………………………………………………………………………………………………………………………………………………. 494
Creating a 2-Rank nozzle………………………………………………………………………………………………………………………………………………. 496
Creating a 3-Rank nozzle………………………………………………………………………………………………………………………………………………. 497
Loading and managing nozzle files…………………………………………………………………………………………………………………………………. 499
Creating a nozzle from a movie……………………………………………………………………………………………………………………………………… 500
RealBristle brushes…………………………………………………………………………………………………………………………………………………….. 503
Getting started with RealBristle brushes…………………………………………………………………………………………………………………………… 503
Modifying RealBristle settings…………………………………………………………………………………………………………………………………………. 504
Using RealBristle brushes with Dynamic Speckles………………………………………………………………………………………………………………..506
Thick Paint………………………………………………………………………………………………………………………………………………………………….. 507
Painting with Thick Paint……………………………………………………………………………………………………………………………………………….. 508
Thick Paint — Media controls……………………………………………………………………………………………………………………………………………511
Thick Paint — Wetness controls…………………………………………………………………………………………………………………………………………513
Thick Paint — Shape controls…………………………………………………………………………………………………………………………………………… 515
Adjusting Thick Paint layers……………………………………………………………………………………………………………………………………………. 518
Adjusting Thick Paint lighting…………………………………………………………………………………………………………………………………………. 519
Cloning with Thick Paint brushes……………………………………………………………………………………………………………………………………..522

12 | Corel Painter 2022 User Guide
Liquid Ink…………………………………………………………………………………………………………………………………………………………………….523
Working with Liquid ink brushes…………………………………………………………………………………………………………………………………….. 523
Adjusting attributes of the Liquid Ink layer………………………………………………………………………………………………………………………..523
Using Liquid Ink controls………………………………………………………………………………………………………………………………………………..524
Adjusting Liquid Ink lighting………………………………………………………………………………………………………………………………………….. 525
Impasto……………………………………………………………………………………………………………………………………………………………………….529
Applying, displaying, and clearing impasto………………………………………………………………………………………………………………………..529
Adjusting and creating Impasto brushes……………………………………………………………………………………………………………………………530
Adjusting Impasto lighting and depth………………………………………………………………………………………………………………………………534
Blending impasto with other layers…………………………………………………………………………………………………………………………………. 536
Layers…………………………………………………………………………………………………………………………………………………………………………. 539
Getting started with layers…………………………………………………………………………………………………………………………………………….. 540
Displaying the Layers panel……………………………………………………………………………………………………………………………………………. 543
Creating and deleting layers…………………………………………………………………………………………………………………………………………… 545
Clearing the contents of layers……………………………………………………………………………………………………………………………………….. 546
Converting selections into layers or floating objects…………………………………………………………………………………………………………… 546
Naming and adding notes to layers………………………………………………………………………………………………………………………………… 547
Selecting layers…………………………………………………………………………………………………………………………………………………………….. 548
Copying and duplicating layers………………………………………………………………………………………………………………………………………..550
Moving layers………………………………………………………………………………………………………………………………………………………………. 551
Transforming layers………………………………………………………………………………………………………………………………………………………..553
Aligning layers……………………………………………………………………………………………………………………………………………………………… 555
Locking layers………………………………………………………………………………………………………………………………………………………………. 556
Showing or hiding layers………………………………………………………………………………………………………………………………………………..556
Changing layer order……………………………………………………………………………………………………………………………………………………..557
Viewing layer position…………………………………………………………………………………………………………………………………………………… 559
Grouping layers……………………………………………………………………………………………………………………………………………………………. 559
Merging layers………………………………………………………………………………………………………………………………………………………………561
Dropping layers with the canvas…………………………………………………………………………………………………………………………………….. 562
Painting on layers…………………………………………………………………………………………………………………………………………………………. 562

Contents | 13
Preserving layer transparency………………………………………………………………………………………………………………………………………….. 564
Adjusting layer opacity………………………………………………………………………………………………………………………………………………….. 565
Adding drop shadows to layers……………………………………………………………………………………………………………………………………….565
Blending layers by using composite methods……………………………………………………………………………………………………………………. 566
Layer masking……………………………………………………………………………………………………………………………………………………………….573
Creating and deleting layer masks…………………………………………………………………………………………………………………………………… 574
Selecting layer masks……………………………………………………………………………………………………………………………………………………..576
Painting on layer masks………………………………………………………………………………………………………………………………………………….576
Inverting layer masks…………………………………………………………………………………………………………………………………………………….. 577
Enabling and disabling layers masks…………………………………………………………………………………………………………………………………577
Loading layer masks to selections…………………………………………………………………………………………………………………………………….578
Copying layer masks………………………………………………………………………………………………………………………………………………………578
Viewing layer masks as grayscale images…………………………………………………………………………………………………………………………..578
Applying layer masks……………………………………………………………………………………………………………………………………………………..579
Importing and exporting layers………………………………………………………………………………………………………………………………………..579
Working with reference layers………………………………………………………………………………………………………………………………………… 580
Storing layers as images in the Image Portfolio…………………………………………………………………………………………………………………. 581
Alpha Channels…………………………………………………………………………………………………………………………………………………………….583
Creating and copying channels………………………………………………………………………………………………………………………………………..583
Generating channels automatically………………………………………………………………………………………………………………………………….. 585
Importing and exporting alpha channels………………………………………………………………………………………………………………………….. 586
Selecting and viewing channels………………………………………………………………………………………………………………………………………. 586
Setting channel attributes……………………………………………………………………………………………………………………………………………….588
Deleting and clearing channels………………………………………………………………………………………………………………………………………..589
Editing channels…………………………………………………………………………………………………………………………………………………………… 589
Selections and transformations……………………………………………………………………………………………………………………………………… 593
Getting started with selections……………………………………………………………………………………………………………………………………….. 594
Selecting areas by painting……………………………………………………………………………………………………………………………………………..596
Creating path-based selections……………………………………………………………………………………………………………………………………….. 601

14 | Corel Painter 2022 User Guide
Creating pixel-based selections……………………………………………………………………………………………………………………………………….. 603
Creating selections from layers……………………………………………………………………………………………………………………………………….. 606
Choosing the protected area of a selection………………………………………………………………………………………………………………………. 607
Saving selections as alpha channels………………………………………………………………………………………………………………………………….607
Working with the Selection Portfolio……………………………………………………………………………………………………………………………….. 610
Viewing selections………………………………………………………………………………………………………………………………………………………… 610
Inverting selections……………………………………………………………………………………………………………………………………………………….. 611
Softening the edges of selections…………………………………………………………………………………………………………………………………….612
Stroking selections…………………………………………………………………………………………………………………………………………………………612
Modifying the borders of selections………………………………………………………………………………………………………………………………… 613
Expanding or contracting selections………………………………………………………………………………………………………………………………… 614
Adding to or subtracting from selections…………………………………………………………………………………………………………………………. 614
Preparing selections for transformations……………………………………………………………………………………………………………………………615
Moving selections…………………………………………………………………………………………………………………………………………………………. 616
Transforming a duplicate selection……………………………………………………………………………………………………………………………………617
Scaling and rotating path-based selections………………………………………………………………………………………………………………………..617
Skewing and distorting path-based selections…………………………………………………………………………………………………………………… 619
Canceling transformations……………………………………………………………………………………………………………………………………………… 621
Common options for effects…………………………………………………………………………………………………………………………………………. 623
Fading effects………………………………………………………………………………………………………………………………………………………………. 623
Applying recently used effects………………………………………………………………………………………………………………………………………… 624
Changing effects with open panels…………………………………………………………………………………………………………………………………. 624
Applying effects using source luminance…………………………………………………………………………………………………………………………..624
Using focus and esoterica effects……………………………………………………………………………………………………………………………………625
Applying Smart Blur……………………………………………………………………………………………………………………………………………………… 625
Applying Camera Motion Blur………………………………………………………………………………………………………………………………………… 626
Applying Depth of Field………………………………………………………………………………………………………………………………………………… 627
Applying Glass Distortion………………………………………………………………………………………………………………………………………………. 629
Applying Motion Blur……………………………………………………………………………………………………………………………………………………. 631
Sharpening focus…………………………………………………………………………………………………………………………………………………………..632

Contents | 15
Softening focus……………………………………………………………………………………………………………………………………………………………. 633
Applying Zoom Blur……………………………………………………………………………………………………………………………………………………… 634
Applying Marbling…………………………………………………………………………………………………………………………………………………………634
Automatically cloning an image……………………………………………………………………………………………………………………………………… 636
Applying the Auto Van Gogh effect………………………………………………………………………………………………………………………………… 637
Applying Blobs…………………………………………………………………………………………………………………………………………………………….. 638
Creating custom tiles……………………………………………………………………………………………………………………………………………………..640
Applying Grid Paper……………………………………………………………………………………………………………………………………………………… 643
Applying Growth effects…………………………………………………………………………………………………………………………………………………643
Applying Highpass…………………………………………………………………………………………………………………………………………………………644
Applying the Maze effect………………………………………………………………………………………………………………………………………………. 645
Placing elements……………………………………………………………………………………………………………………………………………………………645
Applying the Pop Art Fill effect………………………………………………………………………………………………………………………………………. 647
Using lighting and surface texture effects………………………………………………………………………………………………………………………. 649
Applying preset lighting effects………………………………………………………………………………………………………………………………………. 650
Adding, deleting, and repositioning lights…………………………………………………………………………………………………………………………650
Adjusting light properties………………………………………………………………………………………………………………………………………………. 651
Using paper to create texture………………………………………………………………………………………………………………………………………….652
Using 3D brushstrokes to create texture……………………………………………………………………………………………………………………………653
Using image luminance to create texture…………………………………………………………………………………………………………………………. 654
Using clone source or pattern luminance to create texture…………………………………………………………………………………………………..654
Creating embossed effects………………………………………………………………………………………………………………………………………………655
Using channels and layer masks to create texture……………………………………………………………………………………………………………… 656
Creating reflection maps…………………………………………………………………………………………………………………………………………………657
Adjusting texture lighting………………………………………………………………………………………………………………………………………………. 658
Apply Surface Texture controls…………………………………………………………………………………………………………………………………………659
Applying the Apply Screen effect……………………………………………………………………………………………………………………………………. 660
Applying the Color Overlay effect…………………………………………………………………………………………………………………………………….661
Applying the Dye Concentration effect…………………………………………………………………………………………………………………………….. 663
Applying the Express Texture effect…………………………………………………………………………………………………………………………………. 665

16 | Corel Painter 2022 User Guide
Applying a warp effect…………………………………………………………………………………………………………………………………………………..666
Applying the Woodcut effect…………………………………………………………………………………………………………………………………………. 668
Applying the Distress effect…………………………………………………………………………………………………………………………………………….670
Applying the Serigraphy effect……………………………………………………………………………………………………………………………………….. 671
Applying the Sketch effect…………………………………………………………………………………………………………………………………………….. 672
Dynamic Plug-ins…………………………………………………………………………………………………………………………………………………………. 675
Getting started with dynamic plug-ins…………………………………………………………………………………………………………………………….. 676
Modifying and deleting dynamic layers……………………………………………………………………………………………………………………………. 676
Converting dynamic layers……………………………………………………………………………………………………………………………………………… 676
Applying the Brightness and Contrast dynamic plug-in………………………………………………………………………………………………………. 677
Applying the Burn dynamic plug-in…………………………………………………………………………………………………………………………………. 677
Applying the Tear dynamic plug-in………………………………………………………………………………………………………………………………….. 679
Applying the Bevel World dynamic plug-in………………………………………………………………………………………………………………………..680
Applying the Equalize dynamic plug-in……………………………………………………………………………………………………………………………..681
Applying the Glass Distortion dynamic plug-in………………………………………………………………………………………………………………….. 682
Applying the Kaleidoscope dynamic plug-in……………………………………………………………………………………………………………………… 684
Applying the Liquid Lens dynamic plug-in…………………………………………………………………………………………………………………………685
Applying the Liquid Metal dynamic plug-in………………………………………………………………………………………………………………………. 688
Applying the Posterize dynamic plug-in…………………………………………………………………………………………………………………………….695
Patterns……………………………………………………………………………………………………………………………………………………………………….697
Applying pattern fills…………………………………………………………………………………………………………………………………………………….. 697
Painting with patterns…………………………………………………………………………………………………………………………………………………… 699
Creating and editing patterns………………………………………………………………………………………………………………………………………….700
Creating seamless patterns…………………………………………………………………………………………………………………………………………….. 703
Creating fractal patterns…………………………………………………………………………………………………………………………………………………705
Gradients……………………………………………………………………………………………………………………………………………………………………. 709
Applying gradients……………………………………………………………………………………………………………………………………………………….. 711
Editing gradients………………………………………………………………………………………………………………………………………………………….. 714
Applying paint effects to gradients…………………………………………………………………………………………………………………………………..718
Creating gradients………………………………………………………………………………………………………………………………………………………… 720

Contents | 17
Replacing image colors with gradient colors…………………………………………………………………………………………………………………….. 723
Mosaics and tessellations……………………………………………………………………………………………………………………………………………… 725
Creating a mosaic………………………………………………………………………………………………………………………………………………………….726
Selecting and removing tiles……………………………………………………………………………………………………………………………………………728
Specifying tile and grout color……………………………………………………………………………………………………………………………………….. 729
Adjusting mosaic tile dimensions and randomness……………………………………………………………………………………………………………..730
Filling an area with tiles………………………………………………………………………………………………………………………………………………… 733
Creating 3D tiles……………………………………………………………………………………………………………………………………………………………734
Re-rendering mosaic tiles………………………………………………………………………………………………………………………………………………..735
Stroking and filling a selection with mosaic tiles……………………………………………………………………………………………………………….. 735
Adding mosaic effects to an image………………………………………………………………………………………………………………………………….736
Creating tessellations…………………………………………………………………………………………………………………………………………………….. 737
Weaves………………………………………………………………………………………………………………………………………………………………………..741
Applying weaves……………………………………………………………………………………………………………………………………………………………741
Editing and saving weaves…………………………………………………………………………………………………………………………………………….. 742
Creating weave patterns…………………………………………………………………………………………………………………………………………………744
Using the Edit Weave dialog box……………………………………………………………………………………………………………………………………. 744
Defining warp and weft expressions…………………………………………………………………………………………………………………………………745
Defining warp and weft color expressions…………………………………………………………………………………………………………………………747
Designing the tie-up………………………………………………………………………………………………………………………………………………………748
Reference: Expression operators……………………………………………………………………………………………………………………………………….750
Shapes…………………………………………………………………………………………………………………………………………………………………………759
Getting started with shapes…………………………………………………………………………………………………………………………………………… 760
Drawing shapes……………………………………………………………………………………………………………………………………………………………. 760
Drawing lines and curves………………………………………………………………………………………………………………………………………………. 762
Setting preferences for drawing shapes…………………………………………………………………………………………………………………………….765
Selecting a shape…………………………………………………………………………………………………………………………………………………………. 767
Modifying shape outlines and fills…………………………………………………………………………………………………………………………………… 767
Adding, deleting, and moving anchor points……………………………………………………………………………………………………………………. 769

18 | Corel Painter 2022 User Guide
Adjusting curvature………………………………………………………………………………………………………………………………………………………. 771
Cutting and joining shape segments……………………………………………………………………………………………………………………………….. 772
Converting shapes to image layers………………………………………………………………………………………………………………………………….. 774
Converting selections to shapes……………………………………………………………………………………………………………………………………….774
Resizing, rotating, skewing, and flipping shapes……………………………………………………………………………………………………………….. 775
Duplicating shapes……………………………………………………………………………………………………………………………………………………….. 777
Combining shapes………………………………………………………………………………………………………………………………………………………… 777
Blending shapes…………………………………………………………………………………………………………………………………………………………… 778
Saving a shape outline as a selection………………………………………………………………………………………………………………………………. 780
Exporting Adobe Illustrator shapes………………………………………………………………………………………………………………………………….. 780
Adding text………………………………………………………………………………………………………………………………………………………………….781
Adding text to images……………………………………………………………………………………………………………………………………………………781
Formatting text……………………………………………………………………………………………………………………………………………………………..782
Aligning text…………………………………………………………………………………………………………………………………………………………………782
Adjusting text kerning and leading…………………………………………………………………………………………………………………………………..783
Stretching, rotating, and skewing text………………………………………………………………………………………………………………………………783
Adding drop shadows to text………………………………………………………………………………………………………………………………………….784
Applying effects to text…………………………………………………………………………………………………………………………………………………. 784
Applying curves to text…………………………………………………………………………………………………………………………………………………..785
Converting text layers……………………………………………………………………………………………………………………………………………………. 787
Dropping text………………………………………………………………………………………………………………………………………………………………. 787
Working with animation and digital videos (Windows)…………………………………………………………………………………………………….. 789
Choosing an animation workflow…………………………………………………………………………………………………………………………………….789
Creating frame-by-frame animation………………………………………………………………………………………………………………………………….791
Opening a Corel Painter movie………………………………………………………………………………………………………………………………………..792
Importing QuickTime and AVI files………………………………………………………………………………………………………………………………….. 793
Selecting movie frames…………………………………………………………………………………………………………………………………………………..793
Editing frame content…………………………………………………………………………………………………………………………………………………… 793
Applying effects to a single frame……………………………………………………………………………………………………………………………………794
Previewing animations…………………………………………………………………………………………………………………………………………………… 794

Contents | 19
Using onion skinning……………………………………………………………………………………………………………………………………………………..795
Animating with layers…………………………………………………………………………………………………………………………………………………….795
Adding, deleting, and erasing frames……………………………………………………………………………………………………………………………….796
Repeating frames…………………………………………………………………………………………………………………………………………………………..796
Inserting movies…………………………………………………………………………………………………………………………………………………………… 797
Rotoscoping………………………………………………………………………………………………………………………………………………………………….798
Applying scripts to movies………………………………………………………………………………………………………………………………………………798
Exporting movies as QuickTime………………………………………………………………………………………………………………………………………. 799
Exporting movies as AVI………………………………………………………………………………………………………………………………………………… 800
Importing and exporting numbered files………………………………………………………………………………………………………………………….. 801
Exporting animated GIFs…………………………………………………………………………………………………………………………………………………802
Using scripts to automate tasks…………………………………………………………………………………………………………………………………….. 805
Getting started with scripts……………………………………………………………………………………………………………………………………………. 805
Displaying the Scripts panel…………………………………………………………………………………………………………………………………………….806
Recording and playing scripts………………………………………………………………………………………………………………………………………….806
Enabling and playing background scripts…………………………………………………………………………………………………………………………. 808
Creating resolution-independent scripts…………………………………………………………………………………………………………………………….808
Editing, renaming, and deleting scripts……………………………………………………………………………………………………………………………. 809
Converting scripts to movies……………………………………………………………………………………………………………………………………………810
Importing and exporting scripts……………………………………………………………………………………………………………………………………… 811
Importing and exporting script libraries…………………………………………………………………………………………………………………………….811
Creating and deleting script libraries……………………………………………………………………………………………………………………………….. 812
Printing images…………………………………………………………………………………………………………………………………………………………….813
Printing basics……………………………………………………………………………………………………………………………………………………………… 813
Printing images……………………………………………………………………………………………………………………………………………………………..814
Saving files in EPS format for printing………………………………………………………………………………………………………………………………815
Printing composite images…………………………………………………………………………………………………………………………………………….. 816
Printing shapes…………………………………………………………………………………………………………………………………………………………….. 816

20 | Corel Painter 2022 User Guide
Notes for users of Adobe Photoshop………………………………………………………………………………………………………………………………819
Comparing terminology in Corel Painter and Adobe Photoshop…………………………………………………………………………………………… 819
Comparing tools in Corel Painter and Adobe Photoshop…………………………………………………………………………………………………….. 820
Frequently asked questions from users of Adobe Photoshop……………………………………………………………………………………………….. 821
Setting preferences………………………………………………………………………………………………………………………………………………………. 823
General preferences………………………………………………………………………………………………………………………………………………………. 823
Brush cursor preferences……………………………………………………………………………………………………………………………………………….. 824
Special layers preferences………………………………………………………………………………………………………………………………………………. 826
Interface preferences…………………………………………………………………………………………………………………………………………………….. 827
Performance preferences…………………………………………………………………………………………………………………………………………………828
Shapes preferences……………………………………………………………………………………………………………………………………………………….. 830
Cloning preferences………………………………………………………………………………………………………………………………………………………. 831
Tablet and trackpad preferences……………………………………………………………………………………………………………………………………… 832
Connections preferences…………………………………………………………………………………………………………………………………………………833
Web…………………………………………………………………………………………………………………………………………………………………………… 835
Choosing web-safe colors……………………………………………………………………………………………………………………………………………….835
Posterizing using color sets……………………………………………………………………………………………………………………………………………. 835
Choosing web-friendly brushes………………………………………………………………………………………………………………………………………..836
Creating transparent GIFs………………………………………………………………………………………………………………………………………………. 837
Reducing the number of colors in GIF files………………………………………………………………………………………………………………………..838
Creating image maps……………………………………………………………………………………………………………………………………………………. 839
Creating server-side image maps…………………………………………………………………………………………………………………………………….. 841
Creating web page backgrounds…………………………………………………………………………………………………………………………………….. 841
Creating web buttons…………………………………………………………………………………………………………………………………………………….843
Troubleshooting tips…………………………………………………………………………………………………………………………………………………….. 845

Welcome to Corel Painter | 21
Welcome to Corel Painter
Corel® Painter® 2022 is the ultimate digital art studio. Its inventive drawing tools, realistic brushes, cloning capabilities, and customizable
features let you expand your creative output in exciting new ways. When you use the pressure-sensitive brushes of Corel Painter, they
become fluid extensions of your hand, so the resulting brushstrokes are unrivaled in texture and precision. What’s more, features such as the
ability to build your own Natural-Media™ brushes and customize how brushes interact with the canvas give you countless ways to develop
your artistic ideas. Corel Painter takes you far beyond what’s possible in a traditional art environment.
This section contains the following topics:
•“Using the documentation” (page 21)
•“Adjusting the Help window text size” (page 24)
•“Hints and tooltips” (page 24)
•“Welcome Screen” (page 25)
•“Additional resources” (page 26)
•“Registration” (page 26)
•“Feedback” (page 26)
•“About Corel Corporation” (page 26)
Using the documentation
You can learn to use the product in various ways: by accessing the Help, Hints, and tooltips; by reading the Quick Start Guide; by viewing
video tutorials, and by exploring the resources on the Corel Painter website (www.painterartist.com). You can also check the Readme file
(readme.html), which is installed with the software.
Server-based Help
The server-based Help gives you access to a full range of up-to-date topics in a searchable format. You need to have an active internet
connection to access the server-based help.
User Guide PDF
If you often work offline, you can download the Corel Painter 2022 User Guide, which provides all Help topics in a print-friendly PDF file.
Quick Start Guide
The Introduction to Corel Painter 2022 Guide provides an overview of the most common product features and workflows, helping you get
started quickly with the application. This guide also includes information about new features to introduce upgrading users to Corel Painter
2022.

22 | Corel Painter 2022 User Guide
Video learning resources
You can access video learning resources from within the help. The video tutorials show you how to use various brush technologies, such as
Thick Paint, Drip and Liquid, Dab Stencils, Selection brushes, Texture brushes, and Glazing brushes and help you get the most out of features
such as image cloning, gradients, texture synthesis, and more. Whether you are a new or long-time user, you will find useful tips to boost
your productivity and expand your experience. Please note that closed captions are available only in some languages.
Deployment Guide
If you purchased multiple licenses of Corel Painter, you have the option of deploying the software to your organization’s network. The Corel
Painter 2022 Deployment Guide provides detailed information about network installations.
Documentation conventions
The following table describes the conventions used in the Help.
Convention Description Example
macOS and Windows commands Commands for macOS and Windows
sometimes appear within the same
procedural step, with the operating systems
specified in parentheses.
Hold down Command (macOS) or Ctrl
(Windows).
Modifier keys (Command, Option, Ctrl, Alt) Names of modifier keys for macOS and
Windows sometimes appear within the
same procedural step, with the operating
systems specified in parentheses.
Command+I (macOS) or Ctrl+I
(Windows)
(For the macOS, press Command+I; for
Windows, press Ctrl+I.)
Menu commands (Choose X menu menu
item)
You choose a menu name by clicking it, and
then you click to choose a menu item from
the list.
Choose File QuickClone.
Header bar A header bar is located at the top or side of
some workspace components, such as the
toolbox, property bar, and panels.
Panel tab The panel tab appears at the top of a panel.
You can click a panel tab to expand that
panel.
Welcome to Corel Painter | 23
Convention Description Example
Panel options menu Clicking the panel options menu button
displays a pop-up menu with additional
commands.
Flyout Flyouts are containers shared by certain
tools in the toolbox. You can open a flyout
by clicking and holding down the tool on
the flyout that is displayed.
By clicking and holding down the Layer
Adjuster tool in the toolbox, you can
display a flyout that includes the Transform
tool.
A note contains information that is
important to the steps that precede it.
Often, a note describes conditions under
which the procedure can be performed.
This command is available only if you have
turned off a selection.
A tip contains suggestions related to the
procedure. Some tips present alternative
methods of performing the steps, or
information about other benefits and uses
of the procedure.
You can choose a brush category and
variant in the Brush Selector flyout or in the
Brush Selector panel.
To access the Help
•Choose Help Corel Painter 2022 Help (macOS) or Help Topics (Windows).
To use the Help
1Choose Help Corel Painter 2022 Help (macOS) or Help topics (Windows).
2Perform a task from the following table.
To Do the following
Browse through Help topics Click a topic in the left pane.
Tip: To show or hide the table of contents, click the Show/Hide
table of contents button .
Search the full text of the Help Type a word or phrase in the Search box in the upper-right corner
of the Help window, and choose a help topic from the list of search
results.
Note that the search feature does not support quotation marks. If
you enclose the word or expression in quotation marks, the search
will not produce any results.

24 | Corel Painter 2022 User Guide
To access the Corel Painter 2022 User Guide
•Choose Help User Guide.
To access the Introduction to Corel Painter 2022 Guide
•Choose Help Introduction to Corel Painter 2022 (PDF).
Adjusting the Help window text size
You can adjust the size of the text that displays in the Help window by adjusting the zoom level in your browser. Adjusting the zoom level
quickly increases the size of all web page elements, including text and images. You can adjust zoom levels in Internet Explorer, Chrome, and
Firefox. Some browsers may offer additional controls for customizing the font size of the display text. For more information, see the Help for
your browser.
To adjust the size of text in Firefox and Chrome
• In the browser, do one of the following:
• To increase the zoom level, press Ctrl and + (Windows), or Command and + (macOS).
• To decrease the zoom level, press Ctrl and — (Windows), or Command and — (macOS).
To adjust the size of text in Internet Explorer
• In the Internet Explorer browser, do one of the following:
• To increase the zoom level, press Ctrl and +.
• To decrease the zoom level, press Ctrl and —.
Hints and tooltips
Hints can help you get started quickly with Painter brushes and tools. Specific hints are displayed if the active brush uses one of the following
brush technologies: Watercolor, Real Watercolor, Liquid Ink, Cloner, Particles, Dynamic Speckles, or Impasto. If the active brush uses
another brush technology, the Hints panel shows tips about finding and modifying brushes. When you click a tool, the Hints panel shows
a description of all tools in the toolbox. All hints include links to relevant Help topics that provide comprehensive information about the
corresponding brush features or tools.
Tooltips provide helpful information about application controls when you position the pointer over icons, buttons, and other user
interface elements. Some tooltips include illustrations that show the effect of using high and low values of specific settings. You set tooltip
preferences to hide illustrations from tooltips, decreasing the space a tooltip takes on screen. You can choose to display the illustrations in
tooltips at any time.

Welcome to Corel Painter | 25
To access Hints
•Choose Help Hints.
To set tooltip preferences
1Do one of the following:
•(macOS) Choose Corel Painter 2022 Preferences General.
•(Windows) Choose Edit Preferences General.
2In the Tooltips area, enable one of the following options:
•Text and images
•Text only
3Restart Corel Painter.
Welcome Screen
The Welcome Screen appears when you start the application. With the Welcome Screen, you can quickly start or open an image, choose a
workspace that suits your needs, access online learning videos, find new brushes and other content online, and get inspired by a gallery of
original artwork created with Corel Painter.
To access the Welcome screen
•Click Help Welcome.
To hide the Welcome screen at startup, in the Welcome screen, hover over the button in the top-right corner, and disable the
Show this at startup check box. This check box is not available in trial versions of the product.

26 | Corel Painter 2022 User Guide
To close the Welcome screen
• Press Esc.
Additional resources
You can access additional Corel Painter resources online to learn more about the product and connect with the Corel Painter community.
Resources To access
Corel Painter website http://www.painterartist.com
Corel Painter Tutorials http://www.youtube.com/user/PainterTutorials
Corel Painter on Twitter http://www.twitter.com/corelpainter
Corel Painter on Facebook http://www.facebook.com/corelpainter
Feedback
We value any feedback that you may have about the product or the Help content. To provide feedback about a specific Help topic, scroll to
the bottom of any Help topic and click the “Was this page helpful?” link.
Registration
Registering Corel products is important. Registration provides you with timely access to the latest product updates, valuable information
about product releases and access to free downloads.
If you skipped the registration process when installing Corel Painter 2022, you can register at www.corel.com/support/register.
About Corel Corporation
Over the years, Corel has brought a spirit of innovation to the development of a range of award-winning products that includes graphics,
painting, photo, video and office software. We’ve also earned a reputation for delivering high-quality products that are easy to learn and
use, and help people achieve new levels of productivity.
Corel’s product lines include CorelDRAW® Graphics Suite, Painter®, CorelDRAW® Technical Suite, PaintShop® Pro, VideoStudio®,
WinDVD®, Corel® WordPerfect® Office and WinZip®. For more information on Corel, please visit www.corel.com.
What’s new in Corel Painter 2022 | 27
What’s new in Corel Painter 2022
Corel Painter takes you far beyond what’s possible in a traditional art environment.
New! Brush Library experience
The first thing you’re likely to notice in Corel Painter 2022 is the new brush library. It has been meticulously overhauled in every way. There
are fresh, modern icons designed for every brush category. And the categories themselves have been renamed, reorganized, and streamlined
to present a diverse set of brushes and tools in each singularly focused category.
Within a category, you’ll find new variant names, dab previews, and stroke previews that accurately reflect the defining shape and media
characteristics of each brush. This new collection of brushes pulls together many legacy variants from Painter 11, 2015, 2021, and the
Natural Media Brushes library, and fine-tunes them with the latest and greatest brush engine technology.
We’ve also surveyed many Painter Masters to learn which brushes they most value, resulting in a single-click filter that focuses the library on
just those brushes — more than 180! Throughout this process, many artists test drove and helped to optimize brush settings. In addition,
the new Watercolor Sumi-e category offers exciting creative possibilities for watercolor compatibility, and the new Bravura Oils category
features intriguing oil brushes and blenders that do not require any special layers, Impasto, or media settings.

28 | Corel Painter 2022 User Guide
Finally, all Painter 2022 brushes have been adjusted to take advantage of brush engine technology developments, such as the new
Enhanced Cover methods, layer blending, smoothing options, and dab profile anti-aliasing. Whether you use a mouse or a stylus, we’re
certain that you’ll feel the performance enhancements and enjoy a fluid brushing experience. So, grab a brush, and start painting!
New and enhanced! Cover methods
The versatile cover methods are the foundation of many popular brush categories, such as Acrylics, Chalk, Charcoal, Conte, Gouache, Pastels,
and Pens. Cover methods are also used for some Oils and Blenders, and with many stamp-type brushes.
The Enhanced Cover methods, available only in Painter 2022, take advantage of the latest technology advancements for an improved
brushing experience. For Flat methods, anti-aliasing support has been increased resulting in opaque dab rendering. Noise has been added
for artifact reduction in all Enhanced Cover methods, and it is especially pronounced for Soft brushstrokes with feathered edges.
Alpha Blend technology has been added to improve color precision when blending adjacent brushstrokes, reducing the likelihood of
unexpected color shifts near the edges. Grainy methods feature new options for grain control, opacity, and enhanced layer blending. In
addition, brush loading support has been added to all Enhanced Cover methods to give your brushstrokes that smeary, oily look.
Try the Flat Color brush in the Pens category for a great example of improved anti-aliasing, and the Soft variant in Airbrushes for a smooth
buildup of paint with minimal artifacts. To experience the improved color precision of Alpha Blend technology, set the Soft airbrush Opacity
to 1%, Resat to 85%, and Bleed to 34%, and then blend two colors.
(left) A Flat Color brushstroke using Legacy Cover method; (right) A Flat Color brushstroke using Enhanced Cover method
And for a perfect showcase of the new Grainy Edge Flat Alpha Blend subcategory, try the Smudge variant in the Conte brush category to
apply smeary brushstrokes with heightened grain interaction.
What’s new in Corel Painter 2022 | 29
(left) A Smudge brushstroke using Legacy Cover method; (right) A Smudge brushstroke using Enhanced Cover method
For more information, see “General controls: Methods and subcategories” on page 349.
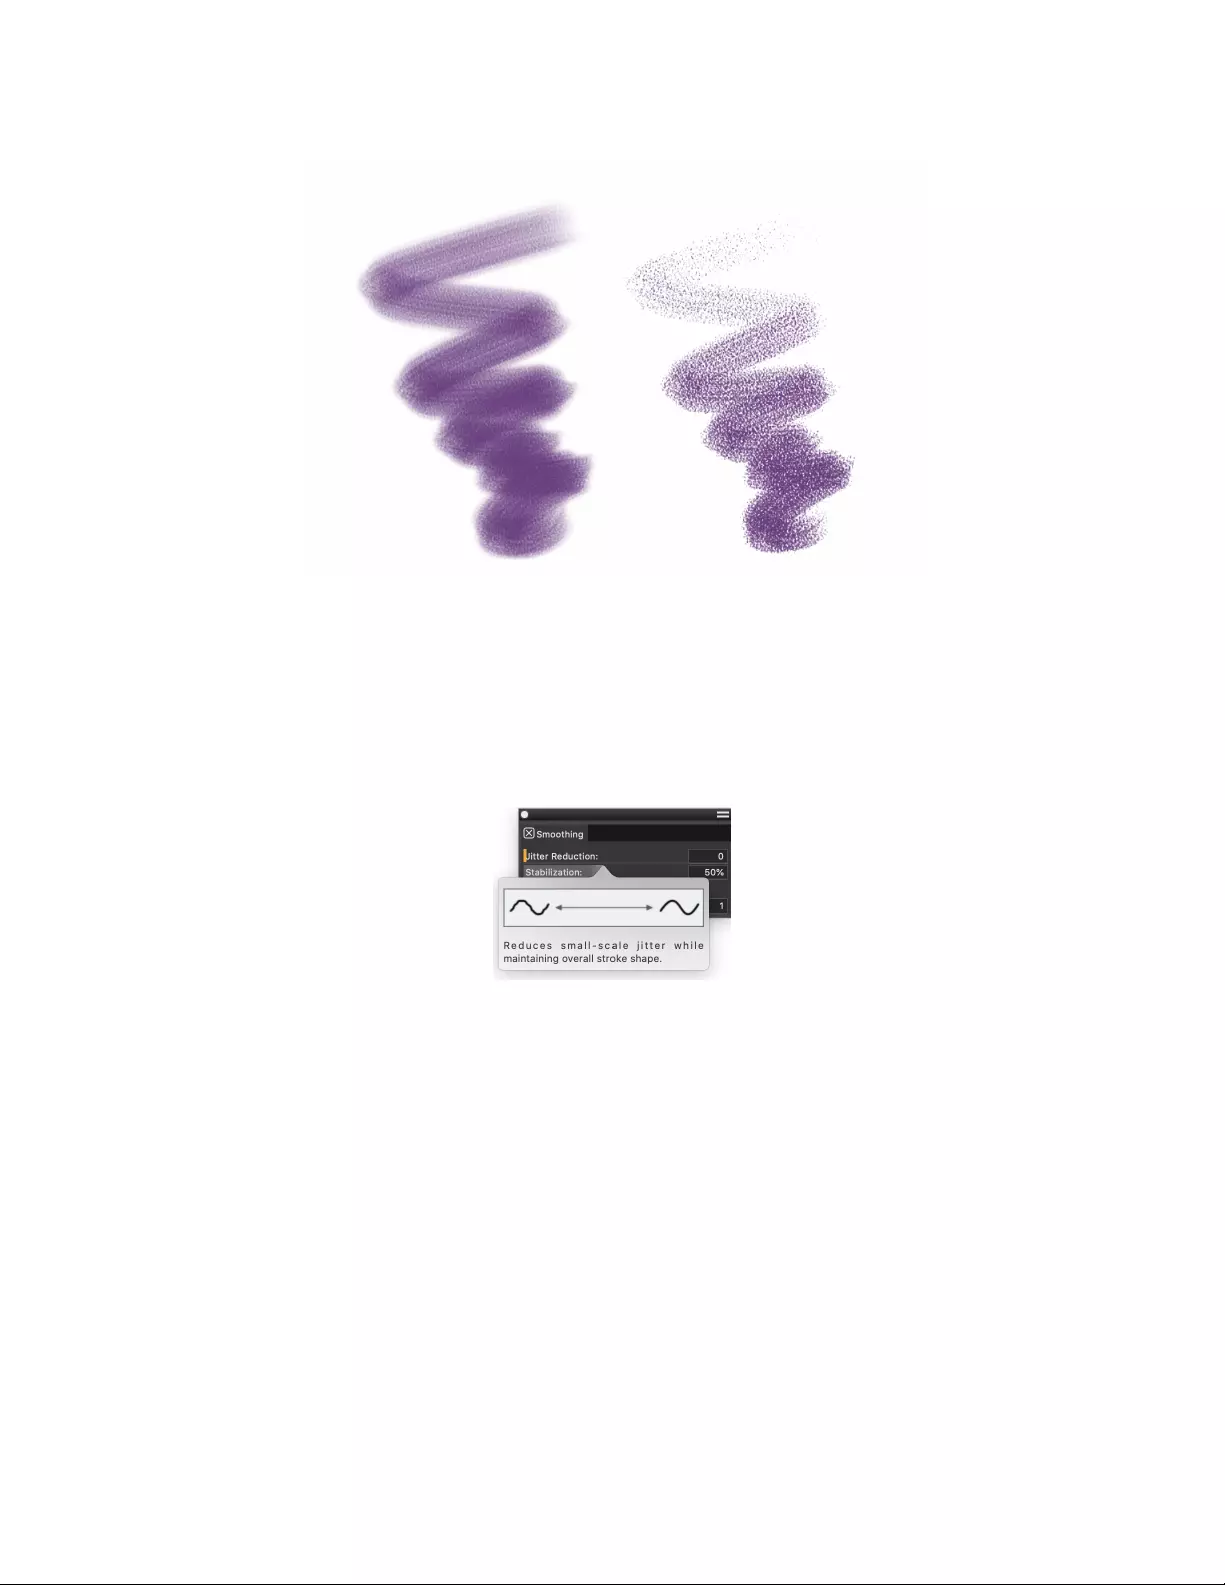
New and enhanced! Smoothing
A new Jitter Reduction option joins the Smoothing controls, along with updated names for existing options that are more indicative of
their respective effects. The panel also provides updated tooltips and graphics that make it easier to soften the appearance of brushstrokes.
For more information, see “Smoothing controls” on page 406.
The new Jitter Reduction option in the Smoothing brush control panel
New! Brush filters and favorites
Quickly build your very own list of favorite brushes, and then use the My Favorites filter to trim the brush library down to your personal
essentials. Take advantage of the Painter Masters filter to experience a wealth of brushes curated by distinguished Painter artists. You can
also quickly isolate stamp-type, Watercolor and Thick Paint compatible, and Cloner brushes. For more information, see “Filtering brushes” on
page 315.

30 | Corel Painter 2022 User Guide
Apply one or more brush filters to hide the brush categories and brushes that you don’t need.
New! Captured dab libraries
The new Captured panel provides boundless possibilities for experimenting with customizing the appearance of brush dabs. There are 12
new captured dab libraries to choose from: Bristles, Concept, Flat, General, Graphic, Hard Media, Hatch, Knives, Light, Natural, Splatter,
and Sponges. You can instantly alter the dab shape of any brush, adjust settings, apply a new Dab Effect, and even capture your new dab
for use with other brushes.
You can also import JPEG or PNG images or create your own shapes to use as captured dabs, and you can now select any portion of your
document — including content from multiple layers — for use as a dab. What’s more, you can instantly capture the dab from your current
brush at any time, which is very useful if your brush has a dab that’s not in the captured dab library. For more information, see “Creating
and managing brush dabs” on page 334.
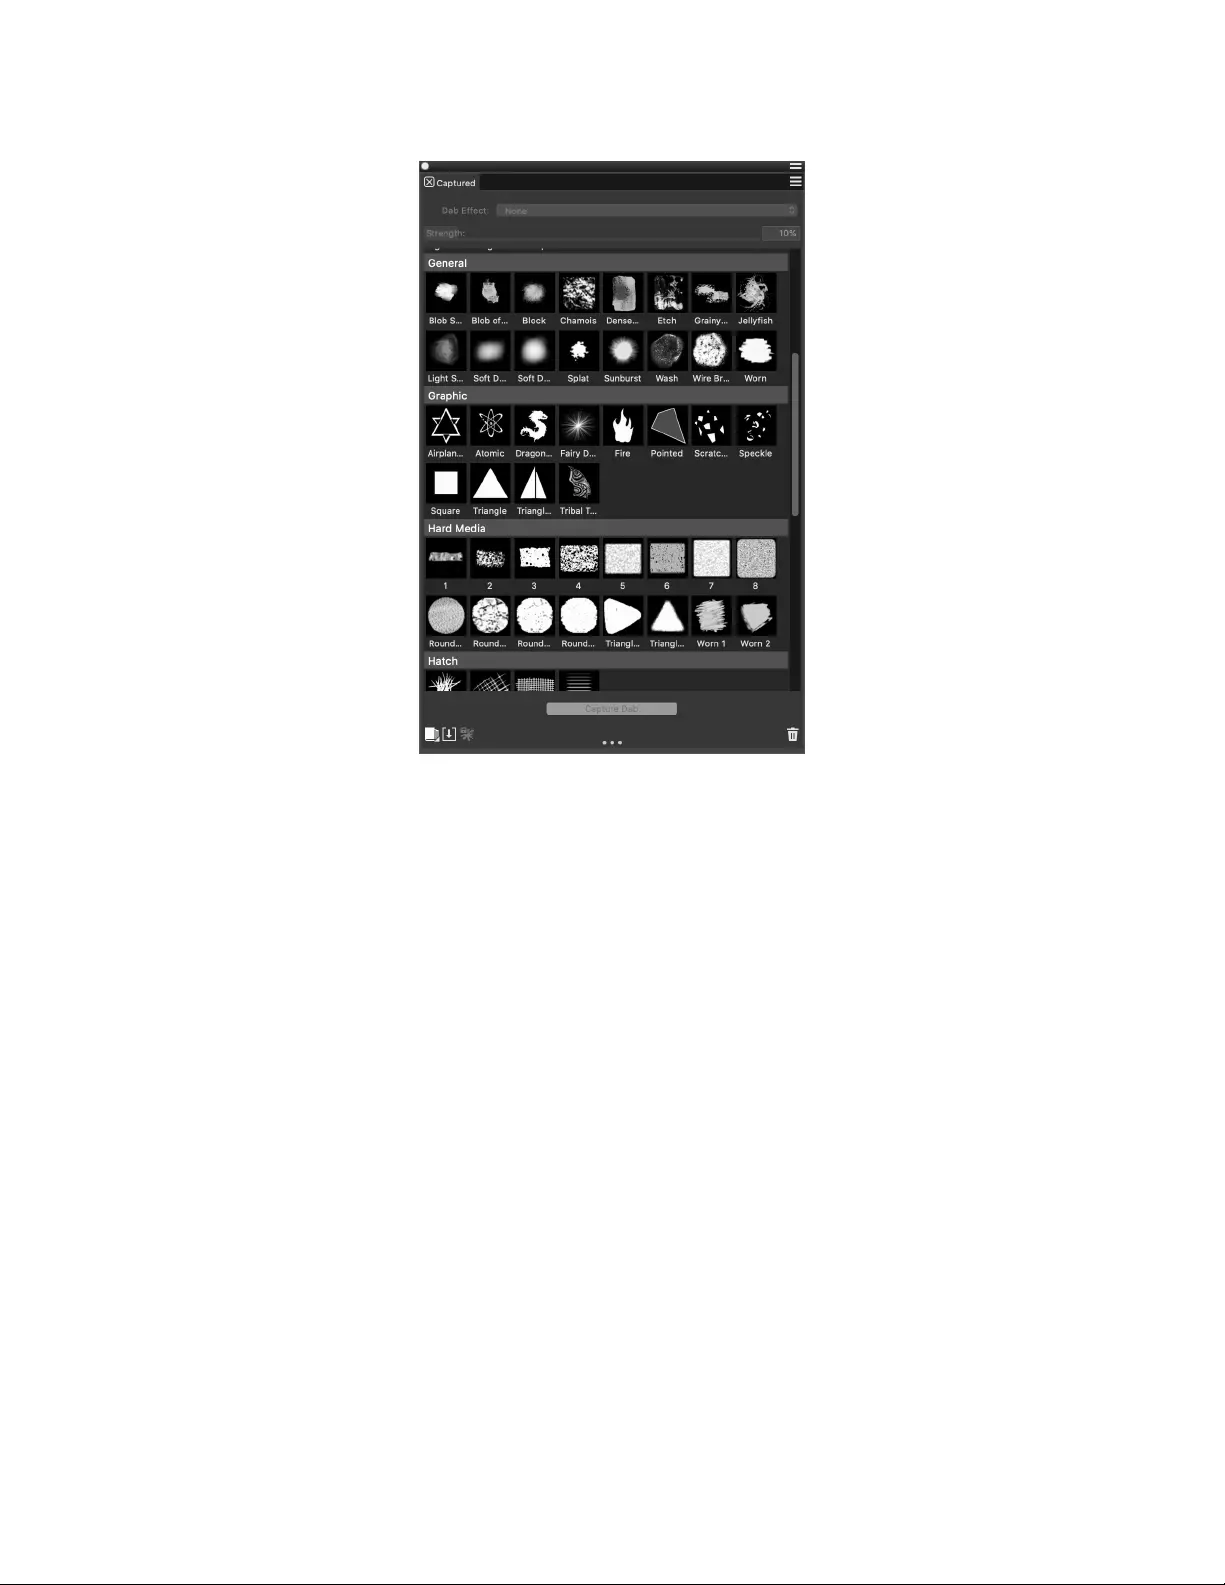
What’s new in Corel Painter 2022 | 31
The Captured panel
New! Import Photoshop Brush Stamps (ABR) as dabs
When you import Photoshop brush stamps with Painter 2022, you now have the option of importing only the brush stamps. They will
be added to a new captured dab library so you can use them with other brushes. For more information, see “Importing Photoshop brush
images” on page 333.
New! Dab Effects
The new Captured Dabs flyout on the property bar offers Dab Effects that you can use to customize captured dabs. You can choose from
Feather, Threshold, Blur, Dilate, and Erode effects, and adjust the strength of each applied effect. For more information, see “Captured
dab controls” on page 371.
New and enhanced! Dab profiles for Circular dab types
You can now experience improved anti-aliasing for Circular-type brushes by using the new Hardness slider in the Dab Options flyout.
This lets you fine-tune the opacity of dab profiles so you can create brush marks with soft edges, or with crisp anti-aliased edges, or even
somewhere in between. In addition, you can try the new Soft Profile that provides a strong core, with a large falloff area towards the edge.
Last but not least, you have the ability to reduce the opacity in the center of Watercolor dabs, which produces a stronger-looking fringe
along the edge of the stroke. For more information, see “Changing dab profiles” on page 368.
New! Rotate and Squeeze Static Bristle
You now have additional shaping options when you’re painting with a Static Bristle brush and a stylus. You can use the Angle controls to
rotate and squeeze the brush, providing new, creative dab and brushstroke possibilities. For more information, see “Static Bristle controls”
on page 384.

32 | Corel Painter 2022 User Guide
(left) A brushstroke with Squeeze set to 0%; (right) A brushstroke with Squeeze set to 30%, Ang Step set to 5°,
Ang Range set to 360°, Expression set to Direction, and Spacing set to 50% to illustrate how the dabs rotate
New! Watercolor compatibility
Painter 2022 breaks down boundaries for mixed-media creators who want to combine watercolor with other art forms. Many default
brushes are now compatible with watercolor layers, letting you fuse dry media and watercolor brush marks on the same layer. Just look for
the Watercolor Layer compatibility icon in the Brush Selector when you’re choosing a brush for mixing with watercolor media, or you can
enable the Watercolor Compatible filter to see only those brushes. And for added creative flexibility, you can now transform watercolor
layers while retaining special media capability. For more information, see “Displaying and customizing the Brush Selector” on page 70.
New! Size selector and library
You can now choose brush size presets from the new Size library. Painter 2022 offers a new collection of dab sizes, and lets you create and
manage your own custom size presets. For more information, see “Size controls” on page 360.
New! Navigator in grayscale
You can now switch the Navigator to grayscale, which is useful for doing color value studies of your compositions. For more information,
see “Navigating images and viewing image information” on page 106.

What’s new in Corel Painter 2022 | 33
When you need to evaluate the color contrast of a design, you can use the Navigator to display the image in grayscale.
New and enhanced! Layer productivity
Painter 2022 introduces many layer productivity improvements designed to accelerate your work with layer-laden documents. It is now faster
and easier to perform operations on more than one layer. You can lock, move, and convert multiple layers at once, as well as collapse visible
layers. Plus, layer lock and visibility operations are recorded in your Undo steps, making it quicker and easier to change those choices.
The new Spotlight Layer visibility option lets you Option-click (macOS) or Alt-click (Windows) the eye icon in the Layers panel to show only
the contents of a layer or group while temporarily hiding all other layers. It’s also easier to load selected layer content to a mask. And when
you move selected layer content, it just moves, and you’ll no longer see a Layer Floating Object appear in the Layers panel. Plus, the new
Color Dodge and Color Burn composite methods give you additional creative options. And you can now clear layer content with a single
keystroke by simply pressing Delete.
(left) Before; (center) After using Color Dodge; (right) After using Color Burn
For more information, see “Layers” on page 539.
Enhanced! Special layers compatibility dialog boxes
While many brushes are compatible with special layers, there are times when a chosen brush may produce brush marks that appear different
than you would expect. There are also brushes that are simply not recommended for the current layer. In these cases, Painter will prompt

34 | Corel Painter 2022 User Guide
you so you can choose how to proceed. We’ve redesigned these dialog boxes to present clear and concise options, so you can make a quick
choice and get back to focusing on your art. For more information, see “Special layers preferences” on page 826.
Enhanced! Performance optimization
The Painter team is continually updating the codebase to take advantage of rapidly evolving operating system technologies.
With Painter 2022, the new Enhanced Cover methods are optimized for CPU and GPU acceleration. The Brush Accelerator™ makes the
Enhanced Cover methods up to 18x faster on Intel multi-core processors with AVX2 extensions, and up to 50x faster when combined with
GPU acceleration. Click Window Search and type “enhanced cover” in the Search text box to find brushes that use Enhanced Cover
methods.
Impasto brushes are also up to 2x faster on default layers, and 1.7x faster on Thick Paint layers. Plus, several other brush engines, plug-ins,
and erasers perform up to 2x faster compared to Painter 2021.
To get the best possible performance from Painter on your system, you need to run the Brush Accelerator. This utility starts by analyzing your
processor (CPU) to detect how many cores are available and whether it supports extensions, such as AVX2. It also analyzes any available
graphics processor (GPU) to determine its compatibility with Painter, as well as how much memory (RAM) is installed on your system. For
more information, see “Using the Brush Accelerator to achieve optimal performance” on page 127.
What was new in earlier versions of Corel Painter
This topic describes what was new in earlier versions of Corel Painter.
What was new in Corel Painter 2021
Enhanced! Performance optimization
Corel Painter 2021 takes advantage of the latest developments in processor (CPU), graphics processor (GPU) and memory to deliver the best
digital painting experience. With improved GPU compatibility and efficiency, you’ll experience faster brush and tool switching.
The enhanced Brush Accelerator is more intuitive and evaluates your system’s CPU, GPU, and memory to optimize application settings
for better performance. It also offers suggestions on how to upgrade system components, as well as recommendations on which brush
categories are most compatible with your computer.
For more information, see “Using the Brush Accelerator to achieve optimal performance” on page 127 and “Performance controls” on
page 353.
New! Apple Touch Bar support
Painter provides new support for the Touch Bar on your MacBook Pro, offering context-sensitive controls that change depending on the
selected tool. For example, when you work with brushes, the Touch Bar will display controls for selecting colors, cloning color, adjusting
brush size and opacity, and more.

What’s new in Corel Painter 2022 | 35
The Touch Bar for the Brush tool
The Touch Bar for the Clone tool
New! Apple Pencil tilt support
With new tilt support for Apple Pencil, you can now tilt the selected brush while you paint to precisely control the shape of the brushstroke,
for example while shading with a pencil, aiming an airbrush, or splaying soft bristles.
Enhanced! Apple Trackpad support
With responsive support for the multi-touch trackpad on your Mac, you can perform useful actions by swiping, and pinching or spreading
your thumb and forefinger on your trackpad. This makes panning, zooming, and rotating your artwork quick, intuitive, and efficient. For
more information, see “Trackpad support (macOS)” on page 123.
New! Apple Sidecar support
With Painter 2021, you can use your iPad as a secondary display that mirrors your Mac desktop. The Painter user interface will auto-adjust
based on the resolution of your iPad.
New! Clone tinting
You can now dynamically add color to mix with your clone source. While painting with clone tinting enabled, you can add the currently
selected color, or a sampled color, to any brush independent of the clone source. This highly versatile technology is supported by any brush
that responds to clone color or clone method. It also works in conjunction with multi-point cloning, giving you an abundance of creative
options while cloning. Plus, the Clone Color and Clone Source flyouts on the property bar provide quicker access to settings, options, and
panels for an improved cloning workflow. For more information, see “Cloning brushes and controls” on page 205.
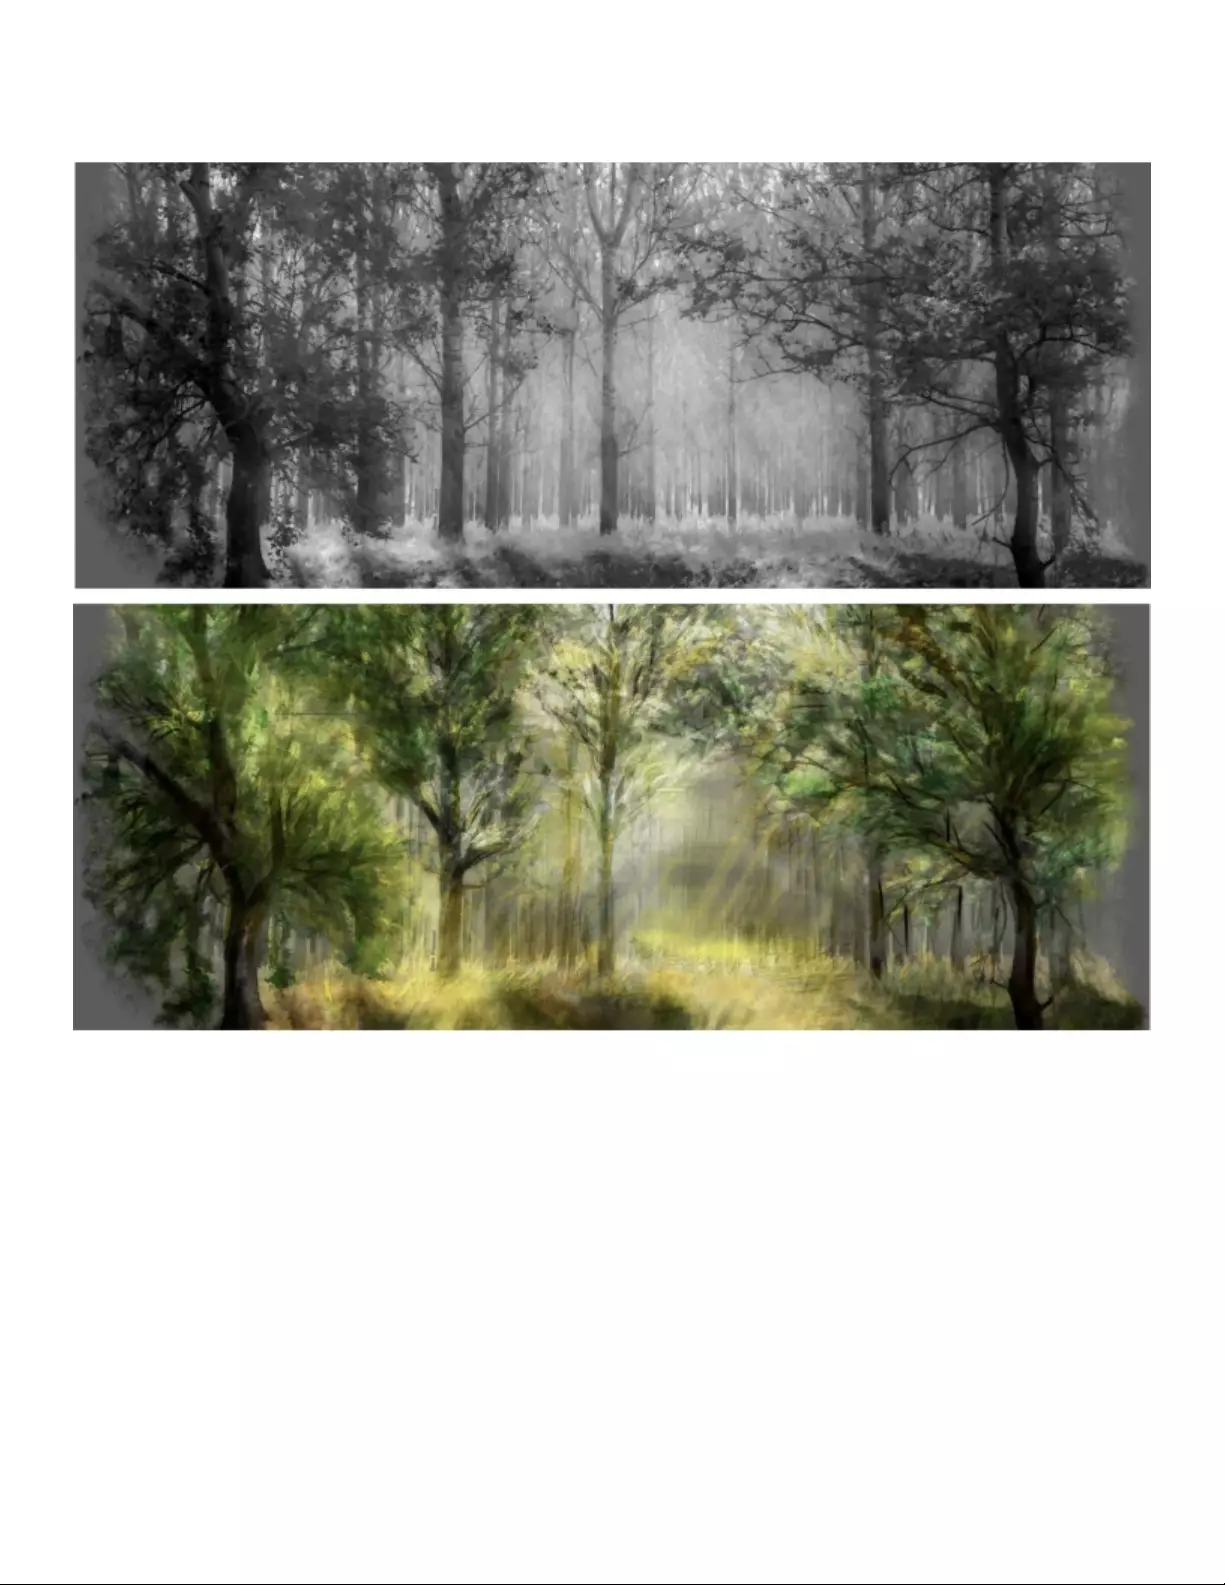
36 | Corel Painter 2022 User Guide
Clone tinting lets you add color to mix with your clone source. Artwork by Dana Diamond.
Enhanced! UI elements
Painter 2021 helps you work faster and more efficiently by giving you quick access to frequently used commands and options. For photo
artists, a new Photo Art command bar lets you instantly clone, access photo art panels, apply surface texture, as well as adjust colors,
brightness and contrast, and equalize. To give you more room to paint, you can move command bars anywhere on the screen.
In addition, Thick Paint brush controls have been reorganized so that property bar flyouts and panels put the most important controls at
your fingertips. An updated Impasto flyout reduces the need to open panels, making it easier to control the interaction of depth on the
canvas. Plus, the Underpainting panel provides instant access to setting up clone documents and brush options.
Enhanced! New Image dialog box
To quickly get started, Corel Painter now lets you start your document by creating a Thick Paint, Watercolor, or Liquid Ink layer, setting
canvas visibility and orientation, and choosing a color profile directly from the New Image dialog box. For more information, see “Creating
documents” on page 98.

What’s new in Corel Painter 2022 | 37
New! A.I. Style panel and transfers
The new A.I. Style panel includes presets and styles that use artificial intelligence to create a stylized painting from a photo. You can fine-
tune the settings of AI styles, and save your own custom preset. Plus, you can add style to virtually anything in Painter: a photo, a sketch, a
painting, or even a few simple brush marks. The unique look and feel of an AI style can serve either as an underpainting for your photo art
or inspiration for your next masterpiece. For more information, see “Applying AI styles” on page 180.
New! AI style presets
You can quick start your photo art by taking advantage of new AI style presets. These meticulously curated settings are tuned to work best
for specific types of photos, such as architecture, portraits, wildlife, landscapes, and more. You can also experiment with AI styles for fast
results in a Quick Clone workflow. For more information, see “Applying AI styles” on page 180.
Two AI style presets: Fabulous Animals (top) and Painted Landscape (bottom)
New! Apple Core ML
Painter 2021 uses the latest and greatest machine learning (ML) technology from Apple to power your AI style experience.
New! Layer compatibility
It’s now easier to identify which brushes are compatible with which layers in the enhanced Brush Selector. As you hover over a brush variant,
layer compatibility icons display for Default, Liquid Ink, Thick Paint, and Watercolor layers. You can also click any layer compatibility icon to
search for all brushes compatible with that layer.
Enhanced! Layers panel
You can now add new Default, Thick Paint, Watercolor, and Liquid Ink layers with a single click. You can also adjust Thick Paint visible depth
in the Layers panel to dynamically control the depth of Thick Paint as you apply brushstrokes to the layer. Plus, the Layer options menu on
the panel has been reorganized for quicker access and better alignment with the commands in the Layers menu. And you can right-click
(Windows), or click with two fingers on the trackpad (macOS), the icons along the bottom of the panel to access handy contextual menus.
For more information, see “Displaying the Layers panel” on page 543.

38 | Corel Painter 2022 User Guide
Enhanced! Layers workflow
Painter 2021 provides other general refinements to layers workflow designed to help you focus on creativity. Watercolor layers have been
improved, making it easier to merge two or more watercolor layers, convert default layers to watercolor, and flip watercolor layers. Plus, you
can quickly unlock all layers, duplicate layer groups and canvas, retain the first layer name when merging a group, and use the Shift key to
constrain movement while adjusting layers.
New! Brushes
Painter 2021 introduces Clone Tinting and Thick Paint-compatible brush categories, featuring new brushes developed by Painter Masters.
You can take advantage of brushes designed by a group of talented illustrators, fine artists, and photo artists who excel in their craft.
With a variety of brush types and shapes, Clone Tinting brushes pick up the currently selected color and mix it with your clone source. The
Thick Paint-compatible brushes are designed to take full advantage of the depth, lighting, and shadows of Thick Paint technology. Plus, there
are nine additional new or enhanced Thick Paint brushes. For more information about Clone Tinting, see “Cloning brushes and controls” on
page 205. For more information about Thick Paint, see “Thick Paint” on page 507.
New and enhanced! Thick Paint workflow
Painter 2021 provides an optimized Thick Paint workflow, featuring reorganized brush control panels and property bar flyouts that give you
quicker access to frequently used settings. You can instantly adjust how Thick Paint is applied to the brush, how the brush behaves, and how
the paint interacts by using the revamped Media, Shape, and Wetness flyouts, reducing the need to open their respective panels.
What’s more, Thick Paint layer performance has been improved, making it easier to duplicate and flip layers, adjust visible depth, and
preserve transparency when blocking in color. You can also lift the canvas, such as a photo, or convert a layer, such as brush marks on
default layers, to Thick Paint, offering you a variety of powerful options to add visible depth to your artwork. For more information, see
“Thick Paint” on page 507.
New! Thick Paint compatibility
Painter 2021 makes it easier to incorporate Thick Paint in your artwork. The improved brush compatibility offers a much greater variety of
shapes, such as captured dabs and stencils, and media types, such as oily Sargent, chalks and pencils, buildup support for inks, crayons, and
sumi-e, and so much more. In addition, the default appearance and interaction has been improved, making it quicker to make fine, non-
destructive adjustments to the visible depth of Thick Paint brushstrokes. All in all, natural-looking mixed media and photo art with Painter is
now more powerful and easier than ever.
What was new in Corel Painter 2020
New! Automatic performance optimization
To help ensure that you have the best digital painting experience, Painter 2020 introduces the Brush Accelerator. This new utility evaluates
your system’s processor (CPU), graphics processor (GPU) and memory, and then optimizes application settings to maximize performance.
Many Painter brushes can now leverage the computation power of your system’s GPU, using it to deliver faster brushing, as well as
smoother document rendering and manipulation. You’ll also get suggestions on how to upgrade system components, as well as
recommendations on which brush categories are most compatible with your computer.
The new Performance panel lets you quickly see whether the currently selected brush can take advantage of your system’s multi-core
processor, AVX2 or GPU. You can use the names of those performance-boosting technologies as search terms to find brushes that leverage
them. What’s more, Painter 2020 introduces two new brush categories designed with performance in mind — Fast and Simple and Fast
and Ornate.
For more information, see “Using the Brush Accelerator to achieve optimal performance” on page 127 and “Performance controls” on
page 353.
Enhanced! UI elements
A re-imagined UI helps you work faster and more efficiently by giving you quick access to frequently used options. Revamped property bars,
flyouts, and palettes for brushes and tools put the most important controls at your fingertips. Intuitive labeling and grouping of property
bar settings reduce the need to open panels, so you have more room to paint. The Library panels have been streamlined to be easier to use

What’s new in Corel Painter 2022 | 39
and free up screen space when you’re working with papers, patterns, textures and more. When the Brush tool is active, the property bar and
Advanced Brush Controls give you a better understanding of the brush shape and the media that you’re using. The Advanced Brush Controls
button now also gives quick access to the General panel. What’s more, Perspective Guides and Mirror Painting are accessible in fewer clicks.
Enhanced! Brush visuals
Enhanced dab and stroke previews are great time-savers in Painter 2020. Improved visuals mean you don’t need to hover over brush strokes
to get an idea of what they’ll look like, and it’s easier than ever to distinguish between popular dab types. There’s also a new option to
display a slimmer, more compact version of the Brush Selector to give you even more painting pixels.
For more information, see “Displaying and customizing the Brush Selector” on page 70.
New! Color selection features
Color-selection controls are more accessible and consistent throughout Painter 2020. Redesigned color ramps in sliders make choosing the
perfect color a breeze, and frequently used dialog boxes offer familiar, intuitive color pickers. A new preview takes the guesswork out of how
colors will look together by showing you the new and current colors side-by-side. The temporal color selector now offers the ability to clone
color, as well as a mode that reconfigures the selector for left-handed artists. You can tailor the Color panel to display only the features you
need, giving you more space to paint. In addition, you can open the temporal color selector by double-clicking a swatch in the Color panel.
And new harmony options let you choose a color and then use it as the foundation of a set of colors that work well together aesthetically.
For more information, see “Choosing colors from the Color panel” on page 250, “Showing or hiding Color panel components” on page
253, “Using the color selector” on page 253, and “Working with color harmonies” on page 271.
Enhanced! Brush switching and Eraser tool performance
The redesigned Brush Selector bar now includes a button to reactivate your last-used brush, allowing you to rapidly switch between variants.
This new feature can also be added to a custom palette or assigned a shortcut key. What’s more, enhancements to Eraser tool provide a
smoother, lag-free painting experience and more customization options.
For more information, see “To select the previous brush variant” on page 315.
Enhanced! Layer workflow
Painter 2020 offers a series of advancements to the layer workflow. More frequently used commands have been added to the Options menu
in the Layers panel, saving you time. Other enhancements include the ability to lock the canvas, more layer pasting choices, and improved
layer collapsing and selection.
For more information, see “Layers” on page 539.
What was new in Corel Painter 2019
Enhanced! Performance
Thanks to enhanced support for multi-core processors and CPUs that use AVX2 extensions, as well as extensive code optimizations, this
is the fastest version of Painter yet. A huge selection of brushes are noticeably faster — some as much as twice as fast. You can also take
advantage of faster document rendering when zooming, panning and rotating — up to 50% faster.
New! Dark user interface theme
You can choose a refreshing, professional interface that makes your artwork the focus. We have meticulously transformed the main user
interface elements in Corel Painter 2019 to reveal a darker theme that allows the interface to melt away and painting to take center stage.
For more information about themes, see “Interface preferences” on page 827.
New! Application icons and controls
Corel Painter 2019 delivers a crisper, cleaner and more responsive environment with over 650 redesigned icons that make the application
easier on the eyes, simpler to understand, and more efficient to use. Try the new slider functionality using modifier keys to precisely select
values. For information about sliders, see “Working with sliders” on page 84.
40 | Corel Painter 2022 User Guide
New! Brushes and patterns
With 36 remarkable new brushes, it’s easier than ever to gain inspiration for fresh creations. Enjoy the new Stamps brush category along
with a host of additional brushes that round out popular categories such as Selections, Airbrushes, Blenders, Dab Stencils, Glazing, Real
Watercolor, Real Wet Oil, Sargent, and Thick Paint. In addition, there are five new patterns that are custom designed for concept artists and
video game designers, but also open a world of creative possibilities for any artist.
The new Stamps brush category includes variants like Atomic (left), Scar (middle). and Tree (right).
Enhanced! Color workflow
Redesigned grabbers in the Color wheel make it easier to see and set colors in the Hue Ring and Saturation/Value Triangle. The new grabbers
are also in the Temporal color selector, which can now be pinned so that it’s always at your fingertips. For more information, see “Using the
color selector” on page 253.
New! Enhanced brush ghost
The Enhanced brush ghost displays a representation of a brush variant when the Brush tool is selected, but not actively painting. The instant
you start applying media, the Enhanced brush ghost changes to an icon. This delivers a more responsive creative experience, without any
lag time, by using strokes that always track directly beneath your stylus. For more information about brush cursor settings, see “Brush cursor
preferences” on page 824.
Enhanced! Windows Multi-touch
Multi-touch enhancements provide a natural sketching and painting experience that you will truly enjoy. Take advantage of a more intuitive
way to simultaneously pan, zoom and smoothly rotate your canvas using two fingers on a Windows touch device. To reset your painting
view, simply double-tap with two fingers. For more information, see “Multi-touch support” on page 122.
New! Drag to zoom functionality
You can zoom in and out of your document quickly by clicking and dragging with your stylus or mouse. Move to the right to zoom in,
and move to the left to zoom out. Holding down the Shift key while clicking and dragging zooms into a specific area of interest. For more
information about zoom modes, see “Zooming images” on page 108.

What’s new in Corel Painter 2022 | 41
What was new in Corel Painter 2018
Corel Painter 2018 introduced the following features and enhancements, which are also available in Corel Painter 2022.
New! Thick Paint
Thick Paint has brushes inspired by traditional tools that you’d instantly recognize in any art supply store. There are a range of bristle brushes
and palette knives carefully crafted to deliver the feel and behavior you’d expect. These new brushes use paint that has pigment and volume
that behaves just like real paint. This means you can blend, build up, push, pull and scrape the paint using the pressure, tilt, and rotation of
your stylus.
These variants deliver versatile, scalable brush loading, so you can spend more time focusing on your work and less on the UI. Using a quick
keyboard shortcut and dragging, you can precisely load the brush on the fly, thanks to a cursor that displays the amount of paint you’ve
loaded and the color.
Just like in the real world, you can create strokes that have ridges of paint within. But what really makes the ridging pop, of course, is
shadows in the canyons of the stroke. With that in mind, Painter lets you adjust the shadow strength and ambient lighting to get depth in
a brushstroke like never before. What’s more, the ability to tweak the transparency of brushstrokes and control how paper texture interacts
with the paint opens up a world of creative possibilities.
The Thick Paint property bar offers presets for painting technique, as well as quick access to settings that allow you to prevent the brush
from running out of paint and control how new brushstrokes blend with existing ones. This makes it easy to jump in and get stunning
results right away. Or if you’d rather tinker and experiment to get a certain look, there are new Thick Paint panels where you can modify
controls. For more information, see “Thick Paint” on page 507.

42 | Corel Painter 2022 User Guide
Thick Paint brushes create visible brush and knife marks in the painting. Artwork by Cher Pendarvis.
Enhanced! Cloning
A range of cloning enhancements lets photo artists to do more, in less time.
You can increase the sophistication of your photo composites in Painter 2018 with new cloning transparency support. You can use
transparent and semi-transparent clone sources when creating a collage, so all elements in a composite interact naturally. And for even more
accurate transparency cloning, there’s a precise cloning option that picks up colors from the center of the brush dab.
Photo artists can use a texture as a clone source. Transformations can be applied to texture clone sources, so you can resize and shape them
to easily and intuitively craft a composite.
The user interface has been streamlined to simplify switching between clone sources. The revamped cloning controls give you more space
to work, but not at the expense of easy access to the settings you need most. All critical cloning controls are easily accessible from a flyout
on the property bar. Whatever your favorite cloning workflow is, Painter 2018 has you covered. Whether tracing paper or a crosshair cloning
cursor works best for you, the choice is yours.
And when you find or create a clone source that you want to reuse, you can save it with the image as an embedded source or as a texture in
the Texture library so it’s always at your fingertips. There’s also an option that lets you embed a clone source in a document, saving you time
finding the source when you get back to work and simplifying sharing with other photo artists. For more information, see “Image cloning
and sampling” on page 191.

What’s new in Corel Painter 2022 | 43
Use cloning techniques to transform your photo into a work of art. Artwork by Bill McEntee
Enhanced! Drip and Liquid brush technologies
Brushes that use the Drip method (all subcategories) or the Plug-in method (Liquid Brush subcategory) are even more versatile in Painter
2018. Take, for example, the Sargent Brush, one of most popular Painter brush variants ever. Loved by artists for its rich brushstrokes, the
Sargent Brush can now be used on an empty layer to blend the currently selected color with an oil-like transparency. Alternatively, you can
use variants that use drip or liquid technologies to pick up color from underlying layers. What’s more, this step forward in brush technology
offers artists of all stripes a range of fresh brushes, opening up a world of possibilities. For more information, see “Drip” on page 351.
In this painting, Melissa Gallo used the Sargent brush variant, as well as brushes from the Artists’ Oils category.
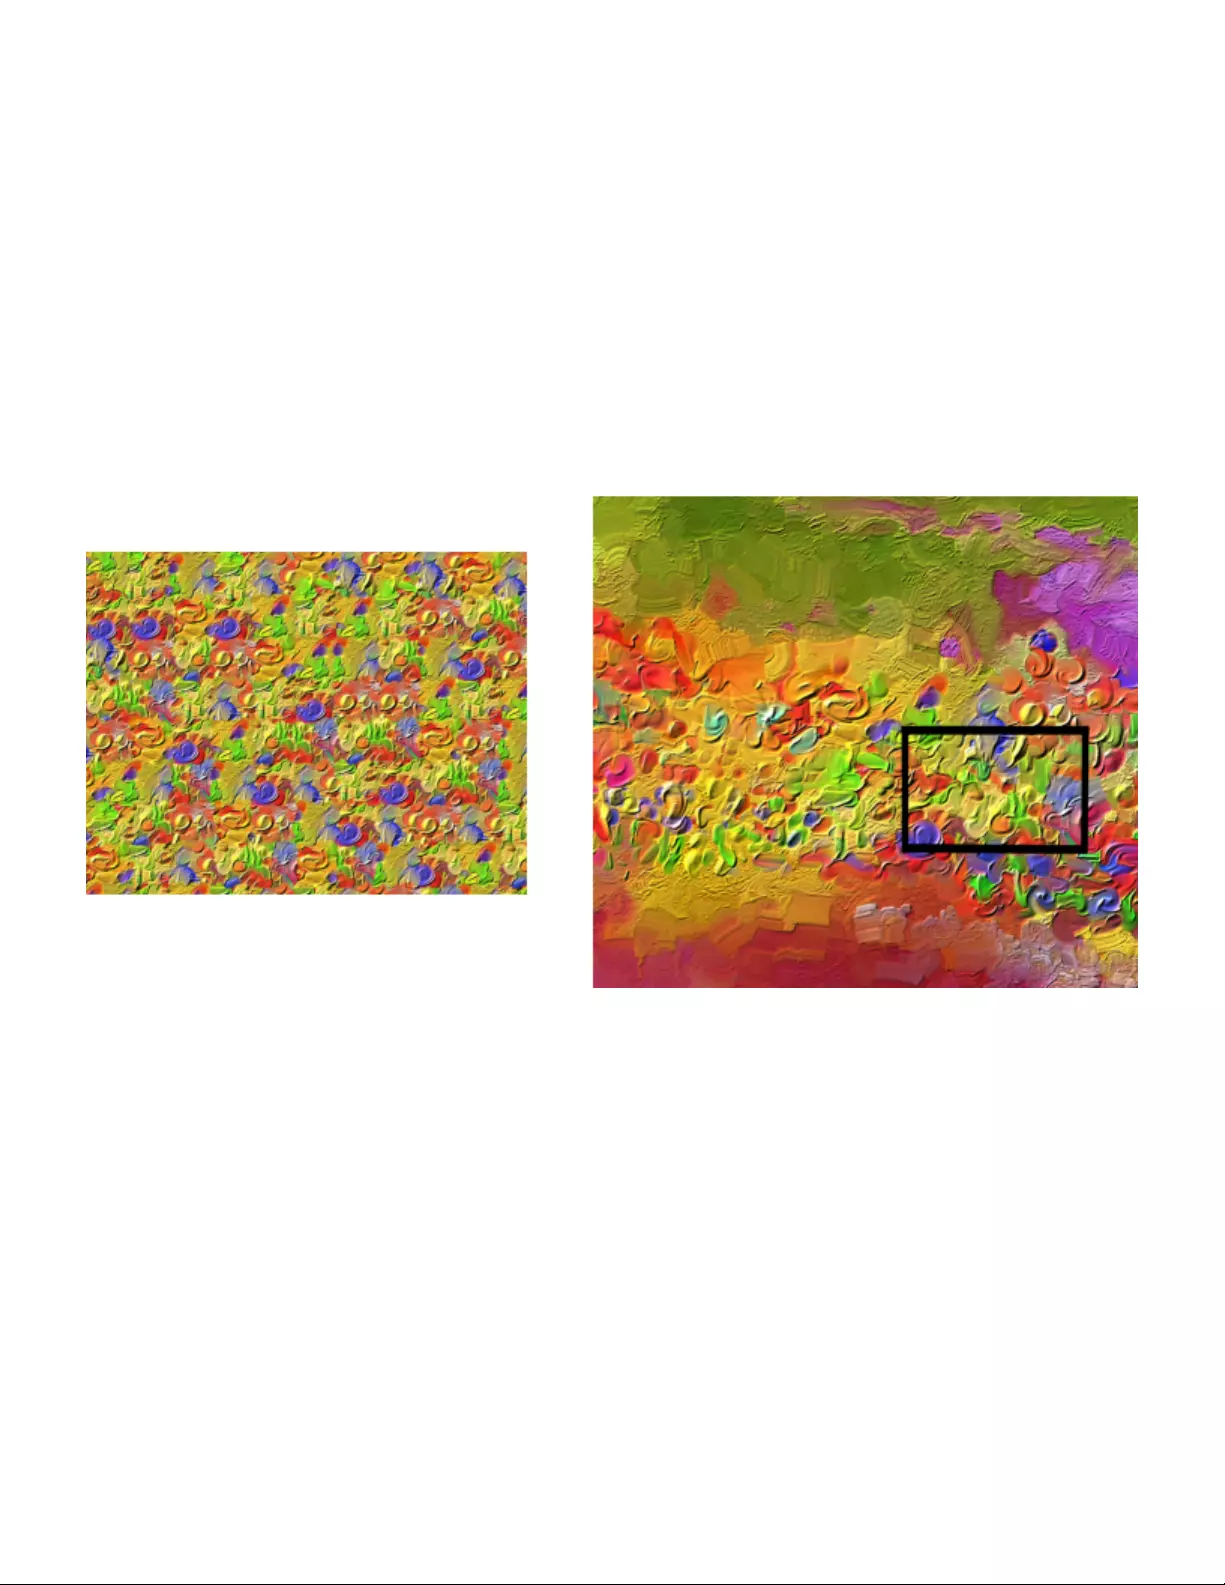
44 | Corel Painter 2022 User Guide
New! Texture synthesis
The limitless creative possibilities that made Texture Painting an instant favorite with concept artists and character designers just got even
more powerful thanks to the addition of the Synthesis feature. It allows you to capture and synthesize an area of a texture or document and
reproduce it on a larger scale, using all the visual elements of the input sample. During the synthesis process, properties of the selected area
are randomized, creating a new texture based on settings that you’ve chosen. You can then paint with it to give every texture brushstroke
even more depth and detail.
Synthesis gives digital artists of all stripes the ability to create vibrant, one-of-a kind textures. Because you can also use part of an image, you
can use favorite brushstrokes as the DNA of a new texture, offering infinite possibilities. The synthesized texture can then be used just like
any other texture or it can be exported to a layer.
And you can fill with texture, whether you created it using the Synthesis feature, imported it to use with a Texture Painting brush, or found it
in the Texture library. For more information, see “Creating textures” on page 464.
Corel Painter generates a large texture (left) from a small sample (right) by
taking into account its structural content. Image (right) by Henk Dawson
New! 2.5D Thick Texture brushes
Concept artists and character designers love Texture Painting for its ability to deliver powerful realism, and Painter 2018 takes the experience
to a whole new level. New 2.5D Thick Texture brushes apply strokes that feel like they are jumping off the canvas. Do you need to make a
character authentically reptilian? You can paint thick, exotic scales that look like they’re rising off the canvas. Or when you need to make skin
more lifelike, Thick Texture brushes let you paint cavernous pores and amplify them by adjusting the directional lighting and appearance of
depth. For more information, see “Add depth to a Texture brush” on page 461.
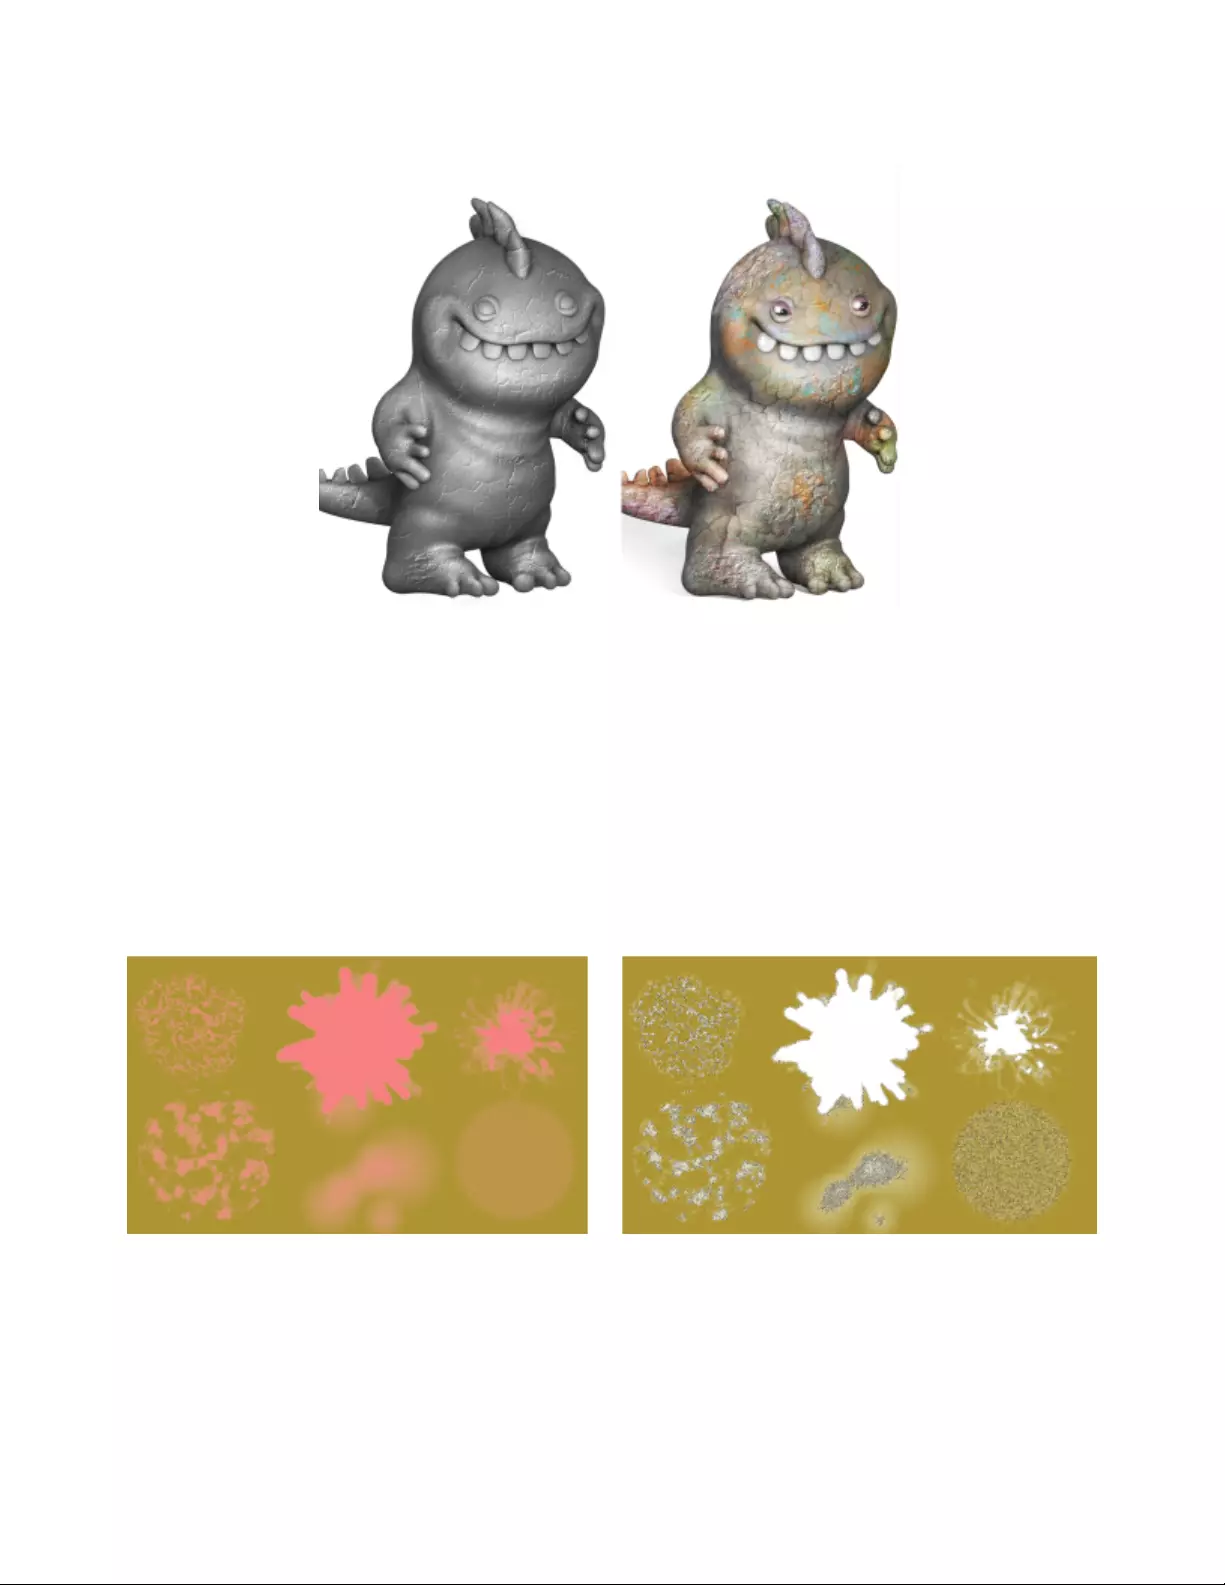
What’s new in Corel Painter 2022 | 45
An example of a Texture brush that uses the impasto Depth method (left)
and the impasto Color and Depth method (right). Model by Cris Palomino.
New! Selection Brush tool and Selection brushes
Because selections are critical to so many digital-art workflows, Corel Painter 2018 gives you more choices when you need to isolate an area
of an image. How much time could you save if you could create a selection as easily and precisely as you can apply a brushstroke? The new
Selection Brush tool lets you do just that. To make it easier to distinguish between selected and protected areas, you can display a color
overlay when you apply a stroke. You can fine-tune the overlay to make it suit the document that you’re working in. There’s a new Selection
brush category with new variants designed specifically for creating selections when working with a complex shape or image area. There’s
also the option of turning any stamp-based brush variant into a selection tool, giving you even more flexibility. What’s more, you can tweak
a brush just as if you were using it to paint, then save it as a custom selection variant for reuse. And in response to artist feedback, there are
a series of selection improvements in Painter 2018. For more information, see “Selecting areas by painting” on page 596.
Examples of selections (right) created with brushes that use the Selection method. The color
overlay (left) that appears as you paint helps to distinguish selected areas from protected areas.
New! Natural Media Brushes library
The new Natural-Media brush library makes it easy for artists transitioning from traditional to digital art. It gives quick, one-stop access
to brushes that mimic traditional media, from pencils and pastels to oils and acrylics, and much more. If you’ve used it in the real world,
chances are you’ll find the digital equivalent in the Natural-Media brush library. You can access the new collection by opening the Brush
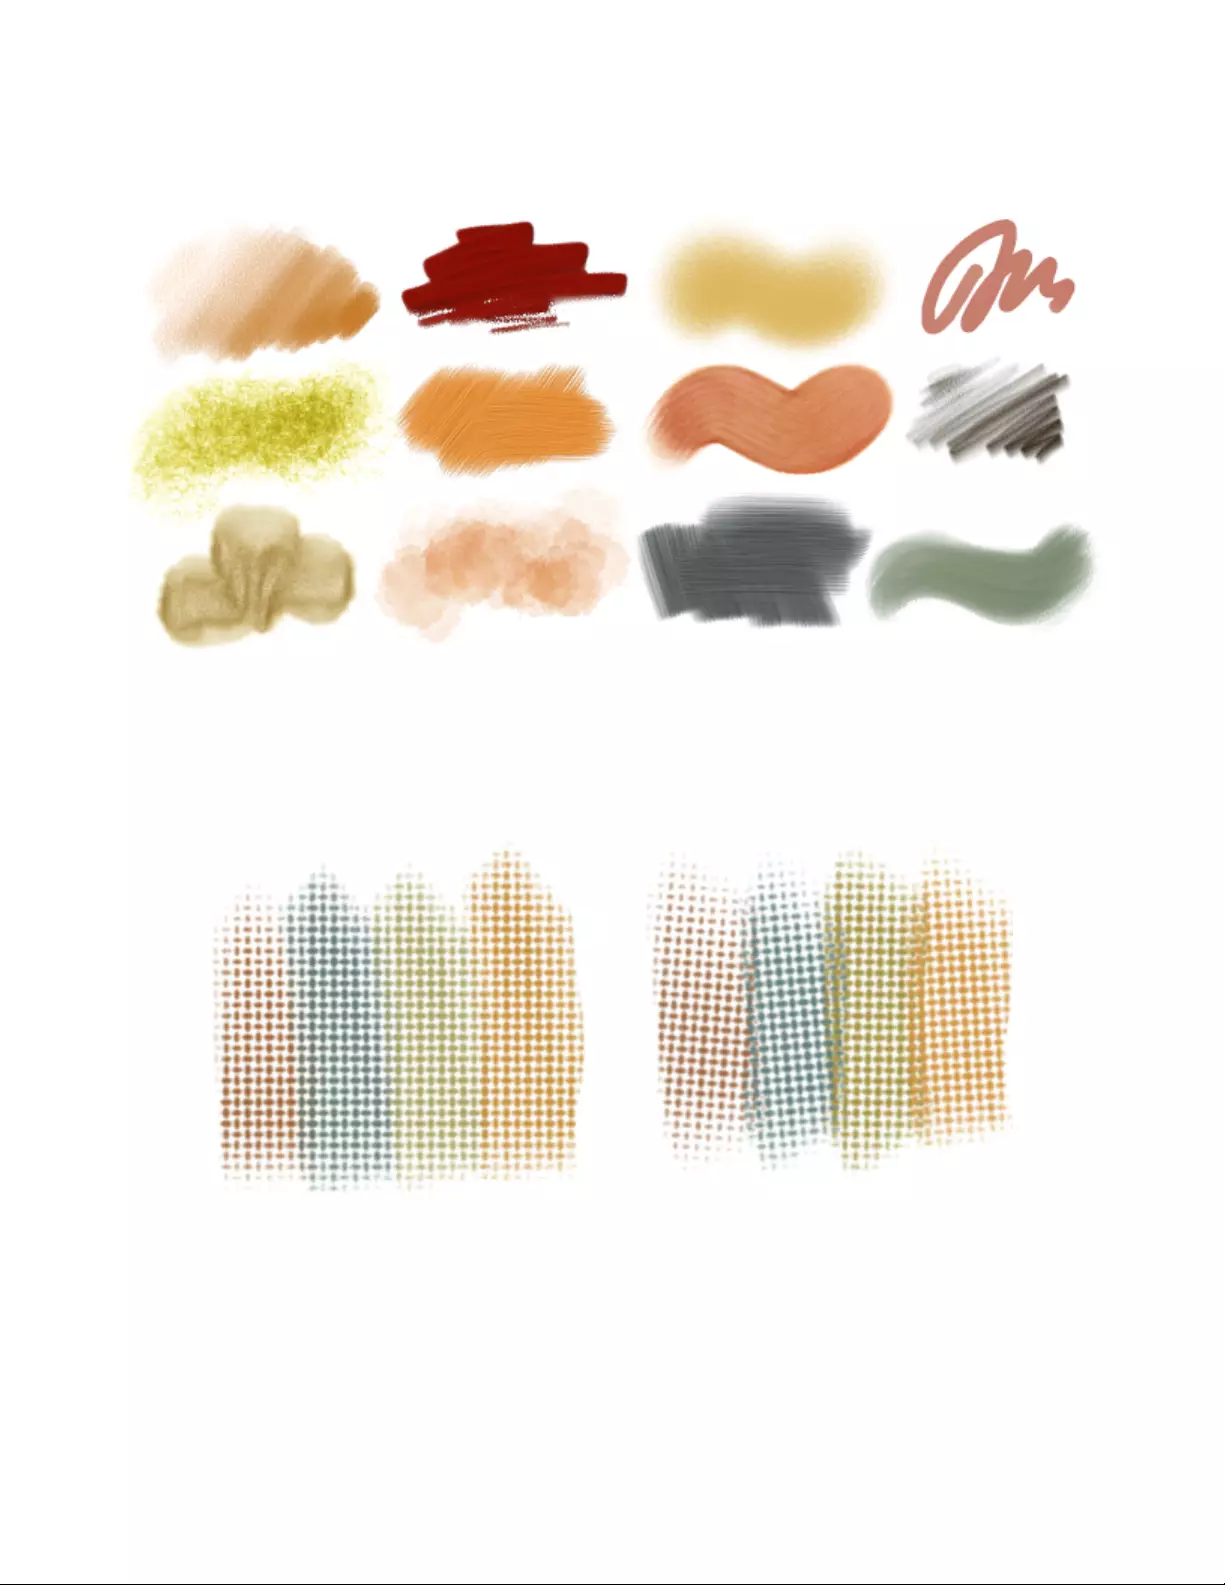
46 | Corel Painter 2022 User Guide
Selector and choosing Natural Media Brushes from the Brush Library list box. For more information, see Reference: Natural Media Brushes
library
Examples of brushstrokes created with brush variants from the Natural Media Brushes library
New! Random grain rotation
Another user request in Painter 2018 is random grain rotation. This new feature slightly rotates the paper grain in each stroke, giving
brushstrokes a more natural, organic look. For more information, see “Grain controls” on page 356.
Select your favorite grainy brush, enable Random Grain Rotation, and Corel Painter will
slightly rotate the grain in each individual stroke. Brushstrokes with Random Grain Rotation
disabled (left) and enabled (right). Grain rotation varies every time you lay down a brushstroke.
What was new in Corel Painter 2017
Corel Painter 2017 introduced the following features and enhancements, which are also available in Corel Painter 2022.
What’s new in Corel Painter 2022 | 47
New! Texture Painting
This groundbreaking new brush category with source-blending technology makes it easy to integrate complex textures into your work.
Whether you’re aiming for a look that is more lifelike or one that’s completely futuristic, or you want to make a digital painting look
authentically timeworn, Texture Painting offers limitless possibilities.
Texture Painting isn’t simply manipulating a layer’s opacity. It lets you intelligently blend a texture into existing content using a range of
stylus expressions, such as pressure. It respects the transparency of the selected texture, giving you full control of when, where, and how
much texture is used. You start by choosing or creating a texture and pairing it with brushes designed specifically for adding texture. And
by combining Texture brushes, flexible brush customization options, and the ability to capture and import your own textures, you can add
any number of surfaces styles to your work. You can even add Dab Stencils, grain, and smudging to the brushes with all the speed, precision
and control you expect from Painter. In addition, you can make your own custom textures from scratch or by modifying a preset texture. For
more information see “Texture painting” on page 453.
A 3D model is rendered into a 2D bitmap image (left). Texture is added to the image in Corel
Painter to give the character more appeal and realism (right). Artwork by Mike Thompson.
New! Interactive Gradient tool
In Corel Painter, getting stunning painted backgrounds is easier than ever with the new Interactive Gradient tool. It lets you quickly create
and edit a gradient to give paintings a range of depth and lighting variations. If you’re just starting a new document, you can kick-start
things by filling the background with a gradient and experimenting with different preset styles. Or if you have an existing sketch or painting,
you can apply and tweak a gradient in context of your work with edit nodes. Corel Painter has a library of gradients to choose from, or you
can create your own and save it for reuse. For more information see “Applying gradients” on page 711.
48 | Corel Painter 2022 User Guide
Gradients were used in this artwork by Marian Basinger.
New! Gradient Express Painting
When a blank white canvas is blocking your creativity or you need a back-drop for a new concept design, the new Express Paint feature lets
you create stunning gradients in a matter of seconds. The new Express Paint feature allows you to apply a wide variety of painting styles
automatically to any gradient, creating the speed and inspiration you need in virtually any composition. For more information, see “Applying
paint effects to gradients” on page 718.
Start a painting by filling the background with a gradient and experimenting with different preset styles.
New! Dab Stencils
Corel Painter gives artists more power to craft and create expressive, unique brushstrokes. Dab Stencils let you change the brushstroke
opacity before you paint, basing it on the active paper, flow map or texture. You can fine-tune exactly how much source texture to reveal as
you paint and link Dab Stencils to a variety of real-time stylus input factors. Using them with the new Texture Brush variants gives you even
greater control over the look and feel of your brushstrokes. For more information, see “Dab Stencil controls” on page 416.
What’s new in Corel Painter 2022 | 49
The brushstrokes in this artwork use the Dab Stencil feature. Artwork by Melissa Gallo.
New! Glazing Brushes
Some of the best Painter developments have been the result of user suggestions. Here’s another one — Glazing Brushes. They let you control
the evolution of your painting using velvety, translucent paint transitions just like the Renaissance masters. Glazing Brushes deliver stroke-
level opacity, so the paint of each brushstroke is applied independently. The paint that each dab deposits on the canvas builds up smoothly
from a minimum to a maximum. This creates a smooth blend between colors, with no unwanted colors where dabs overlap. You’ll really
see Glazing Brushes at their best when you fluctuate stylus pressure in a single brushstroke. For more information, see “Glazing controls” on
page 421.
50 | Corel Painter 2022 User Guide
Glazing brushes were used in this artwork by Héctor Sevilla Luján.
Enhanced! Dropper Tool
Corel Painter makes it easier than ever to sample color. Sometimes what appears to be a solid-colored area is actually subtly shaded or
dithered, so what you see onscreen isn’t what you get when you sample a single pixel. Now you can get the color that you’re seeing with
new Dropper tool options that let you average the colors of pixels in larger sample areas, ranging from 3 × 3 to 101 × 101 pixels. What’s
more, you can sample a color from the active layer or from all visible layers. For more information, see “Sampling colors from images” on
page 258.
New! Palette Drawers
Having the tools that you need right at your fingertips isn’t only important for your productivity, it’s critical for your creativity. That’s why
Corel Painter introduces Palette Drawers. This new workflow enhancement strikes the perfect balance between uncluttering your workspace
and keeping essential tools handy by letting you combine panels and custom palettes in a convenient grouping — for a particular workflow
or project — so the controls and settings are just a click away. And when you’re not using a Palette Drawer, it collapses, freeing up your
work area. For more information, see “Rearranging panels and palettes” on page 77.
Enhanced! Property bars
Optimizing brush and tool settings is important. But time spent tweaking controls is time not spent painting. That’s why the property bars
have been enhanced to make it easier to adjust brushes. For example, when the Brush tool is active, the enhanced property bar gives you
quick access to a range of relevant brush-related panels, saving you time clicking through menus. It also lets you choose new dab profiles
on the fly, select media like paper, and view brushstroke info. There’s also a new Extended property bar that gives quick access to even more
settings. For more information, see “Working with brushes using the property bars” on page 323.
What’s new in Corel Painter 2022 | 51
Enhanced! Brush Selector panel
Corel Painter gives you quicker and easier access to one of the things that makes Painter an industry leader in digital painting — our
unrivaled selection of brushes. To that end, you can now display the Brush Selector as a panel. That way, your recently used brush variants
are at your fingertips, the entire Brush Library is readily accessible, and you can position it wherever it suits your workflow. And the latest
brush packs are available from directly within the Brush Selector. For more information, see “Displaying and customizing the Brush Selector”
on page 70.
Enhanced! Artists’ Layouts
Just getting started with a new project in concept art, fine art, illustration, photo-art or manga? This collection of pre-defined user-interface
arrangements is designed to kick-start a variety of digital art workflows by displaying only the relevant palettes and tools. There’s even one
that displays only minimal UI, freeing up space for tablet users. You can also choose the two workspace layouts that you use most often
and quickly switch between them to suit the current task or the display mode of your device using the Quick Switch feature. For more
information, see “Choosing a workspace layout” on page 61.
What was new in Corel Painter 2016
Corel Painter 2016 introduced the following features and enhancements, which are also available in Corel Painter 2022.
Rotatable media
In Corel Painter 2016, you can change the angle of paper textures and flow maps to get an unprecedented variety in the look of your
brushstrokes. For more information see “Rotating paper texture” on page 174 and “To customize a flow map” on page 479.
Rotatable media can help you vary the look of your brushstrokes.
Default-settings restoration
Corel Painter 2016 makes it easier to preserve custom content when you reset the application to its factory settings. Now when you restore
default settings, you can maintain custom brushes and palettes, paper textures, nozzles, scripts and more. In previous versions, retaining any
customizations required exporting libraries, restoring default settings, and then importing the libraries. For more information, see “Restoring
the default Corel Painter settings” on page 90.
Dynamic Speckles
This feature combines Particle System physics and brush-thickness control linked to your touch, allowing you to create luscious Natural-
Media brushstrokes or progressive-looking Pollock splatters. You can use this feature with select Bristle, RealBristle and Particle brushes, so
you can take full advantage of those revolutionary, Painter-exclusive technologies. For more information, see “Dynamic Speckles controls” on
page 413.

52 | Corel Painter 2022 User Guide
Dynamic Speckles generate a continuous brushstroke from discrete spots of color or speckles.
Audio Expression
Corel Painter 2016 lets you use an audio input device, such as a microphone, or internal audio to modify the look and feel of any brush. For
example, your brushstrokes may change their appearance in synch with streaming music. Audio Expression allows you to link a variety of
brush controls to audio input. In addition, you can adjust the strength of an audio signal, controlling its impact on a brush. For example,
if you link brush size to quiet audio, increasing the strength will result in wider brushstrokes. Conversely, if the audio is loud, decreasing
the strength will result in narrower brushstrokes. In addition, you can set the range of the audio expression to achieve a wider range of
brushstroke variation (for example, minimum to maximum brushstroke width) regardless of whether the audio is consistently strong, low, or
varies. For more information, see “Audio Expression” on page 340.
Document Views
Whether you are working on a project, showing your work, or demonstrating a technique, Corel Painter 2016 makes it even easier to switch
between document views. You can switch document views from the toolbox, the Window menu, and by using keyboard shortcuts. The
Default view shows all the open documents together with commonly used application controls while the Single Document view lets you
focus on the active document. The Presentation Mode hides the menu bar and the taskbar of the operating system, leaving only essential
controls. For more information, see “Switching document views” on page 104.
Brush Hints
Depending on the brush type you are currently working with, context-sensitive brush hints (Help Hints) provide useful tips about brush
technologies. It’s a great way to discover different ways you can take advantage of a variety of unique Corel Painter features, including
Particles, Watercolor brushes, Liquid Ink, Cloner, Impasto, and the new Dynamic Speckles.
Visual tooltips
Some tooltips include illustrations that show the effect of using high and low values of specific settings.
Adobe Photoshop brush file import
With Corel Painter 2016, you can import the brush stamps of pixel-based Adobe Photoshop brushes stored in Adobe Brush Resource (ABR)
files. These files contain a collection of Adobe Photoshop brushes, including shape, texture, dynamics, and other brush information. All
other brush attributes specified in the ABR files are not imported, but can be fully customized in Corel Painter. For more information, see
“Importing Photoshop brush images” on page 333.
Custom content sharing
Corel Painter 2016 simplifies sharing content saved in a custom palette. When you save a custom palette as a Painter Custom Toolbox (BOX)
file, all custom brushes, papers, patterns and flow maps in the palette are saved with the file.

What’s new in Corel Painter 2022 | 53
Welcome Screen
With the Welcome Screen, you can quickly start or open an image, choose a workspace that suits your needs, access online learning videos,
find new brushes and other content online, and get inspired by a gallery of original artwork created with Corel Painter. The Welcome Screen
appears when you start the application, and you can also access it by clicking Help Welcome.
Special media brushes
Corel Painter 2016 offers additional dab types, which are methods for applying media to the canvas. The new dab types use both Particles
and Liquid Ink or Watercolor dabs. These combination dab types include: Liquid Ink Gravity Particles, Liquid Ink Flow Particles, Liquid Ink
Spring Particles, Watercolor Gravity Particles, Watercolor Flow Particles, and Watercolor Spring Particles.
Layer blending
Whether you are painting with a single color or blending two or more colors on a layer, the Enhanced Layer Blending option can help you
produce brushstrokes without white fringes. For more information, see “Blending controls” on page 402.
Brushstrokes without (left) and with (right) Enhanced Layer Blending
What was new in Corel Painter 2015
Corel Painter 2015 introduced the following features and enhancements, which are also available in Corel Painter 2022.
Revolutionary digital brushes
Particle Brushes These new physics-inspired brushes produce rich, chaotic strokes by
emitting particles from a central point that create lines and patterns
as they move across the canvas. This revolutionary brush category
allows a wide variety of artists to push their creative visions further,

54 | Corel Painter 2022 User Guide
whether in photo art, illustration, concept art, traditional art, and
more.
For more information, see “Particle brushes” on page 437.
Jitter Smoothing Corel Painter X3 saw the introduction of Universal Jitter, which
allows you to add randomness to your brushstrokes by integrating
the Jitter expression in a range of brush controls. The addition of
Jitter Smoothing helps you give your brushstrokes an even more
natural, organic look.
Enhanced speed and performance
Native 64-bit application for macOS Users on the macOS will notice extended processing power right
away, especially during operations that require big data transfers,
such as opening files, switching clone sources, working with
multiple layers, using large documents and more.
Enhanced cross-platform performance With the latest round of CPU performance optimizations, brushes
perform faster, so you can concentrate on your art and forget
about technology.
Enhanced real-time effect preview You can now preview effects in real-time on the canvas so you
instantly get an idea how the whole painting will look.
Enhanced brush tracking Because each artist uses a different strength or pressure level in
a stroke, the enhanced Brush Tracking utility helps calculate the
appropriate settings for pressure and velocity. The new visual
power curve helps you control universal application pressure-
sensitive memory and instantly apply the settings to the current
brush variant. There are default pressure curves to choose from,
or you can tweak the curve and save it as a preset. You can also
make practice strokes with a variant on the canvas while you’re
calibrating the brush tracking so you can draw from with the
most realistic, accurate brushstroke information possible. For more
information, see “Brush tracking and calibration” on page 153.
A fully responsive experience
Custom user-interface palette arrangements Inspired by Painter artists, this collection of new pre-defined user—
interface arrangements is designed to kick-start a variety of digital-
art workflows by displaying only the relevant palettes and tools.
There’s one for illustrating, creating photo art, and getting started
with the revolutionary new Particle brushes. There’s even one that
displays only minimal UI, freeing up space for tablet users. For more
information, see “Choosing a workspace layout” on page 61.
Fresh new content
You can add an extra special touch to your artwork with new,
freshly inspirational papers, nozzles, images, patterns, weaves,
gradients and more. Some of the updates are designed specifically
What’s new in Corel Painter 2022 | 55
for different types of digital artists, so whether you’re an illustrator
or photo artist, you can be sure to find compelling content to work
with.
Mobile art that moves you
Real-Time Stylus and Windows Tablet PC support You can combine your Tablet PC with Windows Real-Time Stylus
support to capture whatever inspires you on the fly. Support for
the Windows Real-Time Stylus delivers truly responsive pressure-
sensitivity, and depending on the device, tilt. What’s more, there’s
no stylus driver to install, so you can use Corel Painter right away.
For more information, see “Support for tablets and other devices”
on page 121.
Painter Mobile for Android The Painter Mobile for Android app gives you the ability to paint
anywhere, anytime. When it’s time to finalize your work, you can
import it directly into Corel Painter to add professional finishing
touches.
Particle brushes were used to create the sparks and wisps of smoke in this image. Artwork by Don Seegmiller
Angle Jitter applied to a brushstroke without Jitter Smoothing (top) and with Jitter Smoothing (bottom).

56 | Corel Painter 2022 User Guide
Real-Time Stylus and Windows Tablet PC support let you create art on the go.

Workspace tour | 57
Workspace tour
The Corel Painter workspace has been designed to give you easy access to tools, effects, commands, and features. The workspace is
organized by using a series of menus, selectors, panels, and interactive palettes.
This section contains the following topics:
•“Corel Painter terms” (page 57)
•“Exploring the Document window” (page 59)
•“Choosing a workspace layout” (page 61)
•“Exploring the toolbox” (page 62)
•“Displaying the toolbox” (page 66)
•“Displaying the property bars” (page 68)
•“Exploring the Navigator panel” (page 69)
•“Displaying and customizing the Brush Selector” (page 70)
•“Displaying the command bars” (page 76)
•“Rearranging panels and palettes” (page 77)
•“Exploring panels” (page 81)
•“Working with sliders” (page 84)
•“Creating and modifying custom palettes” (page 85)
•“Renaming and deleting custom palettes” (page 87)
•“Saving, exporting, and importing custom palettes” (page 87)
•“Working with libraries” (page 88)
•“Creating, importing, exporting, and deleting workspaces” (page 89)
•“Restoring the default Corel Painter settings” (page 90)
Corel Painter terms
Before you get started with Corel Painter, you should be familiar with the following terms.
Term Description
Canvas The canvas is the rectangular work area inside the document
window. In addition, the canvas serves as the background layer of

58 | Corel Painter 2022 User Guide
Term Description
the image. However, unlike other layers, it is always locked. The size
of the canvas also determines the size of the image that you create.
Pixels-per-inch (ppi) The default unit of measurement for resolution in Corel Painter.
Pixels-per-inch (ppi) is equivalent to dots per inch (dpi).
Layer Layers are independent image elements that stack on top of the
canvas. You can manipulate the content of a layer without altering
the canvas. Layers let you experiment with different compositions
and effects without risking an unwanted, permanent edit.
Brush category Brush categories are groups of similar brushes and media.
Brush variant Brush variants are specific brushes and brush settings within a
brush category.
Dab types The dab type controls the way a brush applies color to the painting
surface. In Corel Painter, there are numerous dab types that fall
under two dab type groups: rendered and stamp-based, also
known as pixel-based.
Rendered dab type The rendered dab type produces continuous, smooth-edged
strokes. For example, Camel Hair and Airbrush use the rendered
dab type.
Stamp-based dab type The stamp-based dab types produce brushstrokes that are made up
of tiny dabs of color that are closely spaced together so they appear
smooth.
Panel A panel is a single tabbed container that displays commands,
controls, and settings for a specific feature. Panels reside in a
palette. For example, the Color panel contains controls that allow
you to choose colors.
Palette A palette is a container for one or multiple panels.
Paper Paper allows you to control both the color and texture of the
canvas.
Clone source The clone source determines the image, or image area, that you
want to reproduce through cloning. A document can include
multiple clone sources.
Clone document The clone document is created by copying the original clone source
image which allows you to reproduce a painterly version of the
source image. A copy of the clone source is embedded in the clone
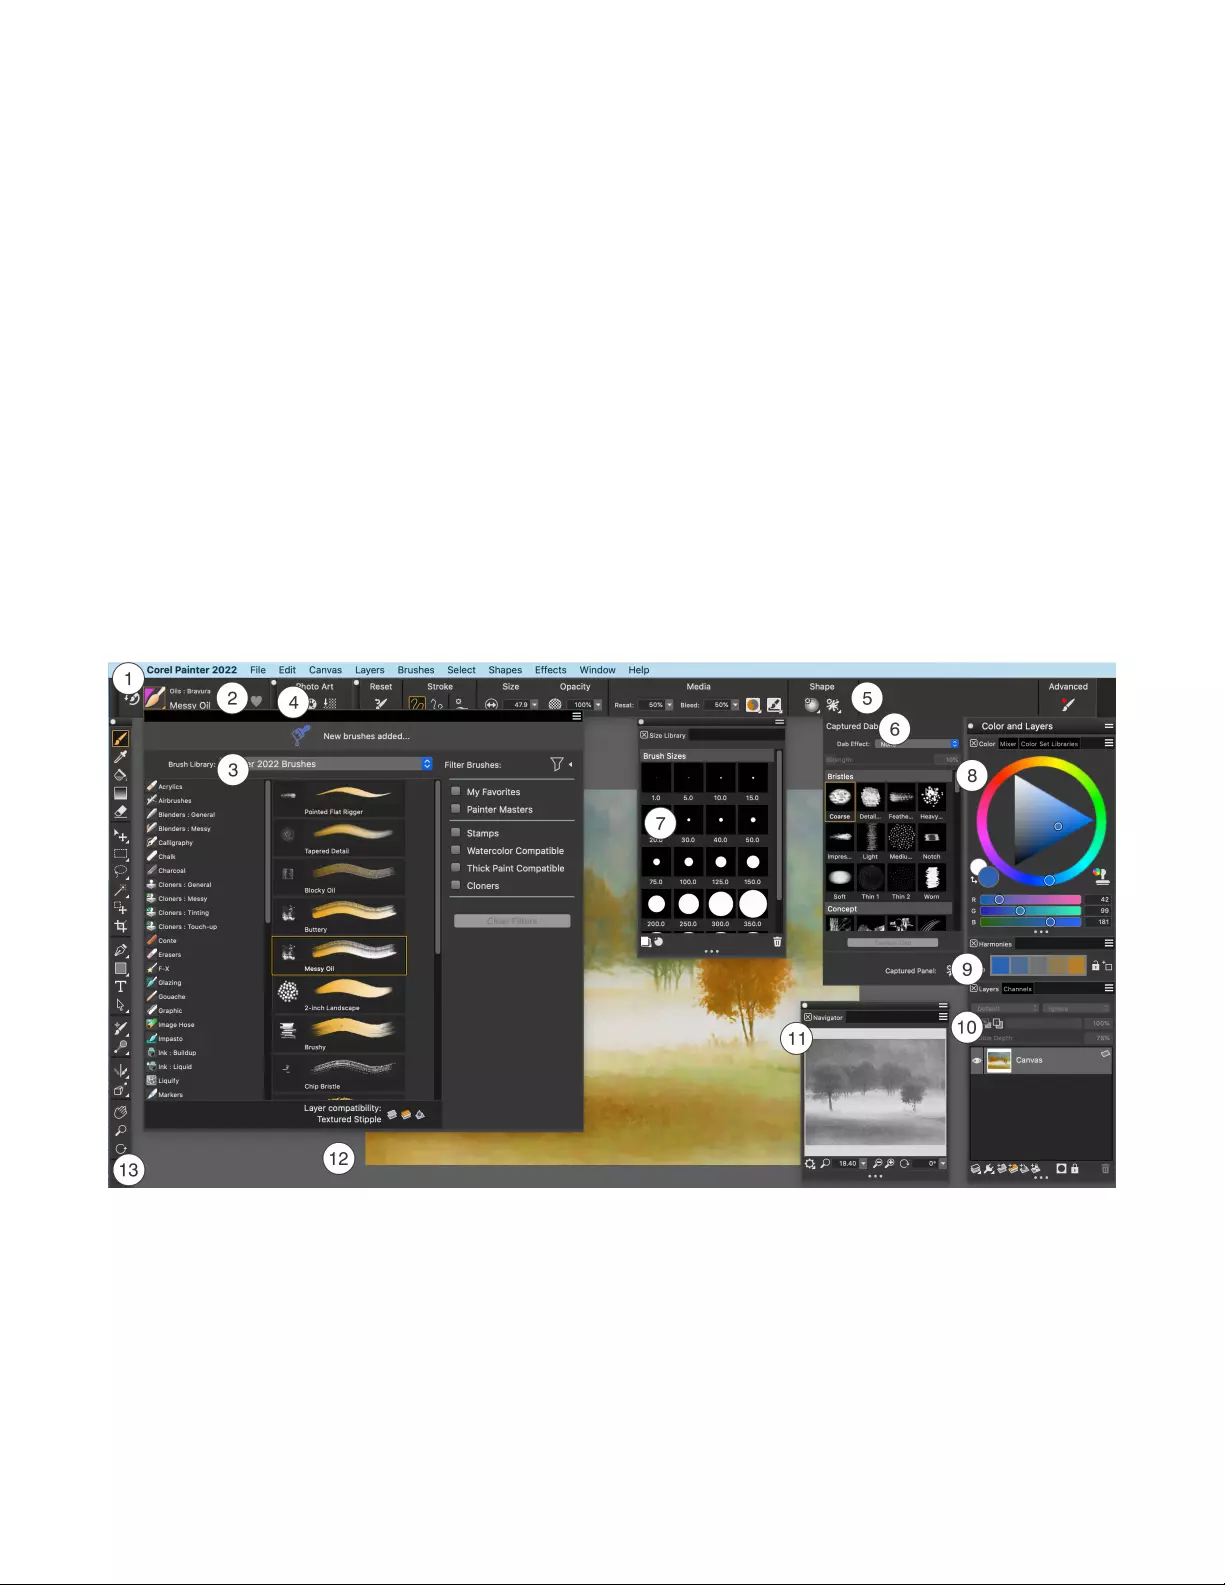
Workspace tour | 59
Term Description
document. In addition, you can add multiple clone sources to a
clone document.
Image sampling Image sampling lets you copy part of one image and reuse it
elsewhere in the image or in another image. You can sample
an image by using the Rubber Stamp tool, a Cloner brush that
supports offset sampling, or a Cloner brush that supports multi-
point sampling. Sampling is similar to cloning, but, unlike cloning,
it does not create a separate document that stores clone sources.
Composite method A composite method, which is similar to blend modes in Adobe
Photoshop, lets you change how a layer blends with an underlying
image.
Exploring the Document window
The document window is the area outside the canvas that is bordered by scroll bars and application controls.
Circled numbers correspond to the numbers in the following table, which describes
the main components of the application window. Artwork by Rainer Sollfrank
Part Description
1. Menu bar Lets you access tools and features using pull-down menu options

60 | Corel Painter 2022 User Guide
Part Description
2. Brush Selector bar Lets you access the Brush Selector flyout. It also allows you to
access the previously used brush variant and mark brushes as
favorite.
3. Brush Selector flyout Lets you choose a brush library, select a brush from a brush
category, apply brush filters to show only the brushes you need,
and browse additional brush packs that can complement your
creative set of brushes. It also lets you instantly identify which
brush variants are compatible with the Default, Liquid Ink, Thick
Paint, and Watercolor layers. When you hover over a brush variant,
eligible layer compatibility icons appear beside the brush name at
the bottom of the Brush Selector.
4. Command bars The command bars — File/Edit, Canvas, Photo Art — contain
buttons and controls that are shortcuts to many commonly used
menu commands.
5. Property bar Displays commands that relate to the active tool or object. For
example, when the Fill tool is active, the fill property bar displays
commands for filling selected areas. Controls on the property bar
are organized logically for ease of use. Group labels help you find,
understand, and use commands quickly and efficiently.
6. Captured Dabs flyout Displays captured dab libraries and controls for changing the
appearance of any brush. You can choose a captured dab, apply
a dab effect and adjust its strength, and then capture the brush
settings as a new dab in your library.
7. Size Library panel Lets you choose a brush size preset and manage size presets
8. Color panel Lets you select a color and view information about the selected
color
9. Harmonies panel Lets you use harmony rules to create color harmonies
10. Layers panel Lets you manage the hierarchy of layers and includes controls for
creating, selecting, hiding, locking, deleting, naming, and grouping
layers
11. Navigator panel Lets you view the entire image in color or grayscale without having
to zoom out. You can use the Navigator to move to a different
image area, change the zoom level, and rotate the canvas.
12. Canvas The canvas is the rectangular work area inside the document
window whose size determines the size of the image you create.

Workspace tour | 61
Part Description
The canvas acts as the image background and, unlike a layer, it is
always locked.
13. Toolbox Lets you access tools for creating, filling, and modifying an image
Choosing a workspace layout
A workspace layout (also known as “palette arrangement”) displays, hides, and positions workspace elements such as palettes and panels to
suit a specific workflow. Corel Painter 2022 offers the following preset workspace layouts:
•New to Painter — Displays the most essential controls together with the Hints panel to help you get started quickly with Corel Painter
•Classic — Ideal for users who have experience with previous versions of Corel Painter and are looking for a seamless transition to a
familiar environment
•Default — The default workspace layout that works well for most computers. For more information, see “Exploring the Document
window” on page 59.
•Simple — Displays minimal user interface that includes the toolbox, the menu bar, and the property bar. This layout is ideal for small
screens.
•Concept Art — Provides quick access to brushes, gradients, and texture painting controls. Brush and media palettes are logically
grouped in palette drawers to save screen space.
•Illustration — Displays the Reference Image panel, brushes, papers, and gradients
•Fine Art — Provides quick access to traditional media brushes, glazing and blending controls
•Photo Art — Displays palettes commonly used by photo artists, providing optimal setup for cloning photos, textures, and paintings
•Manga Art — Provides quick access to brushes, gradients as well as blending and smoothing controls
The Quick Switch feature lets you choose two workspace layouts that you use most often and quickly switch between them to suit the
current task or the display mode of your device. This feature is especially useful on multi- or dual-mode devices. For example, you can select
Default as Layout 1 and Simple as Layout 2. When you flip the display panel from Notebook to Tablet mode, the Simple workspace layout is
automatically displayed, letting you work in an un-cluttered minimalistic user interface.
To choose a workspace layout
•Choose Window Layout, and choose a layout.
You can also choose a layout from the Welcome screen (Help Welcome) by clicking the Get Started tab and selecting a layout in
the Arrange my Workspace area.
To switch between workspace layouts
1Choose Window Layout Quick Switch Layout 1, and choose a layout.
2Choose Window Layout Quick Switch Layout 2, and choose a layout.
3To switch between Layout 1 and Layout 2, do one of the following:
• Reposition the display panel of your dual- or multi-mode device (for example, from Notebook mode to Tablet mode).
•Choose Window Layout Quick Switch Toggle Layout.

62 | Corel Painter 2022 User Guide
You can switch between factory workspace layouts or custom workspace layouts that you created. For information about creating
and saving custom workspace layouts, see “Rearranging panels and palettes” on page 77.
Exploring the toolbox
You can use the tools in the toolbox to paint, draw lines and shapes, fill shapes with color, view and navigate documents, and make
selections.
You can access and change tool options and settings from the property bar. Tool settings are retained when you switch from one tool to
another. You can also use the property bar to restore the default settings of the selected tool.
The following table provides descriptions of the tools in the Corel Painter toolbox.
Tool Description
Color tools
The Brush tool lets you paint and draw on the canvas or a layer.
The property bar displays the most commonly used functions
that are relevant to the active brush. For more information, see
“Selecting, managing, and creating brushes” on page 313.
The Dropper tool lets you pick up a color from an existing image.
The property bar shows the values of the color. When you select a
color with the Dropper tool, that color becomes the current color
in the Color panel. For more information, see “Sampling colors
from images” on page 258.
The Interactive Gradient tool lets you apply a gradient to an image
by filling an area, such as the canvas, a selection, layer, or channel.
For more information, see “Applying gradients” on page 711.
The Paint Bucket tool lets you fill an area with media, such as a
color, gradient, pattern, weave, or clone. The property bar shows
options for the areas that you can fill and the media that you can
use. For more information, see “Working with color fills” on page
274.
The Eraser tool lets you remove unwanted areas from an image.
For more information, see “Erasing image areas” on page 167.
Selection tools
The Layer Adjuster tool is used to select, move, and manipulate
layers. For more information, see “Displaying the Layers panel” on
page 543.
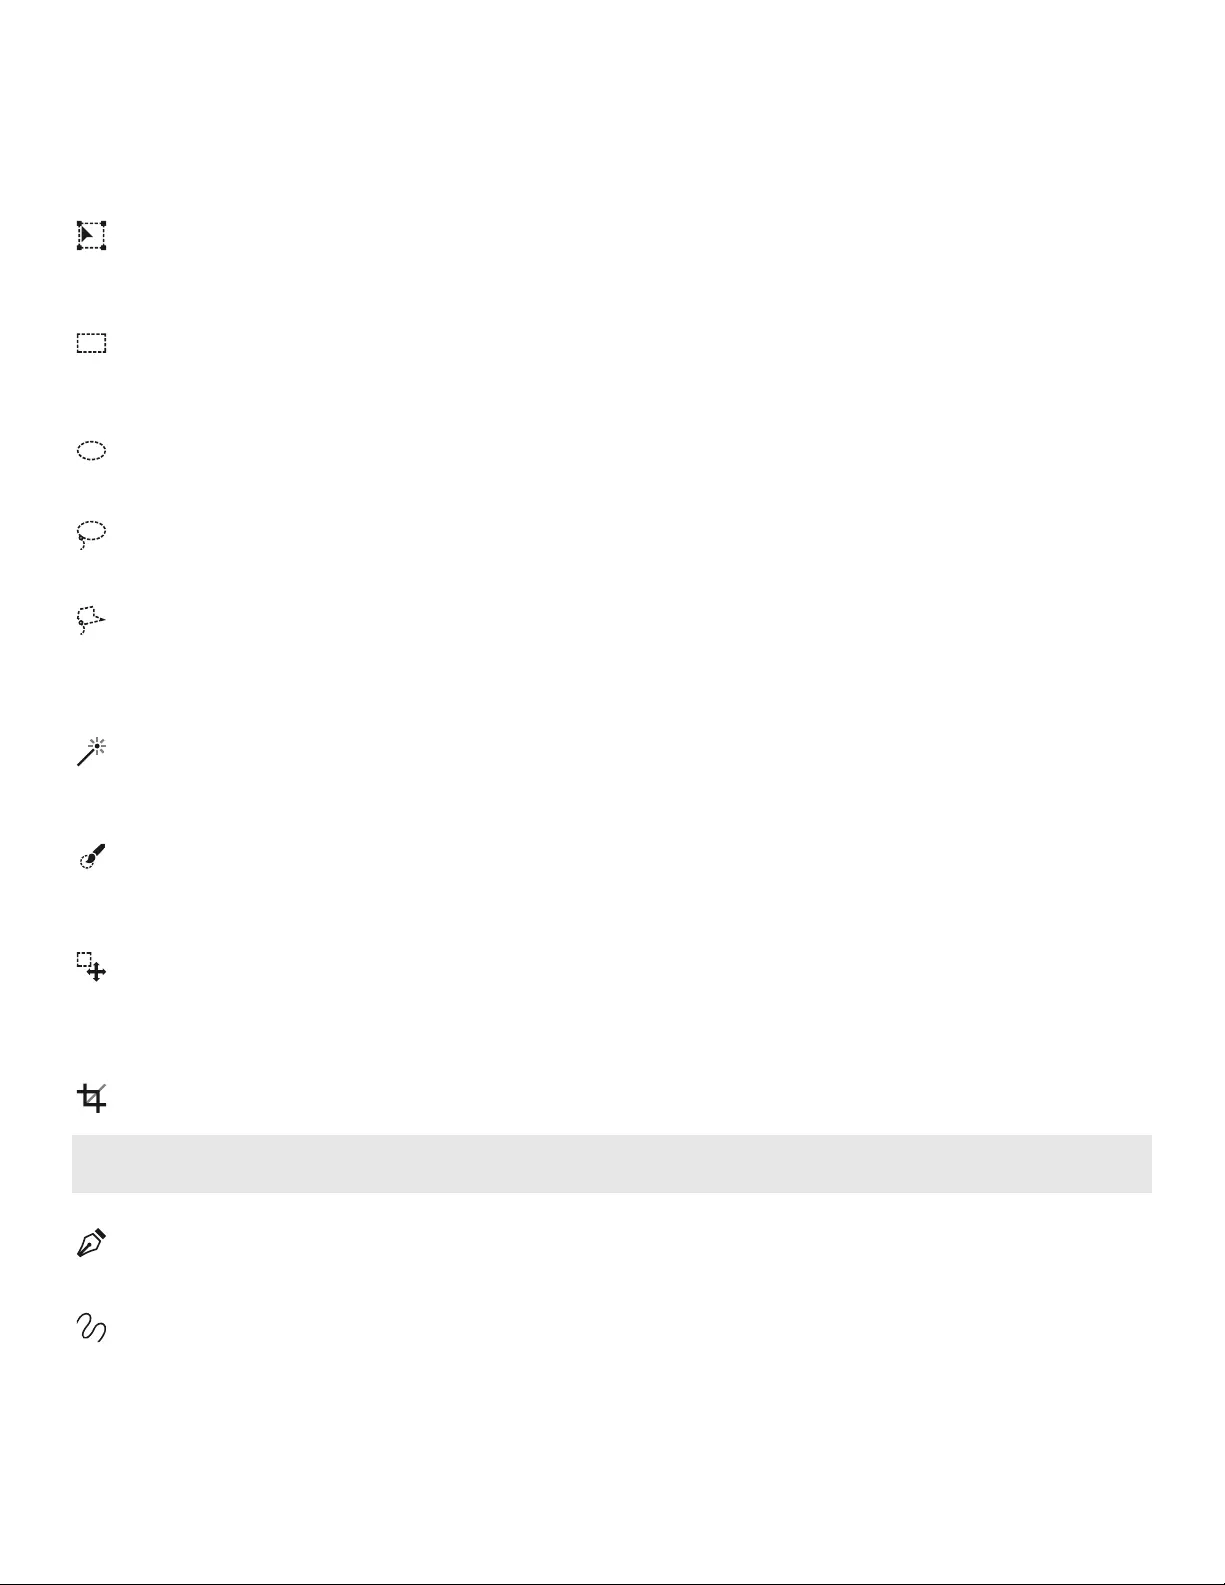
Workspace tour | 63
Tool Description
The Transform tool lets you modify selected areas of an image by
using different transformation modes. For more information, see
“Preparing selections for transformations” on page 615.
The Rectangular Selection tool lets you create rectangular
selections. For more information, see “Getting started with
selections” on page 594.
The Oval Selection tool lets you create oval selections. For more
information, see “Getting started with selections” on page 594.
The Lasso tool lets you draw a freehand selection. For more
information, see “Getting started with selections” on page 594.
The Polygonal Selection tool lets you select an area by clicking
different points on the image to anchor straight line segments. For
more information, see “Creating path-based selections” on page
601.
The Magic Wand tool lets you select an area of similar color
by clicking or dragging in an image. For more information, see
“Creating pixel-based selections” on page 603.
Selection Brush tool lets you create a freehand selection by
painting. For more information see “Selecting areas by painting” on
page 596.
The Selection Adjuster tool lets you select, move, and manipulate
selections created with the Rectangular, Oval, and Lasso selection
tools and selections converted from shapes. For more information,
see “Preparing selections for transformations” on page 615.
The Crop tool lets you remove unwanted edges from an image. For
more information, see “Cropping images” on page 115.
Shape tools
The Pen tool lets you create straight lines and curves in objects. For
more information, see “Drawing lines and curves” on page 762.
The Quick Curve tool lets you create shape paths by drawing
freehand curves. For more information, see “Adjusting curvature”
on page 771.

64 | Corel Painter 2022 User Guide
Tool Description
The Rectangular Shape tool lets you create rectangles and squares.
For more information, see “Drawing shapes” on page 760.
The Oval Shape tool lets you create circles and ovals. For more
information, see “Drawing shapes” on page 760.
The Text tool creates text shapes. Use the Text panel to set the font,
point size, and tracking. For more information, see “Adding text”
on page 781.
The Shape Selection tool is for editing Bézier curves. You use
the Shape Selection tool to select and move anchor points and
adjust their control handles. For more information, see “Selecting a
shape” on page 767.
The Scissors tool lets you cut an open or closed segment. If the
segment is closed, after you click on a line or point, the shape path
becomes open. For more information, see “Cutting and joining
shape segments” on page 772.
The Add Point tool lets you create a new anchor point on a shape
path. For more information, see “Adding, deleting, and moving
anchor points” on page 769.
The Remove Point tool lets you remove an anchor point from
a shape path. For more information, see “Adding, deleting, and
moving anchor points” on page 769.
The Convert Point tool is used to convert between smooth and
corner anchor points. For more information, see “Adjusting
curvature” on page 771.
Photo tools
The Cloner tool gives you quick access to the last Cloner brush
variant you used. For more information, see “Painting in the clone”
on page 195.
The Rubber Stamp tool lets you sample areas within an image or
between images. For more information, see “Cloning image areas”
on page 212.
The Dodge tool lets you lighten the highlights, midtones, and
shadows in an image. For more information, see “Dodging and
burning” on page 305.
Workspace tour | 65
Tool Description
The Burn tool lets you darken the highlights, midtones, and
shadows in an image. For more information, see “Dodging and
burning” on page 305.
Symmetry tools
The Mirror Painting mode lets you create a perfectly symmetrical
painting. For more information, see “Using the Mirror Painting
mode” on page 232.
The Kaleidoscope mode lets you transform basic brushstrokes
into colorful and symmetrical kaleidoscope images. For more
information, see “Using the Kaleidoscope Painting mode” on page
234.
Composition tools
The Divine Proportion tool lets you plan compositions by using
guides based on a classical composition method. For more
information, see “Using the Divine Proportion tool” on page 242.
The Layout Grid tool lets you divide your canvas so that you can
plan your composition. For example, you can divide your canvas
into thirds vertically and horizontally to use the compositional rule
of thirds. For more information, see “Using the Layout Grid” on
page 229.
The Perspective Guides tool lets you display guides using one,
two or three-point perspective. For more information, see “Using
perspective guides” on page 236.
Navigation tools
The Grabber tool lets you scroll through an image quickly. For more
information, see “Repositioning images” on page 114.
The Magnifier tool lets you magnify areas of an image when you
are performing detailed work, or reduce areas to get an overall
view of an image. For more information, see “Zooming images” on
page 108.
The Rotate Page tool lets you rotate an image window to
accommodate the way you naturally draw. For more information,
see “Rotating images and the canvas” on page 111.

66 | Corel Painter 2022 User Guide
Tool Description
Selectors
The View selector allows you to switch between document
views and viewing modes. For more information, see “Switching
document views” on page 104.
To reset the default tool settings
• Click the Reset Tool button on the property bar.
The Reset Tool button on the property bar has the same icon as the selected tool in the toolbox.
Various Reset Tool buttons for the Grabber property bar
Displaying the toolbox
The toolbox is open by default, but you can close it. In addition, to minimize the space required to display the toolbox, tools of similar
function are grouped together and they are accessible from flyout menus. The button for only one of these tools is displayed at a given time
on the toolbox. A flyout menu is indicated by a triangle in the lower-right corner of the button. You can open a flyout to access all of its
tools.
You can also reposition the toolbox by moving it in the application window. In addition, you can change the toolbox display. For example,
you can arrange the tools in two columns instead of one or change the toolbox orientation from vertical to horizontal. If you are working
with a tablet or low-resolution display, or you prefer to work in an uncluttered workspace, you can display a simpler version of the toolbox
that includes fewer tools.
Top: A simpler version of the toolbox. Bottom: A two-row toolbox.
To open or close the toolbox
•Choose Window Toolbox.
You can also close the toolbox by clicking the close button on the toolbox header bar.
To access tools grouped in flyouts
1In the toolbox, click and hold the tool icon whose flyout you want to open.
A flyout menu of the entire group of related tools appears.

Workspace tour | 67
2Click the tool that you want to use.
The tool you’ve chosen appears in the toolbox.
To move the toolbox
• Drag the toolbox header bar to a new location in the application window.
To change the toolbox display
1Do one of the following:
•(macOS) Choose Corel Painter 2022 Preferences Interface.
•(Windows) Choose Edit Preferences Interface.
2Choose an option from the Toolbox Layout list box.
Displaying the Media Selector bar
The Media Selector bar gives you quick access to the libraries for the following Corel Painter media:
• patterns (see “Patterns” on page 697)
• gradients (see “Gradients” on page 709)
• nozzles (see “Image hose” on page 487)
• weaves (see “Weaves” on page 741)
• looks (see “Saving a brush look” on page 333)
The Media Selector bar is open by default, but you can close it at any time.
The Media Selector bar (displayed horizontally). From left to right:
PatternSelector, GradientSelector, NozzleSelector, WeaveSelector, LookSelector.
You can also reposition the Media Selector bar by moving it in the application window. In addition, you can change the Media Selector bar
display. For example, you can change the Media Selector bar orientation or increase the size of the buttons.
To open or close the Media Selector bar
•Choose Window Media Selector.
You can also close the Media Selector bar by clicking the close button on the header bar.
To move the Media Selector bar
• Drag the Media Selector bar header to a new location in the application window.
To change the Media Selector bar display
1Do one of the following:
•(macOS) Choose Corel Painter 2022 Preferences Interface.
•(Windows) Choose Edit Preferences Interface.
2Choose an option from the Media Layout list box.
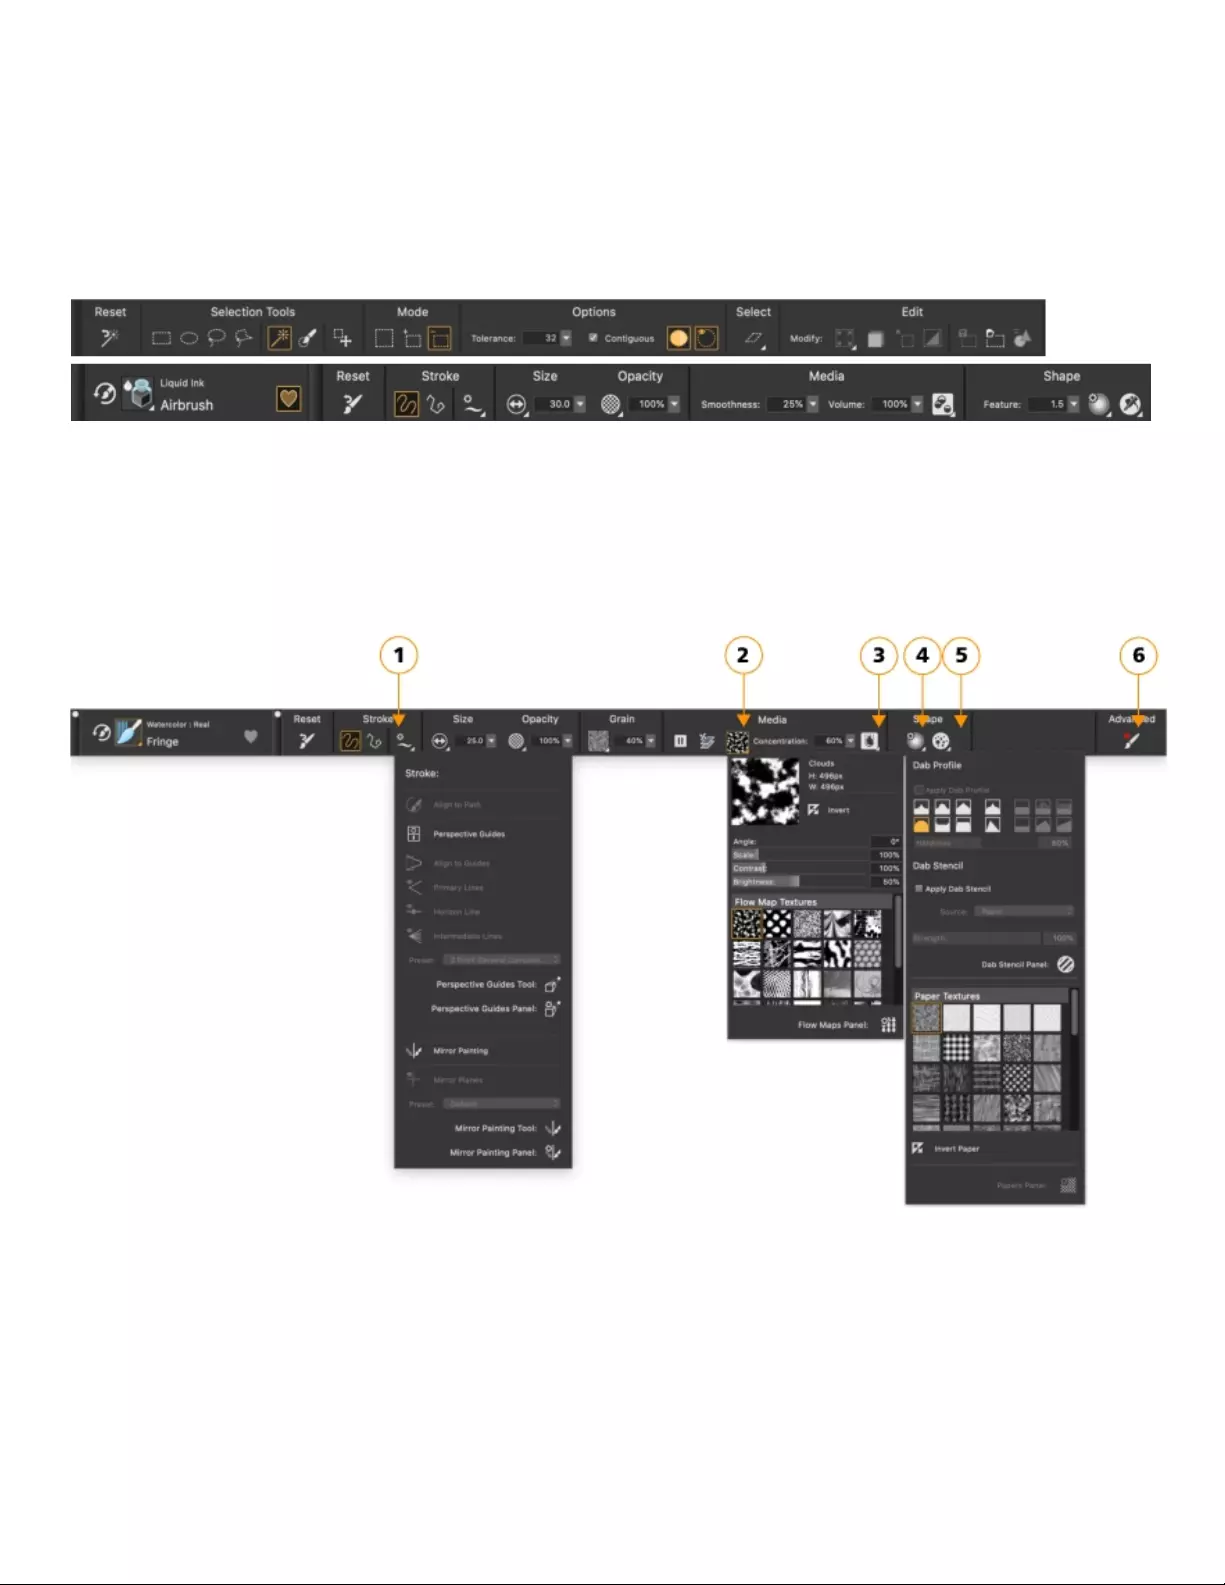
68 | Corel Painter 2022 User Guide
Displaying the property bars
The property bar displays the most commonly used functions that are relevant to the active brush or tool.
The property bar content changes depending on the active brush or tool. For example, when you
choose the Magic Wand tool (top), the property bar displays commands related to selections; when
you choose a Liquid ink brush (bottom), the property bar provides access to Liquid Ink controls.
Controls on the property bar are organized logically for ease of use. Group labels help you find, understand, and use commands quickly and
efficiently. You can show and hide group labels. Depending on the brush category and variant you select, the property bar contains flyouts
that allow you to access brush settings without the need to open different panels.
The property bar for a Real watercolor brush variant: (1) the Stroke flyout; (2) the Flow map flyout; (3) the Real Watercolor flyout button; (4) the Dab Options
flyout; (5) the Static Bristle flyout button; (6) The Advanced Brush Controls button lets you access the panels related to the active brush variant. The background
shape of icons indicates their use. A square background (3) signifies that the control gives access to settings that let you modify the media properties of a brush.
Icons with a round background (4, 5) give access to settings that control the shaping of a brush.
By default, the property bar is displayed in the application window docked below the menu bar, but you can close it. You can also move the
property bar or dock it to the application window.

Workspace tour | 69
To open or close the property bar
•Choose Window Property Bar.
All commands that were available on the Extended Property Bar in previous version of Corel Painter are now available on the
property bar; however, you can still access the Extended Property Bar by choosing Window Extended Property Bar.
You can also close the property bar by clicking the close button on the header bar.
To move or dock the property bar
• Perform a task from the following table.
To Do the following
Move the property bar Drag the header bar to a new location.
Dock the property bar Drag the header bar and place it under the menu bar. The property
snaps into place.
To show or hide group labels
1Do one of the following:
•(macOS) Choose Corel Painter 2022 menu Preferences Interface.
•(Windows) Choose Edit Preferences Interface.
2In the Property Bar area, enable one of the following options:
•Tall (with group labels) — to display the group labels
•Short (without group labels) — to hide the group labels
Exploring the Navigator panel
The Navigator panel is a convenient tool for managing many aspects of a document.
You can use the Navigator panel to better orient yourself in the document window and modify the document window display. For example,
when you’re working at a high zoom level, or with a large image, you can use the Navigator panel’s small canvas preview to display the
entire image without having to zoom out. You can also move to a different image area without having to adjust the zoom level. In addition,
you can change the zoom level or rotate the canvas from the Navigator panel.
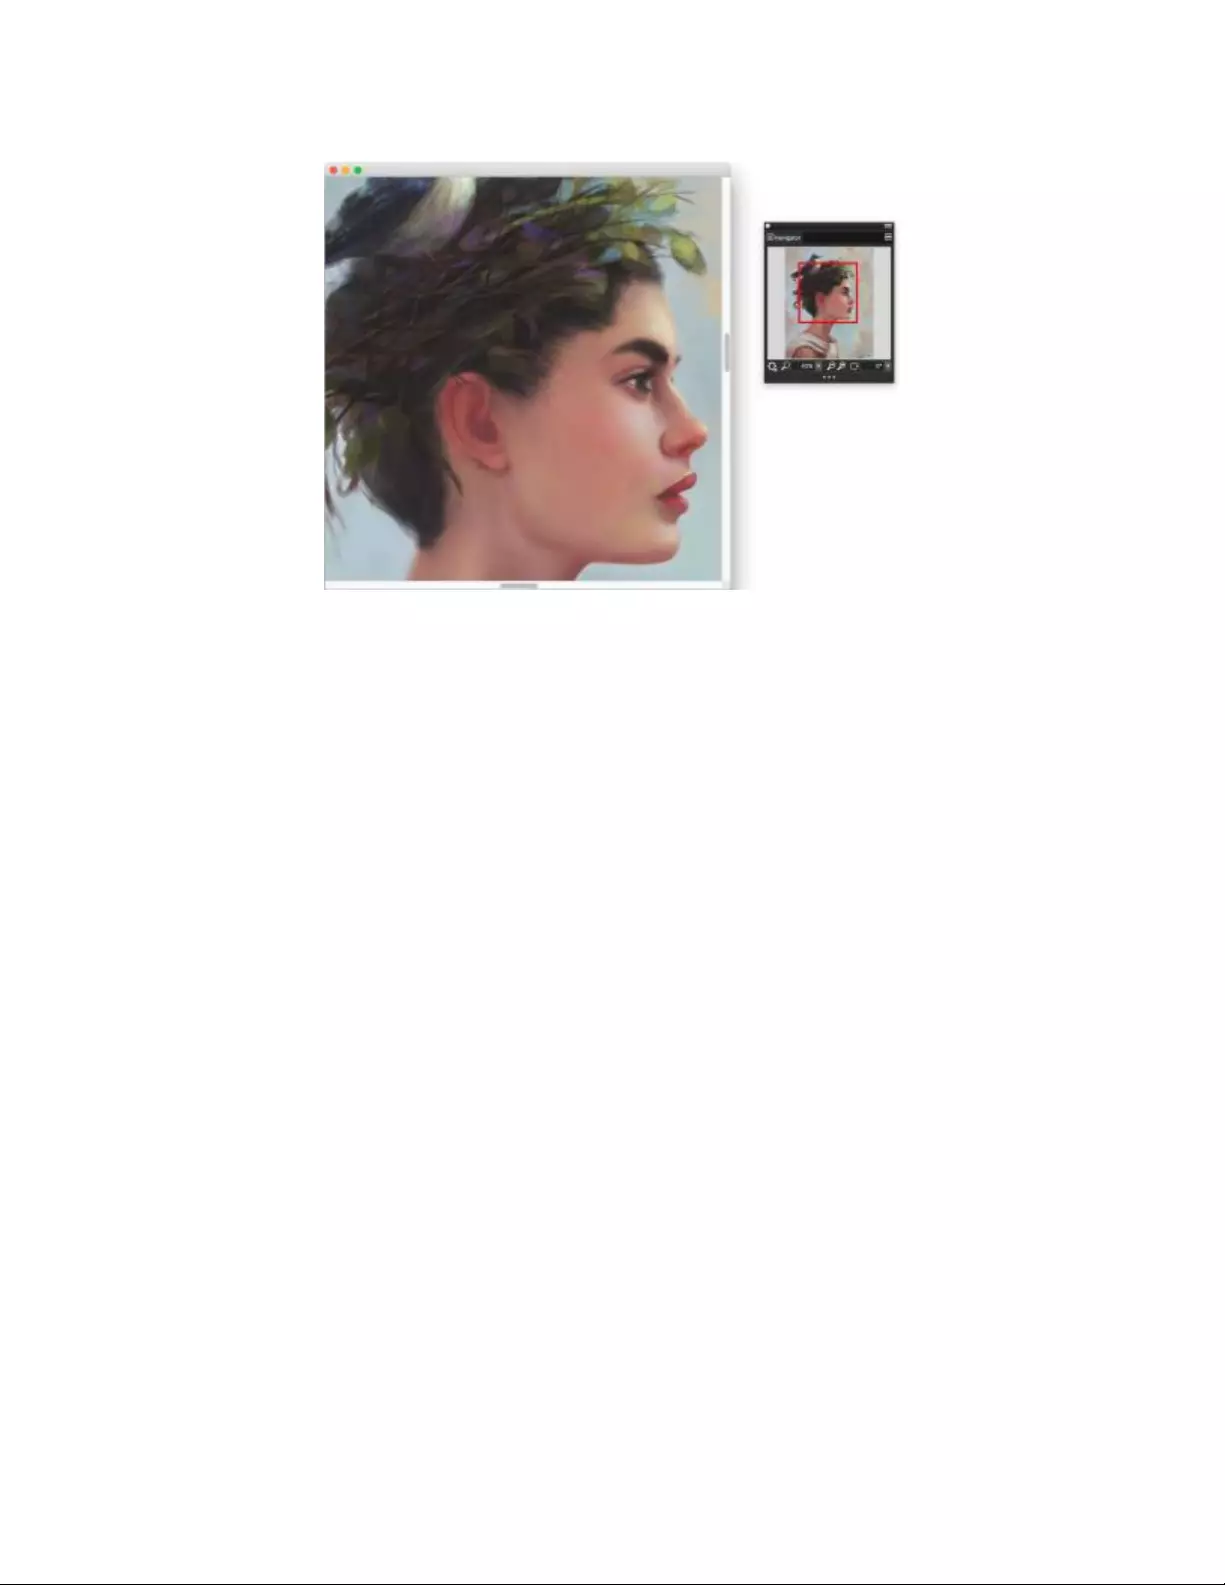
70 | Corel Painter 2022 User Guide
The Navigator’s canvas preview allows you to view the entire image even when you’re zoomed in. Artwork by Wei Hu.
The Navigator lets you enable various tools such as the drawing modes, Impasto information, tracing paper, grids, and color management.
The Navigator panel also displays document information such as the X and Y coordinates and the cursor position to help you navigate
the image. You can also view document width, height, and resolution. For more information, see “Navigating images and viewing image
information” on page 106.
Displaying and customizing the Brush Selector
The Brush Selector lets you choose a brush library, select a brush from a brush category, and browse additional brush packs that can
complement your creative set of brushes.
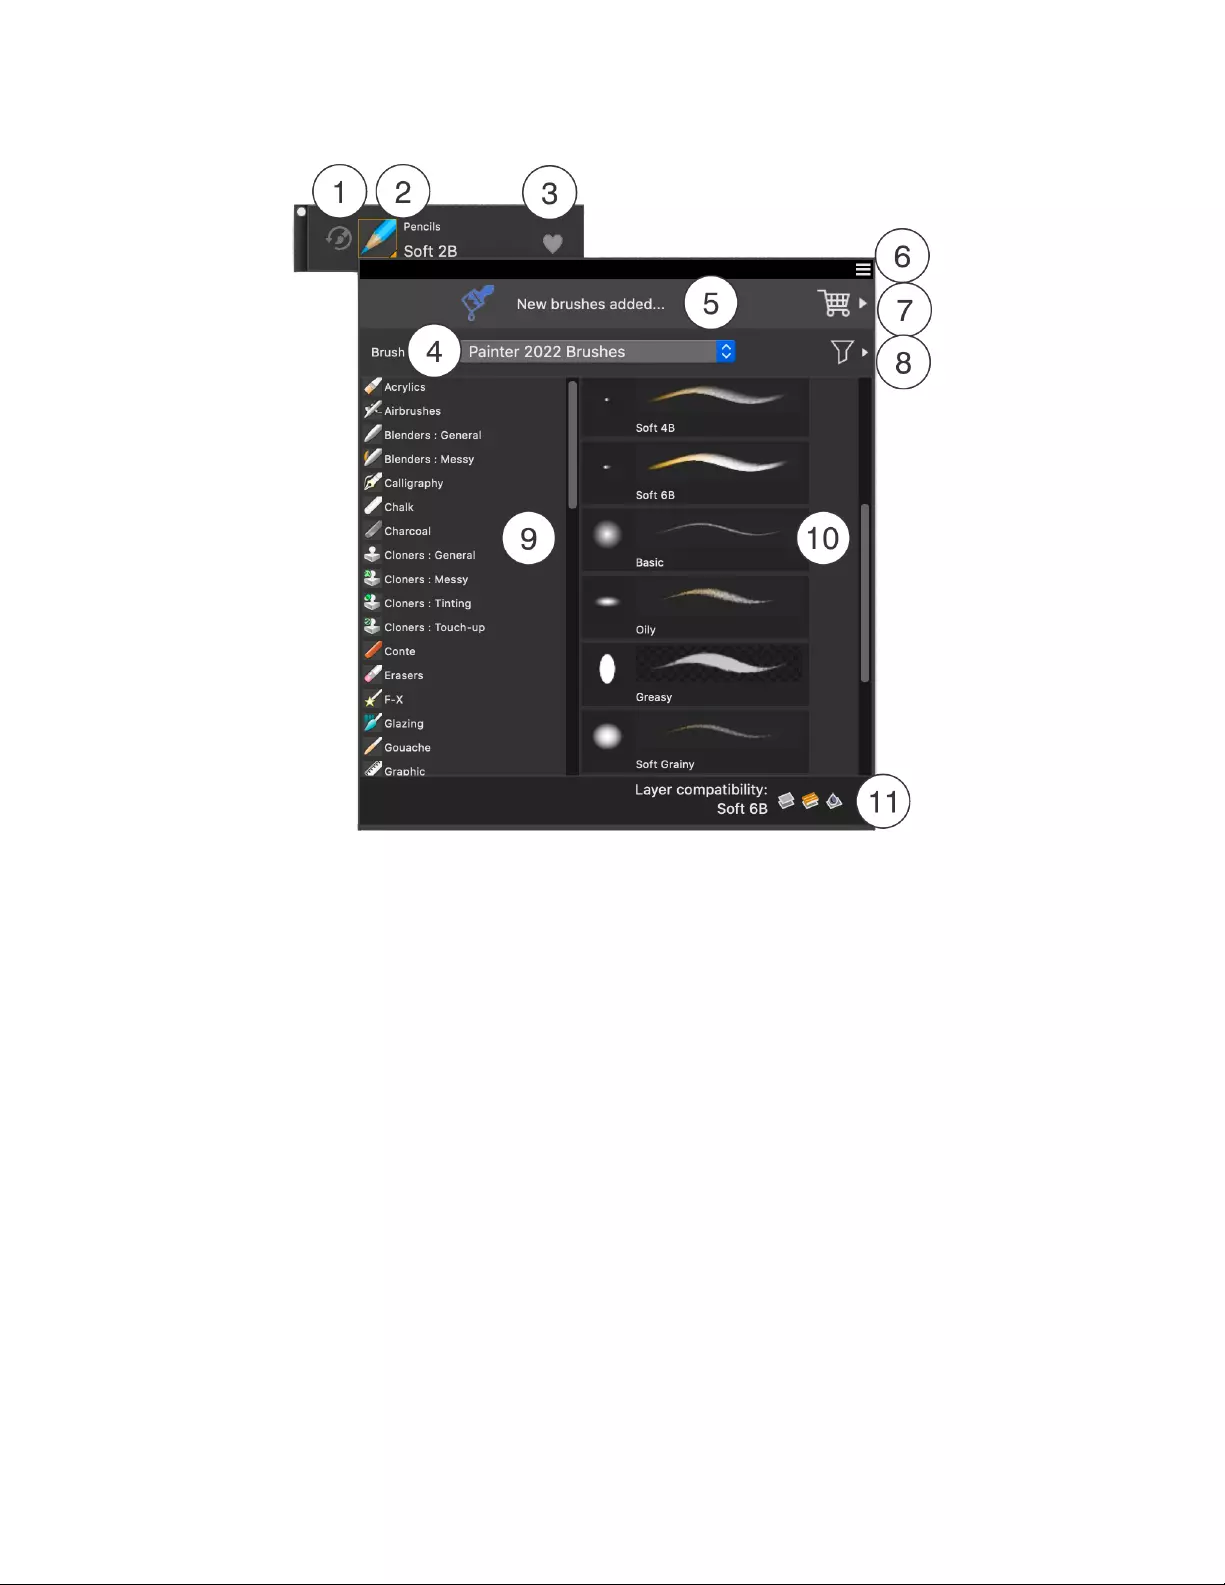
Workspace tour | 71
Circled numbers correspond to the numbers in the following table, which describes the main components of the Brush Selector.
Part Description
1. Last Used Brush Lets you access the previously used brush variant
2. Brush Selector Bar Lets you access the Brush Selector flyout
3. Mark as Favorite Lets you mark the selected brush as favorite
4. Brush Library Selector Lets you choose a brush library
5. Brush Pack Promotions bar Lets you access the Brush Pack Selector and purchase brush packs
6. Brush library options button Lets you access commands that help you organize and display
brushes in various ways
7. Brush Pack Selector Lets you browse the available brush packs

72 | Corel Painter 2022 User Guide
Part Description
8. Filter Brushes button Lets you apply brush filters to show only the brushes you need
9. Brush categories Lets you browse all categories in a brush library. Brush categories
are groups of similar brushes and media.
10. Brush variants Lets you browse the brush variants in a category. Brush variants are
specific brushes and brush settings within a brush category.
11. Layer compatibility icons Lets you identify and search for brush variants that are compatible
with the Default, Liquid Ink, Thick Paint, or Watercolor layers
The Brush Selector is also available as a floating panel that you can keep open to access brushes quickly and easily while you are painting.
The Brush Selector panel has two viewing modes: compact and full view. In full view, both the brush categories and variants are displayed.
In compact view, only the brush variants are displayed, which lets you see more brushes at a glance without the need to scroll. For more
information about grouping, resizing, and docking panels, see “Rearranging panels and palettes” on page 77.
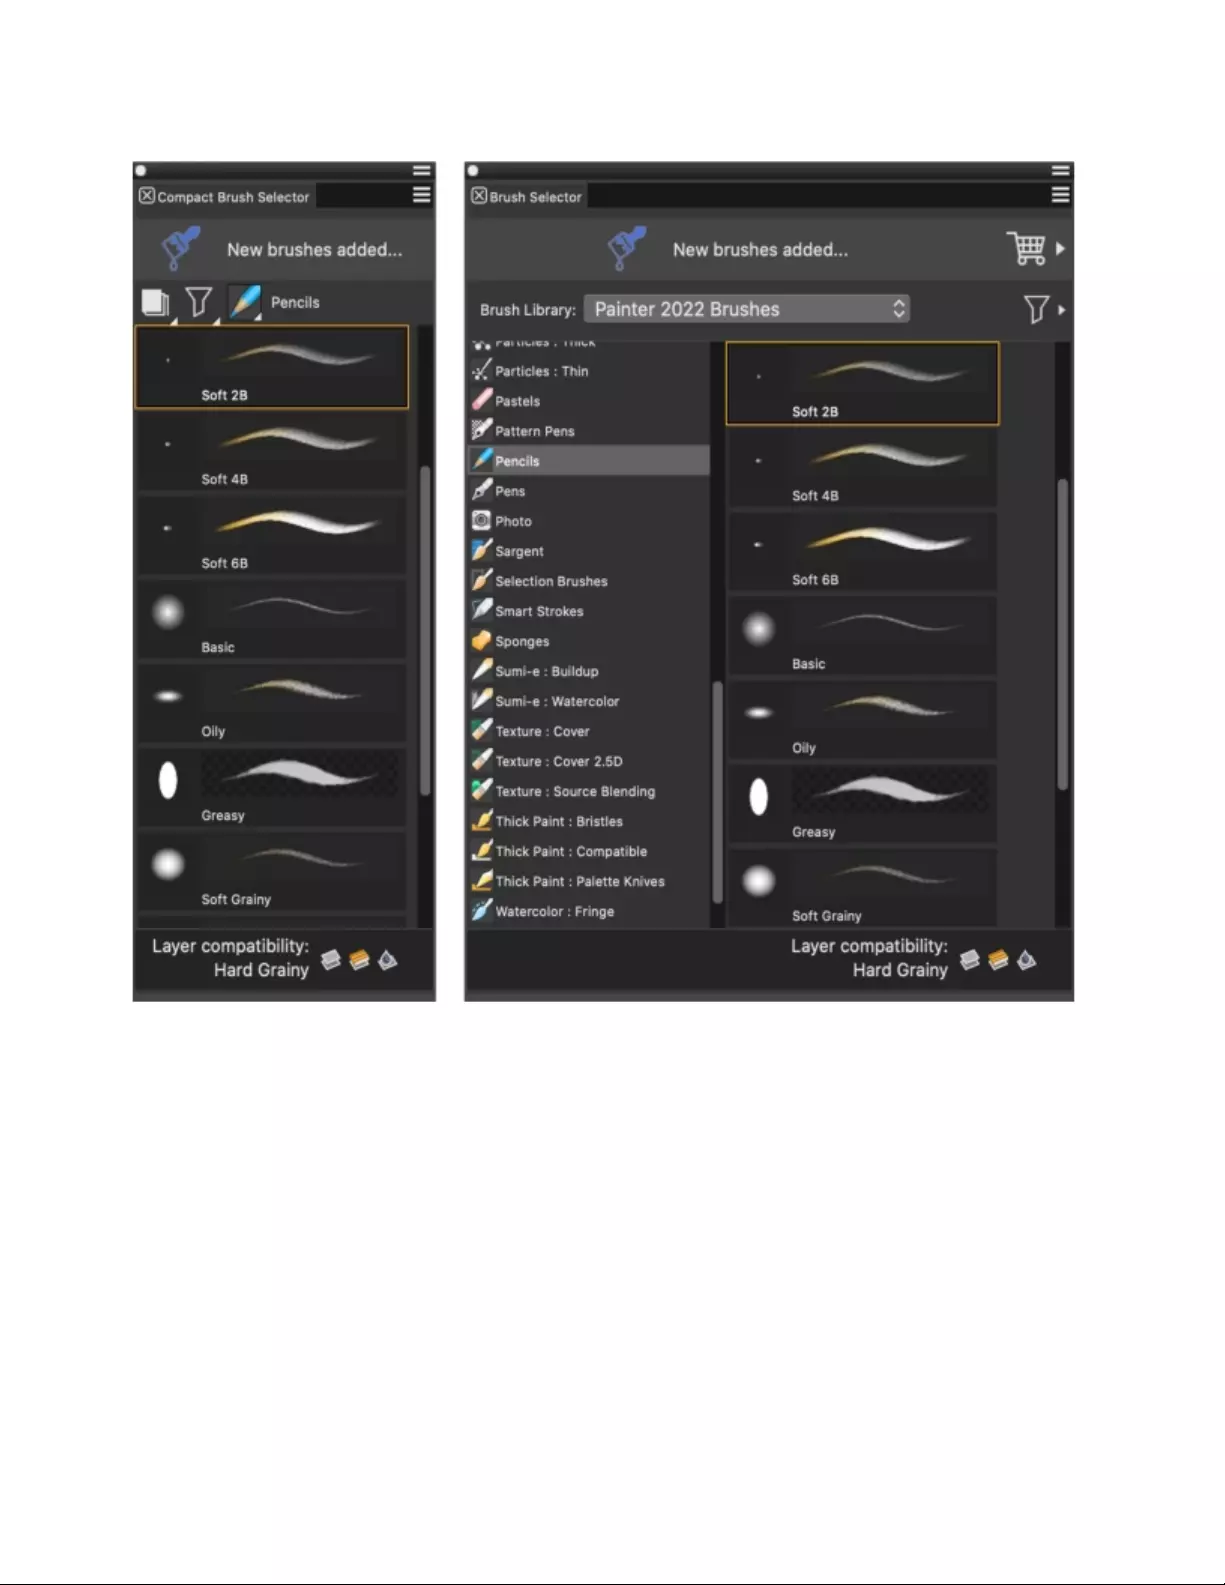
Workspace tour | 73
(left) Brush Selector panel in compact view; (right) Brush Selector panel in full view
The Brush Selector allows you to organize and display brushes in various ways. For example, you can filter brushes to show only the brushes
you need. You can also show or hide Brush Selector parts to suit your workflow. For example, you can show or hide the Brush Library
Selector, recently used brushes, brush pack promotions, and more.
The Brush Selector also lets you instantly identify which brush variants are compatible with the Default, Liquid Ink, Thick Paint, and
Watercolor layers. When you hover over a brush variant, eligible layer compatibility icons appear beside the brush name at the bottom of the
Brush Selector. Clicking a layer compatibility icon lets you find all brush variants that paint on this layer.
You can resize and move the Brush Selector.
To show or hide the Brush Selector
• Perform a task from the following table.

74 | Corel Painter 2022 User Guide
To show or hide Do the following
The Brush Selector bar Choose Window Brush Selector Bar.
The Brush Selector panel in full view Choose Window Brush Selector Panel (Full View).
The Brush Selector panel in compact view Choose Window Brush Selector Panel (Compact).
You can close the Brush Selector bar and Brush Selector panel by clicking the Close button on the header bar.
To show or hide brush filters
•In the Brush Selector, click the Filter Brushes button to show or hide the list of available brush filters.
The Filter Brushes button is disabled when you display the brush pack promotions. You can show only the brush filters or
brush pack promotions at a time.
To show or hide the Brush Pack Promotions bar
•In the Brush Selector, click the Brush library options button , and choose Show Brush Pack Promotions.
To show or hide brush pack promotions
•In the Brush Selector, click the Brush Pack Selector button to display or hide the list of brush pack promotions.
This feature is available only when the Brush Selector is in full view.
The Brush Pack Selector button appears only when you hide the list of brush filters.
To show or hide the Brush Library Selector
•In the Brush Selector, click the Brush library options button , and choose Show Brush Library Selector.
To show or hide recently used brushes
•In the Brush Selector, click the Brush library options button , and choose Show Recent Brushes.
This feature is available only when the Brush Selector is in full view.
The list of recently used brushes includes only brushes from the currently selected brush library. Switching to a different brush
library clears the most recently used brushes list.
Workspace tour | 75
To show or hide the dab and stroke preview window
•In the Brush Selector, click the Brush library options button , and choose Show Dab and Stroke Preview.
This feature is available only when the Brush Selector is in full view.
To show or hide the layer compatibility icons
•In the Brush Selector, click the Brush library options button , and choose Compatible Layers.
The layer compatibility icons are displayed by default but you can hide them.
Click a Layer compatibility icon to search for all brushes that are compatible with the Default , Liquid Ink , Thick Paint
, and Watercolor layers.
To modify the display of brush categories and variants
• In the Brush Selector, perform a task from the following table.
To Do the following
Modify the display of brush categories Click the Brush library options button , choose Category
Display, and choose one of the following:
•Categories as Icons
•Categories as List
Modify the display of brush variants Click the Brush library options button , choose Variant
Display, and choose one of the following:
•Show Dab Preview
•Show List
•Show Stroke Preview
•Sort Variants
Hide a brush category Right-click a brush category, and choose Hide Category.
Hide a brush variant Right-click a brush variant, and choose Hide Variant.
Show all previously hidden brush categories Click the Brush library options button , choose Category
Display, and choose Show All Categories.
76 | Corel Painter 2022 User Guide
Show all previously hidden brush variants Click the Brush library options button , choose Variant
Display, and choose Show All Variants.
Customize a brush category or brush variant icon Right-click a brush category or variant, and choose Set Custom
Icon. Choose the drive and folder where the image is stored. Click
the image file and click Open.
To resize the Brush Selector
• Point to the edge of the panel. When the cursor changes to a double-sided arrow, drag the edge of the panel to resize it.
By default, when group labels are displayed, the height of the Brush Selector bar is the same as that of the property bar. However, if
you want to make it more compact, you can change its height. For more information, see “Interface preferences” on page 827.
To move the Brush Selector
• Perform a task from the following table.
To Do the following
Move the Brush Selector panel Drag the Brush Selector header bar to a new location in the
application window.
Dock the Brush Selector bar Drag the Brush Selector header bar to the edge of the application
window or a panel. The bar snaps into place.
Displaying the command bars
The command bars (Window Command Bars) contain buttons and controls that are shortcuts to many of the menu commands. You
can customize the position and display of command bars. For example, you can move a command bar anywhere on screen and change its
orientation. In addition, you can adjust command bar appearance by choosing the size of icons; and showing only icons or both icons and
group labels.
The File/Edit command bar gives you quick access to commonly used commands such as starting and saving documents, undoing and
redoing actions, cutting and pasting, and accessing brush tracking options. Displaying the File/Edit command bar is especially useful for
tablets and other small-screen devices.
The File/Edit command bar
The Canvas command bar gives you quick access to commonly used commands such as flipping, rotating, and resizing the canvas, setting
canvas color, toggling tracing paper and adjusting its opacity, showing or hiding impasto and texture, and applying surface lighting. It also
includes the Paper selector so you can easily change the texture of the canvas.
Workspace tour | 77
The Canvas command bar
The Photo Art command bar gives you quick access to commonly used cloning commands (Clone and Quick Clone) and the Photo Art
panels (A.I. Style, Underpainting, Auto-Painting, and Restoration). In addition, it includes commands for applying surface texture,
adjusting colors, brightness and contrast, and equalizing.
The Photo Art command bar
You can change the orientation of the command bar.
To display the File/Edit command bar
•Choose Window Command Bars File/Edit, and choose one of the following options:
•Tall (with group labels)
•Short (without group labels)
•Column (small icons)
•Large Icons — Single Row
•Large Icons — Single Column
To display the Canvas command bar
•Choose Window Command Bars Canvas, and choose one of the following options:
•Tall (with group labels)
•Short (without group labels)
•Column
To display the Photo Art command bar
•Choose Window Command Bars Photo Art, and choose one of the following options:
•Tall (with group labels)
•Short (without group labels)
•Column (small icons)
Rearranging panels and palettes
Whether you are new to digital painting software or a long-time user, Corel Painter makes it easy to adapt your design space to your needs.
The interactive panels in Corel Painter are single tabbed containers that let you access content libraries, commands, controls, and settings.
Panels are stored in palettes.
78 | Corel Painter 2022 User Guide
A typical palette features a header bar (1), a Palette Drawer button that lets you turn a palette into a palette
drawer (2), panel tabs (3), and a Paneloptions button that allows you to access a series of related commands (4).
You can increase your efficiency by arranging task-related or frequently used panels into palettes. For example, you can display all color—
specific panels in one color palette, or display panels individually. A palette can contain one or more panels.
This palette includes three color-related panels: Color, Mixer, and Color
Set Libraries. You can access a panel’s content by clicking its tabs.
Corel Painter includes the Brush controls palette, which is a preset palette that groups all panels that contain brush-related settings.
You can add panels to and remove panels from a palette. You can also reposition a panel within a palette group or move a panel to another
palette group. You can turn a palette into a palette drawer, so you can quickly collapse it to save screen space. At any time, you can turn a
palette drawer back into a regular palette. You can resize and reposition a palette drawer like any other palette group.
You can display and hide a panel or palette. When you hide a panel or palette, they are no longer displayed in the application window. If you
want to keep the panel or palette at hand, but save screen space, you can resize or collapse them.
You can also arrange panels and palettes in the application window to quickly access the tools and controls that you use most often or
to maximize screen space. Palettes and panels float in the workspace. Docking attaches the panel or palette to the vertical edge of the
application window. Undocking detaches them from other parts of the workspace, so you can move them. To perform docking, you need to
grab a panel’s tab or a palette’s header bar.
You can save the arrangement of palettes as a custom workspace layout for later use, and you can delete this custom workspace layout
when you no longer need it.
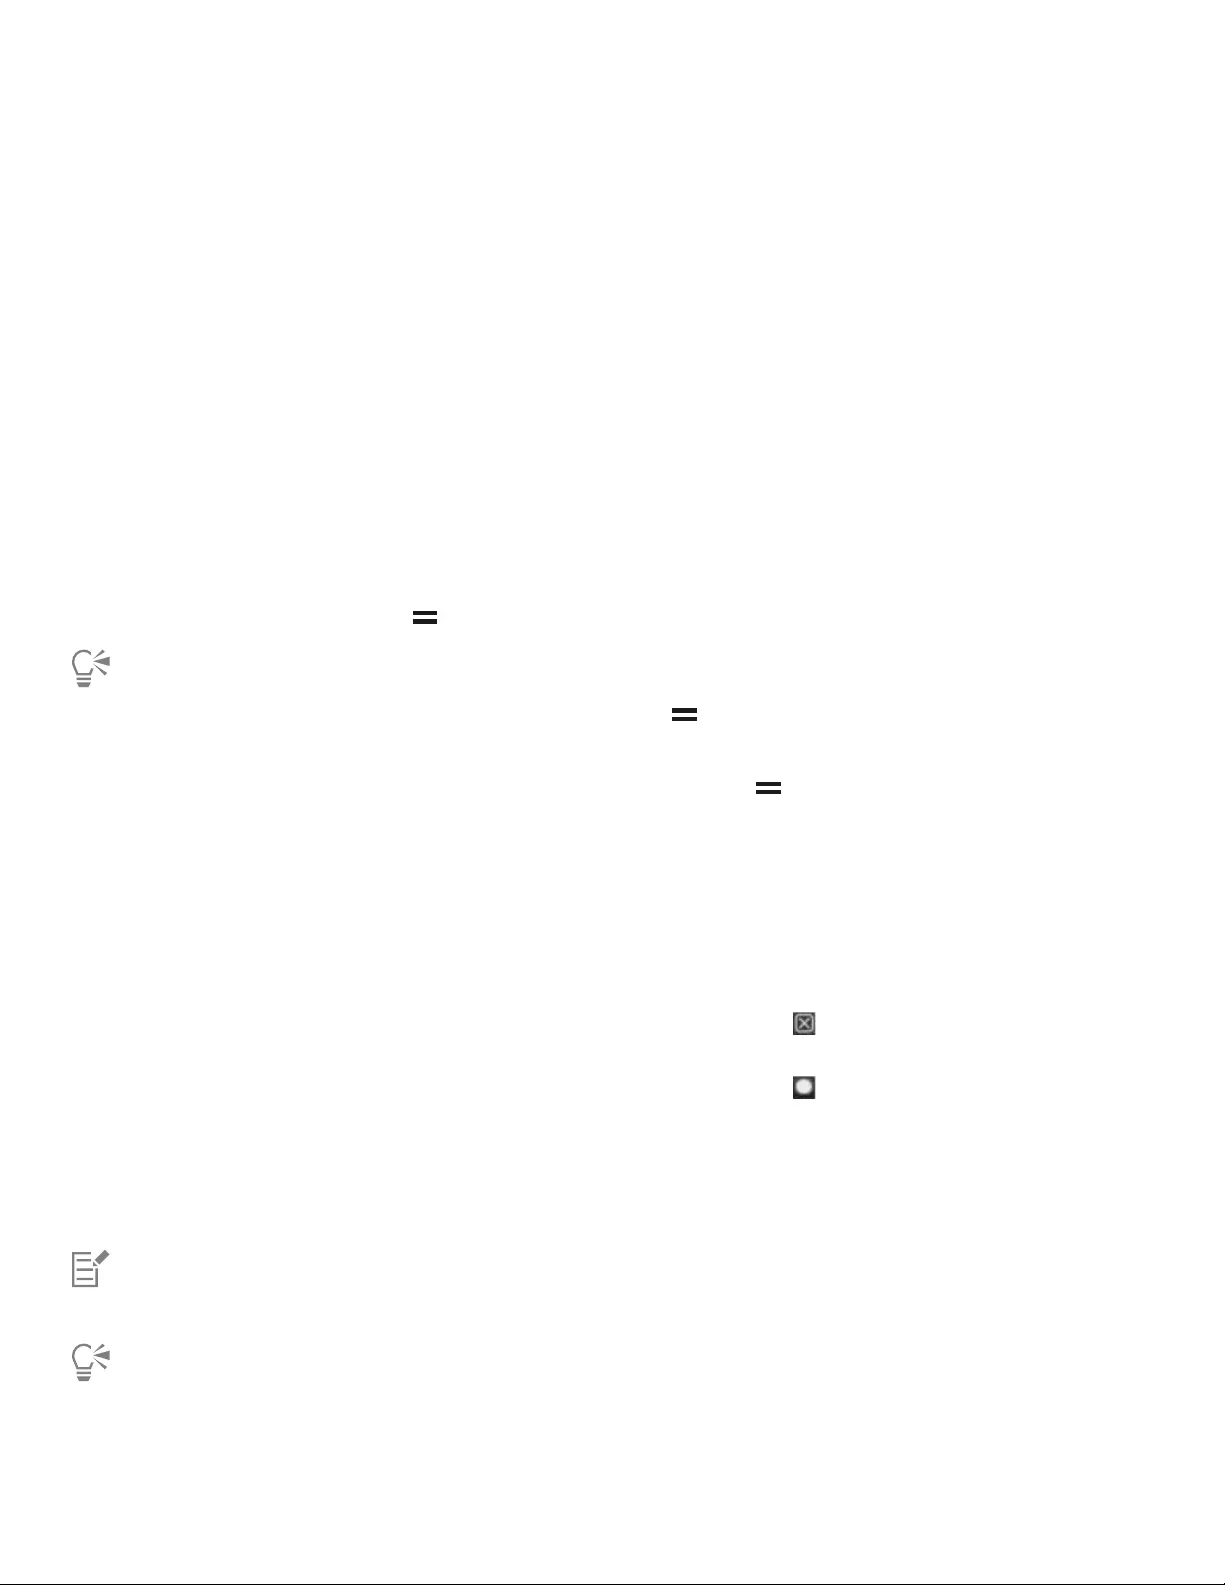
Workspace tour | 79
To group panels into palettes
• Perform a task from the following table.
To Do the following
Group panels into a palette Drag a panel by its tab to another open panel to create a group.
Add a panel to a palette group Drag the panel tab to the palette.
Remove a panel from a palette group Drag the panel tab out of the palette.
Reposition a panel in a palette group Drag the panel tab to a new location in the palette.
To create a palette drawer
•Click the Palette Drawer toggle button on the palette header bar, and click Palette Drawer.
To rename a palette drawer, click the Palette Drawer toggle button on the palette header bar, click Rename, and type a new
name.
To turn a drawer into a regular palette, click the Palette Drawer toggle button on the drawer header bar, and then click
Palette Drawer.
To hide or show a panel, palette, or palette drawer
• Perform an action from the following table.
To Do the following
Hide a panel Click the Close button on the panel tab.
Hide a palette or palette group Click the Close button on the header bar.
Show a panel Choose Window [Panel name].
Show a palette drawer Choose Window Palette Drawers [Palette Drawer name].
When you choose Window Show Panels, only the panels that were open when you chose Hide Panels are displayed.
You can restore a previously hidden palette by choosing Window, and choosing the name of a panel that is contained in the
palette.

80 | Corel Painter 2022 User Guide
To expand or collapse a panel or a palette drawer
• Perform a task from the following table.
To expand or collapse Do the following
A panel Double-click the panel tab.
A palette drawer Double-click the header bar of the palette drawer.
To resize a panel or palette
• Perform a task from the following table.
To Do the following
Resize a panel or palette proportionally Point to the lower-right corner of the panel or palette. When the
cursor changes to a double-sided arrow, drag the panel or palette
to resize it.
Resize a panel or palette vertically Point to the lower edge of the panel or palette. When the cursor
changes to a double-sided arrow, drag the edge of the panel or
palette to resize it.
Resize a panel or palette horizontally Point to the right edge of a panel or palette header. When the
cursor changes to a double-sided arrow, drag the edge of the panel
or palette to resize it.
To dock or undock a palette
• Perform a task from the following table.
To Do the following
Dock a palette Drag the palette header bar to the vertical edge of the application
window. The palette snaps into place when it lines up with the
edge.
Undock a palette Drag the blank area to the right of the panel tabs away from the
edge of the application window.
Dock a palette drawer Before you dock the palettes in a palette drawer, save your
arrangement of palettes as a custom layout so you can return to
it at any time. Choose the palette drawer that you want to dock.
Click the Palette Drawer toggle button on the palette header
bar, and disable Palette drawer. Grab the header bar, and drag the
entire group of palettes towards the vertical edge of the application
window. Ensure the cursor goes all the way to the edge of the
Workspace tour | 81
To Do the following
application window. When a blue highlight appears, release the
mouse button or lift the stylus. The palettes snap into place. After
you dock the drawers that you want, save your layout.
Tips:
•You can undock the palettes, but only one at a time.
•You can quickly return to the arrangement of palettes that you
saved in the first step by choosing Window Layout [Layout
name], where Layout name is the name of your custom layout.
Dock a panel Drag the panel tab to the vertical edge of the application window.
The panel snaps into place when it lines up with the edge.
Undock a panel Drag the panel tab away from the application window.
If there’s not enough space along the vertical edge of the application window (for example, if you have a lot of expanded palettes),
you may not be able to dock a panel or a palette. Collapse one or multiple panels to create sufficient space for docking.
You cannot dock panels or palettes with toolbars.
To access additional panel options
•In the panel, click the Panel options button , and choose an option.
To save an arrangement of palettes as a workspace layout
1Choose Window Layout Save Layout.
2In the Palette Layout Name dialog box, type a name in the New Layout list box.
The workspace layout appears as a menu item under Window Layout.
You can display a saved arrangement of palettes by choosing Window Layout [Layout name].
You can restore the default palette arrangement at any time by choosing Window Layout Default.
To delete a workspace layout
1Choose Window Layout Delete Layout.
2In the Delete Palette Layout dialog box, choose a layout from the Palette Layout list box.
Exploring panels
The following table contains a list of the panels available in Corel Painter.
Panel Description
Brush Control panels

82 | Corel Painter 2022 User Guide
Panel Description
The brush control panels include: General, Performance, Stroke
Preview, Dab Preview, Brush Shape, Brush Media, Brush
Calibration, and Mouse.
There Brush Shape panels (Window Brush Control Panels
Brush Shape) include: Size, Size Library, Angle, Spacing,
Smoothing, Dab Profile, Dab Stencil, Computed Circular, Static
Bristle, Captured, Dynamic Speckle, Bristles, RealBristle, Thick
Paint — Shape, Particles — Common, Flow Particles, Gravity
Particles, Spring Particles, Airbrush, Hard Media, Rake, Multi
The Brush Media panels (Window Brush Control Panels
Brush Media) include: Grain, Opacity, Glazing, Stroke Attributes,
Blending, Impasto, Artists’ Oils, Thick Paint — Wetness, Thick
Paint — Media, Digital Watercolor, Watercolor, Real Watercolor,
Particles — Thin Lines, Real Wet Oil, Liquid Ink, Image Hose,
Clone Color, Clone Method, Texture Brushes, Color Variability,
Color Expression, Stroke Jitter
Allow you to customize brush variants. For more information, see
“Adjusting brushes with brush controls” on page 337.
Advanced Brush Controls panel Generates a grouping of brush control panels that are relevant to
the currently selected brush. For more information, see “Exploring
Brush Controls” on page 338.
Color panels
Color Panel (Full View)
Color Panel (Compact)
Let you choose main and additional colors for painting in Corel
Painter documents. For more information, see “Choosing colors
from the Color panel” on page 250.
Harmonies Lets you use harmony rules to create color harmonies
Mixer Lets you mix and blend colors as you would on an artist’s palette.
For more information, see “Exploring the Mixer panel and mixing
controls” on page 260.
Color Set Libraries Displays the colors in the current color set so you can organize
groups of colors. For more information, refer to “Working with
color sets” on page 267.
Papers panel
Papers Lets you apply and edit paper textures as well as open and manage
paper libraries
Media panels

Workspace tour | 83
Panel Description
Patterns, Gradients, Nozzles, Looks, Textures, and Weaves panels Let you apply and edit patterns, gradients, textures, and weaves as
well as open and manage media libraries
Image Portfolio and Selection Portfolio Contain all images or selections in the current library. You can view
the items as thumbnails or in a list as well as preview the current
item. For more information, see “Storing layers as images in the
Image Portfolio” on page 581 and “Working with the Selection
Portfolio” on page 610.
Flow Maps panel
Flow Maps panel Lets you apply and manipulate flow maps as well as open, manage,
and navigate flow map libraries. For more information, see
“Applying and adjusting flow maps” on page 475 and “Choosing
flow maps and compatible brush variants” on page 476.
Navigator, Clone Source, and Reference Image panels
Navigator panel Lets you navigate the document window. You can also view
document information, such as width and height; X and Y
coordinates and the cursor position; context-sensitive information
based on a selected tool; and unit information, such as pixels,
inches, and resolution. For more information, see “Exploring the
Navigator panel” on page 69.
Clone Source panel Lets you open and manage clone sources. For more information,
see “Cloning workflows” on page 192.
Reference Image panel Lets you display an inspirational image in the document window
while maintaining focus on the canvas. For more information, see
“Displaying reference images” on page 158.
Layers and Channels panels
Layers Lets you preview and arrange all layers in a Corel Painter document.
You can use Dynamic Plug-ins, add new layers (including
Watercolor and Liquid Ink layers), create layer masks, and delete
layers. In addition, you can set the composite method and
depth, adjust the opacity, and lock and unlock layers. For more
information, see “Layers” on page 539.
Channels Lets you preview thumbnails of all the channels in a Corel Painter
document, including RGB composite channels, layer masks, and
alpha channels. From the panel, you can also load, save, and invert
existing channels, and create new channels. For more information,
see “Alpha Channels” on page 583.

84 | Corel Painter 2022 User Guide
Panel Description
Photo Art panels
Underpainting Lets you adjust tone, color, and detail in a photo in preparation
for auto-painting. This panel is used in the first step of the
photo-painting process. For more information, see “Creating
underpaintings” on page 185.
Auto-Painting Lets you specify a range of settings that control how brushstrokes
are applied. This panel is used in the second step of the photo-
painting process. For more information, see “Auto-painting photos”
on page 187.
Restoration Lets you fine-tune a painting by providing brushes that help you
restore detail. This panel is used in the third step of the photo-
painting process. For more information, see “Restoring detail to
paintings” on page 189.
A.I. Style Lets you apply an AI style or preset to prepare an image for Photo
Art. For more information, see “Applying AI styles” on page 180.
Composition panels
Divine Proportion Lets you customize the Divine Proportion guide — a tool that helps
you plan a layout according to a classic composition method. For
more information, see “Using the Divine Proportion tool” on page
242.
Layout Grid Lets you customize the Layout Grid — a tool that helps you divide
your canvas so that you can plan your composition. For more
information, see “Using the Layout Grid” on page 229.
Text and Scripts panels
Text Lets you perform all text-related tasks, such as choosing fonts,
adjusting opacity, and applying drop shadows. For more
information, refer to “Adding text” on page 781.
Scripts Lets you access all commands and settings related to scripts. For
example, you can open, close, play, and record scripts from the
Scripts panel. For more information, see “Using scripts to automate
tasks” on page 805.
Working with sliders
In many panels and property bars in Corel Painter, sliders let you interactively adjust brush settings.
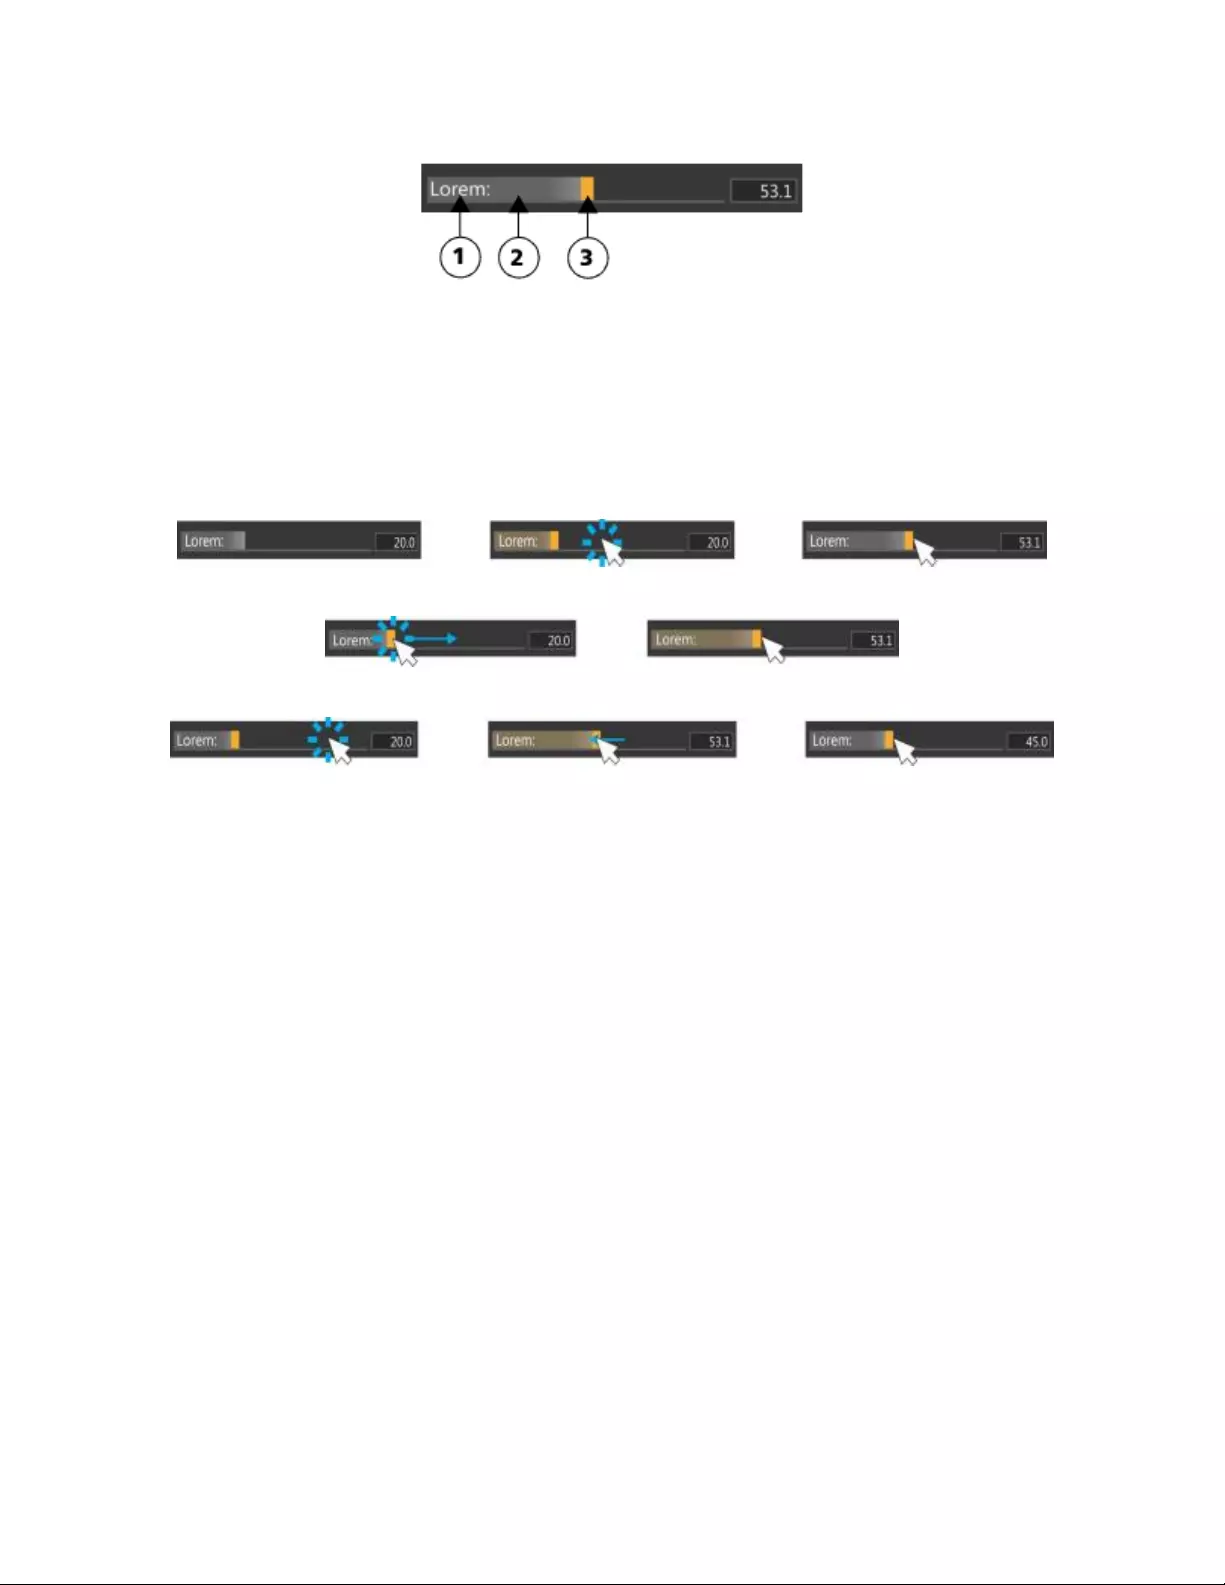
Workspace tour | 85
The label (1), drag area (2), and control point (3) of a slider. As you hover over a slider, the end point (3) is highlighted.
With sliders, you can change values in many different ways. Click anywhere along a slider or grab the control point and drag. Adjust a value
with great precision by using modifier keys or adjust values in 1% increments.
To adjust a value
• Do one of the following:
• Click anywhere along a slider.
• Drag the control point.
• Click anywhere along a slider and drag.
To adjust a value with precision
• Hold down Command (macOS) or Ctrl (Windows) and drag.
To adjust a value in 1% increments
• Click anywhere along a slider and use the arrow keys.
Creating and modifying custom palettes
You can create custom palettes to speed up your work and quickly access the brushes, papers, flow maps, media, menu commands, and
tools that you use most often. For example, you can place items from the Brush Selector panel or any of the Media panels in a custom
palette. You can also add commands from the main menus or panel options to custom palettes.
Items that appear on a custom palette are references (aliases or shortcuts) to the original. This means that if you change the original — for
example, by modifying and saving a brush variant — the custom panel button loads the newest version. However, if you delete the original,
Corel Painter won’t be able to find the item again to load in the custom palette.
You can change how items on a custom palette are displayed. For example, you can display them as text, icons, or wide icons.
Custom palettes behave like the standard panels. For more information about working with panels, see “Rearranging panels and palettes”
on page 77.
To quickly create a custom palette
• Press Shift, and do any of the following:

86 | Corel Painter 2022 User Guide
• Drag a brush variant from the Brush Selector panel to the document window.
•Drag a paper, flow map, or media library thumbnail from the Paper libraries (Window Media Panels Papers), Flow Map libraries
(Window Media Panels Flow Maps), or the other Media panels (Window Media Panels [Textures, Patterns, Gradients,
Nozzles, Looks, Weaves Library Panel]) to the document window.
To add menu commands, controls, or tools to a custom palette
1Choose Window Custom Palette Add Command.
2From the Select Custom Palette list box, choose New to create a new palette or select an existing custom palette.
3With the Create Palette/Add Command dialog box open, perform a task from the following table:
To add Do the following
A menu item Choose a menu item from a default Corel Painter menu.
Additional controls Choose a menu item from the Other menu.
A panel, or any item included in a panel’s options flyout menu Choose a menu item from the Panel Menus menu.
A toolbox tool Choose a menu item from the Tools menu.
An item from an open palette Click the item.
4In the Create Palette/Add Command dialog box, click Add, and then click OK.
You can add brush variants that are stored in different brush libraries to the same custom palette. When you choose a brush variant
from the custom palette, the brush library in which the brush variant is stored is automatically loaded in the Brush Selector. This
allows you to quickly switch between brush libraries.
To rearrange controls on a custom palette
• Hold down Shift and drag a control on a custom palette to a new position.
To open or close a custom palette
• Perform a task from the following table.
To Do the following
Open a custom palette Choose Window Custom Palette [Custom Panel Name].
Close a custom palette On the custom panel header bar, click the Close button.
To change the appearance of items on a custom palette
1Do one of the following:
• (macOS) Holding down Control, click an item.
• (Windows) Right-click an item.

Workspace tour | 87
2Perform a task from the following table.
To Do the following
Use a custom icon Choose Set Custom Icon, and locate the image you want.
Display a text label for each item Choose Text View.
Display an icon for each item Choose Icon View or Wide Icon View.
To change the size of the icons, click the Options button in the custom palette, and choose Small Icons or Large Icons.
Renaming and deleting custom palettes
You can manage your custom palettes in the Custom Palette Organizer. Corel Painter names custom palettes “Custom 1”, “Custom 2,” and
so on. For ease of use, you can rename them.
Corel Painter keeps your custom palettes from one session to the next. You can also save a custom palette to a file. For more information, see
“Saving, exporting, and importing custom palettes” on page 87.
You can delete obsolete custom palettes or those you don’t use very often.
To rename a custom palette
1Choose Window Custom Palette Organizer.
2Choose a palette from the Custom Palette list.
3Click Rename.
4In the Palette Name dialog box, type a name in the New Palette text box.
To delete a custom palette
1Choose Window Custom Palette Organizer.
2Choose a palette from the Custom Palette list.
3Click Delete.
Saving, exporting, and importing custom palettes
You can save a custom palette as a Painter Custom Toolbox (BOX) file so that its custom content such as custom brushes, papers, patterns,
and flow maps are saved with the file. You can share the saved custom toolbox (palette) with others or store it for later use.
You can also export a custom palette to the Painter Palette File (PAL) format to make it compatible with earlier versions of Corel Painter.
However, any custom content included in the palette is not saved with the file.
To save a custom palette as a Painter Custom Toolbox (BOX) file
1Choose Window Custom Palette Organizer.
2Choose a palette from the Custom Palette list.
3Click Save As BOX.
4In the New Palette File dialog box, type a name in the File Name text box.

88 | Corel Painter 2022 User Guide
5Choose the drive and folder where you want to save the file.
It’s a good idea to store all saved palettes in the same folder.
Custom nozzles, scripts, gradients, looks, and weaves are not supported. Buttons for such custom content will not function when
the custom toolbox is imported.
Any non-custom items that are already in the application appear as duplicates.
To export a custom palette to the Painter Palette File (PAL) format
1Choose Window Custom Palette Organizer.
2Choose a palette from the Custom Palette list.
3Click Export As PAL.
4In the New Palette File dialog box, type a name in the File Name text box.
5Choose the drive and folder where you want to save the file.
It’s a good idea to store all exported palettes in the same folder.
Custom content is not saved with the file.
To import a custom palette
1Choose Window Custom Palette Organizer.
2In the Custom Palette Organizer, choose a palette from the Custom Palette list.
3Click Import.
4In the Open Palette File dialog box, choose the file where the custom palette is saved.
5Click Open.
Only custom palette files created with Corel Painter version 8.1 or later are supported. Custom palettes created with version 7 or
earlier cannot be loaded.
Working with libraries
A library is a storage place that helps you organize and manage a collection of similar items, such as brushes or paper textures. For example,
the default paper textures are contained in the Paper Textures library, which is loaded by default when you open Corel Painter. As you
customize paper textures and other resources, you can save them to your own libraries. Libraries are available for brushes, gradients, layers,
lighting, looks, nozzles, paper textures, patterns, selections, scripts, and weaves. For more information, see “Libraries” on page 307 and
“Importing and exporting brush libraries, categories, and variants” on page 330.

Workspace tour | 89
The Papers panel lets you choose, organize, and apply paper textures.
Creating, importing, exporting, and deleting workspaces
Corel Painter lets you completely customize your workspace to suit your workflow needs. You can customize Brush libraries, Paper libraries,
and Portfolios and save these changes to use later. In addition, you can easily create multiple workspaces, each with different libraries and
portfolios. You can even share these customized workspaces with others by importing or exporting them. However, if you are importing a
workspace that was created in an older version of Corel Painter, only libraries and custom palettes are preserved in Corel Painter 2022.
You can also delete any obsolete workspaces.
To create a new workspace
1Choose Window Workspace New Workspace.
2Type a name in the Workspace Name text box.
3From the Based On list box, choose the workspace on which you want to base the new workspace.
4Click Save.
The application switches to the new workspace.
To switch to a different workspace
•Choose Window Workspace [Workspace Name].
To import a workspace
1Choose Window Workspace Import Workspace.

90 | Corel Painter 2022 User Guide
2Choose the workspace file that you want to import.
3Click Open.
To export a workspace
1Choose Window Workspace Export Workspace.
2Choose the workspace that you want to export.
3Click Save.
To revert to the default workspace
•Choose Window Workspace Default.
Corel Painter lets you modify the default workspace, so this workspace may eventually differ from the factory default workspace.
If you restore the factory default workspace, you will lose all customizations unless you save the workspace. For more information,
see “Restoring the default Corel Painter settings” on page 90.
To delete a workspace
1Choose Window Workspace Delete Workspace.
2From the Workspace list box, choose the workspace that you want to delete.
3Click Delete.
If you are trying to remove the active workspace, you may be prompted to choose a new active workspace.
Restoring the default Corel Painter settings
When restoring the Corel Painter workspace to its default factory settings, you can keep some customizations, or you can remove all
modifications that you made to the application.
The following customizations can be kept:
• All custom brushes
• All other libraries (papers, scripts, nozzles, etc.). This option lets you save all papers, flow maps, patterns, gradients, nozzles, looks,
weaves, images, selections, and scripts.
• Custom palettes. Note that palette location and icon settings will be lost.
The following customizations are lost after Corel Painter is restored to its default settings:
• Palette Layout(s)
• Color Sets
• All preferences (Preferences dialog box)
• Customized keyboard shortcuts
• Brush tracking and calibration settings
• Recent brushes
• Color Management presets
• Perspective Guides, Layout, and Divine Proportion presets
You can reset all workspaces — the current one and any workspaces you created or imported, or you can reset only the current workspace.
To restore Corel Painter to its default factory settings
1Hold down Shift, and start Corel Painter.
2Choose one of the following options:

Workspace tour | 91
•Keep some customizations — lets you keep custom brushes, other customized libraries as well as custom palettes
•Restore all settings to factory defaults — removes all customizations that you made to the application including custom brushes and
palettes
3Click one of the following buttons:
•Reset All Workspaces — resets the current workspace and any other workspaces you created or imported
•Reset Current Workspace — resets only the current workspace
When you choose to restore all workspaces, all custom workspaces are deleted. Only the default workspace is preserved and
restored to the factory settings.

92 | Corel Painter 2022 User Guide

A short tour of Corel Painter for users of Adobe Photoshop | 93
A short tour of Corel Painter for users of Adobe Photoshop
by Cher Threinen-Pendarvis
Corel Painter is known for its responsive, realistic brushes, multitude of rich textures, and fabulous special effects, which cannot be found in
any other program. The biggest difference that you will notice between Adobe Photoshop and Corel Painter is the warmth and texture of the
Natural-Media brushes and paper textures of Corel Painter. You’ll find brushes with realistic bristles that lay down oily paint and dry-media
brushes, such as variants in the Chalk and Pastels categories, that are sensitive to textures on the canvas. Now, let’s get started!
Before we begin the tour, you need to make sure that you are displaying the default panels and palettes. To display the default settings,
choose the Window menu, and choose Layout Default.
Property bar
At the very top of the screen, you’ll see the property bar, which is similar to the Options bar in Photoshop. The property bar changes
contextually, depending on the tool that you choose from the toolbox.
The property bar with the Grabber tool selected from the toolbox
Brush Selector bar
On the far left of the property bar is the Brush Selector bar, which lets you open the Brush Selector flyout. The Brush Selector contains the
amazing brush categories and brush variants of Corel Painter, such as the Real watercolor brush category and its variants.

94 | Corel Painter 2022 User Guide
The Brush Selector bar (left) lets you choose a brush category and a brush variant (right).
Color panel
On the upper right corner of your screen you’ll see the large, beautiful Color panel, which lets you choose colors. You can choose colors by
using the Hue Ring and the Saturation/Value Triangle. However, if you prefer to mix color by using numbers, you can adjust the three sliders
that are located under the Hue Ring. By clicking the panel options button on the right side of the Color panel, you can set the sliders to
display either Red, Green, and Blue, or Hue, Saturation, and Value.
Also located on the Color panel is the Clone Color button, a useful control that lets you paint with color from a source image. On the
left of the Color panel are the Main Color swatch or Additional Color swatch . The color swatches in Corel Painter
operate differently than the Foreground and Background Color squares in Photoshop. To change the color, you can double-click either the
Main Color swatch or the Additional Color swatch and then choose a new color on the Hue Ring. Or you can click in the Saturation/Value
Triangle to choose a new tint or shade. You can use the additional color to create gradients or to use brushes that paint more than one color.
Unlike the Background Color in Photoshop, the additional color does not affect the canvas.
Before moving on with the tour, click the Main Color swatch to select it.
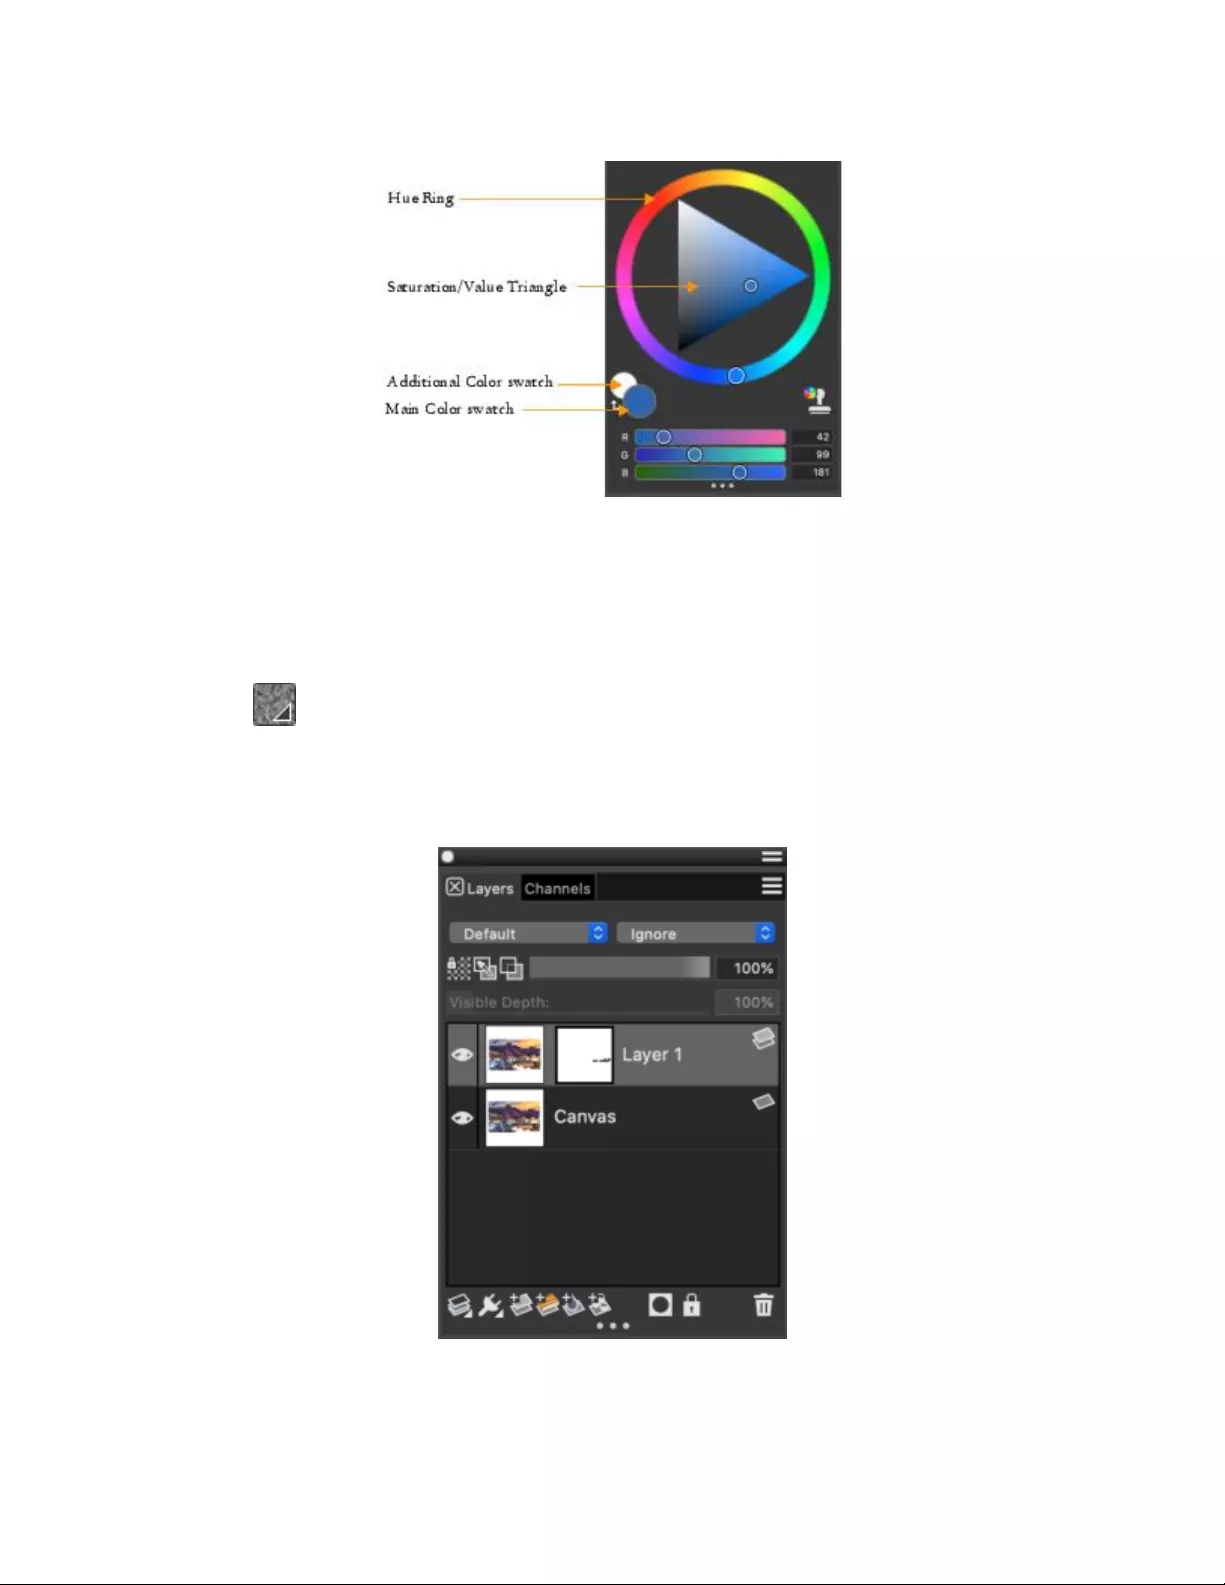
A short tour of Corel Painter for users of Adobe Photoshop | 95
Color panel
In Corel Painter, you can resize the Color panel by dragging the handle in the lower-right corner of the panel to resize it. Resizing the Color
panel lets you select colors more accurately.
Textures
A basic paper texture is automatically loaded when you start Corel Painter. You can access additional rich paper textures by clicking the Paper
Selector flyout button on the property bar or opening the Papers panel (Window menu Media Panels Papers).
Layers and mask channels
In Corel Painter, you can open Photoshop files that contain pixel-based layers and layer masks. You can access and edit the layers and layer
masks by using the Layers panel, much like in Photoshop. The files you open in Corel Painter have multiple channels intact.
Layers panel

96 | Corel Painter 2022 User Guide
Photoshop Layer Styles
If you are using native Photoshop layer styles, such as the Drop Shadow layer style, make sure that you preserve the original Photoshop file in
your archive before you convert the layer style information. That is, save the file with the live layer styles in the Photoshop (PSD) file format,
and then save a new copy of this file. In the new file, convert the layer style information into pixel-based layers before importing the file into
Corel Painter.
To convert a layer that has a Drop Shadow layer style, select the layer, and then choose Layers Layers Style Create Layer. A word of
caution: Some aspects of the effects cannot be reproduced with standard layers.
File formats
Corel Painter gives you the flexibility of opening Photoshop (PSD) files that are saved in RGB, CMYK, and grayscale modes while preserving
pixel-based layers and mask channels (also referred to as alpha channels). You can also open TIFF files in Corel Painter, but only one mask
channel is preserved. Layered TIFF (TIF) files that you create in Photoshop are flattened when you open them in Corel Painter. When you work
exclusively with RIFF (RIF), which is the native file format for Corel Painter, you retain Corel Painter specific elements when saving files. For
instance, special paint media layers, such as Watercolor layers, require the RIFF format to retain the live “wet” capabilities. However, if you
open a Photoshop file in Corel Painter but plan on reopening the file in Photoshop, you should continue to save the file to the Photoshop
format.
Now roll up your sleeves, grab your stylus, and continue to explore Corel Painter.
About the author
An award-winning artist and author, Cher Threinen-Pendarvis is a pioneer in digital art. She has been widely recognized for her mastery
of Corel Painter, Adobe Photoshop, and the Wacom pressure-sensitive tablet and has used these electronic tools since they were first
released. Her artwork has been exhibited worldwide, her articles and art have been published in many books and periodicals, and she
is a member of the San Diego Museum of Art Artist Guild. She has taught Corel Painter and Adobe Photoshop workshops around the
world and is the principal of the consulting firm Cher Threinen Design. Cher is the author of The Photoshop and Painter Artist Tablet Book,
Creative Techniques in Digital Painting, Beyond Digital Photography, and all ten editions of The Painter Wow! book. Visit Cher’s web site at:
www.pendarvis-studios.com.

Creating, navigating, and manipulating documents | 97
Creating, navigating, and manipulating documents
The Corel Painter application provides a digital workspace in which you can create new images, or alter existing images, by using the
Natural-Media tools and effects. Your working image, known as a document, is displayed in a document window. This document window
includes navigation and productivity features to help you work efficiently.
As you create an image, you can save your document in various file formats, such as RIFF (the native Corel Painter format), JPEG, TIFF, and
PSD (Adobe Photoshop). Corel Painter also lets you open or import images saved in many other file formats.
This section contains the following topics:
•“Creating documents” (page 98)
•“Understanding resolution” (page 100)
•“Opening and placing files” (page 101)
•“Creating and opening templates” (page 104)
•“Switching document views” (page 104)
•“Navigating images and viewing image information” (page 106)
•“Zooming images” (page 108)
•“Rotating images and the canvas” (page 111)
•“Flipping images” (page 112)
•“Repositioning images” (page 114)
•“Cropping images” (page 115)
•“Resizing images and the canvas” (page 115)
•“Saving and backing up files” (page 118)
•“Choosing a file format” (page 119)
•“Emailing documents” (page 120)
•“Closing documents and quitting the application” (page 121)
•“Using two monitors” (page 121)
•“Support for tablets and other devices” (page 121)
•“Multi-touch support” (page 122)
•“Trackpad support (macOS)” (page 123)
•“Touch Bar support (macOS)” (page 124)
•“Wacom Intuos support” (page 124)
•“Drag-and-drop features” (page 125)
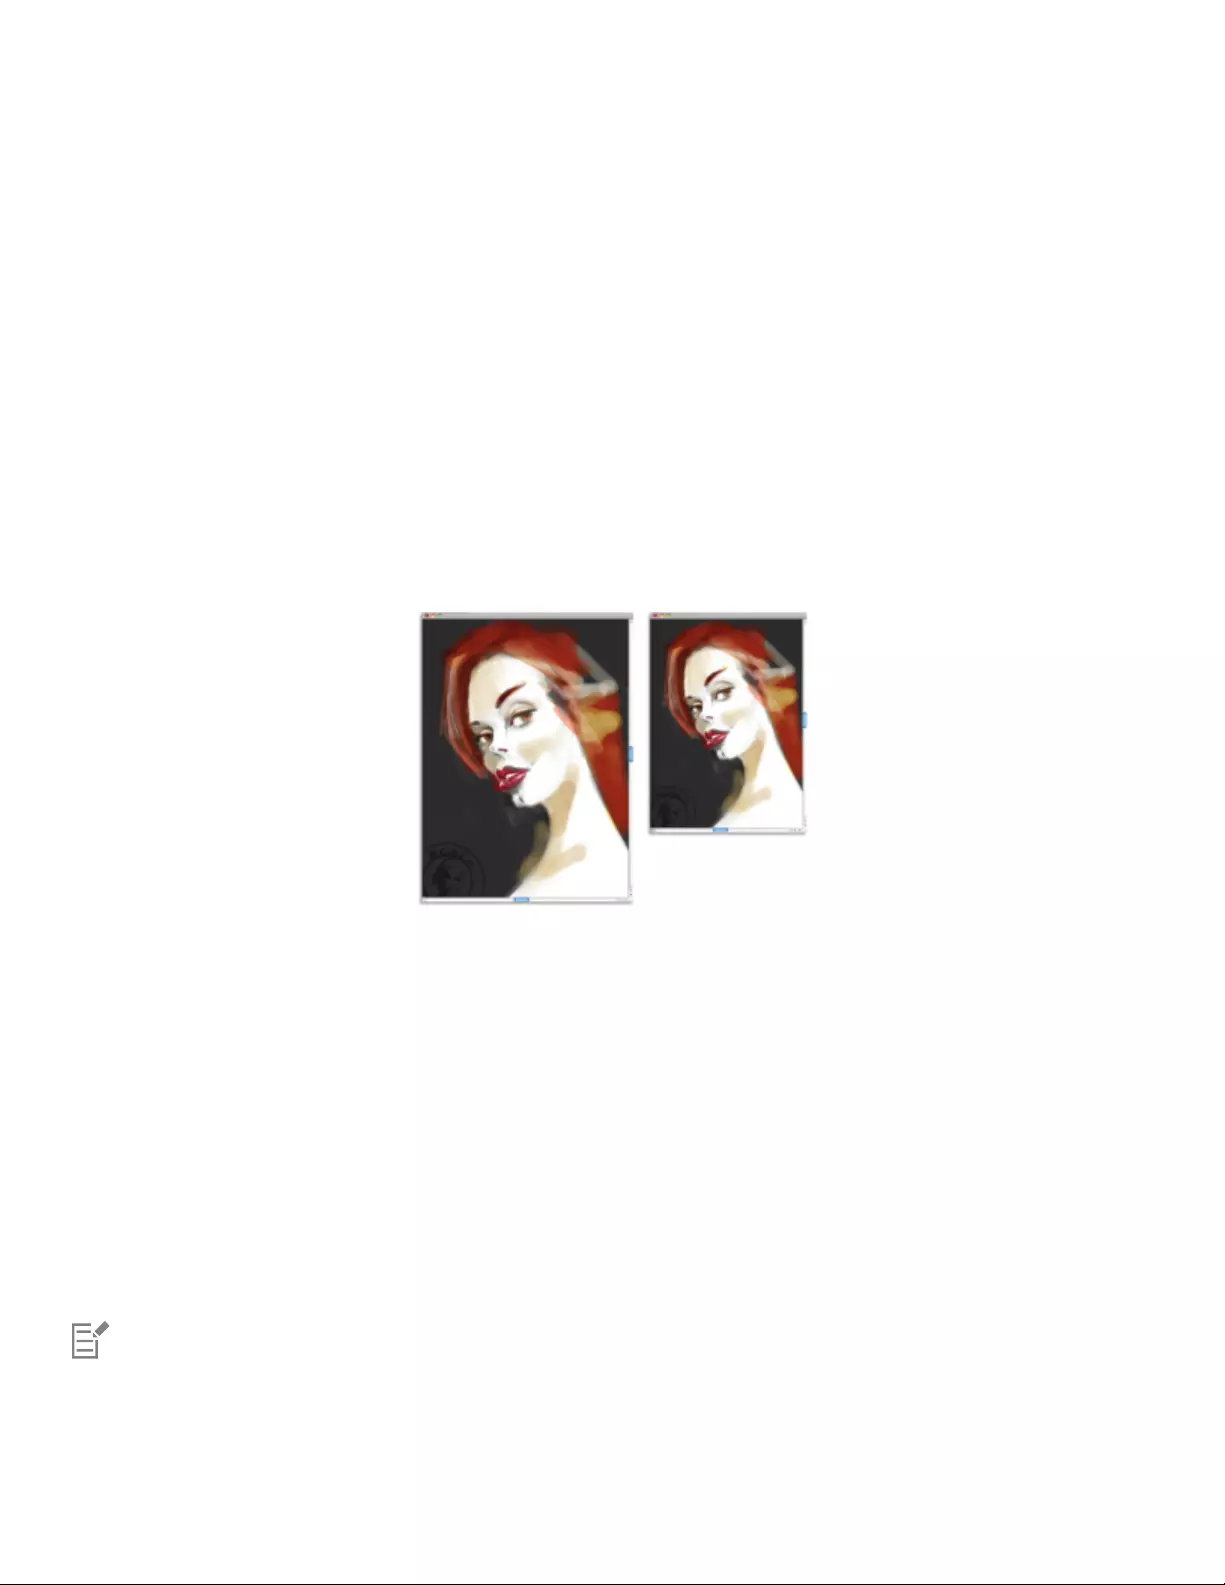
98 | Corel Painter 2022 User Guide
Creating documents
To start an image from a blank canvas, you must create a new document. This allows you to specify canvas settings, such as width, height,
orientation, and resolution. The size of the canvas determines the size of the image when it is printed. When you create a new document,
first set the resolution, and then specify the width and the height. Increasing or decreasing the resolution affects the document size in
inches, however, the total number of pixels in the image remains constant. For more information about resolution, see “Understanding
resolution” on page 100. To quickly get started, you can choose from a list of preset canvas settings. However, you can also specify custom
settings, which you can save as a preset for future use. You can specify the canvas color and texture. If you are planning to paint with a Thick
Paint, Watercolor, or Liquid Ink brush, you can create the layer type you need and set canvas visibility right in the New Image dialog box.
You can also assign an RGB color profile to your document. For more information about color profiles, see “Color management” on page
279.
Canvas size and aspect ratio
When you set the canvas size, choose options that correspond to the image’s destination. If you plan to print your work, the canvas
dimensions determine the size of your artwork when it is printed. Consider the largest size at which you plan to print your artwork, as well
as any smaller copies that you may need.
You can resize the canvas (left) to prepare an image for printing (right).
It is always better to start with a bigger canvas, because you can decrease the width and height of your image at any point without affecting
its quality. A large size makes it easier to preserve image detail if you need to produce a smaller version of the image. However, if you start
with a smaller image and then increase the image dimensions, the application inserts new pixels between existing pixels, and their colors are
based on the colors of adjacent pixels. If you increase image dimensions significantly, images may appear stretched and pixelated.
When choosing a canvas size, make sure your document has the proper aspect ratio that will allow you to print to common canvas and
paper sizes without cropping your artwork (for example, 8 in by 10 in, 11 in by 14 in, 16 in by 20 in, 18 in by 24 in, etc.).
For example, you can set the resolution of a new image at 300 pixels per inch (ppi), the width to 16 inches, and the height to 24 inches. This
large size makes it easier to maintain image quality when you need to produce a smaller version of the image.
Note that the bigger the canvas size and resolution, the more pixels there are in a brushstroke, and the harder it may become for your
computer to process it. To ensure optimal brush and application performance, experiment to find the largest canvas dimensions that work
best for your painting and for your software and hardware configuration.
For information about resizing images, “Resizing images and the canvas” on page 115.
Pixels-per-inch (ppi) is equivalent to dots per inch (dpi).
The maximum canvas size is 16 382 x 16 382 pixels. To prevent performance issues, start with a canvas that is smaller than 16 382
x 16 382 because layers expand when paint and effects are applied close to their edges.
Creating, navigating, and manipulating documents | 99
To create a new document
1Choose File New.
2Type a filename in the Image Name text box.
3From the Preset list box, choose a preset to automatically determine the size, resolution, color of the canvas, and the paper texture.
You can also
Change the unit of measurement for the document Choose a unit of measurement from the Units list box.
Change the document size Type values in the Width and Height boxes.
Change the number of pixels-per-inch (ppi) or pixels per centimeter
that make up an image
Type a value in the Resolution box.
Note: When you work in inches (or centimeters), as you change the
resolution, the pixel count remains the same, however, the width
and height of the image in inches (or centimeters) are automatically
adjusted.
Change the resolution type Depending on whether you are working in inches or centimeters,
choose an option from the list box located to the right of the
Resolution box.
Change the orientation of the document Click the Portrait or Landscape icon in the Orientation
area.
Change the color of the canvas Click the Canvas Color selector, and choose a color from the color
picker.
Change the texture of the canvas Click the Paper selector, and choose a paper texture from the
Papers panel.
Start painting on a layer Enable the Start painting on a layer check box, and choose an
option from the Layer type list.
Hide the canvas Enable the Hide Canvas check box.
Note: If the Start painting on a layer check box is disabled, the
Hide Canvas option is grayed out.
Choose a color profile Choose an option from the Color Profile list box.
In the New Image dialog box, setting the document’s pixels-per-inch is equivalent to setting its dots per inch (dpi). For more
information, see “Understanding resolution” on page 100.

100 | Corel Painter 2022 User Guide
To create a custom canvas preset
1Choose File New.
2Choose the settings that you want to save as a canvas preset.
3Click the Add button .
4In the Add Preset dialog box, type a name in the Preset Name text box.
A custom canvas preset is not a template. Unlike a template, it does not allow you to store any content. A custom canvas preset
allows you to store only canvas dimensions, resolution, color, and texture.
You can delete a canvas preset by choosing the preset name from the Canvas Preset list box and clicking the Delete button .
Understanding resolution
When you work with images in a digital workspace, it is helpful to understand the concept and applications of resolution. Resolution refers
to the amount of visual detail contained in an image.
A document’s resolution affects both its appearance on your computer screen and its print quality. You can specify a document’s resolution
when you create a new document, save, or export a file.
Resolution and screen appearance
Most monitors have a resolution of 72 pixels-per-inch (ppi). The Corel Painter display default is 72 ppi, which means that each pixel in the
Corel Painter image occupies one pixel on your monitor. The display resolution does not affect the document’s actual number of pixels-per—
inch — it affects only how the image is displayed on the monitor.
For example, a 300-ppi image is displayed on-screen at approximately four times its actual size. Because each pixel in the Corel Painter image
occupies one pixel on your monitor, and the monitor’s pixels are approximately four times the size of the image’s pixels (72 ppi versus 330
ppi), the image must appear four times larger on-screen in order to display all of the pixels. In other words, your 300-ppi document will be
printed at approximately one-quarter of its on-screen size. To view the image at its actual size, you can set the zoom level to 25%.
If you set the dimensions in pixels and then change the number of pixels-per-inch (resolution), this change will affect the size of the printed
image. If you set your document size in inches, centimeters, points, or picas and then change the resolution, the dimensions of the printed
image will not be affected.
Pixels-per-inch (ppi) is equivalent to dots per inch (dpi).

Creating, navigating, and manipulating documents | 101
An example of a high-resolution (left) and low-resolution (right) image. In printing terms,
a higher dpi means that the printer will place more dots of ink for every inch of artwork.
Resolution and print quality
The resolution of output devices (printers) is measured in dots per inch, and in the case of halftones, lines per inch (lpi). Output device
resolutions vary, depending on the type of press and paper used. In general, a photograph is output at a crisp 150 lpi if printed on glossy
magazine stock, and at 85lpi if printed on newspaper stock.
If you are using a personal laser or inkjet printer, set your document size in inches, centimeters, points, or picas at the dots-per-inch
setting specific to your printer. For most artwork, 300 dpi is preferred. Most printers produce excellent output from images set at 300 ppi.
Increasing the file’s pixels-per-inch setting does not necessarily improve the output and may create a large, unwieldy file.
You can use 150 dpi for large prints because the difference in print quality is not very noticeable on large pieces when you look at the prints
from a distance.
If you are using a commercial printer or a more sophisticated output device, the dimensions of the image should always be set to the
actual size that you want the image to appear in the printed piece. A good rule of thumb is to set the number of pixels-per-inch to twice
the desired lines per inch. So, at 150lpi, the setting should be twice that, or 300 ppi; at 85lpi, the setting should be 170 ppi. If you have
questions about the resolution of specific output devices, it’s a good idea to check with the print service provider.
Opening and placing files
You can open files that were created in Corel Painter or in other applications. For example, you can open a file from another graphics
application and use Corel Painter to add brushstrokes, tints, or paper textures.
You can also place a file in an existing Corel Painter document. The placed image becomes a new reference layer in the document — you can
transform (resize, rotate, or slant) it on-screen by dragging its handles. A placed file maintains its link to the source file until you commit it to
the standard layer format.

102 | Corel Painter 2022 User Guide
You can scale a file before placing it in a document.
For more information, see “Working with reference layers” on page 580.
Supported file formats
Corel Painter lets you open the following file formats:
• RIFF (RIF) — native Corel Painter format
• TIFF (TIF)
• PNG
• CMYK TIF (TIF) — Because Corel Painter works with RGB colors, the CMYK TIF files that you open or import in the application are
converted to an RGB color profile.
• Adobe Photoshop formats (PSD) — Corel Painter preserves layers, layer masks, alpha channels, and composite methods. Layer effects and
adjustment layers are not supported and should be merged or flattened in Adobe Photoshop.
• Windows Bitmap (BMP)
• PC Paintbrush (PCX)
• TARGA (TGA)
• GIF — Corel Painter does not convert GIF animations to frame stacks.
• JPEG (JPG)
Windows only
• Frame stacks (FRM) — Corel Painter animation files
• QuickTime (MOV), Video for Windows (AVI), and numbered files. For more information, see “Opening a Corel Painter movie” on page
792 or “Importing and exporting numbered files” on page 801.
Corel Painter does not support LZW compressed TIFF file format. Only uncompressed TIFF files can be opened in Corel Painter.

Creating, navigating, and manipulating documents | 103
To open a document
1Choose File Open.
Corel Painter displays the folder of the last file you opened.
2In the Open dialog box, locate the file that you want to open.
For each image, Corel Painter lists the dimensions (in pixels), file size, and file format. Files saved in Corel Painter include thumbnails for
browsing.
3Click Open.
The File menu also offers you a shortcut to previously opened documents. You can find your file in the recently opened files list by
choosing File Recent, and clicking the filename to open the file.
To browse for a document (macOS)
1Choose File Open.
2Click Browse.
The Browse dialog box shows thumbnails for all the RIFF files in a folder.
3Double-click the filename, or select a file, and click Open.
To place a file
1Choose File Place.
2Select an image file, and click Open.
The Place dialog box appears.
3Perform a task from the following table.
To Do the following
Place the image in a specific location in the document window Click the area in the document window where you want to place
the image.
Place the image in the center of the document window Click OK.
Scale the image before placing In the Scaling area, type a value in both the Horizontal and
Vertical boxes.
Maintain the image proportions when scaling In the Scaling area, enable the Constrain Aspect Ratio check box.
Retain the image mask Enable the Retain Alpha check box. The image mask becomes a
layer mask.
If the placed image contains a mask and you do not enable the Retain Alpha check box when placing, the image mask is
discarded.

104 | Corel Painter 2022 User Guide
Creating and opening templates
If you regularly work with documents that contain similar dimensions, formatting, and resolution, you can create document templates so
that you don’t have to start each document from scratch. When creating a template, you can add content to the canvas and save it as part
of the template.
To save a document as a template
1Create a file with the sizing, formatting, and resolution attributes you want.
2Choose File Save As.
3In the Save (macOS) or Save Image As (Windows) dialog box, save the file to one of the following folders in your user folder:
• (macOS) Corel Painter 2022\Support Files\Templates
• (Windows) AppData\Roaming\Corel\Painter 2022\Default\Templates
If you want the template to display under File Open Template, you need to close and then reopen Corel Painter.
In a multiuser environment, only users with Administrator status can add files to the Templates folder.
In Windows, you need to ensure that all hidden files are displayed in order to access the AppData folder.
To open a document template
•Choose File Open Template {template name}.
You can also open a template by choosing Help Welcome, and then choosing a template from the Document Template list.
Switching document views
You can switch between document views and viewing modes to suit your needs. The default setting Single Document View displays only
the active document, hiding the other open documents. The Multi-document View displays all open documents. Both views display all
standard tools in the workspace. For example, the menu bar, property bar, Brush selector bar, toolbox, and a few additional panels are
readily accessible.
You can enable Presentation Mode, which hides your computer’s desktop and taskbar and centers the document window over a solid
background. All Corel Painter features work when you use Presentation Mode. On macOS, Presentation Mode lets you display only one
document at a time (Single Document View). On Windows, Presentation Mode lets you display one document or multiple documents
(Multi-document View).
You can switch document views and viewing modes by using the Window menu, the toolbox, and keyboard shortcuts.

Creating, navigating, and manipulating documents | 105
Multi-document View (top); Single Document View in Presentation Mode (bottom). Artwork by Raquel Bigby
You can also change the default document view mode for the application. For more information, see “Interface preferences” on page 827.
To switch views
• Choose Window, and choose any of the following commands:
•Single Document View — to switch between Multi-document View and Single Document View
•Presentation Mode — to enable or disable Presentation Mode
You can switch views by clicking the Single Document View button and the Presentation Mode button in the toolbox.
You can also switch between Multi-document View and Single Document View by pressing Command + M (macOS) or Ctrl + M
(Windows).
On Windows, you can enable and disable Presentation Mode by pressing F11.
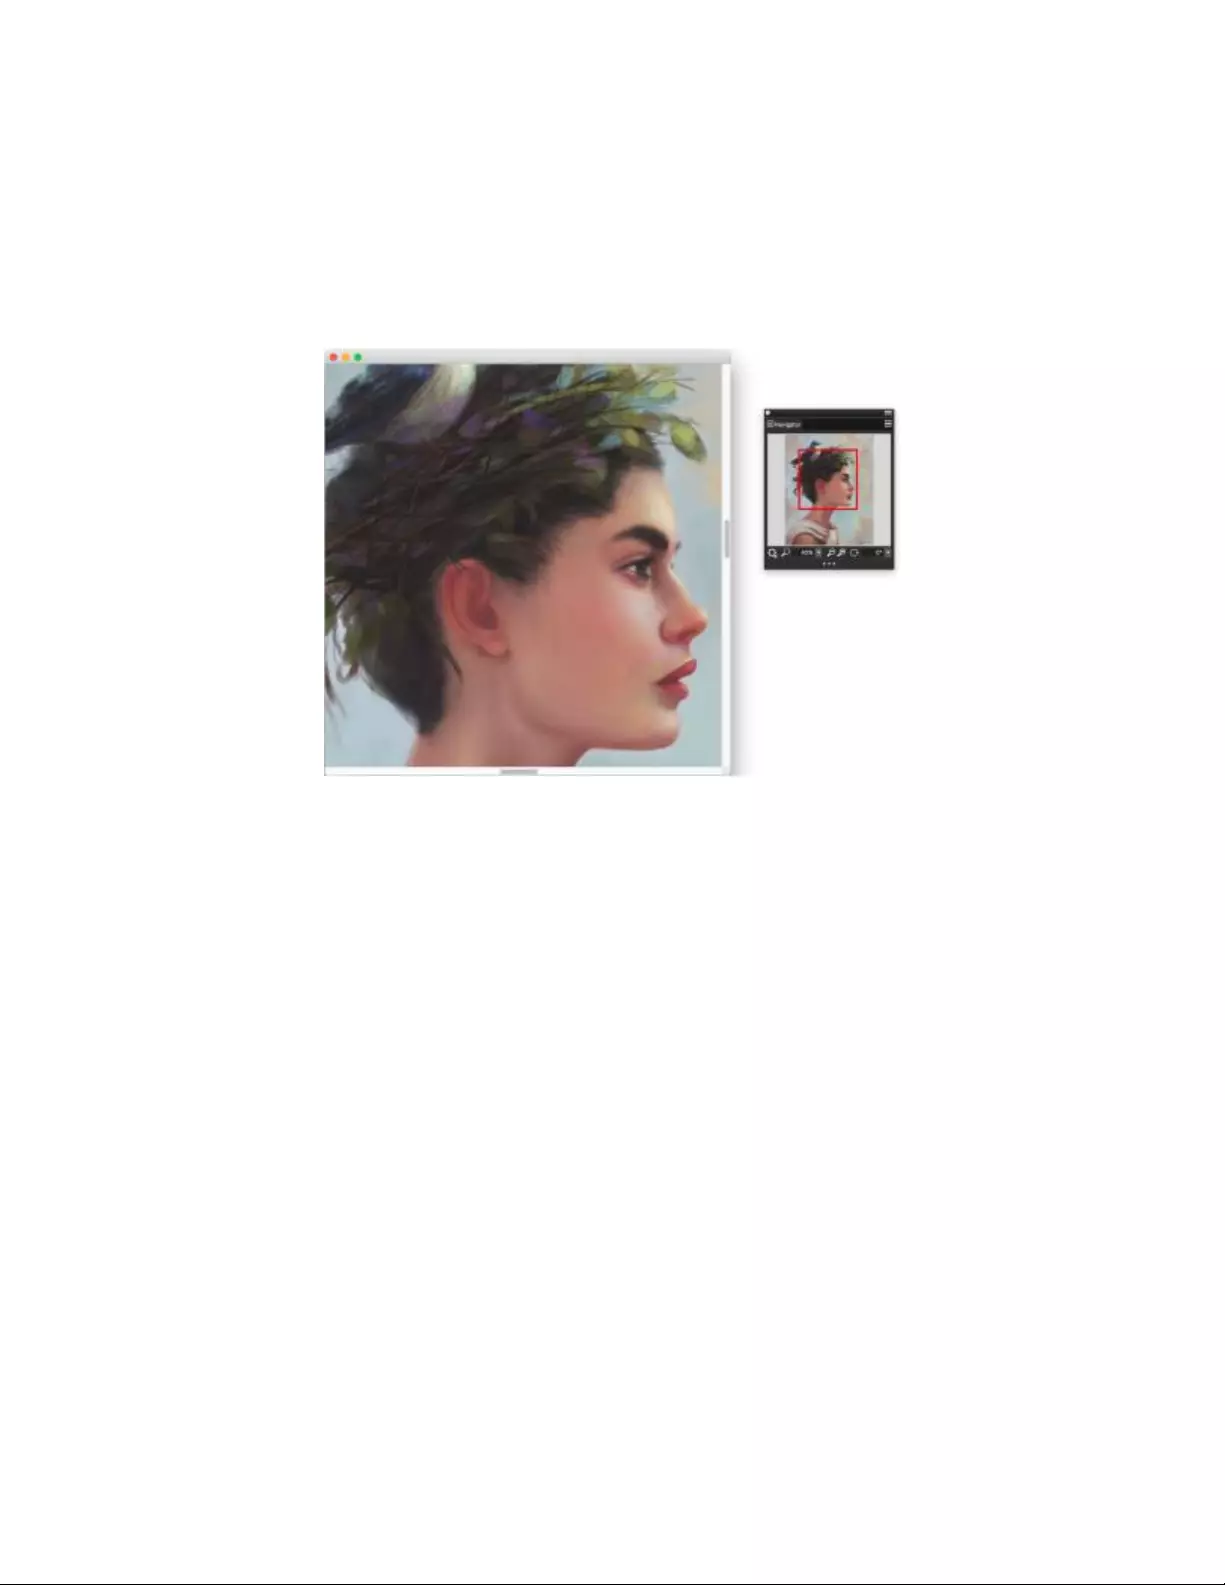
106 | Corel Painter 2022 User Guide
Navigating images and viewing image information
You can use the Navigator panel to better orient yourself in the document window. For example, when you’re working at a high zoom level
or with a large image, you can use the Navigator panel’s small canvas preview to display the entire image without having to zoom out. You
can also move to a different image area without adjusting the zoom level. In addition, you can highlight which area is currently displayed in
the document window.
The Navigator’s canvas preview allows you to view the entire image even when you’re zoomed in. Artwork by Wei Hu.
The Navigator also lets you view the X and Y coordinates and cursor position to help you navigate the image. In addition, you can view
document information, such as width and height; and unit information, such as pixels, inches, and resolution.
You can customize the appearance of the Navigator panel by hiding the image information area or the controls. Occasionally, you may want
to see how your design looks in grayscale rather than in full color. Normally, this would require that you convert the image to grayscale,
however, Corel Painter gives you the option to view your artwork in grayscale without adding steps to your workflow.

Creating, navigating, and manipulating documents | 107
When you need to evaluate the color contrast of a design, you can use the Navigator to display the image in grayscale.
To display the Navigator panel
1Choose Window Navigator.
2Perform a task from the following table.
To Do the following
Move to a different area of the image without adjusting the zoom
level
In the Navigator panel, click a different area of the canvas preview.
Zoom to a specific magnification level in the document window Open the Zoom Canvas list box, and adjust the zoom level slider.
Rotate the image in the document window Open the Rotate Canvas list box, and adjust the rotation slider.
View the image in grayscale In the Navigator panel, click the Navigator options button ,
and click Display In Grayscale.
From the Navigator panel, you can also enable various tools by clicking the Open Navigator Settings button , and choosing
an option. The available tools include the drawing modes, Impasto, tracing paper, grids, and color management.
To hide or show the information area or controls of the Navigator panel
•In the Navigator panel, click the Navigator options button , and disable one of the following options:
•Navigator Frame — In the Navigator canvas preview window, hides the frame that shows the area that is currently displayed in the
document window
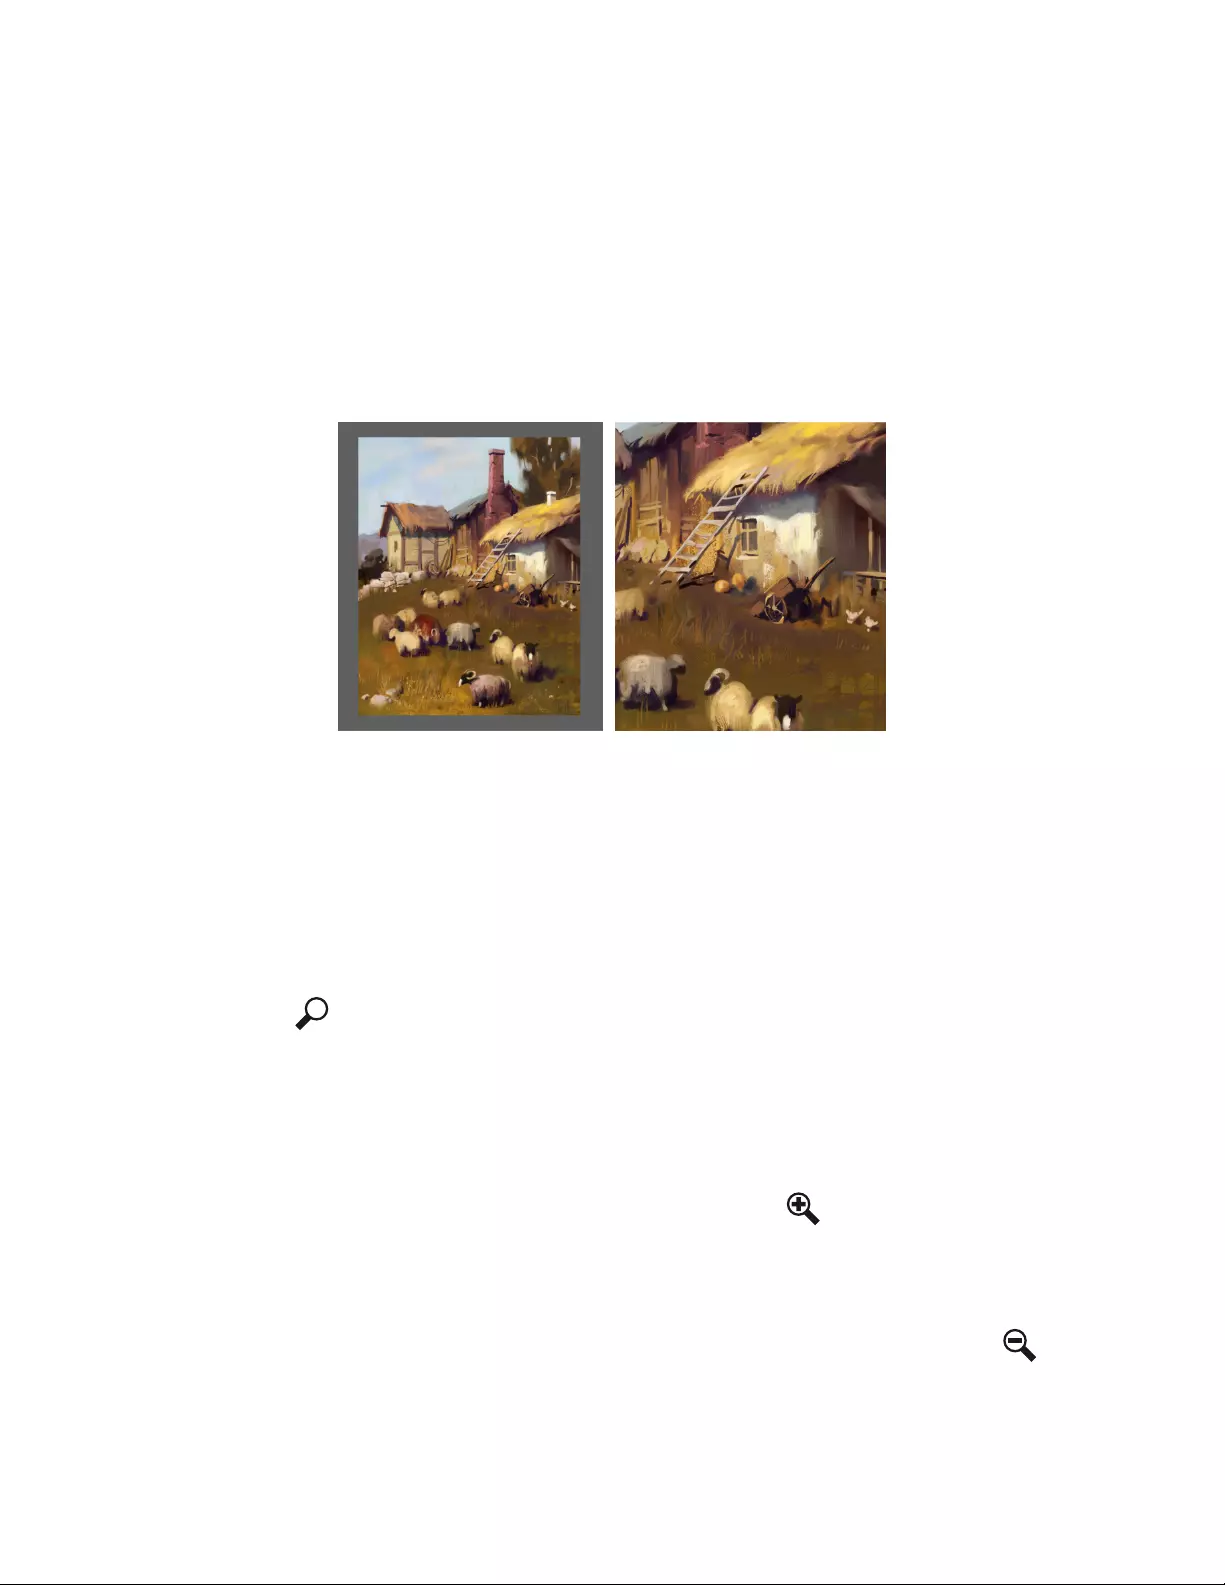
108 | Corel Painter 2022 User Guide
•View Controls — Hides the Navigator controls, such as canvas preview so that you can view the entire image without having to zoom
out. You can also move to a different image area without adjusting the zoom level.
•Info — Hides the X and Y coordinates, cursor position, and document information, such as width and height, and unit information,
such as pixels, inches, and resolution
Zooming images
By default, images are displayed at 100% magnification; however, you can zoom in to get a closer look at image detail or zoom out to
view a larger portion of the image. You can change the level of magnification by zooming in and out with the Magnifier tool, resetting
magnification, or zooming to fit the screen.
The Magnifier tool lets you zoom in and out by clicking in the document window. Artwork by Pavel Goloviy.
The zoom mode you choose determines how the modifier Shift key affects the function of the Magnifier tool. For example, to zoom over
an area in the default Drag to Zoom mode, you simply need to drag to the left or right; however, to perform the same task in the Select
Zoom Area mode, you need to hold down Shift while dragging. Choose the mode that best fits your workflow. If you often zoom quickly in
and out, but you rarely need to select specific areas, you may choose the Drag to Zoom mode. However, if your workflow requires that you
often select specific areas to get a closer look at image detail, you can choose the Select Zoom Area mode; in this mode, you zoom in to a
specific area by simply dragging across the area.
To zoom in preset increments
1Click the Magnifier tool in the toolbox or press M.
2Perform a task from the following table.
To Do the following
Zoom in Click the image where you want to magnify it.
The Magnifier cursor shows a plus sign (+), which indicates
that you are increasing the magnification (zooming in).
Zoom out Hold down Option (macOS) or Alt (Windows) and click the image.
A minus sign (–) appears on the Magnifier cursor , which
indicates that you are decreasing the magnification (zooming out).
Creating, navigating, and manipulating documents | 109
Each click increases or decreases the magnification to the next level, as defined in the Zoom Level box on the property bar.
You can also zoom in using the following keyboard shortcuts:
• (macOS) Hold down Command, and press + (plus sign).
• (Windows) Hold down Ctrl, and press + (plus sign).
You can also zoom out using the following keyboard shortcuts:
• (macOS) Hold down Command, and press – (minus sign).
• (Windows) Hold down Ctrl, and press – (minus sign).
When using a mouse, you can zoom in to or out from the image by using the mouse wheel.
To set the zoom mode
1Click the Magnifier tool in the toolbox or press M.
2On the property bar, choose an option from the Zoom Mode list box:
•Drag to Zoom
•Select Zoom Area
Corel Painter keeps the zoom mode setting from one session to the next.
To zoom by dragging
1Click the Magnifier tool in the toolbox or press M.
2Perform a task from the following table.
To In this mode Do one of the following
Zoom in Drag to Zoom •Drag up.
•Drag to the right.
Zoom out Select Zoom Area •Hold down Shift and drag down.
•Hold down Shift and drag to the left.
To zoom by selecting an area
1Click the Magnifier tool in the toolbox or press M.
2Perform a task from the following table.
In this mode Do the following
Drag to Zoom Hold down Shift and drag across the area you want to magnify.
110 | Corel Painter 2022 User Guide
In this mode Do the following
Select Zoom Area Drag across the area you want to magnify.
To zoom to a specific magnification level
•Choose Window Navigator, and type a value in the Zoom canvas box.
If you prefer, open the Zoom Canvas slider, and adjust the zoom level.
To reset magnification to 100%
•Double-click the Magnifier tool in the toolbox.
You can also reset magnification to 100% by clicking the 100% button or the Reset tool button on the property bar, or
the Reset Zoom to 100% button in the Navigator panel.
To zoom to fit the screen
•Choose Window Zoom to Fit.
Corel Painter generates a view of the entire document to fit your document window.
You can also zoom to fit the screen by clicking the Fit Screen button on the property bar.
To set zooming performance preferences
• Perform a task from the following table.
To Do the following
Smooth objects when zooming (minimize pixelation) Click the Magnifier tool in the toolbox and click the High
Quality Display button on the property bar.
Enable area averaging for zooming at less than 50% magnification Choose Corel Painter 2022 menu Preferences Interface
(macOS) or Edit Preferences Interface (Windows), and enable
the Area Averaging check box in the Display area.
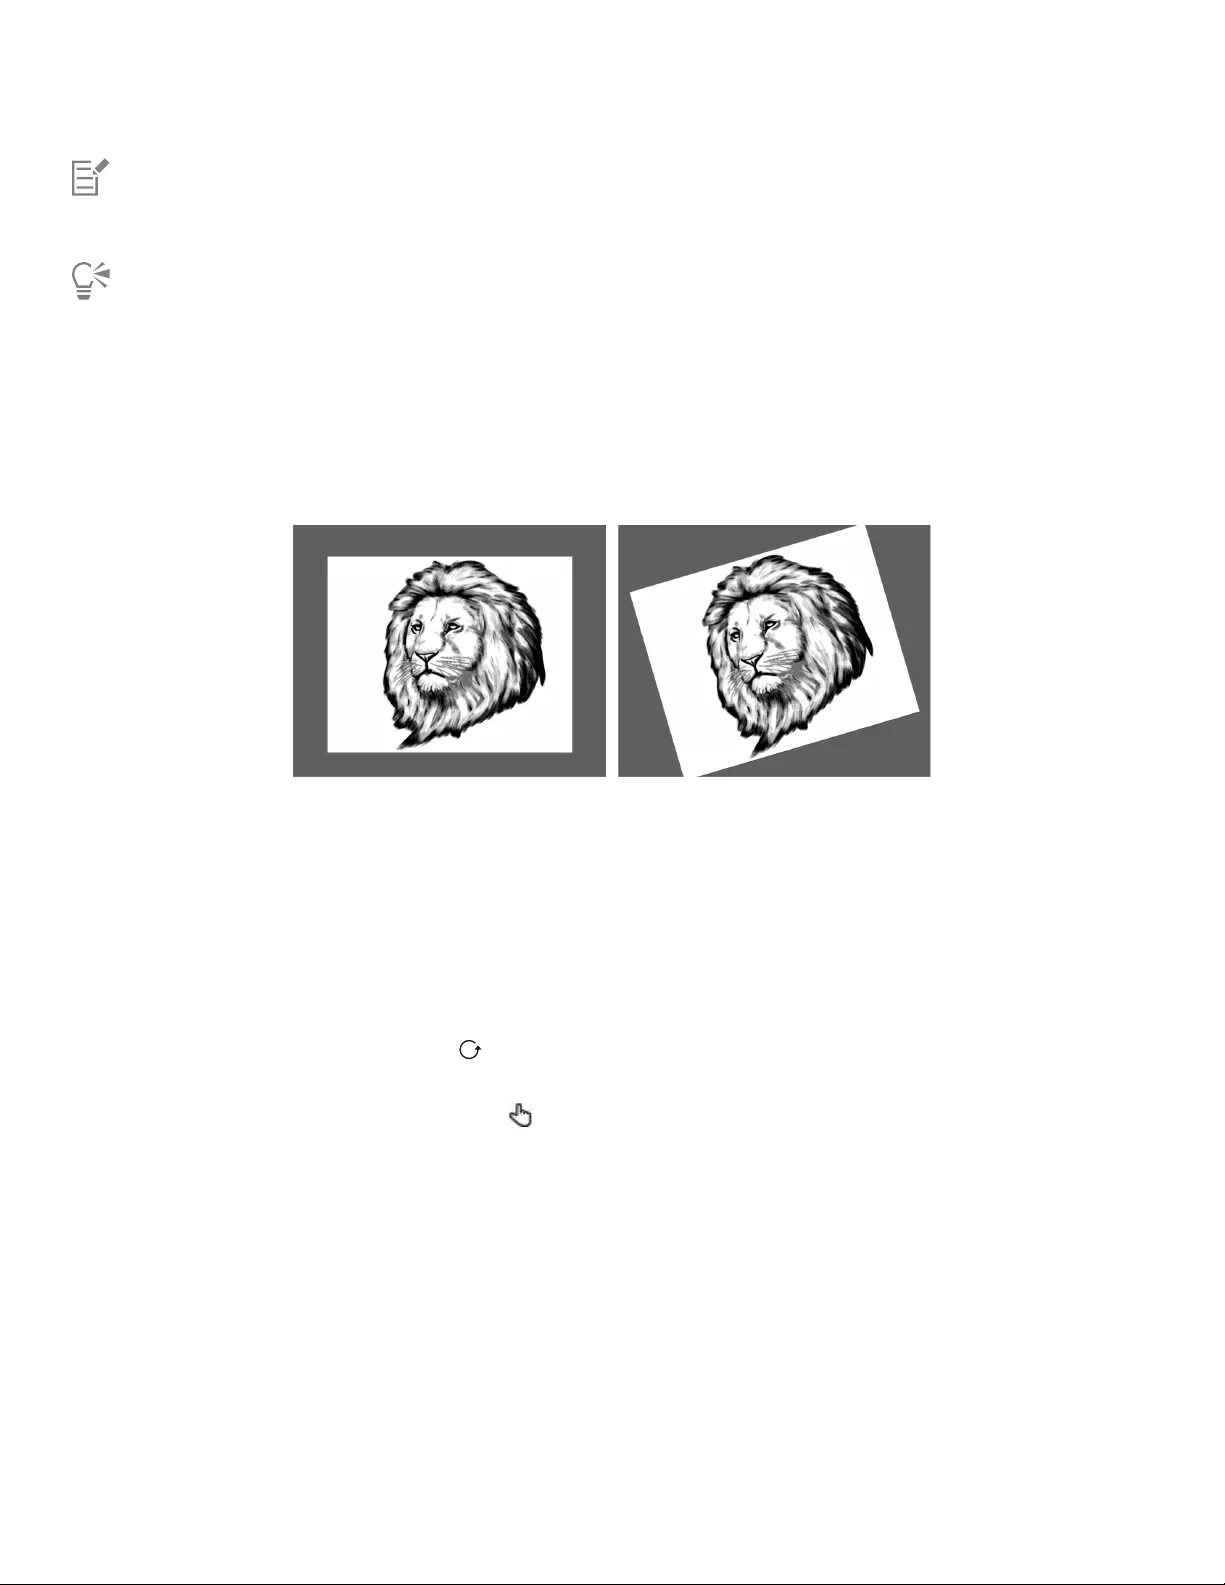
Creating, navigating, and manipulating documents | 111
Area averaging increases the speed at which the screen is drawn when you are viewing an image at less than 50% magnification.
Enabling this option may decrease accuracy.
You can also enable object smoothing by choosing Corel Painter 2022 menu Preferences Performance (macOS) or Edit
Preferences Performance (Windows), and clicking the High Quality Display check box.
Rotating images and the canvas
You can rotate an image on the screen to accommodate the way you draw naturally. You can also rotate the canvas to change the image
orientation.
Rotate an image to accommodate the way you naturally draw. Artwork by Lennart Moberg.
Rotating an image onscreen is meant for drawing purposes only; whereas rotating the canvas modifies the appearance of the image. For
example, if you print an image that you rotated onscreen, the rotation is not reflected in the printed image. However, if you rotate the
canvas of the image, the rotation is reflected in the printed image.
You can rotate an image or the canvas by a predefined amount, or you can choose the amount of rotation. You can also reset the original
orientation of an image.
To rotate an image
1From the toolbox, click the Rotate Page tool .
If you prefer using a keyboard shortcut, hold down Option + Spacebar (macOS) or Spacebar + Alt (Windows).
The cursor changes to a hand with a pointing finger .
2Drag in the document window to rotate the image.
The new rotation angle appears on the property bar.
You can also
Constrain rotation to 90° increments Hold down Shift while rotating.
Rotate an image by specifying a rotation angle Type a rotation angle in the Rotation Angle box on the property
bar or in the Navigator panel.
112 | Corel Painter 2022 User Guide
You can also rotate an image from the Navigator panel by typing a value in the Rotate canvas box or by opening the Rotate
Canvas slider and adjusting the rotation.
To reset the original orientation of an image
1In the toolbox, click the Rotate Page tool .
2Do one of the following:
• Click once in the document window.
•Double-click the Rotate Page tool .
•On the property bar, click the Reset Tool button .
You can also reset image rotation from the Navigator panel by clicking the Reset Rotation button .
To rotate the canvas
1Choose Canvas Rotate Canvas.
2Perform a task from the following table.
You can also
Rotate the Canvas layer 180 degrees Choose Canvas Rotate Canvas 180.
Rotate the Canvas layer 90 degrees clockwise Choose Canvas Rotate Canvas 90 CW.
Rotate the Canvas layer 90 degrees counterclockwise Choose Canvas Rotate Canvas 90 CCW.
Rotate the Canvas layer by a user-defined amount Choose Canvas Rotate Canvas Arbitrary, and type a value in
the Angle box.
If your document has layers of different types, you are prompted to commit all of them to default, pixel-based layers.
Flipping images
You can flip the canvas and all of its associated layers together, or you can flip a layer, selection, or the canvas individually. You can flip all or
parts of an image horizontally (from left to right) or vertically (from top to bottom).

Creating, navigating, and manipulating documents | 113
Original image
Image flipped horizontally
Image flipped vertically
To flip the canvas and layers together
• Perform a task from the following table.
To Do the following
To flip horizontally Choose Canvas Rotate Canvas Flip Canvas Horizontal.

114 | Corel Painter 2022 User Guide
To Do the following
To flip vertically Choose Canvas Rotate Canvas Flip Canvas Vertical.
If your document has layers of different types, you are prompted to commit all of them to a default, pixel-based layer.
To flip the canvas, a layer, or a selection individually
1Perform a task from the following table.
To flip Do the following
The canvas Click the Canvas in the Layers panel.
A layer Click one or multiple layers in the Layers panel.
A selection Click a selection tool from the toolbox, and drag in the document
window to select an area.
2Choose Edit, and choose one of the following:
•Flip Horizontal
•Flip Vertical
Repositioning images
You can reposition an image in the Corel Painter workspace in order to view, or work on, a different area of an image. You can also view a
different area of an image when you’re zoomed in.
To reposition a document
1In the toolbox, click the Grabber tool .
The cursor changes to the Grabber tool.
2Perform a task from the following table.
To Do the following
Scroll through the image Drag in the document window.
Center the image Click once in the document window.
You can also activate the Grabber tool by holding down the spacebar.
To reposition a document while zoomed in
1Choose Window Navigator.
Creating, navigating, and manipulating documents | 115
2In the Navigator panel, click a different area of the preview area.
If the Navigator frame is displayed, you can drag the frame to a different area of the canvas preview.
Cropping images
You can remove unwanted edges from the image with the Crop tool . You can adjust the aspect ratio of the cropped image and choose
to maintain the aspect ratio. You can also remove unwanted areas of an image by resizing the canvas area. For more information, see
“Resizing images and the canvas” on page 115.
To crop an image
1In the toolbox, click the Crop tool .
2Drag inside the image to define the rectangular area that you want to keep.
You can adjust the rectangle by dragging a corner or any of its edges.
3When you’re ready to execute the crop, click the Commit Crop button on the property bar.
To cancel the crop, click the Cancel Crop button on the property bar.
You can also execute the crop by double-clicking inside the rectangle.
To constrain cropping to a square
1In the toolbox, click the Crop tool .
2Hold down Shift, and drag to define the area for cropping.
3Double-click inside the square.
To adjust the aspect ratio of the cropped image
1In the toolbox, click the Crop tool .
2On the property bar, type values in the Crop Ratio Width and Crop Ratio Height boxes.
Resizing images and the canvas
You can change the physical dimensions of an image by resizing the canvas and the image together, or by resizing the canvas area only. It is
important to understand the distinction between the two resizing techniques.
When you resize the canvas and image together, the image dimensions and resolution change, but the image appearance doesn’t change.
For example, if you resize a 300 ppi image to 150 ppi, the image size is smaller, but it looks the same.
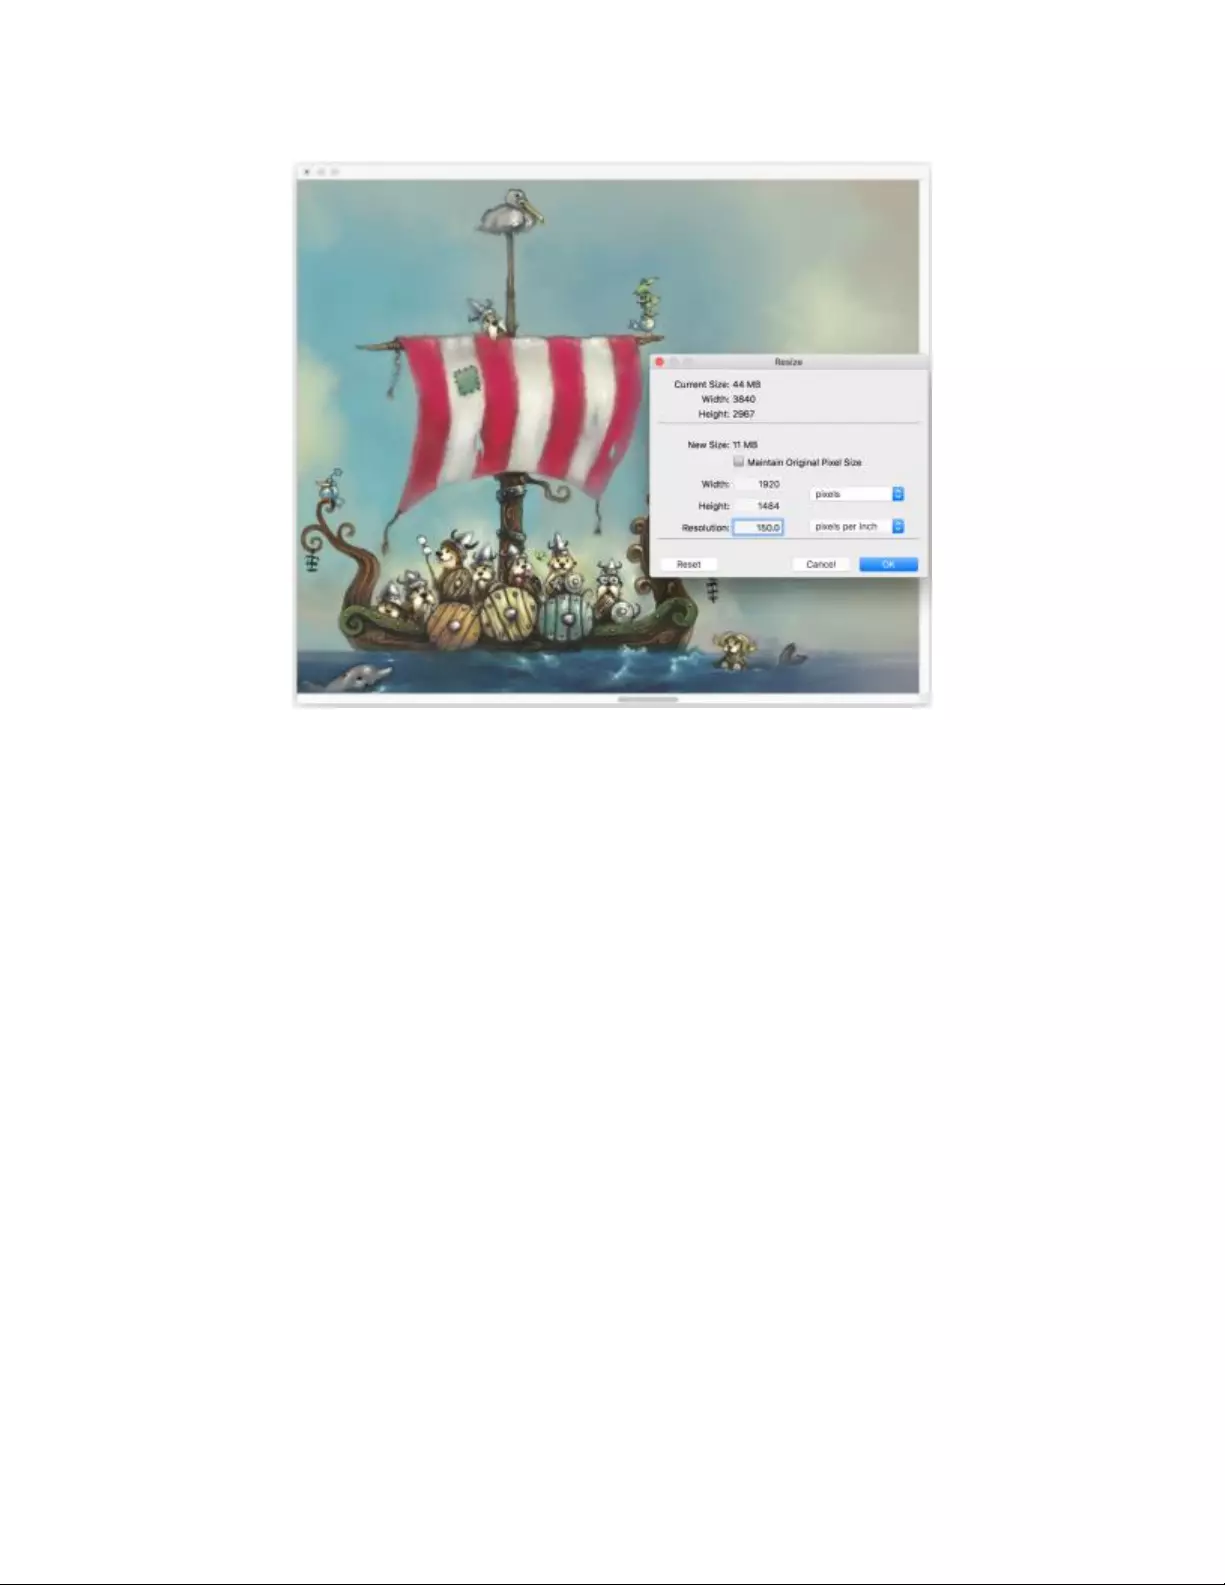
116 | Corel Painter 2022 User Guide
The image was resized by modifying the resolution. Artwork by Chris Melby.
Alternatively, when you resize only the canvas area, both the image dimensions and appearance change. For example, if you increase the size
of the canvas, a border appears around the image. If you decrease the size of the canvas, the edge of the canvas is trimmed. In addition, the
image resolution is affected.

Creating, navigating, and manipulating documents | 117
The canvas area is resized in order to apply an empty border around the edge of an image. Artwork by Chris Melby.
Changing the height and width of an image without changing the resolution results in quality
loss. Left to right: image with smaller dimensions, original image, image with larger dimensions.
It is also important to note that the size of the onscreen image is affected by the pixel height and width of the image, the zoom level, and
the monitor settings. As a result, an image may be displayed as a different size onscreen than when it is printed. For more information, see
“Understanding resolution” on page 100 and “Creating documents” on page 98.
To resize the canvas and image content together
1Choose Canvas Resize.

118 | Corel Painter 2022 User Guide
To keep the file size of the image in megabytes (MB) the same, enable the Maintain original file size check box.
2In the New Size area, type values in the Width and Height boxes.
If you enable the Maintain original file size check box, you need to type a value only in one of the boxes; the other values are adjusted
automatically.
If you choose pixels or percent as the unit and enter a value, the Maintain original file size check box is automatically disabled.
Increasing the image dimensions significantly may cause the image to appear stretched and pixelated.
To resize the canvas area
1Choose Canvas Canvas Size.
2In the Canvas Size dialog box, specify the number of pixels you want to add to any side of the canvas.
To reduce, or trim, the canvas size, specify negative values.
Saving and backing up files
You can save a file in its current format or in a different format. You can also track the changes that you make to a file by saving multiple
versions of the file, also known as iterations. In addition, you have the option of creating backup files every time you save a document.
When you save an iteration of a file, an updated version of the file is saved with a version number added to the filename. For example,
if you saved the original file as Image. RIF and then save an iteration of the file, the latest version of the file is saved as Image_001.RIF.
For each subsequent iterative save that you perform, the number added to the filename increases by1, for example, Image_002.RIF and
Image_003.RIF. Iterative saving is useful if you need to revert to an older version of a file, or simply to track your progress over time.
To save a file in its current format
•Choose File Save.
To save a file with a different name or in a different format
1Choose File Save As.
2In the Save (macOS) or Save Image As (Windows) dialog box, use the controls to specify a location, file name, and format.
To perform an iterative save
•Choose File Iterative Save.
The location of the last file saved is stored and used for iterative saves unless you specify a new location.
You can also perform an iterative save by pressing Command + Option + S (macOS) or Ctrl + Alt + S (Windows).
To create a backup file when saving
1Do one of the following:
•(macOS) Choose Corel Painter 2022 menu Preferences.
•(Windows) Choose Edit Preferences.
2In the Preferences list of categories, click General.
3Enable the Create backup on Save check box.

Creating, navigating, and manipulating documents | 119
Choosing a file format
When you save a file, you must choose a file format. The following section contains information about some of the supported file formats.
Saving RIFF files
RIFF is the Corel Painter file format, which retains special information about your document. For example, a RIFF file maintains all layers.
RIFF files are best used as “work-in-progress” files. It is recommended that you always save files in RIFF format, and then save to GIF, JPEG,
TIF, or another file format when a file is ready for production.
Corel Painter lets you compress files and save disk space with a lossless compression method. When saving in RIFF format, you can minimize
the file size on your hard disk by ensuring that the Uncompressed option is disabled by default.
Saving JPEG files
Corel Painter supports the JPEG file format. Unlike GIF, the JPEG file format displays a full range of colors.
The JPEG file format lets you compress your file on a scale of Fair to Excellent, where quality is directly proportional to file size. These quality
settings will let you achieve compression ratios ranging from less than 10:1 to greater than 100:1. JPEG is a “lossy” file format, meaning
that a compressed JPEG file will not be identical, pixel-for-pixel, to the original. However, because the JPEG algorithm takes into account the
sensitivity of the eye to different colors, the higher-quality settings should achieve visually satisfying results.
You can assign a URL to layers and placed images and then save the file in GIF or JPEG format to produce an image map. For more
information, see “Creating image maps” on page 839.
When you save a file in JPEG format, Corel Painter displays the JPEG Encoding Quality dialog box, with the following options:
• The Quality options — Excellent, High, Good, and Fair — let you set the degree of file compression.
The Excellent option compresses the least, but retains the most data. Fair compresses the most, but loses the most data.
You can also use the Quality slider to adjust file compression.
• The Smoothness slider applies smoothing to the entire image. This is useful when using the Fair option to blur the edges of JPEG
artifacts. The default is 0. Keep in mind that using a high smoothness setting can cause blurring.
• The Progressive JPEG check box creates a progressive JPEG file. The progressive format is useful for files designed for the Web. As the
name implies, the progressive format displays an image in stages — as a series of scans — while the file downloads. The first scan is a
low-quality image; the following scans improve in quality. This allows the user to see the whole image quickly.
• The HTML Map Options — NCSA Map File, CERN Map File, and Client Side Map File — let you generate an image map. (NCSA refers
to the National Center for Supercomputing Applications, and CERN refers to the Conseil Europeén pour la Recherche Nucléaire.) Use the
NCSA Map File or CERN Map File option to generate a server-side image map. Use the Client Side Map File option to generate a client-
side image map.
For more information, see “Creating image maps” on page 839.
It is best not to decompress and recompress a file multiple times. Although JPEG can compress and discard data that is not visible or
obvious, the degradation of the data can affect the condition of your file.
When a file has lost a significant amount of data, block patterns may appear in areas of the image. If you try to use the Apply Surface
Texture feature on a JPEG file, you may find that the block patterns become more prominent.
Saving GIF files
Corel Painter lets you save documents as GIF files. GIF, a file format using 8 or fewer bits, is commonly used to display graphics on the Web.
When you save a GIF file, you can choose settings from 4 Colors to 256 Colors. You can choose how your colors will be displayed and what
part of your image will be transparent.
You can enable the Color Set option to force all colors in the color table of the GIF file to match the colors in the current color set. This
option can be useful when you are doing Web work, especially if you want to constrain colors to a specific color set or control the number
of colors on a Web page, thus controlling the image file size.

120 | Corel Painter 2022 User Guide
The Imaging Method setting determines how a 24-bit Corel Painter document will be converted to the limited number of colors that GIF
uses. If you choose Quantize to Nearest Color, Corel Painter may replace some colors with colors that are located next to each pixel. If you
choose Dither Colors, Corel Painter applies a pattern to the chosen colors to generate a more accurate, less banded result.
Corel Painter can also save a frame stack as a GIF animation file. For more information, see “Exporting animated GIFs” on page 802.
If you want your image to have transparency, enable the Output Transparency check box. Most programs that display GIF files support
transparency, but for those that don’t, you should specify the color of the “transparent” area. If your image will be displayed on the
Web, enable the Background is WWW Gray option. You can also choose to use the background color of your Web page by enabling the
Background is BG Color option.
For programs that support transparency, your selection will determine which areas are transparent. The Threshold slider determines which
selection (loaded mask) value becomes transparent. You can see how the Threshold slider affects the transparency of your image in the
Preview window of the dialog box. Transparency is displayed in the Preview window by a rectangular lattice. You can toggle between the
Preview window and your Save As GIF options to the results you want. Enable the Interlaced check box if your image will be displayed on a
Web page.
For more information, see “Selections and transformations” on page 593.
Saving RGB TIF files
The TIF format facilitates exchange between applications and computer platforms. It is a widely supported bitmap image format that lets
you save RGB color profile information.
Saving Adobe Photoshop (PSD) files
Corel Painter can save files in Adobe Photoshop (PSD) format. For optimum compatibility, shapes and text are rasterized, and masks are
placed in channels.
When you save a file in PSD format, you can embed the RGB color profile, as you do when saving in TIF format.
Saving Encapsulated PostScript (EPS) files
The encapsulated PostScript (EPS) files in Corel Painter conform to the Desktop Color Separation (DCS) 2.0 format (EPS-DCS 5 file format).
Although Corel Painter saves files in EPS-DCS, it can’t read EPS-DCS. If you plan to save an image in EPS-DCS, it’s a good idea to save it in
another format first, so that you’ll have a copy of it that you can reopen in Corel Painter.
When you save an image as an EPS-DCS file with Preview Options turned on, Corel Painter uses the loaded International Color Consortium
(ICC) profile to prepare the separation files. For more information, see “Printing images” on page 813.
Although you can save your images as CMYK EPS separations, Corel Painter can’t open or edit CMYK files.
When you save a file in EPS-DCS, Corel Painter opens the EPS Save Options dialog box, with these options:
•Hex (ASCII) Picture Data provides another way of storing PostScript information. Some page design programs require that this option be
checked. The file sizes will be approximately twice as large when saved with this option.
•Preview options — No Preview, Black and White Preview, and Color Preview — specify whether to save preview data and in what
format. The resulting preview file is a low-resolution (72-ppi) file.
If you have an older laser printer, you must use the black and white preview to print these files. Although the preview or display is black
and white, the color information remains intact.
Emailing documents
Corel Painter lets you email documents by using the default email application installed on your computer.
To email a document
1Choose File Email Image.
2Type the image name in the Image Name text box.

Creating, navigating, and manipulating documents | 121
3In the Select Image Format area, enable one of the following options:
•JPEG
•PNG
•TIFF
Closing documents and quitting the application
You can close documents or quit Corel Painter by using menu commands, keyboard shortcuts, or the Close button of the current window.
To close a document
•Choose File Close.
You can also
Close the current window Click the Close button.
Close the current document by using a keyboard shortcut Press Command + W (macOS) or Ctrl + W (Windows).
To quit Corel Painter
• Do one of the following:
•(macOS) Choose Corel Painter 2022 menu Quit Corel Painter 2022.
•(Windows) Choose File Exit.
You can also quit Corel Painter by pressing Command + Q (macOS) or Ctrl + Q (Windows).
Using two monitors
The Corel Painter user interface can be displayed across two or more monitors. You can drag any of the Corel Painter panels, palettes, the
property bar, and the toolbox to any monitor; however, each panel or palette must be displayed entirely on one monitor at a time. If a panel
or palette straddles two monitors, it automatically snaps to the nearest vertical edge of the monitor displaying the large portion of the panel
or palette. If the panel or palette is displayed equally on both monitors, it snaps to the vertical edge of the left monitor.
For best performance, make sure that both monitors are set to the same resolution. In Windows, you must stretch the application window
to straddle both monitors, then redesign your workspace. For information about configuring your system so that Corel Painter is displayed
across two or more monitors, refer to the documentation of your operating system.
Support for tablets and other devices
Corel Painter supports Wacom-compatible tablets and devices as well as devices that support the Real-Time Stylus (RTS) feature of the
Windows operating system. Both groups have multi-touch capabilities.
Wacom-compatible devices are supported on both macOS and Windows. For more information, see “Wacom Intuos support” on page
124. RTS-compatible devices include tablet PCs and graphics tablets and are supported only on Windows.

122 | Corel Painter 2022 User Guide
By default, Corel Painter uses tablet options that are suitable for Wacom-compatible devices. To take full advantage of your RTS-compatible
graphics tablet or other device with Corel Painter, you must configure it first. Otherwise, you cannot use stylus information such as pressure
and tilt to adjust and control brushstrokes.
To configure your device (Windows)
1Make sure your device is connected and has the latest driver software installed.
2Choose Edit Preferences Tablet.
3Depending on your stylus input device, enable one of the following options in the Tablet settings area:
•Wacom-compatible device (Wintab)
•RTS-compatible device (Real-Time Stylus)
4Restart Corel Painter.
Multi-touch support
Corel Painter supports two ways of working with gestures: with multi-touch mode enabled (default) or disabled.
When you enable multi-touch support, you can simultaneously pan, rotate, and zoom the canvas. This provides a seamless and responsive
way of positioning and navigating the canvas. For example, you can rotate and move the canvas at the same time by moving two fingers
in a circular motion while simultaneously swiping them across the tablet. You can also rotate and zoom by moving two fingers in a circular
motion while simultaneously pinching the fingers together, or pulling them apart. In addition, you can quickly restore the canvas position,
rotation, and zoom level.
You can simultaneously perform panning (1), zooming (2), and rotating (3).
You can also change the reference point, around which rotating and zooming takes place. If you’re not using a multi-touch tablet, by
default the reference point is located at the center of the image. However, when using a multi-touch tablet, the reference point changes
depending on the finger positions. Corel Painter sets the reference point at the center of the space that’s between your two fingers.
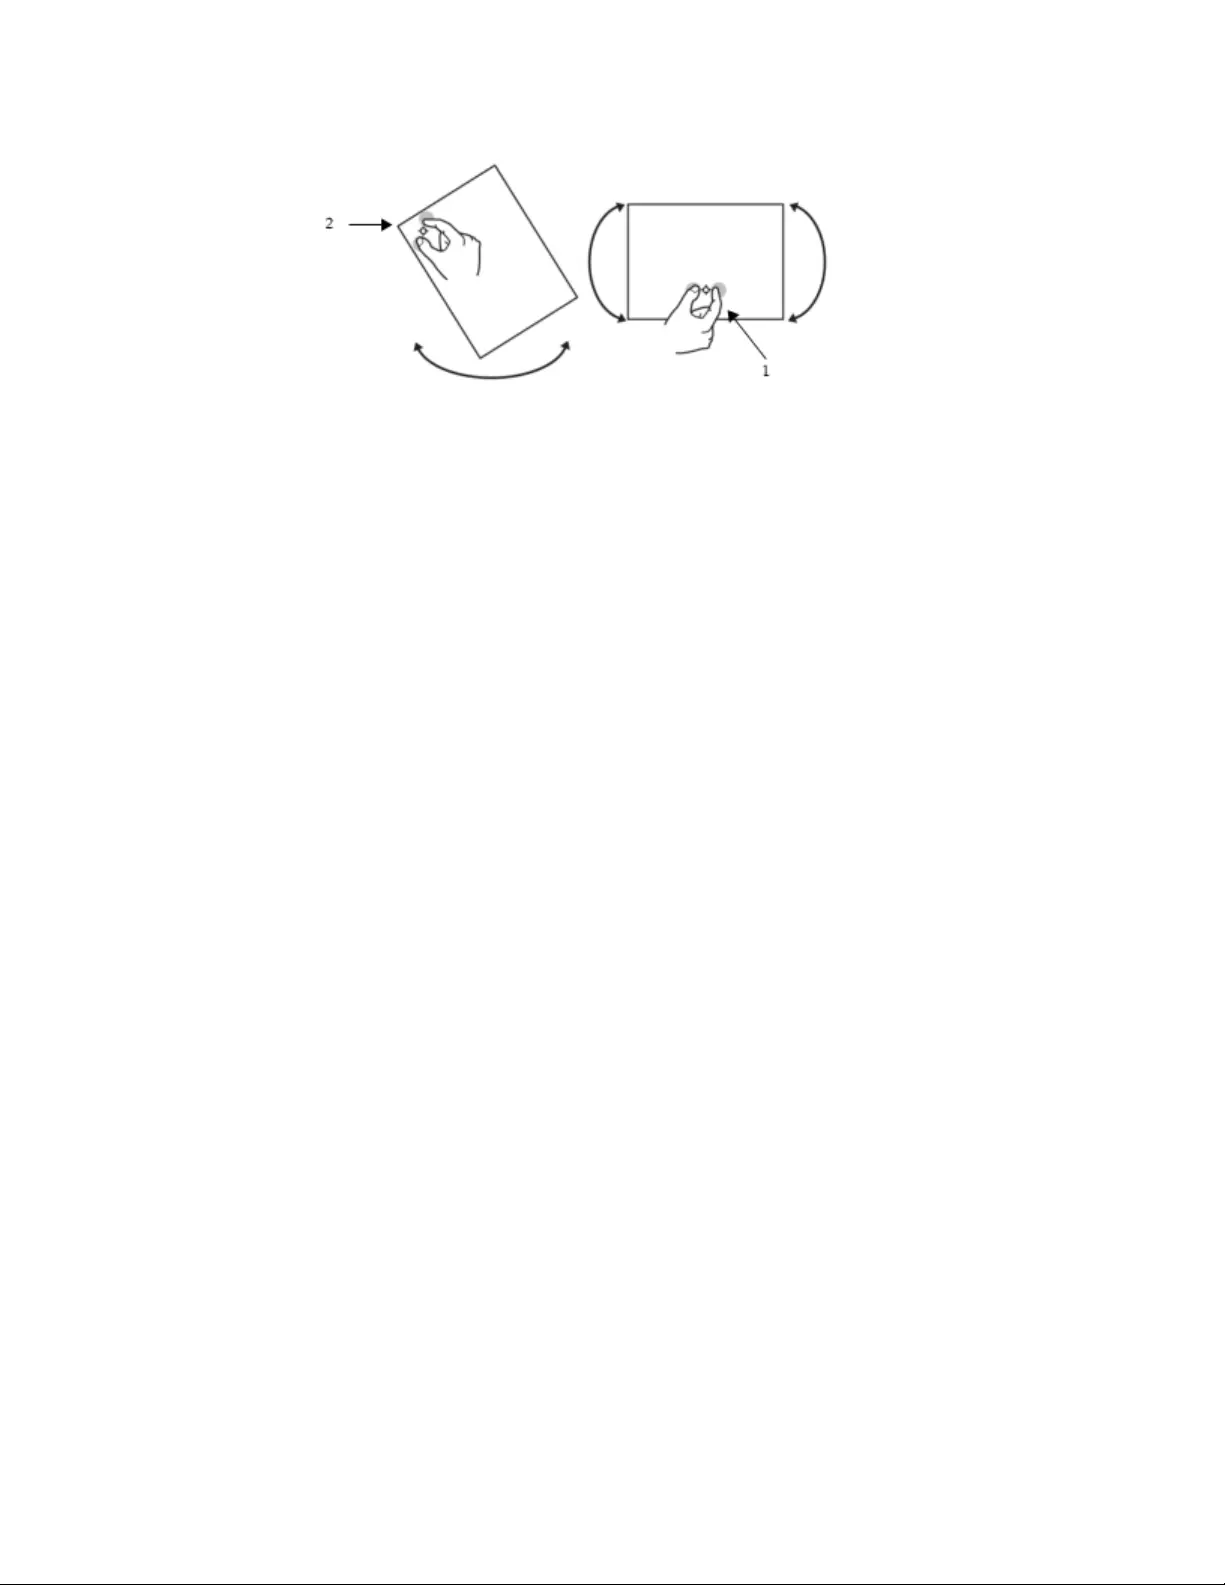
Creating, navigating, and manipulating documents | 123
Changing the finger positions from the center of the image (1) allows you to move the reference point (2).
When the multi-touch mode is disabled, you cannot simultaneously pan, rotate, and zoom the canvas. Disabling multi-touch is useful if you
find that the canvas moves unexpectedly or that brushstrokes do not apply paint as expected.
To restore the canvas position, rotation, and zoom level
• Double-tap two fingers simultaneously on the tablet.
To enable or disable multi-touch support (macOS)
1Choose Corel Painter 2022 Preferences Tablet and Trackpad.
2Enable or disable the Enable multi-touch for Wacom devices option.
To enable or disable multi-touch support (Windows)
1Choose Edit Preferences Tablet.
2In the Multi-touch options area, enable or disable the Enable multi-touch check box.
If multi-touch support is enabled, choose one of the following options:
•Wacom and Windows touch devices (recommended) — This option provides enhanced support both for Windows touch systems
and Wacom Intuos Pro, Cintiq, and other Wacom-compatible devices. Use this option if you have a Wacom tablet connected to a
Windows touch-enabled device and you want to manipulate your document both with the Wacom tablet and the touchscreen device.
•Wacom device — This option, available both on macOS and Windows, provides enhanced support only for Wacom Intuos Pro, Cintiq,
and other Wacom-compatible devices.
•Windows touch device — This option provides enhanced support only for Windows touch-enabled devices, for example, Surface Pro
tablets with a touch screen. With this option, your gestures on the tablet or device behave the same way in Corel Painter as in other
applications.
Trackpad support (macOS)
Corel Painter provides responsive support for the multi-touch trackpad on your Mac. You can perform useful actions by swiping, pinching, or
spreading one or more fingers on your trackpad. For example, you can swipe with two fingers to pan and scroll, pinch with your thumb and
forefinger to zoom in, and spread your thumb and forefinger apart to zoom out.
To enable or disable trackpad support (macOS)
1Choose Corel Painter 2022 menu Preferences Tablet and Trackpad.
2In the Two-finger gesture options on Apple devices equipped with a Trackpad or Sidecar area, choose one of the following:
•Pan, zoom, and rotate the document
•Zoom rapidly
•Disable gestures.
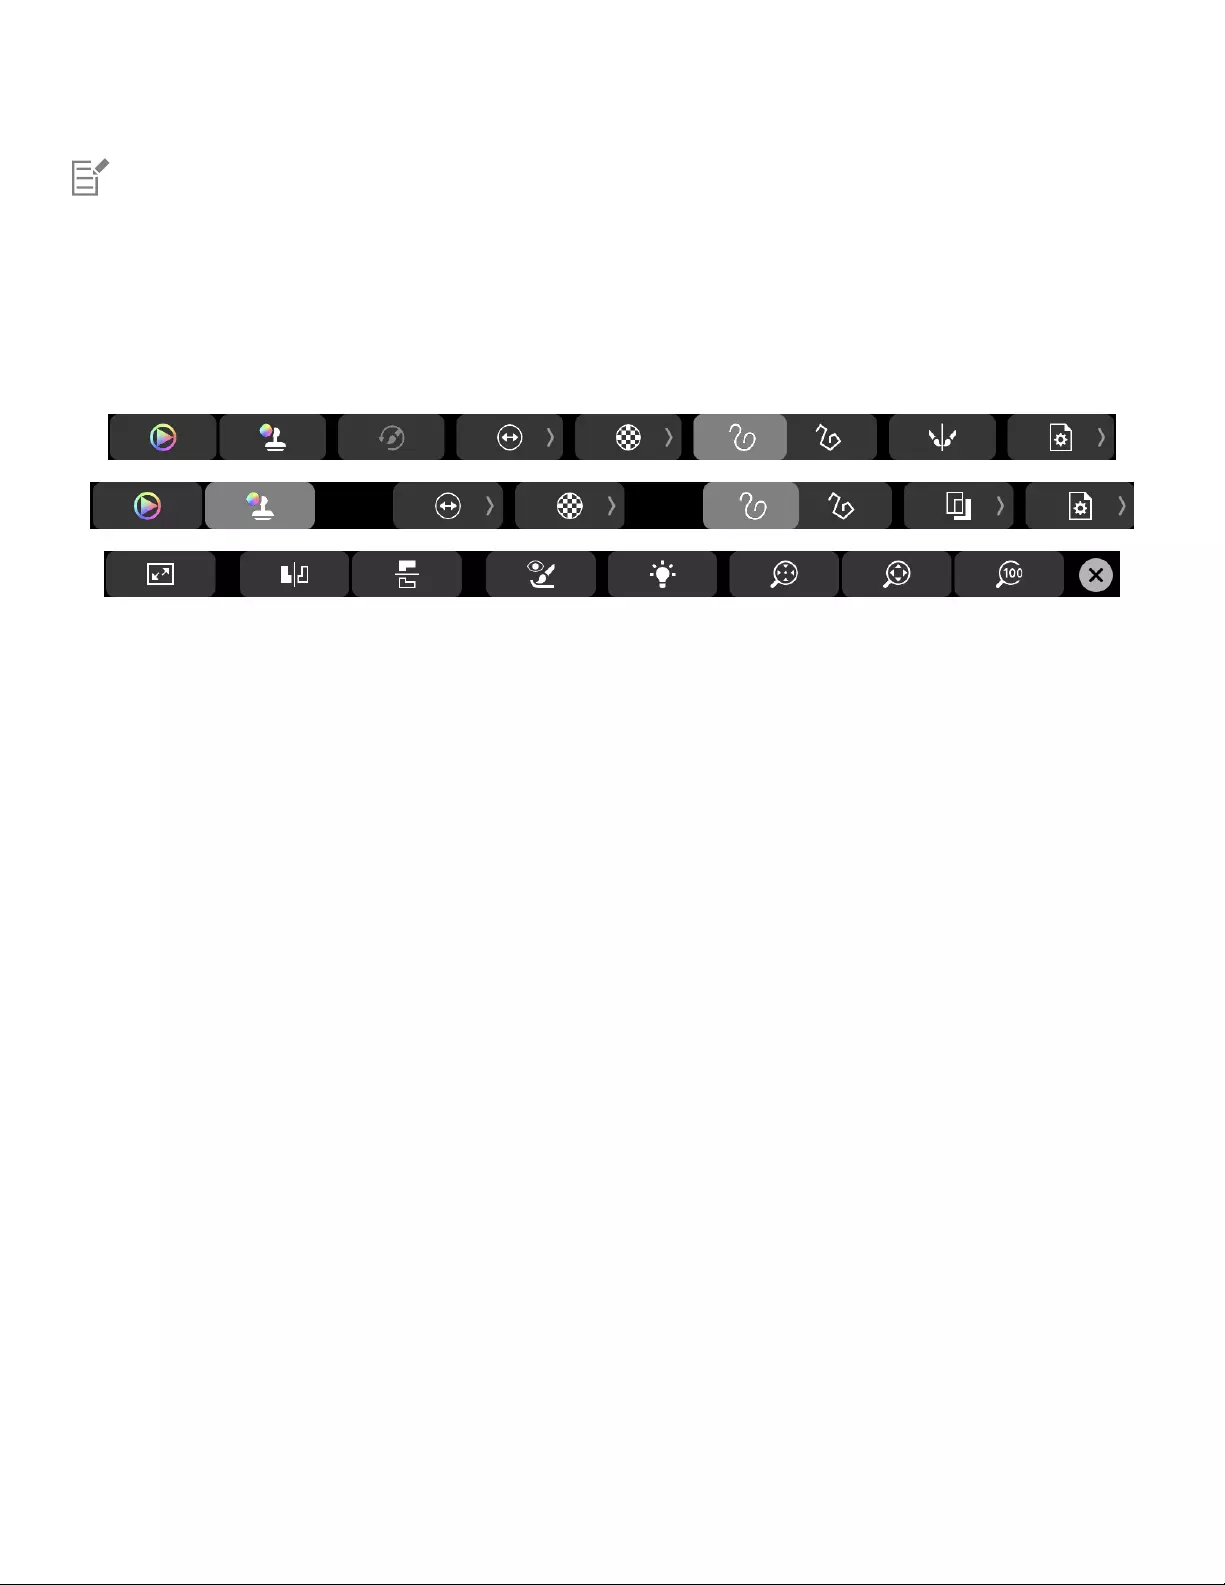
124 | Corel Painter 2022 User Guide
Enabling trackpad support may change mouse behavior.
Touch Bar support (macOS)
Corel Painter lets you take advantage of the Touch Bar, a touchscreen display located above the keyboard on supported MacBook Pro
models. The controls that appear on the Touch Bar change depending on the selected tool. For example, when you work with brushes, the
Touch Bar will display controls for selecting colors, cloning color, adjusting brush size and opacity, and more.
The Touch Bar content changes depending on the active brush or tool. For example, when you choose a variant from the Artists’ oils category (top),
the Touch Bar displays commands for selecting colors, adjusting brush size and opacity, and stroke options; when you choose a variant from a
Cloners category (middle), the Touch Bar provides access to additional controls, such as showing and hiding tracing paper. The Touch Bar also lets
you access useful document options (bottom) for switching document views, flipping the canvas, zooming, and more.
Wacom Intuos support
Corel Painter supports the use of Wacom® Intuos® tablet, pen, and airbrush technology.
Painting with an Intuos tablet and pen
The Intuos tablet provides increased pressure sensitivity to help you create smooth curves, gradual transitions, and precise brushstrokes.
When using an Intuos tablet with Corel Painter, you can take advantage of tilt and bearing input in exciting ways.
Customizing brush tracking
Every artist uses different pressure when drawing on an Intuos tablet. The Corel Painter brush tracking preferences help you customize your
Intuos tablet to meet your pressure sensitivity needs. For more information, see “Brush tracking and calibration” on page 153.
Linking stylus features to Expression settings
The Expression settings in the brush control panels let you tie brush features like Opacity, Grain, Angle, Size, Jitter, Resaturation, Bleed,
Flow, and Depth to stylus data, such as Velocity, Direction, Pressure, Wheel (for airbrushes), Tilt, and Bearing. For more information, see
“Expression settings” on page 339.
Using the Min Size setting
In Corel Painter, the Min Size setting lets you take full advantage of stylus input data. When Size is set in the Expression panel of the Brush
Controls palette to respond to stylus pressure, and the Min Size setting is set to a small percentage of the brush size, the strokes you make
with the stylus create amazingly realistic results.
Using the Intuos airbrush wheel
The Intuos Airbrush — the first true computer airbrush — provides fingertip media flow control. Corel Painter airbrushes respond to angle
(tilt), bearing (direction), and flow (wheel setting) data from the Intuos stylus, allowing for a truly realistic brushstroke. For example, as you
tilt your stylus, specks of media land on the paper in a way that reflects that tilt. Corel Painter airbrushes create conic sections that mirror
your stylus movements.

Creating, navigating, and manipulating documents | 125
Corel Painter airbrushes take advantage of the Intuos Airbrush stylus wheel control. Like the needle control on a real airbrush, the Intuos
wheel control adjusts airbrush flow, or how much medium is applied. For more information, see “Airbrushes” on page 427.
Painting with the Wacom Art Pen
For more information, see “Barrel rotation” on page 161.
Using multiple Intuos pens
All Intuos pens — both standard and airbrush — feature Tool ID, which lets you configure and work with multiple pens during a Corel
Painter session. For example, let’s assume you have two Intuos pens: Pen 1 and Pen 2. Pen 1 is set to an Oil brush variant; Pen 2 is set to a
Blenders variant.
Every time you bring Pen 1 into the tablet’s proximity, Corel Painter automatically changes the active brush to the Oil brush. Every time you
bring Pen 2 into the tablet’s proximity, Corel Painter switches to the Blenders brush. If you’ve adjusted the tool assigned to a pen’s size or
other settings, Corel Painter remembers those changes for the next time you use that pen.
Drag-and-drop features
Corel Painter supports drag-and-drop copying of documents and layers from one window to another.
Dragging layers between documents
You can copy layers between Corel Painter documents by dragging from one window to the other. When you drag a layer to a new
document, the layer keeps its original properties. For more information, see “Moving layers” on page 551.
Dragging between programs
Corel Painter supports drag-and-drop functionality between applications. This can be a quick, convenient way to acquire images. For
example, you can drag files from Adobe Photoshop directly into Corel Painter.

126 | Corel Painter 2022 User Guide

Using the Brush Accelerator to achieve optimal performance | 127
Using the Brush Accelerator to achieve optimal performance
To get the best possible performance from Painter on your system, you need to run the Brush Accelerator.
The Brush Accelerator is a utility that starts by analyzing your processor (CPU) to detect how many cores are available and whether it
supports extensions, such as AVX2. It also analyzes any available graphics processor (GPU) to determine its compatibility with Painter, as well
as how much memory (RAM) is installed on your system.
After the hardware components are detected, the Brush Accelerator tests your brush performance, determines your optimal settings, and
provides a score that indicates how Painter will perform on your system.
This section contains the following topics:
•“Evaluating your system” (page 127)
•“Understanding test results” (page 128)
•“Adjusting GPU settings” (page 129)
Evaluating your system
It typically takes only a few minutes to run the Brush Accelerator. Before running the test, you should save and close all open documents.
During the test, it’s recommended to close all unnecessary applications. Interacting with other applications while the Brush Accelerator is
running can affect the test results. The test may take several minutes.
Some variance in your score should be expected. If you get a lower score than anticipated, simply wait until your system is less busy and then
run the test again.
To run the Brush Accelerator
1On the Welcome Screen, click the Performance tab.
If the Welcome Screen isn’t open, choose Help Welcome.
2Click Optimize Now.
To cancel the test at any time, press Esc.

128 | Corel Painter 2022 User Guide
If your report scores are low, you can still run Painter. For the best experience, try using the Fast and Simple or Fast and Ornate
brush categories, and working on smaller documents.
You can also run the Brush Accelerator from the Performance page of the Preferences dialog box (for more information, see
“Performance preferences” on page 828), the Performance panel (for more information, see “Performance controls” on page
353), and the Advanced Brush Controls panel.
Understanding test results
If you see
4001 or higher (green) The Brush Accelerator predicts that your brush performance will be
exceptional.
1000-4000 (orange) The Brush Accelerator predicts that your system will have good
performance; however, some especially large or complex brushes
may benefit from system upgrades.
999 or lower (red) The Brush Accelerator predicts that although Painter will run on this
system, your brush performance will benefit from system upgrades.
Brush Accelerator — “x faster” A calculation of your brush performance based on the combination
of a baseline system, CPU features, and GPU.
Baseline The Brush Accelerator begins by determining a baseline system,
which is a theoretical, single-core processor with no enhancements.
Baseline + CPU The Brush Accelerator compares the degree to which your brush
performance is improved with the help of CPU features, such as
multi-core, and extensions, such as AVX2.
Baseline + CPU + GPU The Brush Accelerator determines potential brush performance
improvements from your GPU. A score will show only if your GPU
accelerates brushing.
Processor (CPU) cores warning (red) Your system does not have the recommended number of cores. You
will want a minimum of four physical cores for your computer to
keep up the pace.
Extensions (CPU) warning (red) Your system does not have a CPU with AVX2. Systems with an
AVX2-compatible CPU deliver enhanced performance.
Graphics processor (GPU) is gray The Brush Accelerator has compared the speed of your CPU to
the speed of your GPU and determined that your GPU does not

Using the Brush Accelerator to achieve optimal performance | 129
If you see
accelerate brushing. If your score is below 1000, consider updating
your GPU for better performance.
Graphics processor (GPU) is red The Brush Accelerator is unable to compare the speed of your CPU
to the speed of your GPU due to a compatibility issue. Consider
updating your drivers to ensure OpenCL (1.2 or higher) compliance
and run the test again. You will experience faster workflow with a
more powerful GPU.
Memory warning (red) Your system does not have the recommended level of RAM. The
more RAM, the better for working with large documents with
many layers. For fastest performance, you will need at least 8 GB
RAM.
Adjusting GPU settings
After the test, Painter automatically enables your GPU if the Brush Accelerator determines that it may help with brush performance. If you
have multiple available GPUs, check the Preferences dialog box to ensure that Painter has chosen the faster of the supported GPUs.
You can also change the selected GPU, run the Brush Accelerator again, and compare scores for each GPU. In addition, you can toggle GPU
support for all brushes, and for individual brushes, which lets you conduct your own tests for responsiveness with your favorite brushes,
settings, and workflows.
The actual performance you experience is dependent on your system hardware and several additional factors, such as the brush variants and
brush settings you are using, and document complexity, including file size, canvas dimensions, number of layers, as well as use of selections
and other elements.
To run the Brush Accelerator on a different GPU
1Choose Corel Painter 2022 menu Preferences Performance (macOS) or Edit Preferences Performance (Windows).
2In the Graphics Processor (GPU) area, choose a GPU from the Configure list box.
3In the Brush Accelerator area, click Rerun Brush Accelerator.
After the test, if the selected GPU accelerates Painter, you will have a higher Brush Accelerator score, and the Use the graphics
processor (GPU) to accelerate brush performance check box will be enabled in the Preferences dialog box.
If the Use the graphics processor (GPU) to accelerate brush performance check box is disabled, your system does not have a
GPU that is compatible with the Brush Accelerator.
To disable GPU support for all brushes
1Choose Corel Painter 2022 menu Preferences Performance (macOS) or Edit Preferences Performance (Windows).
2In the Graphics Processor (GPU) area, disable the Use the graphics processor (GPU) to accelerate brush performance check box.
To disable GPU support for the currently selected brush
1Choose Window Brush Control Panels Performance.
2In the Current Brush Optimizations area, click the Disable GPU for this brush check box.

130 | Corel Painter 2022 User Guide
You must first have a GPU enabled in the Preferences dialog box.
You can use the Painter Search bar to find brushes that can leverage specific performance technologies by choosing Window
Search, and using the terms GPU, AVX2, or Multi-core.

Keyboard shortcuts | 131
Keyboard shortcuts
Many features in Corel Painter have keyboard shortcuts which allow you to access a variety of tools quickly and easily using the keyboard,
rather than selecting them from a menu or panel.
The four modifier keys on a macOS-compatible keyboard are Command, Option, Shift, and the Spacebar.
The four modifier keys on the Windows keyboard are Ctrl, Alt, Shift, and the Spacebar.
The keyboard shortcuts rely on four modifier keys on macOS-compatible and Windows keyboards: Command, Option, Shift, and the
Spacebar on the macOS; and Ctrl, Alt, Shift, and the Spacebar on Windows.

132 | Corel Painter 2022 User Guide
Some of the same key combinations are reused to provide different actions depending on which tool is currently selected. For example,
holding down the Shift key while using the Rectangle shape tool constrains the shape to a square; whereas holding down the Shift key while
using a Cloning brush sets the clone destination.
This section contains the following topics:
•“Customizing keys” (page 132)
•“Toolbox commands” (page 134)
•“Panel commands” (page 136)
•“Corel Painter menu commands (macOS)” (page 137)
•“File menu commands” (page 137)
•“Edit menu commands” (page 138)
•“Canvas menu commands” (page 138)
•“Layers menu commands” (page 139)
•“Select menu commands” (page 139)
•“Shapes menu commands” (page 140)
•“Effects menu commands” (page 140)
•“Window menu commands” (page 140)
•“Help menu commands” (page 141)
•“Screen navigation” (page 141)
•“Panel navigation” (page 141)
•“Panel menu commands” (page 141)
•“Brush tools” (page 142)
•“Selection tools” (page 144)
•“Adjuster tools” (page 144)
•“Shape tools” (page 146)
•“Animation” (page 147)
•“Lighting” (page 147)
•“Layer selection tools” (page 147)
•“Mosaics” (page 147)
•“Other commands” (page 148)
Customizing keys
Corel Painter lets you assign commands to keys on your keyboard. This saves you time by giving you immediate keyboard access to your
favorite commands. Along with character, numeric, function, and modifier keys, you can also use Tab, Backspace (Windows), Delete, Insert,
Home, End, Page Up, Page Down, Up Arrow, Down Arrow, Left Arrow, Right Arrow, and Spacebar. You can use keys already used for other
shortcuts.
You can also create a collection of keyboard shortcuts, or key sets, based on changes to the default key set. For easy reference, you can
generate an HTML summary of a key set.
To assign commands to keys
1Do one of the following:
•(macOS) Choose Corel Painter 2022 menu Preferences Customize Keys.
•(Windows) Choose Edit Preferences Customize Keys.
If you want to modify keyboard shortcuts that you previously stored in a key set, choose the key set from the Key Set list box.
2Choose one of the following options from the Shortcuts list box:
•Application Menus — lets you create or modify menu bar command shortcuts
•Panel Menus — lets you create or modify panel menu command shortcuts
•Tools — lets you create or modify tools shortcuts

Keyboard shortcuts | 133
•Other — lets you create or modify command shortcuts for items that are not menus, panels, or tools
3Choose a command from the Application Commands list.
4In the Shortcut column next to the command, type the shortcut keys you want to assign.
If you typed a unique shortcut key, you can click OK to exit the Preferences dialog box.
If the shortcut you assigned is already in use, a message appears below the Application Commands list. To proceed, you need to
perform a task from the following table:
To Do the following
Assign the shortcut to the selected command while deleting the
shortcut key from the conflicting command
Click Accept.
Assign the shortcut to the new command and then assign another
keyboard shortcut to the conflicting command
Click Accept and Go To Conflict.
To revert keyboard shortcuts
To Do the following
Revert the last keyboard shortcut you created or modified Click Undo.
Revert to all keyboard shortcuts you created or modified since you
opened the Preferences dialog box
Click Reset. In the warning dialog box, click Yes.
Revert all keyboard shortcuts to their default settings Click Defaults. In the warning dialog box, click Yes.
To manage key sets (macOS)
To Do the following
Open an existing key set Click Open. In the Open Key Set dialog box, select a key set, and
click Open.
Create a new key set from the existing key set Click New. In the Save New Key Set dialog box, type a name for
the key set in the Save As box, and click Save.
Save the active key set Click Save. In the Save Key Set dialog box, type a name for the key
set in the Save As box, and click Save.
Create an HTML summary of the active key set Click Export to HTML. In the Save Summary dialog box, type a
name in the Save As box, and click Save.
Delete the active key set Click Delete.

134 | Corel Painter 2022 User Guide
Key set files created on the macOS cannot be imported into Corel Painter on Windows. Likewise, key set files created on Windows
cannot be imported into Corel Painter on the macOS.
To manage key sets (Windows)
To Do the following
Open an existing key set Click the Open button . In the Open Key Set dialog box,
select a key set, and click Open.
Create a new key set from the existing key set Click the New From Existing button . In the Save New Key
Set dialog box, type a name for the key set in the Filename box,
and click Save.
Save the active key set Click the Save Active Set button . In the Save Key Set dialog
box, type a name for the key set in the Filename box, and click
Save.
Create an HTML summary of the active key set Click the Create HTML Summary button . In the Save
Summary dialog box, type a name in the Filename box, and click
Save.
Delete the active key set Click the Delete button .
Key set files created on the macOS cannot be imported into Corel Painter on Windows. Likewise, key set files created on Windows
cannot be imported into Corel Painter on the macOS.
Toolbox commands
Tool name Shortcut key
Navigation and Utility tools
Magnifier M
Grabber G
Rotate Page E
Divine Proportion ,

Keyboard shortcuts | 135
Tool name Shortcut key
Layout Grid /
Perspective Guides (opens property bar) .
Crop C
Drawing and painting tools
Brush (Freehand line) B
Brush (Straight line) V
Paint Bucket K
Dropper D
Dodge —
Burn =
Cloner ;
Rubber Stamp ‘
Eraser N
Selection tools
Rectangular selection R
Oval selection O
Lasso L
Polygonal selection Shift + L
Magic wand W
Adjuster tools
Layer adjuster F
Selection adjuster S

136 | Corel Painter 2022 User Guide
Tool name Shortcut key
Shape selection H
Shape design tools
Pen P
Quick curve Q
Text T
Shape object tools
Rectangular shape I
Oval shape J
Shape edit tools
Scissors Z
Add point A
Convert point Y
Remove point X
Transform tool
Transform tool Option + Command + T (macOS)
Alt + Ctrl + T (Windows)
Symmetry tools
Mirror tool ‘
Kaleidoscope tool Shift + ‘
Panel commands

Keyboard shortcuts | 137
Command macOS Windows
Brush controls panel (General or All) Command + B Ctrl + B
Colors Command + 1 Ctrl + 1
Mixer Command + 2 Ctrl + 2
Color sets Command + 3 Ctrl + 3
Layers Command + 4 Ctrl + 4
Channels Command + 5 Ctrl + 5
Clone source Command + 6 Ctrl + 6
Navigator Command + 7 Ctrl + 7
Patterns Command + 8 Ctrl + 8
Papers Command + 9 Ctrl + 9
Corel Painter menu commands (macOS)
Command macOS
Preferences General Command + ,
Preferences Brush Tracking Command + Shift + ,
Preferences Customize Keys Command + Option + ,
Hide Corel Painter 2022 Command + H
Hide others Command + Option + H
Quit Command + Q
File menu commands
Command macOS Windows
New Command + N Ctrl + N
Open Command + O Ctrl + O
Close Command + W Ctrl + W
Save Command + S Ctrl + S

138 | Corel Painter 2022 User Guide
Command macOS Windows
Save as Shift + Command + S Shift + Ctrl + S
Iterative save Command + Option + S Ctrl + Alt + S
E-mail image Option + Command + E Alt + Ctrl + E
Page setup Shift + Command + P Shift + Ctrl + P
Print Command + P Ctrl + P
Exit (Windows) Ctrl + Q
Edit menu commands
Command macOS Windows
Undo Command + Z Ctrl + Z
Redo Command + Y Ctrl + Y
Fade Command + Shift + F Ctrl + Shift + F
Cut Command + X Ctrl + X
Copy Command + C Ctrl + C
Copy merged Command + Option + C Shift + Ctrl + C
Paste Shift + Command + V Shift + Ctrl + V
Paste in place Command + V Ctrl + V
Fill Command + F Ctrl + F
Free transform Option + Command + T Alt + Ctrl + T
Preferences General Ctrl + ,
Preferences Brush tracking Shift + Ctrl + ,
Preferences Customize Keys Ctrl + Alt + ,
Canvas menu commands
Command macOS Windows
Resize Shift + Command + R Shift + Ctrl + R

Keyboard shortcuts | 139
Command macOS Windows
Tracing paper Command + T Ctrl + T
Show/Hide rulers Command + R Ctrl + R
Symmetry Mirror Mode Option + Command + M Ctrl + Alt + M
Symmetry Show/Hide Mirror Shift + Command + M Ctrl + Shift + M
Symmetry Kaleidoscope Mode Command + K Ctrl + K
Symmetry Show/Hide Kaleidoscope
Planes
Command + Shift + K Ctrl + Shift + K
Show/Hide guides Command + ; Ctrl + ;
Snap to guides Shift + Command + ; Shift + Ctrl + ;
Show/Hide grid Command + ‘ Ctrl + ‘
Color management settings Option + Command + K Alt + Ctrl + K
Layers menu commands
Command macOS Windows
New layer Command + Shift + N Ctrl + Shift + N
Select all layers Command + Shift + 1 Ctrl + Shift + 1
Group Command + G Ctrl + G
Ungroup Command + U Ctrl + U
Collapse Command + E Ctrl + E
Collapse all visible layers Command+Shift+E Ctrl + Shift + E
Dry digital watercolor Command + Shift + L Ctrl + Shift + L
Select menu commands
Command macOS Windows
All Command + A Ctrl + A
None Command + D Ctrl + D

140 | Corel Painter 2022 User Guide
Command macOS Windows
Invert Command + I Ctrl + I
Reselect Shift + Command +D Shift + Ctrl +D
Hide marquee Shift + Command + H Shift + Ctrl + H
Load selection Shift + Command + G Shift + Ctrl + G
Shapes menu commands
Command macOS Windows
Join endpoints Shift + J Shift + J
Duplicate Command + ] Ctrl + ]
Set shape attributes Command + [ Ctrl + [
Effects menu commands
Command macOS Windows
Last effect Command + / Ctrl + /
2nd Last Effect Command + Option + / Ctrl + Alt + /
Tonal Control Adjust Colors Shift + Command + A Ctrl + Shift + A
Tonal Control Brightness/Contrast Shift + Command + B Ctrl + Shift + B
Tonal Control Equalize Shift + Command + E Ctrl + Shift + E
Tonal Control Negative Shift + Command + I Ctrl + Shift + I
Window menu commands
Command macOS Windows
Panels Tab Tab
Zoom in Command + Plus sign Ctrl + Plus sign
Zoom out Command + Minus sign Ctrl + Minus sign
Zoom to fit Command + 0 Ctrl + 0

Keyboard shortcuts | 141
Command macOS Windows
Actual size Command + Option + 0 Ctrl + Alt + 0
Hide application UI Tab Tab
Hide panels Shift + Tab Shift + Tab
Single document view Command + M Ctrl + M
Help menu commands
Command macOS Windows
Corel Painter 2022 Help F1 F1
Screen navigation
Command macOS Windows
Scroll image with grabber Spacebar Spacebar
Center image Spacebar + click Spacebar + click
Zoom in Spacebar + Command + click Spacebar + Ctrl + click
Zoom out Spacebar + Command + Option +
click
Spacebar + Ctrl + Alt + click
Rotate image Spacebar + Option + drag Spacebar + Alt + drag
Constrain rotate to 90 degrees Shift + Option + Spacebar + drag Spacebar + Alt + Shift + drag
Orient screen to default view Shift + Option + click Shift + Alt + click
Panel navigation
Command macOS Windows
Scroll contents of panel Option + click + drag Alt + click + drag
Expand/Collapse all panels Shift + click on Open/Close triangle Shift + click on Open/Close triangle
Panel menu commands

142 | Corel Painter 2022 User Guide
Command macOS Windows
Layers panel
New layer Command + Shift + N Ctrl + Shift + N
Group layers Command + G Ctrl + G
Ungroup layers Command + U Ctrl + U
Collapse layers Command + E Ctrl + E
Select all layers Command + Shift + 1 Ctrl + Shift + 1
Dry digital watercolor layer Command + Shift + L Ctrl + Shift + L
Colors panel
Toggle between main and additional
colors
Shift + S Shift + S
Standard colors Shift + O Shift + O
Use clone color U U
Mixer panel
When apply color tool or mix color tool
active
Pan tool Spacebar Spacebar
Zoom tool (zoom-in) Command+ Spacebar Ctrl + Spacebar
Zoom tool (zoom-out) Command+ Spacebar + Option Ctrl + Spacebar + Alt
Channels panel
Clear Command + Shift + U Ctrl + Shift + U
Gradients panel
Edit gradient Command + Shift + E Ctrl + Shift + E
Brush tools
Command macOS Windows
Brush controls

Keyboard shortcuts | 143
Command macOS Windows
Dropper Option Alt
Layer adjuster Command Ctrl
Resize brush Option + Command Alt + Ctrl
Increase current brush size
incrementally
] ]
Decrease current brush size
incrementally
[ [
Constrain to 45 degrees Shift Shift
Adjust opacity in 10% increments 1 to 0 keys 1 to 0 keys
Unconstrained draw Shift + 1 Shift + 1
Draw outside Shift + 2 Shift + 2
Draw inside Shift + 3 Shift + 3
Load nozzle Command + L Ctrl + L
Cloners
Set clone source Option Alt
Set clone destination Option + Shift Alt + Shift
Re-link clone source Command + Option + Clone Ctrl + Alt + Clone
Colors
Correct colors Command + Shift + K Ctrl + Shift + K
Toggle between main and additional
colors
Shift + X Shift + X
Gradations
Adjust spiral Command + Angle Adjuster Ctrl + Angle Adjuster

144 | Corel Painter 2022 User Guide
Command macOS Windows
Paint bucket
Limit fill extent Drag Drag
Dropper Option Alt
Selection tools
Command macOS Windows
Rectangle, Oval, and Lasso selection
tools
Constrain to square or circle Hold down Shift after you start to
drag.
Hold down Shift after you start to
drag.
Add to selection Shift Shift
Subtract from selection Option Alt
Magic wand
Add color to selection Shift + click Shift + click
Add range of colors to selection Shift + drag Shift + drag
Remove color from selection Option + click Alt + click
Remove range of colors from selection Option + drag Alt + drag
Adjuster tools
Command macOS Windows
Layer adjuster Command (except when either the
screen navigation or Shape tools are
selected)
Ctrl (except when either the screen
navigation or Shape tools are selected)
Selection adjuster Command (when Selection tools are
selected)
Ctrl (when Selection tools are selected)
Shape selection tool Command (when Shape tools are
selected)
Ctrl (when Shape tools are selected)

Keyboard shortcuts | 145
Command macOS Windows
Layer adjuster
Duplicate Option + drag Alt + drag
Delete layer Command + Shift + D Ctrl + Shift + D
Move layer by one screen pixel Arrow keys Arrow keys
Hide/Display marquee Command + Shift + H Ctrl + Shift + H
Attribute dialog box for current layer Enter Enter
Adjust opacity in 10% increments 1 to 0 keys 1 to 0 keys
Select all layers Command + Shift + Option + Anone
Deselect layers Command + Shift + Option + Dnone
Select/Deselect mode Command + Shift Ctrl + Shift
Selection adjuster
Reposition Click inside active selection, and drag Click inside active selection, and drag
Duplicate Option + drag Alt + drag
Move selection by one screen pixel Arrow keys, on canvas Arrow keys, on canvas
Delete current selection Delete Backspace
Select/Deselect mode Shift Shift
Free transform
Distort Option + corner handles Alt + corner handles
Perspective distort Command + Option + corner handles Ctrl + Alt + corner handles
Resize Corner handles Corner handles
Resize/Preserve aspect Shift + corner handles Shift + corner handles
Resize/One dimension Side handles Side handles
Rotate Command + corner handles Ctrl + corner handles

146 | Corel Painter 2022 User Guide
Command macOS Windows
Skew Command + side handles Ctrl + side handles
Shape tools
Command macOS Windows
Shape selection tool toggle Command Ctrl
Shape design tools
Command macOS Windows
Pen
Add to current point Click last point Click last point
Quick curve
Add to current endpoint Click and draw from endpoint Click and draw from endpoint
Shape objects tools
Command macOS Windows
Rectangle
Constrain to square Shift + click Shift + click
Circle
Constrain to circle Shift + click Shift + click
Shape selection tool
Command macOS Windows
Direct selection
Select start point of shape Home Home
Select endpoint of shape End End
Select previous point in shape Page up Page up
Select next point in shape Page down Page down

Keyboard shortcuts | 147
Command macOS Windows
Move path by one screen pixel Arrow keys Arrow keys
Delete selected (closed) shape Delete Backspace
Animation
Command macOS Windows
First frame of stack Home Home
Last frame of stack End End
Next frame Page up Page up
Previous frame Page down Page down
Stop at current frame Option + Stop Alt + Stop
Stop and return to current starting
frame
Command + . Ctrl + .
Lighting
Command macOS Windows
Lighting mover Shift + Command + L Shift + Ctrl + L
Layer selection tools
Command macOS Windows
Group Command + G Ctrl + G
Ungroup Command + U Ctrl + U
Mosaics
Command macOS Windows
Get tile color Option + click tile Alt + click tile
Get tile shape Command + click tile Ctrl + click tile
Delete tile Shift + click tile Shift + click tile

148 | Corel Painter 2022 User Guide
Command macOS Windows
Select all tiles A A
Deselect all tiles D D
Change selected tiles to current color C C
Tint selected tiles with current color T T
Vary color of selected tiles V V
Other commands
Command macOS Windows
Add current color to color set Command + Shift + T Ctrl + Shift + T
Swap colors Shift + S Shift + S
Use Clone Color Command + Shift + Y Ctrl + Shift + Y
Next document Ctrl + Tab
Previous document Ctrl + Shift + Tab
Tightest enclosing group Command + Shift + Q Ctrl + Shift + Q
Select none Command + Shift + 2 Ctrl + Shift + 2
Nudge 1 pixel Arrow key Arrow key
Nudge 4 pixels Shift + Arrow key Shift + Arrow key
Memory info Shift + I Shift + I
Zoom to actual pixels Command + Option + 0 Ctrl + Alt + 0
Close all windows Command + Shift + W Ctrl + Shift + W
Snap to grid Command + Option + \ Ctrl + Alt + \
Toggle pinned temporal color selector Command + Option + 1 Ctrl + Alt + 1
Transform duplicate Command + Shift + Option + T Ctrl + Alt + Shift + T
Delete selection or node Delete Backspace
Delete layer Command + Delete Ctrl + Backspace

Keyboard shortcuts | 149
Command macOS Windows
Perspective Guides — Reposition one
vanishing point and the associated
primary lines together
Hold down Shift and drag the
vanishing point to a new position.
Hold down Shift and drag the
vanishing point to a new position.
Perspective Guides — Reposition all
vanishing points and primary lines
together
Hold down Command + Shift
(macOS) or Ctrl + Shift (Windows),
and drag the vanishing point to a new
position.
Hold down Command + Shift
(macOS) or Ctrl + Shift (Windows),
and drag the vanishing point to a new
position.

150 | Corel Painter 2022 User Guide
Painting | 151
Painting
The Corel Painter application lets you draw and paint as you might with real artists’ tools and media. In your studio, you use brushes, pens,
pencils, chalk, airbrushes, and palette knives to make marks on a canvas or piece of paper. With Corel Painter, an infinite variety of marks are
possible.
This section contains the following topics:
•“Choosing a painting workflow” (page 151)
•“Brush tracking and calibration” (page 153)
•“Exploring painting media” (page 157)
•“Working with the canvas and layers” (page 157)
•“Displaying reference images” (page 158)
•“Clearing the canvas” (page 159)
•“Setting up the drawing cursor” (page 159)
•“Using a stylus vs. a mouse” (page 159)
•“Applying freehand and straight brushstrokes” (page 164)
•“Constraining, fading, and undoing strokes” (page 165)
•“Aligning brushstrokes to paths and shapes” (page 166)
•“Making 360° strokes” (page 166)
•“Erasing image areas” (page 167)
•“Letting media pool” (page 168)
•“Recording and playing back brushstrokes” (page 168)
•“Reference: Troubleshooting” (page 170)
Choosing a painting workflow
Corel Painter includes a wide array of tools and features that allow you to create original artwork. The purpose of this topic is to introduce
you to the two most-common Corel Painter workflows and refer you to Help topics that provide more information about each of these
workflows.
Workflow 1: Start with a photo
Using Corel Painter’s powerful cloning tools, you can quickly transform a digital photo into a painting.
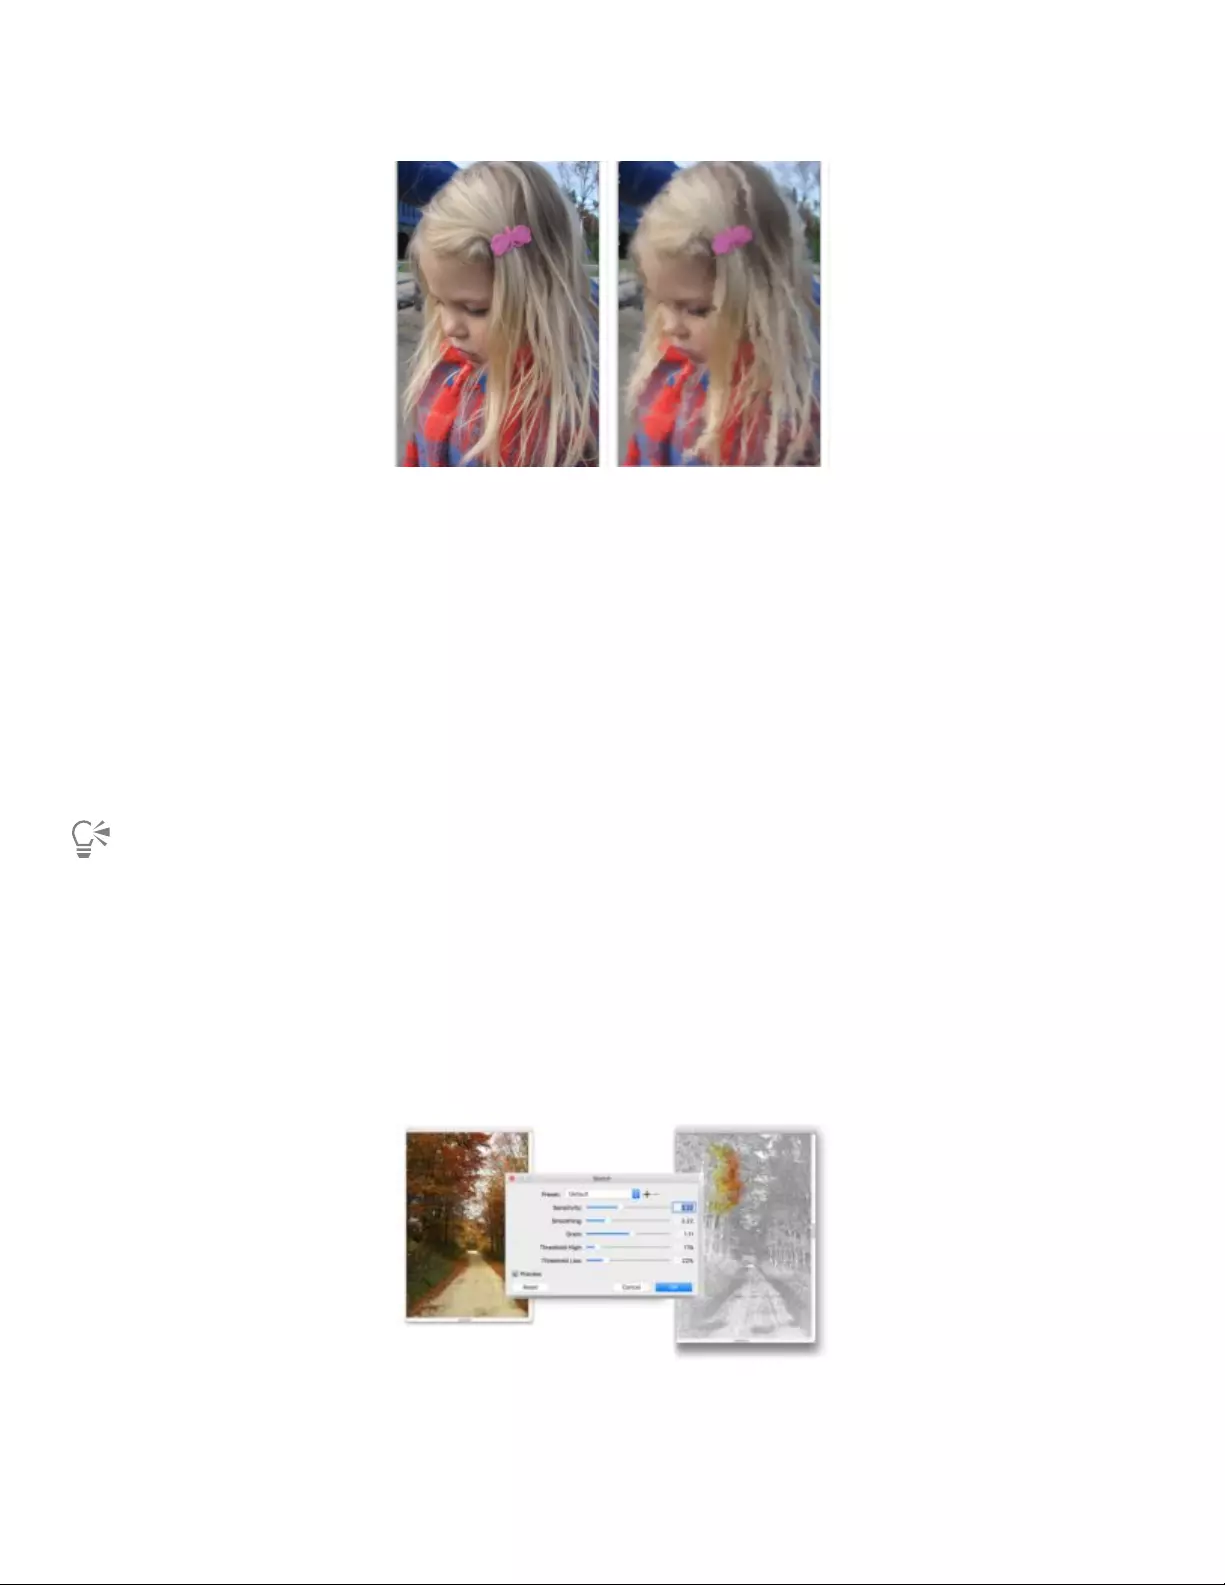
152 | Corel Painter 2022 User Guide
The photo (left) was cloned (right) to begin the painting process.
Workflow step Help topic
1. Open a photo for painting “Opening and placing files” on page 101
2. Prepare a photo for cloning “To clone an image by using Quick Clone” on page 198
3. Paint the clone “Painting in the clone” on page 195
4. Save the photo painting “Saving and backing up files” on page 118
You can also create a photo-painting by using the Auto-painting feature. For more information, see “Auto-painting photos” on
page 187.
Workflow 2: Start with a sketch
In Corel Painter, you can quickly create a sketch of a photo so you can use it as a guide for applying color. To maintain the integrity of the
sketch, you should apply color to layers, and not directly to the sketch. In addition, depending on the desired effect, using layers gives you
the option of incorporating the sketch markings in the final image. If you don’t want the sketch to be visible in the final image, you can
delete the sketch by clearing the canvas. When you’re done, you can drop the layers to the canvas.
The photo (left) was transformed into a sketch (right) to begin the painting process.
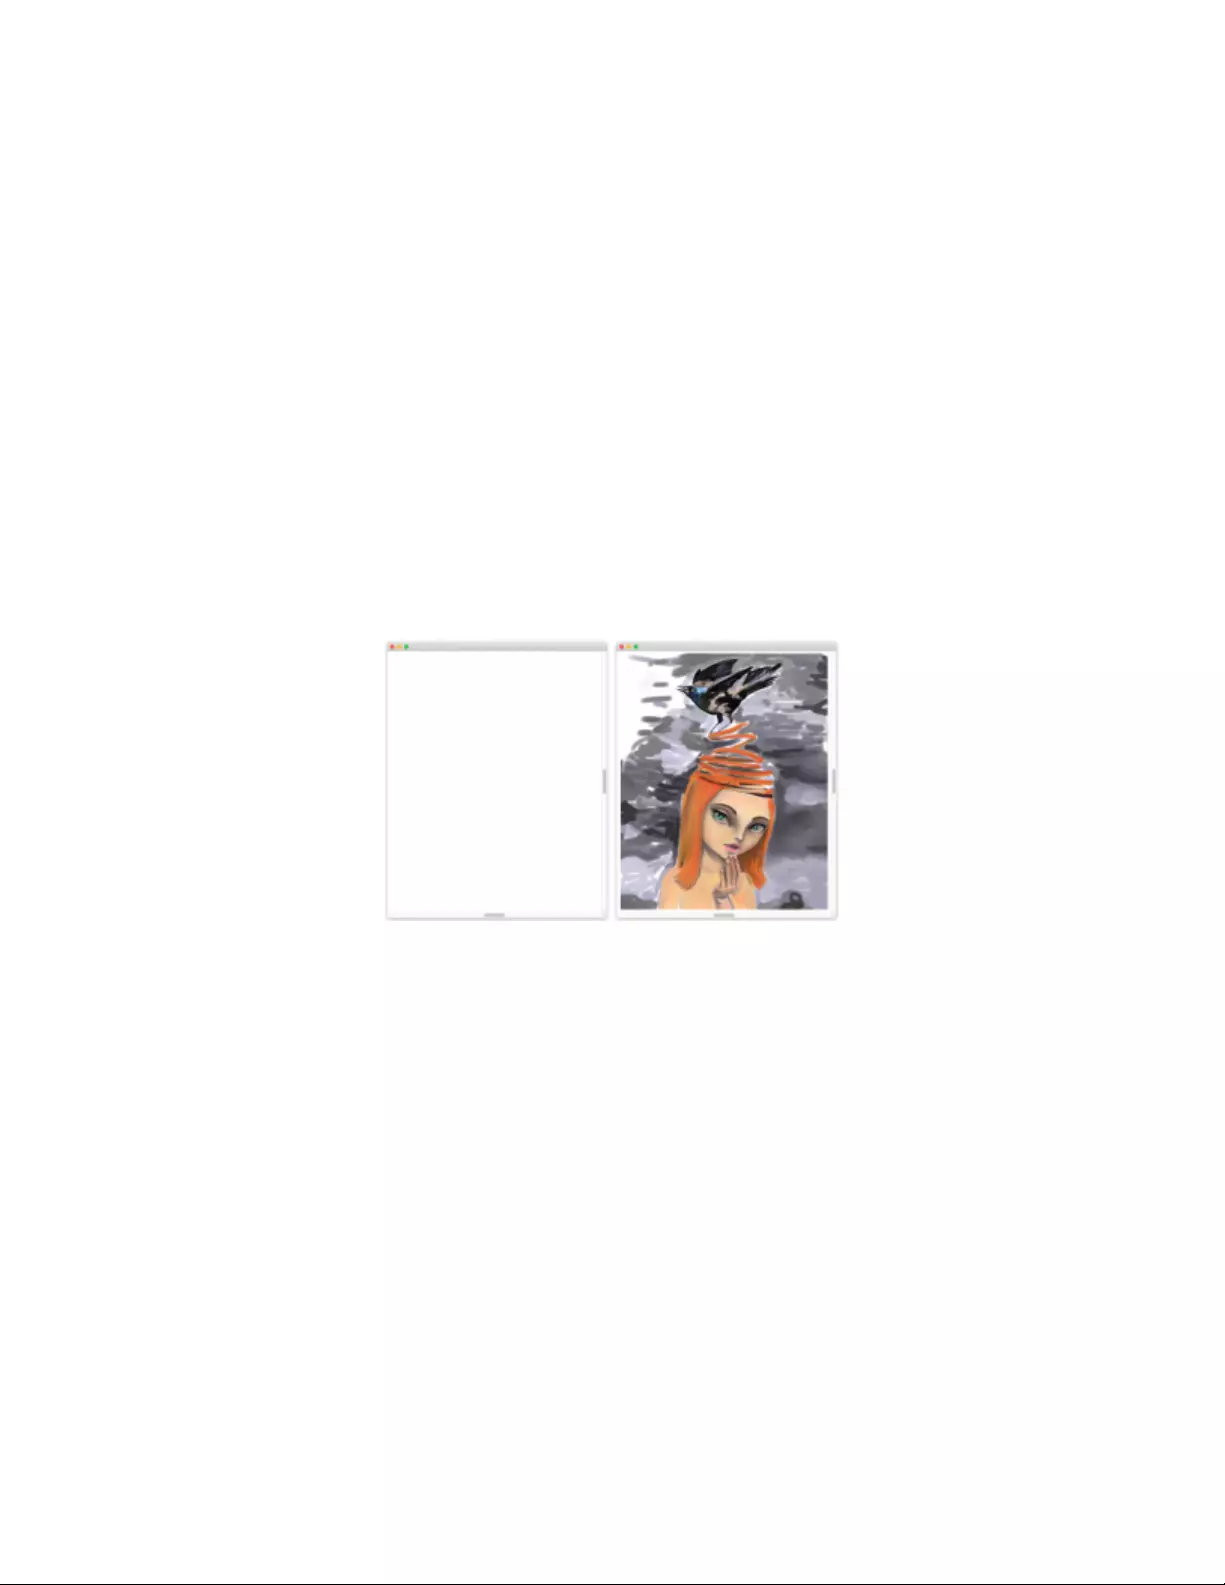
Painting | 153
Workflow Help topic
1. Choose a photo “Opening and placing files” on page 101
2. Convert a photo into a sketch “Applying the Sketch effect” on page 672
3. Create a layer “Creating and deleting layers” on page 545
4. Apply a brushstroke to the layer “Painting on layers” on page 562
5. Clear the canvas “Clearing the canvas” on page 159
6. Drop layers to the canvas “Dropping layers with the canvas” on page 562
Workflow 3: Start with a blank canvas
You can also start a project from scratch by choosing a paper texture and a brush, and applying color to the canvas.
You can start with a blank canvas (left) and use your imagination, and the Corel Painter tools, to create a work of art.
Workflow Help topic
1. Choose a paper texture “Applying paper texture” on page 171
2. Choose a brush “Selecting, managing, and creating brushes” on page 313
3. Choose a color “Choosing colors from the Color panel” on page 250
4. Apply a brushstroke to the canvas “Applying freehand and straight brushstrokes” on page 164
Brush tracking and calibration
When you draw with traditional media, the amount of pressure that you use with a tool determines the density and width of your strokes.
Using a pressure-sensitive stylus with Corel Painter gives you the same kind of control. Because each artist uses a different strength or
pressure level in a stroke, you can adjust Corel Painter to match your stroke strength for all brushes by using the Brush Tracking preferences,
or for a specific brush, by using the Brush Calibration controls.
154 | Corel Painter 2022 User Guide
Brush Tracking for all brush variants
Brush Tracking is particularly useful for artists with a light touch. If a light stroke leaves no color on the canvas, you can use Brush Tracking
to increase sensitivity for all brushes. Corel Painter saves Brush Tracking between sessions, so whatever tracking sensitivity you set will be the
default the next time you open the application.
Abrupt changes in the width or density of your strokes shows that you need to adjust your Brush Tracking preferences.
Top: A brushstroke with abrupt changes in width. Bottom: A similar brushstroke with adjusted brush tracking.
The most common way of adjusting brush tracking is to apply a typical brushstroke, such as a wavy stroke, to the scratch pad. Corel Painter
then uses your stroke to calculate the appropriate pressure and velocity settings for all brush variants. However, you can also specify pressure
and velocity values.
Use the scratch pad in the Brush Tracking dialog box to customize how Corel Painter responds to your stroke pressure and speed.
In addition, Corel Painter includes the following brush tracking presets that you can choose from: Default, Legacy, and Linear.
The graph in the Brush Tracking dialog box shows how increasing the pen pressure affects brushstrokes, which are referred to as “output”
in the graph.
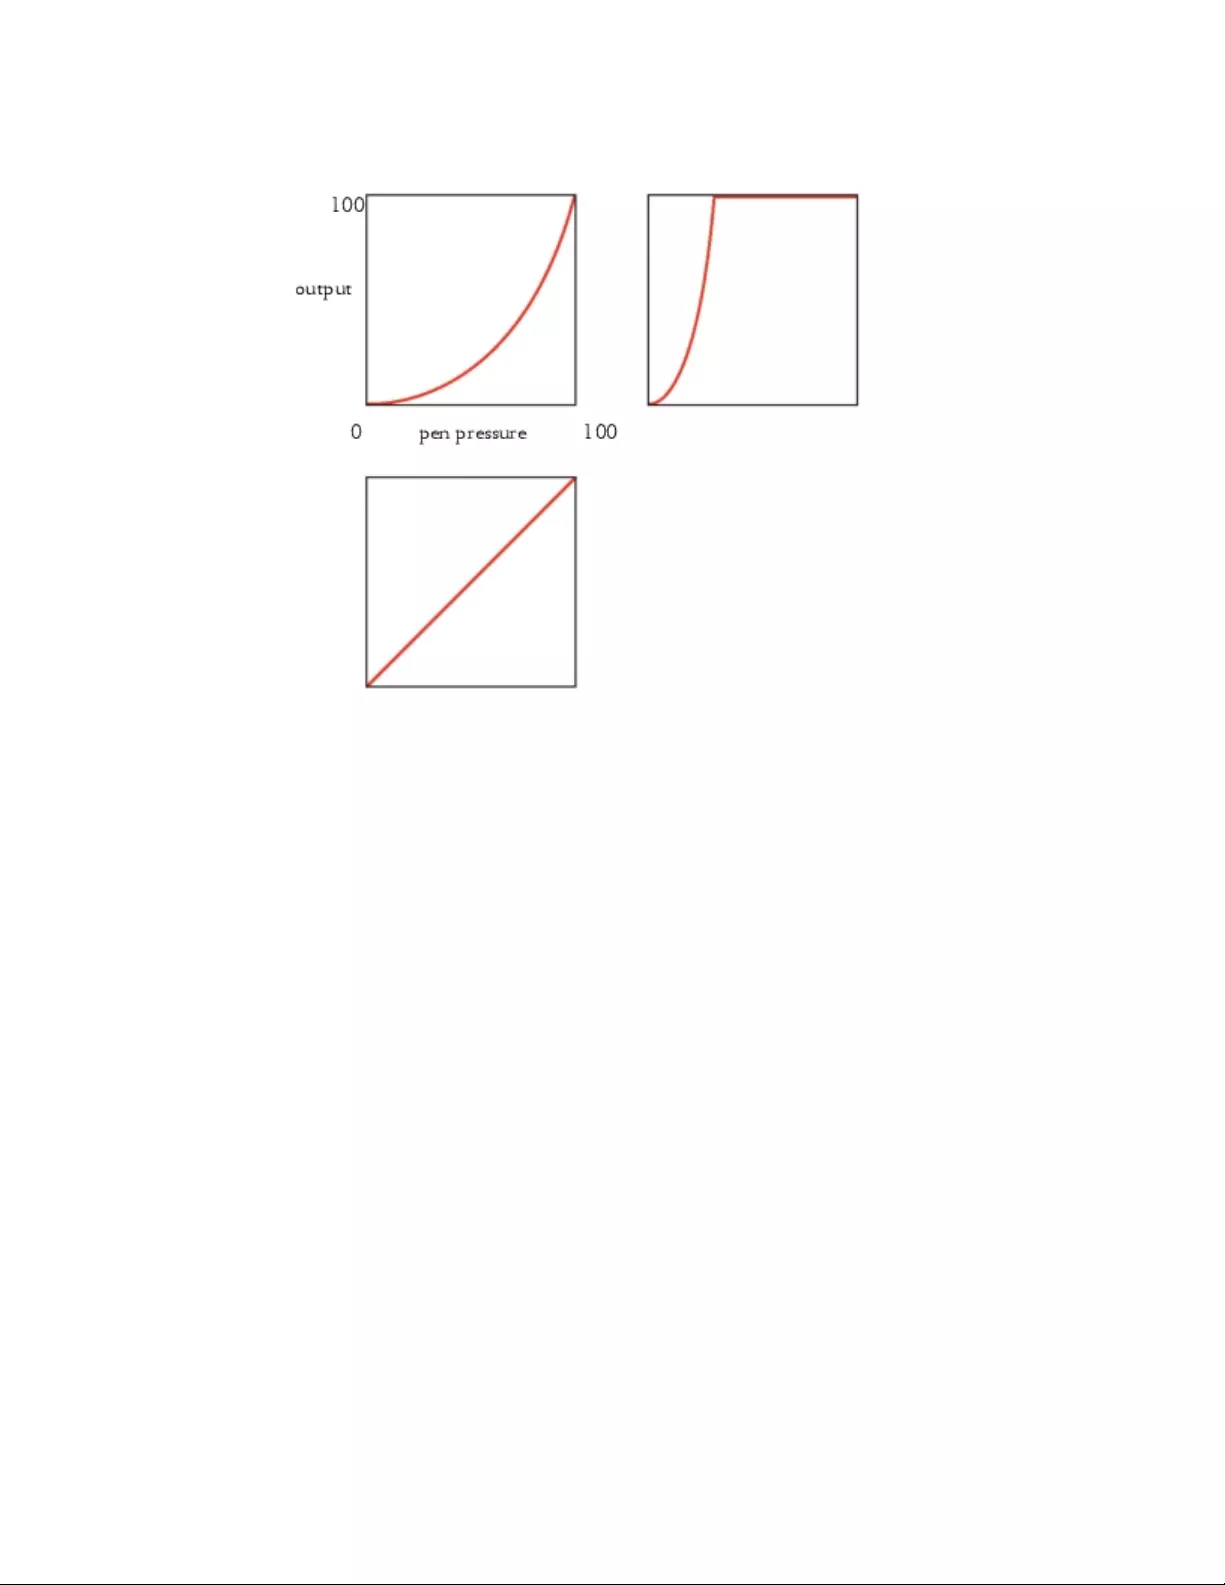
Painting | 155
The graphs for the Default preset (upper left), the Legacy preset (upper right), and the Linear preset (lower left)
By default, brush tracking settings apply to all brush variants, but you can also limit them to only the current brush variant.
Brush Calibration for individual brush variants
The Brush Calibration controls are very useful for adjusting individual brush variants. You can modify the pressure of your stroke on the
scratch pad to achieve different results. For example, you could use a light touch when sketching with a pencil brush variant, but set more
pressure when using an oil paint brush variant. Corel Painter saves Brush Calibration control settings with the brush variant, so whatever
sensitivity you set will be the default the next time you choose the brush variant. If you set Brush Calibration for a specific brush in addition
to general Brush Tracking preferences, the Brush Calibration settings override the Brush Tracking preferences.
Manually adjusting pressure and velocity
When you use the scratch pad to set brush tracking and calibration, Corel Painter calculates the pressure and velocity settings for you.
However, you can manually adjust these settings. For example, you can adjust the stroke pressure to achieve a full pressure range with a
softer or harder touch by using the Scale and Power sliders for pressure. You can also adjust the stroke velocity to achieve a full velocity
range with a slower or faster stroke by using the Scale and Power sliders for velocity.
To ensure that a brush control is using the pressure or velocity settings, you need to set the brush control Expression setting to Pressure or
Velocity. For more information, see “Expression settings” on page 339.
To set brush tracking
1Do one of the following:
•(macOS) Choose Corel Painter 2022 menu Preferences Brush Tracking.
•(Windows) Choose Edit Preferences Brush Tracking.
2Drag in the scratch pad by using a “normal” stroke.
Use the pressure and speed you prefer when drawing or painting. This allows the Brush Tracker to calculate the appropriate speed and
pressure settings for the brush.
156 | Corel Painter 2022 User Guide
If you are using a Wacom-compatible tablet, you can also apply brushstrokes in the document to preview the results and make
adjustments as needed.
To adjust the settings manually, perform a task from the following table:
To Do the following
Achieve a full pressure range with a softer or harder touch In the Pressure area, move the Scale and Power sliders.
Achieve a full velocity range with a slower or faster motion In the Velocity area, move the Scale and Power sliders.
Limit brush tracking to the current brush variant Enable the Apply to current brush variant check box.
To choose a brush tracking preset
1Do one of the following:
•(macOS) Choose Corel Painter 2022 Preferences Brush Tracking.
•(Windows) Choose Edit Preferences Brush Tracking.
2Choose one of the following presets from the Preset list box:
•Default — suitable for most artists. The preset also provides a good starting point for brush tracking adjustments.
•Legacy — default brush tracking in Corel Painter X3 and earlier versions
•Linear — pressure changes impact the brushstroke in a linear fashion. Each small variation in pen pressure changes the brushstroke.
You can also
Save brush tracking settings as a custom preset Adjust any settings you want in the Brush Tracking dialog box.
Click the Add button . In the Add Preset dialog box, type a
name in the Preset Name text box.
Delete a custom brush tracking preset Choose the preset from the Preset list box, and click the Delete
button .
To set brush calibration
1In the toolbox, click the Brush tool .
2Click the Brush Selector on the Brush Selector bar.
3Click a brush category, and click a brush variant.
4Choose Window Brush Control Panels Brush Calibration.
5Enable the Enable Brush Calibration check box.
6Click the Set brush calibration settings button .
7Drag in the scratch pad by using a “normal” stroke.
Use the pressure and speed you prefer when drawing or painting. This allows the Brush Tracker to calculate the appropriate speed and
pressure settings for the brush.
To adjust the settings manually, perform a task from the following table:

Painting | 157
To Do the following
Achieve a full pressure range with a softer or harder touch Adjust the Pressure Scale and Pressure Power sliders.
Achieve a full velocity range with a slower or faster motion Adjust the Velocity Scale and Velocity Power sliders.
Exploring painting media
Corel Painter lets you apply a wide variety of media to the canvas. For example, you can use a brush to apply colors directly from a color
panel or apply a color that you mixed on the Mixer Pad. You can also paint by using a gradient, pattern, or clone.
The following table lists the media that you can apply to the canvas or layer and references to the related topic in the Help.
Media For information
Color “Choosing colors from the Color panel” on page 250
Mixer pad “Exploring the Mixer panel and mixing controls” on page 260
Two-color “Creating two-color brushstrokes” on page 259
Gradients “Applying gradients” on page 711
Patterns “Painting with patterns” on page 699
Cloners “Painting in the clone” on page 195
Working with the canvas and layers
In Corel Painter, you have the option of painting directly on the canvas by applying brushstrokes or by creating a layer and applying
brushstrokes on it. Working with layers allows you to protect the canvas from any unwanted changes. When you select a layer in the Layers
panel, that layer becomes the target for your brushstrokes. For more information, see “Getting started with layers” on page 540.
The result of any brushstroke you make depends on the following:
• The brush category (or drawing tool) you choose
• The brush variant you select within the brush category
• The brush controls you set, such as brush size, opacity, and the amount of color penetrating paper texture
• The paper texture
• The color, gradient, or pattern you use as media
• The brush method
If you are using a Watercolor brush, you can paint only on a Watercolor layer. If you are using a Liquid Ink brush, you can paint only on a
Liquid Ink layer. For more information, refer to “Working with the Watercolor layer” on page 432 and “Working with Liquid ink brushes”
on page 523.
If you try to paint on a shape, dynamic layer, or reference layer, you must commit it to a standard layer so that your brushstrokes are
accepted.

158 | Corel Painter 2022 User Guide
You can also select a channel or a layer mask as the target for your brushstrokes. For more information, see “Creating and copying channels”
on page 583 or “Creating and deleting layer masks” on page 574.
When you have an active selection, painting is confined to the selection by default. For more information, see “Selections and
transformations” on page 593.
When you use complex brush variants, you see a dotted line on the canvas before the mark appears. For example, the Gloopy variant of the
Impasto brush is complex, and it delays the appearance of the stroke onscreen. When you experience a delay, you can continue applying
strokes, without losing any stroke data, while waiting for the stroke to appear on the screen.
Displaying reference images
In Corel Painter, you can open an inspirational photo or image that you want to reference in a painting by using the Reference Image panel.
An example of displaying an image in the Reference Image panel and using it as an inspiration for a painting
You can reposition or magnify the reference image while maintaining focus on your painting. In addition, you can sample a color directly
from the reference image and apply it to your painting. If you plan on using reference images strictly for color sampling, you may prefer
opening images directly in the Mixer panel instead. This technique allows you to sample and mix the image colors. For more information,
see “Opening images in the Mixer panel” on page 264.
You can open reference images that are saved as the following file formats: JPG, PNG, RIFF, and PSD.
To display a reference image
1Choose Window Reference Image.
2In the Reference Image panel, click the Open a Reference Image button .
3In the Open Reference Image dialog box, locate the file that you want to open.
4Click Open.
When you open RIFF, TIFF, and PSD files that contains layers in the Reference Image panel, all layers are flattened.
To move a reference image
1In the Reference Image panel, click the Grabber tool .
2Drag the image to a new position in the Reference Image window.

Painting | 159
To zoom in and out of a reference image
1In the Reference Image panel, click the Magnifier tool .
2Do one of the following:
• To zoom in, click in the Reference Image window.
• To zoom out, hold down Command (macOS) or Ctrl (Windows), and click in the Reference Image window.
To sample a color in a reference image
1In the Reference Image panel, click the Dropper tool .
2Move the cursor to the color that you want to sample, and click it.
The color swatch is updated to display the color you’ve selected.
Clearing the canvas
You can erase the canvas by clearing its contents. Clearing the canvas does not delete the canvas, it only removes its content. In Corel Painter,
you cannot delete the canvas.
To clear the canvas
1Choose Window Layers.
2In the Layers panel, click the Canvas.
3Choose Select All, or press Command + A (macOS) or Ctrl + A (Windows).
4Choose Edit Clear.
5Choose Select None, or press Command + D (macOS) or Ctrl + D (Windows) to release the selection.
Setting up the drawing cursor
You can choose a drawing cursor type, specify whether to see the enhanced brush ghost or an icon when painting, and specify a number of
settings for the drawing cursor icon, such as icon shape, color, and orientation. For information on modifying the appearance of the brush
cursor, see “Brush cursor preferences” on page 824.
Using a stylus vs. a mouse
Overall, a stylus provides more control and interactivity than a mouse because it gives you the most responsive digital painting experience by
allowing your hand and brush to work fluidly as one. While a mouse is a great pointing device, it is not particularly convenient for painting.
A mouse can only move on a flat, two-dimensional surface. A tablet stylus, on the other hand, has the ability to sense the motions of your
wrist, hand, and arm. This gives you an authentic feel, accuracy, and control.
Corel Painter lets you produce realistic brushstrokes that fade in and out; change size, opacity, and angle; and penetrate based on stylus
input data such as velocity, direction, pressure, airbrush fingerwheel, tilt, and bearing.
You can link brush settings (such as size, opacity, and angle) to stylus input data (such as velocity, direction, pressure, airbrush fingerwheel,
tilt, and bearing). Refer to “Expression settings” on page 339 for more information about linking brush settings to stylus input controls.
If you don’t have a stylus, you can adjust the mouse so it simulates stylus pressure, tilt, bearing, and fingerwheel settings. For more
information, see “Mouse controls” on page 405.
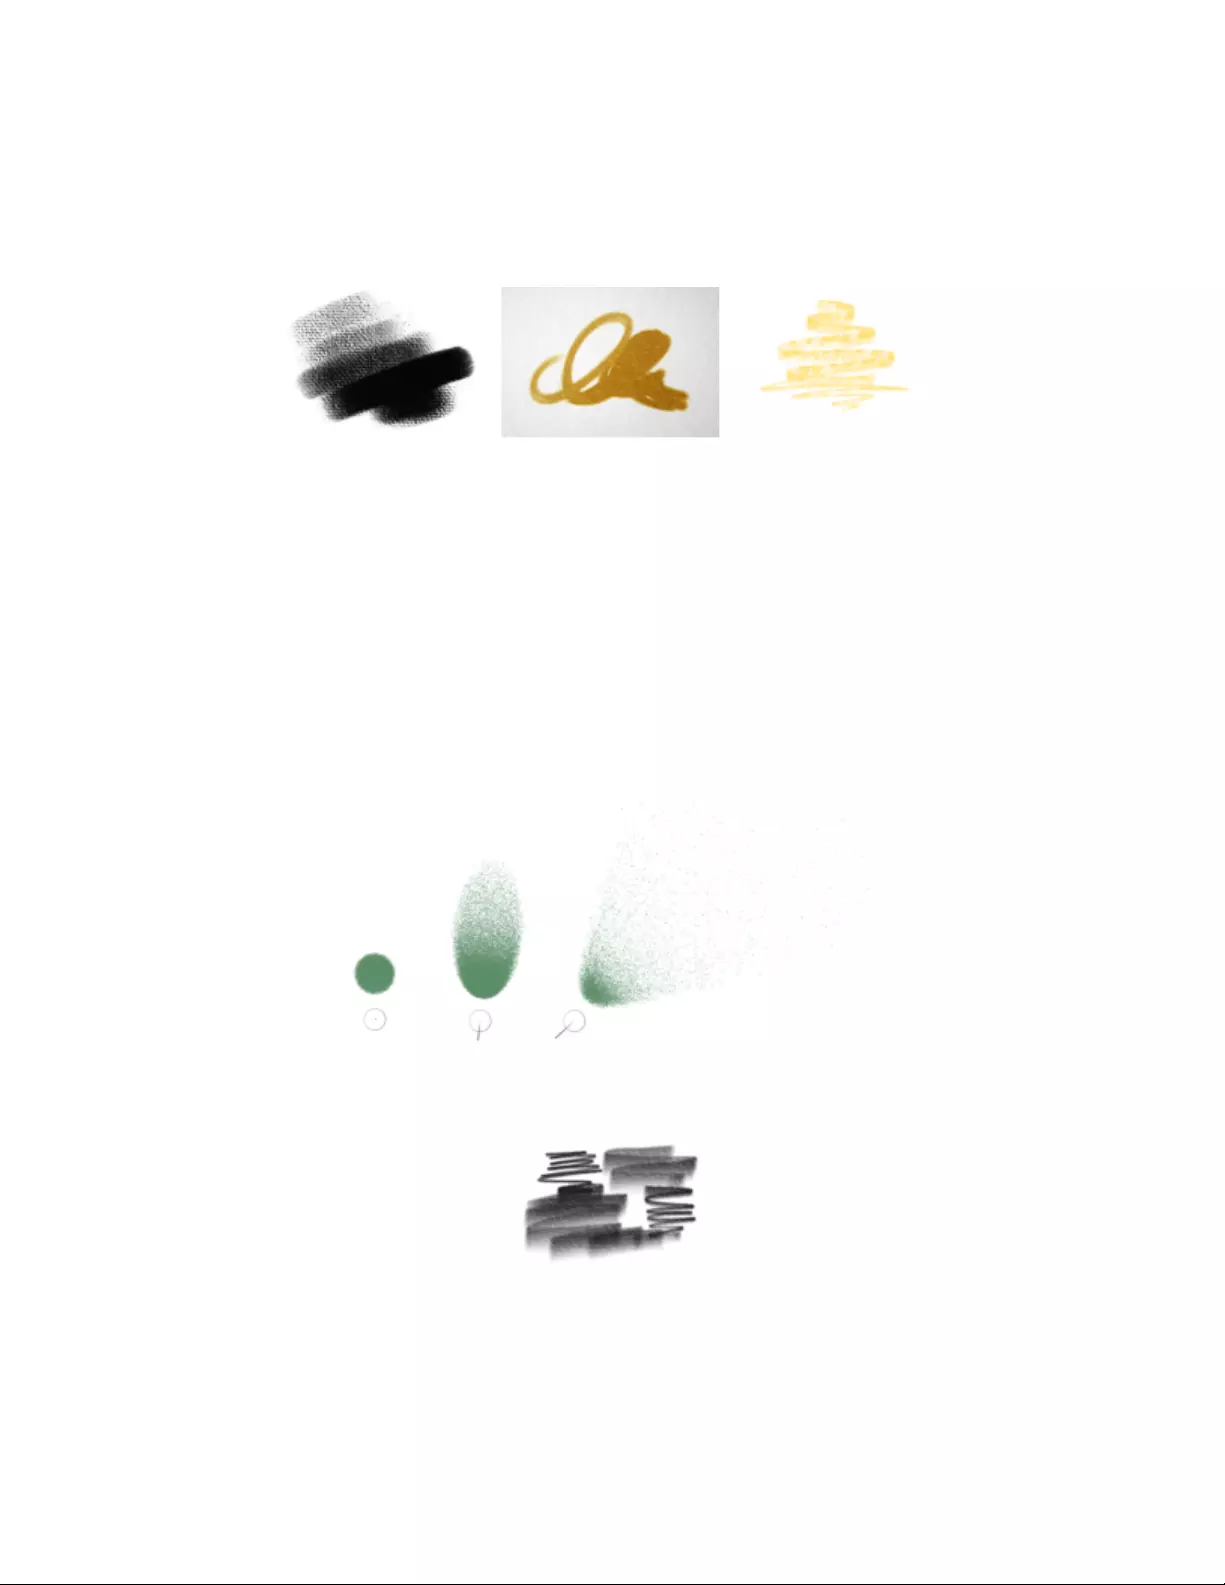
160 | Corel Painter 2022 User Guide
Pressure
Many Corel Painter brushes respond to stylus pressure. Depending on the variant settings, greater stylus pressure can increase the width of
a brushstroke, the penetration of color, or the degree of other effects. The Corel Painter airbrushes also respond to the fingerwheel on the
Wacom Intuos airbrush, simulating a needle control that adjusts how much ink is sprayed.
When you use a pressure-sensitive stylus or pen tablet, the amount of
pressure that you apply controls the opacity and width of your strokes.
In theory, a mouse has no pressure information because a mouse button is either “on” (button down) or “off” (button up). However, with
Corel Painter you can simulate stylus pressure. If you are using a mouse with Corel Painter, you can compensate for the lack of pressure
information by adjusting size, opacity, and grain on the property bar. For example, reducing opacity or grain can produce the same results as
pressing more lightly with a stylus.
Tilt
Some brush variants react to stylus tilt (how close to vertical the stylus is held).
Tilt can significantly affect brushstrokes. If you get unexpected results, especially with bristle-type brushes or airbrushes, you can try reducing
the tilt of your stylus. Extreme tilt angles are usually undesirable.
An example of an airbrush variant that reacts to tilt. (left) The stylus is perpendicular
to the tablet, (middle and right) varying degrees of tilt produce different marks.
The mark varies in width as you change the tilt of the stylus. When you hold the stylus
straight up, you get a fine line; as you start to tilt the stylus, the line gets thicker.
Bearing
Pen bearing (the compass direction in which the stylus is pointing) lets you use the direction in which the tilted stylus is rotated to vary brush
marks.

Painting | 161
Examples of brushstrokes that are affected by pen bearing
Wheel
Corel Painter airbrushes respond to the fingerwheel on the Wacom Intuos airbrush, simulating a needle control that adjusts how much ink is
sprayed.
Like the needle control on real airbrushes, the fingerwheel control adjusts
airbrush flow — that is, how much media is applied by an airbrush stroke.
Some Corel Painter airbrushes take advantage of stylus fingerwheel controls.
Barrel rotation
If you have a flat-tip Intuos Art Pen that supports 360-degree barrel rotation, you can vary your brushstrokes based on the rotation of the
stylus.
As you rotate the barrel of the Intuos Art Pen, the flat brush follows
the rotation of the pen and you can create wide or narrow strokes.
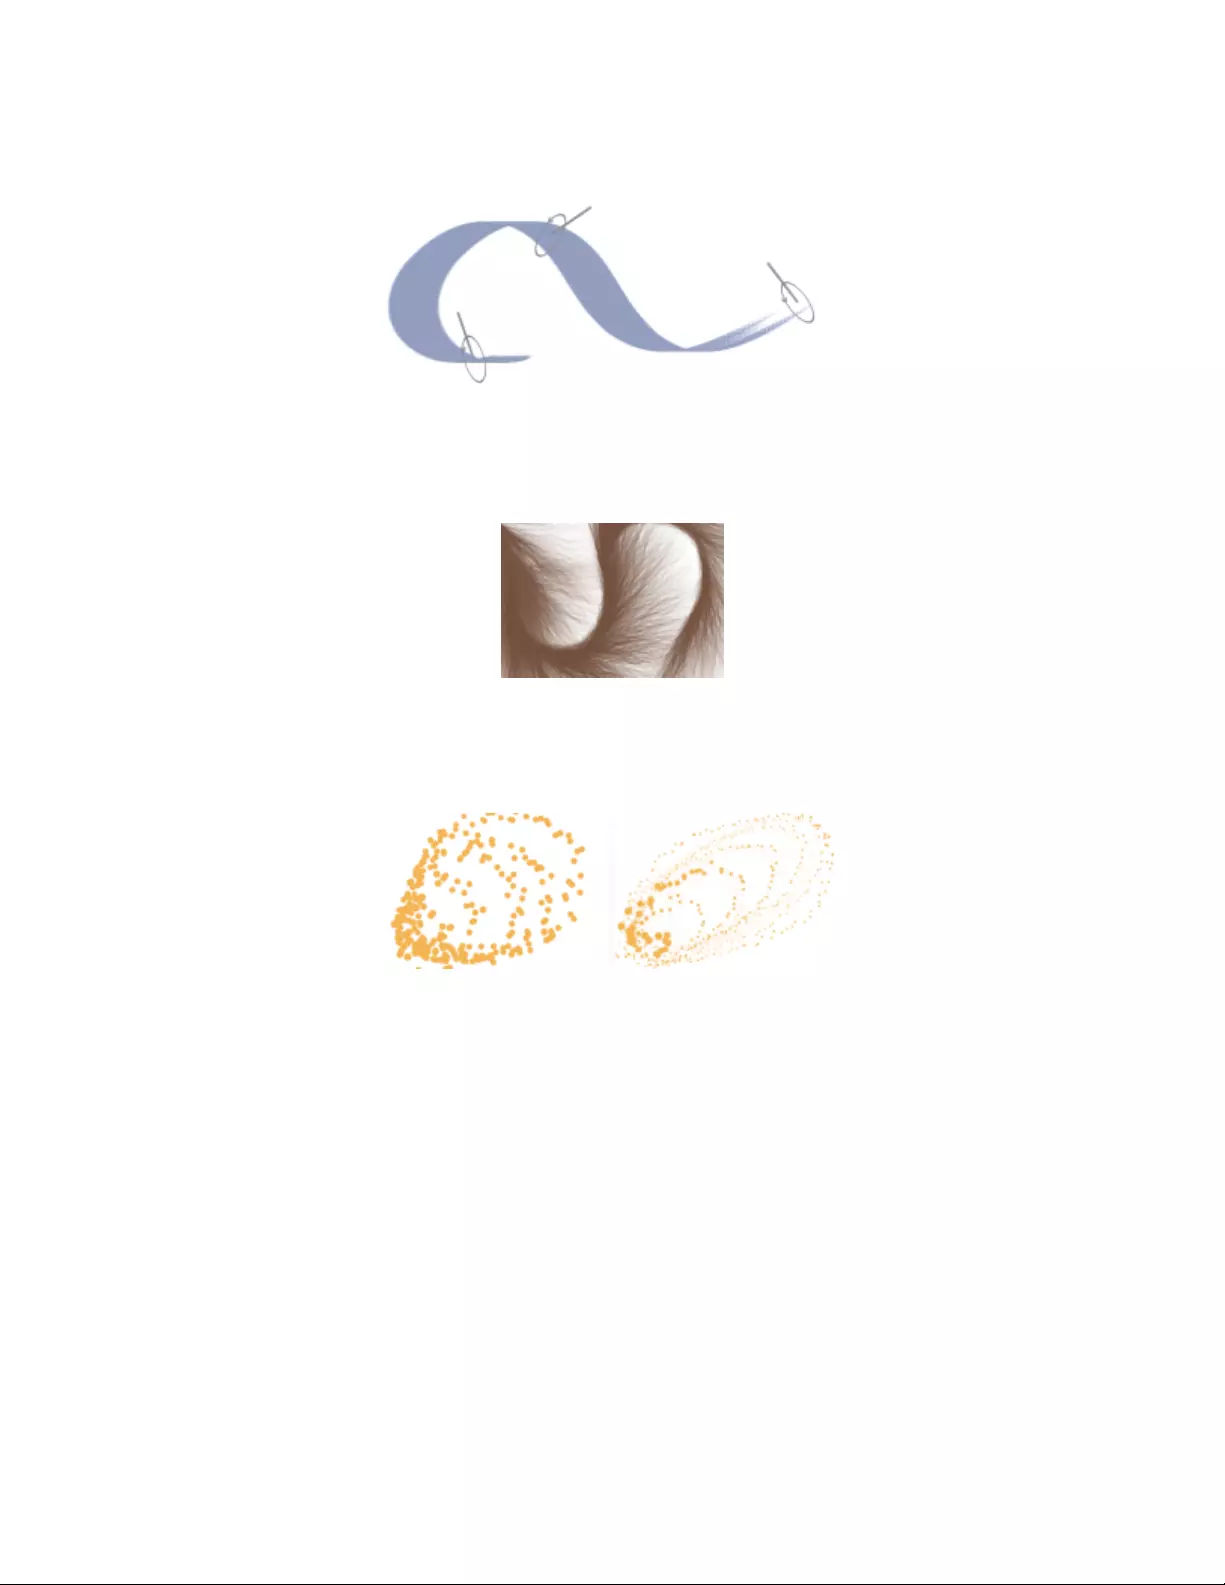
162 | Corel Painter 2022 User Guide
The dot that appears along the outer circle of the enhanced brush ghost indicates the pen rotation.
Direction
Brushstrokes can respond to the direction in which the stylus is moving.
As you change the stroke path, the fur hairs change direction.
Velocity
Brushstrokes can vary in response to the rate at which the pen moves across the tablet.
A brushstroke with low velocity (left) and high velocity (right)
Random
You can adjust brushstrokes on a random basis to produce more realistic results. Randomness contributes to the aesthetics of a painting
because minor irregularities occur in natural structures.
Painting | 163
A brushstroke with randomness (right) and without randomness (left)
Source
You can adjust brushstrokes according to the luminance of the clone source.
Higher luminance (closer to white) produces a wider stroke.
To adjust pressure, tilt, and bearing when using a mouse
1Choose Window Brush Control Panels Mouse.
2Move the Pressure slider.
A 100% setting uses maximum pressure.
3Move the Tilt slider.
A 90° setting simulates a stylus that is perpendicular to the tablet.
4Move the Bearing slider.
A setting of zero indicates that if a stylus were in use, it would be pointing left.
5Move the Rotation slider.
A 360° setting simulates a stylus that complete a 360°-barrel rotation.
To see the effect of the tilt setting, apply a stroke to the drawing window using the Fine Spray variant of the Airbrush category.
164 | Corel Painter 2022 User Guide
To adjust fingerwheel settings when using a mouse
1Choose Window Brush Control Panels General.
2Choose Wheel from the Expression list box.
3Choose Window Brush Control Panels Mouse.
4Move the Wheel slider.
A 90% setting indicates that if a stylus were in use, it would be perpendicular to the tablet.
Applying freehand and straight brushstrokes
You can draw unconstrained lines by using the freehand drawing style, or you can draw straight lines.
When you draw a freehand stroke, you can drag with any motion or in any direction. The stroke follows your path.
Dragging to create freehand strokes
When you draw a straight line stroke, Corel Painter connects points with a straight line.
To create a straight line stroke, you click to add the first point and then click or drag to create the stroke.
To draw freehand lines
1On the Brush property bar, click the Freehand Strokes button .
2Drag on the canvas.
You can use shortcut keys to toggle between the freehand and straight line drawing styles. Press B to choose the freehand style, or
V to choose the straight-line style.
To draw straight lines
1On the Brush property bar, click the Straight line strokes button .
2Click a point on the canvas where you want to start your line.
3Do one of the following:
• Click the point where you want to end the line.
• Drag to place the end point exactly where you want it.
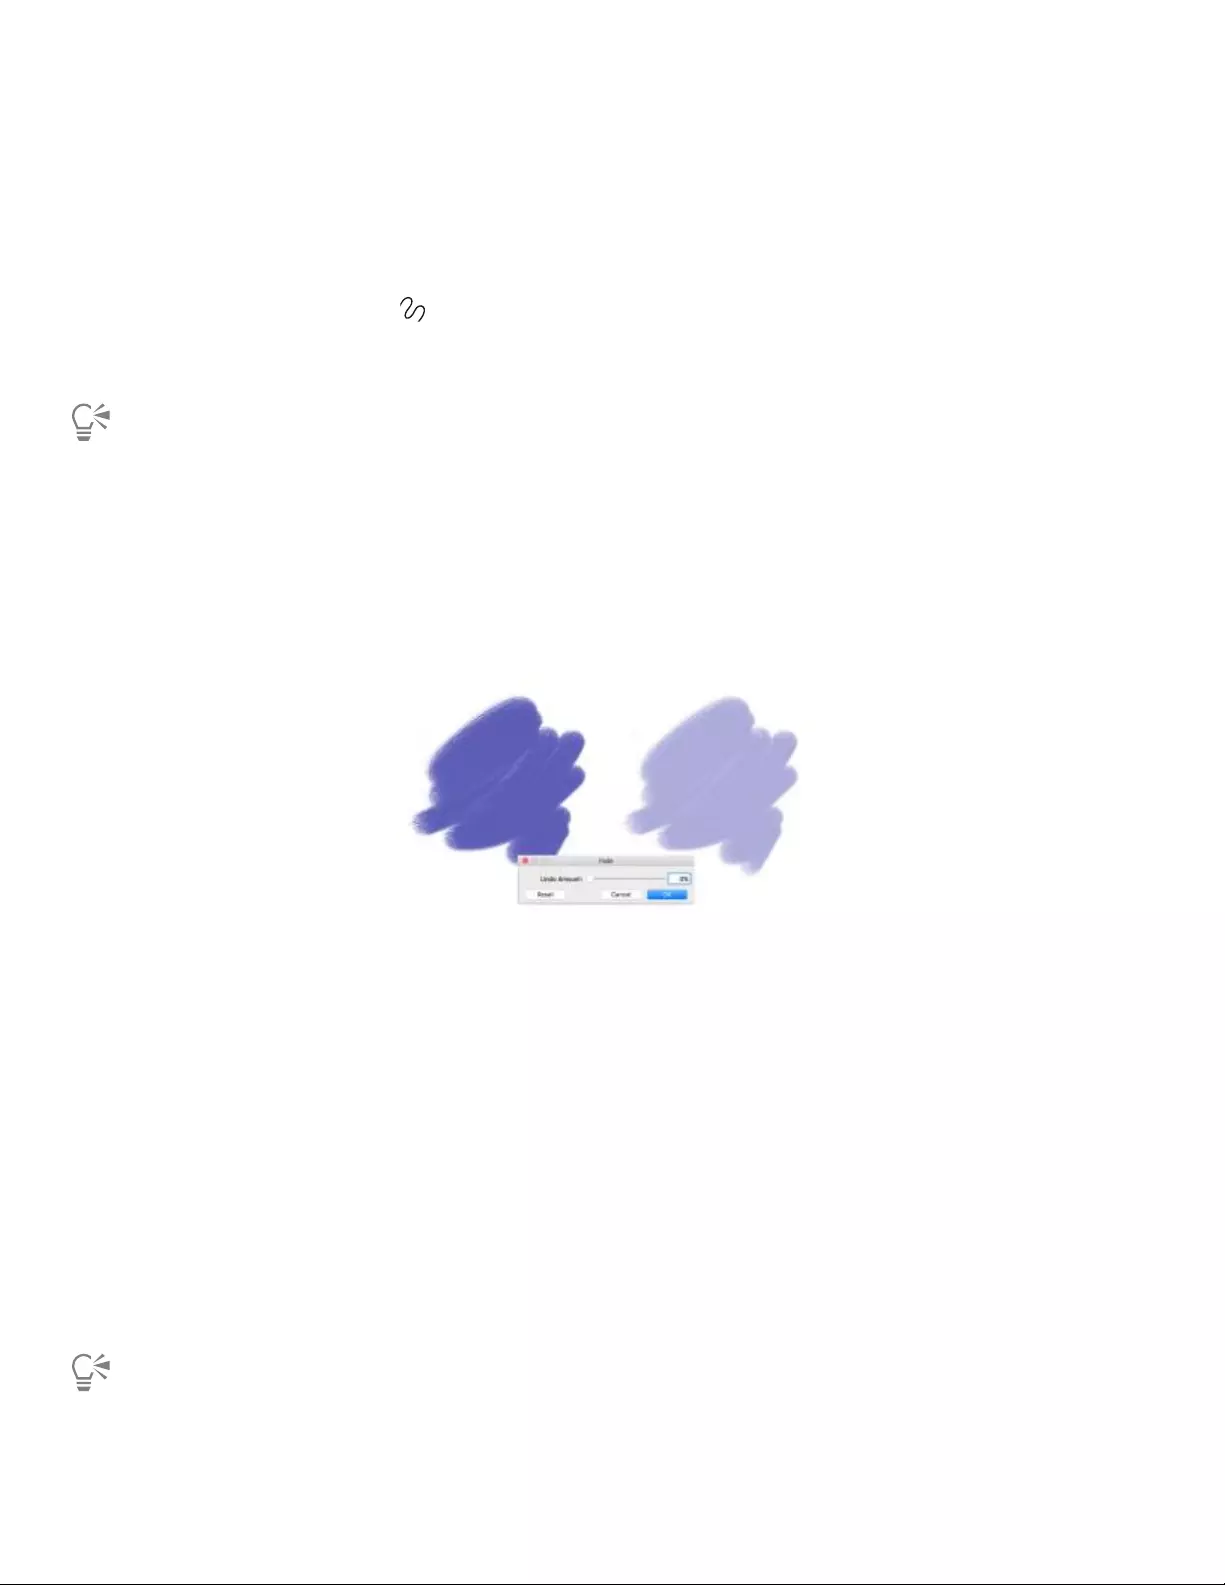
Painting | 165
Corel Painter connects the first and second points with a straight line.
4To continue drawing from the second point, click or drag to create additional points on the canvas.
Corel Painter connects each point with a straight line.
5To end a line, do one of the following:
• Press Return (macOS) or Enter (Windows) to close the polygon. The final point is connected to the origin with a straight line.
•Click the Freehand Strokes button to return to the freehand drawing style without closing the polygon.
6Press V to end the current polygon without closing it, so that you can begin a new one.
7Drag on the canvas.
You can also paint in a straight line by holding down Shift as you drag on the canvas.
Constraining, fading, and undoing strokes
Using the freehand stroke drawing style, you can constrain your strokes to a straight line. The angle you draw depends on the orientation of
the stroke.
You can also make a stroke less opaque, or more translucent, by fading the stroke.
In this example, a brushstroke was applied to the canvas (left) and then fade
was applied to the brushstroke (right) by using the Fade dialog box (center).
In addition, you can undo a stroke. You can also control how many individual strokes can be undone, see “Performance preferences” on
page 828.
To constrain freehand strokes
• Hold down Shift as you drag.
To fade a stroke
1Choose Edit Fade.
2Drag the Undo Amount slider.
To undo a stroke
•Choose Edit Undo Brush Stroke.
You can also undo a stroke by pressing Command + Z (macOS) or Ctrl + Z (Windows).
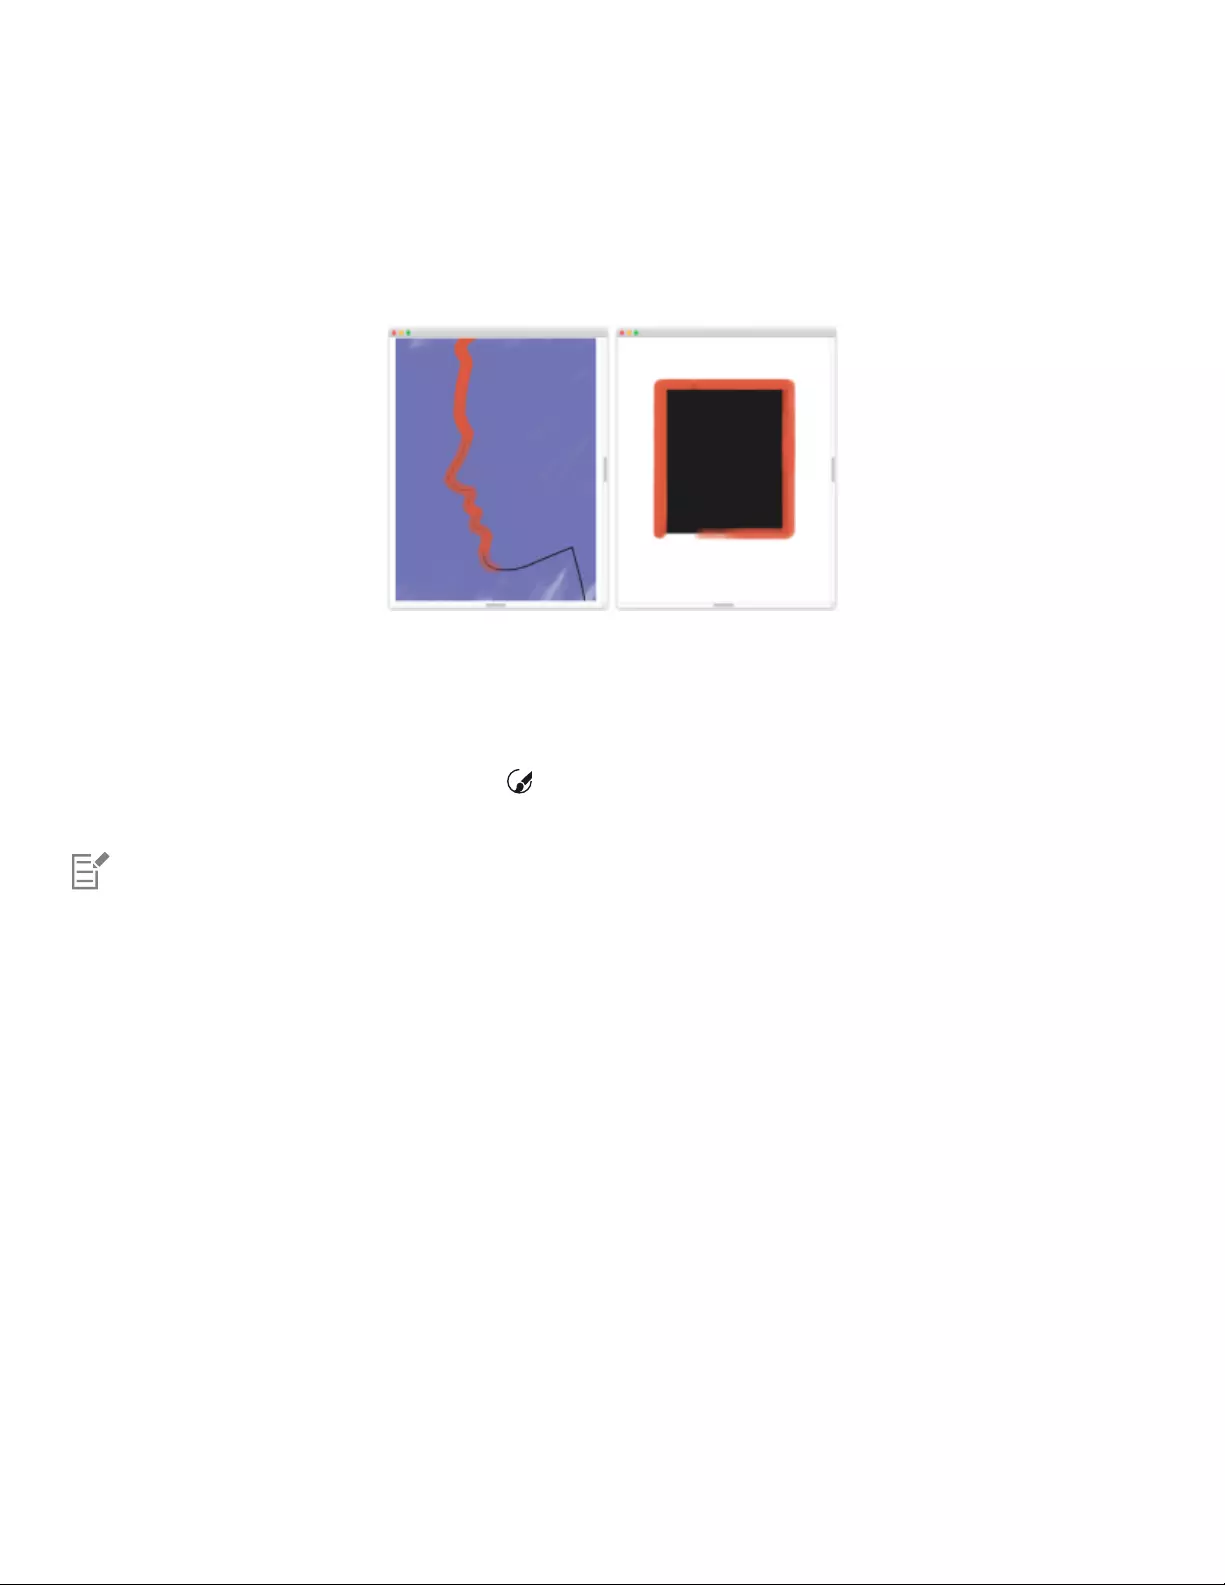
166 | Corel Painter 2022 User Guide
Aligning brushstrokes to paths and shapes
You can automatically align a brushstroke to a path or the edge of a shape. You do this by determining the tolerance area, that is, how
close the brushstroke must be to the path or shape for automatic alignment to occur. If the brushstroke is within the tolerance area, the
brushstroke snaps to the path or shape; if the brushstroke is outside of the tolerance area, no brushstroke is applied.
You can align brushstrokes to paths (left) and to shapes (right).
To align a brushstroke to a path or shape
1Click the Brush Selector on the Brush Selector bar.
2Click a brush category and a brush variant.
3On the property bar, click the Align to Path button .
Brushstrokes within the tolerance area of a path or shape are automatically aligned.
If there are multiple shapes within the tolerance area, the brushstroke is aligned to the shape on the selected layer.
To set the tolerance area for brushstroke alignment
1Choose one of the following:
•(macOS) Corel Painter 2022 menu Preferences
•(Windows) Edit Preferences
2In the Preferences list of categories, click General.
3Type a number in the Align Brush to Path tolerance box.
The tolerance area is measured in pixels and must be between 1 and 999.
Making 360° strokes
Because there are no restrictions on bearing (stylus direction) in Corel Painter, you can create full 360° strokes with noncomputed brushes by
completing an arc without interruption. Computed brushes use bearing, with the exception of those that use the Rendered dab type, so you
cannot use them to create 360° strokes.
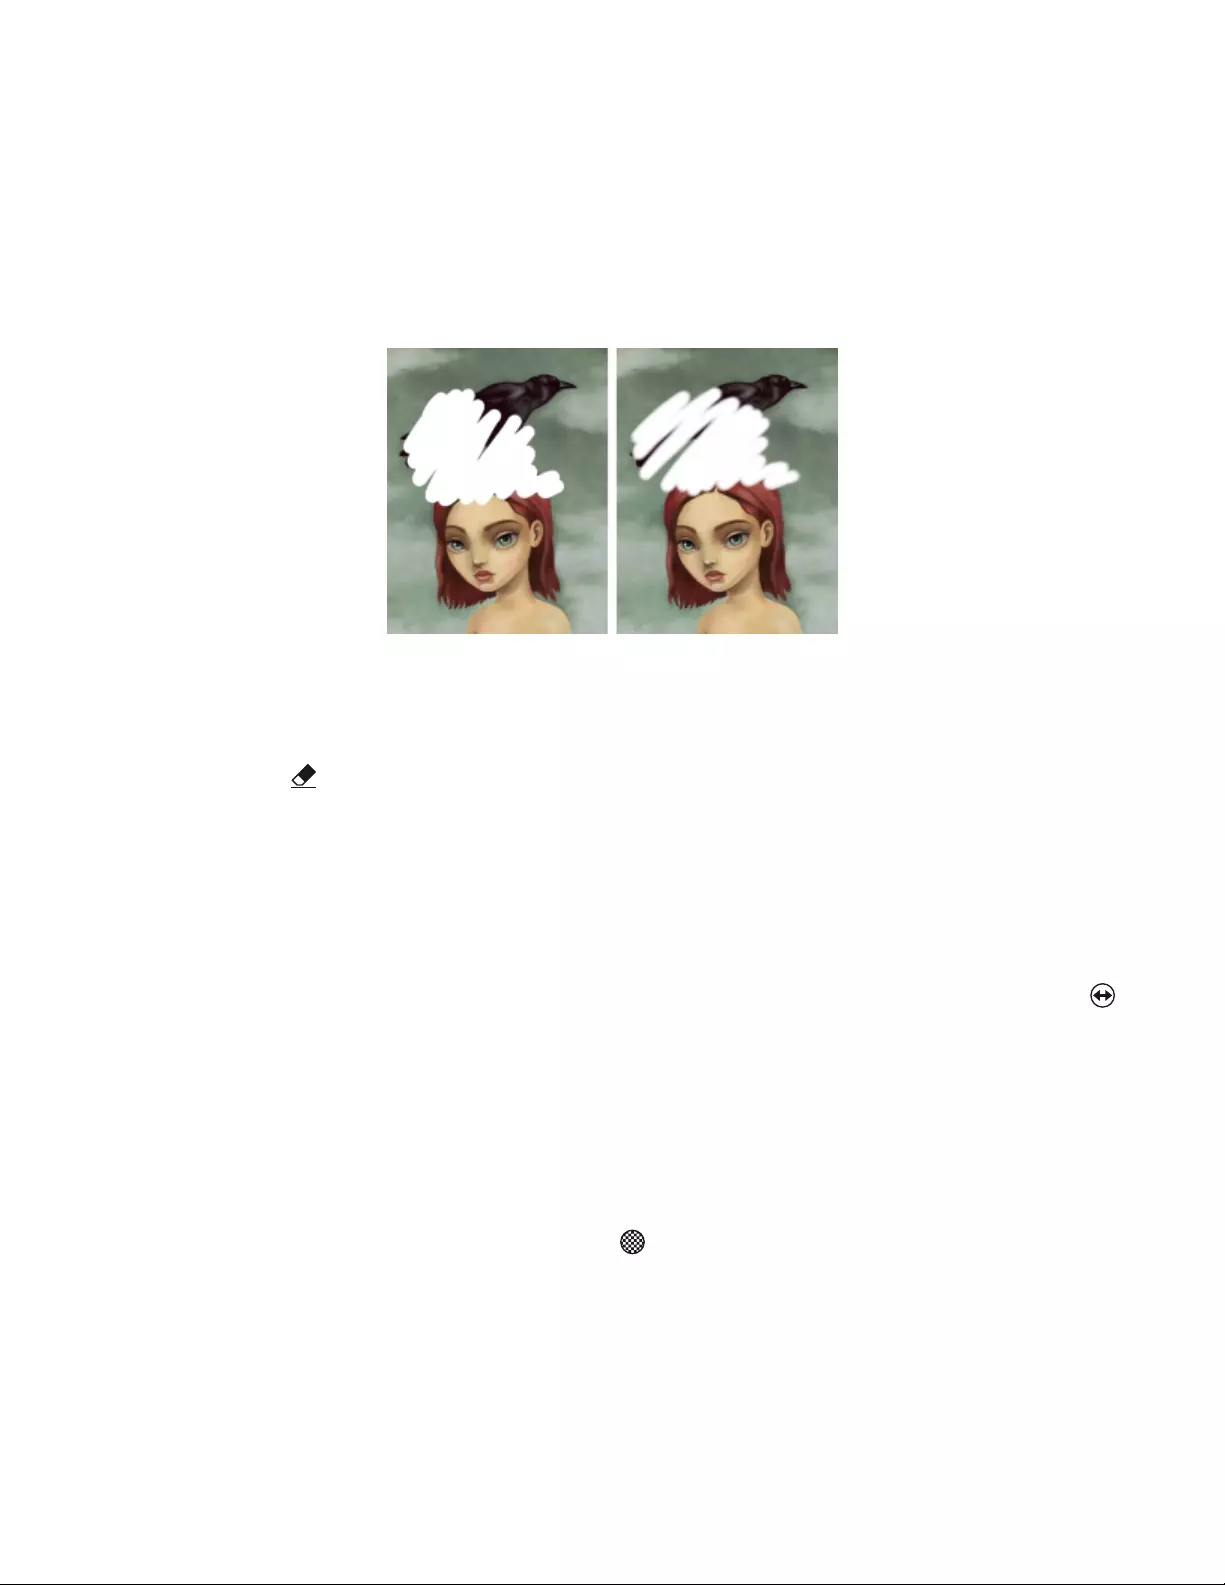
Painting | 167
Erasing image areas
You can erase any part of your image with the Eraser tool or an Eraser brush. Corel Painter lets you fully customize the Eraser tool by using
the property bar or the General panel. For example, on the property bar, you can adjust the width of the brushstrokes, control the opacity of
erased areas, and select from a great variety of dab profiles. You can link opacity and size to stylus pressure or specify a fixed value. To learn
more about the options that you can set on the General panel, see “General controls” on page 344.
You can choose a dab profile for a brushstroke with harder (left) or softer (right) edges.
To erase an image area
1In the Layers panel, choose the layer on which you want to erase.
2Choose the Eraser tool in the toolbox.
3Perform a task from the following table.
To Do the following
Set size On the property bar, type a value in the Size box or move the Size
slider.
Tip: To link size to an expression, click the Size flyout button ,
and choose an option from the Expression list box.
For more information about size controls, see “Size controls” on
page 360.
Set opacity On the property bar, type a percentage in the Opacity box or move
the Opacity slider.
Tip: To link opacity to an expression, click the Opacity flyout button
, and choose an option from the Expression list box.
For more information about opacity controls, see “Opacity
controls” on page 354.
Choose a dab profile On the property bar, click a Dab profile button.
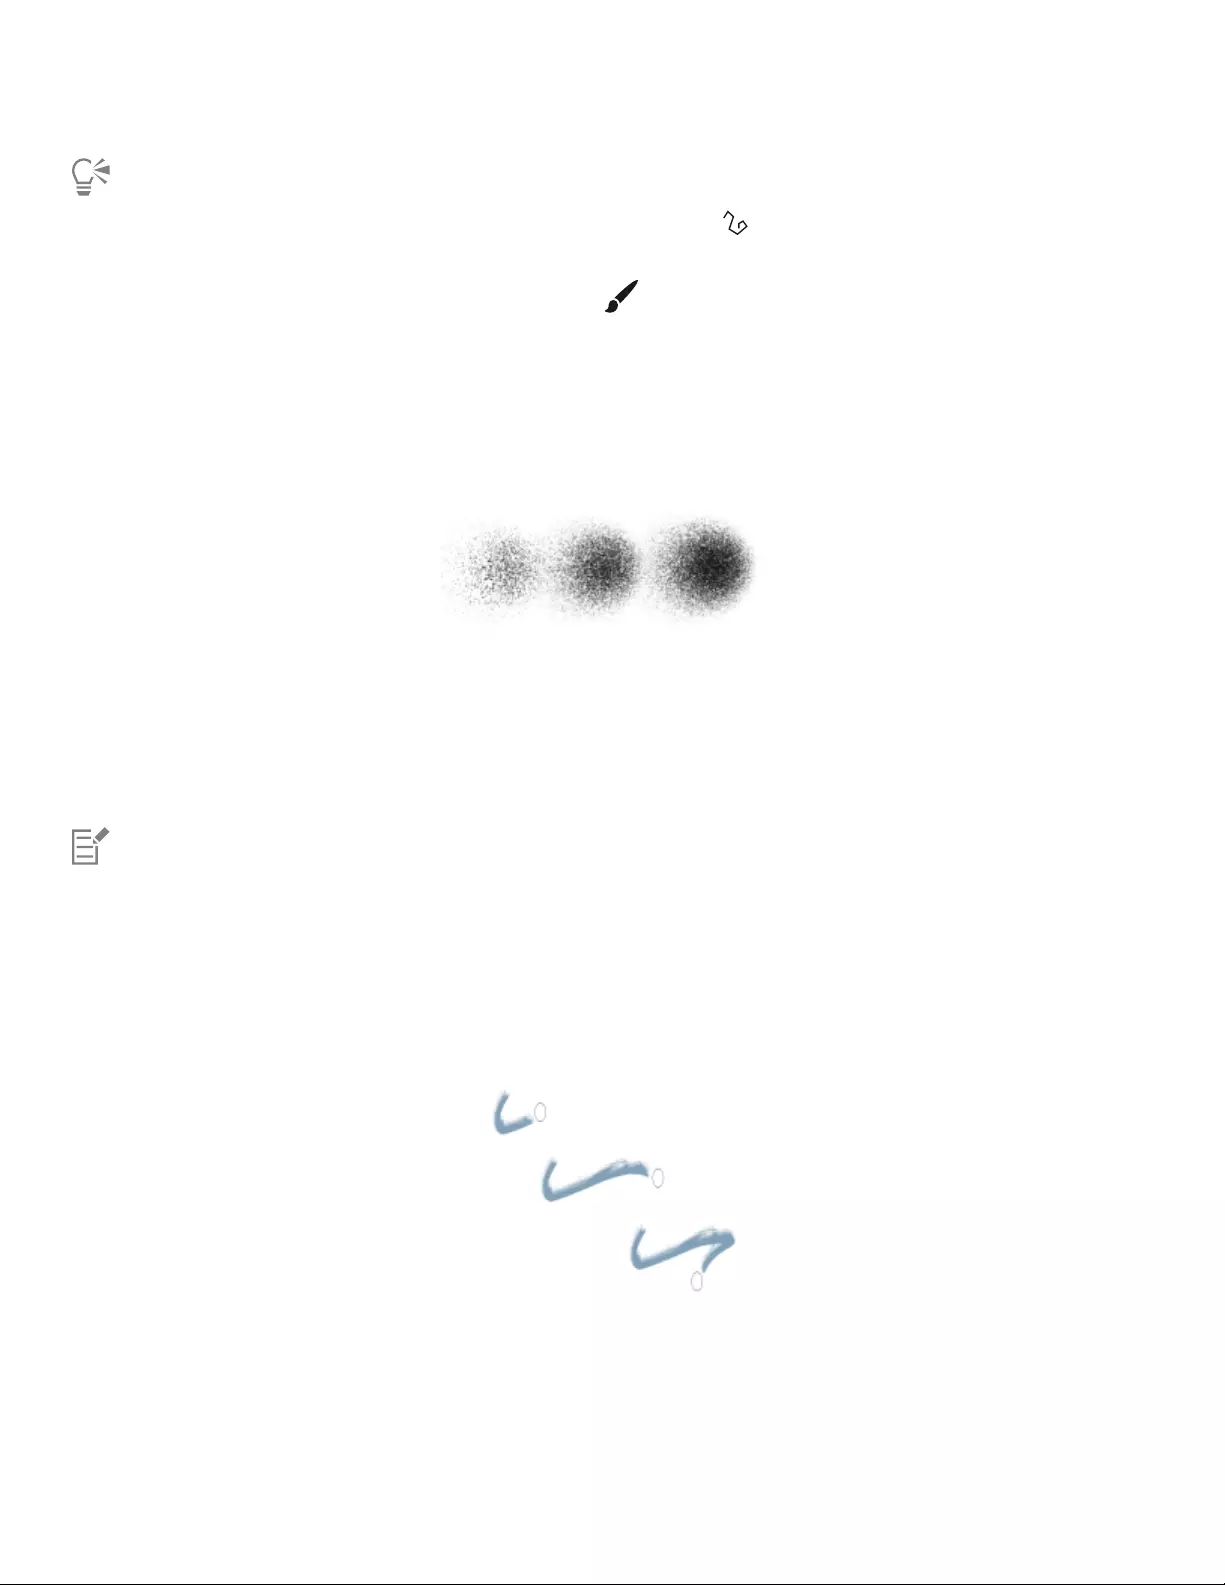
168 | Corel Painter 2022 User Guide
You can erase in straight lines by clicking the Straight line strokes button on the property bar, clicking a point on the canvas
where you want to start your line, and clicking where you want to end the line.
You can also erase image areas by choosing the Brush tool in the toolbox and choosing Erasers from the Brush Category
selector on the Brush Selector bar.
Letting media pool
Corel Painter computed brushes allow media to build up or “pool” when you move a brush slowly. Pooling creates very realistic strokes,
especially with airbrushes. You can also cause media to pool by simply touching and pausing with the selected brush.
With an airbrush, paint pools when you pause in a stroke for 1second (left), 4seconds (middle), and 7seconds (right).
To enable media pooling
1Choose Window Brush Control Panels Brush Shape Spacing.
2Enable the Continuous Time Deposition check box.
When the Continuous Time Deposition check box is disabled, you must move the brush (even just slightly) to cause media to be
deposited.
Recording and playing back brushstrokes
Corel Painter plays back any stroke you record, wherever you click in the document window. In this way, you can easily create a series of
identical strokes — for example, when you create hatching effects.
A brushstroke (top) is recorded and played back within a triangular selection.
Another way to use a recorded stroke is with Auto Playback, which lets you repeat the recorded stroke at random positions on the page.

Painting | 169
You can also save recorded strokes for later use. You can play back saved strokes, and you can paint with the data from a saved stroke. This
way of working can be particularly useful if you work sometimes with a stylus and sometimes with a mouse: you can record the brushstrokes
you make with a stylus, save them for later use, and then use a mouse to obtain the data from that stroke, allowing stylus-quality results.
Corel Painter has a number of brushstroke scripts that can be played back on their own or used in conjunction with an original brushstroke.
When you use a brushstroke script, your freehand brushstrokes adhere to the stroke data in the script. This allows you to emulate features of
a tablet and stylus while using a mouse.
To record a stroke
•Choose Brushes Record Stroke.
The next brushstroke you make is saved in memory.
To play back a stroke
1Choose Brushes Playback Stroke.
2Click where you want to repeat the stroke.
Corel Painter centers the stroke on the point on which you click. You can repeat the stroke as many times as you want.
3Choose Brushes Playback Stroke to turn off playback.
To play back strokes randomly
•Choose Brushes Auto Playback.
Corel Painter repeats the stroke at random positions until you click.
To save a stroke
1Choose Brushes Save Stroke.
2In the Save Stroke dialog box, type a name.
Corel Painter adds the stroke to the list of saved strokes.
To select a saved stroke
•Choose Brushes Strokes, and choose a saved stroke.
The selected stroke is used when you play back strokes or use stroke data.
To use stroke data
1Choose Brushes Strokes, and choose one of the following:
•Pressure Modulate — varies the stylus pressure in a brushstroke
•360° Bearing Rotate — rotates the stylus bearing by 360°
•Size/Bearing Modulate — varies the size of the brush tip and stylus bearing in a brushstroke
•Size/Tilt Modulate — varies the size of the brush tip and tilt of the stylus in a brushstroke
•Fade In/Out — the start point and endpoint of a brushstroke
•Short Stroke — decreases the length of a brushstroke
•Bearing Rotate — rotates stylus bearing in a brushstroke
You can also base stroke data on brushstrokes that you’ve already saved.
2Choose Brushes Use Stroke Data.
3Draw brushstrokes.

170 | Corel Painter 2022 User Guide
Reference: Troubleshooting
This topic describes some of the reasons why a brushstroke may not appear:
• Main color — In the Color panel, what color is the Main Color (front) swatch? Is it a color that will show up when applied to your
image? If not, click the Main Color swatch, and then set a different color.
• Opacity — Check the Opacity setting on the property bar and, if necessary, adjust the pop-up slider to increase opacity.
•Brush method — The brush method determines the basic nature of a brush. To check the brush method, choose Window Brush
Control Panels General. If you’re drawing with a light color on a dark background, the method must be set to Cover in order to show
the lighter color.
• Drawing mode — When you make a selection, the drawing mode determines what part of the selection is protected. For more
information, see “Choosing the protected area of a selection” on page 607.
For more troubleshooting tips, see “My brushes stopped working” on page 846.
Working with paper texture and grain | 171
Working with paper texture and grain
With traditional art media, the results from using a marking tool depend on the texture of the surface to which it is applied. Corel Painter
allows you to control the texture of the canvas to achieve the results you would expect from using traditional media on a given surface —
pencil on watercolor paper, felt pens on cotton paper, chalk on the sidewalk, and so on. You can also create your own paper textures and
adjust the grain of paper textures.
You can use paper textures in many ways. Brushes interact with paper “grain,” just as traditional tools react with the texture of the surfaces
beneath them. Working with paper grains is useful when you use the Apply Surface Texture command or other effects, such as Glass
Distortion. You can select different paper textures, modify them, organize them in libraries, and even create your own custom textures.
In Corel Painter, brushes that react with paper texture have a “grainy” method. For more information about brush methods, see “General
controls: Methods and subcategories” on page 349.
This section contains the following topics:
•“Applying paper texture” (page 171)
•“Creating and deleting paper textures” (page 172)
•“Managing paper textures” (page 173)
•“Rotating paper texture” (page 174)
•“Inverting and scaling paper grain” (page 174)
•“Controlling brightness and contrast of paper grain” (page 175)
•“Adjusting grain direction and behavior” (page 176)
The terms “paper grain” and “paper texture” are used synonymously.
Applying paper texture
Corel Painter allows you to apply paper texture to the canvas. In general, you can define texture as the roughness or coarseness of a surface,
which you can both see and feel. In Corel Painter, however, texture modifies only the appearance of the image, to give you the illusion of
surface roughness. It also interacts by subtly or dramatically altering the appearance of brushstrokes.
In addition, certain brushes include a “grainy” method subcategory that is specifically designed to react with the paper texture and grain.
Some brushes also let you determine the amount of grain that is revealed by each brushstroke. For more information about brush methods,
see “General controls: Methods and subcategories” on page 349.
172 | Corel Painter 2022 User Guide
One brushstroke applied to three different paper textures
It is important to note that some brushes, such as those in the Airbrushes category, don’t reveal paper texture in their brushstrokes. This
behavior corresponds with that of a traditional airbrush.
Corel Painter includes several default paper textures that are stored in the Papers Textures library. For more information about working with
libraries, see “Working with libraries” on page 88. Additional paper textures are also provided on the Corel Painter DVD and on the Corel
website.
To apply a paper texture
•In the Papers panel (Window Media Panels Papers), click a paper texture swatch in the Paper Textures area.
The currently selected paper is saved with the document. This includes custom paper textures that may not be saved in a paper
texture library.
When the Brush tool is selected, you can choose a paper texture by clicking the Grain flyout button on the property
bar and clicking a paper texture swatch. For more information, see “To apply a paper texture using the property bar” on page
325.
Creating and deleting paper textures
You can create your own paper texture by choosing a pattern and then modifying the spacing of the pattern elements. You can also modify
the angle of the pattern elements to alter the direction of the texture.
You can create a paper texture from a selected pattern.
Working with paper texture and grain | 173
You can also create a paper texture by selecting an area of an image and converting it into a paper texture.
A paper texture was generated by selecting an area of the image (left). An example
of applying a brushstroke to the canvas using the new paper texture (right).
To create a paper texture
1Choose Window Media Panels Papers.
2In the Papers panel, click the Make Paper button .
3In the Make Paper dialog box, choose a pattern from the Pattern list box.
4Adjust the Spacing slider.
Moving the Spacing slider to the right opens up the space between rows and columns in the selected pattern. It also increases the size
of the pattern.
5Adjust the Angle slider.
Moving the Angle slider changes the direction of the texture rows.
6Type a name in the Save As box.
7Click OK.
The paper texture appears as the last selection in the Papers panel.
To capture a paper texture
1Open or create an image.
2Choose the Rectangular Selection tool from the toolbox.
3Drag in the document window to select the area of the image that you want to capture as a paper texture.
4In the Papers panel, click the Capture Paper button .
If you want to blend the distinction between tile borders, in the Capture Paper dialog box drag the Crossfade slider to the right.
5Type a name in the Save As box.
The paper texture is added to the currently selected library.
The Make Fractal Pattern feature and certain weaves also produce excellent paper textures. For more information, see “Creating
fractal patterns” on page 705.
Managing paper textures
You can organize and manage paper textures. The Papers panel displays the default Papers library, the custom libraries that you create, and
any custom libraries that you import.
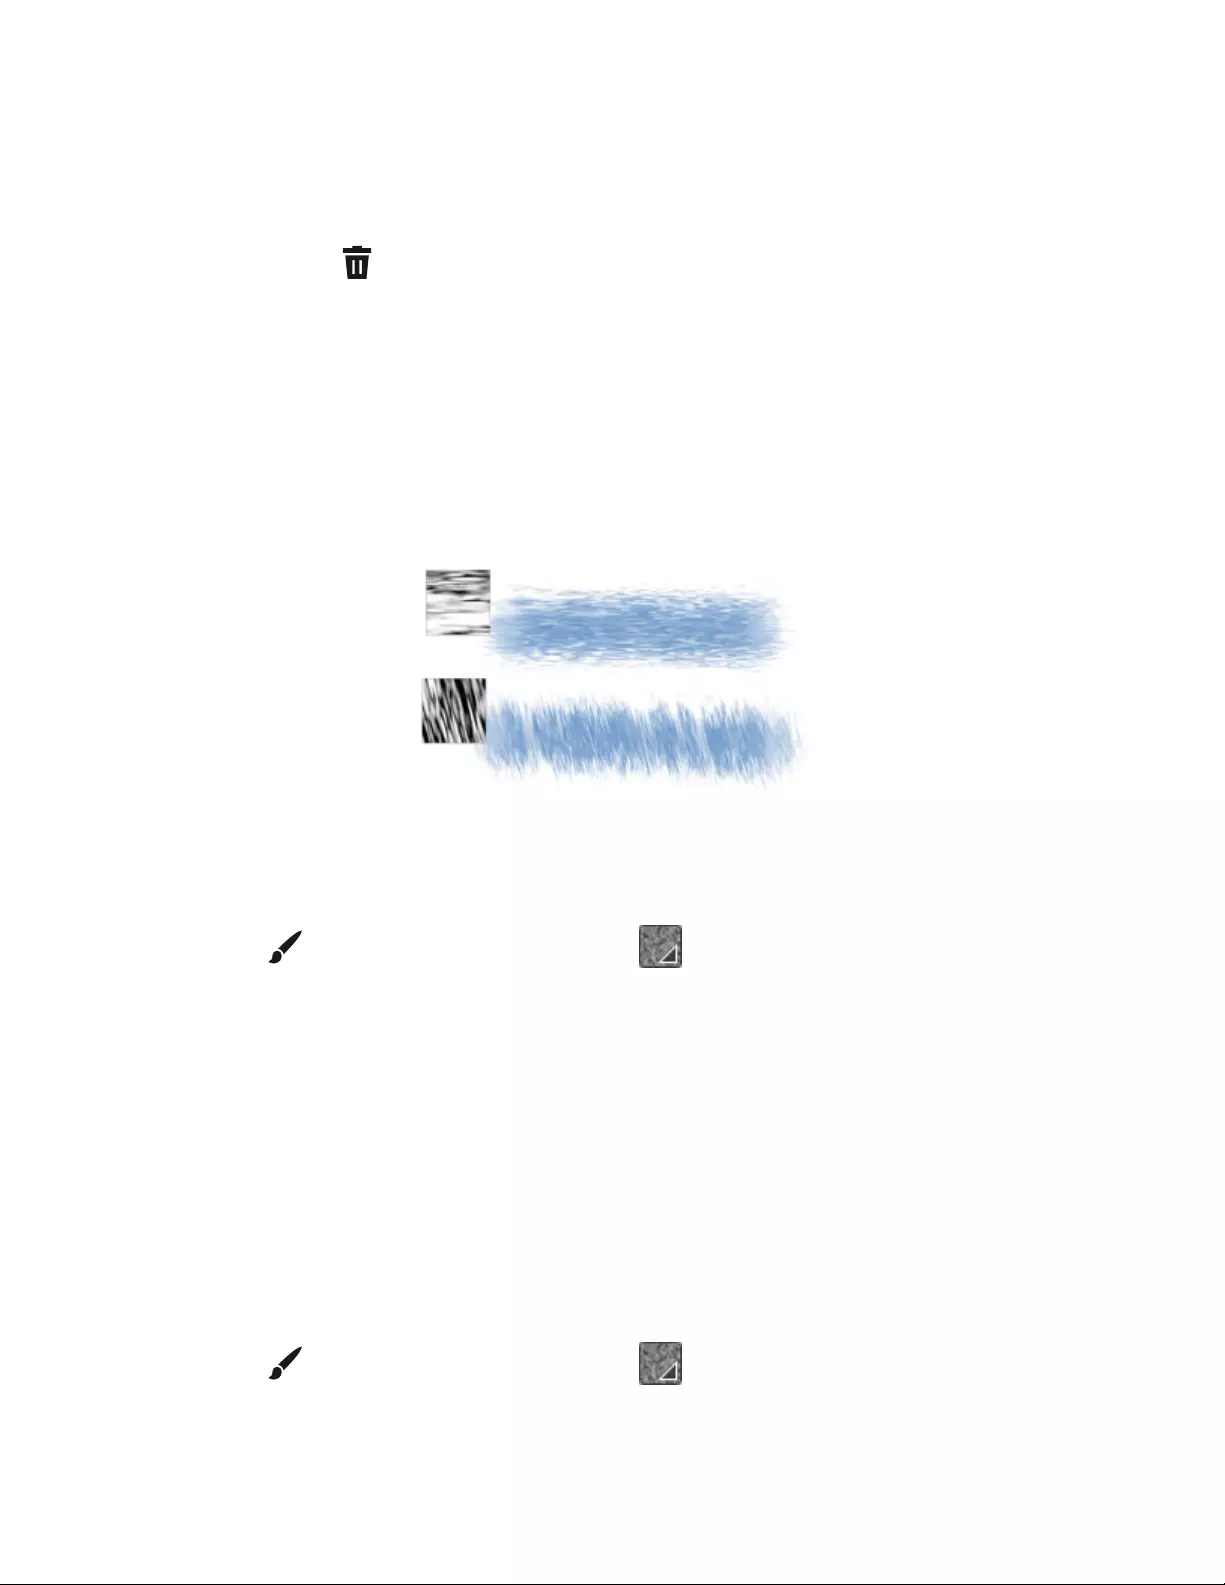
174 | Corel Painter 2022 User Guide
To delete a paper texture
1In the Papers panel (Window Media Panels Papers), click a paper texture swatch in the Paper Textures area.
2Click the Delete Paper button .
To rename a paper texture
1In the Papers panel (Window Media Panels Papers), right-click (Windows) or Control-click (macOS) a paper texture swatch in the
Paper Textures area, and choose Rename Paper.
2Type a name in the New Name box.
Rotating paper texture
You can rotate paper texture at any angle to achieve the artistic look you want.
A brushstroke applied to a non-rotated paper texture (top) and a rotated paper texture (bottom)
To rotate a paper texture
1Do one of the following:
•On the Brush tool property bar, click the Grain flyout button .
•Choose Window Media Panels Papers to open the Papers panel.
2Click a paper texture swatch in the Paper Textures area.
3Move the Angle slider.
Inverting and scaling paper grain
Paper texture can be visualized as a three-dimensional landscape made up of grains. The size, shape, and spacing of the grains determine
the pattern and direction of the paper texture. When applying media to the canvas, brushes react to paper texture by coloring the grain
peaks and ignoring the valleys. However, Corel Painter allows you to invert this effect to make color fill the grain valleys instead of the peaks.
You can also resize the paper grain by adjusting the scale.
To invert paper grain
1Do one of the following:
•On the Brush tool property bar, click the Grain flyout button .
•Choose Window Media Panels Papers to open the Papers panel.
Working with paper texture and grain | 175
2Click a paper texture swatch in the Paper Textures area.
3Click the Invert button .
You can also invert paper texture by clicking the Paper options button in the Papers panel, and choosing Invert Paper.
The green brushstroke was painted with the paper grain inverted.
To scale paper grain
1Do one of the following:
•On the Brush tool property bar, click the Grain flyout button .
•Choose Window Media Panels Papers to open the Papers panel.
2Click a paper texture swatch in the Paper Textures area.
3Adjust the Scale slider to resize the paper grain.
As you move the slider, the Paper Preview window updates to display the new grain size. You can scale texture down to 25% or up to
400%.
Scaling large textures can use a great deal of Random Access Memory (RAM). Most textures in Corel Painter range from 50 to 400
pixels square at 100% scaling.
Brushstrokes on paper grains with different scale values
Controlling brightness and contrast of paper grain
Brightness can be thought of as controlling the depth of the paper grain. The effect of lowering the paper’s brightness is similar to that of
using a more shallow grain.
Contrast can be thought of as controlling the steepness of the paper grain. The grain in higher-contrast paper changes from high to low
more quickly and with fewer intermediate levels than the grain in lower-contrast paper.
To change paper grain brightness
1Do one of the following:
176 | Corel Painter 2022 User Guide
•On the Brush tool property bar, click the Grain flyout button .
•Choose Window Media Panels Papers to open the Papers panel.
2Click a paper texture swatch in the Paper Textures area.
3Adjust the Brightness slider.
To change paper grain contrast
1Do one of the following:
•On the Brush tool property bar, click the Grain flyout button .
•Choose Window Media Panels Papers to open the Papers panel.
2Click a paper texture swatch in the Paper Textures area.
3Adjust the Contrast slider.
Adjusting grain direction and behavior
When you use a brush that interacts with paper grain, the results appear with each stroke. If you have a stylus and tablet, you can adjust
paper grain by changing the stroke of the stylus on a pressure-sensitive tablet. In most cases, a light stroke colors only the peaks and ridges
of the grain. A heavy stroke fills color deep into the pockets and valleys. You can also affect the brush interaction with paper grain by
changing the brush grain settings.
If you want a uniform paper grain across an image, create your artwork first, and then apply the grain as a surface texture. If you apply
paper texture before you create an image, the texture is erasable, and you cannot erase the paper texture without erasing brushstrokes at
the same time. For this reason, it is usually best to add paper texture as a last step in developing your image.
By default, paper grain is fixed, which means that the texture is in the same position each time you apply a brushstroke. You can change this
setting if you want grain to be applied randomly.
You can also change the look of brushstrokes by having the paper grain interact with stroke direction. This option works best when you
paint with a stylus and use certain papers and brushes.
When you find a brush and paper combination that you really like, you can save it as a new look in the Look Libraries. For more information
about saving looks, see “Saving a brush look” on page 333.
To randomize paper grain
1Choose Window Brush Control Panels Brush Media Grain.
2Enable the Random Grain Rotation check box.
The Random Grain Rotation check box is not available for all brushes.
To enable directional paper grain
1Do one of the following:
•On the Brush tool property bar, click the Grain flyout button .
•Choose Window Media Panels Papers to open the Papers panel.
2Click a paper texture swatch in the Paper Textures area.
3Click the Direction button .

Working with paper texture and grain | 177
Factors such as stylus pressure, paper, and brush variant affect the appearance of brushstrokes when the Direction Toggle button
is enabled. Papers with pronounced grain, such as Wood Grain and Gessoed Canvas, produce the best results.

178 | Corel Painter 2022 User Guide

Photo art | 179
Photo art
Corel Painter’s photo art tools streamline the process of creating a painting that is based on a digital image or scanned photo. Previous
experience with digital art is not required to use these tools.
The photo art process involves four basic steps:
Step 1: Applying an AI style Apply an AI style or preset by using the A.I. Style panel (Window
Photo Art Panels A.I. Style). This step is optional.
For more information about AI styles, see “Applying AI styles” on
page 180.
Step 2: Underpainting Prepare a photo for painting by using the Underpainting panel
(Window Photo Art Panels Underpainting). This step is
optional.
For more information about underpaintings, see “Creating
underpaintings” on page 185.
Step 3: Auto-painting Apply brushstrokes to the canvas by using the Auto-Painting panel
(Window Photo Art Panels Auto-Painting).
For more information, see “Auto-painting photos” on page 187.
Step 4: Fine-tuning Fine-tune your artwork by restoring some detail to the image
(Window Photo Art Panels Restoration).
For more information, see “Restoring detail to paintings” on page
189.
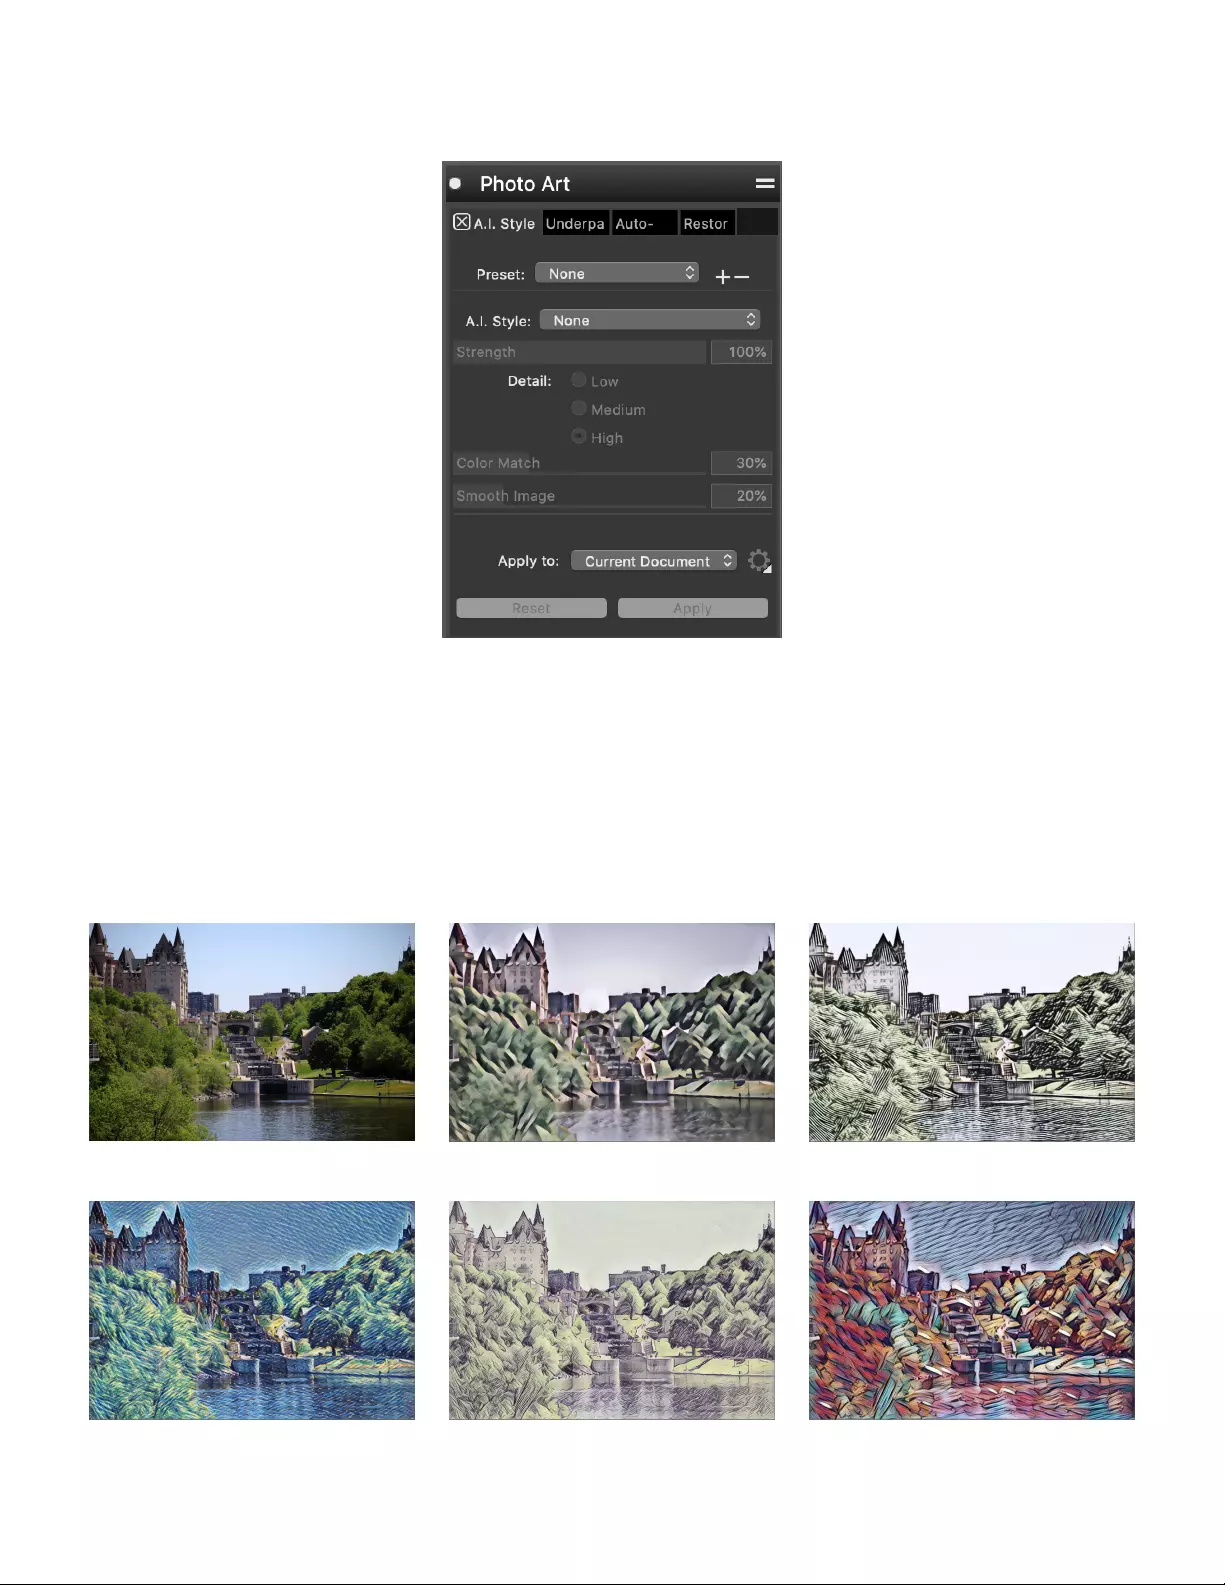
180 | Corel Painter 2022 User Guide
The Photo Art panels — A.I. Style, Underpainting, Auto-Painting, and Restoration — are grouped together. The A.I Style
and Underpainting panels let you prepare a photo for painting and clone the photo. Next, you can quickly access the Auto-
Painting panel to create the painting (Step 3). Finally, you can go to the Restoration panel to fine-tune your painting (Step 4).
Applying AI styles
Corel Painter offers styles and presets that use artificial intelligence to create a stylized painting from a photo. The AI styles simulate the
textures, color, visual patterns, and aesthetics of the reference photo. The table below lists the styles available in the application.
Original Smooth Acrylic Linocut
Post Impressionist Aged Print Bold Strokes

Photo art | 181
Lava Lamp Medium Charcoal Gilded
Soft Pastels Warm Mosaic Sunset
Pastel Mosaic
For more creative freedom and experimentation, you can apply a style and then fine-tune your painting by using the settings in the A.I. Style
panel. You can vary the intensity of a style by adjusting its strength, level of detail, and color matching. You can also soften the appearance
of the resulting painting by smoothing out the colors and sharp details.
In addition to the default styles, Corel Painter provides a selection of presets which have been carefully curated to offer optimal results for
specific image types. Depending on your image and the effect you want to achieve, you can choose one of the presets listed in the following
table.
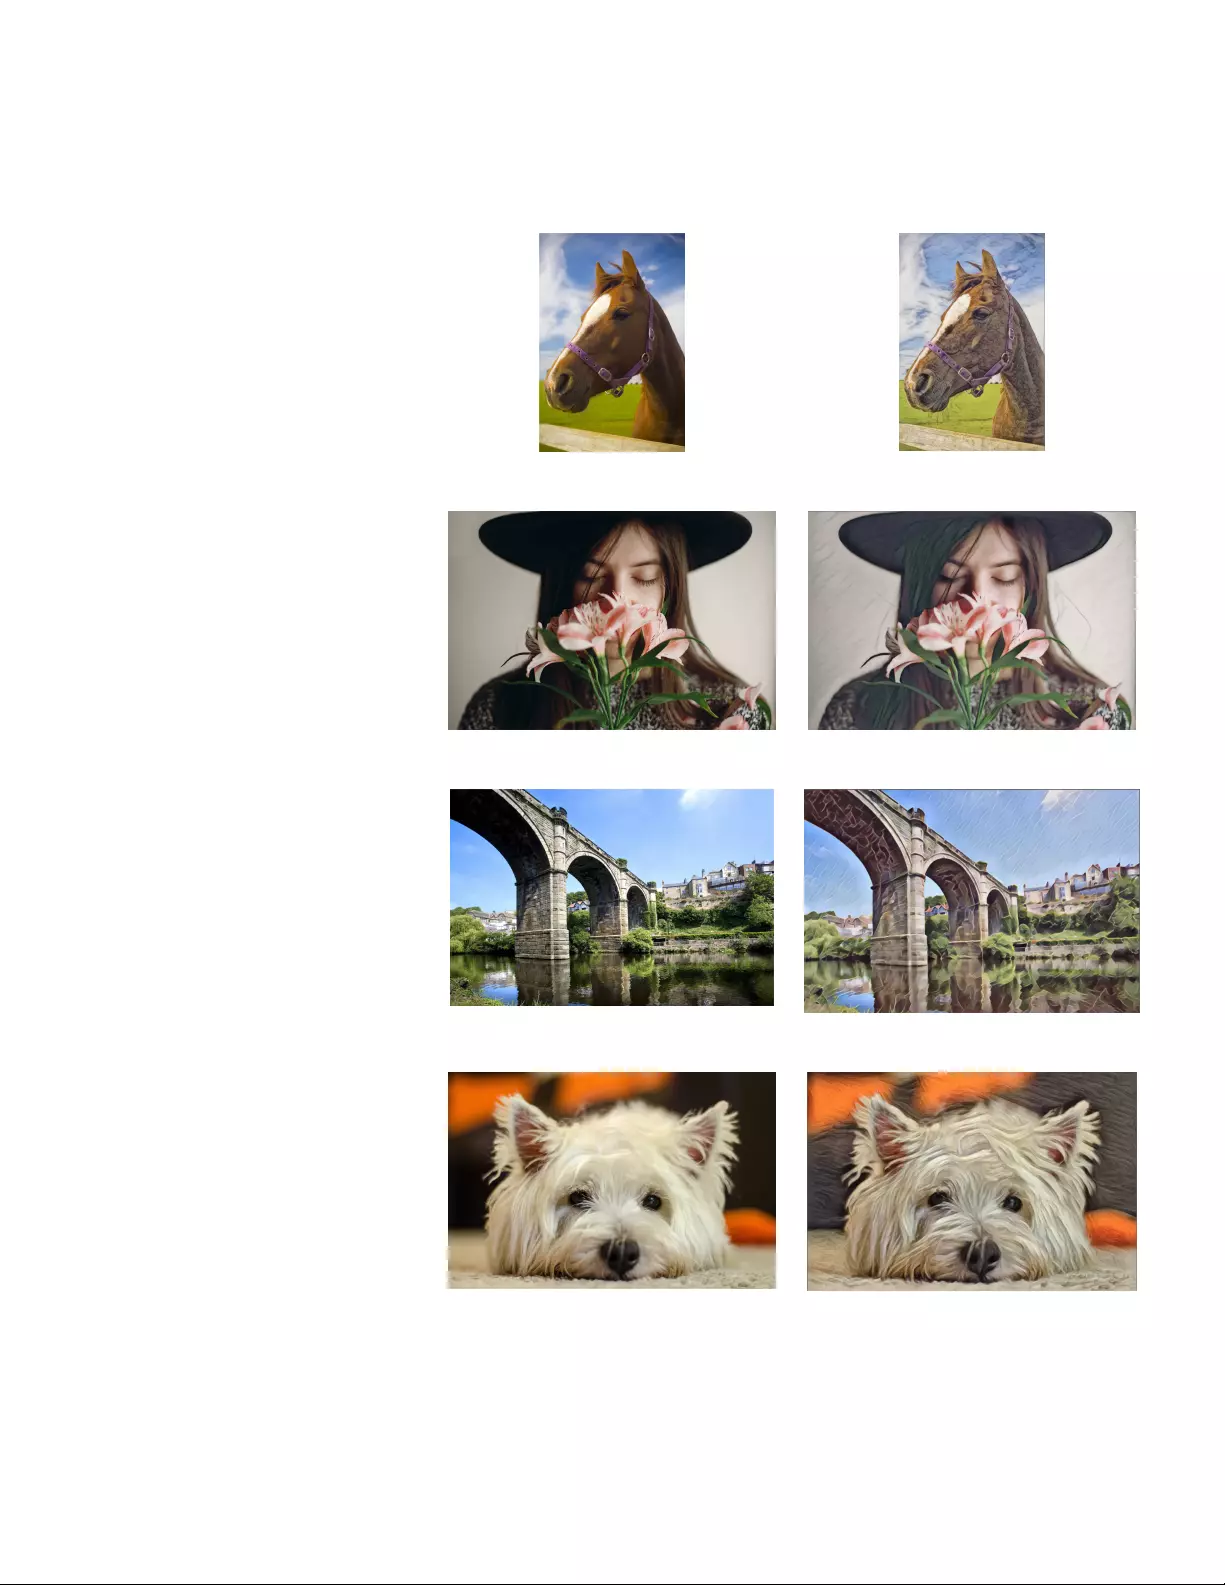
182 | Corel Painter 2022 User Guide
Preset Examples
Colored Pencil
Adds colored pencil marks to a photo
Original Colored Pencil
Soft Portrait
Prepares a portrait for Photo Art
Original Soft Portrait
Bold Architecture
Turns a drawing, painting, or photograph
of geometric buildings into an inspiring
stylized image
Original Bold Architecture
Fabulous Animals
Prepares an animal photo for Photo Art by
adding wavy brushstrokes
Original Fabulous Animals
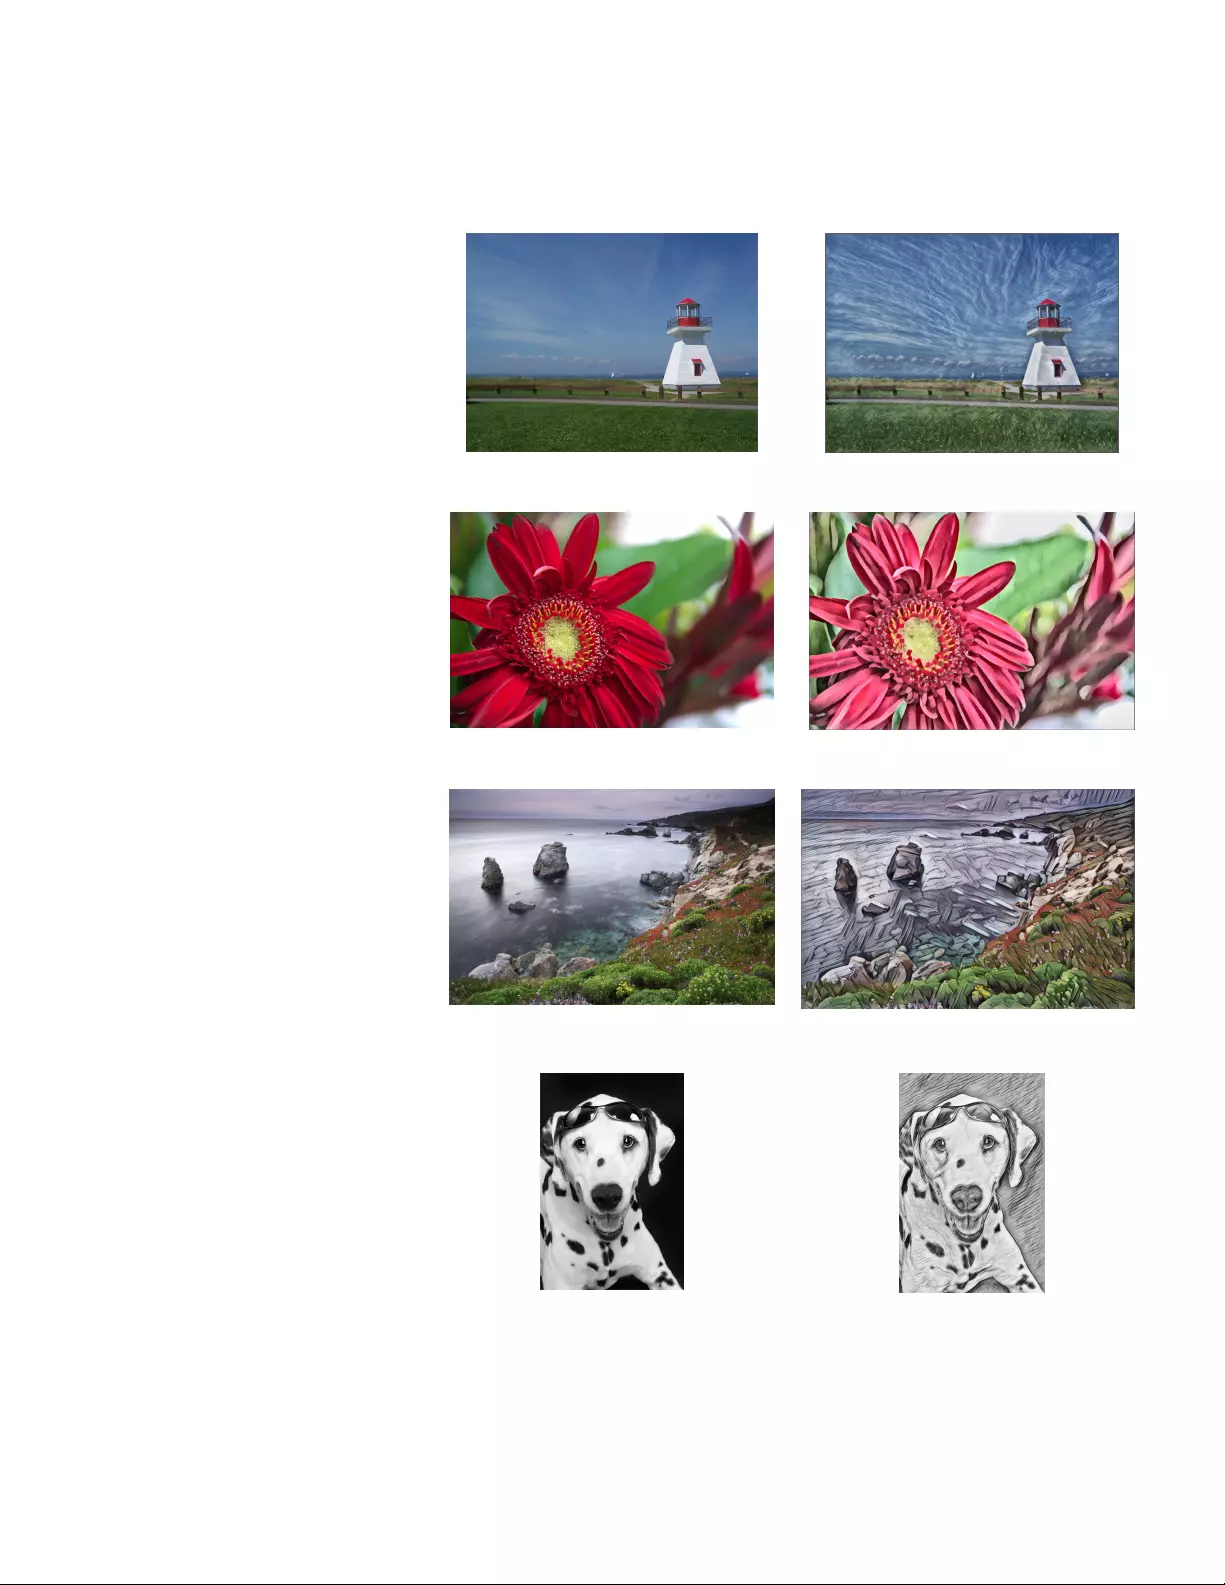
Photo art | 183
Preset Examples
Painted Landscape
Prepares a landscape for Photo Art by
adding impressionist-style brushstrokes
Original Painted Landscape
Short Strokes
Versatile, works with just about any image
by adding short, soft random brushstrokes
Original Short Strokes
Heavy Brushing
Adds bold, powerful strokes to create a
dramatic representation of the photo
Original Heavy Brushing
Charcoal
Converts a photo or painting to a charcoal
image suitable for Cloning
Original Charcoal

184 | Corel Painter 2022 User Guide
Preset Examples
Absolute Abstract
Turns brush marks, paintings, illustrations or
images into abstract paintings
Original Absolute Abstract
You can apply the changes to the current document or to a clone document.
You can also create your own presets by modifying the settings of any of the default styles or presets.
To apply an AI style or preset
1Open an image.
2In the A.I. Style panel (Window Photo Art Panels A.I. Style), do one of the following:
• Choose a style from the A.I. Style list box to apply a style.
• Choose a preset from the Preset list box to apply a preset.
3When you are satisfied with the result, click Apply.
You can also
Vary the intensity of the effect Move the Strength slider.
Specify the level of detail in the style transfer In the Detail area, enable one of the following options:
•Low
•Medium
•High
Specify the percentage of color matching taken from the original
image
Move the Color Match slider.
Smooth out the colors and sharp details Move the Smooth Image slider.
Apply a style to the current document Choose Current Document from the Apply to list box.
Apply a style to a new clone document Choose New Clone Document from the Apply to list box.
Tip: Click the Settings button to adjust various clone and
brush settings, such as clearing the canvas, activating tracing paper,
and switching to a cloning brush category.
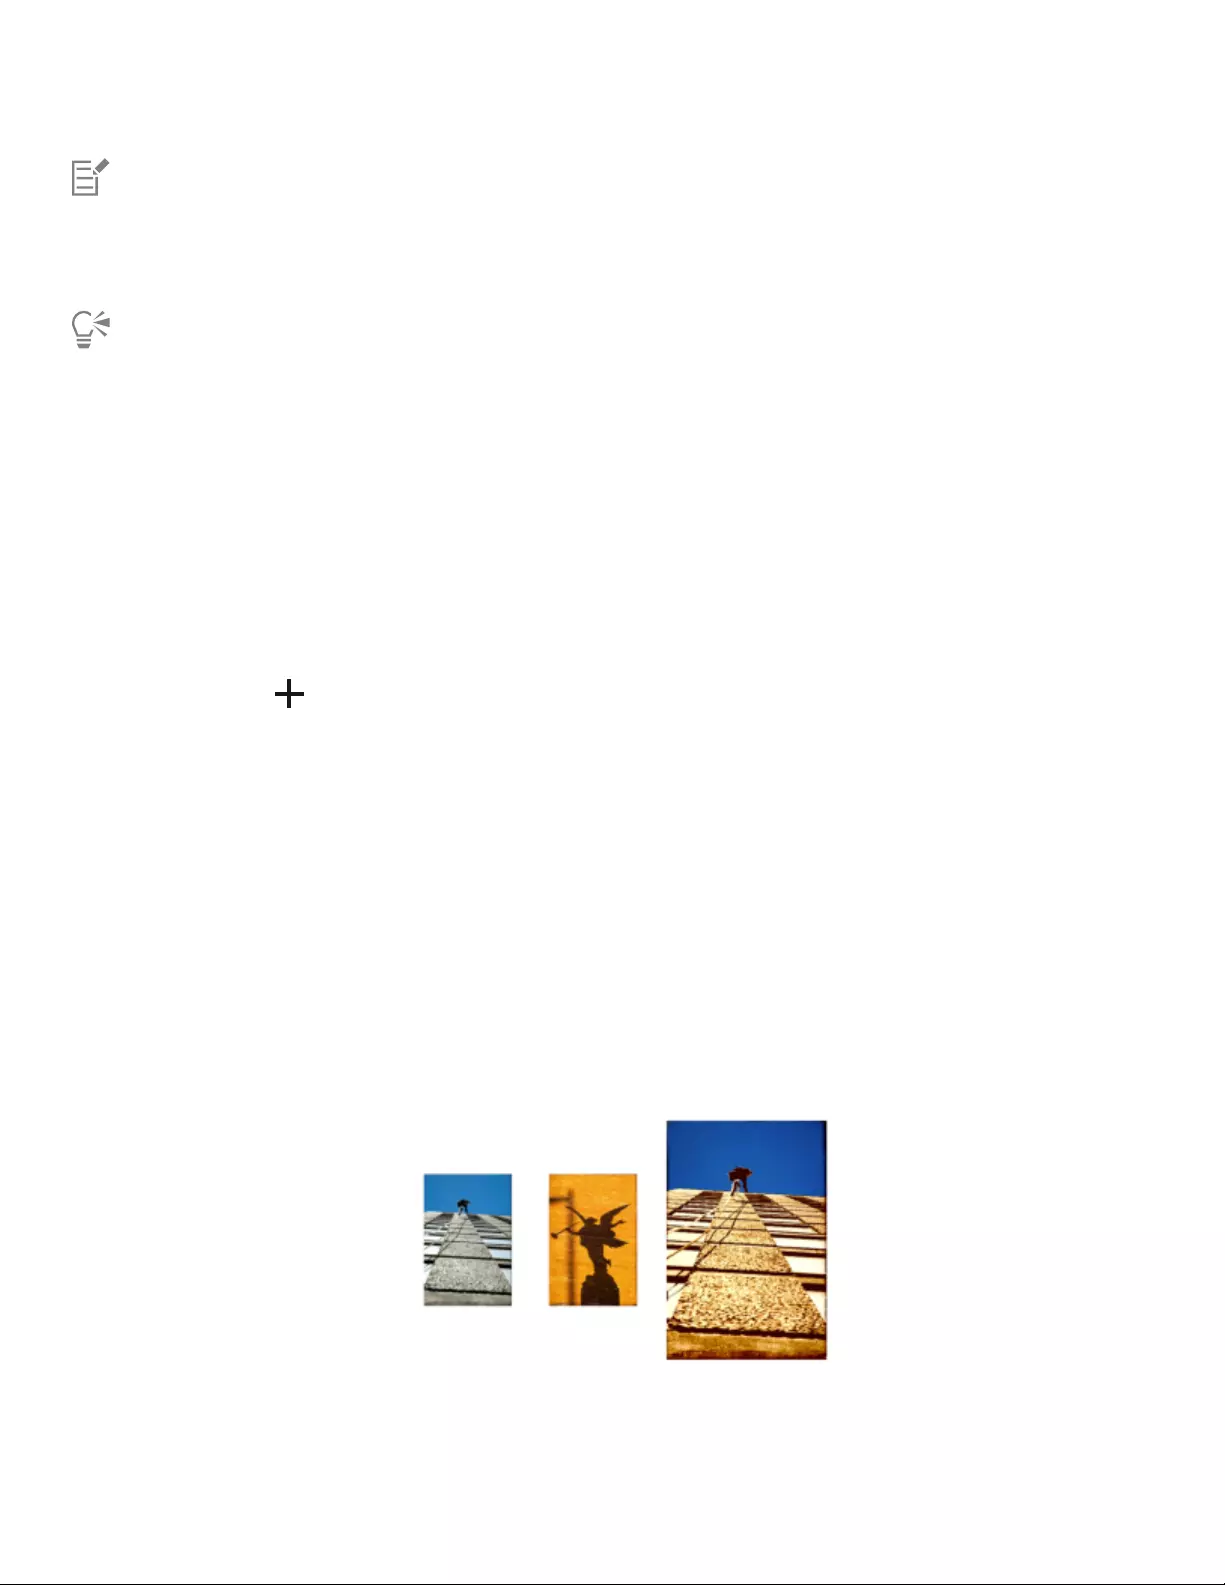
Photo art | 185
You can apply an AI style or preset only to default layers. To apply an AI style or preset to Watercolor, Thick Paint, or Liquid Ink
layers, you have to convert them to default layers.
In a multi-layer document, you can apply an AI style or preset only to the currently selected layer.
You can also apply an AI style or preset to a selection. For more information about selections, see “Selections and transformations”
on page 593.
You can also access the photo art panels by using the Photo Art command bar. For more information, see “Displaying the
command bars” on page 76.
To save an AI style preset
1Open an image.
2In the A.I. Style panel (Window Photo Art Panels A.I. Style), do one of the following:
• Choose a style from the A.I. Style list box to apply a style.
• Choose a preset from the Preset list box to apply a preset.
3Adjust any of the settings you want.
4Click the Add button beside the Preset list box.
Creating underpaintings
An underpainting is a version of the photo in which you adjust the photo’s colors, tones, and sharpness. The purpose of the underpainting
is to prepare it for auto-painting. For example, you can darken colors to simulate the colors used in an 18th-century painting, or you can
soften colors to simulate the colors found in watercolor paintings. After retouching a photo, you can clone it to prepare it for auto-painting.
For more information about auto-painting, see “Auto-painting photos” on page 187.
Choosing an underpainting method
Depending on the effect you want to achieve, you can choose one of the following methods for creating an underpainting:
• Quickly simulate the color and tone used in some popular art styles, such as watercolor paintings or chalk drawings, by using a Color
Scheme preset.
• Match the color and tone of your underpainting to an existing image, such as a photo, scanned image, or digital artwork.
• Quickly lighten, darken, or shift the color or contrast of your photo by using a Photo Enhance preset.
• Adjust individual settings in the Photo Enhance area, and save the settings as a custom preset.
One method you can use to prepare a photo for painting (left) is to choose a source image (center) that contains the colors and
tones you want to use. The color and tone of the source image can be applied to your photo to create an underpainting (right).
186 | Corel Painter 2022 User Guide
To create an underpainting
1Open the image that you want to auto-paint.
2Choose Window Photo Art Panels Underpainting.
3In the Underpainting panel, choose a preset from the Color Scheme list box.
4Choose a preset from the Photo Enhance list box.
5In the Photo Enhance area, move any of the following sliders:
•Brightness — lets you brighten or darken the photo
•Contrast — lets you increase or decrease the difference in tone between the dark and light areas of the photo
•Hue — lets you shift the color balance of the photo. For example, you can correct a color cast or apply a cast to create a special effect.
•Saturation — lets you adjust the vividness of colors
•Value — lets you brighten or darken the photo by using the HSV color space values
•Smart Blur — lets you adjust the level of detail in the photo. More detail is maintained in high-contrast areas than in low-contrast
areas.
A preview of the change is shown in the photo, but the change is not applied until you click Apply.
6Click Apply to create the underpainting.
The button becomes grayed out after the underpainting is created.
Before clicking Apply, you can return the photo to its original state by clicking Reset.
To apply the changes to the current document, choose Current Document from the Apply to list box.
To clone a photo after retouching it, choose New Clone Document from the Apply to list box. Click the Settings button
if you want to adjust various clone and brush settings, such as clearing the canvas, activating tracing paper, and switching to a
cloning brush category.
You can add an edge effect to simulate the unpainted edge of a canvas or to create a frame effect by choosing an edge from the
Edge Effect list box and moving the Amount slider.
To save underpainting settings as a preset
1In the Underpainting panel, adjust the Photo Enhance sliders to achieve the style you want.
2Click the Add Preset button .
3In the Save Preset dialog box, type a name for your preset.
The preset appears in the Photo Enhance list box.
You can delete a preset by choosing it in the Photo Enhance list box and clicking the Delete Preset button .
To create an underpainting by matching the color and tone of another image
1Open the image that you want to use as a source for color matching.
2Open the image that you want to use as an underpainting.
This image is now the active document.
3In the Underpainting panel, choose the filename for the source image from the Color Scheme list box.
The underpainting is automatically updated with the color scheme from the source image.
If you want to fine-tune the underpainting, you can adjust the Photo Enhance settings.
4Click Apply.
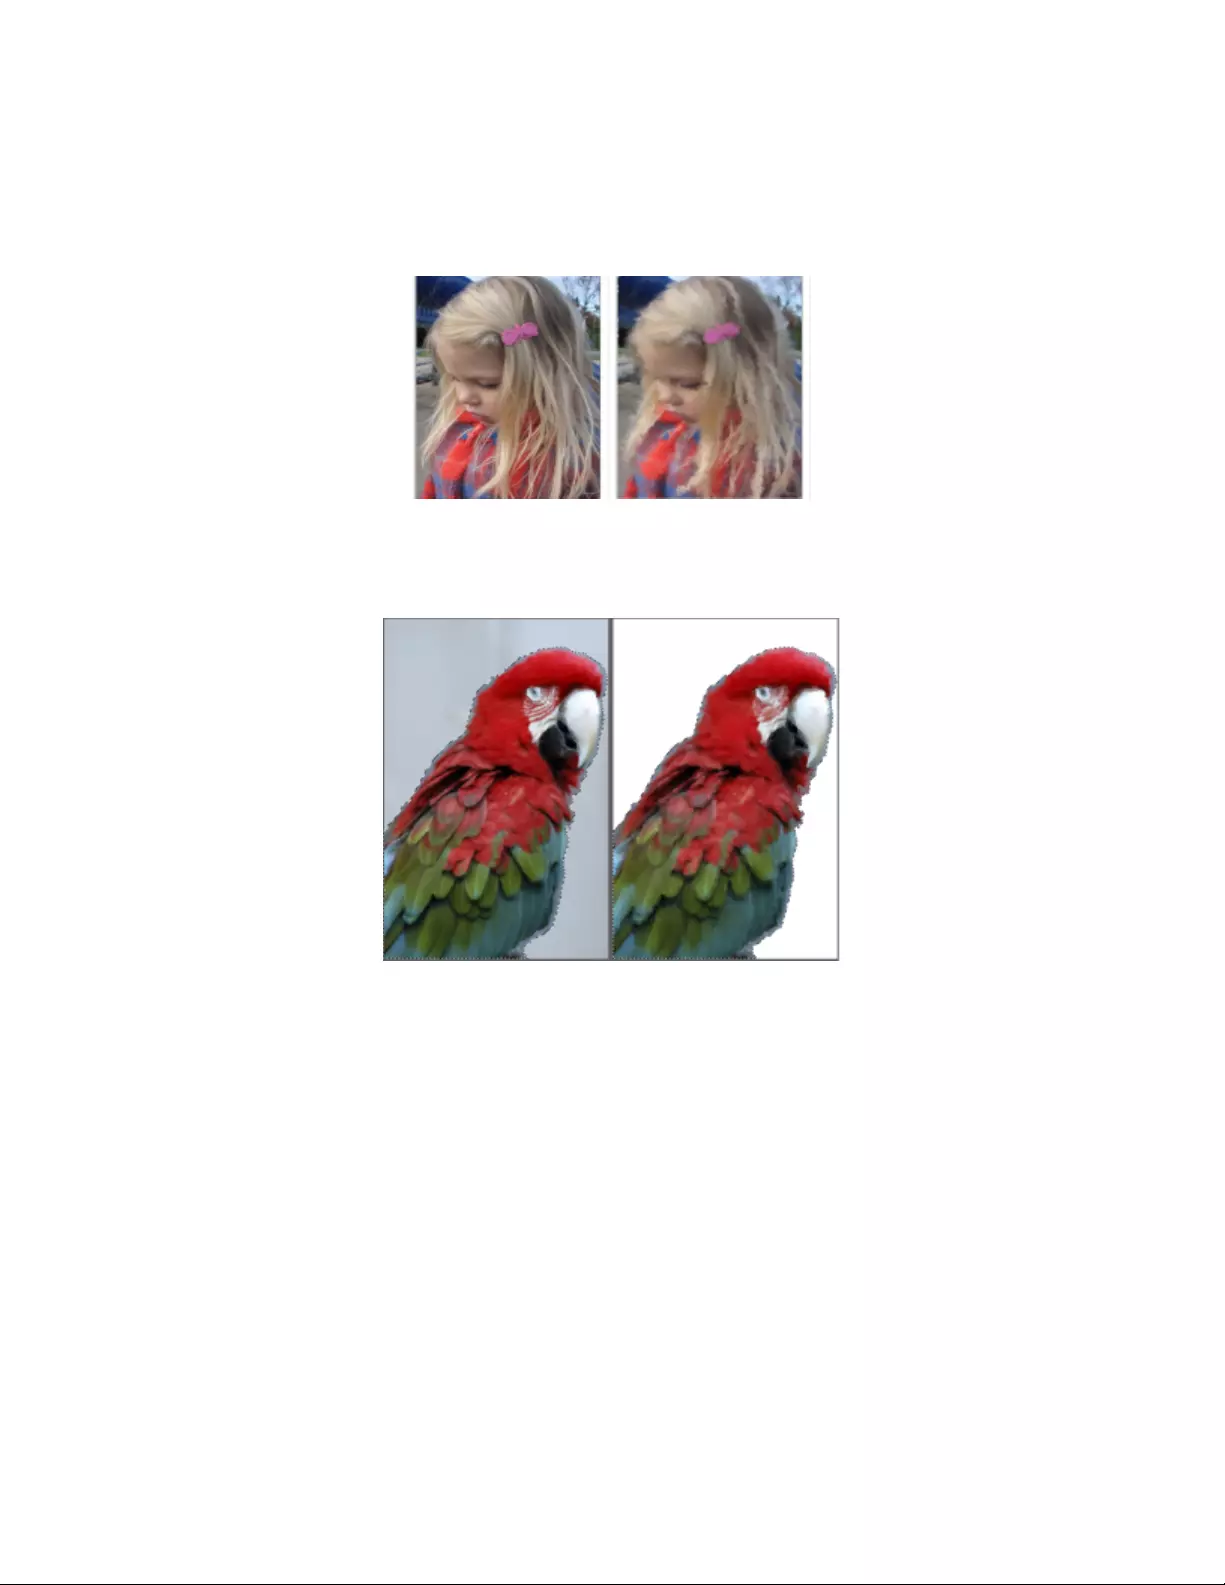
Photo art | 187
Auto-painting photos
After the photo is cloned, you can start the auto-painting process.
Auto-painting applies brushstrokes to the canvas.
If you want to isolate an area for auto-painting, you can create a selection first. In the final result, the areas protected by the selection are
filled with the canvas color. For information about selections, see “Selections and transformations” on page 593.
Auto-painting using a selection
You can control the speed of auto-painting so that you can see how and where individual strokes are applied. You can also stop the auto-
painting process at any time.
Smart Stroke painting
You can choose a Smart Stroke brush variant and let the Smart Stroke painting and settings do the work. Although the Smart Stroke brush
variants are optimized for auto-painting, you can also use any Cloner brush variant. You can choose from the following options:
•Smart Stroke Painting — automatically applies paint strokes that follow forms in the photo
•Smart Settings — changes the size, length, and pressure of brushstrokes in areas of greater detail. This option can be used with Smart
Stroke painting to preserve detail from the source photo.
Customizing stroke settings
If you want more control over how the brushstrokes interact with the canvas, you can set individual stroke settings as follows:
•Stroke — lets you choose a brushstroke. You can also add custom brushstrokes to the list.
•Randomness — introduces an “accidental” quality in color and stroke. Randomness contributes to the appealing, unique look of
artwork created with Corel Painter. You can control the randomness of the following settings:
•Pressure — lets you set a value from 0 to 100 to specify the amount of pressure with which brushstrokes are applied. This setting
represents the percentage of the preset pressure for the Stroke option.
188 | Corel Painter 2022 User Guide
•Length — lets you set a value from 0 to 100 to specify the length of the brushstrokes. This setting represents the percentage of the
preset length for the Stroke option.
•Rotation — lets you set a value from 0 to 360 degrees to specify the rotation of the brushstrokes.
•Brush Size — lets you set the brush size
You can also record a custom brushstroke.
To auto-paint a photo by using Smart Stroke painting
1Select the clone document in the application window.
If you want to auto-paint only specific areas in a photo, click a selection tool in the toolbox, and create a selection.
2In the Brush Selector, choose the Smart Strokes brush category, and choose a brush variant.
Note: You can also use any variant in the Cloners categories.
3In the Auto-Painting panel (Window Photo Art Panels Auto-Painting), enable the Smart Stroke Painting check box.
You can turn off tracing paper to view the auto-painting progression by pressing Command + T (macOS) or Ctrl + T (Windows).
4Click the Play button .
Brushstrokes are applied automatically.
5Click the Stop button when you are satisfied with the results.
If you do not click the Stop button, auto-painting stops at the end of the brushstroke cycle.
You can also
Set paint strokes to adjust automatically in size, length, and
pressure to areas of greater detail
Enable the Smart Settings check box.
Control the speed at which brushstrokes are applied Move the Speed slider.
If only a solid color is used for painting, undo the auto-painting, and make sure that the Clone Color button in the Color
panel is enabled.
To auto-paint a photo by using a custom stroke
1Select the clone document in the application window.
If you want to auto-paint only specific areas in a photo, click a selection tool in the toolbox, and create a selection.
2In the Brush Selector, choose a Cloners brush category, and choose a brush variant.
3In the Auto-Painting panel, choose a stroke from the Stroke list box.
You can turn off tracing paper to view the auto-painting progression by pressing Command + T (macOS) or Ctrl + T (Windows).
4Click the Play button .
Brushstrokes are applied automatically.
5Click the Stop button when you are satisfied with the results.
If you do not click the Stop button, auto-painting stops at the end of the brushstroke cycle.
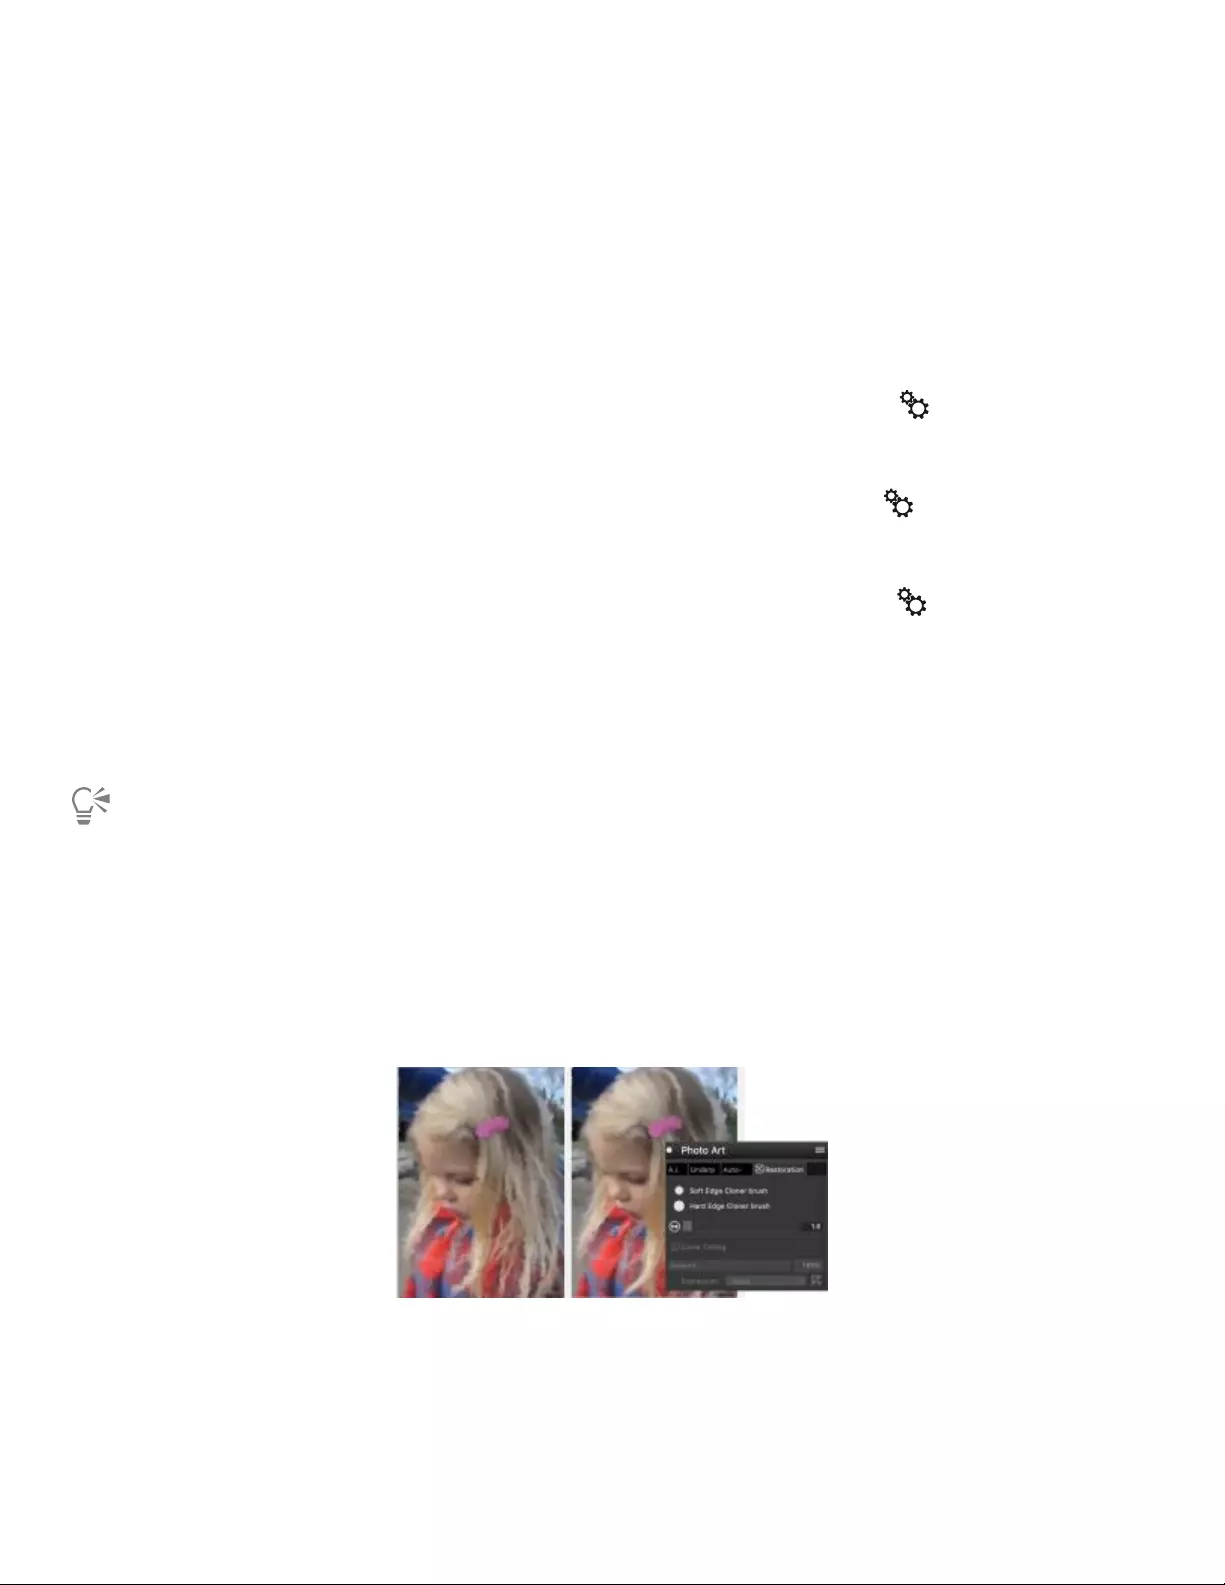
Photo art | 189
You can also
Vary the brushstrokes Move the Randomness slider. The settings in the slider determine
the range of randomness for Pressure, Length, and Rotation. For
example, if the Randomness for pressure slider is set to 32% and
the Randomness slider is set to 64%, the pressure for each stroke is
between 0% and 32% with a variation of 64%.
Vary the pressure of the brushstrokes Click the Randomness for pressure button, and then move
the slider.
Vary the length of the brushstrokes Click the Randomness for length button, and then move the
slider.
Vary the rotation of the brushstrokes Click the Randomness for rotation button, and then move
the slider.
Change the size of the brushstrokes Move the Brush Size slider.
Control the speed at which brushstrokes are applied Move the Speed slider.
You can use a custom stroke by clicking the Recording Options button and choosing Record Stroke. Paint a stroke on the canvas,
and choose Save Stroke from the same menu. Your stroke is added to the Stroke list box. For more information, see “Recording
and playing back brushstrokes” on page 168.
Restoring detail to paintings
After the auto-painting process is complete, you can use the Restoration panel to recover detail from the original photo, if necessary. For
example, the Restoration panel is ideal for restoring some detail in the area of a subject’s eyes in a portrait.
You can restore detail from the original photo by using brushes in the Restoration panel.
The Restoration panel gives you access to two cloner brushes, which you can use in specific areas of your photo to restore detail. You can
adjust the settings for these brushes on the property bar. You can paint in the clone colors or use tinting to mix a color with your clone
source. For more information about clone tinting, see “Cloning brushes and controls” on page 205.

190 | Corel Painter 2022 User Guide
To restore photo detail
1Choose Window Photo Art Panels Restoration.
2In the Restoration panel, click one of the following buttons:
•Soft Edge Cloner Brush — activates the Soft brush variant from the Cloners : Touch-up category, which restores detail
gradually
•Hard Edge Cloner Brush — activates the Hard brush variant from the Cloners : Touch-up category, which restores detail quickly
with a few brushstrokes
3Move the Brush Size slider .
4Paint over the area in which you want to restore detail.
To preview and fine-tune the painting, you can turn off and on tracing paper by pressing Command + T (macOS) or Ctrl + T
(Windows).
You can also
Mix a color with your clone source Enable the Clone Tinting check box. Press Alt (Windows) or
Option (macOS), and click in the document window to sample a
color from the image or choose a color in the color wheel.
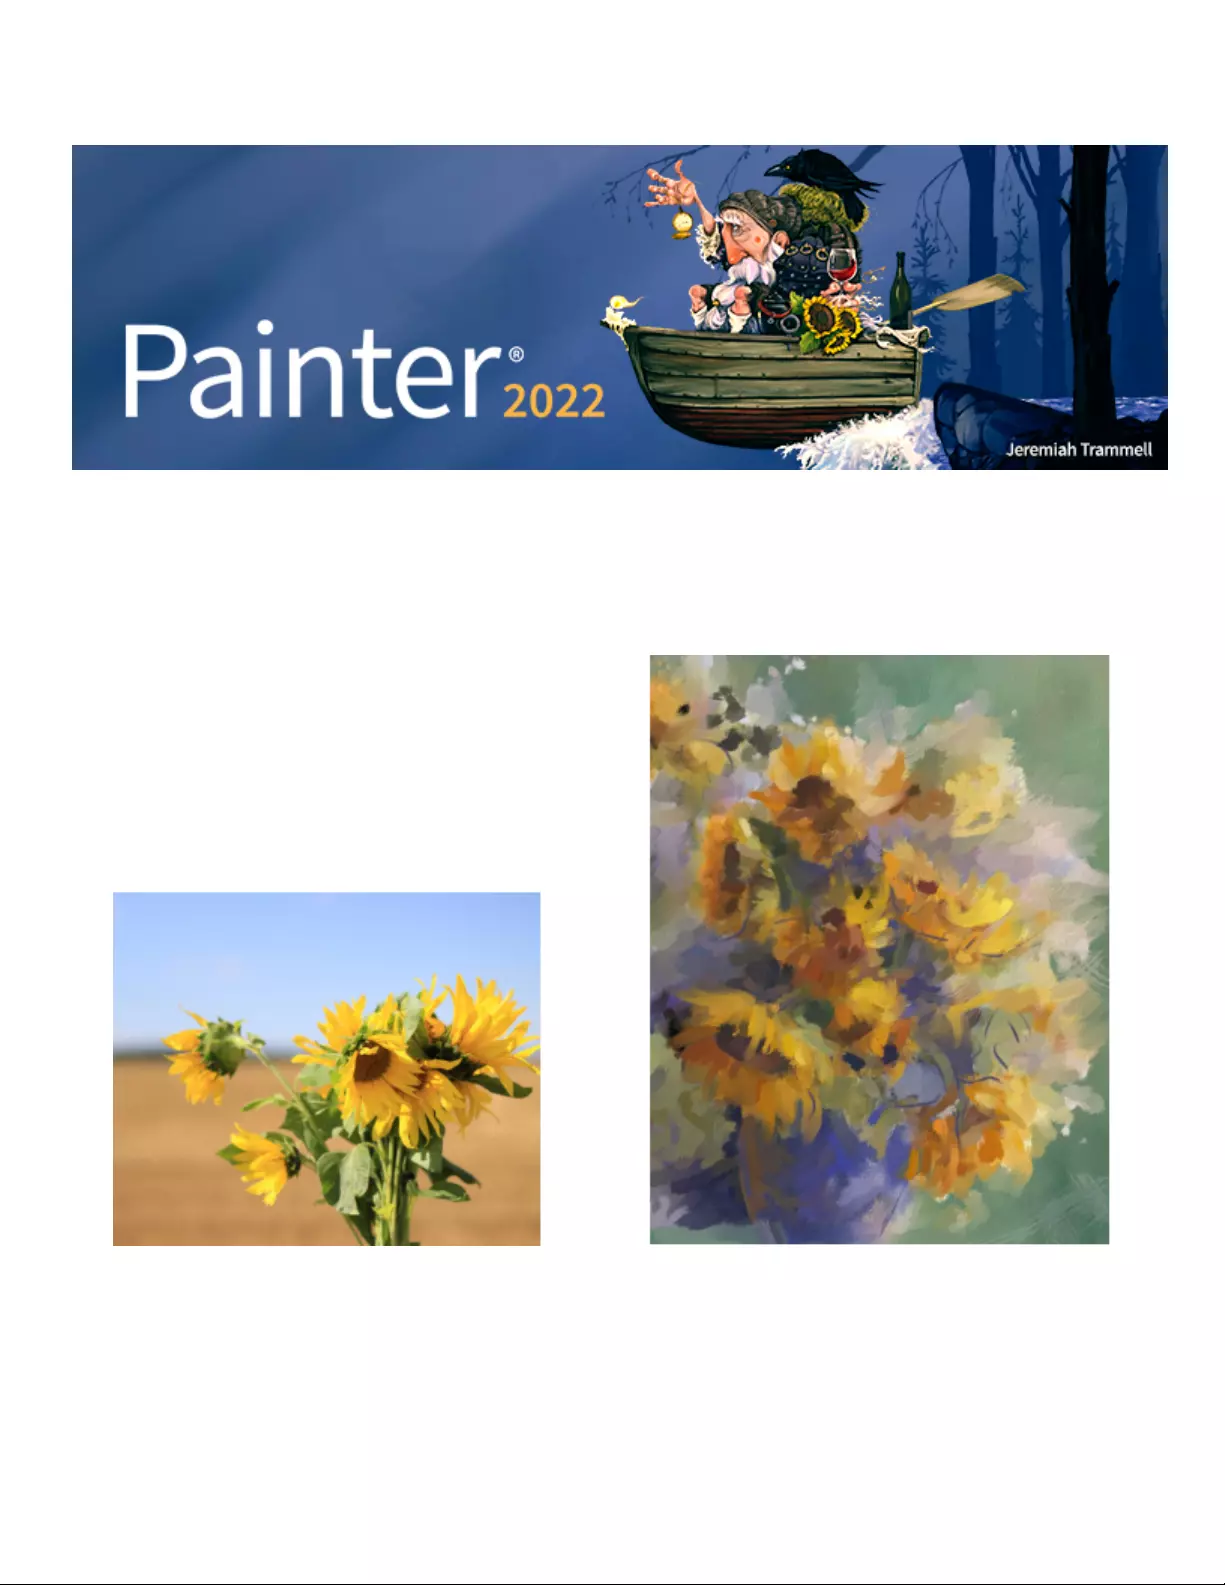
Image cloning and sampling | 191
Image cloning and sampling
Corel Painter includes powerful image cloning tools to help you transform an existing image, such as a photograph, into a work of art.
Use cloning techniques to give your digital photographs a second life. Original photo (left) and artwork (right) by Karen Bonaker.

192 | Corel Painter 2022 User Guide
Combine images with creative collage and compositing techniques to achieve stunning results. Artwork by Deborah Kolesar.
You can also use image sampling tools and techniques to sample a portion of an image so you can use it elsewhere. Sampling is a useful
technique for retouching photographs.
This section contains the following topics:
•“Cloning workflows” (page 192)
•“Using embedded images as clone sources” (page 196)
•“Using textures as clone sources” (page 200)
•“Using patterns as clone sources” (page 202)
•“Working with embedded clone sources” (page 203)
•“Setting cloning preferences” (page 204)
•“Cloning brushes and controls” (page 205)
•“Cloning image areas” (page 212)
•“Multi-point cloning” (page 214)
•“Using selections and transformations when sampling” (page 225)
•“Filling an area with a sampled image” (page 226)
Cloning workflows
The most common workflows for photo painting and creating composite images (such as collages) include:
Workflow I: Turn a photo into a painting
Workflow step Help topic
1. Open a photo for painting “Opening and placing files” on page 101

Image cloning and sampling | 193
Workflow step Help topic
2. Clone a photo “To clone an image by using Quick Clone” on page 198
3. (optional) Add an additional clone source “To embed an additional clone source image into a document” on
page 199
“To use a texture as a clone source” on page 201
“To use a pattern as a clone source” on page 202
4. (optional) Edit an embedded clone source “Working with embedded clone sources” on page 203
5. Paint in the clone “Painting in the clone” on page 195
Wokflow II: Create a composite image
Workflow step Help topic
1. Create the assets that you need (images, textures, and patterns)
and add them to a library
“Creating textures” on page 464
“Using textures in photo painting and image compositing” on page
472
“Creating and editing patterns” on page 700
2. Create a new document “Creating documents” on page 98
3. Add content assets as clone sources “To embed an additional clone source image into a document” on
page 199
“To use a texture as a clone source” on page 201
“To use a pattern as a clone source” on page 202
4. (optional) Edit a clone source to suit your composition and
concept
“To apply a transformation to a texture” on page 469
“To edit a texture” on page 470
“To edit a texture clone source” on page 201
5. (optional) Edit an embedded clone source “Working with embedded clone sources” on page 203
6. Paint in the clone “Painting in the clone” on page 195
Choosing an image
The first step is to choose a document, such as a photo or another image, that you want to clone, or create a new document.

194 | Corel Painter 2022 User Guide
In this example, the artist started by cloning a photo and then painted in
the clone. Original photo (top) and artwork (bottom) by Mary Ann Rolfe.
Working with clone sources
A clone source is a reference — a guide — for brush colors. You clone (copy) color from a clone source and apply it to a destination canvas
(clone document). A clone source may or may not be embedded. Embedding a clone source allows you to keep it with your document and
switch quickly between clone sources as you paint.
You can use images, textures, and patterns as clone sources. If you plan to use a clone source only once — for example, if you want to
turn a photo into a painting — you can embed it as an image. If you plan to reuse a content asset as a clone source in multiple projects,
you can store it as a texture or pattern in the Texture or Pattern library, respectively. Corel Painter supports PNG and RIFF clone sources with
transparency and lets you easily transform textures in the context of your composition to make them suit your artistic vision.
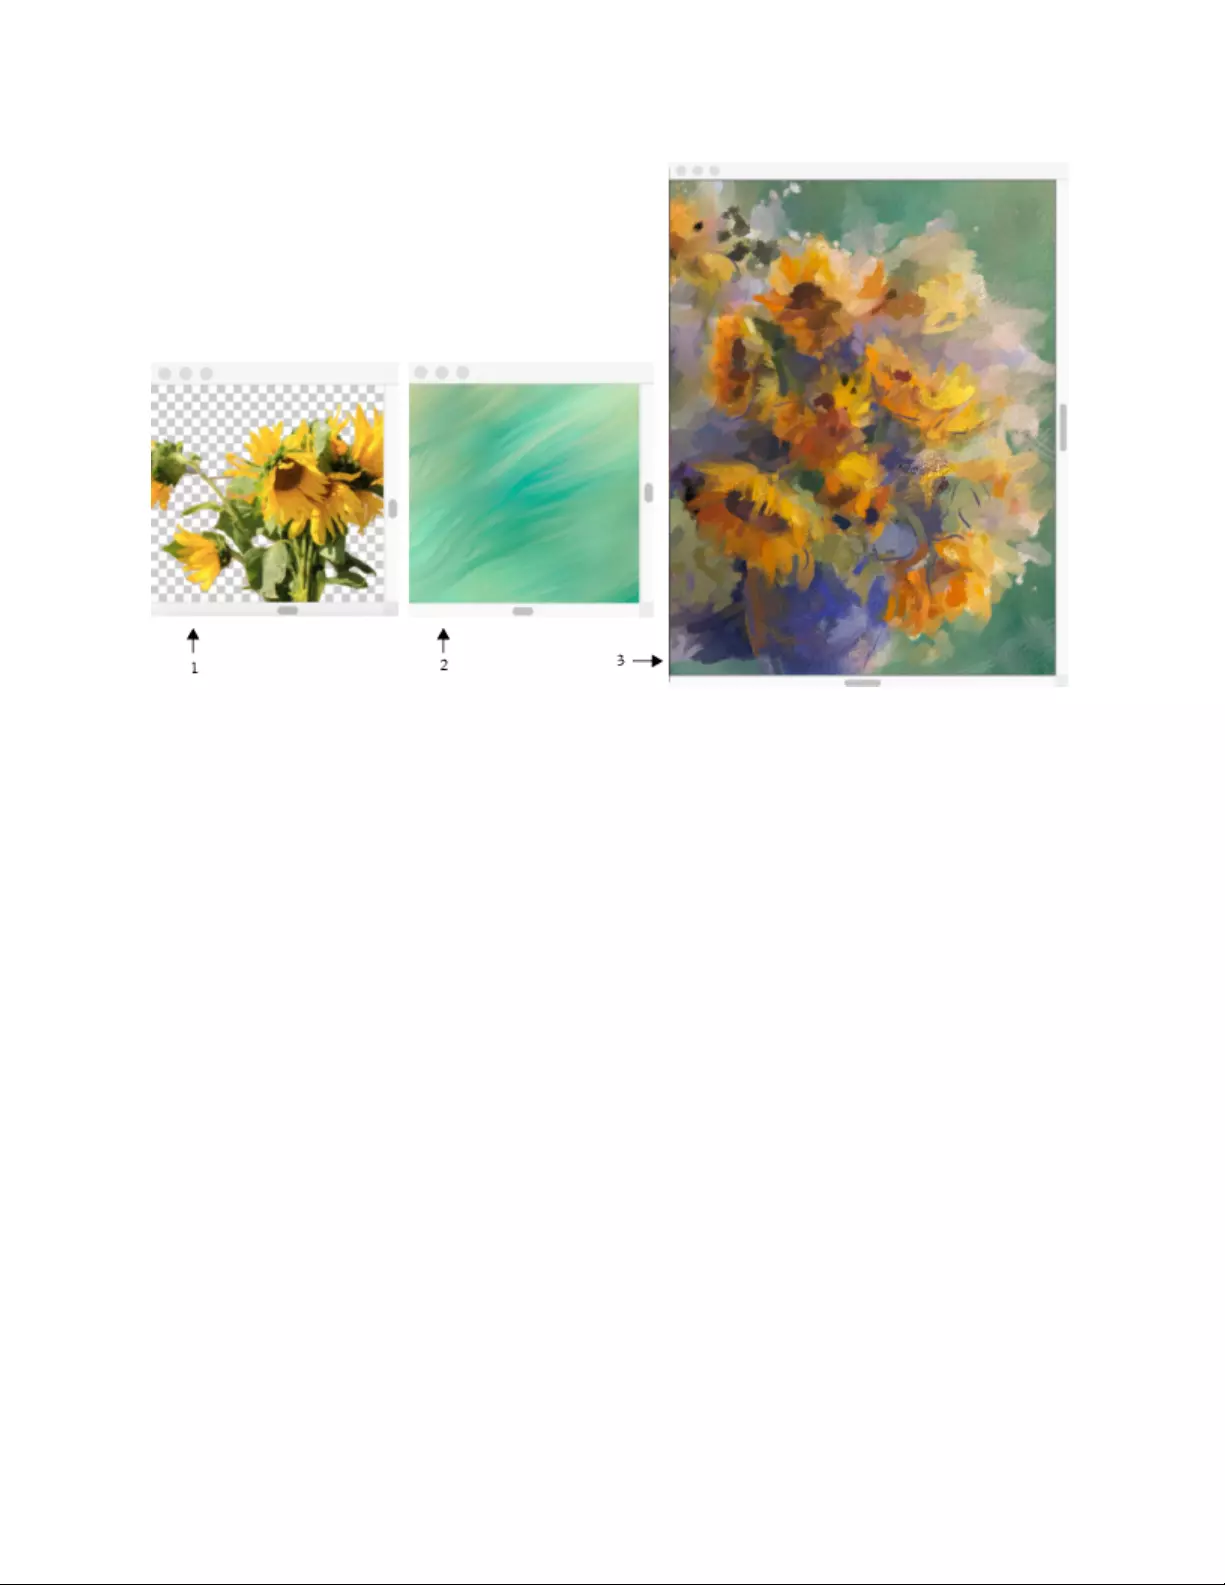
Image cloning and sampling | 195
Clone a photograph to create a unique work of art, or import your content assets as textures
and reuse them as clone sources in different projects. A transparent PNG (1) and a texture (2)
were used as clone sources in the clone document (3). Images and artwork by Karen Bonaker.
If you want to borrow elements from different images and combine them in the clone document to create a composite image, you can use
multiple clone sources.
Painting in the clone
After choosing a clone source, pick a brush and apply strokes to the canvas or let Corel Painter automatically apply brushstrokes for you. You
can paint in the clone colors or use tinting to mix a color with your clone source.
Cloner brushes
To quickly get started with cloning, choose any of the brush variants available in the Cloners brush categories. If you prefer to create your
own custom variant, see “Cloning brushes and controls” on page 205 for detailed information on cloning controls.
Clone tinting
Clone tinting lets you add the currently selected color to any clone brush independent of the clone source. While painting with clone tinting
enabled, you can dynamically add color to mix with your clone source. For more information about tinting, see “To apply clone tinting” on
page 210.
Auto-painting
Using a cloner brush may take a long time if you’re working on a large area. To work more quickly, you can have Corel Painter automatically
apply brushstrokes for you. For detailed information on auto-painting, see “Auto-painting photos” on page 187.
You can also use the Auto Clone effect. For more information, see “Automatically cloning an image” on page 636.
You can also have Corel Painter place directional brushstrokes to produce a Van Gogh–like rendition of a cloned image. For more
information, see “Applying the Auto Van Gogh effect” on page 637.
Additional clone painting techniques
The following table describes different techniques for painting a clone.

196 | Corel Painter 2022 User Guide
To For information, see
Create a mosaic or tessellation by using a source image “Creating a mosaic” on page 726
Add three-dimensional effects by applying surface texture “Using 3D brushstrokes to create texture” on page 653
Create a selection or channel “Selections and transformations” on page 593 and “Alpha
Channels” on page 583
Displaying the clone source image or texture
If you want to use the clone source image or texture as a reference while painting in the clone, you can display it in a separate window.
The clone source image (right) is displayed and arranged side by side with the clone document (left). As you paint in the
clone document (left), the crosshair cursor in the source image window (right) identifies the area where you are painting.
You can quickly switch between clone sources as you paint.
Using embedded images as clone sources
When you want to clone a document, such as a photo or another image, you can use Quick Clone. Corel Painter automatically sets up the
workspace to start painting in the clone:
• creates a new document (called a clone document or simply a clone)
• embeds a copy (called an embedded clone source) of the original image
• closes the clone source image
• clears the canvas
• enables tracing paper
• selects a cloner brush
If the original document has layers, cloning creates a fully composited copy — that is, all layers in the image are dropped automatically.
You can change the Quick Clone preferences. For example, you can apply an AI style preset or choose to start painting on a Default, Thick
Paint, Liquid Ink, or Watercolor layer. For more information, see “Setting cloning preferences” on page 204.

Image cloning and sampling | 197
The sunflowers (1) and background (2) images were embedded as clone sources into the clone document (3). Both
embedded clone sources (4 and 5) are displayed in the Clone Source panel (6). Images and artwork by Karen Bonaker.
You can also start from a blank document and add one or more clone sources.
After you clone an image, a copy of the image is automatically embedded in the clone document and the relationship with the original
image is broken. Consequently, if you modify the original image, the changes are not reflected in the embedded clone source image. If you
make changes to the original image and you want to use the most up-to-date version in your clone document, you need to add it as a new
clone source, and then delete the older version. You can also edit the embedded clone source image. For more information, see “To edit an
embedded clone source image” on page 203.
You can enable tracing paper, which helps you apply clone colors precisely. Tracing paper displays a faded-out version of the source image in
the clone document. Unlike traditional tracing paper, the Corel Painter tracing paper is not a real object, such as a layer or a document. It’s
a viewing mode that allows you to see the clone source image and use it as a reference when painting. When you enable tracing paper and
start painting, the media is applied to the clone document the way it would be applied to traditional tracing paper.

198 | Corel Painter 2022 User Guide
When you enable tracing paper (left), you can see a faded-out
version of the clone source image (right). Artwork by Henk Dawson.
If you can’t see all image details when tracing paper is enabled, you can toggle the tracing paper view to switch between showing and
hiding the clone source. You can also control the opacity of the tracing paper.
To clone an image by using Quick Clone
1Open the image that you want to clone.
2Choose File Quick Clone.
3Apply brushstrokes to the canvas.
Tip: To auto-paint an image, in the Auto-painting panel (Window Photo Art Panels Auto-Painting), enable Smart Stroke Painting,
and click Play. For more information, see “Auto-painting photos” on page 187.
You can paint in the clone colors or use tinting to mix a color with your clone source. For more information about clone tinting,
see “To apply clone tinting” on page 210.
Transparency is fully supported only in PNG and RIFF images.
If you enabled the Switch to cloner brushes check box in the Preferences dialog box, the last Cloner brush that you used is
automatically selected. For more information about cloning preferences, see “Cloning brushes and controls” on page 205.
If you select a Cloner brush and switch to offset sampling while cloning an image, the Offset Sampling option is automatically
selected from the Source list in the Clone Source panel. It is also important to note that the sampling reference point is not treated
as an embedded clone source and does not appear in the Clone Source panel. For more information, see “Cloning image areas”
on page 212.
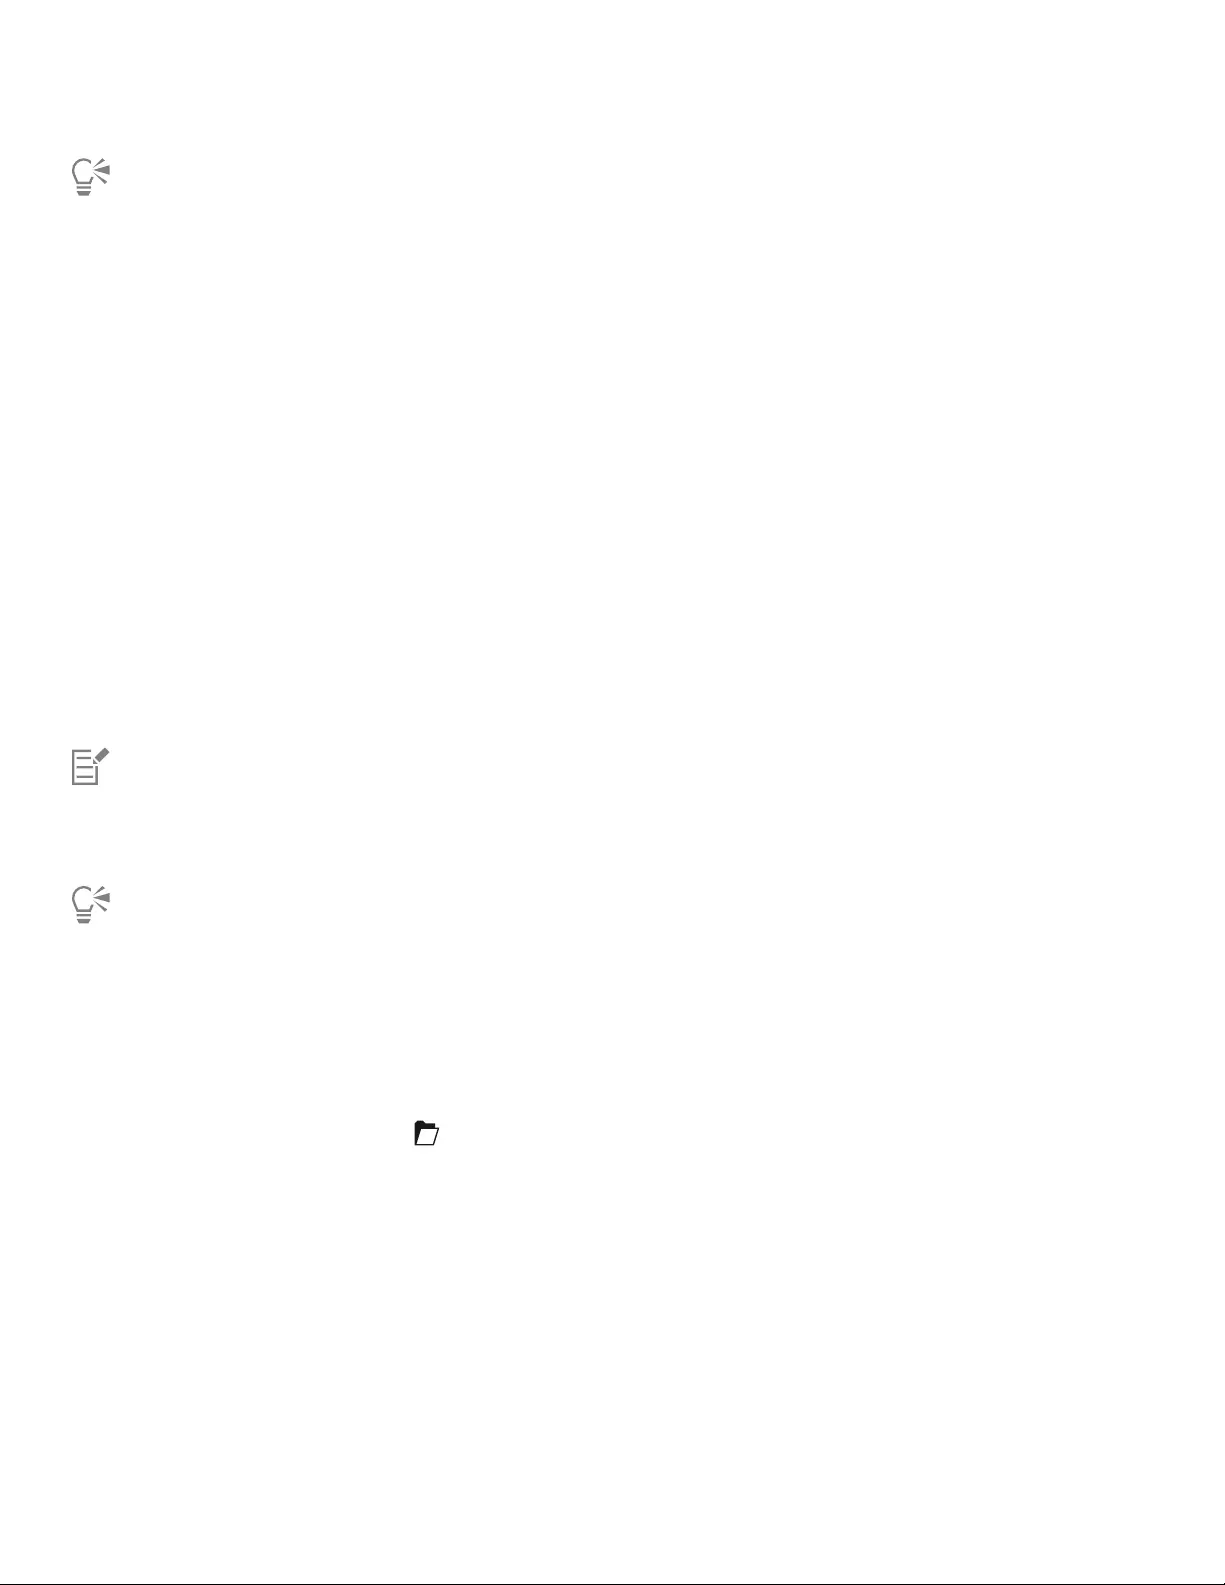
Image cloning and sampling | 199
You can also clone an image by opening the image and choosing File Clone. Corel Painter creates a clone document and embeds
a copy of the original image in the document. If you want to paint in the clone colors on a blank canvas, clear the clone document
by choosing Select All, and then choosing Edit Clear. Apply brushstrokes to the canvas by using a cloner brush, or choose any
brush and set it to clone color.
You can also access Quick Clone by using the Photo Art command bar. For more information, see “Displaying the command bars”
on page 76.
To embed a clone source image into a new document
1Create a new document.
2In the Clone Source panel (Window Clone Source), choose Embedded Image from the Source list box.
3In the Embed Source Image dialog box, do one of the following:
• To browse for a file, enable the Browse option.
• To clone a currently open document, enable the Current Document option, and choose a document from the list box.
• To embed the active texture, enable the Current Texture option.
4Click OK.
5In the Brush Selector, choose a cloner brush.
6Apply brushstrokes to the canvas.
To auto-paint an image, in the Auto-painting panel (Window Photo Art Panels Auto-Painting), enable Smart Stroke Painting, and
click Play. For more information, see “Auto-painting photos” on page 187.
The Embed Source Image dialog box appears only when your document does not contain any embedded clone sources. If you
already have an embedded clone source and you want to add more clone sources, see “To embed an additional clone source image
into a document” on page 199.
To edit an embedded clone source image, follow the steps in the procedure “To edit an embedded clone source image” on page
203.
To embed an additional clone source image into a document
1Open a clone document.
2In the Clone Source panel (Window Clone Source), choose Embedded Image from the Source list box.
3Click the Embed Source Image button .
4Perform a task from the following table.
To Do the following
Browse for a file Click Browse. Locate the folder that contains the image that you
want to use, select the image, and click Open.
Clone an open document Click a document in the list.
Embed the active texture Click Current Texture.
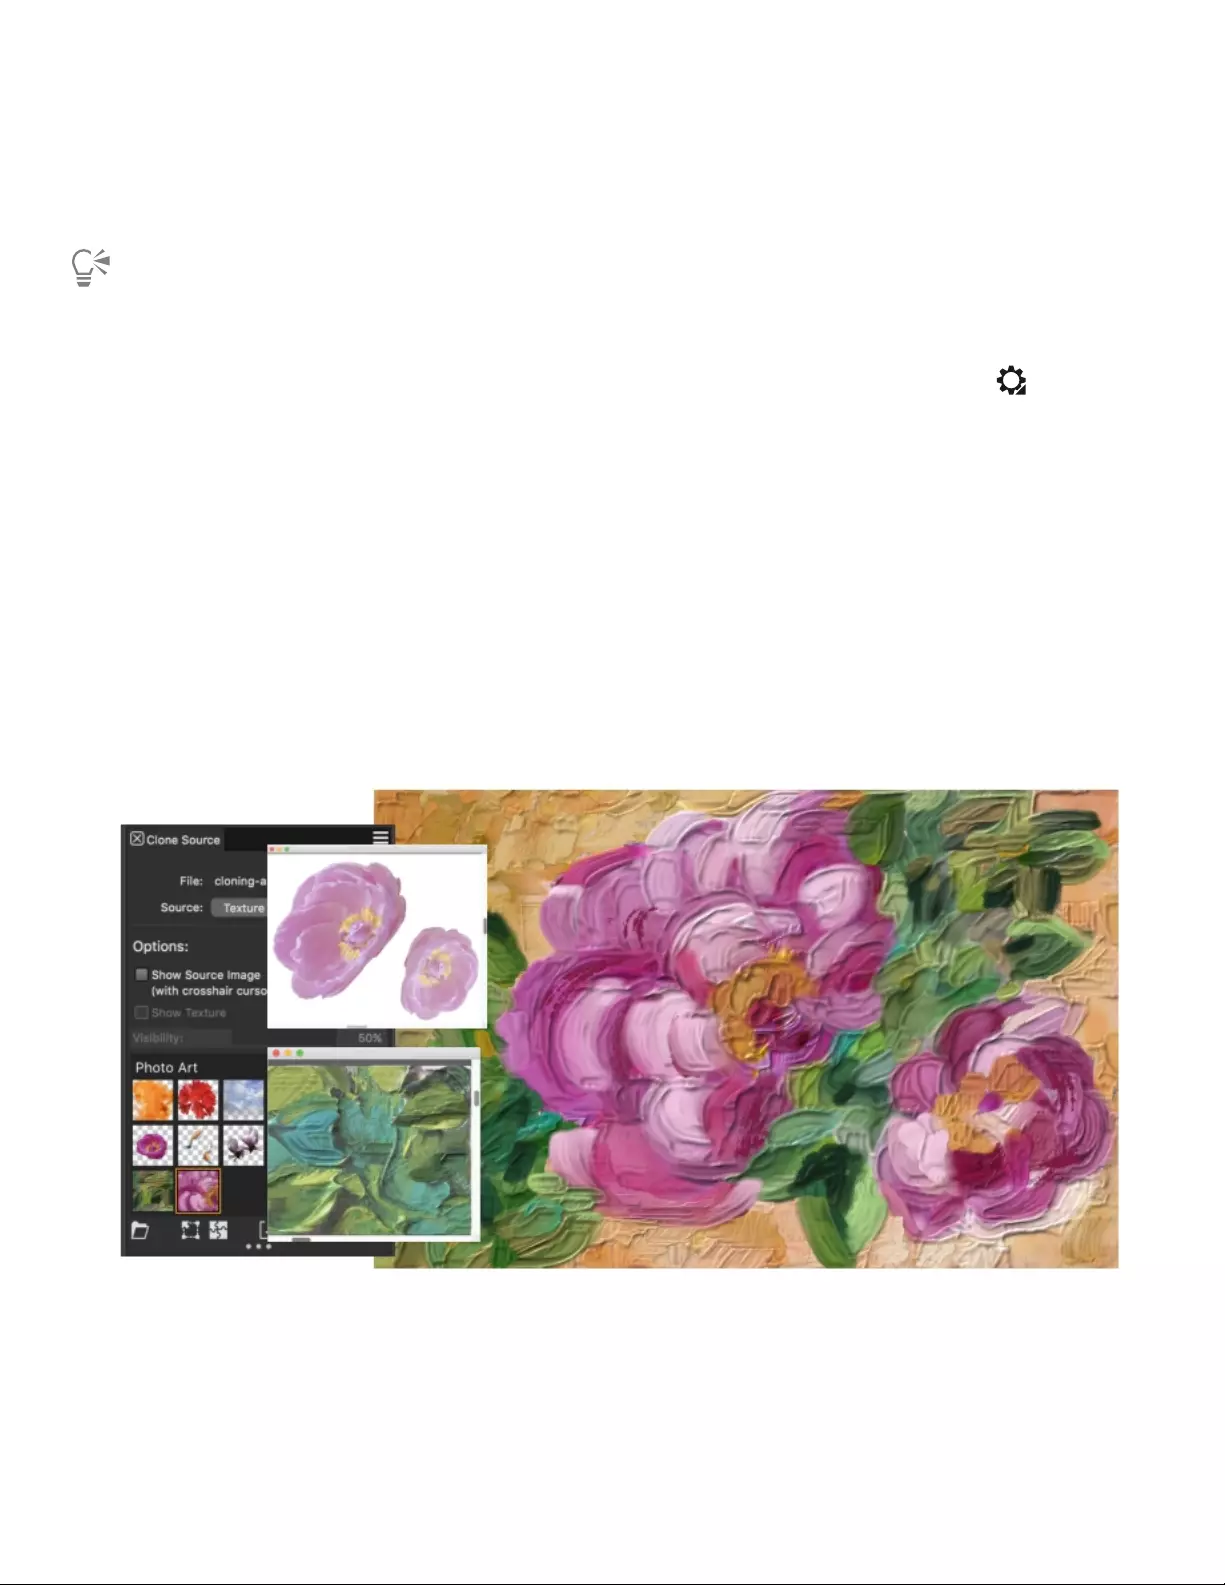
200 | Corel Painter 2022 User Guide
To enable tracing paper
•In the Clone Source panel (Window Clone Source), enable the Toggle Tracing Paper check box.
To change the opacity of the tracing paper, move the Opacity slider.
To use a keyboard shortcut, press Command + T (macOS) or Ctrl + T (Windows).
You can also enable tracing paper from the Navigator panel by clicking the Open Navigator Settings button and choosing
Toggle Tracing Paper.
To display a clone source image
1In the Clone Source panel (Window Clone Source), choose Embedded Image from the Source list box.
2Enable the Show Source Image (with crosshair cursor) check box.
The clone source image appears in a separate document window.
Using textures as clone sources
You can use a texture as a clone source. Explore the preset textures provided with Corel Painter, or create your own custom textures. For
more information, see “Creating textures” on page 464. If you have content assets that you want to reuse, add them to the Texture library
as textures, and then use them in your projects.
Create your content assets, import them into the Texture library, and use them as clone sources in your painting or photo collage.
Before you clone a texture, you can modify its appearance to suit your artistic vision. For more information, see “To apply a transformation to
a texture” on page 469 and “To edit a texture” on page 470.

Image cloning and sampling | 201
As your composition progresses, you can further modify a clone source texture in the context of your painting. When you finish editing the
texture and return to the clone document, you have the option to update the active clone source texture or create a new texture and add it
to the current Texture library. Note that with both options, all layers will be merged and the undo levels will be lost. If you have added layers
that you want to preserve, you need to export the source texture as a new document before you return to the clone source document.
If you want to keep a copy of the texture with the clone document, you can embed it, so the next time you open the document or share
it with someone else, the texture will be in the document. For more information about embedding clone sources, see “Working with
embedded clone sources” on page 203.
To use a texture as a clone source
1Create a new document or open an image.
2In the Clone Source panel (Window Clone Source), choose Texture from the Source list box.
3Click a texture thumbnail in the Painter Textures library.
If you want to see a representation of the texture in the document window, enable the Show Texture check box.
Tip: To adjust the texture visibility, move the Visibility slider.
4In the Brush Selector, choose a cloner brush.
5Apply brushstrokes to the canvas.
To auto-paint a texture, in the Auto-painting panel (Window Photo Art Panels Auto-Painting), enable Smart Stroke Painting, and
click Play. For more information, see “Auto-painting photos” on page 187.
You can also
Transform a texture clone source Follow the steps in the procedure “To apply a transformation to a
texture” on page 469.
Modify a texture clone source Follow the steps in the procedure “To edit a texture” on page
470.
To edit a texture clone source
1Create a new document or open an image.
2In the Clone Source panel (Window Clone Source), choose Texture from the Source list box.
3Click a texture thumbnail in the Painter Textures library.
If you want to see a representation of the texture in the document window, enable the Show Texture check box.
Tip: To adjust the texture visibility, move the Visibility slider.
4Enable the Show Source Image (with crosshair cursor) check box.
5Click in the Source Image window.
The Edit Source Texture dialog box opens to provide instructions on how to proceed after editing a texture clone source.
6Click OK.
7In the Source Image window, edit the clone source texture.
If you want to preserve all layers and export the source texture as a new document, choose File Export Source Image. In the Export
Source Image As dialog box, choose the drive and folder where you want to save the file. Type a filename in the Save As (macOS) or File
Name (Windows) text box, and click Save.
8Click in the clone document.
9In the Edit Source Texture Options dialog box, enable one of the following options:
•Create New — creates a new texture and saves it to the current Texture library, flattening all layers and deleting all undo levels
•Update — replaces the current texture, flattening all layers and deleting all undo levels
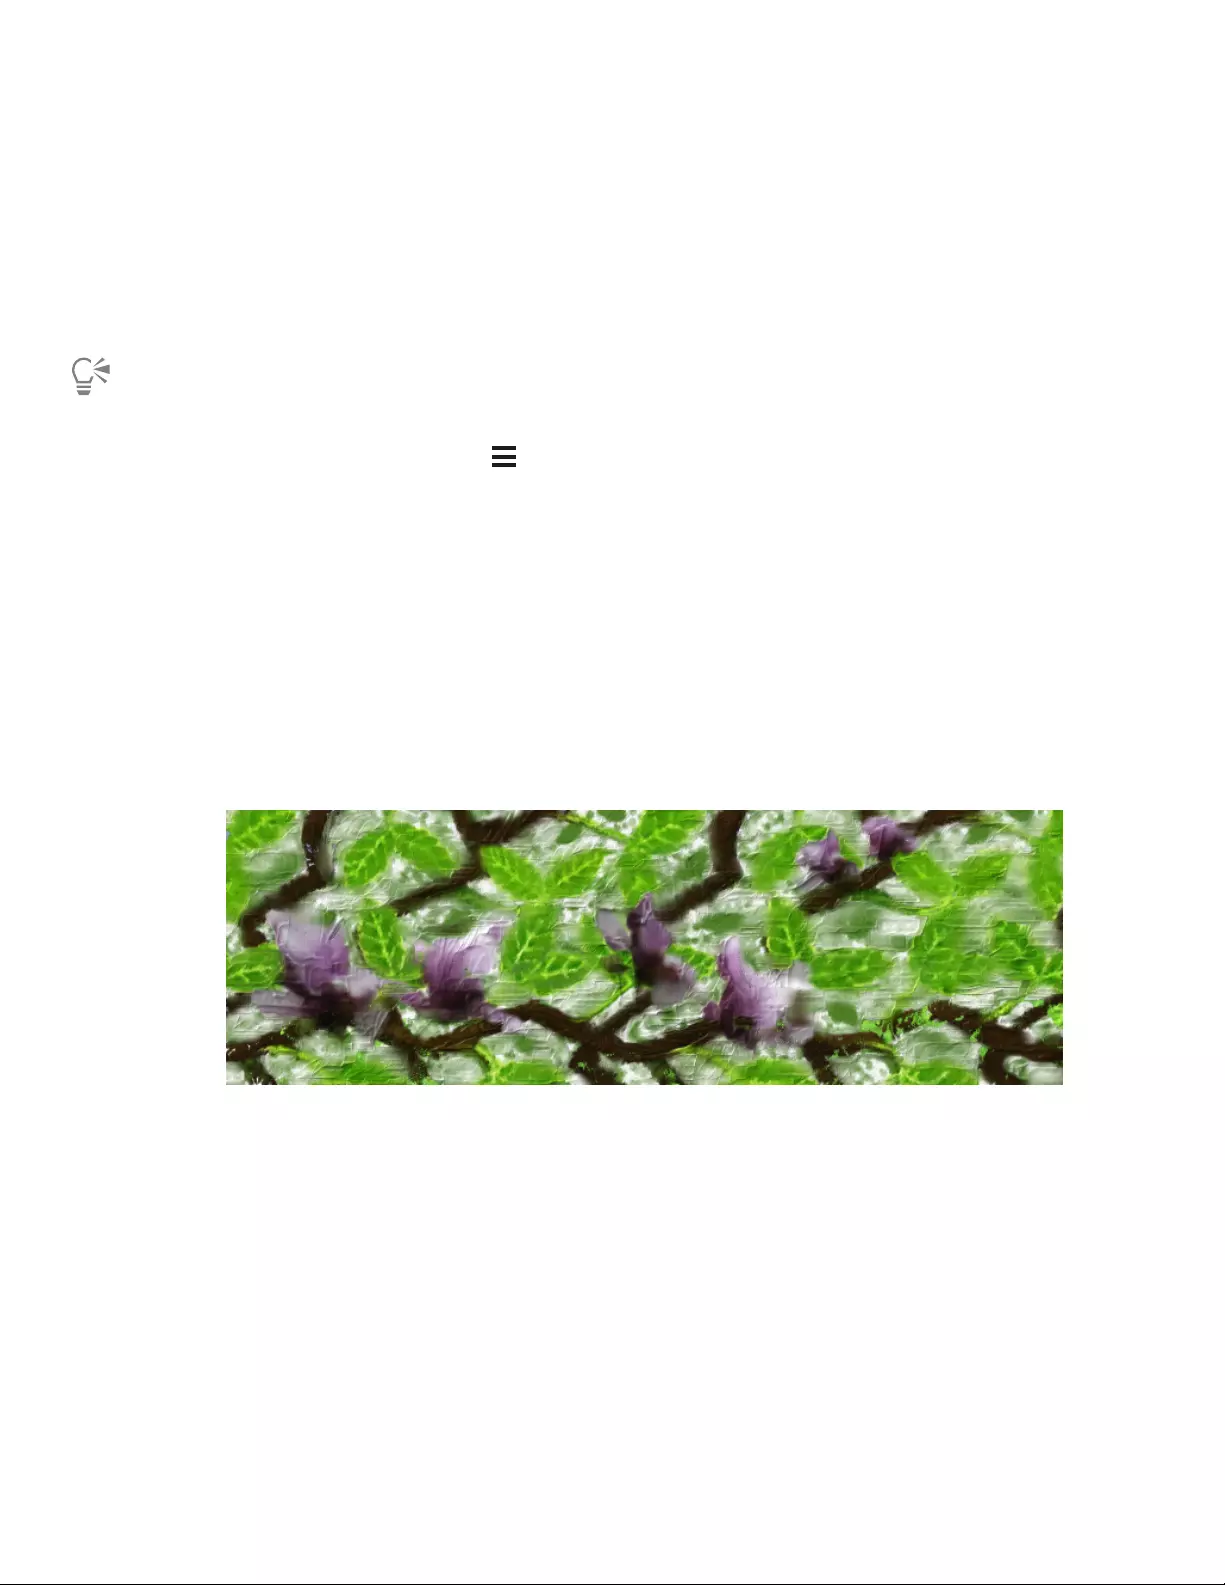
202 | Corel Painter 2022 User Guide
•Discard — removes changes from the selected texture
To embed a texture as a clone source image
1Create a new document or open an image.
2In the Clone Source panel (Window Clone Source), choose Texture from the Source list box.
3Right-click a texture thumbnail (Windows) or hold down Control and click a texture thumbnail (macOS), and click Embed Texture as
Clone Source Image.
You can also embed a texture as a clone source image by selecting the texture in the Textures panel (Window Media Panels
Textures), clicking the panel options button , and clicking Embed Texture as Clone Source Image.
To display a clone source texture
1In the Clone Source panel (Window Clone Source), choose Texture from the Source list box.
2Enable the Show Source Image (with crosshair cursor) check box.
The clone source texture appears in a separate document window.
Using patterns as clone sources
You can also use patterns as clone sources. For more information about patterns, see “Patterns” on page 697.
An example of a pattern that is used as a clone source
To use a pattern as a clone source
1Create a new document or open an image.
2In the Clone Source panel (Window Clone Source), choose Current Pattern from the Source list box, and click a pattern thumbnail in
the Painter Patterns library.
3Apply brushstrokes to the canvas.
To auto-paint a pattern, in the Auto-painting panel (Window Photo Art Panels Auto-Painting), enable Smart Stroke Painting, and
click Play. For more information, see “Auto-painting photos” on page 187.
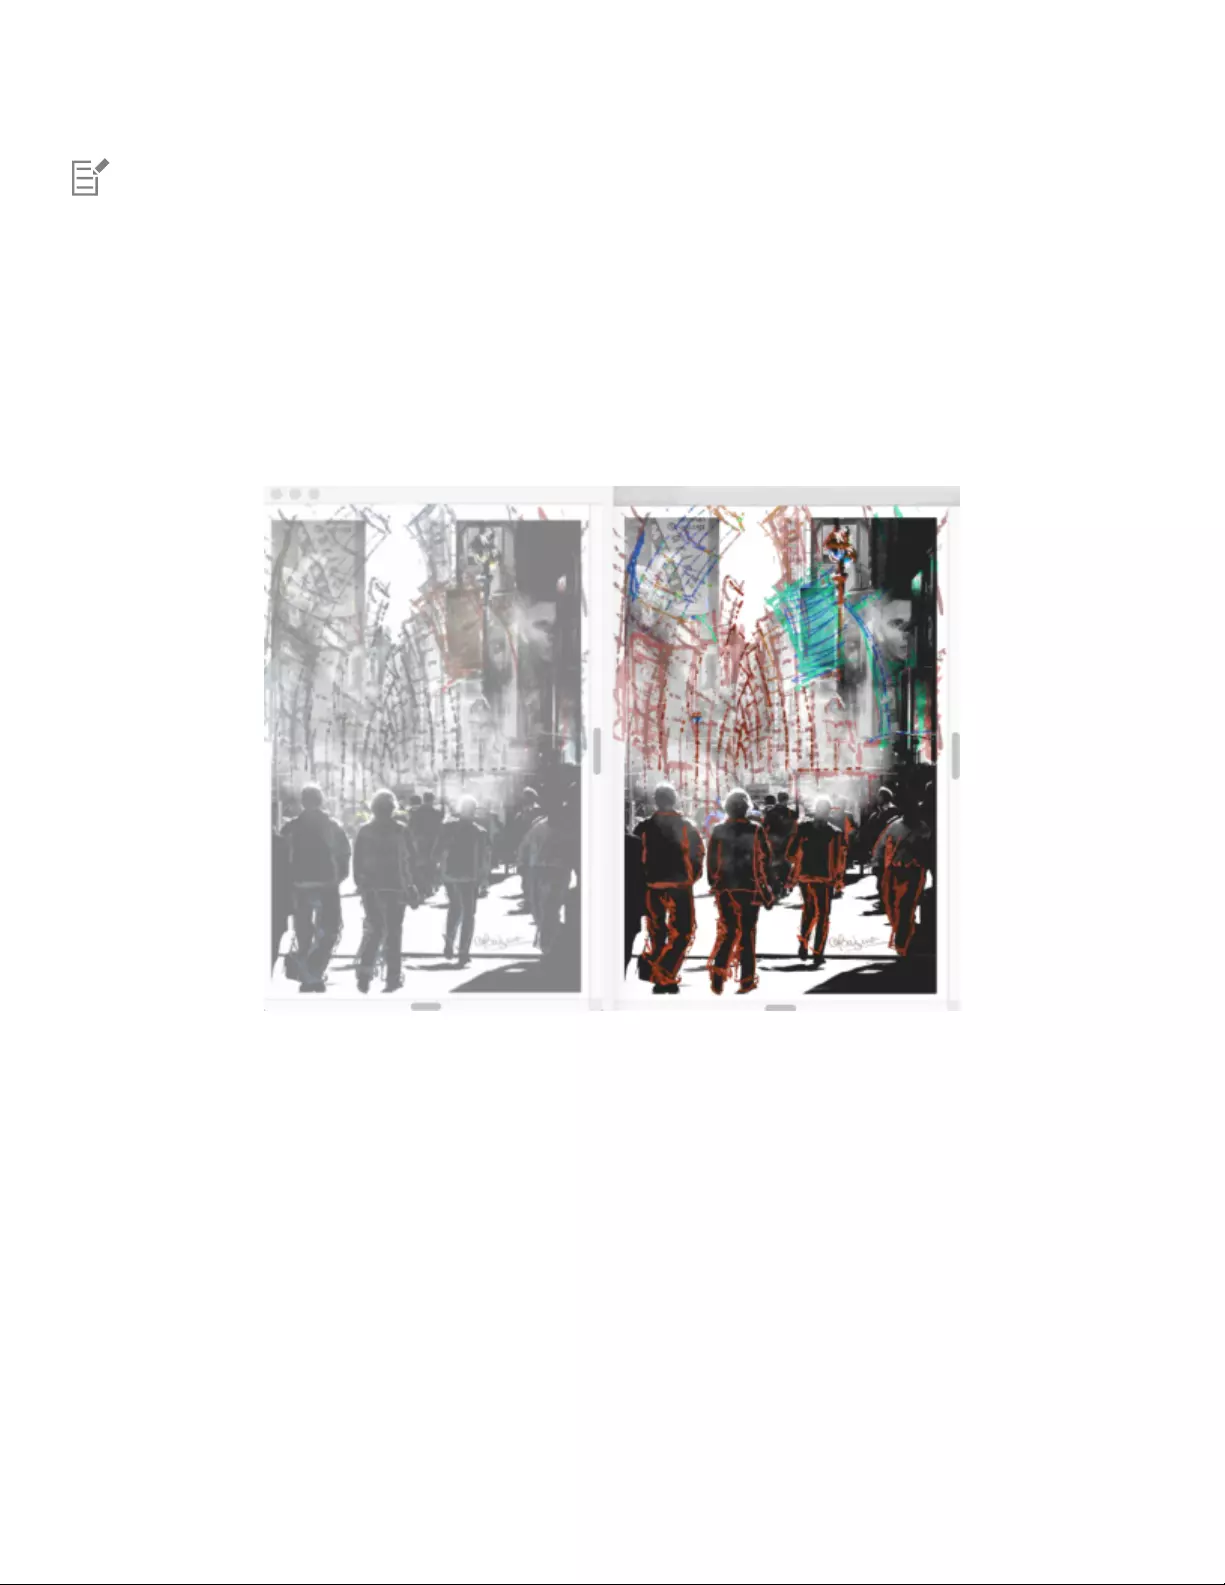
Image cloning and sampling | 203
When you delete all clone sources, the Current Pattern option is automatically selected in the Source list box, and you paint with
the active pattern.
Working with embedded clone sources
When you embed a clone source, it is saved with your document for future use. The embedded image is best described as a snapshot of a
selected image or texture at a given time. Once a copy of the source clone is embedded into the document, the relationship with the original
image or texture is broken. However, you can edit the embedded image to change its appearance. For example, you can add layers or apply
effects to the source image. When the source image modifications are complete, you have various options for working with the edited
image.
The Adjust Colors effect was applied to the source image (right). However, the edit is not
yet reflected in the embedded clone source image (left). Artwork (left) by Claudia Salguero.
You can save the changes to the source image by updating the currently selected clone source, or by creating a new image from the edited
source. You can also discard any changes that you make to the embedded source image. It’s important to note that if you choose to update
the active clone source or create a new clone source, all layers will be merged and the undo levels will be lost. If you want to retain the
layers, export the source image as a new document and then update the embedded source image to continue cloning. Once the source
image is exported as a new document, the relationship with the embedded source image is broken.
You can switch between embedded clone sources as you work on your composite image.
To edit an embedded clone source image
1In the Clone Source panel (Window Clone Source), choose Embedded Image from the Source list box.
2Click a thumbnail in the list of embedded clone sources.
3Enable the Show Source Image (with crosshair cursor) check box.
4Click in the Source Image window.

204 | Corel Painter 2022 User Guide
The Edit Embedded Source Image dialog box opens to provide instructions on how to proceed after editing a source image. Click OK.
5In the Source Image window, edit the source image.
If you want to preserve all layers and export the source image as a new document, choose File Export Source Image. In the Export
Source Image As dialog box, choose the drive and folder where you want to save the file. Type a filename in the Save As (macOS) or File
Name (Windows) text box, and click Save.
6Click in the clone document.
7In the Edit Embedded Source Image Options dialog box, perform a task from the following table.
To Do the following
Replace the selected clone source image Enable the Update option. Click OK.
Create a new clone source image Enable the Create New option. Click OK.
The new clone source image appears in the Clone Source panel.
Discard the changes made to the source image Enable the Discard option. Click OK.
After you make changes to the clone source image in the Source Image window, you can also export it by pressing Command +
Shift + S (macOS) or Ctrl + Shift + S (Windows).
To switch between embedded clone sources
1In the Clone Source panel (Window Clone Source), choose Embedded Image from the Source list box.
2Click a thumbnail in the list of embedded clone sources.
3Apply brushstrokes to the canvas.
4To work with a different clone source, click the clone source in the list of embedded clone sources.
Setting cloning preferences
You can set various cloning preferences. For example, you can choose to always use the last selected cloner brush variant or enable tracing
paper.
To customize cloning behavior
1Do one of the following:
•(macOS) Choose Corel Painter 2022 menu Preferences Cloning.
•(Windows) Choose Edit Preferences Cloning.
2Perform a task from the following table.
To Do the following
Keep the file that was used as the clone source open* Disable the Close source image check box.
Close the image that was used as the clone source* Enable the Close source image check box.
Image cloning and sampling | 205
To Do the following
Open the Clone Source panel automatically* Enable the Open Clone Source panel check box.
Start painting in the clone colors on a clear canvas* Enable the Clear Canvas check box.
Activate tracing paper* Enable the Turn on Tracing Paper check box.
Activate the last cloner brush variant* Enable the Switch to cloner brushes check box.
Use the current brush variant to clone the underlying color* Enable the Clone color check box.
To enable the Clone color check box, you must disable the Switch
to cloner brushes check box.
Start painting on a Default, Thick Paint, Liquid Ink, or Watercolor
layer*
Enable the Start painting on a layer check box, and choose a layer
type from the Layer type list box.
Apply an AI style* Enable the Apply A.I. Style check box, and choose a style from the
A.I. Style Preset list box.
Create a new layer with your clone source image* Enable the Insert original image source as a new layer check box.
Display a warning when changes are made to the embedded clone
source image
Enable the Show Edit Source Image dialog box check box.
Note: The message reminds you that if you choose to create a new
clone source or update the currently selected clone source, all layers
in the source image will be flattened and all undo levels will be lost.
* Please note that all settings marked with an asterisk apply only to Quick Clone.
Cloning brushes and controls
Painting with a cloner brush is a great way to obtain an artistic rendering from photographic source material. Choose the Cloner tool to
automatically enable the brush variants in the General cloners brush category. Many cloner variants let you reproduce a source image with
media effects, such as paper grain and specialized dabs.
An example of a cloner brush variant
You can customize existing cloner brush variants or create new variants by using the brush controls. For more information, see “Adjusting
brushes with brush controls” on page 337.

206 | Corel Painter 2022 User Guide
Cloning method
You can also expand Corel Painter’s cloning capabilities by turning almost any brush variant into a cloner. Brush variants that use the Cloning
method reproduce the source image while effectively “filtering” it, which allows you to create an artistic rendering of an image.
An example of a brush variant using a cloning method
Because the Cloning method uses a full set of pixels from the original document for each brush dab, you get a truer copy of the original
than you might by using the Clone Color button . Unlike the Clone Color option, the Cloning method preserves the original image
texture in the clone. The Cloning method is good to use when you want to precisely recreate portions of a source image.
Brushes that use build-up methods, like pencils and felt pens, build toward black. If you clone with one of these brushes in a dark area of
your image, you may not achieve the desired results. Use the Opacity slider on the property bar to control how rapidly these brushes build
up to black. You can also choose chalk or one of the other tools that cover underlying colors.
Cloning controls
The Cloning controls are specific to brushes that use the Cloning method and the Clone Color option.
Clone Color
The Clone Color control directs a brush to pick up color from a source image. Clone Color takes averaged samples of color from the clone
source, resulting in an approximation of the original. The Clone Color option is also available on the Color panel and the temporal color
selector. For information about using different clone types, see “Cloning color” on page 259.
Clone tinting
Clone tinting lets you add the currently selected color to any clone brush independent of the clone source. When tinting is enabled, you
dynamically mix a color with your clone source. Sample a color from your image or simply hover over the color wheel, and choose a color.
This versatile technology gives you greater creative control while cloning, and is also useful in many other scenarios, such as painting with
textures, patterns, and other image content.
Image cloning and sampling | 207
Clone tinting lets you add color to mix with your clone source. Artwork by Dana Diamond.
Precise Sampling
The Precise Sampling control directs a brush to sample color from the center of the dab and is useful when using a large dab to clone
images with transparency. It is supported for brushes that use the following dab types: Circular, Computed Circular, Captured, Single-Pixel,
Static Bristle, Dynamic Speckle Bristle, and Dynamic Speckle Particle types (Flow, Gravity, and Spring).
Cloning color with Precise Sampling enabled (left) and disabled (right)

208 | Corel Painter 2022 User Guide
Variability
When you work with brushes using the Cloning method, you can modify the Variability to control the offset of the clone based on the
location of the source image. When Variability is set at zero, the pixels of the source and destination images correspond precisely. Using a
cover brush at full Opacity (and no Grain) simply recreates the source image.
Brushstrokes with Variability set to 0 (top) and 12 (bottom)
Introducing a degree of randomness disturbs the pixel-to-pixel correspondence. The resultant variations distance the clone from its
photographic source, which can contribute to a Natural-Media appearance.
How Often
The How Often controls allow you to set the period between random offsets.
Brushstrokes with How Often set to 0 (top) and 15 (bottom)
Random Clone Source
Random Clone Source randomly samples the source document and then places strokes in the clone document. There is no correspondence
between the samples taken from the source and where they are placed in the clone. The result is a random pattern of the predominant
colors and edges of the source. The brush and stroke determine the nature of the pattern.
You might use Random Clone Source with a faint stipple brush to add “noise” to an image. In this case, the clone source image merely
contains the noise colors that you wish to add.
Image cloning and sampling | 209
Brushstrokes with Random Clone Source disabled (left) and enabled (right)
Clone Type
The Clone Type control lets you choose among several cloning variations. For detailed information on using the different clone types and
multi-point cloning, refer to “Multi-point cloning” on page 214.
Obey Source Selection
The Obey Source Selection option uses any selection in the clone source region to constrain painting in the destination. If a transform
Clone Type is used, the selection is appropriately transformed. This option is available only with the Cloning method.
Copy Source Selection
When Copy Source Selection is enabled, the Cloner brush reproduces the source selection information in the destination selection. This
option is available only with the Cloning method.
4-Point Tiling
With the 4-Point Tiling check box enabled, your clone source is tiled in a repeating pattern.
Using brush loading
For greater color accuracy while cloning, you can use the brush loading option to pick up individual colors in different regions of the brush
dab.
Without brush loading, the Clone Color option uses a single, averaged color from the source for each brush dab. This results in an
approximation of the original and lets you create an artistic impression of the source.
To choose a cloner brush
1With a clone source selected, click the Cloner tool in the toolbox.
The Cloners : General brush category and a cloner brush variant are automatically selected.
If you want to change the brush variant, in the Brush Selector, click a different Cloners brush category or variant.
2On the property bar, adjust any of the brush properties and settings.

210 | Corel Painter 2022 User Guide
For increased color accuracy, you can enable the Brush Loading option. For more information, see “Using brush loading” on page
209.
To transform a brush variant into a cloner brush
1With a clone source selected, click the Brush tool in the toolbox.
2In the Brush Selector, click a brush category and a brush variant.
3In the General panel (Window Brush Control Panels General), choose Cloning from the Method list box.
4From the Subcategory list box, choose one of the following options:
•Hard Cover Cloning — results in partially anti-aliased brushstrokes that hide underlying strokes
•Soft Cover Cloning — produces anti-aliased brushstrokes that cover layered ones
•Grainy Hard Cover Cloning — works like Hard Cover Cloning, but brushstrokes also interact with paper grain
•Grainy Soft Cover Cloning — works like Soft Cover Cloning, but brushstrokes also interact with paper grain
5In the Clone Color panel (Window Brush Controls Panels Brush Media Clone Color) or Clone Method panel (Window Brush
Controls Panels Brush Media Clone Method), choose Normal from the Type list box.
The additional cloning types allow you to apply transformation to the clone. For more information, see “Multi-point cloning” on page
214.
You can also transform a brush into a cloner brush by choosing a brush in the Brush Selector and clicking the Clone Color button
in the Color panel (Window Color Panels Color Panel (Full View)). Enabling the Clone Color option disables the Color
panel and the color information is pulled from the clone source.
If you change brushes while cloning images, you must click the Clone Color button again.
If you change the brush or variant, the clone color is automatically disabled. To continue working with the clone color, re-enable
the clone color.
For more information about methods and subcategories, see “General controls: Methods and subcategories” on page 349.
To set clone color
•In the Clone Color panel (Window Brush Controls Panels Brush Media Clone Color), enable the Clone Color check box.
To apply clone tinting
1In the Brush Selector, choose a cloner brush.
Tip: To paint with a brush from any other category, choose a brush, and click the Clone Color button in the Color panel (Window
Color Panels Color Panel (Full View)).
2Click the Clone Color flyout button on the property bar, and enable the Clone Tinting check box.
3Perform a task from the following table.
To Do the following
Set the amount of tinting applied to a brushstroke Move the Amount slider.

Image cloning and sampling | 211
To Do the following
Link tinting to a specific stylus or mouse movement Choose an option from the Expression list box.
4Hover over the color wheel in the Color panel and choose a color.
Tip: You can also press Alt (Windows) or Option (macOS), and click in the document window to sample a color from the image.
5Paint in the clone document.
Enable the Precise Sampling check box to sample color from the center of the dab, which is useful for cloning images with
transparency.
To sample color from the center of the dab
•In the Clone Color panel (Window Brush Controls Panels Brush Media Clone Color), enable the Precise Sampling check box.
To set clone type
•In the Clone Color panel (Window Brush Controls Panels Brush Media Clone Color) or Clone Method panel (Window Brush
Controls Panels Brush Media Clone Method), choose a type from the Type list box.
To constrain painting in the destination
•In the Clone Color panel (Window Brush Controls Panels Brush Media Clone Color) or Clone Method panel (Window Brush
Controls Panels Brush Media Clone Method), enable the Obey Source Selection check box.
To reproduce the source selection information in the destination selection
•In the Clone Color panel (Window Brush Controls Panels Brush Media Clone Color) or Clone Method panel (Window Brush
Controls Panels Brush Media Clone Method), enable the Copy Source Selection check box.
To tile clone source
•In the Clone Color panel (Window Brush Controls Panels Brush Media Clone Color) or Clone Method panel (Window Brush
Controls Panels Brush Media Clone Method), enable the 4-Point Tiling check box.
To set clone location variability
•In the Clone Method panel (Window Brush Controls Panels Brush Media Clone Method), perform a task from the following
table.
To Do the following
Increase the range (distance) that the sample can be offset In the Clone Location area, move the Variability slider to the right.
Limit the offset variability so that the source and destination images
correspond more precisely
In the Clone Location area, move the Variability slider to the left.
Clone location sliders have no effect when Clone Color is enabled in the Color panel. They have an effect only when a Clone
method is used.

212 | Corel Painter 2022 User Guide
To set the period between random offsets
•In the Clone Method panel (Window Brush Controls Panels Brush Media Clone Method), perform a task from the following
table.
To Do the following
Offset a greater number of samples and give the clone image a
rough, distorted look
In the Clone Location area, move the How Often slider to the left.
Offset samples less frequently and keep the clone image more
coherent
In the Clone Location area, move the How Often slider to the
right.
To use random cloning
•In the Clone Method panel (Window Brush Controls Panels Brush Media Clone Method), enable the Random Clone Source
check box.
To enable the Brush Loading option
1Choose Window Brush Control Panels Brush Media Blending.
2In the Blending panel, enable the Brush Loading check box.
Cloning image areas
You can sample an area of an image and reuse it in the same document or in a different document. Sampling (also referred to as “offset
sampling” or “point-to-point cloning”) is a useful technique for retouching photographs. For example, you can copy pixels from one image
area to another in order to cover damaged or unwanted elements in an image. You can also clone image elements you like and apply them
to another image area or a second image.
To clone an image area, you must set a sampling reference point and then set destination reference points. Sampling reference points specify
the area of the document that you want to reuse, or clone. Destination reference points determine the area where you want the sampled
image to appear. To identify which area of the source document you are sampling, a crosshair cursor appears.
The green dot (left) represents the sampling reference point. The red dot (right) represents the destination point.
It is important to note that the sampling reference point, also known as the source, is not treated as a clone source. The sampled area does
not appear in the Clone Source panel.
To perform offset sampling in a document
1Click the Rubber Stamp tool in the toolbox.
If you want to adjust the size of the sampled area, type a value in the Size box, or adjust the slider on the property bar.

Image cloning and sampling | 213
2Hold down Option (macOS) or Alt (Windows), and click to set the source reference point.
A green marker appears on the image to indicate the reference point for the source image.
3Hold down Option + Shift (macOS) or Alt + Shift (Windows), and click to set the destination reference point.
A red marker appears on the image to indicate the destination point.
4Apply brushstrokes to the destination area to reveal the sampled area.
You can disable offset sampling by clicking the Clone Color button in the Color panel or by choosing a non-Cloner brush variant in
the Brush Selector.
You can also
Adjust the clone color opacity On the property bar, type a percentage in the Opacity box, or move
the slider.
Adjust the randomized jitter of the brushstroke On the property bar, type a value in the Stroke Jitter box, or move
the slider.
You can also enable offset sampling by clicking the Cloner tool in the toolbox.
You can set the destination area before painting by clicking while holding down Option + Shift (macOS) or Alt + Shift
(Windows). A red marker indicates the destination area.
To perform offset sampling between documents
1Open both the image that you want to use as a sampling source and the image that you want to use as a destination.
If you want to view both images at once, you may want to arrange them side by side.
2With the source image selected, click the Cloner tool in the toolbox.
If you want to change the brush variant, click the Brush Selector, and choose a different Cloners brush category and variant.
3Hold down Option (macOS) or Alt (Windows), and click the source document to set the sample source area reference point.
A green numbered marker appears on the image to indicate the reference point for the source area.
4Hold down Option + Shift (macOS) or Alt + Shift (Windows), and click the destination document to set the destination reference point.
5In the destination document, apply brushstrokes to the canvas.
You can disable offset sampling by clicking the Clone Color button in the Color panel or by choosing a non-Cloner brush variant in
the Brush Selector.
You can also
Adjust the size of the brushstroke Type a value in the Size box, or move the slider on the property bar.
Adjust the clone color opacity On the property bar, type a percentage in the Opacity box, or move
the slider.
Control the amount of color that is replenished in a stroke On the property bar, type a percentage in the Resat box, or move
the slider.

214 | Corel Painter 2022 User Guide
You can also
Control how much the brush colors smear underlying colors,
including the canvas color
On the property bar, type a percentage in the Bleed box, or move
the slider.
Adjust bristle separation On the property bar, type a value in the Feature box, or move the
slider. The higher the setting, the farther apart the bristle hairs will
appear.
Scale the brushstroke proportionally with the brush size Click the Scale Feature With Brush Size button on the
property bar.
Multi-point cloning
Corel Painter allows you to sample part of an image and apply a transformation to the sample when you reuse it elsewhere. This technique
is also referred to as multi-point cloning. You can apply transformations such as scaling, rotating, shearing (also referred to as skewing), and
perspective. To create unique color schemes and transformations when sampling, you can use clone tinting. For more information about
tinting, see “Clone tinting” on page 206.
To apply transformations when sampling, you can use brush variants from the Cloners categories, variants that support the Cloning method,
as well as multi-point sampling variants from the Cloners brush category in the Painter 2015 Brushes library. For more information, see “To
transform a brush variant into a cloner brush” on page 210.
The Painter 2015 Brushes library is available for download from the Welcome book store (Help Welcome Store.)
To access the Painter 2015 Brushes library, first download it from the Welcome book store. Next, restart Painter, and then in the
Brush Selector, choose Painter 2015 Brushes from the Brush Library list box.
Clone types
After selecting a brush variant, you have to choose a transformation type. The Clone Type control lets you choose among several cloning
variations. These variations are arranged according to the number of reference points used. With two or more reference points, you can
apply a transformation (rotate, skew, scale, mirror, and perspective) during cloning.
•Normal (0), or zero-point, cloning references the upper-left corners of the source and destination documents and patterns. This means
that the pixels of the destination document correspond directly to the pixels of the source document. This type of cloning, in which no
transformations occur, is the basic type of cloning between documents.
•Offset (1) cloning offsets the image from the source. The source and destination areas can be at different locations in the same or
different documents. Offset cloning is basic point-to-point cloning and is useful for retouching photographs. For more information, see
“Cloning image areas” on page 212.
•Rotate & Scale (2) cloning rotates and scales the source image using two reference points.

Image cloning and sampling | 215
Rotate & Scale cloning. Note that the source and destination reference points are numbered and connected by a line.
•Scale (2) cloning scales the source image using two reference points. The distance between the two destination points, in relation to the
distance between the two source points, determines the scaling transformation.
Scale cloning
•Rotate (2) cloning rotates the source image using two reference points. The line between the two destination points in relation to the
line between the two source points determines the rotation transformation.
Rotate cloning
•Rotate & Mirror (2) cloning rotates and mirrors (flips) the source image using two reference points.

216 | Corel Painter 2022 User Guide
Rotate & Mirror cloning
•Rotate, Scale, & Shear (3) cloning rotates, scales, and shears (slants) the source image using three reference points. The relative
positions of the three source and the three destination reference points determine the transformation effect.
Rotate, Scale, Shear cloning
•Bilinear (4) cloning applies a bilinear warp to the source image using four reference points. The relative positions of the four source and
the four destination points describe the bilinear transformation.
Bilinear cloning
•Perspective (4) cloning applies perspective to the source image using four reference points. The relative positions of the four source and
the four destination points describe the perspective transformation.

Image cloning and sampling | 217
Perspective cloning
Reference points
After selecting a brush variant and a clone type, you need to set the sample and destination reference points in the image. The number of
reference points depends on the type of transformation that you choose. The reference points allow you to identify the sample area, position
the destination, and control the transformation. After the points are set, you can apply brushstrokes to the destination area to gradually
reveal the transformed sample. You can insert source points in one document and destination points in another, or you can insert both sets
of points in the same document.
Sample source (left) and destination (right) reference points are set for Perspective cloning.
Tiling
Tiling allows you to fill a space by repeating a small sampled image. The 4-Point Tiling option is available for Bilinear and Perspective
cloning only.
The four sample reference points define the sampled area, which is temporarily converted into a pattern tile. In the clone destination, the tile
is warped according to the relative positions of the source and destination reference points and repeated as necessary to cover the area. If
you want to save the sampled area for future use, you can capture it as a pattern. For more information, see “Creating and editing patterns”
on page 700.
With 4-Point Tiling, the source image is repeated.
Tiling is particularly useful when you want to fill an area with the sample source. For more information, see “Filling an area with a sampled
image” on page 226.
218 | Corel Painter 2022 User Guide
Cloning controls
For detailed information about multi-point sampling controls, see “Cloning brushes and controls” on page 205.
Reference: Multi-point sampling brush variants in the Painter 2015 Brushes library
The following table describes the multi-point sampling brush variants, which are included in the Painter 2015 Brushes library.
The Painter 2015 Brushes library is available for download from the Welcome book store (Help Welcome Store.)
To access the Painter 2015 Brushes library, first download it from the Welcome book store. Next, import it, and then in the Brush
Selector, choose Painter 2015 Brushes from the Brush Library list box.
Multi-point Cloners brush variant Example
Rotate, Scale 2P lets you turn the sampled area around its center
of rotation and size it to a percentage of its original size. Rotate,
Scale 2P uses two reference points.
Scale 2P lets you size the sampled area to a percentage of its
original size. Scale 2P uses two reference points.
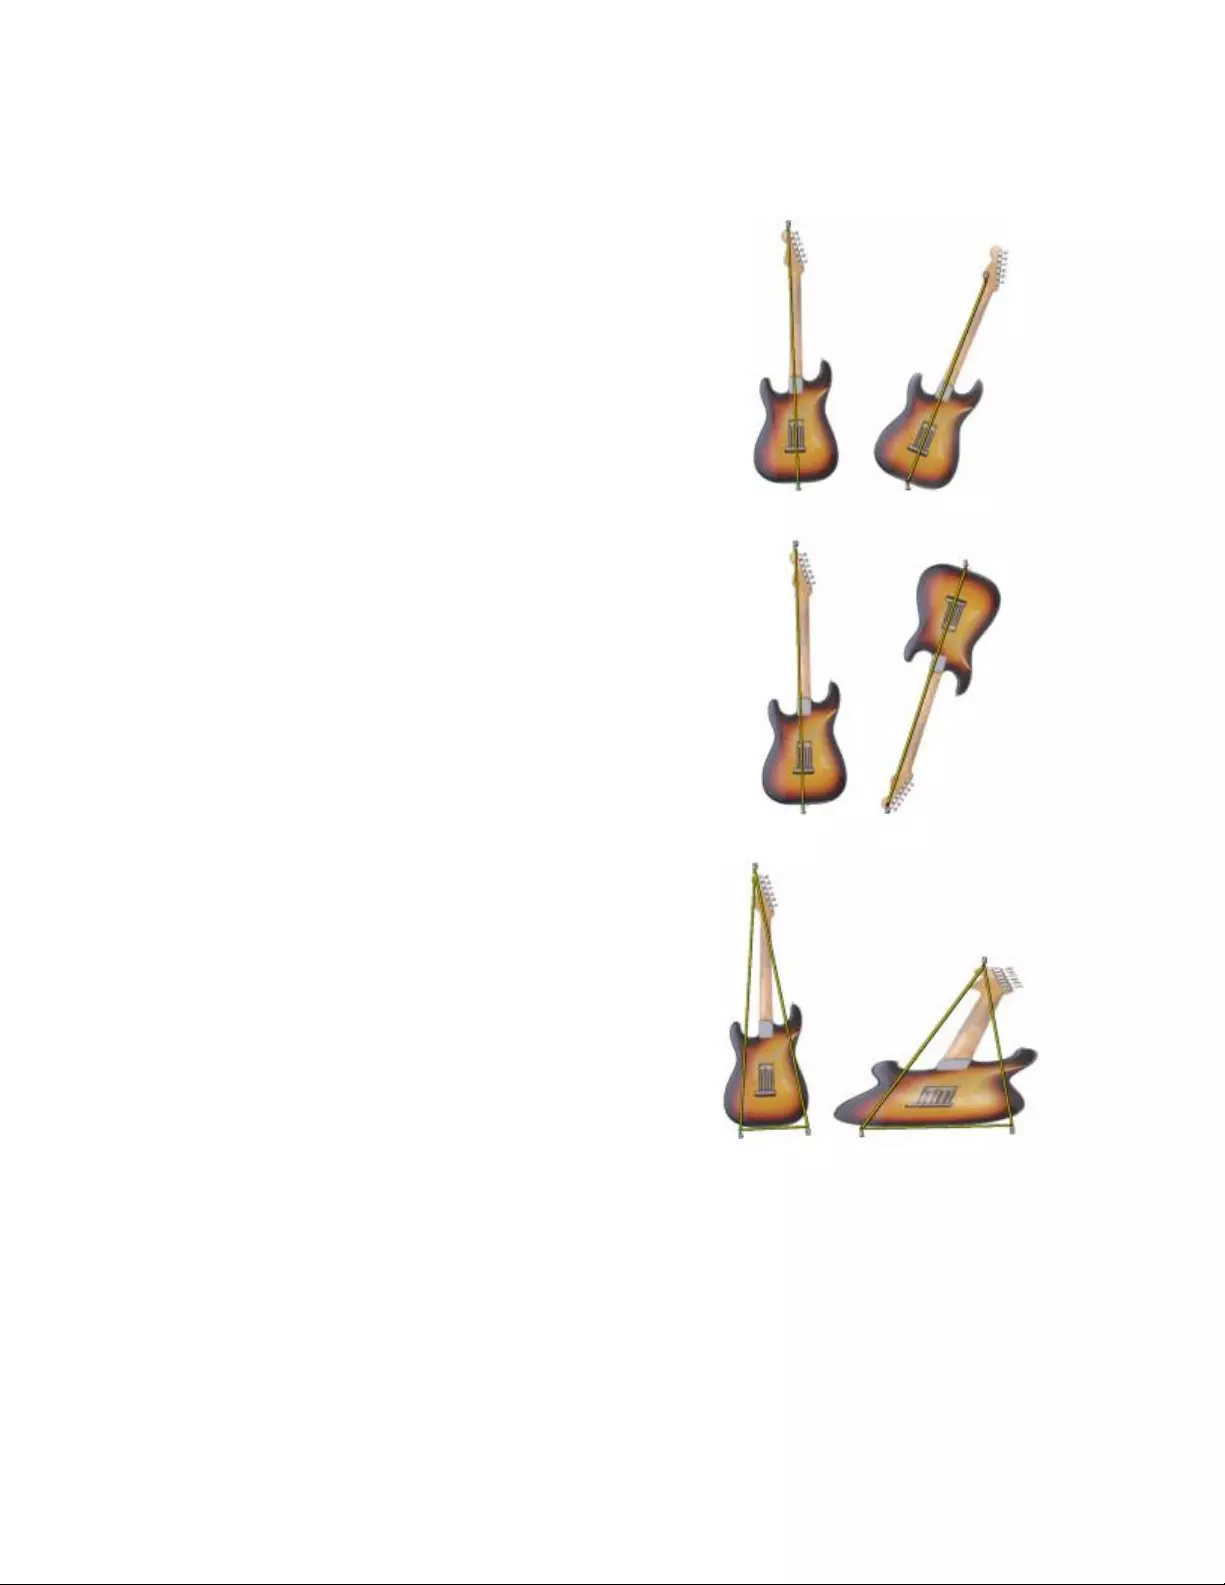
Image cloning and sampling | 219
Multi-point Cloners brush variant Example
Rotate 2P lets you turn the sampled area around its center of
rotation. Rotate 2P uses two reference points.
Rotate, Mirror 2P lets you turn the sampled area around its center
of rotation while creating a horizontal or vertical mirror image of
the clone source. Rotate, Mirror 2P uses two reference points.
Rotate, Scale, Shear 3P lets you turn the sampled area around its
center of rotation, while sizing it to a percentage of its original size
and skewing its appearance. Rotate, Scale, Shear 3P uses three
reference points.
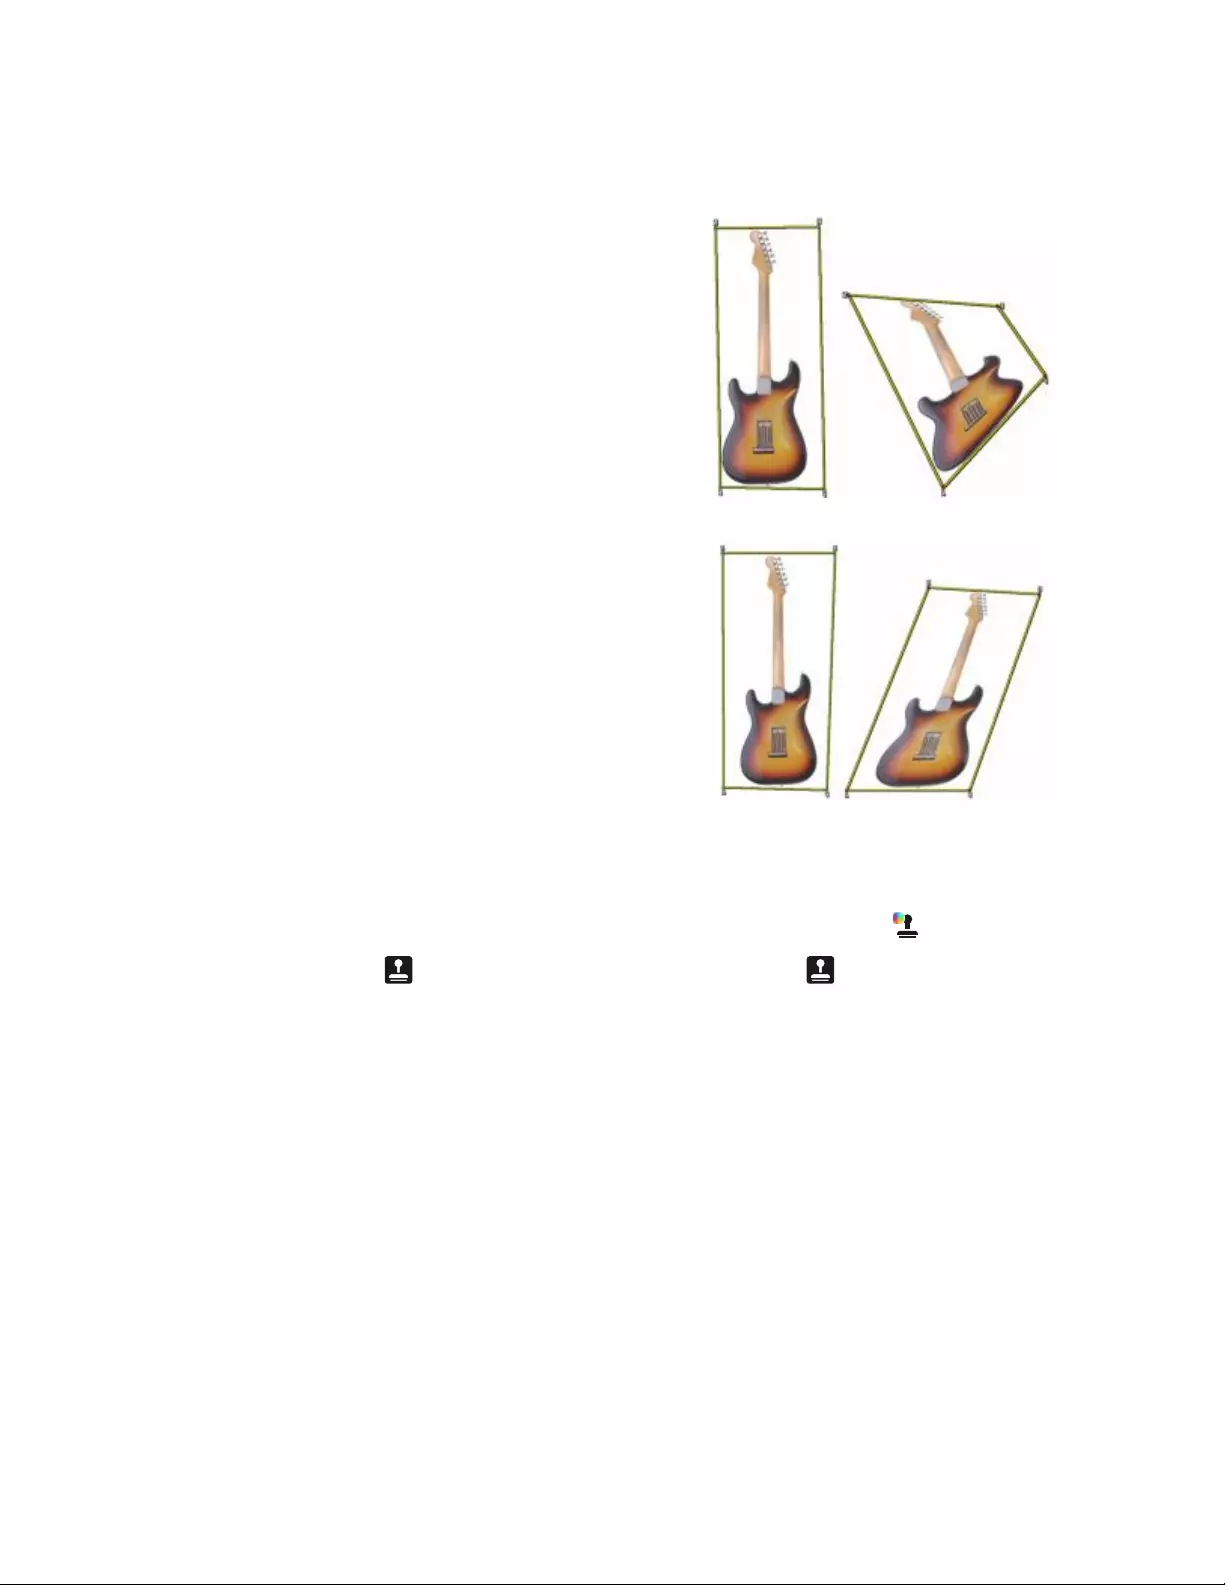
220 | Corel Painter 2022 User Guide
Multi-point Cloners brush variant Example
Bilinear 4P lets you stretch, or warp, the sampled area
disproportionately. You can also tile the clone source. Bilinear 4P
uses four reference points.
Perspective 4P lets you give the sampled area the appearance of
depth. Perspective Tiling 4P also lets you tile the sampled area.
Perspective 4P uses four reference points.
To apply multi-point cloning
1In the Brush Selector, choose a Cloner brush.
Tip: To paint with a brush from any other category, choose a brush, and click the Clone Color button in the Color panel.
2Click the Clone Color flyout button on the property bar, and click Clone Color Panel .
3In the Multi-Point Cloning area of the Clone Color panel, enable the Set first point with Alt/Option check box.
4Choose a clone type from the Type list box:
•Normal (0)
•Offset (1)
•Rotate & Scale (2)
•Scale (2)
•Rotate (2)
•Rotate & Mirror (2)
•Rotate, Scale, Shear (3)
•Bilinear (4)
•Perspective (4)
5Hold down Option (macOS) or Alt (Windows), and click in the image to set the source reference point(s).
6Hold down Option + Shift (macOS) or Alt + Shift (Windows), and click to set the two destination reference points.
7Apply brushstrokes to the destination area.
Image cloning and sampling | 221
You can also constrain painting in the destination by enabling the Obey Source Selection check box.
You can also reproduce the source selection information in the destination selection by enabling the Copy Source Selection check
box.
To scale the sample source
1Click the Cloner tool in the toolbox.
2In the Brush Selector, choose the Painter 2015 brushes library from the Brush library list box.
3Click the Cloners brush category, and click the XScale 2P brush variant.
When you choose the XScale 2P brush variant, the Scale (2) clone type is automatically selected in the Clone Color panel (Window
Brush Controls Panels Brush Media Clone Color) and Clone Method panel (Window Brush Controls Panels Brush Media
Clone Method).
4Hold down Option (macOS) or Alt (Windows), and click in the image to set the two sample reference points.
5Hold down Option + Shift (macOS) or Alt + Shift (Windows), and click to set the two destination reference points.
The relative distance between the two destination points and the two source points determines the amount of scaling that is applied
to the sample. For example, if the line between the two destination points is longer than the line between the two source points, the
sample is scaled up. Conversely, if the line between the two destination points is shorter than the line between the two source points, the
sample is scaled down.
6Apply brushstrokes to the destination area.
You can disable offset sampling by clicking the Clone Color button in the Color panel or by choosing a non-Cloner brush variant in
the Brush Selector.
To achieve the best scaling results, set the sample reference points at the outer edges of the object that you want to sample to
better delineate its size. This ensures that the object will be scaled proportionally.
To rotate the sample source
1Click the Cloner tool in the toolbox.
2In the Brush Selector, choose the Painter 2015 brushes library from the Brush library list box.
3Click the Cloners brush category, and click the XRotate 2P brush variant.
When you choose the XRotate 2P brush variant, the Rotate (2) clone type is automatically selected in the Clone Color panel (Window
Brush Controls Panels Brush Media Clone Color) and Clone Method panel (Window Brush Controls Panels Brush Media
Clone Method).
4Hold down Option (macOS) or Alt (Windows), and click in the image to set the two sample reference points.
5Hold down Option + Shift (macOS) or Alt + Shift (Windows), and click in the image to set the two destination reference points.
The relative difference between the angle of the line of the two destination points and the two sample reference points determines the
angle of rotation of the sample. If the line angle does not change, the position of the destination points relative to the sample points
also affects the rotation. For example, if you set the sample points vertically from bottom to top, but then set the destination points at
the same vertical angle but from top to bottom, the sampled image will be flipped 180 degrees.
6Apply brushstrokes to the destination area.
You can disable offset sampling by clicking the Clone Color button in the Color panel or by choosing a non-Cloner brush variant in
the Brush Selector.
222 | Corel Painter 2022 User Guide
The line length does not affect the rotation.
To rotate and mirror the sample source
1Click the Cloner tool in the toolbox.
2In the Brush Selector, choose the Painter 2015 brushes library from the Brush library list box.
3Click the Cloners brush category, and click the XRotate, Mirror 2P brush variant.
When you choose the XRotate, Mirror 2P, the XRotate & Mirror (2) clone type is automatically selected in the Clone Color panel
(Window Brush Controls Panels Brush Media Clone Color) and Clone Method panel (Window Brush Controls Panels
Brush Media Clone Method).
4Hold down Option (macOS) or Alt (Windows), and click in the image to set the two sample reference points.
5Hold down Option + Shift (macOS) or Alt + Shift (Windows), and click to set the two destination reference points.
The relative difference between the angle of the line of the two destination points and the two sample points determines the angle of
rotation of the mirrored clone image.
If the line angle does not change, the position of the destination points relative to the sample points also affects the rotation. For
example, if you set the sample points vertically from bottom to top, but then set the destination points at the same vertical angle but
from top to bottom, the sampled image will be flipped 180 degrees.
If you want to mirror the sample, without any rotation, set both the sample and destination points in the same position.
6Apply brushstrokes to the destination area.
You can disable offset sampling by clicking the Clone Color button in the Color panel or by choosing a non-Cloner brush variant in
the Brush Selector.
To rotate and scale the sample source
1Click the Cloner tool in the toolbox.
2In the Brush Selector, choose the Painter 2015 brushes library from the Brush library list box.
3Click the Cloners brush category, and click the XRotate, Scale 2P brush variant.
When you choose the XRotate, Scale 2P brush variant, the XRotate & Scale (2) clone type is automatically selected in the Clone Color
panel (Window Brush Controls Panels Brush Media Clone Color) and Clone Method panel (Window Brush Controls Panels
Brush Media Clone Method).
4Hold down Option (macOS) or Alt (Windows), and click in the image to set the sample reference points.
5Hold down Option + Shift (macOS) or Alt + Shift (Windows), and click in the image to set the two destination reference points.
The relative distance between the two destination points and the two sample points determines the amount of scaling that is applied
to the sample. In addition, the relative difference between of the angle of the line of the two destination points and the two sample
reference points determines the angle of rotation of the mirrored sample image. In cases where the line angle does not change, the
position of the destination points relative to the sample points also affects the rotation.
Image cloning and sampling | 223
Two destination reference points are set in preparation for Rotate & Scale sampling.
6Apply brushstrokes to the destination area.
You can disable offset sampling by clicking the Clone Color button in the Color panel or by choosing a non-Cloner brush variant in
the Brush Selector.
To rotate, scale, and shear the sample source
1Click the Cloner tool in the toolbox.
2In the Brush Selector, choose the Painter 2015 brushes library from the Brush library list box.
3Click the Cloners brush category, and click the XRotate, Scale, Shear 3P brush variant.
When you choose the XRotate, Scale, Shear 3P brush variant, the XRotate, Scale, Shear (3) clone type is automatically selected in the
Clone Color panel (Window Brush Controls Panels Brush Media Clone Color) and Clone Method panel (Window Brush
Controls Panels Brush Media Clone Method).
4Hold down Option (macOS) or Alt (Windows), and click in the image to set the three sample reference points.
5Hold down Option + Shift (macOS) or Alt + Shift (Windows), and click in the image to set the three destination reference points.
When all three points are inserted, a triangle is created. The length of the line segments controls the scaling of the sample, the angling
of the line segments controls the rotation, and the degree of slanting controls the shearing, also referred to as skewing.
Sample source–destination reference points are set for Rotate, Scale, & Shear.
6Apply brushstrokes to the destination area.
You can disable offset sampling by clicking the Clone Color button in the Color panel or by choosing a non-Cloner brush variant in
the Brush Selector.
224 | Corel Painter 2022 User Guide
To warp the sample source
1Click the Cloner tool in the toolbox.
2In the Brush Selector, choose the Painter 2015 brushes library from the Brush library list box.
3Click the Cloners brush category, and click the XBilinear 4P brush variant.
When you choose the XBilinear 4P brush variant, the XBilinear 4P clone type is automatically selected in the Clone Color panel
(Window Brush Controls Panels Brush Media Clone Color) and Clone Method panel (Window Brush Controls Panels
Brush Media Clone Method).
4Hold down Option (macOS) or Alt (Windows), and click to set the four sample reference points.
5Hold down Option + Shift (macOS) or Alt + Shift (Windows), and click to set the four destination reference points.
6The relative positions of all four sample and four destination points affect the warping of the sample.
7Apply brushstrokes to the destination area.
You can disable offset sampling by clicking the Clone Color button in the Color panel or by choosing a non-Cloner brush variant in
the Brush Selector.
You can tile the sample by enabling the 4-Point Tiling check box in the Cloning brush control panel.
To add perspective to the clone source
1Click the Cloner tool in the toolbox.
2In the Brush Selector, choose the Painter 2015 brushes library from the Brush library list box.
3Click the Cloners brush category, and click the XPerspective 4P brush variant.
If you want the clone to produce a tiling effect, click the XPerspective Tiling 4P brush variant.
When you choose the XPerspective 4P brush variant, the XPerspective 4P clone type is automatically selected in the Clone Color panel
(Window Brush Controls Panels Brush Media Clone Color) and Clone Method panel (Window Brush Controls Panels
Brush Media Clone Method).
4Hold down Option (macOS) or Alt (Windows), and click in the image to set the four sample reference points.
5Hold down Option + Shift (macOS) or Alt + Shift (Windows), and click in the image to set the four destination reference points.
The relative position of the four sample and four destination points controls the perspective transformation. To achieve a simple
perspective transformation, set the four sample points to form a rectangle, and then set the four destination points to form a trapeze.
6Apply brushstrokes to the destination area.
You can disable offset sampling by clicking the Clone Color button in the Color panel or by choosing a non-Cloner brush variant in
the Brush Selector.
To move previously set reference points
1Do one of the following:
• Hold down Option (macOS) or Alt (Windows) to display the sample points.
• Hold down Option + Shift (macOS) or Alt + Shift (Windows) to display the destination points.
2With the reference points displayed, drag a point to a new location.
Image cloning and sampling | 225
Using selections and transformations when sampling
You can use a selection when sampling an image area in two ways: by making brushstrokes in the destination image obey the selection
in the sample source image, or by copying the active selection in the sample source region. These two options can be used individually or
together.
Use Obey Source Selection to paint in the area that corresponds to the source selection.
Use Copy Source Selection to sample both the selection and the color.
To sample an area of an image by using a source selection
1Choose a selection tool from the toolbox, and select the area of the image that you want to sample.
If you want to closely outline the sample source area, choose the Lasso tool . For information about setting up a selection, see
“Creating path-based selections” on page 601.
2Click the Cloner tool in the toolbox.
3In the Brush Selector, click a Cloners category, and click a brush variant.
4In the Clone Color panel (Window Brush Controls Panels Brush Media Clone Color), click the Enable Clone Color check box.
If the Enable Clone Color check box is grayed out, these selection options are not available for that brush. Choose a different variant.
5Enable any of the following options:
•Obey Source Selection — respects the content of the active sample source selection. When you paint in the destination, the
brushstrokes are constrained to a region that corresponds to the sample source selection. For sampling types that apply a
transformation, the selection is transformed.
•Copy Source Selection — copies the active selection in the source region. When you paint in the destination, your brushstrokes
sample the selection’s pixels as well as the RGB pixels. For sampling types that apply a transformation, the copied selection is
transformed. Copy Source Selection is often used together with Obey Source Selection.
226 | Corel Painter 2022 User Guide
6Hold down Option (macOS) or Alt (Windows), and click to set the sample source reference points.
7Hold down Option + Shift (macOS) or Alt + Shift (Windows), and click to set the destination reference points.
The number of points depends on the brush variant that you chose.
8Apply brushstrokes to the destination area.
You can disable offset sampling by clicking the Clone Color button in the Color panel or by choosing a non-Cloner brush variant in
the Brush Selector.
This image uses Rotate & Scale sampling with both Obey Source Selection and Copy Source Selection enabled.
Filling an area with a sampled image
You can apply a transformed sample by filling, instead of using a brush. Filling allows you to cover a large area evenly, without much effort.
Filling is supported only when you use perspective or bilinear sampling, with or without tiling.
To apply a transformed sample as a fill, you need to set both sample source and destination reference points, as you would when applying a
sample with a brush. For information, see “Multi-point cloning” on page 214.
If you want to save the sample source reference area as a pattern for future use, you can capture the pattern. For more information, see
“Creating and editing patterns” on page 700.
To fill with a transformed source image
1In the Brush Selector, choose the Painter 2015 brushes library from the Brush library list box.
2Click the Cloners brush category, and click a brush variant that allows you to select four sample source and four destination points:
•XPerspective 4P
•XPerspective Tiling 4P
•XBilinear 4P
3In the Clone Color panel (Window Brush Controls Panels Brush Media Clone Color), enable the Clone Color check box.
4Do one of the following:
• If you chose the XPerspective 4P or XPerspective Tiling 4P variant, choose Perspective from the Clone Type list box.
• If you chose the XBilinear 4P variant, choose Bilinear from the Clone Type list box.
5Hold down Option (macOS) or Alt (Windows), and click to set the four sample source reference points.
6Hold down Option + Shift (macOS) or Alt + Shift (Windows), and click to set the four destination reference points.
7Click the Paint Bucket tool in the toolbox.
8Choose Source Image from the Fill list box on the property bar.

Image cloning and sampling | 227
9Click in the destination area to apply the fill.
You can disable offset sampling by clicking the Clone Color button in the Color panel or by choosing a non-Cloner brush variant in
the Brush Selector.
The destination points determine where the transformation occurs.
You can use transformed clone information to make a brick pattern become a steep wall.

228 | Corel Painter 2022 User Guide

Working with composition tools, symmetry tools, rulers, and guides | 229
Working with composition tools, symmetry tools, rulers, and
guides
The placement of objects in a painting can dramatically affect the overall appearance of the finished work. Corel Painter includes many tools
and features to help you compose, size, and position images and image elements. For example, you can display the rulers or the grid to help
you position image elements with precision. You can also use symmetry tools, such as the Mirror Painting tool, to achieve visual balance.
This section contains the following topics:
•“Using the Layout Grid” (page 229)
•“Using the Mirror Painting mode” (page 232)
•“Using the Kaleidoscope Painting mode” (page 234)
•“Using perspective guides” (page 236)
•“Using the Divine Proportion tool” (page 242)
•“Using rulers” (page 245)
•“Using guides” (page 246)
•“Using Snap to Guides” (page 247)
•“Using the grid” (page 247)
•“Using Snap to Virtual Grid” (page 248)
Using the Layout Grid
The Layout Grid provides an easy way to divide your canvas so that you can plan your composition. For example, you can divide your canvas
into thirds vertically and horizontally to use the compositional rule of thirds. From the Layout Grid panel, you can access grid settings, such
as the number of divisions, size, angle, color, and opacity of the grid. You can adjust these settings while you work and save them as a preset
for future drawings and paintings. You can also move the grid to a new position. You can restore the default settings of the Layout Grid
tool at any time.
The Layout Grid also lets you divide the canvas into compositional sections based on the proportions of the canvas. This nonprinting grid is
used primarily for composing artwork before you begin drawing or painting.
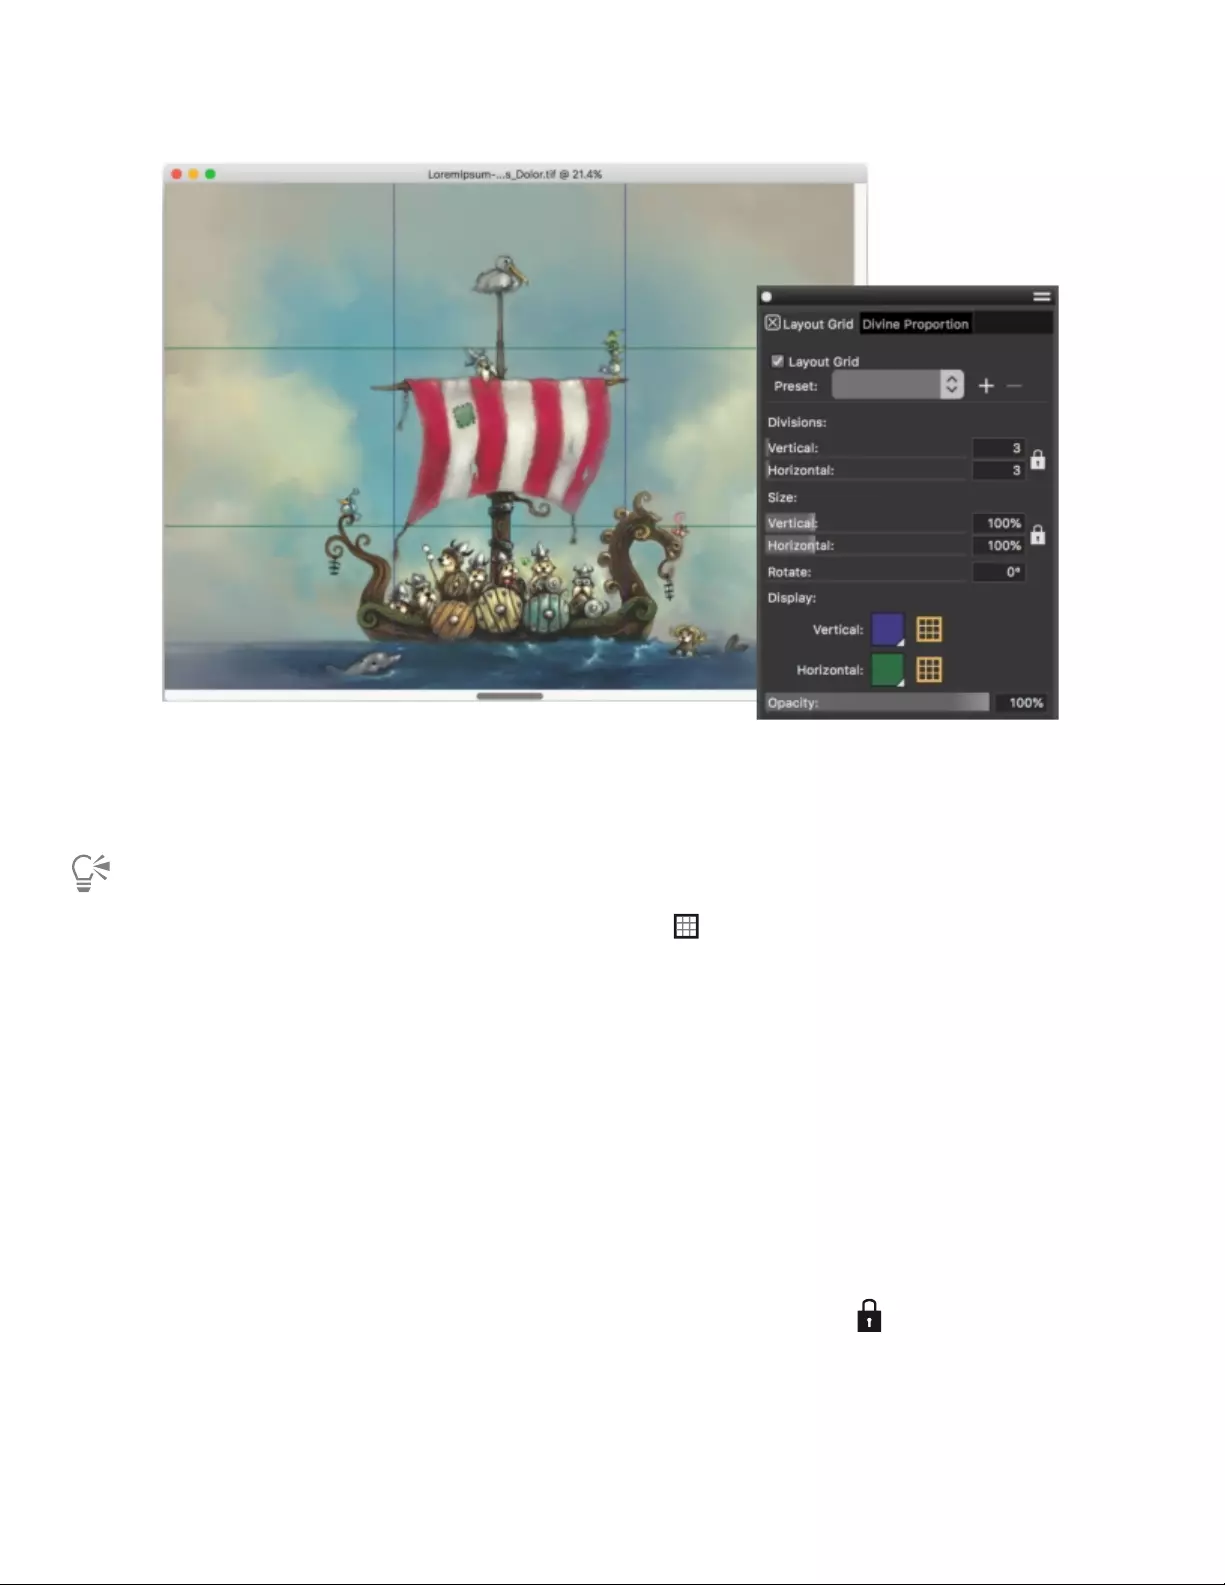
230 | Corel Painter 2022 User Guide
The Layout Grid helps you compose images. Artwork by Chris Melby.
To show or hide the Layout Grid
•Choose Canvas Compositions, and choose either Show Layout Grid or Hide Layout Grid.
You can also show or hide the grid by clicking the Layout Grid tool in the toolbox and enabling the Layout Grid check box on
the property bar.
To set Layout Grid options
1Choose Window Composition Panels Layout Grid.
In the Layout Grid panel, ensure that the Layout Grid check box is enabled.
2Perform a task from the following table.
To Do the following
Set the number of vertical and horizontal divisions In the Divisions area, type values in the Vertical box and the
Horizontal box.
If you want to link the Vertical and Horizontal values, click the
Synchronize Divisions button .
Resize the grid In the Size area, move the Vertical slider to set the height, and
move the Horizontal slider to set the width.
Working with composition tools, symmetry tools, rulers, and guides | 231
To Do the following
If you want to resize the grid proportionally, enable the
Synchronize Sizes button .
Change the angle of the grid Type a value in the Rotate box to set the degree of the angle.
Change the color of the vertical or horizontal gridlines In the Display area, click the Horizontal or Vertical color picker,
and choose a color.
Change the opacity of the grid Move the Opacity slider to the left to increase transparency. Move
the slider to the right to increase opacity.
You can also set some Layout Grid options by clicking the Layout Grid tool in the toolbox, and modifying the settings you
want on the property bar.
To save Layout Grid settings as a preset
1In the Layout Grid panel, modify the settings you want, and click the Add button .
2In the Add Preset dialog box, type a name for your preset in the Preset Name box.
3Click Save.
The preset appears in the Preset list box.
You can also save a preset by clicking the Layout Grid tool in the toolbox and clicking the Add button on the property
bar.
To delete a Layout Grid preset
1In the Layout Grid panel, choose the preset you want to delete from the Preset list box.
2Click the Delete button .
You can also delete a preset by clicking the Layout Grid tool in the toolbox, selecting a preset from the Preset list box on the
property bar, and clicking the Delete button .
To choose a Layout Grid preset
• In the Layout Grid panel, choose a preset from the Preset list box.
To move a Layout Grid
1In the toolbox, click the Layout Grid tool .
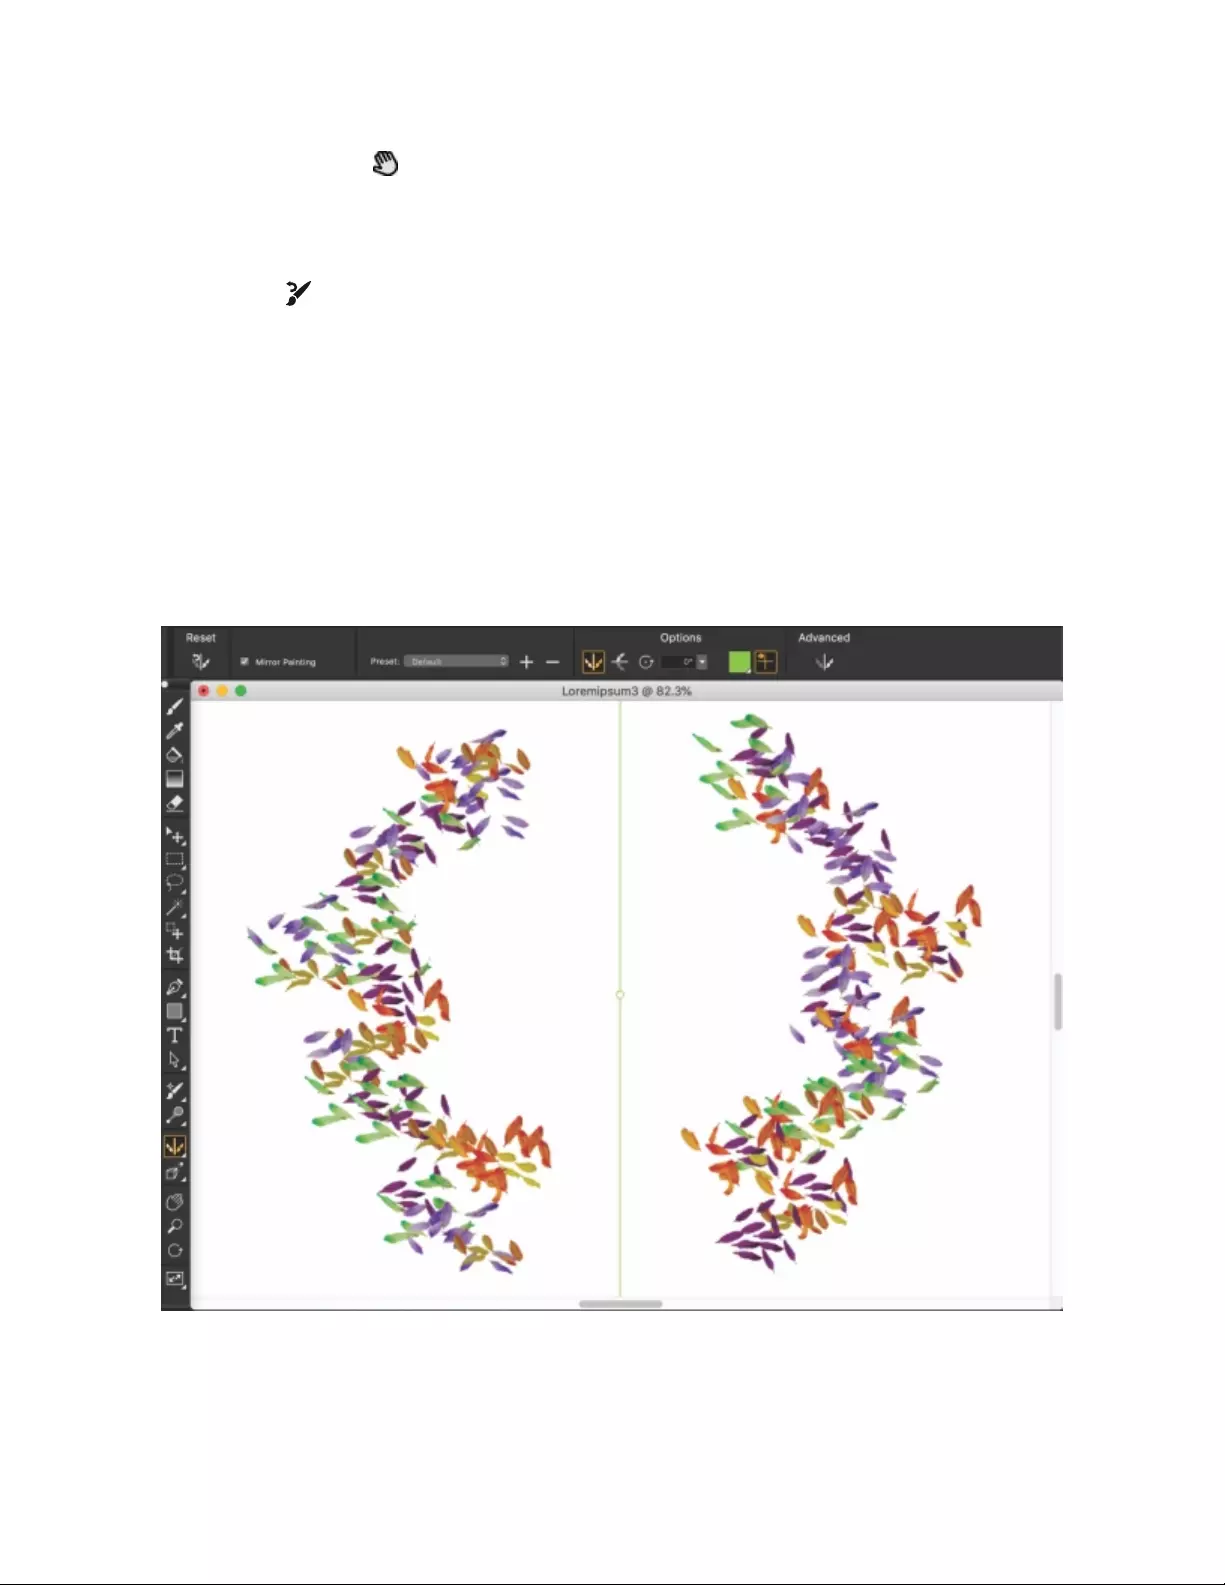
232 | Corel Painter 2022 User Guide
The cursor changes to a hand icon .
2In the document window, drag the grid to a new position.
To restore the default settings of the Layout Grid tool
•Click the Reset button on the property bar.
Using the Mirror Painting mode
In Corel Painter, you can create a symmetrical painting by using the Mirror Painting mode. When you enable the Mirror Painting mode, a
symmetry plane appears in the drawing window that lets you paint one half of an object while Corel Painter automatically replicates a mirror
image of the opposing side of the object by reproducing the brushstrokes. For example, if you want to paint a symmetrical face, simply paint
one half of the face and Corel Painter automatically completes the other half.
When using the Mirror Painting mode, the brushstrokes that you apply on one side of the plane may occasionally look different in the
opposite plane. For example, if you start the Mirror Painting on a canvas that contains previously applied brushstrokes, the mirrored
brushstrokes blend with the colors that are already on the canvas. In addition, if you’re applying randomized brushstrokes, such as a nozzle,
the mirrored brushstrokes are also randomly applied.
The green line that is displayed in the middle of the document window represents the mirror plane.
You can position the mirror symmetry planes horizontally, vertically, or both horizontally and vertically in the document window. You can also
control the placement of the mirror planes by moving or rotating the planes. You can restore the default settings of the Mirror Painting tool
at any time.
Working with composition tools, symmetry tools, rulers, and guides | 233
To create a mirror painting
1Click the Brush Selector on the Brush Selector bar.
2Click a brush category, and click a brush variant.
3Click the Stroke Options flyout button on the property bar, and click Mirror Painting .
4Apply a brushstroke in the mirror symmetry planes.
You can also
Show or hide the mirror symmetry planes while painting Click Mirror Planes .
Turn off Mirror Painting mode Click the Stroke Options flyout button , and click Mirror
Painting .
Choose a preset Click the Preset list box, and choose a preset.
Choose the Mirror Painting tool Click Mirror Painting Tool .
Show or hide the Mirror Painting panel Click Mirror Painting Panel .
Position the mirror symmetry planes horizontally or vertically in the
document window Click Mirror Painting Panel , and in the Mirror area of the
panel, click one of the following options:
•Horizontal Plane
•Vertical Plane
The Brush tool is the only tool that you can use to create mirror and kaleidoscope paintings. Other tools, such as the Shape tool,
are not supported.
To show or hide the mirror symmetry plane while painting, press Command + Shift + M (macOS) or Ctrl + Shift + M (Windows).
To control the display of the mirror symmetry planes
1Click Window Composition Panels Mirror Painting.
2Perform a task from the following table.
To Do the following
Specify an angle of rotation Type a value in the Rotation Angle box.
234 | Corel Painter 2022 User Guide
To Do the following
Rotate the planes in the drawing window Point to a plane until the cursor changes into a rotation angle
cursor , and then drag to rotate the plane.
Change the plane position Hover over the center point of the plane until the cursor changes
into a four-headed arrow , and then drag the plane to a new
location in the drawing window.
Change the color of the planes Click the Symmetry Plane Color button, and choose a color from
the color picker.
You can also control the display of the mirror planes by clicking the Mirror Painting tool in the toolbox, and adjusting the
settings on the property bar.
To restore the default settings of the Mirror Painting tool
•Click the Reset button on the property bar.
Using the Kaleidoscope Painting mode
Corel Painter lets you to transform basic brushstrokes into a colorful and symmetrical kaleidoscope image. When you paint a brushstroke
in one kaleidoscope segment, multiple reflections of the brushstroke appear in the other segments. You can apply between 3 to 12 mirror
planes to a kaleidoscope. You can also rotate or reposition the mirror planes to expose different colors and patterns. You can restore the
default settings of the Kaleidoscope tool at any time.
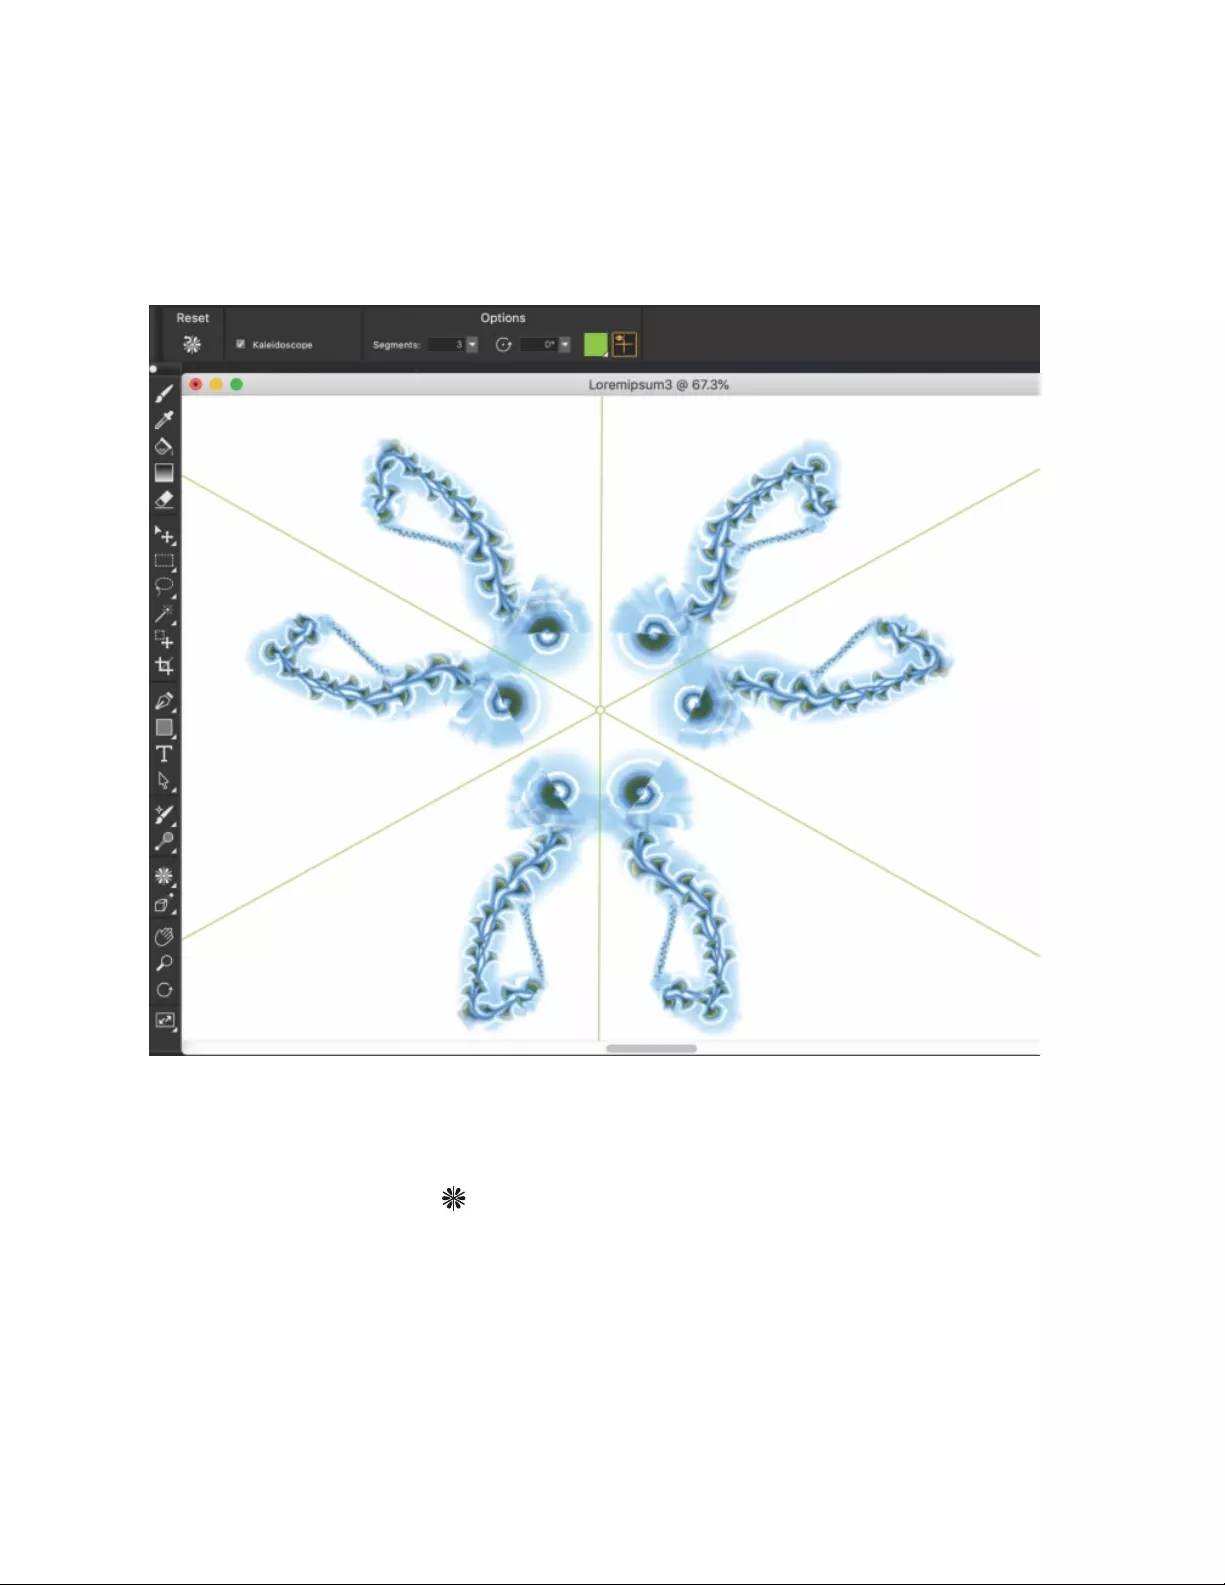
Working with composition tools, symmetry tools, rulers, and guides | 235
The green lines that are displayed in the document window delineate the symmetrical planes.
To create a kaleidoscope painting
1In the toolbox, click the Kaleidoscope tool .
2In the Segments box on the property bar, type the number of planes that you want to display.
3Click the Brush Selector on the Brush Selector bar.
4Click a brush category, and click a brush variant.
5Apply brushstrokes in any of the kaleidoscope segments.
If you want to achieve a spiralling effect, apply brushstrokes across multiple segments.
236 | Corel Painter 2022 User Guide
To Do the following
Hide the kaleidoscope planes while painting Click the Mirror Planes toggle button on the Kaleidoscope
tool property bar.
Disable the Kaleidoscope Painting mode Disable the Kaleidoscope check box on the Kaleidoscope tool
property bar.
Turn off the Kaleidoscope Painting mode Click the Stroke Options flyout button , and click Mirror
Painting .
The Brush tool is the only tool that you can use to create mirror and kaleidoscope paintings. Other tools, such as the Shape tool,
are not supported.
To control the display of the kaleidoscope planes
1In the toolbox, click the Kaleidoscope tool .
2Perform a task from the following table:
To Do the following
Specify an angle of rotation On the property bar, type a value in the Rotation Angle box.
Rotate the plane in the drawing window Point to a plane until the cursor changes to a rotation angle cursor
, and then drag to rotate the plane.
Change the plane position Point to the center point of the planes until the cursor changes into
a four-headed arrow , and then drag it to a new location in the
drawing window.
Change the color of the plane Click the Symmetry Plane Color button, and choose a color from
the color picker.
To restore the default settings of the Kaleidoscope Painting tool
•Click the Reset Kaleidoscope button on the property bar.
Using perspective guides
You can display non-printing perspective guides to paint objects that give the impression that they are receding, or vanishing, from view.
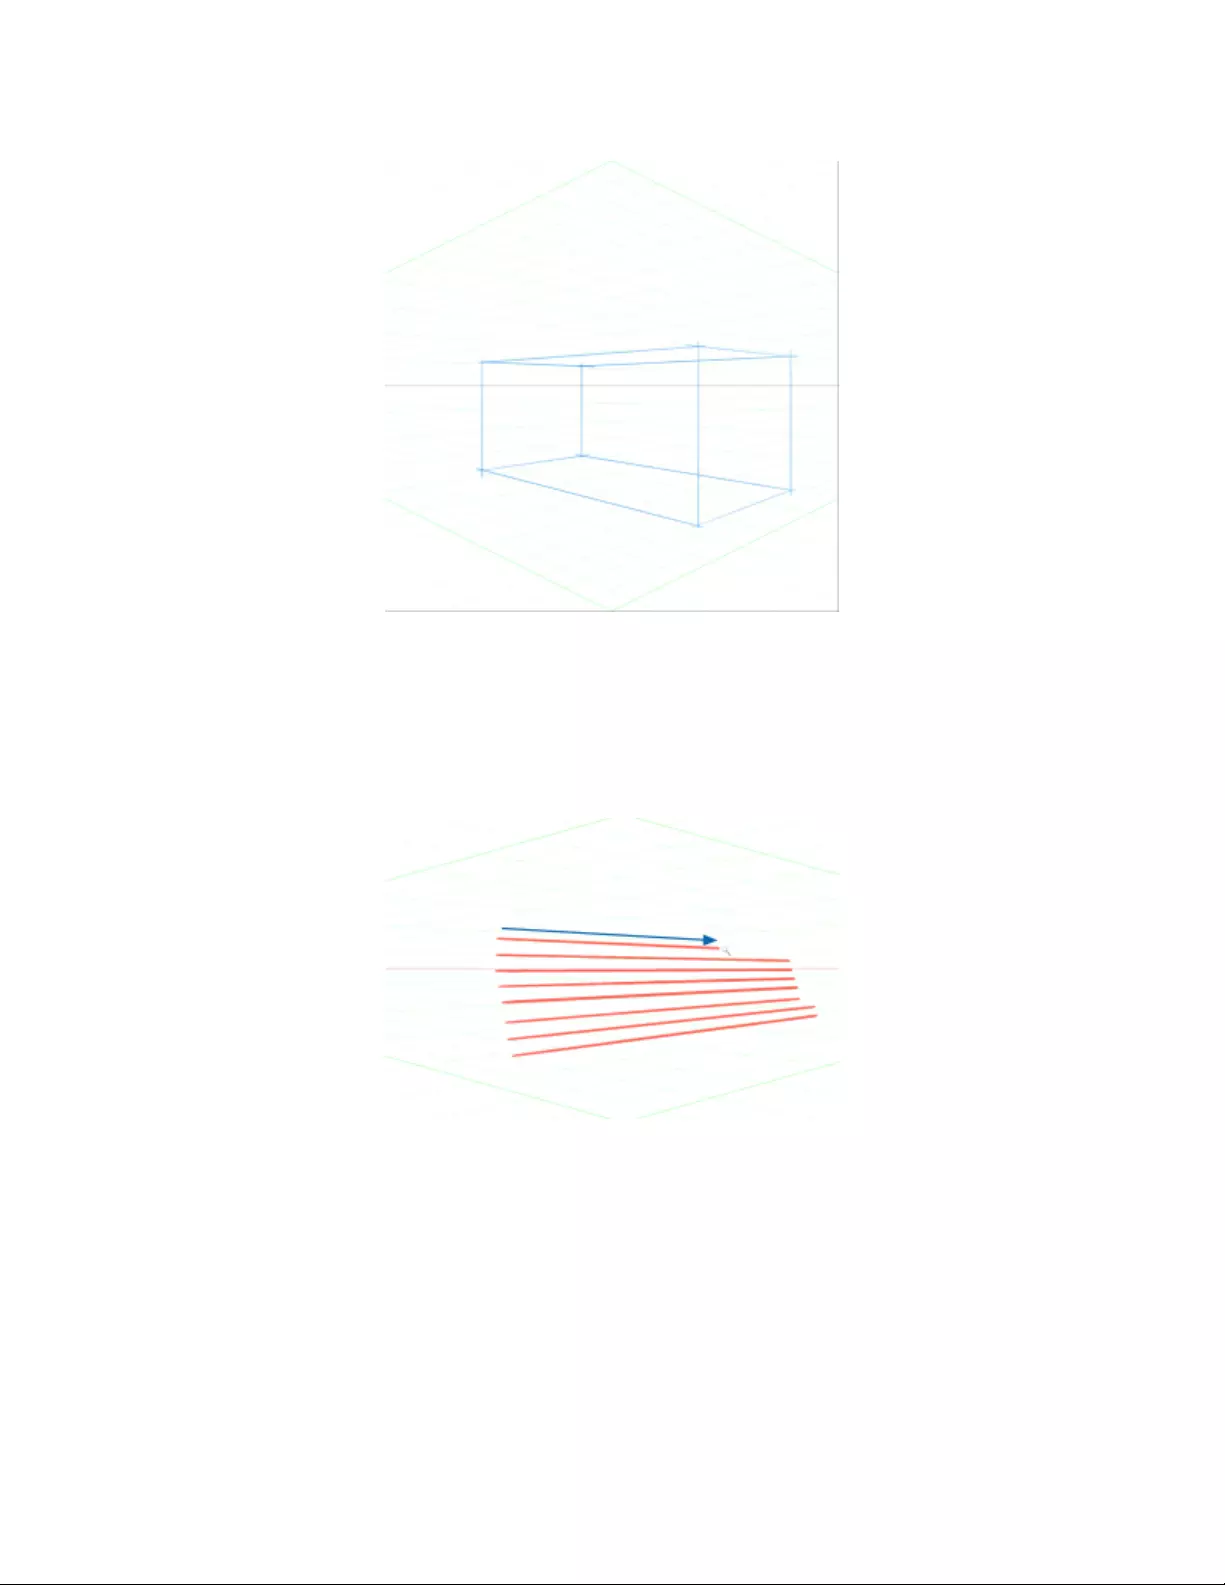
Working with composition tools, symmetry tools, rulers, and guides | 237
An example of painting a box by using perspective guides
Corel Painter provides a selection of presets, which include different configurations of the perspective guides. The presets have one, two,
or three vanishing points that help set the direction of the perspective. You can modify a preset and save it. You can also delete presets and
restore the default settings of presets.
You can display the perspective guides simply as a visual aid, or you can choose to paint in perspective mode. In this mode, Corel Painter
aligns the brushstrokes you apply in the document window to the vanishing points.
Painting in perspective aligns brushstrokes to vanishing points.
Depending on your workflow, you may choose to adjust the perspective guide settings by using the Stroke flyout on the Brush tool property
bar, the property bar of the Perspective Guides tool, or the Perspective Guides panel. If using the feature for the first time, select the
Perspective Guides tool, adjust the options you want, and save them as a preset once you are happy with your setup. When you start
painting, you can quickly enable or disable the guides, change view options, and choose presets from the Stroke Options flyout on the
Brush tool property bar. If you need to edit and reposition lines and vanishing points at any time, however, you can access the Perspective
Guides tool from the Stroke Options flyout. When your changes are complete and you save your settings as presets, you have to select
the Brush tool again to continue painting. If you often make changes to the guides, you can place the Perspective Guides panel in your
workspace and keep it open. The panel allows you to access and adjust all perspective guide-related settings without the need to switch
between tools.
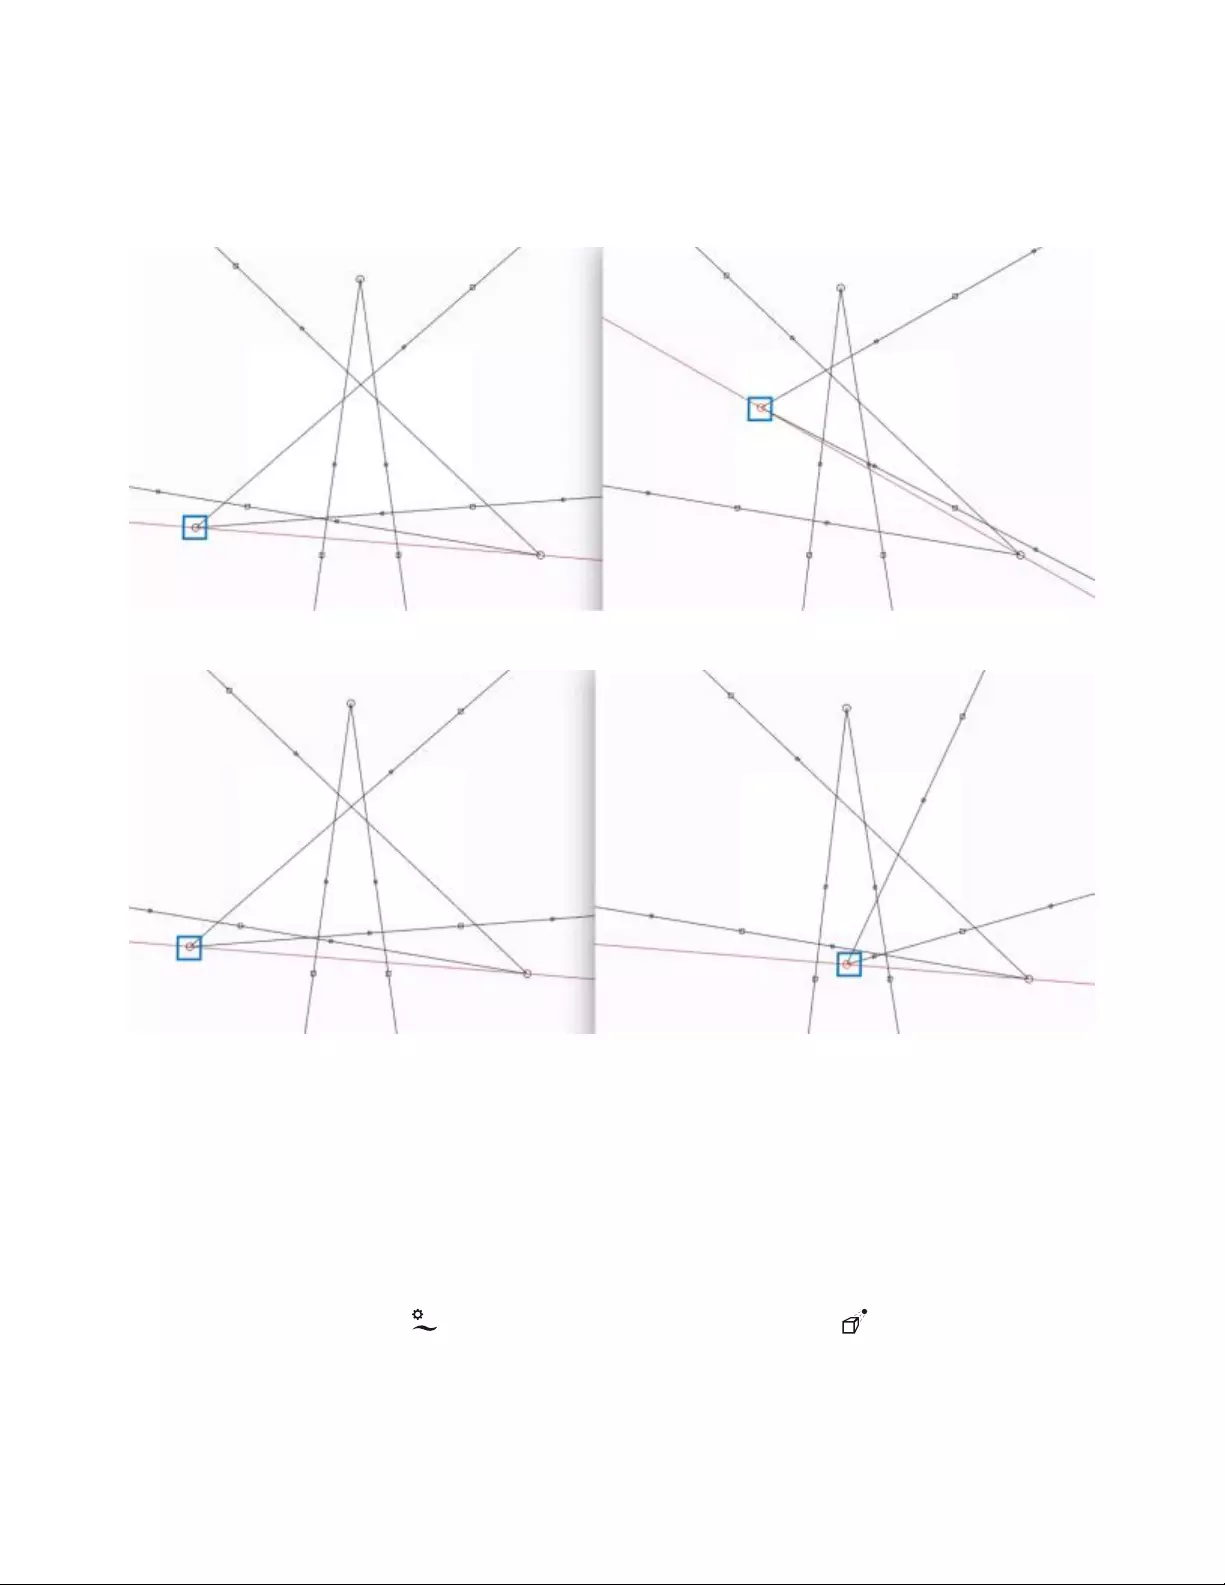
238 | Corel Painter 2022 User Guide
You can modify the appearance of perspective guides by repositioning the vanishing point, the horizon line, and the primary lines. When
you reposition the vanishing point, you can reposition both the horizon and the primary lines, or you can reposition only the primary lines by
constraining the movement of the vanishing point along the horizon line. You can also rotate the primary lines to best suit your needs.
As you drag the vanishing point to a new location, both the horizon and primary lines are repositioned.
Hold down Shift as you drag the vanishing point to constrain the movement of
the vanishing point along the horizon line and reposition only the primary lines.
In addition, you can change the color and opacity of all lines. You can also increase or decrease the density of the intermediate lines.
You can hide the perspective guides when you no longer need them.
To paint in perspective
1Click the Brush Selector on the Brush Selector bar.
2Click a brush category, and click a brush variant.
3Click the Stroke Options flyout button on the property bar, and click Perspective Guides .
4Apply brushstrokes in the document window.
Working with composition tools, symmetry tools, rulers, and guides | 239
You can also
Show or hide the primary lines Click the Stroke Options flyout button , and click Primary
Lines .
Show or hide the horizon line Click the Stroke Options flyout button , and click Horizon
Line .
Show or hide the intermediate lines Click the Stroke Options flyout button , and click
Intermediate Lines .
Choose a preset Choose an option from the Preset list.
Edit and reposition lines and vanishing points with the Perspective
Guides tool Click the Perspective Guides Tool .
Show or hide the Perspective Guides panel Click Perspective Guides Panel .
To exit the perspective painting mode at any time, click the Stroke Options flyout button on the property bar, and click Align
to Guides .
You can also show or hide the perspective guides by clicking the Perspective Guides tool in the toolbox, and enabling or
disabling the Perspective Guides check box on the property bar.
You can also enable or disable perspective mode by clicking the Perspective Guides tool in the toolbox, enabling the
Perspective Guides check box on the property bar, and then enabling or disabling the Align to Guides check box on the property
bar.
To better display the guides, make sure you are in Full Screen mode. This allows you to reposition the guides to best suit your
needs.
To reposition lines and the vanishing point
1Do one of the following:
•Click the Stroke Options flyout button on the Brush tool property bar, and click the Perspective Guides Tool .
•In the toolbox, click the Perspective Guides tool .
2Perform a task from the following table.

240 | Corel Painter 2022 User Guide
To Do the following
Reposition a vanishing point In the document window, drag the vanishing point to a new
position.
Constrain the movement of a vanishing point to the horizon line Hold down Shift and drag the vanishing point to a new position.
Reposition the horizon line Drag the horizon line up or down.
Reposition a primary line Drag the primary line’s position handle to a new position.
Rotate a primary line Drag a rotation handle to change the line angle.
Reposition all vanishing points and primary lines as a group Hold down Command + Shift (macOS) or Ctrl + Shift (Windows),
and drag the vanishing point to a new position.
Move the primary line position handle Drag the position handle along the primary line.
Tip: To save your settings as a preset, click the Preset flyout button on the property bar, choose Add from the list, enter a preset name,
and click Save.
To display the Perspective Guides panel
•Click Window Composition Panels Perspective Guides.
To control the display of the primary lines
1In the Perspective Guides panel (Window Composition Panels Perspective Guides), enable the Perspective Guides check box.
2Perform a task from the following table.
To Do the following
Show or hide the primary lines Click the Primary Lines button .
Change the opacity of the primary lines In the Primary Lines area, move the Opacity slider.
Change the color of the primary lines In the Primary Lines area, click the Color picker, and choose a
color.
You can also control the display of the primary lines by clicking the Perspective Guides tool in the toolbox and adjusting any
of the primary lines settings on the property bar.
Working with composition tools, symmetry tools, rulers, and guides | 241
To control the display of the horizon line
1In the Perspective Guides panel (Window Composition Panels Perspective Guides), enable the Perspective Guides check box.
2Perform a task from the following table.
To Do the following
Show or hide the horizon line Click the Horizon Line button .
Change the opacity of the horizon line In the Horizon Line area, move the Opacity slider.
Change the color of the horizon line In the Horizon Line area, click the Color picker, and choose a color.
You can also control the display of the horizon line by clicking the Perspective Guides tool in the toolbox and adjusting any
of the horizon line settings on the property bar.
To control the display of the intermediate lines
1In the Perspective Guides panel (Window Composition Panels Perspective Guides), enable the Perspective Guides check box.
2Perform a task from the following table.
To Do the following
Show or hide the intermediate lines Click the Intermediate Lines button .
Change the opacity of the intermediate lines In the Intermediate Lines area, move the Opacity slider.
Change the color of the intermediate lines In the Intermediate Lines area, click the Color picker, and choose a
color.
Change the line density In the Intermediate Lines area, move the Density slider.
You can also control the display of the intermediate lines by clicking the Perspective Guides tool in the toolbox and adjusting
any of the intermediate lines settings on the property bar.
To save perspective guide settings as a preset
1In the Perspective Guides panel, modify the settings you want.
2Click the Add Preset button .
3In the Add Preset dialog box, type a name for your preset in the Preset Name box.

242 | Corel Painter 2022 User Guide
4Click Save.
The preset appears in the presets list.
If you export your workspace, any perspective guides presets that you created are saved with the workspace.
You can also add a preset by clicking the Perspective Guides tool in the toolbox, enabling the Perspective Guides check box
on the property bar, clicking the Preset flyout button, choosing Add from the list, entering a name, and clicking Save.
To delete a perspective guide preset
1In the toolbox, click the Perspective Guides tool .
If the perspective guides are not displayed, enable the Perspective Guides check box.
2Click the Preset flyout button on the property bar, and then choose Delete from the list.
3Choose a preset from the Preset Name list box.
4Click Yes.
You can also delete a preset by clicking the Perspective Guides panel button on the property bar, clicking the Delete Preset
button , choosing a preset name, and clicking Yes.
To reset the Perspective Guides tool
1In the toolbox, click the Perspective Guides tool .
2Click the Reset Tool button on the property bar.
Using the Divine Proportion tool
The Divine Proportion tool lets you use guides based on a classical composition method of the same name. When planning your artwork,
you can use the guides to create a sense of proportion, which helps maintain interest as the eye of the viewer travels across a drawing or
painting.
Divine Proportion — helps identify where to place focal areas in artwork by using classical composition. This nonprinting layout is primarily
used for composing artwork before you begin drawing or painting.
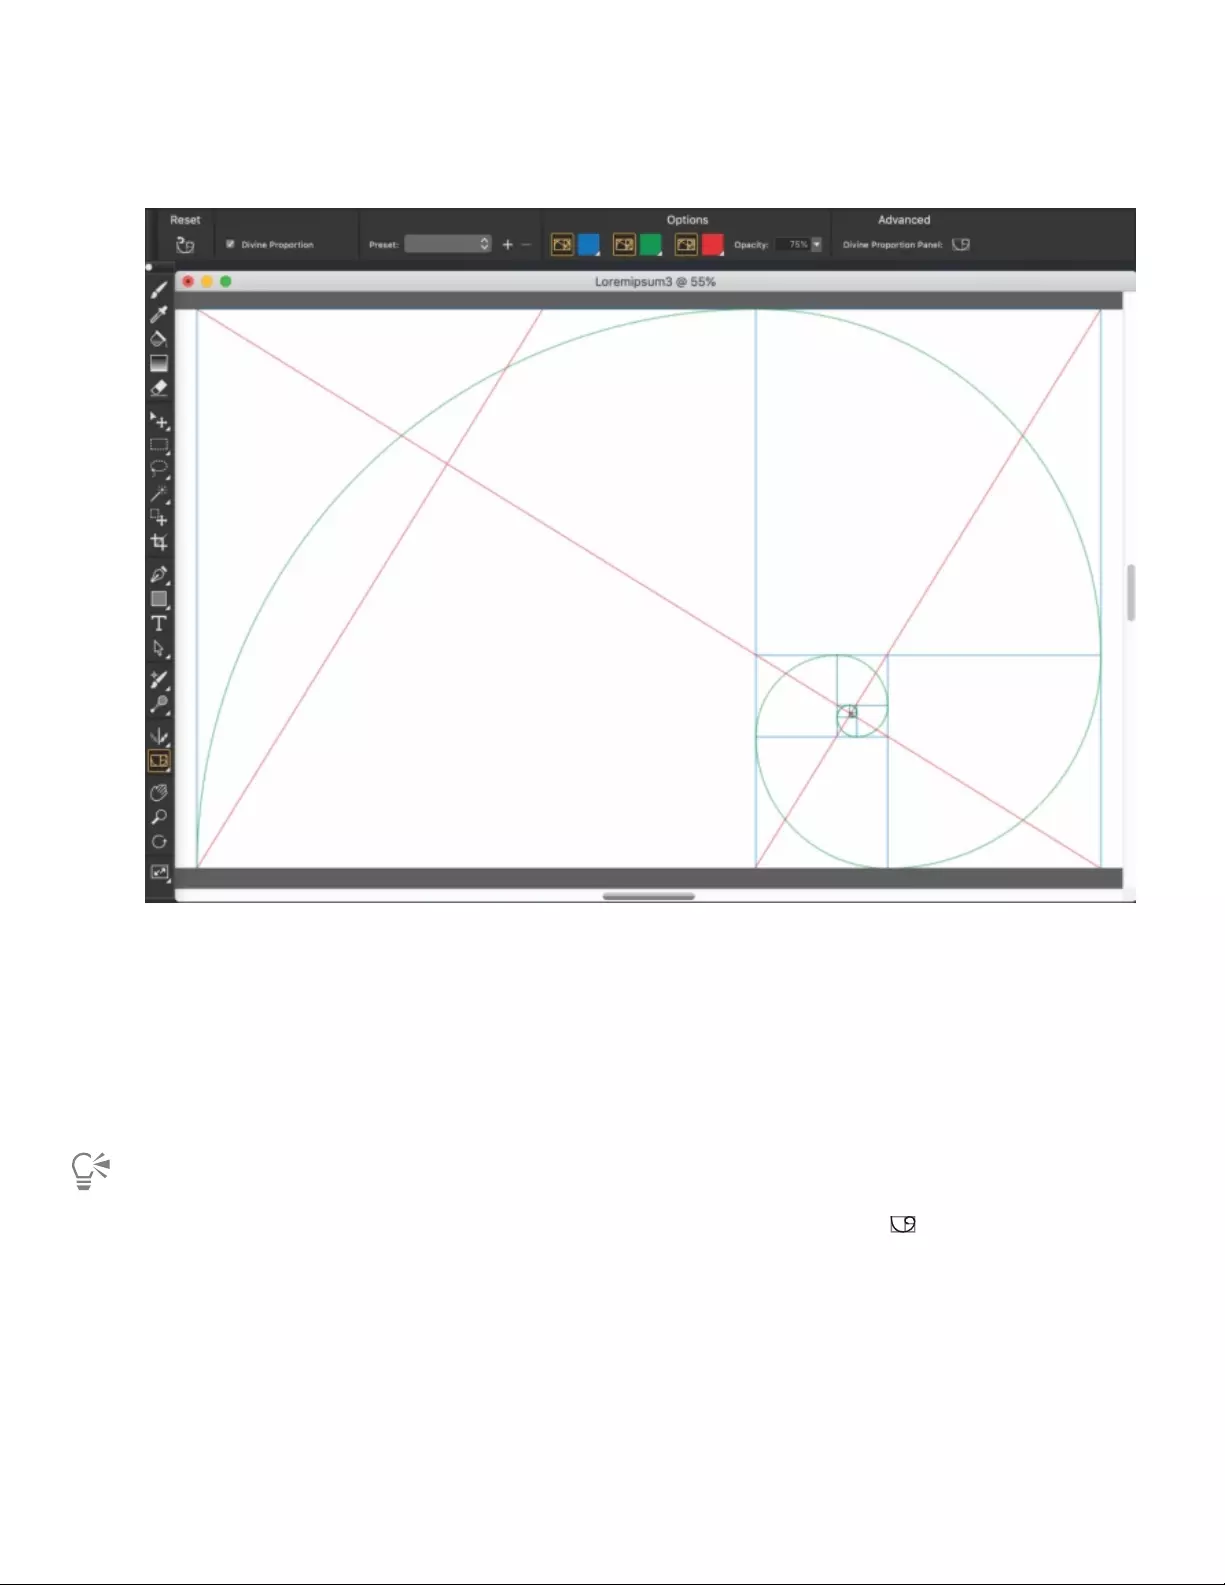
Working with composition tools, symmetry tools, rulers, and guides | 243
The Divine Proportion tool can help you establish focal areas.
The Divine Proportion panel lets you change the orientation, size, angle, color, and opacity of the Divine Proportion guide that appears on
the canvas. You can also adjust the number of levels to determine how many times a section divides within itself, creating a spiral. You can
adjust these settings while you work, and you can save them as a preset. You can also move the Divine Proportion guide to a new position.
To show or hide the Divine Proportion guides
•Choose Canvas Compositions, and then choose either Show Divine Proportion or Hide Divine Proportion.
You can also show or hide the Divine Proportion guides by clicking the Divine Proportion tool in the toolbox and enabling or
disabling the Divine Proportion check box on the property bar.
To set Divine Proportion options
1Choose Window Composition Panels Divine Proportion.
The Divine Proportion panel appears.
2In the Divine Proportion panel, enable the Divine Proportion check box, and perform a task from the following table.
244 | Corel Painter 2022 User Guide
To Do the following
Set orientation In the Orientation area, click one of the Landscape or Portrait
buttons.
Resize the guide Move the Size slider to the right to increase the size. Move the
slider to the left to decrease the size.
Size is measured as a percentage of the width or height of the
canvas, depending on whether the orientation is Landscape or
Portrait.
Change the angle Type a value in the Rotate box to set the degree of the angle.
Change the color of the grid, spiral, or axis In the Display area, click the Grid, Spiral, or Axis color picker, and
choose a color.
Change the opacity Move the Opacity slider to the left to increase transparency. Move
the slider to the right to increase opacity.
Change the numbers of levels Move the Levels slider to the right to increase the number of levels.
Move the slider to the left to decrease the number of levels.
You can also set some Divine Proportion options by clicking the Divine Proportion tool in the toolbox and modifying the
settings that you want on the property bar.
To save Divine Proportion settings as a preset
1In the Divine Proportion panel, modify the settings you want, and click the Add button .
2In the Add Preset dialog box, type a name for your preset in the Preset Name box.
3Click Save.
The preset appears in the Type list box.
You can also save a preset by clicking the Divine Proportion tool in the toolbox and clicking the Add button on the
property bar.
To delete a Divine Proportion preset
1In the Divine Proportion panel, choose the preset you want to delete from the Type list box.
2Click the Delete button .
Working with composition tools, symmetry tools, rulers, and guides | 245
You can also delete a preset by clicking the Divine Proportion tool in the toolbox, selecting a preset from the Presets list box
on the property bar, and clicking the Delete button .
To choose a Divine Proportion preset
• In the Divine Proportion panel, choose a preset from the Preset list box.
To move the Divine Proportion guide
1In the toolbox, click the Divine Proportion tool .
The cursor changes to a hand icon .
2In the document window, drag the Divine Proportion guides to a new position.
Using rulers
Corel Painter lets you show or hide rulers along the top and left sides of the document window. Each mark on a ruler is known as a tick and
represents the selected unit of measurement. You can set the unit of measurement to pixels, inches, centimeters, points, or picas.
As you rotate an image in the document window, the rulers scroll to show the position of the canvas in the document window. The origin of
the document is the intersection of the zero (0) ticks on each ruler. By default, the origin is the upper left corner of the canvas. Changing the
origin resets the location of the zero ticks on the rulers.
To show or hide rulers
•Choose Canvas Rulers, and choose either Show Rulers or Hide Rulers.
To set the ruler units
1Choose Canvas Rulers Ruler Options.
2In the Ruler Options dialog box, choose a unit of measurement from the Ruler Units list box.
You can also open the Ruler Options dialog box by holding down Option (macOS) or Alt (Windows) and clicking the ruler.
To change the document origin
1Click the box at the intersection of the rulers (upper-left corner of the document window).
2Drag diagonally into the document window.
Crosshairs mark the new origin point.
3Drag the crosshairs to the desired position.
The ruler numbers update to show the new origin as 0,0.
To restore the origin
• Double-click the box at the intersection of the rulers (upper-left corner of the document window).
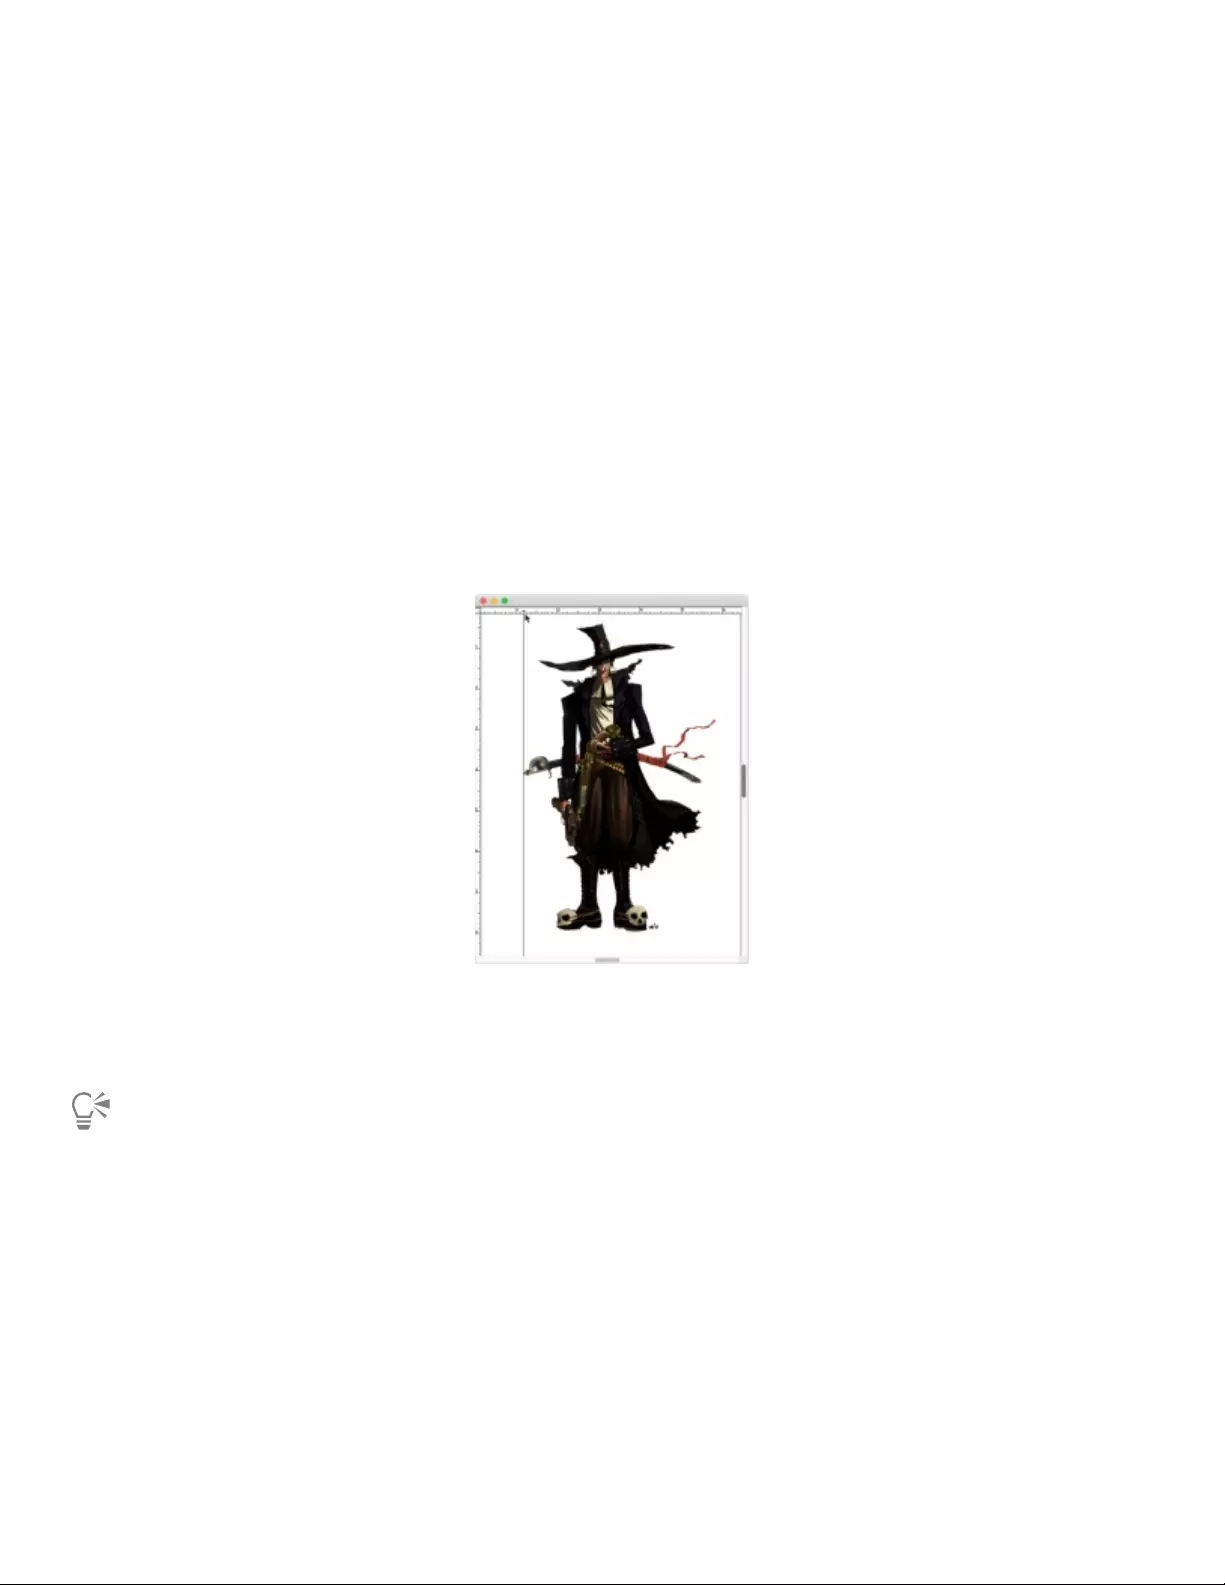
246 | Corel Painter 2022 User Guide
Using guides
Guides are nonprinting lines that appear over the image in the document window. They are very helpful in aligning image elements. You can
place guides at any position in the document window and easily reposition and remove them. If you enable the Snap to Ruler Ticks option,
the guides you create will land precisely on the tick marks. Each guide also has options that let you change its color and lock it so that it
can’t be dragged.
To show or hide guides
•Choose Canvas Guides Show Guides or Hide Guides.
To create a guide
1Show the rulers and the guides.
2Click in a ruler at the position where you want to place the guide.
A guide appears in the document window and a triangular marker appears in the ruler.
A black triangle marks the guide’s position in the ruler.
To reposition a guide
• Drag the guide’s marker to any point of the ruler.
You can also double-click the guide’s marker to display the Guide Options dialog box, and enter a value in the Guide Position box.
To enable the Snap to Ruler Ticks option
•Choose Canvas Rulers Snap to Ruler Ticks.
To set a guide’s color
1Double-click the guide’s marker.
2In the Guide Options dialog box, click the Guide Color chip, and choose a color.
To change the color of all guides, enable the Same Color for All Guides check box.
Working with composition tools, symmetry tools, rulers, and guides | 247
To lock or unlock a guide
1Double-click the guide’s marker to display the Guide Options dialog box.
2Enable or disable the Lock Guide check box.
To remove a guide
• Drag the guide’s marker off the edge of the document window.
To remove all guides
1Double-click the guide’s marker to display the Guide Options dialog box.
2Click Delete All Guides.
Using Snap to Guides
The Snap to Guides option enables selections and tool operations to “snap” to a guide within 6 pixels of the cursor (or edge).
The following operations respect Snap to Guides:
•Dragging with the Rectangular Selection and Oval Selection tools
•Dragging with the Crop tool
•Drawing straight lines with the Brush tool
•Clicks made with the Pen tool
•Clicking with the Text tool to create a text entry point
•Clicking and dragging with the Paint Bucket tool and Magnifier tool
• Dragging shapes and selections. The edges of the content and the selection rectangle for the shapes and selections snap to the guides.
The cursor — wherever it might be in the object — also snaps to the guide.
• Dragging the handles of reference layers, shapes, and selections to transform them
•Dragging with the Selection Adjuster tool or Layer Adjuster tool
To enable Snap to Guides
•Choose Canvas Guides Snap to Guides.
The option is enabled when the menu item has a check mark beside it.
Using the grid
Corel Painter provides a virtual grid to help you in laying down brushstrokes or creating shapes. You can align and snap image elements to a
basic grid. You can set the types, size, line thickness, and color of the grid. You can also print gridlines.
To show the virtual grid
•Choose Canvas Virtual Grid Show Virtual Grid.
A non-printing grid appears.
248 | Corel Painter 2022 User Guide
You can also activate the grid from the Navigator panel by clicking the Open Navigator Settings button and choosing Show
Grid.
To hide the virtual grid
•Choose Canvas Virtual Grid Hide Virtual Grid.
You can also deactivate the virtual grid from the Navigator panel by clicking the Open Navigator Settings button and
choosing Hide Virtual Grid.
To set grid options
1Choose Canvas Virtual Grid Virtual Grid Options.
2In the Grid Options dialog box, choose a grid type from the Grid Type list box.
3Type values in any of the following boxes:
•Horizontal Spacing
•Vertical Spacing
The unit of measure can be in pixels, inches, centimeters, points, picas, columns (2 in. wide), or percent.
4Click the Grid Color chip to set the color of the gridlines.
5Click the Background chip to set the grid’s background color.
To print gridlines
•Choose Effects Esoterica Grid Paper.
Using Snap to Virtual Grid
The Snap to Virtual Grid option enables certain tool operations to “snap” to a grid within 6 pixels of the cursor.
The following tools respect Snap to Virtual Grid:
•Pen tool
•Shape Selection tool
•Convert Point tool
•Text tool
To enable Snap to Virtual Grid
•Choose Canvas Virtual Grid Snap to Virtual Grid.
The option is enabled when the menu item has a check mark beside it.

Color | 249
Color
Corel Painter offers many ways to select color and apply it to your image. For example, you can change the canvas color, choose colors for
your brushstrokes, or apply a color fill to an entire image or selection.
You can select colors in several ways. You can use
• the color swatches in the Color panel
• the color selector
• the Harmonies panel
• the Dropper tool, which samples color from the image
• the Use Clone Color setting, which pulls color from a source
• the Mixer panel
• the Color Sets panel
This section contains the following topics:
•“Choosing colors from the Color panel” (page 250)
•“Resizing the Color panel” (page 253)
•“Showing or hiding Color panel components” (page 253)
•“Using the color selector” (page 253)
•“Changing the canvas color” (page 257)
•“Sampling colors from images” (page 258)
•“Cloning color” (page 259)
•“Creating two-color brushstrokes” (page 259)
•“Exploring the Mixer panel and mixing controls” (page 260)
•“Displaying and resizing the Mixer panel” (page 261)
•“Mixing, sampling, and applying colors from the Mixer pad” (page 262)
•“Opening images in the Mixer panel” (page 264)
•“Changing and saving the Mixer color swatches” (page 265)
•“Saving Mixer panel colors to a color set” (page 265)
•“Clearing and resetting Mixer panel colors” (page 266)
•“Saving the Mixer pad” (page 266)
•“Loading color swatches and Mixer pad files” (page 267)
•“Working with color sets” (page 267)
•“Customizing the layouts of color sets” (page 269)
•“Creating and exporting color sets” (page 269)
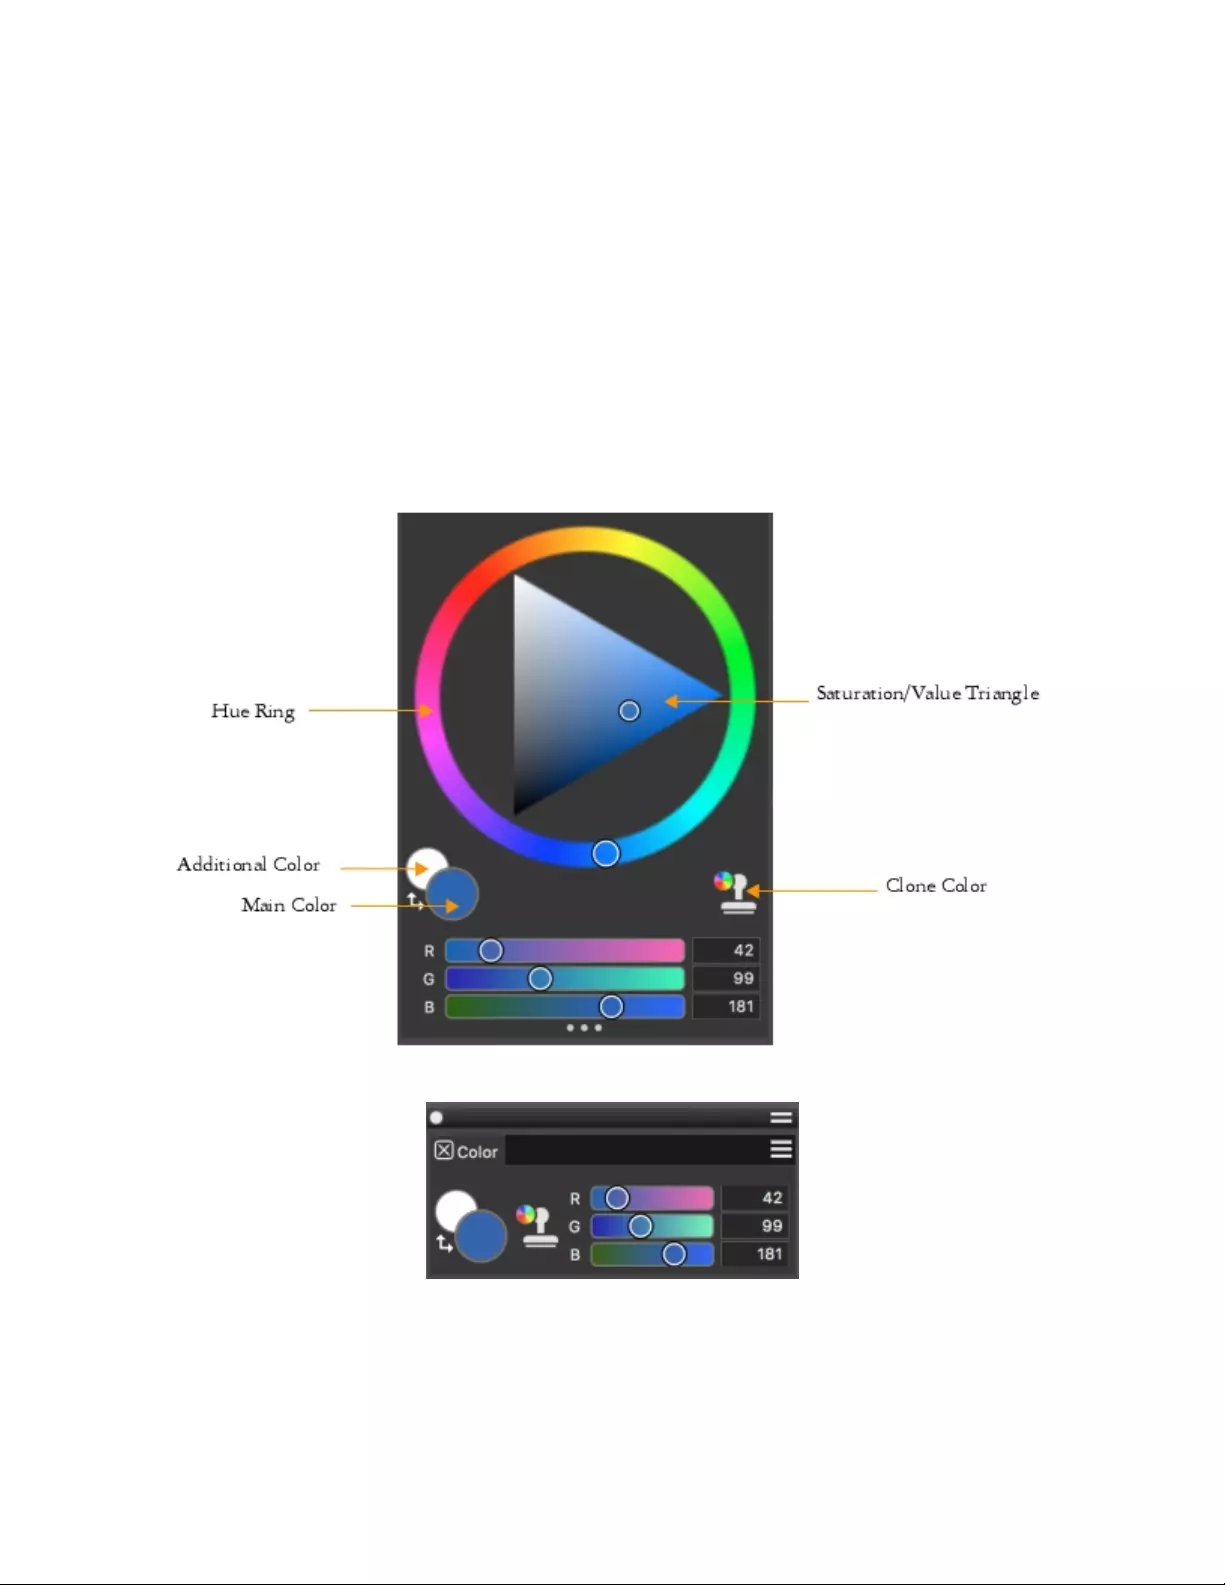
250 | Corel Painter 2022 User Guide
•“Editing color sets” (page 270)
•“Working with color harmonies” (page 271)
•“Setting color variability” (page 273)
•“Setting Color Expression” (page 274)
•“Loading multiple colors” (page 274)
•“Working with color fills” (page 274)
•“Applying a color as a fill” (page 275)
•“Limiting and preventing leakage” (page 276)
Choosing colors from the Color panel
You can use the Color panel to select a color and view information about the selected color. The Color panel has two viewing modes:
compact and full view. In full view, both the color wheel and sliders are displayed. In compact view, only the sliders are displayed.
The Color panel in full view
The Color panel in compact view
In the Color panel, you can choose a color from the Hue Ring and adjust the color from the Saturation/Value Triangle. The following
information can help you adjust colors by using the Saturation/Value Triangle.
• Color values span the Saturation/Value Triangle from top to bottom. The top of the triangle represents the highest value (white), and the
bottom of the triangle represents the lowest value (black).
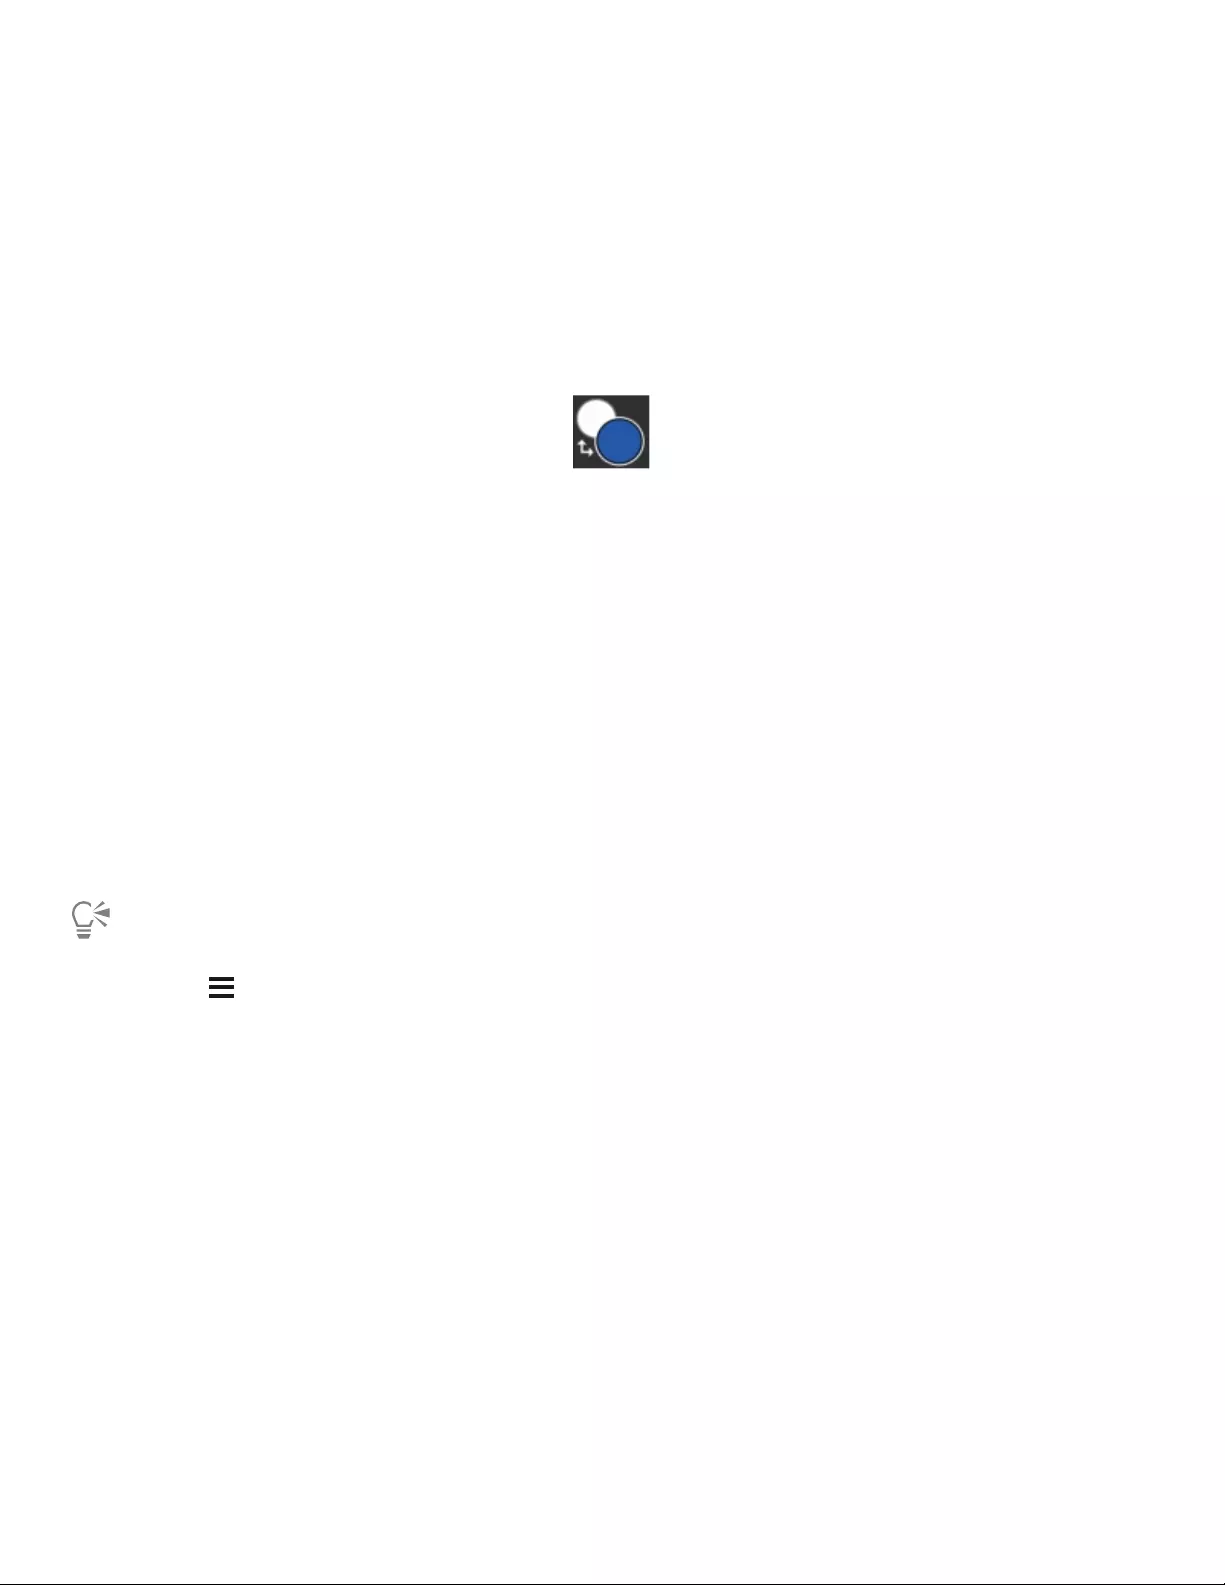
Color | 251
• Saturation levels increase from left to right. Dragging to the right, or clicking on the right, produces purer colors within the predominant
hue. Dragging to the left, or clicking on the left, reduces the color saturation and produces “muddier” or grayer colors.
You can also set the Hue, Saturation, Value (HSV) and standard Red, Green, Blue (RGB) values for the selected color.
The Main and Additional Color swatches display in the Color panel and the toolbox. They include two overlapping swatches: the front
swatch displays the selected Main color and the back swatch displays the selected Additional color.
The Additional color is used when applying more than one color, as in two-color brushstrokes, two-point gradients, and Image Hose
effects. It is not what other graphics applications refer to as the “background color.” In Corel Painter, the background color is the canvas
color.
The Main Color and Additional Color overlapping swatches
You can preview a new color before selecting it. When you interact with the Hue Ring, the Saturation/Value triangle, or the sliders, the left
half of the color swatch displays a preview of the new color and the right half shows the current color.
You can also enable the Clone Color option from the Color panel. For more information, see “Cloning color” on page 259.
To display the Color panel
• Perform a task from the following table.
To display the Color panel in Do the following
Full view Choose Window Color Panels Color Panel (Full View).
Compact view Choose Window Color Panels Color Panel (Compact).
When using the Color panel in full view, you can quickly show or hide the Compact Color panel by clicking the Color options
button , and choosing Color Panel (Compact).
To show or hide the color wheel when using the Color panel in full view, see “To show or hide the color wheel” on page 253.
To choose a hue and color from the Color panel
1Choose Window Color Panels Color Panel (Full View).
2Drag the handle on the Hue Ring to select the predominant hue.
The Saturation/Value Triangle displays all available colors within that selected hue.
3Select a color on the Saturation/Value Triangle by dragging the circle or by clicking the color you want.
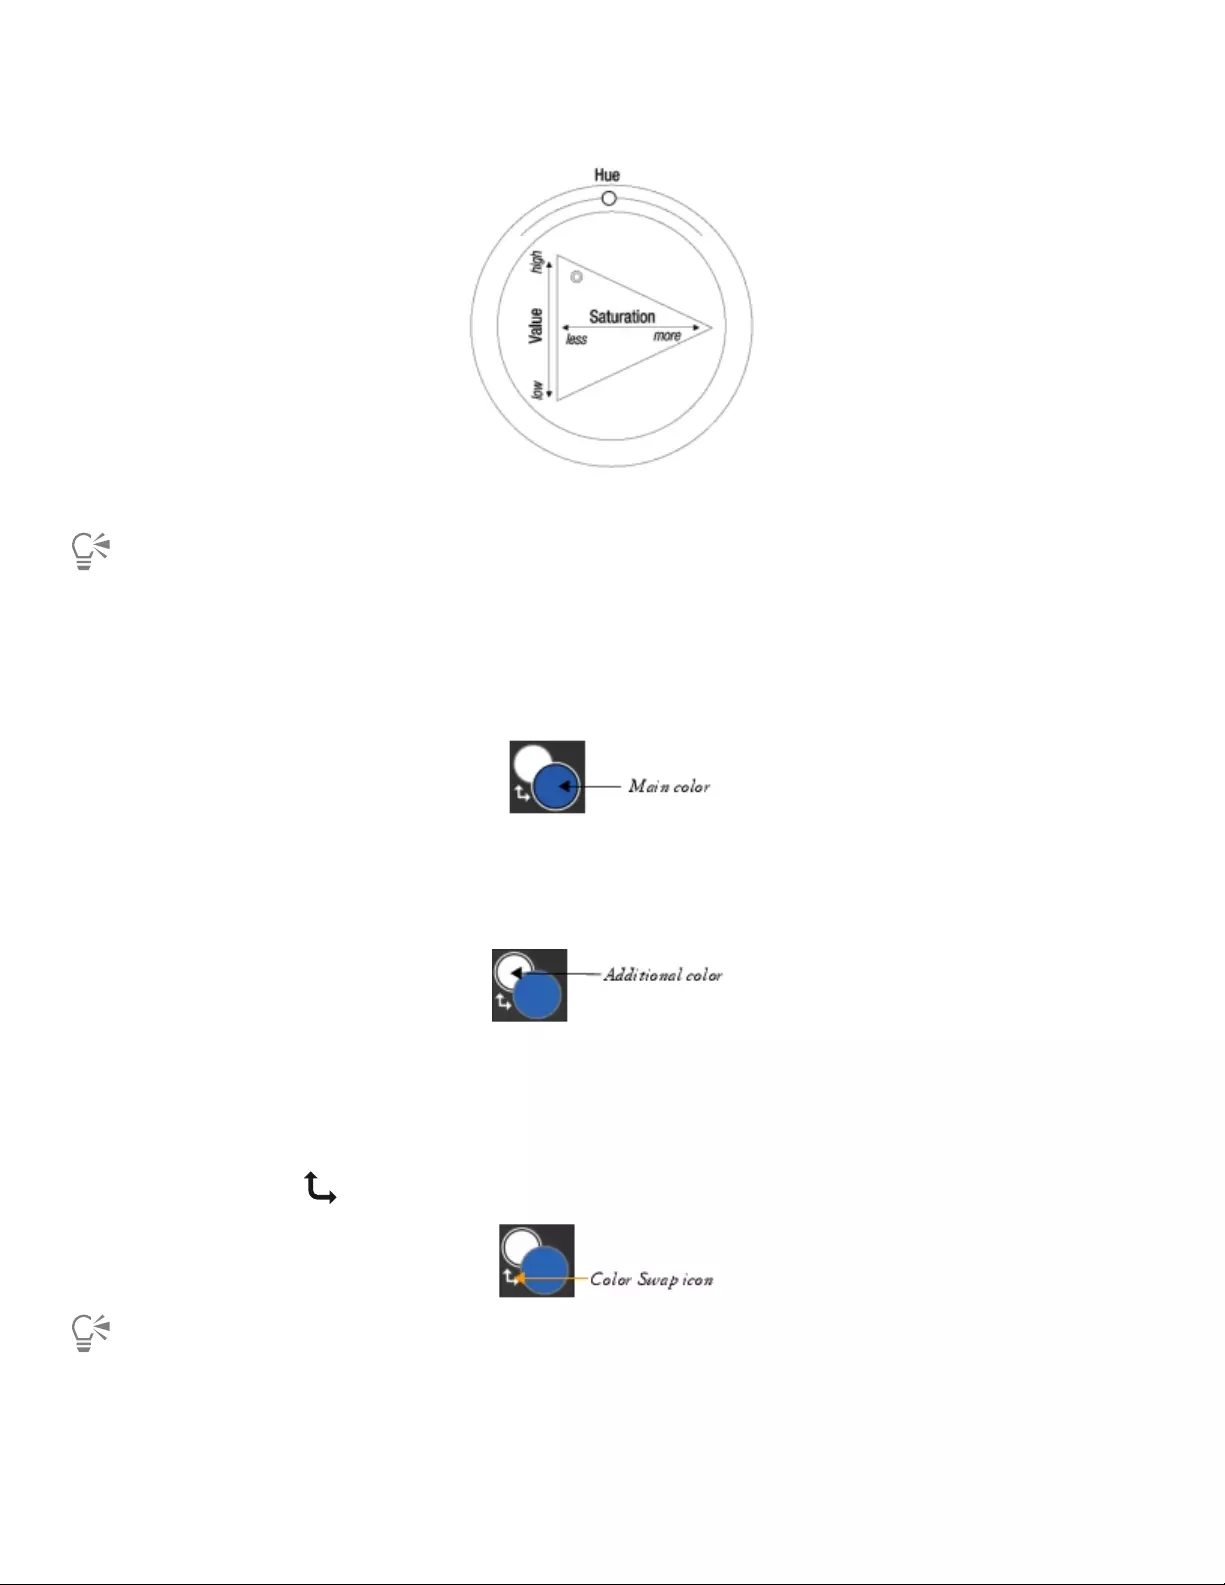
252 | Corel Painter 2022 User Guide
Drag in the Hue Ring to select a hue. Drag in the Saturation/Value Triangle to pick the saturation.
You can also select a hue by clicking anywhere on the Hue Ring (in the Standard Colors view) or on the hue indicator (in the Small
Colors view).
To choose the Main color
• In the Color panel, click the front swatch, and choose a color.
Click the front swatch to set the Main color.
To choose the Additional color
• In the Color panel, click the back swatch, and choose a color.
Click the back swatch to set the Additional color.
To work with the Main color, click the front swatch to reselect it.
To switch between the Main and Additional colors
•Click the Color Swap icon in the lower-left corner of the Color Selector.
You can also switch between the Main color and the Additional color by pressing Shift + S or Shift + X.
Color | 253
To switch between RGB and HSV values
1Choose Window Color Panels Color Panel (Full View).
2Click the Color options button , and choose one of the following options:
•Display as RGB
•Display as HSV
3Move the sliders to adjust the values, or type new values in the boxes.
You can preview the new color in the Main Color (front) swatch and the Additional Color (back) swatch .
Resizing the Color panel
You can customize the Color panel by changing its width and height. For instance, you can increase the panel size in order to select colors
more accurately, and then decrease the panel size in order to focus on the canvas. When the Color panel is in full view, you can change
both its width and height. When the Color panel is in compact view, you can change only its width. For detailed information about resizing
panels, see “To resize a panel or palette” on page 80.
Showing or hiding Color panel components
You can show or hide the Color panel components.
To show or hide the color wheel
1Choose Window Color Panels Color Panel (Full View).
2Click the Color options button , and choose Color Wheel.
A check mark indicates that it is displayed.
To show or hide the color sliders
1Choose Window Color Panels Color Panel (Full View).
2Click the Color options button , and choose Color Sliders.
A check mark indicates that it is displayed.
To show or hide the Clone Color button
•In the Color panel, click the Color options button , and choose Clone Color Button.
A check mark indicates that it is displayed.
Using the color selector
The color selector is a floating color palette that displays in the document window and allows you to view and choose colors in the context
of your image.

254 | Corel Painter 2022 User Guide
Display the color selector over your image to choose colors based on the colors in your image. Artwork by Skip Allen
The color selector is similar to the Color panel and consists of two components: the Hue Ring and the Saturation/Value Triangle.

Color | 255
The Hue Ring (1) lets you choose a color. The Saturation/Value Triangle (3) lets you specify the intensity of the
color as well as, black, white, or shades of gray. The current color (2) is displayed in a round swatch to the left
of the Saturation/Value Triangle. The Options button (4) lets you access useful commands for unpinning the
color selector, enabling Clone Color, swapping the main and additional colors, and enabling left-handed mode.
Saturation levels can be set from left to right. Dragging or clicking to the right increases the saturation and produces purer colors within the
predominant hue. Dragging or clicking to the left reduces the level of color saturation, producing «muddier» or grayer colors.
Values can be set from top to bottom. The top of the triangle is the highest value (white), and the bottom is the lowest value (black).
You can preview a new color before selecting it. When you interact with the Hue Ring or the Saturation/Value triangle in the color selector,
the left half of the color swatch displays a preview of the new color and the right half shows the existing color.
You can also enable the Clone Color option from the color selector. For more information, see “Cloning color” on page 259.
The color selector is available both as a temporal palette that disappears after you pick a color and click in the document window and as
a palette that can stay open as long as you need it. You can easily move the color selector in the document window and resize it to take a
closer look at colors. You can also configure the color selector for left-handed artists.
To display the color selector
• Press Command + Option + 1 (macOS) or Ctrl + Alt + 1 (Windows).
You can customize the keyboard shortcut for displaying the color selector by choosing Corel Painter 2022 menu Preferences
(macOS) or Edit Preferences (Windows), and choosing Customize Keys. In the Customize Keys dialog box, choose Other from

256 | Corel Painter 2022 User Guide
the Shortcuts for (macOS) or Shortcuts (Windows) list box, click Toggle Color Selector, and enter a new shortcut key in the
Shortcut column and click OK.
When you display the color selector for the fist time, it appears in the center of the document window; every subsequent time, it
appears where you last placed it.
When unpinned, the temporal color selector appears under your cursor.
If you are using a Wacom tablet, you can also assign a shortcut to the stylus button.
You can also display the temporal color selector by double-clicking the Main or Additional Color swatches in the Color panel.
The Main Color and Additional Color swatches in the Color panel
To display the color selector in the Simple layout (Window Layout Simple), you can click the Color Selector button in
the toolbox.
By default, the Color Selector tool is available only in the toolbox of the Simple layout. To make it available in all layouts, you
can add it to a custom palette. For information about creating custom palettes, see “Creating and modifying custom palettes” on
page 85.
To pin the color selector
•In the color selector, click the Options menu , and choose Pin.
A check mark indicates that the color selector is pinned.
To choose a color on the color selector
1In the color selector, click a color on the Hue Ring.
2Inside the Hue Ring, click the Saturation/Value Triangle to set the exact shade that you want.
The color is displayed as the current color.
To switch between the Main and Additional colors when using the color selector, click the Options menu , and choose Swap
Colors.
To resize the color selector
•Position the cursor over the clear edge of the color selector and when the crosshair cursor appears, drag until the color selector is
the size you want.
To move the color selector
• Click anywhere in the grab area and drag the color selector to a new position.
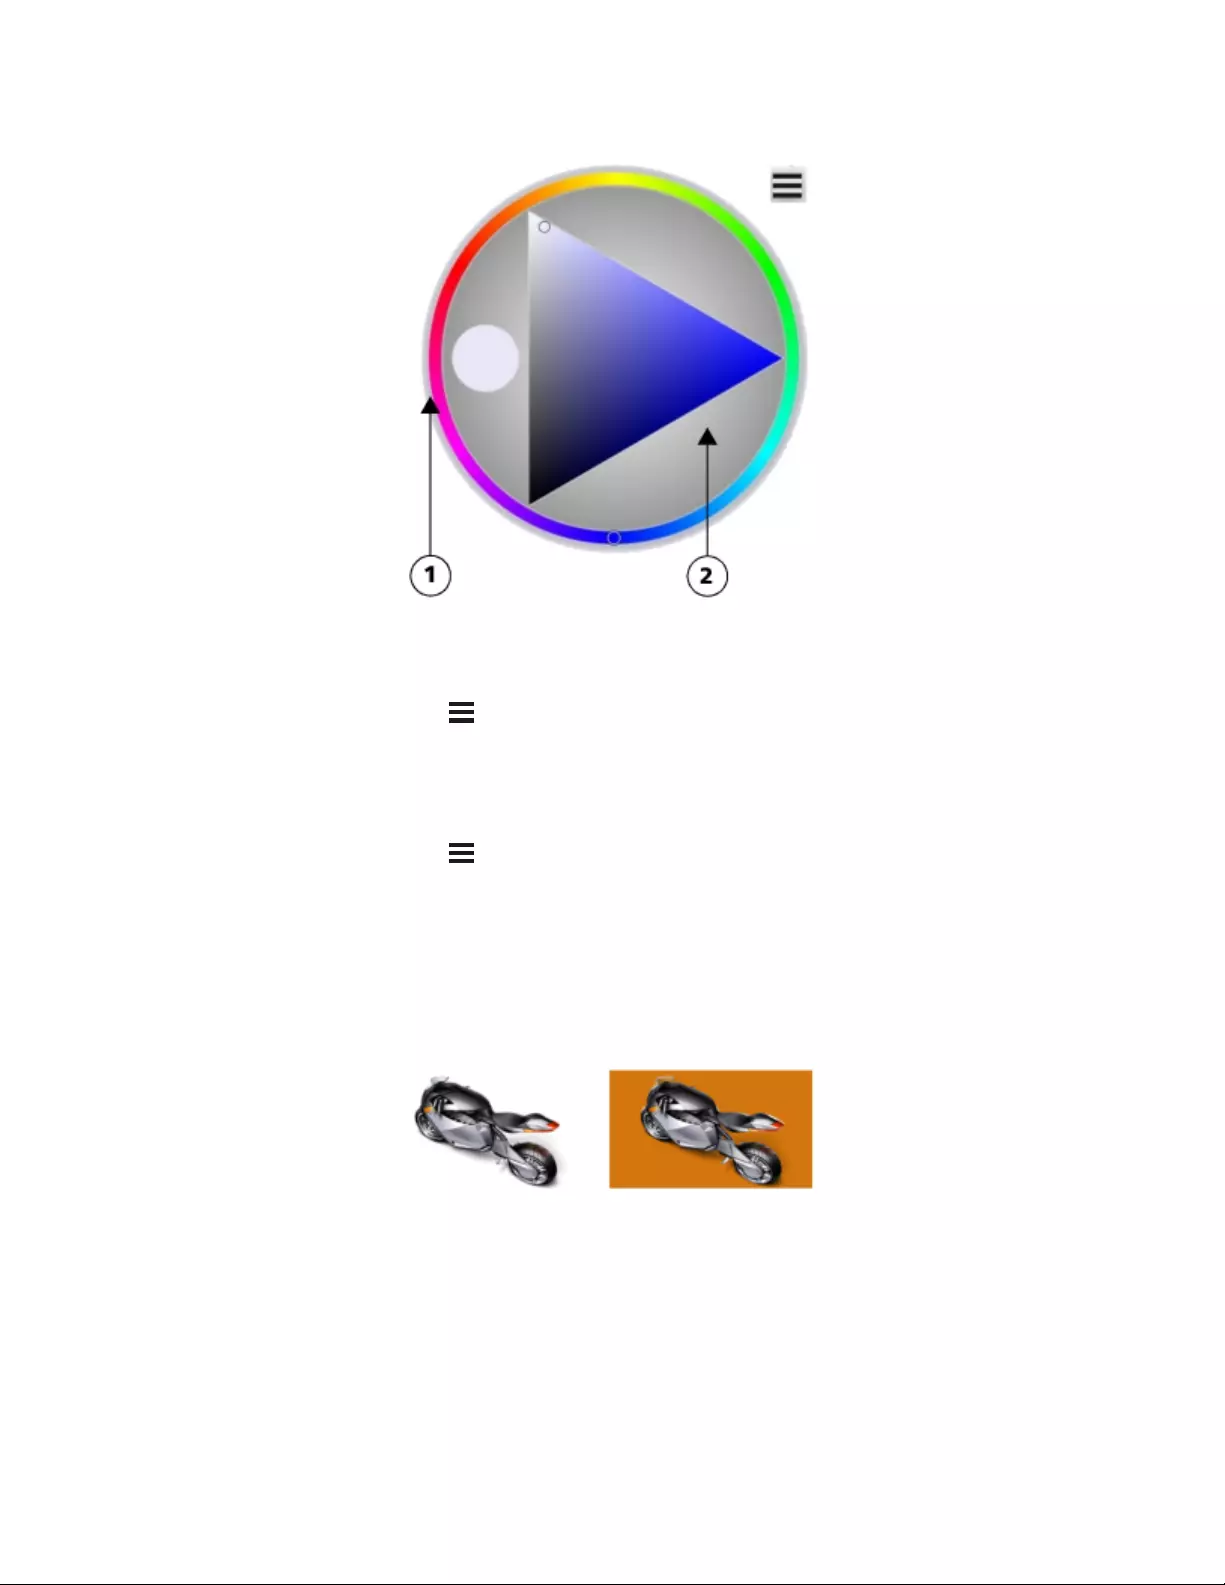
Color | 257
The resize (1) and grab area (2) of the color selector
To enable Clone Color in the color selector
•In the color selector, click the Options menu , and choose Use Clone Color.
A check mark indicates that it is enabled.
To enable left-handed mode in the color selector
•In the color selector, click the Options menu , and choose Left-Handed.
A check mark indicates that it is enabled.
Changing the canvas color
You can change a document’s canvas color — the color of the background canvas — at any time. However, any content or brush marks
currently on the canvas will be deleted, so it is recommended that you only change the color of a blank canvas.
An example of changing the canvas color
To change the existing canvas color
1Choose a Main Color from the Color panel.
2Choose Canvas Set Canvas Color.
3In the Layers panel, select the Canvas.
4Choose Select All, or press Command + A (macOS) or Ctrl + A (Windows), and then press Delete.
The new canvas color is displayed.

258 | Corel Painter 2022 User Guide
Do not use a bleach variant to expose the new canvas color unless the canvas color is white. Bleach variants erase to white,
regardless of the canvas color.
Sampling colors from images
You can select, or sample, a color from an existing image so that you can apply it to other areas in an image. You can sample a color from
one or more selected layers or from all visible layers. By default, you sample a single pixel from the image window. In addition, you can
sample pixels from a selected area. When you sample color from an area, Corel Painter averages the colors of pixels in the selected area. You
can set the sample area size to 3 × 3, 5 × 5, 11 ×11, 31 × 31, 51 × 51, and 101 × 101 pixels.
To sample a color from an image
1On the Color Selector in the toolbox, click the Main Color or Additional Color.
2Click the Dropper tool in the toolbox.
3Choose an option from the Sample Size list box on the property bar.
•Point sample — lets you sample the color of a single pixel
•3 × 3 — lets you sample the average color value in a 3 × 3 pixel area
•5 × 5 — lets you sample the average color value in a 5 × 5 pixel area
•11 × 11 — lets you sample the average color value in a 11 × 11 pixel area
•31 × 31 — lets you sample the average color value in a 31 × 31 pixel area
•51 × 51 — lets you sample the average color value in a 51 × 51 pixel area
•101 × 101 — lets you sample the average color value in a 101 × 101 pixel area
4Choose an option from the Sample list box on the property bar.
•Selected layer(s) — lets you sample a color from the active layer or one or more selected layers
•All Visible Layers — lets you sample a color from all underlying layers that are visible
5Perform a task from the following table.
To Do the following
Sample a color from the active layer Click in the image.
Sample a color from selected layers Select the layers in the Layers panel and click in the image.
Sample color from all visible layers Click in the image.
The Dropper tool does not pick up color in areas of transparency; it returns the last color that you sampled.
The Dropper tool picks up visible color only; it cannot be used to select a hidden color.
The Dropper tool works with the Brush, Crop, Pen, Rectangular Shape, Oval Shape, Text, Shape Selection, Scissors, Add Point,
Remove Point, Convert Point, and Paint Bucket tools.
Color | 259
You can quickly access the Dropper tool from the toolbox by clicking the Brush tool in the toolbox, and then pressing Option
(macOS) or Alt (Windows) or by pressing D on the keyboard.
Cloning color
Cloning a color lets you pick up dabs of color from an original (source) image and apply the same color to a clone (destination). Brushes
that use stamp-based dab types produce a color based on samples of color from the clone source, which results in an approximation of the
original color. Brushes that use rendered dab types sample several colors and load each color onto individual bristles, which allows startlingly
realistic results. For more information, see “Painting in the clone” on page 195.
Creating two-color brushstrokes
Selected brush categories include variants that support two-color brushstrokes. For example, the Acrylics, Calligraphy, and Chalk categories
include variants that allow you to produce two-color brushstrokes. They are also known as noncomputed dab types, which are stamp-based,
as opposed to rendered. For more information, see “General controls: Dab types” on page 344.
You can choose the two colors used by the brushstroke by specifying both a Main and an Additional Color. If you have only a Main Color
selected, you produce a solid-color brushstroke. You can then use the Color Expression panel to determine when Corel Painter uses one
color or the other. For more information, see “Setting Color Expression” on page 274.
You can use two colors at once in a brushstroke.
To set up a two-color brushstroke
1In the Color panel, click the Main Color (front) swatch .
2Click a color on the Saturation/Value Triangle.
3Click the Additional Color (back) swatch .
4Click a color on the Saturation/Value Triangle.
5Choose Window Brush Control Panels Brush Media Color Expression.
Displaying the Color Expression panel helps you determine which brush variants support two-color brushstrokes.
6Click the Brush Selector on the Brush Selector bar.
7Click a brush category and a brush variant.
If the Expression list box is grayed out in the Color Expression panel, the brush variant does not support two-color brushstrokes.
8In the Color Expression panel, choose Direction from the Expression list box.

260 | Corel Painter 2022 User Guide
For information about using the Color Sets panel, see “Working with color sets” on page 267.
For information about using Color Expressions, see “Setting Color Expression” on page 274.
For different results, try different Expression settings. For example, choose Pressure to create color transitions based on the
pressure you apply with your stylus.
You can also choose a color from a color set. For more information, see “Working with color sets” on page 267.
Exploring the Mixer panel and mixing controls
The Mixer panel lets you mimic the experience of mixing colors on a traditional artist’s palette. In the Mixer panel, you can access color
swatches and various tools that let you mix colors. You can then apply two or more colors to the Mixer pad, the mixing area at the center of
the Mixer panel, and then blend them together to create a new color.
You can save, load, and reset colors in the Mixer panel. In addition, you can save colors as Mixer swatches and save colors to color sets.
Understanding the Mixer panel controls
The controls in the Mixer panel are used to apply, mix, sample, and clear color on the Mixer pad.
Mixer panel tools
The following table describes all of the Mixer panel tools.
Mixer panel tool Description
Dirty Brush Mode tool
Lets you apply colors that were mixed in the Mixer panel to
the canvas. The Dirty Brush Mode tool is active by default and
can be used with brush variants that support mixing. For more
information, see “Mixing, sampling, and applying colors from the
Mixer pad” on page 262.
Color | 261
Mixer panel tool Description
Apply Color tool Acts as a loaded paint source; applies color to the Mixer pad. Color
loaded on the Apply Color tool blends with color already in the
Mixer pad.
Mix Color tool Mixes colors already in the Mixer pad; does not add new colors to
the Mixer pad
Sample Color tool Samples color in the Mixer pad for use on the canvas. The sampled
color becomes the Main Color in the Color panel.
Sample Multiple Colors tool Samples multiple colors in the Mixer pad. The size of the sample
area is determined by the Change Brush Size slider. You can use
the sampled color on the canvas.
Zoom tool Lets you zoom in to areas in the Mixer pad. To zoom out, press
Command (macOS) or Ctrl (Windows), and click in the Mixer pad.
Pan tool Lets you scroll through the Mixer pad
Using the Clear and Reset Canvas button
The Clear and Reset Canvas button erases the contents of the Mixer pad and resets the zoom level to 100%. It does not, however,
reset the brush size.
Using the Change Brush Size slider
The Change Brush Size slider lets you increase or decrease the size of the Apply Color tool and the Mix Color tool. The Change Brush
Size slider also lets you set the size of the sample area in the Mixer pad when sampling with the Sample Multiple Colors tool. If you adjust
the Change Brush Size slider, the new value is retained when you reopen the application.
Displaying and resizing the Mixer panel
To display the Mixer panel, you can use the Window menu, or you can use a keyboard shortcut. You can start mixing colors using the
default Mixer Pad or you can load one of the inspirational Mixer Pads that were designed for you by various expert Corel Painter artists.
If you need more space to mix your colors, you can undock the Mixer panel and resize it. Increasing the size of the Mixer panel also gives
you access to additional Mixer swatches. For more information, see “Changing and saving the Mixer color swatches” on page 265.
You can also change the background of the Mixer pad, the surface on which you mix color.

262 | Corel Painter 2022 User Guide
Mixer panel before (left) and after (right) resizing
To display the Mixer panel
•Choose Window Color Panels Mixer.
You can also display the Mixer panel by pressing Command + 2 (macOS) or Ctrl + 2 (Windows).
To choose a Mixer Pad
1Choose Window Color Panels Mixer.
2Click the Mixer options button , and choose one of the following:
•Restore Jeremy Sutton’s Mixer Pad
•Restore John Malcom’s Mixer Pad
•Restore Karen Bonaker’s Mixer Pad
•Restore Skip Allen’s Mixer Pad
•Restore Default Mixer
To resize the Mixer panel
• With the Mixer panel undocked, drag the resize handle at the lower-right corner of the main window of the panel.
To change the Mixer pad background
1Choose Window Color Panels Mixer.
2Click the Mixer options button , and choose Change Mixer Background.
3In the Color dialog box, choose a background color.
Mixing, sampling, and applying colors from the Mixer pad
You can create a color in the Mixer panel and then sample it to apply it to the canvas.
In addition, some brush variants that support mixing allow you to mix colors in the Mixer panel and apply them directly to the canvas
without sampling, which mimics the traditional experience of mixing color on an artist’s palette. The brush variants that support mixing use
the following dab types: Camel Hair, Flat, Bristle Spray, Watercolor Camel Hair, Watercolor Flat, and Watercolor Bristle Spray. The dab
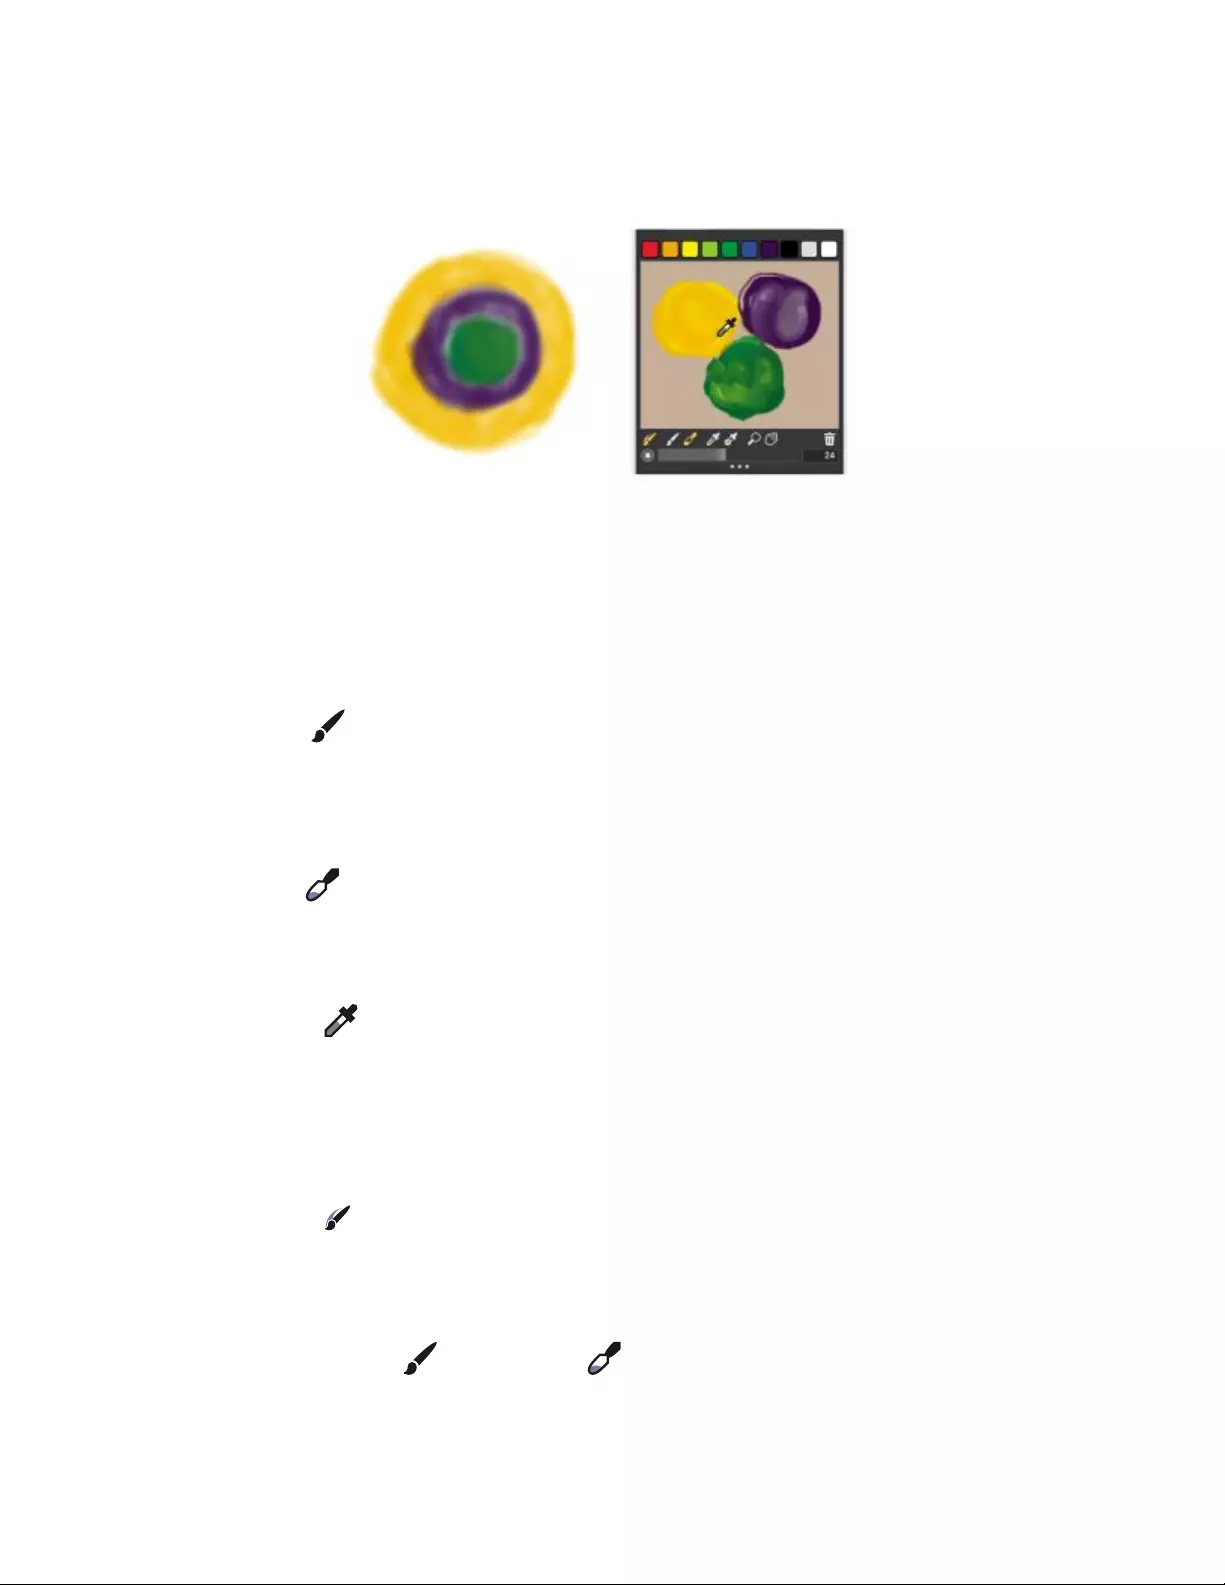
Color | 263
type for a brush variant appears in the General panel of the Brush Controls palette. These brush variants also allow you to sample multiple
colors simultaneously to produce multi-colored brushstrokes.
You can sample multiple colors in the Mixer panel and paint directly on the canvas.
When you have finished mixing and sampling colors, you can clear the mixer pad, or save it as a mixer pad (MXS) file that you can open and
use later. For more information, see “Saving the Mixer pad” on page 266.
To mix colors
1Choose Window Color Panels Mixer.
2Click the Apply Color tool in the Mixer panel.
3Choose a color from a Mixer swatch, and paint on the Mixer pad.
4Choose a second color from the Mixer swatch, and paint on the Mixer pad.
5Do one of the following:
• Use the Apply Color tool to add to and blend the colors.
•Use the Mix Color tool to blend the colors.
To sample a color from the Mixer pad
1Choose Window Color Panels Mixer.
2Click the Sample Color tool .
3On the Mixer pad, click the color you want to sample.
The sampled color becomes the Main Color in the image.
To paint from the Mixer panel
1Mix the color you want in the Mixer panel.
The Dirty Brush Mode tool is active by default. If it is not active, click the Dirty Brush Mode tool.
2Click the Brush Selector on the Brush Selector bar.
3Choose a brush category and variant that supports mixing.
4Paint in the document window.
The last color on the Apply Color tool or Mix Color tool is used in the brushstroke.
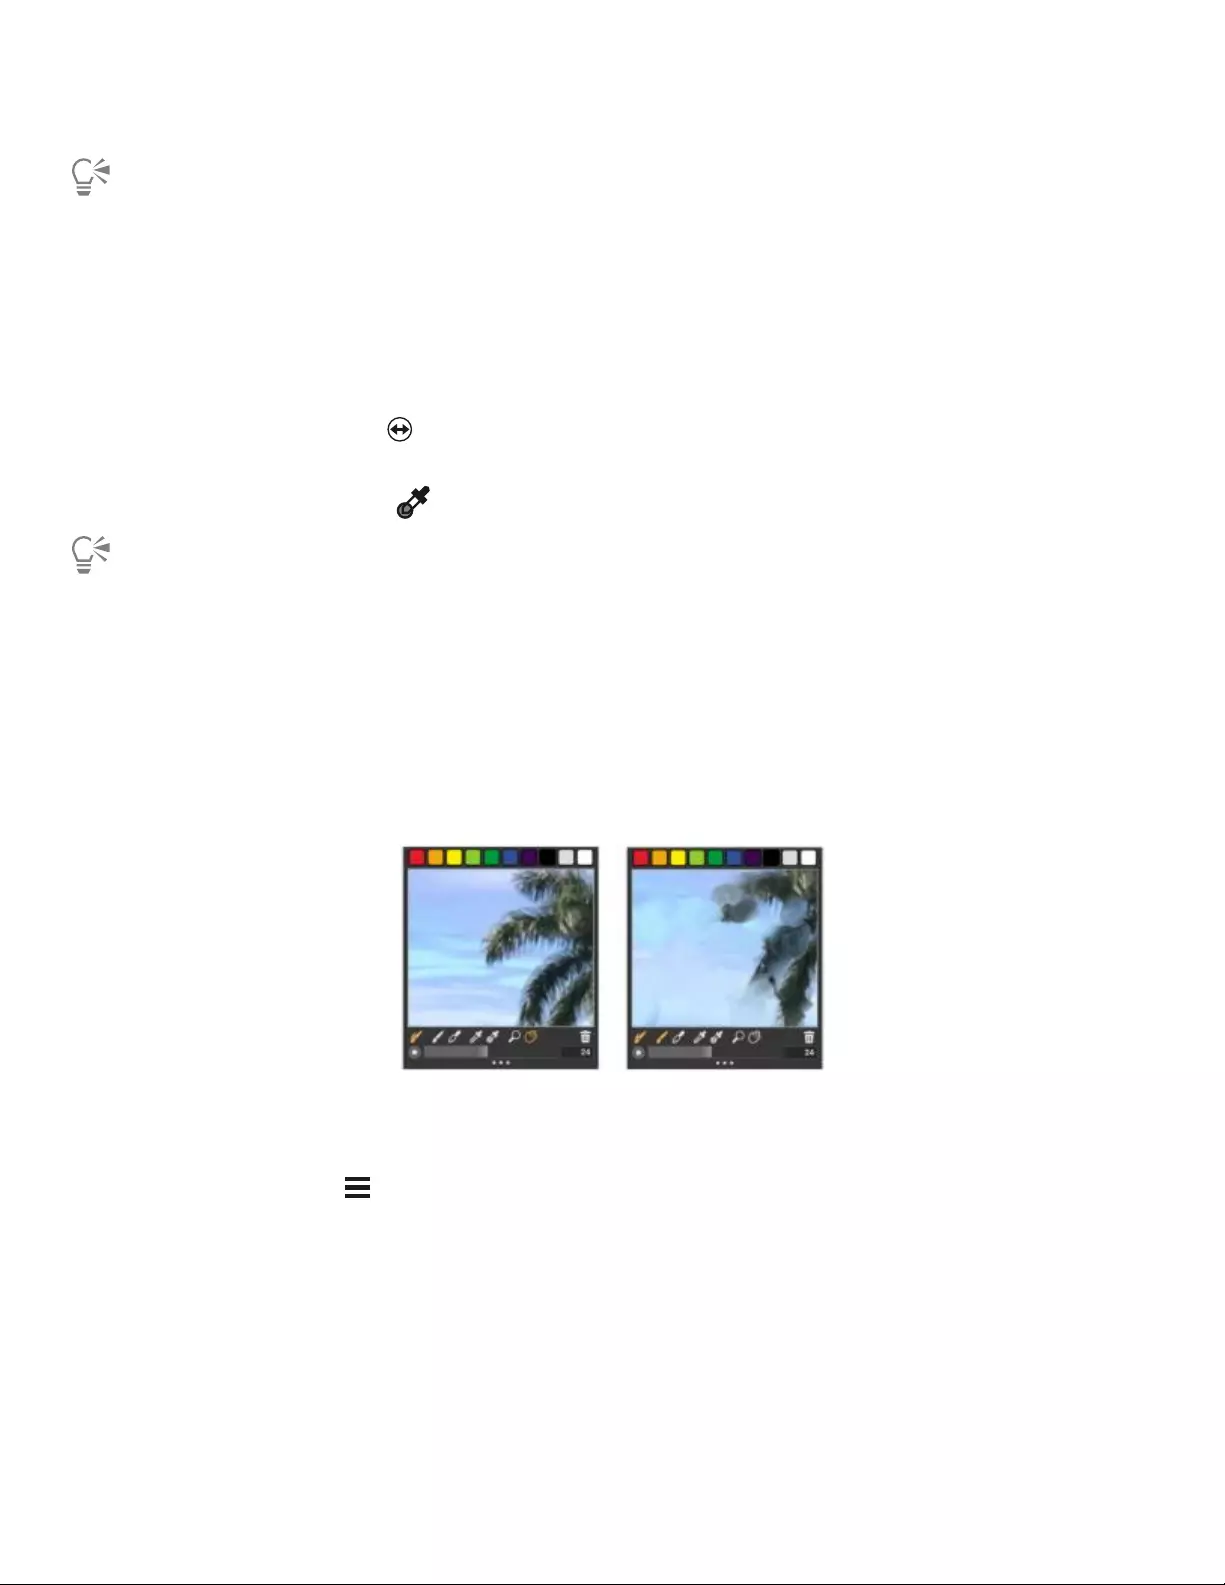
264 | Corel Painter 2022 User Guide
You can verify if a brush variant supports mixing by clicking Window Brush Control Panels General, and ensuring that one
of the following dab types is selected: Camel Hair, Flat, Bristle Spray, Watercolor Camel Hair, Watercolor Flat, and Watercolor
Bristle Spray.
To sample multiple colors
1In the Brush Selector, choose a brush category and variant that supports mixing.
2Mix the color you want in the Mixer panel.
3Move the Change Brush Size slider to set the size of the sample area.
The size of the sample area is displayed to the right of the slider and is measured in pixels.
4Click the Sample Multiple Color tool , and click the area of the Mixer pad that you want to sample.
You can verify if a brush variant supports mixing by clicking Window Brush Control Panels General, and ensuring that one
of the following dab types is selected: Camel Hair, Flat, Bristle Spray, Watercolor Camel Hair, Watercolor Flat, and Watercolor
Bristle Spray.
Opening images in the Mixer panel
You can now load an external image file in the Mixer panel so that you can sample and mix the image colors. For example, you can open a
photo and then blend its colors directly in the Mixer pad to create new colors. You can open PNG, RIFF, TIFF, JPEG, and PSD files in the Mixer
panel.
An example of importing a photo in the Mixer panel (left) to transform the photo into a Mixer Pad
To open an image in the Mixer panel
1Click the Mixer options button , and choose Open Mixer Pad.
2In the Open Mixer Pad dialog box, choose the image file format from the list box.
3Browse to the folder where the image file is stored.
4Choose the image, and click Open.
Color | 265
Changing and saving the Mixer color swatches
You can store commonly used colors in Mixer color swatches at the top of the Mixer panel and then use these colors on the Mixer pad. A
series of colors appears by default; however, this color series can be changed to suit the individual preferences of the artist. You can save the
Mixer color swatches that you create.
To change a Mixer swatch color
1Choose Window Color Panels Mixer.
2In the Mixer panel, click the Sample Color tool , and choose a color for the swatch.
3Press Command (macOS) or Ctrl (Windows) and then click the Mixer swatch that you want to change.
The new color appears in the Mixer swatch.
To save colors in the Mixer panel
1Choose Window Color Panels Mixer.
2Click the Mixer options button , and choose Save Mixer Colors.
3In the Save Mixer Colors dialog box, type a name for the Mixer colors and choose where you want to save the Mixer swatches (MSW)
file.
4Click Save.
Saving Mixer panel colors to a color set
You can add individual colors that you saved as color swatches to the currently selected color set. For example, if you mixed colors that you
are particularly happy with, you can save them to a color set. You can also create a color set from the colors on the Mixer pad. You can also
choose the maximum number of colors that you want to retain from the Mixer pad. For more information, see “Working with color sets” on
page 267.
To add a Mixer color swatch to a color set
1In the Mixer panel, click the Sample Color tool , and choose the Mixer swatch that you want to save to a color set.
2Click the Mixer options button , and choose Add Swatch to Color Set.
The selected color is added to the current color set.
To create a color set from the Mixer Pad
1In the Mixer panel, click the Mixer options button , and choose New Color Set from Mixer Pad.
2In the New Colorset dialog box, type a name in the Name text box.
3Adjust the Max Colors slider to set the maximum number of colors that you want to add to the color set.
4Click OK.
5To access the new colors, choose Window Color Panels Color Sets.
266 | Corel Painter 2022 User Guide
Clearing and resetting Mixer panel colors
There are various options for clearing and restoring both the Mixer pad and Mixer color swatches. You can clear all colors from the Mixer
pad to start mixing colors from scratch. You can also restore the Mixer pad to the default colors.
In addition, you can reset the Mixer color swatches to the factory default colors.
You can revert to the factory default color swatch colors.
To clear the Mixer pad
1Choose Window Color Panels Mixer.
2Do one of the following:
•Click the Mixer options button , and choose Clear Mixer Pad.
•In the Mixer panel, click the Clear and Reset Canvas button .
To restore the default Mixer pad
•Click the Mixer options button , and choose Restore Default Mixer.
To reset Mixer color swatches
•Click the Mixer options button , and choose Reset Mixer Colors.
Saving the Mixer pad
When you have finished mixing and sampling colors, you can save the Mixer pad contents as a Mixer pad (MXS) file that you can open and
use later. In addition, you can also save a Mixer pad as a PNG file.
To save a new version of the Mixer pad
1Choose Window Color Panels Mixer.
2Click the Mixer options button , and choose Save Mixer Pad.
3In the Save Mixer Pad dialog box, type a name for the Mixer colors, and choose where you want to save the Mixer pad (MXS) file.
4Click Save.
To save a Mixer pad as a PNG file
1Choose Window Color Panels Mixer.
2Click the Mixer options button , and choose Save Mixer Pad.
3In the Save Mixer Pad dialog box, type a name in the File Name box.
4Choose choose PNG from the Save As Type list box.
5Click Save.

Color | 267
Loading color swatches and Mixer pad files
You can load previously saved Mixer color swatches or Mixer pad files (MXS) in the Mixer panel.
To load colors in the Mixer panel
1Choose Window Color Panels Mixer.
2Click the Mixer options button , and choose Load Mixer Colors.
3In the Load Mixer Colors dialog box, choose the Mixer swatch (MSW) file that you want to load.
4Click Open.
You can also load a color set in the Mixer panel by clicking the Mixer options button , choosing Load Mixer Colors. In the
Load Mixer Colors dialog box, go to Corel\Painter 2022\Support Files\Color Sets\[Color Set Name], type *.* in the File name
box, and press Enter. A list of hidden user files appears. Double-click a color set.
To load a saved version of the Mixer pad
1Choose Window Color Panels Mixer.
2Click the Mixer options button , and choose Open Mixer Pad.
3In the Open Mixer Pad dialog box, choose the Mixer pad (MXS) file that you want to open.
4Click Open.
Working with color sets
Color sets are collections of colors that help you organize and store colors. Some color sets are organized by both name and color
relationship. Corel Painter provides several color sets — Painter Colors, macOS and Windows system palettes, and the PANTONE MATCHING
SYSTEM are a few. You can open any of the available color sets, choose a color from the color set, and then apply it to a brushstroke. You
can open multiple color sets at a time.
In addition, you can import a color set to access additional colors. For example, you can import a color set that you created in a previous
version of Corel Painter.
If you need to find a specific color in a color set, you can search for the color by name or have Corel Painter find the color that comes closest
to matching the current color.
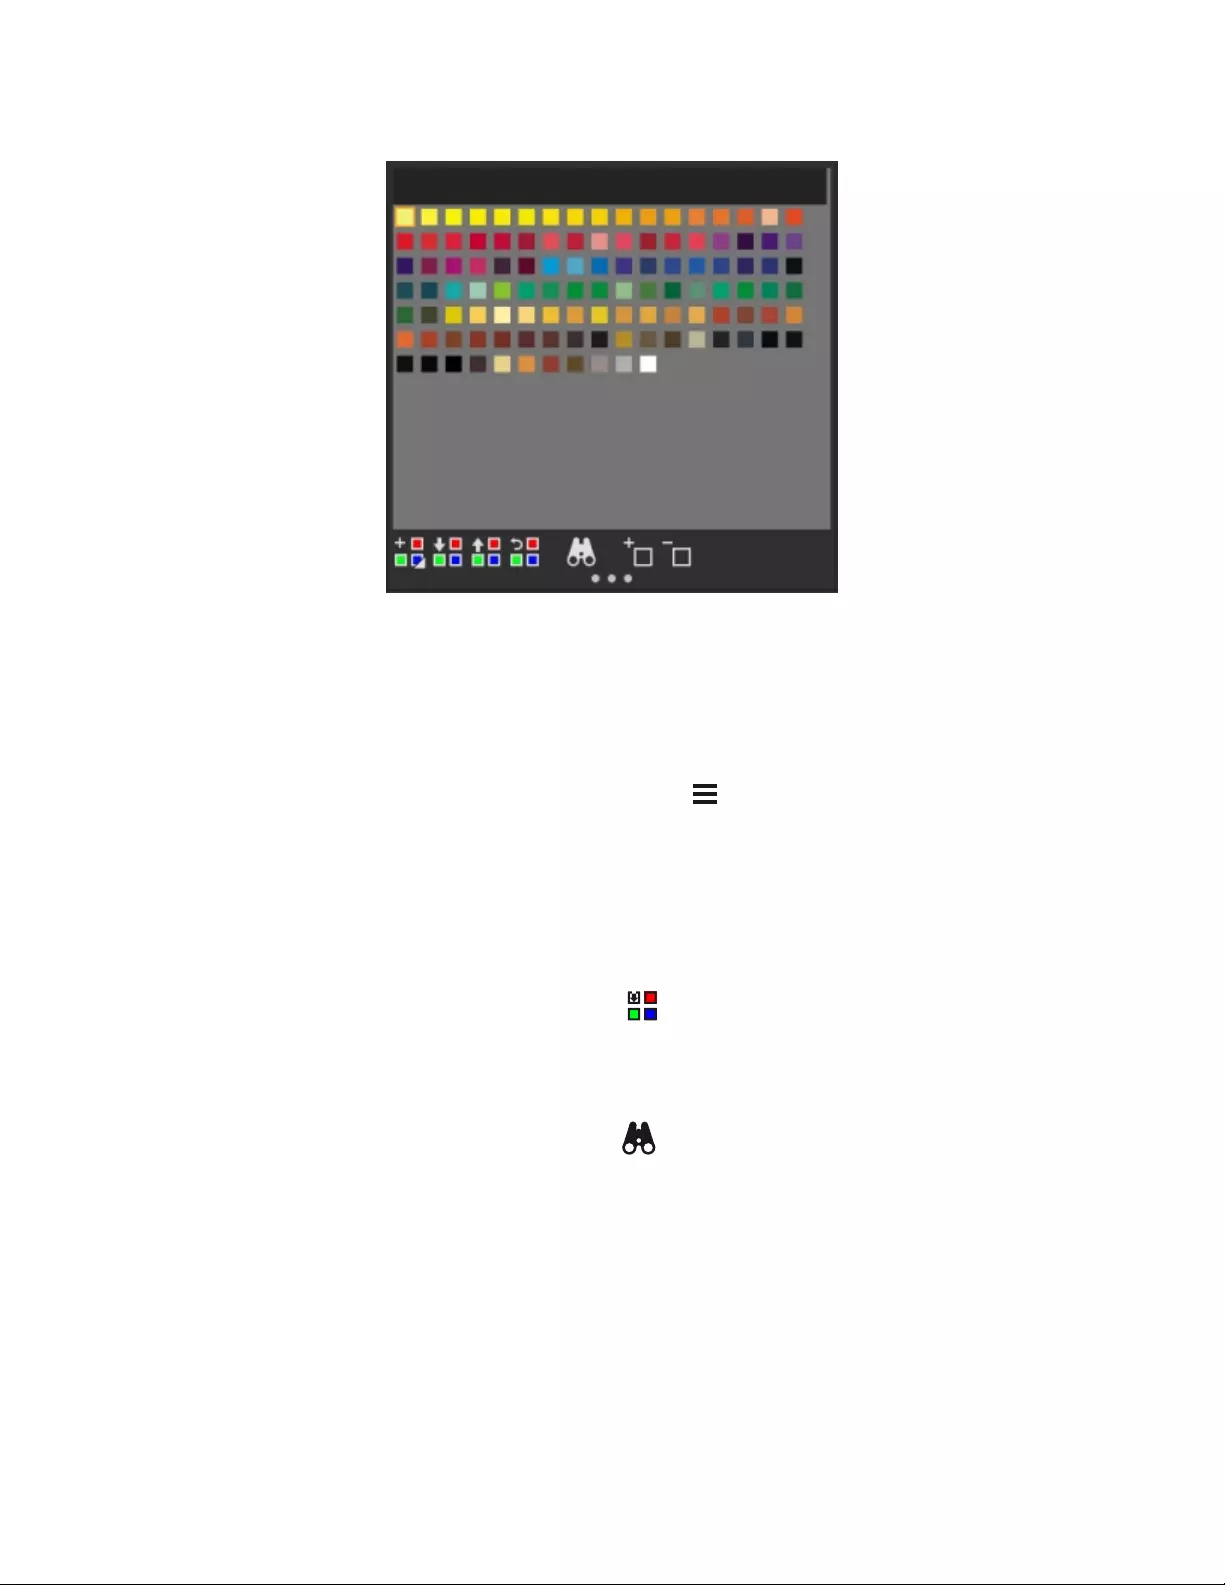
268 | Corel Painter 2022 User Guide
Color Sets panel
To display the Color Sets panel
•Choose Window Color Panels Color Sets.
To open a color set
•In the Color Set Libraries panel, click the Color Set Libraries options button , and choose Color Set Libraries, and choose a color set
from the list.
To choose a color from a color set
• In the Color Set Libraries panel, click a color.
To import a color set
1In the Color Set Libraries panel, click the Import Color Set button .
2In the Select Color Set dialog box, click the Color Sets folder, choose a color set, and click Open.
To find a color in a color set
1In the Color Set Libraries panel, click the Search for Color button .
2In the Find Color dialog box, do one of the following:
• Enable the By name option, and type a name in the box.
• Enable Closest to current color.
3Click Begin.
4Click OK when the desired color is found.
If the color set is visible, Corel Painter surrounds the found color with a selection frame.
If you search for a color by name, but a color with that name is not found, the OK button is not available (it is grayed out).
Color | 269
Customizing the layouts of color sets
You can arrange colors in a color set in various ways. You can sort by hue, luminance, and saturation; determine the size of color swatches;
decide whether to have grid lines; and display the colors in a list in order to view the color names.
To change how colors are sorted
1Choose Window Color Panels Color Sets.
2In the Color Set Libraries panel, click the Color Set options button and choose Sort Order.
3Choose one of the following options:
•Saved — sorts colors in the order in which they were originally entered.
•HLS — sorts colors by hue, luminance, and saturation.
•LHS — sorts colors by luminance, hue, and saturation.
•SHL — sorts colors by saturation, hue, and luminance.
To adjust the size of the color swatches
•In the Color Set Libraries panel, click the Color Set options button , choose Color Set Library View, and choose one of the
following options:
•Small
•Medium
•Large
To display the color swatches as a list
•In the Color Set Libraries panel, click the Color Set options button , choose Color Set Library View, and choose List.
Creating and exporting color sets
You can create color sets to control the colors in particular projects or to create groups of favorite painting colors. Creating clearly named
color sets can be very useful. For example, you could name a color set Shades of Purple, Hero Image, My Crayons, or Rollover Buttons — all
offering you easy access to recognizable color sets.
You can create color sets from
• an image
• a selection on an image
• a layer
• the Mixer panel
Once a color set is created, you can add additional colors to the color set. You can also export the color set.
To create a color set
1Choose Window Color Panels Color Sets.
2In the Color Set Libraries panel, click the New Color Set button , and choose one of the following options:
•New Color Set from Image — Includes all image colors in the color set. This option is available only if an image is open.
•New Color Set from Layer — Includes all colors that are found in the active layer in the color set. This option is available only if an
active layer is selected in the image.
270 | Corel Painter 2022 User Guide
•New Color Set from Selection — Includes all colors in the selected area of the image in the color set. This option is available only if
the image has an active selection.
•New Color Set from Mixer Pad — Includes all colors that are used in the Mixer panel in the color set.
3In the New Color Set dialog box, type a name in the Name text box.
4Adjust the Max Colors slider to set the maximum number of colors that you want to add to the color set.
For information about adding colors to a color set, see “Editing color sets” on page 270.
For more information about selecting colors, see “Choosing colors from the Color panel” on page 250.
To export a color set
1In the Color Set Libraries panel, click the Export Color Set button .
2Choose the name of the color set that you want to export from the Library list box.
3Click OK.
4Choose the drive and folder where you want to save the file.
If you want to rename the color set, type a name for the color set in the File name box.
5Click Save.
Editing color sets
You can customize color sets by adding, deleting, or replacing colors. You can also append colors to a color set. This is useful if you want to
use colors from multiple color sets. In addition, you can name or rename individual colors in a color set.
Naming colors in a color set can be useful. You can then search for a color by name, or annotate the colors you use, right in the document
window. For more information, see “To find a color in a color set” on page 268.
To add a color to a color set
1In the Color panel, choose a color.
2In the Color Set Libraries panel, choose the color set where you want to add the selected color.
3Click the Add Color to Color Set button .
You can also
Add a sampled color to a color set Click the Dropper tool in the toolbox, click a color in the
image, then click the Add Color to Color Set button .
Add a color from another color set Drag a color swatch from one color set to another.
To delete a color
1In the Color Set Libraries panel, choose a color and click the Delete Color from Color Set button .
2In the warning dialog box, click Yes.
Corel Painter deletes the chosen color from the color set.

Color | 271
To replace a color
1Choose the color you want to add from the Color panel, a color set, or an existing image.
2Hold down Command (macOS) or Ctrl (Windows), and click the color you want to replace.
The new color replaces the old one in the color set.
To show or hide a color
• Perform a task from the following table.
To Do the following
Hide a color Right-click a color swatch in the Color Set Libraries panel, and
choose Hide Color.
Show all hidden colors In the Color Set Libraries panel, click the Color Set options button
, choose Color Set Library View, and choose Show All Hidden
Items.
To name or rename a color
1Right-click a color swatch in the Color Set Libraries panel, and choose Rename Color.
2Type a color name in the New name box.
Color names can contain up to 31 characters.
To restore the default color set
•In the Color Set Libraries panel, click the Color Set options button , choose Restore a Default Color Set.
Working with color harmonies
Corel Painter lets you create a color harmony, a set of colors that work well together aesthetically. The resulting color scheme contains a set
of colors that are created based on the chosen mode, and its base color is the Main Color in the Color panel.
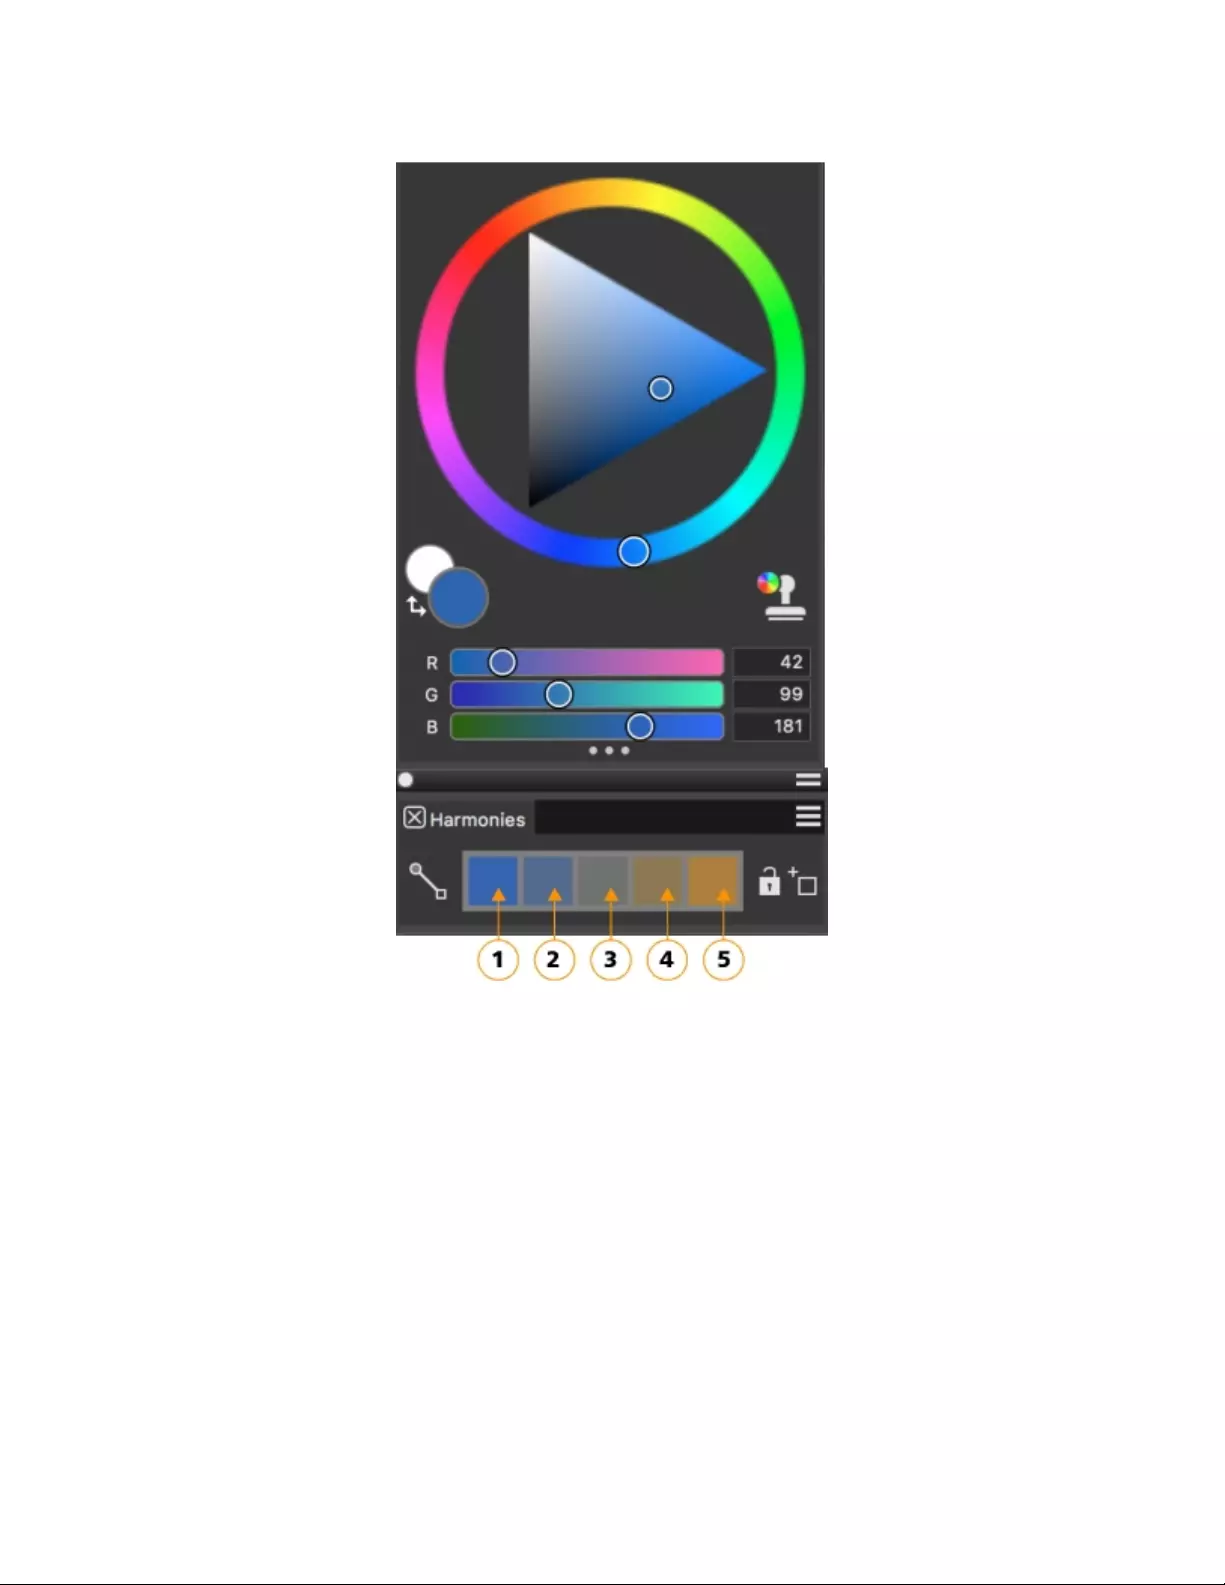
272 | Corel Painter 2022 User Guide
Warm and cold colors are created for vibrant and energetic color schemes. From left to right,
the five color swatches of the Complementary harmony are: Main color (1) and its direct
complementary color (5); (2), (3), and (4) are a blend of the two complementary colors.
Once you create a color harmony, you may choose to lock it to prevent changes to the colors. When a harmony is not locked, the colors in
the color harmony are linked to the Main Color in the color wheel. Changing the Main Color dynamically updates the swatches in the color
harmony, and vice versa, clicking a color harmony swatch updates the Main Color in the color wheel. When you lock a harmony, selecting
a new Main Color in the color wheel does not affect the color harmony colors, however, clicking a color harmony swatch still updates the
Main Color in the color wheel. When you unlock a color harmony, it is updated immediately based on the Main Color in the color wheel.
You can save a color harmony for future use. Color harmonies are saved as color sets and appear in the Color Set Libraries panel (Window
Color Panels Color Sets).
To create a color harmony
• Do one of the following:
• Choose a color in the Color panel.
• Double-click the Main Color or Additional Color swatches in the Color panel to display the floating color selector, and choose a color
in the context of your painting.
Color | 273
Corel Painter automatically applies the Complementary color harmony mode and creates a color palette, which appears in the
Harmonies panel.
If you select a swatch in the color harmony, the harmony is updated using that swatch as the base color.
To lock or unlock a color harmony
•Click the Lock button next to the color harmony.
To show or hide the color harmony swatches
•In the Harmonies panel, click the Color options button , and choose a color harmony option:
•Analogous Harmony — includes colors that are next to each other on the color wheel, creating clear and smooth color
schemes. The Main Color is the middle of five swatches.
•Complementary Harmony — balances the Main Color with the opposite color on the color wheel. Warm and cold colors
are created for vibrant and energetic color schemes. From left to right, the five color swatches are: Main color (1) and its direct
complementary color (5); (2), (3), and (4) are a blend of the two complementary colors.
•Split Complementary Harmony — balances the Main Color with colors that are situated close to the opposite end of the color
wheel, forming a triangle. This harmony rule usually creates color schemes of soft contrast. The Main Color is the leftmost of three
swatches.
•Tetradic Harmony — based on a pair of colors and their complements on the color wheel. This rule usually creates bold color
harmonies and requires careful planning when used. The Main Color is the leftmost of four swatches.
•Monochromatic Light Harmony — creates smooth color schemes that include five colors: the Main Color, which is the leftmost
color, and four variations that increase in lightness in increments of 10%
•Monochromatic Dark Harmony — creates smooth color schemes that include five colors: the Main Color, which is the leftmost
color, and four variations that increase in darkness in increments of 10%
To save a color harmony as a color set
1In the Harmonies panel, click the Add Swatches to Color Set button next to the color harmony.
2In the New Library dialog box, type a name in the Save As box, and click OK.
The new set appears at the bottom of the Color Sets Libraries panel (Window Color Panels Color Sets).
To show or hide the Harmonies panel
•Click Window Color Panels Harmonies.
Setting color variability
Color variability allows you to create brushstrokes of more than one color. Variability can be used to enhance the Natural-Media appearance
of your work. For more information, see “Color Variability controls” on page 410.

274 | Corel Painter 2022 User Guide
Setting Color Expression
Color expression determines where Corel Painter should use the Main or Additional Color in an image. For more information, see “Color
Expression controls” on page 412.
Loading multiple colors
Imagine the ability to load color at a bristle level, picking up different colors with each “hair” of a brush — as though filling tiny ink wells.
Imagine also the ability to move multiple colors along with a palette knife, dragging them across your canvas or paper. The Brush Loading
feature affects how paint comes off a brush and what happens to the pixels underneath.
When Brush Loading is not active, brushes interact with previously applied colors by sampling underlying pixels and then loading the brush
with one new color — the average of those that were sampled. With Brush Loading active, brushes can literally “pick up” existing colors,
hair by hair. This capability offers truer color interaction, astounding color variations, and better cloning results.
To paint with multiple colors
1Click the Brush Selector on the Brush Selector bar.
2Click a brush category and a brush variant.
3Choose Window Brush Control Panels General.
4Choose Static Bristle from the Dab Type list box.
5Choose Multi from the Stroke Type list box.
6Choose Window Brush Control Panels Brush Media Blending.
7In the Blending panel, enable the Brush Loading check box.
This step activates the brush’s ability to pick up underlying colors.
8Adjust the Resaturation and Bleed sliders.
The Bleed setting determines how much underlying paint is affected by the brushstroke. A higher Bleed setting, combined with a low
Resaturation setting, can enhance the Brush Loading feature. A resaturation value of 0, combined with different levels of bleed, will
cause your brush to smear image color, rather than deposit it. In this case, the lower the bleed, the longer the smear.
9Choose Window Brush Control Panels Brush Shape Spacing.
10 In the Spacing panel, adjust the Spacing and Min Spacing sliders to create fewer “echo” artifacts in your smeared stroke.
11 Drag a brushstroke through existing paint to see how the paint is “picked up” from the underlying pixels and moved across the canvas.
It is easier to see the Brush Loading feature if the canvas is not white. To fill the canvas with another color, see “Applying a color as
a fill” on page 275.
You can tie brush controls like Bleed to the Controller setting in the Color Expression panel. For example, if you choose Pressure,
each stroke bleeds more or less, depending on how hard you press the stylus. For more information, see “Expression settings” on
page 339.
Working with color fills
Corel Painter gives you many options for filling images with color. You can apply a color fill to only part of an image, to a layer of an image,
to an alpha channel, or to an entire image. You can also fill image areas based on pixel color.
In addition, you can apply gradients, patterns, and weaves as fills. The following table lists the various ways to apply fills to an image and
where to find more information.

Color | 275
Fill type For more information see
Color “Applying a color as a fill” on page 275
Gradient “Applying gradients” on page 711
Pattern “Applying pattern fills” on page 697
Weaves “Applying weaves” on page 741
Applying a color as a fill
Corel Painter gives you different options for applying a color as a fill. You can quickly apply a fill to a selected area of an image or you can
apply a fill to the entire image based on a selected pixel color. When filling an image with a selected pixel color, you can apply the fill directly
to the canvas or to a channel. Corel Painter fills areas of the image based on color boundaries, as well as the specified tolerance and feather
settings.
Tolerance allows you to set the amount of variance allowed from the color of the selected pixel. With a low tolerance setting, Corel Painter
fills only contiguous pixels that are very close to the selected pixel color. With a high tolerance setting, Corel Painter fills a greater range of
colors.
Feathering softens the edges of the fill by controlling the fill opacity for pixels with colors outside the tolerance range. For example, if
feather is set to zero (the default), only pixels in the tolerance range are filled. With a low feather setting, pixels with colors just outside
the Tolerance range receive partial fill. Increasing the feather setting increases the range of colors that receive partial fill. Pixels with colors
farther from the tolerance range receive a more transparent fill. Typically, when feather is set high, tolerance is set low.
You can also fill the interior of an area that is bound by lines. This is especially useful for producing solid fills of regions bounded by anti-
aliased lines. If you want to fill regions completely, without affecting the lines, you can first copy the lines to a selection. Then, when you fill
the cells, the lines are protected.
To apply a color fill
1In the Color panel, click the Main Color (front) swatch in the Color Selector, and choose a color.
2To apply a gradient to:
• The canvas — Click the Canvas in the Layers panel.
• A selection — Click a selection tool from the toolbox, and drag in the document window to select an area.
• A layer — Click a layer in the Layers panel.
• A channel — Click a channel in the Channels panel.
3Choose Edit Fill.
If you prefer, press Command + F (macOS) or Ctrl + F (Windows).
4In the Fill dialog box, choose Current Color from the Fill with list box.
5Adjust the Opacity slider.
To apply a pixel-based color fill
1Choose Window Color Panels Color Sets.
2In the Color Sets panel, click the Color Sets options button , and choose New Color Set from Image.

276 | Corel Painter 2022 User Guide
3In the New Colorset dialog box, type a name in the Name text box.
4Choose the Paint Bucket tool from the toolbox.
5On the property bar, click one of the following buttons:
•Fill Image
•Fill Cell
6Choose the Current Color option from the Fill list box.
7Open the Select Fill panel, and choose a color.
The image color set displays in the Select Fill palette.
8Click the image in the drawing window.
If the result is not what you want, undo the fill, change the settings, and try again.
You can also
Specify the range of colors to be filled On the property bar, type a value in the Tolerance box or adjust the
slider.
Specify the fill opacity for pixels outside of the tolerance range On the property bar, type a value in the Feather box or adjust the
slider.
Soften the edges of the fill On the property bar, click the Anti-Alias button .
Anti-aliasing is desirable when the Feather setting is set to zero or
extremely low.
You can constrain the fill to a rectangular area by dragging with the Paint Bucket tool.
Limiting and preventing leakage
In complex drawings, lines don’t always meet, which can cause the fill to leak into areas that you don’t want filled — sometimes through
the whole image. You can’t always tell if there’s a leak just by looking at your image. If you click a small area and see the prompt, Now
Looking for Extent of Fill, there’s probably a leak, and Corel Painter is preparing to fill a bigger area than you had in mind. In this case, you
can abort the fill.
You can limit leakage to a specific rectangular area. In typical cartoon line work, unbounded areas — for example, hair, tail feathers, and
brush bristles — sometimes must be filled. By limiting leakage to a specific area, you can close off these items. You can also close leaks
by copying the lines to a selection, saving the selection to a channel, editing the channel, and then reloading it to the selection. For more
information about editing channels, refer to “Editing channels” on page 589.
To undo a fill
• To undo a fill, do one of the following:
•Choose Edit Undo Paint Bucket Fill.
• Press Command + Z (macOS), or Ctrl + Z (Windows).

Color | 277
To limit leakage
1Choose the Paint Bucket tool from the toolbox.
2On the property bar, click the Fill Cell button or the Fill Image button .
3Drag to create a rectangle that just covers the area you want to fill.
If there is no leak, only the area within the lines is filled. If there is a leak, the fill goes outside the area, but not beyond the constraints of
your rectangle.
To close a leak
1Copy the lines to a selection.
2Choose Select Save Selection.
3In the Save Selection dialog box, choose New from the Save to list box.
4Click OK.
A new channel is displayed in the Channels panel.
5In the Channels panel, display and select the channel.
6Click the Brush Selector on the Brush Selector bar.
7In the Brush Selector, choose the same brush you used to create the lines.
8In the Color panel, set black as the current Main Color.
9Paint in the channel to close the gaps.
10 Choose Select Load Selection.
11 In the Load Selection dialog box, choose the modified channel from the Load From list box.
12 Enable the Replace Selection option to replace the original with the edited version.
If you want to adjust the mask threshold, double-click the Paint Bucket tool in the toolbox, and move the slider.
The channel does not have to be selected to contain the fill. If you deselect the channel in the Channels panel, the loaded selection
is still in effect.
Edit the channel to close leaks. Remember to load the channel back into the selection after editing.

278 | Corel Painter 2022 User Guide

Color management | 279
Color management
Corel Painter lets you manage colors when you create or open images, or place images in a document. The color management controls
help ensure that colors are consistent when you work with images from various sources, such as Adobe Photoshop or a digital camera. In
addition, you can store color information in a document by embedding a color profile in the file when you save it.
This section contains the following topics:
•“Understanding color management” (page 279)
•“Specifying the default RGB color profile” (page 282)
•“Embedding color profiles when saving files” (page 283)
•“Specifying the default CMYK color profile for converting CMYK images to RGB” (page 283)
•“Previewing and soft-proofing color profiles” (page 284)
•“Assigning or removing color profiles” (page 285)
•“Converting color profiles” (page 285)
•“Working with color profile policies” (page 286)
•“Working with presets” (page 287)
Understanding color management
This section provides answers to some commonly asked questions about color management.
What is color management?
Color management is a process that lets you predict and control color reproduction, regardless of the source or destination of the image.
For example, a monitor displays a different set of colors than a printer reproduces, so you may see colors on-screen that cannot be printed.
If you want to reduce color discrepancies, you can use color management to ensure a more accurate color representation when an image is
viewed, modified, or printed.
During the digital imaging process, different tools are used to capture, modify, and print images. In a typical workflow, you capture an
image by using a digital camera, upload the image to a computer, modify the image in a photo-editing application, and print the image.
Each of these tools has a different way of interpreting color. In addition, each has its own range of available colors, called a color space,
which is a set of numbers that define how each color is represented. A color space is a subset of a color model (for example, CMYK or RGB).
Consider a color in the color space of your digital camera: a vivid blue RGB color with the values Red = 0, Green = 0, and Blue = 255. This
color may appear as a different color in the color space of your monitor. In addition, the color space of your printer may not contain a match
for this color. As a result, when your document moves through the workflow, this vivid blue color gets lost in the translation and is not
accurately reproduced.
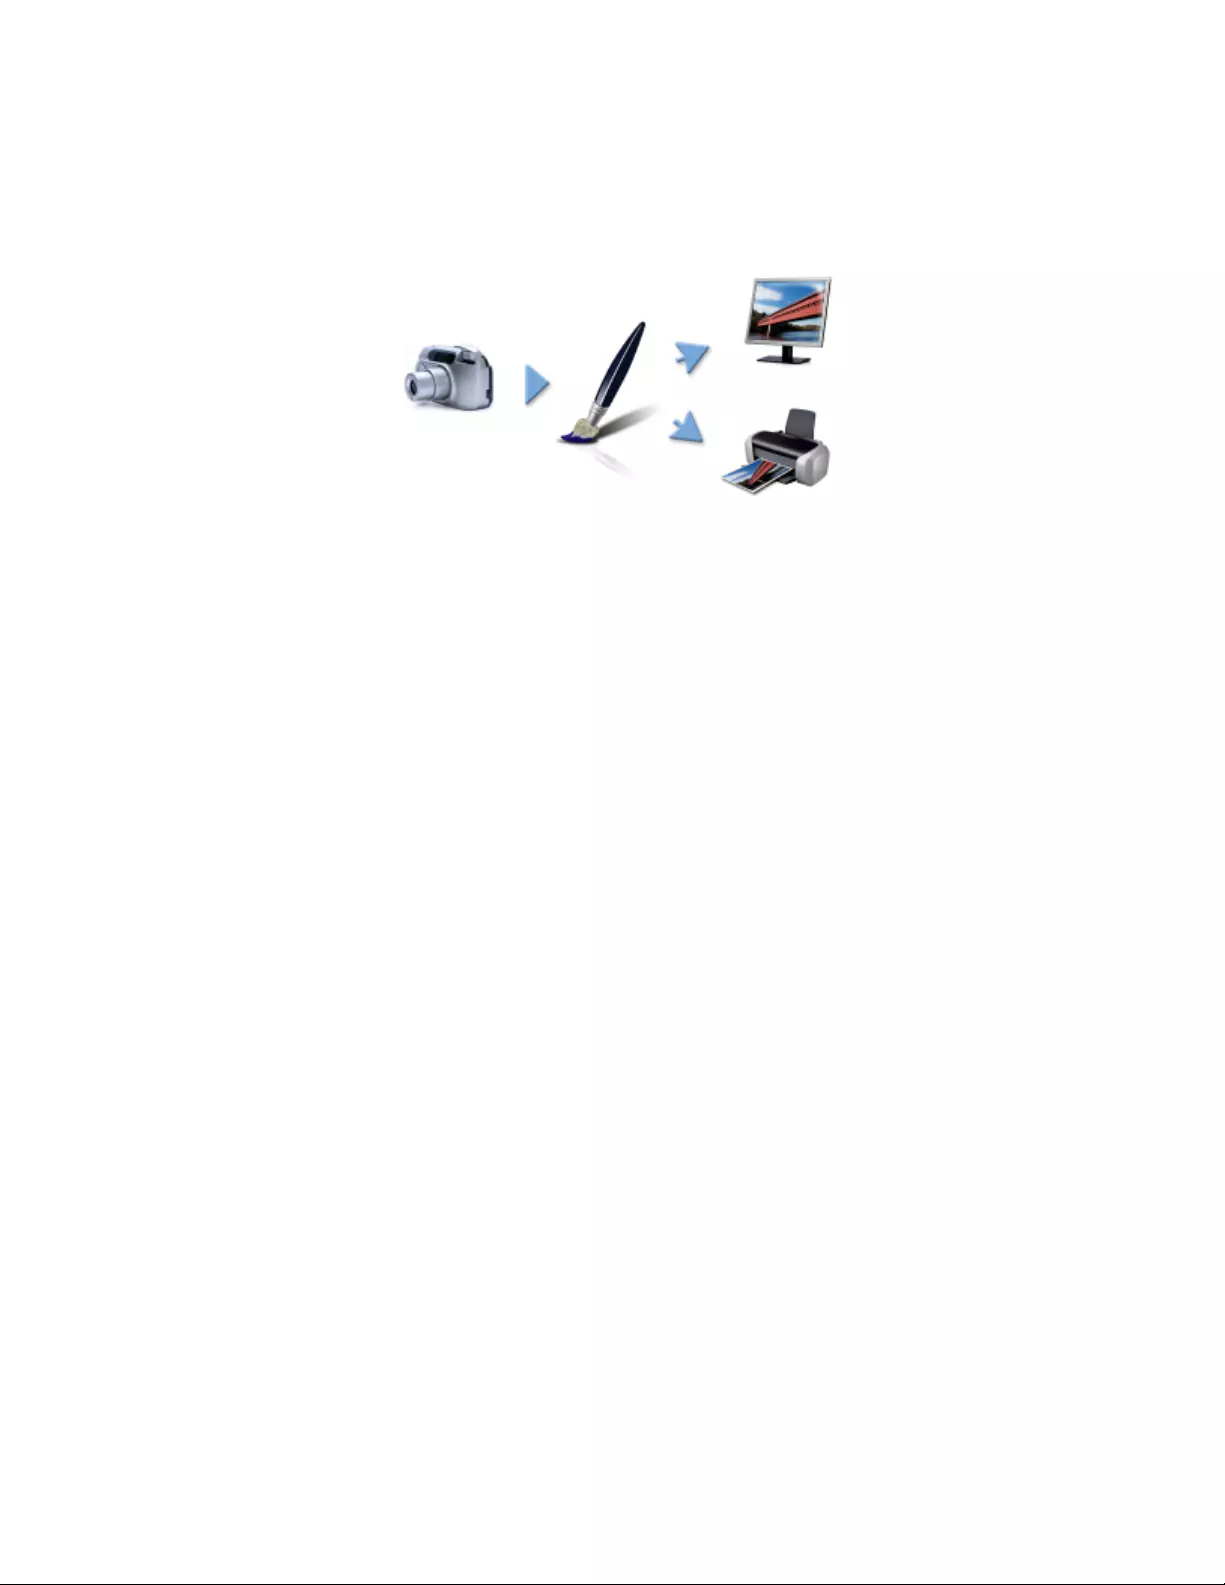
280 | Corel Painter 2022 User Guide
Each tool speaks a unique language when it comes to color. One number in the color space of a digital camera may represent an entirely
different color in the color space of a monitor. As a result, when an image moves through the workflow, the colors get lost in the translation
and are not accurately reproduced. A color management system is designed to improve the communication of color in the workflow so that
the color of the output matches your intended color.
This is an example of a typical digital imaging workflow.
A color management system, also known as a color engine, uses color profiles to translate the color values from the source, which ensures
a more accurate color reproduction at the destination. A color profile contains the data that the color management system requires to
translate colors. Many standard color profiles are available. In addition, color profiles exist for different brands of monitors, scanners, digital
cameras, and printers.
Why do I need color management?
If your document requires accurate color representation, you should consider using color management. The complexity of your workflow
and the ultimate destination of the images are also important considerations. If your documents are destined only for online viewing, color
management may not be as important. However, if you plan to open images in another application, such as Adobe Photoshop, or if you are
creating images for print or multiple types of output, the use of color management is essential.
Color management lets you do the following:
• reproduce colors consistently across your digital imaging workflow, especially when opening documents that were created in other
applications
• reproduce colors consistently when sharing files with others
• preview, or soft-proof, colors before they are printed
• reduce the need to adjust and correct images when sending images to different destinations
A color management system does not offer identical color matching (this is not technically possible), but it greatly improves the color
representation.
Is my monitor displaying the right colors?
How you perceive the color that your monitor displays is another important factor in managing color consistency. Your perception is
influenced by the environment in which you are viewing the images. Here are some ways to neutralize your viewing environment.
• Ensure that your room has a consistent flow of light. For example, if the room is filled with sunlight, use a shade, or if possible, work in a
room without windows.
• To ensure accuracy in perceiving colors, some graphics professionals work in windowless rooms with gray or neutral walls and ceilings. If
these conditions do not match the room you work in, you can invest in a monitor hood, or you can create one by using black cardboard
and tape.
• Don’t wear bright clothing that can clash with the display of colors on the monitor. For example, wearing a white shirt reflects on the
monitor and alters your perception of color.
• Set the monitor background to a neutral color, such as gray, or apply a grayscale image. Avoid using colorful wallpapers and
screensavers.
Calibration and profiling of the monitor, also known as characterization, are also important steps for ensuring color accuracy. Calibration
helps ensure consistency in the colors that are displayed on the monitor. After calibration, you can create a color profile of the monitor,
which contains the details of how the monitor interprets colors. The profile is then shared with other devices. Calibration and profiling work
together to achieve color accuracy: If a monitor is incorrectly calibrated, its color profile is not useful.
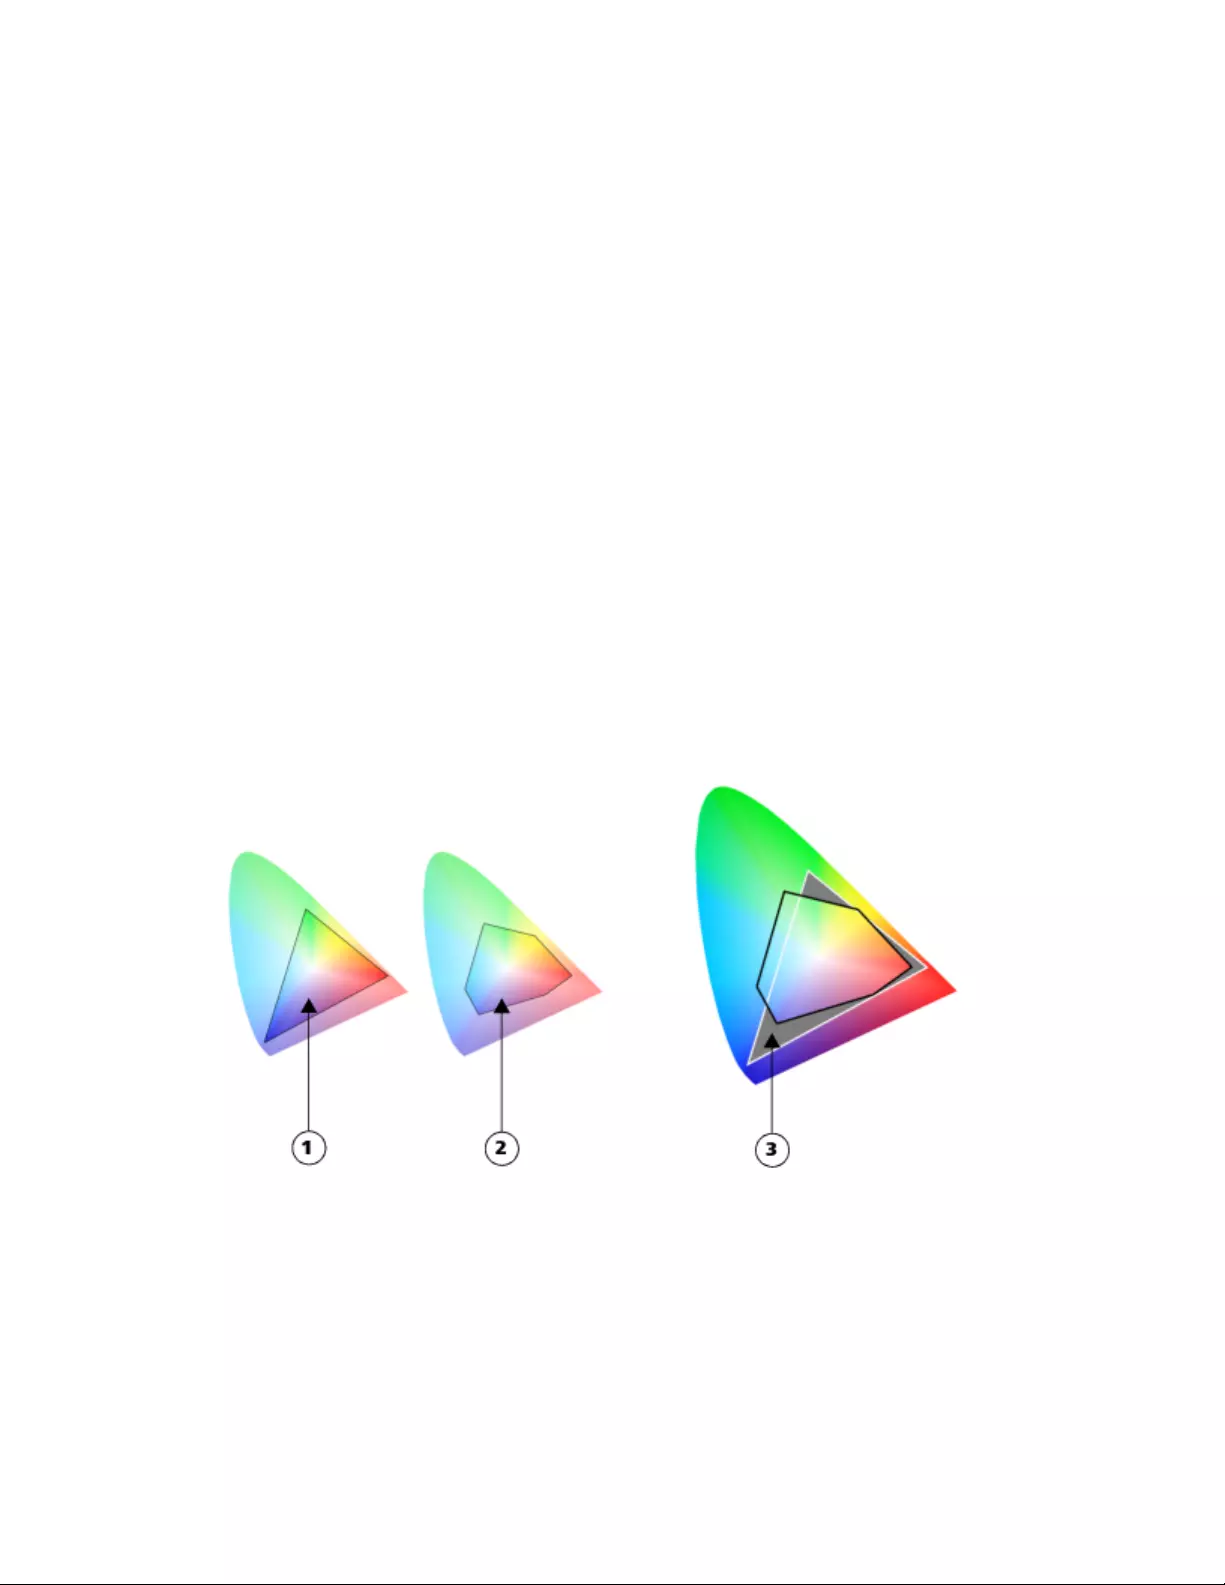
Color management | 281
Calibration and profiling usually require a special calibration device and specialized software. Keep in mind that improper calibration may
do more harm than good. You can find additional information about monitor calibration and custom color profiles by researching color—
management techniques and products. You can also refer to the documentation that was provided with your operating system or monitor.
Should I assign or convert color profiles?
In deciding whether to assign or convert a color profile, you should first consider the results that each action produces. When you assign a
color profile in Corel Painter, the color values, or numbers, in the document do not change. Instead, the application simply uses the color
profile to interpret the colors in an image. However, when you convert a color profile, the color values in the document change. Instead of
assigning a color profile, the application translates one color profile to another. Converting a color profile does more than affect the display
of colors — it produces irreversible changes to the colors in the document.
The best practice is to choose a working color space, such as sRGB, when you create an image and to use the same color profile throughout
your workflow. You should avoid assigning and converting color profiles. However, you may encounter scenarios that require you to switch
to a different color profile.
For example, if you receive a file from someone, and no color profile is embedded in the file, you should assign a color profile to the file. In
this way, you can retain the file’s original color values.
You should choose the conversion option only if you are preparing the file for a specific output, such as a printer. After the data has been
changed to accommodate the destination profile, conversion back to the original color profile is often not suitable.
What is a rendering intent?
A color management system can perform effective translation of colors from the source to multiple outputs. However, when matching colors
from one color space to another, a color management system may be unable to match certain colors. These “out-of-gamut” colors can
dramatically change the look of the image, depending on how they are interpreted by the color management system. Fortunately, you can
choose a rendering intent to instruct the color management system how to interpret the out-of-gamut colors.
Many colors in an sRGB (1) document may be out of gamut for the U.S. Web Coated (SWOP) v2 color
space (2). The out-of-gamut colors (3) are mapped into gamut according to the rendering intent.
The rendering intent that you choose depends on the graphical content of the image.

282 | Corel Painter 2022 User Guide
This is an example of three types of images and their corresponding rendering intents.
•Perceptual — Choose this rendering intent for photographs and bitmaps that contain many out-of-gamut colors. The overall color
appearance is preserved by changing all colors, including in-gamut colors, to fit within the destinations range of colors at the
destination. This rendering intent maintains the relationships between colors to produce the best results. In general, the Perceptual
rendering intent is best for giclée prints.
•Saturation — Choose this rendering intent to produce more concentrated solid colors in business graphics, such as charts and graphs.
Colors may be less accurate than those produced by other rendering intents.
•Relative Colorimetric — Choose this rendering intent for logos or other graphics to preserve original colors. If a match is not found for
the source colors, then the closest possible match is found. This rendering intent causes the white point to shift. In other words, if you
are printing on white paper, the white areas of an image use the white of the paper to reproduce the color. Therefore, this rendering
intent is a good option for printing images.
•Absolute Colorimetric — Choose this rendering intent for logos, or other graphics, that require very precise colors. If no match is found
for the source colors, then the closest possible match is used. The Absolute Colorimetric and Relative Colorimetric rendering intents
are similar, but the Absolute Colorimetric rendering intent preserves the white point through the conversion and does not adjust for the
whiteness of the paper. This option is used mainly for proofing.
What is soft-proofing?
Soft-proofing provides an on-screen preview of the image as it will appear when it is reproduced by a specific printer or displayed on a
specific monitor. This technique simulates the “hard-proofing” stage in a traditional printing workflow.
Unlike hard-proofing, soft-proofing lets you look at the final result without committing ink to paper. For example, you can preview what the
printed image will look like when a specific brand of printer is used. You can also preview what the image will look like on another type of
monitor.
To simulate the output colors that are produced by a device, you need to choose the color profile of the device. Because the color spaces of
the document and device are different, some document colors may not have matches in the gamut of the device color space. These out-of-
gamut colors can dramatically change the look of the image, depending on how they are interpreted by the color management system. You
can choose a rendering intent to instruct the color management system how to interpret the out-of-gamut colors. For information about
rendering intents, see “What is a rendering intent?” on page 281.
For information about soft-proofing an image, see “To soft-proof an image” on page 284.
Specifying the default RGB color profile
To use color management in Corel Painter, you can start by specifying the default RGB color profile that you want to assign to all new
documents.
The default settings in Corel Painter produce good color results, but you can change these default settings so that they suit your specific
workflow. The Corel Painter default color profile is sRGB_IEC61966-2-1 black scaled. You can visit the International Color Consortium (ICC)
website http://www.color.org/findprofile.xalter to find more information about this profile.
When you create images in another application, such as Adobe Photoshop, you should use the same default color profile that you will use
when opening the file in Corel Painter. In addition, you should always embed the color profile when saving a document in Corel Painter or
Adobe Photoshop, so that the document retains the color information. For more information, see “Embedding color profiles when saving
files” on page 283.

Color management | 283
To change the default RGB color profile
1Choose Canvas Color Management Settings.
2Choose a color profile from the Default RGB Profile list box.
The factory default color profile for Corel Painter is sRGB, which is the default color profile for many monitors, digital cameras, and
even some printers.
You can also access the Color Management Settings dialog box from the Navigator panel by clicking the Open Navigator
Settings button , clicking Color Management, and choosing Color Management Settings.
Embedding color profiles when saving files
Embedding a color profile attaches the color profile to the document to ensure that the same colors you used are shared with anyone who
views or prints the document. In this way, you help ensure color consistency when files are viewed, modified, or reproduced.
If you did not assign a color profile to the file, the default color profile is embedded.
The following file formats support color profile embedding:
• RIFF (RIF)
• TIFF (TIF)
• Photoshop (PSD)
• JPEG
• Portable Network Graphics (PNG)
To embed a color profile when saving a file
1Choose File Save As.
2In the Save Image As dialog box, use the controls to specify a location and filename.
3From the Format list box (macOS) or the Save As Type list box (Windows), choose one of the following file formats:
•RIFF Files (*.RIF; *.RIFF)
•TIF Files (*.TIF; *.TIFF)
•Photoshop Files (*.PSD)
•JPEG Files (*.JPG; *.JPEG)
•PNG Files (*.webp)
4Enable the Embed Profile check box.
If you do not want to embed the color profile, you need to disable the Embed Profile check box.
Specifying the default CMYK color profile for converting CMYK images to RGB
Because Corel Painter works with RGB colors, all CMYK images that you open or import in the application are converted to an RGB color
profile. You can specify the default CMYK profile that Corel Painter uses to convert the CMYK images to RGB. The following file formats are
supported for CMYK images:
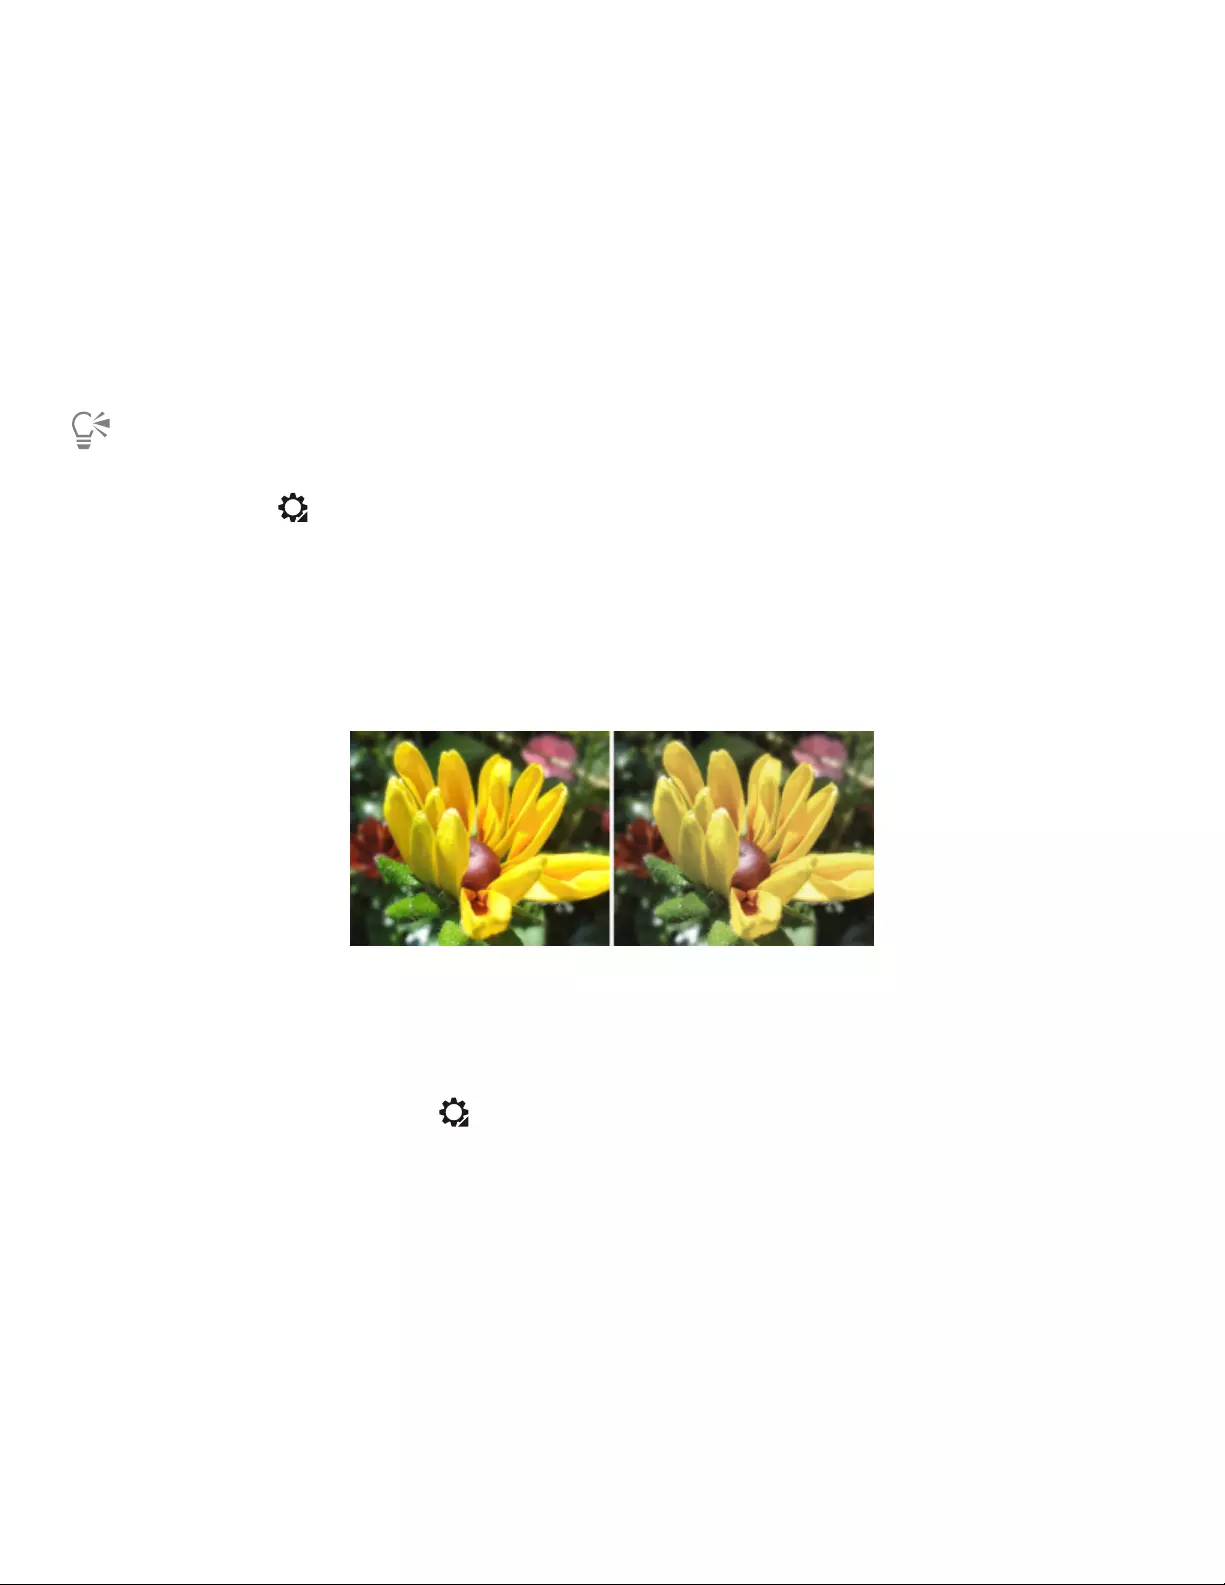
284 | Corel Painter 2022 User Guide
• RIFF (RIF)
• TIFF (TIF)
• Photoshop (PSD)
• JPEG
• Portable Network Graphic (PNG)
To specify the default CMYK color profile for converting CMYK images to RGB
1Choose Canvas Color Management Settings.
2Choose a color profile from the Default CMYK Conversion Profile list box.
You can also access the Color Management Settings dialog box from the Navigator panel by clicking the Open Navigator
Settings button , clicking Color Management, and choosing Color Management Settings.
Previewing and soft-proofing color profiles
After an RGB profile is selected for the document, you can preview the image with the default color profile applied. You can also soft-proof
images, which means to preview on-screen what the image will look like when it is printed with a specific printer, or when it is displayed
on another type of monitor. You can also soft-proof by using a specific rendering intent. For more information, see “What is a rendering
intent?” on page 281. After soft-proofing an image, you can turn off the soft-proofing feature.
Soft proof documents to preview final results on-screen. (left) An sRGB color profile is assigned to an image.
(right) Assigning the U.S. Web Coated (SWOP) v2 profile allows an on-screen simulation of the printed output.
To preview a color profile
1Choose Window Navigator.
2Click the Open Navigator Settings button , click Color Management Settings, and choose the name of the color profile that you
want to preview.
To soft-proof an image
1Choose Canvas Color Proofing Settings.
2To simulate the output colors that are produced by a specific device, choose a profile from the Simulate Device list box.
The list includes all color profiles installed on your computer.
3Choose a rendering intent from the Rendering Intent list box.
4Enable the Turn On Color Proofing Mode check box.

Color management | 285
Simulating printer output may cause on-screen colors to appear dull because all colors are brought into a CMYK color space, which
has a smaller gamut than an RGB color space. After soft proofing an image, you can turn off the soft proofing feature.
The accuracy of the simulation depends on factors such as the quality of your monitor, the color profile of the monitor and the
output device, and the ambient lighting in your work area.
To turn off soft-proofing
•Choose Canvas Color Proofing Mode.
Assigning or removing color profiles
You can change the appearance of a document by assigning a new color profile. A color profile contains the data that the color
management system requires to translate colors from one color space to another. The default color profile for Corel Painter is sRGB
IEC61966-2-1 noBPC, but you can choose from a list of Standard ICC color profiles.
When you assign a new profile, the color values, or numbers, in the document do not change. When you enable color management and
display a document, the colors in the document represent an interpretation of the assigned color profile. For more information, see “Should
I assign or convert color profiles?” on page 281.
You can also remove an assigned color profile from a document. In other words, color management is no longer applied to the document.
The color values are retained, however.
To assign or remove a color profile
1Choose Canvas Assign Profile.
2Enable one of the following color profile options:
•Use Default RGB Profile — applies the default RGB profile to the document
•Use Profile — applies a color profile to the document but does not convert the original colors. If you enable this option, you must
choose a color profile.
•Do Not Color Manage — retains the color values without associating them with a color profile
If you have color profiles installed on your computer, Corel Painter includes them in the list of available color profiles.
You can also assign a color profile from the Navigator panel by clicking the Open Navigator Settings button , clicking Color
Management, and choosing Assign Profile.
Converting color profiles
Corel Painter lets you convert the color profile of a document to another color profile. Converting a color profile differs from assigning a
color profile, which involves only the translation of one color profile to another and affects only the display of color. When you convert one
color profile to another, the color values in the document are irreversibly changed. For more information, see “Should I assign or convert
color profiles?” on page 281.
Corel Painter also lets you choose the color management engine that is used for converting color profiles. The color management engine,
also known as a color management module (CMM), uses the information in the color profiles to translate the color values. The resulting
translation of the color values may differ, depending on the color management engine.

286 | Corel Painter 2022 User Guide
In addition, you can flatten images when converting color profiles. Flattening images drops all the layers onto the background canvas.
To convert a color profile
1Choose Canvas Convert To Profile.
2Choose a new color profile from the New Color Profile list box.
You can also
Choose a color engine Choose a color engine from the Color Engine list box.
Choose a rendering intent Choose a rendering intent from the Rendering Intent list box.
Flatten all layers in the image Enable the Flatten Image option.
You can also convert the color profile from the Navigator panel by clicking the Open Navigator Settings button , clicking
Color Management, and choosing Convert To Profile.
Working with color profile policies
Corel Painter lets you create color profile policies for opening and placing both RGB and CMYK images. The options that you choose for the
Color Profile Policy determine how colors are managed in images that you open and work with in the application.
When creating a color profile policy for opening and placing images, you can specify the following:
• RGB color profile to apply to images
• CMYK color profile for converting images to RGB
• color engine
• rendering intent (depends on image content)
For more information, see “What is a rendering intent?” on page 281.
The color profile policy lets you display warning messages when a document has a mismatched or missing color profile. In the case of a
mismatched color profile, you can choose a new color profile. If the document does not have a color profile associated with it, you can apply
a new color profile or choose not to use color management with the document.
To create a color profile policy
1Choose Canvas Color Management Settings.
2Choose one of the following options from the RGB Images list box:
•Use embedded profile — applies the embedded RGB color profile to RGB images that you open or import
•Use default RGB profile — converts the image by using the default RGB color profile that you specify in the color management
settings
3Choose one of the following options from the Convert CMYK Images list box:
•Use default CMYK profile — converts to RGB by using the default CMYK color profile that you specify in the color management
settings
•Use embedded profile — converts to RGB by using the embedded CMYK color profile
4Choose a color engine from the Color Engine list box.
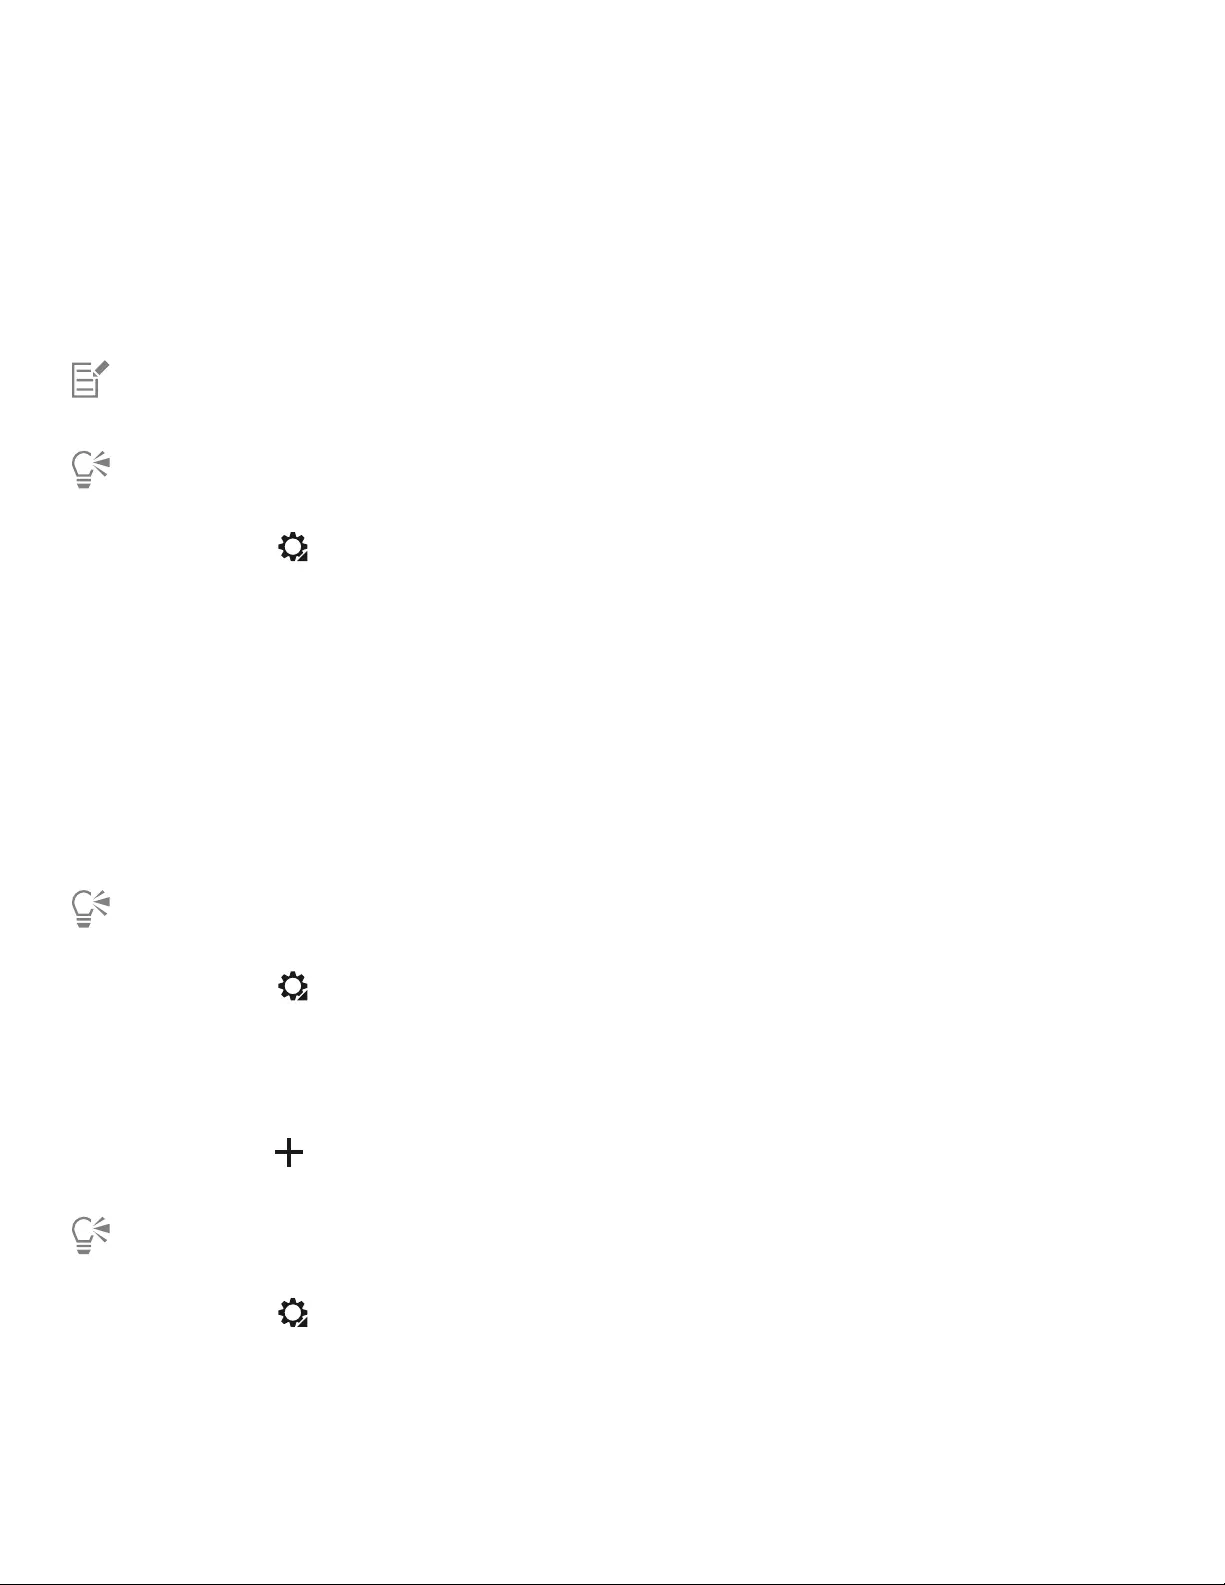
Color management | 287
5From the Rendering Intent list box, choose one of the following options:
•Perceptual — is recommended for a variety of images, especially bitmaps and photographs
•Saturation — is best for vector graphics (lines, text, and solid-colored objects, such as charts)
•Relative Colorimetric — is ideal for producing proofs on inkjet printers
•Absolute Colorimetric — preserves the white point and can be used to proof images
If you want to display a warning message when you open a document that has a mismatched color profile, enable the Profile Mismatch
check box.
For more complete descriptions of rendering intents, see “What is a rendering intent?” on page 281.
You can also access the Color Management Settings dialog box from the Navigator panel by clicking the Open Navigator
Settings button , clicking Color Management, and choosing Color Management Settings.
Working with presets
Corel Painter provides color management presets, which are default settings that you can apply to a document. They are useful if you do not
feel comfortable changing the settings in the Color Management Settings dialog box. You can also create your own presets, which allows
you to retain all of your selections in the Color Management Settings dialog box and reuse them in other documents. If you no longer need
a preset, you can delete it.
To choose a preset
1Choose Canvas Color Management Settings.
2Choose a preset from the Preset list box.
You can also access the Color Management Settings dialog box from the Navigator panel by clicking the Open Navigator
Settings button , clicking Color Management, and choosing Color Management Settings.
To add a preset
1Choose Canvas Color Management Settings.
2In the Color Management Settings dialog box, use the controls to specify color management settings.
3Click the Add button next to the Preset list box.
4Type a name for the preset in the Preset Name box.
You can also access the Color Management Settings dialog box from the Navigator panel by clicking the Open Navigator
Settings button , clicking Color Management, and choosing Color Management Settings.
To delete a preset
1Choose Canvas Color Management Settings.
2Choose a preset from the Preset list box.

288 | Corel Painter 2022 User Guide
3Click the Delete button next to the Preset list box.
A warning box appears and asks you if you want to delete the preset.
4Click Yes.
You can also access the Color Management Settings dialog box from the Navigator panel by clicking the Open Navigator
Settings button , clicking Color Management, and choosing Color Management Settings.

Correcting and adjusting colors | 289
Correcting and adjusting colors
Corel Painter includes a variety of effects and tools that let you correct and adjust image colors. For example, you can use the effects to fix
a color-casted or washed-out photo. You can also use the effects to creatively alter image colors using techniques such as posterizing or
inverting.
This section contains the following topics:
•“Correcting colors using curves” (page 289)
•“Adjusting brightness and contrast” (page 290)
•“Using the curve to correct colors” (page 293)
•“Drawing freehand curves to adjust colors” (page 294)
•“Specifying the curve values to adjust colors” (page 295)
•“Adjusting hue, saturation, and value” (page 296)
•“Adjusting selected colors” (page 299)
•“Equalizing images” (page 301)
•“Matching color and brightness across images” (page 303)
•“Inverting colors” (page 303)
•“Posterizing an image” (page 304)
•“Applying video legal colors” (page 305)
•“Dodging and burning” (page 305)
Correcting colors using curves
Corel Painter lets you correct colors by using curves to adjust the relative amounts of the color components in an image. You can adjust the
curves for red, green, blue, or all three color components at once. Modifying a curve individually is useful for correcting an unwanted color
cast. The curves describe how the input color values are adjusted to create the output (corrected) color values.

290 | Corel Painter 2022 User Guide
A visual representation of the curve
The horizontal axis represents the input (original color) values. The vertical axis represents the output (corrected) values. Before you adjust
a curve, it appears perfectly diagonally (45°), which indicates that all input and output values are equal. Corel Painter maps light values at
the top of the graph and darker values at the bottom. When you edit RGB curves, the current color is indicated by a colored point on the
curve. For example, if you’re editing the color blue, dragging the curve below the diagonal line subtracts blue from the image and adds its
complimentary color yellow. Alternatively, dragging above the line intensifies the color blue.
You can use any of the following curve methods to correct colors:
•Curve
•Freehand
•Advanced
Use the Color Correction dialog box to correct colors
You can use a single curve method, or a combination of curve methods, to adjust the image.
You can apply color correction to a selection, a layer, or the entire image.
• If there is no selection, the correction is applied to the entire image.
• To correct the color of only a section of the canvas, select the area by using a selection tool before applying the color correction. For
more information about these tools, refer to “Getting started with selections” on page 594.
• To correct the color of a layer, select the layer before applying the color correction. For more information about selecting a layer, refer to
“Selecting layers” on page 548.
• To apply color correction to a shape, dynamic layer, text layer, or reference layer, you must first commit the layer to an image layer.
Adjusting brightness and contrast
Corel Painter offers two different methods for adjusting image brightness and contrast. You can adjust brightness and contrast more quickly
by using the Brightness/Contrast effect, or more precisely by using the curve in the Color Correction dialog box.
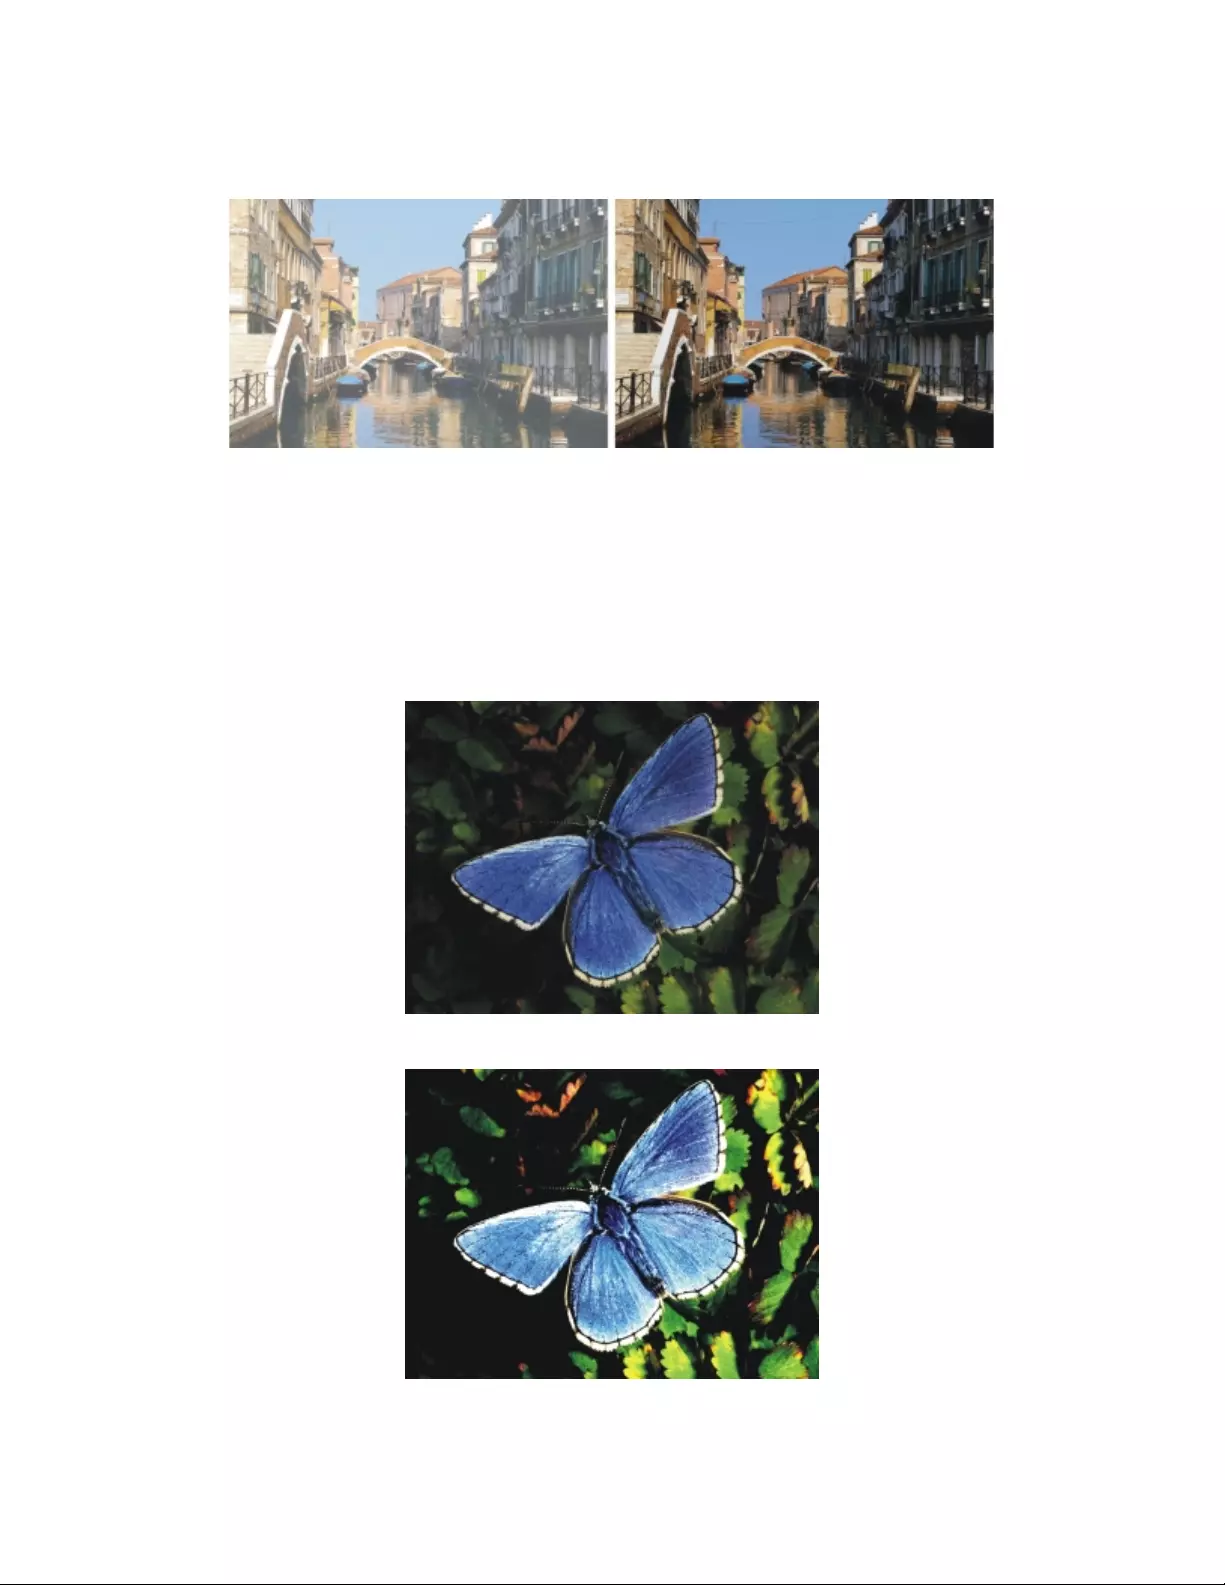
Correcting and adjusting colors | 291
When using the Brightness/Contrast effect, you can adjust all image colors at once.
Before (left) and after (right) applying the Brightness/Contrast effect
When using the curve, you can adjust the contrast or brightness of colors while maintaining the tonal transitions in the original image. You
can adjust all colors at once, or adjust R, G, and B individually. As you adjust the Contrast or Brightness sliders, the endpoints of the curves
remain fixed. Because the effect maintains the levels from the original image, there are always 256 distinct levels, regardless of how much
you adjust the sliders.
Contrast adjusts the difference between light and dark values. As you increase the contrast, the curve takes on an “S” shape, indicating that
light colors are becoming lighter and dark colors darker. If you decrease the contrast, the curve takes on an inverted “S” shape and tones
down the contrast of all midtone colors.
An image before adjusting brightness and contrast by using the curve
An example of increasing the contrast by using the curve

292 | Corel Painter 2022 User Guide
Brightness moves all values on a curve to a brighter tone or darker tone.
An example of increasing brightness by using the curve
To quickly adjust brightness and contrast
1To apply the effect to:
• The canvas — Click the Canvas in the Layers panel.
• A selection — Click a selection tool from the toolbox, and drag in the document window to select an area.
• A layer — Click a layer in the Layers panel.
2Choose Effects Tonal Control Brightness/Contrast.
3Move the Brightness slider to adjust image brightness.
4Move the Contrast slider to adjust image contrast.
You can reset the sliders to the default settings by clicking Reset.
You can compare the adjusted image with the original image by enabling and disabling the Preview check box.
To adjust brightness and contrast by using the curve
1Choose Effects Tonal Control Correct Colors.
2In the Color Correction dialog box, choose Curve from the Method list box.
3Click one of the following Channel buttons:
•Red — allows you to adjust only the red curve
•Green — allows you to adjust only the green curve
•Blue — allows you to adjust only the blue curve
•Master — allows you to adjust all color curves at once
4Move any of the following sliders:
•Brightness — lets you brighten or darken the selected color(s). This control can correct exposure problems caused by too much light
(overexposure) or too little light (underexposure).
•Contrast — increases or decreases the difference in tone between the dark and light areas of an image
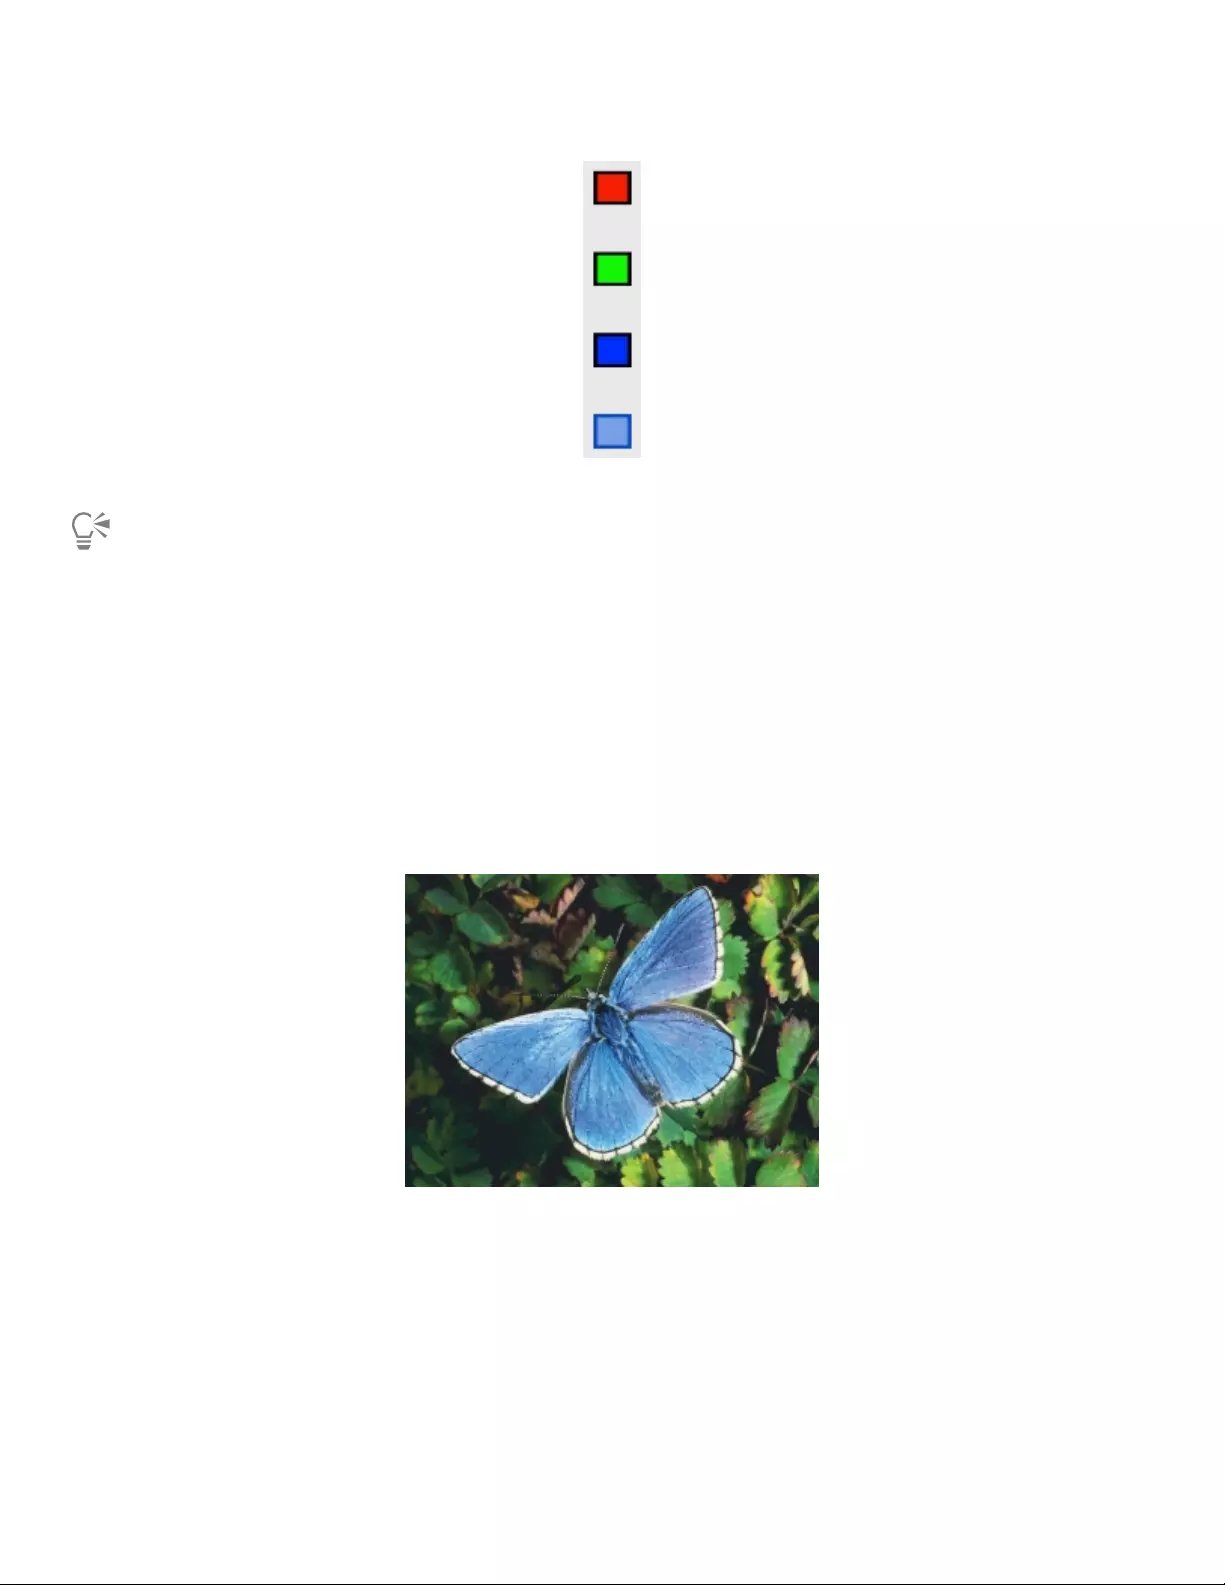
Correcting and adjusting colors | 293
Channel icons in the Color Correction dialog box
You can clear all corrections so that you can start again by clicking Reset.
You can compare the adjusted image with the original image by enabling and disabling the Preview check box.
Using the curve to correct colors
You can use the Curve method to drag the color curves to reshape them. This method lets you create very specific changes in color values.
You can control the overall effect by using the Effect slider. The slider controls how much of the curve moves in response to dragging. When
the slider is all the way to the right, the entire curve moves. As the value is reduced, a smaller portion of the curve moves.
The Curve method lets you perform color and tonal corrections by adjusting either individual color channels (R, G, or B) or the master
channel (all channels combined).
Curve method of color correction
To quickly adjust colors, you can use the automatic correction controls.
To correct colors using the curve
1Choose Effects Tonal Control Correct Colors.
2In the Color Correction dialog box, choose Curve from the Method list box.
3Click one of the following Channel buttons:
•Red — allows you to adjust only the red curve
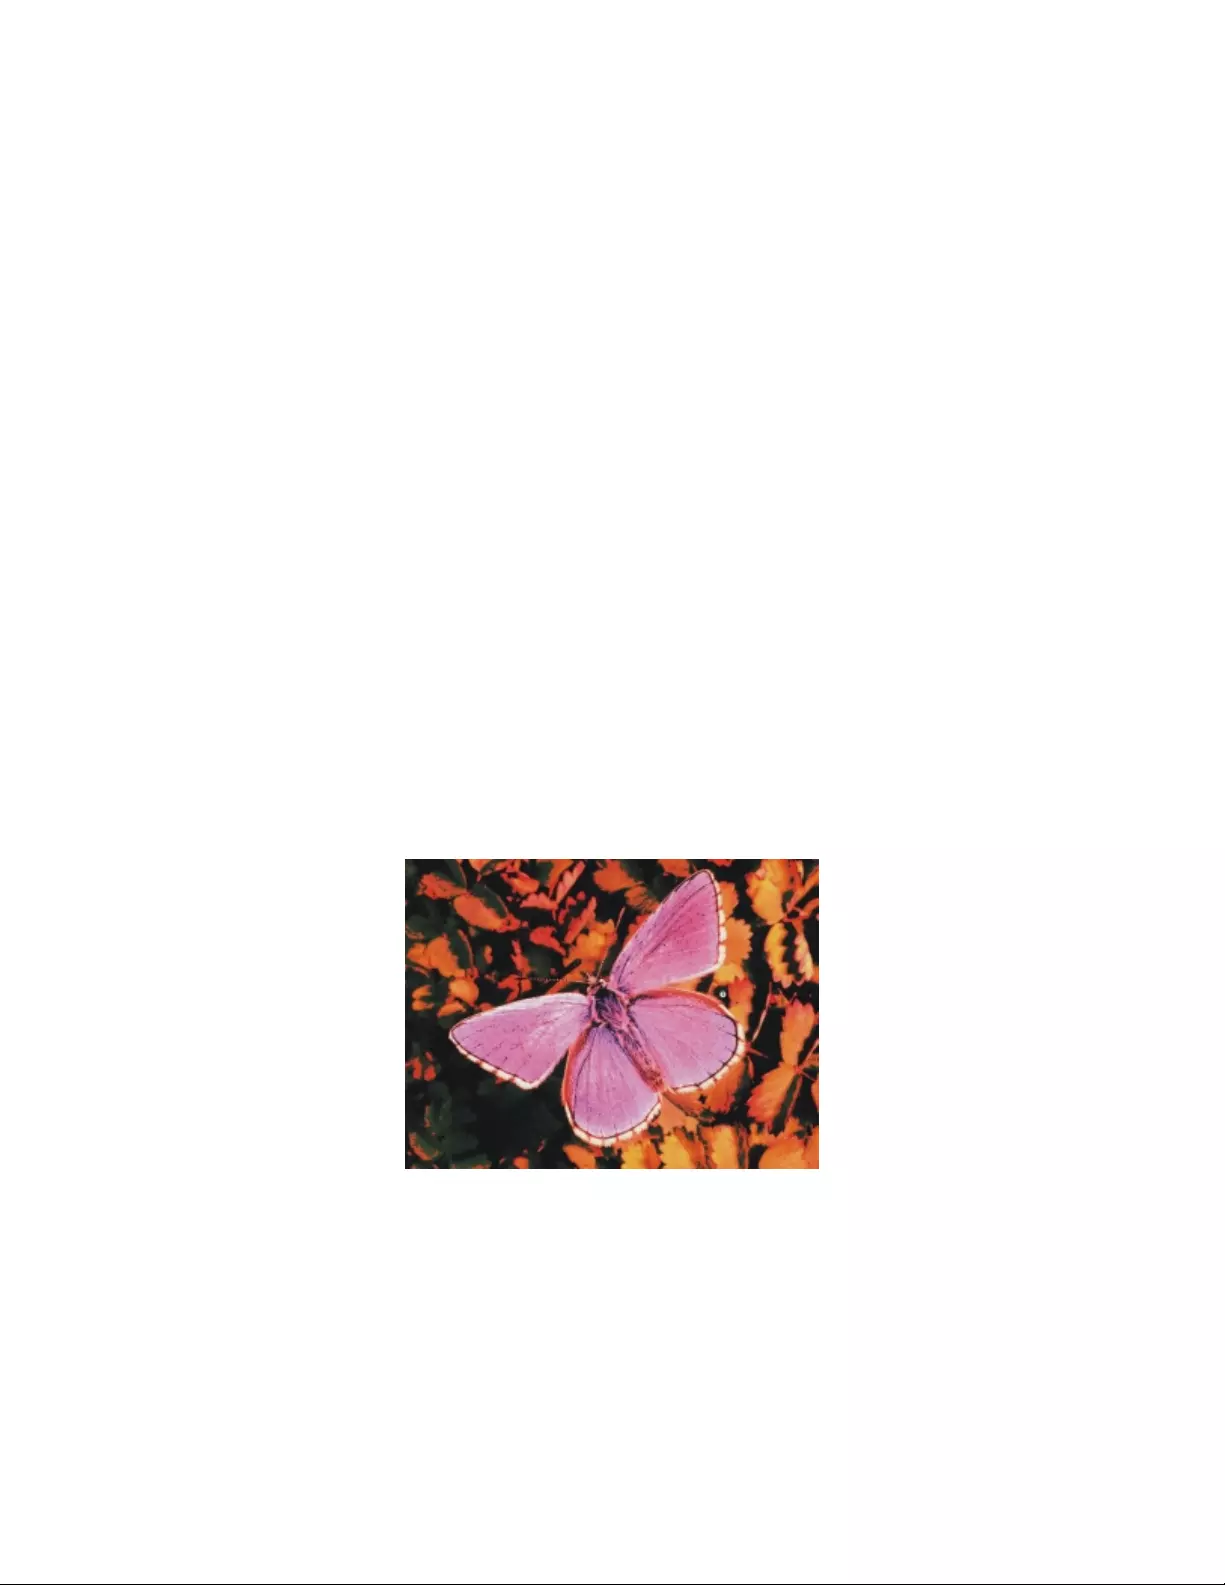
294 | Corel Painter 2022 User Guide
•Green — allows you to adjust only the green curve
•Blue — allows you to adjust only the blue curve
•Master — allows you to adjust all color curves at once
4Drag the Effect slider to the right to increase the range of the curve that’s affected when you drag it, or drag it to the left to decrease
range.
5Position the crosshair cursor over the diagonal line, and drag the curve.
Dragging the curve down increases shadows and dragging it up increases highlights.
You can also
Automatically correct the contrast and color in an image Choose Auto-set from the Curve Preset list box.
Automatically adjust the contrast in an image according to the
white point
Choose White Point from the Curve Preset list box.
Automatically adjust the contrast in an image according to the
black point
Choose Black Point from the Curve Preset list box.
Clear all corrections Click Reset.
Drawing freehand curves to adjust colors
You can use the Freehand method to adjust colors. This method lets you draw a curve to produce dramatic results. It’s particularly useful for
creating posterized or solarized effects.
Freehand method of color correction
To adjust colors by using the Freehand method
1Choose Effects Tonal Control Correct Colors.
2In the Color Correction dialog box, choose Freehand from the Method list box.
3Click one of the following Channel buttons:
•Red — allows you to adjust only the red curve
•Green — allows you to adjust only the green curve
•Blue — allows you to adjust only the blue curve
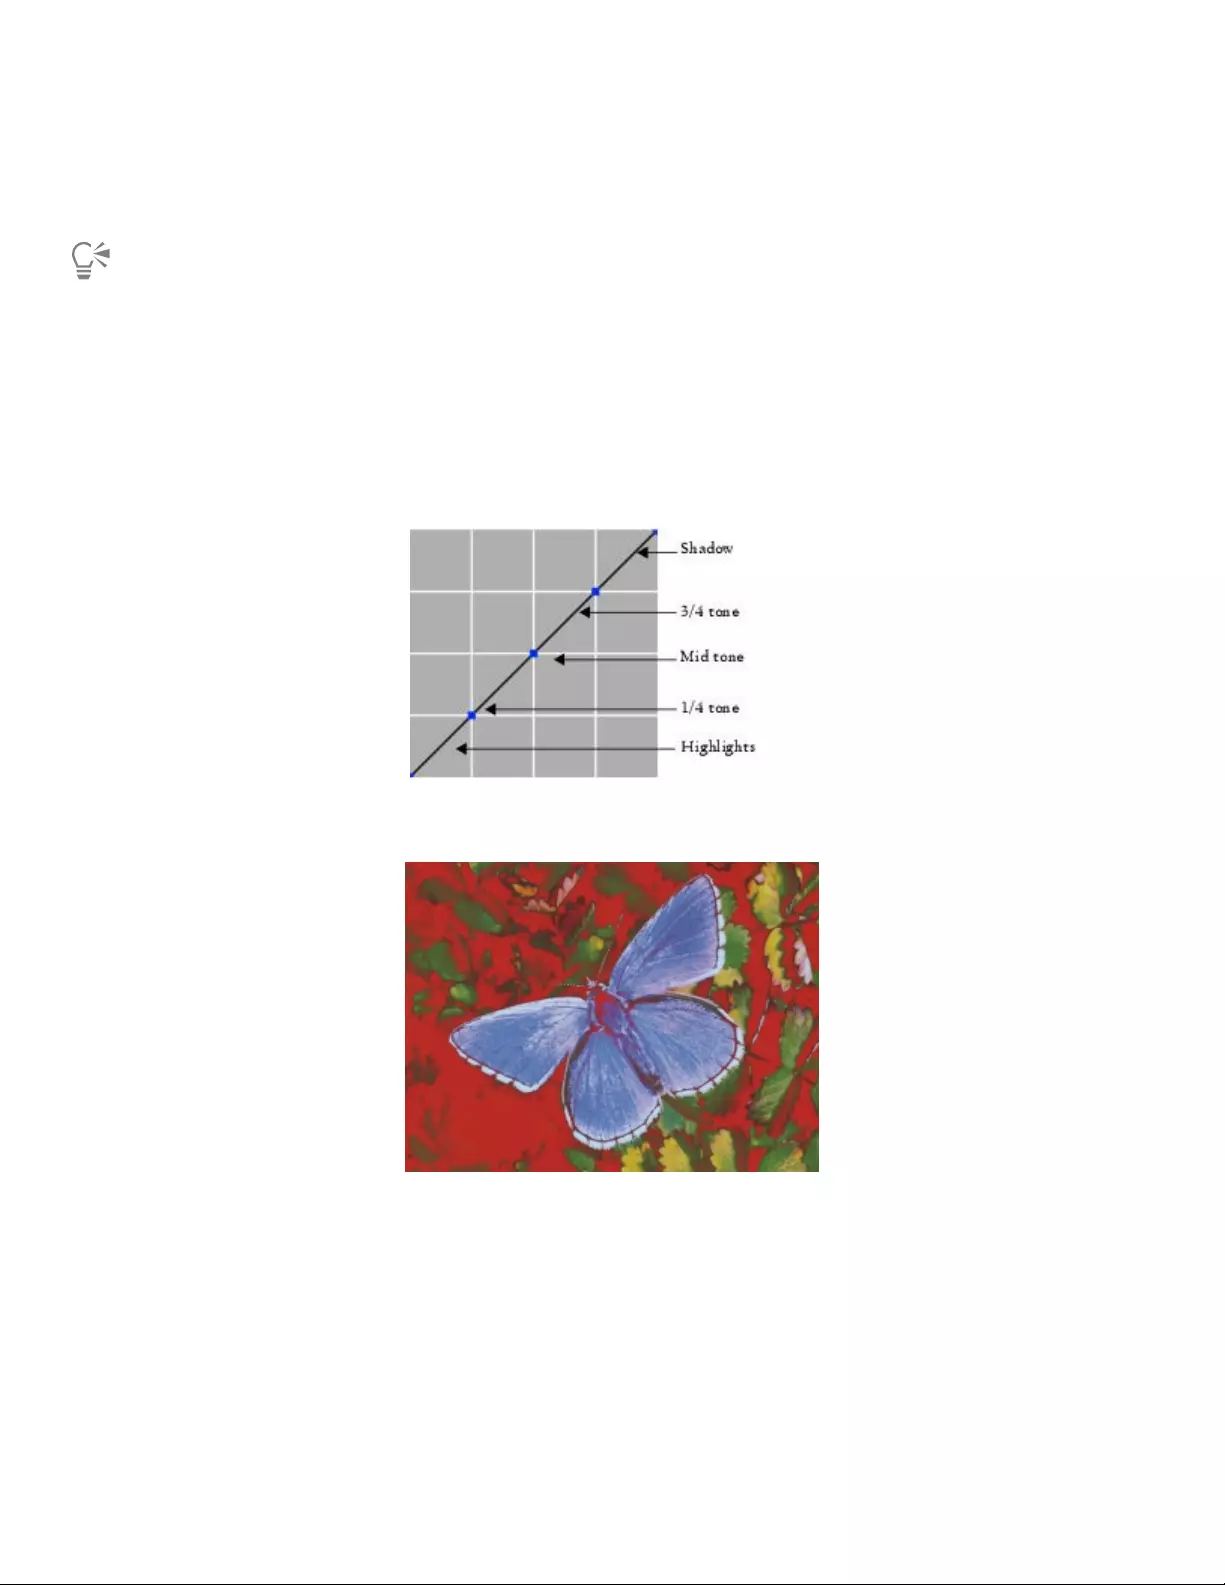
Correcting and adjusting colors | 295
•Master — allows you to adjust all color curves at once
4Drag the pointer over the graph to draw a new curve. Drawing a curve below the middle line increases shadows and drawing a curve
above the middle line increases highlights.
You can clear all corrections so that you can start again by clicking Reset.
You can compare the adjusted image with the original image by enabling and disabling the Preview check box.
Specifying the curve values to adjust colors
You can use the Advanced method to more accurately adjust colors using the curve. You can adjust the 1/4 Tone, Midtone, and 3/4 Tone
ranges by manually dragging the curves of red, green, and blue. You can also adjust color by setting the percentage of red, green, and blue
at five specific points in the curve: Highlight, 1/4 Tone, Midtone, 3/4 Tone, and Shadow.
Each section of the curve controls the balance between the shadows, midtones, and highlights of an image. Setting values in
the upper portion of the grid lightens the image; whereas setting values in the lower portion of the grid darkens the image.
Various tone curves were modified to achieve this look.
You can compare the adjusted image with the original image by enabling and disabling the Preview check box.
To adjust 1/4 tone, midtone, and 3/4 tone by dragging color curves
1Choose Effects Tonal Control Correct Colors.
2In the Color Correction dialog box, choose Advanced from the list box.
3Click one of the following Channel buttons:
•Red — allows you to adjust only the red curve

296 | Corel Painter 2022 User Guide
•Green — allows you to adjust only the green curve
•Blue — allows you to adjust only the blue curve
4Drag a node on the diagonal line. Dragging the curve down darkens the image and dragging it up lightens the image.
To adjust colors by specifying curve values
1Choose Effects Tonal Control Correct Colors.
2In the Color Correction dialog box, choose Advanced from the Method list box.
3Type percentage values for Red, Green, or Blue in the following columns:
•Highlight — adjusts the image highlights (lower portion of the graph)
•1/4 Tone — adjusts the image contrast
•Midtone — adjusts the image contrast
•3/4 Tone — adjusts the image contrast
•Shadow — adjusts the image shadows (upper portion of the graph)
Typing positive percentages, such as 89%, sets values in the upper portion of the graph, which lightens the image. Typing negative
percentages, such as -89%, sets values in the lower portion of the graph and darkens the image. Typing the same percentage value for
each color applies the change equally.
Adjusting hue, saturation, and value
The Adjust Colors effect lets you control the hue, saturation, and value of an image in much the same way as you would adjust your
television. It also lets you adjust the image colors equally or by using the luminosity of an external source.
When using luminosity to adjust colors, pixels with higher luminance undergo greater color adjustments.
You can choose any of the following adjustment methods:
•Uniform Color — adjusts all pixels equally
•Paper — uses the selected paper grain to control the color adjustment
•Image Luminance — uses the luminance of the image as the model for color adjustment. Areas of greater luminance are adjusted more.
•Original Luminance — uses the luminance of the clone source as the model for color adjustment. If you have not set up a clone source,
the current pattern is used.
•[Alpha channel] or [Layer mask] — sets the selected alpha channel or layer mask as the model for controlling color adjustment. For
example, a black-to-white gradation in the channel or mask lets you adjust the color progressively across the image. In black areas of the
channel or mask, colors are not changed. In white areas of the channel or mask, the adjustment applies fully. Transitional areas receive
proportional color adjustments.
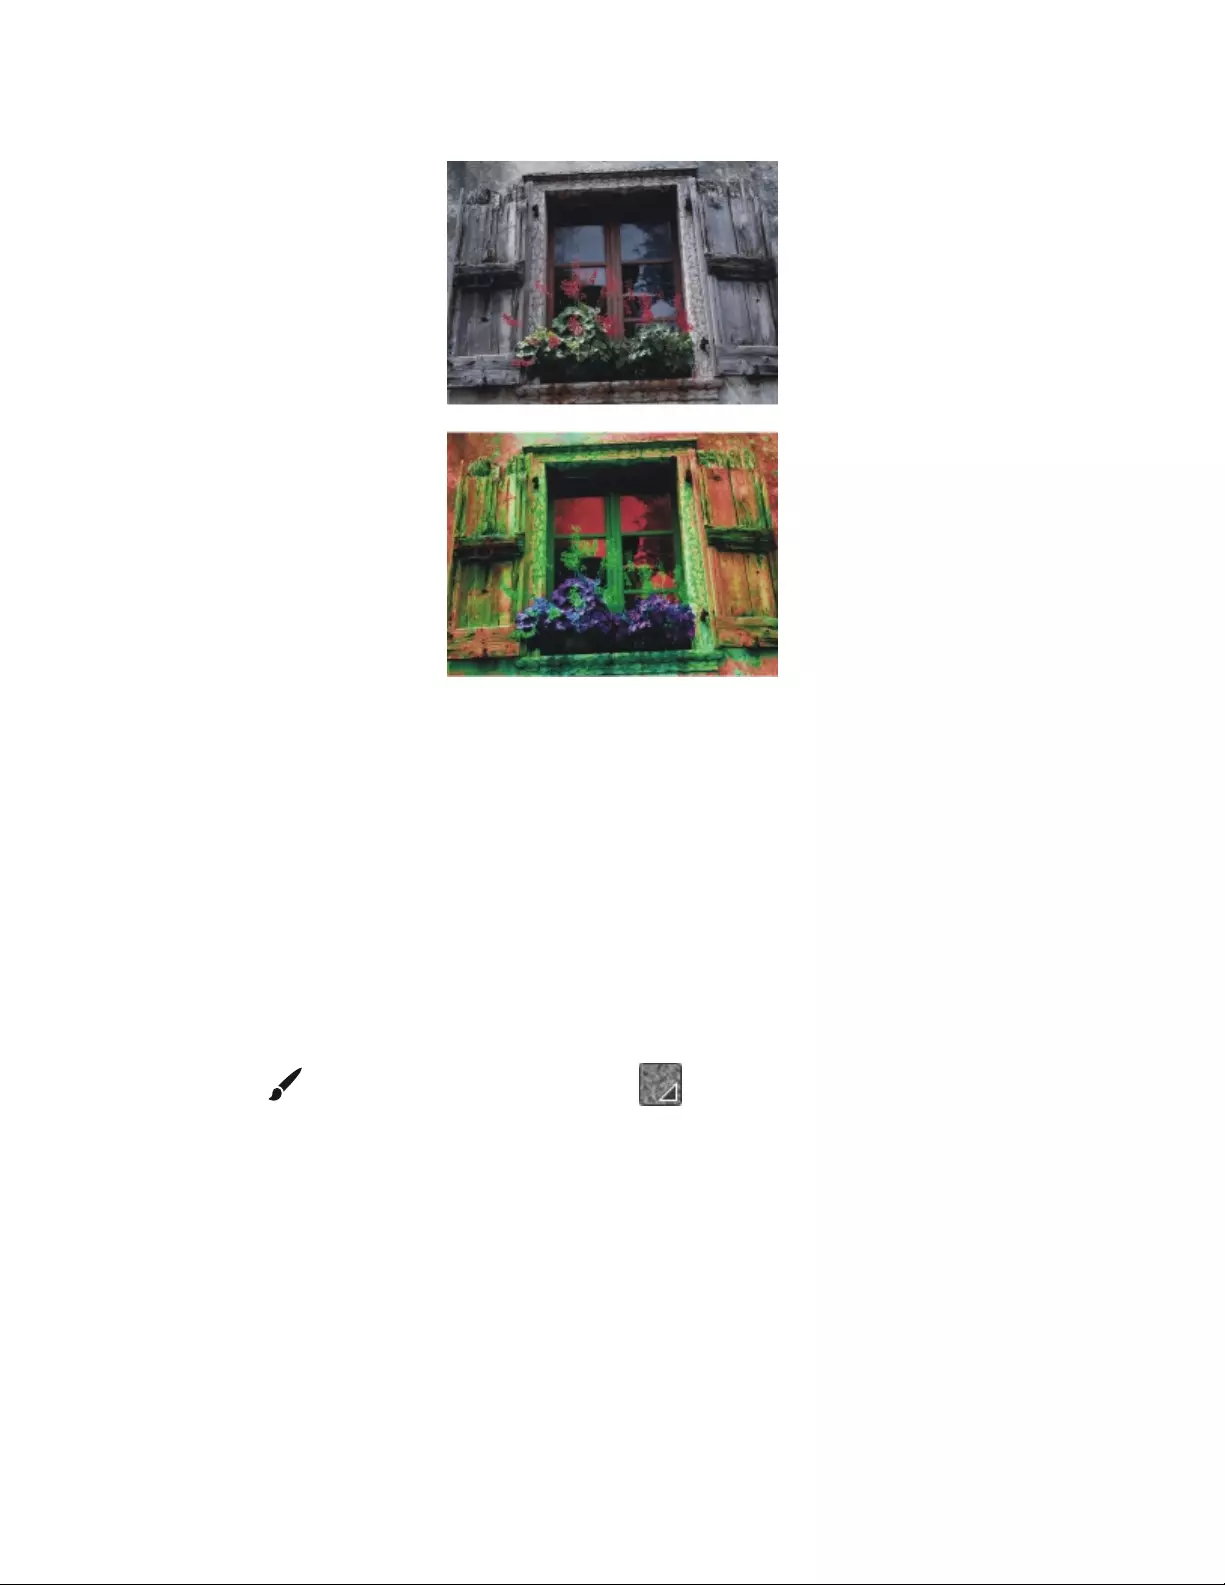
Correcting and adjusting colors | 297
Use the Adjust Color dialog box to change the hue, saturation, and value of an image.
To adjust colors equally
1To apply the effect to:
• The canvas — Click the Canvas in the Layers panel.
• A selection — Click a selection tool from the toolbox, and drag in the document window to select an area.
• A layer — Click a layer in the Layers panel.
2Choose Effects Tonal Control Adjust Colors.
3Choose Uniform Color from the Using list box.
4Adjust any of the Adjust Colors controls. For information, see “Adjust Colors controls” on page 298.
To adjust colors by using paper luminance
1Do one of the following:
•On the Brush tool property bar, click the Grain flyout button .
•Choose Window Media Panels Papers to open the Papers panel.
2Click a paper texture swatch in the Paper Textures area.
3To apply the effect to:
• The canvas — Click the Canvas in the Layers panel.
• A selection — Click a selection tool from the toolbox, and drag in the document window to select an area.
• A layer — Click a layer in the Layers panel.
4Choose Effects Tonal Control Adjust Colors.
5Choose Paper from the Using list box.
6Adjust any of the Adjust Colors controls. For information, see “Adjust Colors controls” on page 298.

298 | Corel Painter 2022 User Guide
To adjust colors by using image luminance
1To apply the effect to:
• The canvas — Click the Canvas in the Layers panel.
• A selection — Click a selection tool from the toolbox, and drag in the document window to select an area.
• A layer — Click a layer in the Layers panel.
2Choose Effects Tonal Control Adjust Colors.
3Choose Image Luminance from the Using list box.
4Adjust any of the Adjust Colors controls. For information, see “Adjust Colors controls” on page 298.
To adjust colors by using clone, texture, or pattern luminance
1Perform a task from the following table.
2In the Clone Source panel (Window Clone Source), perform a task from the following table.
To use Do the following
A clone source Choose Embedded Image from the Source list box.
In the Embed Source Image dialog box, do one of the following:
•To browse for a file, enable the Browse option.
•To clone a currently open document, enable the Current
Document option, and choose a document from the list box.
•To embed the active texture, enable the Current Texture option.
Click OK.
A texture Choose Texture from the Source list box, and click a texture swatch
in the Painter Textures area.
A pattern Choose Current Pattern from the Source list box, and click a
pattern swatch in the Painter Patterns area.
3To apply the effect to:
• The canvas — Click the Canvas in the Layers panel.
• A selection — Click a selection tool from the toolbox, and drag in the document window to select an area.
• A layer — Click a layer in the Layers panel.
4Choose Effects Tonal Control Adjust Colors.
5Choose Original Luminance from the Using list box.
6Adjust any of the Adjust Colors controls. For information, see “Adjust Colors controls” on page 298.
Adjust Colors controls
•Hue Shift — adjusts the hue of pixels
•Saturation — adjusts the amount of pure hue in the color
•Value — adjusts color brightness. Moving the slider to the left darkens colors.
•Reset — resets the sliders to their default settings

Correcting and adjusting colors | 299
Adjusting selected colors
The Adjust Selected Colors effect is similar to the Adjust Colors effect, but it works only on a specified range of colors within an image. You
choose a color in an image and adjust colors within a range of that color. You could, for example, change yellow peppers to red peppers.
You can adjust colors that are exactly the same as the color you select, or you can choose colors within a range, based on proximity (on the
color wheel or the color space) to the selected color.
Selective color adjustments change only certain colors in the image.
The Range sliders determine the extent of the HSV color space around the selected center color.
By combining these settings, you can set up a very specific range of colors to adjust. For example, you can limit changes to a precise shade of
red.
The Feather sliders affect the softness at the edge of the selected colors. These sliders can help you create smoother transitions between the
replaced color and the original.
A replaced color with and without feathering
You can choose from any of the following adjustment methods:
•Uniform Color — adjusts all pixels equally
•Paper — uses the selected paper grain to control the color adjustment
•Image Luminance — uses the luminance of the image as the model for color adjustment. Areas of greater luminance are adjusted more.
•Original Luminance — uses the luminance of the clone source as the model for color adjustment. If you have not set up a clone source,
the current pattern is used.
300 | Corel Painter 2022 User Guide
To adjust a selected color
1Choose Effects Tonal Control Adjust Selected Colors.
The Adjust Selected Colors dialog box appears.
2Move the cursor over the image in the document window (the cursor becomes a dropper), and click the color you want to adjust.
The Color panel displays the selected color as the main color.
3Choose Uniform Color from the Using list box.
4Adjust any of the Adjust Selected Colors controls. For information, see “Adjust Selected Colors controls” on page 301.
To adjust selected colors by using paper luminance
1Do one of the following:
•On the Brush tool property bar, click the Grain flyout button .
•Choose Window Media Panels Papers to open the Papers panel.
2Click a paper texture swatch in the Paper Textures area.
3To apply the effect to:
• The canvas — Click the Canvas in the Layers panel.
• A selection — Click a selection tool from the toolbox, and drag in the document window to select an area.
• A layer — Click a layer in the Layers panel.
4Choose Effects Tonal Control Adjust Selected Colors.
5Choose Paper from the Using list box.
6Adjust any of the Adjust Selected Colors controls. For information, see “Adjust Selected Colors controls” on page 301.
To adjust colors by using image luminance
1To apply the effect to:
• The canvas — Click the Canvas in the Layers panel.
• A selection — Click a selection tool from the toolbox, and drag in the document window to select an area.
• A layer — Click a layer in the Layers panel.
2Choose Effects Tonal Control Adjust Selected Colors.
3Choose Image Luminance from the Using list box.
4Adjust any of the Adjust Selected Colors controls. For information, see “Adjust Selected Colors controls” on page 301.
To adjust colors by using clone, texture, or pattern luminance
1In the Clone Source panel (Window Clone Source), perform a task from the following table.
To use Do the following
A clone source Choose Embedded Image from the Source list box.
In the Embed Source Image dialog box, do one of the following:
•To browse for a file, enable the Browse option.
•To clone a currently open document, enable the Current
Document option, and choose a document from the list box.
•To embed the active texture, enable the Current Texture option.
Click OK.

Correcting and adjusting colors | 301
To use Do the following
A texture Choose Texture from the Source list box, and click a texture swatch
in the Painter Textures area.
A pattern Choose Current Pattern from the Source list box, and click a
pattern swatch in the Painter Patterns area.
2To apply the effect to:
• The canvas — Click the Canvas in the Layers panel.
• A selection — Click a selection tool from the toolbox, and drag in the document window to select an area.
• A layer — Click a layer in the Layers panel.
3Choose Effects Tonal Control Adjust Selected Colors.
4Choose Paper from the Using list box.
5Adjust any of the Adjust Selected Colors controls. For information, see “Adjust Selected Colors controls” on page 301.
Adjust Selected Colors controls
The following controls in the Select area let you refine the color selection.
Hue controls
•Range — controls the number of hues adjusted. Only hues within the specified percentage of hues on the color wheel are adjusted.
•Feather — controls the softness at the edge of the selected hues
Saturation controls
•Range — controls the range of saturation adjusted. Only saturations within this range are adjusted.
•Feather — controls the softness at the edge of the range of saturated colors
Value controls
•Range — controls the range of values adjusted
•Feather — controls the softness at the edge of the selected values
Moving the Range sliders to the right increases the amount of color space affected and creates smoother transitions between the
replaced color and the original.
The following controls in the Replace area let you refine the adjusted colors.
•Hue — adjusts the colors of the pixels by changing their hue. Moving the slider to the right increases the hue.
•Saturation — adjusts the amount of pure hue in the color. Moving the slider all the way to the left creates a grayscale image.
•Value — adjusts color brightness. Moving the slider to the left darkens colors.
The following controls can help you preview and reset adjustments.
•Preview — enable this check box to preview the adjustments in the document window
•Reset — resets the sliders to their default settings
Equalizing images
Corel Painter includes various options for equalizing images. Equalizing involves increasing the contrast by resetting the darkest and lightest
points and then evenly distributing the values across those two points.
You can produce an equalizing effect by automatically or manually adjusting the black and white points in an image.
You can also equalize an image by using the Equalize effect. This effect allows you to adjust contrast, adjust black and white points,
and distribute the brightness levels throughout the entire range of available levels. In addition, you can equalize an image by creating a

302 | Corel Painter 2022 User Guide
histogram showing the number of pixels for each brightness level value and then adjusting those values. The Equalize effect also allows
gamma adjustment, which lightens or darkens an image without changing highlights or shadows.
Before (left) and after (right) applying the Equalize effect
To automatically set black and white points
1Choose Effects Tonal Control Correct Colors.
2In the Color Correction dialog box, choose Curve from the Method list box.
3From the Curve Preset list box, choose Auto Set.
To manually set black or white points
1Choose the Dropper tool from the toolbox.
2In the document window, click the color you want to assign as the darkest or lightest point.
3Choose Effects Tonal Control Correct Colors.
4In the Color Correction dialog box, choose Curve from the list box.
5From the Curve Preset list box, choose one of the following:
•Black Point — assigns all colors equal to or darker than the current main color to black
•White Point — assigns all colors equal to or lighter than the current main color to white
To equalize colors
1To apply the effect to:
• The canvas — Click the Canvas in the Layers panel.
• A selection — Click a selection tool from the toolbox, and drag in the document window to select an area.
• A layer — Click a layer in the Layers panel.
2From the menu bar, choose Effects Tonal Control Equalize.
Corel Painter automatically adjusts the image or selection so that the lightest color is white and the darkest color is black.
3In the Equalize dialog box, adjust contrast by dragging the black and white markers under the histogram, or type values in the Black box
and White box.
Any values in the image located to the right of the white marker become white; any values to the left of the black marker become black.
4Move the Gamma slider.
Moving the slider to the right darkens the image; moving the slider to the left lightens the image.
Changing the gamma adjusts only the midtones of an image and leaves the black and white areas untouched.
5Click OK to apply changes.
A preview of the changes is applied to the original image, but the changes are not final until you click OK. If you want to revert to the
original image, click Cancel.
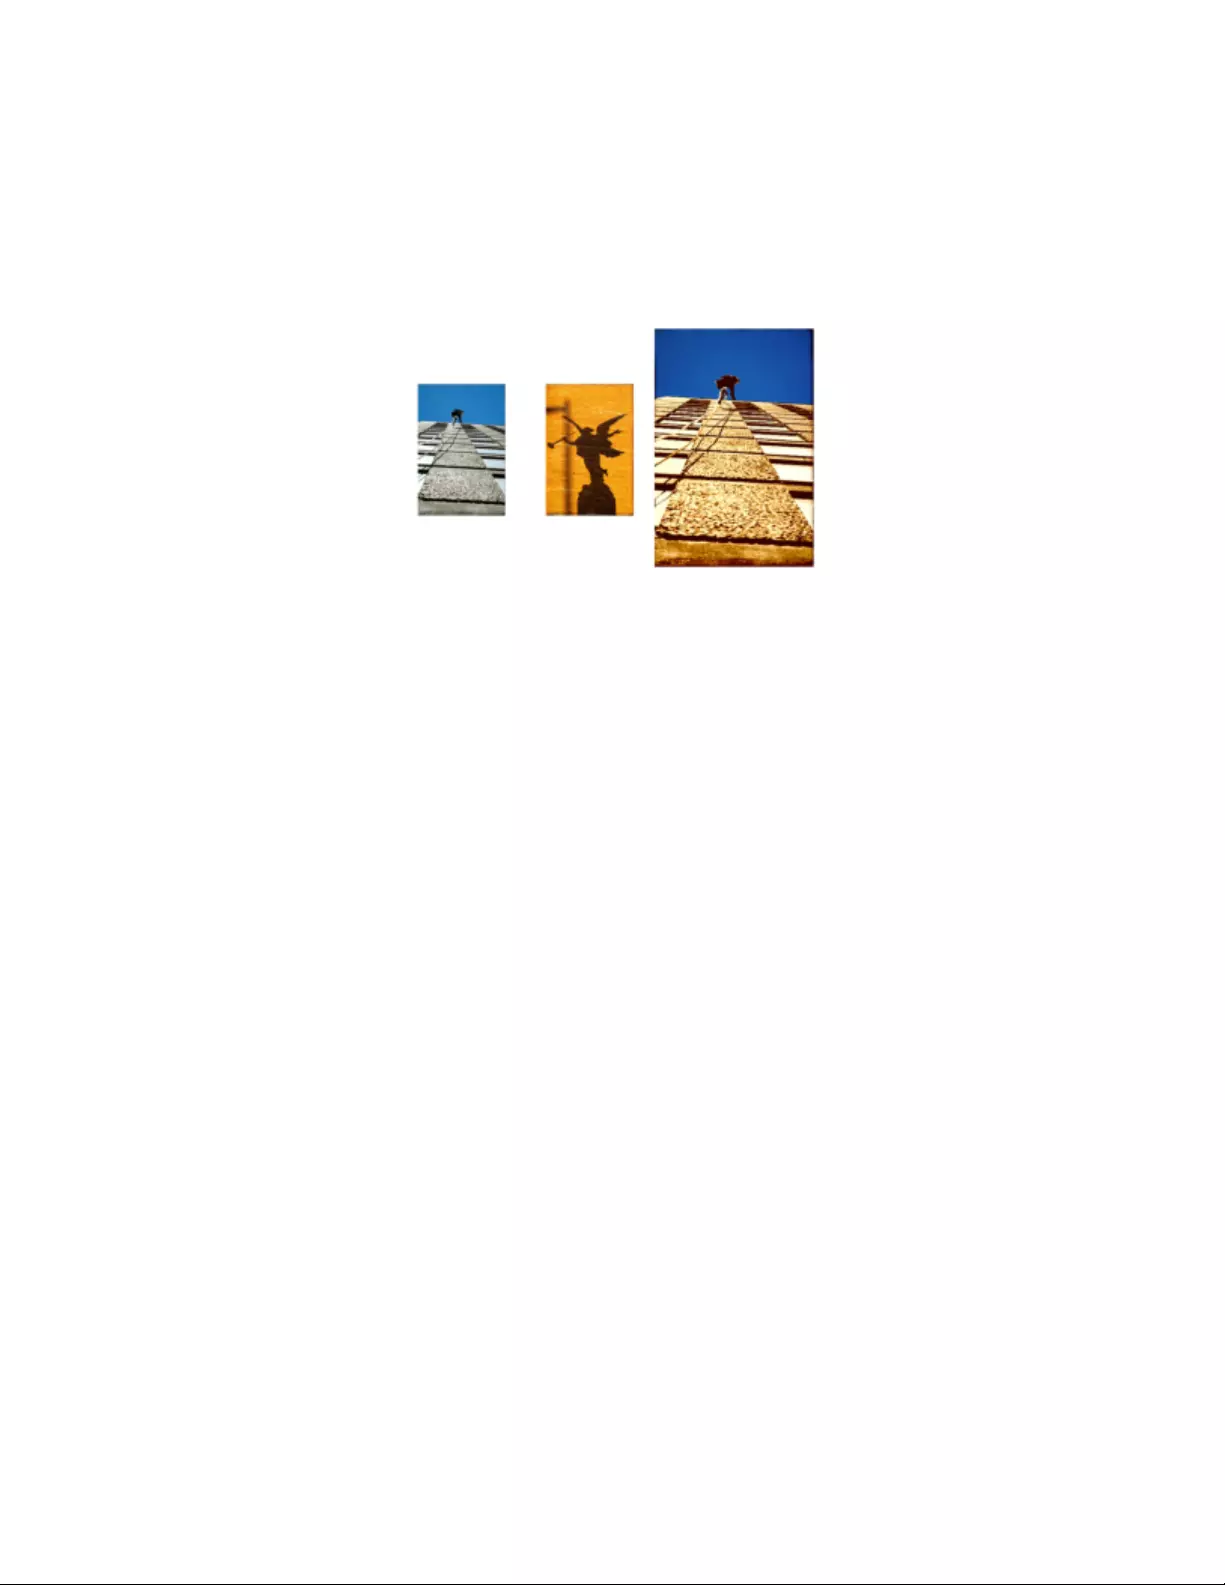
Correcting and adjusting colors | 303
Matching color and brightness across images
The Match Palette effect lets you apply the color and brightness of a source image to a destination image. For example, you can match the
colors in a photo to the colors in a favorite painting. You can then clone and paint your photo in the same style as your favorite painting.
You can also use the Match Palette effect to ensure that the color and brightness in a group of photos is consistent.
You can apply the color and brightness from a source image (center) to your working image (left) to create a new effect (right).
To match colors across images
1Open both the source image and the destination image.
2Select the destination image.
3Choose Effects Tonal Control Match Palette.
4From the Source list box, select the source image.
The filenames for all open images appear in the list box.
5Adjust any of the following sliders:
•Color — lets you determine how the colors from the source image blend with the colors in the destination image. At higher settings,
more source color is applied.
•Variance (Color) — lets you adjust the range of the source colors. Higher settings increase the number of shades used from the source
image.
•Brightness — lets you determine how the luminance from the source image blends with the luminance in the destination image.
Higher settings pull more highlights and shadows from the source image into the destination image.
•Variance (Brightness) — lets you adjust the range of highlights and shadows. Higher settings increase the contrast between the
highlights and shadows.
6Move the Amount slider to specify the overall intensity of the other settings.
Start at 100%, and decrease the amount until you are satisfied with the results.
Inverting colors
The Negative effect inverts all the colors in an image, or in the selected layer.
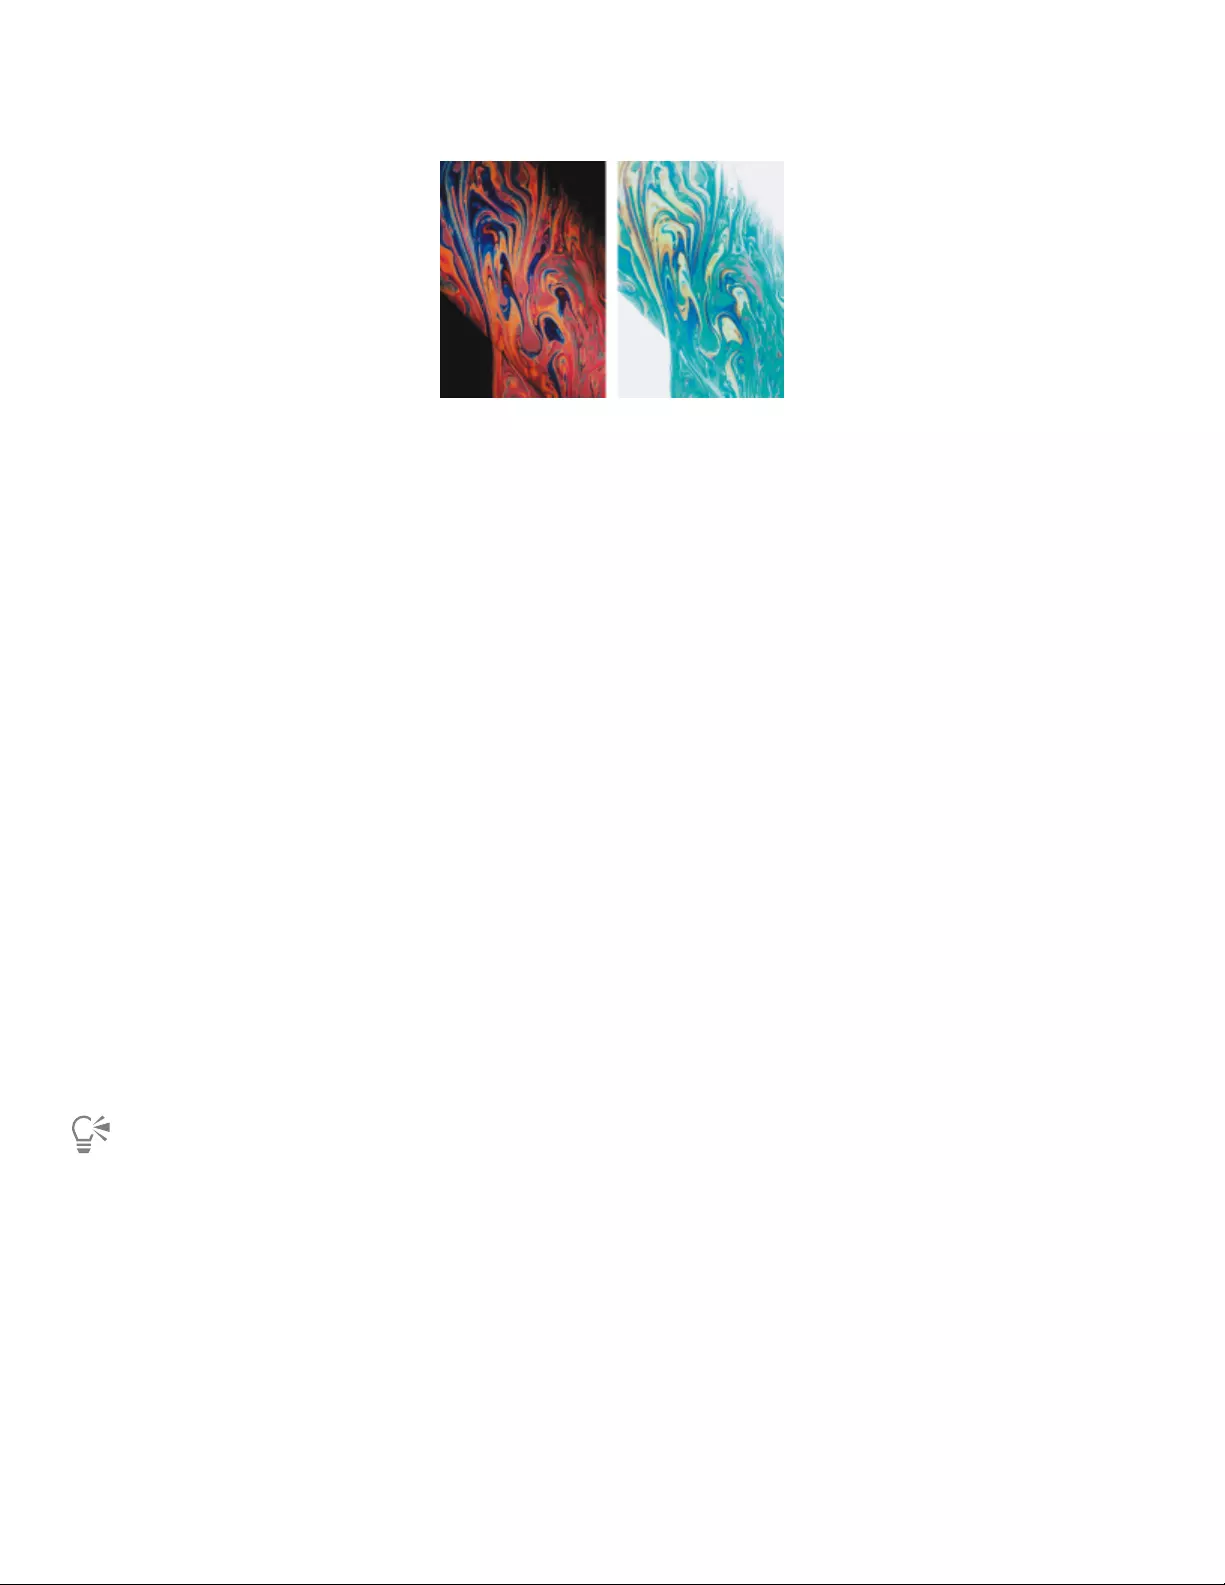
304 | Corel Painter 2022 User Guide
Positive (left) and negative (right) versions of an image
To invert colors
1To apply the effect to:
• The canvas — Click the Canvas in the Layers panel.
• A selection — Click a selection tool from the toolbox, and drag in the document window to select an area.
• A layer — Click a layer in the Layers panel.
2Choose Effects Tonal Control Negative.
Posterizing an image
Corel Painter offers two different options for posterizing images. You can use the Posterize effect to reduce the number of color levels
contained in an image.
You can also posterize an image by specifying a color set. This effect lets you replace image colors with those of a specified colors set. This is
useful for multimedia work, as well as applications such as silkscreening. You can use this effect to reduce the number of colors in an image.
To posterize an image
1To apply the effect to:
• The canvas — Click the Canvas in the Layers panel.
• A selection — Click a selection tool from the toolbox, and drag in the document window to select an area.
• A layer — Click a layer in the Layers panel.
2Choose Effects Tonal Control Posterize.
3In the Posterize dialog box, specify a number of levels.
The fewer levels you specify, the more dramatic the effect.
To posterize an image combined with a paper grain, refer to “Applying the Apply Screen effect” on page 660.
To posterize to two levels and also adjust the brightness, refer to “Equalizing images” on page 301.
To posterize an image by using a color set
1To apply the effect to:
• The canvas — Click the Canvas in the Layers panel.
• A selection — Click a selection tool from the toolbox, and drag in the document window to select an area.
• A layer — Click a layer in the Layers panel.
2Choose Window Color Panels Color Sets.
Correcting and adjusting colors | 305
3Click the Color set libraries options button , choose Color Set Libraries, and choose a color set from the list.
4Choose Effects Tonal Control Posterize Using Color Set.
The image is replaced with the colors in the current color set.
Applying video legal colors
You can apply an effect that adjusts the colors in an image so they are compatible with video. Colors that aren’t possible in video are
converted to video legal colors.
Only bright yellows and cyans are not video legal. Corel Painter supports both the National Television System Committee (NTSC) for video
systems in the U.S. and Phase Alternation by Line (PAL) for video systems in Europe.
To apply video legal colors
1To apply the effect to:
• The canvas — Click the Canvas in the Layers panel.
• A selection — Click a selection tool from the toolbox, and drag in the document window to select an area.
• A layer — Click a layer in the Layers panel.
2Choose Effects Tonal Control Video Legal Colors.
3In the Video Legal Colors dialog box, choose NTSC or PAL from the System list box.
Dodging and burning
The Dodge and Burn tools let you adjust the highlights, midtones, and shadows in an image. The Dodge tool lightens the tone; the Burn
tool darkens it. You can dodge and burn anywhere in a photo, affecting an area as large or as small as you like.
To lighten the tone
1Choose the Dodge tool from the toolbox.
2On the property bar, move the Size slider , or type a value in the Size box.
3Move the Opacity slider , or type a value in the Opacity box.
4Drag the brush in the image to apply the effect.
The Dodge tool was used to lighten the girl’s eye.
To darken the tone
1Choose the Burn tool from the toolbox.
If the Burn tool is not displayed in the toolbox, hold down the Dodge tool to open the tool flyout.
306 | Corel Painter 2022 User Guide
2On the property bar, move the Size slider , or type a value in the Size box.
3Move the Opacity slider , or type a value in the Opacity box.
4Drag the brush in the image to apply the effect.
The Burn tool was used to reduce the strong highlights on the faces.
Libraries | 307
Libraries
A library is a storage place for a collection of tools or media. In Corel Painter, default libraries are available for the following resources:
brushes, brush sizes, captured dabs, papers, color sets, gradients, looks, nozzles, textures, patterns, selections, scripts, images, weaves, and
flow maps. The default libraries contain a vast array of resources that are ready for you to use. In addition, you can create your own libraries
to better organize resources, or to store customized resources.
This section contains the following topics:
•“Importing and exporting libraries” (page 307)
•“Creating and removing libraries” (page 308)
•“Modifying the display of media panels” (page 309)
•“Moving, renaming, and deleting library resources” (page 310)
•“Restoring default libraries” (page 311)
Importing and exporting libraries
Corel Painter lets you import and export libraries. For example, you can open a library that was created in a previous version of Corel Painter.
You can also open multiple libraries at once, except in the Brush Selector. For more information, see “Creating and deleting brush libraries”
on page 329.
All of the Corel Painter tools and media that are included in the application are stored in default libraries. For example, the default papers
that are included in Corel Painter are contained in the Paper Textures libraries. When you first open a library in a media panel, the content of
the default library for that given tool or media is displayed in the panel.
To import a library
1Depending on the media panel, do one of the following:
•Click the Manage Libraries flyout button , and then click Import [Resource type] Library.
For example, if you want to open a paper textures library, click the Manage Libraries flyout button in the Papers panel, and then
click Import Paper Library.
•Click the Import [Resource type] Library button .
For example, if you want to open a Brush Looks library, click the Import Look Library button in the Looks panel.
2Choose the drive and folder where the library is stored.

308 | Corel Painter 2022 User Guide
3Click Open.
The imported library displays at the bottom of the panel window. Depending on the size of the panel, you may need to scroll to see the
imported library.
To import a library created in a previous version of Corel Painter
1Depending on the media panel, do one of the following:
•Click the Manage Libraries flyout button , and then click Import Legacy [Resource type] Library.
•Click the media panel’s options button , and choose Import Legacy [Resource type] Library.
2Choose the drive and folder where the library is stored.
3Click Open.
The imported library displays at the bottom of the panel window.
To export a library
1Depending on the media panel, do one of the following:
•Click the Manage Libraries flyout button , and then click Export [Resource type] Library.
For example, if you want to export a gradient library, click the Manage Libraries flyout button in the Gradients panel, and then
click Export Gradient Library.
•Click the Export [Resource type] Library button .
For example, if you want to export a nozzle library, click the Export Nozzle Library button in the Nozzles panel.
2In the Choose Library dialog box, choose the library that you want to export from the Library list box.
3Choose the drive and folder where you want to store the library.
4Click Save.
Creating and removing libraries
Libraries allow you to store and organize tools and media to make it easier for you to locate and access them. When you create a new
resource, such as a gradient, it is automatically saved to the current library. However, you can create a custom library and move the resource
to that library. In addition, you can copy any of the default resources to a custom library. If you no longer need a library, you can remove it.
The method for creating a library is the same for most tools and media, except for brush libraries. For more information, see “Creating and
deleting brush libraries” on page 329.
To create a library
1Depending on the media panel, do one of the following:
•Click the Manage Libraries flyout button , and then click New [Resource type] Library.
For example, if you want to create a flow map library, click the Manage Libraries flyout button in the Flow Maps panel, and then
click New Flow Maps Library.
•Click the New [Resource type] Library button .
For example, if you want to create a new selection portfolio, click the New Selection Portfolio button in the Selections panel.

Libraries | 309
2In the New Library dialog box, type a name in the Save As box.
A header bar for the new library appears at the bottom of the media panel and its title appears in the list of available libraries. The new
library also contains one swatch by default.
When you save an item, Corel Painter adds it to the currently selected library. If you want to store the item in a different library,
make sure you select the correct library before saving the item. You can move items between libraries later, but switching libraries
before saving the resource will spare you that extra step.
To add an existing resource to a library
• In a media panel, drag an item from one library to the library where you want to add the resource.
When you create a new resource, such as a brush variant, paper, or weave, it is automatically saved to the currently selected library.
For more information about creating resources, please refer to the Help chapter that pertains to the resource.
Over time, with additions and deletions, library file sizes are compounded. In some cases, you may lose items if you restore a
default library. For best results, save new resources to new libraries, and limit the number of resources in each library.
To remove a library
1Click the media panel’s options button , choose Remove [Resource type] Library.
2Choose the library that you want to remove from the Library list box.
The Remove [Resource type] Library command is available only in the Textures, Papers, Flow Maps, Patterns, and Gradients
panels.
Modifying the display of media panels
You can modify the appearance of media panels by changing the way they are organized and displayed. You can show or hide some user
interface elements if you don’t need them. You can resize a media panel to control the space that it takes in the application window. You
can also change the display size of the resource icons. If you do not need to use some of the resource swatches, you can hide them. In
addition, if you create a new resource, you can create a custom icon for the resource.
To modify the display of a media panel
1Open a media panel.
2Perform a task from the following table.
To Do the following
Resize the media panel Point to the edge of the panel. When the cursor changes to a
double-sided arrow, drag the edge of the panel to resize it.
Show or hide the [resource type] preview Click the media panel’s options button , and choose Show
Preview.

310 | Corel Painter 2022 User Guide
Show or hide sliders Click the media panel’s options button , and choose Show
Sliders.
Resize the library swatches Depending on the media panel, do one of the following:
•Click the Manage Libraries flyout button , and click
[Resource type] Library View.
•Click the media panel’s options button , choose [Resource
type] Library View.
Choose one of the following options:
•Small
•Medium
•Large
Display the library swatches as a list Depending on the media panel, do one of the following:
•Click the Manage Libraries flyout button , and click
[Resource type] Library View.
•Click the media panel’s options button , choose [Resource
type] Library View.
Choose List.
Hide a library swatch Right-click (Windows) or Control-click (macOS) a library resource
swatch, and choose Hide [Resource type].
Show all swatches that were previously hidden Depending on the media panel, do one of the following:
•Click the Manage Libraries flyout button .
•Click the media panel’s options button , choose [Resource
type] Library View.
Choose Show All Hidden Items.
Customize a swatch icon Right-click (Windows) or Control-click (macOS) a resource swatch,
and choose Set Custom Icon. Choose the drive and folder where
the image is stored. Click the image file and click Open.
Moving, renaming, and deleting library resources
You can move a library resource to a new position within a library, or drag it to a different library. You can also rename resources, such as
renaming a paper or gradient, to give them more descriptive names. You can also delete an item from a library, including a default library.
You can also restore the default library to the factory settings. For information, see “Restoring default libraries” on page 311.
To move a library resource
• In a media panel, do one of the following:
• Drag a resource swatch to another position within the library.
• Drag a resource swatch to another library.

Libraries | 311
If you’re dragging a swatch to a different library, you cannot position the swatch at the end of the library. You must place the swatch in
between, or before, an existing swatch.
To rename a library resource
1In a media panel, right-click (Windows) or Control-click (macOS) the resource that you want to rename, and choose Rename [Resource].
(e.g. Rename Paper)
2In the Rename dialog box, type the new name in the Rename [Resource] text box.
To delete a library resource
1In a media panel, click the resource that you want to delete.
2Click the Delete [Resource] button .
Do not delete default resource files or folders.
Restoring default libraries
You can restore a default library at any time. When you restore the default libraries, all custom resources are removed for all libraries.
To restore a default library
• Depending on the media panel, do one of the following:
•Click the Manage Libraries flyout button , and then click Restore Default [Resource] Library.
•Click the panel’s options button , and choose Restore Default [Resource] Library.

312 | Corel Painter 2022 User Guide

Selecting, managing, and creating brushes | 313
Selecting, managing, and creating brushes
Corel Painter offers an impressive array of realistic and responsive brushes that you can use to apply media to the canvas. For example, you
can choose a brush with realistic bristles that apply oil, watercolor, or acrylic paint. You can also choose a dry media brush, such as chalk or
charcoal.
This section contains the following topics:
•“Understanding brushes” (page 313)
•“Searching and selecting brushes” (page 314)
•“Filtering brushes” (page 315)
•“Marking brushes as favorite” (page 317)
•“Acquiring brushes” (page 318)
•“Setting basic brush attributes” (page 320)
•“Working with brushes using the property bars” (page 323)
•“Renaming brush categories and variants” (page 326)
•“Saving and deleting brush variants” (page 327)
•“Restoring default brush variants” (page 328)
•“Creating and deleting brush categories” (page 329)
•“Creating and deleting brush libraries” (page 329)
•“Importing and exporting brush libraries, categories, and variants” (page 330)
•“Importing Photoshop brush images” (page 333)
•“Saving a brush look” (page 333)
•“Creating and managing brush dabs” (page 334)
Understanding brushes
Corel Painter offers users a wide range of preset brushes that are designed with the real media in mind, so you can predict how a brush will
behave.
In an art store, if the brushes in one aisle don’t produce the results you want, you can try a different aisle. Similarly, with Corel Painter,
individual brushes, known as brush variants, are stored in the Brush Selector in different brush categories. You can use the brush variants as
they are, or you can adjust them to suit your purposes. Many artists use brush variants with only minor adjustments — to size, opacity, or
grain (how brushstrokes interact with paper texture).
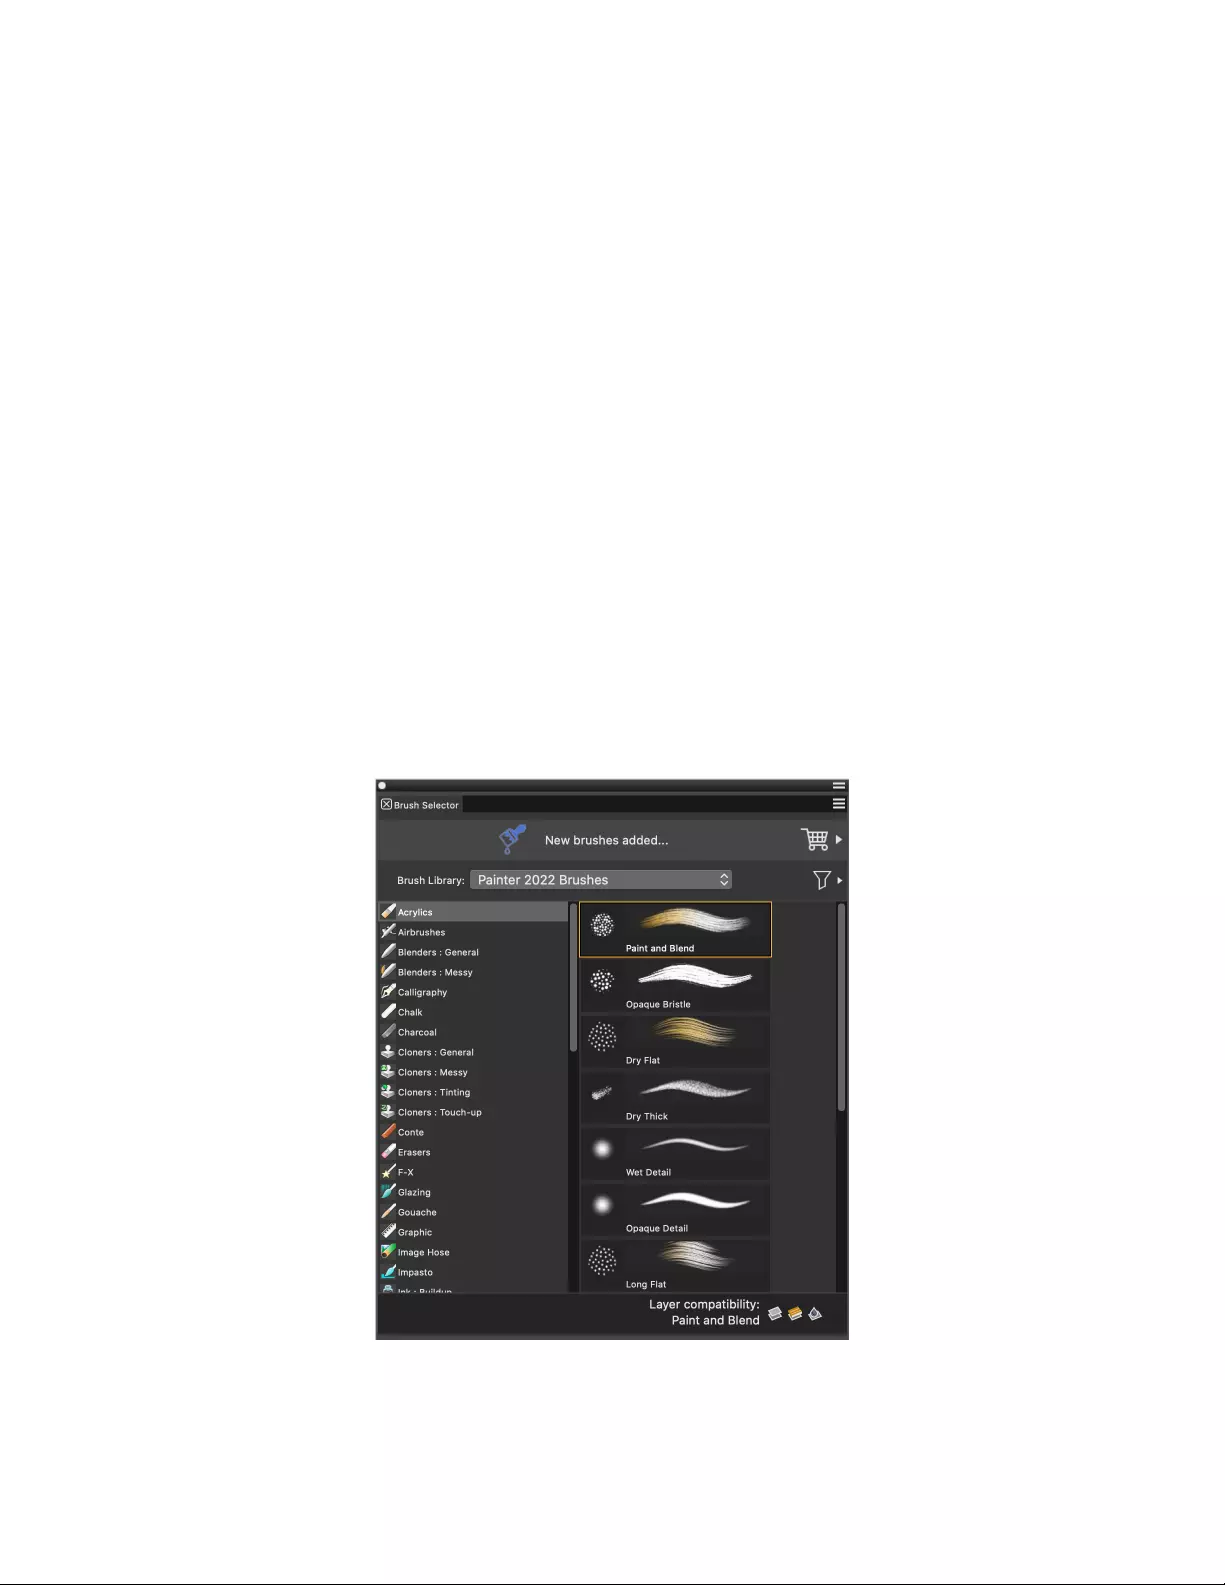
314 | Corel Painter 2022 User Guide
To modify a brush variant extensively, or to create a new brush variant, you can adjust the brush controls. For more information, see
“Adjusting brushes with brush controls” on page 337 or “Saving and deleting brush variants” on page 327.
Most Corel Painter brushes apply media, such as a color, gradient, or pattern, to an image. However, some brushes make changes to media
already in the image. For example, the Just Add Water brush variant (in the General blenders brush category) smudges and dilutes existing
colors in the image with smooth, anti-aliased brushstrokes. Using one of these brushes on a blank area of the canvas has no effect.
Corel Painter includes a batch of Natural-Media brushes that use a media application method called “rendered dab types” to produce
wonderfully realistic, continuous, smooth-edged brushstrokes. They are fast and more consistent because the brushstrokes appear as you
draw, and are not created by applying dabs of color. In fact, you can’t draw fast enough to leave dabs or dots of color in a brushstroke.
These brushes allow for rich features that are not possible with the application of stamp-based media. You can take better advantage of tilt
and angle, and you can paint with patterns or gradients. For more information, see “General controls: Dab types” on page 344.
Searching and selecting brushes
In Corel Painter, you can find brush variants by searching or browsing the currently selected brush library.
You can quickly search the content of the currently selected brush library to find brushes that match a specific description. You can perform a
search by entering one attribute, or a combination of brush attributes. For example, typing the search terms “pencil real” generates a list of
all “Real Pencil” brush variants.
You can also look for brush variants by browsing the brush categories in the Brush Selector. The Brush Selector displays a preview the
variant’s brush dab and brush stroke and lets you instantly identify which brush variants are compatible with the Default, Liquid Ink, Thick
Paint, and Watercolor layers. When you hover over a brush variant, eligible layer compatibility icons appear beside the brush name at the
bottom of the Brush Selector. Clicking a layer compatibility icon lets you find all brush variants that paint on this layer. For more information
about the Brush Selector, see “Displaying and customizing the Brush Selector” on page 70.
In full view, the Brush Selector lets you choose a brush category (left) and a brush variant (right).
You can access the last used brush from a button on the Brush Selector bar.
Selecting, managing, and creating brushes | 315
You can filter brushes to show only the brushes you need in the Brush Selector. For more information, see “Filtering brushes” on page 315.
The default Corel Painter brush variants are displayed in the Brush Selector until you open or import a different brush library. In addition, the
Brush Selector displays only one brush library at a time. For more information, see “Importing and exporting brush libraries, categories, and
variants” on page 330.
If you’re looking for a brush from a previous version of Corel Painter, you can reload the old version’s brush library. For more information, see
“Importing and exporting brush libraries, categories, and variants” on page 330.
To select a brush category and variant
1In the toolbox, click the Brush tool .
2Click the Brush Selector on the Brush Selector bar.
3Click a brush category, and click a brush variant.
To select a brush category when using the Brush Selector in compact view (Window Brush Selector Panel (Compact)), click
the Category flyout button, and click a category.
To select the previous brush variant
•On the Brush Selector bar, click the Last Used Brush button .
You can also select the last brush variant that you used by clicking Brushes Select Previous Variant.
You can assign a keyboard shortcut to this command. For more information, see “To assign commands to keys” on page 132.
To search for brush variants
1Click Window Search.
2In the Search bar, type one attribute or a combination of brush attributes in the Search text box.
3Choose a brush variant from the list.
The Search bar is displayed by default only in the Classic layout and is located to the right of the property bar, in the upper-right
corner of the document window. To display the Search bar in all other layouts, click Window Search.
You can also search for new or updated brushes in Corel Painter 2022 by typing 2022 in the Search box.
In addition, you can use GPU, AVX2, and Multi-core (or “Multicore”) as search terms to find brushes that leverage those
technologies.
Filtering brushes
Brush filters let you show only the brushes you need for the creative task at hand. For example, you can apply the Thick Paint Compatible
filter to show only Thick Paint and Thick Paint compatible brushes and hide all other brushes from the Brush Selector.
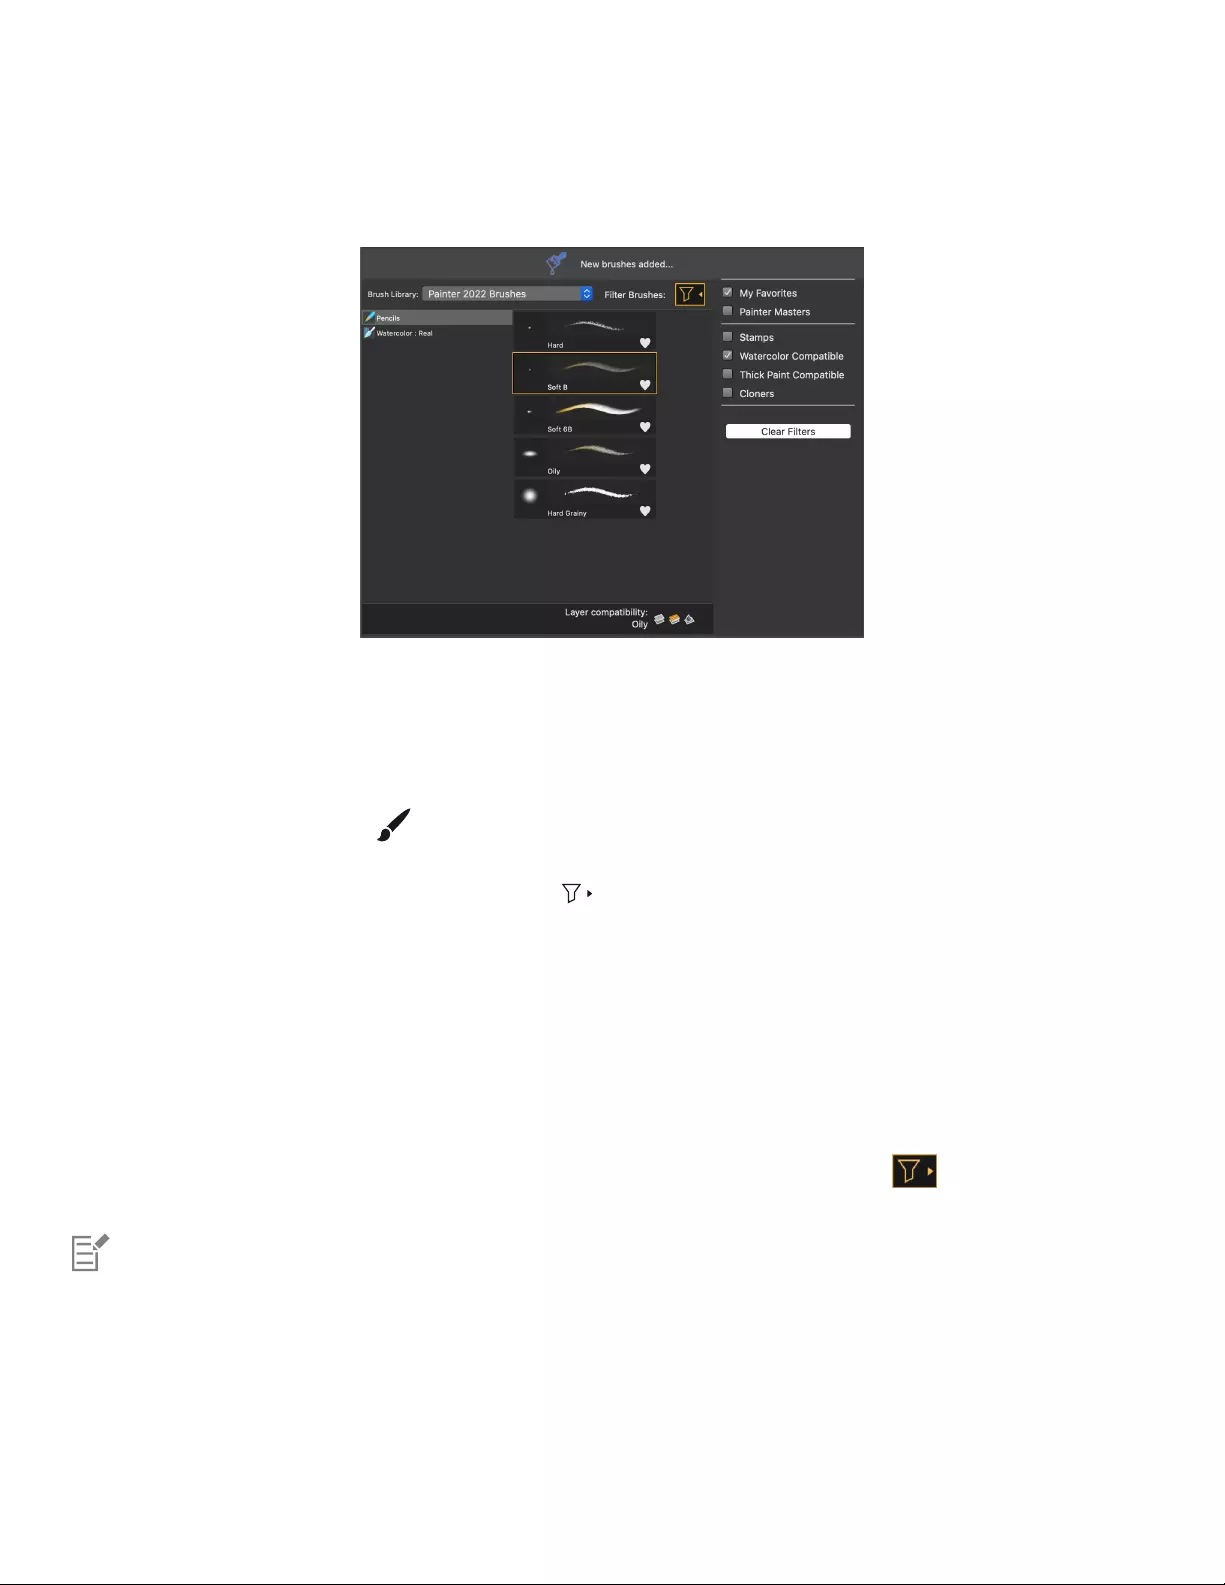
316 | Corel Painter 2022 User Guide
Corel Painter provides several brush filters: My Favorites, Painter Masters, Stamps, Watercolor Compatible, Thick Paint Compatible, and
Cloners. To fine-tune your selection of brushes, you can apply two or more filters at the same time. For example, you can show only your
favorite Watercolor Compatible brushes.
Apply one or more brush filters to hide the brush categories and brushes that you don’t need.
You can clear one or more filters to expand your brush selection, and you can clear all brush filters to display all brushes in the active brush
library.
To filter brushes
1In the toolbox, click the Brush tool .
2Click the Brush Selector on the Brush Selector bar.
3In the Brush Selector flyout, click the Filter Brushes button to show the list of available brush filters.
4Enable one or more of the following check boxes:
•My Favorites — shows only the brushes you have marked as favorites. For more information about favorite brushes, see “Marking
brushes as favorite” on page 317.
•Painter Masters — shows only brushes that are highly valued and used by Painter masters
•Stamps — shows only stamp-type brushes that use the Circular, Captured, Computed Circular, or Static Bristle dab types
•Watercolor Compatible — shows only Watercolor brushes and brushes that can be used on Watercolor layers
•Thick Paint Compatible — shows only Thick Paint brushes and brushes that can be used on Thick Paint layers
•Cloners — shows only cloner and clone tinting brushes
When a brush filter is applied, the outline of the Filter Brushes button changes from white to orange .
You can filter any imported brushes, brush categories, or brush libraries.
Brush filters are applied only to visible brushes. Hidden brush categories and brush variants remain hidden.
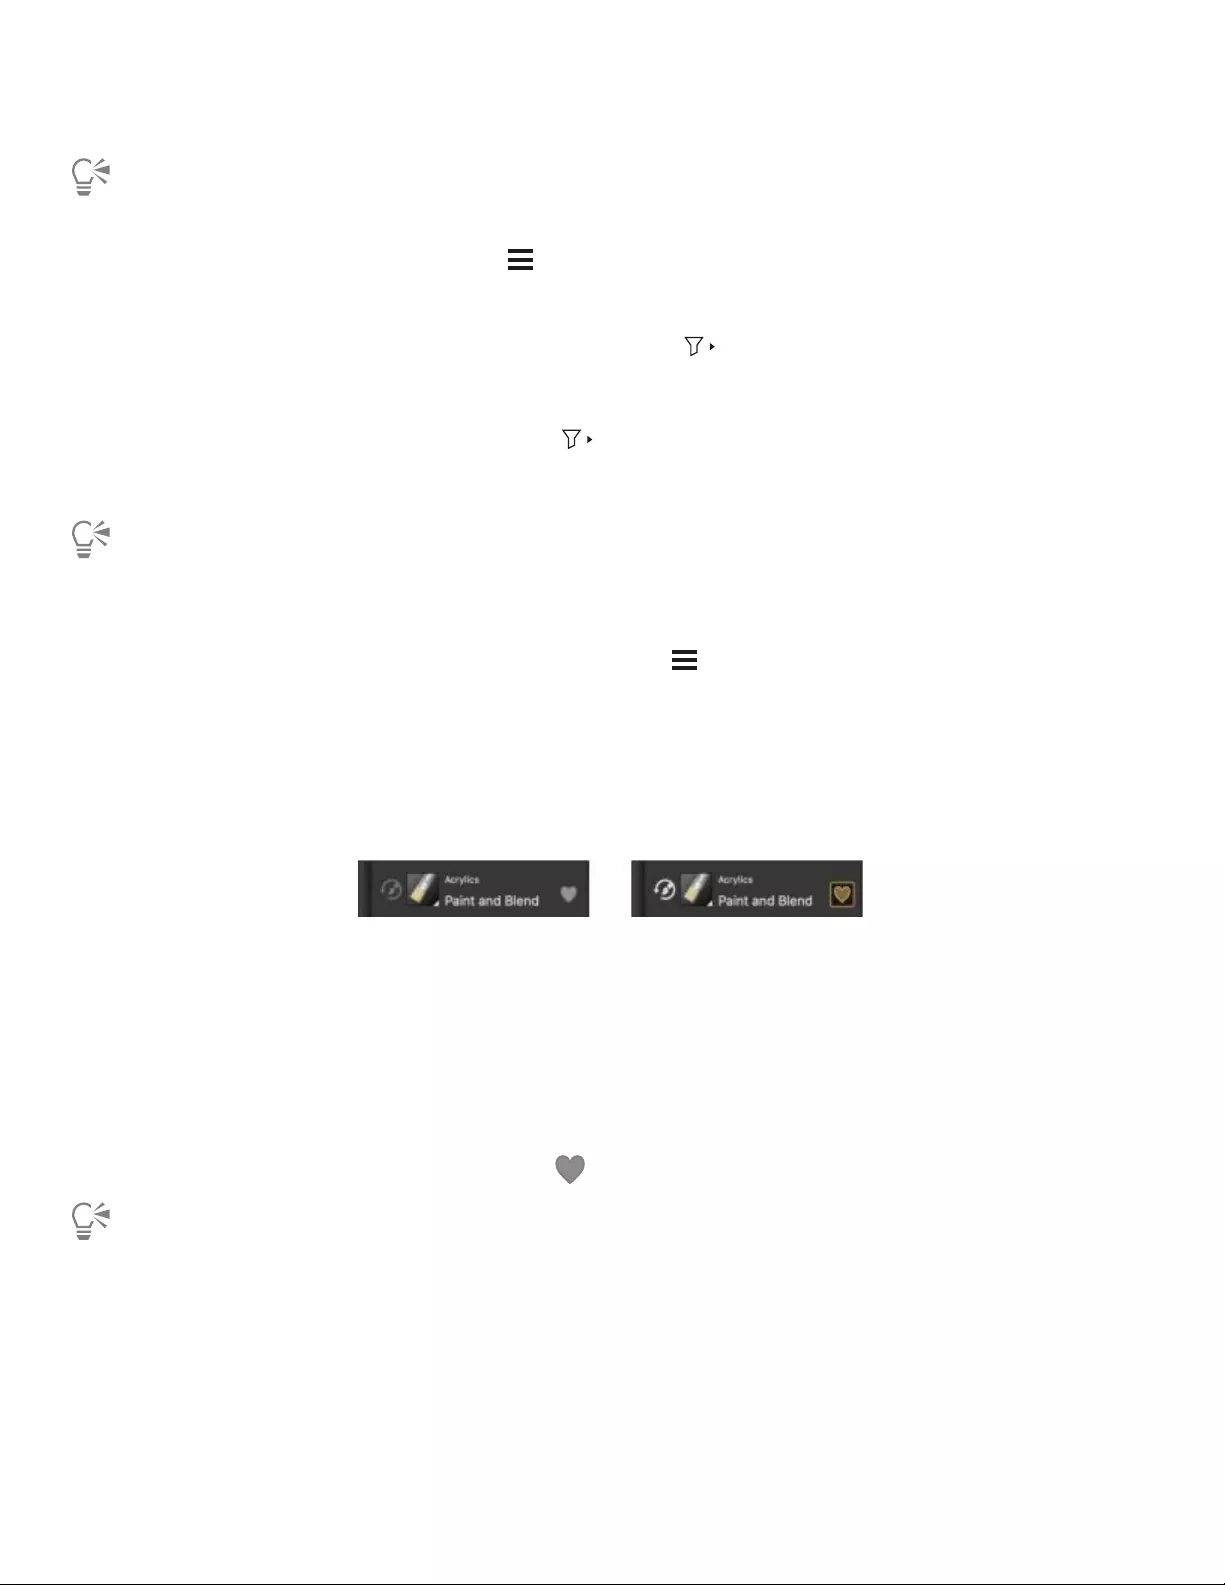
Selecting, managing, and creating brushes | 317
To access brush filters, you can also do one of the following in the Brush Selector flyout:
•Click the Brush library options button , and click Filter Brushes.
• Right-click a brush variant, and click Filter Brushes.
You can also access brush filters by clicking the Filter Brushes button in the Brush Selector panel (Window Brush Selector).
To clear filters
•In the Brush Selector flyout, click the Filter Brushes button , and do one of the following:
• To clear all filters, click Clear Filters. All brush variants and brush categories included in the active brush library are displayed.
• To clear a specific filter, disable the filter check box.
To clear all brush filters, you can also do one of the following:
• In the Brush Selector, right-click a brush variant, click Filter Brushes, and click Clear Filters.
•In the Brush Selector, click the Brush library options button , click Filter Brushes, and click Clear Filters.
Marking brushes as favorite
Marking the brushes you like as favorite helps you easily find them by the Favorite icons that appear beside their names. You can mark
the selected brush as favorite from the Brush Selector bar with one click. To mark multiple brushes as favorite, it is faster to use the Brush
Selector flyout or the Brush Selector panel. You can remove a brush from your list of favorites at any time.
The selected brush (left) is marked as favorite (right) from the Brush Selector bar.
If you like all brushes in a brush category, you can mark all of them as favorite at the same time. You can also remove all brushes in a
category from your list of favorites at once.
You can show only your favorite brushes in the Brush Selector by applying the My Favorites filter. For more information, see “Filtering
brushes” on page 315.
To mark the selected brush as favorite
•On the Brush Selector bar, click the Mark as Favorite icon , located to the right of the brush name.
You can also mark a brush as favorite in the Brush Selector flyout or Brush Selector panel by right-clicking the brush and clicking
Favorite. Use this method when you want to mark multiple brushes as favorite.
You can also press Option (macOS) or Alt (Windows), and click a brush variant to mark it as a favorite without selecting it.
You can also mark the selected brush as favorite by clicking Brushes Favorite.

318 | Corel Painter 2022 User Guide
To remove the selected brush from your list of favorites
•On the Brush Selector bar, click the Remove from Favorites icon , located to the right of the brush name.
You can also remove a brush from your favorites in the Brush Selector flyout or Brush Selector panel by right-clicking the brush and
clicking Favorite. Use this method when you want to remove multiple brushes from your favorites.
You can also press Option (macOS) or Alt (Windows), and click a brush variant to remove it from your favorites without selecting it.
You can also remove a selected brush from your favorites by clicking Brushes Favorite.
To mark all brushes in a brush category as favorite
• In the Brush Selector, right-click a brush category, and click Favorite All Brushes in Category.
To remove all brushes in a brush category from your list of favorites
• In the Brush Selector, right-click a brush category, and click Unfavorite All Brushes in Category.
Acquiring brushes
You can expand your collection of brushes by purchasing creative brush packs from within Corel Painter.
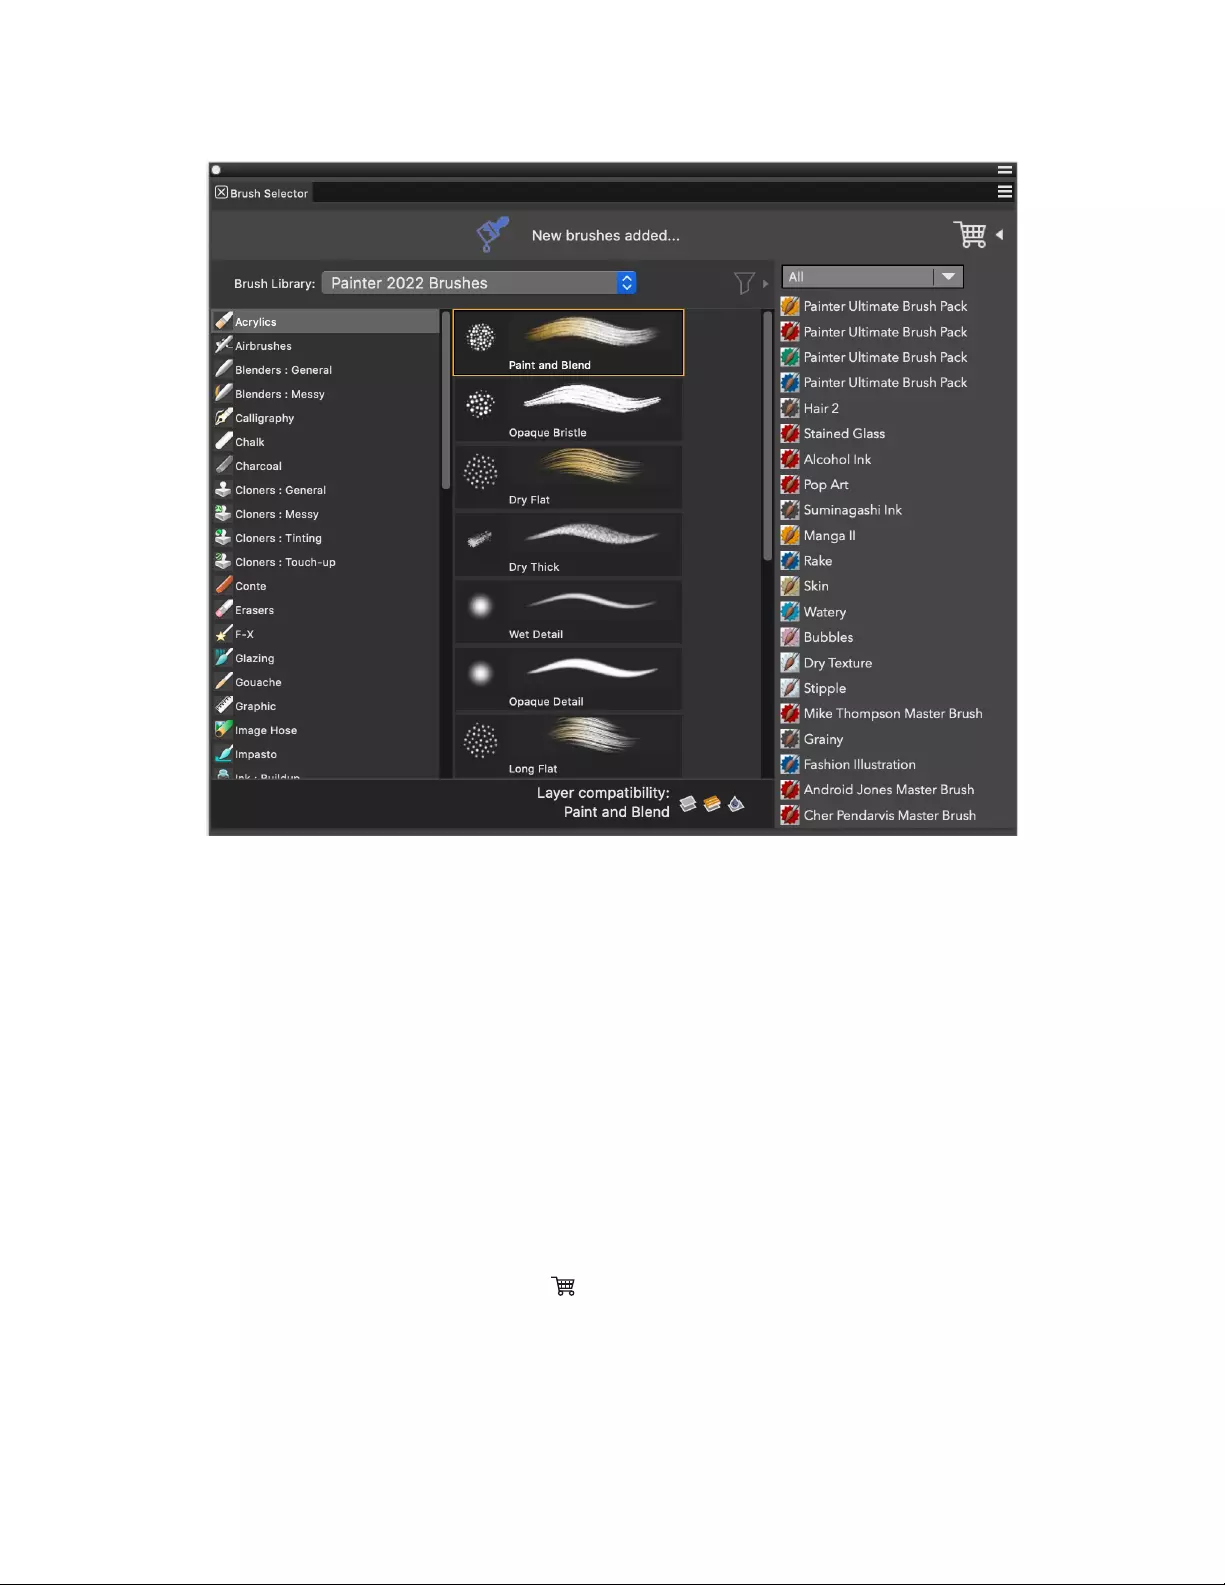
Selecting, managing, and creating brushes | 319
New brush packs appear in the Brush Selector. Choose from a selection of creative
brush packs for enhancing photos, designs, and paintings to enrich your projects.
The selection is updated with new offerings as they become available. After you purchase a brush pack, it is installed and appears as the
active brush in the Brush Selector. For more information about the Brush Selector, see “Displaying and customizing the Brush Selector” on
page 70.
If you reinstall Corel Painter or install it on another computer, you can restore your purchases. This will help you download the items that you
have already purchased and reinstall them.
If you want to import brushes that you have used in another version of Corel Painter, see “Importing and exporting brush libraries,
categories, and variants” on page 330.
To acquire a brush pack
1Do one of the following:
• Click the Brush Selector on the Brush Selector bar.
•Click Window Brush Selector Panel (Full View).
2In the Brush Selector, click the Brush Pack Selector button to display the list of brush pack promotions.
To sort brush packs by category, choose a category from the list box at the top of the promotions list.
3Click a brush pack.
A dialog box opens with the brush pack selected.
4Click Buy now and follow the onscreen instructions to purchase the item.
The brush pack that you purchased is installed and appears as the active brush in the Brush Selector.
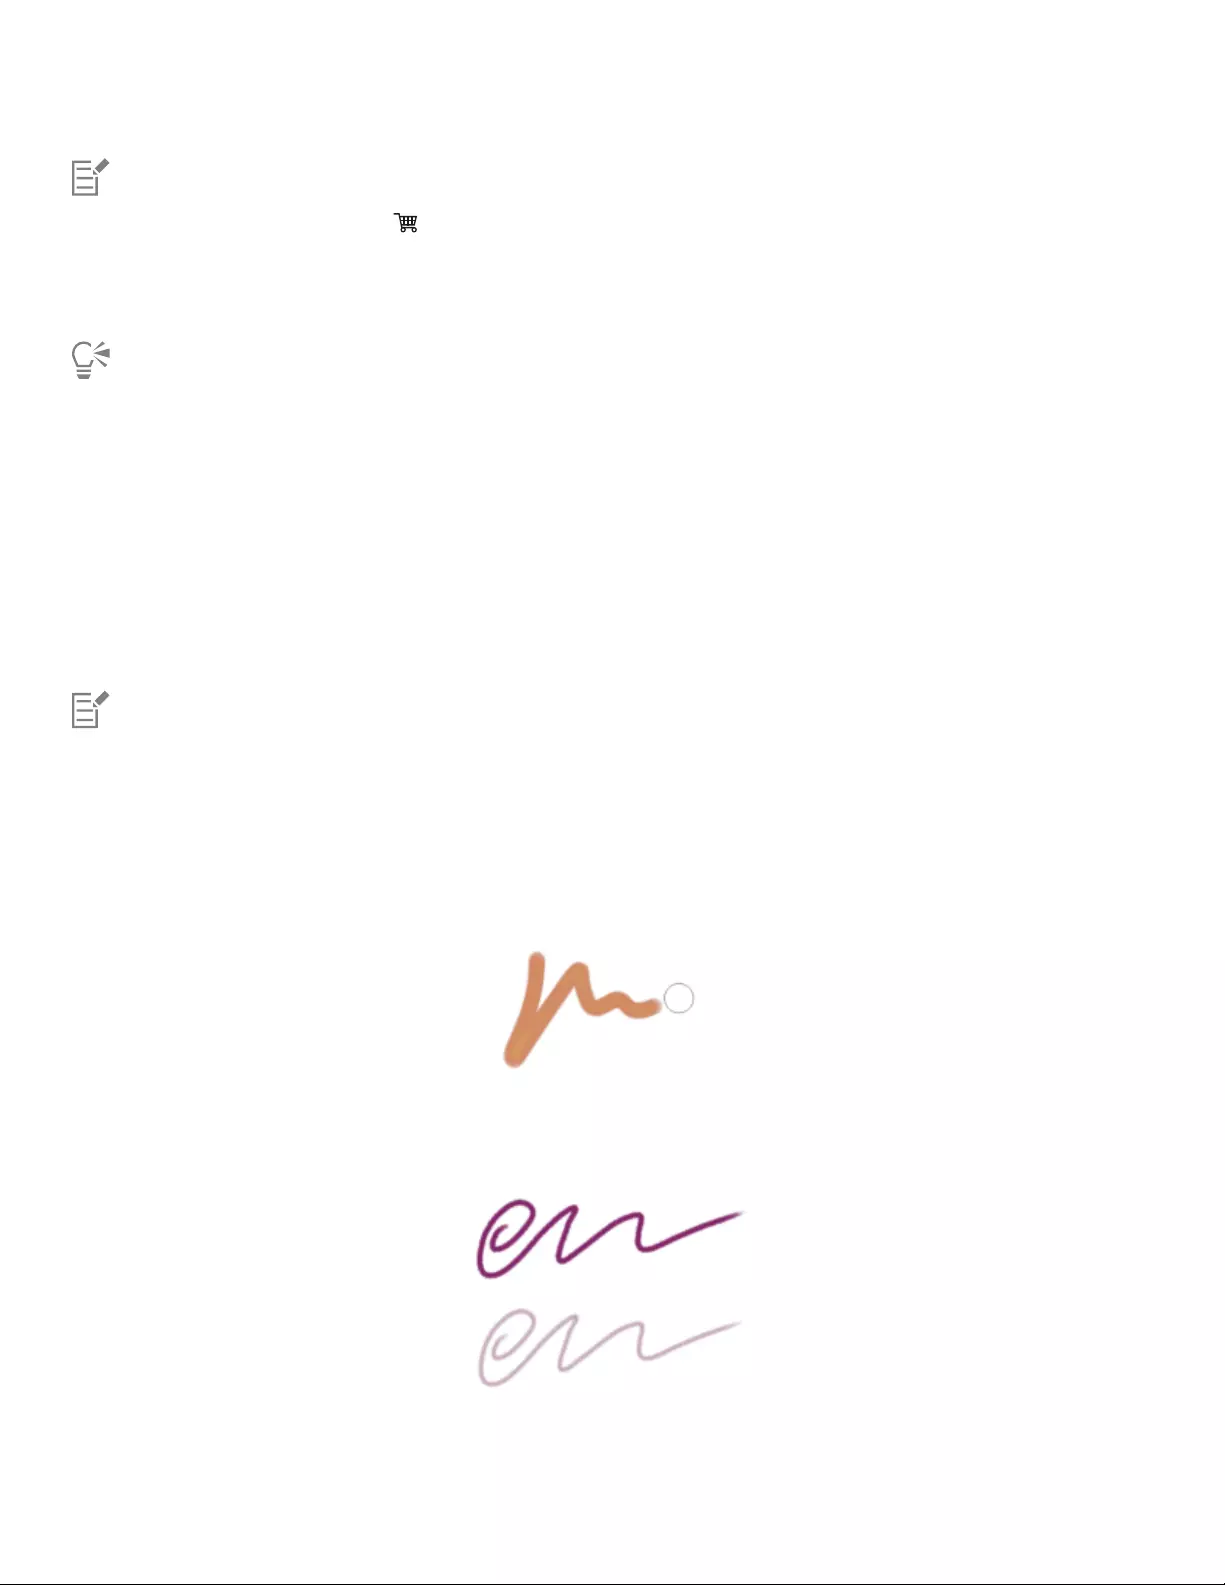
320 | Corel Painter 2022 User Guide
The Brush Pack Selector button appears only when the Brush Filters list is collapsed.
The brush packs that you purchase are added to the default Painter 2022 Brushes library. If you are currently using another brush
library, for example, Painter 2016 — 2020 Brushes, you have to switch to the default Painter 2022 Brushes library to access the
new brush packs.
To acquire a brush pack when using the Brush Selector in compact view (Brush Selector Panel (Compact)), click the Brush Pack
Promotions bar to display the list of brush pack promotions.
To restore your purchases
1Click Help Restore Purchases
2In the dialog box that appears, type the email address that was used to make the purchases, and click Continue.
A list of your purchases is displayed.
If prompted for an administrator permission, enter your system password to continue with the installation.
3Click Close.
The brush packs that you have purchased are installed and added to the default Painter 2022 Brushes library.
This procedure can help you restore only brush packs that you purchased from within Corel Painter.
Setting basic brush attributes
To quickly get started in Corel Painter, you specify basic brush attributes, such as brush size, opacity, and grain, on the property bar. Size
determines the dimension of a single brush dab. You can also use the ghost brush to determine if a change in size is required. For more
information, see “Setting up the drawing cursor” on page 159.
The ghost brush, the circle displayed to the right of the brushstroke, appears when a brush
is selected and positioned over the canvas. It mirrors the size and shape of the brush dab.
Opacity controls the degree to which a stroke covers or builds up on the underlying pixels.
80% opacity (top) and 20% opacity (bottom)
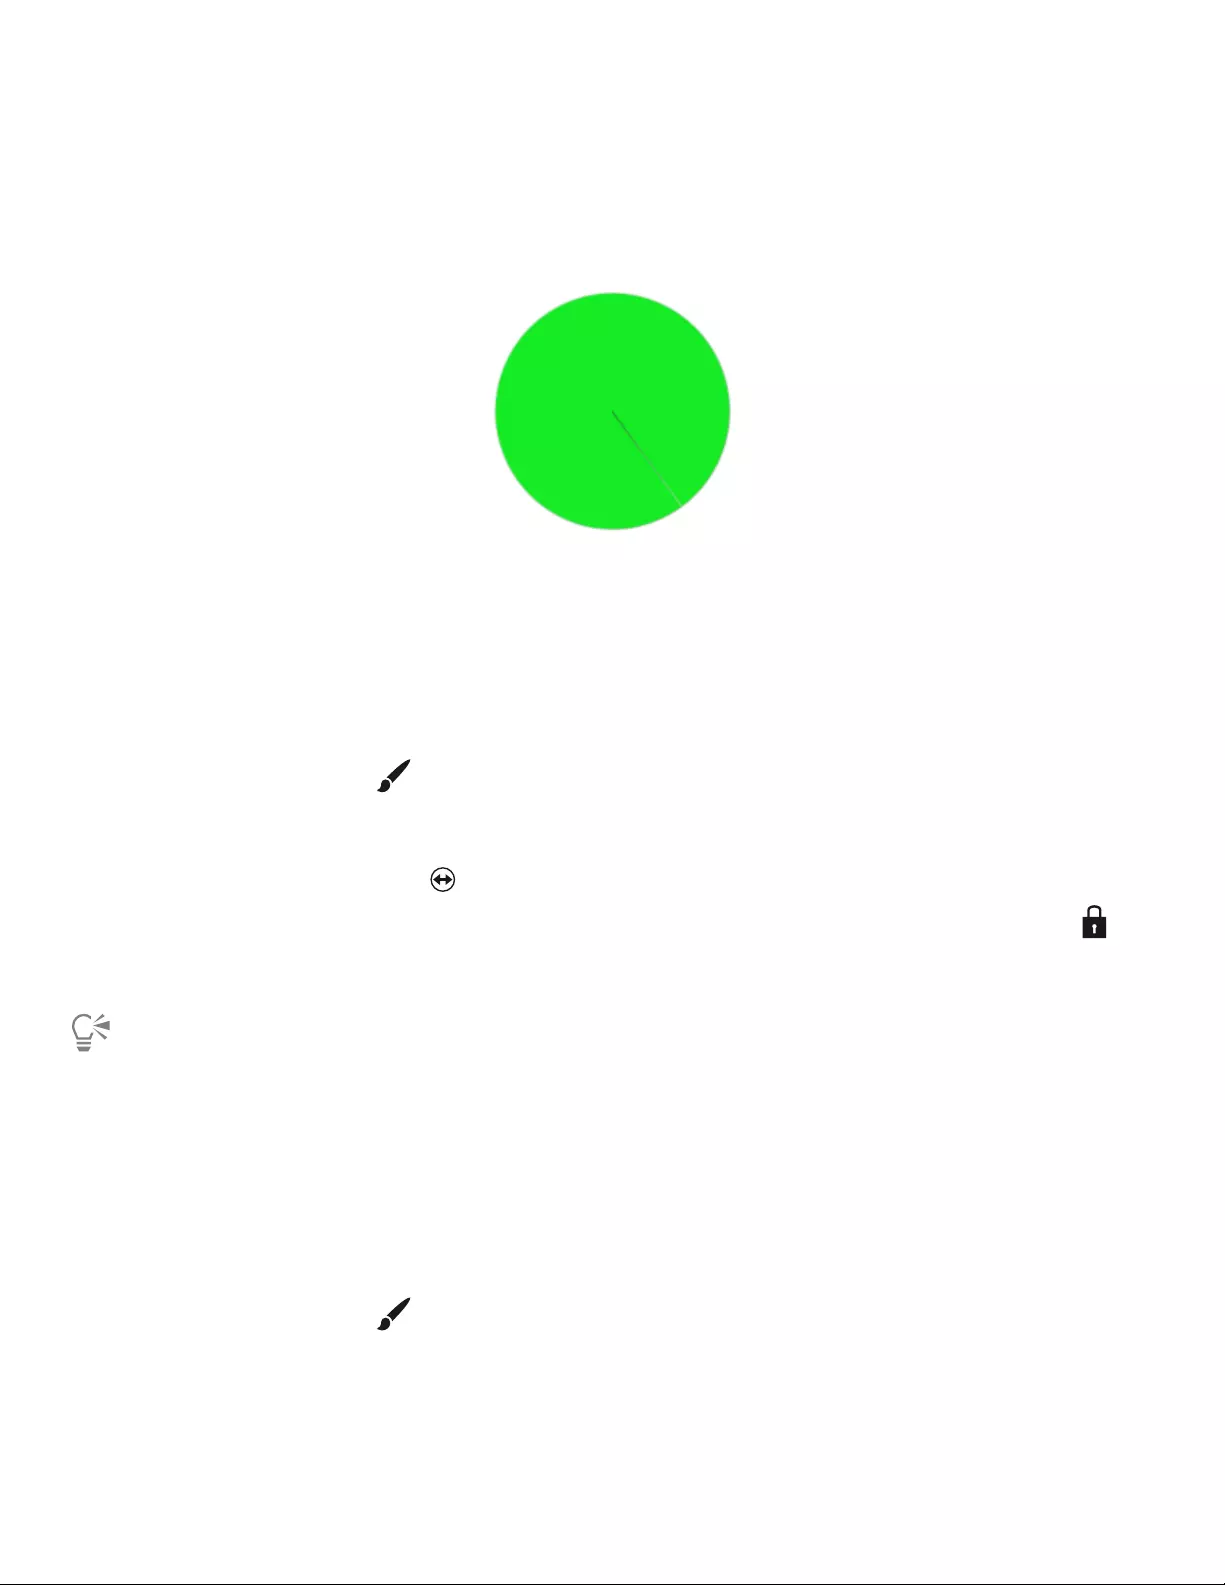
Selecting, managing, and creating brushes | 321
Grain controls the interaction of color with the paper texture.
You can also set brush attributes, such as angle and squeeze, dynamically onscreen. A circle appears onscreen in the document window that
lets you size and shape the brush within the context of the image.
The circle provides a visual representation of the brush size onscreen.
You can also access additional brush controls to further customize brushes. For example, you can set a minimum brushstroke size to control
the tapering and widening of brushstrokes as stylus pressure or direction is varied. For more information, see “Adjusting brushes with brush
controls” on page 337.
To set brush size
1In the toolbox, click the Brush tool .
2Click the Brush Selector on the Brush Selector bar.
3Click a brush category, and click a brush variant.
4On the property bar, move the Size slider , or type a value in the Size box.
If you want to scale the brushstroke feature proportionally with the brush size, click the Scale Feature with Brush Size button on
the property bar, which is available for some brushes.
Corel Painter may need to rebuild the brush after you resize it; therefore, you can expect a short delay.
You can also increase brush size incrementally by pressing the right square bracket ( ] ) key or decrease brush size by pressing the
left square bracket ( [ ) key.
You can specify the default brush size increment value in pixels by choosing Corel Painter 2022 Preferences General (macOS)
or Edit Preferences General (Windows) and typing a pixel value in the Brush size increment box.
You can also disable the scaling option in all areas by choosing Corel Painter 2022 Preferences General (macOS) or Edit
Preferences General (Windows) and enabling the Disable feature scaling when resizing brush.
To set opacity
1In the toolbox, click the Brush tool .
2Click the Brush Selector on the Brush Selector bar.
3Click a brush category, and click a brush variant.

322 | Corel Painter 2022 User Guide
4On the property bar, move the Opacity slider , or type a percentage in the Opacity box.
When the Opacity setting is low, the applied color is thin, so you can see through to the underlying colors. When the setting is high, the
applied color covers underlying pixels more completely.
Some methods and dab types do not allow you to adjust opacity.
When the Brush tool is active, you can set opacity by pressing a number key. Each number key is mapped to a fixed percentage. For
example, 1 equals 10% opacity, 5 equals 50% opacity, and 0 equals 100% opacity.
To set grain
1In the toolbox, click the Brush tool .
2Click the Brush Selector on the Brush Selector bar.
3Click a brush category, and click a brush variant.
4On the property bar, move the Grain slider, or type a percentage in the Grain box.
Move the slider to the left to reduce penetration and reveal more texture. Move it to the right to increase penetration and reveal less
grain.
For liquid media brushes, Grain controls the amount of “pull.” For other brushes, such as airbrushes, the Grain slider is not
available.
To set brush attributes onscreen
• Perform a task from the following table.
To Do the following
Change the brush size Hold down Command + Option (macOS) or Ctrl + Alt
(Windows), and drag the crosshair cursor to display the Radius
circle in the document window. Keep dragging until the circle is
set to the size that you want, and then release the stylus or mouse
button.
Change the brush opacity Hold down Command + Option (macOS) or Ctrl + Alt
(Windows), and click the crosshair cursor to display the Radius
circle in the document window. While pressing the stylus, or
holding down the left mouse button, release the keys, and press
Command (macOS) or Ctrl (Windows) once. Drag the Opacity
circle in the image window until the circle is set to the opacity that
you want, and then release the stylus or mouse button.
Change the brush squeeze setting Hold down Command + Option (macOS) or Ctrl + Alt
(Windows), and click the crosshair cursor to display the Radius
circle in the document window. While pressing the stylus, or
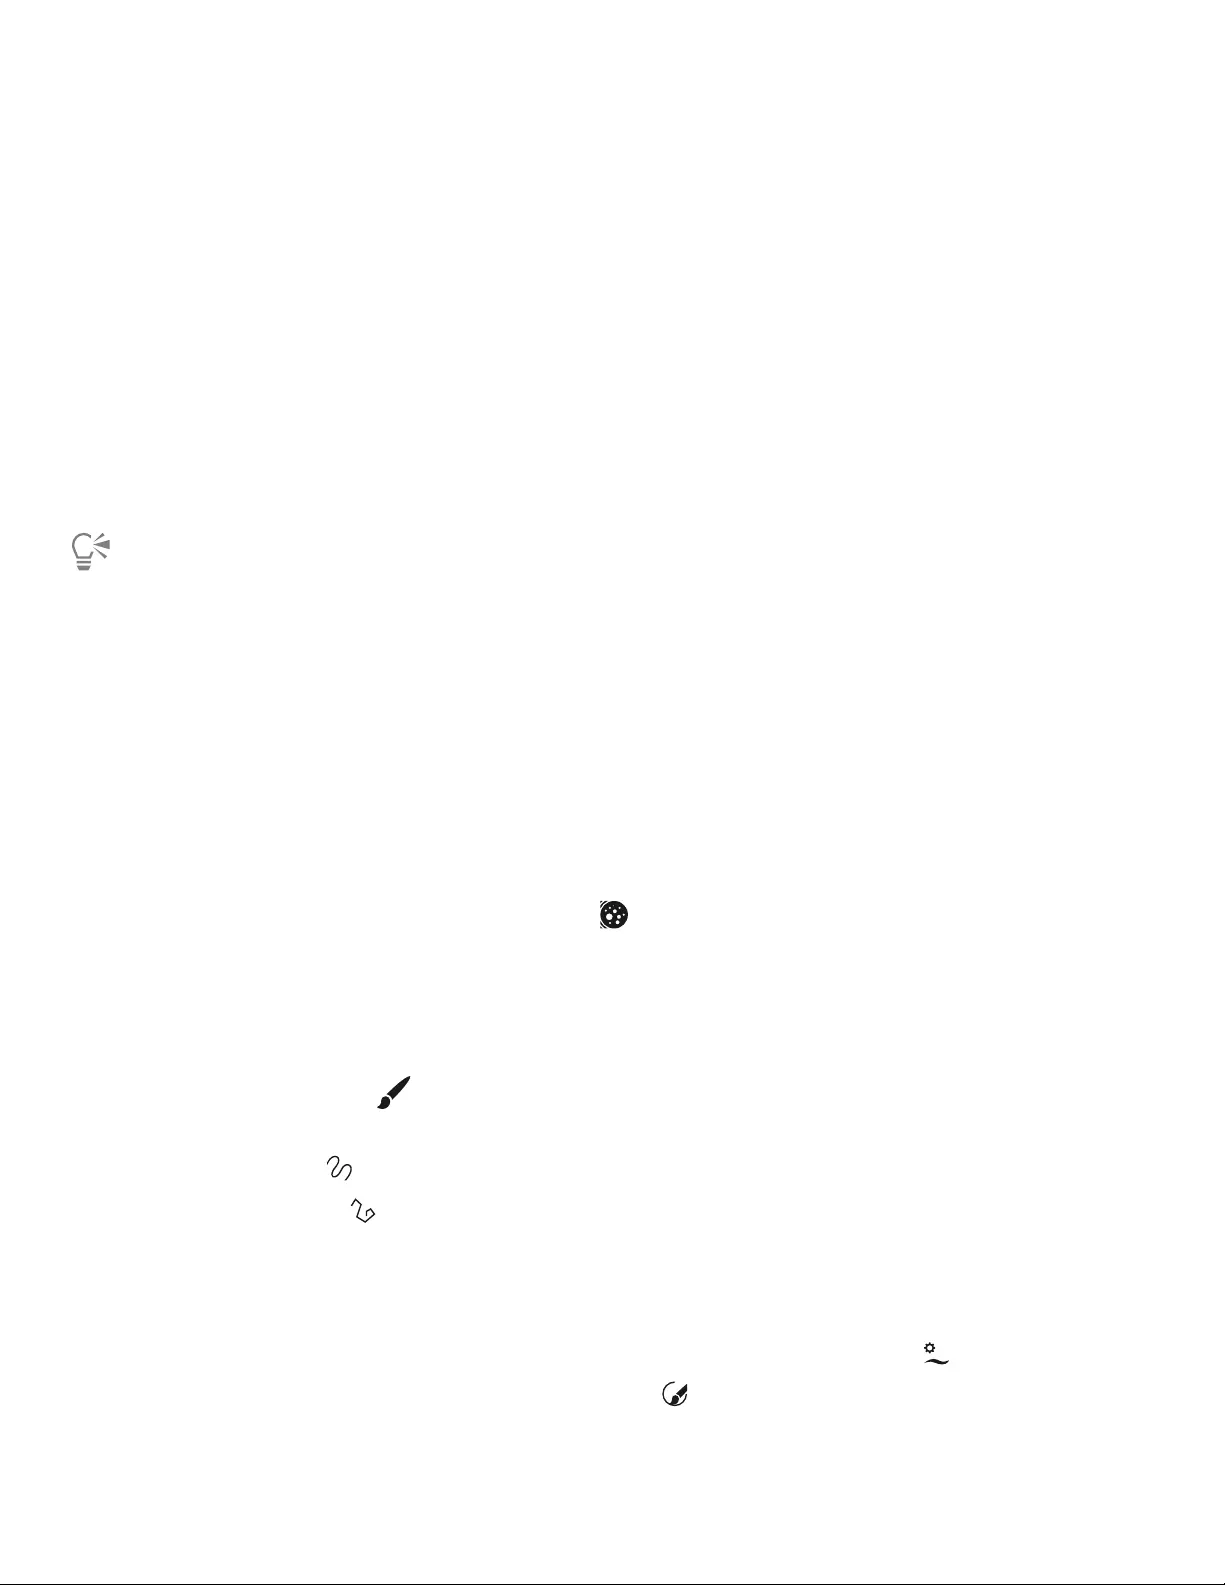
Selecting, managing, and creating brushes | 323
To Do the following
holding down the left mouse button, release the keys, and press
Command (macOS) or Ctrl (Windows) twice. Drag the Squeeze
circle in the document window until the circle is set to the brush
squeeze that you want, and then release the stylus or mouse
button.
Change the brush angle Hold down Command + Option (macOS) or Ctrl + Alt
(Windows), and click the crosshair cursor to display the Radius
circle in the document window. While pressing the stylus, or
holding down the left mouse button, release the keys, and press
Command (macOS) or Ctrl (Windows) three times. Drag the Angle
circle in the document window until the circle is set to the angle
that you want, and then release the stylus or mouse button.
You can also revert to an onscreen brush sizing control that has the look and feel of the brush sizing control in earlier versions of
Corel Painter by choosing Corel Painter 2022 Preferences General (macOS) or Edit Preferences General (Windows) and
enabling the Simplified brush resizing control (Legacy-style) check box.
Working with brushes using the property bars
When the Brush tool is selected, you can access and change brush options and settings on the property bar. The property bar displays one
set of options and settings, such as brush size, opacity, and stroke attributes, that are available for all brush categories, and another related
to the selected brush category. You can use the property bar to restore the default settings of a brush. Depending on the selected brush
variant, the property bar may also let you choose a paper texture, dab type, and blending options. The flyouts on the property bar simplify
the process of finding controls and media relevant for a brush and let you quickly access advanced controls for a brush instead of opening
different brush control panels. For example, if you are working with a brush that uses a Dynamic Speckles dab type, you can quickly access
the relevant options by clicking the Dynamic Speckle flyout button .
For more information about modifying the individual controls, see “Selecting, managing, and creating brushes” on page 313. For more
information about working with property bars, see “Displaying the property bars” on page 68.
To choose a stroke type on the property bar
1In the toolbox, click the Brush tool .
2On the property bar (Window Property Bar), click one of the following buttons:
•Freehand strokes button — to draw freehand lines
•Straight line strokes button — to draw straight lines
You can also
Align a brushstroke to a path or shape Click the Stroke Options flyout button , and click Align to
Path .
324 | Corel Painter 2022 User Guide
You can also
Align brushstrokes to perspective guides Click the Stroke Options flyout button , and click Perspective
Guides .
To set brush size options on the property bar
1In the toolbox, click the Brush tool .
2On the property bar (Window Property Bar), type a value in the Size box, or open the Size flyout, and move the Size slider.
You can also
Link the size settings to a specific stylus or mouse movement Click the Size flyout button , and choose an option from the
Expression list box.
Set the percentage of variability that you want the expression to
apply to brush size Click the Size flyout button , and move the Min Size slider.
Link brush size to audio Click the Size flyout button , and click the Audio Expression
button .
Reverse the effect of an Expression setting on brush size Click the Size flyout button , and click the Invert Size
Expression button .
You can restore a default brush variant by clicking the Reset Tool button .
To set brush opacity options on the property bar
1In the toolbox, click the Brush tool .
2On the property bar (Window Property Bar), type a percentage in the Opacity box, or open the Opacity flyout, and move the
Opacity slider.
You can also
Link the opacity settings to a specific stylus or mouse movement Click the Opacity flyout button , and choose an option from
the Expression list box.
Selecting, managing, and creating brushes | 325
You can also
Set the percentage of variability that you want the expression to
apply to brush opacity Open the Opacity flyout button , and move the Min Opacity
slider.
Link brush opacity to audio Open the Opacity flyout button , and click the Audio
Expression button .
Reverse the effect of an Expression setting on brush opacity Open the Opacity flyout button , and click the Invert Opacity
Expression button .
You can restore a default brush variant by clicking the Reset Tool button .
To apply a paper texture using the property bar
1In the toolbox, click the Brush tool .
2On the property bar (Window Property Bar), click the Paper selector flyout button .
3In the Paper Textures area, click a paper texture swatch.
You can also
Set grain Move the Grain slider, or type a percentage in the Grain box.
Move the slider to the left to reduce penetration and reveal more
texture. Move it to the right to increase penetration and reveal less
grain.
These options are not available for all brush variants.
For more information about paper textures, see “Applying paper texture” on page 171.
You can restore a default brush variant by clicking the Reset Tool button .
To choose a dab profile using the property bar
1In the toolbox, click the Brush tool .
2Click the Brush Selector on the Brush Selector bar, and choose a brush variant.
3Click the Dab Options flyout button on the property bar.
326 | Corel Painter 2022 User Guide
If the selected brush is using a Captured dab type, enable the Apply Dab Profile check box.
4Click a brush tip profile icon.
If your brush uses a Circular dab type, move the Hardness slider to adjust the opacity of the dab profile.
You can adjust the hardness only of Circular brushes that use one of the following dab profiles: Pointed, Medium, Soft, Dull, 1-pixel
edge, and Watercolor.
To choose a captured dab using the property bar
1In the toolbox, click the Brush tool .
2Click Window Search, type captured in the Search text box, and then choose a variant from the list.
3On the property bar, click the Captured Dabs flyout button and then click a captured dab icon.
To apply a dab profile to a captured dab using the property bar
1In the toolbox, click the Brush tool .
2Click Window Search, type captured in the Search text box, and then choose a variant from the list.
3On the property bar, click the Dab Options flyout button , enable the Apply Dab Profile check box, and then click a brush tip
profile icon.
To apply a dab effect using the property bar
1In the toolbox, click the Brush tool .
2Click Window Search, type captured in the Search text box, and then choose a variant from the list.
3On the property bar, click the Captured Dabs flyout button , and choose an option from the Dab Effects list box.
You can adjust the Strength slider to determine the percentage of the effect.
To display relevant brush control panels using the property bar
1In the toolbox, click the Brush tool .
2On the property bar, click the Advanced Brush Controls button .
Renaming brush categories and variants
You can rename brush categories and variants.
To rename brush categories and variants
1Click the Brush Selector on the Brush Selector bar.
2Perform a task from the following table.

Selecting, managing, and creating brushes | 327
To Do the following
Rename a brush category Right-click a brush category, choose Rename Category, and type a
name for the category.
Rename a brush variant Right-click a brush variant, choose Rename Variant, and type a
name for the variant.
Saving and deleting brush variants
You can save a customized brush variant for future use. When saving a brush variant, you have the option of saving to the currently selected
brush category, or saving to a new brush category that you create. The new brush variant is always saved to the currently selected brush
library. You can also delete the brush variants that you create.
In addition, you can save the variant as a look. Variant settings are included when you save a look, but looks can also include paper texture,
pattern, gradient, and nozzle data. For more information, see “Saving a brush look” on page 333.
To save a brush variant
1In the Brush Selector, click the brush variant that you want to save.
2Choose Brushes Save Variant.
3In the Save Variant dialog box, type a name for the new variant.
4Choose the category in which you want to save the variant from the Brush Category list box.
If you want the current main and additional colors to be saved with the variant, enable the Save Current Color check box. You do not
need to enable the option if the variant uses the Clone Color option.
5Click Save.
The new variant appears on the variant menu, in the currently selected brush category.
You can also
Copy the variant to another category With a variant selected, click the Brush library options button ,
and choose Copy Variant. Choose the destination brush category
from the Copy Variant To list box. (Remember to delete the variant
in the category from which it was copied.)
When you create a new variant, the variant files are saved in the operating system’s Users folder. The variant is stored in the brush
category folder that was selected when the variant was saved.
328 | Corel Painter 2022 User Guide
You can also create a new brush category by clicking the Add New Brush Category button in the Save Variant dialog box
and typing a name in the New Category Name text box.
You can also save a brush variant from the Brush Selector flyout by clicking the Brush library options button and choosing
Save Variant.
You can also copy brush variants at the root of the category folder by copying the brush variant files (XML, NIB, STK, and, in
some instances, a JPEG file) to the desired category. This is a useful method when you need to copy multiple variant files to a new
category.
To delete a brush variant
1Click the Brush Selector on the Brush Selector bar.
2Click a brush category, and then click the brush variant that you want to delete.
3Choose Brushes Remove Variant.
4Click Yes to delete the variant.
The variant’s related files (XML, NIB, STK, and, in some instances, a JPEG file) are deleted from the operating system’s Users folder.
You cannot delete any of the default brush variants.
You can also delete a brush variant from the Brush Selector flyout by clicking the Brush library options button and choosing
Remove Variant.
Restoring default brush variants
You can restore any modified brush variant to its default settings. For information about restoring all factory default settings, see “Restoring
the default Corel Painter settings” on page 90.
To restore a default brush variant
1Click the Brush Selector on the Brush Selector bar.
2Click a brush category, and then click the brush variant that you want to restore.
3Click the Brush library options button , and choose Restore Default Variant.
If you want to restore all brush variants to their default settings, click the Brush library options button , and choose Restore All
Default Variants.
You can also restore a default brush variant by clicking the Reset Tool button on the property bar.
Selecting, managing, and creating brushes | 329
Creating and deleting brush categories
You can create a brush category to store new brush variants or to organize existing variants for a specific workflow or project. You can also
delete a brush category.
To create a new brush category
1Choose Brushes New Brush Category.
2Type a name in the New Category Name text box.
The new brush category appears in the Brush Category list of the Brush Selector and contains the currently selected brush variant,
because a brush category must contain at least one brush variant.
You can also change the brush category icon by right-clicking a category in the Brush Selector, choosing Set Custom Icon, and
choosing the image that you want to display as the category icon.
You can also create a new brush category from the Brush Selector by clicking the Brush library options button and choosing
New Brush Category.
To remove a brush category
1Choose Brushes Remove Brush Category.
2In the Choose Brush Category dialog box, choose a category from the Category list box.
3Click OK.
A warning message about deleting the brush category appears.
4Click OK.
You cannot remove any of the default Painter brush categories.
You can also remove a brush category from the Brush Selector by clicking the Brush library options button and choosing
Remove Brush Category.
Creating and deleting brush libraries
You can create a brush library by modifying the contents of an existing brush library and then exporting it. You cannot create a brush library
from scratch. To modify an existing brush library for export, you can add new brush categories and variants. You can also exclude brush
categories and variants from export by hiding them in the Brush Selector. After you’ve exported the modified library, you can import it as a
new brush library. In addition, you can delete a brush library from within Corel Painter.
To create a brush library
1In the Brush Selector, display the brush library that you want to copy.
To exclude brush categories and variants from the exported brush library, you can hide them by doing the following:
• Right-click a brush category, and choose Hide Category.
• Right-click a brush variant, and choose Hide Variant.

330 | Corel Painter 2022 User Guide
2Click Brushes Export Brush Library.
3In the Choose Brush Library dialog box, choose the brush library that you want to export from the Library list box.
4Click OK.
5In the Export Brush Library dialog box, type a name for the new library in the File Name text box.
6Click Save.
7Click Brushes Import Brush Library.
8In the Import Brush Library dialog box, choose the exported library, and click Open.
This is the recommended method for creating a new brush library in Corel Painter 12 Update 1 and later. In previous versions of
Corel Painter, the only method for creating a new library was by manipulating brush files in the operating system file browser.
Currently, there is no method for creating blank brush libraries.
To delete a brush library
1Click the Brush library options button , and choose Remove Brush Library.
2Choose a brush library from the list box.
If you are trying to remove the active library, which is the library currently open in the Brush Selector, you are prompted to choose a new
active library.
You cannot delete any of the default Painter brush libraries.
Importing and exporting brush libraries, categories, and variants
You can import and export brush libraries, categories, and variants. This allows you to work with brush resources that were created by
others, or share them with others. You can only import brush libraries, categories, and variants that were previously exported by you or
someone else from Corel Painter 12 Update 1 or later.
When you import a brush library, category, or brush variant, Painter gives you the option of also importing brush dab images which will be
added to a new captured dab library. You can also choose to import only the brush dab images, which lets you reuse captured dabs from
other brush resources.
You can share exported brush resources (brush libraries, categories, and variants) only with users who have Corel Painter 12 Update 1 or
later installed. The brush source files of Corel Painter 12 Update 1 or later are not supported in older versions of Corel Painter, including Corel
Painter 12 and Service Pack 1.
It is important to note that you can display only one library at a time in the Brush Selector.
Corel Painter 11 (or earlier) brush libraries
You can open brush libraries that were created in an older version of Corel Painter. In Corel Painter 11 and earlier versions, brush variants are
individual XML files organized in brush category folders within brush libraries. To use older brush libraries, you must first copy them to Corel
\Painter 2022\Brushes. After you copy the files, you can access them through the Brush Selector or the Brushes menu.
Brush libraries that are not in the Brushes folder are not recognized or visible within Corel Painter. The folder structure of brush libraries must
match that of the default Painter Brushes library folder (Corel\Painter 2022\Brushes\[library folder]\[category folder]\[variantFile.xml]). If
you want to copy only a few brush variants, you must still add them to a brush library while following the correct folder structure.
When you open the older library, you can export it. This converts the brush library to the new brush library format.

Selecting, managing, and creating brushes | 331
To import a brush library
1Click Brushes Import Brush Library.
2In the Import Brush Library dialog box, browse to the folder where the brush library is stored.
3Choose the brush library, and click Open.
The imported brush library is displayed in the Brush Selector.
You can also import a brush library from the Brush Selector by clicking the Brush library options button , choosing Import, and
choosing Brush Library.
You can also import a brush library from the file browser of your operating system by double-clicking a brush library file.
To import a legacy Corel Painter brush library
1In the file browser of your operating system, browse to the location where the legacy brush library folder is stored.
2Copy the files.
3Paste the library folder in the Corel\Painter 2022\Brushes folder.
4Ensure that the library folder is writable by doing the following:
• (macOS) Control-click the brush library folder, and click Get Info. In the Info dialog box, disable the Locked check box. Repeat for
subfolders and files.
• (Windows) Right-click the brush library folder, and choose Properties. On the General page, disable the Read-only check box, and
click Apply. In the Confirm Attribute Changes dialog box, enable the Apply Changes to This Folder, Subfolders and Files option.
5In Corel Painter, click the Brush Selector on the Brush Selector bar.
6Click the Brush library options button , and choose Brush Library Painter Brushes.
To export a brush library
1Click Brushes Export Brush Library.
2In the Choose Brush Library dialog box, choose the brush library that you want to export from the Library list box.
3In the Export Brush Library dialog box, browse to the folder where you want to store the library.
To rename the brush library, type a name in the File Name box.
4Click Save.
You can also export a brush library from the Brush Selector by clicking the Brush library options button , choosing Export, and
choosing Brush Library.
To import a brush category
1Click Brushes Import Category.
2In the Import Brush Category dialog box, browse to the folder where the brush category is stored.
3Choose the brush category, and click Open.
If the brush category you are importing contains a brush dab image, an Import Brushes dialog box appears.
4In the Import Brushes dialog box, choose one of the following options:
•Import brushes only
•Import captured dabs only
332 | Corel Painter 2022 User Guide
The dabs will be added to a new captured dab library so you can use them with other brushes.
•Import both brushes and captured dabs
5Click Import.
You can also import a brush category from the Brush Selector by clicking the Brush library options button , choosing Import,
and choosing Category.
You can also import a brush category from the file browser of your operating system by double-clicking a brush category file. The
brush category automatically appears in the Brush Selector.
To export a brush category
1Click Brushes Export Category.
2In the Choose Brush Category dialog box, choose a brush category from the Category list box.
3Click OK.
4In the Export Brush Category dialog box, click Save.
To rename the brush category, type a name in the File Name box.
You can also export a brush category from the Brush Selector by clicking the Brush library options button , choosing Export,
and choosing Category.
To import a brush variant
1Click Brushes Import Brush.
2In the Import Brush Variant dialog box, browse to the folder where the brush variant is stored, select it, and then click Open.
3In the Import Brush dialog box, choose the brush category where you want to store the variant from the Brush Category list box.
To rename the brush variant, type a name in the Save Variant As text box.
4Click Save.
If the brush you are importing contains a brush dab image, another Import Brush dialog box appears.
5In the Import Brush dialog box, choose one of the following options:
•Import brush only
•Import captured dab only
•Import both the brush and captured dab
If you are importing the captured dab, choose a library from the Captured Dab Library list box.
6Click Import.
You can also create a new brush category while in the Save Variant dialog box by clicking the Add New Brush Category button
and typing a name in the New Category Name text box.
You can also import a brush variant from the Brush Selector by clicking the Brush library options button , choosing Import,
and choosing Brush.
You can also import a brush variant from the file browser of your operating system by double-clicking a brush variant file. The
brush variant automatically appears in the Brush Selector.

Selecting, managing, and creating brushes | 333
To export a brush variant
1In the Brush Selector, click the brush variant that you want to export.
2Click Brushes Export Brush.
3In the Export Brush dialog box, click Save.
To rename the brush variant, type a name in the File Name box.
You can also export a brush variant from the Brush Selector by clicking the Brush library options button , choosing Export, and
choosing Brush.
Importing Photoshop brush images
You can import the brush dab shapes, also known as brush stamps, of Photoshop brushes saved to Adobe Brush Resource (ABR) files. All
other brush attributes specified in the ABR files, such as texture and dynamics, are not imported and can be fully customized.
The brush stamps contained in an ABR file are imported as a new brush category that you can name. Each imported brush stamp appears as
a new brush variant.
To import Photoshop brush stamps
1Click Brushes Import New from Photoshop Brush Stamps (ABR).
2Browse to the folder where the ABR file is stored, choose the file, and click Open.
3In the Import Photoshop Brush Stamps (ABR) dialog box, perform a task from the following table.
To Do the following
Import only the dab shapes Choose Import dab shapes only. Click Import.
The dabs will be added to a new captured dab library so they can
be used with other brushes. For more information about captured
dabs, see “Captured dab controls” on page 371.
Create a brush for every ABR brush stamp Choose Create a basic brush for every ABR brush stamp that
Painter is able to import. Click Import. Type a name for the new
brush category, and click OK.
You can import only the brush stamps of pixel-based brushes.
Saving a brush look
A look retains all brush variant settings, plus the paper, pattern, gradient, or nozzle settings. For example, if you customize a brush variant
and paper texture to achieve a specific effect that you want to use in the future, you can save these settings as a look. When you save a look,
it is added to the Look Libraries panel.
334 | Corel Painter 2022 User Guide
A brush variant is not itself associated with information about underlying texture or other elements. The look, on the other hand, is
associated with additional information about a particular variant. Regardless of a document’s current libraries, when you select a look, you
use the elements that are part of that look.
To save a look
1Choose Window Media Panels Looks.
2Create a look by choosing a brush variant and any additional settings that you want to save with the look.
3Apply a brushstroke to the canvas.
4Click the Rectangular Selection tool , and drag to select a portion of the image or brushstroke, so you can use it as an icon for the
look.
5In the toolbox, click the Brush tool .
6Click the Look Libraries options button , and choose Save Look.
7In the New Look dialog box, type a name for the look in the Save As box.
The new look appears as the last item in the Brush Looks panel.
To apply a saved look
1From the Media Selector bar, click the Look Selector button.
2Choose a look from the Brush Looks panel.
Corel Painter loads the correct variant and materials for the saved look.
3Paint in the document window.
Creating and managing brush dabs
You can create your own brush dabs by creating a shape, selecting it, and then capturing it as a dab. You can also capture a brush dab
from any portion of your document, including multiple layers, by making a rectangular selection. And you can import an image to use as a
captured dab, set a custom icon, and rename a captured dab. In addition, when you are painting with a brush that uses a Captured dab
type, you can save the brush dab to the captured dab library.
This musical note was captured as a brush dab.
You can customize the appearance of brush dabs. You can instantly alter the dab shape of any brush, adjust settings, apply a new dab
effect, and even capture your new dab for use with other brushes. For more information, see “Captured dab controls” on page 371.
To create a brush dab from scratch
1On a white background, draw a shape in black color.
Selecting, managing, and creating brushes | 335
Brush dabs are grayscale. Use shades of gray to define the transparent areas of the dab.
To follow stroke direction, a captured brush dab must face toward the right side.
2Choose the Rectangular Selection tool from the toolbox, and drag across your shape to create a selection.
3Click the Brush Selector on the Brush Selector bar, and choose the brush category and variant for which you want to save the captured
dab.
For optimal results, try a stamp-type variant that uses a Captured, Circular, Computed Circular, or Static Bristle dab type. You can find
such variants by choosing Window Search and typing a dab type in the Search text box. You can also use the Stamps brush filter to
show only stamp-type brushes in the brush library. For more information, see “Filtering brushes” on page 315.
4Choose Brushes Capture Dab.
5In the Save to Captured Dab Library dialog box, type a name for the captured dab in the Save As text box, choose a library from the
Captured Dab Library list box, and then click Save.
The captured dab will be added to the library of your choice in the Captured panel.
To open the Captured panel, choose Window Brush Control Panels Brush Shape Captured.
6Choose Select None, and draw with the brush on the canvas.
If you like the results you’ve captured, you can save the brush as a new variant. For information about how to save customized brushes
for later use, see “Saving and deleting brush variants” on page 327.
If the brush is not painting after capturing a dab, choose Window Brush Control Panels Brush Shape Captured. In the
Captured panel, either choose None from the Dab Effect list box or adjust the Strength slider to reduce the strength of the dab
effect.
Corel Painter uses the area you selected in step 2 to set the brush size. When the brush is created, the selected area is sampled to
compute each brush dab.
If the original area requires scaling to the size of the brush dab, sampling can appear aliased. The greater the scaling, the more
aliasing is apparent. To prevent too much aliasing from appearing, create a shape with soft (grayscale) edges that is close to the
size you’ll be using.
You can paint with a captured brush dab just as you would with other brushes.
To capture a brush dab from a selection
1Choose the Rectangular Selection tool from the toolbox, and drag across the area that you want to capture.
You can make a selection that includes content from multiple layers; however, transparency is not supported.
2Click the Brush Selector on the Brush Selector bar, and choose the brush category and variant for which you want to save the captured
dab.
For optimal results, try a stamp-type variant that uses a Captured, Circular, Computed Circular, or Static Bristle dab type. You can find
such variants by choosing Window Search and typing a dab type in the Search text box. You can also use the Stamps brush filter to
show only stamp-type brushes in the brush library. For more information, see “Filtering brushes” on page 315.
3Choose Brushes Capture Dab.
4In the Save to Captured Dab Library dialog box, type a name for the captured dab in the Save As text box, choose a library from the
Captured Dab Library list box, and then click Save.
336 | Corel Painter 2022 User Guide
The captured dab will be added to the library of your choice in the Captured panel.
To open the Captured panel, choose Window Brush Control Panels Brush Shape Captured.
5Choose Select None, and draw with the brush on the canvas.
If the brush is not painting after capturing a dab, choose Window Brush Control Panels Brush Shape Captured. In the
Captured panel, either choose None from the Dab Effect list box or adjust the Strength slider to reduce the strength of the dab
effect.
To save a captured dab from the currently selected brush
1Choose Brushes Save Dab To Captured Dab Library.
2In the Save to Captured Dab Library dialog box, type a name for the captured dab in the Save As text box, choose a library from the
Captured Dab Library list box, and then click Save.
You can also save a captured dab from the currently selected brush in the Captured panel. Choose Window Brush Control
Panels Brush Shape Captured, and then click the Save a captured dab from the currently selected brush button .
To import a captured dab
1Choose Window Brush Control Panels Brush Shape Captured.
2In the Captured panel, click the Import Captured Dab button .
3In the Import Captured Dab dialog box, navigate to the folder containing the JPEG or PNG that you want to import, select it, and click
Open.
You can also
Rename a capture dab In the Captured panel, right-click a captured dab, and click
Rename Captured Dab. In the Rename dialog box, type a new
name, and click OK.
Set a custom icon In the Captured panel, right-click a captured dab, and click Set
Custom Icon. In the Import Captured Dab dialog box, navigate to
the folder containing the image you want to use, select it, and click
Open.
Hide a captured dab In the Captured panel, right-click a captured dab, and click Hide
Captured Dab.
Delete a captured dab In the Captured panel, choose a captured dab, and click the Delete
Captured Dab button .

Adjusting brushes with brush controls | 337
Adjusting brushes with brush controls
Like a fully stocked art store, Corel Painter supplies you with many different brushes and drawing tools, each with modifiable characteristics.
This chapter provides descriptions and procedures for customizing and saving the many parameters of any brush type.
This section contains the following topics:
•“Exploring Brush Controls” (page 338)
•“Expression settings” (page 339)
•“Audio Expression” (page 340)
•“Previewing brushstrokes and brush dabs” (page 342)
•“Calibrating brush variants” (page 343)
•“General controls” (page 344)
•“General controls: Dab types” (page 344)
•“General controls: Stroke types” (page 348)
•“General controls: Methods and subcategories” (page 349)
•“General controls: Source” (page 353)
•“Performance controls” (page 353)
•“Opacity controls” (page 354)
•“Grain controls” (page 356)
•“Stroke Attributes controls” (page 358)
•“Size controls” (page 360)
•“Angle controls” (page 364)
•“Spacing controls” (page 367)
•“Changing dab profiles” (page 368)
•“Captured dab controls” (page 371)
•“Jitter controls” (page 373)
•“Real Watercolor controls” (page 374)
•“Real Wet Oil controls” (page 378)
•“Computed Circular controls” (page 382)
•“Hard Media controls” (page 383)
•“Bristle controls” (page 383)
•“RealBristle controls” (page 384)
•“Static Bristle controls” (page 384)
•“Airbrush controls” (page 387)
•“Artists’ Oils controls” (page 390)

338 | Corel Painter 2022 User Guide
•“Impasto controls” (page 392)
•“Digital Watercolor controls” (page 392)
•“Water controls” (page 392)
•“Liquid Ink controls” (page 396)
•“Stroke Jitter controls” (page 401)
•“Blending controls” (page 402)
•“Mouse controls” (page 405)
•“Smoothing controls” (page 406)
•“Image Hose controls” (page 407)
•“Rake controls” (page 407)
•“Multi controls” (page 410)
•“Cloning brushes and controls” (page 205)
•“Color Variability controls” (page 410)
•“Color Expression controls” (page 412)
•“Dynamic Speckles controls” (page 413)
•“Dab Stencil controls” (page 416)
•“Glazing controls” (page 421)
Exploring Brush Controls
You can apply media to the canvas by using a ready-to-use default brush variant from the impressive Corel Painter brush library. You can also
modify a brush variant to meet a particular need. The brush controls are divided into multiple brush control panels that allow you to adjust a
brush variant while you work, or alter an existing variant to create a new variant.
Corel Painter also includes an advanced brush controls panel that generates a grouping of brush control panels that are relevant to the
currently selected brush. The Edit panel makes it easy to switch between editing the controls that affect brush shape and editing controls
that affect brush media.
You can use the brush controls to adjust the Corel Painter brushes in many different ways, such as change their size, shape, angle, flow, and
much more. In fact, the Corel Painter default brush variants are built by adjusting the same set of brush controls in order to emulate a real-
life painting or drawing tool.
Changes that you make to brush variants, including basic controls such as Size and Opacity, are retained until you restore the brush
variant. You can also save custom brushes as the default, as new variants, or as looks. For more information, see “Saving and deleting brush
variants” on page 327 and “Saving a brush look” on page 333.
Modifying Brush Variants
When you modify a brush variant using the brush controls, the modified brush variant information is stored in the variant’s XML, NIB, STK,
and in some instances, JPEG files that are found in the operating system’s User folder:
Users\(user name)\AppData\Roaming\Corel\Painter 2022\Default\Brushes\Painter Brushes folder (Windows)
When you start Corel Painter, the application applies the modified settings to the brush variant, instead of the default settings. However,
the default settings are not lost, they remain stored in the application folder. If you decide to reset a brush variant’s default settings, the
modified brush variant files are automatically deleted from the Users folder.
To open a brush control panel
•Choose Window Brush Control Panels, and choose a brush control panel from the list.
To open all general brush controls panels at once
•Choose Window Brush Control Panels General.
Adjusting brushes with brush controls | 339
You can also open all brush control panels at once by pressing Command + B (macOS) or Ctrl + B (Windows). To close all brush
control panels at once, the General brush control panel must be docked with the other brush control panels.
To use the advanced brush control panel
1With a brush variant selected, click the Advanced Brush Controls button on the property bar.
2In the Edit panel, click the Shape button or Media button , and adjust the controls in any of the panels.
To close a brush control panel
• Click the Close button on the brush control panel title bar.
Expression settings
Corel Painter lets you control brush effects along the stroke based on a number of real-time input factors. For example, many brushes vary
their opacity or size in response to changes in stylus pressure. These responses reflect their default settings. You can use the Expression
settings to vary these effects in response to other factors, such as stroke direction or velocity.
Expression settings are linked to the following controls: Opacity, Grain, Size, Angle, Airbrush (Feature and Flow), Thick Paint, Impasto,
Liquid Ink, Stroke Jitter, Blending (Saturation and Bleed), Color Expression, and Particles. In addition, for some of the brush controls
that use Expression, you can adjust the Min setting to specify the range of variation that you want the expression to apply. The Min setting
represents a percentage of the specific setting, such as Opacity, and it must be linked to an expression to have an effect. For example, if you
choose the Pressure expression on the Opacity panel, set the Opacity slider to 50%, and then set the Min Opacity slider to 20%, the more
stylus pressure you apply, the more opaque the brushstroke will be.
Direction adjusts the angle value of the direction controller. When the expression is set to Direction, it specifies the angle at which a
brushstroke narrows or widens, which is particularly useful for calligraphic effects.
Some brush controls such as Size, Opacity, Angle, Stroke Jitter, Color Expression, and Color Variability can also be linked to audio input.
For more information, see “Audio Expression” on page 340.
To choose an Expression setting
1Open any of the following brush control panels: Opacity, Grain, Size, Angle, Airbrush (Feature and Flow), Impasto, Liquid Ink, Stroke
Jitter, Blending (Saturation and Bleed), Color Expression, or any of the Particles or Thick Paint panels.
2Perform a task from the following table.
To Do the following
Disable the expression setting Choose None from the Expression list box.
Adjust the brushstroke based on the dragging speed Choose Velocity from the Expression list box. Dragging quickly
minimizes the setting; dragging slowly increases it.
Adjust the selected brushstroke based on the direction of the stroke Choose Direction from the Expression list box, and move the
Direction slider.
Adjust the brushstroke based on stylus pressure Choose Pressure from the Expression list box. Greater pressure
increases the setting for that brush feature.

340 | Corel Painter 2022 User Guide
To Do the following
Adjust the brushstroke based on the wheel setting on an airbrush
stylus, specifically the Intuos Airbrush stylus
Choose Wheel from the Expression list box. The maximum value is
set when the wheel is pushed all the way forward. The minimum is
set when the wheel is pushed all the way back.
Adjust the brushstroke based on the angle of the stylus from the
tablet
Choose Tilt from the Expression list box. For example, when the
stylus is perpendicular to the tablet, Tilt is set at zero.
Adjust the brushstroke according to the direction in which the
stylus points
Choose Bearing from the Expression list box.
Adjust the brushstroke as you turn a flat-tip Intuos Art Pen that
supports 360-degrees of barrel rotation sensitivity
Choose Rotation from the Expression list box.
Adjust the brushstroke according to the luminance of the clone
source
Choose Source from the Expression list box. Higher luminance
(closer to white) increases the setting for that component,
producing a wider stroke.
Adjust the brushstroke on a random basis Choose Random from the Expression list box.
Reverse the effect of an Expression setting Click the Invert button .
Not all stylus models convey tilt, rotation, or bearing information.
Audio Expression
The Audio Expression feature lets you use audio from your computer’s microphone, or internal audio to modify the look and feel of any
brush. For example, your brushstrokes may change their appearance in synch with streaming music. Audio Expression can also help you
capture the ambient sounds and the atmosphere of the surroundings while working on a project.
The width (size) of the brushstroke changes in synch with the audio signal.
Audio Expression allows you to link audio input to controls on any of the following brush panels: Size, Opacity, Angle, Stroke Jitter, Color
Expression, Color Variability, Dynamic Speckles, Grain, Airbrush, Liquid Ink, Particles — Common, Flow Particles, Gravity Particles, and
Spring Particles. You can link one or more brush attributes to audio. For example, if you link audio to brush size, angle, and color variability,
brushstrokes will change their width, angle and color in synch with the audio input.

Adjusting brushes with brush controls | 341
Left: A steady audio signal does not change the opacity of the
brushstroke. Right: Opacity changes in synch with the audio signal.
In addition, you can adjust the strength of an audio signal, controlling its impact on a brush. For example, if you link brush size to quiet
audio, increasing the strength will result in wider brushstrokes. Conversely, if the audio is loud, decreasing the strength will result in
narrower brushstrokes. In addition, you can set the range of the audio expression to achieve a wider range of brushstroke variation (for
example, minimum to maximum brushstroke width) regardless of whether the audio is consistently strong, low, or varies.
Audio Expression can be used together with other expressions to control brush attributes. For example, you can apply both pressure and
audio expression to control how brush size varies. For more information about expressions, see “Expression settings” on page 339.
To link brush attributes and effects to audio
1Choose Window Audio Audio Settings Panel.
2Enable the Enable Audio Input check box.
3Choose an audio source from the Input list box.
4Choose Window Brush Control Panels Brush Media or Window Brush Control Panels Brush Shape, and choose any of the
following panels: Size, Opacity, Angle, Stroke Jitter, Color Variability, Color Expression, Dynamic Speckles, Grain, Airbrush, Liquid
Ink, Particles- Common, Flow Particles, Gravity Particles, Spring Particles.
5Click the Audio Expression button .
(macOS) The volume level of the Internal Audio Driver (Corel Painter) is disabled so that audio expression strength is maintained.
To adjust the sound level, go to the application that is playing the audio.
You can also enable audio input by choosing Window Audio Enable Audio Input.
You can also select an audio source by choosing Window Audio Input, and choosing an audio source.
To choose audio expression settings
1Choose Window Audio Audio Settings Panel.
2Perform a task from the following table.
To Do the following
Adjust the strength of an audio signal Move the Strength slider.
While observing the input level indicator below the Input list box,
adjust the Strength slider according to the sound. Red indicates
that the maximum strength has been achieved.
Set the range of audio expression Move the Range slider.
342 | Corel Painter 2022 User Guide
To Do the following
While observing the input level indicator below the Input list box,
adjust the Range slider according to the sound. Red indicates that
the maximum range has been achieved.
Use low values for low audio, medium values for varying audio,
and high values for strong audio.
Previewing brushstrokes and brush dabs
The Stroke Preview and Dab Preview panels include preview windows that show how brush control changes affect the appearance of the
currently selected variant’s brushstrokes and brush dabs. Both preview panels display changes in real-time. In addition, the Stroke Preview
panel reflects how brushstrokes blend with colors and textures. For example, if you change the brush size (Size panel) or dab type (General
panel), you can preview the impact of the changes on both the dab and stroke.
The Dab Preview window lets you choose different viewing modes, to reveal different aspects of the brush dabs.
The Dab Preview window lets you toggle between Size and Shape, Hard Media, and Brush Dab views.
In the Size and Shape view, concentric circles show the minimum and maximum sizes of a brush. The inner (black) circle shows the
minimum dab width. The outer (gray) circle shows the maximum dab width. Remember that some brushes vary the line width based on
pressure or stroke speed. The difference between the diameter of the two circles shows the range in which the stroke width can vary.
In the Hard Media view, you can preview what a Hard Media, such as a Pencil variant, will look like at various angles. This is useful when
modifying the settings in the Hard Media brush control panel. The dab appears in the Dab Preview window at the corresponding angle.
In the Dab Preview, shading shows the density distribution of the brush tip. The density distribution describes how much of the medium
is conveyed by a given point on the brush dab. For example, an individual dab made by an airbrush produces a soft-edged circular mark
with minimum density at the outer edge of the dab. Density increases inward to a maximum value at the exact center of the dab. The Dab
Preview cannot be used for the Image Hose or rendered dab types.
To preview brushstrokes
•Choose Window Brush Control Panels Stroke Preview.
To preview brush dabs
1Choose Window Brush Control Panels Dab Preview.
2In the Dab Preview panel, click one of the following buttons:
•Preview Size and Shape
•Preview Hard Media
•Preview Brush Dab

Adjusting brushes with brush controls | 343
The Dab Preview window supports only views of dab based brushes.
You can switch between the different preview modes by clicking (Windows) or holding down Command and clicking (macOS) in
the preview window.
Calibrating brush variants
When you draw with traditional media, the amount of pressure that you use with a tool determines the density and width of your strokes.
Using a pressure-sensitive stylus with Corel Painter gives you this same kind of control. Because each artist uses a different strength or
pressure level in a stroke, you can calibrate individual brush variants to match your stroke strength.
The most common way of adjusting brush calibration is to apply a typical brush stroke, such as a wavy stroke, to the scratch pad. Corel
Painter then uses your stroke to calculate the appropriate pressure and velocity settings for the brush variant.
For example, you can set less pressure when sketching with a pencil brush variant, but set more pressure when using an oil paint brush
variant. Corel Painter saves Brush Calibration control settings with the brush variant, so whatever sensitivity you set will be the default the
next time you choose the brush variant. If you set Brush Calibration for a specific brush in addition to general Brush Tracking preferences,
the Brush Calibration settings override the Brush Tracking preferences. For more information, see “Brush tracking and calibration” on page
153.
When you use the scratch pad to set brush calibration, Corel Painter calculates the pressure and velocity settings for you. However, you can
manually adjust these settings. For example, you can adjust the stroke pressure to achieve a full pressure range (Pressure Scale slider) using
a softer or harder touch (Pressure Power slider). You can also adjust the stroke velocity to achieve a full velocity range (Velocity Scale slider)
with a slower or faster stroke (Velocity Power slider).
To ensure that a brush control is using the pressure or velocity settings, you need to set the brush control Expression setting to Pressure or
Velocity. For more information, see “Expression settings” on page 339.
To calibrate a brush variant
1With a brush variant selected, choose Window Brush Control Panels Brush Calibration.
2Enable the Enable Brush Calibration check box.
3Click the Set brush calibration settings button .
The Brush Tracker appears.
4Drag in the Scratch Pad using a “normal” stroke.
Use the pressure and speed you prefer when drawing or painting. This allows the Brush Tracker to calculate the appropriate speed and
pressure settings for the brush.
If you want to adjust the settings manually, perform a task from the following table.
To Do the following
Achieve a full pressure range with a softer or harder touch Adjust the Pressure Scale and Pressure Power sliders.
Achieve the full velocity range with a slower or faster motion Adjust the Velocity Scale and Velocity Power sliders.

344 | Corel Painter 2022 User Guide
You can also access the Brush Calibration panel by clicking the Advanced Brush Controls button on the Brush tool property
bar.
General controls
Corel Painter provides extensive control over brush properties and dab types. You can also choose how brushstrokes interact with existing
color in the image.
To learn about the controls included in the General panel, see the following topics:
•“General controls: Dab types” (page 344)
•“General controls: Stroke types” (page 348)
•“General controls: Methods and subcategories” (page 349)
•“General controls: Source” (page 353)
General controls: Dab types
When you choose a dab type, you’re choosing a method for applying media to the canvas. Corel Painter uses rendered dab types that are
computed during the stroke, and stamp-based dab types in which brushes apply small dots of media to create brushstrokes.
With the spacing between dabs set small, strokes appear smooth. If you zoom in enough, you can probably tell that the brushstroke is made
up of tiny dabs of color. If you make a rapid brushstroke or set large spacing between dabs, strokes can become trails of dots.
Rendered dab types create continuous, smooth-edged strokes. They’re fast and less prone to artifacts than stamp-based media application.
In fact, you can’t draw fast enough to leave dabs or dots of color showing in a stroke, because they’re just not there. Rendered dab types
allow rich new features that were not possible with stamp-based media application.
The Scratchboard variant of the Pens brush category illustrates the
smooth stroke that can be accomplished with the rendered dab types.
Corel Painter brushes use stamp-based or rendered dab types:
Stamp-based dab type Description
Circular Dabs are controlled by the sliders in the Size and Angle brush
control panels.
Computed Circular Controlled by the sliders in the Computed Circular brush control
panel. This dab type allows you to customize the brush dab profile.

Adjusting brushes with brush controls | 345
Stamp-based dab type Description
For more information, see “Computed Circular controls” on page
382.
Single-Pixel Consists of one pixel only. You can’t change its size. You use single-
pixel brushes when you zoom in for editing at the pixel level.
Static Bristle Controlled by the sliders in the Static Bristle brush control panel
and Size flyout on the property bar. When the Static Bristle dab
type is selected, the preview grid displays a bristly profile.
Captured Shapes that you create and capture. For more information, see
“Creating and managing brush dabs” on page 334.
Erase All Dabs that let you erase parts of images
A captured dab lets you paint with specific shapes and designs that you create.
Rendered dab type Description
Camel Hair Creates bristle brushes with circular arrays of bristles. Individual
brush hairs can have their own color, and they can also pick up
underlying colors independently of the Brush Loading option.
By increasing color variability in Corel Painter, you can make each
hair a separate color. For more information, see “Setting color
variability” on page 273.
The Feature slider in the Bristles panel separates bristles. The
higher the setting, the farther apart the hairs will appear. Using a
low setting makes the strokes more solid. For more information
about the Size controls, see “Size controls” on page 360.
Flat Creates flat brushes such as those used to apply paint to houses or
walls. Brushes that use Flat dabs respond to bearing and allow for
flat or narrow strokes, depending on how the stylus is held. Flat
dabs are always perpendicular to the shaft of the stylus.
The Feature setting in the Bristles panel separates bristles.

346 | Corel Painter 2022 User Guide
Rendered dab type Description
Palette Knife Creates brushes that are the opposite of Flat dab brushes. With
resaturation set low, you can use these brushes to scrape, push,
pick up, or rapidly drag colors along. Palette Knife dabs are always
parallel to the shaft of the stylus.
The Feature setting in the Bristles panel separates bristles.
Bristle Spray Creates brushes that can use airbrush controls. These brushes
recognize tilt, which separates bristles on the opposite side of the
tilt.
By adjusting the Feature slider in the Bristles panel, you can
separate bristles.
Airbrush Creates brushes that act like airbrushes. Bearing (direction) and
angle (tilt) affect the eccentricity of the resulting conic section.
The Feature slider in the Airbrush panel controls the size of the
individual droplets of media. Setting the Feature slider too high
might produce undesirable artifacts.
You can reverse the spray direction when you paint by enabling
the Continuous Time Deposition check box in the Spacing panel,
and by holding down Option + Shift (macOS) or Alt + Shift
(Windows).
Pixel Airbrush Creates brushes that work like airbrushes. Brushes that use Pixel
Airbrush dabs cannot use the Feature slider to control the size of
individual droplets of media.
You can reverse the spray direction when you paint by enabling
the Continuous Time Deposition check box in the Spacing panel,
and by holding down Option + Shift (macOS) or Alt + Shift
(Windows).
Line Airbrush Creates brushes that work like airbrushes. Brushes that use Line
Airbrush dabs spray lines instead of droplets of media.
You can reverse the spray direction when you paint by enabling
the Continuous Time Deposition check box in the Spacing panel,
and by holding down Option + Shift (macOS) or Alt + Shift
(Windows).
Projected Creates brushes that act like airbrushes. Brushes created with
Projected dabs work similarly to the airbrush from previous
versions of the application, but react to bearing and angle data.
They create conic sections with an overall softness.
You can reverse the spray direction when you paint by enabling
the Continuous Time Deposition check box in the Spacing panel,
and by holding down Option + Shift (macOS) or Alt + Shift
(Windows).

Adjusting brushes with brush controls | 347
Rendered dab type Description
Rendered Creates brushes that conform the source to a stroke. Use the
Source list box to control what is mapped into the computed
brushstrokes. For more information, see “General controls: Source”
on page 353.
The effects of Feature on the stroke
Corel Painter also includes other dab types that do not fall under the stamp-based or rendered dab types.
Other dab types
Liquid Ink Liquid Ink dabs create liquid paint effects that simulate traditional
ink-based media. You can give a Liquid Ink brushstroke the
appearance of height by applying lighting effects. There are five
types of Liquid Ink dab types: Liquid Ink Camel Hair, Liquid Ink
Flat, Liquid Ink Palette Knife, Liquid Ink Bristle Spray, and Liquid
Ink Airbrush.
Watercolor dabs Watercolor dabs create brushes that work like watercolor brushes.
The colors flow and mix and absorb into the paper. You can control
the wetness and evaporation rate of the paper. There are five types
of Watercolor dab types: Watercolor Camel Hair, Watercolor
Flat, Watercolor Palette Knife, Watercolor Bristle Spray, and
Watercolor Airbrush.
Artists’ Oil dabs Artists’ Oil dabs produce brushes that work like real-world, high
quality oil brushes. There are three types of Artists’ Oils dabs:
Artists’ Oils Camel Hair, Artists’ Oils Flat, and Artists’ Oils.
Thin Line Particles With this dab type, brushes emit particles from a central point,
and in turn the particles draw a pattern of lines (paths) as they
move across the canvas. This dab type includes Thin Line Gravity
Particles, Thin Line Flow Particles, and Thin Line Spring Particles.
Particles combined with Liquid Ink or Watercolor Additional dab types are available that use both Particles and
Liquid Ink or Watercolor dabs. These combination dab types
include: Liquid Ink Gravity Particles, Liquid Ink Flow Particles,
Liquid Ink Spring Particles, Watercolor Gravity Particles,
Watercolor Flow Particles, and Watercolor Spring Particles.
Dynamic Speckles combined with Particles, Bristle, or RealBristle Dynamic Speckle dab types create brushstrokes with thicker lines
from discrete spots of color. The speckles in the brushstroke are

348 | Corel Painter 2022 User Guide
Other dab types
generated as you paint. These dab types include Dynamic Speckle
Gravity Particles, Dynamic Speckle Flow Particles, Dynamic
Speckle Spring Particles, and Dynamic Speckle Bristle.
To choose a dab type
1Choose Window Brush Control Panels General.
2Choose a dab type from the Dab Type list box.
General controls: Stroke types
The Stroke Type determines how a brushstroke applies media. Corel Painter brushes use one of the following stroke types.
• The Single stroke type draws one dab path that corresponds exactly to your brushstroke.
• You can use Static Bristle, Captured, or one of the bristly rendered dab types (such as Camel Hair) with the Single stroke type to
create the effect of multiple bristles.
The Single stroke type has one dab path.
• The Multi stroke type draws a set of randomly distributed dab paths, positioned around the brushstroke you make. These dabs leave
dab paths that are not parallel and might overlap. The Multi stroke type may produce different results each time you use it. For more
information, see “Multi controls” on page 410.
• Increasing the Stroke Jitter value in the Stroke Jitter panel spreads out the strokes in a multi-stroke brush.
• Increasing the amount of bristles can increase the density of the brushstroke. For more information, see “Multi controls” on page
410.
•Multi-stroke brushes are computed before you apply them, therefore, the computing process can delay their appearance on the
canvas. Because of this delay, multi-stroke brushes work best when you apply short, controlled strokes.
The Multi stroke type draws a set of randomly distributed dab paths.
• The Rake stroke type draws a set of evenly distributed dab paths. The several dab paths in a rake brushstroke are parallel. You can control
all other aspects of the stroke by using settings in the Rake brush control panel.
• Each bristle in a Rake brush can have a different color. Increasing Color Variability in Corel Painter causes bristles to be colored
differently.
A Rake stroke is composed of evenly distributed dab paths.
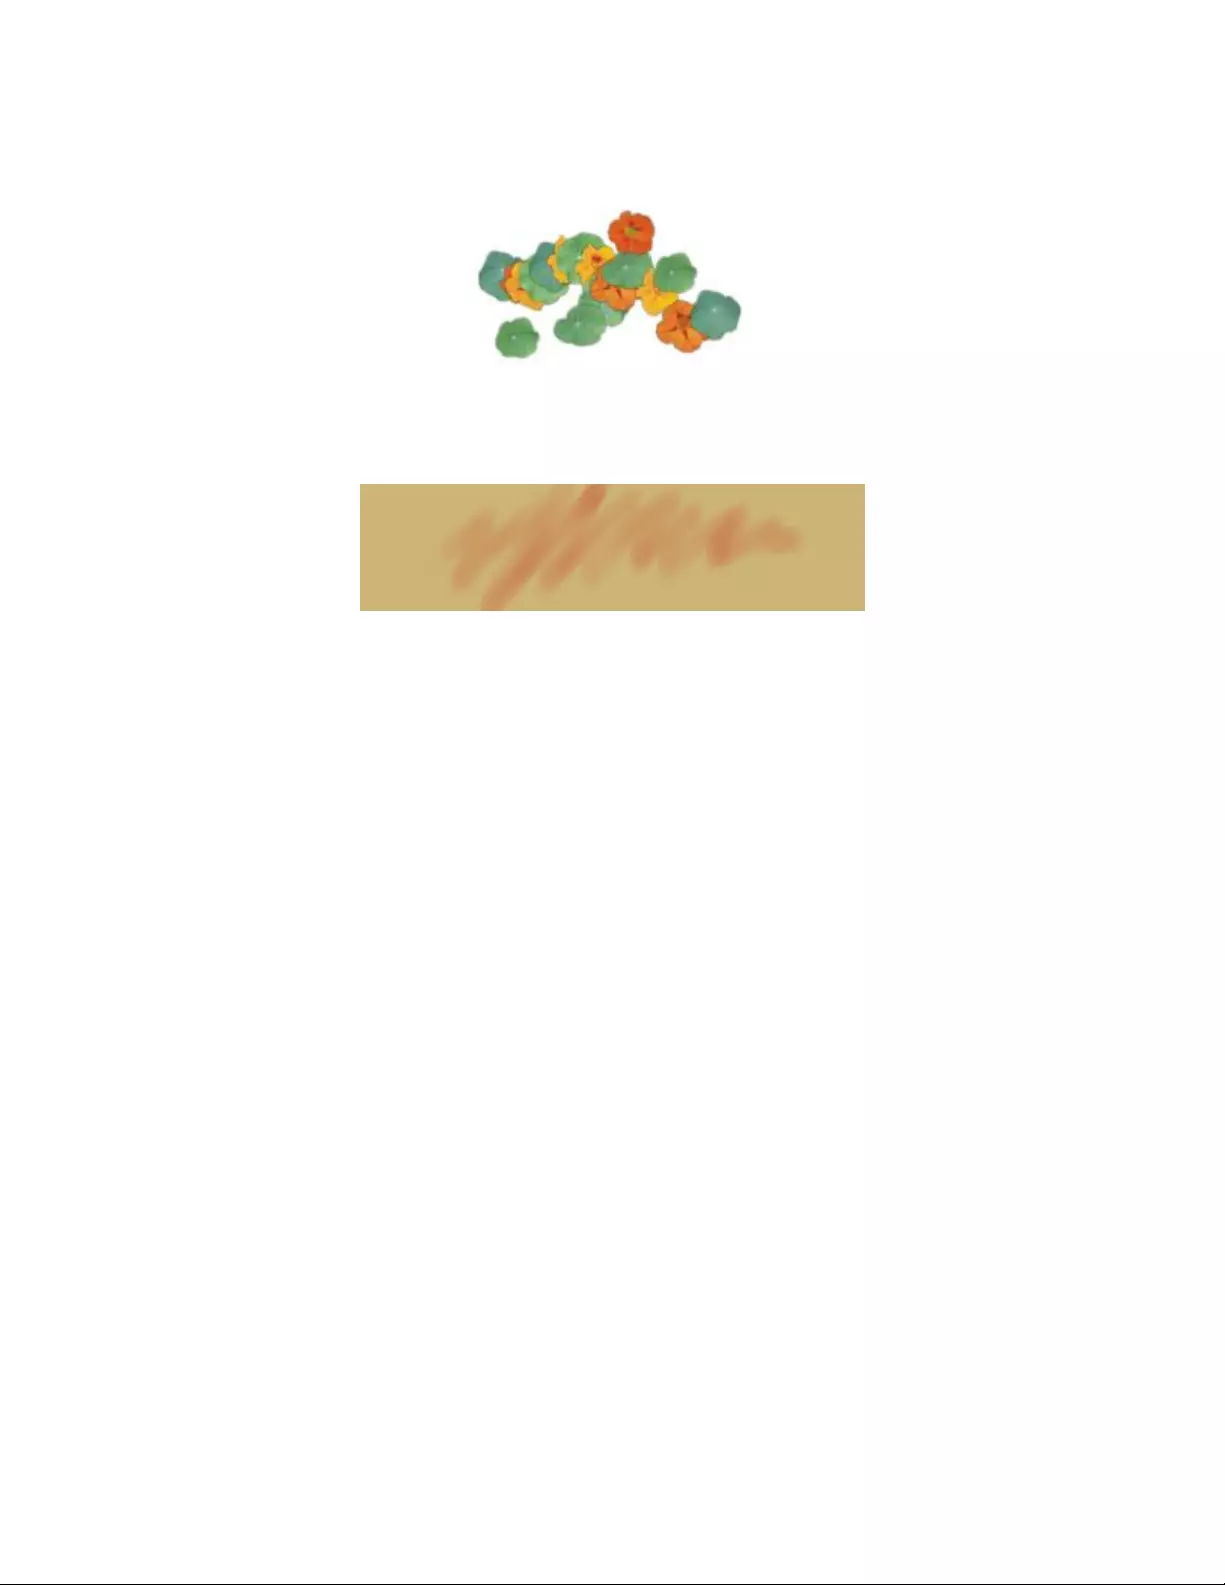
Adjusting brushes with brush controls | 349
• The Hose stroke type applies only to the Image Hose. It’s a single stroke composed of the current Image Hose Nozzle file. For more
information about the Image Hose and Nozzle files, see “Image hose” on page 487.
The Hose stroke type uses the current Nozzle file as media.
• The Glazing stroke type draws brushstrokes with smooth opacity build-up from the beginning of the mark to the end. The paint that
each dab deposits on the canvas is temporarily added to an invisible layer, and then the layer is dropped down onto the canvas.
In a Glazing stroke type, opacity builds up gradually from a minimum to a maximum along a brushstroke.
To choose a stroke type
1Choose Window Brush Control Panels General.
2Choose a stroke type from the Stroke Type list box.
If a stroke type is not available (appears grayed out), it’s not supported by the currently selected brush variant and dab type.
General controls: Methods and subcategories
The brush method defines the most basic level of brush behavior and is the foundation on which all other brush variables are built. The
method and method subcategory represent attributes of the stroke’s appearance.
Because the method sets a brush variant’s most basic behavior, you can alter a variant’s behavior by changing its method. For example,
suppose you want a stroke that looks like charcoal, but instead of hiding underlying strokes, you want the brushstrokes to build to black.
You can get this effect by changing the method to Buildup. Perhaps you want a variant of the Pens brush category to smear underlying
colors. You can change its method from Cover to Drip. Some brush effects are less easily affected by other methods, and results may differ.
Each method can have several variations, called method subcategories. These subcategories further refine the brush behavior. The following
terms are used in describing most method subcategories:
• Soft methods produce strokes with feathered edges.
• Flat methods produce hard strokes with reduced dab detail.
• Hard methods produce smooth strokes.
• Grainy methods produce brushstrokes that react to paper texture.
• Alpha Blend methods produce brushstrokes with improved color precision, reduced appearance of digital artifacts, and enhanced layer
blending.
• The words “edge” and “variable” are sometimes used to describe a method subcategory. Edge strokes are thick and sticky-looking.
Variable strokes are affected by tilt and direction.
Combining a method with a method subcategory results in a specific brush style that you can assign to a given brush. For example, Grainy
Hard Cover brushstrokes interact with paper grain and are semi anti-aliased so that they hide underlying pixels. Grainy Hard Cover is used
for many Chalk and Charcoal variants.
350 | Corel Painter 2022 User Guide
Grainy Hard Buildup was used to create the brushstroke on top.
Soft Variable Buildup was used to create the stroke on the bottom.
Corel Painter supplies the following methods:
•“Buildup” (page 350)
•“Cover” (page 350)
•“Enhanced Cover” (page 351)
•“Eraser” (page 351)
•“Drip” (page 351)
•“Cloning” (page 352)
•“Digital Wet” (page 352)
•“Marker” (page 352)
•“Selection” (page 352)
•“Wet” (page 352)
•“Plug-in” (page 352)
Buildup
The Buildup methods allow you to produce brushstrokes that build towards black as they are overlaid. A real-world example of buildup is
the felt pen: scribble on the page with blue, then scribble on top of that with green, and then red. The scribbled area keeps getting darker,
approaching black. Even if you were to apply a bright color like yellow, you couldn’t lighten the scribble — it would stay dark. Crayons and
Felt Pens are buildup brushes.
An example of the Buildup method
Cover
Cover methods are very versatile, and are the foundation of many popular brush categories, such as Acrylics, Chalk, Charcoal, Conte,
Gouache, Pastels, and Pens. Cover methods are also used for some Oils and Blenders, and with many stamp-type brushes.
The Legacy Cover methods are core Painter brush media technology that produce a range of brush characteristics and options, including
blending, opacity, and grain interaction. Some Chalk and Impasto variants are examples of brushes that use the Legacy Cover method.
An example of the Cover method
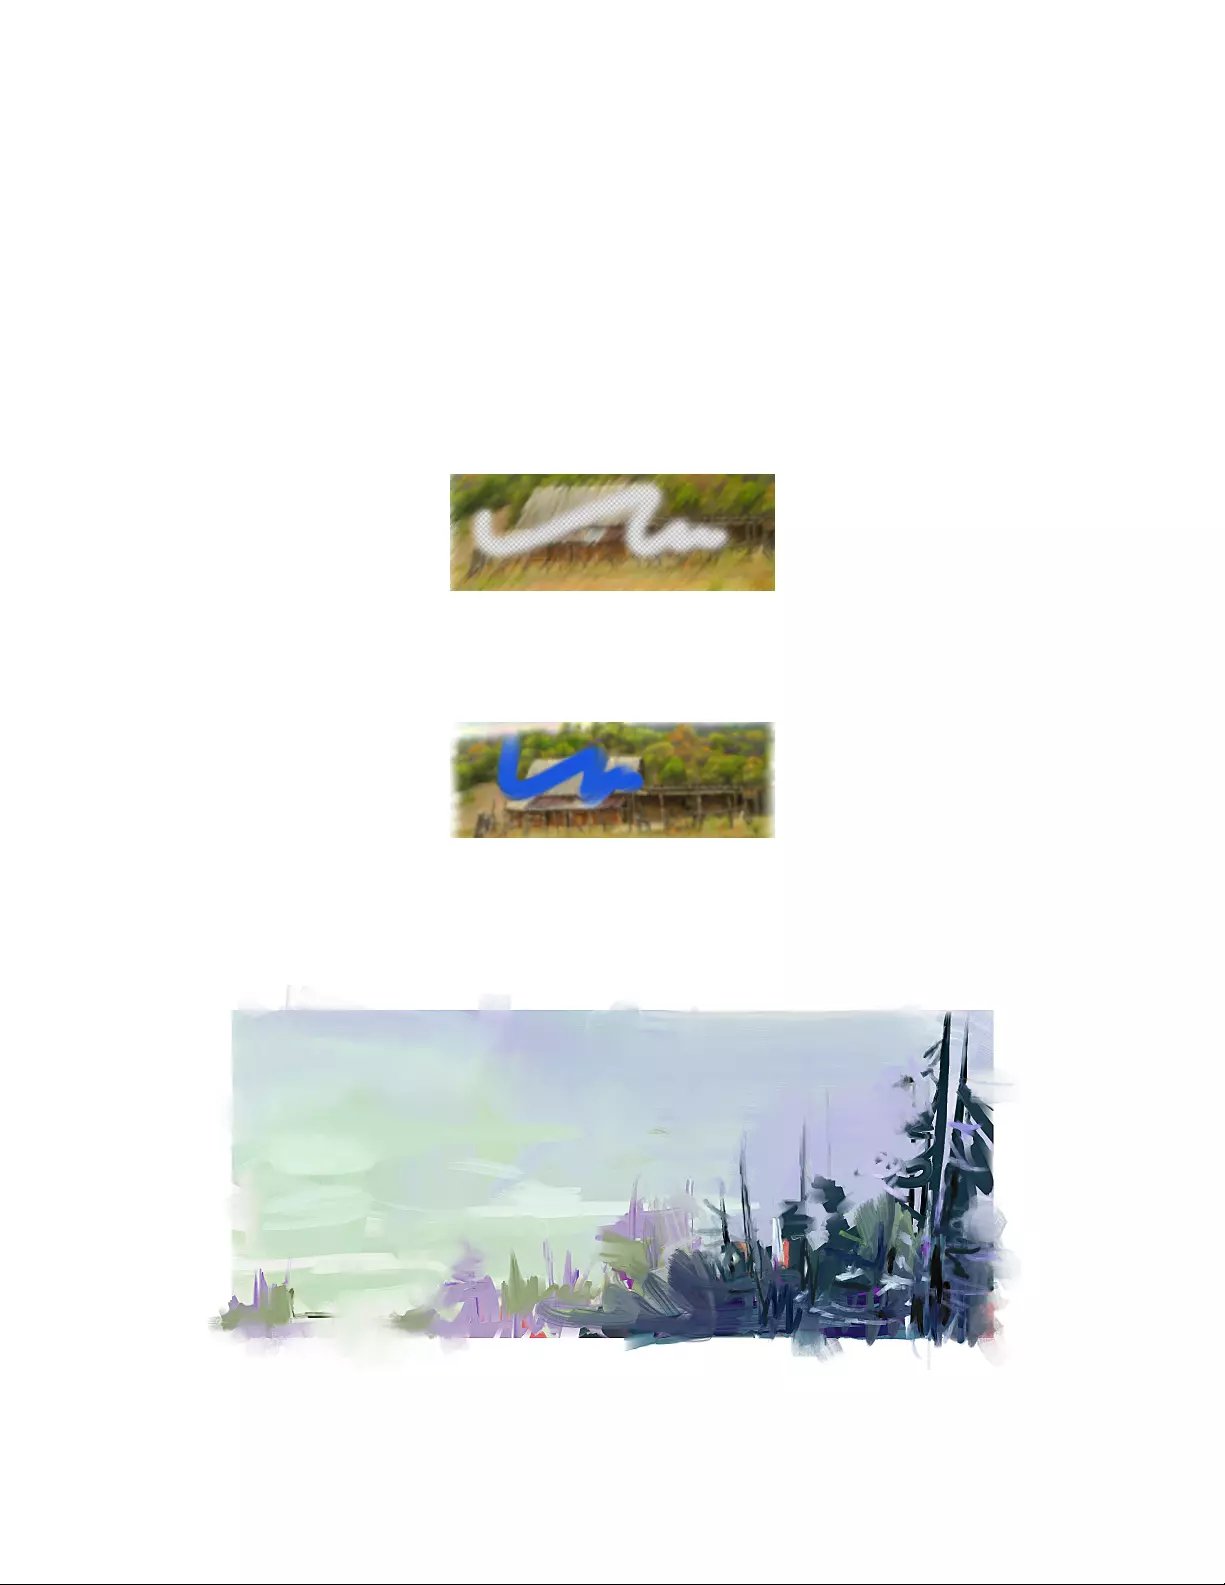
Adjusting brushes with brush controls | 351
Enhanced Cover
The new Enhanced Cover methods available only in Painter 2022 take advantage of the latest technology advancements for an improved
brushing experience. For Flat methods, anti-aliasing support has been increased resulting in opaque dab rendering. Noise for artifact
reduction has been added to all Enhanced Cover methods, and it is especially pronounced for Soft method brushstrokes with feathered
edges.
Alpha Blending methods offer improved color precision when blending adjacent brushstrokes, reducing the likelihood of unexpected
color shifts near the edges. And for Grainy methods, options for grain control, opacity, and enhanced layer blending have been added. In
addition, brush loading support has been added to all Enhanced Cover methods to give your brushstrokes that smeary, oily look.
Eraser
The Eraser methods erase, lighten, darken, or smear the underlying colors.
An example of the Eraser method
Drip
The Drip methods interact with the underlying colors to distort the image.
An example of the Drip method
Brushes using this method mix in the current color with the underlying brushstrokes, creating a nice oily effect. The brushes work both on
the canvas and on a layer, support transparency, and work in conjunction with preserve transparency and selections. Paint expressive luscious
brushstrokes with these brushes that blend, smear, push, and pull color similarly to wet oil paint.
In this painting, Melissa Gallo used the Sargent brush variant, as well as brushes from the Artists’ Oils category.
To search for variants that use the Drip method, in the Search bar (Window Search), type sargent or drip.

352 | Corel Painter 2022 User Guide
Cloning
The Cloning methods take images from a clone source and re-create them in another location, often rendering them in a Natural-Media
style. For more information about painting a clone, see “Painting in the clone” on page 195.
The image on the left was created with a brush that used the image on the right as the clone source.
Digital Wet
The Digital Wet method applies digital watercolor brushstrokes to the canvas or a regular layer. For more information, see “Working with
Fringe watercolor brushes” on page 434.
Marker
The Marker method lets you simulate the use of professional markers for drawing and creating renderings. For more information, see
“Markers” on page 485.
Selection
The Selection method allows you to create freehand selections by painting with brushes that use the following dab types: Circular,
Computed Circular, Captured, Single-Pixel, Static Bristle, Dynamic Speckle Bristle, and Dynamic Speckle Particle types (Flow, Gravity, and
Spring). For more information, see “Selecting areas by painting” on page 596.
Examples of selections (right) created with brushes that use the Selection method. The color
overlay (left) that appears as you paint helps to distinguish selected areas from protected areas.
Wet
The Wet method applies brushstrokes to a Watercolor layer. For more information, see “Working with the Watercolor layer” on page 432.
Plug-in
Plug-in is a special category of method subcategories. It defines no specific brush behavior, but is an open door to a wide range of
subcategories.
It’s well worth your time to browse through the Plug-in method subcategories. There, you’ll find methods such as Left Twirl, which
simulates the dab and brushstroke of an Impressionist performing left-handed twirls.

Adjusting brushes with brush controls | 353
You can give any built-in brush the power of a plug-in by changing its method and subcategory.
To choose a method and subcategory
1Choose Window Brush Control Panels General.
2Choose a method from the Method list box.
3Choose a subcategory from the Subcategory list box.
The Method and Subcategory options are available only with circular, single-pixel, static bristle, captured, and eraser dab types.
General controls: Source
The Source setting lets you specify the media that is applied by the brush variant. Source applies only to some dab types, such as Line
Airbrush, Projected, and Rendered. For more information about setting a media source, see “Exploring painting media” on page 157.
Corel Painter brushes use one of the following source types:
• Color applies primary or secondary color.
• Gradient applies the current gradient across the length of the stroke. For more information, see “Applying gradients” on page 711.
• Gradient Repeat applies the current gradient repeatedly along the stroke. For more information, see “Applying gradients” on page 711.
• Pattern paints with a pattern containing no mask information. For more information, see “Painting with patterns” on page 699.
• Pattern With Mask paints with a pattern limited by the pattern’s mask. For more information, see “Painting with patterns” on page
699.
• Pattern As Opacity paints a pattern in which the luminance of the pattern becomes the opacity of the stroke. For more information, see
“Painting with patterns” on page 699.
To choose a media source
1Choose Window Brush Control Panels General.
2Choose a source from the Source list box.
Performance controls
You can quickly see whether the currently selected brush can take advantage of your system’s multi-core processor (CPU), AVX2 extensions of
the CPU, or graphics processor (GPU) technologies. You can also run the Brush Accelerator to evaluate your system and optimize application
settings.
Your system has been evaluated and application settings optimized,
and the selected brush can take advantage of the technology.
Your system has been evaluated and application settings optimized.
The selected brush can take advantage of the technology, but your
system is below the baseline requirements for it to do so.
354 | Corel Painter 2022 User Guide
Your system has not been evaluated. To resolve issues, run
the Brush Accelerator utility or enable GPU support. For more
information, see “Performance preferences” on page 828.
You can disable your system’s GPU for the currently selected brush, allowing you to experiment with performance settings.
The Performance panel also lets you know if your system’s GPU has been disabled for all brushes or if the number of cores allocated to
Painter is insufficient. For more information, see “Performance preferences” on page 828.
To disable GPU support for the currently selected brush
1Choose Window Brush Control Panels Performance.
2Enable the Disable GPU for this brush check box.
To evaluate your system and optimize application settings
1Choose Window Brush Control Panels Performance.
2Click the Brush Accelerator button .
If the Brush Accelerator utility has already been run, the button displays as .
You can also run the Brush Accelerator utility from the Welcome Screen (Help Welcome Screen).
Opacity controls
Opacity lets you control how Corel Painter varies the density of the media that you apply to the canvas. The Opacity controls let you set
opacity levels for the currently selected brush.
You can also use the Expression settings to link opacity to various stylus or mouse movements. For example, you can link the opacity of an
Airbrush variant to stylus pressure. Heavier pressure produces more opaque strokes. For more information, see “Expression settings” on page
339.
You can also adjust the Min setting to specify the range of variability that you want the expression to apply. The Min Opacity setting
represents a percentage of the Opacity setting and it must be linked to an expression to have an effect. For example, if you choose the
Pressure expression on the Opacity panel, set the Opacity slider to 20%, and then set the Min Opacity slider to 50%, the opacity will vary
from 10% to 20% every time you apply pressure during a brushstroke.
You can increase the variation of the opacity effect by adjusting Opacity Jitter, which enhances the natural appearance of brushstrokes. You
can also use the Smoothness slider to smooth the opacity variation in a brushstroke for a more organic look.
Soft airbrush brushstrokes without Opacity Jitter (left) and with Opacity Jitter (right)

Adjusting brushes with brush controls | 355
Opacity Jitter applied to a brushstroke without jitter smoothing (top) and with jitter smoothing (bottom)
Audio Expression lets you link opacity to audio input from your microphone, or internal audio such as streaming music. The brushstroke
becomes more or less opaque as the strength of the audio signal changes.
Using audio input to vary the opacity of a brushstroke (right)
To set brush opacity
1Choose Window Brush Control Panels Brush Media Opacity.
2Move the Opacity slider to the left to reduce opacity, or to the right to increase opacity.
You can also
Link the opacity settings to a specific stylus or mouse movement Choose an option from the Expression list box.
Set the percentage of variability that you want the expression to
apply
Move the Min Opacity slider.
Adjust the angle of the Direction expression Move the Direction slider.
Adjust the amount of variation that is applied to Opacity Move the Opacity Jitter slider.
Smooth the opacity variation Move the Smoothness slider.
Link opacity to audio Click the Audio Expression button .
To choose an audio input and adjust audio settings, choose
Window Audio Audio Settings Panel. For more information,
see “Audio Expression” on page 340.
When adjusting Opacity Jitter, make sure the Min Opacity slider is not set to 100%. Setting the Min Opacity to 100% stops
Opacity Jitter from occurring.
You can also set brush opacity dynamically onscreen. For more information, see “To set brush attributes onscreen” on page 322.
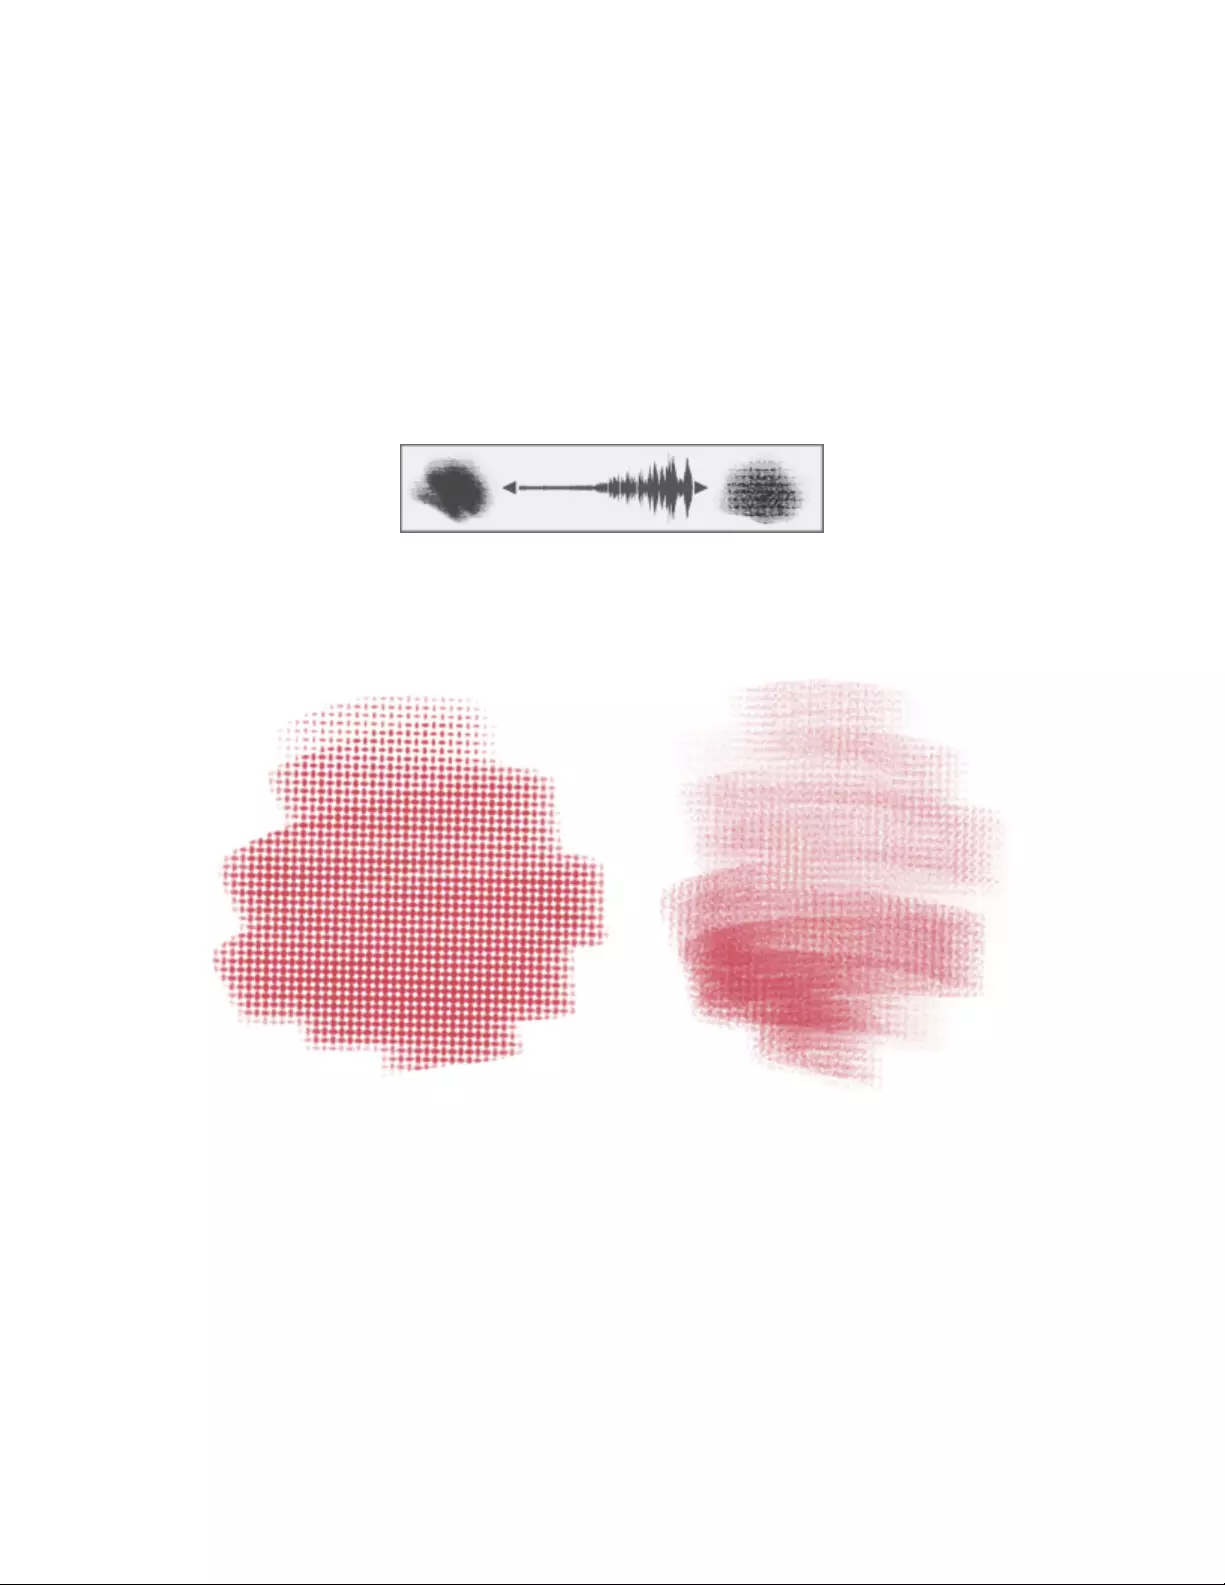
356 | Corel Painter 2022 User Guide
Grain controls
Grain lets you control the amount of paper texture that brushstrokes reveal. You can link grain to various stylus or mouse movements. For
example, if you link grain to pressure, increasing the pressure causes the pencil to “dig into” the paper and produce a grainier brushstroke.
For more information, see “Expression settings” on page 339. You can also specify the range of variability that you want the expression
to apply by adjusting the Min setting. The Min Grain setting represents a percentage of the Grain setting, and it must be linked to an
expression to have an effect. For example, if you choose the Pressure expression on the Grain panel and set the Grain slider to 100% and
the Min Grain slider to 10%, the amount of grain revealed will vary from 10% to 100% every time you apply pressure during a brushstroke.
You can smooth the grain jitter in a brushstroke for a more organic look. You can also link grain to audio input from your microphone, or
internal audio such as streaming music. For more information, see “Audio Expression” on page 340.
Using Audio Expression to vary grain
Normally, when you make a brushstroke, the paper grain is fixed, which means that the texture is in the same position. To get organic, non-
repetitive looking marks, you can vary the paper grain position for each dab in a brushstroke (Random Grain Position) or rotate the paper
grain for each new brushstroke (Random Grain Rotation).
A brushstroke with Random Grain Position disabled (left) and enabled
(right). Grain position varies from dab to dab within the brushstroke.
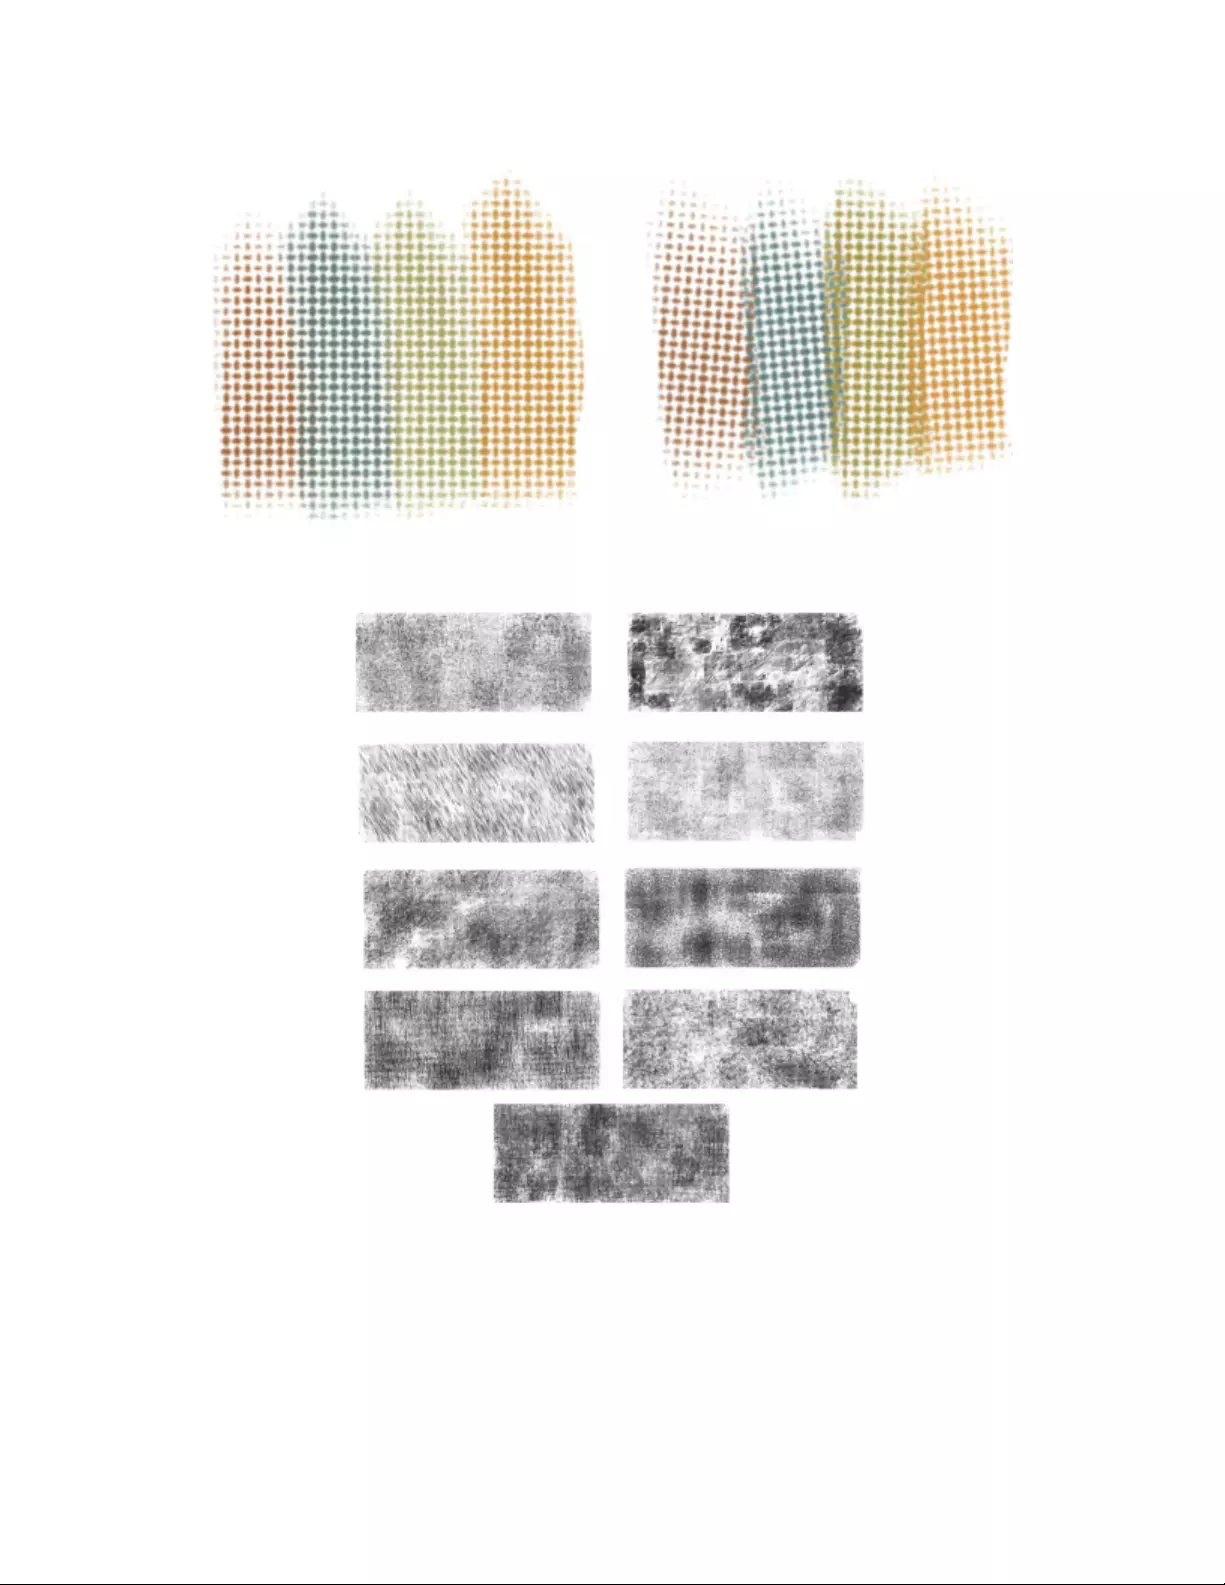
Adjusting brushes with brush controls | 357
Brushstrokes with Random Grain Rotation disabled (left) and enabled
(right). Grain rotation varies every time you lay down a brushstroke.
Varying grain position and rotation makes paper textures look more natural and
helps reduce repetition with Captured dab brushes. Image by Karen Bonaker
In addition, you can use the paper’s brightness and contrast settings to control brush–grain interaction. For more information, see “Working
with paper texture and grain” on page 171 and “Expression settings” on page 339.
To set grain
1Choose Window Brush Control Panels Brush Media Grain.
2Move the Grain slider to adjust the penetration of a brushstroke into the grain.

358 | Corel Painter 2022 User Guide
You can also
Link the grain settings to a specific stylus or mouse movement Choose an option from the Expression list box.
Set the minimum level of grain a brushstroke reveals when linked to
a specific stylus or mouse movement
Move the Min Grain slider.
Specify the angle at which a brushstroke shows grain Move the Direction slider.
Set the amount of grain variation Move the Grain Jitter slider.
Smooth the grain jitter in a brushstroke Move the Smoothness slider.
Vary grain rotation within each brushstroke Enable the Random Grain Rotation check box.
Vary grain position within each brushstroke Enable the Random Grain Position check box.
When adjusting Grain Jitter, make sure the Min Grain slider is not set to 100%. Setting the Min Grain to 100% stops Grain Jitter
from occurring.
Stroke Attributes controls
You can apply a merge mode to a brush variant to control how brushstrokes interact with the underlying colors within the currently selected
layer or the canvas. This technique allows you to produce similar results to applying composite method to layers. In addition, it allows you to
control where the effect is applied. For more information about composite methods, see “Blending layers by using composite methods” on
page 566.
You can set some stroke attributes on the property bar. For more information, see “To choose a dab profile using the property bar” on page
325.
To apply a merge mode
1Choose Window Brush Control Panels Brush Media Stroke Attributes.
2Enable the Use Stroke Attributes check box.
3Move the Stroke Opacity slider.
4From the Merge Mode list box, choose one of the following merge modes:
Merge Mode Description
Color Creates a new color by combining the luminance of the underlying
color with the hue and saturation of the brushstroke color. This
method is the opposite of Luminosity.

Adjusting brushes with brush controls | 359
Merge Mode Description
Color Burn Simulates the photographic technique called burning, which
darkens image areas by increasing the exposure
Color Dodge Simulates the photographic technique called dodging, which
lightens image areas by decreasing the exposure
Colorize Replaces the hue and saturation of the underlying color with the
hue and saturation of the brushstroke color. You can use this mode
to apply color to a grayscale image.
Darken Darkens the underlying color with the brushstroke color —
whichever is darker
Default Covers and hides the underlying brushstrokes
Difference Subtracts one color from the other, depending on which color has
a greater brightness value
Dissolve Combines the underlying color with the brushstroke color, based on
opacity
Gel Tints the underlying color with the brushstroke color. For example,
a yellow brushstroke gives the underlying color a yellow cast.
GelCover Uses a combination of the Default method and the Gel method
Hard Light Multiplies, or screens colors, depending on the luminance of the
underlying color
Hue Creates a color by combining the luminance and saturation of the
underlying color with the hue of the brushstroke color
Lighten Colors with the underlying color or the brushstroke color —
whichever is lighter
Luminosity Creates a new color from the hue and saturation of the underlying
color and the luminance of the brushstroke color. This method is
the opposite of Color.
Magic Combine Combines the brushstroke color with the underlying color based on
luminance. The parts of the brushstroke that are lighter than the
underlying color are visible. The parts that are darker are replaced
by the lighter area of the underlying color.

360 | Corel Painter 2022 User Guide
Merge Mode Description
Multiply Combines colors to create a darker color
Normal Works like the Default method; the brushstroke covers the
underlying color.
Overlay Combines colors while preserving the highlights and shadows of
the underlying color
Pseudocolor Translates the brushstroke’s luminance into hue
Reverse-Out Inverts the colors beneath it
Saturation Creates a color by combining the luminance and hue of the image
color with the saturation of the layer color
Screen Combines colors to create a lighter color
Shadow Map Blocks light and combines colors while preserving the shadows of
the underlying color
Soft Light Darkens or lightens colors depending on the luminance of the
underlying color
Size controls
The Size brush controls determine how Corel Painter varies the width of the brushstroke.
Size lets you control the width of the brush and the brushstroke. As size changes, you may need to adjust the spacing controls for brushes
that use nonrendered or stamp-based dab types to prevent gaps from appearing in the stroke.
Size controls the width of the brush.
You can adjust brush size dynamically onscreen, use the Size slider and flyout on the property bar, or choose a preset from the Size library.
There’s a collection of dab sizes available in the application. You can also create custom presets. Corel Painter provides options to manage
presets in the Size Library panel. For example, you can hide, delete, and rename presets, as well as assign custom icons to presets. For
information about modifying the appearance of the Size library and restoring its default settings, see “Modifying the display of media
panels” on page 309 and “Restoring default libraries” on page 311.
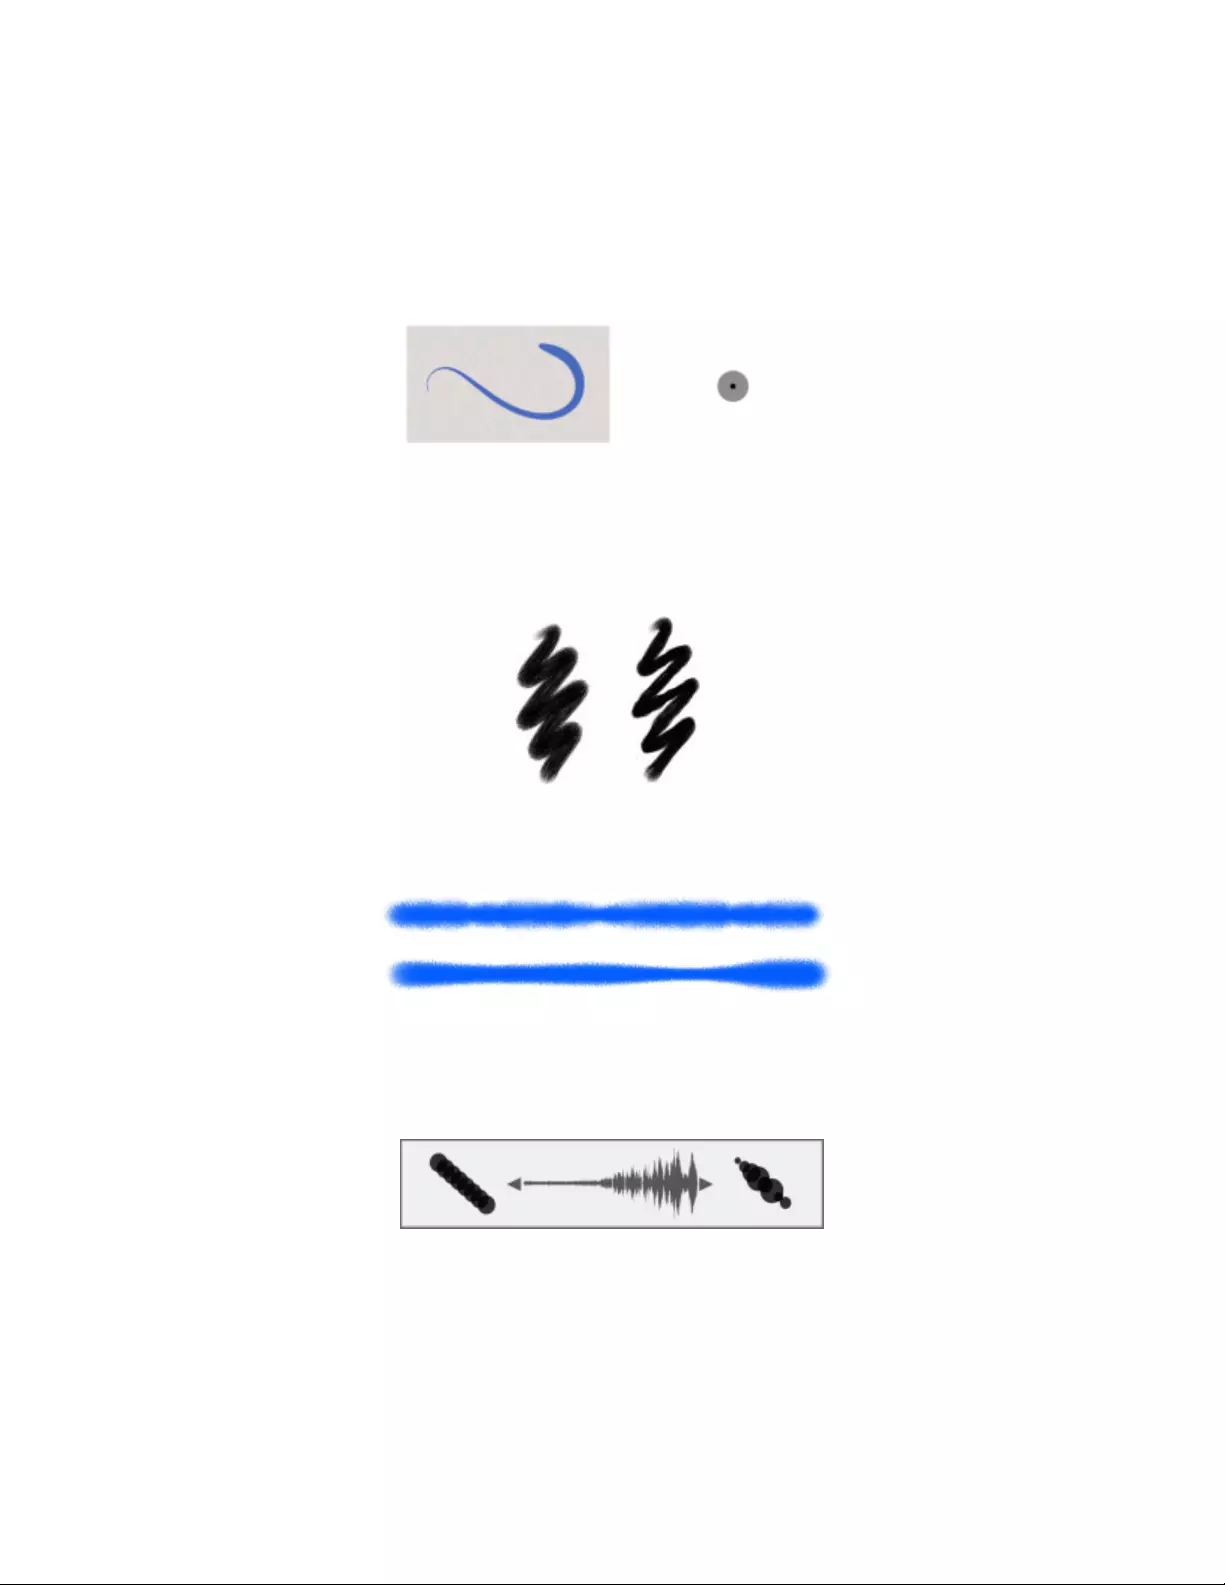
Adjusting brushes with brush controls | 361
You can choose an Expression setting to create a brush that responds to subtle hand movements. For more information, see “Expression
settings” on page 339. You can also adjust the Min setting to specify the range of variability that you want the expression to apply. The
Min Size setting represents a percentage of the Size setting and it must be linked to an expression to have an effect. For example, if you
choose the Pressure expression on the Size panel, set the Size slider to 40 and set the Min Size slider to 50%, the stroke sizes will vary from
20% to 40% every time you apply pressure. The Min Size control allows you to create a brushstroke that is amazingly realistic. As stylus
pressure eases, brushstrokes taper. As pressure increases, brushstrokes widen, just as they would with a real brush.
The minimum and maximum sizes of a stroke can be linked to Expression settings, such as pressure or velocity.
The small black circle shows the minimum stroke size, and the gray circle shows the maximum stroke size.
The Size Jitter control lets you introduce more variation to the size of the brushstroke, which enhances the responsiveness and natural
appearance of the brushstrokes. You can also use the Smoothness slider to smooth the size variation for a more organic look.
Brushstrokes without Size Jitter (left) and with Size Jitter (right)
Size Jitter applied to a brushstroke without jitter smoothing (top) and with jitter smoothing (bottom)
Audio Expression lets you link brush size to audio input from your microphone, or internal audio such as streaming music. The brushstroke
becomes wider or narrower as the strength of the audio signal changes.
The brushstroke changes its width in synch with the audio input (right).
Size Step controls the transition between narrow and wide sections of a stroke.
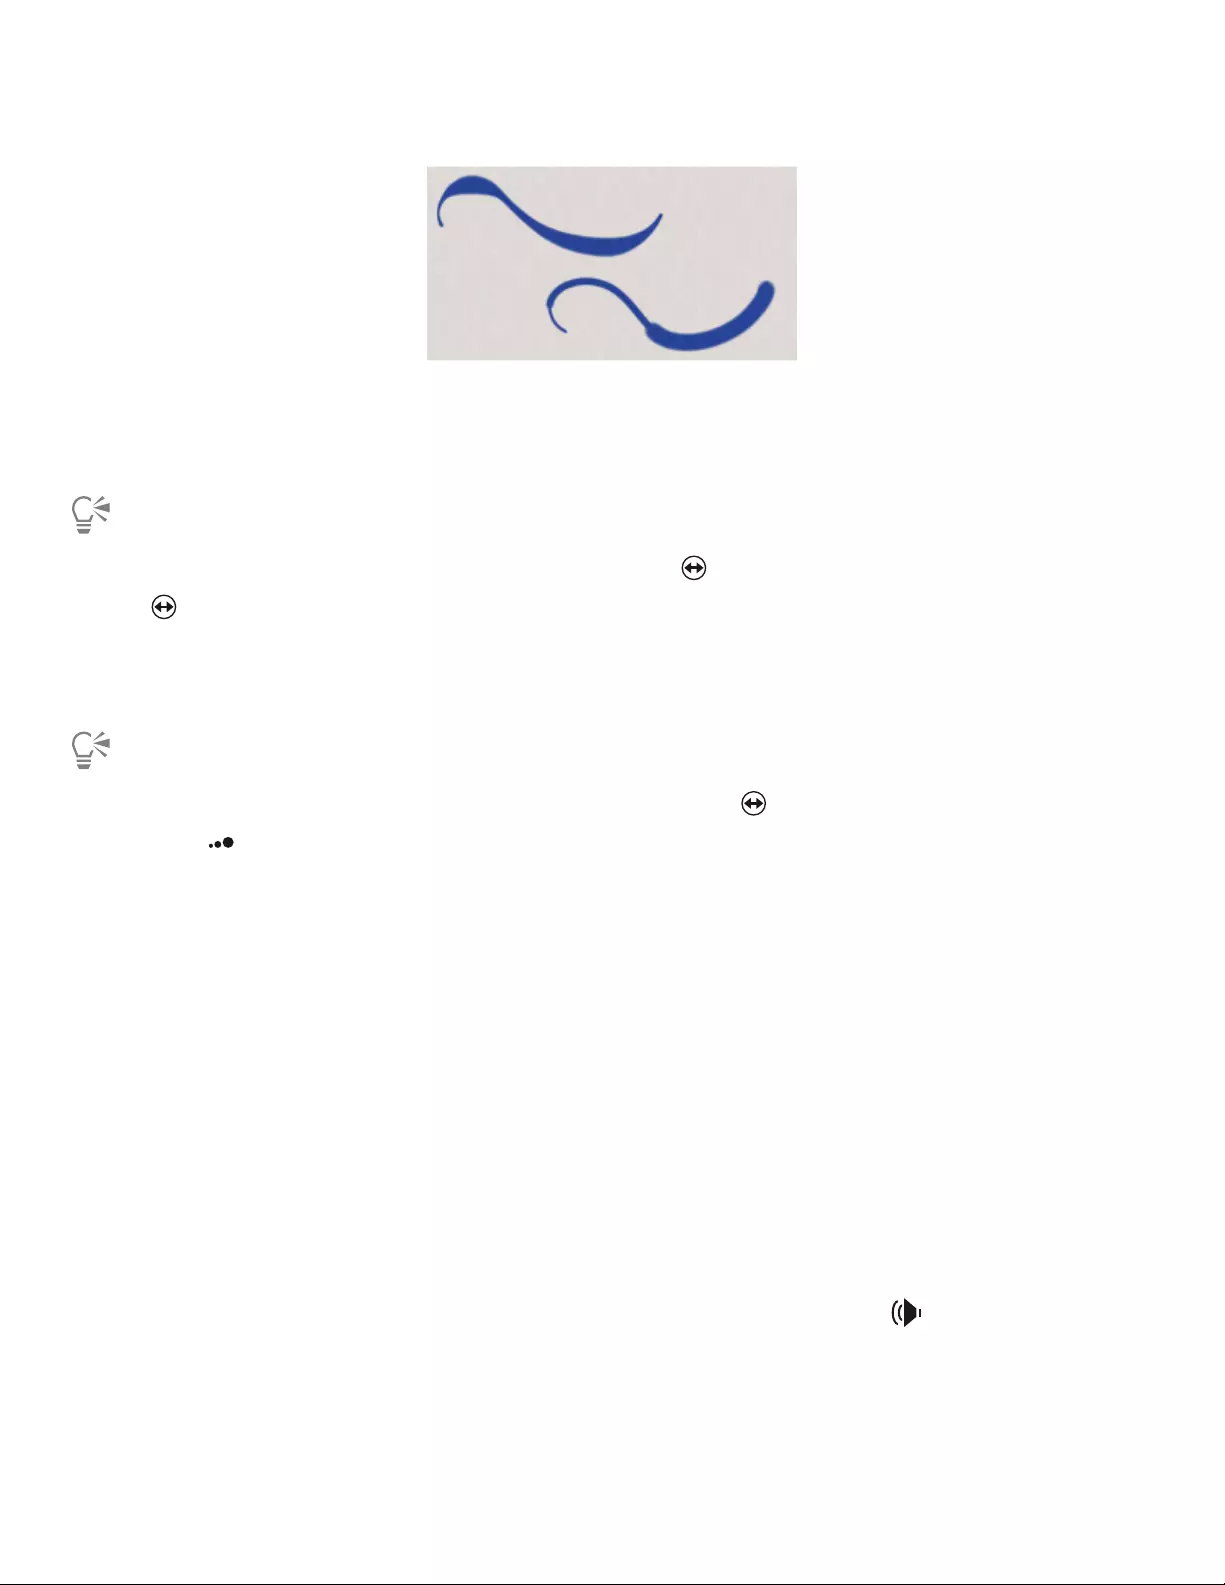
362 | Corel Painter 2022 User Guide
Brushstrokes with Size Step set to 1% (top) and 100% (bottom)
To display the Size panel
•Click Window Brush Control Panels Brush Shape Size.
You can also access the Size panel by clicking the Size flyout button on the property bar, and clicking the Size Panel button
.
To display the Size library
•Window Brush Control Panels Brush Shape Size Library.
You can also access the Size Library panel by clicking the Size flyout button on the property bar, and clicking the Size Library
button .
To adjust size controls
•In the Size panel (Window Brush Control Panels Brush Shape Size), perform a task from the following table.
To Do the following
Adjust brush size Move the Size slider to the right to make the brush larger, which
makes the transition appear more abrupt. Move the slider to
the left to make the brush smaller, which produces a smoother
transition.
Adjust the amount of variation that is applied to Size Move the Size Jitter slider.
Smooth the size variation Move the Smoothness slider.
Link size to audio Click the Audio Expression button .
To choose an audio input and adjust audio settings, choose
Window Audio Audio Settings Panel. For more information,
see “Audio Expression” on page 340.

Adjusting brushes with brush controls | 363
To Do the following
Link the size settings to a specific stylus or mouse movement Choose an option from the Expression list box.
Set the percentage of variability that you want the expression to
apply
Move the Min Size slider.
Adjust the angle of the Direction expression Move the Direction slider.
You can also set the brush size dynamically onscreen. For more information, see “To set brush attributes onscreen” on page 322.
When adjusting Size Jitter, make sure the Min Size slider is not set to 100%. Setting the Min Size to 100% stops Size Jitter from
occurring.
You can also change the brush size from the property bar by adjusting the Size slider or typing a value in the Size box.
To choose a brush size preset
•Click the Size flyout button on the property bar, click the Size Library button , and click a preset in the Brush Sizes panel.
To manage brush size presets
•In the Size Library panel (Window Brush Control Panels Brush Shape Size Library), perform a task from the following table.
To Do the following
Add a preset In the toolbox, click the Brush tool . Click the Brush Selector
on the Brush Selector bar, and choose a brush category and variant.
On the property bar, move the Size slider, or type a value in the
Size box. Once you are satisfied with the brush size, click the Add
Size Preset button in the Size Library panel.
Delete a preset Click a preset, and click the Delete Size Preset button.
Tip: You can also delete a preset, by right-clicking (Windows) or
Control-clicking (macOS) the preset, and choosing Delete Size
Preset.
Rename a preset Right-click (Windows) or Control-click (macOS) the preset, choose
Rename Size Preset, and enter a new name.
Assign a custom icon to a preset Do one of the following:
•Open or create an image. In the toolbox, choose the Rectangular
Selection tool , and drag in the document window to
select the area of the image. In the Size Library panel, right-

364 | Corel Painter 2022 User Guide
To Do the following
click (Windows) or Control-click (macOS) the preset, and choose
Capture Icon.
•In the Size Library panel, right-click (Windows) or Control-click
(macOS) the preset, and choose Set Custom Icon. Choose the
drive and folder where the image is stored. Click the image file
and click Open. Only PNG and JPEG images are supported.
To set stroke transition
•In the Size panel (Window Brush Control Panels Brush Shape Size), move the Size Step slider to the right to increase the
transition between brush sizes. Move it to the left to make the transitions smaller.
To switch the brush size preview mode
1Choose Window Brush Control Panels Dab Preview.
2Click the Preview Size and Shape button .
Angle controls
The Angle controls let you change the shape of a brush. Some Angle controls work in conjunction with Expression settings. For more
information, see “Expression settings” on page 339.
The Squeeze setting lets you control the shape of the brush dab. Squeezing a brush changes it from round to elliptical. You use the Squeeze
controls with Circular and Captured dab types.
Brushstrokes with Squeeze set to 100% (left) and 25% (right)
This brushstroke uses the Squeeze control to produce a calligraphy effect.
The Angle slider controls the angle of an elliptical brush dab and the length of the ellipse. It is significant only for dabs with Squeeze
settings under 100%. You can use Angle controls with Circular and Captured dab types.
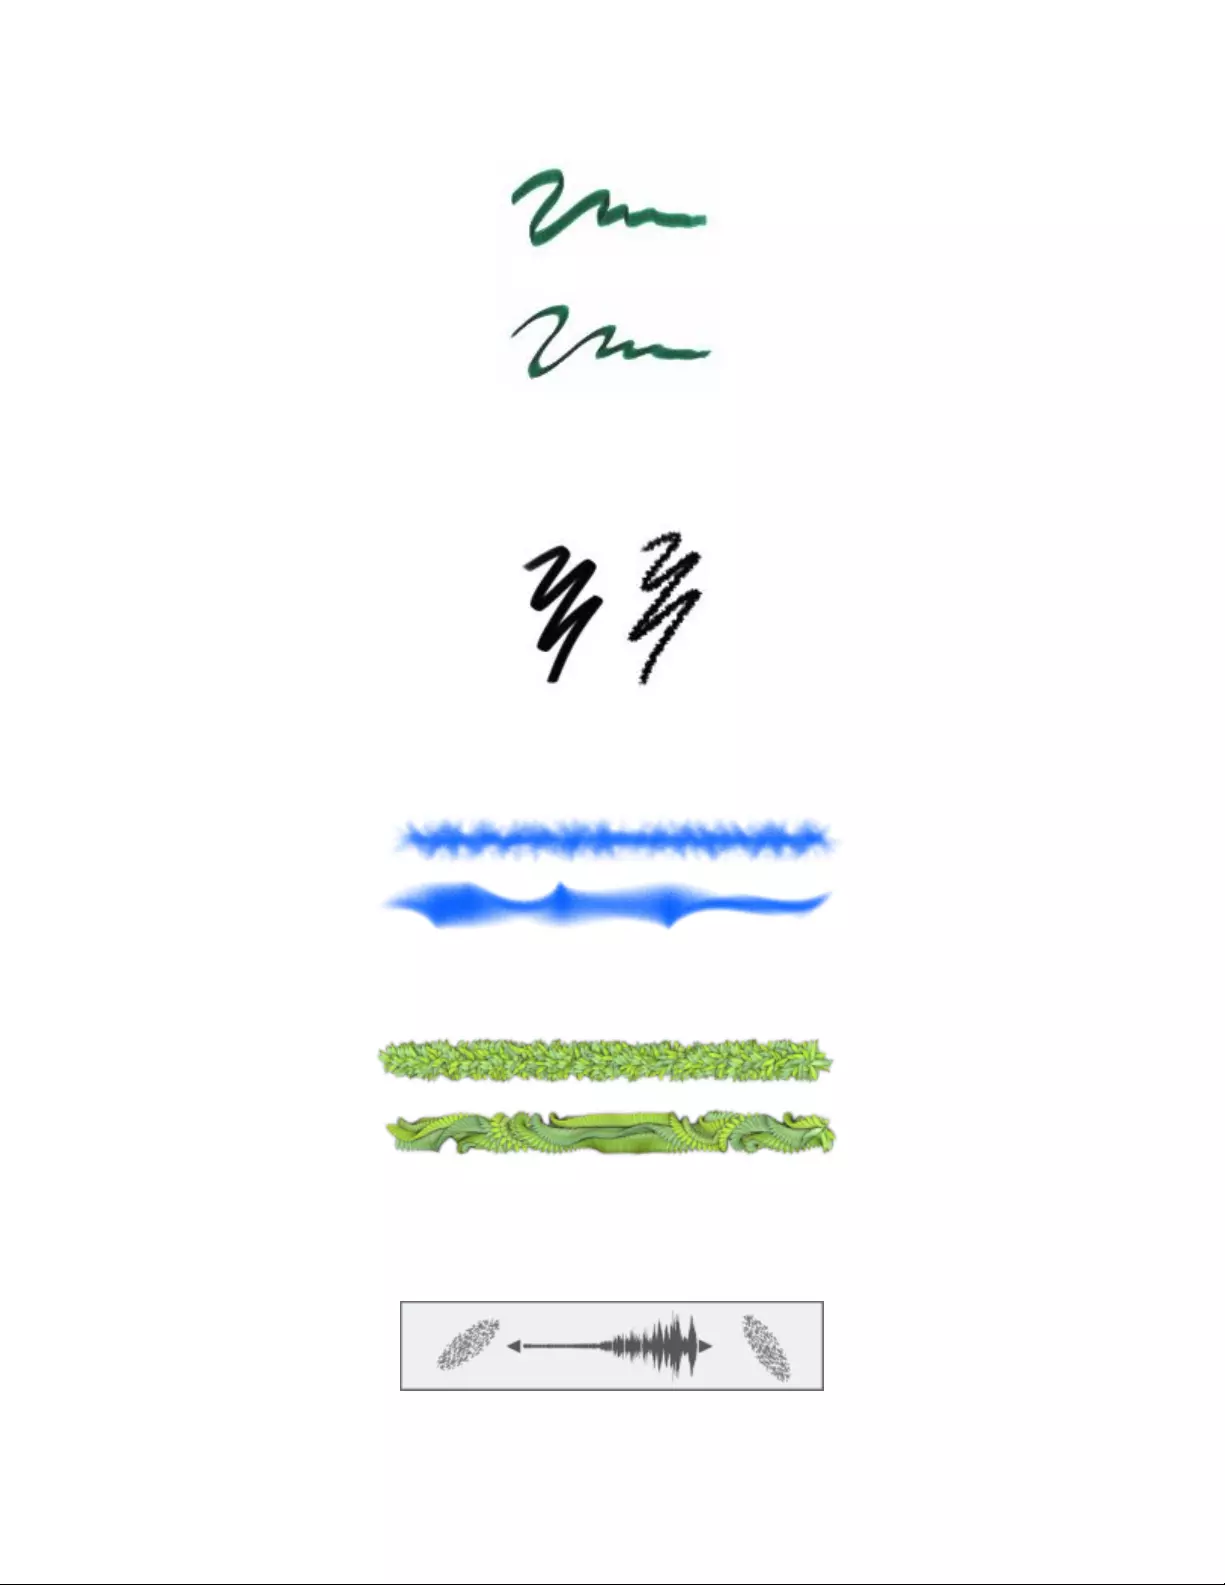
Adjusting brushes with brush controls | 365
Brushstrokes with Angle set to 90° (top) and 45° (bottom)
The Angle Jitter control lets you introduce variation to the angle of the brushstrokes, which enhances their responsiveness and natural
appearance. You can use the Smoothness slider to smooth the angle variation in a brushstroke for a more organic look.
Felt marker brushstrokes without Angle Jitter (left) and with Angle Jitter (right)
Angle Jitter applied to a brushstroke without jitter smoothing (top) and with jitter smoothing (bottom)
Angle Jitter applied to an Image Hose brushstroke without jitter smoothing (top) and with jitter smoothing (bottom)
Audio Expression lets you link angle variation to audio input from your microphone, or internal audio such as streaming music. The dab
angle changes in sync with the audio signal.
Changing dab angle in sync with audio
366 | Corel Painter 2022 User Guide
For stamp-based brushes, the Ang Range setting lets you specify a range of dab angles that may appear in a brushstroke. To take advantage
of this feature, you must use the Expression settings to base the angle on some factor, such as stroke direction or bearing. For more
information, see “Expression settings” on page 339.
Brushstrokes with Ang Range set to 0° (left) and 180° (right)
For stamp-based brushes, the Ang Step slider controls the increment of change for brushes with an Ang Range setting greater than 0°. For
example, setting the Ang Step to 5° produces a brush dab every 5° within the current Ang Range setting.
Brushstrokes with Ang Step set to 0° (left) and 90° (right)
To set brush shape
1Choose Window Brush Control Panels Brush Shape Angle.
2Move the Squeeze slider to the left to make the brush dab more elliptical. Move it to the right to make it rounder.
You can also change the brush shape dynamically onscreen. For more information, see “To set brush attributes onscreen” on page
322.
To apply an expression to the brush angle
1Choose Window Brush Control Panels Brush Shape Angle.
2Choose an option from the Expression list box.
If you want to switch the effect of the expression, click the Invert button .
If you chose Direction from the Expression list box, move the Direction slider until the desired angle is achieved.
To link the brush angle to an audio signal, click the Audio Expression button .
To set elliptical brush dab angle
1Choose Window Brush Control Panels Brush Shape Angle.
2Move the Angle slider to the right to rotate the dab counterclockwise. Move the slider to the left to rotate the brush clockwise.

Adjusting brushes with brush controls | 367
To set brush dab angle range
1Choose Window Brush Control Panels Brush Shape Angle.
2Move the Ang Range slider to the right to increase the range of angles that can appear in a dab. Move the slider to the left to reduce
the range of angles that can appear in a stroke.
Setting this slider to 360° allows for any angle in your stroke.
To set angle variation using jitter
1Choose Window Brush Control Panels Brush Shape Angle.
2Move the Angle Jitter slider.
To smooth the angle variation, move the Smoothness slider.
To set brush angle increment
1Choose Window Brush Control Panels Brush Shape Angle.
2Move the Ang Step slider to the right to produce fewer angles between dabs. Move it to the left to create more angles between dabs.
Spacing controls
When a brushstroke uses a stamp-based dab type, Corel Painter creates the stroke with a series of dabs. By adjusting the spacing between
those dabs, you can control the continuity of the brushstroke.
The Spacing control allow you to set the distance between brush dabs in a stroke. The Min Spacing slider specifies the minimum number of
pixels between dabs. If you don’t want a continuous stroke, you can adjust the Min Spacing to create a dotted or dashed line. Each dot or
dash represents one brush dab.
Brushstrokes with Min Spacing set to 2.0 (top) and 10.5 (bottom)
Continuous Time Deposition controls whether you must move a brush before a medium is applied. With Continuous Time Deposition
enabled, the medium begins flowing at the first touch.
Brushes that use rendered dab types take full advantage of this setting, which causes the medium to pool realistically when the stroke is
slowed or paused. Brushes that use stamp-based dab types require a full pause in the stroke before the medium begins to pool. You use
Continuous Time Deposition mostly with airbrush tools.
With Continuous Time Deposition disabled, you must move a brush before the medium flows.
Boost allows you to optimize the performance of brushstrokes. However, a high-boost level may produce a less accurate brushstroke that
appears a little jagged. This setting applies only to specific brush dab types, such as Flat and Camel hair.

368 | Corel Painter 2022 User Guide
To set spacing between brush dabs
1Choose Window Brush Control Panels Brush Shape Spacing.
2Perform a task from the following table.
To Do the following
Increase the distance between dabs Move the Spacing slider to the right.
Decrease the distance between dabs Move the Spacing slider to the left until the dabs begin to overlap.
Overlapping increases the density of the stroke and makes it look
more continuous.
Set the size of the dab to equal the spacing Move the Spacing slider to the right to 100%. For example, a dab
that is 10 pixels across is repeated every 10 pixels.
To set minimum dab spacing
1Choose Window Brush Control Panels Brush Shape Spacing.
2Move the Min Spacing slider to the right to increase the minimum spacing between dabs. Move it to the left to decrease the minimum
spacing between dabs.
To set continuous time deposition
1Choose Window Brush Control Panels Brush Shape Spacing.
2Enable the Continuous Time Deposition check box.
To boost brushstrokes
1Choose Window Brush Control Panels Brush Shape Spacing.
2Move the Boost slider to the right to increase brush performance. Move it to the left to decrease brush performance.
Starting with low boost values (under 10%) can significantly increase brush performance.
Changing dab profiles
The Dab Profile panel displays a selection of dab profiles that you can apply to your brushes. Each brush tip profile shows a cross-section of
density distribution across the diameter of the dab. You can think of a brush tip profile as a bell-curve graph representing the density spread
across the brush dab.
Different media have different density distributions. Changes in the density distribution produce different marking qualities in a brushstroke.
For rendered airbrush dab types, the brush tip profile controls the concentration of the spray.
Each Corel Painter brush uses one of the following brush tip profiles.

Adjusting brushes with brush controls | 369
Profile Description
Pointed Profile Provides maximum density at the center, with rapid falloff to the
edge
Medium Profile
Has a wide area of greater density at the center, with rapid falloff
to the edge
Linear Profile
Provides maximum density at the center, with even falloff to the
edge
Soft Profile
Provides a strong core, with a large falloff area towards the edge
Dull Profile
Provides maximum density at the center, with high density
weighting to the edge
Watercolor Profile
Provides maximum density at the outer edge in a ringlike fashion,
with medium internal density. This tip may be used with the
rendered dab types to yield a hollow dab or a spray concentration.
1-Pixel Edge
Provides maximum density throughout, with rapid falloff at the
edge, producing a 1-pixel, anti-aliased edge
Artists’ Oils brush tip profiles
There are six brush tips designed specifically for Artists’ Oils brushes. You can also use any brush tip, listed in the table above, with Artists’
Oils brushes.
Artists’ Oils profile Description
Soft Round Provides maximum density throughout, with rapid falloff at the
edge

370 | Corel Painter 2022 User Guide
Pointed Rake Provides a range of bristle lengths, with bristles longer in the center
and tapering in length toward the edge
Flat Rake Provides a range of bristle lengths and maximum density
throughout, producing pronounced, even bristling
Flat Designed for Artists’ Oils palette knives, it provides maximum
density throughout, with rapid falloff at the edge
Chisel Designed for Artists’ Oils palette knives, its maximum density is off-
center, with uneven falloff
Wedge Designed for Artists’ Oils palette knives, it provides maximum
density at one edge, with consistent falloff to the other edge
Hard Media Profiles
There are seven tip profiles designed specifically for the Hard Media variants.
Hard Media profile Description
Pencil Profile Provides a sharper tip when perpendicular to the tablet and a
wider, softer tip when at an angle
Medium Profile
Has a wide area of greater density at the center, with rapid falloff
toward the edge
Linear Profile
Provides maximum density at the center, with even falloff toward
the edge
Soft Profile
Provides a strong core, with a large falloff area towards the edge
Pointed Profile Provides maximum density at the center, with rapid falloff toward
the edge

Adjusting brushes with brush controls | 371
Hard Media profile Description
Dull Profile
Provides maximum density at the center, with high-density
weighting toward the edge
1-Pixel Edge
Provides maximum density throughout, with rapid falloff toward
the edge, producing a 1-pixel, anti-aliased edge
To choose a brush tip profile
1In the toolbox, click the Brush tool .
2Click the Brush Selector on the Brush Selector bar, and choose a brush variant.
3Click the Dab Options flyout button on the property bar.
If the selected brush is using a Captured dab type, enable the Apply Dab Profile check box.
4Click a brush tip profile icon.
If your brush uses a Circular dab type, move the Hardness slider to adjust the opacity of the dab profile.
You can adjust the hardness only of Circular brushes that use one of the following dab profiles: Pointed, Medium, Soft, Dull, 1-pixel
edge, and Watercolor.
You can also choose a dab profile by clicking Window Brush Control Panels Brush Shape Dab Profile to open the Dab
Profile panel, and clicking a brush tip profile icon.
Captured dab controls
The Captured panel displays captured dab libraries and controls for changing the appearance of any brush. You can choose a captured dab,
apply a dab effect and adjust its strength, and then capture the brush settings as a new dab in your library. You can also edit a captured dab.
For information about creating brush dabs, see “Creating and managing brush dabs” on page 334.
To display the Captured panel
•Choose Window Brush Control Panels Brush Shape Captured.
To choose a captured dab
• In the Captured panel, click a captured dab icon.
To edit a captured dab
1In the Captured panel, right-click a captured dab icon, and choose Check Out Captured Dab.
2In the Brush Selector, choose a brush variant, and then make any changes you want to the dab shape.
When you save the edited captured dab, it will be named after the currently selected brush variant.
372 | Corel Painter 2022 User Guide
3In the toolbox, click the Rectangular Selection tool , and make a rectangular selection of the dab shape.
4In the Captured panel, click the Capture Dab button.
The edited captured dab is added to the active captured dab library.
5Click File Close and choose Don’t Save to check the captured dab back into the library.
To apply a dab effect
1In the Captured panel, click the Dab Effects list box and choose one of the following options:
•Feather — softens the edges of the brushstroke
•Threshold — removes pixels from the brushstroke that are below the specified opacity strength
•Blur — softens the brushstroke by smoothing the pixels and edges
•Dilate — expands the pixels and edges of the brushstroke
•Erode — contracts the pixels and edges of the brushstroke
2Adjust the Strength slider to determine the percentage of applied dab effect.
You can restore the brush variant to its default state by clicking the Reset Tool button on the property bar.
To choose a captured dab library
•In the Captured panel, click the Manage Libraries flyout button Captured Dab Libraries, and then choose one of the following
options:
•Bristles •Concept
•Flat •General
•Graphic •Hard Media
•Hatch •Knives
•Light •Natural
•Splatter •Sponges
To modify the display of the Captured panel
•In the Captured panel, click the Manage Libraries flyout button , choose Captured Dab Library View, and then choose one of the
following options:
•Small Icons
•Medium Icons
•Large Icons
•Icons and Names
•List
To manage captured dab libraries
• In the Captured panel, perform a task from the following table.

Adjusting brushes with brush controls | 373
To Do the following
Create a new captured dab library Click the Manage Libraries flyout button , and choose New
Captured Dab Library. In the New Library dialog box, type a name
in the Save As box, and click OK.
Import a captured dab library Click the Manage Libraries flyout button , and choose Import
Captured Dab Library. In the Import Library dialog box, choose a
captured dab library file, and click Open.
Export a captured dab library Click the Manage Libraries flyout button , and choose Export
Captured Dab Library. In the Choose Library dialog box, select a
captured dab library from the Library list box, and click OK. Type a
name in the Save As box, choose a location from the Where box,
and then click Save.
Remove a captured dab library Click the Manage Libraries flyout button , and choose
Remove Captured Dab Library. In the Choose Library dialog box,
select a library Library list box, and click OK
Restore the default captured dab library Click the Manage Libraries flyout button , and choose Restore
Default Captured Dab Library.
Show all hidden items Click the Manage Libraries flyout button , and choose Show
All Hidden Items.
Jitter controls
Corel Painter includes a collection of Jitter brushes that let you introduce a range of random behaviors to brushstrokes to produce more
realistic results. You can use the preset Jitter brush variants and adjust them as needed. You can also save these customized brushes as new
Jitter brush variants.
Corel Painter includes several preset Jitter brush variants. You can use the variants as they are or customize them by using the Jitter controls
to build your own Jitter brushes.
A brushstroke with no Jitter (left) and a brushstroke that has Opacity Jitter and Color Jitter (right)

374 | Corel Painter 2022 User Guide
The Jitter brush variants are found in many different brush categories. The easiest way to find a Jitter brush variant is to use the Search bar.
You can control the amount of Jitter a brush produces. The Jitter controls that you can modify are determined by the Jitter brush variant that
you choose. For example, if you choose the Coarse Spray brush variant from the Airbrushes category, you can adjust the following Jitter
controls: Size Jitter (Size brush control panel), Feature Jitter and Flow Jitter (Airbrush brush control panel), Opacity Jitter (Opacity brush
control panel), and Stroke Jitter (Stroke Jitter brush control panel).
To quickly find the Jitter brush controls for a selected brush, you can let Corel Painter generate a group of all the relevant brush controls
panels for your selected brush variant. This narrows down your search for Jitter controls by limiting the number of brush control panels that
are available for your selected brush. For more information, see “Working with brushes using the property bars” on page 323.
The following table lists all of the brush control panels that include Jitter controls and where you can find more detailed information about
these brush controls in the Help.
Brush control panel with Jitter controls For more information, see
Opacity “Opacity controls” on page 354
Grain “Grain controls” on page 356
Size “Size controls” on page 360
Angle “Angle controls” on page 364
Airbrush “Airbrush controls” on page 387
Impasto “Impasto controls” on page 392
Color Expression “Color Expression controls” on page 412
Stroke Jitter “Stroke Jitter controls” on page 401
To find a Jitter variant
1Click Window Search and type jitter in the Search text box.
2Click a Jitter brush variant in the list of search results.
Real Watercolor controls
The Corel Painter Real Watercolor brush controls help you achieve very realistic watercolor brushstrokes. The controls simulate working
with a watercolor brush, watercolor paper, pigments, and a glass of water. You can adjust pigment levels and water consistency to achieve
natural flow and pigment settling effects. The following section describes the Real Watercolor brush controls in more detail.
Brush controls
The Real Watercolor brush-related controls let you set the amount of water and pigment that the brush deposits on the paper.
Adjusting brushes with brush controls | 375
Brushstrokes set at a lower Wetness setting (left) and higher Wetness setting (right)
Water controls
The Real Watercolor water-related controls let you adjust the water viscosity, or thickness, in order to control the way it flows and spreads
on the surface of the paper. For example, if the water viscosity is high, it will produce a runny effect and the water will flow and spread
easily. If the water viscosity is low and thick, it will have a tendency to pool, instead of flow. You can also adjust the speed at which the water
dries, which influences how and where the pigment settles on the paper.
Brushstrokes set at a lower Viscosity setting (left) and higher Viscosity setting (right)
Flow controls
The Flow controls let you enable and choose flow maps, so you can introduce an additional surface texture that promotes greater water
displacement. For more information, see “Getting started with flow maps” on page 475. You can also adjust the Flow Resistance to
control the effect the paper grain or flow map texture has on the direction of the water flow.
Brushstrokes set at a lower Flow Resistance setting (left) and higher Flow Resistance setting (right)
Pigment controls
The Pigment controls let you adjust how much pigment is deposited on the paper after the water evaporates and how quickly the pigment
settles on the paper. You can also specify the degree to which water is able to lift dry pigment from the paper.
376 | Corel Painter 2022 User Guide
Brushstrokes set at a higher Settling Rate (left) and a lower Settling Rate (right)
Paper controls
With the Paper controls, you can adjust how the Real watercolor brushes interact with paper texture and grain. You can adjust the paper
roughness, which affects all other paper settings.
Brushstrokes set at a lower Roughness setting (left) and higher Roughness setting (right)
In addition, you can set the rate at which the paper grain can absorb water and control the amount of pigment that settles into the valleys
of the paper grain when it dries.
Wind controls
The Wind controls let you control the angle at which water flows on the paper. You can also specify the amount of wind force exerted on
the water.
Brushstrokes set at a lower Angle and Force settings (left) and higher Angle and Force settings (right)
Diffusion controls
The diffusion controls allow you to manage how and when the pigment is diffused on the paper. You can specify that diffusion be precisely
applied to ensure accurate water flow. You can also delay diffusion so the effect is applied only after you complete a brushstroke. In
addition, you can choose to suspend diffusion temporarily. This lets you apply multiple brushstrokes to the paper before applying the
diffusion, to apply the effect to all brushstrokes at once. You can also specify the number of flow steps to be completed during animation.
This controls the rate at which the visual flow of the pigment refreshes onscreen. For example, you can specify a lower number of steps for
smaller brushes and a higher number of steps for bigger brushes.
To adjust the Real Watercolor controls
1Choose Window Brush Control Panels Brush Media Real Watercolor.
2Perform an action from the following table.

Adjusting brushes with brush controls | 377
To Do the following
Set the amount of water the brush deposits on the paper In the Brush area, move the Wetness slider to adjust the amount
of water.
Set the amount of pigment the brush deposits on the paper In the Brush area, move the Concentration slider to adjust the
amount of pigment.
Adjust the water thickness to control the way it flows and spreads
on the surface of the paper
In the Water area, move the Viscosity slider to adjust the thickness.
Adjust the speed at which the water dries In the Water area, move the Evaporation Rate slider to adjust the
effect.
Adjust the degree to which the flow map surface, or the paper
texture, affects the direction of the water flow
In the Flow area, move the Flow Resistance slider to adjust the
effect.
Adjust the amount of pigment deposited on the paper after the
water evaporates
In the Pigment area, move the Settling Rate slider to adjust the
amount of pigment.
Control how quickly the pigment settles on the paper In the Pigment area, move the Weight slider to the left to achieve
a lighter pigment or to the right to achieve a heavier pigment. A
lighter weight pigment flows with the water longer, whereas a
heavier pigment settles onto the paper very quickly.
Specify the degree to which water is able to lift dry pigment from
the paper
In the Pigment area, move the Pickup slider to adjust the amount
of pigment pickup.
Adjust the paper roughness In the Paper area, move the Roughness slider to the left to
decrease the paper roughness or to the right to increase the paper
roughness. This impacts flow resistance, dry rate, and pigment
granulation.
Adjust the rate at which the paper grain can absorb water In the Paper area, move the Dry Rate slider to the left to decrease
the speed of absorption or to the right to increase the speed of
absorption.
Control the amount of pigment that settles into the valleys of the
paper grain when it dries
In the Paper area, move the Granulation slider to adjust the effect.
Control the angle at which water flows on the paper In the Wind area, move the Angle slider to adjust the angle.
Specify the amount of wind force exerted on water, which affects
the way it flows on the paper
In the Wind area, move the Force slider to adjust the force.
378 | Corel Painter 2022 User Guide
You can optimize the performance of Real watercolor and Real Wet oils brushes by temporarily disabling High Quality Display.
Click the Magnifier tool in the toolbox, and click the High Quality Display button on the property bar.
To apply a flow map when using a Real watercolor brush
1In the Brush Selector, choose a Watercolor: Real brush variant.
2Choose Window Brush Control Panels Brush Media Real Watercolor.
3In the Flow area, enable the Flow Map option to set the Source.
To maximize the effect of flow maps, you need to ensure that the Wetness control is set high and the Evaporation Rate control is
set low.
To control Real Watercolor diffusion
1Choose Window Brush Control Panels Brush Media Real Watercolor.
2Perform an action from the following table.
To Do the following
Apply diffusion precisely to ensure accurate water flow Enable the Accurate Diffusion check box.
Delay diffusion until the brushstroke is complete Enable the Delay Diffusion check box.
Suspend diffusion temporarily Enable the Pause Diffusion check box or click the Pause Diffusion
button on the property bar to suspend the diffusion. You
need to disable the check box to perform the diffusion.
Specify the speed at which the pigment is revealed onscreen Move the Animation Step slider to the left to lower the speed of
the animation or to the right to increase the speed.
Specifying a lower Animation Step, such as 0, produces a
smoother effect.
Real Wet Oil controls
The Real Wet oils brush variants help you achieve realistic oil brushstrokes. For example, you can control paint viscosity and color
concentration, similar to mixing oil paint and a medium. The following section describes the Real Wet Oil brush controls in more detail.
Brush controls
The Real Wet Oil brush-specific controls let you set the amount of liquid and paint that the brush deposits on the canvas.
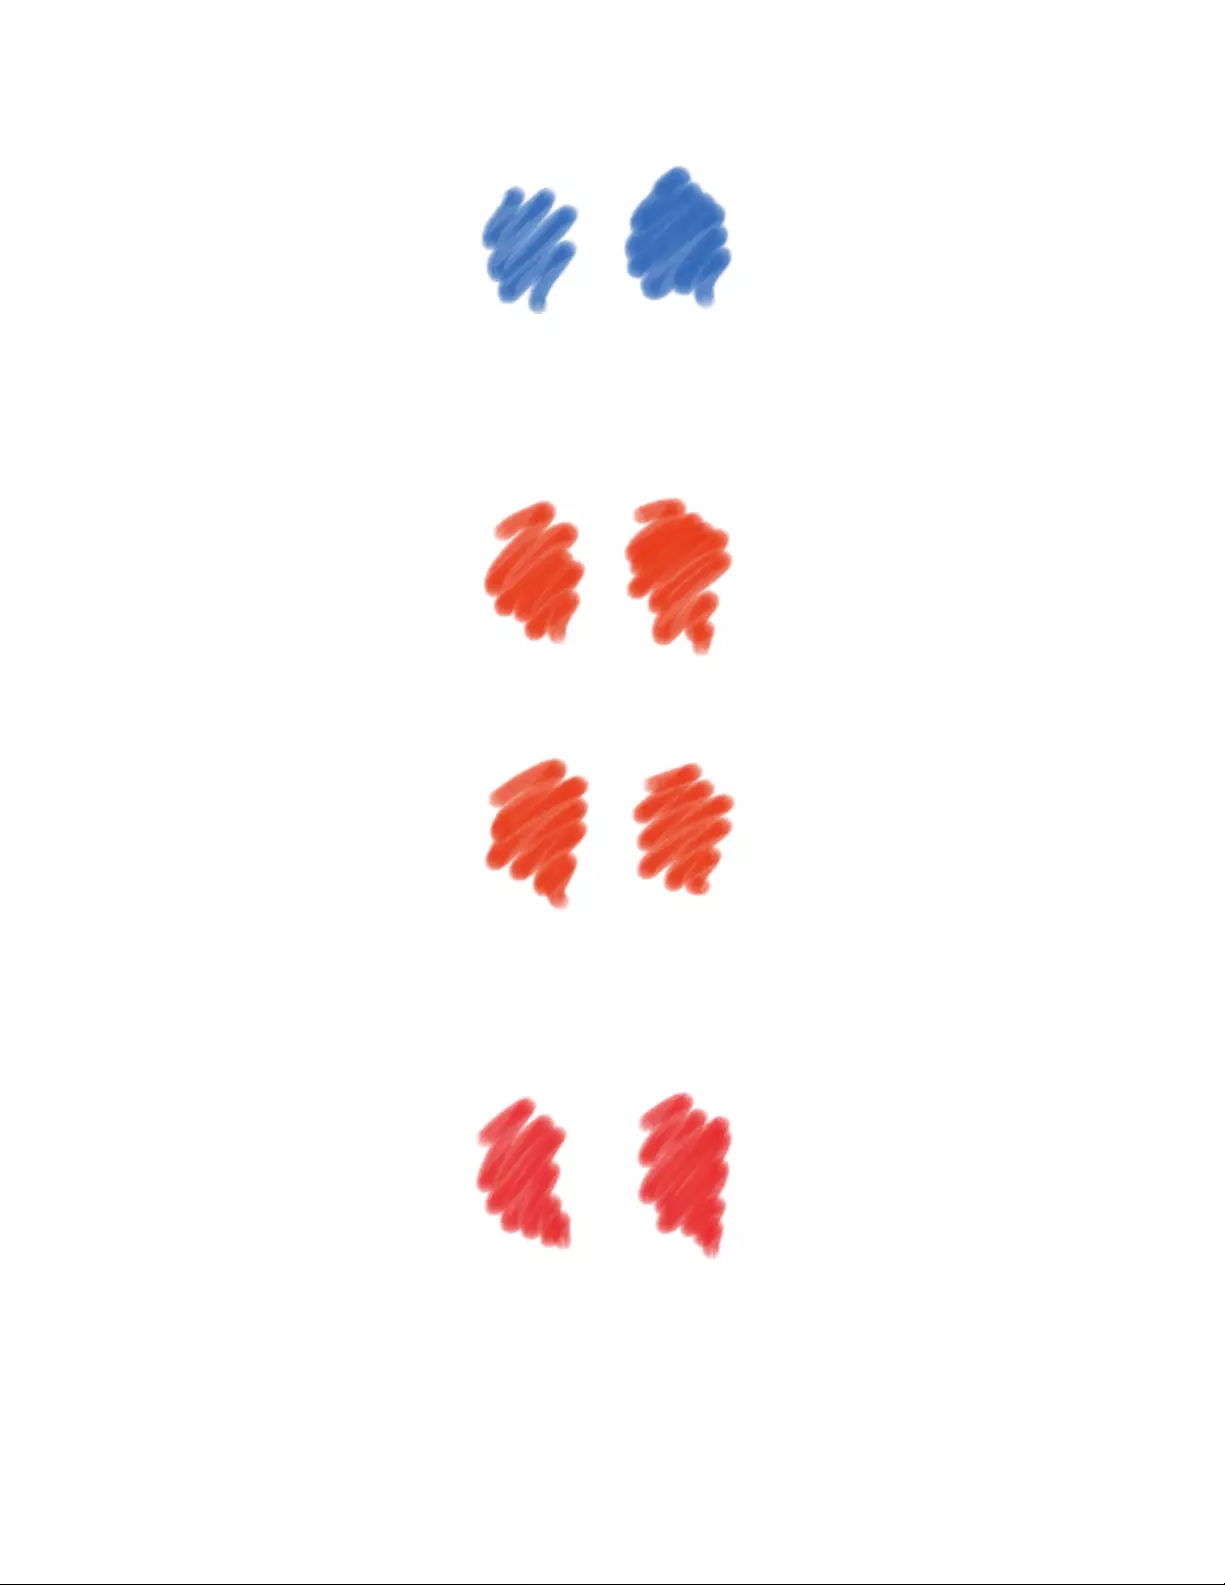
Adjusting brushes with brush controls | 379
Brushstrokes set at a lower Wetness setting (left) and higher Wetness setting (right)
Liquid Flow controls
The Liquid Flow controls let you adjust the liquid viscosity, or thickness, in order to control the way it’s applied to the canvas. For example,
if the liquid viscosity is high, the paint spreads easily and looks smooth. If the liquid viscosity is low and thick, the paint does not spread as
easily and creates the illusion of texture.
Brushstrokes set at a lower Viscosity setting (left) and higher Viscosity setting (right)
You can also adjust the speed at which the liquid evaporates, which influences how the paint dries on the canvas.
Brushstrokes set at a lower Evaporation Rate (left) and higher Evaporation Rate (right)
Flow controls
The Flow controls let you enable and choose flow maps, so you can introduce an additional surface texture to promote greater liquid
displacement. For more information, see “Getting started with flow maps” on page 475. You can also adjust the flow resistance to control
how paint spreads on the canvas or flow map.
Brushstrokes set at a lower Flow Resistance setting (left) and higher Flow Resistance setting (right)
Paint controls
The Paint controls let you modify the look and feel of paint on the canvas. For example, you can adjust the opacity of the paint deposited on
the canvas after the oil dries. You can also specify how easily the paint blends and the degree to which oil is able to lift dry paint from the
canvas.
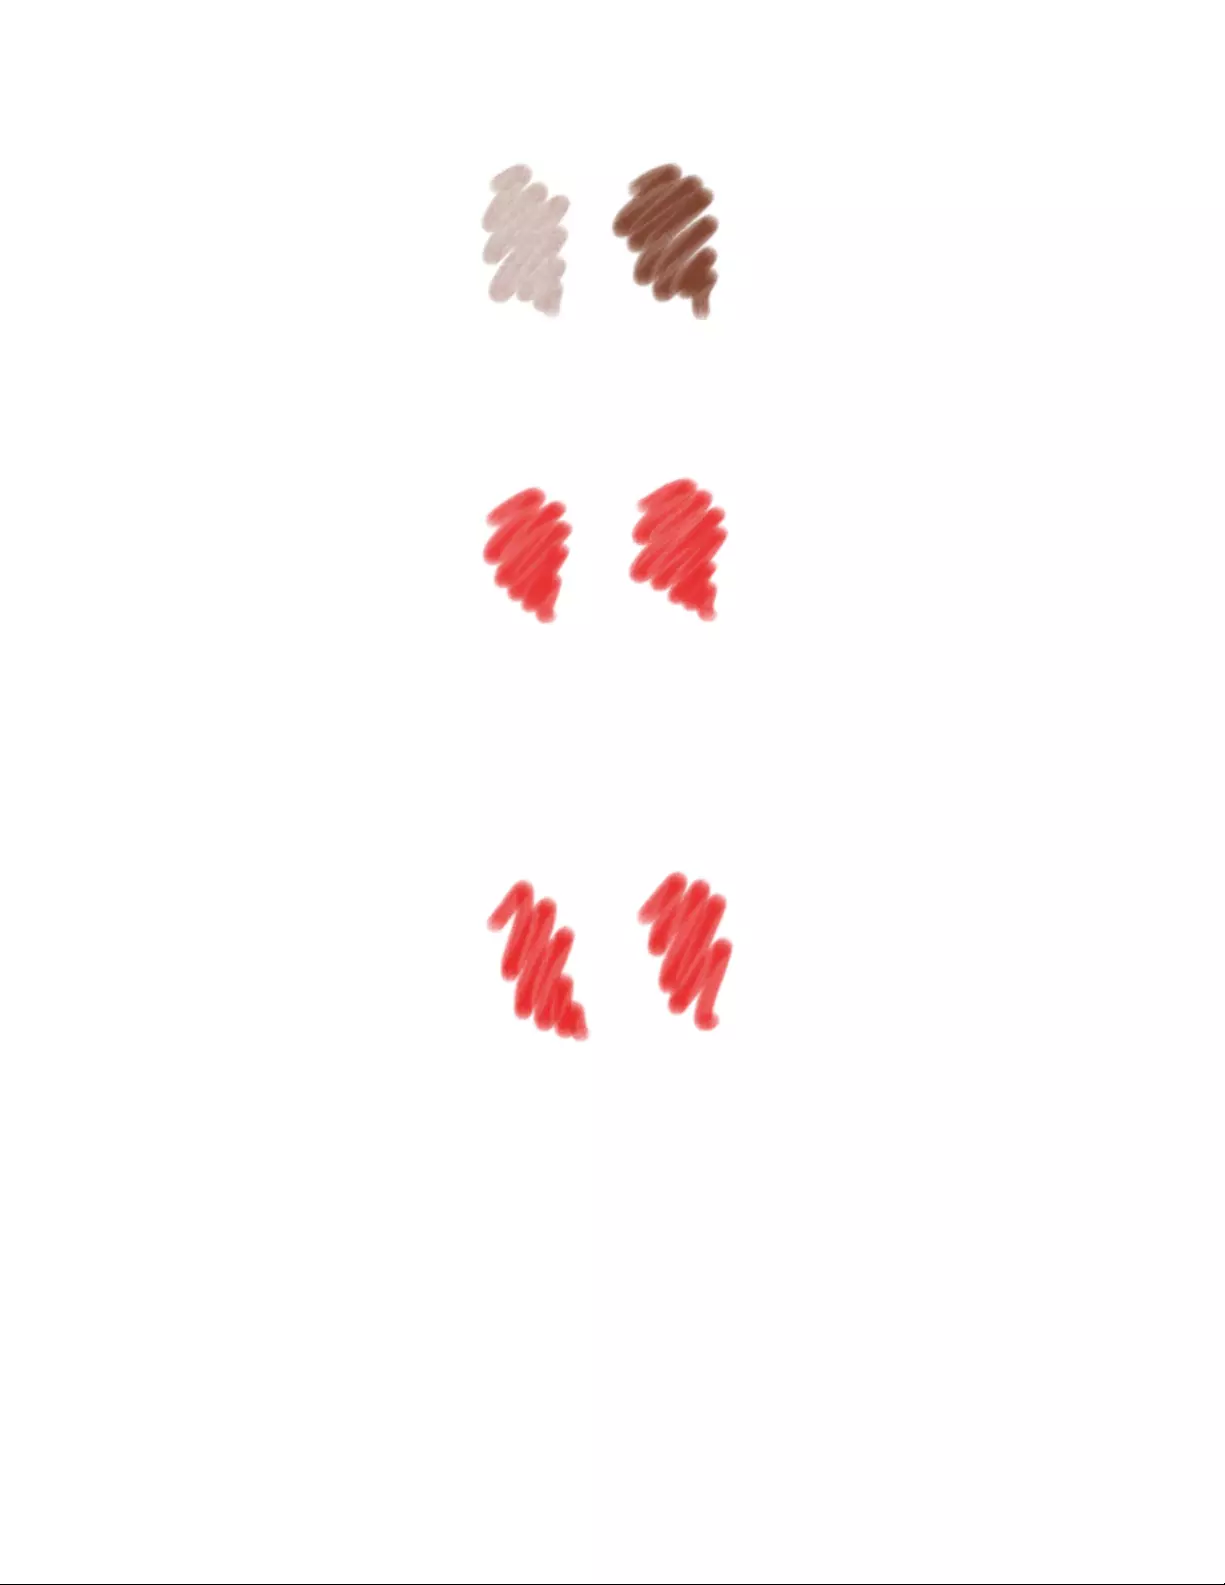
380 | Corel Painter 2022 User Guide
Brushstrokes set at a lower Settling Rate (left) and higher Settling Rate (right)
Canvas controls
With the canvas controls, you can adjust how the Real Wet oils brushes interact with canvas texture and grain. For example, you can adjust
the canvas roughness, which affects all other canvas settings.
Brushstrokes set at a lower Roughness setting (left) and higher Roughness setting (right)
In addition, you can set the rate at which the paper grain can absorb liquid and control the amount of paint that settles into the valleys of
the canvas grain when it dries.
Wind controls
The Wind controls let you to set the angle at which the paint spreads on the canvas. You can also specify the amount of wind force exerted
on the paint.
Brushstrokes set at a lower Angle and Force settings (left) and higher Angle and Force settings (right)
Diffusion controls
The Diffusion controls allow you to manage how and when the paint is diffused on the canvas. You can specify that diffusion be precisely
applied to ensure accurate paint dispersion. You can also delay diffusion so the effect is applied only after you complete a brushstroke.
In addition, you can choose to suspend diffusion temporarily. This lets you apply multiple brushstrokes to the canvas before applying the
diffusion, to apply the effect to all brushstrokes at once. You can also specify the number of flow steps to be completed during animation.
This controls the rate at which the visual flow of the paint refreshes onscreen. For example, you can specify a lower number of steps for
smaller brushes and a higher number of steps for bigger brushes.
You can set some Real Wet Oil options on the property bar. For more information, see “To choose a dab profile using the property bar” on
page 325.

Adjusting brushes with brush controls | 381
To adjust the Real Wet Oil controls
1Choose Window Brush Control Panels Brush Media Real Wet Oil.
2Perform an action from the following table.
To Do the following
Set the amount of oil the brush deposits on the canvas In the Brush area, move the Wetness slider to adjust the amount
of liquid.
Set the concentration of paint the brush deposits on the canvas In the Brush area, move the Concentration slider to adjust the
amount of pigment.
Adjust the oil thickness to control the way it spreads on the surface
of the canvas
In the Liquid Flow area, move the Viscosity slider to adjust the
viscosity effect.
Adjust the speed at which the paint dries In the Liquid Flow area, move the Evaporation Rate slider to
adjust the effect.
Adjust the degree to which the flow map surface, or the paper
texture, affects the direction of the water flow
In the Flow area, move the Flow Resistance slider to adjust the
effect.
Adjust the opacity of the paint deposited on the canvas after the oil
dries
In the Paint area, move the Settling Rate slider to the left to
decrease the amount of paint (more opacity) or to the right to
increase the amount of paint (less opacity).
Control how easily the paint colors mix on the canvas In the Paint area, move the Blend Rate slider to the left to decrease
the blending capacity or to the right to increase the blending
capacity.
Specify the degree to which oil is able to lift dry paint from the
canvas
In the Paint area, move the Pickup slider to adjust the amount of
paint pickup.
Adjust the canvas roughness In the Canvas area, move the Roughness slider to the left to
decrease the canvas roughness or to the right to increase the
canvas roughness. (This impacts flow resistance, dry rate, and paint
granulation.)
Control the effect canvas grain has on the direction of the paint
flow
In the Canvas area, move the Flow Resistance slider to adjust the
flow resistance.
Adjust the rate at which the canvas grain can absorb paint In the Canvas area, move the Dry Rate slider to adjust the speed of
absorption.
Control the degree to which paint settles into the valleys of the
canvas grain when it dries
In the Canvas area, move the Granulation slider to adjust the
effect.
382 | Corel Painter 2022 User Guide
To Do the following
Control the angle at which paint spreads on the canvas In the Wind area, move the Angle slider to adjust the angle.
Specify the amount of wind force exerted on paint, which affects
the way it spreads on the canvas
In the Wind area, move the Force slider to adjust the force.
You can improve the appearance of the visual flow of paint onscreen by clicking the Magnifier tool in the toolbox, and
disabling the High Quality Display button on the property bar.
To apply a flow map when using a Real Wet oils brush
1In the Brush Selector, choose a Oils : Real Wet brush variant.
2Choose Window Brush Control Panels Brush Media Real Wet Oil.
3In the Flow area, enable the Flow Map option to set the Source.
To maximize the effect of flow maps, you need to ensure that the Wetness control is set high and the Evaporation Rate control is
set low.
To control Real Wet Oil diffusion
1Choose Window Brush Control Panels Brush Media Real Wet Oil.
2Perform an action from the following table.
To Do the following
Apply diffusion precisely to ensure accurate water flow Enable the Accurate Diffusion check box.
Delay diffusion until the brushstroke is complete Enable the Delay Diffusion check box.
Suspend diffusion temporarily Enable the Pause Diffusion check box to suspend the diffusion.
You need to disable the check box to perform the diffusion.
Specify the speed at which the paint is revealed onscreen Move the Animation Step slider to the left to lower the speed of
the animation or to the right to increase the speed.
Specifying a lower Animation Step, such as 0, produces a
smoother effect.
Computed Circular controls
The Computed Circular controls allow you to specify the tip profile of brushes using the Computed Circular dab type. For example, you can
customize the dab opacity and hardness, which controls the color density at the outer edge of the dab.

Adjusting brushes with brush controls | 383
You can set some Computed Circular controls on the property bar. For more information, see “To choose a dab profile using the property
bar” on page 325.
To customize a Computed Circular dab profile
1Choose Window Brush Control Panels Brush Shape Computed Circular.
2Perform a task from the following table.
To Do the following
Modify dab opacity Move the Dab Opacity slider to the left to reduce the opacity.
Move it to the right to increase the opacity.
Control the color density at the edge of the dab Move the Dab Hardness slider to the left to reduce the color
density and create a soft dab. Move it to the right to increase the
color density and create a hard dab.
Hard Media controls
The Hard Media controls let you customize drawing and sketching tools with more precision. You can adjust several Hard Media variants,
which include blenders, pencils, chalks, Conté, crayons, pastels, markers, and erasers. The Hard Media controls can be used only with the
Circular, Captured, and Eraser dab types. For more information, see “Hard Media” on page 481.
Bristle controls
The Bristle controls allow you to adjust the appearance of bristle brushes, such as Camel Hair, Flat, Palette Knife, and Bristle Spray. You
can specify the number of bristles, or bristle density (Feature). You can also control how far the bristles spray out, or fan out, when applying
brushstrokes (Spread). This control is linked to the Tilt expression. For example, the more you tilt the stylus, the greater the bristles will fan
out.
You can also specify that bristles scale relative to the size of the brush. This ensures that the feature is distributed proportionally to match the
size of the brush.
You can set some bristle options on the property bar. For more information, see “To choose a dab profile using the property bar” on page
325.
To adjust bristle controls
1Choose Window Brush Control Panels Brush Shape Bristles.
2Perform an action from the following table:
To Do the following
Specify the number of bristles Move the Feature slider. The higher the setting, the denser the
brush bristles.
Adjust the fanning of the bristles Move the Spread slider. This control is linked to the Tilt expression.

384 | Corel Painter 2022 User Guide
To scale bristles with the brush size
1Choose Window Brush Control Panels Brush Shape Bristles.
2Enable the Scale Feature with Brush Size check box.
You can also scale a brushstroke’s features with the brush size by clicking the Scale Feature with Brush Size button on the
Brush property bar.
You can also disable the scaling option in all areas by choosing Corel Painter 2022 menu Preferences General (macOS) or Edit
Preferences General (Windows), and enable the Disable feature scaling when resizing brush.
RealBristle controls
RealBristle controls let you choose a brush tip profile, adjust the brush, and determine how the brush interacts with the surface of the
canvas. For more information about RealBristle controls, see “Modifying RealBristle settings” on page 504.
Static Bristle controls
The Static Bristle controls help you create the look of a real brushstroke, complete with the striations that hairs on a real brush make. Use
the Static Bristle controls to design the individual bristles in a single brush dab.
You can also preview a “soft” view of the dab to display how the bristle dabs change. For more information, see “To switch the brush size
preview mode” on page 364.
If you choose Rake as the stroke type, you can adjust brush scale and contact angle. For more information, see “Rake controls” on page
407.
The Thickness slider controls the diameter of separate bristles.
Brushstrokes with Thickness set to 17% (left) and 87% (right)
Clumpiness lets you control how bristles adhere to each other by applying a random variance to the thickness of each bristle, which makes
some of the bristles look like they are clumping together. Clumpiness is proportional to Thickness.

Adjusting brushes with brush controls | 385
Brushstrokes with Clumpiness set to 0% (left) and 100% (right)
The Hair Scale lets you control the density of bristles in the brush dab and, therefore, the number of bristles in the dab.
Brushstrokes with Hair Scale set to 410% (top) and 990% (bottom)
Scale/Size lets you control the degree of size variation applied to the bristles of a brush. At 0%, there is no size change applied to the
bristles. Setting this slider to a value greater than 0% creates a set of scaled iterations of the dab.
Brushstrokes with Scale/Size set to 0% (top) and 100% (bottom)
At a Scale/Size setting of 100%, when the brush size changes, the bristles scale in proportion to the size. At a Scale/Size setting of 8%,
when the brush size changes, the bristles remain a constant absolute size. The Scale/Size control is invalid if a size range is not specified
(that is, if Min Size is set to 100%).
You can squeeze and rotate Static Bristle brushes. For detailed information about Angle controls, see “Angle controls” on page 364.

386 | Corel Painter 2022 User Guide
(left) A brushstroke with Squeeze set to 0%; (right) A brushstroke with Squeeze set to 30%, Ang Step set to 5°,
Ang Range set to 360°, Expression set to Direction, and Spacing set to 50% to illustrate how the dabs rotate
To set bristle thickness
1Choose Window Brush Control Panels Brush Shape Static Bristle.
2Move the Thickness slider to the left to reduce the density of the medium left by the stroke. Move it to the right to increase brush
density.
When the slider is moved fully to the left, the brush leaves a faint stroke — even if Opacity is set to 100%.
To set clumping of bristles
1Choose Window Brush Control Panels Brush Shape Static Bristle.
2Move the Clumpiness slider to the left to reduce bristle clumping. Move it to the right to increase bristle clumping.
To set bristle density
1Choose Window Brush Control Panels Brush Shape Static Bristle.
2Move the Hair Scale slider to the left to reduce the amount of bristle density and create a fine-hair brush. Move it to the right to increase
density.
To scale bristles according to brush size
1Choose Window Brush Control Panels Brush Shape Static Bristle.
2Move the Scale/Size slider to the left to reduce the degree of size variation. Move it to the right to increase size variation.
To squeeze and rotate a Static Bristle brush
1In the toolbox, click the Brush tool .
2Click the Brush Selector on the Brush Selector bar, and choose a Static Bristle brush variant.
There are Static Bristle brushes in many categories. To find a Static Bristle variant, click Window Search, and enter Static Bristle.
3Click the Size flyout button on the property bar.
4Set the Ang Step to 5°.
5Set the Ang Range to 360° to allow for any angle in your stroke.
6From the Expression list box in the Angle area, choose one of the following options:
•Bearing
•Direction
•Rotation
Adjusting brushes with brush controls | 387
7Set Squeeze to 30%.
For detailed information about bearing, direction, and rotation, see “Expression settings” on page 339, “Wacom Intuos support”
on page 124, and “Using a stylus vs. a mouse” on page 159.
Airbrush controls
The Airbrush controls allow you to adjust the amount and the displacement of the media that is applied by an airbrush.
Feature lets you set the maximum size of the individual droplets.
Flow controls how much media is applied by an airbrush stroke. The Flow control acts like the needle control on a real airbrush. Because
the airbrush dab types deposit many small dabs to create their spray-paint look, you might need to cut down on the flow to speed up the
airbrush.
You can also link the Flow and Feature controls to a specific stylus or mouse movement. You can choose different Expression settings for
each. For example, you can link Flow to the Pressure expression and link Feature to the Tilt expression. In addition, you can link the Flow
and Feature controls to audio input from your microphone, or internal audio such as streaming music. For more information, see “Audio
Expression” on page 340.
Using Audio Expression to vary Flow
Using Audio Expression to vary Feature
You can also adjust the Min setting to specify the range of variability that you want the expression to apply. The Min Flow and Min Feature
settings represent a percentage of the Flow and Feature settings and they must be linked to an expression to have an effect. For example, if
you link the Pressure expression to the Flow control, set the Flow slider to 40% and set the Min Flow slider to 50%, the amount of flow will
vary from 20% to 40% every time you apply pressure with the stylus.
Spread controls how paint spreads out as it is applied. In other words, it sets the size of the cone of spread from the tip of the airbrush or
spray can. A good range for the Spread setting is 30% to 40%. Narrow settings for Spread and Angle can cause problems. Narrow settings
for Spread and Tilt can cause paint to be deposited away from the cursor.
Flow Jitter and Feature Jitter let you adjust the amount of variation that you want these controls to apply when using the airbrush, which
produces more realistic results. You can use the Smoothness sliders to smooth the jitter for a more organic look.
388 | Corel Painter 2022 User Guide
Brushstrokes without Flow Jitter (left) and with Flow Jitter (right)
Brushstrokes without Feature Jitter (left) and with Feature Jitter (right)
Flow Jitter applied to a brushstroke without jitter smoothing (top) and with jitter smoothing (bottom)
Feature Jitter applied to a brushstroke without jitter smoothing (top) and with jitter smoothing (bottom)
You can set some Airbrush options on the property bar. For more information, see “To choose a dab profile using the property bar” on page
325.
To set the size of individual droplets
1Choose Window Brush Control Panels Brush Shape Airbrush.
2Move the Feature slider to set the maximum size of individual droplets. The higher the setting, the bigger the paint droplets.

Adjusting brushes with brush controls | 389
You can also
Set the minimum size of the individual droplets Move the Min Feature slider.
Specify the range of variation that is applied to the size of the
droplets
Move the Feature Jitter slider.
Smooth the variation in the droplet size Move the Smoothness slider.
Link the droplet size to a specific stylus or mouse movement Choose an option from the Expression list box.
Specify the angle at which the droplet size starts to vary Move the Direction slider.
When adjusting Feature Jitter, make sure the Min Feature slider is not set to 100%. Setting the Min Feature to 100% stops
Feature Jitter from occurring.
To set paint spread
1Choose Window Brush Control Panels Brush Shape Airbrush.
2Move the Spread slider to the left to reduce the amount of spread, or to the right to increase the amount of spread.
To set the amount of media to apply with a brushstroke
1Choose Window Brush Control Panels Brush Shape Airbrush.
2Move the Flow slider to the left to reduce the amount of media applied with a stroke, or to the right to increase it.
You can also
Specify the minimum amount of media to apply with a brushstroke Move the Min Flow slider.
Specify the range of variation that is applied to the media flow Move the Flow Jitter slider.
Smooth the variation in the paint flow Move the Smoothness slider.
Link the media flow controls to a specific stylus or mouse
movement
Choose an option from the Expression list box.
Specify the angle at which the paint flow starts to vary Move the Direction slider.
When adjusting Flow Jitter, make sure the Min Flow slider is not set to 100%. Setting the Min Flow to 100% stops Flow Jitter
from occurring.

390 | Corel Painter 2022 User Guide
Artists’ Oils controls
The Artists’ Oils controls are divided into three components: Paint, Brush, and Canvas. You can control Artists’ Oils brush size and opacity
with a tablet expression. For more information, see “Expression settings” on page 339.
The Grain slider on the General panel affects the look of Artists’ Oils by controlling the level at which paper absorbs paint. When the Grain
slider is set to 0%, the paper absorbs a very limited amount of paint; no paper grain is visible in the stroke and the paint color appears
lighter. When Grain is set to 100%, the paper completely absorbs the paint; no paper grain is visible, and the paint color appears darker.
Grain is visible with Artists’ Oils when Grain is set between 1% and 99%. As an Artists’ Oils brush runs out of paint, paper grain becomes
more visible, so Amount also affects how much grain appears.
Artists’ Oil brushes hold a finite amount of paint. As the paint runs out, the stroke becomes fainter.
Paint
Amount determines how much paint is loaded before each new brushstroke. The more paint you load, the longer the brushstroke lasts.
Viscosity controls the rate at which a brush runs out of paint. The higher the viscosity, the faster the brush runs out of paint, creating
shorter brushstrokes.
Blend controls how the paint color mixes with paint already on the canvas. High blend levels allow paint on the brush to blend easily with
existing paint.
Brush
Bristling controls the amount of bristling at the tail and tip of a brushstroke. For example, you can adjust bristling to increase the irregularity
of the brush bristles.
Clumpiness controls brush bristle fineness. For example, you can increase the amount of brush hair variation, or clumpiness.
Trail-off determines the length of a brushstroke tail when the brush is running out of paint. This doesn’t change the length of the
brushstroke, just the look of the end of the stroke. For example, you can adjust the trail-off to produce a longer trail-off effect of the
brushstroke tail.
Canvas
Wetness determines the wetness of the paint on the canvas. This affects how paint from a brushstroke interacts with paint already on the
canvas.

Adjusting brushes with brush controls | 391
Painting in Dirty Mode
Painting in Dirty Mode allows you to further replicate the experience of using artists’ oil paints in the real world. In this mode, any paint
remaining on the brush upon completion of a brushstroke is left to interact with paint loaded for the next brushstroke. When you select
another color, the brush is cleared of remaining paint.
You can set some Artists’ Oils controls on the property bar. For more information, see “To choose a dab profile using the property bar” on
page 325.
To set the amount of Artists’ Oils paint loaded
1With an Oils : Artists’ brush selected, choose Window Brush Control Panels Brush Media Artists’ Oils.
If the controls on the Artists’ Oils panel are not available (appear gray), the selected Oils brush variant is not supported by the Artists’
Oils controls. For example, any Oils brush variant name that begins with Real are supported brush variants.
2Move the Amount slider to the right to increase the amount of paint loaded for each brushstroke.
To set the viscosity of Artists’ Oils paint
1With an Oils : Artists’ brush selected, choose Window Brush Control Panels Brush Media Artists’ Oils.
If the controls on the Artists’ Oils panel are not available (appear gray), the selected Oils brush variant is not supported by the Artists’
Oils controls. For example, any Oils brush variant name that begins with Real are supported brush variants.
2Move the Viscosity slider to the right to increase the rate at which a brush runs out of paint.
It is important to note that higher viscosity settings make for a shorter brushstroke.
To set Artists’ Oils paint blending
1With an Oils : Artists’ brush selected, choose Window Brush Control Panels Brush Media Artists’ Oils.
If the controls on the Artists’ Oils panel are not available (appear gray), the selected Oils brush variant is not supported by the Artists’
Oils controls. For example, any Oils brush variant name that begins with Real are supported brush variants.
2Move the Blend slider to the right to increase the blending of brushstroke paint and existing paint.
You can also set how Artists’ Oils paint blend on the Blend slider on the Artists’ Oils property bar.
To set Artists’ Oils brush bristling
1With an Oils : Artists’ brush selected, choose Window Brush Control Panels Brush Media Artists’ Oils.
If the controls on the Artists’ Oils panel are not available (appear gray), the selected Oils brush variant is not supported by the Artists’
Oils controls. For example, any Oils brush variant name that begins with Real are supported brush variants.
2Move the Bristling slider to the right to increase the length of the bristling at the tip and tail of the brushstroke.
To set Artists’ Oils brushstroke trail-off
1With an Oils : Artists’ brush selected, choose Window Brush Control Panels Brush Media Artists’ Oils.
If the controls on the Artists’ Oils panel are not available (appear gray), the selected Oils brush variant is not supported by the Artists’
Oils controls. For example, any Oils brush variant name that begins with Real are supported brush variants.
2Move the Trail-off slider to the right to increase the length of a brushstroke tail when the brush is running out of paint.
To set canvas wetness for Artists’ Oils
1With an Oils : Artists’ brush selected, choose Window Brush Control Panels Brush Media Artists’ Oils.

392 | Corel Painter 2022 User Guide
If the controls on the Artists’ Oils panel are not available (appear gray), the selected Oils brush variant is not supported by the Artists’
Oils controls. For example, any Oils brush variant name that begins with Real are supported brush variants.
2Move the Wetness slider to the right to increase the mixing of brushstroke color and existing color.
You can also set how Artists’ Oils paints blend on the Blend slider on the Artists’ Oils property bar.
To paint in Dirty Mode
1With an Oils : Artists’ brush selected, choose Window Brush Control Panels Brush Media Artists’ Oils.
If the controls on the Artists’ Oils panel are not available (appear gray), the selected Oils brush variant is not supported by the Artists’
Oils controls. For example, any Oils brush variant name that begins with Real are supported brush variants.
2Enable the Dirty Mode check box to allow the paint that remains on the brush after you complete a brushstroke to mix with the paint
loaded for the next brushstroke.
Impasto controls
The Impasto brush controls let you modify and create brush variants that give the illusion of depth. The controls allow you to choose
different methods for applying and controlling the appearance of depth. For more information, see “Impasto” on page 529 and
“Adjusting and creating Impasto brushes” on page 530.
Some Impasto controls work in conjunction with Expression settings. For more information, see “Expression settings” on page 339.
Digital Watercolor controls
Digital Watercolor controls let you create effects similar to those of watercolor brushes without requiring a separate layer.
You can use Diffusion to create soft, feathery edges on the brushstrokes.
Wet Fringe controls the amount of pooling of water and paint at the edges of Fringe watercolor brushstrokes. For more information about
wet fringe, see “Working with Fringe watercolor brushes” on page 434.
Water controls
Water controls work with Watercolor layers. A Watercolor layer is automatically created when you apply a stroke with a Watercolor brush.
The layer can be edited from the Layers panel.
Wetness controls the dilution and the spread of paint. As Wetness is increased, the resulting stroke expands over a larger area, eliminating
the appearance of brush hairs.
Brushstrokes with Wetness set to 0 (top) and 40 (bottom)
Adjusting brushes with brush controls | 393
Pickup controls how much dry paint gets picked up during diffusion. Lower values mean that there is no mixing or leaching of paints.
Higher values produce more leaching.
Brushstrokes with Pickup set to 0% (top) and 100% (bottom)
Dry Rate controls the rate at which water dries during diffusion. Lower values cause greater spread; higher values reduce the amount of
spread.
Brushstrokes with Dry Rate set to 1% (top) and 50% (bottom)
The evaporation threshold (Evap Thresh slider) controls the minimum amount of water that can still diffuse. Lower values cause greater
spread; higher values reduce the amount of spread.
Brushstrokes with Evap Thresh set to 1% (top) and 50% (bottom)
The diffusion setting (Diffuse Amt slider) controls the amount of paint diffused. Using high diffusion creates soft edges that feather into the
grain, as though you were painting on wet absorbent paper. Using low diffusion is similar to painting on dry paper.
394 | Corel Painter 2022 User Guide
Brushstrokes with Diffuse Amt set to 0% (top) and 8% (bottom)
The capillary factor (Cap Factor slider) controls the grain’s effect on diffusion. Lower values result in a smoother edge.
The grain soak-in (Grn Soak-In slider) controls the amount of paint that soaks into the grain when paint is drying. You can lower both
capillary factor and grain soak-in values to reduce grain effects.
Brushstrokes with Grn Soak-In set to 0% (top) and 100% (bottom)
Enable the Accurate Diffusion check box to use a smaller diffusion window. Disabling Accurate Diffusion results in a larger, less accurate
window being used.
Brushstrokes with Accurate Diffusion enabled (top) and disabled (bottom)
You can specify the amount of wind force exerted on the diffusing particles. Set the Wind Force to zero to turn off directional diffusion.
Brushstrokes with Wind Force set to 0% (top) and 25% (bottom)
You can specify wind direction, which controls the direction in which the particles diffuse. This can be used to simulate tilting of a wet
watercolor image to introduce the paint migration effects of gravity.

Adjusting brushes with brush controls | 395
Brushstrokes with Wind Angle set to 270° (top) and 180° (bottom)
You can set some watercolor options on the property bar. For more information, see “To choose a dab profile using the property bar” on
page 325.
To adjust watercolor controls
1Choose Window Brush Control Panels Brush Media Watercolor.
2Perform an action from the following table.
To Do the following
Adjust wetness Move the Wetness slider to the left to create a more uniform
brushstroke, or to the right to have the water flow more in the
direction of the wind.
Set paint pickup Move the Pickup slider to the right to increase the amount of
leaching, or to the left to reduce it.
Set the dry rate Move the Dry Rate slider to the right to reduce the amount of
spread, or to the left to increase it.
Set the evaporation threshold Move the Evap Threshold slider to the right to reduce the amount
of spread, or to the left to increase it.
Set the diffusion amount Move the Diffuse Amt slider right to create soft edges that feather
into the grain, or to the left to emulate painting on dry paper.
Set the effect of grain on diffusion Move the Cap Factor slider to the right to create rougher edges, or
to the left to create smoother, more continuous results.
Set grain soak-in Move the Grn Soak-In slider to the right to create rougher surfaces,
or to the left to create smoother, more continuous results.
Set accurate diffusion Enable the Accurate Diffusion check box.
Set wind force Move the Wind Force slider to the right to increase wind force, or
to the left to decrease it.
Set wind direction Move the Wind Angle slider to the right to increase angle.

396 | Corel Painter 2022 User Guide
To Do the following
Delay diffusion Enable the Delay Diffusion check box. Diffusion begins when you
finish the brushstroke.
When you enable the Delay Diffusion check box, you increase the speed of Watercolor brush variants.
Liquid Ink controls
Liquid Ink controls work with Liquid Ink layers. You can use the Liquid Ink controls to specify qualities such as type, smoothness, and
volume of a brushstroke. You can adjust the Liquid Ink controls when you select a Liquid ink brush.
Liquid Ink is divided into two basic properties: Ink and Color. The Ink component provides the form of the brushstroke, while the Color
component applies color to the Ink form. The Ink and Color components can be used together or controlled separately.
The following describes the available Ink types.
Example Description
Ink Plus Color applies the currently selected color to the Ink form.
Ink Only applies only the ink component.
Color Only applies only the color component.
Soften Ink Plus Color applies color to an ink form, causing inks
and colors to blend into one another.

Adjusting brushes with brush controls | 397
Example Description
Soften Ink Only applies only the ink component.
Soften Color Only applies only the color component.
Resist repels ink.
Erase deletes ink and color.
Presoftened Ink Plus Color is applied in conjunction with surface
depth effects.
Smoothness controls the “tack” of the brushstrokes. Lower values result in coarser brushstrokes. Higher values cause brushstrokes to appear
smoother.
Brushstrokes with Smoothness set to 0% (top) and 100% (bottom)
Volume controls the height of the brushstroke, or the amount of medium applied to the image. Higher values result in thicker strokes.

398 | Corel Painter 2022 User Guide
Brushstrokes with Volume set to 100% (top) and 500% (bottom)
You can also use the Expression settings to link Volume to various stylus or mouse movements. For example, you can link Volume to the
Wheel expression to control the amount of spray from the Liquid ink airbrush by adjusting the wheel on the airbrush stylus. The wheel on
the stylus acts like a needle control on a real airbrush.
Volume can also be linked to audio input from your microphone, or internal audio such as streaming music. For more information, see
“Audio Expression” on page 340.
Using Audio Expression to vary Volume
In addition, you can adjust the Min Volume setting to specify the range of variability that you want the expression to apply. The Min
Volume setting represents a percentage of the Volume setting and it must be linked to an expression to have an effect. For example, if
you choose the Wheel expression on the Liquid Ink panel, set the Volume slider to 40%, and then set the Min Volume slider to 50%, the
volume will vary from 20% to 40% every time you use the stylus wheel to apply spray.
You can use the Depth controls to give Liquid Ink brushstrokes the appearance of height. For more information about Depth controls, see
“Impasto controls” on page 392.
Volume Jitter controls the randomness in volume within the brushstroke. A value of zero results in a perfectly smooth brushstroke.
Brushstrokes with Volume Jitter set to 0% (top) and 100% (bottom)
Size Jitter controls the randomness in size within a brushstroke. A value of zero results in a perfectly smooth brushstroke.

Adjusting brushes with brush controls | 399
Brushstrokes with Size Jitter set to 0% (top) and 100% (bottom)
Setting the appearance of ink droplets
Descriptions of the controls in the Ink Droplets area follow.
Thickness controls the thickness of the bristles. Higher values cause the bristles to stick together and result in a smoother brushstroke. Lower
values cause the individual brushstrokes to become visible.
Brushstrokes with Thickness set to 3% (top) and 20% (bottom)
Volume Jitter controls the variation in bristle height (length). A value of zero signifies that all the bristles are of equal height.
Brushstrokes with Volume Jitter set to 0% (top) and 75% (bottom)
Size Jitter controls the variation in bristle width. A value of zero signifies that all the bristles are of equal width.
Brushstrokes with Rand Br Size set to 0% (top) and 100% (bottom)
Feature lets you adjust the size and count of the ink droplets. When used with a Particle brush, this control affects only the size of the
particles. When used with a Bristle brush, both bristle size and count are impacted.
400 | Corel Painter 2022 User Guide
To choose an ink type
1Choose Window Brush Control Panels Brush Media Liquid Ink.
2Choose a liquid ink type from the Ink Type list box.
To set smoothness
1Choose Window Brush Control Panels Brush Media Liquid Ink.
2Adjust the Smoothness slider.
Lower values result in coarse brushstrokes. Higher values cause brushstrokes to blend into one another and appear smoother.
To set ink volume
1Choose Window Brush Control Panels Brush Media Liquid Ink.
2Move the Volume slider.
Higher values result in thicker strokes.
To apply an expression to ink volume
1Choose Window Brush Control Panels Brush Media Liquid Ink.
2Choose an option from the Expression list box.
You can also
Set the percentage of variability that you want the expression to
apply
Move the Min Volume slider.
Adjust the angle of the Direction expression Move the Direction slider until the desired angle is achieved.
Reverse the effect of an Expression setting Click the Invert button .
To set random volume
1Choose Window Brush Control Panels Brush Media Liquid Ink.
2In the Randomness area, move the Volume Jitter slider.
Lower values result in more uniform brushstrokes.
To set random size
1Choose Window Brush Control Panels Brush Media Liquid Ink.
2In the Randomness area, move the Size Jitter slider.
Lower values result in more uniformly sized brushstrokes.
To set bristle thickness
1Choose Window Brush Control Panels Brush Media Liquid Ink.
Adjusting brushes with brush controls | 401
2Move the Thickness slider.
Higher values result in strokes in which individual bristles are less visible.
To vary bristle length
1Choose Window Brush Control Panels Brush Media Liquid Ink.
2In the Ink Droplets area, move the Volume Jitter slider.
Higher values result in a greater variation in the length of brush bristles.
To vary bristle width
1Choose Window Brush Control Panels Brush Media Liquid Ink.
2In the Ink Droplets area, move the Size Jitter slider.
Higher values result in a greater variation in the width of brush bristles.
To adjust the size and count of the ink droplets
1Choose Window Brush Control Panels Brush Media Liquid Ink.
2Move the Feature slider.
Stroke Jitter controls
The Stroke Jitter controls introduces a randomized jitter to the brushstroke. Instead of appearing directly along the stroke, dabs appear
randomly outside the brushstroke path. You can also set an Expression setting to further control the Stroke Jitter effect. For more
information, see “Expression settings” on page 339.
You can set some stroke jitter options on the property bar. For more information, see “To choose a dab profile using the property bar” on
page 325.
Brushstrokes with Stroke Jitter set to 0 (top) and 3.13 (bottom)
Audio Expression lets you link the Stroke Jitter effect to audio input from your microphone, or internal audio such as streaming music. The
jitter changes in synch with the audio signal.
Varying Stroke Jitter in synch with audio
You can also find feature-specific jitter controls on the following brush control panels: Opacity, Grain, Size, Angle, Airbrush, Impasto, and
Color Expression.
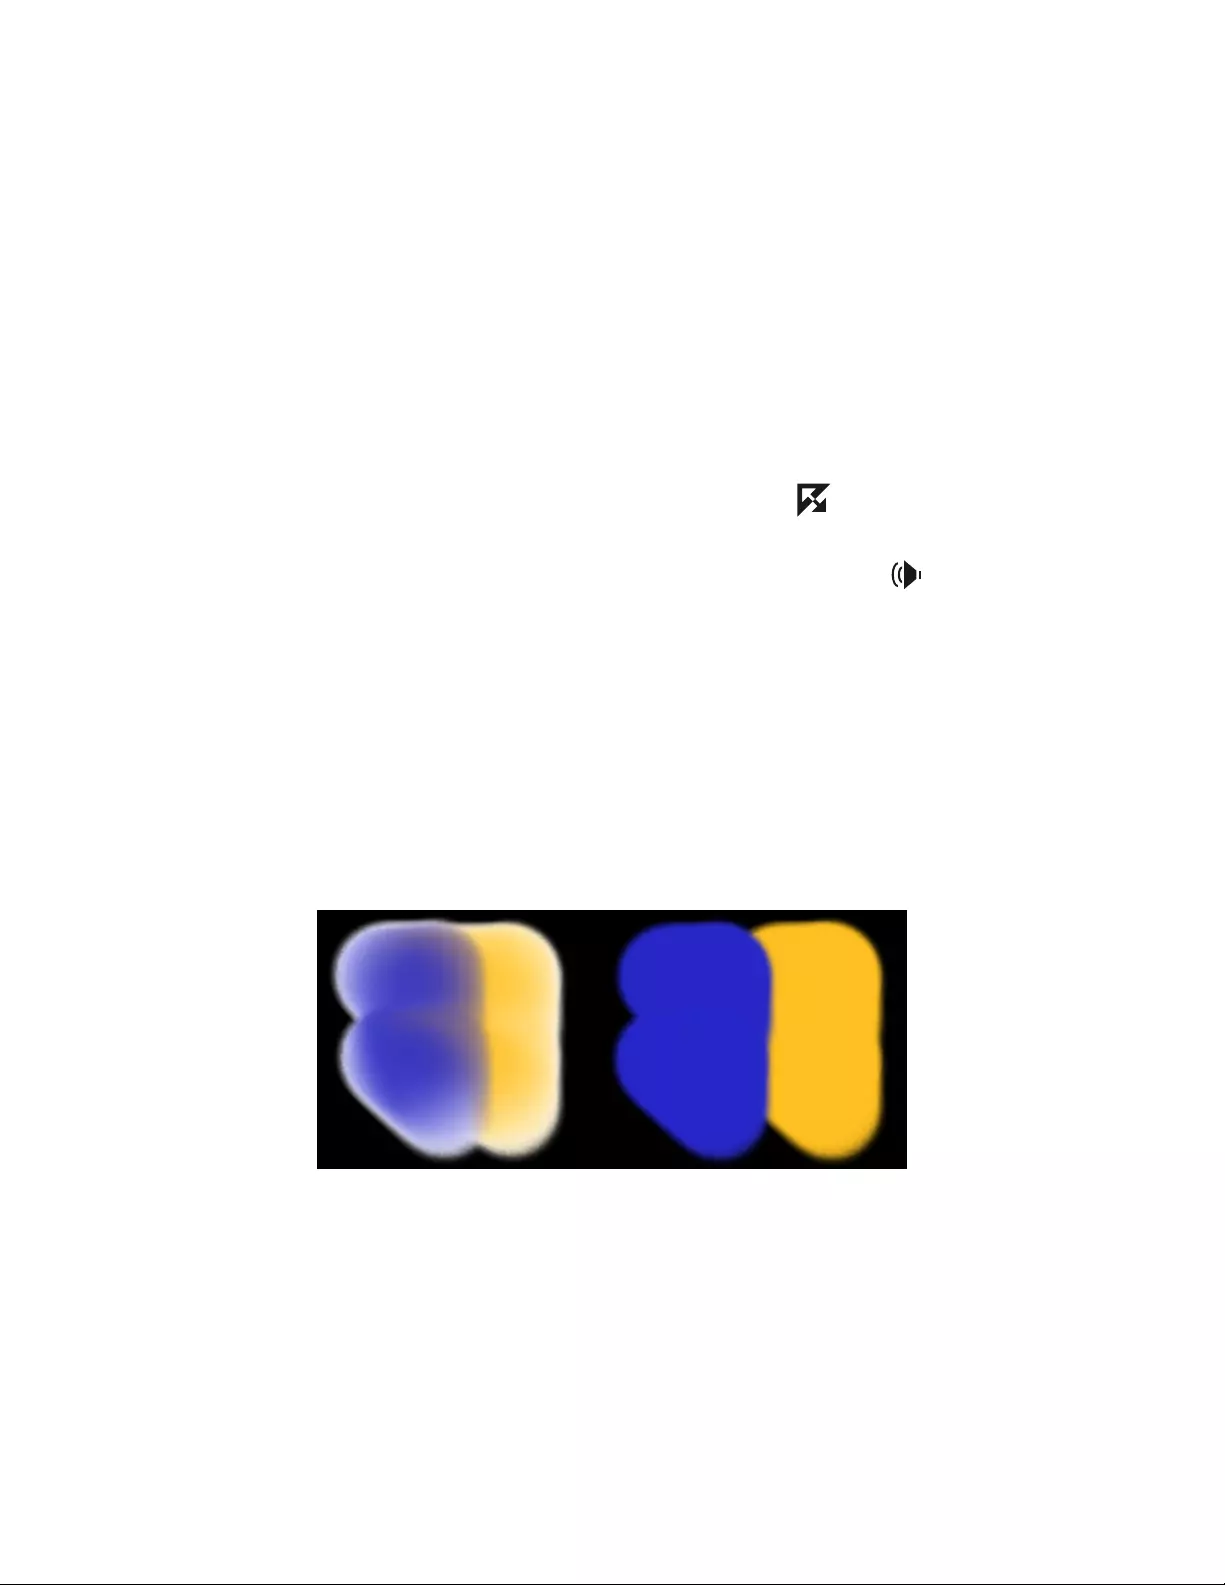
402 | Corel Painter 2022 User Guide
To set stroke jitter
1Choose Window Brush Control Panels Brush Media Stroke Jitter.
2Move the Stroke Jitter slider to the left to decrease brushstroke deviation from the path you draw, or to the right to increase the
deviation.
You can also
Specify the angle at which the brushstroke starts to deviate from
the path you draw
Move the Direction slider until the desired angle is achieved.
Reverse the effect of an Expression setting Click the Invert button .
Link stroke jitter to an audio signal Click the Audio Expression button .
To choose an audio input and adjust audio settings, choose
Window Audio Audio Settings Panel. For more information,
see “Audio Expression” on page 340.
Blending controls
The Blending controls determine how a brush conveys its medium (color) to the paper. You can choose from several preset to suit your
needs.
Whether you are painting with a single color or blending two or more colors on a layer, the Enhanced Layer Blending option can help you
produce brushstrokes without white fringes. This option uses improved transparency support.
Brushstrokes without (left) and with Enhanced Layer Blending (right)
The Bleed, Resaturation, and Dryout controls work together to determine how much color a brush has at the start and finish of a stroke.
Resaturation lets you control the amount of color that is replenished in a stroke. If it is set at zero, the brush does not produce any color.
When Resaturation is less than 10% (and Bleed is less), a brushstroke fades in gently. When the Resaturation slider is set at zero and Bleed
is set high, an airbrush can move underlying colors, as when just the airbrush hose is used to blow paint around on the canvas.

Adjusting brushes with brush controls | 403
Brushstrokes with Resaturation set to 25% (top) and 100% (bottom)
Bleed lets you control how much the brush colors smear underlying colors, including the canvas color. When Bleed is higher than
resaturation, more color bleeds than covers, so the stroke never reaches full opacity.
Brushstrokes with Bleed set to 55% (left) and 1% (right)
You can also apply an Expression setting to the Resat and Bleed controls to link them to a stylus or mouse movement. You can choose
different Expression settings for each. For example, you can link Resat to the Pressure expression and link Bleed to the Velocity expression.
You can also adjust the Min setting to specify the range of variability that you want each expression to apply. The Min Resat and Min Bleed
settings represent a percentage of the Resat and Bleed settings and they must be linked to an expression to have an effect. For example,
if you link the Pressure expression to the Resat control, set the Resat slider to 40% and set the Min Resat slider to 50%, the amount of
resaturation will vary from 20% to 40% every time you apply pressure with the stylus.
Brush Loading affects how stamp-based brushes interact with underlying pixels and works in conjunction with Resat and Bleed. When
Brush Loading is active, brushes can pick up existing colors, hair by hair. This capability offers truer color interaction, astounding color—
variations, smearing, and better cloning results. For more information about stamp-based brushes, see “General controls: Dab types” on
page 344.
When Brush Loading is not active, brushes interact with previously applied colors by sampling underlying pixels and then loading the brush
with one new color — the average of the colors that were sampled. When you use Brush Loading, it’s best to use a very low setting for
spacing. For more information, see “Spacing controls” on page 367.
The Dryout control determines how quickly a brush runs out of medium. Dryout is measured in pixels. Moving the slider to the left causes a
brush’s reservoir to empty more quickly. This can produce brushstrokes that fade out gently. If Dryout is set high, the brush never runs out of
color.
Dryout works in conjunction with Bleed, so Bleed must be set above zero if you want to take advantage of Dryout. You can modulate the
Dryout effect by changing the Bleed setting.

404 | Corel Painter 2022 User Guide
Brushstrokes with Dryout set to 724 (left) and 22026 (right)
You can set some blending options on the property bar. For more information, see “To choose a dab profile using the property bar” on page
325.
To choose a blending preset
1Choose Window Brush Control Panels Brush Media Blending.
2Choose a preset from the Presets list box.
To choose enhanced layer blending
1Choose Window Brush Control Panels Brush Media Blending.
2Enable the Enhanced Layer Blending check box.
3Choose a preset from the Presets list box.
To set color bleed
1Choose Window Brush Control Panels Brush Media Blending.
2Move the Bleed slider to the left to reduce the amount of interaction with underlying pixels. Move it to the right to increase the
interaction.
You can also
Link the size settings to a specific stylus or mouse movement Choose an option from the Expression list box.
Set the percentage of variability that you want the expression to
apply
Move the Min Bleed slider.
Adjust the angle of the Direction expression Move the Direction slider.
To set resaturation
1Choose Window Brush Control Panels Brush Media Blending.
2Move the Resaturation slider to the left to reduce the amount of color replenished in a stroke. Move it to the right to increase the
amount of color.

Adjusting brushes with brush controls | 405
You can also
Link the size settings to a specific stylus or mouse movement Choose an option from the Expression list box.
Set the percentage of variability that you want the expression to
apply
Move the Min Resat slider.
Adjust the angle of the Direction expression Move the Direction slider.
To set brush dryout
1Choose Window Brush Control Panels Brush Media Blending.
2Move the Dryout slider to the left to shorten the distance the brush can move before it dries out. Move it to the right to lengthen the
distance.
If you want the brushstroke to gradually become fully transparent, enable the Dryout to transparency check box.
To enable brush loading
1Choose Window Brush Control Panels Brush Media Blending.
2Enable the Brush Loading check box.
Mouse controls
In theory, a mouse has no pressure information. A mouse button is either on (button down), or off (button up). However, the Corel Painter
Mouse controls let you simulate the following stylus settings:
•Pressure (how hard you would be pressing with a stylus)
•Tilt (how close to vertical the stylus is held)
•Bearing (the compass direction in which the stylus is pointing)
•Rotation (to simulate using a flat-tip stylus that supports 360-degree rotation)
•Wheel (how much ink is sprayed).
For more information, see “Using a stylus vs. a mouse” on page 159.
You can record and save brushstrokes created with a stylus and then have Corel Painter use the saved settings for the stroke when you switch
to a mouse. For more information about using saved brushstrokes to further enhance mouse functionality, see “Recording and playing back
brushstrokes” on page 168.
To set pressure for the mouse
1Choose Window Brush Control Panels Mouse.
2Move the Pressure slider.
A 100% setting uses maximum pressure.
To set tilt for the mouse
1Choose Window Brush Control Panels Mouse.
2Move the Tilt slider.
A 90º setting indicates that if a stylus were in use, it would be perpendicular to the tablet.

406 | Corel Painter 2022 User Guide
To set bearing for the mouse
1Choose Window Brush Control Panels Mouse.
2Move the Bearing slider.
A setting of 0º indicates that if a stylus were in use, it would be pointing left.
To set rotation for the mouse
1Choose Window Brush Control Panels Mouse.
2Move the Rotation slider.
A 360° setting simulates a stylus that completes a 360° barrel rotation.
Rotation is supported only when you are using a brush with the Expression setting set to Rotation. For more information, see
“Expression settings” on page 339.
To set ink flow for the mouse
1Choose Window Brush Control Panels Mouse.
2Move the Wheel slider.
A setting of 100% indicates that maximum flow is in effect.
Smoothing controls
The Smoothing controls allow you to soften the appearance of brushstrokes.
Jitter Reduction minimizes small-scale jitter while maintaining overall stroke shape.
Stabilization averages variations in stroke path and rounds off sharp changes in direction. High values of Stabilization round out corners of
a stroke. A value of 50% works best. Higher values may be necessary for jittery input devices such as a mouse.
Faceting Reduction smooths jagged brushstrokes by adding points to dab paths. With particle brushes, higher values result in more
responsive particle movement.
To adjust smoothing controls
1Choose Window Brush Control Panels Brush Shape Smoothing.
2Perform a task from the following table.
To Do the following
Smooth strokes by reducing jitter Move the Jitter Reduction slider to the right to minimize small-
scale jitter. Higher values result in a smoother stroke.
Adjust stabilization Move the Stabilization slider to the right to even out jagged
strokes. Move it to the left to allow for more ragged transitions
between points on the stroke.

Adjusting brushes with brush controls | 407
To Do the following
Smooth strokes by adding path points In the Faceting Reduction area, move the Points slider to the right
to add points and even out jagged strokes. Move it to the left to
decrease the number of additional points.
Image Hose controls
The Image Hose controls let you design nozzles designated Rank 1, 2, and 3. For more information, see “Image hose” on page 487.
The settings for each rank consist of the Expression settings plus the Sequential setting. For more information, see “Expression settings” on
page 339.
Rank 1
The Rank 1 control lets you assign an input to locate Rank 1 imagery within an Image Hose nozzle.
Rank 2
The Rank 2 control lets you assign an input to locate Rank 2 imagery within an Image Hose nozzle.
Rank 3
The Rank 3 control lets you assign an input to locate Rank 3 imagery within an Image Hosee nozzle.
To choose expression settings for ranks
1Choose Window Brush Control Panels Brush Media Image Hose.
2Choose a setting from each of the Rank list boxes.
To pick out nozzles from the index in order, you can choose Sequential from any of the Rank list boxes.
For more information, see “Expression settings” on page 339.
Rake controls
The Rake controls let you control the sophisticated features of a Rake stroke, which maintains the angle of the brush head as the stroke
changes direction. As the brush turns, bristles come in and out of contact with the painting surface.
The Contact Ang slider adjusts how much of the brush touches the painting surface — in other words, the number of rake “tines” that
touch the canvas at any one time.
Brushstrokes with Contact Ang set to 180° (left), 125° (middle), and right 0° (right), with a Brush Scale setting of 450%
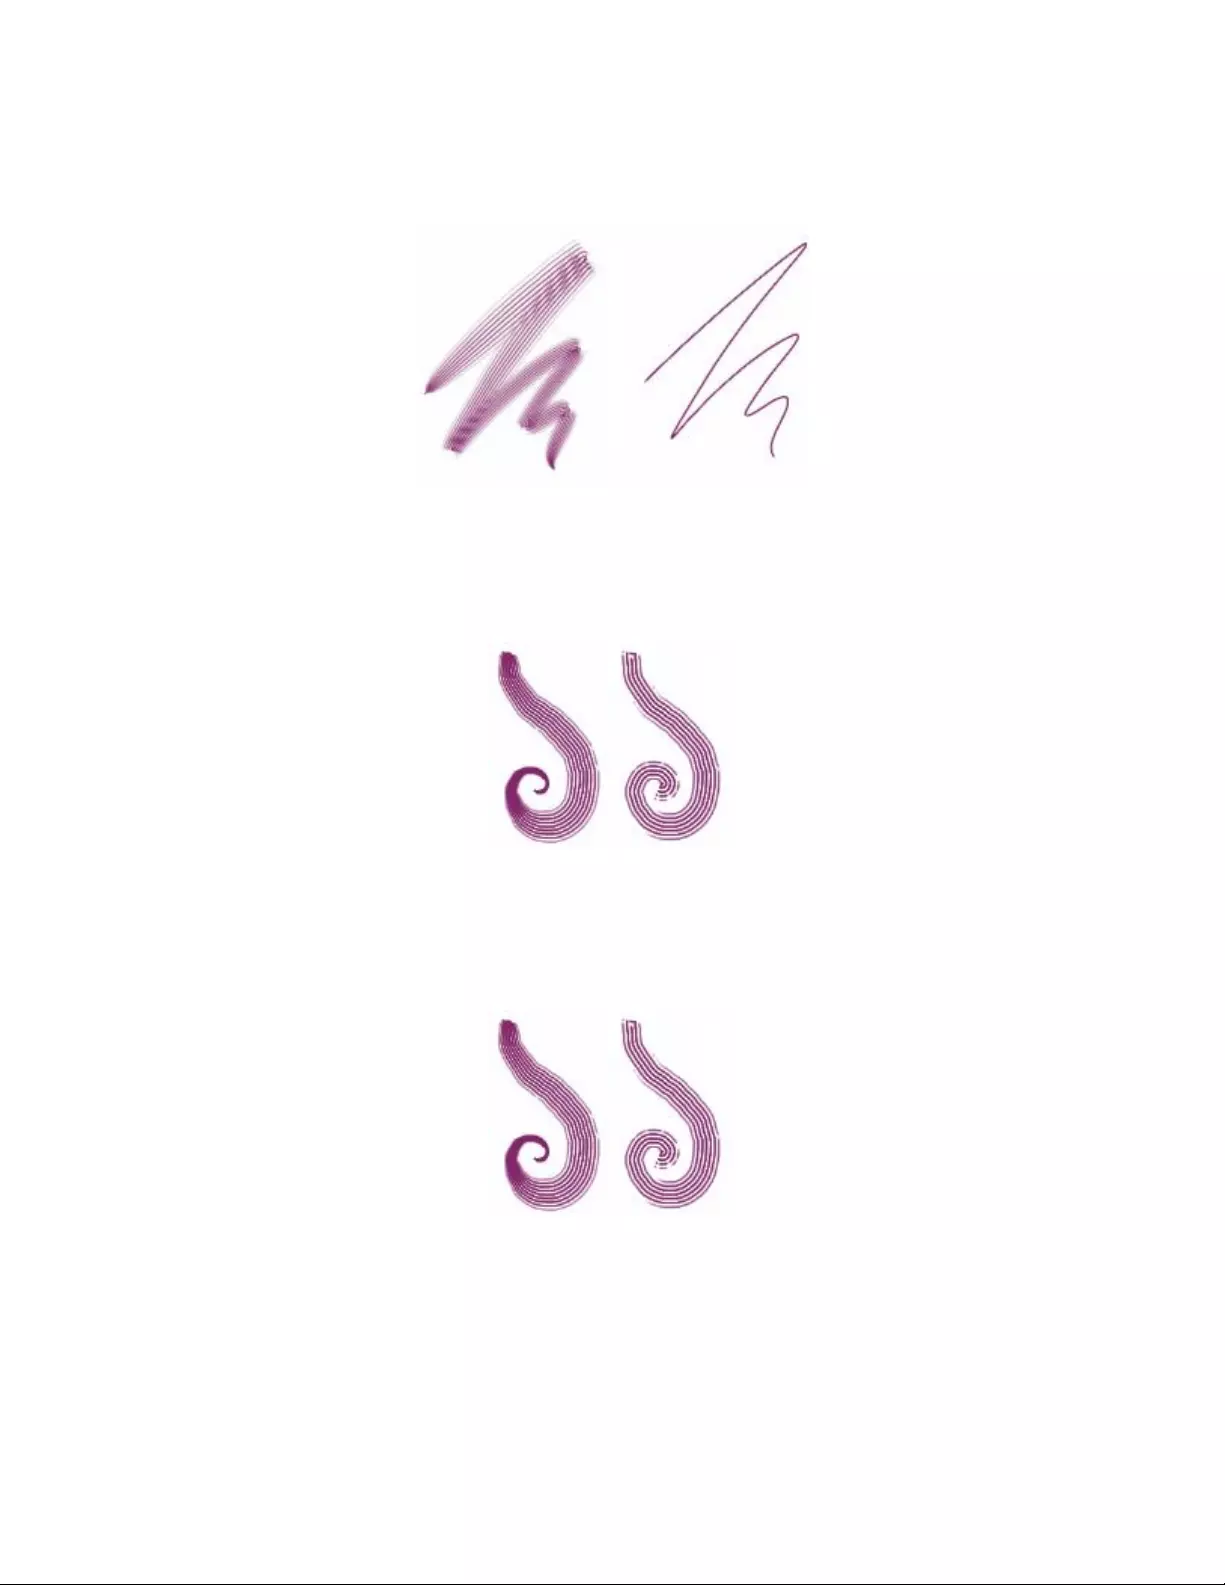
408 | Corel Painter 2022 User Guide
Brush Scale controls the spacing between individual bristles that compose the Rake. The size of each dab is determined in the Size brush
control panel. For more information, see “Spacing controls” on page 367.
Brushstrokes with Brush Scale set to 2500% (left) and 0% (right)
When you turn a real brush to paint a curve, bristles at the edges move in and out of contact with the painting surface, depending on the
brush’s location on the curve (inside or outside). Turn Amount simulates this bristle displacement by controlling the displacement of inside
and outside bristles.
Brushstrokes with Turn Amount set to 0% (left) and 150% (right)
The Bristle controls set the number of bristles or dabs used for Rake stroke types.
The Spread Bristles control dynamically adjusts brush scale on the basis of stylus pressure. The harder you press, the more the brush fans
out. If you want to maintain the spread, regardless of pressure, disable the option.
Brushstrokes with Spread Bristles enabled (left) and disabled (right)
Soften Bristle Edge makes a brush’s outer dabs semitransparent. This option is particularly effective when used with Turn Amount.

Adjusting brushes with brush controls | 409
Brushstrokes with Soften Bristle Edge disabled (left) and enabled (right)
To set brush contact angle
1Choose Window Brush Control Panels Brush Shape Rake.
2Move the Contact Ang slider to the left to create a low contact angle (few of the dabs are in contact with the paper). Move the slider all
the way to the right to create a high contact angle (all the dabs are in contact with the paper).
To set brush scale
1Choose Window Brush Control Panels Brush Shape Rake.
2Perform a task from the following table.
To Do the following
Bring the scale closer to equaling the dab width Move the Brush Scale slider to the right. When the scale is 100%,
the stroke width equals the dab width multiplied by the number of
dabs.
Cause dabs to overlap Move the Brush Scale slider to the left. When the scale is less than
100%, the dabs overlap. Overlapping dabs create a natural, subtle
stroke when used with Turn Amount and Soften Bristle Edge.
To set bristle displacement
1Choose Window Brush Control Panels Brush Shape Rake.
2Perform a task from the following table.
To Do the following
Increase the degree to which the displacement changes are based
on the direction of the brush
Move the Turn Amount slider to the right.
Decrease the degree to which the displacement changes are based
on the direction of the brush
Move the Turn Amount slider to the left.
To adjust the number of Rake brush bristles
1Choose Window Brush Control Panels Brush Shape Rake.
2Move the Bristle slider to adjust the number of bristles.

410 | Corel Painter 2022 User Guide
To set bristle spacing
1Choose Window Brush Control Panels Brush Shape Rake.
2Enable the Spread Bristles check box.
To soften bristle edge
1Choose Window Brush Control Panels Brush Shape Rake.
2Enable the Soften Bristle Edge check box.
Multi controls
You can set the number of bristles used for brushes set to the Multi stroke type. For more information, see “General controls: Stroke types”
on page 348.
To adjust the number of Multi brush bristles
1Choose Window Brush Control Panels Brush Shape Multi.
2Move the Bristles slider to adjust the number of bristles.
Color Variability controls
Color variability allows you to create brushstrokes of more than one color. Color variability can be set for HSV or RGB mode, and it can be
based on the current gradient or color set. For information about color sets, see “Working with color sets” on page 267 and “Creating and
exporting color sets” on page 269.
Examples of brushstrokes with color variability
You can also use the Smoothness slider to smooth the color variability in a brushstroke for a more organic look.
Color Variability applied to a brushstroke without smoothing (top) and with smoothing (bottom)

Adjusting brushes with brush controls | 411
Color Variability based on a color set applied without smoothing (top) and with smoothing (bottom)
Audio Expression lets you link color variability to audio input from your microphone, or internal audio such as streaming music. The
brushstroke colors vary in synch with the changes of the audio signal.
Color Variability linked to audio (right)
To display the Color Variability panel
•Choose Window Brush Control Panels Brush Media Color Variability.
To set color variability in HSV mode
1In the Color panel, choose a main color.
2Choose Window Brush Control Panels Brush Media Color Variability.
3Choose in HSV from the list box.
4Adjust the Hue Variability, Saturation Variability, and Value Variability sliders to control hue, saturation, and value ranges for color
variability:
• Moving the ±H slider to the right increases the number of hues in the resulting brushstroke. These colors are the ones adjacent to the
selected color on the color wheel.
• Moving the ±S slider to the right increases variability in the color intensity of the brushstroke.
• Moving the ±V slider to the right increases variability in the brightness of the brushstroke.
You can try different hue, saturation, and variability settings with any of the brushes to produce interesting results.
To smooth the color variability in the brushstroke, move the Smoothness slider.
When you save a brush variant, the current color variability setting is also saved.
To set color variability in RGB mode
1In the Color panel, choose a main color.
2Choose Window Brush Control Panels Brush Media Color Variability.
3Choose in RGB from the list box.
4Move the ±R, ±G, and ±B sliders to control color variability of red, green, and blue values.
To smooth the color variability in the brushstroke, move the Smoothness slider.
To set color variability based on the current gradient
1In the Color panel, choose a main color.
2Choose Window Brush Control Panels Brush Media Color Variability.

412 | Corel Painter 2022 User Guide
3Choose from Gradient from the list box.
Color variability is now based on random colors from the current gradient.
To smooth the color variability in the brushstroke, move the Smoothness slider.
To set color variability based on the current color set
1In the Color panel, choose a main color.
2Choose Window Brush Control Panels Brush Media Color Variability.
3Choose from Color Set from the list box.
Color variability is now based on random colors from the current color set.
To smooth the color variability along the brushstroke, move the Smoothness slider.
To ignore color set variability
1Choose Window Brush Control Panels Brush Media Color Variability.
2Enable the Ignore color variability from color sets check box.
To link color variability to audio
1Choose Window Brush Control Panels Brush Media Color Variability.
2Click the Audio Expression button .
To choose an audio input and adjust audio settings, choose Window Audio Audio Settings Panel. For more information, see
“Audio Expression” on page 340.
Color Expression controls
Color Expression determines whether Corel Painter should use the main or additional color in an image. Using Color Expression, you can
introduce input (such as direction) which controls output when you apply two-color brushstrokes. You can control the variation between the
main and additional colors in a brushstroke by adjusting Color Jitter. You can also smooth the variation between the main and additional
colors along the brushstroke.
Soft airbrush brushstrokes without Color Jitter (left) and with Color Jitter (right)
Color Jitter applied to a brushstroke without jitter smoothing (top) and with jitter smoothing (bottom)
You can also link color variation in brushstrokes to audio input from your microphone, or internal audio such as streaming music.

Adjusting brushes with brush controls | 413
Brushstroke color can change in synch with audio input.
To set color expression controls
1Choose Window Brush Control Panels Brush Media Color Expression.
2In the Color Expression panel, choose one of the following options from the Expression list box:
•None — applies no adjustment to the color expression
•Velocity — adjusts the color expression based on the dragging speed
•Direction — adjusts the color expression based on the direction of the stroke, and according to the value you set with the slider or in
the box
•Pressure — adjusts the color expression based on stylus pressure
•Wheel — adjusts the color expression based on the wheel settings on an airbrush stylus, specifically the Wacom Intuos Airbrush stylus
•Tilt — adjusts the color expression based on the angle of the stylus from the tablet
•Bearing — adjusts the color expression based on the direction in which the stylus points
•Rotation — adjusts the color expression based on the rotation of the stylus
•Source — adjusts the color expression based on the luminance of the clone source
•Random — adjusts the color expression at random
If you want to switch the main and additional colors, click the Invert button .
If you chose Direction from the Expression list box, move the Direction slider until the desired angle is achieved.
To control the variation between the main and additional colors in a brushstroke
1Choose Window Brush Control Panels Brush Media Color Expression.
2Move the Color Jitter slider.
To smooth the color variation along the brushstroke, move the Smoothness slider.
To link color expression to audio
1Choose Window Brush Control Panels Brush Media Color Expression.
2Click the Audio Expression button .
To choose an audio input and adjust audio settings, choose Window Audio Expression Audio Settings Panel. For more
information, see “Audio Expression” on page 340.
Dynamic Speckles controls
Dynamic Speckles generate a continuous brushstroke from discrete spots of color or speckles. The speckles in the brushstroke are truly
dynamic — they are generated as you paint.
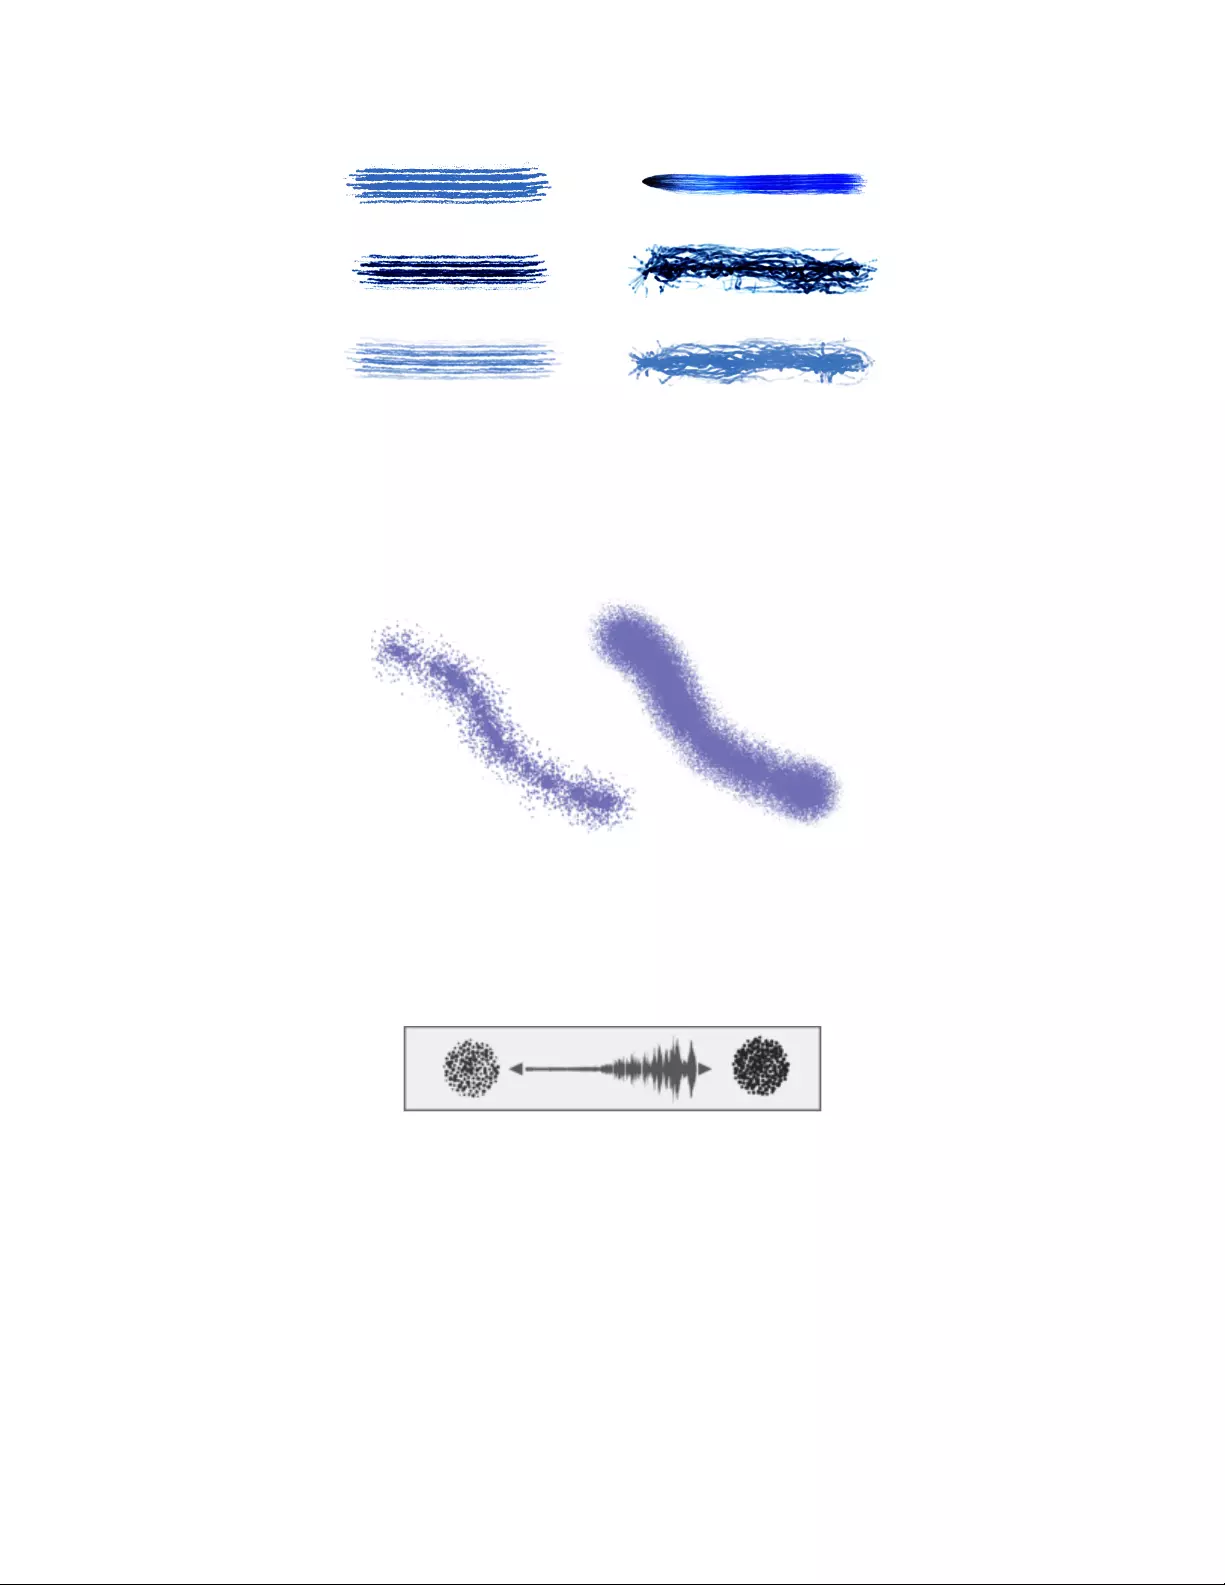
414 | Corel Painter 2022 User Guide
Dynamic Speckles dab types with bristle brushes (left) and Particle brushes (right)
To modify the appearance of the brushstrokes, you can adjust the number of dynamic speckles and change their size. You can connect
speckle size to an expression such as pressure or velocity so that the speckles grow or shrink in response to subtle hand movements.
You can specify the range of speckle size variability that you want the expression to apply by moving the Min Size slider. This setting
represents a percentage of the Size setting. For example, if you connect speckle size with pressure and set Min Size to 20% and Size to
70%, the speckle size will change from 20% to 70% when you apply pressure during a brushstroke.
Dynamic Speckles dab types with size of 14% (left) and 95% (right)
If the size of the brush is linked to an expression, you can scale the speckle size and count to match the brushstroke width so that the overall
stroke appearance is preserved. You can control the extent to which the speckles are scaled.
You can link speckle size to an audio signal. For more information, see “To link brush attributes and effects to audio” on page 341.
Dynamic speckles can change their size in synch with audio.
Dynamic speckles can have soft or hard edges.
You can change the size of the speckles and their opacity randomly for a more organic look. In addition, you can vary the size and opacity of
dynamic speckles by applying jitter, and you can smooth the jitter effect for more natural-looking brushstrokes.

Adjusting brushes with brush controls | 415
Dynamic speckles without jitter (left), and with jitter applied (right).
To find a Dynamic Speckles brush variant
1Click Window Search and type Dynamic Speckle in the Search box.
2Choose a brush variant from the list of search results.
To adjust the properties of a Dynamic Speckle brush variant
1Select a Dynamic Speckle brush variant.
2Choose Window Brush Control Panels Brush Shape Dynamic Speckle.
3Perform a task from the following table.
To Do the following
Adjust the number of dynamic speckles Move the Count slider.
Adjust the size of dynamic speckles Move the Size slider.
Set the range of speckle size variability Move the Min Size slider.
Link speckle size to an expression From the Expression list box, choose an expression.
Adjust the number and size of dynamic speckles to match brush
size changes
Move the Scale with Size slider. Higher values result in more
accurate scaling.
Create speckles with soft or hard edges Click the Hard or Soft button.
Vary the size of dynamic speckles Move the Random Thickness slider. Higher values vary the size
more randomly.
To apply additional size variation, enable the Jitter check box. Move
the Smoothness slider for a more organic look.
Vary the opacity of dynamic speckles Move the Random Opacity slider.
To apply additional Opacity variation, enable the Jitter check box.
Move the Smoothness slider for a more organic look.
416 | Corel Painter 2022 User Guide
To apply Dynamic Speckles to a brush variant
1Choose a RealBristle, bristle, or Particle brush variant from the Brush Selector.
2Choose Window Brush Control Panels General.
3From the Dab Type list box, choose one of the following:
•Dynamic Speckle Gravity Particles — to use with a gravity particle brush
•Dynamic Speckle Flow Particles — to use with a flow particle brush
•Dynamic Speckle Spring Particles — to use with a spring particle brush
•Dynamic Speckle Bristle — to use with a bristle or RealBristle brush
4To modify Dynamic Speckles properties, choose Window Brush Control Panels Brush Shape Dynamic Speckle, and adjust the
settings you want in the Dynamic Speckle panel.
Dab Stencil controls
Dab Stencil masks brush dabs before you apply a brushstroke, letting you add control and creative touch to a wide range of brushes — from
blending brushes, to Watercolor and Impasto. Applying a dab stencil knocks out areas of the brush dab by making them more transparent.
It is as if the brush dab becomes a stamp that has elevated and indented areas. The brush applies more paint with the elevated areas of the
dab, and less or no paint at all with the indented areas.
You can choose a dab stencil source from a variety of stencil media such as paper, flow maps, and textures.
The brushstrokes in this artwork use the Dab Stencil feature. Artwork by Melissa Gallo.

Adjusting brushes with brush controls | 417
From left to right: Using paper, flow map, and texture as a dab stencil source
You can adjust the properties of the dab stencil to change the look of the brushstrokes. For example, you can use the Strength and Min
Strength controls to adjust the maximum and minimum opacity of the dab stencil. When the dab stencil is at maximum strength (100%),
it is the most opaque and makes the dab areas that it covers the most transparent. In addition, you can apply jitter to vary the opacity of
the dab stencil, and you can smooth the jitter for more natural-looking brushstrokes. You can link a dab stencil to an expression so that dab
stencil opacity changes in response to specific mouse or stylus movement, such as pressure, direction or velocity.
Strength settings from left to right: Maximum, medium, and low values. At maximum strength, the dab areas
knocked out by the stencil stand out best; at low strength, the knocked out areas almost blend with the other areas.
The strength of the dab stencil is at 100% in all three brushstrokes, but the minimum strength varies from 0 to 87%. Higher
minimum settings result in a dab stencil with higher minimum opacity that produces a more distinct brush stamp (right).
From left to right: Dab stencil brushstrokes without jitter, with jitter, and with jitter and smoothness
You can also link a dab stencil to audio input from your microphone, or internal audio such as streaming music. The opacity (strength) of the
dab stencil varies in synch with the changes of the audio signal.
418 | Corel Painter 2022 User Guide
The Dab Stencil feature differs from grain in several ways. Dab stencils vary the opacity of the dab before you apply a brushstroke and can be
applied only to stamp-based brushes. While grain works only with paper textures, dab stencils can use flow maps and other textures as well.
Also, dab stencils work with methods and subcategories that currently do not support grain. For example, you can apply a dab stencil to a
glow brush.
Applying the same paper texture by using Grain (left) and applying a dab stencil (right)
Glow brushes work well with the Dab Stencil feature to create interesting texture and lighting
effects. From left to right: A paper, texture, and a flow map are used as dab stencil sources.
You can use the Dab Stencil feature together with texture brushes to create impactful and controlled brushstrokes. For more information
about texture brushes, see “Texture painting” on page 453.
Adjusting brushes with brush controls | 419
Texture brushes and dab stencil brushes are used together with the shown
texture and other paper textures to create the sphere surface on the right.
Dab Stencil can also be combined with Impasto brushes to add a realistic, three-dimensional look and feel to an image.
Combining Impasto with Dab Stencil
To apply a dab stencil to a brush variant
1Choose a stamp-based brush variant from the Brush Selector.
Dab Stencil works well with brushes that use any of the following dab types: Captured, Dynamic Speckles, Circular, Computed Circular,
and Static Bristle.

420 | Corel Painter 2022 User Guide
2On the extended property bar, open the Dab Options flyout , and enable the Apply Dab Stencil check box.
If the extended property bar isn’t open, choose Window Extended Property Bar.
3Adjust any properties you want. For more information, see “To adjust the properties of a dab stencil” on page 420.
You can also apply a dab stencil from the Dab Stencil panel (Window Brush Control Panels Brush Shape Dab Stencil).
To adjust the properties of a dab stencil
1Choose a Dab Stencil brush variant or a brush variant that supports Dab Stencil.
2Choose Window Brush Control Panels Brush Shape Dab Stencil.
3Make sure the Apply Dab Stencil check box is enabled.
4From the Source list box, choose one of the following options:
•Flow Map — to use a flow map as the stencil source
•Paper — to use a paper texture as the stencil source
•Texture — to use a texture as the stencil source. If you want to display a preview of the texture in the image window, enable the Show
Texture check box.
5Click the selector button next to the Source list box, and choose the flow map, paper texture, or texture you want to use as a source.
To edit the source, click the Toggle [Source Name] Panel button, and adjust any attributes you want on the corresponding panel. For
more information about editing the dab stencil source, see “To customize a flow map” on page 479, “Working with paper texture and
grain” on page 171 or “Customizing Texture brushes” on page 457.
6To adjust the Dab Stencil properties, perform a task from the following table.
To Do the following
Specify the maximum level of opacity that the stencil applies to the
dab
Move the Strength slider.
Specify the minimum level of opacity that the stencil applies to the
dab
Move the Min Strength slider.
Set the range of opacity variability of the dab stencil based on the
maximum and minimum strength settings
Move the Strength Jitter slider.
Smooth the jitter of opacity variability of the dab stencil Click the Smoothness slider.
Link Dab Stencil to an expression From the Expression list box, choose an expression.
Link Dab Stencil to audio Click the Audio Expression button .
To choose an audio input and adjust audio settings, choose
Window Audio Expression Audio Settings Panel. For more
information, see “Audio Expression” on page 340.
Adjust the angle of the Direction expression Move the Direction slider.
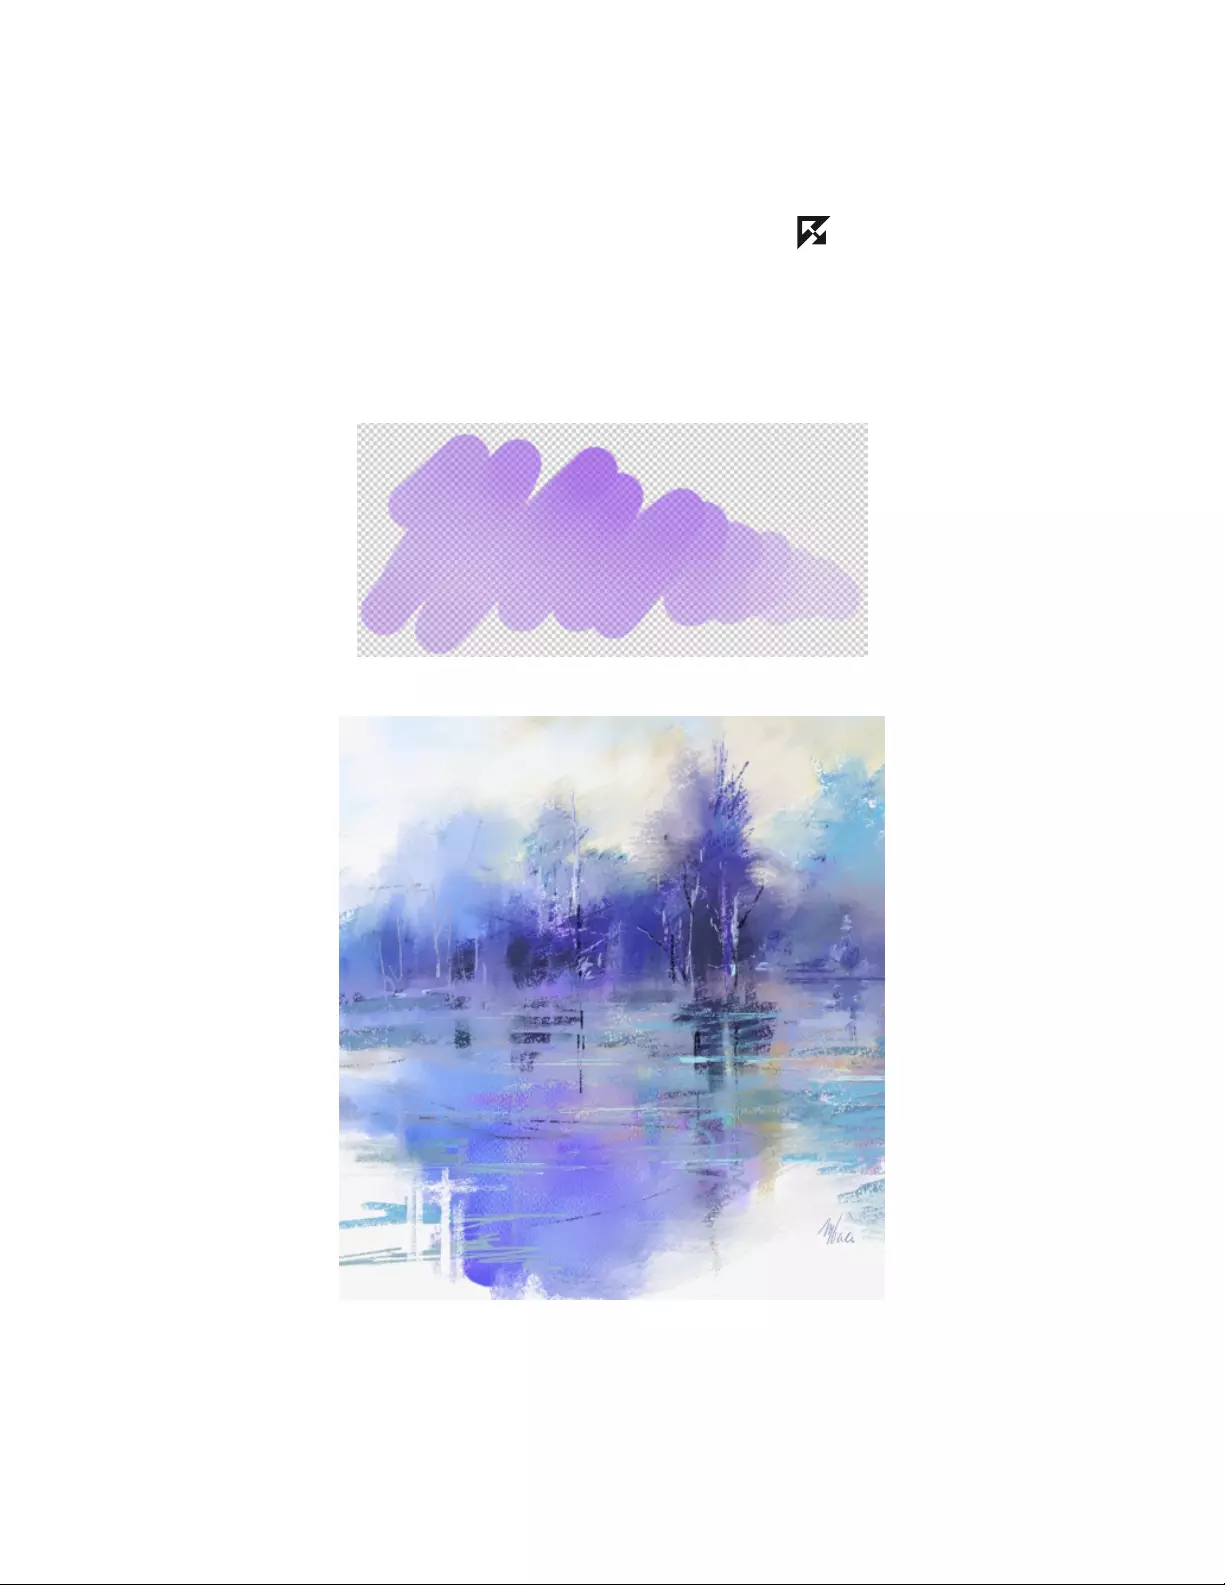
Adjusting brushes with brush controls | 421
To Do the following
Reverse the effect of an Expression setting Click the Invert button .
Glazing controls
There are multiple ways to control the opacity of the paint deposited with a brush. Glazing (Window Brush Control Panels Brush
Media Glazing) lets you specify the maximum level of opacity in a brushstroke.
Glazing allows you to work with very high levels of transparency and paint with light, semi-transparent brushstrokes.
Glazing brushes were used in this painting by Melissa Gallo.
Glazing is different from Brush opacity (Window Brush Control Panels Brush Media Opacity), which controls the opacity of each
dab (or bristle for other brush types.) If you set Glazing to 20%, the opacity in a single brushstroke will never exceed 20%. Within that 20%
range, you can specify the opacity of each dab from 1% to 100%. For example, if you set dab opacity to 100%, the paint that a brushstroke
422 | Corel Painter 2022 User Guide
will deposit will still be only 20% of the selected color. Brush opacity allows you to gradually build up to the selected color and Glazing
determines what that color is. The lower the Brush opacity, the slower you build up to the color specified by Glazing in a single brushstroke.
(Left) 100% Brush opacity, 100% Glazing; (middle) 100% Brush opacity, 20% Glazing. Color
does not build up when you brush over the same area in a single brushstroke; (right) 20% Brush
opacity, 100% Glazing. Color builds up when you brush over the same area in a single brushstroke.
Glazing brushes can help you fill an area with long continuous strokes that have a very soft gradation from the beginning of the mark to the
end.
Glazing brushes create a nice smooth blend between colors; there are no artifacts in the areas where the dabs overlap.
You can add grain to Glazing brushes, however, you will see overlaps.
Adjusting brushes with brush controls | 423
A single brushstroke with 100% Glazing and (top) 100% Grain, (bottom) 50% Grain
Glazing is available to all stamp-based brushes and can be linked to specific stylus or mouse movements. For more information, see
“Expression settings” on page 339.
Glazing works well with the following dab types: (from top to bottom) Captured, Circular, Computed Circular, Static Bristle
You can use merge modes to control how brushstrokes interact with the underlying colors on the active layer or the canvas.
424 | Corel Painter 2022 User Guide
To adjust Glazing properties
1Choose Window Brush Control Panels Brush Media Glazing to display the Glazing panel.
2From the Merge Mode list box, choose a merge mode.
For a detailed description of each merge mode, see “To apply a merge mode” on page 358.
3Move the Glazing slider to set the maximum level of opacity in a brushstroke.
You can also
To Do the following
Link brushstroke opacity to an expression such as pressure, tilt,
direction to vary the opacity in a brushstroke
Choose an option from the Expression list box.
Reverse the effect of an Expression setting Click the Invert Glazing Expression button .
Link brushstroke opacity to audio expression Click the Audio Expression button .
Set the minimum level of opacity in a brushstroke Move the Min Glazing slider.
The Min Glazing setting represents a percentage of the Glazing
setting and it must be linked to an expression to have an effect.
For example, if you choose the Pressure expression, set Glazing to
100%, and set the Min Glazing to 10%, the opacity will vary from
10% to 100% every time you apply pressure in a brushstroke.
A brushstroke with Glazing set to 100%, (top) Min Glazing set to 80%, and
(bottom) Min Glazing set to 20%
Set the range of opacity variability in a brushstroke Move the Glazing Jitter slider.
Move the slider to the right to randomly vary the opacity of a
brushstroke.
A brushstroke with (left) Glazing Jitter set to 95%, and (right) Glazing Jitter set
to 20%
Adjusting brushes with brush controls | 425
To Do the following
Smooth the jitter in a brushstroke Move the Smoothness slider.
A brushstroke with Glazing Jitter set to 100%, (top) Smoothness set to 100%,
and (bottom) Smoothness set to 10%
Specify the angle at which a brushstroke changes opacity Move the Direction slider.
Glazing brushes work only with the Glazing stroke type. For more information, see “General controls: Stroke types” on page
348. The controls on the Glazing panel are grayed out when you select a stroke type that is not supported, such as Single, Multi,
Rake, and Hose.
If there are unwanted overlaps in your Glazing brush, try the following:
•Set Opacity (Window Brush Control Panels Brush Media Opacity) to 100%, Opacity Jitter to 0%, and Opacity
Expression to None.
•Set Grain (Window Brush Control Panels Brush Media Grain) to 0%, Grain Jitter to 0%, Grain Expression to None.
•Set Dab Opacity (Window Brush Control Panels Brush Shape Computed Circular) for Computer Circular brushes to
100%.

426 | Corel Painter 2022 User Guide
Airbrushes | 427
Airbrushes
The Corel Painter computed airbrushes are so realistic, you feel as though you’re using a real airbrush. For more about computed brushes,
refer to “General controls: Dab types” on page 344.
The best way to get used to the Corel Painter airbrushes is to play with them. Select each variant and spray paint onto the canvas without
worrying about running out of compressed air. With computed airbrushes, you can paint with color, patterns, or variants. One variant blows
hairlike strokes; another variant just blows existing paint around on the canvas, like a hose without an airbrush attached.
Try using the Fine Spray variant in the Airbrushes category for an example of how Bearing and Flow settings combine to give realistic
airbrush results.
For information about the Airbrush controls, see “Airbrush controls” on page 387.
Previous versions of digital airbrushes projected a thin mist of dots (or paint dabs) onto the canvas. The Soft variant (named Fat Stroke in
previous versions of Corel Painter) is included in the default brush library. With a digital airbrush, dots are laid down, or sprayed, within a
circular area, resembling the circle thrown by a flashlight that is perfectly perpendicular to a piece of paper. The area of application remains
circular, regardless of tilt, bearing, or stylus pressure. Density, or flow, adjustments can be mimicked with adjustments to the Opacity setting.
Previous versions of airbrushes sprayed a thin layer of dots within an area that was always
circular, like a circle of light from a flashlight that is perpendicular to a piece of paper.
Now, airbrushes respond to angle (tilt), bearing (direction), and flow (fingerwheel setting) data from a stylus, allowing for a truly realistic
brushstroke. For example, as you tilt your stylus, specks of media land on the paper in a way that reflects that tilt. Imagine, again, the circle
of light thrown by a flashlight. The moment the flashlight is no longer perpendicular to the paper, the shape of the cone of light changes,
creating a conic section. In the same manner, Corel Painter airbrushes create conic sections that mirror your stylus movements.
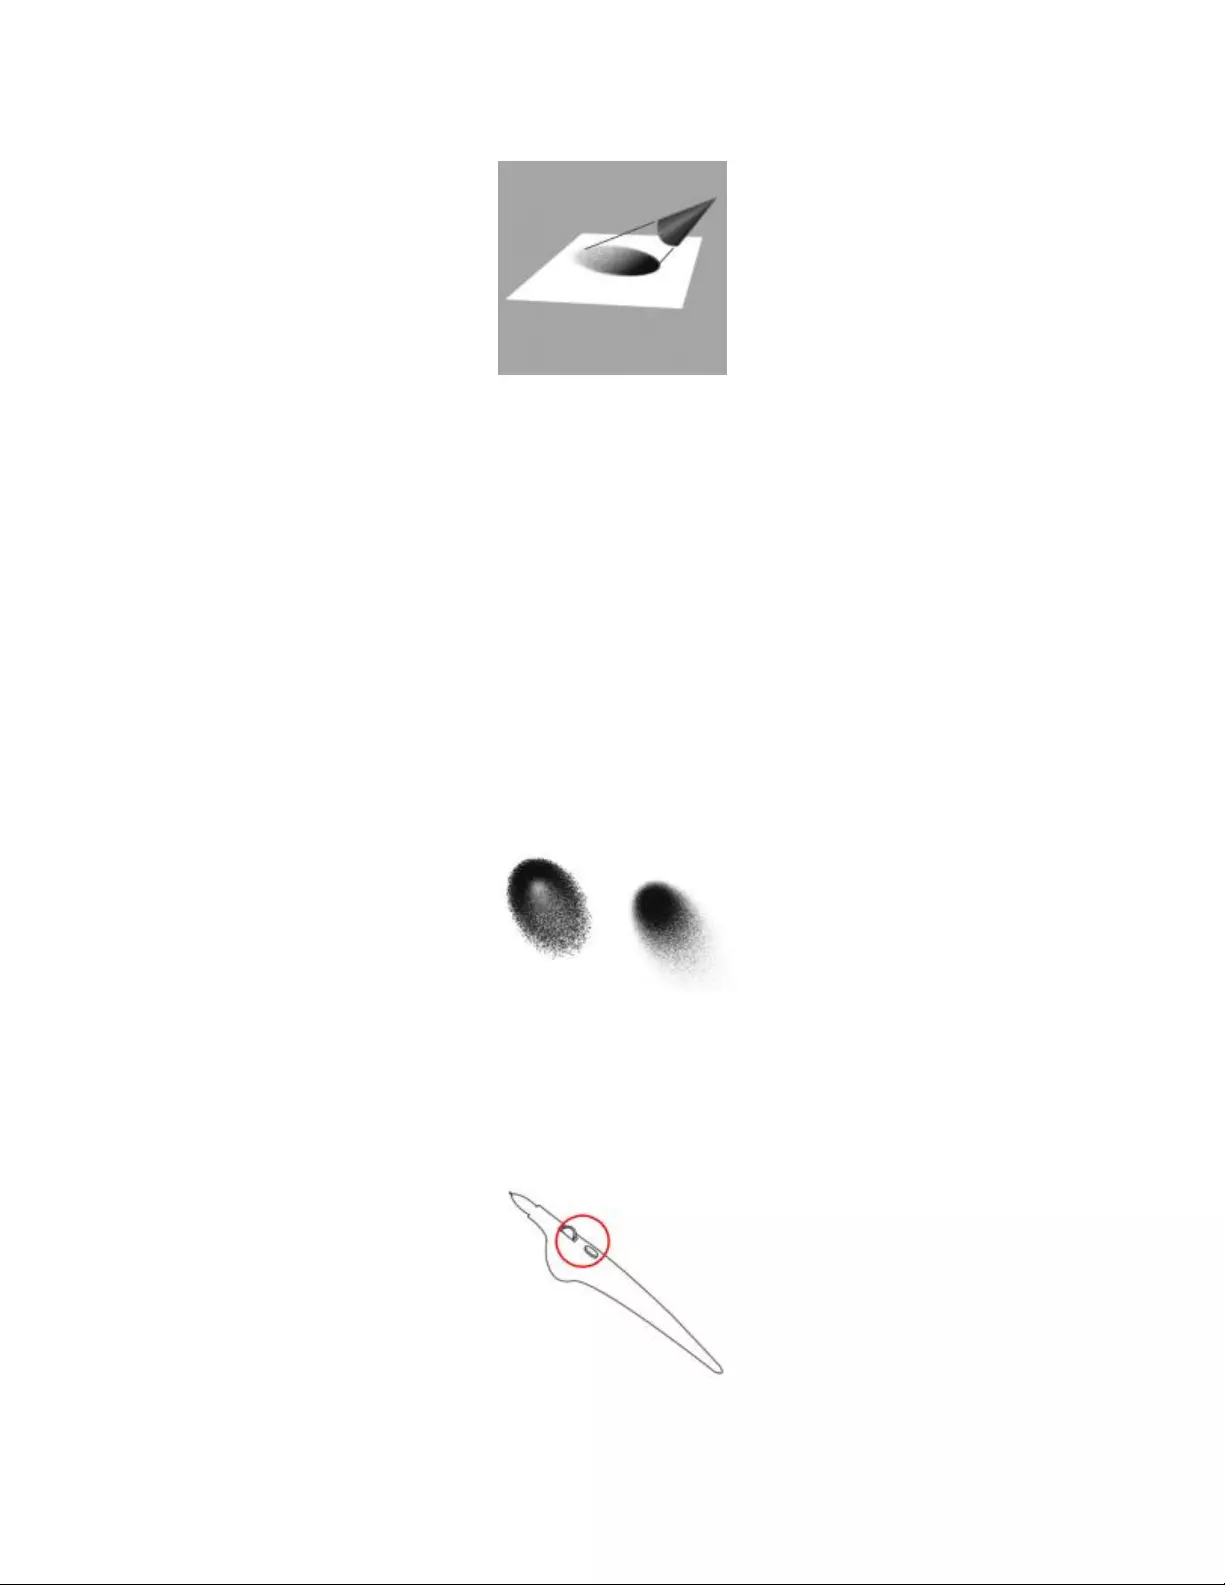
428 | Corel Painter 2022 User Guide
Angle and tilt determine the shape and size of the conic section created by Corel Painter airbrushes,
which resembles a circle of light from a flashlight that is no longer perpendicular to the paper.
Extreme-tilt angles affect large areas of the canvas. This can slow the brush down as it tries to squirt paint too far from the stylus.
Adjusting airbrush spread and flow
Adjusting spread
You can adjust airbrush spread, which affects how paint spreads out as it is applied. In other words, it sets the size of area where the paint
will be applied.
A good range for the Spread setting is 30° to 40°. Narrow settings for Spread and Angle can cause problems. Combined with a very tilted
stylus, a narrow setting for Spread can cause paint to be deposited away from the cursor.
Varying edges
You can vary the edges of the paint sprayed from an airbrush to achieve desired softness by selecting a brush tip profile. Each profile gives
you a different edge to the paint you spray. For more information, refer to “Changing dab profiles” on page 368.
Airbrush edges created with the Watercolor profile (left) and the Medium profile (right)
Adjusting flow
Although you can still adjust Opacity to apply fainter or darker dots of media, some Corel Painter airbrushes take advantage of stylus
fingerwheel controls. Like the needle control on real airbrushes, the fingerwheel control adjusts airbrush flow — that is, how much media is
applied.
With the fingerwheel control, you can adjust airbrush flow on many airbrush styluses.
Airbrushes | 429
Controlling droplet size
You can control the size of the airbrush droplets. This is not the same as adjusting the size of the brush (the larger the brush, the more
droplets are sprayed).
Very large droplets may produce unexpected results.
The Feature setting is not available for variants that use the Pixel Airbrush or Line Airbrush dab types.
To increase or decrease media flow from an airbrush
• Move the stylus fingerwheel toward the tip (or forward), to decrease flow. Move it away from the tip (or backward), to increase flow.
You can also control media flow from an airbrush by adjusting the Flow and Min Flow sliders in the Airbrush panel in the Brush
Controls palette. Flow sets the maximum flow. Min Flow sets the minimum amount of flow as a percentage of Flow.
Depending on the Airbrush variant, you can reverse the effect of moving the airbrush fingerwheel by enabling the Invert button
in the Color Expression panel, or by clicking the Invert Flow Expression button in the Airbrush panel in the Brush
Controls palette.
In the Airbrush panel in the Brush Controls palette, you can also determine flow based on stylus information, such as velocity or
pressure, by choosing an expression from the Flow Expression list box.
To change the size of airbrush droplets
1Choose Window Brush Control Panels General.
2Choose Airbrush from the Dab Type list box.
3In the Brush palette, click the Size tab to open the Size panel.
4In the Size panel, move the Size slider.
5Move the Feature slider to the left for smaller droplets, or to the right for larger droplets.

430 | Corel Painter 2022 User Guide

Watercolor | 431
Watercolor
Corel Painter features different tools and controls that allow you to produce natural-looking watercolor effects. The tools include watercolor
brushes that are stored in the following brush categories.
Brush category Description
Real watercolor The Real watercolor brushes allow you to apply pigment to the
paper in a very realistic way. They include brush control options
that allow you to precisely control water and paper interactions.
The Real watercolor brushes are applied to the Watercolor layer.
Pigment watercolor The Pigment watercolor brushes are designed to produce natural-
looking effects. They include brush control options that allow you
to control color diffusion and some water and paper interactions.
The Pigment watercolor brushes are applied to the Watercolor
layer.
Fringe watercolor The Fringe watercolor brushes let you apply watercolor effects
directly to the canvas or a default layer, without the need for a
Watercolor Layer. However, the brush control options for Fringe
watercolor are limited.
There are Watercolor-compatible brushes in other categories as well. To check whether a brush is compatible with Watercolor, look for
the Watercolor Layer compatibility icon in the bottom-right corner of the Brush selector. For more information on painting with
compatible brushes on special layers, see “Special layers preferences” on page 826. For information about the Layer compatibility icons,
see “To show or hide the layer compatibility icons” on page 75.
You can also alter the appearance of watercolor by changing the paper texture and modifying the brush controls.
This section contains the following topics:
•“Working with the Watercolor layer” (page 432)
•“Watercolor brushes and paper texture interaction” (page 433)
•“Working with Real watercolor brushes” (page 433)
432 | Corel Painter 2022 User Guide
•“Working with Pigment watercolor brushes” (page 434)
•“Working with Fringe watercolor brushes” (page 434)
Working with the Watercolor layer
Both the Real watercolor and Pigment watercolor brushes paint into a watercolor layer, which enables the colors to flow and mix and
absorb into the paper. In Corel Painter, you can edit the Watercolor layer as you would any other layer without changing anything in the
image layer. For example, you can draw pencil outlines in the image layer and then overlay watercolor shading without smudging the pencil
lines.
You can sketch on one layer and paint with watercolors on a separate Watercolor layer.
You can apply transformations to Watercolor layers without converting them to default layers. For more information about transforming
layers, see “Transforming layers” on page 553.
You can transfer, or lift, information from the canvas to the Watercolor layer. This is useful if you want to apply Watercolor effects to a
photograph. You can also wet the Watercolor layer, which activates a diffusion process.
To create a new Watercolor layer
1Choose Window Layers.
2In the Layers panel, click the Layer options button , and choose New Watercolor Layer.
If you select a Real watercolor or Pigment watercolor brush variant from the Brush library, a Watercolor layer is automatically
created when you apply a brushstroke to the document window.
To transfer the canvas to a Watercolor layer
1Open the image that you want to convert to a watercolor in the document window.
2Choose Window Layers.
If the image contains multiple layers, you can drop all of the layers onto the canvas by clicking the Layer options button in the
Layers panel, and choosing Drop All.
3In the Layers panel, click the Layer options button , and choose Lift Canvas to Watercolor Layer.
Once the layer content is lifted from the canvas, the canvas is blank.
Watercolor | 433
To wet the Watercolor layer
1Choose Window Layers.
2In the Layers panel, click the Layer options button , and choose Wet Entire Watercolor Layer.
To work with a dry surface, click the Layer options button in the Layers panel, and choose Dry Watercolor Layer.
Watercolor brushes and paper texture interaction
The watercolor brushes interact with paper texture and grain — the colors flow, mix, and are absorbed into the paper. The luminance
information of the paper grain is used to determine how the paint diffuses into the paper. It also affects how the pigment settles onto the
paper when it dries.
You can experiment by adjusting the sliders in the Papers panel to see their effect on the watercolor brushes. The Paper Scale slider controls
the size of the grain. The Paper Contrast slider, as it applies to the Watercolor layer, controls the height of the grain surface. Adjusting the
Paper Contrast slider to the right increases the height of the grain and adds more texture as a result. For more information, see “Controlling
brightness and contrast of paper grain” on page 175.
The Scale slider controls the size of the paper grain. The image on
the left is set to 50% and the image on the right is set to 200%.
In addition, the Real watercolor brushes include controls that allow you to further control the paper interaction. For more information, see
“Working with Real watercolor brushes” on page 433.
Working with Real watercolor brushes
The Real watercolor brush variants let you produce very realistic watercolor brushstrokes because they replicate real world watercolor media.
Corel Painter simulates the look and feel of blending pigments with water so they interact with paper in a very natural way. When working
with Real watercolor brushes, the brushstrokes are applied to the Watercolor layer.
Using Real watercolor brush variants
You can get started quickly with the Real watercolor brushes by choosing one of the available brush variants. However, you can also
customize a brush variant by using the Real Watercolor brush controls. For more information, see “Real Watercolor controls” on page 374.
To choose a Real watercolor brush variant
1In the toolbox, click the Brush tool .
2Click the Brush Selector on the Brush Selector bar.
3Click the Watercolor : Real brush category, and click a brush variant.

434 | Corel Painter 2022 User Guide
To customize a Real watercolor brush variant
•Choose Window Brush Control Panels Brush Media Real Watercolor.
For more information about each of the Real Watercolor controls, see “Real Watercolor controls” on page 374.
Working with Pigment watercolor brushes
The Pigment watercolor brush variants produce natural-looking watercolor effects. When working with Pigment watercolor brushes, the
brushstrokes are applied to the Watercolor layer.
Stylus pressure affects the width of the brushstroke for most Pigment watercolor brush variants. Increased pressure widens a brushstroke;
less pressure narrows a stroke.
If too many strokes are made within a short period, particularly with slow-drying brushes, the application can become slower. In this
situation, it is best to wait for the drying process to finish before continuing.
Watercolor Dab Types
For more information about Watercolor Dab Types, see “General controls: Dab types” on page 344.
Water Controls
When you select a Pigment watercolor brush, you can adjust the Water controls which allow you to specify various settings for the Pigment
watercolor brushes. For example, you can adjust brush size, control diffusion, and determine how the paper texture will interact with the
brushstrokes. For more information, see “Water controls” on page 392.
A watercolor stroke before diffusion (left) and after diffusion (right)
To choose a Pigment watercolor brush variant
1In the toolbox, click the Brush tool .
2Click the Brush Selector on the Brush Selector bar.
3Click the Watercolor : Pigment brush category, and click a brush variant.
To customize a Pigment watercolor brush variant
•Choose Window Brush Control Panels Brush Media Watercolor.
For more information about each of the Watercolor controls, see “Water controls” on page 392.
Working with Fringe watercolor brushes
The Fringe watercolor brushes paint directly on both the Canvas layer or a default layer so you can create effects similar to those of
watercolor brushes without using a separate layer.

Watercolor | 435
You can use Fringe watercolor brushes to create effects similar to those produced with watercolor brushes, without
having to create a separate layer. Settings such as Diffusion, Opacity, and Wet Fringe control the appearance of the stroke.
Digital Watercolor Diffusion
Fringe watercolor brushes also use diffusion to create soft, feathery edges on the brushstrokes. You can adjust the amount of diffusion by
using the controls on the property bar.
Wet Fringe
The Wet Fringe slider controls the amount of water pooling and paint at the edges of Fringe watercolor brushstrokes. You can dynamically
adjust the wet fringe on any Fringe watercolor brushstroke before you dry it. Dynamically adjusting the Wet Fringe affects every wet Fringe
watercolor brushstroke, which remains wet until you dry it.
When you’re satisfied with the wet fringe, it’s a good idea to dry Fringe watercolor brushstrokes. This allows you to dynamically adjust the
Wet Fringe on future brushstrokes without affecting existing brushstrokes that you’re satisfied with.
To choose a Fringe watercolor brush variant
1In the toolbox, click the Brush tool .
2Click the Brush Selector on the Brush Selector bar.
3Click the Watercolor : Fringe brush category, and click a brush variant.
To adjust diffusion
1With a Fringe watercolor brush variant selected, adjust the Diffusion slider on the property bar.
Drag the slider to the right to increase diffusion, or to the left to decrease diffusion.
2Apply one or more strokes.
If you would like to restrict the diffusion to a region, make a selection with any selection tool. The diffusion effect will apply only within
the selection.
The Diffusion slider is also accessible from the Digital Watercolor panel. You can open the panel by choosing Window Brush
Control Panels Brush Media Digital Watercolor.
To adjust wet fringe
1Apply one or more strokes with a Fringe watercolor variant.
If you would like to restrict the diffusion to a region, make a selection with any selection tool. The pooling effect will apply only within
the selection.
2On the property bar, adjust the Wet Fringe slider on the property bar.
Drag the slider to the right to increase pooling, or to the left to decrease pooling.

436 | Corel Painter 2022 User Guide
You can also adjust wet fringe before applying brushstrokes by adjusting the Wet Fringe slider.
The Wet Fringe slider is also accessible from the Digital Watercolor panel in the Brush Controls palette. You can open the panel by
choosing Window Brush Control Panels Brush Media Digital Watercolor.
To dry Fringe watercolor brushstrokes
•Choose Layer Dry Digital Watercolor.
After you dry a Fringe watercolor brushstroke, you can no longer adjust its wet fringe.

Particle brushes | 437
Particle brushes
Particle brushes are physics-inspired brushes that give a unique look and feel to your artwork. They emit particles from a central point, and in
turn the particles draw a pattern of lines (paths) as they move across the canvas.
You can control the particle paths with precision or introduce randomness in the brushstroke movement by using the Particle brush controls.
Particle brushes are capable of wide-ranging creative variation when you adjust the parameters of each brush variant.
In addition, you can streamline your workflow by choosing the New Brushes workspace layout, which displays the palettes of the Particle
brushes.
Depending on the movement of the particles around the central point, there are three types of Particle brushes: Gravity, Flow, and Spring
brushes. A dark background is ideal for most of these brushes.
You can use dynamic speckles with Particle brushes for brushstrokes with a different look and feel.
You can set some Particle controls on the property bar. For more information, see “To choose a dab profile using the property bar” on page
325.
This section contains the following topics:
•“Gravity Particle dab types” (page 438)
•“Flow Particle dab types” (page 440)
•“Spring Particle dab types” (page 442)
•“Common Particle brush controls” (page 445)
•“Particles — Thin Lines brush controls” (page 448)
•“Using Dynamic Speckles with Particle brushes” (page 450)
438 | Corel Painter 2022 User Guide
Gravity, Flow, and Spring Particle brushes were used to create smoke and Aurora
Borealis effects in this artwork, as well as to enhance the water reflections.
Gravity Particle dab types
Brushes that use Gravity Particle dab types create sweeping marks that dramatically shrink and grow with movement. The movement of the
particles in a Gravity brush resembles planetary movement, as the particle paths are greatly influenced by velocity, acceleration, and other
forces. Depending on the speed of the stroke, the particles can stay tight within the brushstroke, or they can be pulled apart by forces.
Gravity Particle brushstrokes
Gravity Particle brush controls
You can customize brushes that use Gravity Particle dab types by using the Gravity Particles control panel, which includes the Velocity,
Acceleration, and Spin Rate controls.
Particle brushes | 439
The Velocity slider sets the base speed of all particles. Use it together with the Acceleration slider to control the forward movement of the
particles.
The Acceleration slider sets the distance between particle paths.
Left: Low velocity and acceleration. Right: High velocity and acceleration
A brushstroke with low velocity and acceleration (left) and high velocity and acceleration (right)
The Spin Rate slider sets the speed at which the particles spin around the cursor. Slower spin rates allow the particles to track the cursor
closely, while higher spin rates allow the particles to travel further away from the cursor.
Low spin rate (left) and high spin rate (right)
A brushstroke with low spin rate (left) and high spin rate (right)
You can also associate the spin rate with an expression by choosing an option from the Expression list box. For more information about
Expression controls, see “Expression settings” on page 339. In addition, you can link spin rate to audio input from your microphone, or
internal audio such as streaming music. For more information, see “Audio Expression” on page 340.
Using Audio Expression to vary spin rate
For information about common Particle brush settings, see “Common Particle brush controls” on page 445.
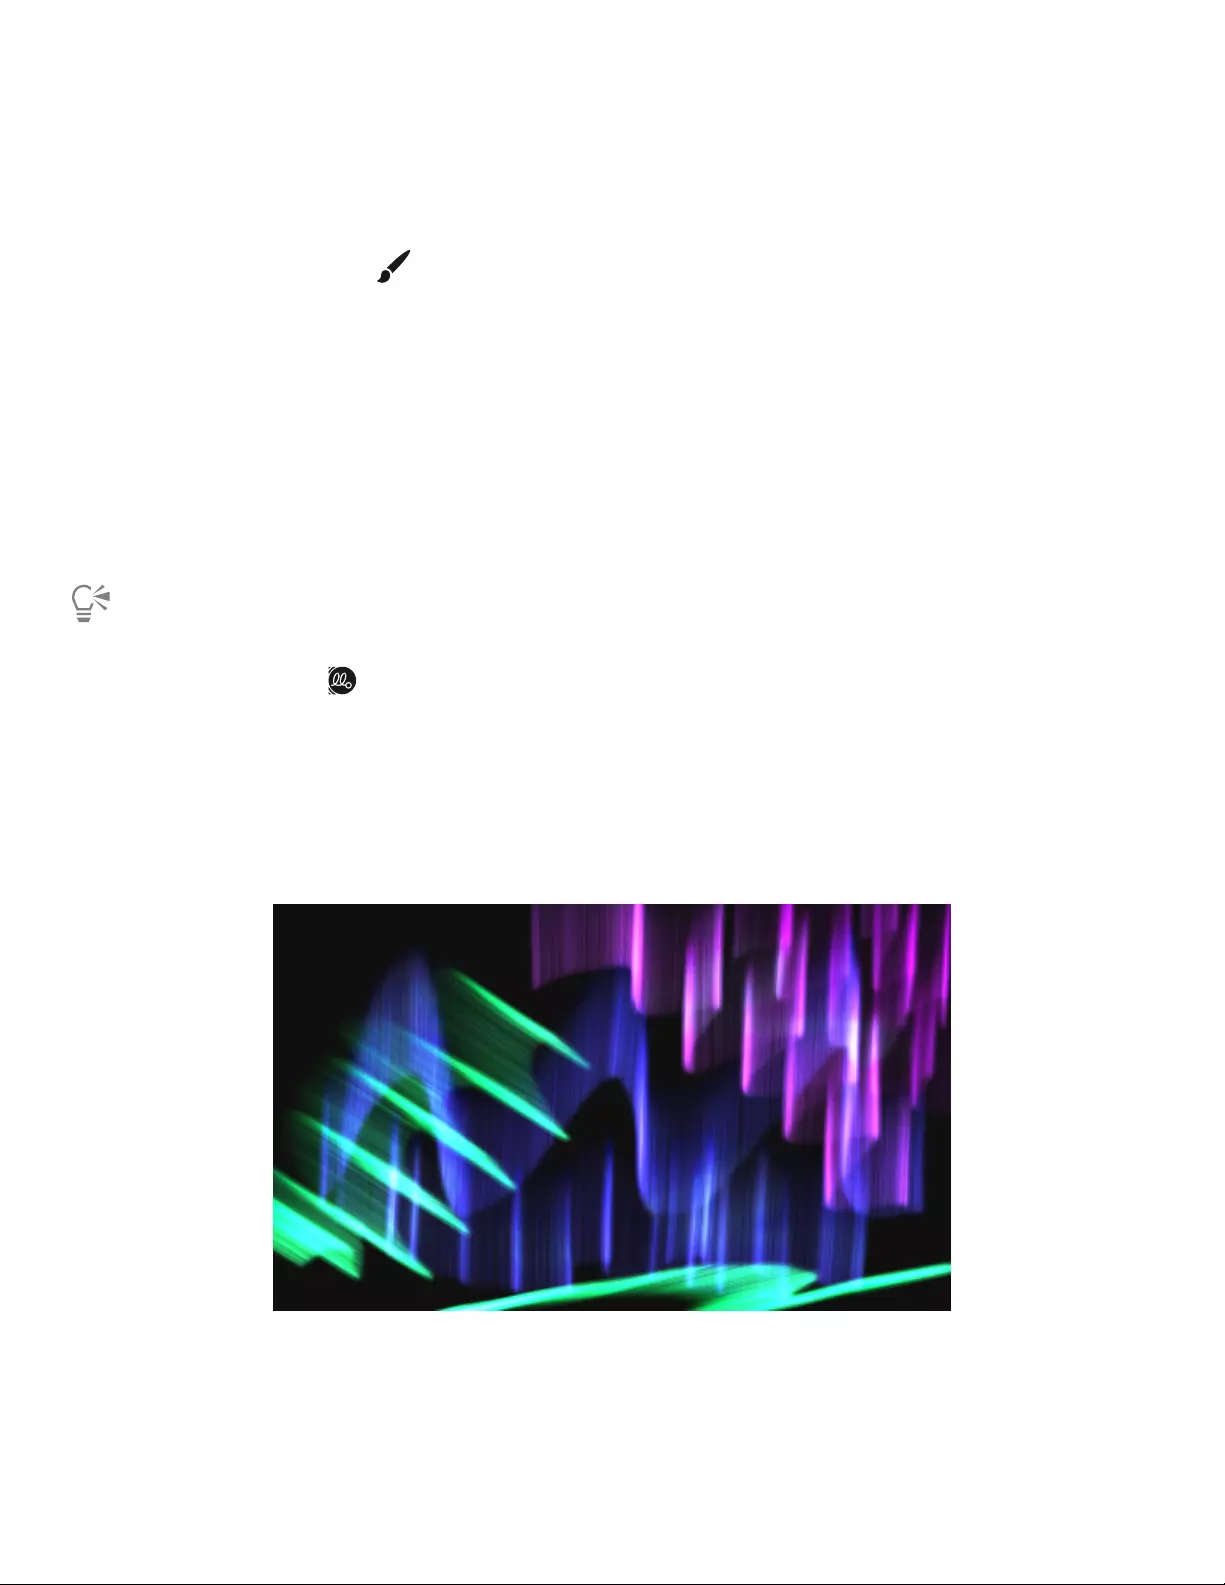
440 | Corel Painter 2022 User Guide
For information about other brush settings, see “Adjusting brushes with brush controls” on page 337.
To choose a brush that uses Gravity Particle dab types
1In the toolbox, click the Brush tool .
2Click Window Search and type gravity particles in the Search text box.
3Choose a brush variant from the list.
To customize a Gravity Particle brush variant
1Choose Window Brush Control Panels Brush Shape Gravity Particles.
2Adjust any of the settings in the Gravity Particles panel.
3Choose Window Brush Control Panels Brush Shape Particles — Common.
4Adjust any of the settings in the Particles — Common panel.
For more information see “Common Particle brush controls” on page 445.
While painting with a brush that uses Gravity Particle dab types, you can quickly access brush controls by clicking the Gravity
Particles flyout button on the property bar.
Flow Particle dab types
Brushes that uses Flow Particle dab types emit short-lived particles that flow out from the center of the brushstroke across the canvas and
gradually fade. Their movement resembles that of fireworks. As they flow, they encounter forces that change their path, resulting in a
chaotic or controlled movement. The Flow brushes are easily influenced by force, chaos, and flow maps. For more information about flow
maps, see “Applying and adjusting flow maps” on page 475.
Flow Particle brushstrokes
Flow Particle brush controls
You can customize brushes that use Flow Particle dab types by using the Flow Particles control panel, which includes the Position Jitter,
Randomize Chaos, and Enhance Flow Map controls.
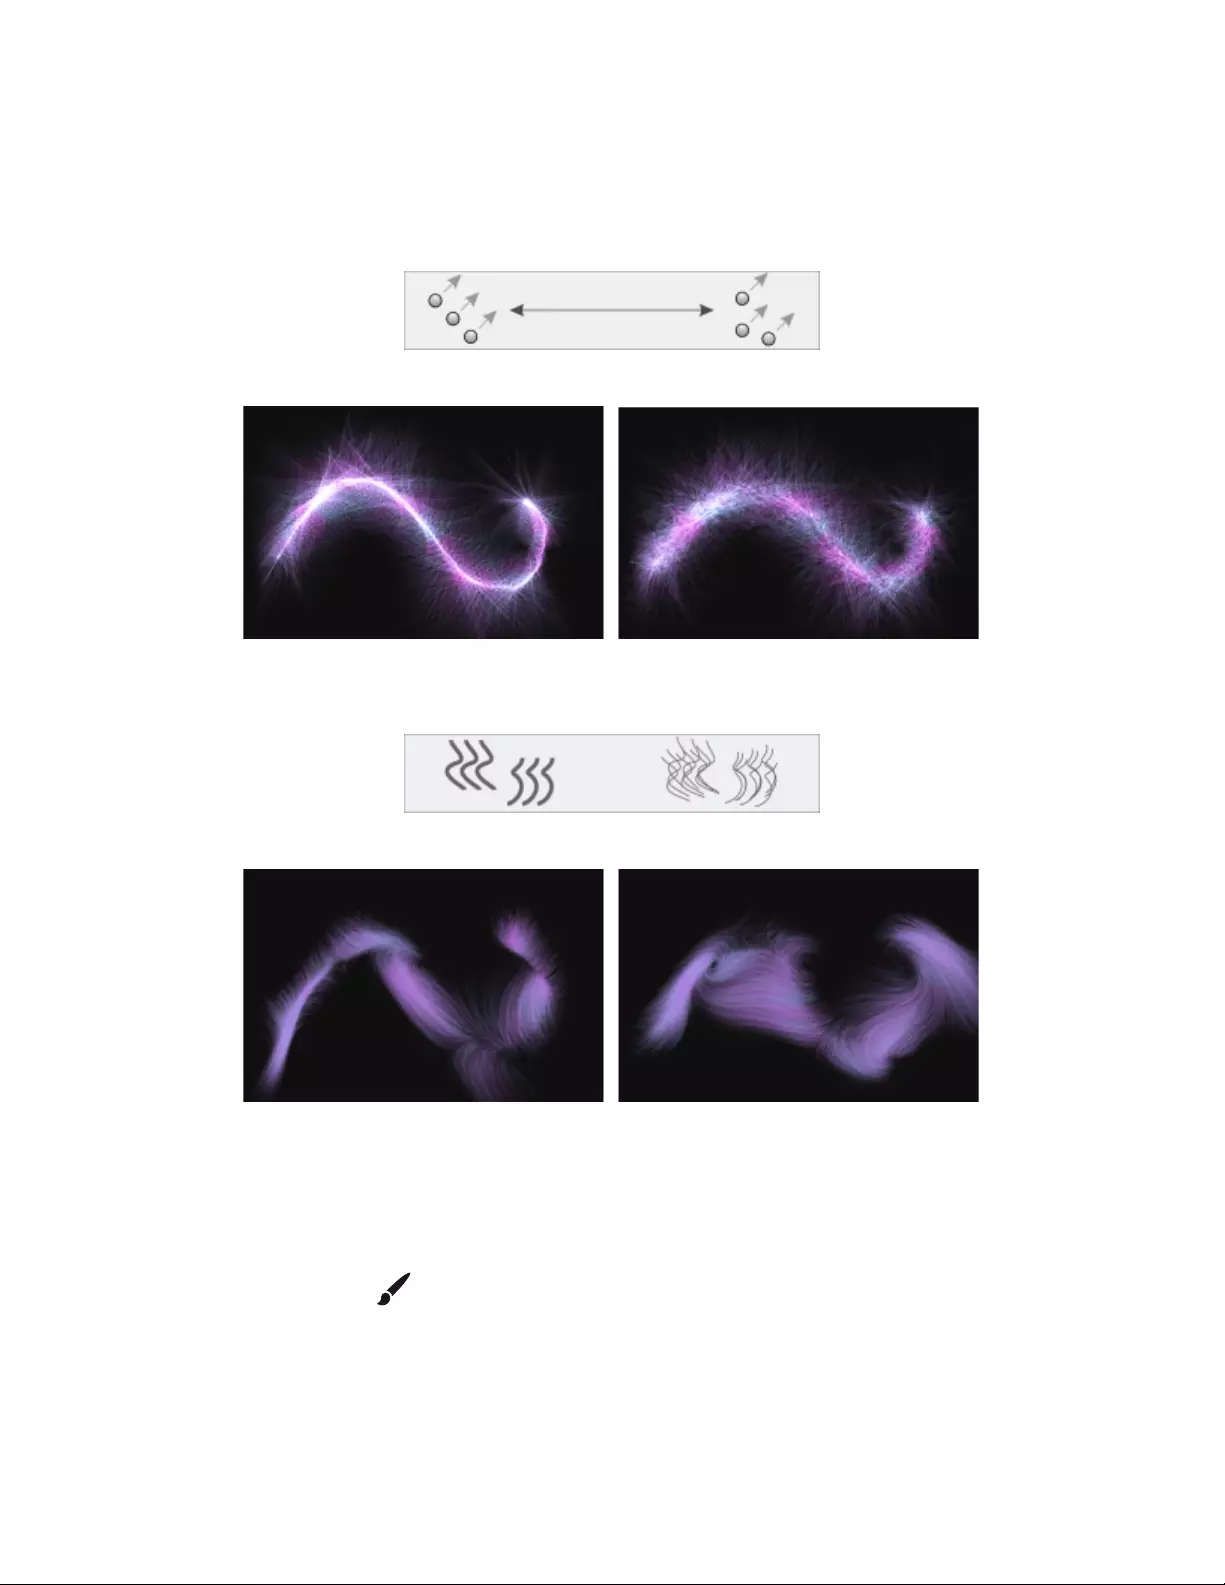
Particle brushes | 441
The Position Jitter slider lets you vary the starting position of the particles. You can also associate the position jitter with an expression by
choosing an option from the Expression list box. For more information about Expression controls, see “Expression settings” on page 339. In
addition, you can link position jitter to audio input from your microphone, or internal audio such as streaming music. For more information,
see “Audio Expression” on page 340.
Low position jitter (left) and high position jitter (right)
A brushstroke with low position jitter (left) and high position jitter (right)
The Randomize Chaos check box lets you change the chaos pattern randomly for a more organic look.
Particle paths before and after applying randomized chaos
A brushstroke with randomized chaos off (left) and on (right)
The Enhance Flow Map controls include the Edge slider and the Brightness slider, which modify the brushstroke based on the edge and
brightness of the flow map.
To choose a brush that uses Flow Particle dab types
1In the toolbox, click the Brush tool .
2Click Window Search and type flow particles in the Search text box.
3Choose a brush variant from the list.
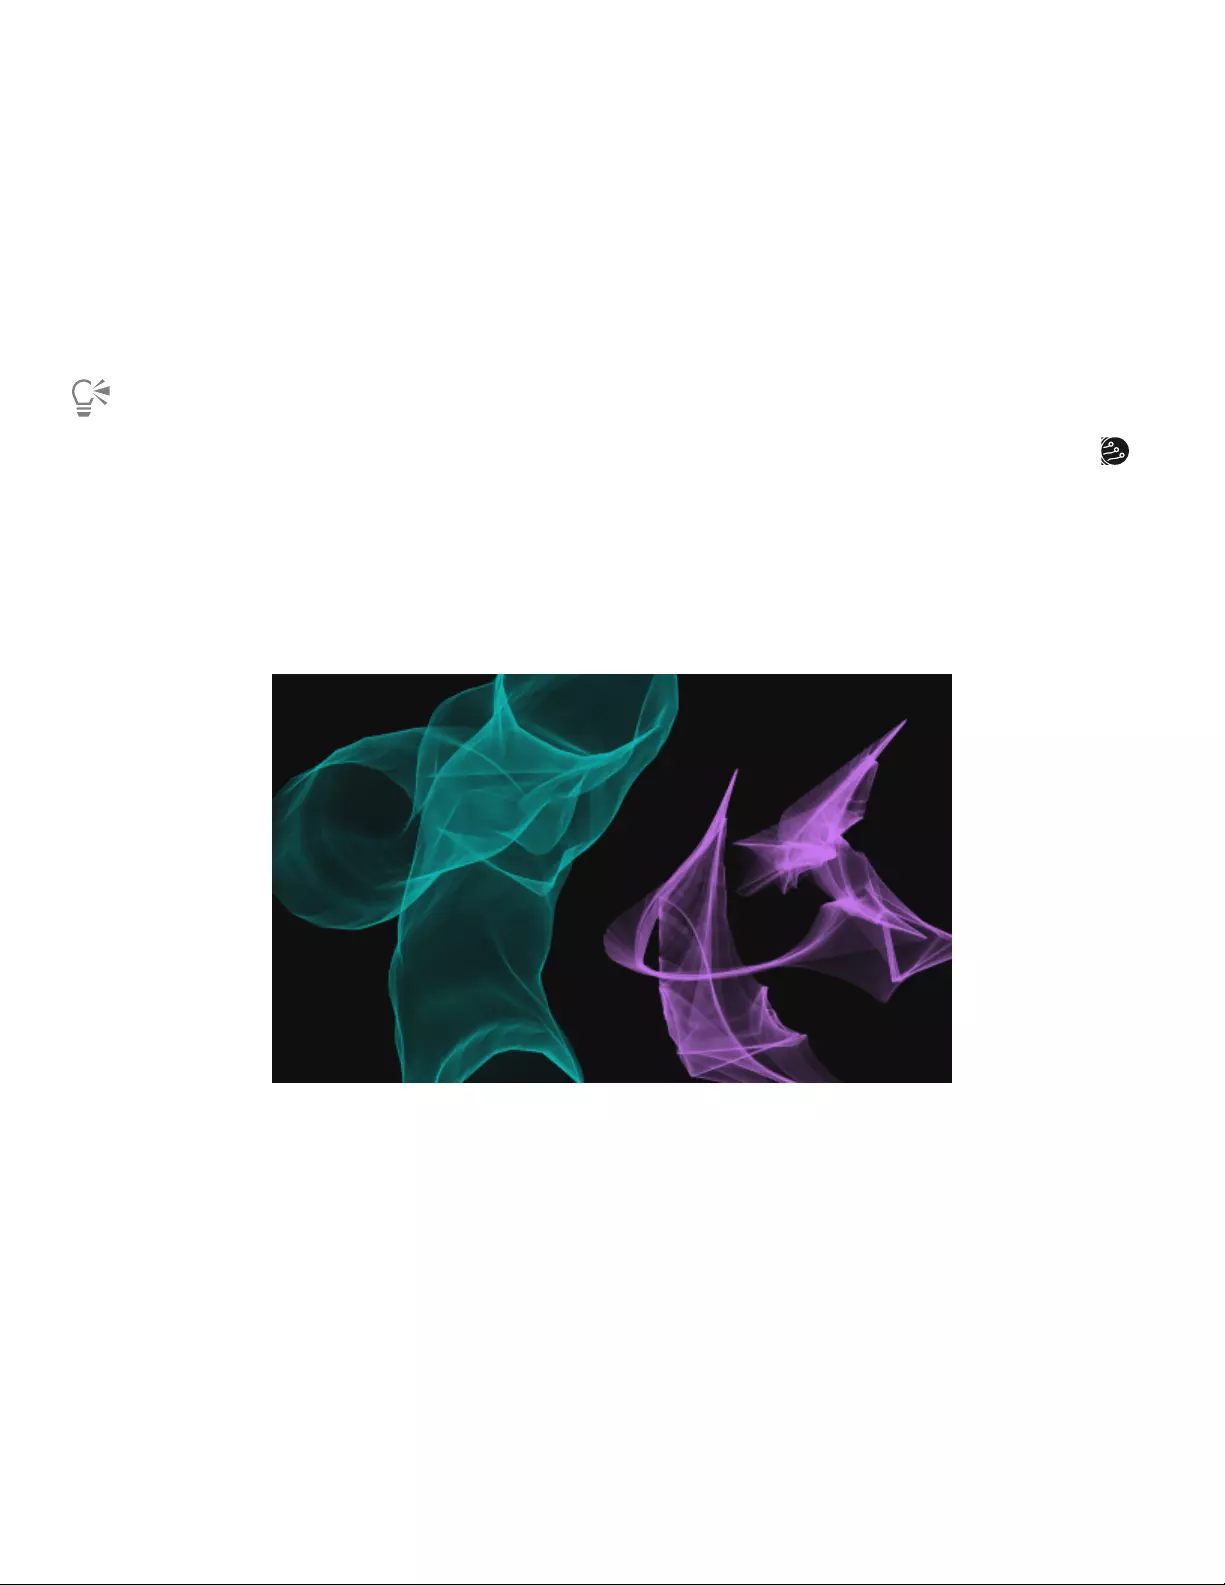
442 | Corel Painter 2022 User Guide
To customize a Flow Particle brush variant
1Choose Window Brush Control Panels Brush Shape Flow Particles.
2Adjust any of the settings in the Flow Particles panel.
3Choose Window Brush Control Panels Brush Shape Particles — Common.
4Adjust any of the settings in the Particles — Common panel.
For more information see “Common Particle brush controls” on page 445.
While painting with a Flow Particle brush, you can quickly access brush controls by clicking the Flow Particles flyout button
on the property bar.
Spring Particle dab types
Brushes that use Spring Particle dab types consist of a net of particles held together by elastic springs. Since the particles are connected
to each other, they don’t spread out across the canvas but bounce back toward the center of the brushstroke. The brushstroke mark is
determined by the individual paths of the particles and the flexibility of the springs between them.
Spring Particle brushstrokes
Spring Particle brush controls
You can customize brushes that use Spring Particle dab types by using the Spring Particles control panel, which includes the Appearance,
Stiffness, Stiffness Jitter, Length Jitter, and Minimum Length controls.
The Appearance controls let you choose a Nucleus, Chain, or Geometric appearance for the particle pattern.
•Nucleus — Particles spring outward from the brush path.
•Chain — A chain of particles whips around the brush path.
•Geometric — Particles form a geometric shape around the brush path.
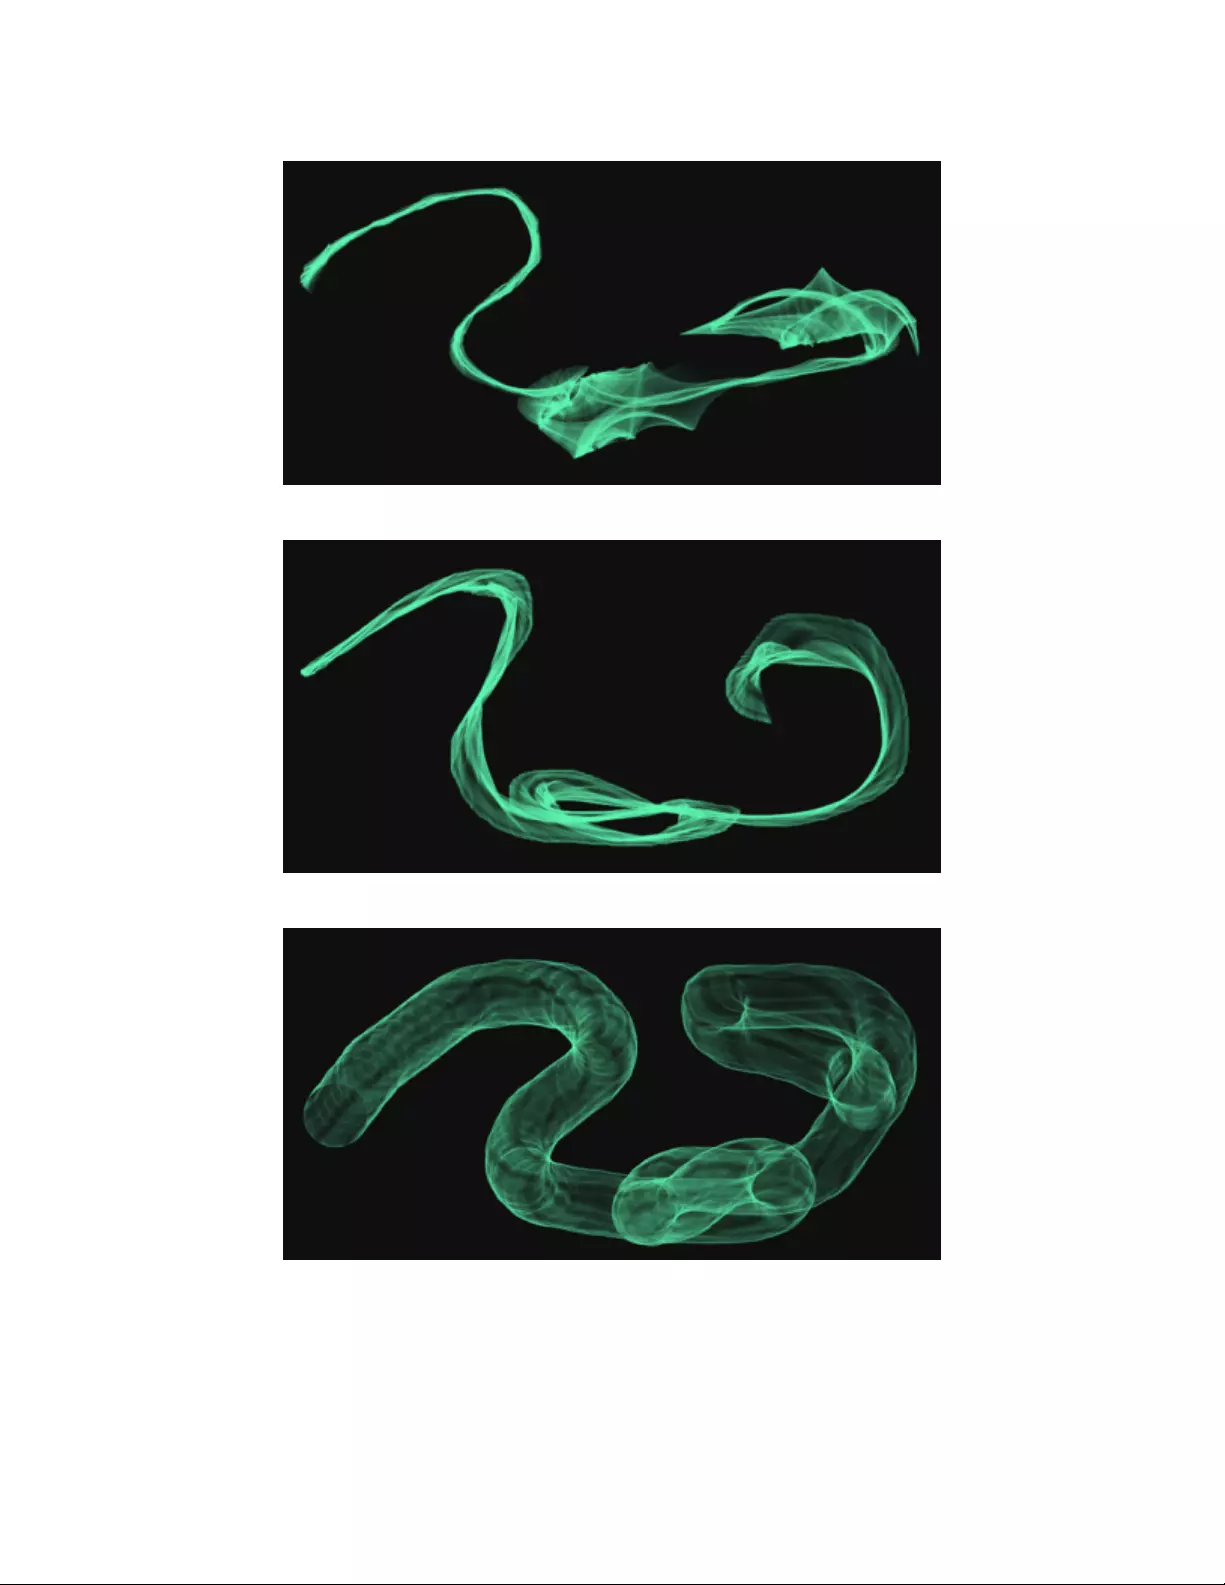
Particle brushes | 443
A brushstroke with Appearance set to Nucleus
A brushstroke with Appearance set to Chain
A brushstroke with Appearance set to Geometric
The Random Length slider randomly varies the length of individual springs. Once adjusted, the lengths remain constant during the
brushstroke.
444 | Corel Painter 2022 User Guide
Low random length (left) and high random length (right)
A brushstroke with low random length (left) and high random length (right)
The Stiffness slider controls the strength of the springs. Low values produce more relaxed springs, which allows the particles to move more
freely in relation to each other. You can also associate the stiffness with an expression by choosing an option from the Expression list box.
The Stiffness Jitter slider randomly varies the strength of individual springs.
Low stiffness (left) and high stiffness (right)
A brushstroke with low stiffness (left) and high stiffness (right)
You can also link stiffness to audio input from your microphone, or internal audio such as streaming music. For more information, see
“Audio Expression” on page 340.
Using Audio Expression to vary stiffness
The Minimum Length slider sets the initial length of the springs. Low values allow springs to stretch more.

Particle brushes | 445
Low minimum length (left) and high minimum length (right)
A brushstroke with low minimum length (left) and high minimum length (right)
To choose a brush that uses Spring Particle dab types
1In the toolbox, click the Brush tool .
2Click Window Search and type spring particles in the Search text box.
3Choose a brush variant from the list.
To customize a Spring Particle brush variant
1Choose Window Brush Control Panels Brush Shape Spring Particles.
2Adjust any of the settings in the Spring Particles panel.
3Choose Window Brush Control Panels Brush Shape Particles — Common.
4Adjust any of the settings in the Particles — Common panel.
For more information see “Common Particle brush controls” on page 445.
While painting with a brush that uses Spring Particle dab types, you can quickly access brush controls by clicking the Spring
Particles flyout button on the property bar.
Common Particle brush controls
Brush controls common to all Particle brushes are accessible through the Particles — Common control panel.
The Count slider sets the number of particles in a brushstroke, and in turn the number of paths rendered during the stroke.
Low count (left) and high count (right)
446 | Corel Painter 2022 User Guide
A brushstroke with low count (left) and high count (right)
The Global Chaos slider applies chaos to all particles equally, so that they move chaotically but in unison. The Local Chaos slider randomly
applies chaos to individual particles in the brush. The Smoothness slider smooths the chaos for a more organic look. You can also associate
global and local chaos with an expression.
Global chaos (left) and local chaos (right)
A brushstroke with low chaos (top), high global chaos (lower-left) and high local chaos (lower-right)
Smoothness applied to chaos
Particle brushes | 447
A brushstroke with high chaos, low smoothness (left) and high chaos, high smoothness (right)
The Damping slider allows or inhibits particle movement. Low damping allows particles to move faster and be more responsive to any forces
affecting their movement. High damping reduces all forces affecting particle movement, and the movement itself becomes slow and heavy.
The Damping Jitter slider applies damping at random to individual particles.
Damping applied to particle movement
A brushstroke with low damping (left) and high damping (right)
The Force slider applies global directional force to all particle movement. The effect is similar to the effect of wind on watercolor. The
Direction slider sets the direction of the global force in degrees. You can also associate force and direction with an expression.
Left: Low force, direction at 0. Right: High force, direction at 90.
A brushstroke with low force, direction 0 (left) and high force, direction 90 (right)
448 | Corel Painter 2022 User Guide
The Flow Map slider sets the degree to which particle movement is affected by the flow map. For more information about flow maps, see
“Applying and adjusting flow maps” on page 475.
A brushstroke without (left) and with (right) a flow map applied
You can link force, direction, global chaos, and local chaos to audio input from your microphone, or internal audio such as streaming music.
For more information, see “Audio Expression” on page 340.
Using Audio Expression to vary force
Using Audio Expression to vary direction
Using Audio Expression to vary global chaos
Using Audio Expression to vary local chaos
To access the common Particle brush controls
1Choose Window Brush Control Panels Brush Shape Particles — Common.
2Adjust any of the settings in the Particles — Common panel.
Particles — Thin Lines brush controls
Particle brushes emit particles from a central point, and in turn the particles draw a pattern of lines (paths) as they move across the canvas.
You can adjust the appearance of the lines by using the controls on the Particle — Thin Lines brush panel. The lines of Particle brushes that
use dynamic speckles can be adjusted by using the Dynamic Speckles panel. For more information, see “Using Dynamic Speckles with
Particle brushes” on page 450.
Particle brushes | 449
The Glow check box makes particles shine, with colors building up to white. A dark background is required.
The Weight slider sets the opacity of particle paths. Use it together with Weight Jitter to add depth and dimension to rendered paths. The
Weight Jitter slider randomly varies the opacity of individual particle paths.
Weight applied to a particle path
A brushstroke with low weight (left) and high weight (right)
Weight jitter applied to individual paths
A brushstroke with low weight jitter (left) and high weight jitter (right)
In addition, the Particles — Thin Lines panel includes two controls to adjust the opacity of Spring Particle brushes.
The Path Opacity slider sets the opacity of the particle path (the mark that each particle makes on the canvas).
The Spring Opacity slider sets the opacity of the springs (the links between the particles).
Left: High path opacity, zero spring opacity. Right: High spring opacity, zero path opacity.
450 | Corel Painter 2022 User Guide
A brushstroke with high path opacity, low spring opacity (left) and low path opacity, high spring opacity (right)
To access the Particles — Thin Lines brush controls
1Choose Window Brush Control Panels Brush Media Particles — Thin Lines.
2Adjust any of the settings in the Particles — Thin Lines panel.
While painting with a Particle — Thin Lines brush, you can quickly access brush controls by clicking the Particles — Thin Lines flyout
button on the property bar.
Using Dynamic Speckles with Particle brushes
Some Particle brushes can be used with dynamic speckles to create thicker, more pronounced brushstrokes. Dynamic speckles generate a
continuous brushstroke from discrete spots of color or speckles. The speckles in the brushstroke are truly dynamic — they are generated as
you paint.
To use dynamic speckles, you must choose a Dynamic Speckle dab type from the General brush control panel (Window Brush Control
Panels General). For more information, see “Dynamic Speckles controls” on page 413.
A Flow Particle brushstroke (left) and a Dynamic Speckle Flow Particle brushstroke (right)
A Gravity Particle brushstroke (left) and a Dynamic Speckle Gravity Particle brushstroke (right)

Particle brushes | 451
A Spring Particle brushstroke (left) and a Dynamic Speckle Spring Particle brushstroke (right)

452 | Corel Painter 2022 User Guide

Texture painting | 453
Texture painting
Corel Painter lets you paint with Texture brushes that create the appearance of surface texture. This brush category with source-blending
technology makes it easy to integrate complex textures into your work. Whether you’re aiming for a look that is more lifelike or one that’s
completely futuristic, or you want to make a digital painting look authentically timeworn, Texture Painting offers limitless possibilities.
Blend a texture into your painting to simulate cracked or peeling paint. Artwork by Cher Pendarvis.
3D artists can import a rendered version of a 3D model into Painter and add textures or perform touch-up work with Painter tools.

454 | Corel Painter 2022 User Guide
A 3D model is rendered into a 2D bitmap image (left); Texture is added to the image in Corel
Painter to give the character more appeal and realism (right). Artwork by Mike Thompson.
Artists who start in grayscale can take their works to the next level by blending different textures into their grayscale paintings.
Texture painting | 455
A grayscale illustration (top); a texture is blended into the tree (bottom). Artwork by Justin Buus.
Texture Painting isn’t simply manipulating a layer’s opacity. It lets you intelligently blend a texture into existing content using a range of
stylus expressions, such as pressure. It respects the transparency of the selected texture, giving you full control of when, where, and how
much texture is used. You start by choosing or creating a texture and pairing it with brushes designed specifically for adding texture. And
by combining Texture brushes, flexible brush customization options, and the ability to capture and import your own textures, you can add
any number of surfaces styles to your work. You can even add Dab Stencils, grain, and smudging to the brushes with all the speed, precision
and control you expect from Painter. In addition, you can make your own custom textures from scratch or by modifying a preset texture. For
more information about textures, see “Textures” on page 463.
This section includes the following topics:
•“Painting with textures” (page 455)
•“Customizing Texture brushes” (page 457)
Painting with textures
Texture painting lets you add textures to your projects by taking the color and luminance components of a source image — the texture —
and transposing them onto another surface — your painting — using different brush methods. Texture painting works with brushes that use
any of the following dab types: Circular, Computed Circular, Captured, Single-Pixel, Dynamic Speckle Bristle, and Particle types (Flow, Gravity,
and Spring).
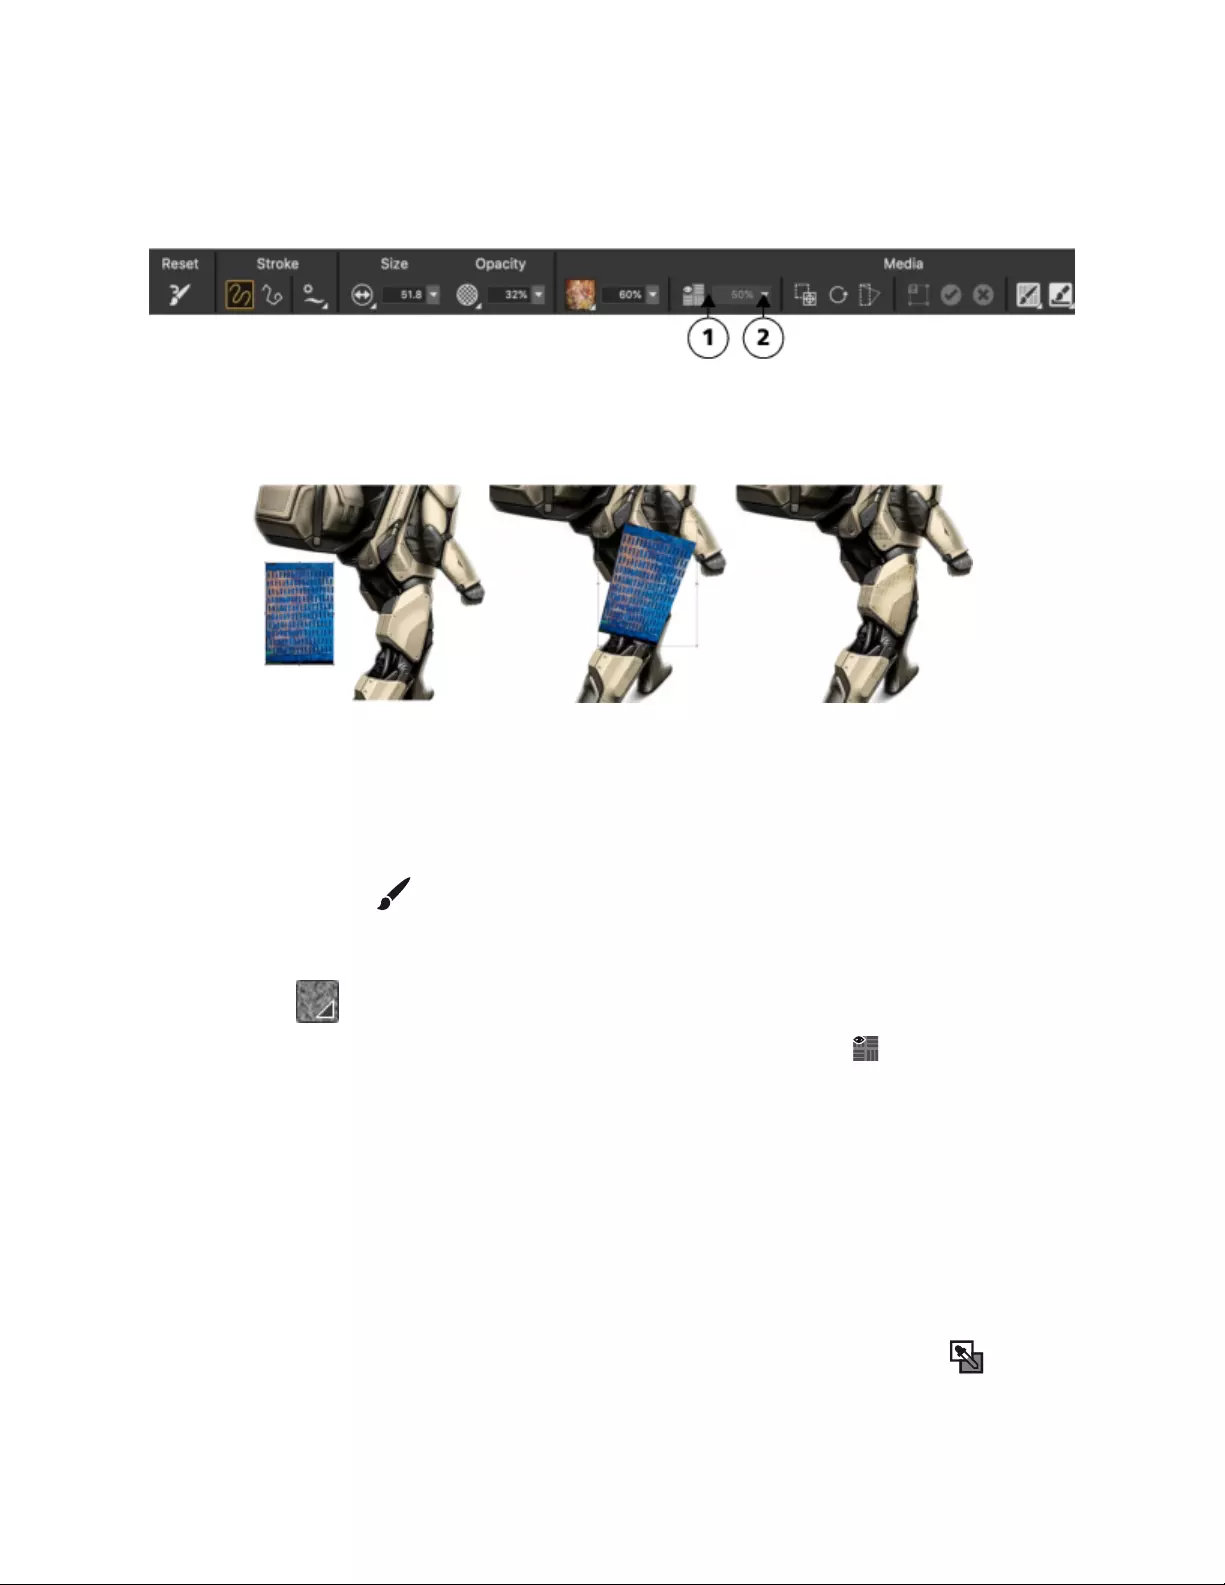
456 | Corel Painter 2022 User Guide
You can display a representation of the texture onscreen to help you move it, position it precisely, and manipulate it in relation to the
underlying brushstrokes or image. In addition, you can control how much of the underlying image you see through a texture. If you don’t
want to see the texture or it’s obscuring your ability to paint, you can hide it.
You can quickly adjust the visibility of a texture by using the controls on the property bar. (1) Show Texture button; (2) Visibility slider.
Before you apply a texture, you can modify its appearance to suit your composition and concept. For more information, see “Transforming
and editing textures” on page 469.
From left to right: original texture; the texture after distorting; the texture is blended into a model. Model by Erik Holmen.
When you apply textures, you can specify how Texture brushes interact with previously applied brushstrokes. For more information, see
“Customizing Texture brushes” on page 457.
To paint with a texture
1In the toolbox, click the Brush tool .
2Click the Brush Selector on the Brush Selector bar.
3Click a Texture brush category and a brush variant.
4Click the Texture selector on the property bar, and click a texture.
If you can’t see a representation of the texture in the document window, click the Show Texture button on the property bar.
5Choose settings from the property bar.
6Perform a task from the following table.
To paint on Do the following
The canvas Select the canvas in the Layers panel.
A layer Select a layer in the Layers panel.
Note: If you are painting with a brush that uses Source Blending,
click the Pick Up Underlying Color button . For information
about source blending, see “Blend the texture with the underlying
image” on page 460.
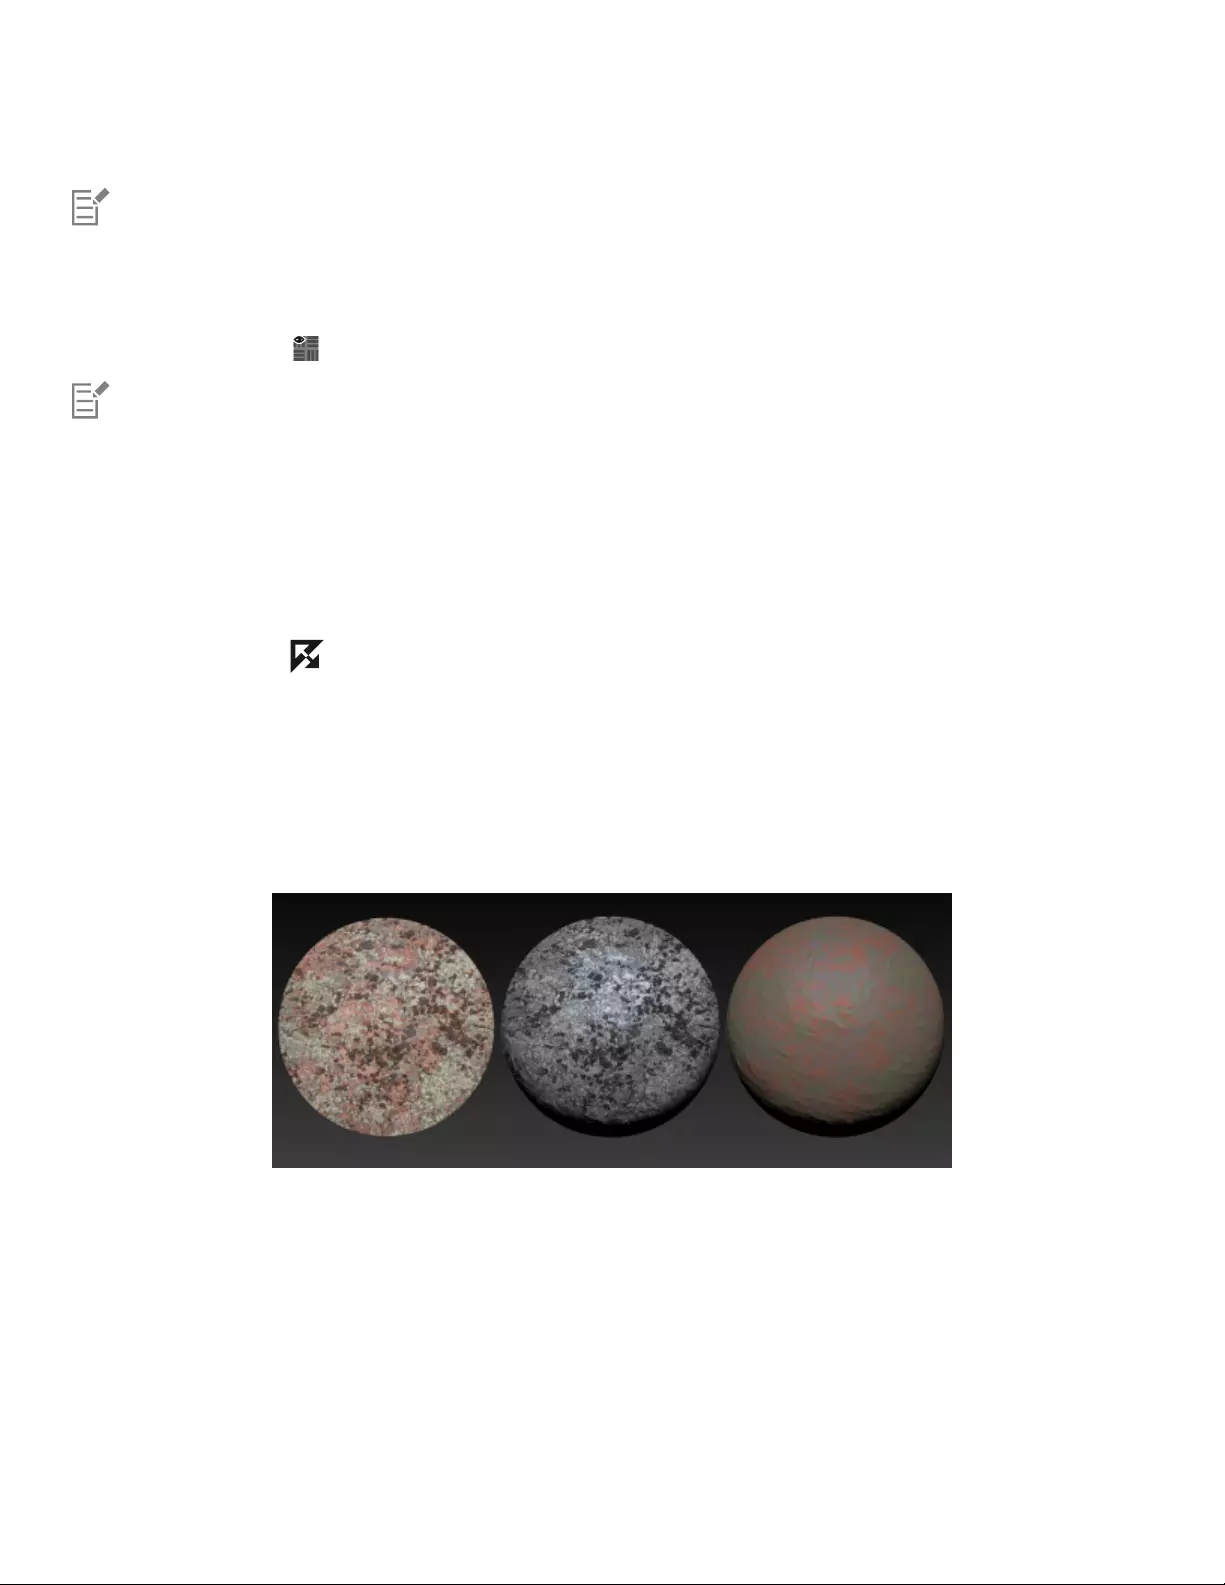
Texture painting | 457
7Paint in the document window.
For information on creating, importing, transforming, and modifying textures, see “Textures” on page 463.
To show or hide the display of textures
•Click the Show Texture button on the property bar.
You can assign a shortcut key to this command. For more information, see “Customizing keys” on page 132.
To control texture visibility
• On the property bar, move the Visibility slider, or type a percentage in the Visibility box.
A low value reveals more of the underlying brushstrokes.
To invert a texture
•Click the Invert Texture button.
Customizing Texture brushes
To quickly get started with texture painting, choose any of the brush variants available in the Texture Cover and Texture Source Blending
brush categories. In addition, Corel Painter gives you full control to create custom Texture brushes.
There are a number of different methods that allow you to specify whether a Texture brush uses the color, luminance, or both the color and
luminance information of a selected texture and whether it interacts with paper grain.
An example of a Texture brush variant (left), a Grainy Texture Luminance
brush variant (middle), and a Grainy Texture Chroma variant (right)
You can control the amount of texture that a brushstroke reveals.

458 | Corel Painter 2022 User Guide
A brush with (left) 50% Strength and (right) 100% Strength
You can also specify how Texture brushes interact with paint already applied to the canvas. For example, Texture brushes can either cover or
blend with the underlying image to create amazing effects.
A 3D rendered model (left); a texture is blended into the image (right). Model by Mike Thompson.
Texture brushes can use the original texture color or mix the texture color with a different color. For example, if the texture that you want
to use doesn’t match the tone and color of your composition, you can sample a color from your painting and mix it with the texture color.
You can choose an expression such as pressure, tilt, direction to vary the amount of color you mix into the texture. For more information, see
“Expression settings” on page 339.
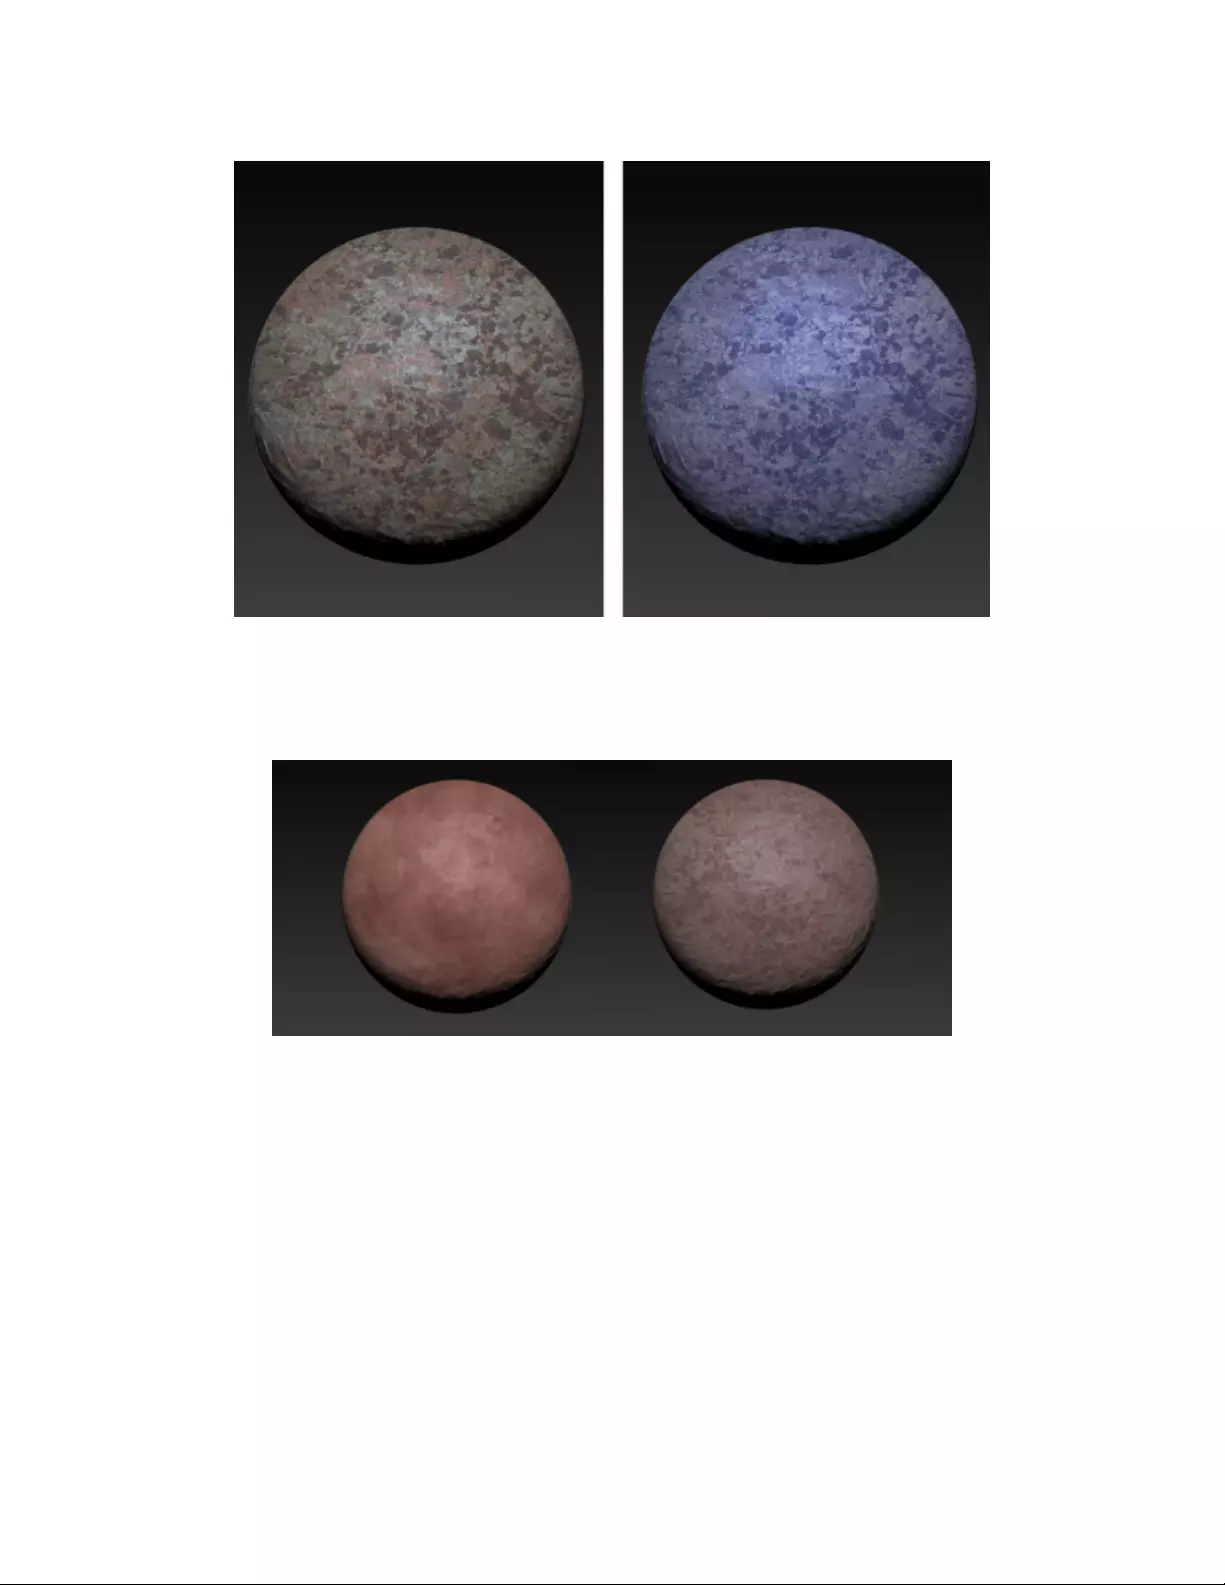
Texture painting | 459
An example of a Texture brush that uses the original texture color (left). The original texture color is mixed with the selected color (right).
You can smudge a texture. Smudging reveals a little of the current texture as you push, pull, and smear pixels. You can choose a fixed
amount of smudging or vary the effect with an expression. For example, if you link smudging to stylus pressure, light pressure will reveal
more texture detail, increased pressure will reveal less detail.
An example of a Texture brush with smudging (left) and without smudging (right)
For even more astonishing results, you can use dab stencils to shape the dab and modify the opacity of Texture brushes. For information
about dab stencils, see “Dab Stencil controls” on page 416.
Texture brushes can have depth and support the impasto Depth and Color and Depth drawing methods. Corel Painter uses the luminance
(brightness) information in the texture to determine how much depth is applied within a stroke. Light areas of the texture receive more
depth; dark areas receive less. Black areas appear flat. For more information about impasto methods, see “Adjusting and creating Impasto
brushes” on page 530. You can add or remove depth, and control the effect by manipulating the lighting of the painted result. Add depth
to Texture brushes to create pores on skin, scales on a lizard, thick brick walls, and prickly pebble board.
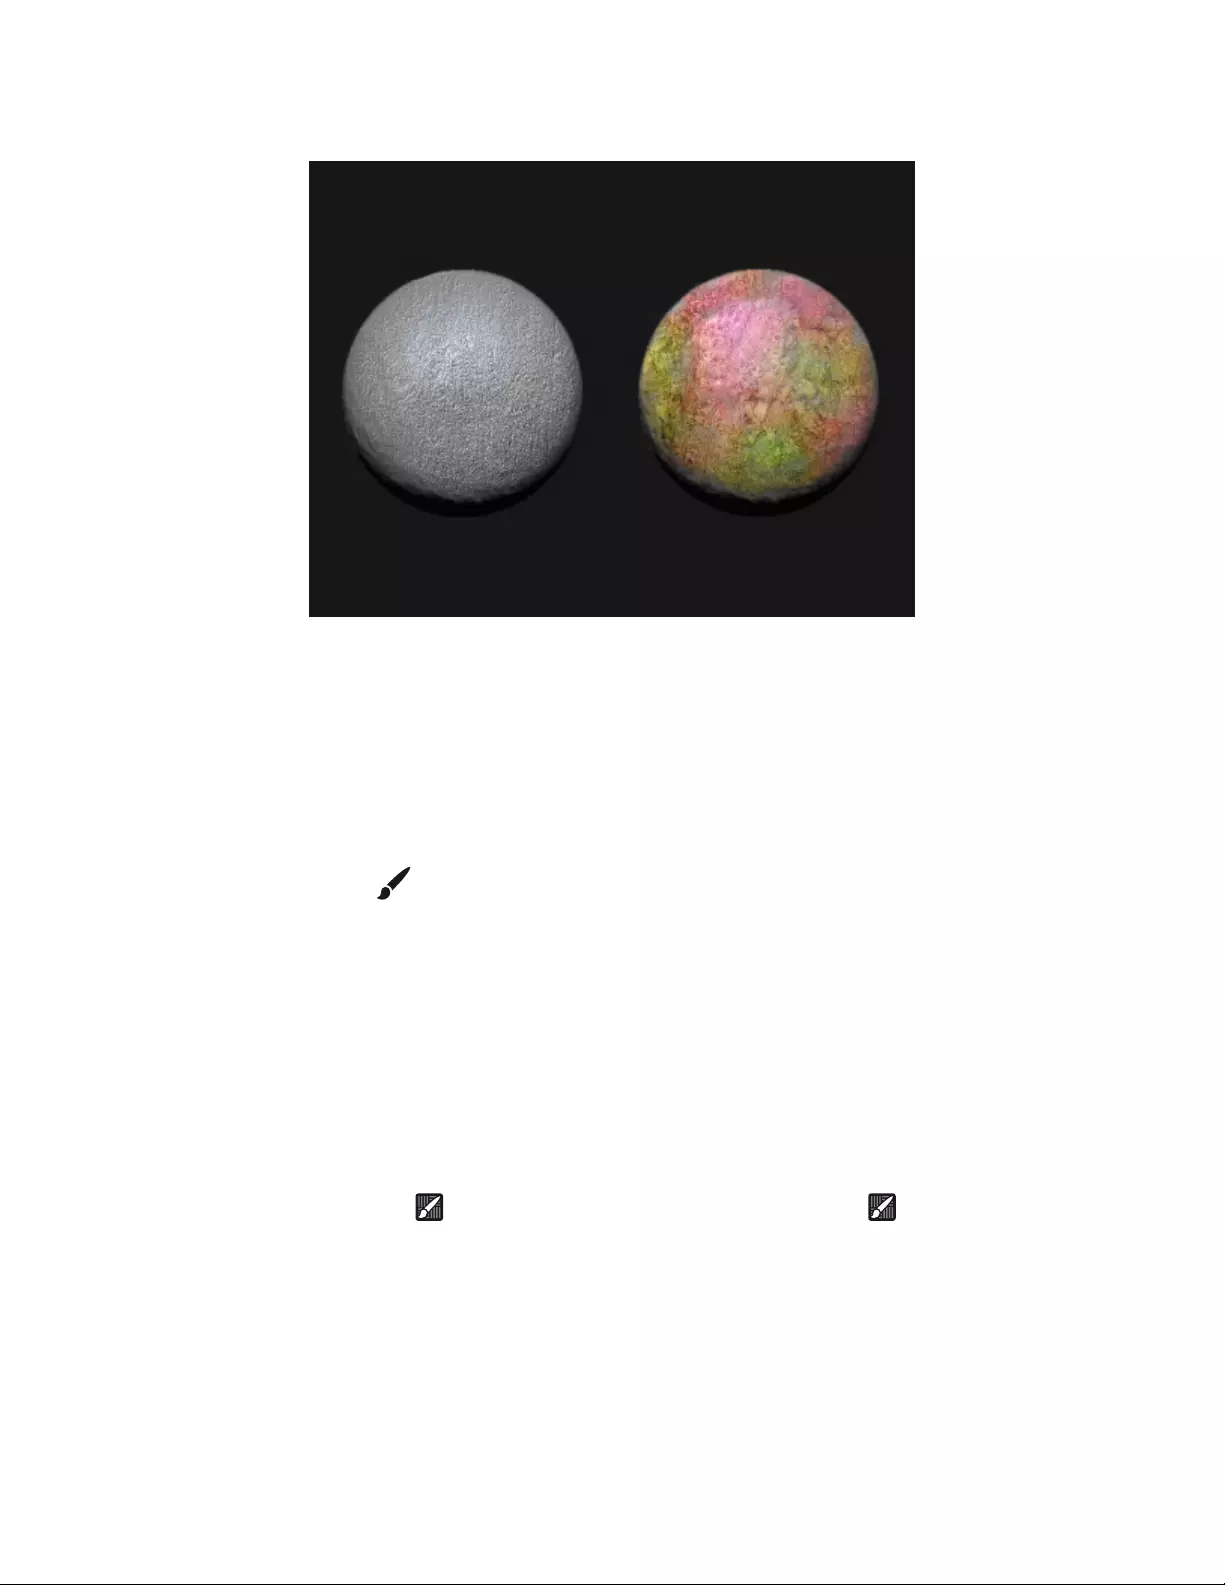
460 | Corel Painter 2022 User Guide
An example of a Texture brush that uses the impasto Depth method (left) and the impasto Color and Depth method (right)
Experiment with different brush settings to produce the effect you like. Texture brush settings are saved as part of a brush variant or applied
to any active brush. For more information, see “Adjusting brushes with brush controls” on page 337.
After you customize a Texture brush variant, you can associate it with a texture and save it as a brush look for use in future projects. When
you save a look, it is added to the Look Libraries panel. For more information, see “Saving a brush look” on page 333.
To customize a Texture brush
1In the toolbox, click the Brush tool .
2Click the Brush Selector on the Brush Selector bar.
3Click a Texture brush category and a brush variant.
4On the General panel (Window Brush Control Panels General), choose one of the following methods from the Subcategory list
box:
•Texture — uses both the color and luminance information of the texture
•Grainy Texture — works like Texture but also interacts with paper grain
•Texture Luminance — uses only the luminance (lighting) information of the texture
•Grainy Texture Luminance — works like Texture Luminance but also interacts with paper grain
•Texture Chroma — uses only the color information of the texture
•Grainy Texture Chroma — works like Texture Chroma but also interacts with paper grain
5Click the Texture Brushes flyout button on the property bar, and click Texture Brushes Panel .
6In the Texture Brushes panel, perform a task from the following table.
To Do the following
Set the maximum amount of texture a brushstroke reveals Move the Strength slider.
Blend the texture with the underlying image Enable the Source Blending check box.

Texture painting | 461
To Do the following
Control the color of a texture Enable the Color Control check box. Enable one of the following
options:
•Current Color — lets you mix the original texture color with the
selected color
•Texture Color — lets you use the original texture color
Tips:
•To control the amount of color you apply with a brushstroke,
move the Amount slider.
•You can choose an expression such as pressure, tilt, direction to
vary the amount of color mixed into the texture.
Notes:
•The Color Control option is not available for brushes that use the
Texture Chroma or Grainy Texture Chroma methods.
•The Texture Color option is available only for brushes that use
the Texture Luminance and Grainy Texture Luminance methods.
Smudge a texture Enable the Texture Smudging check box. Move the Amount slider
to adjust the smudging amount.
Tip:
•To link texture smudging to an expression such as pressure, tilt,
direction, choose an option from the Expression list box.
You can also
Add depth to a Texture brush In the Impasto panel (Window Brush Control Panels Brush
Media Impasto), enable the Paint with Depth check box, choose
one of the following drawing methods from the Type list box:
•Color and Depth
•Depth Only
From the Depth Method list box, choose Texture Luminance to
use the texture luminance to control the appearance of depth. Drag
the Depth slider to the right to increase depth, or to the left to
decrease it.
Tips:
•To adjust the appearance of depth, click Canvas Surface
Lighting, and adjust the sliders in the Appearance of Depth
area.
•To adjust the ambient and directional lighting, click Canvas
Surface Lighting, and experiment with the controls in the
Ambient Lighting and Directional Lighting area, respectively.
For detailed information about the impasto depth controls, see
“Adjusting and creating Impasto brushes” on page 530.
When painting with brushes that use Source Blending, you may notice overlaps when you overlay brushstrokes. To paint without
overlaps, in the Texture Brushes panel, disable the Source Blending option and set the texture Strength to 100%. In the Layers

462 | Corel Painter 2022 User Guide
panel, add a new layer, and choose the Overlay method from the Composite Method list box. Move the Opacity slider to adjust
the intensity of the brush marks. This workflow produces results that are very similar to Source Blending.

Textures | 463
Textures
Textures are an essential tool in digital painting. Whether you are an illustrator, character designer, concept artist, or photography hobbyist,
Corel Painter can help you integrate intricate textures into your projects, add detail to your marks, and expand your creativity. You can
add textures to the sky, land, and sea and paint nature scenes and environments. You can use textures to create the look of pores, scales,
feathers, fur and add realism to your characters. Whether it’s wood, glass, or metal, textures can simulate the appearance of materials.
Aging textures can add natural-looking cracks and breaks to your paintings.
You can use textures in texture painting. For more information, see “Texture painting” on page 453.
A 3D model is rendered into a 2D bitmap image (left); Texture is added to the image in Corel
Painter to give the character more appeal and realism (right). Artwork by Mike Thompson.
You can also use textures in photo painting. For more information, see “To use a texture as a clone source” on page 201.
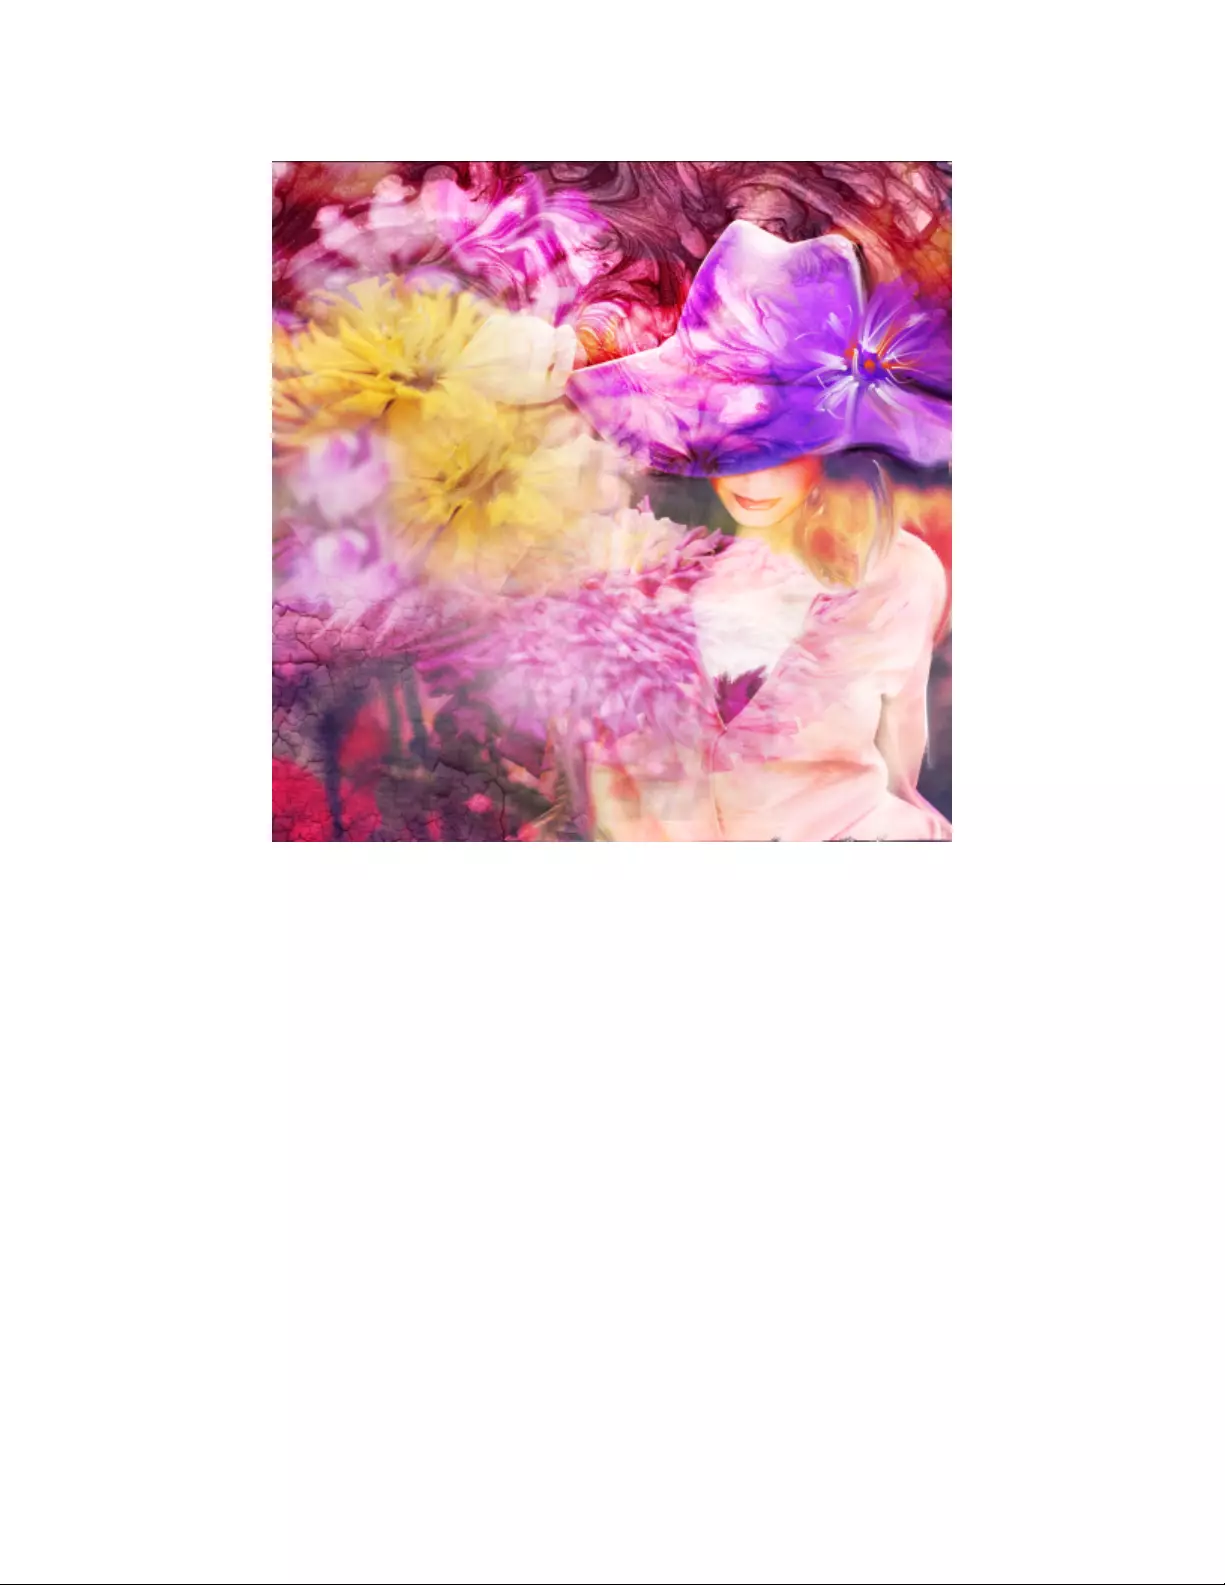
464 | Corel Painter 2022 User Guide
Photo artists can use textures in collages for creative impact. Artwork by Mandy McMahan.
Explore the collection of textures in Corel Painter to find some interesting and useful textures that can spark ideas for your work, create your
own custom textures, or import your library of content assets that you have built up over time.
Whether you choose a texture from the library of preset textures available in the application or create your own texture, Corel Painter
provides powerful controls that let you synthesize, manipulate, and modify textures to achieve dramatic and unique effects.
This section includes the following topics:
•“Creating textures” (page 464)
•“Transforming and editing textures” (page 469)
•“Applying textures as fills” (page 470)
•“Using textures in photo painting and image compositing” (page 472)
•“Working with Texture libraries” (page 472)
Creating textures
You can use the preset textures provided with Corel Painter. In addition, you can import or create custom textures.
You create a texture by capturing the canvas or a layer. You can also create a texture from a selected area in an image. Textures are saved in
the Corel Painter texture library format.

Textures | 465
You can also create a texture by using Texture synthesis. The effect lets you generate a new image based on elements of a source texture or
document. Corel Painter reproduces the original image on a larger scale by using all the visual elements in the input sample. Use the effect
to expand small textures and create textures from brushstrokes in your document.
Corel Painter generates a large texture (left) from a small sample (right) by
taking into account its structural content. Image (right) by Henk Dawson
First, choose a source image. You can synthesize an image from a texture or from content in a Corel Painter document. When choosing a
source image, you may find the following tips helpful.
• A big variance in color cast or brightness in the source image may result in a noticeable seam in the synthesized texture where the color
or brightness varies greatly across the edge of the tiles. For best results, use images with similar color cast, brightness, and contrast
across the image.
• Use source textures that are neither regular (with exact repeating patterns) nor very noisy (random), but somewhere in between.
• Use images that have some repeating similarity across the image.
• Avoid exactly repeating geometric patterns.
• Avoid very chaotic images that have little repeating similarity or pattern.
• Avoid images that have vignetting or other significant changes in appearance around the edges, or make a selection in the image to
avoid the unwanted areas.
• Ensure there are many repetitions of the objects or features in an image. Avoid having unique objects and features (for example, a single
green apple in a pile of red apples) or large objects and features that take up more than 10% of the image. These will not have any other
features to match with and will make the resulting image fragmented and repetitive.
• Objects or features in an image should have a roughly similar size to other similar objects in the image. For example, in an image with
apples and oranges, the apples should be approximately similar in size to the other apples; the oranges can be a different size as long as
they are also approximately similar to the other oranges.
• Avoid images with perspective that make similar objects in the foreground and background have different sizes. You can use images with
perspective provided objects across the image are similar in size.
Next, define an area within the source image that you want to use as an input sample. For best results, select a small area.
Once you decide which area you want to sample, you have to define the size of the synthesis building blocks — the tiles. The texture
synthesis process works by taking an input seed — a tile — and randomizing it. The tile size you choose depends on the source image. In
images with repeated shapes, lines, or colors, you can get good results with small tiles; in images without patterns, bigger tiles will allow
you to include all the elements you need. Start with a tile size that is about 20% of the selection size, and experiment with increasing or
decreasing the tile size until Corel Painter generates a pattern that you like.
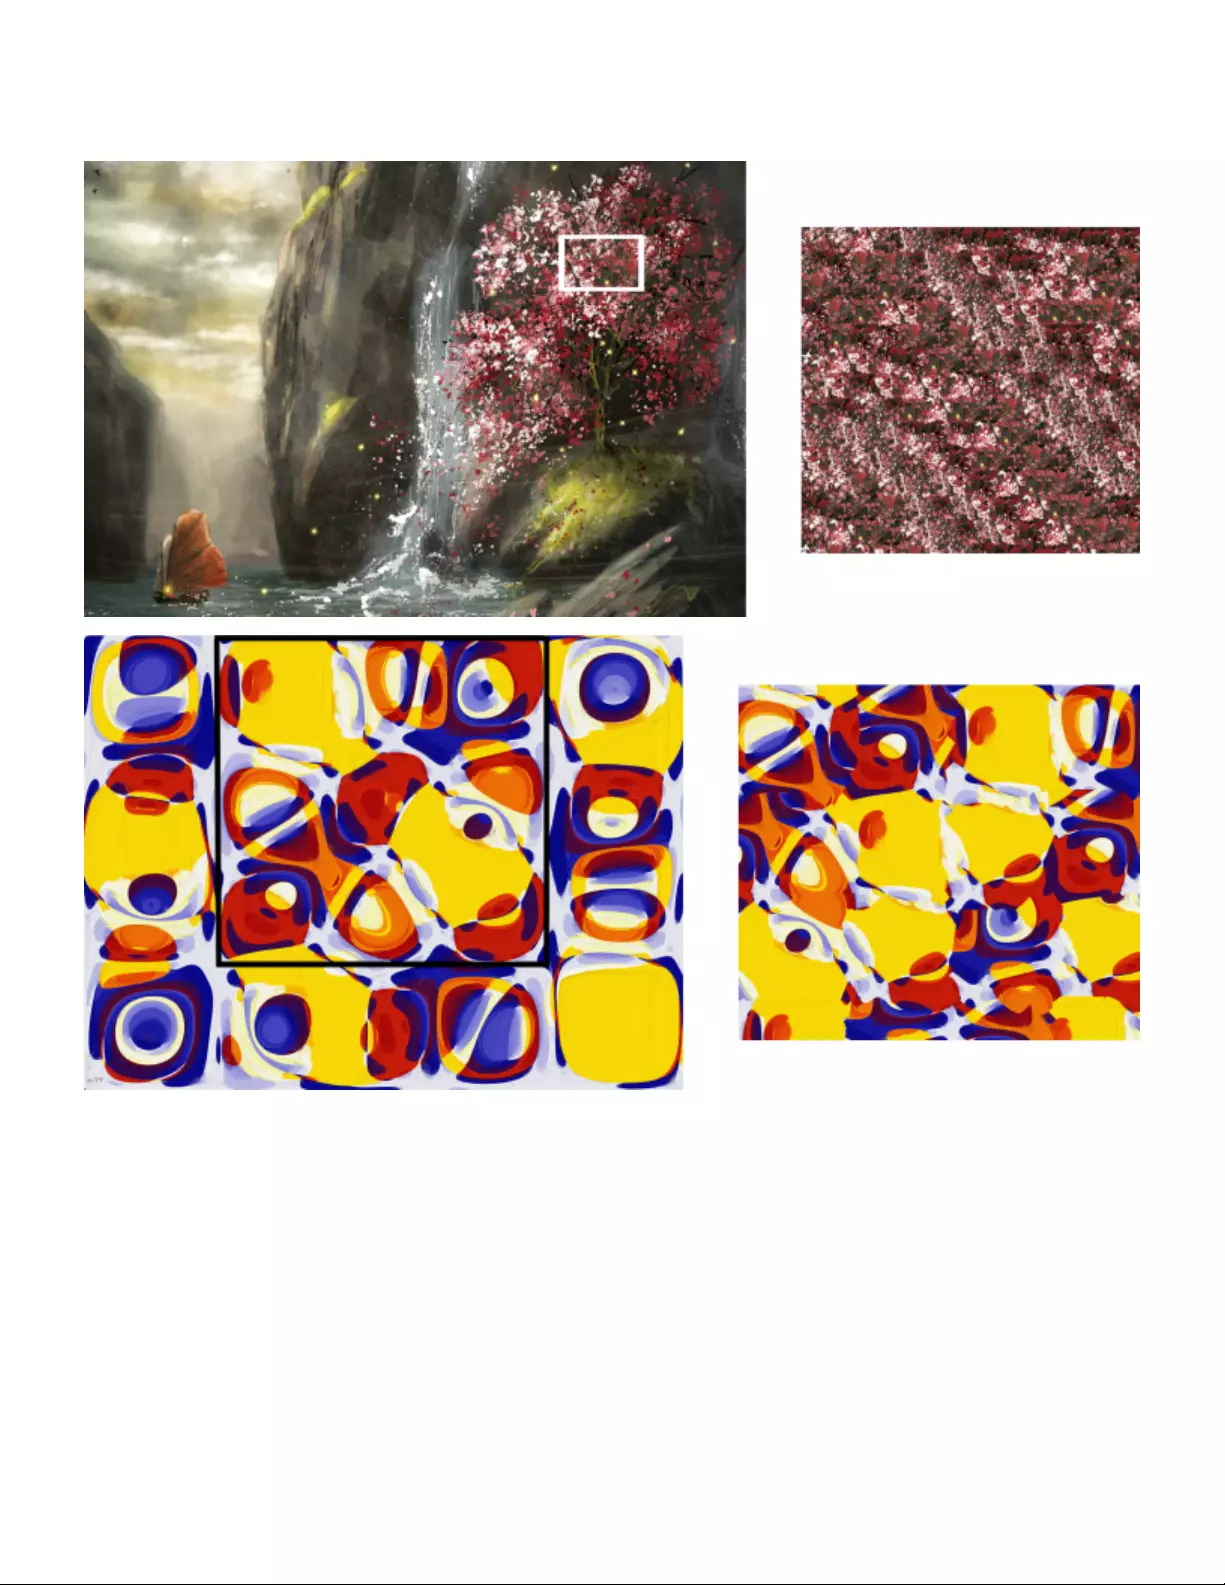
466 | Corel Painter 2022 User Guide
Top: A small tile is selected in a texture with repeated elements. Artwork by Michelle Webb. Bottom: A
big tile is selected in a texture without a pattern to include more details. Artwork by Michael Pierre Price.
You can regenerate a texture multiple times. Every time you apply the effect, Corel Painter creates an image with a different pattern and
associates a random value — called a seed — with that pattern. You can manually enter random seed values, or you can let Corel Painter
automatically generate them. The advantage of entering the seed values manually is that, as you try different values, you can choose
the value that produces the desired result and reapply it. Preview the result in the document window and experiment until Corel Painter
generates a pattern that you like.
When you are satisfied with the appearance, you can save the resulting image as a texture in the currently selected Texture library or send
it to a new layer. You can specify the width and height of the resulting image. The maximum document size is 16 382 by 16 382 pixels;
however, it may take a long time to synthesize images that exceed 2500 pixels.
All preset and custom textures are stored in libraries. For more information, see “Working with Texture libraries” on page 472.
Textures | 467
To create a texture by capturing an area
1Open or create an image.
2Perform a task from the following table.
To create a texture from Do the following
The canvas Select the canvas in the Layers panel.
A layer Select a layer in the Layers panel.
A selection Choose the Rectangular Selection tool from the toolbox.
Drag in the document window to select the area of the image that
you want to capture as a texture.
3In the Textures panel (Window Media Panels Textures), click the Capture Texture button.
4Enter a name in the Save As box.
The texture is added to the currently selected library.
When you create a texture from a layer, Corel Painter preserves the transparent areas.
To create a texture by using Texture synthesis
1Open or create a document.
2In the Texture Synthesis panel (Window Media Panels Texture Synthesis), choose a source image by performing a task from the
following table.
To synthesize an image from Do the following
A texture Choose Texture from the Source list box, click the Texture selector,
and click a texture.
Content in the active document Choose Document from the Source list box.
Note: In a multi-layer document, all visible layers are merged, and
the flattened image is used as a base for the synthesis.
3Choose the Rectangular Selection tool in the toolbox.
4In the document window, drag to define the sampling area that will be used to synthesize the new image.
Note: Ensure your selection is 4 by 4 pixels or larger.
5Move the Side Length slider to adjust the tile size.
Note: Tiles have a square shape.
6Generate the synthesized image by performing a task from the following table.

468 | Corel Painter 2022 User Guide
To Do the following
Generate a texture with a different pattern each time Enable the Random Seed check box.
Note: Each time you click the button, Corel Painter creates an
image with a different pattern. Experiment until an image that you
like is generated.
Generate the same pattern every time Disable the Random Seed check box. Enter a value in the Seed
box.
Note:
•Each time you enter a value, Corel Painter creates an image with
a different pattern. Note the value that produces an image that
you like and re-enter it to get the desired result.
Tip:
•Click the Generate a texture with different pattern button to
generate a different seed number.
7Perform a task from the following table.
To send the synthesized image to Do the following
A new layer Enable the New Layer option.
The active Texture library Enable the Texture Library option.
8Type values in the Width and Height boxes to specify the size of the resulting image.
Note: Images that exceed 2500 pixels may take a long time to synthesize.
9Click the Start button .
Tip: To stop the synthesis at any time, click the Stop button .
If texture synthesis doesn’t start, try one of the following:
• Make sure you select Document or Texture from the Source list box. This option is reset after each synthesis so you need to
choose Document or Texture again to perform another synthesis.
• Delete the existing selection by holding down Ctrl + D (Windows) or Command + D (macOS), and then make a new
rectangular selection.
If the texture that you want to synthesize is bigger than the size of your document, you will not be able to see the entire texture
when sending the texture to a new layer.

Textures | 469
For best results, use images with similar color cast, brightness, and contrast across the image. To improve the variance of an
image, open the image in Corel Painter, click Effects Tonal Control Match Palette, move the Variance (Color) and Variance
(Brightness) sliders to the left to reduce the color and brightness variance, and click OK.
If the colors in the source image don’t match, try creating a grayscale version of the image. Click Effects Tonal Control Adjust
Colors. Move the Saturation slider to the left for a less colorful image, or choose the lowest value for pure grayscale, and click OK.
This is also useful for synthesizing textures that don’t require color, such as images for papers and flow maps.
If the appearance of the resulting image is too repetitive, enable the Scramble option or try decreasing the tile size. If the resulting
image is lacking in detail or objects or features are cut out of the source image, try increasing the tile size.
If texture synthesis is taking a long time, try making a small selection (for example, 250 pixels by 250 pixels) and choosing a small
output size (for example, 1000 pixels by 1000 pixels) first.
To import a texture
1In the Textures panel (Window Media Panels Textures), click the Import Texture button.
2In the Import Texture dialog box, browse to the folder where the texture is stored.
3Choose a texture, and click Open.
The texture is added to the current library.
You can also import multiple textures.
Transparency is supported only for PNG images.
The size of the texture depends on the original size of the image that you import. If you prefer not to resize the texture in Corel
Painter, make sure you import it at the size you need it. For best results, use high-resolution images.
The texture that you import should not exceed the maximum size of 16 382 x 16 382 pixels.
Transforming and editing textures
You can scale, rotate, skew, or distort a texture interactively in the image window.
You can also edit a texture to modify its appearance. When you finish adjusting a texture and you are satisfied with the result, you can save it
and begin painting with it. When you save a texture, it is added it to the current texture library.
To apply a transformation to a texture
1Create or open a document.
2In the Transform Textures panel (Window Media Panels Transform Textures), click one of the following buttons:
•Move and Size — lets you reposition and resize a texture
•Scale — lets you change the width and height of a texture
•Rotate — lets you turn a texture around its center axis
•Skew — lets you slant the vertical and horizontal dimensions of a texture nonproportionally
•Distort — lets you move the corners of a texture in different directions
•Perspective Distortion — lets you move the corner of a texture to apply a one-point perspective
3Click Commit.

470 | Corel Painter 2022 User Guide
To save the texture as a new library item, click Save As. The texture is added to the currently selected library.
After you finish making changes to a texture, it is recommended that you save it, so you can use it in the future.
To reset the texture origin point, click the Reset reference point button .
To discard the changes that you have made to the selected texture and continue painting, click Cancel.
To edit a texture
1Create or open a document.
2In the Textures panel (Window Media Panels Textures), hold down Control and click a texture (macOS), or right-click a texture
(Windows), and choose Export Texture to New Layer.
A new layer with the name of the texture appears above the active layer.
3Make changes to the texture in the document window.
To add the modified texture to the active Texture library, click the texture layer in the Layers panel, and then click the Capture Texture
button in the Textures panel. Enter a name in the Save As box.
The size of the new layer is based on the document size. If the texture is smaller than the document, the space around the texture
will be transparent. When you select, move, copy, or transform the layer, its bounding box shrinks to the texture size.
Applying textures as fills
Corel Painter lets you apply texture fills to images.

Textures | 471
An example of a selection filled with a texture
To apply a texture as a fill
1Create or open a document.
2Perform a task from the following table.
To fill Do the following
The canvas Select the canvas in the Layers panel.
A layer Select a layer in the Layers panel.
A selection Choose a selection brush from the Brush Selector Panel (Window
Brush Selector Panel (Full View)) or a selection tool from the
toolbox. Drag in the document window to select the area of the
image that you want to fill.
3Click the Paint Bucket tool in the toolbox.
472 | Corel Painter 2022 User Guide
4On the property bar, click the Fill Image button .
5From the Fill list box on the property bar, choose Texture.
6Click the Fill selector on the property bar, and click a texture.
7In the document window, click the canvas, selection, or layer.
You can also
Specify the range of colors to be filled On the property bar, type a value in the Tolerance box or move the
slider.
Specify the texture opacity for pixels outside the tolerance range On the property bar, type a value in the Feather box or move the
slider.
Soften the edges of the texture On the property bar, click the Anti-Alias button .
Anti-aliasing is desirable when the Feather setting is extremely low
or set to zero.
You can also choose a texture by clicking Edit Fill. In the Fill dialog box, choose Texture from the Fill with list box, and click the
Fill selector. Move the Opacity slider to adjust the texture opacity, and click OK. Texture transparency is maintained.
Using textures in photo painting and image compositing
You can use textures in photo painting and creating composite images. For information about using textures as clone sources, see “To use
a texture as a clone source” on page 201. After you create or modify a texture, you can embed it as a clone source. For information about
working with embedded clone sources, see “Working with embedded clone sources” on page 203. Store your content assets as textures in a
texture library and reuse them in your projects.
To embed a texture as a clone source
1Create or open a document.
2In the Textures panel (Window Media Panels Textures), select a texture, and click the Embed Texture as Clone Source Image
button .
The texture appears in the Clone Source panel (Window Clone Source) as an embedded clone source image.
Transparency in PNG images is maintained.
Working with Texture libraries
You can organize and manage textures from the Textures panel. The Textures panel displays the default Textures library, the custom libraries
that you create, and any custom libraries that you import. When you create a new texture, it is automatically saved to the current library.
However, you can create a custom library and move the texture to that library. Texture libraries are saved in the .texturelibrary format.

Textures | 473
For more information about creating, importing, exporting, removing, and restoring libraries, and moving textures between libraries, see
“Libraries” on page 307.
To access the Textures panel
•Click Window Media Panels Textures.

474 | Corel Painter 2022 User Guide

Applying and adjusting flow maps | 475
Applying and adjusting flow maps
Flow maps are designed to maximize the creative potential of the Watercolor : Real brushes and the Particle brushes by adding a textured
surface that helps direct the flow of paint.
This section contains the following topics:
•“Getting started with flow maps” (page 475)
•“Choosing flow maps and compatible brush variants” (page 476)
•“Enabling flow maps and controlling flow resistance” (page 477)
•“Customizing flow maps” (page 478)
Getting started with flow maps
You can use flow maps when working with Real watercolor and Particle brushes to create textured surfaces that help direct the flow of paint.
Flow maps are similar to paper textures; however, the surfaces that they create have higher peeks and deeper valleys that allow for greater
water displacement. The flow map relief encourages the paint to flow and settle in unique and irregular patterns. You can use flow maps in
combination with paper texture to retain the paper grain.
A flow map (1) works with paper texture (2) to add relief to the image and encourage water
displacement. The elevated areas (3) in the flow map help direct the flow of water (4).
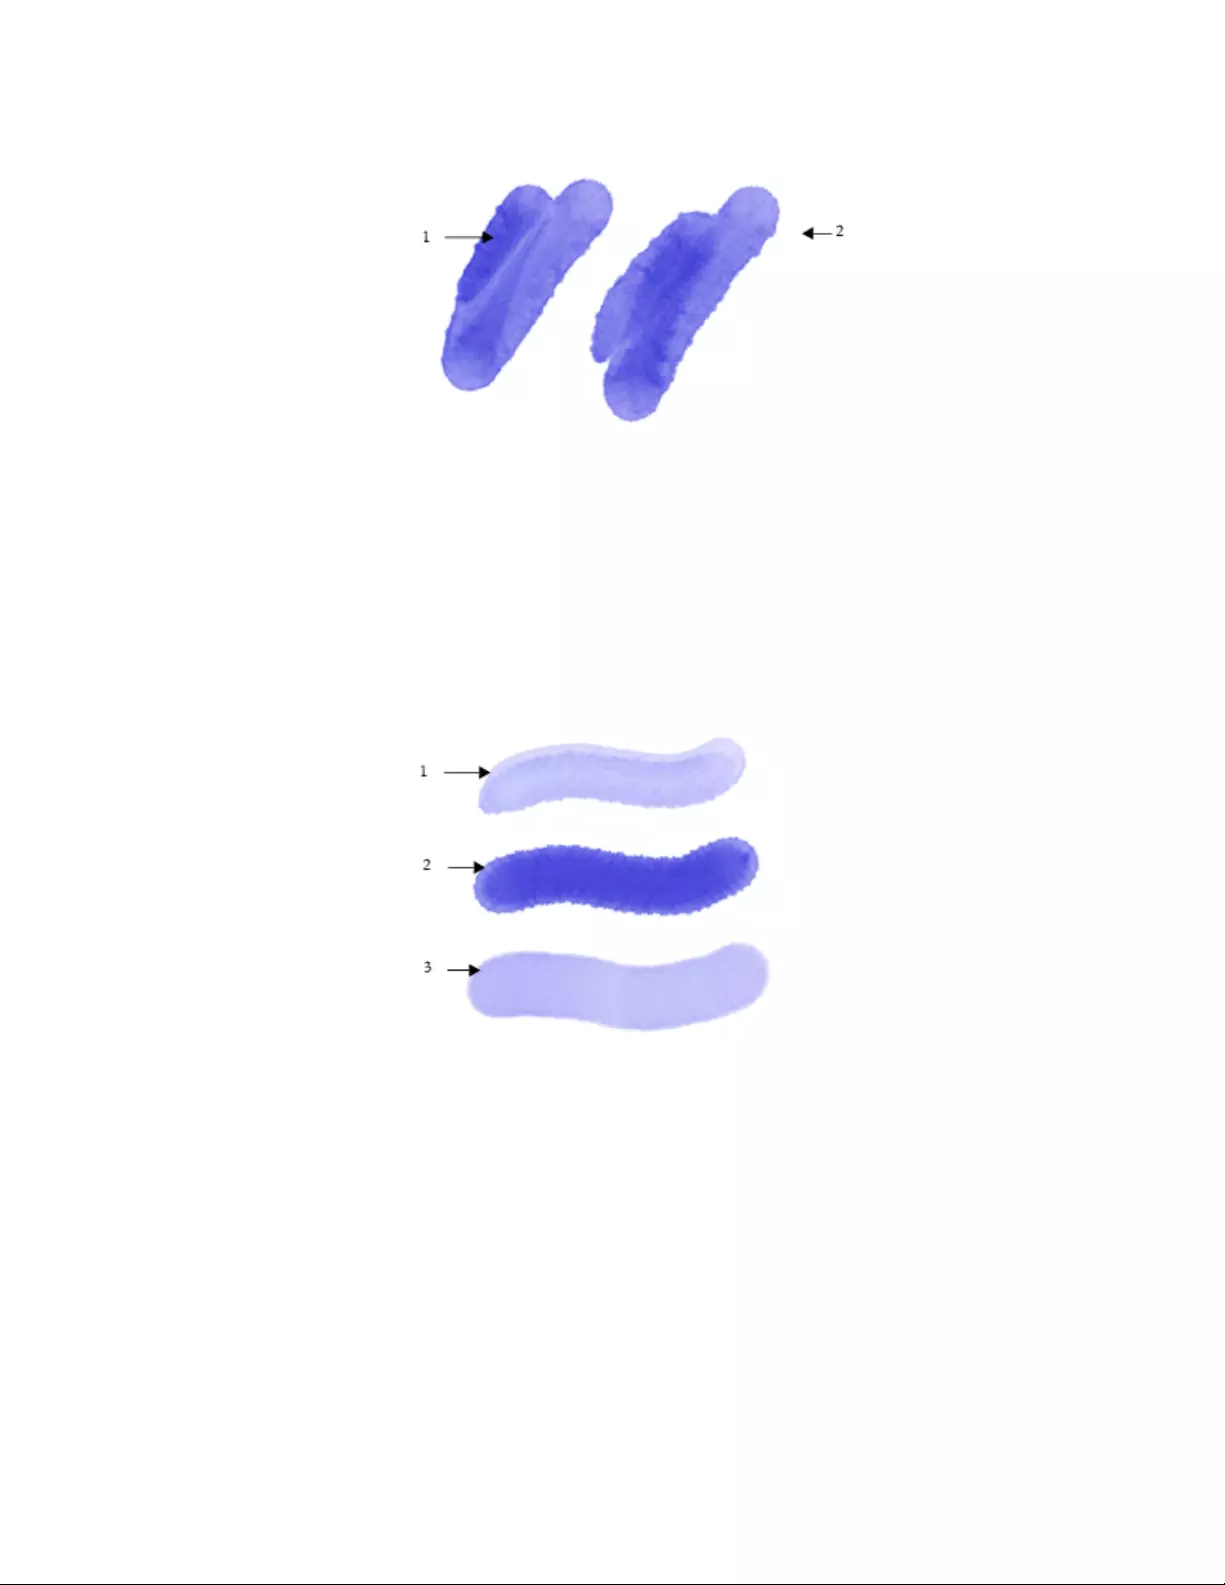
476 | Corel Painter 2022 User Guide
This Real watercolor brush variant is used with paper texture (1). The same
brushstroke is used in combination with paper texture and the Gravel flow map (2).
Although flow maps are intended for Real watercolor brushes, you can also use them with Real Wet oil brushes.
Choosing flow maps and compatible brush variants
To quickly get started with flow maps, you can choose one of the flow map brush variants. They are available under the Real watercolor
brush category. These brush variants enable flow maps by default. You can experiment and choose a different flow map to produce the
effect you like.
Brushstrokes using three Real watercolor brush variants with the Fine Dots flow map selected
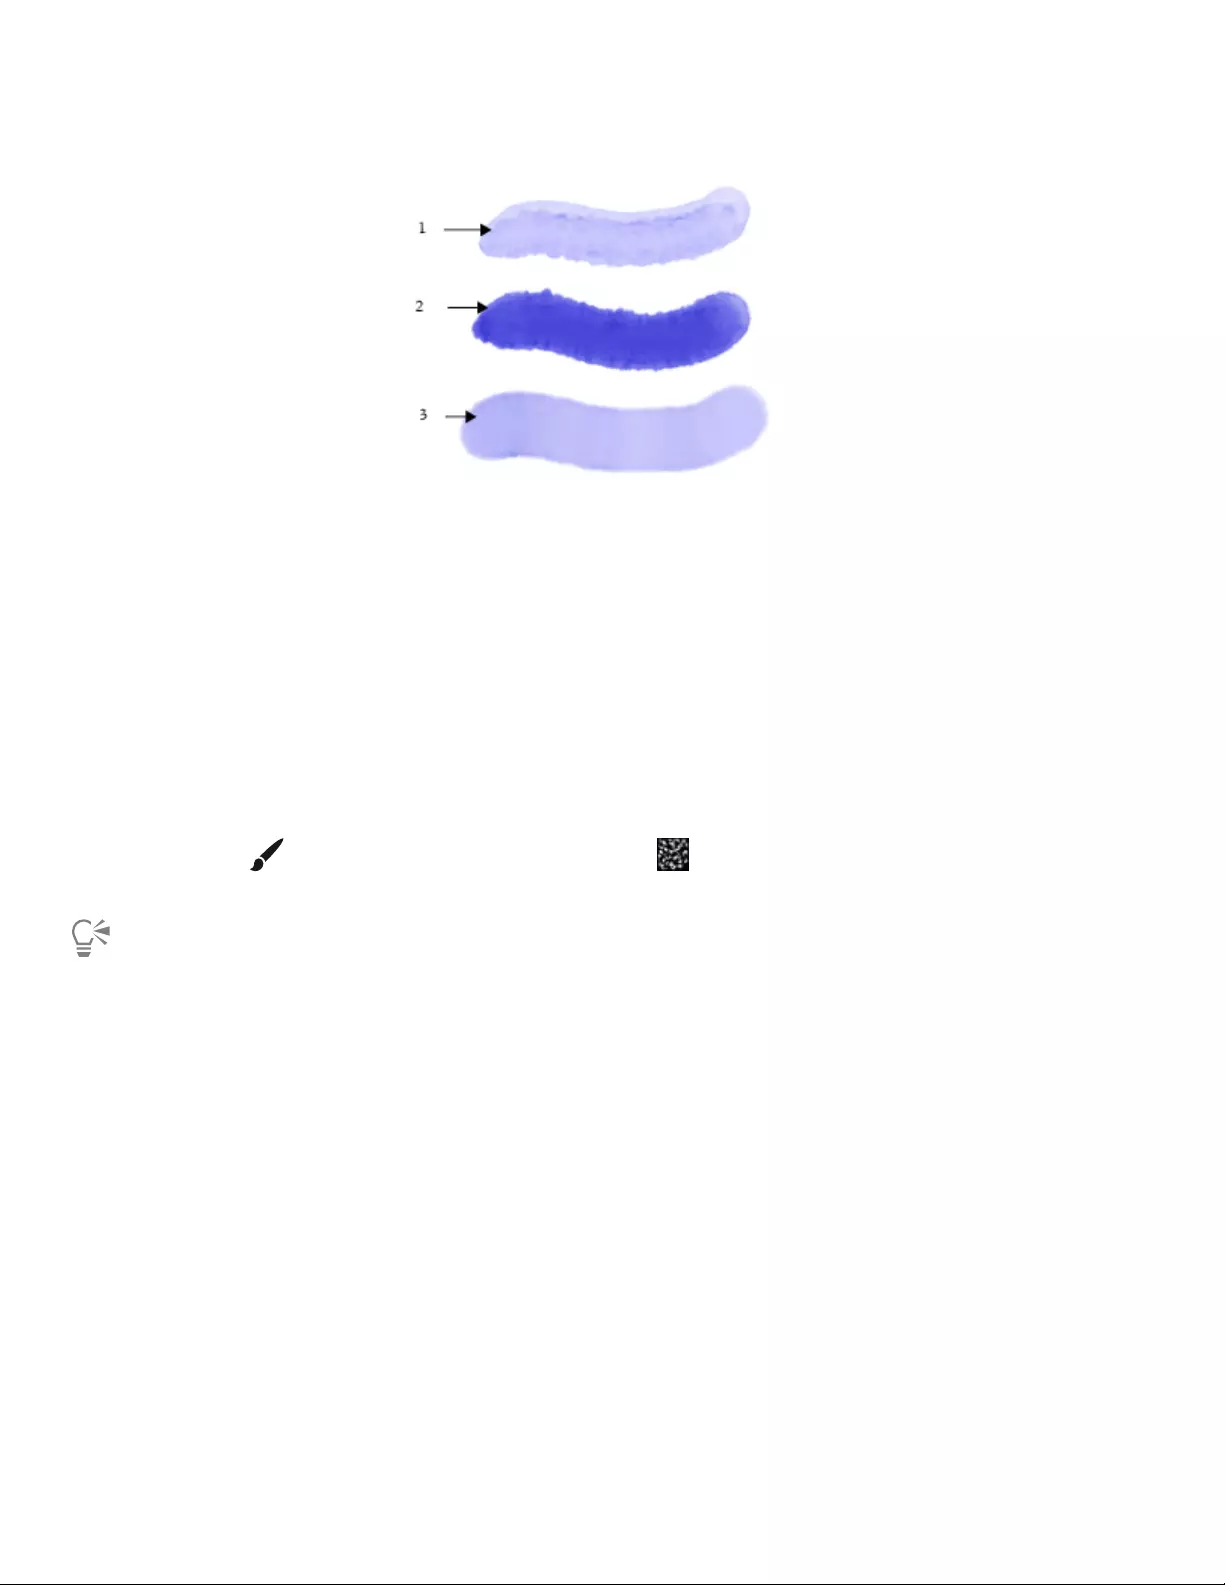
Applying and adjusting flow maps | 477
Brushstrokes using three Real watercolor brush variants with the Gravel flow map selected
To choose a flow map brush variant
1From the Brush Selector, choose the Watercolor : Real brush category.
2Choose one of the following brush variants:
•Melted Bristle
•Fringe
•Small Wash
•Hard
To choose a flow map
1Click Window Search, type flow map in the Search text box, and choose a brush variant from the list.
2On the Brush tool property bar, click the Flow Map flyout button .
3Click a flow map swatch in the Flow Map Textures area.
You can also choose a flow map in the Flow Maps panel (Window Media Panels Flow Maps).
Enabling flow maps and controlling flow resistance
You can choose an existing Real watercolor brush variant and then manually enable flow maps. You can also adjust the flow resistance of a
brush to enhance the flow map interaction. Flow resistance lets you control the degree to which the flow map surface, or the paper texture,
affects the direction of the water flow.
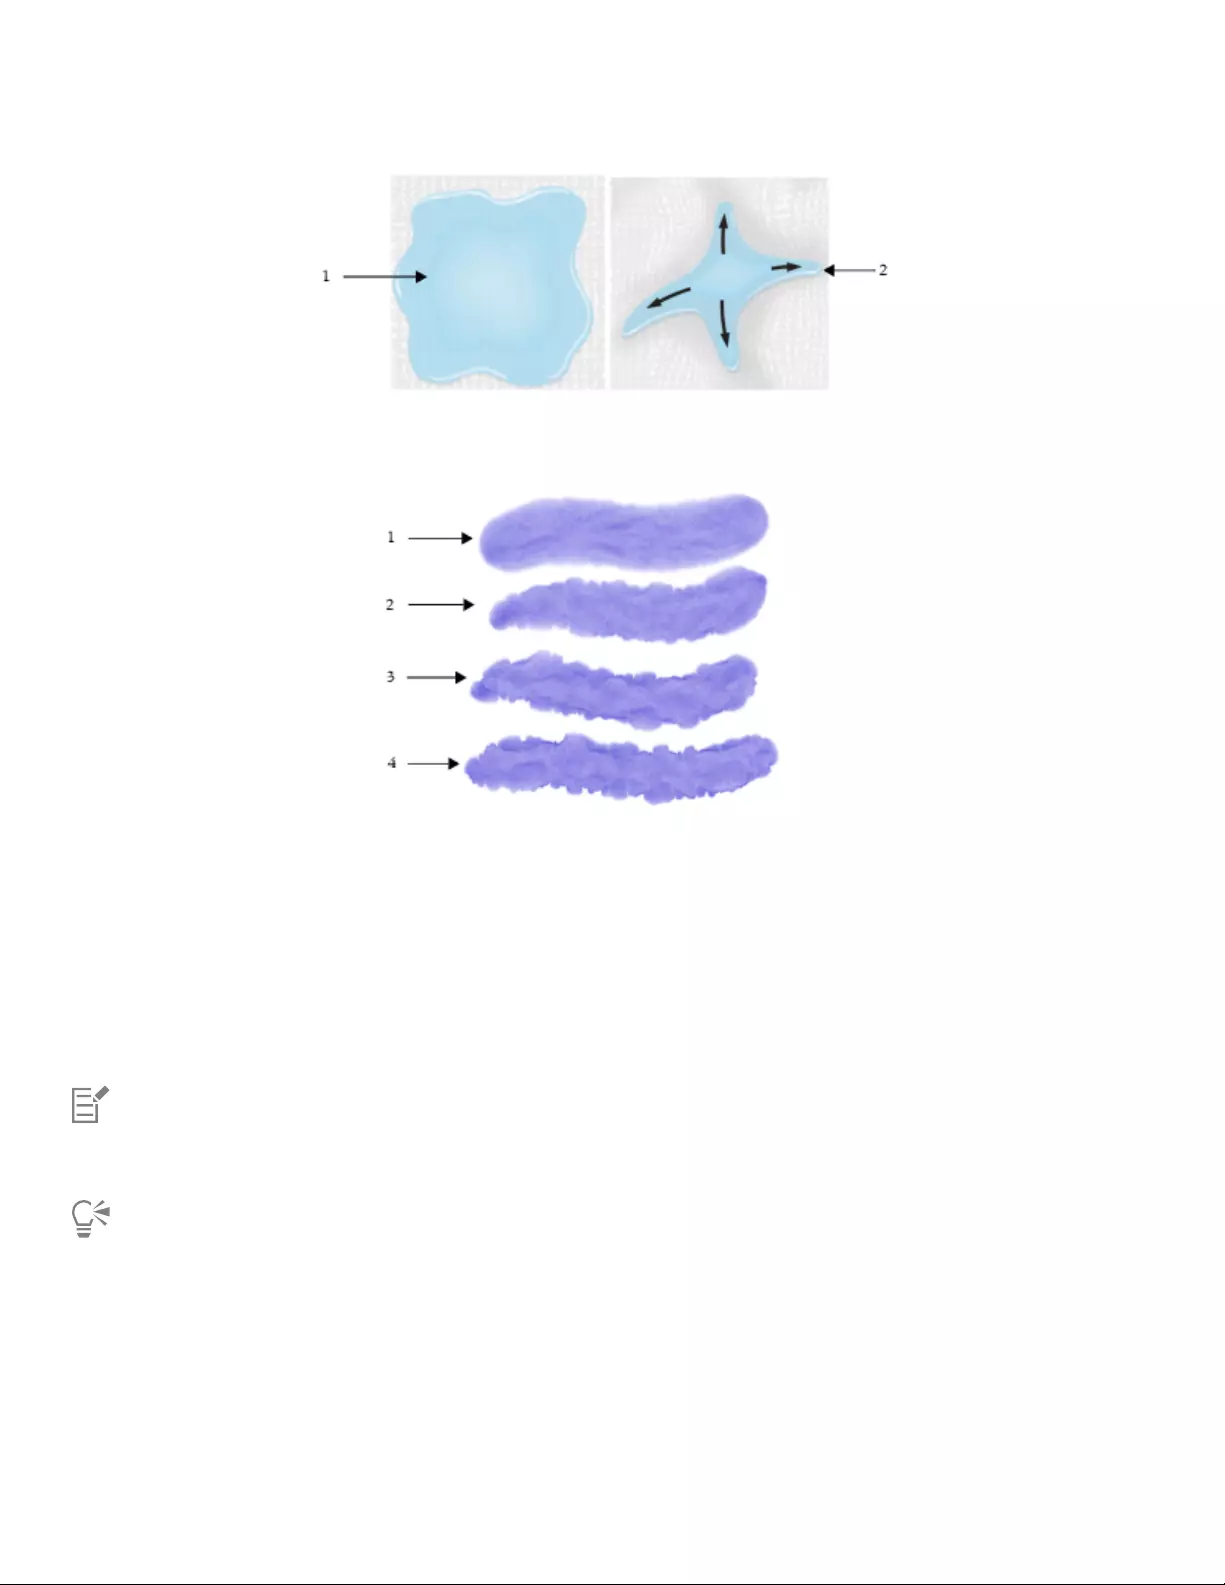
478 | Corel Painter 2022 User Guide
When the flow resistance is set low, the water flows freely across the
canvas (1), when the resistance is set high, the flow is obstructed (2).
Brushstrokes set at a flow resistance of 0 (1), 33 (2), 66 (3), and 100% (4) with the Clouds flow map selected
To enable flow maps and control flow resistance
1In the Brush Selector, choose a Real watercolor brush variant.
2Choose Window Brush Control Panels Brush Media Real Watercolor.
3In the Flow area, enable the Flow Map option to set the Source.
4Move the Flow Resistance slider to adjust the resistance.
Moving the slider to the right increases the effect.
To maximize the effect of flow maps, you need to ensure that the Wetness control is set high and the Evaporation Rate control is
set low.
You can also adjust the flow resistance of the Real Wet oil brush variants by choosing Window Brush Control Panels Brush
Media Real Wet Oil.
Customizing flow maps
You can create a custom flow map by using an existing paper texture or by capturing an area of an image.

Applying and adjusting flow maps | 479
To customize an existing flow map, you can rotate it. You can also modify the scale, contrast, and several other settings of a flow map the
same way that you would modify paper texture. For more information, see “Working with paper texture and grain” on page 171. Note that
flow maps benefit from increased scale and contrast; therefore, if you create a flow map from a paper texture or image, you should increase
the scale and contrast.
An area of an image was selected (1) to create a flow map (2).
To create a flow map from a paper texture
1In the Papers panel (Window Media Panels Papers), click a paper texture swatch.
2In the Flow Maps panel (Window Media Panels Flow Maps), click the Create From Current Paper button .
If you want to rename the flow map, right-click (Windows) or Control-click (macOS) the swatch, and choose Rename Flow Map.
To capture a flow map from an image
1Open or create an image.
2Choose the Rectangular Selection tool from the toolbox.
3Drag in the document window to select the area of the image.
4In the Flow Maps panel (Window Media Panels Flow Maps), click the Capture Flow Map button .
If you want to blend the distinction between tile borders, drag the Crossfade slider to the right in the Capture Flow Map dialog box.
5Type a name in the Save As text box.
The flow map is added to the currently selected library.
To customize a flow map
1In the Flow Maps panel (Window Media Panels Flow Maps), click a flow map swatch in the Flow Map Textures area.
2Perform one or more actions from the following table.
To Do the following
Rotate a flow map Move the Angle slider.
Invert the flow map effect Click the Invert button .
Resize the flow map pattern Move the Scale slider.
480 | Corel Painter 2022 User Guide
To Do the following
Control the contrast of the flow map Move the Contrast slider. A higher setting alternates the flow map
pattern from high to low more quickly and with fewer intermediate
levels than a lower setting.
Control the brightness of the flow map Move the Brightness slider.
When the Brush tool is active, you can customize the currently selected flow map by clicking the Flow Map flyout button
on the property bar and adjusting the settings you want.
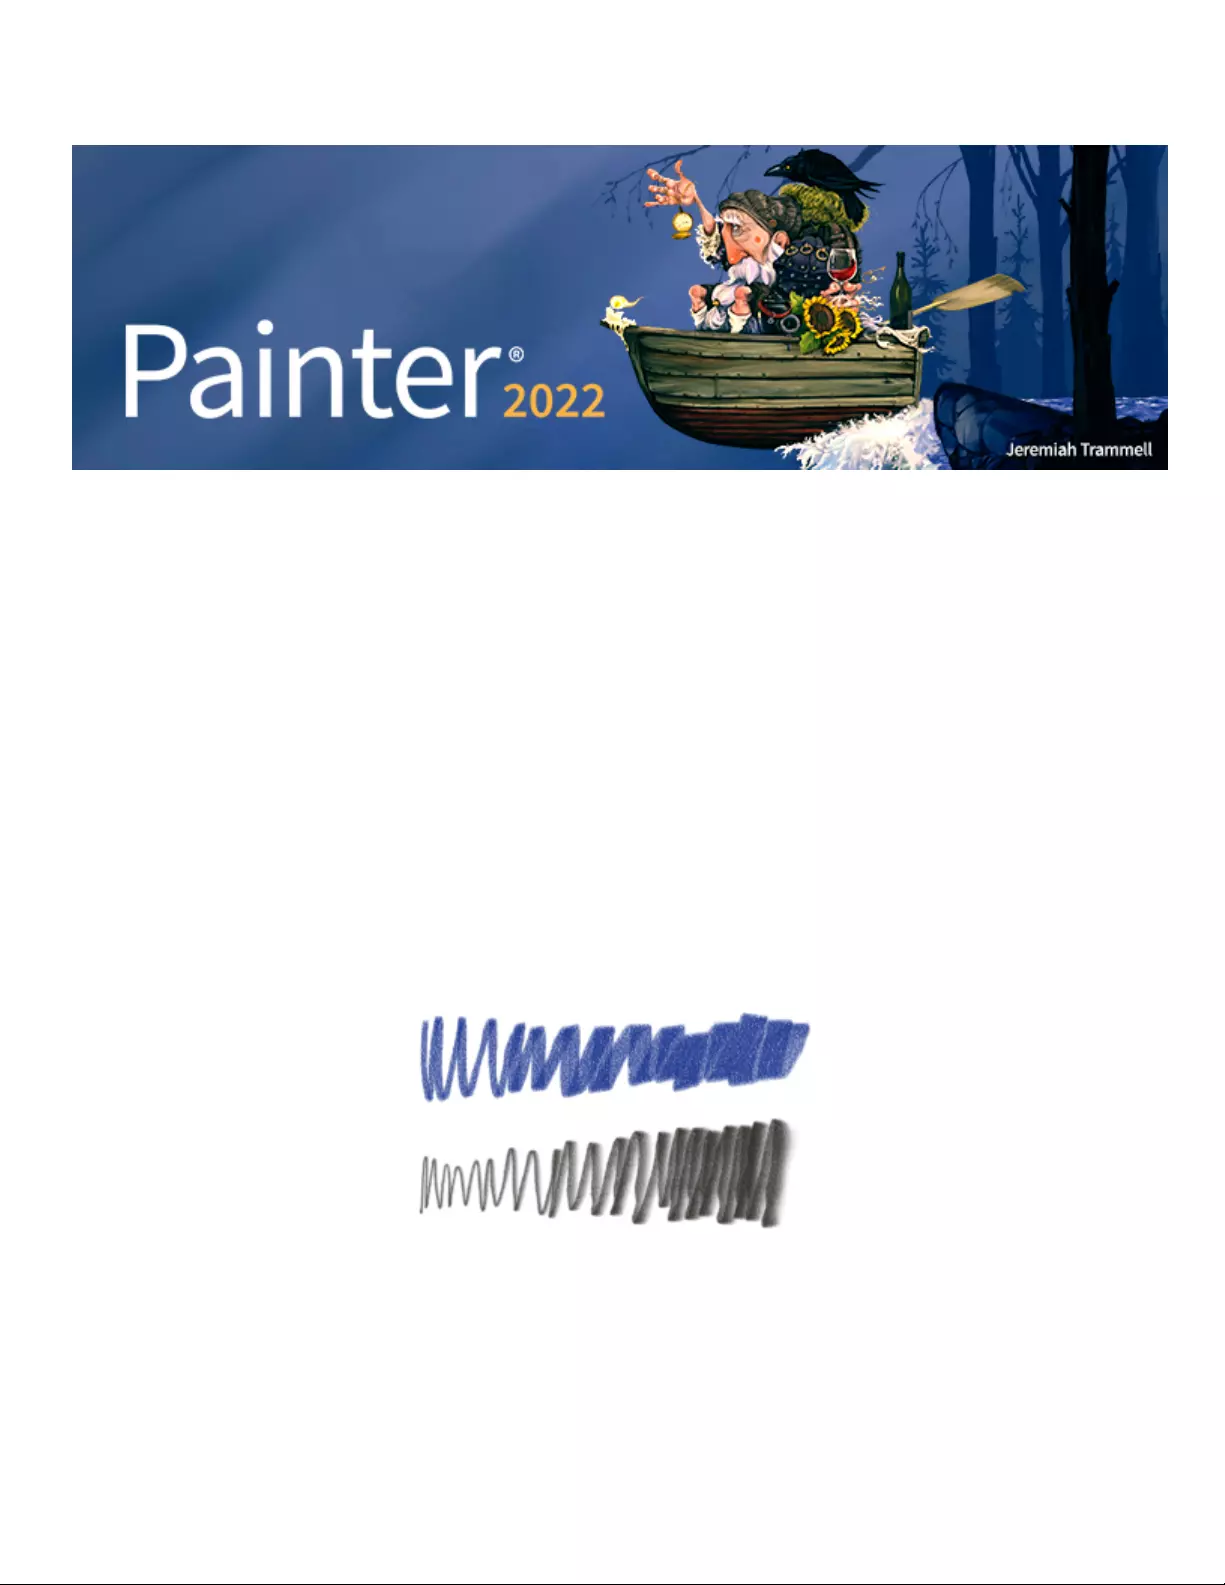
Hard Media | 481
Hard Media
Corel Painter lets you simulate many different types of traditional hard media, such as pencils, pens, and markers. The hard media brush
controls and variants give you a wide range of options for creating drawings, sketches, and renderings. You can use the preset variants or
create your own collection of customized Hard Media brush variants.
This section contains the following topics:
•“Choosing a Hard Media variant” (page 481)
•“Modifying Hard Media profiles” (page 482)
•“Controlling the behavior of Hard Media variants” (page 483)
•“Previewing Hard Media dabs” (page 484)
Choosing a Hard Media variant
Corel Painter includes a vast array of preset Hard Media brush variants. You can use the variants as they are or customize them by using the
Hard Media controls to build your own Hard Media toolkit. For information, see “Controlling the behavior of Hard Media variants” on page
483 and “Modifying Hard Media profiles” on page 482.
You can modify select chalk (top) and pencil (bottom) variants using the Hard Media controls.
The Hard Media brush variants are found in different brush categories such as Chalk, Pencils, Erasers, Markers, and more. The easiest way to
find a Hard Media brush variant is to use the Search bar.

482 | Corel Painter 2022 User Guide
To find a Hard Media variant
1Click Window Search and type hard media in the Search text box.
2Click a Hard Media brush variant in the list of search results.
Modifying Hard Media profiles
You can modify Hard Media profiles to change the shape and size of the dabs that you apply to the canvas. By changing the profile, you can
simulate the real-world hard media that have different shapes, sharpness, or thickness. Using the Hard Media controls, you can change the
size and choose one of the following profiles to modify the shape.
Hard Media profile Description
Pencil Profile Provides a sharper tip when perpendicular to the tablet, and
provides a wider, softer tip when at an angle
Medium Profile
Has a wide area of greater density at the center, with rapid falloff
toward the edge
Linear Profile
Provides maximum density at the center, with even falloff toward
the edge
Soft Profile
Provides a strong core, with a large falloff area towards the edge
Pointed Profile Provides maximum density at the center, with rapid falloff toward
the edge
Dull Profile
Provides maximum density at the center, with high-density
weighting toward the edge
1-Pixel Edge
Provides maximum density throughout, with rapid falloff toward
the edge, producing a 1-pixel, anti-aliased edge

Hard Media | 483
For more information about choosing Hard Media tip profiles, see “Changing dab profiles” on page 368. For more information about setting
the Hard Media tip size, see “To set the Hard Media tip size” on page 483 and “To choose a brush size preset” on page 363.
When changing the shape, you can use the Squeeze controls to specify the vertical and horizontal ranges of the dab. For example, tilting
the tool while drawing can change the dab shape from round to elliptical. You can also change the size of the tip.
The Hard Media controls are usable only with the Circular, Captured, and Eraser dab types. For more information about dab types, see
“General controls” on page 344.
You can also save your customized Hard Media variant. For more information, see “Adjusting brushes with brush controls” on page 337.
To choose a Hard Media tip profile
•With a Hard Media variant selected, click the Dab Options flyout button on the property bar, and click the Hard Media tip profile
that you want to use.
If the brush uses a Circular dab type, move the Hardness slider to adjust the opacity of the dab profile.
To set the Hard Media tip size
•With a Hard Media variant selected, move the Size slider on the property bar, or type a value in the Size box.
To set the Hard Media tip shape
1With a Hard Media variant active, choose Window Brush Control Panels Brush Shape Hard Media.
2In the Squeeze area, adjust any of the following sliders:
•V Min — sets the amount of squeeze applied to the dab on the vertical axis. This setting represents the dab at its smallest.
•V Max — sets the amount of squeeze applied to the dab on the vertical axis. This setting represents the dab at its maximum size.
•H Min — sets the amount of squeeze applied to the dab on the horizontal axis. This setting represents the dab at its smallest.
•H Max — sets the amount of squeeze applied to the dab on the horizontal axis. This setting represents the dab at its maximum size.
Controlling the behavior of Hard Media variants
Corel Painter lets you control how a Hard Media variant behaves when you apply strokes to the canvas. The Stepping slider controls the
transition between narrow and wide sections of a stroke. Moving the slider to the right makes the transition appear more abrupt, and
moving it to the left makes the transition smoother.
The Transition Range sliders lets you determine the angle at which you transition from a fine point to a wider stroke when tilting your stylus.
This control lets you simulate the look and feel of hard media such as pencils or markers. A real-world example of this would be holding a
sharp pencil perpendicular to a piece of paper. When you draw at a 90° angle, you produce a very narrow or hard line. If you tilt your pencil
to a 60° angle, you produce a wider or softer line.

484 | Corel Painter 2022 User Guide
At the top of the image, a stylus is shown tilting at different angles and the stoke that
corresponds with the angle is displayed at the bottom of the image. The graph in the middle of
the image identifies the start (green arrow) and the Finish (red arrow) of the Transition Range.
The Hard Media controls are usable only with the Circular, Captured, and Eraser dab types. For more information, see “General controls”
on page 344.
To set the Hard Media size step
1With a Hard Media variant active, choose Window Brush Control Panels Brush Shape Hard Media.
2Move the Stepping slider to the right to produce fewer angles between dabs, or move it to the left to create more angles between dabs.
To set the Hard Media transition range
1With a Hard Media variant active, choose Window Brush Control Panels Brush Shape Hard Media.
2Move the Start slider to set the angle at which the transition will start.
Moving the slider to the right increases the angle; moving the slider to the left decreases the angle.
3Move the Finish slider to set the angle at which the transition will finish.
Moving the slider to the right increases the angle; moving the slider to the left decreases the angle.
Previewing Hard Media dabs
As you modify the Hard Media variants, you can preview your changes to see how they affect the dab shape and size in the Dab Preview
panel. You can toggle between different views of the dab, including the Hard Media view. For more information about these views, see
“Previewing brushstrokes and brush dabs” on page 342.
To choose a brush dab preview option
1Choose Window Brush Control Panels Dab Preview.
2In the Dab Preview panel, click (Windows) or hold down Command and click (macOS) in the Brush Dab Preview Window until the
desired preview appears.

Markers | 485
Markers
Corel Painter includes a Markers brush category to simulate the professional markers that are used by illustrators, graphic designers,
industrial designers, and architects for drawing and creating renderings.
This section contains the following topics:
•“Getting started with markers” (page 485)
•“Customizing markers” (page 486)
Getting started with markers
The brush variants in the Markers category replicate traditional markers used for drawing and creating renderings.
You can choose any of the following rendering marker variants from the Markers brush category:
Flat Tip Chisel Tip
Felt Worn
Leaky Dry Tip
Dirty Art Marker
Fine Tip Thick and Thin
The strokes that you make with the Marker variants closely reflect those of traditional, high-quality markers, mainly because of the way
the Marker variants interact with the canvas, allowing color buildup and pooling. One continuous brushstroke at a constant speed lays
down one consistent color. However, if you lift the stylus, or release the mouse button, the color builds up, as it would with conventional
markers. The Marker variants also let you overlay strokes, and because the applied color is somewhat transparent, the underlying colors
show through.
The color builds up only when you either lift your stylus up from the tablet or let go of the left mouse button. Slowing down or stopping
does not cause build up.

486 | Corel Painter 2022 User Guide
With a marker, you can build up or pool color.
To choose a marker variant
1Click the Brush selector on the Brush Selector bar.
2Click the Markers brush category, and click a marker brush variant.
Customizing markers
You can customize a preset Marker variant by using various brush controls, such as General controls or Size controls. In addition, you can
change the look of Markers more precisely by using the Hard Media controls that are specifically designed for modifying drawing media,
such as markers and pencils. For more information about the Hard Media options, see “Hard Media” on page 481. For more information
about customizing brushes, see “Adjusting brushes with brush controls” on page 337.
You can also save your customized Marker variant. For more information, see “Saving and deleting brush variants” on page 327.

Image hose | 487
Image hose
The Image hose lets you paint with images instead of painting with color. The images flowing from the hose change as you make a
brushstroke. You can modify the appearance of the default Image hose elements or create your own set of images so you can paint with a
unique image series.
The Image hose allows you to paint with images.
This section contains the following topics:
•“Painting with the Image hose” (page 487)
•“Adjusting the opacity and color of image hose elements” (page 489)
•“Adjusting the size and spacing of image hose elements” (page 490)
•“Indexing nozzle files” (page 491)
•“Understanding nozzles, ranks, and indexing” (page 492)
•“Creating a 1-Rank nozzle” (page 494)
•“Creating a 2-Rank nozzle” (page 496)
•“Creating a 3-Rank nozzle” (page 497)
•“Loading and managing nozzle files” (page 499)
•“Creating a nozzle from a movie” (page 500)
Painting with the Image hose
To start painting with the Image hose, you need to choose the Image Hose category from the Brush library, select an Image hose variant,
and then choose the imagery that you want to apply. The imagery is stored in a nozzle file. For example, you can load images of any
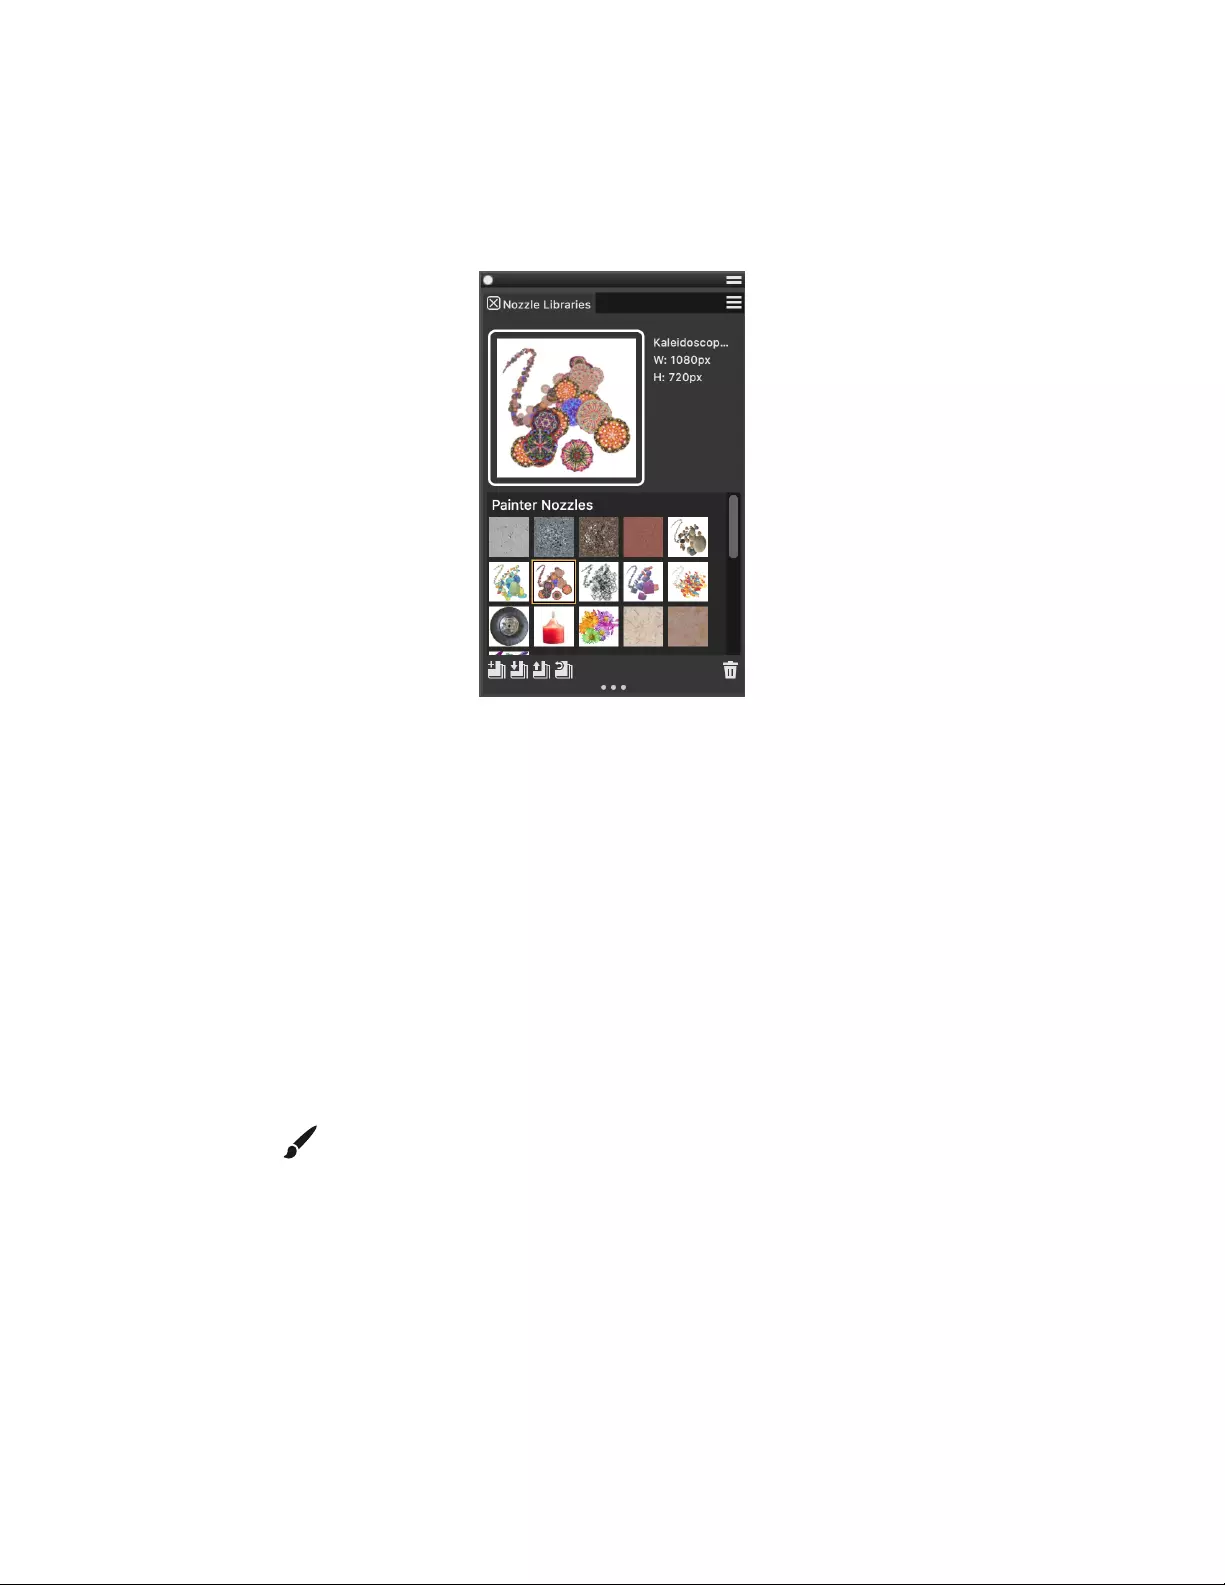
488 | Corel Painter 2022 User Guide
description — leaves, bark, grass, stones, people, or whatever you want. When you paint with these image elements, you can build them
into coherent shapes, such as a tree, hill, cobblestone street, or crowd of people.
As with other Corel Painter brushes, the Image hose has several variants. These built-in variants combine nozzle control factors (indexing
rules) with brush settings to create different hose effects.
The Nozzle Libraries panel
Variants are divided into two types — Spray and Linear — according to the placement of images in relation to the stroke. Spray variants
scatter images. Linear variants place images directly on the stroke path. Variants also differ in the way they link the size and angle of images
to factors such as stylus tilt, pressure, and position.
A variant’s name contains important information. For example, Linear Pressure Bearing indicates that this is a Linear variant that links
the size of images you paint to the stylus pressure and places them at an angle based on the direction of the stylus (Bearing). For more
information, see “Color Expression controls” on page 412 and “Understanding nozzles, ranks, and indexing” on page 492.
You can use these variants as a starting point and then adjust the brush and nozzle controls to deliver the images just as you want them.
For more information, see “Adjusting the opacity and color of image hose elements” on page 489 and “Adjusting the size and spacing of
image hose elements” on page 490.
You can also control the image output by increasing stylus pressure, so you can paint larger or more colorful images, or by changing the
direction of the stroke, so you can change the angle of the images.
To use the Image hose
1Choose the Brush tool from the toolbox.
2Click the Brush Selector on the Brush Selector bar.
3Click the Image Hose brush category, and click a brush variant.
4Choose Window Media Panels Nozzles.
5In the Nozzles panel, choose a nozzle from the list box.
You can also paint with nozzle files that you have created. For more information, see “Loading and managing nozzle files” on page
499.
6Make a brushstroke on the canvas.
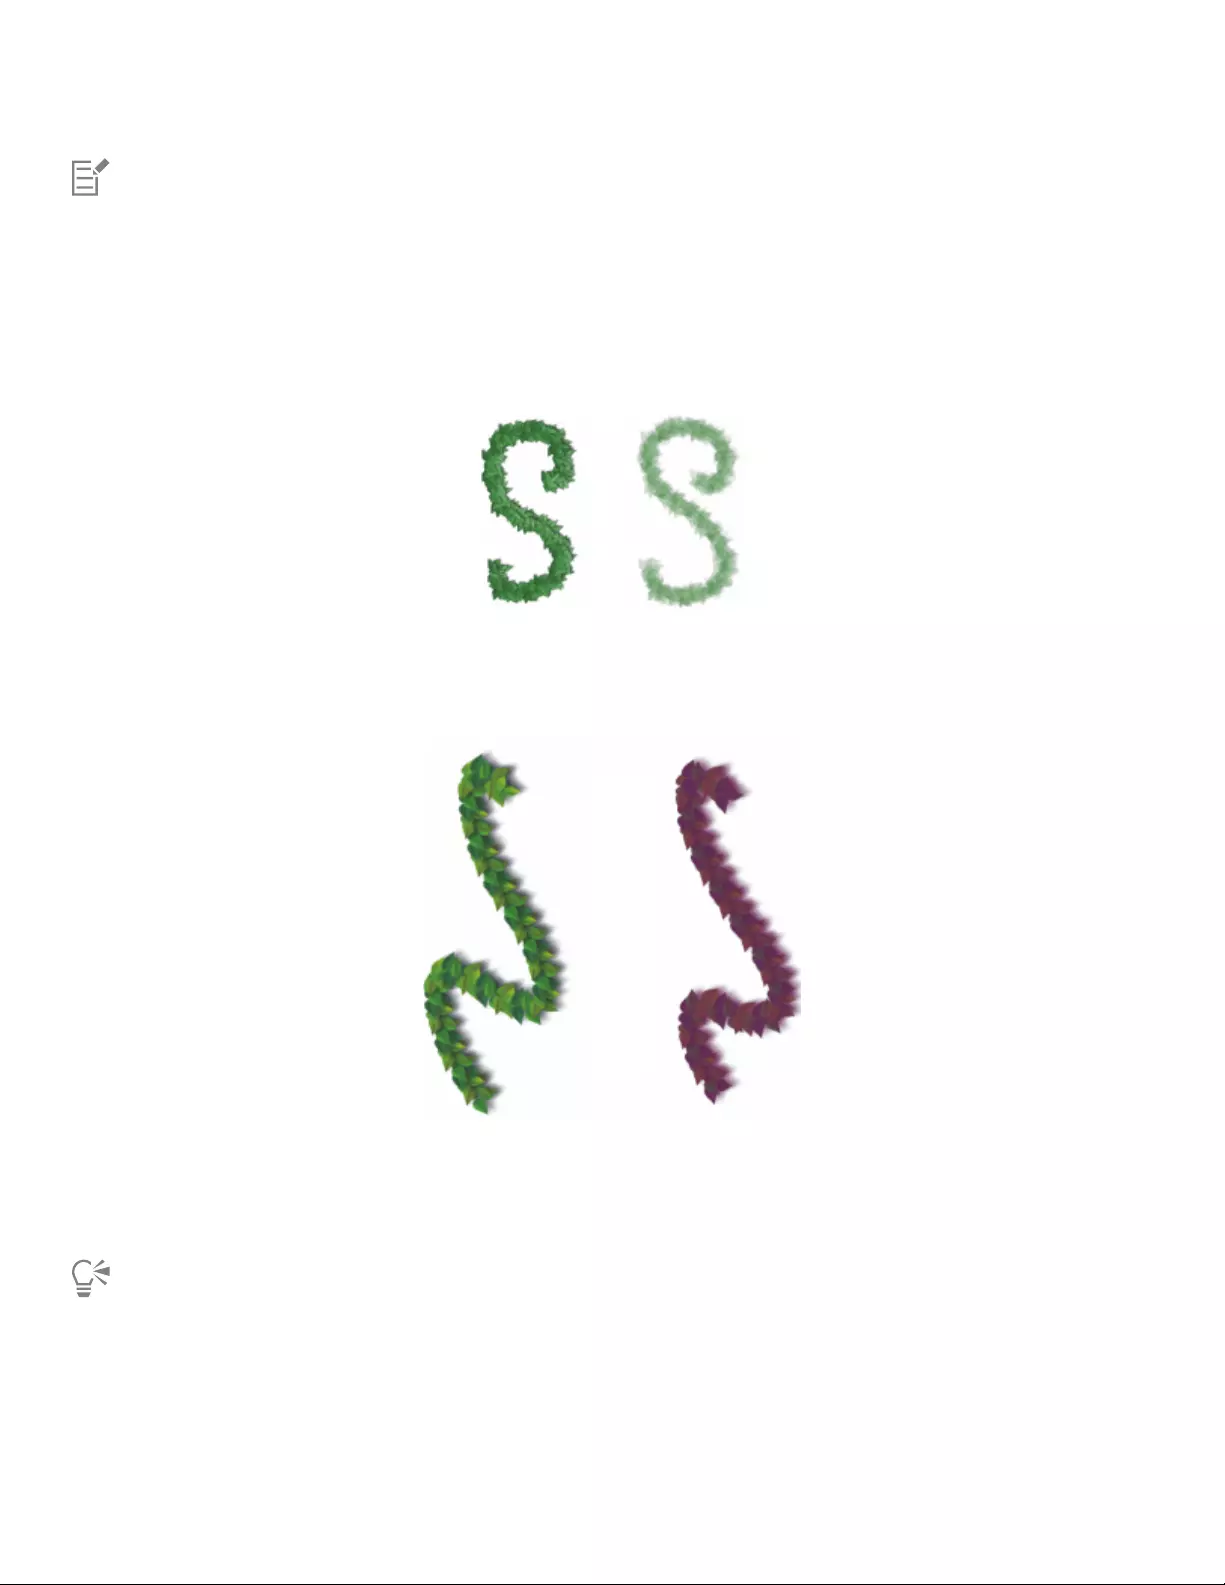
Image hose | 489
The Image hose deposits 24-bit images with an 8-bit mask. The mask enables you to layer the images gently, without aliased edges
or artifacts.
Adjusting the opacity and color of image hose elements
You can change the appearance of the image hose elements by adjusting the opacity or color. For example, you can adjust the opacity to
add transparency to the nozzle images and allow the background colors to show through.
You can change the opacity of Image hose strokes. Settings shown are 100% opacity (left) and 20% opacity (right).
You can also mix the additional color with the nozzle images to adjust the shading of image elements. If the Additional Color slider is set to
100%, the nozzle images remain unaffected. As you move the slider to the left, more of the additional color appears in the elements.
In these brushstrokes, the Additional Color is set to 100% (left) and to 39% (right).
To adjust the opacity of image hose elements
• On the property bar, move the Opacity slider.
You can also randomize the effect by choosing Window Brush Control Panels Brush Media Opacity. In the Opacity panel,
choose Random from the Expression list box.
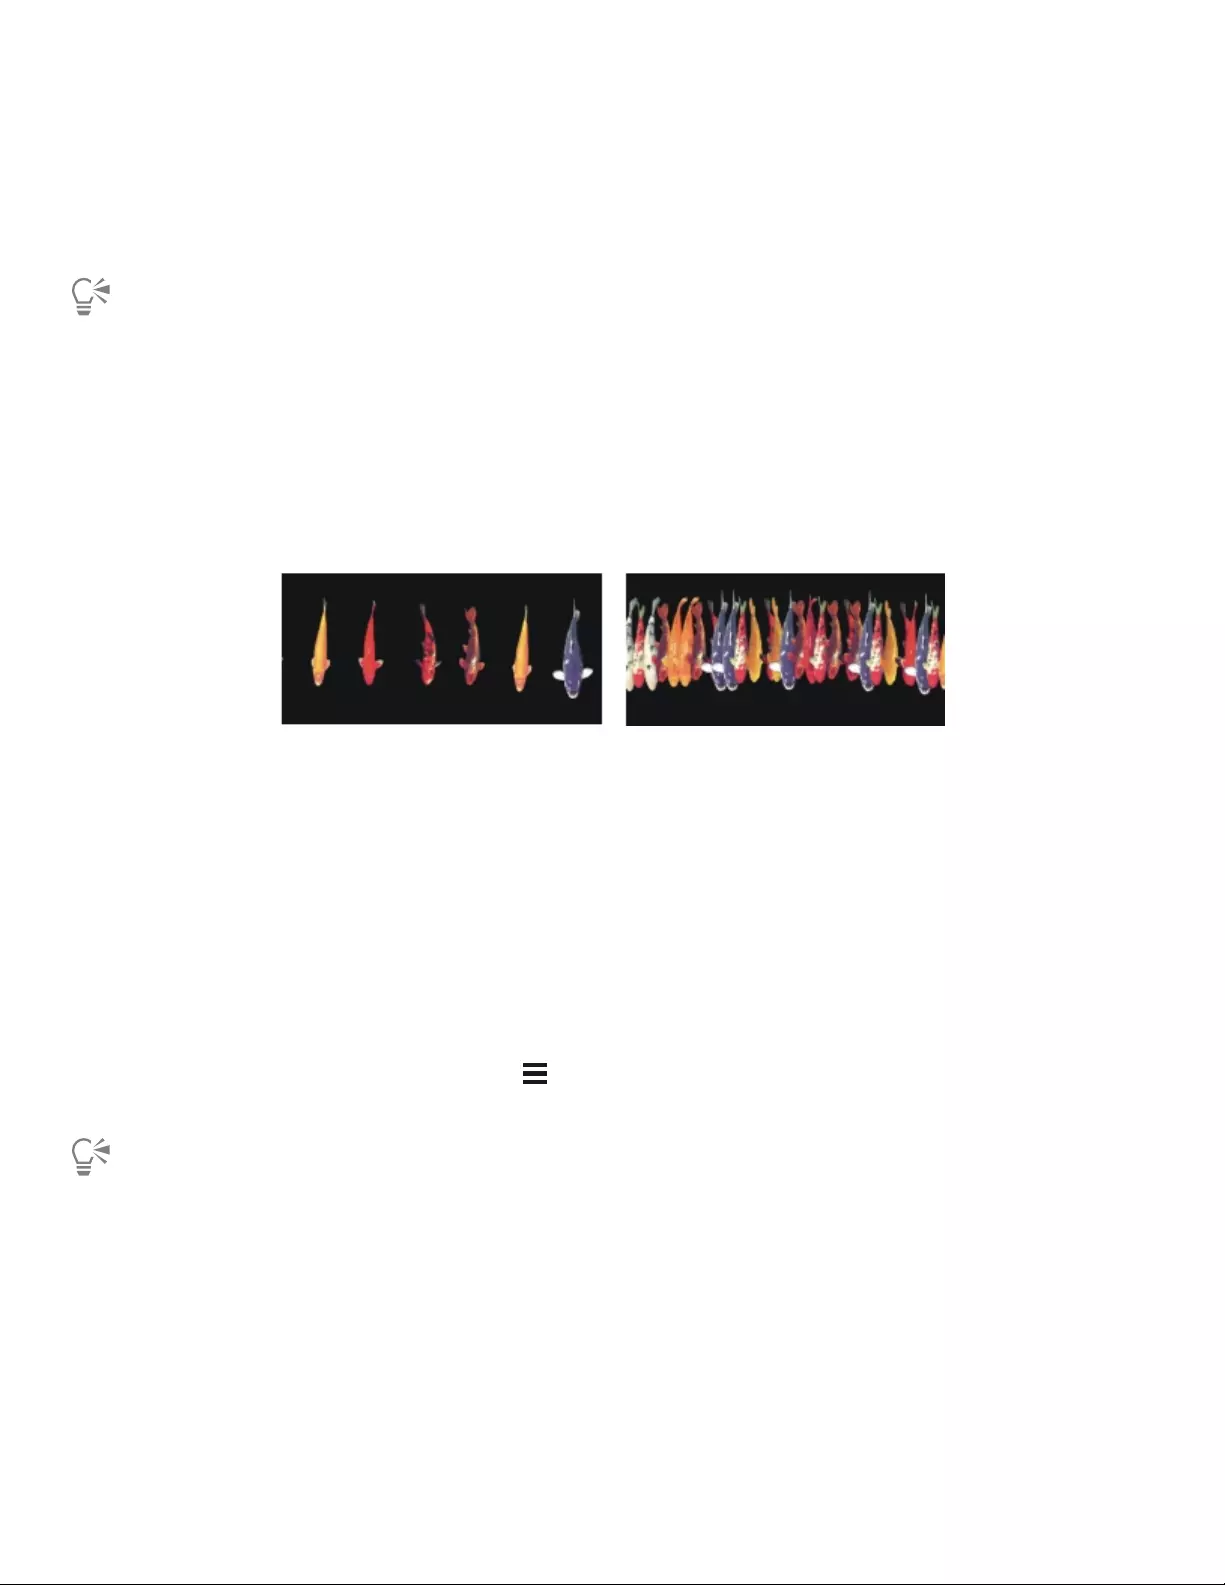
490 | Corel Painter 2022 User Guide
To adjust the color of image hose elements
1In the Color panel, click the Additional Color swatch and choose a color.
2On the property bar, move the Additional Color slider.
You can also vary the additional color that is mixed with the nozzle images by moving the Additional Color Jitter slider on the
property bar.
Adjusting the size and spacing of image hose elements
You can scale the size of image elements that are applied by the Image hose. At 100%, the images are the same size as they are in the
nozzle file.
You can also control the space between images.
The Spacing slider controls the spacing of the images. Settings shown are 85% (left) and 20% (right).
Because spacing is based on the diameter of the brush, the Size settings also affect image spacing. For example, increasing the brush size
adds space between the images applied with the hose.
The Min Size slider also affects the size of images applied by the Image hose. When set to stylus pressure or direction, the Min Size setting
determines the range within which the images you apply will vary in size. For more information, see “Spacing controls” on page 367 and
“Size controls” on page 360.
You can also randomize the proximity of images to the stroke path by increasing jitter.
To adjust the scale of the image hose elements
1Choose Window Media Panels Nozzles.
2In the Nozzles panel, click the Nozzle options button , and choose Set Nozzle Scale.
3Type a value in the New Scale box.
You can also change the scale of the elements by moving the Size slider on the property bar, just as you would with other brushes.
To adjust the spacing between Image hose elements
1Choose Window Brush Control Panels Brush Shape Spacing.
2Move the Spacing slider.
3Move the Min Spacing slider.
Image hose | 491
To randomize the spacing between Image hose elements
• On the property bar, move the Stroke Jitter slider to the right.
Indexing nozzle files
A nozzle file can contain any number of images. Usually, the images are similar and form a logical series — that is, the images progress
along some order. For example, the images might increase in size or advance in angle. It is not necessary for images to progress in a logical
series, but the Image hose is more effective when they do.
“Indexing” refers to the method used to select particular images from the many images in a nozzle file. You can apply indexing rules to
control the sequencing of nozzle images. For example, you can set up the nozzle so that by pressing harder with a pressure-sensitive stylus,
you paint with larger images.
Ranks and indexing rules
Image nozzle files can be created with one, two, or three image progressions known as “ranks.” Corel Painter offers these three rankings,
so each nozzle file can be identified as a 1-Rank, 2-Rank, or 3-Rank nozzle. For more information, see “Creating a 1-Rank nozzle” on page
494.
The following indexing rules are available for each rank in Corel Painter:
•None returns one element only — the last in the rank.
•Velocity indexes images from the rank based on the speed of the stroke. A faster stroke delivers elements from later in the rank. Velocity
is often used with a mouse to mimic pressure. Velocity can be difficult to control. For this reason, you might want to use it in a rank with
few elements.
•Direction indexes images from the rank based on the direction of the stroke. The first item in the rank corresponds to a left-to-right
stroke (toward 3 o’clock). As the stroke direction progresses counterclockwise, the Image hose delivers subsequent images from the rank.
The number of elements in the rank determines the directional change required to index a different element. For example, a nozzle file
that contains 72 images at progressive angles delivers a different item at every 5° of stroke direction (360° divided by 72 equals 5°).
This Arrow nozzle is an example of indexing based on Direction.
•Pressure indexes images based on stylus pressure. Greater pressure selects images from later in the rank. Pressure works only with
pressure-sensitive tablets. Pressure is a great control for requesting images from a nozzle. For example, if you set up your nozzle file to
progress from small to large images, heavier strokes deliver larger images.
•Wheel indexes images based on the wheel setting on an airbrush stylus.
•Tilt indexes images based on the tilt of the stylus. Not all stylus models convey this information. This control does not work with a
mouse.
•Bearing indexes images based on the position of the stylus. Not all stylus models convey this information. This control does not work
with a mouse.
•Rotation indexes images based on the rotation of a flat-tip stylus that supports 360-degree rotation.
•Source delivers images based on the luminance of pixels in the clone source (or current pattern if you have not set a clone source). The
pixels of the working document have a direct correspondence with the pixels of the clone source image. As the luminance increases,
Source delivers images from later in the rank. For best results, the clone source should have the same dimensions as the document in
which you’re working. For more information, see “Painting in the clone” on page 195. Depending on the nozzle you’re using, Source
can be quite useful. For example, if the source image is black on the left and progresses through gradations to white on the right, the
Image hose delivers images from the start of the rank at the left of the document, in the dark area. As the brush moves to the right
into the lighter area, the Image hose delivers images from later in the rank. To take advantage of this feature, you may want to create a
special source image for the single purpose of controlling the Image hose. The clone source image or pattern for controlling the Image
hose may be grayscale. Remember, Corel Painter uses only the luminance values.

492 | Corel Painter 2022 User Guide
Indexing based on Source
•Random selects images from the rank at random. Randomness can add irregularity of color and texture to the areas you paint with the
Image hose. This contributes to the aesthetics of the painting, because minor irregularities occur in natural structures.
•Sequential indexes images in the order they appear in the rank — moving left to right, and top to bottom.
Left: sequential indexing. Right: random indexing.
To change the indexing rule
1Choose Window Brush Control Panels Brush Media Image Hose.
2For each rank in the nozzle, choose an indexing rule from the list box.
If you choose Direction, adjust the Direction slider.
If you want to invert the effect of the indexing rule, click the Invert Rank button . For example, if you choose Pressure for an
indexing rule, greater stylus pressure selects images from later in the rank. Inverting the rank produces the opposite result — greater
stylus pressure delivers images from earlier in the rank.
The indexing rules for Rank 2 and Rank 3 have no effect on a 1-Rank nozzle.
Understanding nozzles, ranks, and indexing
You can create custom nozzles for the Image hose by choosing a series of images and then applying ranks and indexing rules. After saving
a custom nozzle, you can load it so you can use it in an image. For more information, see “Loading and managing nozzle files” on page
499.
You can create a simple nozzle (1-Rank) or, as your Image hose requirements become more exacting, you can create complex nozzles (2-
Rank or 3-Rank) that involve two or three progressions — for example, images getting larger and changing angle. In this case, you’ll use
one input factor to determine image size and use another factor to determine image angle.
Image hose | 493
Introducing the rank indexing system
A 1-Rank indexing system is simply a numbered sequence. You can locate any element in the sequence by specifying its number — for
example, “Item 3.”
A 2-Rank indexing system uses two perpendicular indexes. The first rank extends horizontally and the second extends vertically. Again, you’ll
vary input to locate an item for either rank. You can think of indexing in the two ranks as “selecting a column” and “selecting a row.” The
Image hose delivers the image that is located where the selected column and row intersect. For this to work properly, you must use different
indexing rules (input factors) for selecting in each rank.
A 3-Rank indexing system extends the 2-Rank model. The third rank is created by repeating the 2-Rank “set.” Within the selected set, the 1-
Rank and 2-Rank indexing (described above) is used. You must use different indexing rules for selecting in each rank.
A 3-Rank indexing system can be used with calendar dates. Any day — past, present, or future — can be located by specifying the month,
day, and year. For example, “February 25, 1962 (2/25/1962).”
Designing nozzles: 1, 2, or 3 ranks
A nozzle file contains a series of images arranged in a regular grid. Usually, the images are progressive in terms of size, shape, angle, or
color. Progression is not necessary, but it increases the sophistication of the Image hose. For example, a nozzle file with images progressing
in size can be set up so that greater stylus pressure paints incrementally larger images.
A 1-Rank nozzle progresses in one dimension. In this example, changing angle is the first rank.
If you want a two-dimensional progression, such as having image elements increasing in size and changing angle, you need to set up your
images as a 2-Rank nozzle file. Painting with a 2-Rank nozzle, you can control where your image comes from in terms of both progressions.
In this case, you use a different input factor to control the location of the image elements in each rank.
A 2-Rank nozzle progresses in two dimensions. In this example,
changing angle is the first rank, and changing size is the second rank.
You can extend the nozzle to a third progression, creating a 3-Rank nozzle. Again, you use a separate indexing rule (input factor) to control
the location in each rank. If you use one indexing rule to control two ranks, some image elements become unavailable. In the following
image, Rank 3 is a progression in color. You might control this final rank with randomness, velocity, or source — depending on your plans
for the image.
494 | Corel Painter 2022 User Guide
Color is the third rank in this 3-Rank nozzle.
It is recommended that you consider how you will control each rank before you build a nozzle. The way you lay out the images can limit
the ways you can control the indexing. Before you begin building a nozzle, you must decide which rank level you need as well as how many
elements you want in each progression. For more information, see “To change the indexing rule” on page 492.
Preparing images
Regardless of the rank level of the nozzle you are making or the method you use to build it, the following tips will help you develop the
individual images.
Each element in an Image hose nozzle must be selected. The selection allows you to paint with images of irregular shape. Only what is inside
the selection will flow from the Image hose.
You might want to work by creating a silhouette of the image shape as a selection, and then fill in the color information later. With soft
edges to the selection, you can create images that are anti-aliased automatically. This improves the continuity across an area of hosed
images.
You can create Image hose nozzles from layers. As you create image elements, turn them into layers. If the layer looks good when dropped
on different backgrounds, the image will look good as a nozzle element. Building a nozzle from layers offers advantages in convenience as
well.
Another technique is to float the image on a black background and add a drop shadow. This will enhance the appearance of three
dimensions, as image elements build up in layers. When all elements have the shadow in the same position, the light source appears the
same across the painted area. For more information, see “Layers” on page 539.
Creating a 1-Rank nozzle
To create a 1-Rank nozzle, first you create the images that you want to include in the nozzle. Each image must be created on a separate
layer. You can then select and group the individual layers and save the nozzle file in the RIFF format. To use the new 1-Rank nozzle, you load
it in the nozzle library. For more information, see “Loading and managing nozzle files” on page 499.
Image hose | 495
In a 1-Rank nozzle, the images do not need to be in one line. Corel Painter wraps images onto several lines to create a document of
reasonable shape. Corel Painter follows a mathematical rule in reconstructing the rank of images. This rule is contained in the nozzle
definition. For more information, see “To build a 2-Rank nozzle” on page 497.
Nozzles are most useful when they deliver similar images with some irregularity — for example, butterflies on flowers.
To create a 1-Rank nozzle from layers
1Choose Window Layers.
2Click the New Layer button .
3Create an image element to be used as a nozzle.
The alignment of layers in the document doesn’t affect the nozzle-building process.
4Repeat steps 2 and 3 to create additional image elements.
Rearrange the layer hierarchy to create the progression you want in the nozzle. The top layer on the list will be the first element in the
nozzle sequence. Moving down the list advances through the element progression.
5Hold down the Shift key, and select the layers that you want to add to the nozzle.
6Click the Layer Commands button , and choose Group Layers.
All items are now part of the same group.
7Choose Window Media Panels Nozzles.
8In the Nozzles panel, click the Nozzle options button , and choose Make Nozzle From Group.
Corel Painter creates a new, untitled image. This is your nozzle file.
9From the menu bar, choose File Save.
Save the file to the RIFF format.

496 | Corel Painter 2022 User Guide
Creating a nozzle from layers
Creating a 2-Rank nozzle
If you want to create a 2-Rank nozzle, such as a nozzle with a two-dimensional progression, you need to set up the nozzle images
accordingly. Unlike 1-Rank nozzles, nozzles of two and three ranks cannot be created from a layer group. You must build these nozzles
manually. The indexing system requires the nozzle images to fit in a grid. You can create a nozzle file by setting up a grid and placing an
image element at the center of each cell.
The cell size is based on the smallest rectangle that will hold the largest image element (including its selection). To make sure that your
images fit in the grid, copy your largest image element to a layer. After you have set up the nozzle images in the grid, you can build your
nozzle. For more information, see “Creating and deleting layers” on page 545.
To determine the grid cell size and nozzle dimensions
1In the toolbox, click the Layer Adjuster tool , enable the Auto-Select Layer check box on the property bar, and in the document
window click the layer with the largest image element that you want to include in the nozzle.
Corel Painter displays the pixel width and height of the layer’s content in the Navigator panel. To display the Navigator panel, choose
Window Navigator.
You might want to use slightly larger values for the grid cell size.
Determine the number of elements that you want in each rank.
2Multiply the number of items in Rank-1 by the cell width.
This value is the nozzle’s width.
3Multiply the number of items in Rank-2 by the cell height.
This value is the nozzle’s height.
To create the grid
1From the menu bar, choose File New, and enter the nozzle’s width and height in the Width and Height boxes.
You must enter the nozzle’s width and height that you calculated in steps 3 and 4 of “To determine the grid cell size and nozzle
dimensions” on page 496.
2From the menu bar, choose Canvas Virtual Grid Virtual Grid Options.
3In the Grid Options dialog box, set the Horizontal spacing and Vertical spacing to the values of the cell width and height, and click
OK.
You need to enter the cell width and height from step 1 of “To determine the grid cell size and nozzle dimensions” on page 496.
4Show the grid by choosing Canvas Virtual Grid Show Virtual Grid.
The grid should describe the number of elements you want in each rank — Rank 1 horizontally and Rank 2 vertically.
Image hose | 497
To build a 2-Rank nozzle
1Place one image element in the center of each grid cell.
Follow an appropriate progression based on your intentions for controlling this nozzle.
The easiest way to do this is with layers. When you bring image elements into the grid as layers, they bring their layer masks with them.
If the image elements are layers in different files, it is easier to open the files one at a time.
2From the menu bar, choose Window Layers.
3In the Layers panel, select all layers.
4Click the Layer options button , and choose Drop and Select.
5From the menu bar, choose File Save As, and save the file in RIFF format.
In this finished 2-Rank nozzle, variety is the first rank, and size is the second rank.
To paint with your new nozzle file, you’ll need to load it first. For more information, see “To load a 1-Rank nozzle file” on page
499.
Creating a 3-Rank nozzle
You can create a 3-Rank nozzle using the grid method.
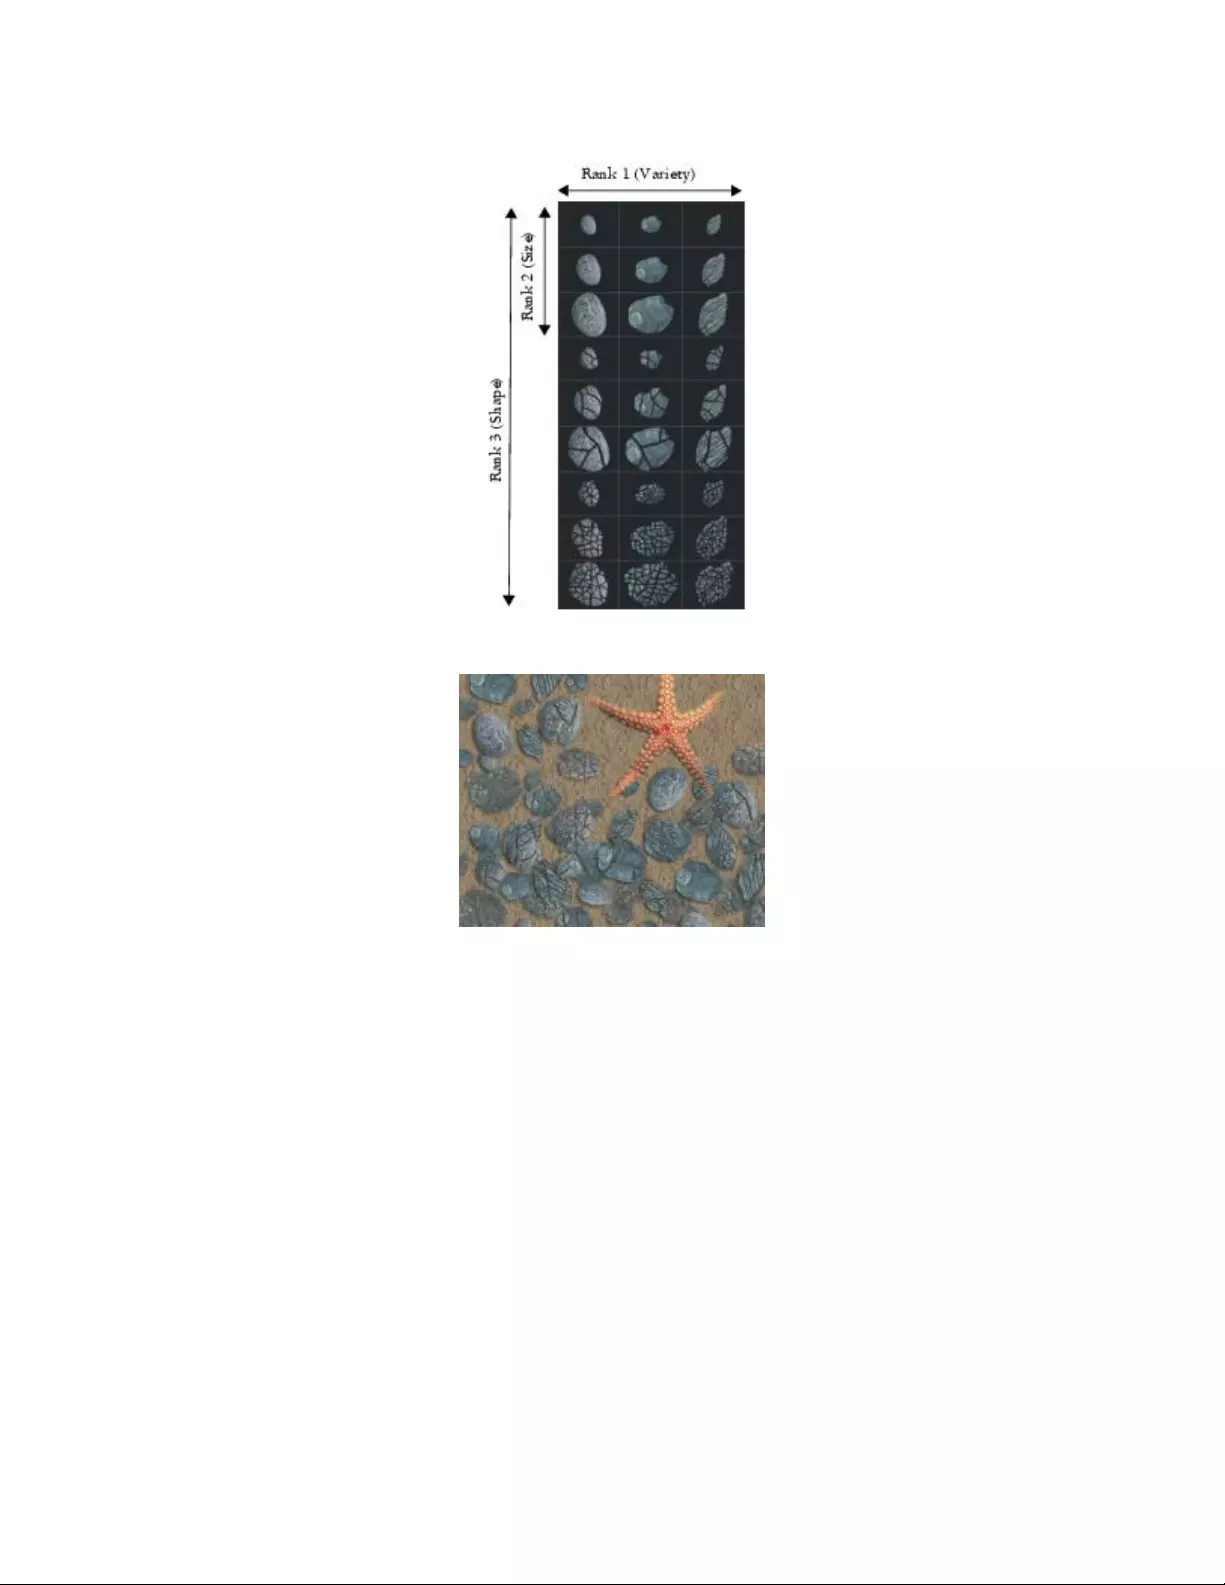
498 | Corel Painter 2022 User Guide
This nozzle file has three items in Rank 1, three items in Rank 2, and three items in Rank 3.
Painting with the 3-Rank nozzle “Broken Shells”
To create a 3-Rank nozzle
1Build or open a 2-Rank file.
2Determine the number of elements you want in the third rank.
3Choose Window Navigator to display the Navigator panel, and check the height of the current nozzle file.
4Multiply the number of items in the third rank by the height of the file.
The result will be the height of your 3-Rank nozzle file.
5Choose Select Reselect.
6Choose Select Float.
7Choose Edit Copy.
Now you must extend this file vertically to accommodate the items in the third rank.
8In the Layers panel, select the canvas.
9From the menu bar, choose Canvas Canvas Size.
10 To set the canvas to the height of your 3-Rank nozzle, add the correct number of pixels in the Add: pixels to bottom box.
The value you need is the difference between the height of the 3-Rank nozzle calculated in step 4 and the height of the open 2-Rank
nozzle.
Image hose | 499
Now you can develop images for each item (set) in the third rank.
11 Choose Edit Paste, and position the pasted layer in the area you added.
The images should be centered in the grid cells.
If necessary, modify the images in this layer.
12 Select both layers in the Layers panel.
13 Click the Layer options button , and choose Drop and Select.
14 Choose File Save, and save the file in RIFF format.
If you previously defined this file as a nozzle, you must edit the definition to describe the three ranks you created.
15 Choose File Get Info, and edit the nozzle definition in the File Information dialog box.
For example, the nozzle definition “Image hose 3 by 3” describes a 2-Rank nozzle with three image elements (items) in Rank 1 and three
image elements in Rank 2. Suppose the new nozzle has three image elements in Rank 3. To paint with images from all three ranks, you
need to change the nozzle definition to “Image hose 3 by 3 by 3”.
To paint with your new nozzle file, you first need to load it. For more information, see “To load a 1-Rank nozzle file” on page
499.
Loading and managing nozzle files
To paint with a custom nozzle file, one that isn’t available in a nozzle library, you need to load it in the application. You can also store
custom nozzle files by adding them to a nozzle library. For information about painting with nozzle files using an Image hose variant, see
“Painting with the Image hose” on page 487.
To load a 1-Rank nozzle file
1Choose Window Media Panels Nozzles.
2In the Nozzles panel, click the Nozzle options button , and choose Load Nozzle.
3Choose a nozzle from the Open dialog box, and click Open.
4You can now paint with the nozzle.
To load a 2-Rank or 3-Rank nozzle file
1Choose Window Media Panels Nozzles.
2In the Nozzles panel, click the Nozzle options button , and choose Load Nozzle.
3Choose a nozzle from the Open dialog box, and click Open.
4In the Item Width and Item Height boxes in the Nozzle Definition dialog box, enter the values you set in the nozzle file. These values
describe the grid cell size.
If you are not sure about these values, first open the nozzle file, and choose File Get Info. The File Information dialog displays all the
information you need. For example, “Image hose 3 by 2 items (height 100, width 100)” indicates that this is a 2-Rank nozzle, with three
image elements in Rank 1 (horizontal progression) and two image elements in Rank 2 (vertical progression). Item width and height are
100 pixels each (grid cell size of 100 by 100 pixels).
5In the Index Rank box, enter 2 for a 2-Rank nozzle and 3 for 3-Rank nozzle.
6In the Rank columns, enter the number of image elements used in each rank of the nozzle file.
If this is a 2-Rank nozzle file, enter 1 in the Rank 3 column.
500 | Corel Painter 2022 User Guide
If the values you enter do not describe the file, Corel Painter won’t accept them. In other words, the “number of items” in Rank 1
(horizontal progression) multiplied by the “item width” must equal the width of the nozzle file; the “number of items” in Rank 2 (vertical
progression) multiplied by the “item height” must equal the height of the nozzle file.
Remember, you still need to describe the indexing rule for each rank.
Corel Painter needs the information you enter in the Nozzle Definition dialog box to index images correctly.
To add a nozzle to the library
1Choose Window Media Panels Nozzles.
2In the Nozzles panel, click the Nozzle options button , and choose Load Nozzle.
3Locate your nozzle file in the dialog box, and click Open.
If necessary, enter the values to define the number of elements, their size, and rank.
4In the Nozzles panel, click the Nozzle options button , and choose Add Nozzle to Library.
5In the Save Nozzle dialog box, name the nozzle.
To retrieve and edit a nozzle
1Choose Window Media Panels Nozzles.
2In the Nozzles panel, click the Nozzle options button , and choose Check Out Nozzle.
3In the Check Out Nozzle dialog box, type a value in the Scale box.
Corel Painter opens the nozzle file in an image window.
4Choose Select Reselect.
5If necessary, edit the file.
Make sure to keep the selections.
6Choose File Save As, and save the file to the folder you want.
If you want to protect your original nozzle, save the file under a different name.
7Choose Window Media Panels Nozzles.
8In the Nozzles panel, click the Nozzle options button , and choose Load Nozzle, and select the nozzle you just saved.
9To put the nozzle back in the library, click the Nozzle options button , and choose Add Nozzle to Library.
Creating a nozzle from a movie
(Windows only)
On the Windows operating system, Corel Painter lets you create an Image hose nozzle from a movie. This allows you to transform each
frame of a Corel Painter movie into Image hose imagery. The frame size describes the item size. If you’re creating a movie just to turn it into
a nozzle, set the frame size just large enough to hold your largest image element. You can use the selection in each frame to control the
shape of the images.
The Make Nozzle From Movie command automatically creates a 1-Rank nozzle. If you want, you can use this technique to create a 2-Rank
nozzle.
To make a nozzle file from a movie
1Open the movie that you want to turn into a nozzle file.
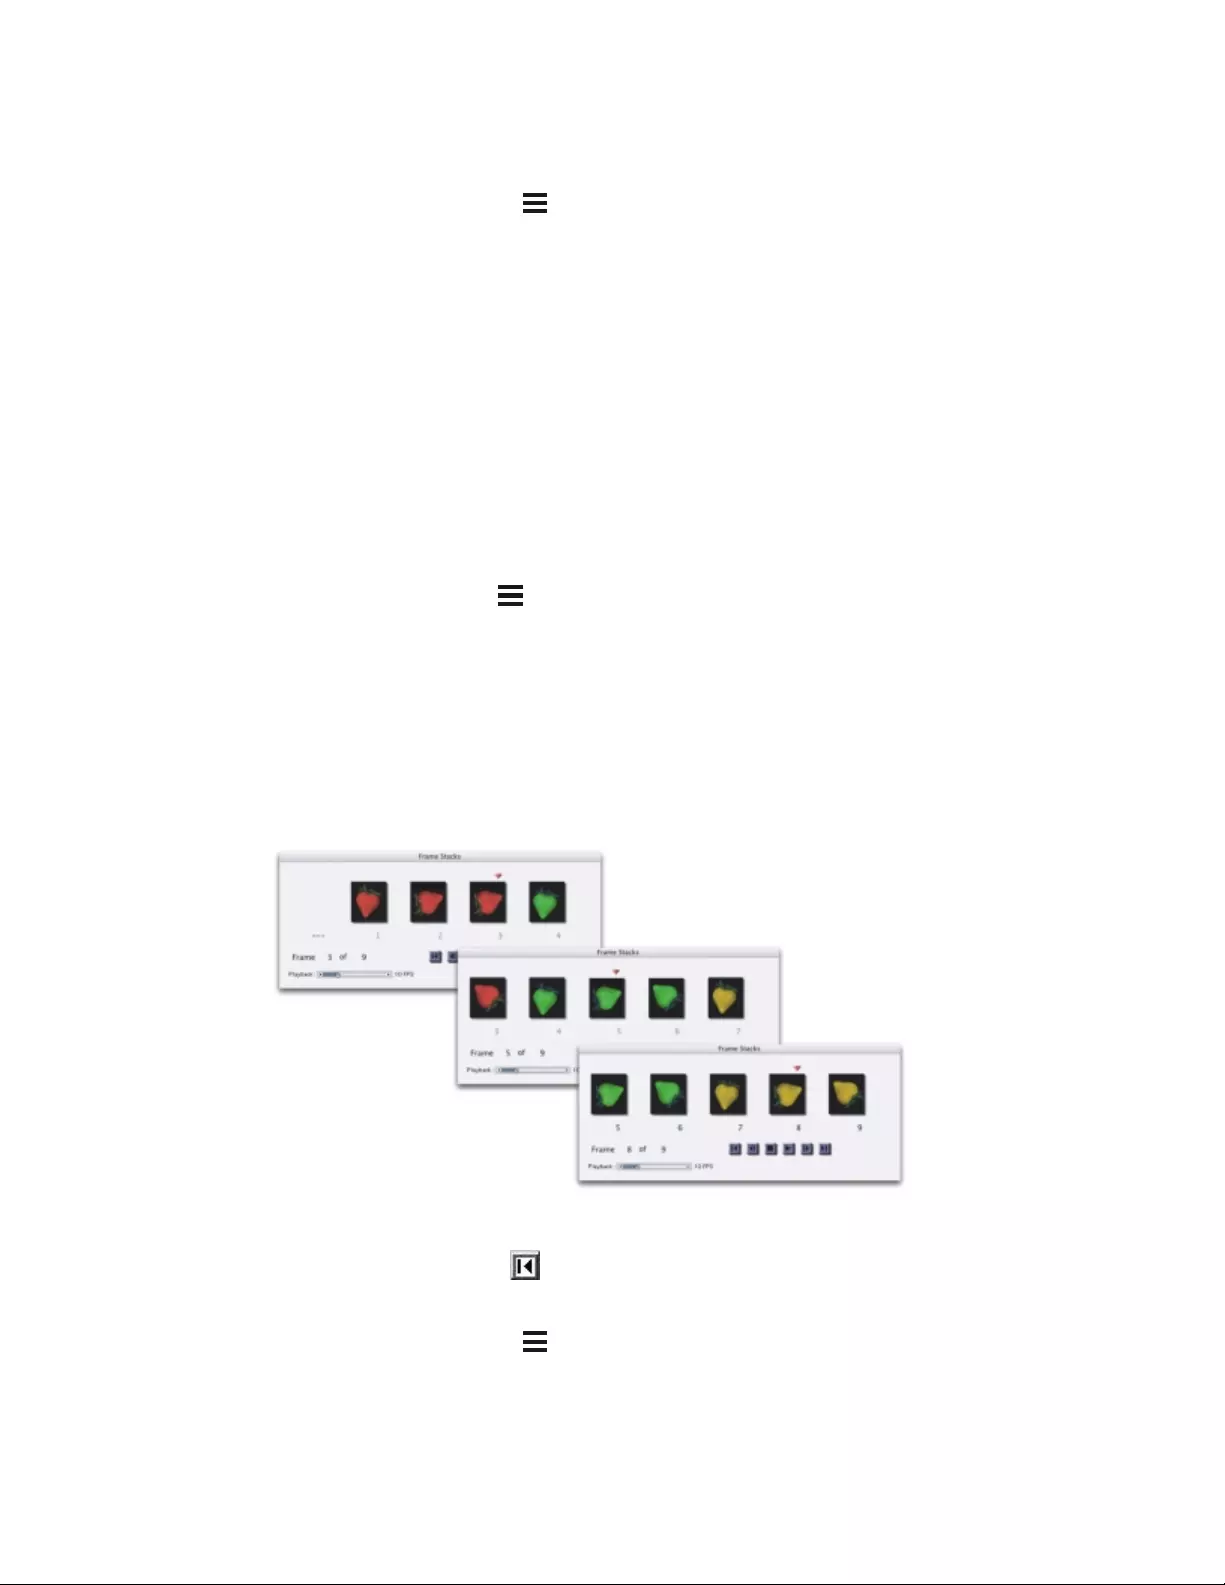
Image hose | 501
2Choose Window Media Panels Nozzles.
3In the Nozzles panel, click the Nozzle options button , and choose Make Nozzle From Movie.
An untitled image file appears containing each movie frame.
4If you didn’t create selections in a frame of the frame stack, you can create the selections now.
Remember, each image element must be included in the selection.
5Save the file in RIFF format.
You can now load and use this file as you would any 1-Rank nozzle file.
To make a 2-Rank nozzle from a movie
1Choose Movie New Movie, and start a movie.
The frame size (canvas width and height) should be just large enough to hold your largest image element.
The total number of frames must equal the number of elements in Rank 1 multiplied by the number of elements in Rank 2. For example,
for a 2-rank nozzle with three items in Rank 1 and three items in Rank 2, the movie needs to contain nine frames.
2Add an image element to the first frame. You can add image elements by using selections or layers.
3In the Layers panel, click the Layer options button , and choose Drop and Select.
4Move to the second frame, and add an image element. Edit the image element if necessary, and repeat step 3 before moving to the next
frame.
5Continue adding image elements to the remaining frames. Make sure to apply the Drop and Select command before moving to a new
frame.
You need to arrange image elements in sets according to the second rank. In the following example, the second rank progression for the
new nozzle is changing color. The movie is organized in three color sets. Frames 1 to 3 form the red set; frames 4 to 6, the green set,
and frames 7 to 9, the yellow set. Each set is the first rank progression (changing angle) for the new nozzle and contains images that are
the same color but are placed at a different angle.
The image elements in this movie are arranged in color sets according to the second rank.
6In the Frame Stacks panel, click the Rewind button to return to the first frame of the movie.
7Choose Window Media Panels Nozzles.
8In the Nozzles panel, click the Nozzle options button , and choose Make Nozzle From Movie.
A new file appears.
502 | Corel Painter 2022 User Guide
The resulting nozzle file from the movie in the previous example
9From the menu bar, choose File Get Info.
The File Information dialog box holds the information Corel Painter uses to index in this file.
10 Edit the statement to describe the nozzle index you created.
For example, the statement “Image hose 9 items” describes a 1-Rank nozzle with nine image elements. To describe a 2-Rank nozzle with
three items in Rank 1 and three items in Rank 2, you need to change the statement to “Image hose 3 by 3 items.”
11 Save the file.
To paint with the new nozzle file, you need to load it first. For more information, see “To load a 2-Rank or 3-Rank nozzle file” on page
499.
Do not allow empty frames at the end of the movie.
RealBristle™ brushes | 503
RealBristle™ brushes
RealBristle brushes bring a new level of realism to the digital painting experience by simulating the natural movement of an artist’s brush.
The resulting brushstrokes and their interaction with the canvas more closely reflect the look and feel of working with a traditional art brush.
RealBristle Painting System
Artwork by Cher Threinen-Pendarvis
RealBristle brush variants are based on brush variants from different brush categories, such as Acrylics, Oils, and Watercolor.
When you work with RealBristle brushes, enabling the Enhanced Brush Ghost option gives you more visual feedback about your brush. For
more information, see “Setting up the drawing cursor” on page 159.
This section contains the following topics:
•“Getting started with RealBristle brushes” (page 503)
•“Modifying RealBristle settings” (page 504)
•“Using RealBristle brushes with Dynamic Speckles” (page 506)
Getting started with RealBristle brushes
RealBristle brush variants are stored in various brush categories, such as Acrylics, Oils, Watercolor, and more. They consist of a broad range
of bristle-based brushes that let you apply brushstrokes to the canvas or a layer.

504 | Corel Painter 2022 User Guide
To choose a RealBristle brush variant
1Click Window Search.
2In the Search bar, type realbristle.
3Choose a brush variant from the list.
Modifying RealBristle settings
You can work with a preset RealBristle brush variant or customize a preset brush and save it as a new brush variant. The RealBristle panel
gives you easy access to settings that let you modify a brush variant.
The following diagram outlines some key terminology used to describe RealBristle brushes and their settings.
The RealBristle panel
The RealBristle panel contains the following settings:
Roundness — lets you control the rounding along the width of the brush and overall shape of the brush. With a round brush, lower values
flatten the brush to create an elliptical shape (can be flattened to a minimum thickness of 10% of the diameter). With a flat brush, lower
values create a brush with more angular corners (90 degree edges as opposed to rounded edges).
The brush on the left approximates the rounded edges created by a flat brush with a Roundness
setting of 1%; the brush on the right approximates a round brush with a Roundness setting of 100%.
Expression — lets you choose an expression, such as direction or velocity, to rotate the brush. For information about expression settings, see
“Expression settings” on page 339.
Bristle length — lets you control the length of the bristles, from the end of the ferrule to the tip of the brush. The bristle length is calculated
by multiplying the brush size value by the bristle length value you choose. For example, if your Brush size setting is 20, and your Bristle
length setting is 2, the length of the bristles is 40.
RealBristle™ brushes | 505
The brush on the left approximates a brush with a Bristle length setting
of 1; the brush on the right approximates a brush with a setting of 2.
Profile length — lets you control the length of the profile as a percentage of the overall length of the bristles.
Although quite different in shape, both brushes have a Profile length of approximately 50%.
Bristle rigidity — lets you control the flexibility of the bristles. Lower values create a more flexible brush, similar to a sable hair brush; higher
values create a more rigid brush, similar to a hog hair brush.
The brush on the left has a Bristle rigidity setting of approximately
90%; the brush on the right has a setting of approximately 30%.
Fanning — lets you control how the bristles spread out from the ferrule. Lower values keep the bristles closer together, creating a more
pointed tip; higher values spread the bristles out.
The brush on the left represents a Fanning setting of 100%; the brush on the right represents a setting of 0%.
Friction — lets you control how smoothly the bristles move across the canvas. This setting works in conjunction with the Rigidity setting.
Lower values produce smoother strokes; higher values produce more textured, splayed brushstrokes.
Height — lets you control the minimum distance between the ferrule and the canvas. Higher values let you paint with the tip of the brush
only; lower values let you compress the bristles against the canvas, causing the bristles to splay in different directions.
506 | Corel Painter 2022 User Guide
The brush on the left represents a Height setting of 100%; the brush on the right represents a height setting of 50%.
To open the RealBristle panel
•Choose Window Brush Control Panels Brush Shape RealBristle.
To customize a RealBristle brush variant
1Click Window Search.
2In the Search bar, type realbristle, and then choose a brush variant from the list.
3Choose Window Brush Control Panels Brush Shape RealBristle.
If the selected brush variant is a true RealBristle brush, the controls in the RealBristle panel are available and the Enable RealBristle
check box is enabled.
4Choose Window Brush Control Panels Brush Shape Dab Profile.
5In the Dab Profile panel, click the brush tip profile that you want to use.
6In the RealBristle panel, adjust any of the Brush sliders.
7In the RealBristle panel, adjust any of the Surface sliders.
By enabling the Enable RealBristle check box, you can create RealBristle brushes from any brush variant that uses the following
Dab types: Camel Hair, Flat, Palette Knife, or Bristle Spray.
Using RealBristle brushes with Dynamic Speckles
Some RealBristle brushes can be used with dynamic speckles to create thicker, more pronounced strokes. To use dynamic speckles with a
RealBristle brush, you must first choose the Dynamic Speckle Bristle dab type from the General brush control panel. For more information,
see “Dynamic Speckles controls” on page 413.

Thick Paint | 507
Thick Paint
Thick Paint brushes offer a natural-media experience with the look and feel of thick paint and traditional impasto. They can help you paint
beautiful images by adding depth, texture, or movement regardless of whether you are creating traditional art, photo art, or illustrations.
Thick Paint brushes create visible brush and knife marks in the painting. Artwork by Cher Pendarvis.
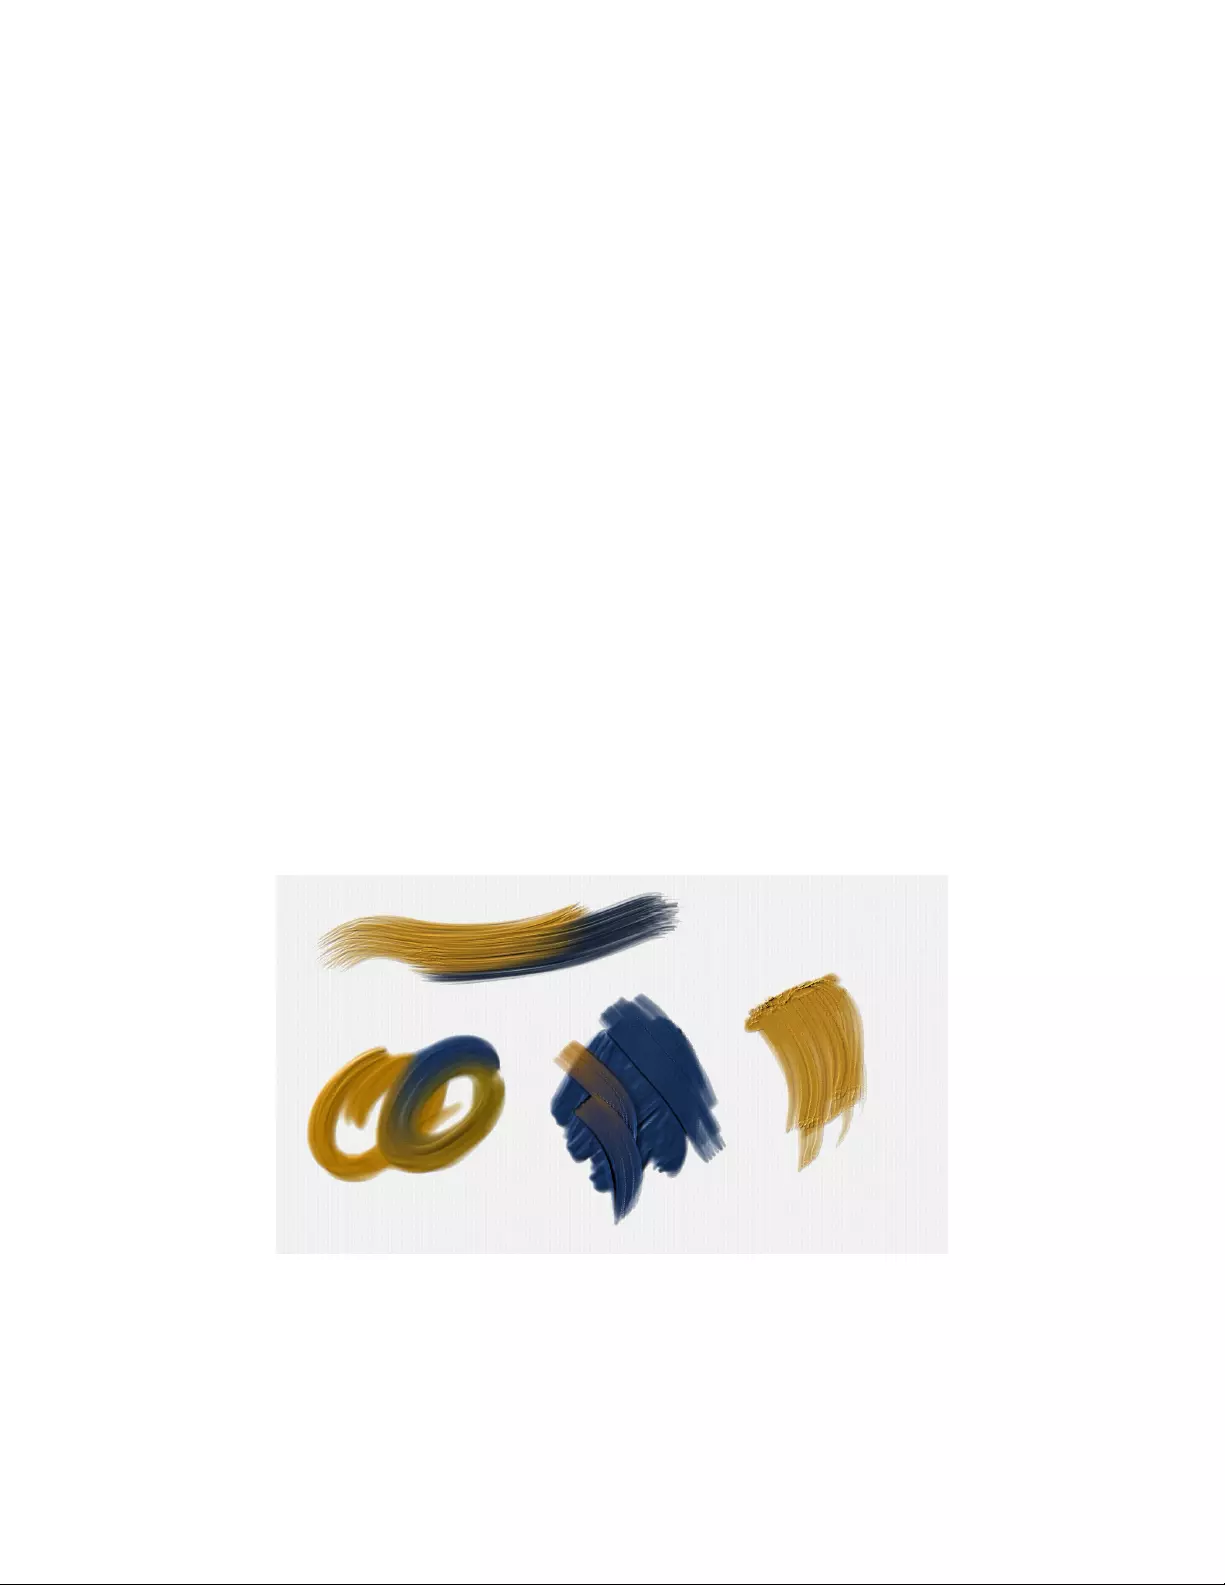
508 | Corel Painter 2022 User Guide
Thick Paint brushes apply paint that you can blend, build up, push, pull, and scrape. You can use these brushes to create dry and semi-
transparent brushstrokes, reveal or hide paper texture, and blend brushstrokes naturally. In addition, you can displace and carve paint,
creating indents in the brushstrokes.
Thick Paint brushes can be adjusted with the help of presets and special Thick Paint controls. You can use the pressure, the tilt, and even the
rotation of your stylus to control and vary your brushstrokes with ease.
Thick Paint brushstrokes are applied on special layers. You can adjust the properties of these layers for a more or less pronounced thick-paint
effect.
Brushstrokes applied with Thick Paint brushes reflect the light in a specific way. You can adjust the lighting and shadows in the brushstrokes
to fine-tune brushstroke appearance and set the lighting of your image.
Thick Paint brushes create brushstrokes similar to Impasto brushstrokes but with a more realistic look and feel. For information about
Impasto, see “Impasto” on page 529.
This section includes the following topics:
•“Painting with Thick Paint” (page 508)
•“Thick Paint — Media controls” (page 511)
•“Thick Paint — Shape controls” (page 515)
•“Thick Paint — Wetness controls” (page 513)
•“Adjusting Thick Paint layers” (page 518)
•“Adjusting Thick Paint lighting” (page 519)
•“Cloning with Thick Paint brushes” (page 522)
Painting with Thick Paint
There are two types of Thick Paint brushes: bristle brushes and palette knives. Bristle brushes let you apply thick paint while simulating the
movement of a traditional artist brush; palette knives let you scrape, push, and drag colors in your image.
Sample brushstrokes with Thick Paint : Bristles (left) and Thick Paint : Palette Knives (middle and right)
To find a brush that has the specific shape or mark you need, browse the Thick Brush variants accessible from the Brush Selector.
Once you find the brush you want, you can start painting. You can also quickly adjust brushstroke appearance by accessing presets and
other controls from the property bar.
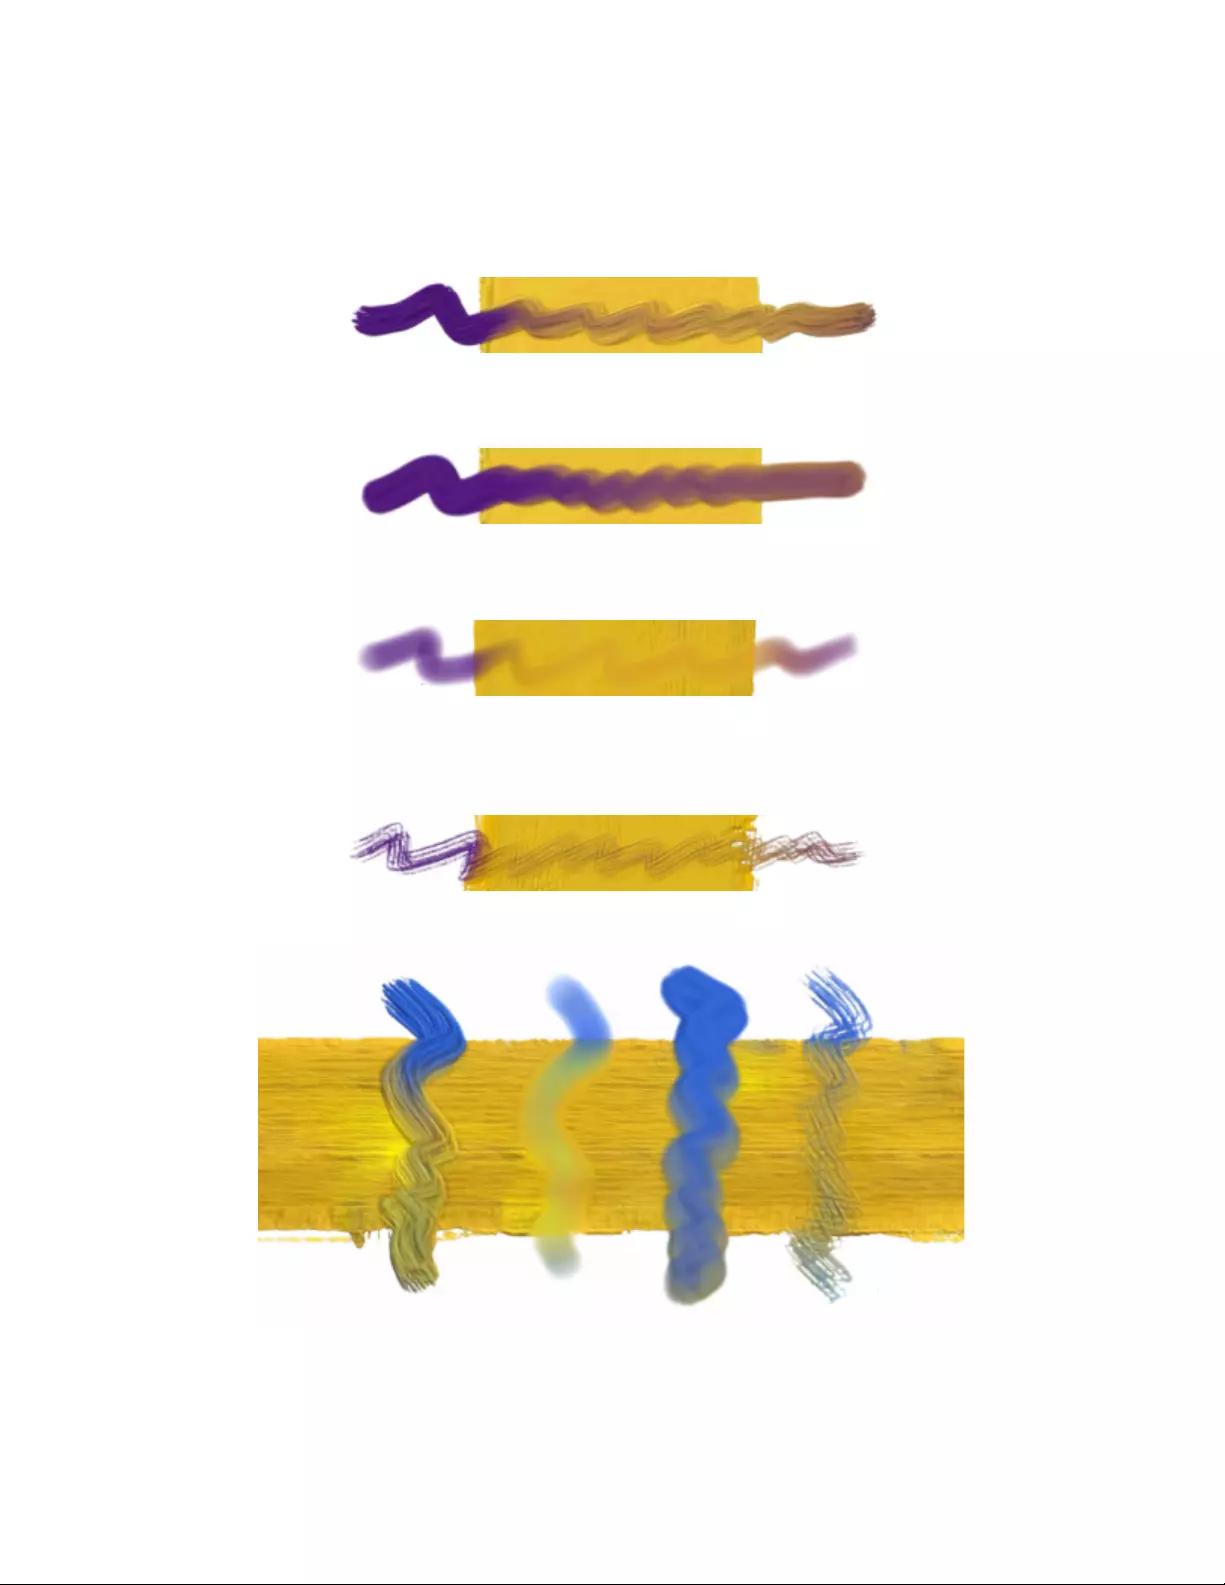
Thick Paint | 509
Technique presets
Depending on the technique you want to use, you can choose from the following presets:
Thick lets you add thick, rich brushstrokes that have a very pronounced impasto effect.
Thick
Soft lets you apply smooth, flat, and fluid brushstrokes that are ideal for adding detail to an image or filling large areas.
Soft
Thin lets you apply thin brushstrokes that lightly cover existing strokes and can reveal some paper texture.
Thin
Dry lets you paint long, crisp brushstrokes, with visible bristle marks. With this preset, you can use the brush to skim the surface, applying a
light touch to create fully opaque brushstrokes. You can also use Dry for brushstrokes that drag existing paint.
Dry
Brushstrokes made with the same brush but with different technique presets applied: Thick, Soft, Thin, and Dry.
510 | Corel Painter 2022 User Guide
Loading paint
Most Thick Paint brushes are loaded with a certain amount of paint. You can adjust the amount of paint on your Thick Paint brush before
you start painting. That way, you don’t need to interrupt your painting to refill with paint.
Thick Paint controls
Special Thick Paint brush controls let you customize your brushstrokes and create your own Thick Paint brushes. These controls are grouped
into three panels: Thick Paint — Media, Thick Paint — Shape, and Thick Paint — Wetness. The Media controls let you customize the paint applied
by the Thick Paint brush. The Shape controls let you customize the behavior of the brush. The Wetness controls let you customize the
interaction of Thick Paint with the canvas. Most controls are common for Thick Paint Bristle brushes and Thick Paint Palette Knife brushes.
For more information, see “Thick Paint — Media controls” on page 511, “Thick Paint — Shape controls” on page 515, and “Thick Paint —
Wetness controls” on page 513.
In addition, you can add RealBristle features to your Thick Paint Bristle brushes. For more information about RealBristle features, see
“Modifying RealBristle settings” on page 504.
You can also improve the brush performance of Thick Paint brushes.
To paint with a Thick Paint brush
1In the toolbox, click the Brush tool .
2Click the Brush Selector on the Brush Selector bar.
3Click a Thick Paint brush category, and click a brush variant.
4Paint in the document window.
To choose a Thick Paint technique
1Select a Thick Paint brush.
2On the property bar, click the Media flyout button , and choose a preset from the Technique area.
To load a Thick Paint brush with paint
1Select a Thick Paint brush variant.
2Adjust the Paint Load slider on the property bar.
3Paint in the document window.
You can create a custom shortcut to access the Paint Load control. Choose Corel Painter 2022 menu Preferences Customize
Keys (macOS) or Edit Preferences Customize Keys (Windows). From the Shortcuts (Windows) or Shortcuts for (macOS)
list box, choose Other. In the list of Application Commands, scroll down to the Thick Paint Load (onscreen) command. In the
Shortcut column next to the command, type the shortcut keys you want to assign. Click OK. If the shortcut you assigned is already
in use, a message appears below the Application Commands list. To proceed, click one of the following:
•Accept — to assign the shortcut to the Thick Paint Load (onscreen) command while deleting the shortcut key from the
conflicting command
•Accept and Go To Conflict (Windows) or Apply and Reassign (macOS) — to assign the shortcut to the Thick Paint Load
(onscreen) command and then assign another keyboard shortcut to the conflicting command
You can also load paint onscreen by using keyboard shortcuts, similarly to the way you can change brush attributes such as size,
opacity, squeeze, and angle. First, hold down Command + Option (macOS) or Ctrl + Alt (Windows), and drag in the document
window to resize the brush. Release the keys without releasing the mouse button or lifting the stylus, and then press Command
(macOS) or Ctrl (Windows) several times to cycle through opacity, squeeze, and angle until the Paint Load control is displayed.
Next, drag in the document window to load the brush.
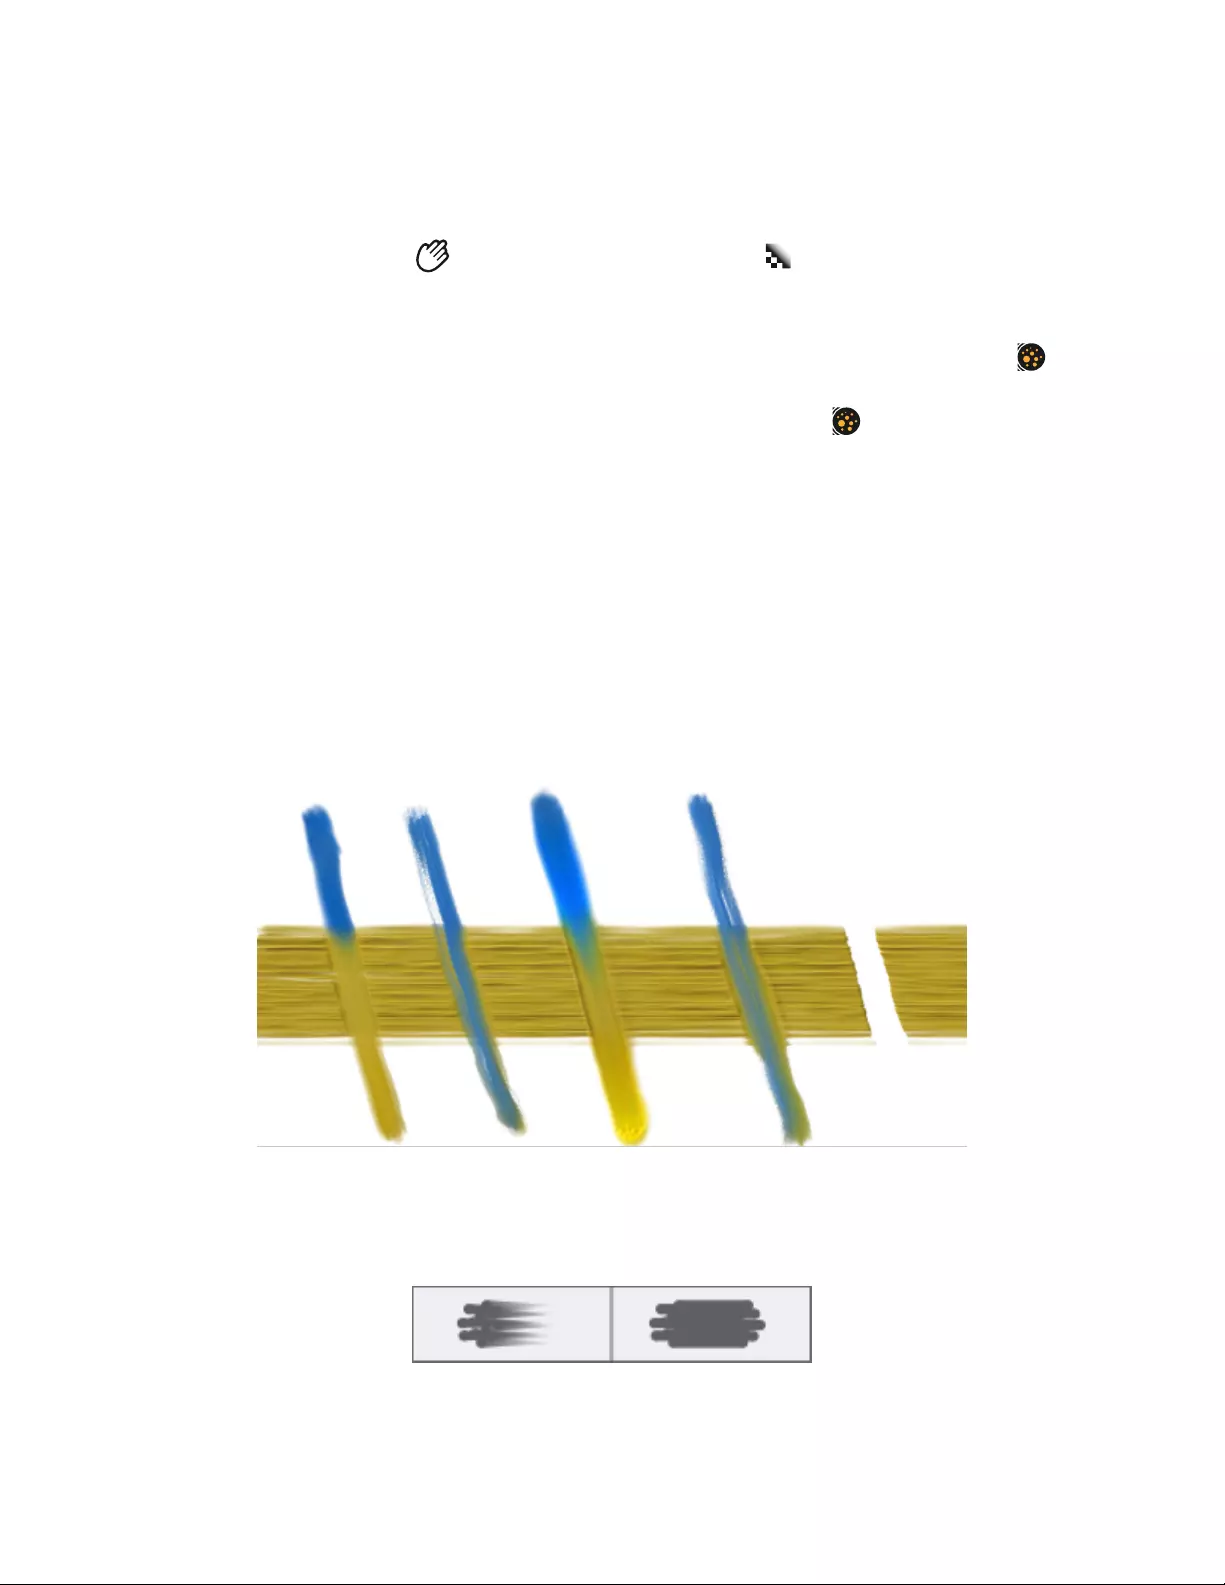
Thick Paint | 511
To improve the performance of Thick Paint brushes
• Do any of the following:
•In the toolbox, click the Grabber tool . Click the High Quality Display button on the property bar to disable it.
•If the Navigator panel is displayed, hide it by clicking Window Navigator or Cmd+7 (macOS) or Ctrl + 7 (Windows).
• Use thick paint without ambient lighting. See “To disable ambient lighting” on page 521.
•Increase the spacing between the droplets of paint. Select a Thick Paint brush variant. Click the Shape flyout button on the
property bar, and adjust the Spacing slider in the Droplets area. Higher values result in improved brush performance.
•Decrease the brush density. Select a Thick Paint brush variant. Click the Shape flyout button on the property bar, and move the
Brush Density slider to the left by very small amounts (for example, decrease the value by 2%) to reduce the number of bristles in the
brush.
Thick Paint — Media controls
To customize Thick Paint brushes, you can adjust the paint from the Thick Paint — Media panel (Window Brush Control Panels Brush
Media Thick Paint — Media). All controls in this panel are available for both Thick Paint Bristle and Thick Paint Palette Knife brushes.
Type
You can set the brush to apply or erase paint. The following paint types are available:
•Paint — lets you apply thick paint with the brush.
•Erase — lets you erase existing paint.
Paint types from left to right: Paint, Paint with Grain, Plow Paint, Plow Paint with Grain, Erase
Paint Loading
Infinite Paint lets you prevent the selected brush from running out of paint.
Infinite Paint disabled (left); Infinite Paint enabled (right)

512 | Corel Painter 2022 User Guide
When you disable the Infinite Paint check box, you can use the Paint Load slider to specify how much paint to load on the brush. In some
cases, you may not want to load any paint on the brush. For example, if you want to scrape or drag existing paint with a Thick Paint Palette
Knife brush, specify a value of 0.
Paint Load values: low (left), high (right)
Deposit Rate
Deposit Rate controls let you adjust how paint is deposited on the layer.
Rate helps you set the speed at which the paint is deposited. The faster the rate, the more paint is deposited along the brushstroke, and the
faster the brush will run of paint. High Rate values produce thicker and shorter brushstrokes; low Rate values produce longer and thinner
brushstrokes.
Rate values: low (left), high (right)
Brushstrokes made at low rate (left) and maximum rate (right)
When you use an expression such as velocity or pressure, you can vary the deposit rate by using your stylus. The Min Rate control lets you
set the minimum rate of paint deposit for the linked expression. For information about expression settings, see “Expression settings” on page
339.
Rate Jitter allows you to vary the deposit rate in a brushstroke. Low values produce smoother and more uniform brushstrokes; higher values
result in more varied, organic-looking brushstrokes. For best results, specify a value close to the Radius Jitter value in the Thick Paint —
Shape panel.
Rate Jitter values: low (left), high (right)
Smoothness lets you smooth the deposit rate jitter in a brushstroke.
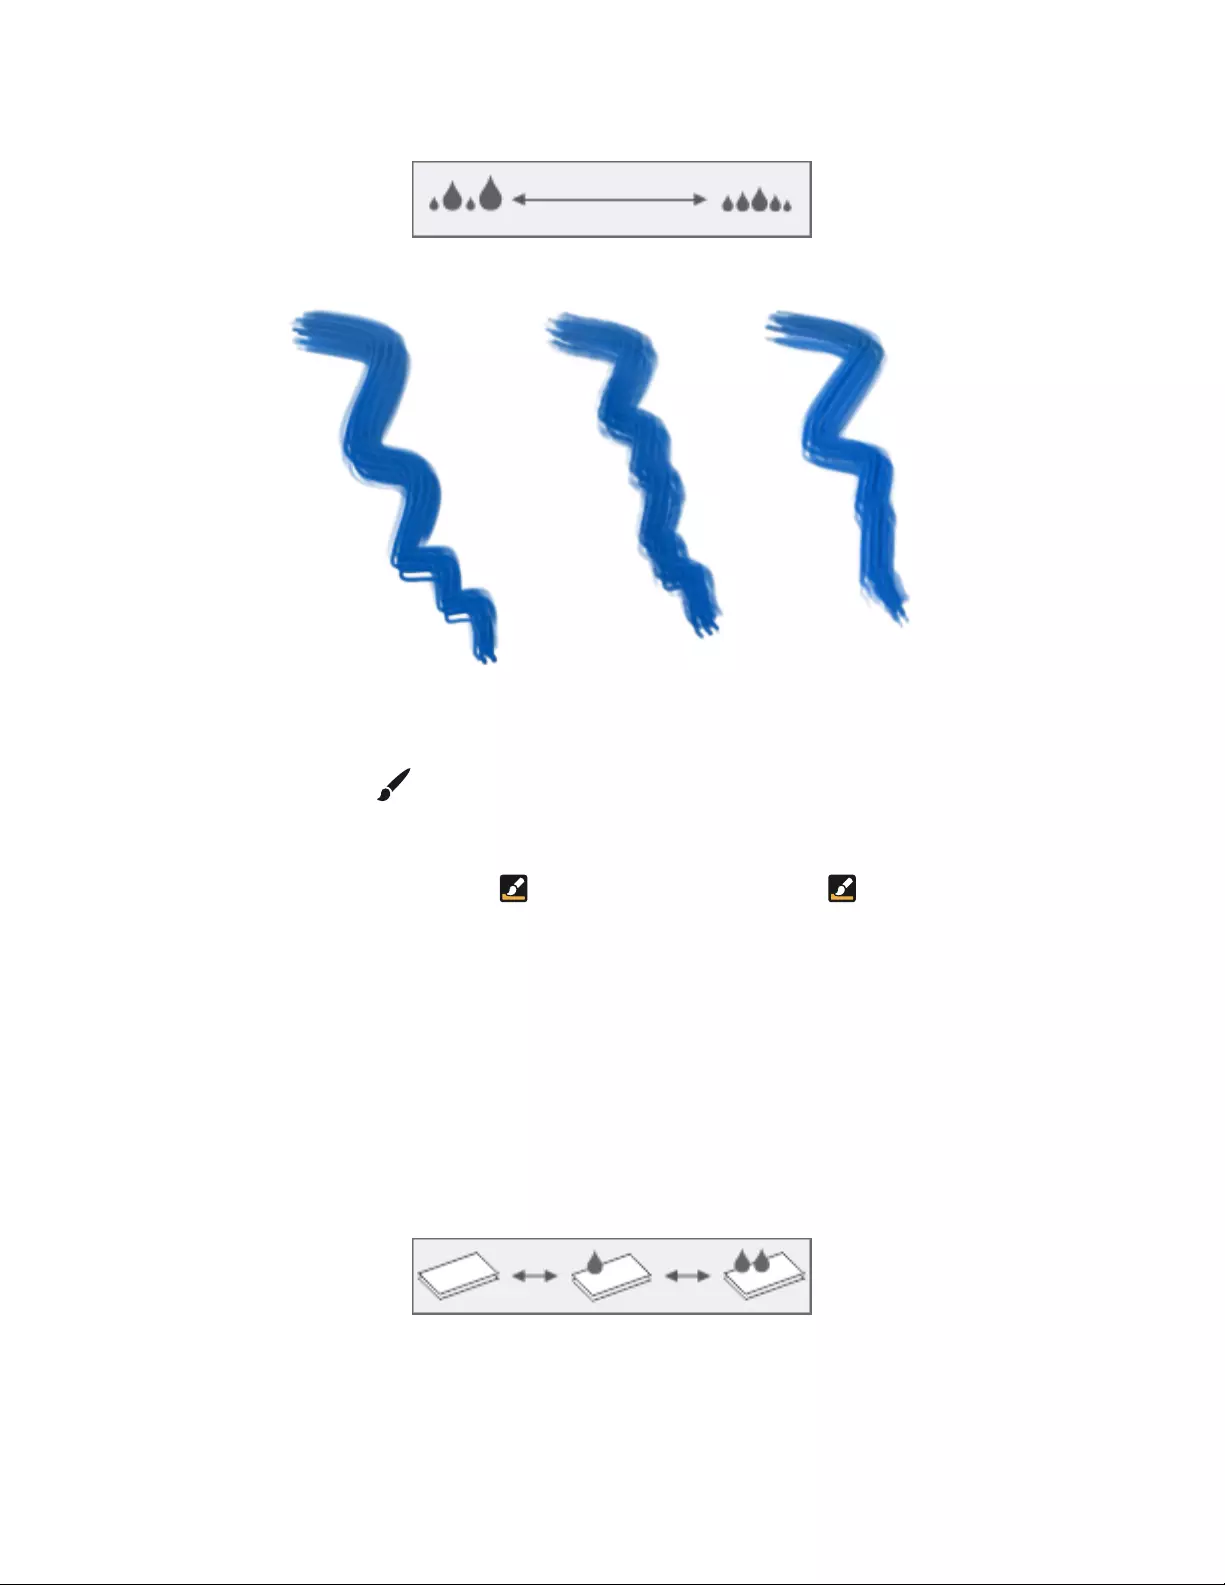
Thick Paint | 513
Smoothness values: low (left), high (right)
Brushstrokes from left to right: without Deposit Jitter, with Deposit Jitter, and with Deposit Jitter and Smoothness
To adjust the media of a Thick Paint brush
1In the toolbox, click the Brush tool .
2Click the Brush Selector on the Brush Selector bar.
3Click a Thick Paint brush category, and click a brush variant.
4On the property bar, click the Media flyout button , and click Thick Paint — Media Panel .
5In the Thick Paint — Media panel, adjust any settings you want.
Thick Paint — Wetness controls
You can adjust the interaction of Thick Paint with the canvas by using the controls in the Thick Paint — Wetness panel (Window Brush
Control Panels Brush Media Thick Paint — Wetness).
Canvas
Canvas controls affect how the current brush interacts with existing paint.
Wetness determines the wetness of the paint on the canvas and lets you adjust how much paint is picked up by the brush. Higher Wetness
values result in more paint being picked up by the brush.
Wetness values: low (left), medium (middle), high (right)
Expression allows you to vary wetness by using your stylus. Min Wetness lets you specify the minimum wetness value of the paint on the
canvas.
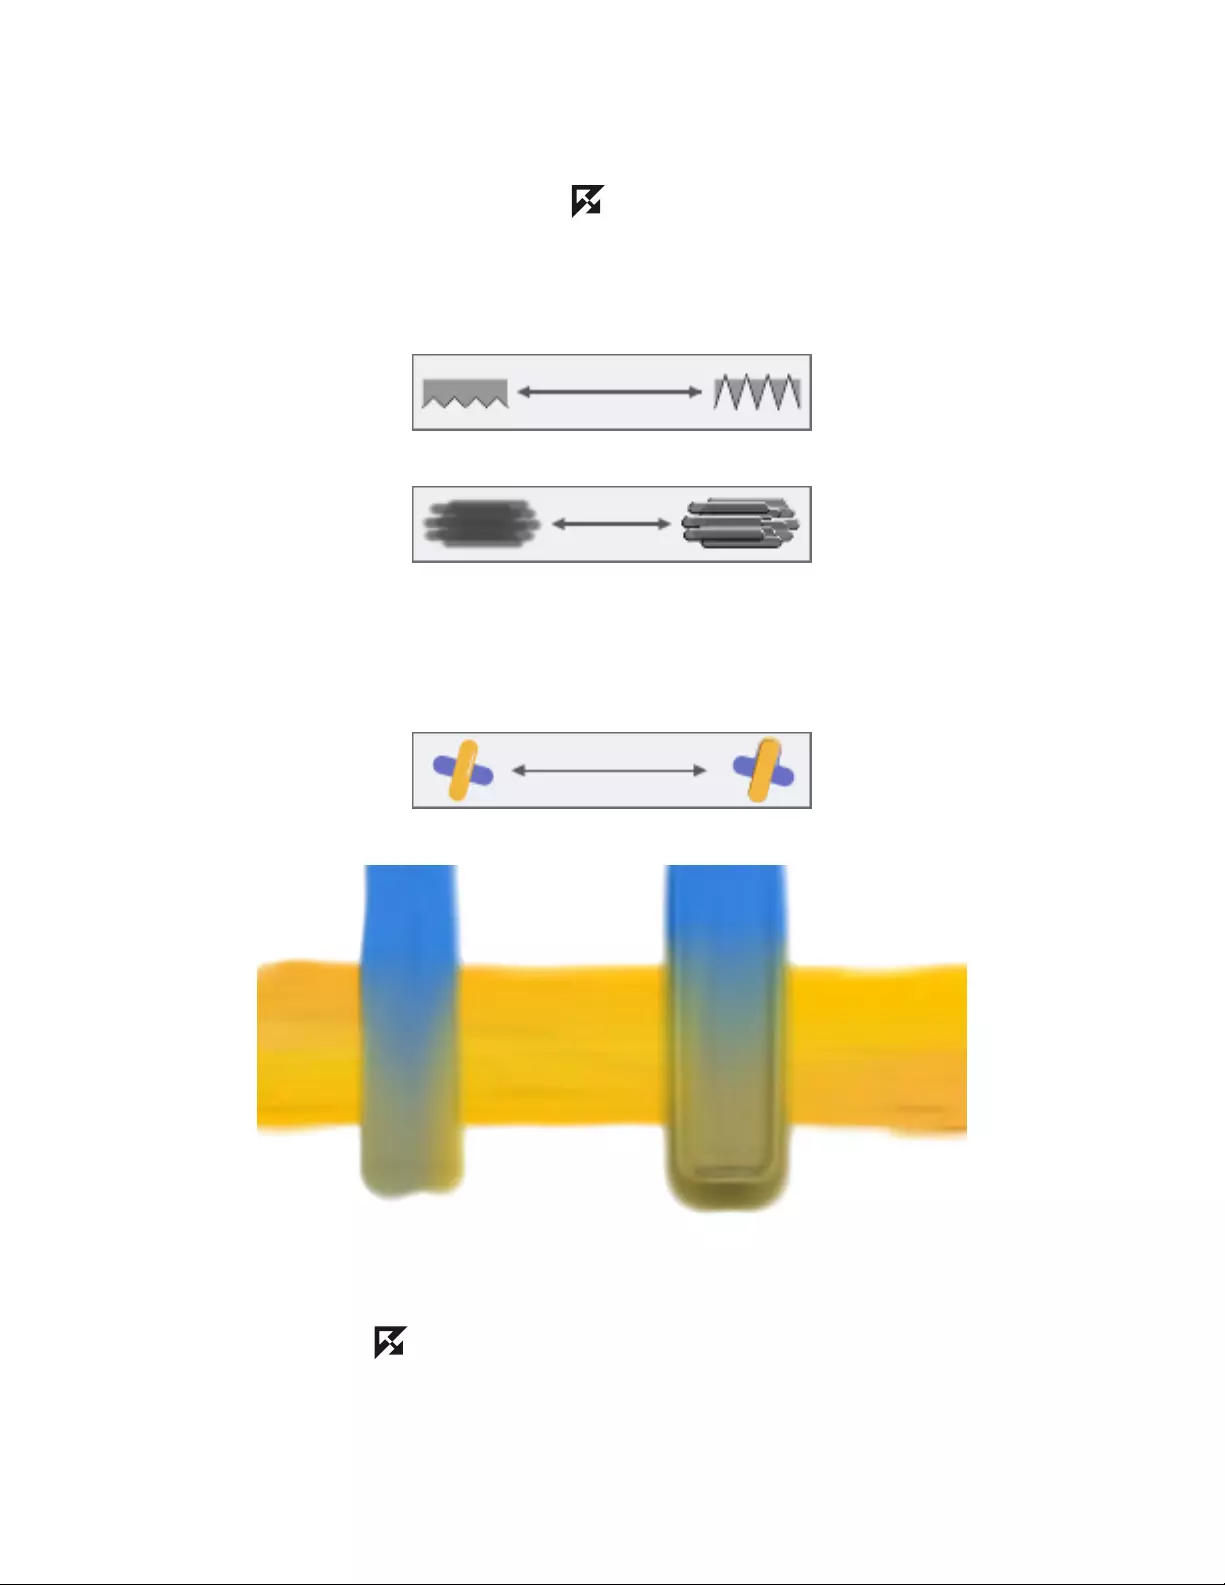
514 | Corel Painter 2022 User Guide
For example, if you choose pressure as an expression, the harder you press with the stylus, the more paint is picked up by the brush. You can
reverse the effect of the expression by using the Reverse button so that light pressure increases paint wetness instead of decreasing it.
Grain
Grain determines how the current brush interacts with paper grain.
Grain Height allows you to set how high the grain is. Higher values reveal more paper grain.
Grain Height values: low (left), high (right)
Hardness values: low (left), high (right)
Plow
Plow Paint lets you push paint forward and out.
Strength lets you adjust how much paint is displaced by the brush.
Strength values: low (left), high (right)
Brushstrokes with low plow strength (left) and high plow strength (right)
Expression lets you vary plow strength. The Min Strength slider lets you specify the minimum amount of paint that is displaced with the
linked expression. The Reverse button lets you reverse the effect of the expression on the plow strength.
Radius lets you specify how widely the displaced paint is spread.

Thick Paint | 515
Radius values: low (left); high (right)
To adjust the wetness of a Thick Paint brush
1In the toolbox, click the Brush tool .
2Click the Brush Selector on the Brush Selector bar.
3Click a Thick Paint brush category, and click a brush variant.
4On the property bar, click the Wetness flyout button , and click Thick Paint — Wetness Panel .
5In the Thick Paint — Wetness panel, adjust any settings you want.
Thick Paint — Shape controls
You can adjust the behavior of Thick Paint brushes by using the controls in the Thick Paint — Shape panel (Window Brush Control Panels
Brush Shape Thick Paint — Shape).
Brush Density lets you adjust the number of bristles in the brush. High density values create thicker brushstrokes.
Brush Density values: low (left); high (right)
Clumpiness
Clumpiness lets you control how bristles adhere to each other by applying a random variance to the thickness of each bristle, which makes
some of the bristles look like they are clumping together. The controls in this area let you vary the radius, length, and thickness of the brush
bristles.
Bristling lets you vary the radius of the bristles within the brush.
Bristling values: low (left); high (right)
Paint varies bristle length and thickness for a more natural brushstroke.
Paint values: low (left); high (right)
Color varies how individual bristles blend color.

516 | Corel Painter 2022 User Guide
Color values: low (left); high (right)
Droplets
The controls in the Droplets area let you adjust the size of the paint drops that the brush deposits on the canvas.
Radius allows you to adjust the radius of the paint droplets applied by the brush.
Radius values: low (left); high (right)
Expression lets you choose a real-time input factor such as the pressure or direction of your stylus to vary the droplet size. If you don’t want
the paint drops to be too small, you can set a minimum radius value by using the Min Radius control. You can also reverse the effect of the
linked expression on the droplet radius by using the Reverse button .
Radius Jitter lets you vary the radius of the paint droplets. For best results, specify a value close to the Rate Jitter value.
Smoothness lets you smooth the radius jitter.
Sample brushstrokes from left to right: without Radius Jitter, with Radius Jitter, and with Radius Jitter and Smoothness
Spacing controls the distance between the droplets of paint.
Spacing values: low (left), high (right)
Hardness controls how the paint droplets join together. High values create ridges in the brushstrokes, making it appear coarse. Low values
create softer brushstrokes with more gradual transitions in height.
Flatten Paint lets you flatten brushstrokes.
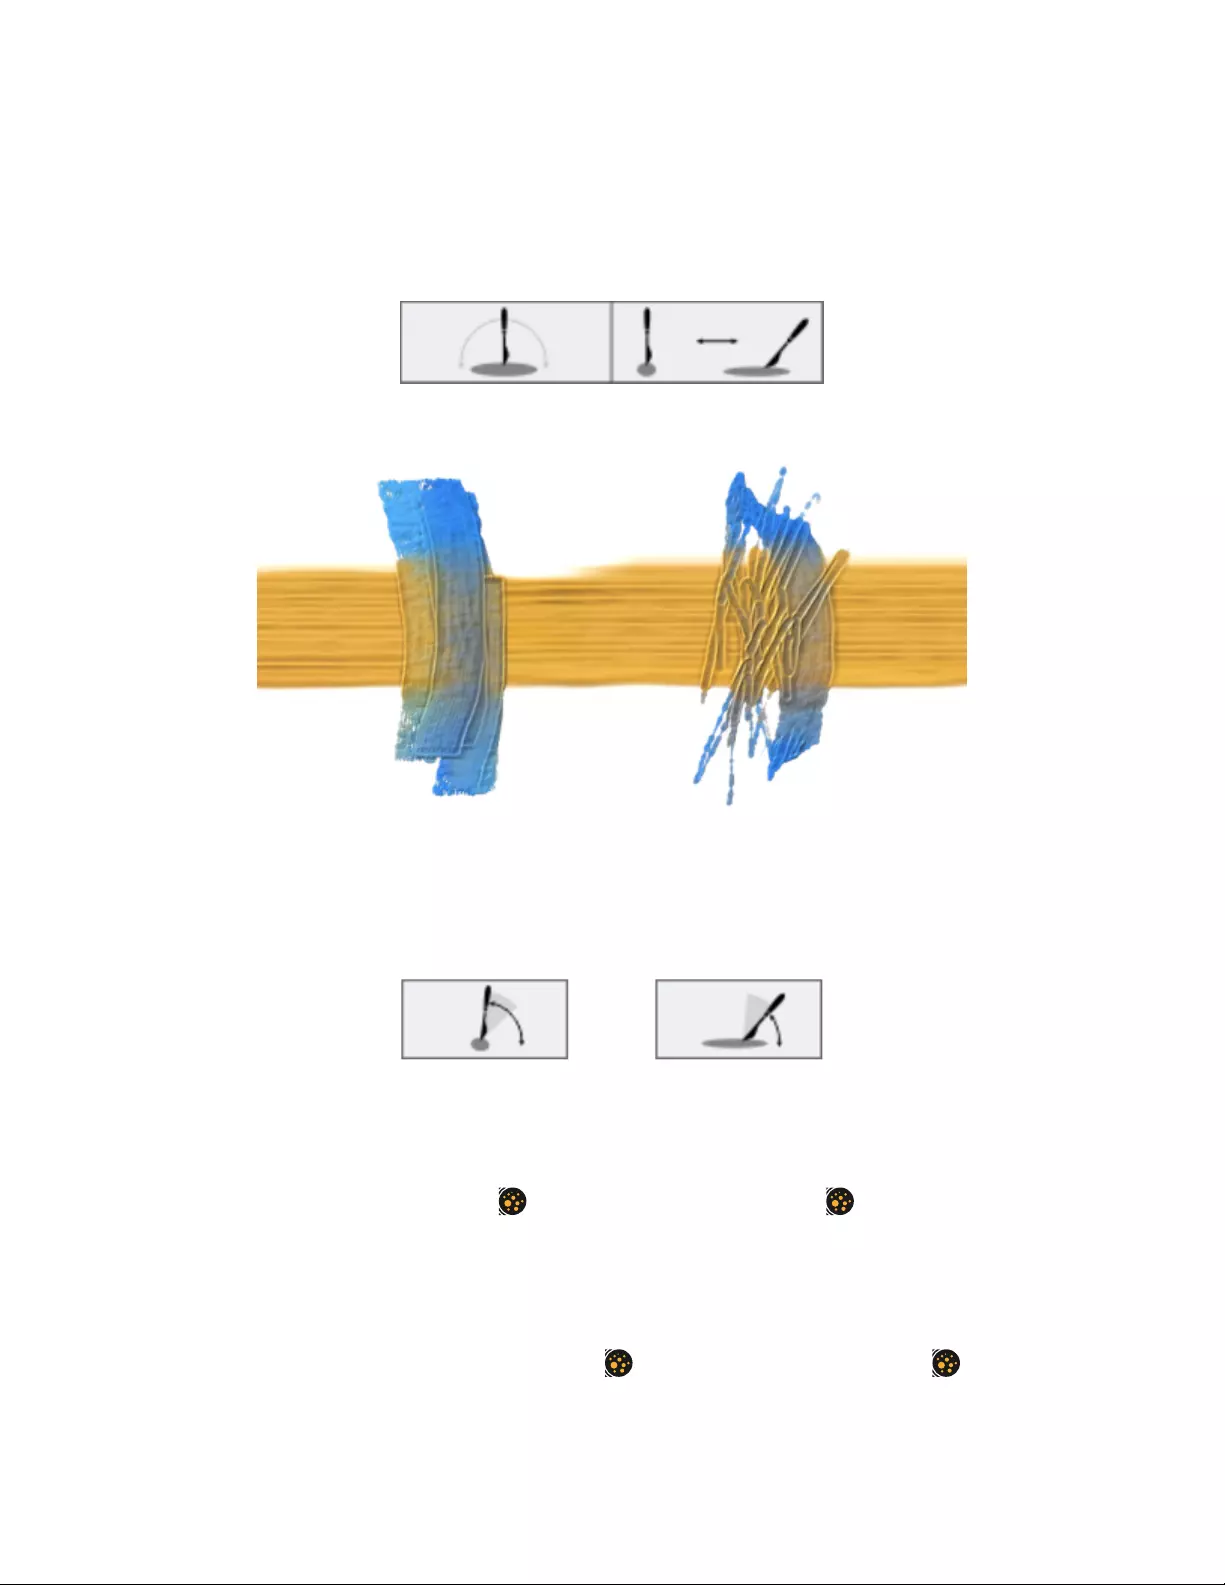
Thick Paint | 517
Palette Knife
The controls in this area have an effect only on Thick Paint : Palette Knives brushes.
Corner Tilt allows you to use the tilt of your stylus to vary the angle of the palette knife. When you disable the Corner Tilt check box, the
palette knife angle does not change: the palette knife remains flat, and the brush mark shape remains the same.
Corner Tilt disabled (left); Corner Tilt enabled (right)
Left to right: brushstrokes with and without corner tilt
Start lets you set the tilt angle of your stylus at which the palette knife starts to transition from corner to flat.
End lets you set the tilt angle of your stylus at which the palette knife becomes flat. The angle and brush mark of the palette knife change
only when you tilt the stylus within the range set by the Start and End angles.
Start tilt angle of the stylus (left); end tilt angle of the stylus (right)
To adjust the brush attributes of a Thick Paint brush
1In the Brush Selector, select a Thick Paint brush.
2 On the property bar, click the Shape flyout button , and click Thick Paint — Shape Panel .
3In the Thick Paint — Shape panel, adjust any settings you want.
To use the tilt of your stylus to vary the angle of a Thick Paint palette knife
1In the Brush Selector, select a variant from the Thick Paint : Palette Knives brush category.
2On the property bar, click the Thick Paint – Shape flyout button , and click Thick Paint — Shape Panel .
3In the Palette Knife area of the Thick Paint — Shape panel, enable the Corner Tilt check box.
4In the Start box, type a value to set the tilt angle of your stylus at which the palette knife edge starts to transition from corner to flat.
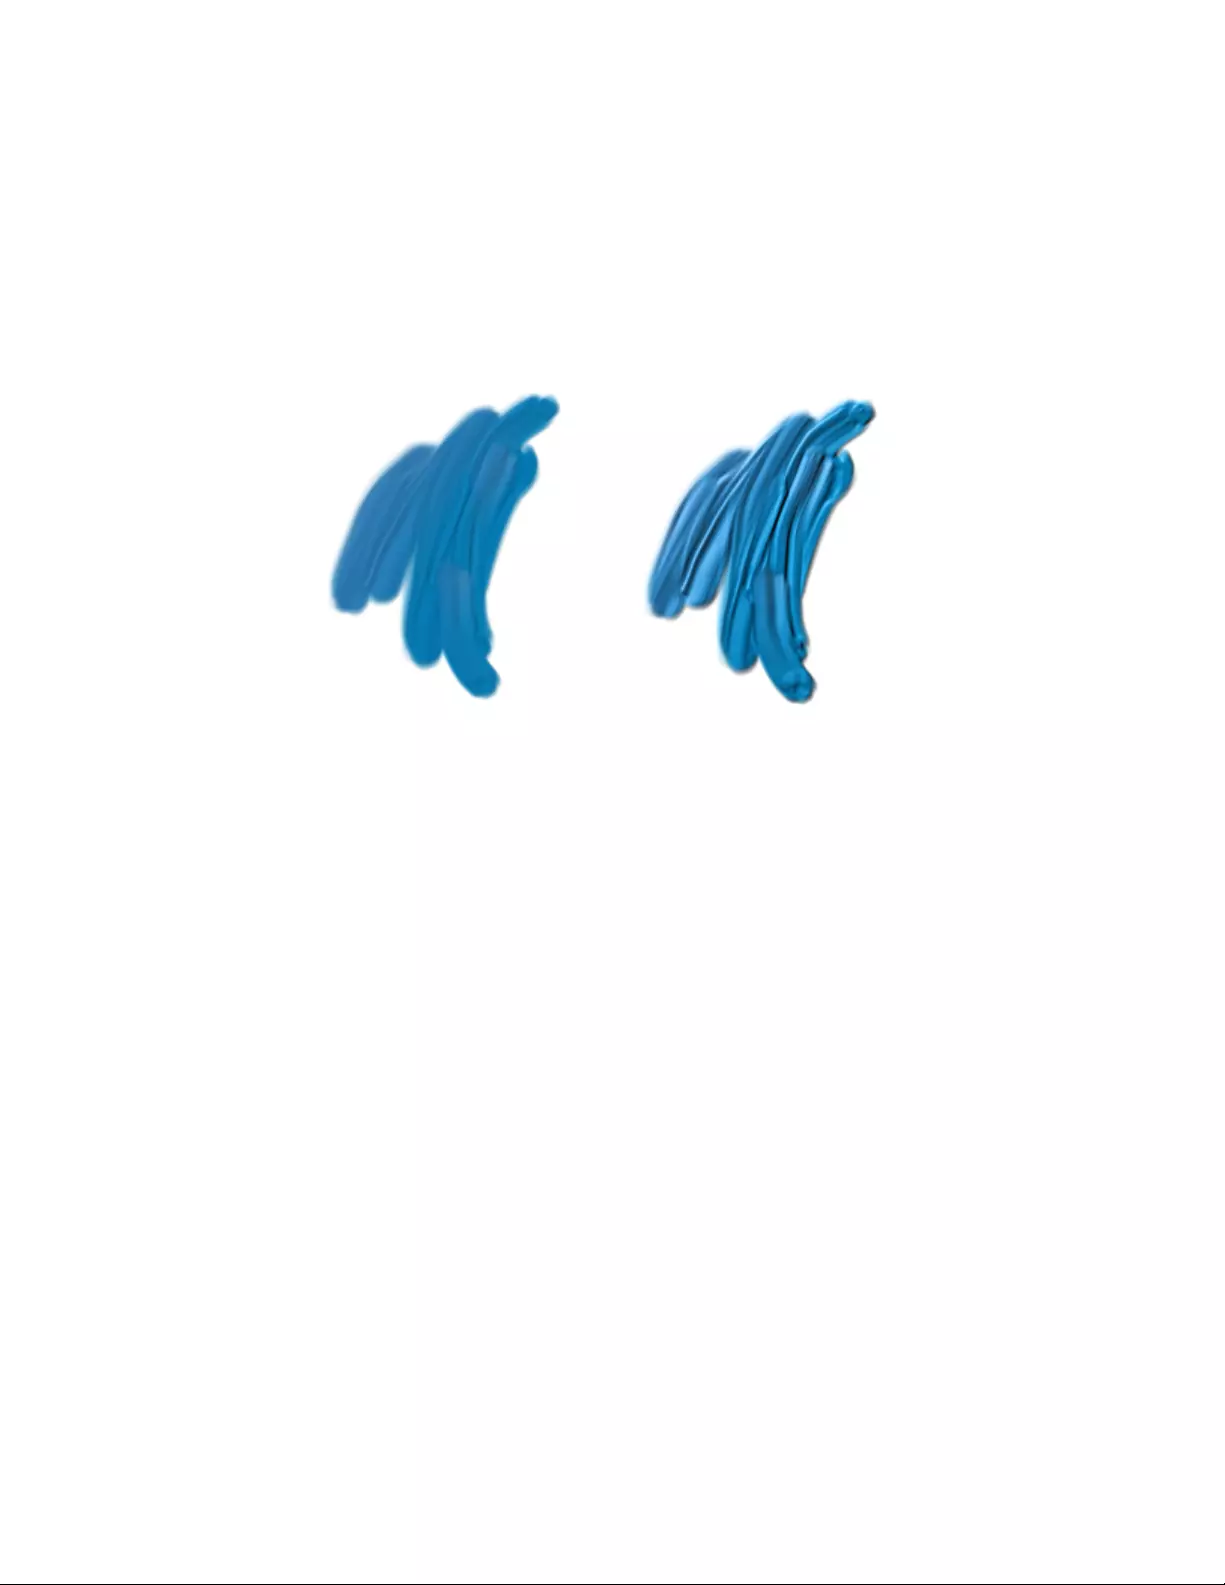
518 | Corel Painter 2022 User Guide
5In the End box, type a value to specify the tilt angle of your stylus at which the palette knife edge becomes flat.
6Paint in the document, using the tilt of your stylus to change the palette knife from corner to flat and back.
Adjusting Thick Paint layers
Thick Paint brushes work on special Thick Paint layers. You can experiment with the Thick Paint layer settings to control the appearance of
thick paint on the layer. Increase the visible depth of thick paint to increase the height of the elevated areas in the brushstrokes, creating a
more pronounced thick-paint effect. Alternatively, you can decrease the visible depth for a more subdued thick-paint effect.
Thick Paint Amount values: low (left); high (right)
You can set the Thick Paint visible depth to 0 to create flat brushstrokes. This can help you take advantage of the superior blending power of
Thick Paint brushes while you use them as regular brushes.
If you prefer to customize the Thick Paint visible depth and use that amount as the new default in your image, you can set it as a Thick Paint
layer preference.
You can also transfer, or lift, information from the canvas to the Thick Paint layer. This is useful if you want to apply Thick Paint effects to a
photograph.
To adjust Thick Paint layers
• Perform a task from the following table.
To Do the following
Adjust the appearance of Thick Paint on a layer Click a Thick Paint layer. Move the Visible Depth slider to increase
or decrease the height of the brushstrokes.
Tip: You can also adjust the appearance of Thick Paint on a layer
by double-clicking the layer, and moving the Visible Depth slider in
the Thick Paint Layer Attributes dialog box.
Name a Thick Paint layer Double-click the layer. In the Thick Paint Layer Attributes dialog
box, type a name in the Name box.
Adjust the position of a Thick Paint layer Double-click the layer. In the Thick Paint Layer Attributes dialog
box, type values in the Top and Left boxes.

Thick Paint | 519
To Do the following
Add layer notes Double-click the layer. In the Thick Paint Layer Attributes dialog
box, type layer information in the Notes box.
To transfer the canvas to a Thick Paint layer
1Open the image that you want to convert to a Thick Paint layer in the document window.
2Choose Window Layers.
If the image contains multiple layers, you can drop all of the layers onto the canvas by clicking the Layer options button in the
Layers panel, and choosing Drop All.
3In the Layers panel, click the Layer options button , and choose Lift Canvas to Thick Paint Layer.
Once the layer content is lifted from the canvas, the canvas is blank.
To set the default visible depth for Thick Paint layers
1Do one of the following:
•(macOS) Choose Corel Painter 2022 menu Preferences Special Layers.
•(Windows) Choose Edit Preferences Special Layers.
2In the Thick Paint area, move the Default Visible Depth slider.
Adjusting Thick Paint lighting
Corel Painter lets you manipulate the overall lighting in Thick Paint brushstrokes by using ambient lighting, adjusting shadows, and adding
directional lights. These controls are global — they affect all Thick Paint brushstrokes on all layers.
Ambient lightning and shadows
An ambient light source is available for Thick Paint brushstrokes. You can adjust the brightness of the ambient light to lighten or darken the
colors in the lit areas. You can also disable the ambient light source.
A brushstroke with ambient light (left) and without ambient light (right)
You can control how dark the shadows are in the brushstrokes. When you increase the shadow strength, the colors in the unlit, indented
areas of the brushstroke become darker.

520 | Corel Painter 2022 User Guide
Shadow Strength values: low (left), high (right)
Setting the position and color of directional lights
You can adjust surface lighting by using preset (simple) lighting or custom lighting. With simple lighting, you can choose one of eight preset
lights. With custom lighting, you can add more light sources, and you can move and delete light sources. The lighting sphere shows all
possible surface angles and how the lights illuminate them. The light indicators on the sphere show the position of all light sources.
When you disable the Simple lighting option, the lighting sphere appears with a
single light indicator. You can then add more light sources and change their position.
In addition, you can change the color of a light source. For example, you can have multiple colored lights interact with the depth to produce
different texture effects. You should keep in mind that each light interacts with all Thick Paint brushstrokes, so be careful not to set up
colored lights that clash with the colors in your composition or light sources that create unwanted shadows.
The Thick Paint brushstrokes above use light sources with different colors.

Thick Paint | 521
To adjust ambient lighting
1Choose Canvas Surface Lighting.
2In the Ambient Lighting area, make sure that the Ambient light check box is enabled.
3Move the Brightness slider.
To disable ambient lighting
•In the Surface Lighting dialog box (Canvas Surface Lighting), disable the Ambient light check box.
To adjust shadows
•In the Surface Lighting dialog box (Canvas Surface Lighting), move the Shadow Strength slider.
To add, remove, or modify a directional light source
1Choose Canvas Surface Lighting.
2In the Directional Lighting area, perform an action from the following table.
To Do the following
Add a preset light source Enable the Simple lighting check box, and click a light indicator on
the lighting sphere.
Add a custom light source Disable the Simple lighting check box, and click on the lighting
sphere where you want to add a new light source.
A new light indicator (small circle) appears where you click.
Delete custom light sources Move the Light(s) slider to the left.
Add custom lights along a circular path Disable the Simple lighting check box, and move the Light(s) slider
to the right.
Change the position of a custom light source Drag the light indicator to a new position on the sphere.
Change the light color Click a light indicator, click the Light Color chip, and choose a
color.
To adjust the intensity and brightness of directional light
1Choose Canvas Surface Lighting.
2In the Directional Lighting area, adjust any of the following sliders:
•Brightness — controls how much light the light source contributes to the overall lighting color
•Concentration — adjusts the spread of the light over the surface
•Exposure — adjusts the overall lighting amount from darkest to brightest

522 | Corel Painter 2022 User Guide
Cloning with Thick Paint brushes
Turn a Thick Paint brush into a cloner by clicking the Clone Color button in the Color panel (Window Color Panels Color Panel
(Full View)) and start painting. For more information about cloning, see “Image cloning and sampling” on page 191. If you are not satisfied
with the appearance of the brushstrokes, try the following:
• Increase the brush size.
•Increase the droplet radius. Select a Thick Paint brush variant. On the property bar, click the Shape flyout button , and in the
Droplets area, move the Radius slider to the right to increase the size of the paint droplets.
•Decrease the brush density. Select a Thick Paint brush variant. Click the Shape flyout button on the property bar, and move the
Brush Density slider to the left in small amounts (for example, minus 2%) to reduce the number of bristles in the brush.
•Blur the clone source by painting with brushes from the Blenders category or by applying a Focus effect (Effects Focus), such as
Depth of Field, Glass Distortion, Motion Blur, Zoom Blur or Woodcut (Click Effects Surface Control Woodcut. Disable the
Output black check box. Move the Color edge slider to the right). To blur the clone source, in the Clone Source panel, enable the Show
Source Image check box. Click in the Source Image window, and click OK. Blur the source image by using a blender brush or an effect.
Once you are done, click the clone document, and enable the Create New option in the dialog box that appears.

Liquid Ink | 523
Liquid Ink
Liquid Ink brushes in Corel Painter create liquid paint effects that simulate traditional ink-based media.
This section contains the following topics:
•“Working with Liquid ink brushes” (page 523)
•“Adjusting attributes of the Liquid Ink layer” (page 523)
•“Using Liquid Ink controls” (page 524)
•“Adjusting Liquid Ink lighting” (page 525)
Working with Liquid ink brushes
To work with Liquid ink brushes, you need to create a Liquid Ink layer. Liquid Ink layers are displayed in the Layers panel.
To create a new Liquid Ink layer
1Choose Window Layers to display the Layers panel.
If the Layers panel is not expanded, double-click the Layers panel tab.
2In the Layers panel, click the Layers options button , and choose New Liquid Ink Layer.
When you apply a brushstroke to the document window using a Liquid ink brush, a Liquid Ink layer is automatically created.
To choose a Liquid ink brush variant
1In the toolbox, click the Brush tool .
2Click the Brush Selector on the Brush Selector bar.
3Click the Ink : Liquid brush category and click a brush variant.
Adjusting attributes of the Liquid Ink layer
You can experiment with the Liquid Ink layer settings to control the appearance of depth and adjust the threshold of the edges of the ink.
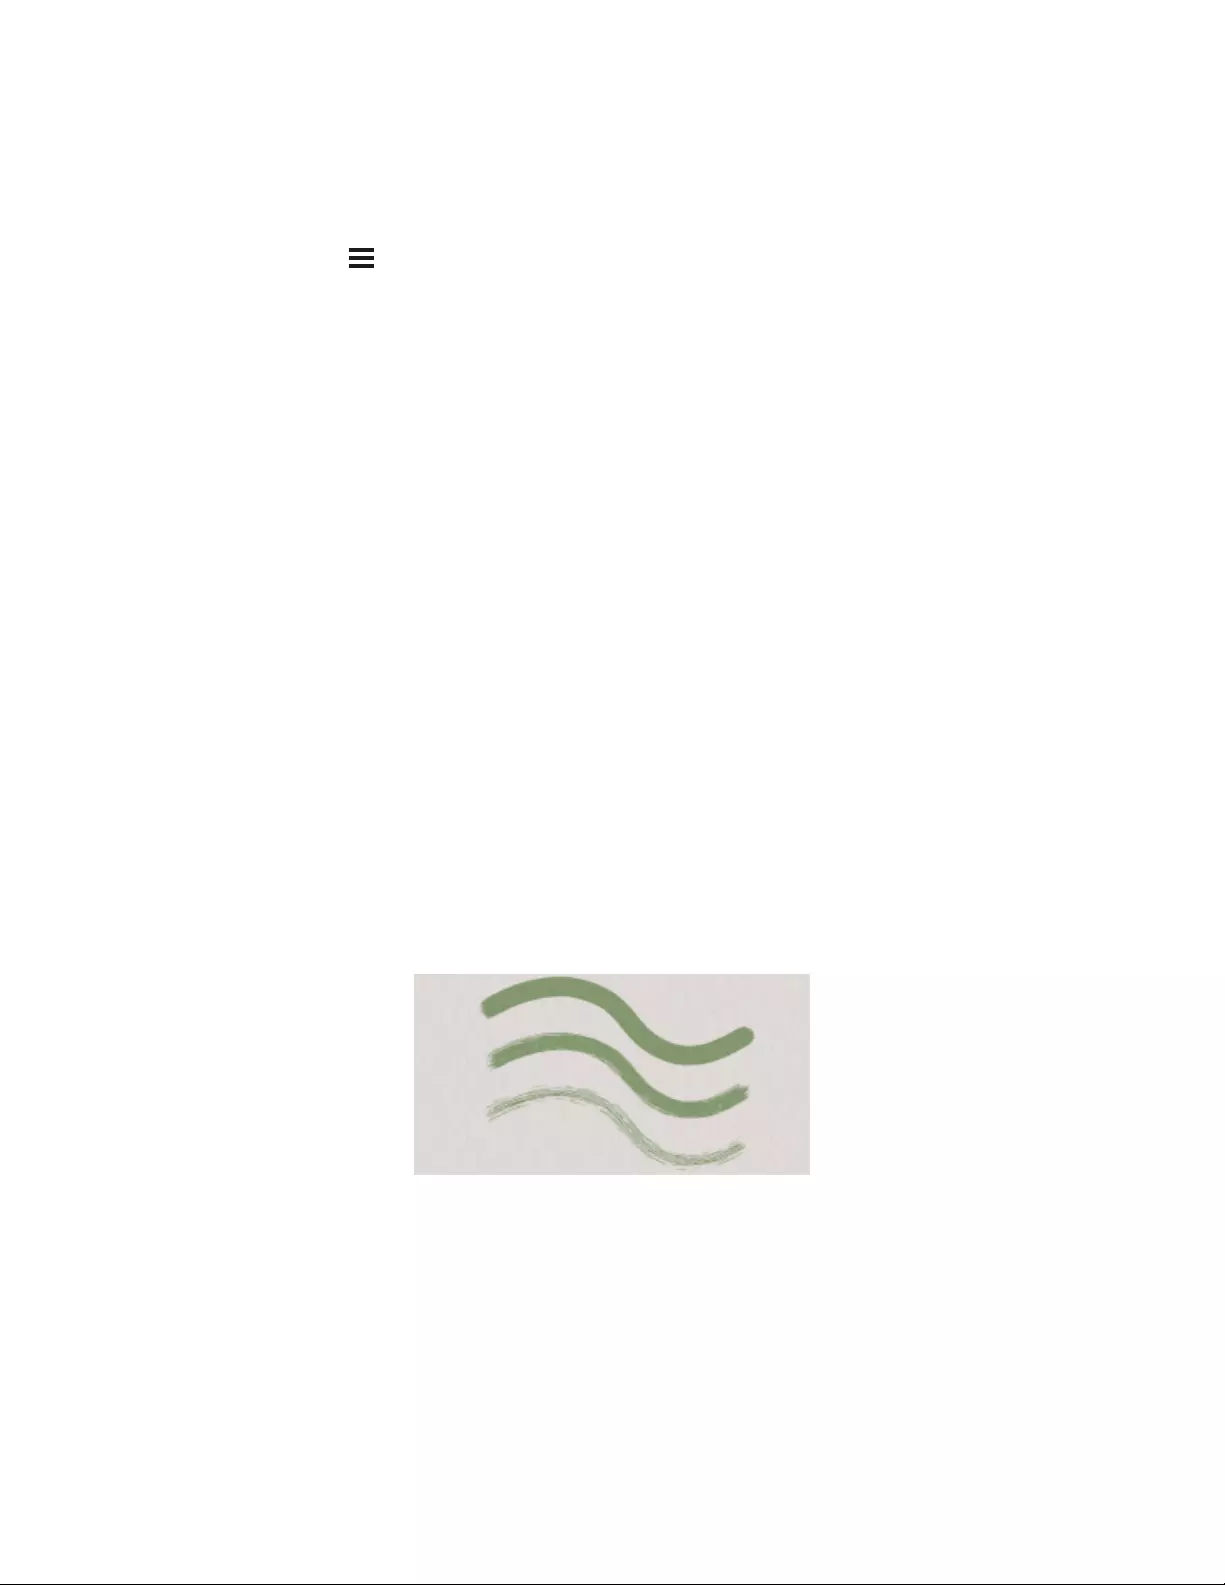
524 | Corel Painter 2022 User Guide
To adjust Liquid Ink layer attributes
1In the Layers panel, double-click the Liquid Ink layer you want to modify.
2Click the Layers options button , and choose Layer Options.
3In the Liquid Ink Layer Attributes dialog box, perform a task from the following table.
To Do the following
Name the layer Type a name in the Name box.
Adjust the position of the layer Type values in the Top and Left boxes.
Add layer notes Type layer information in the Notes box.
Increase or decrease the width of the brushstroke Adjust the Threshold slider.
Increase or decrease the height, or three-dimensional appearance,
of the brushstroke
Adjust the Amount slider.
Using Liquid Ink controls
You can adjust the Liquid Ink controls. For example, you can select brush type, size, smoothness, and stroke volume. For more information,
see “Liquid Ink controls” on page 396.
Size
The Feature slider lets you determine the space between bristles. You can experiment with the Feature slider and its effect on different
Liquid ink brushes; the higher the setting, the farther apart the bristles appear. Lower settings produce more solid strokes. With Liquid ink
brushes, the adhesion of the bristles minimizes the appearance of individual bristles.
The Feature slider and its effect on Liquid Ink brushstrokes
Expression
You can use the Expression settings to vary Liquid Ink effects. For example, you can vary the stroke volume by adjusting controllers such as
Direction or Velocity. You can also use the Pressure controller to create layered Liquid Ink strokes. For more information, see “Expression
settings” on page 339.
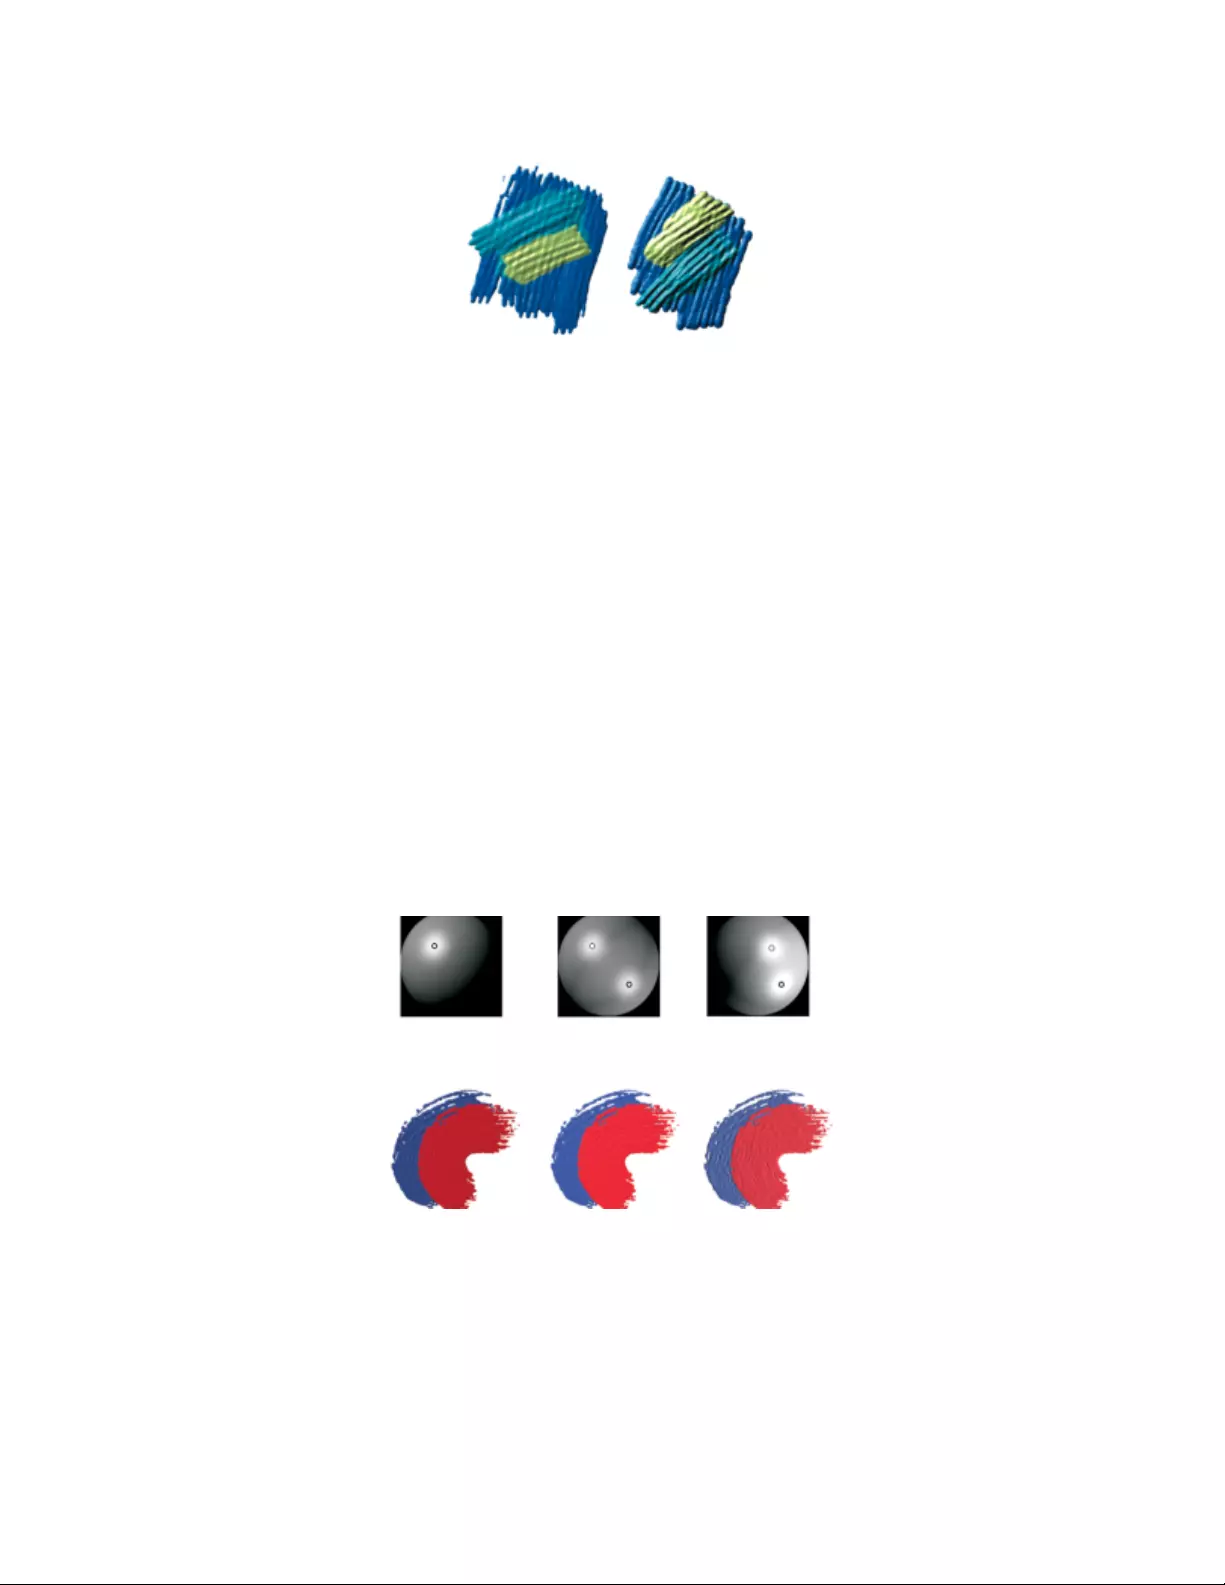
Liquid Ink | 525
Light pressure is used to apply overlapping strokes (left). Increased pressure produces a heavier layering effect (right).
To customize a Liquid ink brush variant
•Choose Window Brush Control Panels Brush Media Liquid Ink.
For more information about each of the Liquid Ink controls, see “Liquid Ink controls” on page 396.
Adjusting Liquid Ink lighting
You can use the Surface Lighting controls to give the appearance of depth to Liquid ink brushstrokes. These controls are global — they
affect all Liquid ink brushstrokes on all layers.
Surface lighting can include ambient lighting and directional lighting.
Adjusting ambient lighting
You can increase or decrease the ambient lighting in the image. The angle of the light does not change, only the brightness. Ambient
lighting can be used in combination with directional light sources.
Setting directional light sources
You can adjust surface lighting by using directional light sources, which illuminate the brushstroke from a certain angle. You can use preset
(simple) lighting or custom lighting. With simple lighting, you can choose one of eight preset lights. With custom lighting, you can add
more light sources, and you can move and delete light sources.
By adjusting the lighting angle and adding multiple light sources,
you can adjust the appearance of depth of Liquid ink brushstrokes.
The lighting sphere shows all possible surface angles and how the lights illuminate them. The light indicators on the sphere show the
position of all light sources.
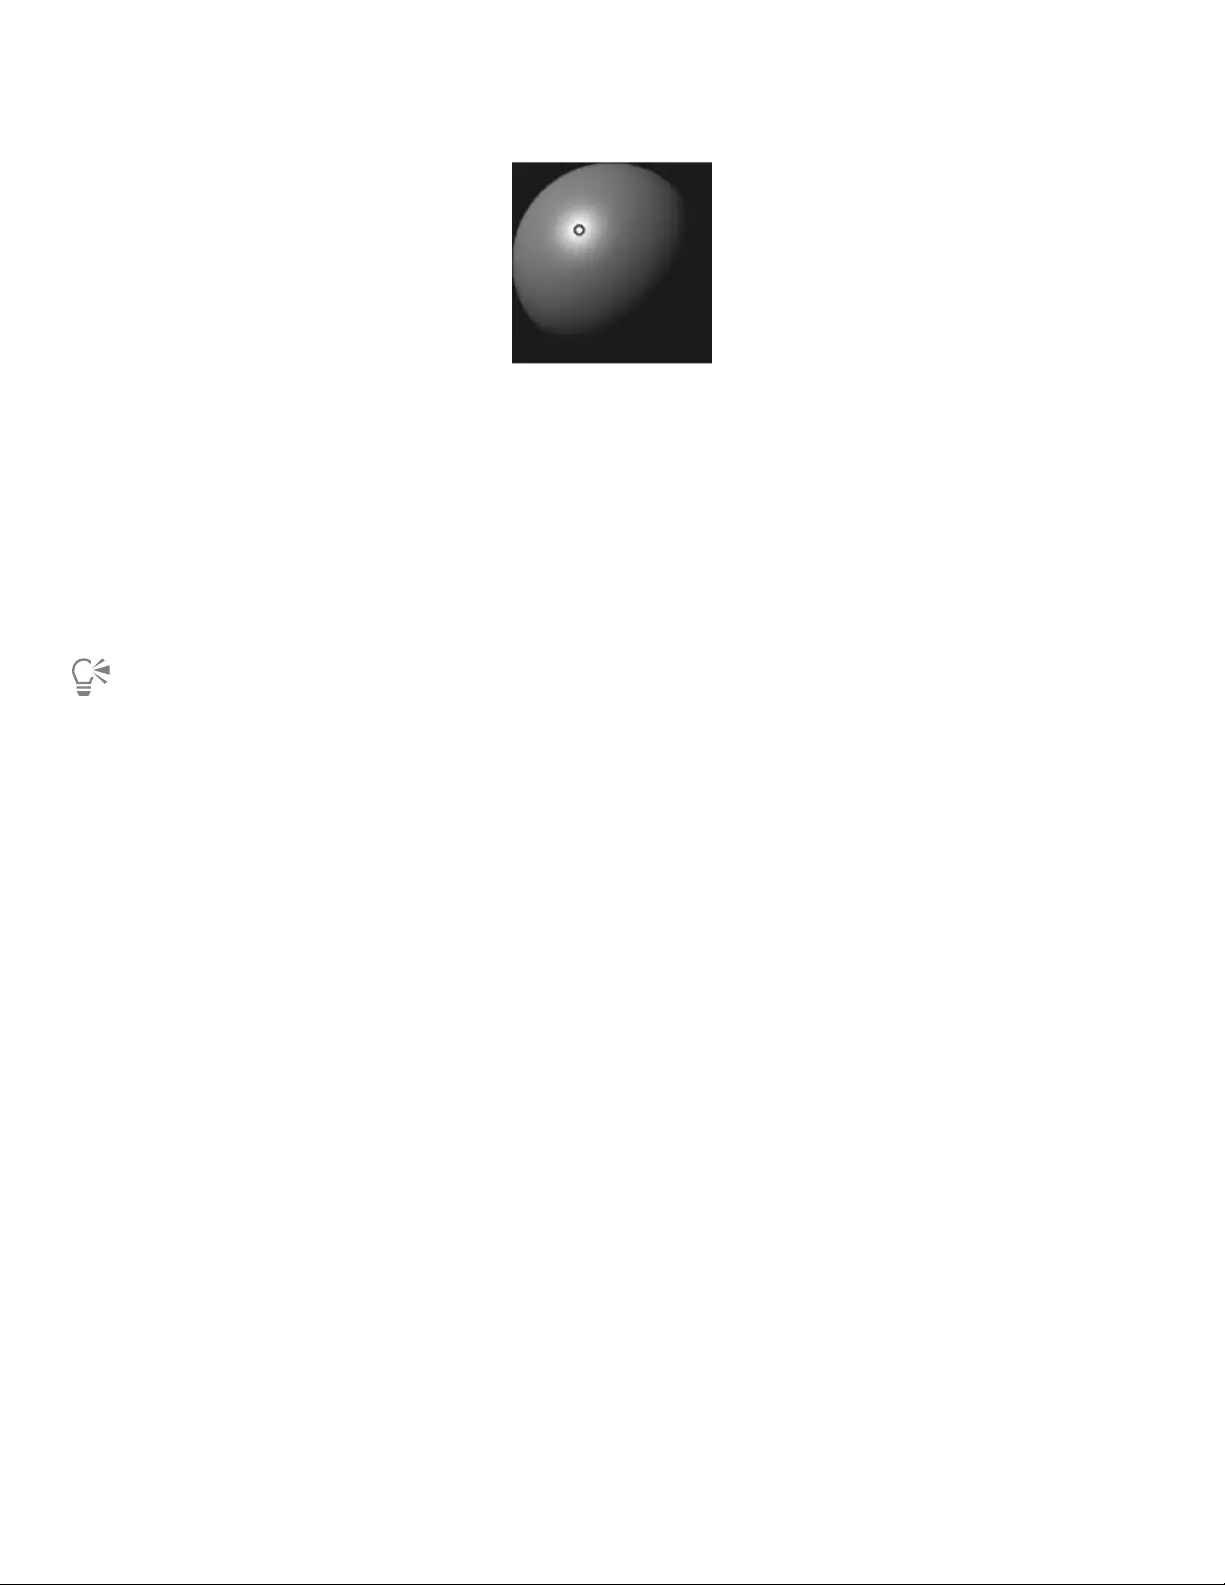
526 | Corel Painter 2022 User Guide
When you disable the Simple lighting option, the lighting sphere appears with a
single light indicator. You can then add more light sources and change their position.
In addition, you can change the color of a light source. For example, you can have multiple colored lights interact with the depth to produce
different textural effects. You can also adjust the intensity and brightness of directional light.
To adjust ambient lighting
1Choose Canvas Surface Lighting.
2In the Ambient Lighting area, make sure that the Ambient lighting check box is enabled.
3Move the Brightness slider.
To remove ambient lighting, disable the Ambient lighting check box.
To add, remove, or modify a directional light source
1Choose Canvas Surface Lighting.
2In the Directional Lighting area, perform an action from the following table.
To Do the following
Add a preset light source Enable the Simple lighting check box, and click a light indicator on
the lighting sphere.
Add a custom light source Disable the Simple lighting check box, and click on the lighting
sphere where you want to add a new light source.
A new light indicator (small circle) appears where you click.
Delete custom light sources Move the Lights slider to the left.
Add custom lights along a circular path Disable the Simple lighting check box, and move the Lights slider.
Change the position of a custom light source Drag a light indicator to a new position on the sphere.
Change the light color Click a lighting indicator, click the Light Color chip, and choose a
color.

Liquid Ink | 527
If the brushstroke doesn’t have any height, the lighting effects are not visible. To increase the height of the brushstroke, double-
click the Liquid Ink layer in the Layers panel, and in the Liquid Ink Layer Attributes dialog box, adjust the Amount slider.
To adjust the intensity and brightness of directional light
1Choose Canvas Surface Lighting.
2In the Directional Lighting area, adjust any of the following sliders:
•Brightness — controls how much light the light source contributes to the overall lighting color
•Concentration — adjusts the spread of the light over the surface
•Exposure — adjusts the overall lighting amount from darkest to brightest
If the brushstroke doesn’t have any height, the lighting effects are not visible. To increase the height of the brushstroke, double-
click the Liquid Ink layer in the Layers panel, and in the Liquid Ink Layer Attributes dialog box, adjust the Amount slider.

528 | Corel Painter 2022 User Guide
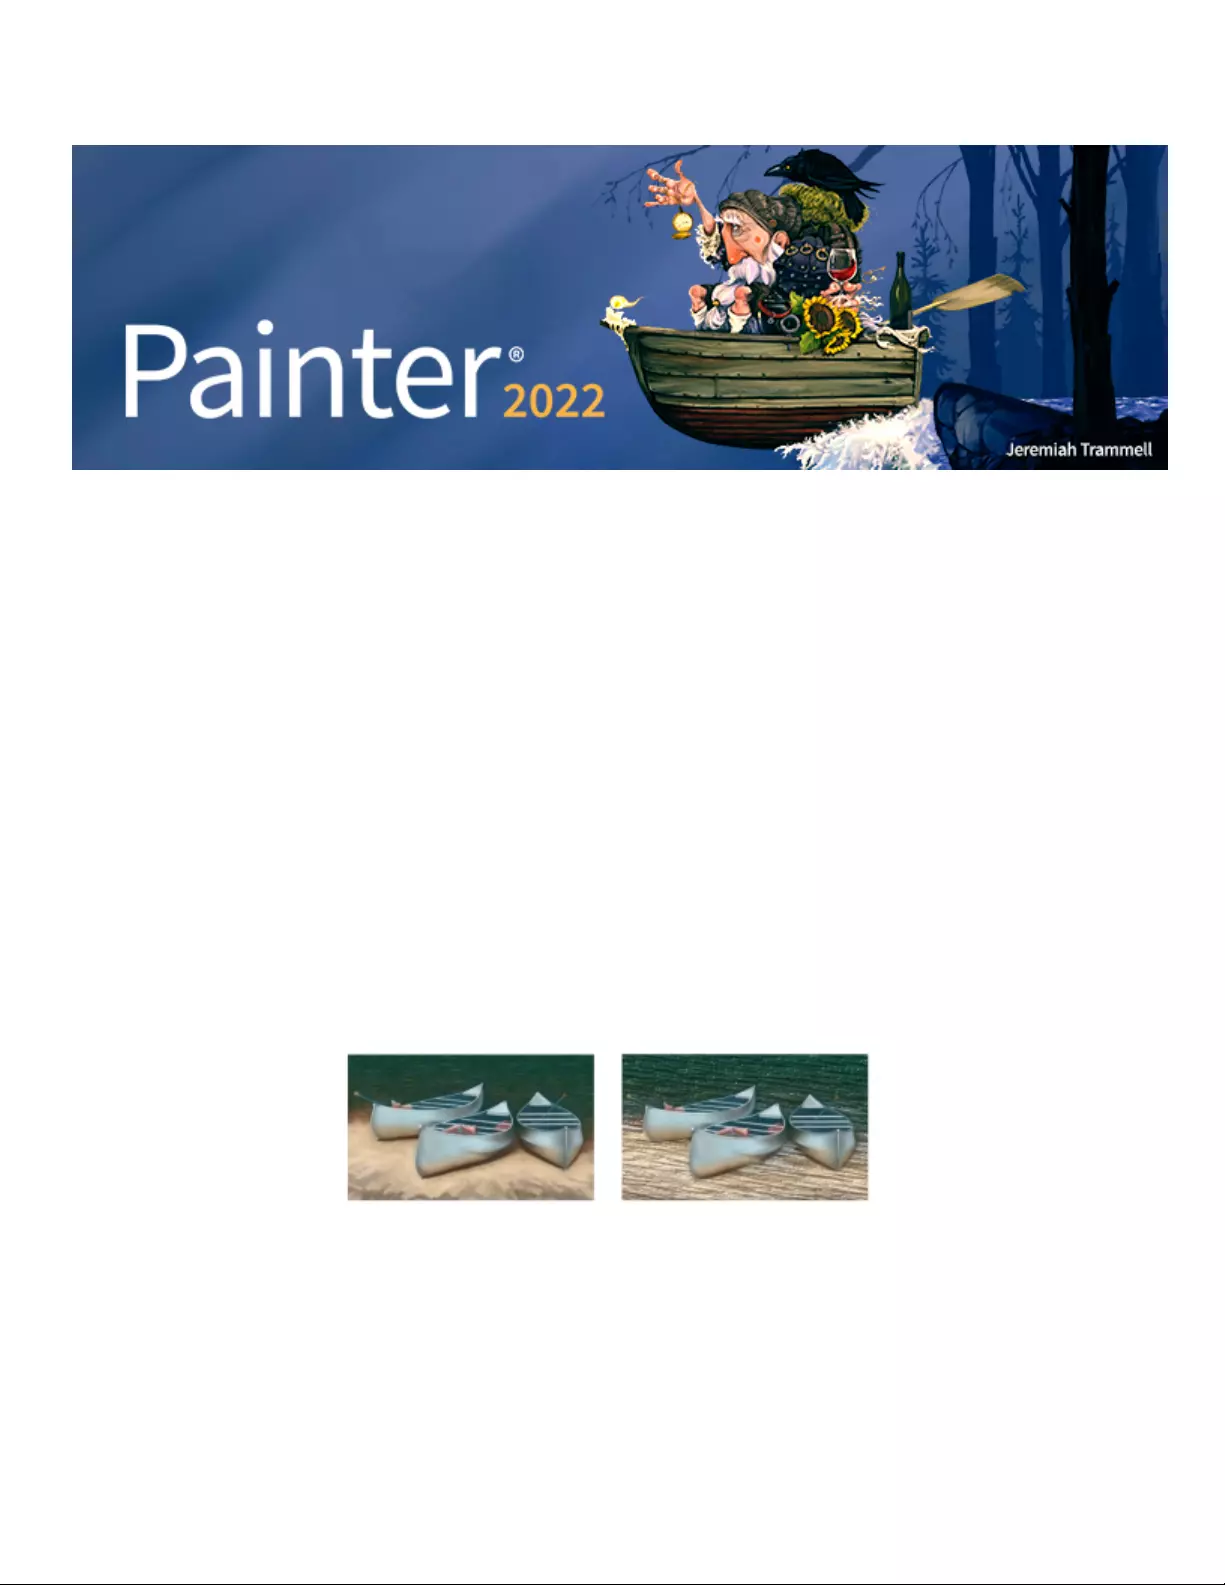
Impasto | 529
Impasto
Impasto is a painting technique that involves using a brush or palette knife to apply thick paint on a canvas and retain visible brush or knife
marks. This painting method is used to add texture, dimension, and movement to a painting. In Corel Painter, the Impasto brushes allow
you to simulate the appearance and texture of traditional impasto. You can also control the impasto effect by manipulating the surface
lighting to increase or decrease the perceived depth of the brushstrokes.
This section contains the following topics:
•“Applying, displaying, and clearing impasto” (page 529)
•“Adjusting and creating Impasto brushes” (page 530)
•“Adjusting Impasto lighting and depth” (page 534)
•“Blending impasto with other layers” (page 536)
Applying, displaying, and clearing impasto
Before applying Impasto brushstrokes, you need to set the canvas to display the impasto depth and lighting information. The canvas stores
the impasto information for the entire image, which includes the Impasto brushstrokes that you apply to individual layers. If the impasto
information is hidden, the brushstrokes appear smooth and flat.
An image with impasto information hidden (left) and displayed (right)
You can choose one of the available Impasto brush variants from the Impasto brush category. You can also transform other brush variants
into Impasto brushes. For more information, see “Adjusting and creating Impasto brushes” on page 530.
You can clear the impasto information from the canvas at any time. You can also hide the impasto information before clearing it in order to
preview the end result.
530 | Corel Painter 2022 User Guide
To display or hide impasto information
1Choose Window Navigator.
2In the Navigator panel, click the Open Navigator Settings button , and choose Show Impasto.
If you want to deactivate the Impasto view, click the Open Navigator Settings button in the Navigator panel, and choose Hide
Impasto.
You can also activate the impasto view by choosing Canvas Surface Lighting, and enabling the Enable Impasto check box.
To quickly apply an Impasto brushstroke
1In the Brush Selector panel (Window Brush Selector Panel (Full View)), click the Impasto brush category, and click an Impasto
brush variant.
2Click the Impasto flyout button on the property bar, enable the Paint with Depth check box, and choose a drawing method from
the Type list box.
3Paint on the canvas or layer.
If you save a file that contains Impasto brushstrokes on multiple layers to the Adobe Photoshop (PSD) format, do not drop the
layers to the canvas before saving. If you drop the layers before saving, you may lose some of the impasto information.
To clear the impasto information
•Choose Canvas Clear Impasto.
Adjusting and creating Impasto brushes
The Impasto brush controls let you modify Impasto brush variants, or transform other brush variants into Impasto brushes. The controls let
you set drawing and depth methods, set the amount of depth applied, and modify brush interaction. The impasto settings act identically
to other brush settings, in that they’re saved as part of a brush variant or applied to any active brush. For more information, see “Adjusting
brushes with brush controls” on page 337.
Setting an impasto drawing method
The impasto drawing methods control the amount of color and depth that the brush applies to the canvas. When you change the drawing
method, it affects the next brushstroke that you apply to the canvas.
Setting an impasto depth method
The impasto Depth Method lets you choose a control medium for applying depth. Corel Painter uses the luminance (brightness) information
in the control medium to determine how much depth is applied within a stroke. Light areas of the medium receive more depth; dark areas
receive less. Black areas appear flat.
For example, when you use Paper as the Depth Method, the bright and dark areas of the paper grain determine where grooves and bumps
appear in the brushstroke.
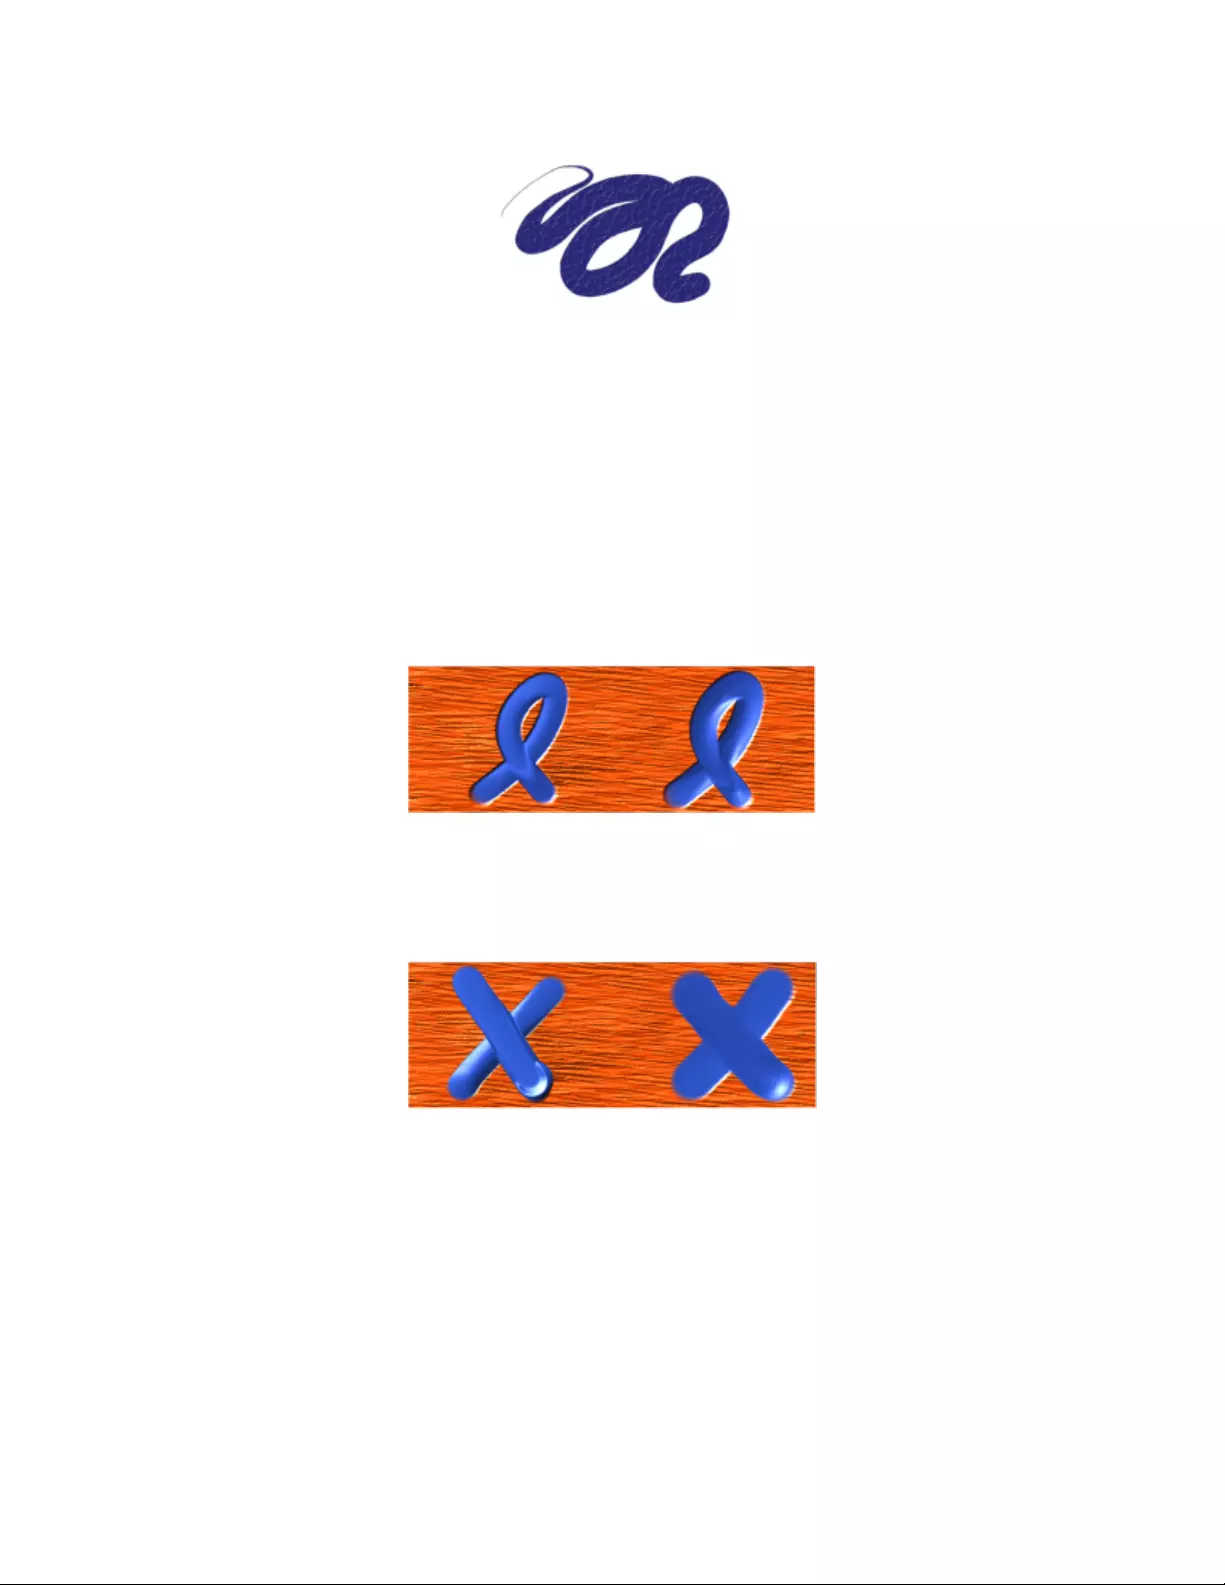
Impasto | 531
This Impasto brushstroke is produced when Paper is used as the Depth Method.
You can set the impasto Depth method to use the selected texture. For more information about texture painting and Texture brushes, see
“Texture painting” on page 453 and “Customizing Texture brushes” on page 457.
The impasto depth method option is not supported by all brush types.
Controlling the depth interaction of a medium
If the brush variant that you chose allows you to select a Depth Method, you can also adjust various settings that alter the way the
brushstrokes interact with the canvas and other brushstrokes.
You can invert the depth method to apply the negative of the source in a brushstroke. For example, if you invert the depth using Weaving
Luminance, light areas of the weave become dark and vice versa.
You can also apply negative depth, which allows you to use a brushstroke to excavate, or dig into the paint.
The Negative depth option forces impasto to excavate (left). Normally, impasto raises ridges and bumps (right).
In addition, you can specify how Impasto interacts with previously applied brushstrokes. For example, you can adjust the Plow strength so
when a brushstroke with a high Strength value encounters another Impasto brushstroke, it displaces the depth of the existing brushstroke.
In essence, the brushstroke “plows” through existing brushstrokes. This technique produces realistic effects.
The effects of high (left) and low (right) Plow settings
You can apply one of the nine depth Expression settings to control the flow of depth based on stylus pressure, velocity, or bearing. You
can also invert the depth Expression setting to create a different effect. For example, if you set depth Expression to Pressure and the
Invert option is enabled, less depth is applied as you press harder, just as it would if you were using a real brush. For more information, see
“Expression settings” on page 339.
You can also adjust the Min setting to specify the range of variability that you want the expression to apply. The Min Depth setting
represents a percentage of the Depth setting and it must be linked to an expression to have an effect. For example, if you choose the
Pressure expression on the Impasto panel, set the Depth slider to 20%, and then set the Min Depth slider to 50%, the depth will vary from
10% to 20% every time you apply pressure to the stylus.
You can increase the variation of depth that is applied by adjusting the Depth Jitter. You can also use the Smoothness slider to smooth the
depth jitter in a brushstroke for a more organic look.
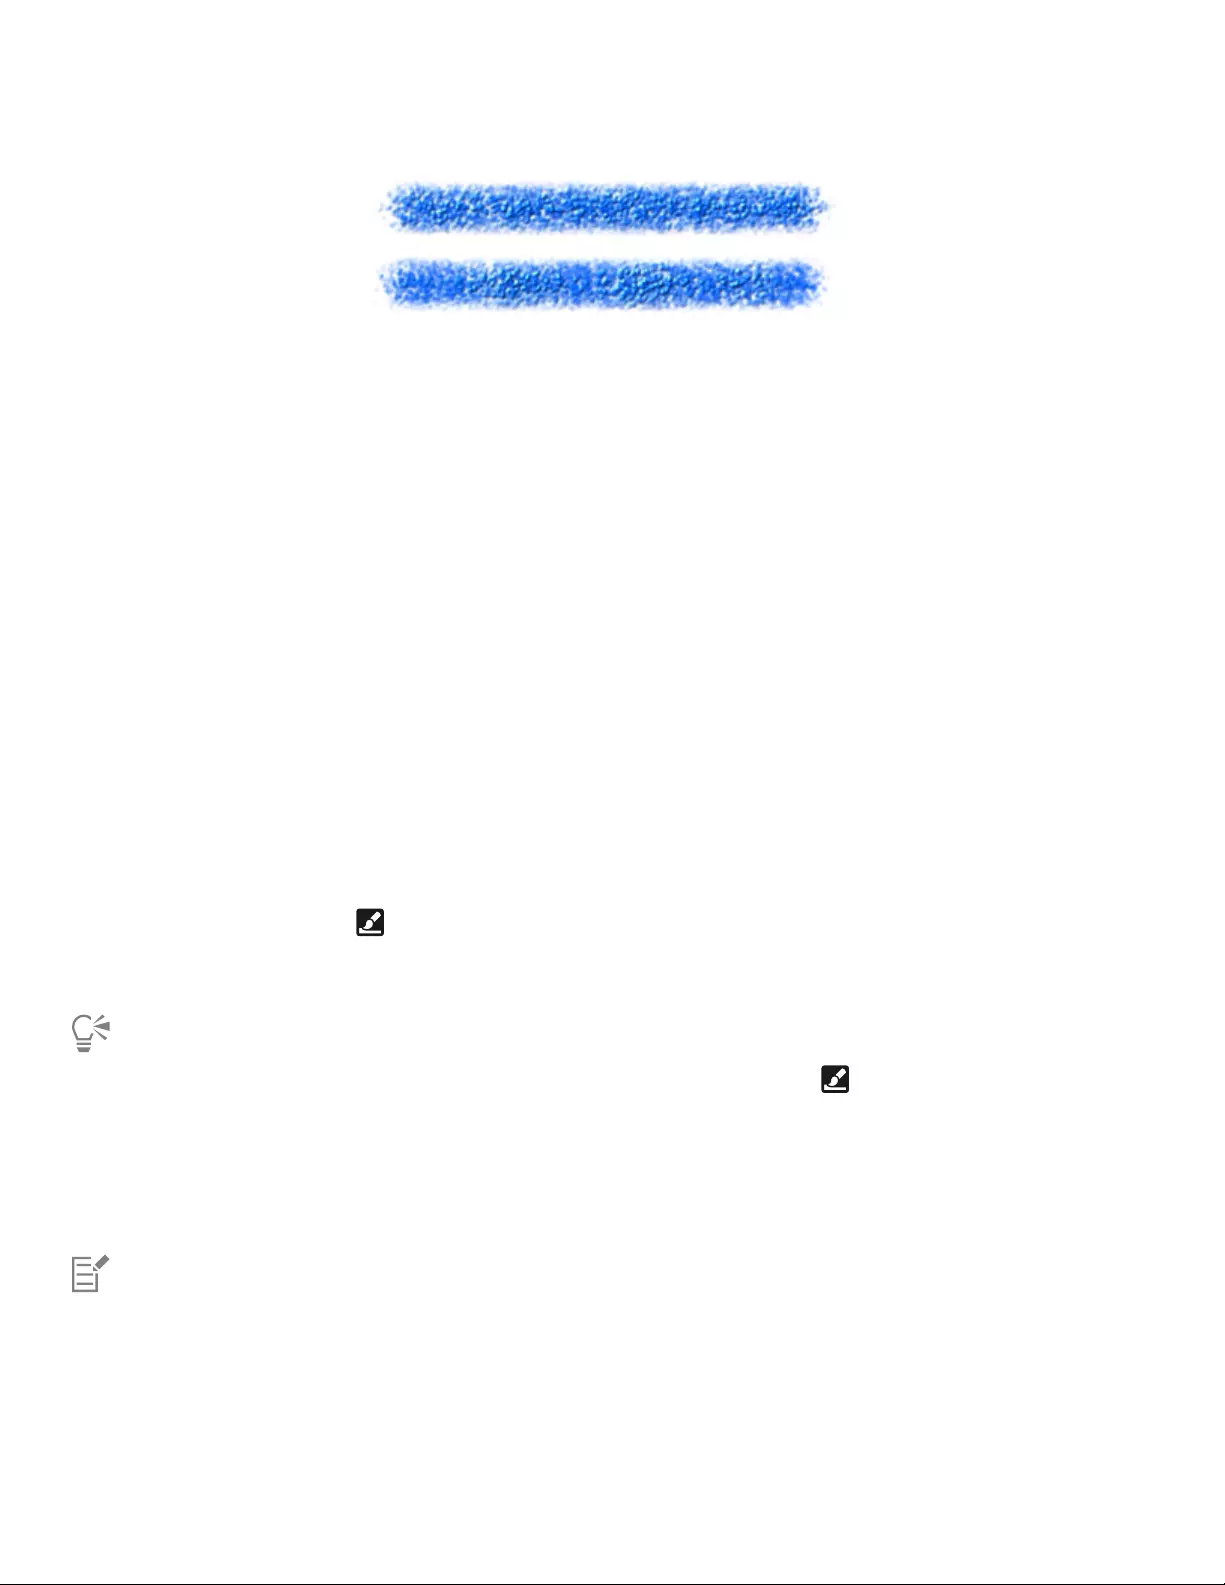
532 | Corel Painter 2022 User Guide
Depth Jitter applied to a brushstroke without jitter smoothing (top) and with jitter smoothing (bottom)
To choose an impasto drawing method
1Choose Window Brush Control Panels Brush Media Impasto.
2From the Draw to list box, choose one of the following options:
•Color and Depth — applies brushstrokes with color and depth
•Depth Only — applies grayscale brushstrokes to represent the highlights and shadows created by depth, color is disabled
To control the appearance of depth
1Choose Window Brush Control Panels Brush Media Impasto.
2From the Depth Method list box in the Advanced Depth Options area, choose one of the following:
•Uniform — applies brushstokes with even depth and little texture
•Erase — removes depth while applying color, which allows you to remove unwanted Impasto brushstrokes. To erase depth, you must
select the Color and Depth option from the Type list box. The amount of depth removed depends on the Depth value that is set. If
you want to remove all depth, set the Depth slider to the maximum value (300).
•Paper — uses the selected paper grain to control the appearance of depth
•Texture Luminance — uses the texture luminance to control the appearance of depth. For more information about texture painting,
see “Texture painting” on page 453.
•Original Luminance — uses the clone source luminance to control depth. For more information, see “Using clone source or pattern
luminance to create texture” on page 654.
•Weaving Luminance — uses the selected weave pattern to control the appearance of depth
3Click the Impasto flyout button on the property bar, and drag the Depth slider below the Type list box to the right to increase
depth, or to the left to decrease it.
If you set a high value, you produce brushstrokes that have deeper grooves.
When painting with an Impasto brush variant, you can click the Impasto flyout button on the property bar to quickly adjust
the Depth value.
The Impasto depth method option is not supported by all brush types.
You can create Impasto brush variants using only stamp-based dab types, such as Circular, Static Bristle, and Computed Circular.
When a brushstroke with a high Plow value encounters another Impasto brushstroke, it displaces the depth of the existing
brushstroke. In essence, your brushstroke “plows” through existing brushstrokes.
For a realistic effect, try varying Depth inversely with Pressure. Set the Expression list box to Pressure, and enable the Invert
option. This lets you apply paint more thickly when you press lightly, but more thinly when you press firmly, just as if you were
using real paint.

Impasto | 533
To control the depth interaction
1Choose Window Brush Control Panels Brush Media Impasto.
2Perform an action from the following table:
You can also
Invert the appearance of impasto depth Enable the Invert check box.
Change the direction of impasto depth so you can dig into the
paint
Enable the Negative Depth check box.
Link the depth settings to a specific stylus, or mouse, movement Choose an option from the Expression list box.
Set the percentage of variability that you want the expression to
apply
Move the Min Depth slider.
Invert the appearance of the depth expression Click the Invert Depth Expression button.
Adjust the amount of variation that is applied to Depth Move the Depth Jitter slider.
Smooth the depth variation Move the Smoothness slider.
Specify the transitions in the brushstroke texture Move the Smoothing slider to the right to increase the effect,
or to the left to decrease it. A high smoothing value produces
brushstrokes with less texture.
Control how much depth a brushstroke displaces when it intersects
with other brushstrokes
In the Plow area, move the Strength slider to the right to increase
the effect, or to the left to decrease it.
When a brushstroke with a high Plow strength value encounters another Impasto brushstroke, it displaces the depth of the existing
brushstroke. In essence, your brushstroke “plows” through existing brushstrokes.
For a realistic effect, try varying Depth inversely with Pressure. Set the Expression list box to Pressure, and enable the Invert
option. This lets you apply paint more thickly when you press lightly, but more thinly when you press firmly, just as if you were
using real paint.
When adjusting Depth Jitter, make sure the Min Depth slider is not set to 100%. Setting the Min Depth to 100% stops Depth
Jitter from occurring.
534 | Corel Painter 2022 User Guide
Adjusting Impasto lighting and depth
Corel Painter offers surface lighting controls that let you manipulate the overall depth effect that impasto creates. The changes that you
make to the surface lighting can increase or decrease the depth, or perceived thickness, of the brushstroke. These controls are global — they
affect all the Impasto brushstrokes on all layers.
In addition, you can use ambient lighting or directional lighting.
You can modify the impasto effect by increasing the appearance of depth.
Adjusting the appearance of depth
You can use surface lighting to adjust the appearance of depth in the brushstrokes. The adjustments that you make to surface lighting affect
all Impasto brushstrokes.
To change the depth of individual brushstrokes, you can vary stylus settings or build up media. For more information, see “Blending impasto
with other layers” on page 536.
Adjusting ambient lighting
You can increase or decrease the ambient lighting in the image. The angle of the light does not change, only the brightness. Ambient
lighting can be used in combination with directional light sources.
Setting directional light sources
You can adjust surface lighting by using directional light sources, which illuminate the brushstroke from a certain angle. You can use preset
(simple) lighting or custom lighting. With simple lighting, you can choose one of eight preset lights. With custom lighting, you can add
more light sources, and you can move and delete light sources.
The lighting sphere shows all possible surface angles and how the lights illuminate them. The light indicators on the sphere show the
position of all light sources.
When you disable the Simple lighting option, the lighting sphere appears with a
single light indicator. You can then add more light sources and change their position.
You can change the color of a light source. For example, you can have multiple colored lights interact with the depth to produce different
textural effects. You should keep in mind that each light interacts with all the Impasto brushstrokes, so be careful not to set up colored lights
that clash with the colors in your composition or light sources that create unwanted shadows.
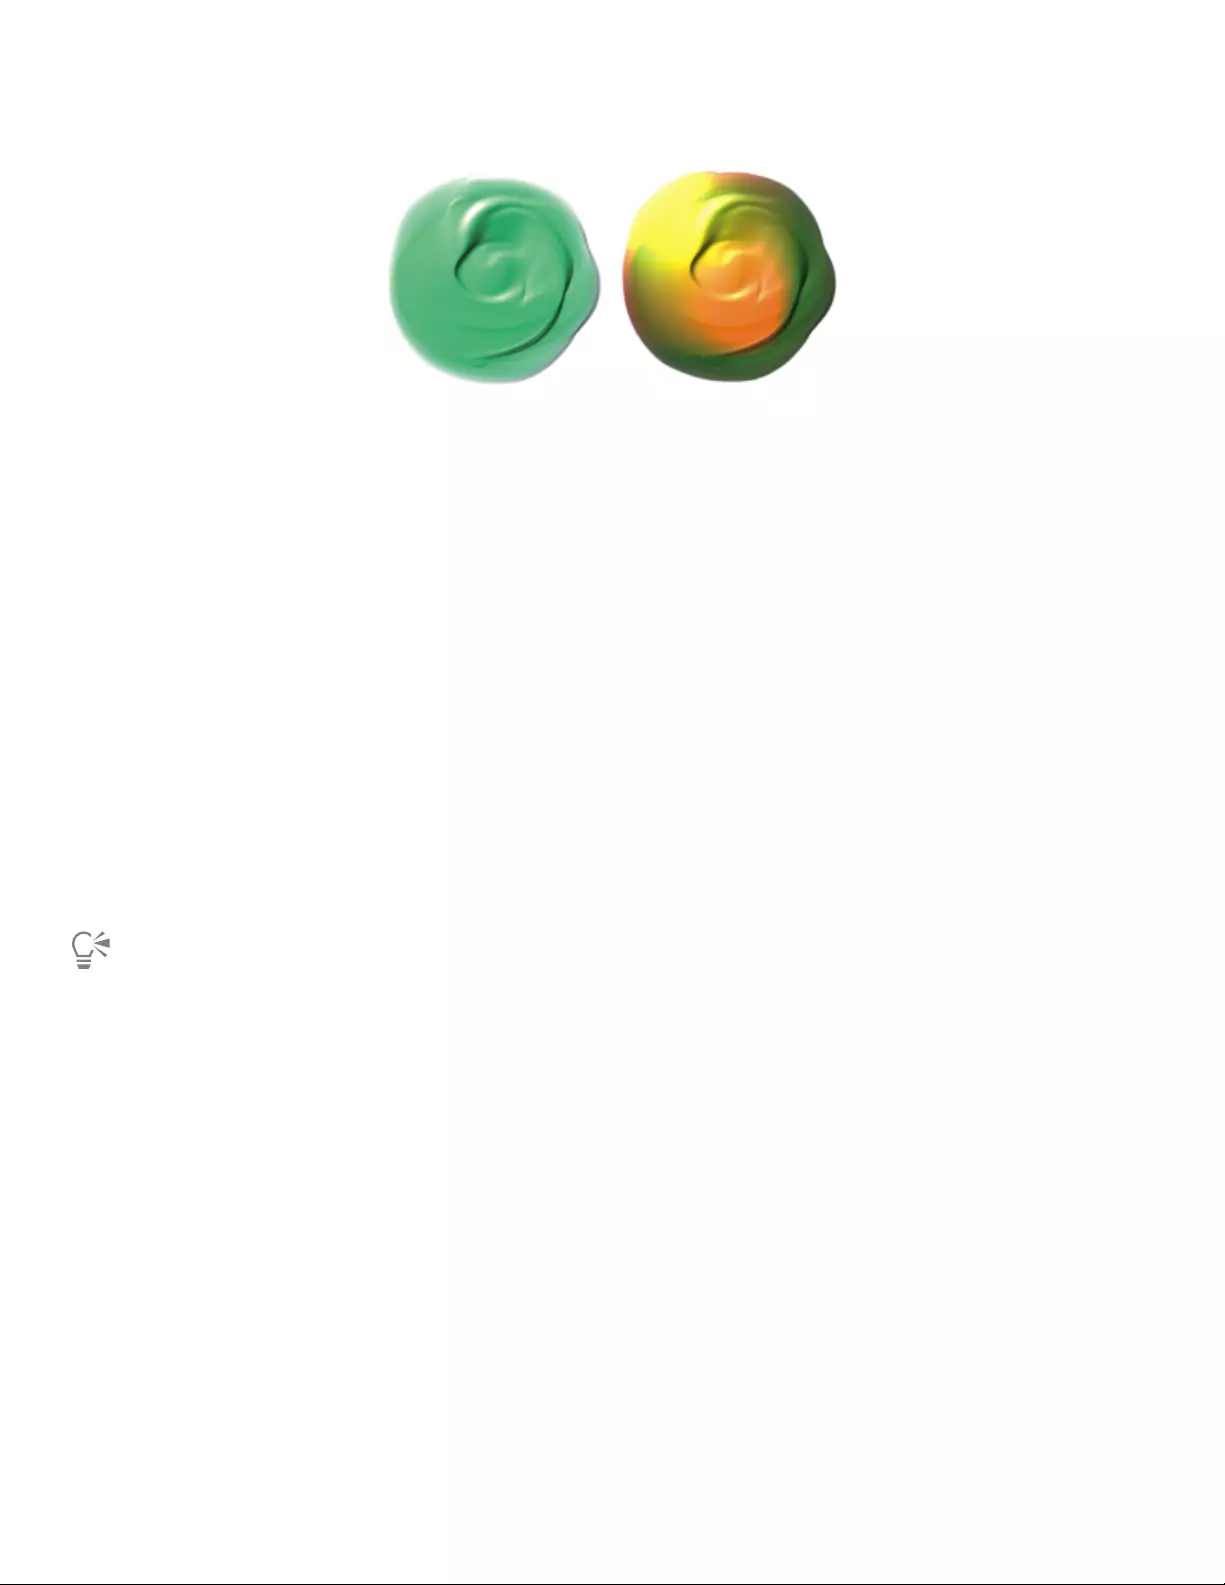
Impasto | 535
The image above uses two different colored light sources.
You can also adjust the intensity and brightness of directional light.
To modify surface lighting to adjust depth
1Choose Canvas Surface Lighting.
2In the Appearance of Depth area, adjust any of the following sliders:
•Amount — increases or decreases the visibility of brush striations in brushstrokes. The highest value displays more striations to create
the illusion of more texture and increased depth, whereas the lowest value displays fewer striations to create the illusion of smooth
texture without depth.
•Picture — controls how much color appears in the image. At its lowest value, all color is washed out, leaving only the highlights.
•Shine — controls how much highlight appears on the surface of brushstrokes. Higher Shine values make the brushstroke look metallic.
•Reflection — maps a clone source image or pattern onto the texture at a variable percentage. For more information, see “Creating
reflection maps” on page 657.
To adjust ambient lighting
1Choose Canvas Surface Lighting.
2In the Ambient Lighting area, make sure that the Ambient lighting check box is enabled.
3Move the Brightness slider.
To remove ambient lighting, disable the Ambient lighting check box.
To add, remove, or modify a directional light source
1Choose Canvas Surface Lighting.
2Enable the Enable Impasto check box.
3In the Directional Lighting area, perform an action from the following table.
To Do the following
Add a preset light source Enable the Simple lighting check box, and click a light indicator on
the lighting sphere.
Add a custom light source Disable the Simple lighting check box, and click on the lighting
sphere where you want to add a new light source.
A new light indicator (small circle) appears where you click.

536 | Corel Painter 2022 User Guide
To Do the following
Delete custom light sources Move the Lights slider to the left.
Add custom lights along a circular path Disable the Simple lighting check box, and move the Lights slider.
Change the position of a custom light source Drag a light indicator to a new position on the sphere.
Change the light color Click a lighting indicator, click the Light Color chip, and choose a
color.
To adjust the intensity and brightness of directional light
1Choose Canvas Surface Lighting.
2In the Directional Lighting area, adjust any of the following sliders:
•Brightness — controls how much light the light source contributes to the overall lighting color
•Concentration — adjusts the spread of the light over the surface
•Exposure — adjusts the overall lighting amount from darkest to brightest
Blending impasto with other layers
You can control how Impasto brushstrokes blend with images on other layers by selecting a Composite Depth method in the Layers panel.
The Composite Depth menu provides the following methods for combining Impasto brushstrokes:
• The Add method, which is the default Composite Depth method, combines depth information between layers. Brushstrokes on different
layers build up where they overlap. If the composite depth method is set to Add and you paint with an Impasto brush variant on a layer,
the composite depth setting does not change.
An example of the Add composite depth method
• The Subtract method removes depth information between layers. Impasto brushstrokes on top layers create grooves in the image data
beneath them. If the composite depth method is set to Subtract and you paint with an Impasto brush variant on a layer, the composite
depth method does not change.
An example of the Subtract composite depth method
• The Replace method uses layer masks to replace the depth information from lower layers with information from top layers. Wherever
brushstrokes overlap, only the top brushstrokes are visible; the lower brushstrokes are completely covered. If the composite depth
method is set to Replace and you paint with an Impasto brush variant on a layer, the composite depth method does not change.

Impasto | 537
An example of the Replace composite depth method
• The Ignore method prevents Impasto brushstrokes from interacting with image data on different layers. With the Ignore method active,
the display of depth for the layer is turned off. This makes it possible to disable display of depth for individual layers. If the composite
depth method is set to Ignore and you paint with an Impasto brush variant on a layer, the method changes back to Add.
You can set a different composite depth method for every layer in a document. For more information, see “Blending layers by using
composite methods” on page 566.

538 | Corel Painter 2022 User Guide

Layers | 539
Layers
Layers provide one of the great advantages of creating images in a digital workspace — the freedom to experiment with different
compositions and effects without risking an unwanted, permanent edit. The Corel Painter file format preserves layers when you save a
document, so you can easily make changes at a later time.
This section contains the following topics:
Creating layers
•“Getting started with layers” (page 540)
•“Displaying the Layers panel” (page 543)
•“Creating and deleting layers” (page 545)
•“Clearing the contents of layers” (page 546)
•“Converting selections into layers or floating objects” (page 546)
•“Naming and adding notes to layers” (page 547)
Selecting, transforming, and manipulating layers
•“Selecting layers” (page 548)
•“Copying and duplicating layers” (page 550)
•“Moving layers” (page 551)
•“Transforming layers” (page 553)
•“Aligning layers” (page 555)
•“Locking layers” (page 556)
•“Showing or hiding layers” (page 556)
•“Changing layer order” (page 557)
•“Viewing layer position” (page 559)
•“Grouping layers” (page 559)
•“Merging layers” (page 561)
•“Dropping layers with the canvas” (page 562)
Working with layer content
•“Painting on layers” (page 562)
•“Preserving layer transparency” (page 564)
•“Adjusting layer opacity” (page 565)
•“Adding drop shadows to layers” (page 565)
•“Blending layers by using composite methods” (page 566)
540 | Corel Painter 2022 User Guide
Working with layers masks
•“Layer masking” (page 573)
•“Creating and deleting layer masks” (page 574)
•“Selecting layer masks” (page 576)
•“Painting on layer masks” (page 576)
•“Enabling and disabling layers masks” (page 577)
•“Inverting layer masks” (page 577)
•“Loading layer masks to selections” (page 578)
•“Copying layer masks” (page 578)
•“Viewing layer masks as grayscale images” (page 578)
•“Applying layer masks” (page 579)
Saving, storing, and sharing layers
•“Importing and exporting layers” (page 579)
•“Working with reference layers” (page 580)
•“Storing layers as images in the Image Portfolio” (page 581)
Getting started with layers
A layer is an object that serves as a container for image data. You can use layers to build an image one element at a time. This allows you to
modify and manipulate the content of a layer independently of other layers and the canvas. Likewise, you can work on the canvas without
interfering with any of the other layers. For example, if you introduced an element to an image by using a layer and you don’t like the result,
you don’t have to clear the entire canvas — just modify or remove the affected layer.
When you add content, such as brushstrokes to a layer, the areas of the layer that have no content are transparent. This allows you to see
the content of layers below and the canvas. In Corel Painter, you can control the behavior of layer transparency. For more information, see
“Preserving layer transparency” on page 564.
Think of layers as sheets of clear material, such as acetate. Painting on a layer obscures
the image below it. Areas of a layer that don’t contain images remain transparent.
Understanding layers and the canvas
To better understand the role of layers in Corel Painter, it’s important to understand the role of the canvas. All Painter documents have
canvas — a blank background that is filled with white pigment by default. You can change the canvas color, and brushes that blend and
mix paint will interact with the canvas color. For more information about picking up color from underlying layers, see “Painting on layers” on
page 562.
Although the canvas displays as the first layer in the Layers panel, you cannot modify the canvas like other layers. For example, you cannot
delete, reorder, transform, or group the canvas. In addition, the canvas cannot be transparent, so if you convert the canvas to a layer,
even areas that appear transparent retain the canvas color. For more information about converting the canvas to a layer, see “Converting
selections into layers or floating objects” on page 546.

Layers | 541
For greater control and more options, such as changing layer order, location, and transparency, consider painting only on layers. When you
start a new document, Corel Painter automatically creates a Default layer, or you can choose to create a Thick Paint, Watercolor, or Liquid Ink
layer instead. You can also choose to hide the canvas while you paint. For more information, see “To create a new document” on page 99.
Layer categories and types
Corel Painter includes different layer types that are pixel-based, media-based or vector-based. It also includes dynamic and reference layers. In
addition, there are several special layers, including Thick Paint, Watercolor, and Liquid Ink.
The Corel Painter default layer is pixel-based. It is the most compatible layer type, and is recommended if you are round-tripping files with
Photoshop. You can use most brush variants on pixel-based layers, with the following exceptions: Thick Paint, Liquid Ink, Real Watercolor,
and Watercolor. You can transform, pick up underlying color, preserve layer transparency, merge, collapse, reorder, lock, unlock, group, and
delete default layers. The default layer is also used in some specialized functions, such as building an image hose nozzle, embedding a URL
in an image, or creating an animation.
With Thick Paint layers, you can use Thick Paint and other compatible brushes to create brushstrokes with pigment and depth. The paint
on Thick Paint layers can be pushed, pulled, and mixed to increase or decrease the elevation of brushstrokes. For some brushes, such as
Impasto, the control of depth provided by Thick Paint layers produces more realistic results.
You can also apply and adjust surface lighting to change the appearance of thick paint with depth of shadows. By default, the application
warns you every time you choose a brush that is incompatible with Thick Paint layers. You can set Corel Painter to automatically create a new
compatible layer for you and save this option in the application preferences, so that you no longer see this warning. For more information,
see “Adjusting Thick Paint layers” on page 518.
With Watercolor layers, you can apply pigment and colors that flow and mix and absorb into the paper. Watercolor brushes also interact
with the texture and grain of the paper. The entire layer can be wet or dry, and watercolor brushstrokes will automatically rewet. You can
also convert default layers to watercolor, as well as merge two or more watercolor layers. For more information, see “Working with the
Watercolor layer” on page 432.
With Liquid Ink layers, you control the appearance of depth and adjust the threshold of the edges of the ink. You can also control surface
lighting, remove and smooth edges, and adjust the width, height, or three-dimensional appearance of brushstrokes. For more information,
see “Liquid Ink” on page 523.
Vector-based layers contain shapes or text. When you create a shape with one of the shape tools (Pen, Quick Curve, Rectangular Shape,
or Oval Shape) or text using the Text tool, Corel Painter automatically adds a new layer to the document. Each new shape or text block
becomes a separate layer; you can group multiple shapes together or merge them into a single shape.
The following table describes each of the layer types.
Layer type Description
Default Stores the paint applied by most brush variants. You can also apply
effects to pixel-based default layers.
Thick Paint Stores the paint applied by Thick Paint brushes. You can adjust
the elevation of Thick Paint brushstrokes on the layer. For more
information, see “Adjusting Thick Paint layers” on page 518.
Watercolor Stores the paint applied with the Watercolor and Real Watercolor
brushes and enables them to mix and flow together. When
you apply a Watercolor brush to the canvas, or to a standard
layer, an incompatible brush warning appears and lets you set a
default behavior. For more information about incompatible brush
warnings, see “Special layers preferences” on page 826. For more
information, see “Working with the Watercolor layer” on page 432.

542 | Corel Painter 2022 User Guide
Layer type Description
Liquid Ink Stores the brushstrokes of Liquid Ink brushes. When you apply
one of the Liquid Ink brushes to the canvas or to an image
layer, an incompatible brush warning appears and lets you set a
default behavior. For more information about incompatible brush
warnings, see “Special layers preferences” on page 826. For more
information about Liquid Ink brushes, see “Working with Liquid ink
brushes” on page 523.
Floating object Stores layer selections so you can edit layer content. For more
information, see “Converting selections into layers or floating
objects” on page 546.
Reference Stores low-resolution representations of other layers, which lets you
manipulate standard layers more easily. For more information, see
“Working with reference layers” on page 580.
Dynamic Lets you apply effects to the underlying image. Some dynamic
layers, such as Glass Distortion and Equalize, interact with the
underlying images in a specific area to produce effects. Other
dynamic layers, such as Liquid Metal, interact with the underlying
images as you apply brushstrokes. For more information, see
“Dynamic Plug-ins” on page 675.
Shape Stores any shapes that you create using one of the shape tools.
When you create a shape, a new vector-based shape layer is
automatically created. For more information, see “Getting started
with shapes” on page 760.
Text Stores single blocks of text that were inserted with the Text tool.
When you add text, a vector-based text layer is automatically
created. For more information, see “Aligning text” on page 782.
Converting layers
Some features in Corel Painter can be applied only to default, pixel-based layers. If you want to use these features on shapes, Watercolor
layers, Liquid Ink layers, dynamic layers, and so on, you must convert them to default layers.
To convert to a default layer
•In the Layers panel, select one or more layers, click the Layer options button , and choose Convert To Default Layer.
You can convert Watercolor, Thick Paint, Liquid Ink, Shape, Text, and dynamic layers into default layers.
You can also convert a layer to a default layer by right-clicking the layer, and choosing Convert To Default Layer.
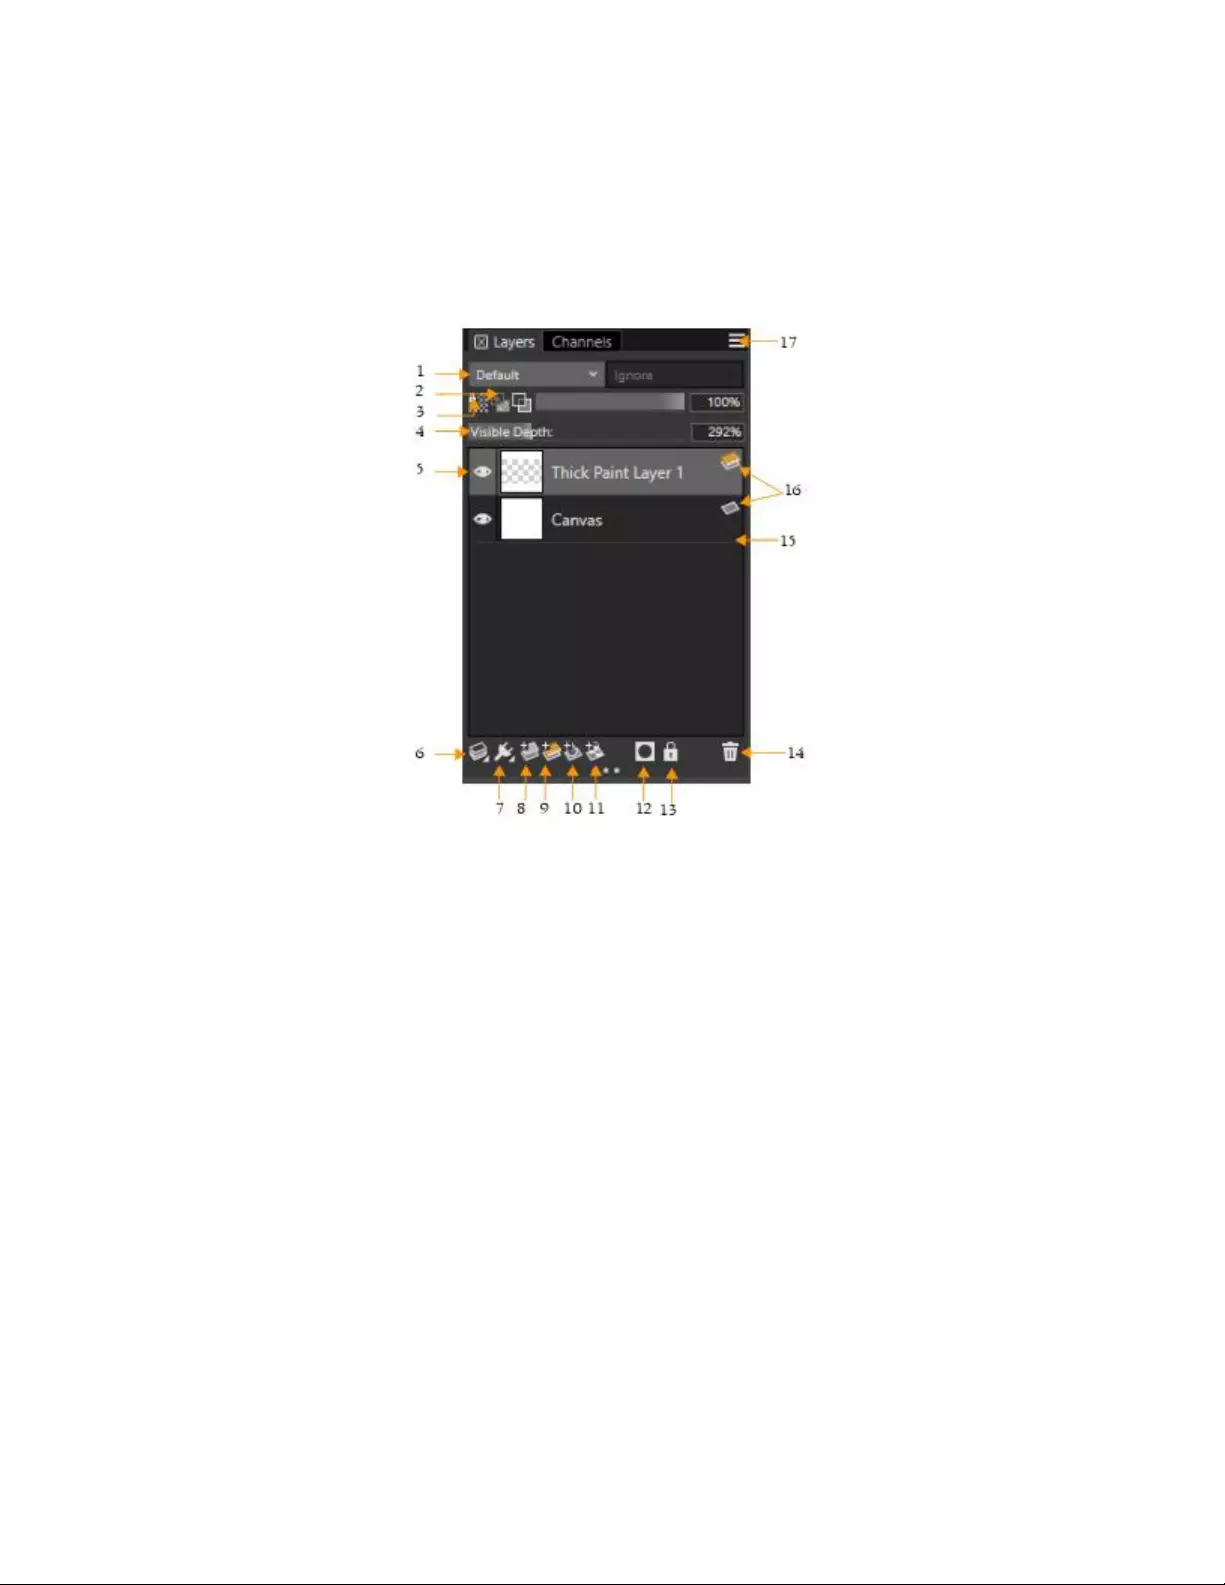
Layers | 543
Displaying the Layers panel
All layers in a document are listed in the Layers panel. The Layers panel allows you to manage layers. It includes commands and controls
for selecting, hiding, locking, deleting, naming, and grouping layers. You can access the various layer commands and controls by using the
buttons at the bottom of the panel and the context menus that appear when you right-click a layer.
Layer panel components
1. Composite Method list box 10. New Watercolor Layer button
2. Pick Up Underlying Color button 11. New Liquid Ink Layer button
3. Preserve Transparency button 12. New Layer Mask button
4. Visible Depth slider 13. Lock Layer button
5. Show/Hide Layer icon 14. Delete Layer button
6. Layer Commands 15. Canvas
7. Dynamic Plugins 16. Layer list
8. New Layer button 17. Layer options button
9. New Thick Paint Layer button

544 | Corel Painter 2022 User Guide
The Layers panel displays icons that identify layer types and characteristics. The following table lists the icons that appear in the Layers
panel.
Icon Description
Canvas
Default layer
Shape layer
Reference layer
Dynamic layer
Watercolor layer
Liquid Ink layer
Text layer
Thick Paint layer
Layer group
Expanded group
Visible layer
Hidden layer
Layers | 545
Icon Description
Locked layer
In the Layers panel, you can also set layer opacity and choose a composite method. For information, see “Adjusting layer opacity” on page
565 and “Blending layers by using composite methods” on page 566.
The Navigator panel displays information about the dimensions and position of layer content. For more information, see “Navigating images
and viewing image information” on page 106.
To display the Layers panel
•Choose Window Layers.
If the panel is not expanded, double-click the Layers panel tab.
Creating and deleting layers
You can add a default, Thick Paint, Watercolor, or Liquid Ink layer to an image at any time. When you paint with compatible or incompatible
brushes on Thick Paint, Watercolor, and Liquid Ink layers, the application will warn you and let you set a default behavior.
You can let Corel Painter automatically create a new compatible or default layer for you and save this option in the application preferences.
You can also modify how Corel Painter behaves when you paint on special layers in preferences. For more information, see “Special layers
preferences” on page 826.
When you create a layer, the new layer is placed directly above the selected layer in the Layers panel. If the selected layer belongs to a group,
the new layer is added to the group. If a layer group is selected, the layer is placed above the group. You can also change the order in which
layers are displayed. For more information, see “Changing layer order” on page 557 and “Grouping layers” on page 559.
To create a new layer
• Perform a task from the following table.
To Do the following
Create a default layer In the Layers panel, click the New Layer button .
Create a Thick Paint layer In the Layers panel, click the New Thick Paint Layer button .
Create a watercolor layer In the Layers panel, click the New Watercolor Layer button .
Create a Liquid Ink layer In the Layers panel, click the New Liquid Ink Layer button .
To delete a layer
1In the Layers panel, select one layer or multiple layers.
2Do one of the following:
•Click the Delete Layer button at the bottom of the Layers panel.
546 | Corel Painter 2022 User Guide
•Click the Layer options button , and choose Delete Layer.
• Right-click a layer, and choose Delete Layer.
You can also delete shape layers by selecting the shape and pressing Delete (macOS) or Backspace (Windows).
You cannot delete the canvas layer.
Clearing the contents of layers
You can clear the contents of a layer without deleting the layer from your document. If you often use this command in your workflow, you
can assign a keyboard shortcut to it. For information about assigning keyboard shortcuts to commands, see “Customizing keys” on page
132.
To clear the contents of a layer
1In the Layers panel, click the name of the layer you want to clear.
2Press Delete.
Pressing Command + A (macOS) or Ctrl + A (Windows), and then pressing Delete doesn’t clear all layer contents, just what is
visible on the canvas. Any content outside the canvas will remain on the layer.
You can also clear the contents of a layer by selecting the layer in the Layers panel, and clicking Layers Clear Content.
You can also clear the contents of a layer by right-clicking the layer in the Layers panel, and choosing Clear Content.
Converting selections into layers or floating objects
In Corel Painter, you can convert a selection that was made on the canvas into a layer. You can also convert a selection that was made on
a layer into a floating object. You can convert selections that were made with the Rectangular Selection, Oval Selection, Lasso, or Magic
Wand tool. You can also duplicate a selection to convert it to layer or floating object.
Converting a selection to a layer is also a useful way to convert the entire canvas to a layer. For example, you can convert a photo into a layer
and then apply effects to it.
Layer-based selections function in the same way as selections on the canvas — you can use them to constrain brushstrokes, to isolate
an area of the layer for applying an effect, or to choose an area of the layer to cut or copy. For more information, see “Selections and
transformations” on page 593.
When you convert a canvas-based selection to a layer, a new layer appears in the Layers panel. However, when you convert a layer-based
selection, a Layer Floating Object appears as an item below the parent layer in the Layers panel.
You can move floating objects around a layer to create new compositions. Each layer in a document can have only one floating object at a
time. You can drop a floating object to merge it with the layer, but many operations automatically drop (or merge) the floating object back
to its parent layer.
Floating objects are created by making a selection on a pixel-based layer. Shapes cannot be floating objects because they are vector-based.
However, you can turn a shape into a pixel-based layer. For more information, see “To convert a shape to a pixel-based layer for painting” on
page 774.

Layers | 547
When you save a document to RIFF format, Corel Painter preserves all floating objects. However, saving a document in a non-RIFF format
automatically drops floating objects onto their parent layers.
To convert a selection to a layer or floating object
1Create a selection on the canvas or a layer with a selection tool.
2Perform an action from the following table.
To Do the following
Convert the selection to a layer or floating object Choose Select Float or click the selection with the Layer Adjuster
tool .
Duplicate the selection as a layer or floating object Hold down Option (macOS) or Alt (Windows), and click the
selection with the Layer Adjuster tool .
When you rotate, scale, distort, or flip a selection using the Transform tool , the selection is automatically committed to a
layer. For more information, see “Preparing selections for transformations” on page 615.
To convert the canvas to a layer
1In the Layers panel, select the canvas.
2Choose Select All.
3Choose Select Float.
To reposition or drop a floating object
1In the Layers panel, select the floating object.
2Perform an action from the following table.
To Do the following
Reposition a floating object In the document window, drag the floating object to the new
location with the Layer Adjuster tool . Then, press the arrow
keys to move the floating object one pixel at a time.
Drop a floating object Click the Layer Commands button , and choose Drop.
Naming and adding notes to layers
As you add more layers and groups to a document, it can become difficult to remember which image data each layer contains. By assigning
descriptive names to layers and groups, you can keep track of the separate pieces of an image. You can also assign more descriptive
information to a layer by adding notes to it.
548 | Corel Painter 2022 User Guide
Corel Painter assigns each layer or group a default name when you create it. This name references the object’s type and creation order. For
example, pixel-based layers are titled Layer 1, Layer 2, and so on. A shape’s title is based on the tool you use to create it — Rect for the
Rectangular Shape tool, Oval for the Oval Shape tool, and Shape for the Pen and Quick Curve tools.
To name a layer or group
1In the Layers panel, double-click a layer or group.
2Type a new name in the text box.
You can also rename a layer by clicking the Layer options button , choosing Layer Attributes, and typing a name in the Name
box.
When you collapse layers, the name of the bottom layer is used as the name of the new merged layer.
You cannot rename the Canvas layer.
To add a layer description
1In the Layers panel, click the Layer options button , and choose Layer Attributes.
2Type in the Note box.
You cannot add notes to a layer if you enable the WWW Map Clickable Region check box for image mapping.
You can also add a layer description by right-clicking a layer or group in the Layers panel, choosing Layer Attributes, and typing in
the Note box.
You can also add a layer description by selecting a layer or group, choosing Layers Layer Attributes, and typing in the Note box.
Selecting layers
In Corel Painter, you have different options for selecting individual and multiple layers. You must select layers to make changes such as
moving, aligning, and painting. If no layers are selected when making changes, you may make unwanted changes to the canvas.
Layer Adjuster tool and Auto-Select Layer option
You can select layers with the Layer Adjuster tool if the Auto-Select Layer option is enabled.
When you choose the Layer Adjuster tool from the toolbox, the property bar displays layer-related options including the Auto-Select Layer
check box. When you enable this option, you can select layers automatically with the Layer Adjuster tool by clicking an area of layer content
in the document window.
By default, the Auto-Select Layer option is disabled. This means that the layer selection is “locked in” — the Layer Adjuster tool affects only
the selected layer or layers. In other words, without enabling the Auto-Select Layer option, you cannot select a layer by clicking it in the
document window; you must select a layer by clicking it in the Layers panel.
Layers panel
You can select a layer, multiple layers, or a layer group from the Layers panel. Because the Layers panel lists all image layers, it’s a useful tool
for browsing and selecting layers. For more information, see “Displaying the Layers panel” on page 543.
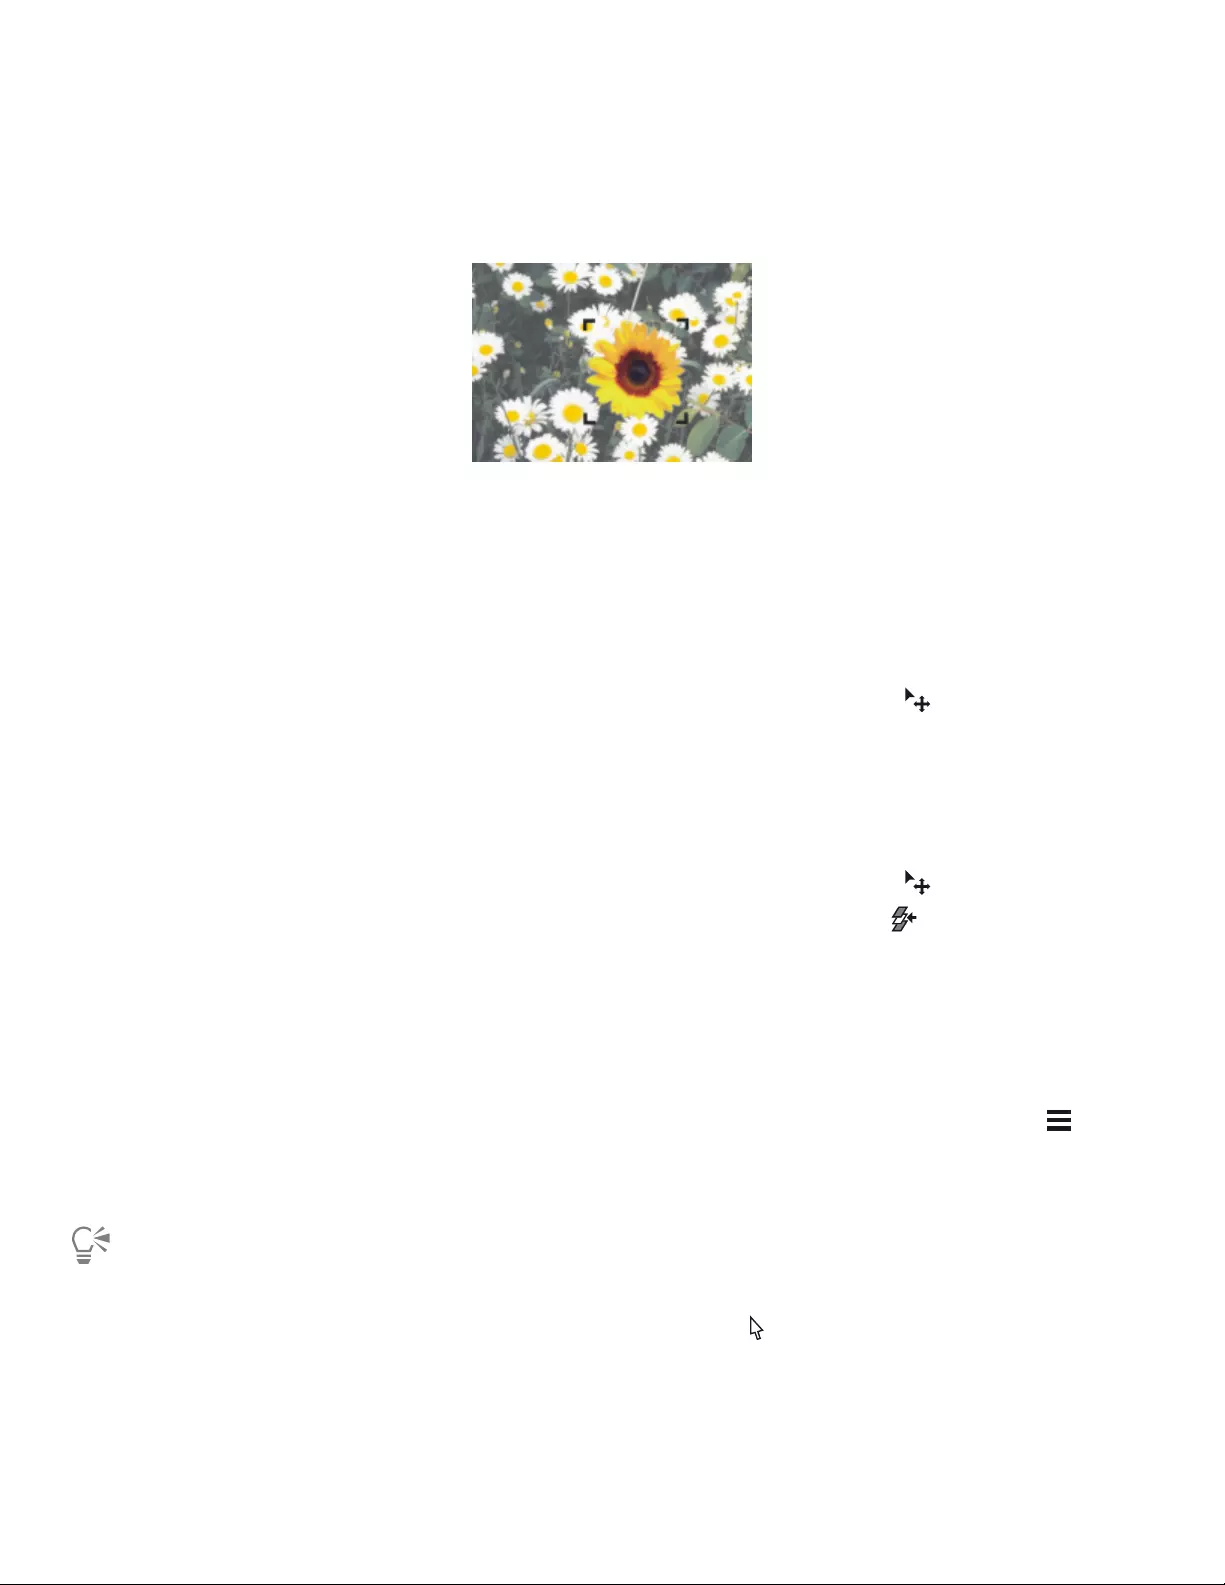
Layers | 549
Displaying layer indicators
You can also display layer indicators, which are handles that display at the corners of a selected layer’s content. The layer indicators provide a
visual representation of the layer’s bounding box. For more information, see “Moving layers” on page 551.
Show the layer indicators to mark the corners of a selected layer.
To select a layer
To Do the following
Select a single layer Do one of the following:
•Click a layer in the Layers panel.
•Choose the Layer Adjuster tool from the toolbox, enable
the Auto-Select Layer check box on the property bar, and then
click anywhere in a layer’s content.
Select multiple layers Do one of the following:
•In the Layers panel, hold down Command (macOS) or Ctrl
(Windows), and click each layer you want to select.
•Choose the Layer Adjuster tool from the toolbox, enable
the Auto-Select Layer button on the property bar, hold
down Shift, and click the layers you want to select in the
document window.
Tip: To select contiguous layers in the Layers panel, click a layer,
hold down Shift, and then click the last layer you want to select.
Select all layers in a document Do one of the following:
•In the Layers panel, click the Layer options button , and
choose Select All Layers.
•Press Ctrl + Shift + 1 (Windows) or Command + Shift + 1
(macOS).
You can also press the F key to activate the Layer Adjuster tool.
If you are working with a shape, you can switch to the Shape Selection tool by double-clicking a shape with the Layer
Adjuster tool.
550 | Corel Painter 2022 User Guide
To deselect layers
• In the Layers panel, click the Canvas.
You can also deselect a single layer by clicking the Layer options button in the Layers panel, and choosing Deselect Layer.
To show layer indicators
1In the Layers panel, select a layer.
2Click the Layer options button , and choose Show Layer Indicators.
To hide the layer indicators, click the Layer options button , and choose Hide Layer Indicators.
Copying and duplicating layers
You can copy individual layers in the same image or between images. You can also duplicate layers in order to quickly replicate image
elements. In addition, you can simultaneously copy the contents of multiple layers by using a selection.
To copy and paste a layer
1Choose the Layer Adjuster tool in the toolbox.
2Enable the Auto-Select Layer check box on the property bar.
3In the document window, click the layer that you want to copy.
4On the property bar, click the Copy button , and perform an action from the following table:
To paste a layer Do the following
Directly above the copied layer Click the Paste in Place button .
Above another layer Click the layer in the Layers panel, and then click the Paste in Place
button .
Above the canvas Select the canvas in the Layers panel, and then click the Paste in
Place button .
You can also copy a selected layer by pressing Ctrl + C (Windows) or Command + C (macOS), and then paste it by pressing Ctrl +
V (Windows) or Command + V (macOS).
You can also copy a selected layer by choosing Edit Copy, and then paste it by choosing Edit Paste in Place.
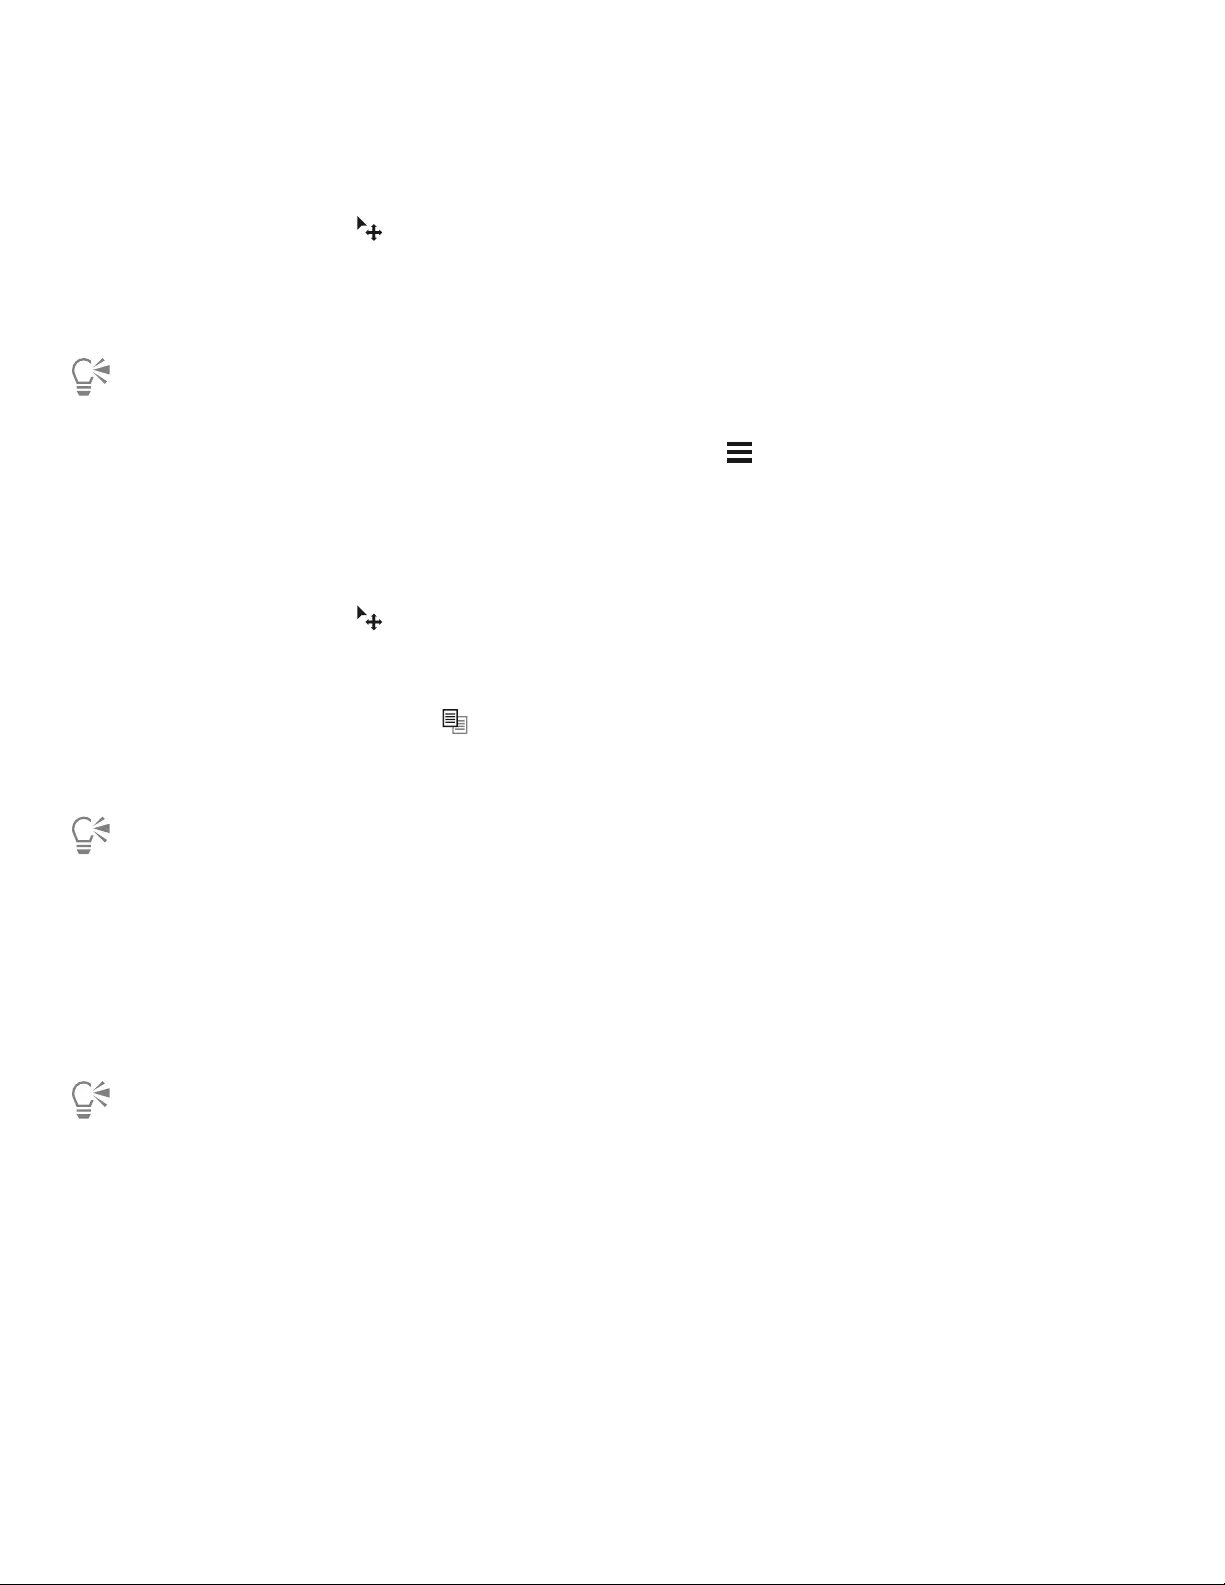
Layers | 551
To duplicate a layer
1Choose the Layer Adjuster tool in the toolbox.
2Enable the Auto-Select Layer check box on the property bar.
3Hold down Option (macOS) or Alt (Windows) and click a layer.
A duplicate layer is created on top of the original layer. Drag the new layer to reveal the original layer in the document window.
You can also duplicate a layer by right-clicking the layer in the Layers panel, and choosing Duplicate Layer.
You can also duplicate a selected layer by clicking the Layer options button in the Layers panel, and choosing Duplicate
Layer.
You can also duplicate a layer by selecting the layer in the Layers panel, and choosing Layers Duplicate Layer.
To copy a layer to another document
1Choose the Layer Adjuster tool from the toolbox.
2Enable the Auto-Select Layer check box on the property bar.
3In the document window, click the layer that you want to copy.
4On the property bar, click the Copy button .
5Open or create a document.
6Choose Edit Paste In New Image.
You can also copy a layer by opening the document where you want to copy the layer, enabling the Auto-Select Layer check box
on the property bar, and dragging the layer to the other document.
To copy a selection from multiple layers
1Make a selection.
The selection must include elements from multiple layers.
2Choose Edit Copy Merged.
You can also copy from multiple layers by pressing Command + Option+C (macOS) or Ctrl + Alt + C (Windows).
Moving layers
When a layer is selected, you can move its content anywhere in the document to create a new image layout.
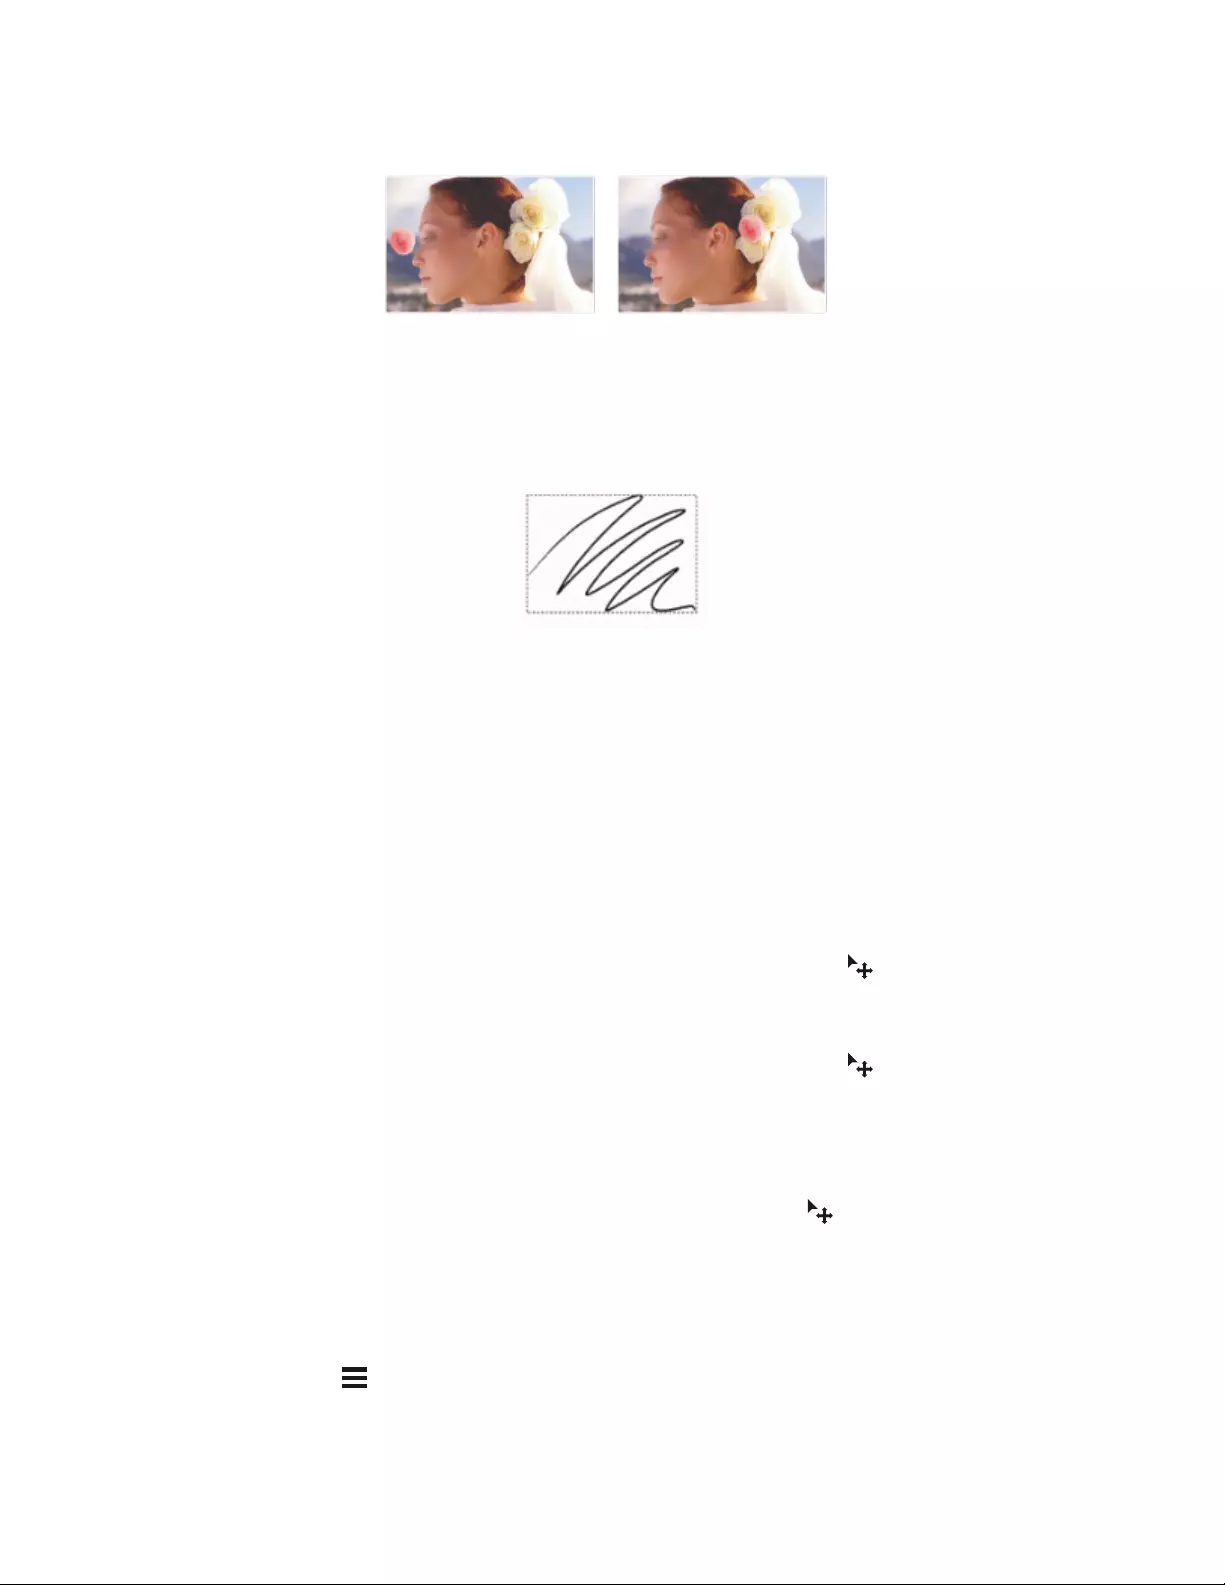
552 | Corel Painter 2022 User Guide
The pink rose was added to an individual layer. The rose layer (left) was repositioned on top of the white roses (right).
Think of a layer’s content as being contained by an invisible bounding box. This bounding box is a rectangle that marks the left, right, top,
and bottom edges of the layer’s content. When you move or align a layer, you work with the dimensions and position of this bounding box,
not with the entire area of the layer. This allows you to easily position the contents of a layer in relation to the canvas.
This layer contains a brushstroke. The content area is defined by an
invisible bounding box (indicated by a dashed outline in the image).
The layer indicators provide a visual representation of the bounding box. For more information, see “Selecting layers” on page 548.
To move or nudge a layer
1In the Layers panel, select the layer or group you want to move.
2Perform an action from the following table.
To Do the following
Move a layer Click the Layer Adjuster tool in the toolbox, and drag the
selected layer in the document window.
Move a layer one pixel at a time Click the Layer Adjuster tool in the toolbox, click the layer
in the document window, and press the Arrow keys to move the
selected layer one pixel at a time.
Move a layer to a new document window With two or more documents open in the application window, click
the Layer Adjuster tool in the toolbox, and drag the selected
layer to another document window.
To move a layer to a specific location
1In the Layers panel, select a layer or group.
2Click the Layer options button , and choose Layer Attributes.
3In the Position area, type values in the following boxes:

Layers | 553
•Top — defines the distance in pixels from the top edge of the canvas to the top edge of the layer’s content. Increase to move the layer
down, or decrease to move the layer up.
•Left — defines the distance in pixels from the left edge of the canvas to the left edge of the layer’s content. Increase to move the layer
to the right, or decrease to move the layer to the left.
If you use negative values, or values larger than the canvas dimensions, the layer is placed partially or wholly outside the canvas.
You can also open the Layer Attributes dialog box by right-clicking a layer or group in the Layers panel, and choosing Layer
Attributes.
Transforming layers
You can apply transformations to layers individually or multiple layers simultaneously, which also includes transforming layer groups. For
more information about the various methods of transformation, see “Selections and transformations” on page 593.
An example of selecting multiple layers for performing a transformation
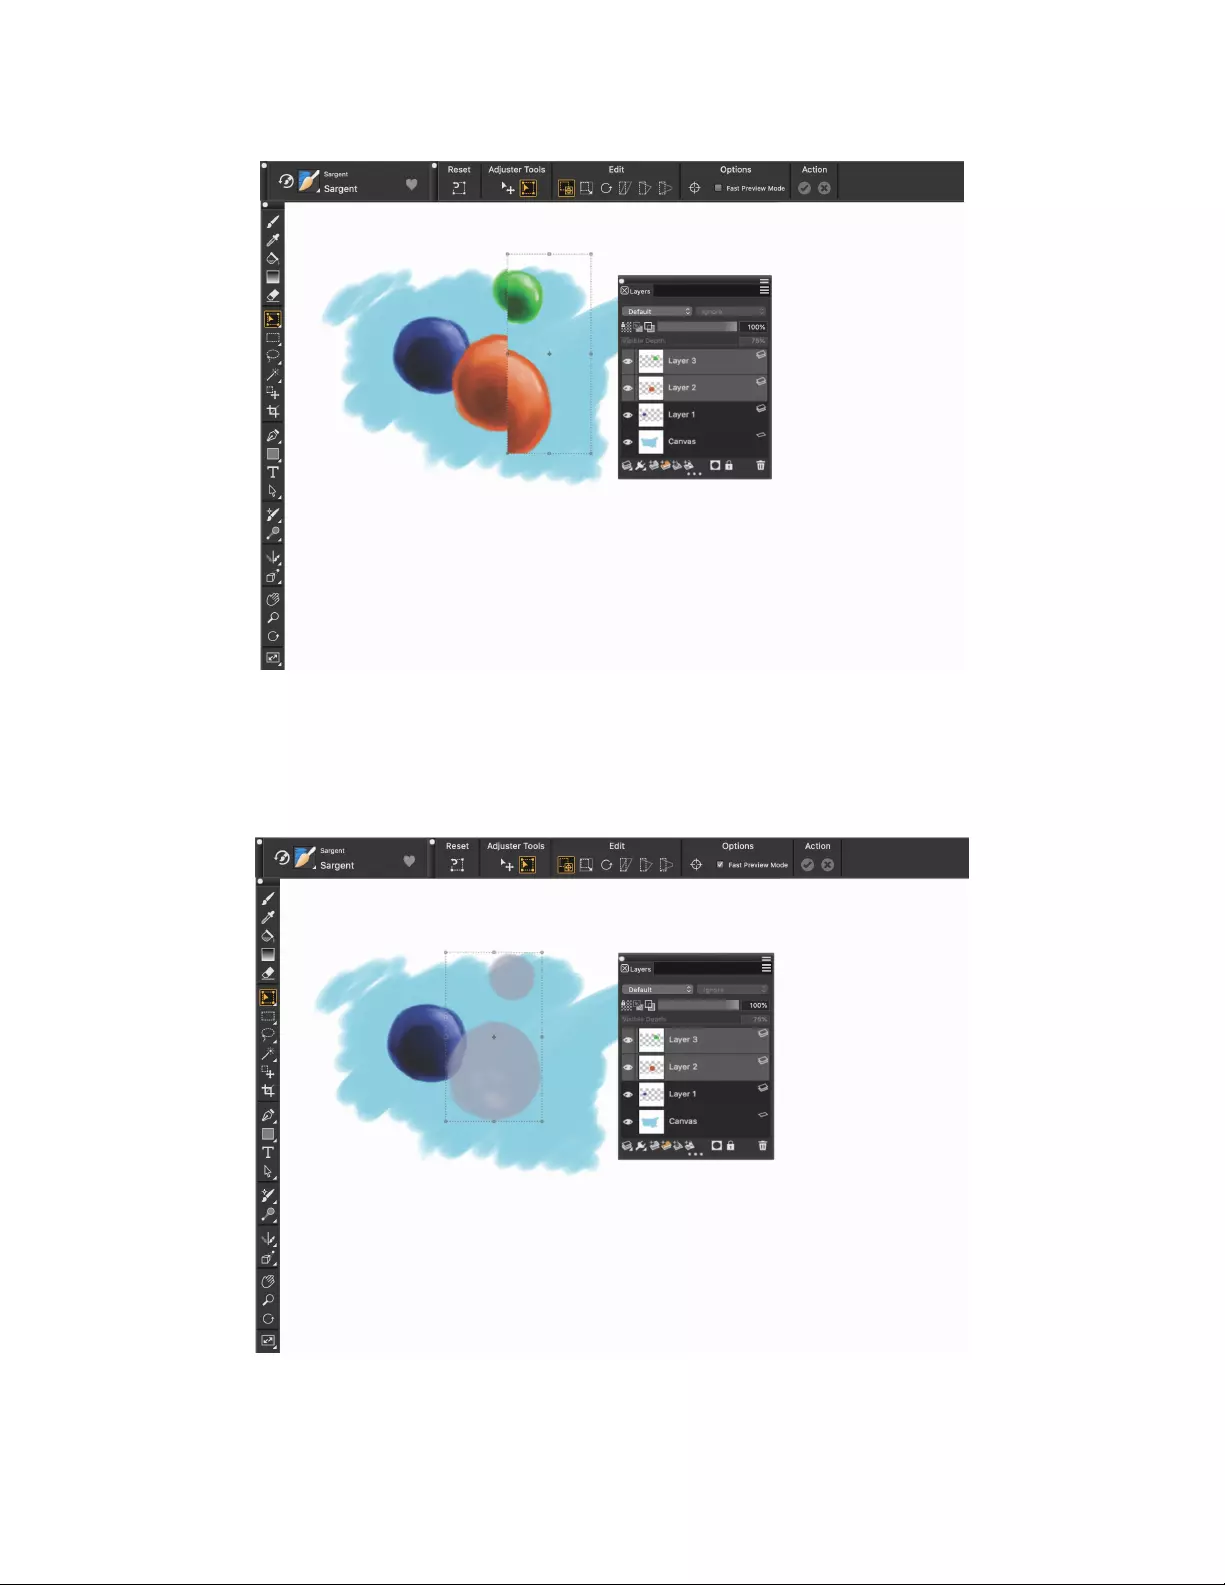
554 | Corel Painter 2022 User Guide
An example of applying a transformation across multiple selected layers
To speed up the process of applying transformations to multiple layers or a layer group, you can enable the Fast Preview Mode. During the
transformation, only a grayscale rendering of the layers displays in the document window, instead of full-color details. You can turn off the
Fast Preview Mode to reveal the full-color results. For example, you may want see the transformed layers in full-color before committing the
transformation.
Fast Preview Mode displays the selected layers in grayscale to perform the transformation more quickly.

Layers | 555
In addition, you can apply a transformation to a selection across multiple layers. For more information, see “Creating path-based selections”
on page 601.
Please note that you cannot make transformations to hidden or locked layers.
To transform one or multiple layers
1In the Layers panel (Window Layers), do one of the following:
• Click a layer.
• Click a layer group.
• Hold down Command (macOS) or Ctrl (Windows), and click each layer you want to select.
2In the toolbox, click the Transform tool .
If the Transform tool is not displayed in the toolbox, click and hold the Layer Adjuster tool to open the flyout, and then choose the
Transform tool .
3On the property bar, click one of the following:
•Move button
•Scale button
•Rotate button
•Skew button
•Distort button
•Perspective Distortion button
4Perform the transformation.
5On the property bar, click the Commit Transformation button .
When applying a transformation to a layer group, the transformation is applied to all layers within a layer group, including hidden
layers or layers that do not appear to be selected.
You cannot apply transformations to locked or hidden layers.
To enable or disable Fast Preview of transformations
1In the toolbox, click the Transform tool .
2On the property bar, enable or disable the Fast Preview Mode check box.
Aligning layers
You can align layers horizontally or vertically. When aligning layers, Corel Painter calculates the “destination” point for alignment. For
example, if you align layers to the left, the destination is the leftmost point of all selected layers. If you align horizontally to the center, the
destination is the midpoint between the leftmost edge and the rightmost edge of the selected layers.
Next, Corel Painter aligns the corresponding edge of each selected layer’s bounding box with the destination point. For example, if you align
layers to the left, each layer is moved so that the left edge of its bounding box lines up with the destination point. If you align horizontally to
the center, each layer is moved so that the horizontal midpoint of its bounding box lines up with the destination point.
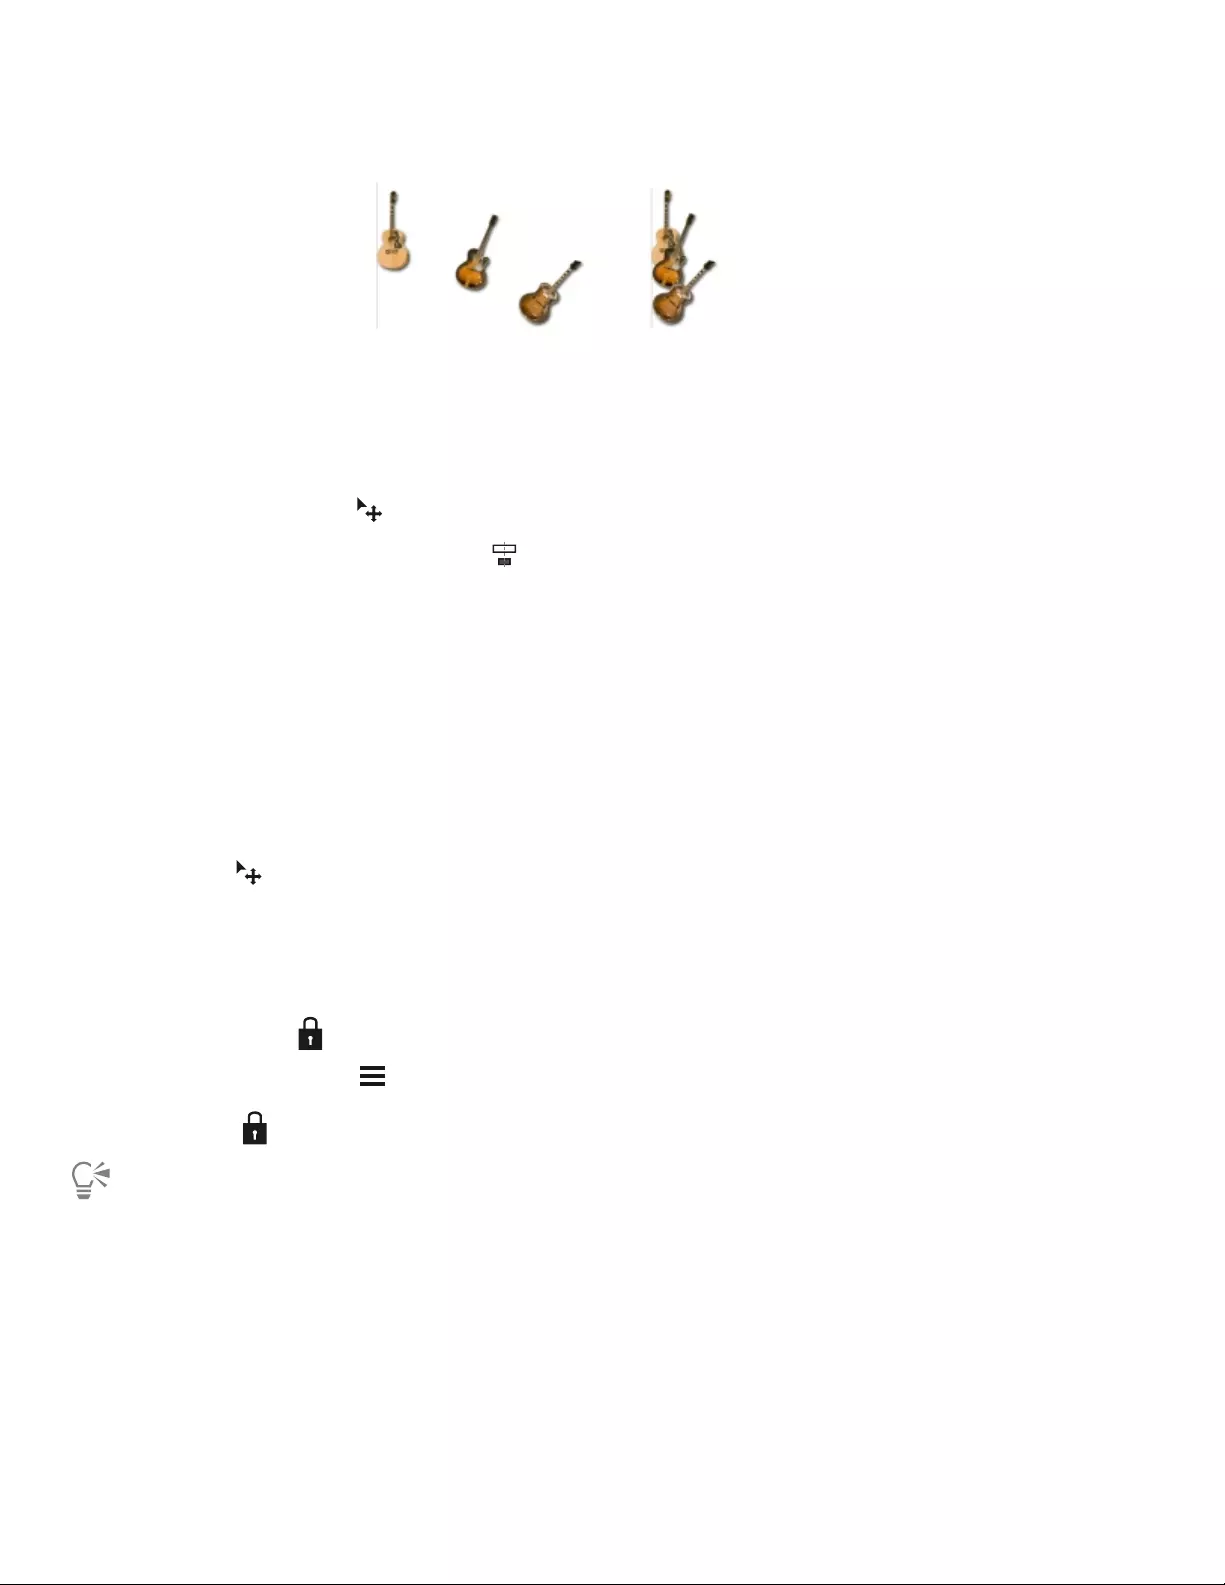
556 | Corel Painter 2022 User Guide
The left edge of the image is the leftmost point of all the layers (left). The layers are
aligned horizontally to the left so that all the layers line up with the leftmost point (right).
To align layers
1Select the layers or groups that you want to align.
2Choose the Layer Adjuster tool in the toolbox.
3On the property bar, click the Align flyout button , and choose any of the following:
•Left Edges — aligns the left edges of the layers’ content
•Horizontal Centers — aligns the midpoints of the layers’ content horizontally
•Right Edges — aligns the right edges of the layers’ content
•Top Edges — aligns the top edges of the layers’ content
•Vertical Centers — aligns the midpoints of the layers’ content vertically
•Bottom Edges — aligns the bottom edges of the layers’ content
Locking layers
You can lock layers and the canvas to avoid accidentally changing them. When the canvas or a layer is locked, you cannot select it with the
Layer Adjuster tool in the document window. You can, however, move a locked layer or shape by nudging it.
To lock or unlock a layer or the canvas
1In the Layers panel, select one or more layers or the canvas.
2Do one of the following:
•Click the Lock button .
•Click the Layer options button , and choose Lock or Unlock.
The Locked icon appears next to a locked layer or locked canvas in the Layers panel.
You can also unlock all layers at any time by choosing Layers Unlock All Layers.
Showing or hiding layers
You can control the view of an image in the document window by changing the layer visibility settings. This is helpful in both compositing
an image and applying effects. For example, you can hide one layer to gain better visibility of the layer below it.
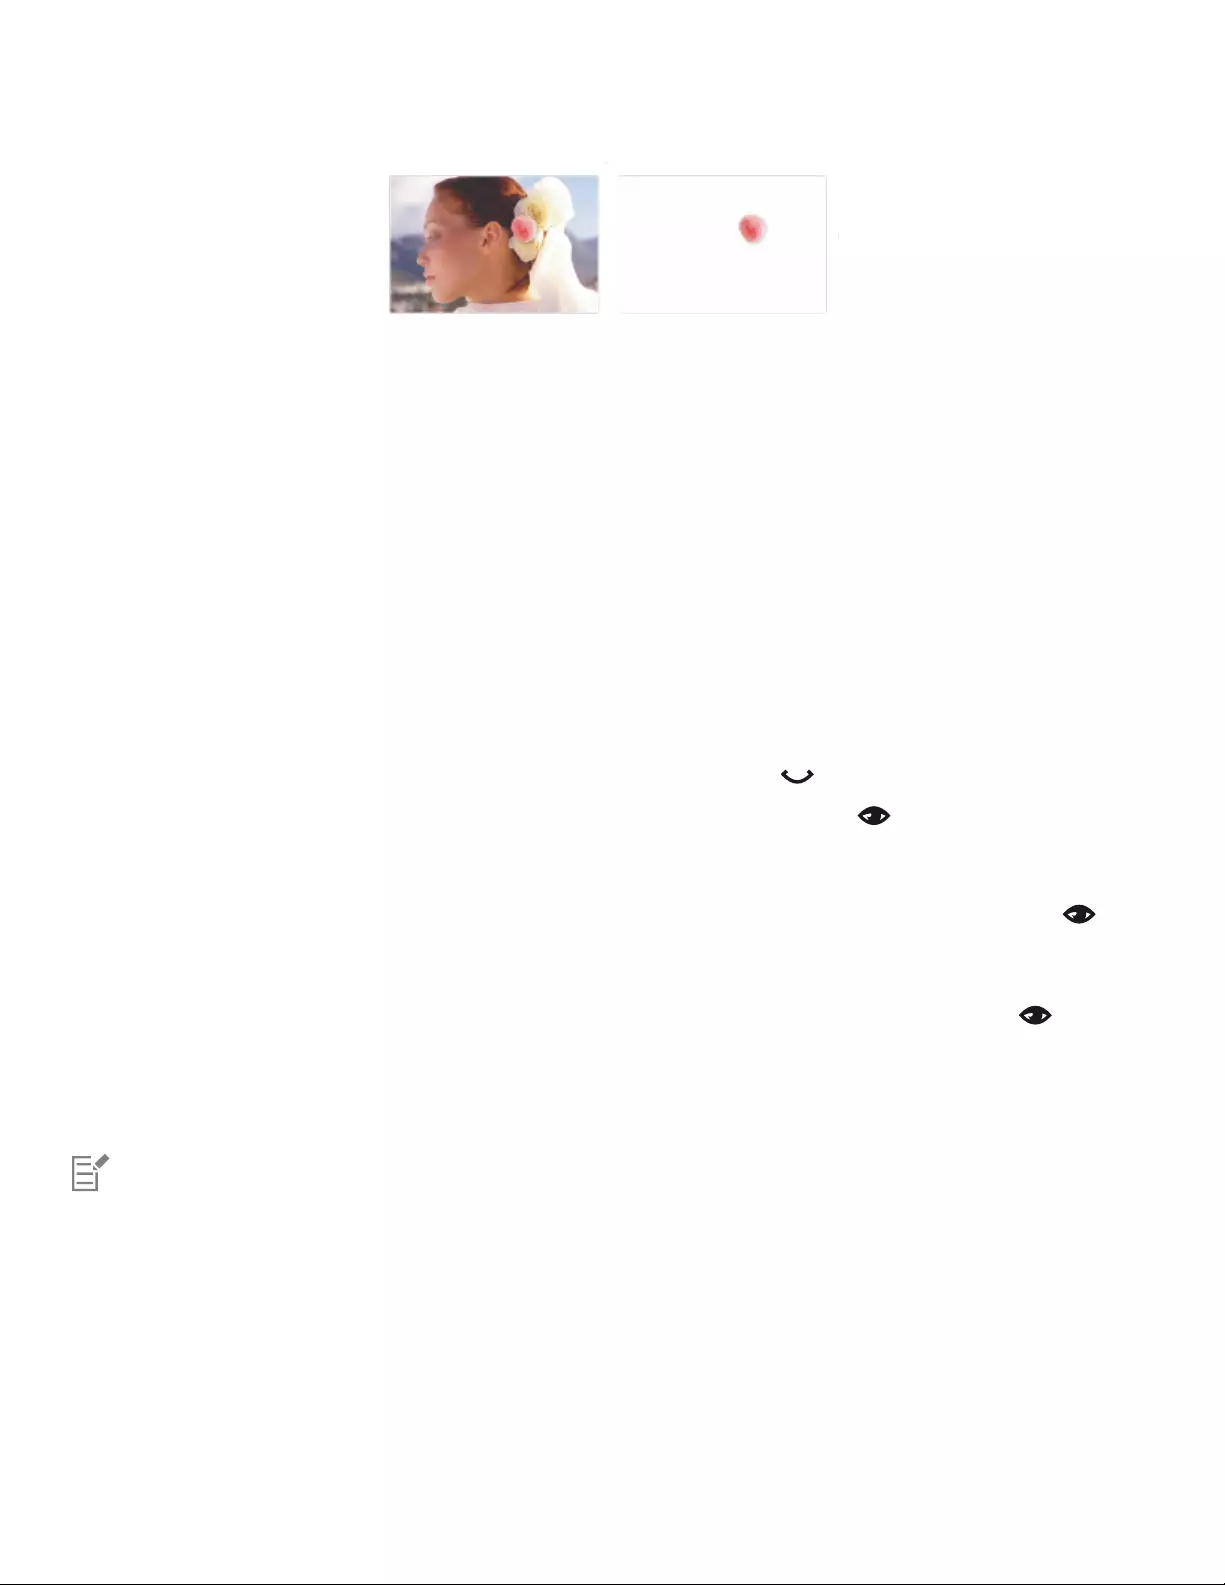
Layers | 557
In the example on the left, the layer containing the background is visible;
in the example on the right, the layer containing the background is hidden.
Layer visibility settings stay active when you print or save documents to certain file formats. In other words, the content of hidden layers does
not print and is not saved. However, saving a document in RIFF or PSD format preserves hidden layers as part of the document. For more
information, see “Importing and exporting layers” on page 579.
You can display only the contents of a layer or group while temporarily hiding all other layers. This is option is useful for viewing and editing
layers in complex documents.
To show or hide a layer or the canvas
• In the Layers panel, perform a task from the following table.
To Do the following
Show or hide the contents of a layer, group, or the canvas Click the eye icon next to the layer name or the canvas.
When the eye is shut , the layer is hidden in the document
window. When the eye is open , the layer is visible in the
document window.
Show only the contents of a layer or group while temporarily hiding
all other layers
Alt-click (Windows) or Option-click (macOS) the eye icon next
to the layer or layer group.
If you don’t change the visibility of any other layer, Alt-clicking
(Windows) or Option-clicking (macOS) the eye icon of the
same layer again restores the original layer visibility settings.
However, if you change the visibility of any layer after Alt-clicking
(Windows) or Option-clicking (macOS) the eye icon, you will have
to manually restore the original visibility settings of all layers.
You cannot paint on a hidden layer or hidden canvas.
Changing layer order
The layer order determines how the layers in a document interact. When you create a new pixel-based layer, it appears on top of the canvas
(when the canvas is selected) or on top of the selected layer. New Watercolor, Liquid Ink, and dynamic layers are always created on top
of existing layers. Depending on its transparency, masking, and compositing characteristics, the layer will obscure or otherwise affect the
underlying layers.

558 | Corel Painter 2022 User Guide
A document’s layer order is reflected in the Layers panel. The bottom layer is always the canvas.
In this example, the picture of the brush is contained in a layer. The brush
layer is displayed in the top position (left) and in the bottom position (right).
To change the order of layers
• In the Layers panel, select one or more layers, and drag them to a new position.
You can also change the order of layers by choosing the Layer Adjuster tool in the toolbox, and performing a task from the
following table.
To Do the following
Move a layer to the bottom Do one of the following:
•On the property bar, click the Order flyout button , and
choose Move to Bottom .
•Right-click the layer in the Layers panel, and choose Move to
Bottom.
Move a layer to the top Do one of the following:
•On the property bar, click the Order flyout button , and
choose Move to Top .
•Right-click the layer in the Layers panel, and choose Move to
Top.
Move a layer down one On the property bar, click the Order flyout button , and
choose Move Down One Layer .
Move a layer up one On the property bar, click the Order flyout button , and
choose Move Up One Layer .
When you have nonoverlapping layers in a document, the Move Up One Layer and Move Down One Layer commands may move
the selected layer past multiple layers. This is because nonoverlapping layers are considered to be at the same level. The Move Up
One Layer and Move Down One Layer commands move the selected layer (or layers) above or below the next level. To move a
layer to a position between nonoverlapping layers, drag it in the Layers panel.

Layers | 559
Viewing layer position
You can display information about the size of a layer’s content and its position on the canvas in the Navigator panel. Think of the area of a
layer that contains images as being marked by a bounding box. For more information, see “Selecting layers” on page 548. The Navigator
panel displays the dimensions and position of the bounding box, not the entire area of the layer. This makes it easy to determine the exact
size and location of a layer’s content in the document.
The following table describes the information displayed in the Navigator panel.
Position indicator (measured in pixels) Description
XX-coordinate of the pointer on the canvas
YY-coordinate of the pointer on the canvas
WWidth of the layer’s content
HHeight of the layer’s content
In the document window, you can also view indicators that mark the corners of the selected layer’s content. For more information, see “To
show layer indicators” on page 550.
To displaying layer position information
•Choose Window Navigator.
If the panel is not expanded, double-click the Navigator panel tab.
Grouping layers
Grouping layers enables you to control layers as a unit. A group can contain any combination of layers: pixel-based layers, Watercolor layers,
Liquid Ink layers, vector-based shapes, and dynamic layers.
You can move, rename, hide, show, lock, and set options for a group just as you do for a single layer. However, you cannot paint across
layers in a group or change the composite method for a group; you must collapse the group into a single layer if you want to paint on it.
To work with individual layers in a group, you must open the group. To regain control of the group as a unit, you must close the group.
Collapsing a group reduces its contents to a single layer.
If you select a layer within a group in the Layers panel and then proceed to create a new layer, the new layer is added to the group. If the
group is selected, the layer is placed above the group.
To create a group
1In the Layers panel, select the layers you want to group.
For more information, see “Selecting layers” on page 548.
2Do one of the following:
•Choose the Layer Adjuster tool in the toolbox, and click the Group Layers button on the property bar.
•Choose Layers Group Layers.

560 | Corel Painter 2022 User Guide
• Right-click the selected layers in the Layers panel, and choose Group Layers.
The layers are collected under a group item in the Layers panel.
If you select nonsequential layers (layers not next to each other in the list), Corel Painter creates the group at the position of the
topmost layer. To select nonsequential layers, in the Layers panel, hold down Ctrl (Windows) or Command (macOS), and click each
layer you want to select.
You can also group layers by using keyboard shortcuts. For more information, see “Layers menu commands” on page 139.
To open or close a group
• In the Layers panel, click the arrow to the left of the group.
When the arrow points down and you can see the group items, the group is open. When the arrow points to the right and
the names of the group members are hidden, the group is closed.
To add or remove a layer in a group
1In the Layers panel, open the destination group.
2Perform an action from the following table.
To Do the following
Add a layer to a group Drag a layer to the group.
Remove a layer from a group Drag the layer out of the group.
You can create a nested group by dragging a closed group to the open destination group.
To ungroup layers
1In the Layers panel, select the group.
If the group is open, close the group.
2Do one of the following:
•Choose the Layer Adjuster tool in the toolbox, and click the Ungroup Layers button on the property bar.
•Choose Layers Ungroup Layers.
• Right-click the selected layers in the Layers panel, and choose Ungroup Layers.
You can also ungroup layers by using keyboard shortcuts. For more information, see “Layers menu commands” on page 139.
To collapse a group
1In the Layers panel, select the group.
2Do one of the following:
Layers | 561
•Click the Layer Commands button , and choose Collapse Layers.
•Choose the Layer Adjuster tool in the toolbox, click the Merge flyout button on the property bar, and choose Collapse Layers
.
If the group contains shapes, Liquid Ink layers, or dynamic layers, a warning dialog box is displayed. Click OK to convert the items to
pixel-based layers before collapsing the entire group.
When you collapse layers, the name of the bottom layer is used as the name of the new merged layer.
If you want to collapse a group containing a Watercolor layer, you must first convert the Watercolor layer to a default layer. For
more information, see “Blending layers by using composite methods” on page 566.
You can also collapse layers by right-clicking the selected layers in the Layers panel, and choosing Collapse Layers.
You can also collapse layers by clicking the Layer options button in the Layers panel, and choosing Collapse Layers.
If you have enabled the Activate this setting in Special Layers preferences and do not ask again check box in the warning
dialog box, you can reinstate the warning when collapsing special, plugin, and shape layers by choosing Corel Painter 2022 menu
Preferences Special Layers (macOS) or Edit Preferences Special Layers (Windows), and enabling the Prompt before
converting Special, Plugin, or Shape layers to default layers check box.
Merging layers
Merging layers lets you group them permanently. You can merge multiple layers into one layer, or merge layers with the canvas. For more
information about merging layers with the canvas, see “Dropping layers with the canvas” on page 562. To merge special, plugin, shape
and text layers, you must first convert them to default layers. For more information about converting layers to default layers, see “To
convert to a default layer” on page 542. You can also merge all visible layers. For more information about showing and hiding layers, see
“Showing or hiding layers” on page 556. When you merge layers, the file size of an image is decreased but you can no longer edit the
layers independently.
To merge layers
• In the Layers panel, perform a task from the following table.
To Do the following
Merge two or more layers Select the layers that you want to merge, and choose Layers
Collapse Layers.
Tip: You can also merge layers by selecting the layers, right-clicking,
and choosing Collapse Layers.
Merge all visible layers Select any visible layer, and choose Layers Collapse Visible
Layers.
Tips:
•You can also merge all visible layers by right-clicking any layer,
and choosing Collapse Visible Layers.
562 | Corel Painter 2022 User Guide
To Do the following
•You can also merge all visible layers by pressing Command +
Shift + E (macOS) or Ctrl + Shift +E (Windows).
The order of the layers in the Layers panel determines how overlapping content appears in the merged layer. Content in layers that
are at the top of the list replaces overlapping content on the underlying layers.
Dropping layers with the canvas
You can drop a layer or layer group to merge its contents with the canvas. Dropping a layer is a permanent change. Once layers are dropped,
you can no longer access the layers’ content separately from the canvas. You can drop specific layers or you can drop all layers at once, this
also known as flattening an image.
When you drop a layer, you can choose to create a selection based on the layer contents. If the layer has a layer mask, the mask is used to
make the selection. For more information, see “Creating and deleting layer masks” on page 574 and “Selections and transformations” on
page 593.
To drop a layer
To Do the following
Drop specific layers In the Layers panel, select the layers (or groups) that you want to
drop, and do one of the following:
•Click the Layer Commands button , and choose Drop.
•Click the Layer options button , and choose Drop.
Drop all layers In the Layers panel, click the Layer options button , and
choose Drop All.
Make a selection by dropping a layer In the Layers panel, click the Layer options button , and
choose Drop and Select.
When the Layer Adjuster tool is selected in the toolbox, you can also drop layers by clicking the Merge flyout button on the
property bar, and choosing the command you want.
Painting on layers
Painting on layers, instead of painting directly on the canvas, allows you build an image gradually and with more control. For example, if you
add a series of brushstrokes to a layer and you’re not satisfied with the result, you can delete the layer and start over. You can paint on layers
using any of the Corel Painter brushes. The purpose of this section is to provide you with tips and techniques for painting on layers.

Layers | 563
Pick up colors from underlying layers
When painting using brush variants that push paint, rather than apply paint, you can choose to pick up colors from underlying layers. For
example, if you have red paint on the top layer, and blue paint on the bottom layer, you can blend the red and blue paint. In most cases,
brush variants that allow you to blend colors within an individual layer will also support the picking up of colors on underlying layers.
Brush methods and painting on layers
The Natural-Media environment allows brushstrokes on different layers to interact with each other. However, mixing brushstrokes that use
the Cover and Buildup methods on the same layer can produce unexpected results. This is caused by a conflict between the brush method
and the layer’s composite method.
• Brushes that use the Buildup method — such as those in the Felt Pens or Pencils category — work best on layers that use the Gel
composite method. In fact, when you use the Buildup method to paint on a blank layer, Corel Painter automatically sets the layer’s
composite method to Gel.
• Brushes that use the Cover method work best on layers that are set to the Default composite method.
For more information, see “Blending layers by using composite methods” on page 566 and “General controls: Methods and
subcategories” on page 349.
General tips for painting on layers
The following are tips for painting on layers:
• You can use Liquid Ink brushes only on Liquid Ink layers.
• While many brushes are compatible with special layers, there are times when a chosen brush may produce brush marks that appear
different than you would expect. There are also brushes that are simply not recommended for the current layer. In these cases, Painter
will warn you so that you can choose how to proceed. For more information, see “Special layers preferences” on page 826.
• You must collapse a layer group before painting, because you cannot paint on grouped layers. For more information, see “Grouping
layers” on page 559.
• You can protect areas of a layer from painting by creating a selection or preserving transparency. For more information, see “Selections
and transformations” on page 593 and “Preserving layer transparency” on page 564.
• You can control what parts of a layer are visible and hidden by creating a layer mask. For more information, see “Creating and deleting
layer masks” on page 574.
• You cannot paint on hidden or locked layers.
To paint on a layer
1In the Layers panel, select a layer.
2Click the Brush selector on the Brush selector bar.
3Click a brush category and brush variant.
4Paint on the layer in the document window.
The Preserve Transparency button in the Layers panel affects what areas of a layer you can paint on. For more information, see
“Preserving layer transparency” on page 564.
To pick up color from underlying layers
•In the Layers panel, click the Pick Up Underlying Color button .
You can also pick up color from underlying layers by choosing Layers Pick Up Underlying Color or clicking the Layer options
button in the Layers panel, and choosing Pick Up Underlying Color.

564 | Corel Painter 2022 User Guide
Preserving layer transparency
Areas of a layer that don’t contain images are transparent. In Corel Painter, you can preserve these transparent areas of a layer. When you
preserve layer transparency, it affects which areas of a layer you can create images on. It also affects the results of erasing or deleting images
on a layer.
By default, the Preserve Transparency setting is disabled, which lets you paint anywhere on the layer. When the setting is enabled, the
transparent areas are preserved, and you are confined to painting on areas of the layer that already contain images.
The results of painting on a layer with Preserve Transparency disabled (left) and enabled (right)
If you want to paint on a shape, you must first commit the shape to a pixel-based layer. For more information, see “Converting shapes to
image layers” on page 774.
A good way to think about preserving transparency is in terms of a layer mask. As described in “Creating and deleting layer masks” on page
574, a layer mask defines the visible areas of a layer.
Preserving transparency provides a powerful selective editing capability to create interesting effects by altering the strokes you’ve already
applied. For example, you can enable the setting to fill a set of hand-drawn letters with a pattern, a color gradient, or other brushstrokes.
Preserving transparency also affects the results of cutting or erasing on a layer.
• When Preserve Transparency is disabled, erasing or deleting images restores transparency to the area and reveals the underlying image.
• When Preserve Transparency is enabled, erasing or deleting images reveals the document’s canvas color. In effect, erasing or deleting
with Preserve Transparency enabled is the same as painting or filling with the document’s canvas color.
Erasing part of a layer (the woman’s hair) with Preserve Transparency disabled restores
transparency (left). When the option is enabled, erasing reveals the canvas color (right).
You can create a layer mask based on the layer’s transparency. A layer mask defines which areas of a layer are visible in the document
window. For more information, see “Creating and deleting layer masks” on page 574.
To preserve layer transparency
•In the Layers panel, click the Preserve Transparency button .
You can also preserve a layer’s transparency by choosing Layers Preserve Transparency or clicking the Layer options button
in the Layers panel, and choosing Preserve Transparency.
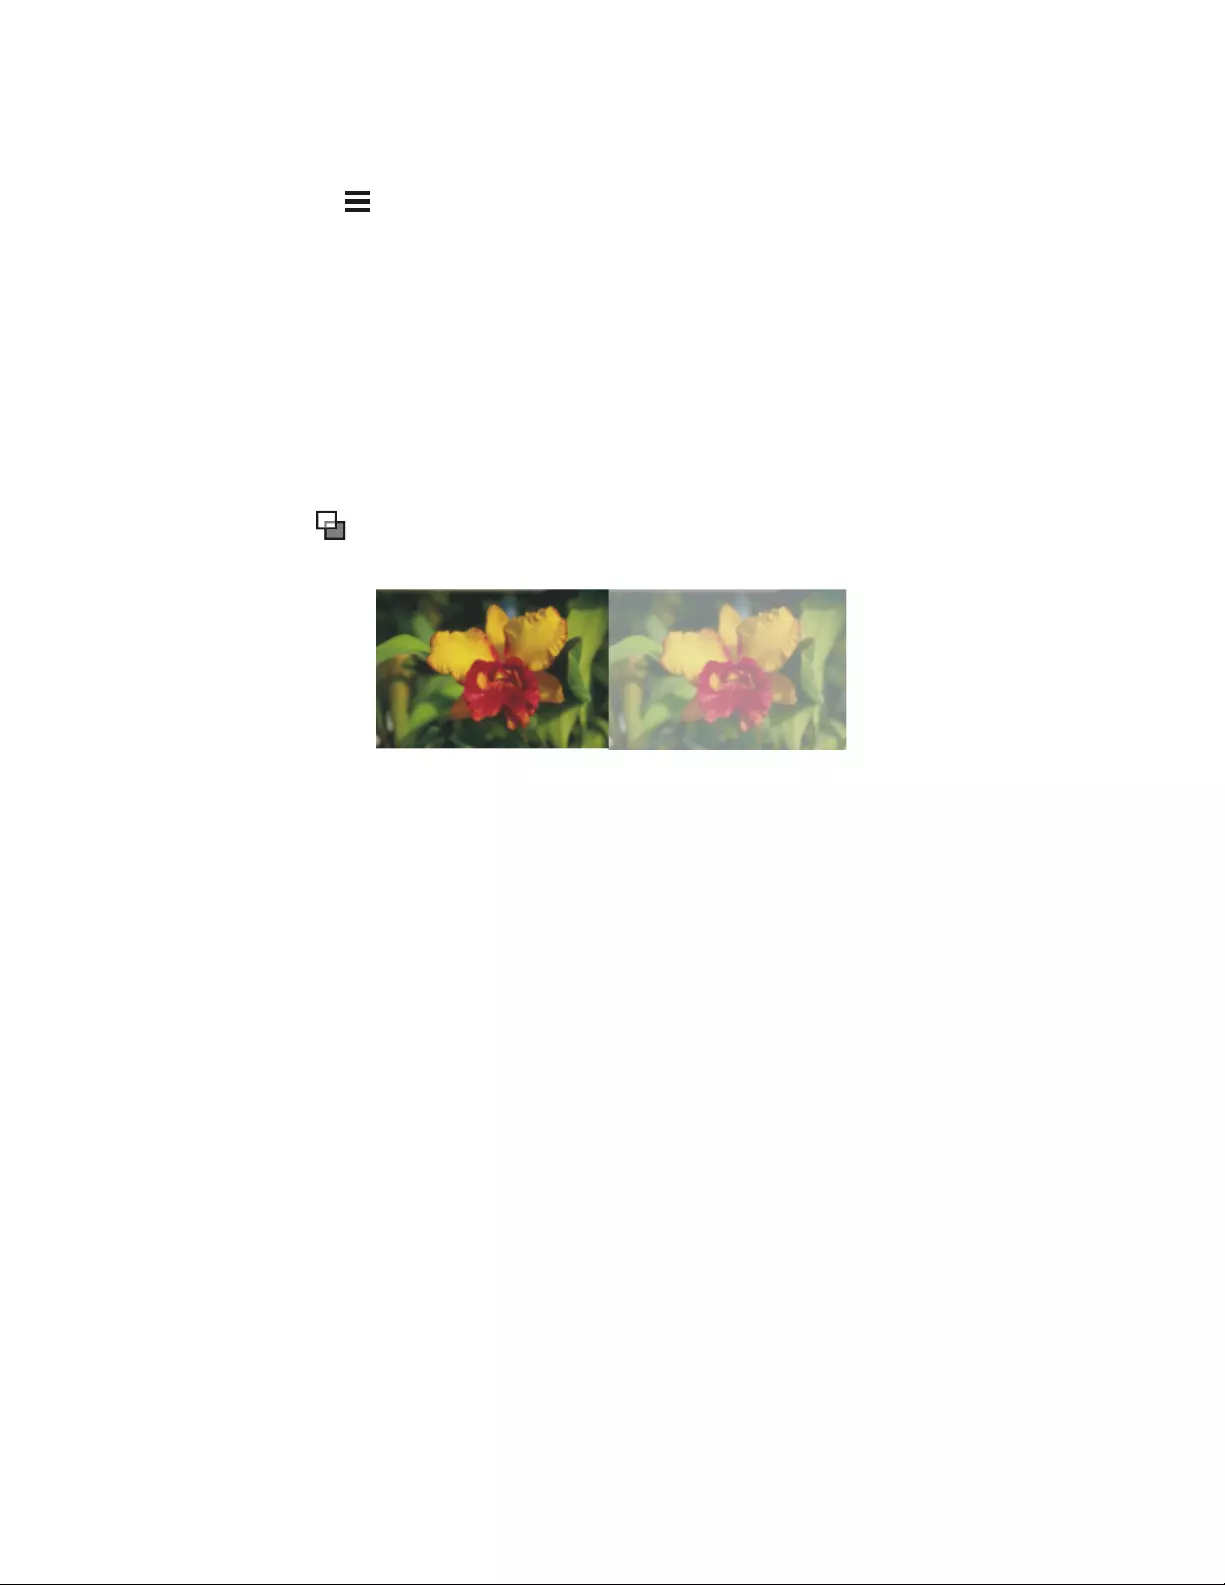
Layers | 565
You can load a layer’s transparency to a selection. In the Layers panel, right-click a layer, and choose Select Layer Content. Click
the Layer options button in the Layers panel, and choose Layer Mask Create From Transparency. For more information,
see “Selections and transformations” on page 593.
Adjusting layer opacity
You can adjust a layer’s opacity to create different levels of transparency. The Opacity slider covers a range of 0% (completely transparent) to
100% (completely opaque).
To change a layer’s opacity
1Select the layer you want to change.
2In the Layers panel, do one of the following:
•Move the Opacity slider .
• Type a percentage in the Opacity box, and press Return (macOS) or Enter (Windows).
The example on the left shows the background layers at 100% opacity. The example on the right shows them at 50% opacity.
Adding drop shadows to layers
You can add a drop shadow to a single layer or to a group to enhance the appearance of an image. Drop shadows are also helpful for
developing Image Hose nozzles.
When you add a drop shadow, Corel Painter creates a new layer for the shadow and groups it with the original. This enables you to select
and modify the drop shadow layer independently from the original layer.
To add a drop shadow
1Select a layer or group.
2Choose Effects Objects Create Drop Shadow.
3In the Drop Shadow dialog box, type values in the following boxes:
•X-Offset and Y-Offset — specifies the distance, in pixels, from the center of the layer image to the shadow
•Opacity — specifies the degree to which the shadow covers underlying images. Setting Opacity to 100% obscures underlying images;
lower values create a more transparent shadow.
•Radius — specifies the amount of blur at the edge of the shadow. The radius is half the distance across the blurred region. If you set
Radius to zero, you create a sharp-edged shadow.
•Angle — specifies the direction of the blur.
•Thinness — specifies the amount of blur applied perpendicular to the Angle. If a blur shows streaks, increase Thinness to soften it.
If you want to merge the drop shadow layer with the image layer, enable the Collapse to one layer check box.
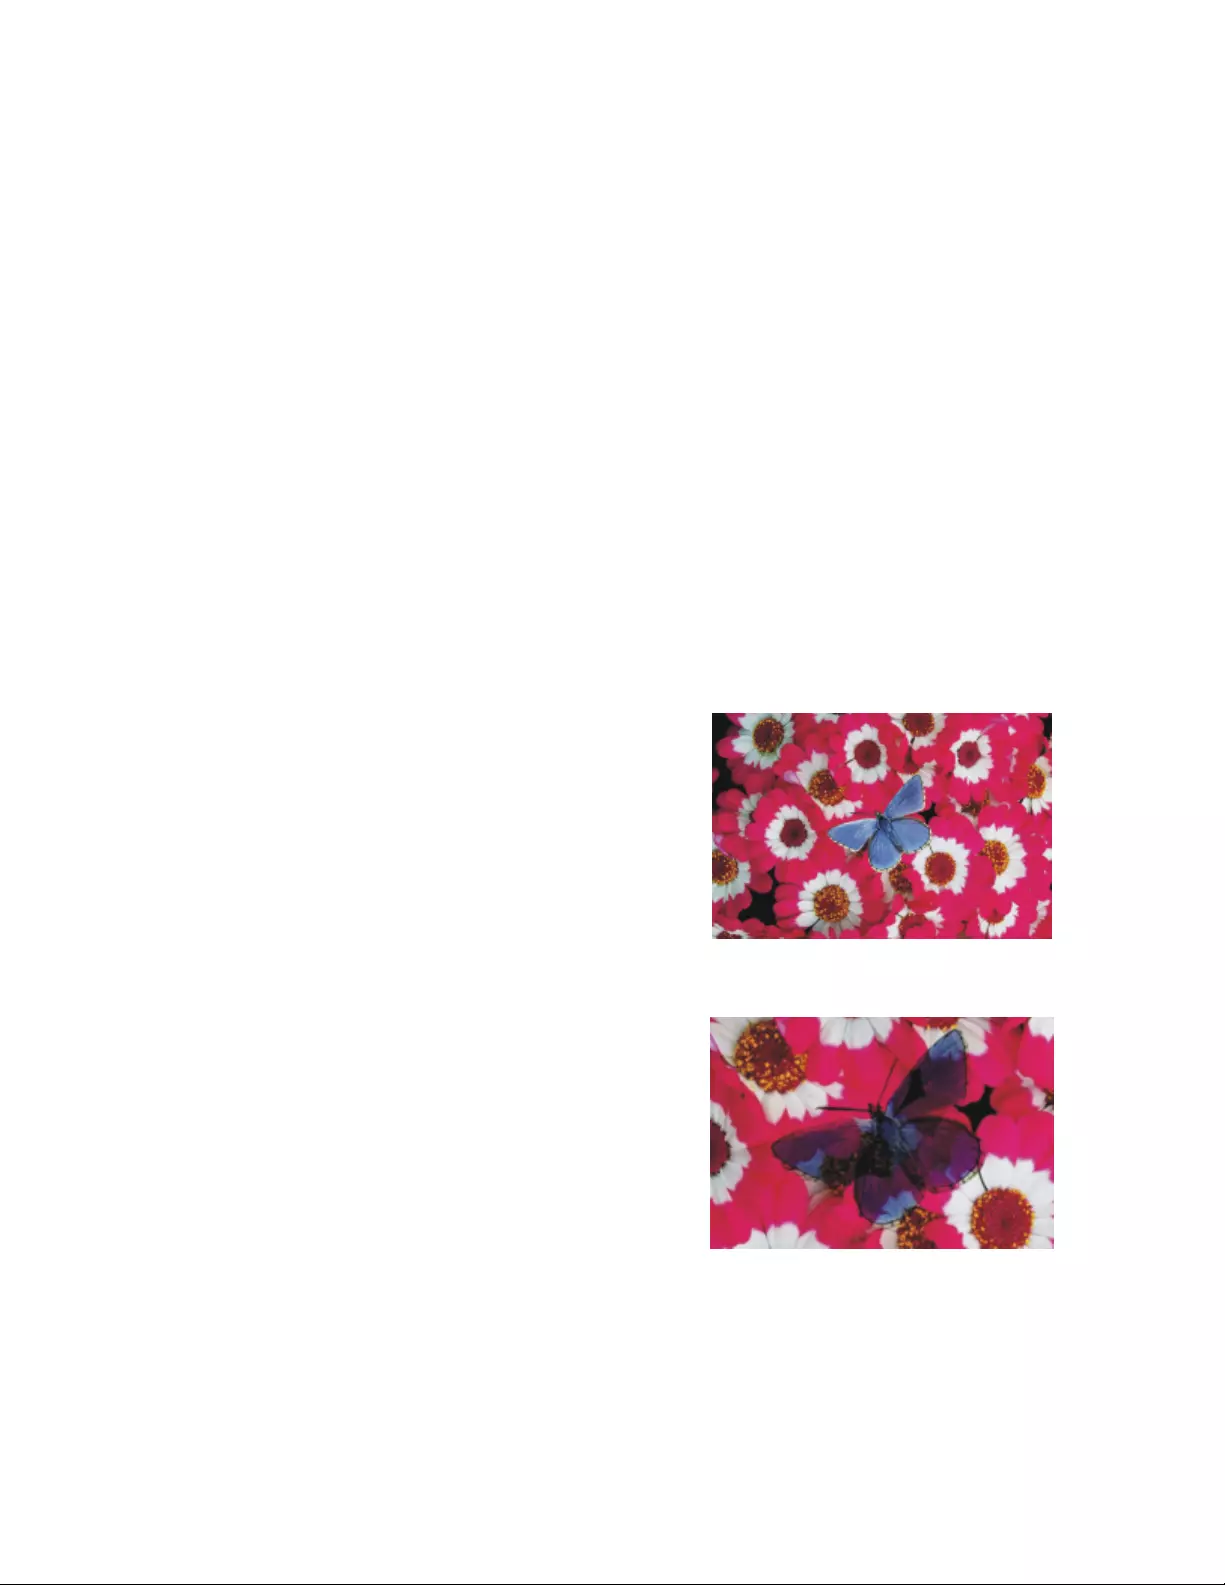
566 | Corel Painter 2022 User Guide
Blending layers by using composite methods
Composite methods control how layers interact with the underlying image. You can change composite methods to create special effects
without changing the actual images that make up a document.
Corel Painter provides two types of composite settings:
•Composite Method sets the standard composite method.
•Composite Depth controls how a layer’s image data interacts with depth information on the canvas and other layers.
For example, if the canvas contains Impasto brushstrokes, the Composite Depth setting determines what happens when these brushstrokes
intersect with brushstrokes on the layer. For more information, see “Blending impasto with other layers” on page 536.
You can set a different composite method for every layer in a document. Keep in mind the role of the underlying image in creating an effect
— you might achieve an unexpected result if the underlying image is solid black or white.
The best way to understand the different composite methods is by seeing them in action. Quickly cycle through a layer’s composite methods
to create new and interesting versions of your image. For a comparison of Corel Painter composite methods and Adobe Photoshop blend
modes, see “Importing and exporting layers” on page 579.
The available composite methods are described in the following table:
Composite method Example
Default
Allows the layer to cover and hide the underlying image
Gel
Tints the underlying image with the layer’s color. For example, a
yellow layer gives the underlying image a yellow cast.
Corel Painter automatically sets a layer’s composite method to Gel
if you paint on it with a brush that uses the Buildup method.

Layers | 567
Composite method Example
GelCover
Uses a combination of the Default method and the Gel method.
The edges of the layer’s content tint the underlying image with
their color (the Gel method). The rest of the layer covers the
underlying image (Default method).
If you save a file that uses a GelCover composite method layer to
the PSD file format, the GelCover information will be lost.
Colorize
Replaces the hue and saturation of the canvas pixels with the hue
and saturation of the layer pixels.
You can use this feature to convert a color image to grayscale, or
a grayscale image to color. A black layer turns the underlying color
image into a grayscale image. A colored layer adds color to an
underlying grayscale image.
Reverse-Out
Allows the layer to invert the colors beneath it. This method is a
great way to remove text. Place a layer over black text to turn it
white.
A color’s inverse, also known as its complementary color, is the
color on the opposite side of the color wheel.
With Reverse-Out, the colors in the layer are ignored; the layer
content becomes transparent and reveals the inverse of the colors
beneath it.
Shadow Map
Blocks light, letting you create shadows without changing the
image

568 | Corel Painter 2022 User Guide
Composite method Example
Magic Combine
Combines the layer with the underlying image based on luminance.
The parts of the layer that are lighter than the underlying image are
visible. The parts that are darker are replaced by the lighter area of
the underlying image.
One way to use this method is to fill text. With a photograph as the
top layer and black text as the underlying image, choosing Magic
Combine fills the text with the image.
Pseudocolor
Translates the layer’s luminance into hue. You can use this method
to turn a grayscale layer into a spectrum of color.
Normal
Works like the Default method; the layer covers the underlying
image. The Normal method is the default mode in Photoshop.
Dissolve
Combines the image color with the layer color based on opacity
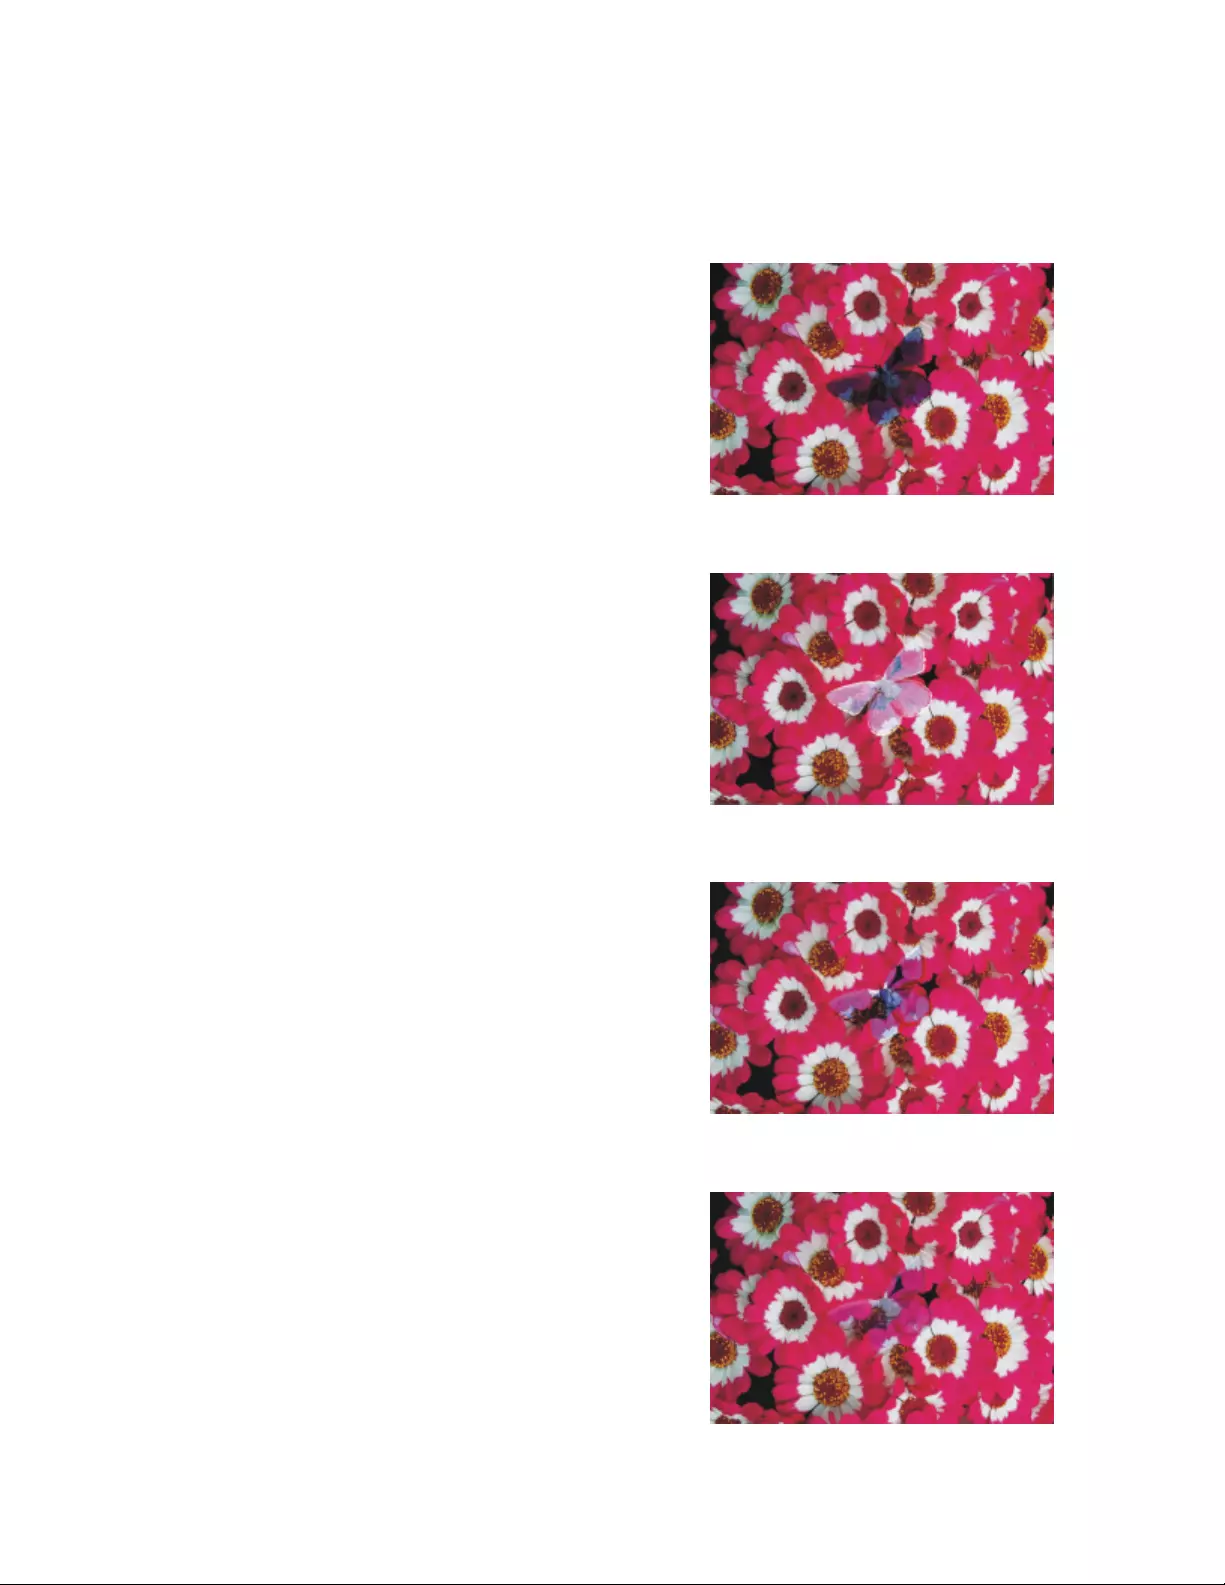
Layers | 569
Composite method Example
Multiply
Combines colors to create a darker color
Screen
Combines colors to create a lighter color
Overlay
Combines colors while preserving the highlights and shadows of
the image color
Soft Light
Darkens or lightens colors depending on the luminance of the layer
color

570 | Corel Painter 2022 User Guide
Composite method Example
Hard Light
Multiplies or screens colors, depending on the luminance of the
layer color
Color Burn
Simulates the photographic technique called burning, which
darkens image areas by increasing the exposure
Darken
Colors with the image color or the layer color — whichever is
darker
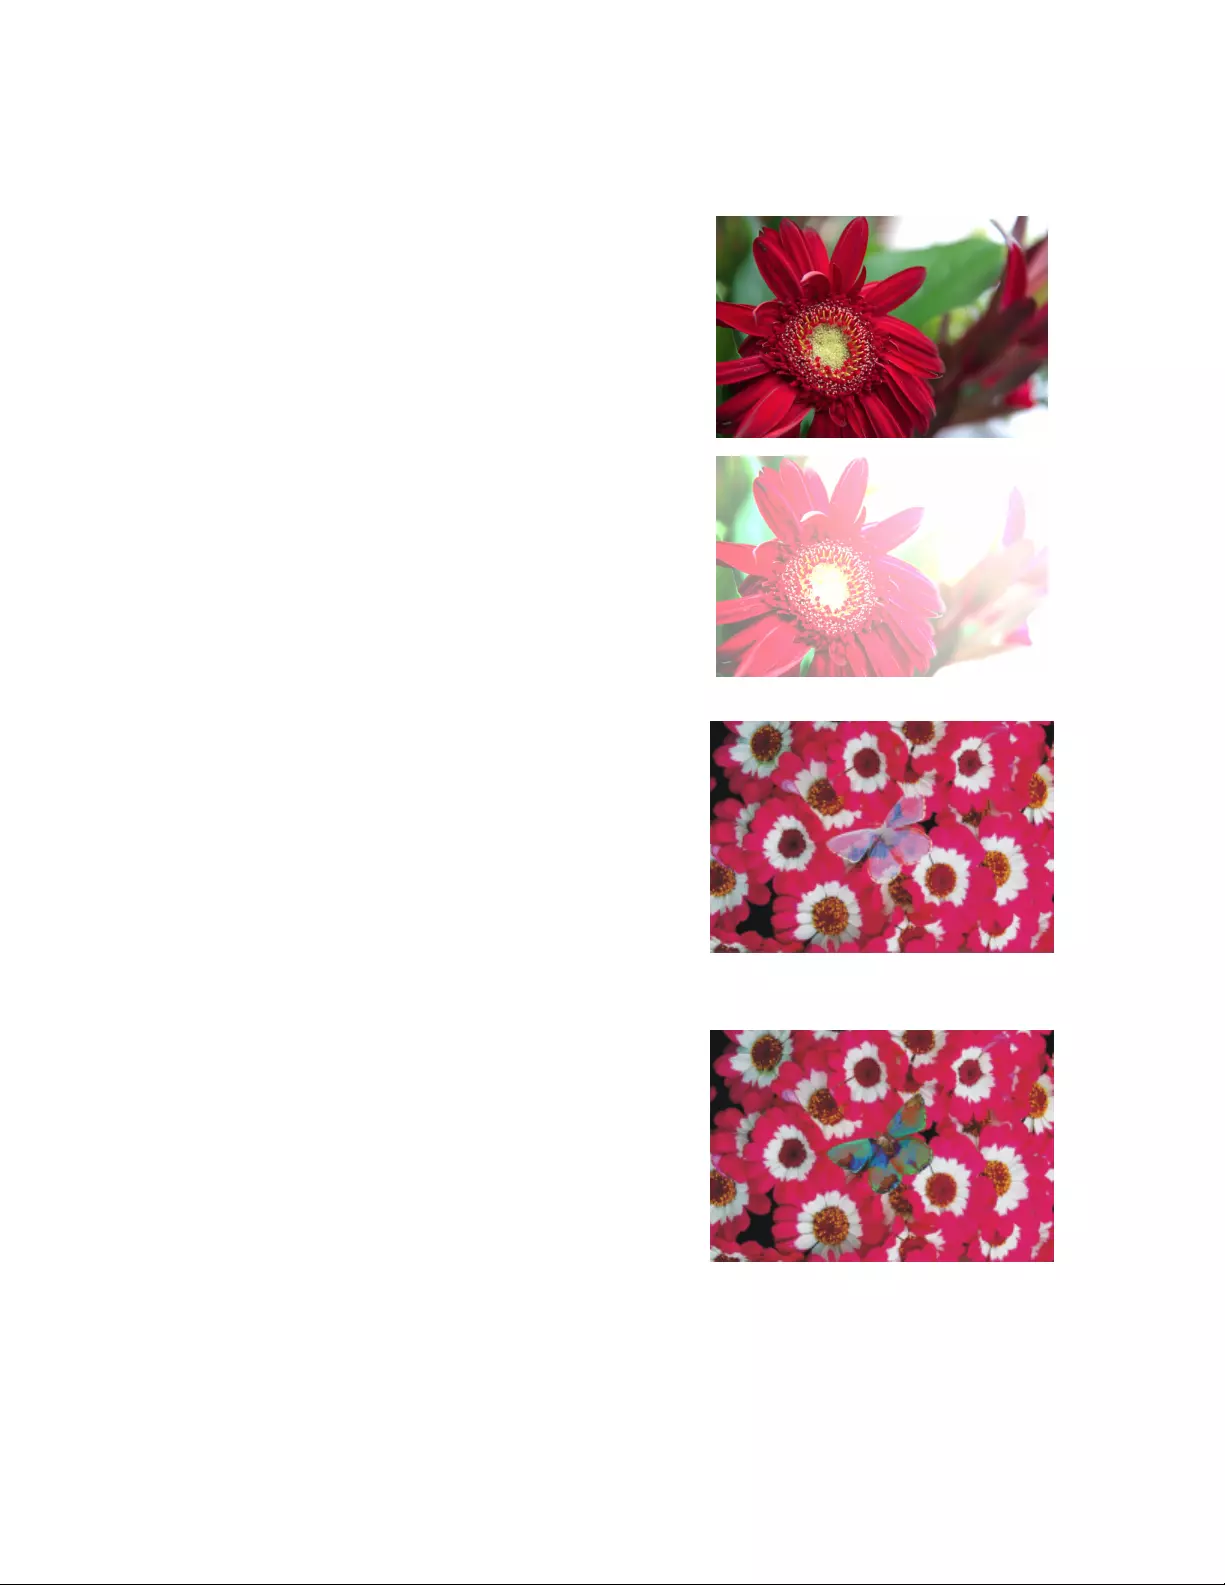
Layers | 571
Composite method Example
Color Dodge
Simulates the photographic technique called dodging, which
lightens image areas by decreasing the exposure
Lighten
Colors with the image color or the layer color — whichever is
lighter
Difference
Subtracts one color from the other, depending on which color has
a greater brightness value

572 | Corel Painter 2022 User Guide
Composite method Example
Hue
Creates a color by combining the luminance and saturation of the
image color with the hue of the layer color
Saturation
Creates a color by combining the luminance and hue of the image
color with the saturation of the layer color
Color
Creates a new color by combining the luminance of the image
color with the hue and saturation of the layer color. This method is
the opposite of Luminosity.
Luminosity
Creates a new color from the hue and saturation of the image color
and the luminance of the layer color. This method is the opposite of
Color.

Layers | 573
To change a layer’s composite method
1Select a layer.
2In the Layers panel, choose a composite method from the Composite Method list box.
You can also choose a composite depth method from the Composite Depth list box. For more information, see “Blending impasto
with other layers” on page 536.
Layer masking
Masking originated as a technique for creating color separations, where sheets of masking material were hand-cut to define the color
regions in an image. In the Corel Painter digital workspace, the layer mask is a powerful tool for controlling image composition and effects.
Unlike permanently erasing and deleting content from a layer, layer masking is a non-destructive way to conceal areas of a layer.
Layer masks vs. channels
A layer mask is similar to an alpha channel. Both are grayscale images that you can create and edit; however, their characteristics and
functions are different:
• A layer mask is attached to a layer, but an alpha channel is independent.
• The canvas can have up to 32 alpha channels; each layer can have only one layer mask.
• Channels don’t influence the visibility of the canvas image; a layer mask defines what areas of a layer’s image are visible.
• An alpha channel, when loaded, protects designated areas of an image; a layer mask does not provide protection.
• A channel is enabled by loading it to a selection. A layer mask can be enabled and disabled at any time, and it can also be loaded to a
selection.
The Channels panel provides access to both channels and layer masks. For more information about channels, see “Creating and copying
channels” on page 583.
Layer masking workflow
First, select a layer and create a layer mask. If you want to define the visible and concealed areas by painting, create a blank layer mask. You
can also create a mask based either on a selection or the transparency of the selected layer. Where the mask is white, the layer content is
fully visible; where the mask is black, the layer content is hidden. Shades of gray in the mask represent varying degrees of transparency in the
layer; areas filled with darker shades of gray appear more transparent than areas filled with lighter shades.
Next, select the layer mask in the Layers panel, and choose a compatible brush. Some variants, such as brushes from the Thick Paint, Liquid
Ink, Watercolor, Real Watercolor, Selection, Erasers, and Impasto categories, cannot be used on layer masks. You can set brush attributes
such as size, opacity, dab profile, hardness, and expression now, or you can adjust them later as you paint. You can also use the Paint Bucket
and Interactive Gradient tools to quickly fill an area or create a soft and gradual transition between pure black and pure white, respectively.
Finally, start painting in the document window. To conceal areas of the layer, paint with pure black at full opacity; to reveal areas of the layer
and bring back details, paint with pure white. Painting with gray will result in partial transparency. The lighter the shade of gray you use, the
less transparent the area of the layer will be; the darker the shade of gray, the more transparent the area will be. To control the shades of
gray, adjust brush opacity. Since the brush is loaded with pure black, changing the brush opacity will result in varying shades of gray. Switch
back and forth between painting with black, white, and gray to fine-tune the layer mask and find the right balance.
The following table provides links to the help topics that contain detailed information about the main steps for creating a layer mask.
Workflow step Help topic
1 Create a layer mask “To create a blank layer mask” on page 574.
“To create a layer mask based on transparency” on page 575.
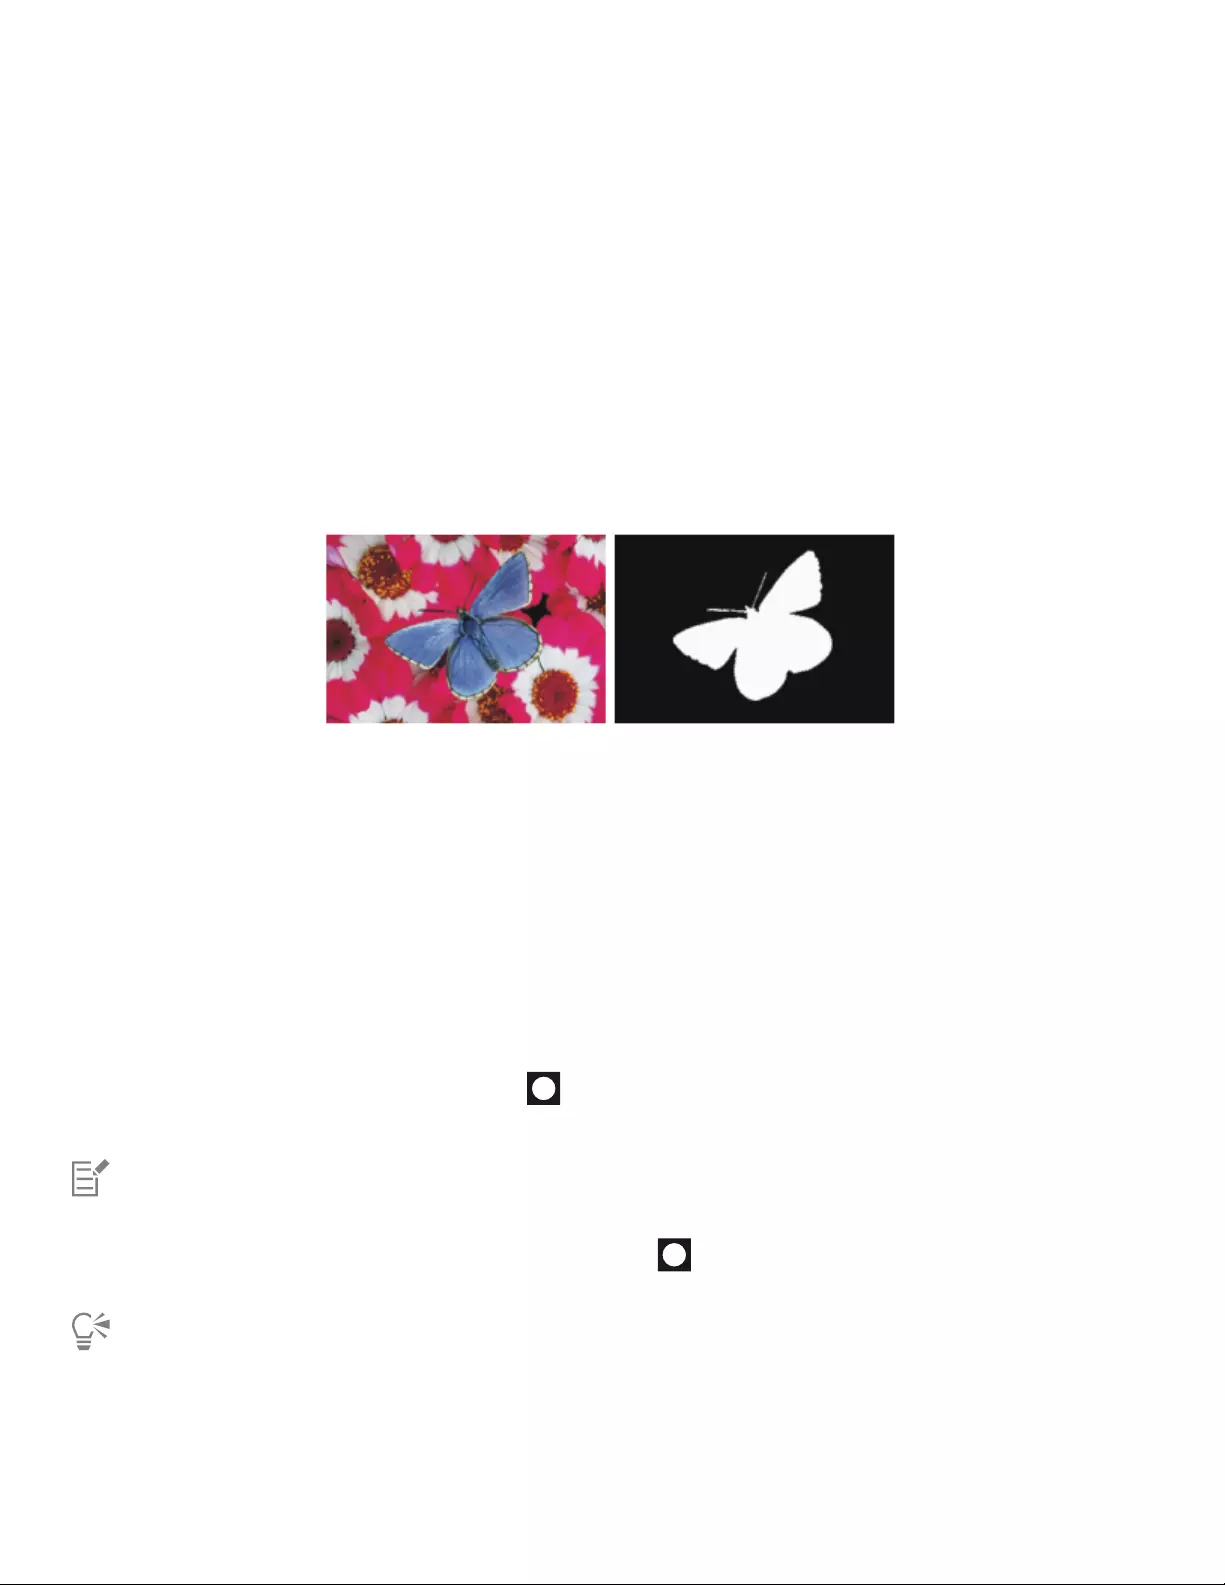
574 | Corel Painter 2022 User Guide
Workflow step Help topic
“To create a layer mask based on a selection” on page 575.
2 Select a layer mask “To select a layer mask” on page 576.
3 Paint on a layer mask “Painting on layer masks” on page 576.
Creating and deleting layer masks
You can create a blank layer mask or a layer mask based on transparency. By default, when you add a blank layer mask, it is white and the
layer is fully visible. A layer mask based on transparency shows all transparent areas in the layer black, and all content on the layer white.
Intermediate levels of gray are partially transparent. For more information, see “Preserving layer transparency” on page 564.
A layer mask for the butterfly layer is created based on its transparency.
The layer mask shows transparent areas in black and layer content in white.
You can also create a layer mask based on a selection. If you want to edit the selection after you have created the layer mask, make the
adjustments on the layer, and then load the modified selection to the layer mask. For information about creating and modifying selections,
see “Selections and transformations” on page 593.
Once you create the layer mask, you can start painting on it. For more information about painting on layer masks and editing them, see
“Painting on layer masks” on page 576.
You can clear a layer mask if you want to make the entire layer fully visible again. When you no longer need a layer mask, you can delete it.
To create a blank layer mask
1Select a layer.
2In the Layers panel, click the New Layer Mask button .
A white layer mask icon displays next to the layer icon in the Layers panel.
The layer mask icon varies in appearance depending on how you’re viewing the layers. If you are displaying layers as No
Thumbnails, the icon is the same as the New Layer Mask button . If you’re viewing layers as any size of thumbnail, a small-
scale representation of the mask displays as the icon.
You can also create a blank layer mask by choosing Layers Layer Mask Create.

Layers | 575
To create a layer mask based on transparency
• In the Layers panel, right-click a layer, and choose Create Layer Mask From Transparency.
The layer mask icon displays next to the layer icon in the Layers panel.
You can create layer masks based on transparency for pixel-based layers only. Other layers must first be converted to default layers
by right-clicking the layer in the Layers panel, and choosing Convert To Default Layer.
Earlier versions of Corel Painter used layer visibility masks. If you have a file with a modified visibility mask that was created with an
earlier version of Corel Painter, use this procedure to load the visibility mask to a layer mask.
You can also create a layer mask based on transparency by selecting a layer and choosing Layers Layer Mask Create From
Transparency.
To create a layer mask based on a selection
1In the Layers panel, select a layer, and click the New Layer Mask button to create a blank layer mask.
2In the Layers panel, click the layer thumbnail icon to select the layer.
3Choose a selection tool and make a selection in the document.
4In the Layers panel, right-click the layer mask icon, and click Load Selection to Layer Mask.
5In the Operation area, enable one of the following options:
•Replace Mask — replaces the mask with the current selection
•Add to Mask — combines the current selection with the mask
•Subtract From Mask — subtracts the current selection from the mask
•Intersect With Mask — determines the intersection of the selection and the mask and saves the intersection to the mask
If you have already created a layer mask based on a selection, but you want to adjust the selection, click the layer icon in the Layers
panel to select the layer, and modify the selection in the document. Next, right-click the layer mask icon in the Layers panel, click
Load Selection to Layer Mask, and choose an option in the dialog box that appears.
The Load Selection To Layer Mask command is also accessible from the Layers menu (Layers Layer Mask Load Selection To
Layer Mask) and the Layers panel (Layer options button Layer Mask Load Selection To Layer Mask.)
To delete or clear a layer mask
• Perform an action from the following table.
To Do the following
Delete a layer mask Do one of the following:
•In the Layers panel, right-click the layer mask, and choose Delete
Layer Mask.
•Choose Layers Layer Mask Delete.
•In the Layers panel, select the layer mask and click the Delete
button .

576 | Corel Painter 2022 User Guide
To Do the following
•In the Layers panel, select the layer mask, click the Layer options
button , and choose Layer Mask Delete.
•In the Channels panel, select the layer mask, click the Channel
options button , and choose Delete.
•Click the Delete button at the bottom of the Channels
panel.
Clear a layer mask In the Channels panel, click the Channel options button , and
choose Clear.
Selecting layer masks
Before you work with a layer mask, you must select it.
To select a layer mask
• In the Layers panel, click the layer mask icon next to the layer name.
A color outline appears around the layer mask icon to indicate that the mask is active.
Selecting a layer mask in the Channels panel lets you view the mask as a grayscale image.
Painting on layer masks
You can paint in a layer mask; apply effects to it; fill it with a color, pattern, gradient, or weave; and feather it.
A layer mask before (left) and after (right) feathering
Layer masks are grayscale images that are separate from the RGB image; therefore, you cannot paint with color; you can use only black,
white, and various shades of gray. Painting with white removes areas from the mask and reveals more content from the layer. Painting with
black adds to the mask, which conceals more of the layer. Painting with intermediate gray values makes the mask semitransparent. You can
edit a layer mask at any time. Just select the mask in the Layers panel, and paint in the document. As you make modifications, the mask is
adjusted automatically.
To paint on a layer mask
1Select a layer mask.
2Click the Brush Selector on the Brush Selector bar, and choose a brush variant that can paint on layer masks.
3Set brush attributes such as size, opacity, dab profile, hardness, and expression now, or you can adjust them later as you start painting.
4In the document window, perform a task from the following table.
Layers | 577
To Do the following
Conceal content Paint with 100% black at full opacity (100%).
Reveal content Paint with pure white to make modifications or bring back details
that you have erased.
Make pixels semitransparent Paint with shades of gray.
The lighter the shade of gray you use, the less transparent the
area of the layer will be; the darker the shade of gray, the more
transparent the area will be.
Tip: To control the shades of gray, adjust brush opacity.
Thick Paint, Liquid Ink, Watercolor, Real Watercolor, Selection, Erasers, and Impasto brushes cannot paint on layer masks.
You can also use the Paint Bucket and Interactive Gradient tools to quickly fill an area or create a soft and gradual
transition between pure black and pure white, respectively.
Inverting layer masks
You can invert a layer mask to make dark pixels light, and light pixels dark.
To invert a layer mask
1In the Channels panel, select a layer mask.
2Click the Channel options button , and choose Invert.
You can also invert a layer mask by right-clicking the layer mask, and choosing Invert.
Enabling and disabling layers masks
You can disable a layer mask to view the entire layer, but you can re-enable it at any time.
To enable or disable a layer mask
• Right-click a layer mask in the Layers panel, and click Enable Layer Mask or Disable Layer Mask.
You can also enable a layer mask by selecting the mask, and choosing Layers Layer Mask Enable.
You can also disable a layer mask by selecting the mask, and choosing Layers Layer Mask Disable. A red ‘X’ is displayed over
the layer mask icon.
578 | Corel Painter 2022 User Guide
Loading layer masks to selections
Although a layer mask does not protect areas of a layer from being edited, you can load a layer mask to a selection. The selection provides
protection to the hidden parts of the layer. For more information, see “Selections and transformations” on page 593.
To load a layer mask to a selection
1In the Layers panel, select a layer that has a layer mask.
2Right-click the layer mask icon, and choose Load Layer Mask To Selection.
Copying layer masks
You can copy a layer mask to an alpha channel or copy a channel to a layer mask. The name of a layer mask in the Channels panel reflects
the name of the layer ([Layer Name] [Layer Mask]). Although you cannot change the name of a layer mask, it automatically updates if you
change the layer name.
To copy a layer mask to a channel
1Right-click a layer mask in the Channels panel, and choose Duplicate.
2In the Duplicate Channel dialog box, enable the New Alpha Channel option.
You can also copy a channel to an existing channel, so that the existing channel is replaced. To do this, enable the Replace Existing
Alpha Channel option, and choose the existing channel from the list box.
To copy a channel to a layer mask
1Select a layer in the Layers panel.
2Click the New Layer Mask button .
A blank layer mask is created.
3In the Channels panel, right-click the channel you want to copy, and choose Duplicate.
4In the Duplicate Channel dialog box, enable the Replace Existing Alpha Channel option.
Corel Painter copies to the layer mask the portion of the channel that coincides with the layer content.
Viewing layer masks as grayscale images
You can also view a layer mask as a grayscale image.
To view a layer mask as a grayscale image
1Select a layer with a layer mask.
2In the Channels panel, click the layer mask.
In this mode, the RGB image is hidden.
To hide the layer mask, click the eye icon next to the layer mask, so that the icon changes to a closed eye .

Layers | 579
Applying layer masks
If you like the result of a layer mask, you can apply it. This permanently removes the hidden parts of the layer and deletes the layer mask.
To apply a layer mask
• In the Layers panel, right-click a layer mask, and choose Apply Layer Mask.
You can also apply a layer mask by selecting the layer mask and choosing Layers Layer Mask Apply.
Importing and exporting layers
You can save your Corel Painter document in the RIFF format with “live” layers — the layers continue to function when you reopen the file.
RIFF is the only format that preserves layers in their original state.
If you export a Corel Painter document in PSD (Photoshop) format, all layers convert to standard Photoshop transparent layers. Photoshop
does not preserve groups; each layer in a group becomes its own Photoshop layer. For more information, see “Grouping layers” on page
559.
The following table describes how Corel Painter layer composite methods are converted to blend modes in Photoshop:
Corel Painter Composite
Method
Photoshop Blend Mode Corel Painter Composite
Method
Photoshop Blend Mode
Gel Darken Overlay Overlay
GelCover not converted Soft Light Soft Light
Colorize Color Hard Light Hard Light
Reverse-Out Normal Darken Darken
Shadow Map Multiply Lighten Lighten
Magic Combine Lighten Difference Difference
Pseudocolor Normal Hue Hue
Normal Normal Saturation Saturation
Dissolve Dissolve Color Color
Multiply Multiply Luminosity Luminosity
Screen Screen
For more information, see “Blending layers by using composite methods” on page 566.
If you save a file to a file format other than RIFF or PSD, the layers drop (or merge) into a single background image.

580 | Corel Painter 2022 User Guide
Working with reference layers
Reference layers get their image content from an external source — either a pixel-based layer in the current document or a separate file.
They provide a low-resolution representation of the original image that you can quickly manipulate in ways that would otherwise require
more time. Working with a reference layer allows you to resize, rotate, or slant a layer onscreen by dragging its handles. The changes are
immediately displayed in the document window. When you finish making changes, you can commit the reference layer back to a standard
layer. Corel Painter examines the source image to restore the original resolution.
You cannot edit the image data in a reference layer. If you try to paint on or apply effects to a reference layer, Corel Painter prompts you to
commit it back to a pixel-based layer.
You can create a reference layer by basing it on an existing layer or by placing an image. For more information, see “Opening and placing
files” on page 101.
To create a reference layer
1Select a layer.
2Click the Layer options button in the Layers panel, and choose Convert To Reference Layer.
The layer’s icon in the Layers panel changes to an eight-handled shape , and an eight-handled box marks the boundary of the
layer’s contents in the document window.
You can also create a reference layer by right-clicking a layer in the Layers panel, and choosing Convert To Reference Layer.
You can also create a reference layer by selecting the layer, and choosing Layers Convert To Reference Layer.
To modify a reference layer
• Select a reference layer.
To Do the following
Resize a reference layer in one direction Drag a side handle.
Resize a reference layer in more than one direction at once Drag a corner handle. If you want to maintain the layer
proportions, hold down Shift as you drag. The pointer changes
when you position it over a corner handle .
Rotate a reference layer Hold down Command (macOS) or Ctrl (Windows), and drag a
corner handle. The pointer changes when you position it over a
corner handle .
Skew a reference layer Hold down Command (macOS) or Ctrl (Windows), and drag a
side handle. The pointer changes when you position it over a side
handle .
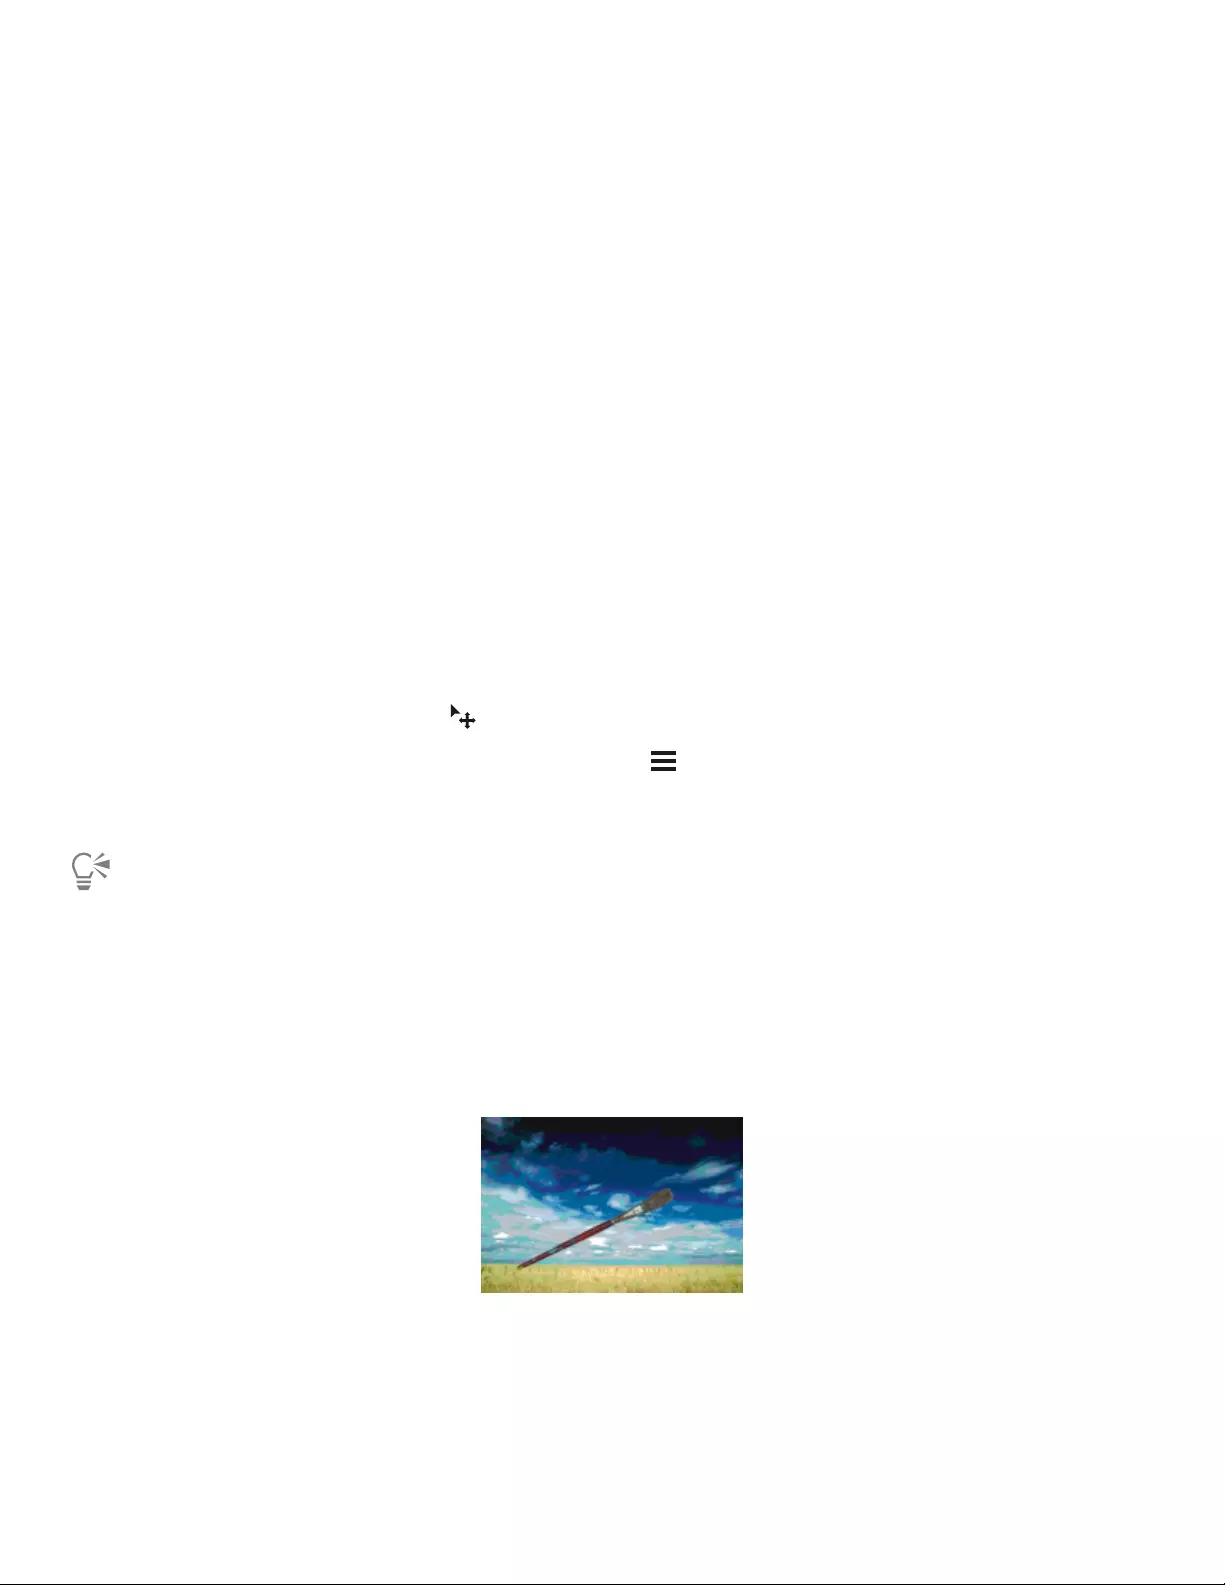
Layers | 581
To commit a reference layer
• In the Layers panel, right-click a reference layer, and click Convert To Default Layer.
The conversion process might take a few seconds, depending on the size and quality of the layer.
Storing layers as images in the Image Portfolio
The Image Portfolio is a convenient place to store layers as images so you can use them again.
You can create your own Image Portfolio libraries to organize images by category. When you’re creating a library, keep in mind that the
smaller the library, the easier it will be to see its contents at a glance.
You can also move items between Image Portfolio libraries. For more information, see “Working with libraries” on page 88.
To display the Image Portfolio panel
•Choose Window Media Panels Images.
If the Image Portfolio panel is not expanded, double-click the Image Portfolio panel tab.
To add a layer to the Image Portfolio
1Select a layer.
2In the toolbox, click the Layer Adjuster tool .
3In the Image Portfolio panel, click the Image Portfolio options button , and choose Add Image To Portfolio.
The layer is added to the portfolio.
4In the Save Image dialog box, type a name in the Save As box.
The Image Portfolio holds only pixel-based layers. If you want to add a shape, Watercolor, Liquid Ink, or dynamic layer to the
Image Portfolio, you must first convert it to a default layer. In the Layers panel, right-click the layer, and choose Convert To
Default Layer.
To use an image from the Image Portfolio
1Choose Window Media Panels Images.
2Double-click an item in the Image Portfolio panel to add it to the document window.
Corel Painter places the Image Portfolio item on a new layer.

582 | Corel Painter 2022 User Guide

Alpha Channels | 583
Alpha Channels
Alpha channels, also referred to simply as channels, let you store and edit path-based and pixel-based selections in an active document.
Corel Painter stores only the current selection by default, therefore, when you make a new selection, your previous selection is automatically
lost. However, by saving the selection as an alpha channel, you can retain the selection information and load it in the image whenever you
need it.
The alpha channel is a grayscale image that stores 8 bits of information per pixel, which means that each pixel can be assigned one of
256 levels of gray — from 0 (black) to 255 (white). White areas of the channel are selected, and black areas of the channel are protected.
Intermediate levels of gray are partially protected. For example, areas that are 50% gray will allow 50% of the brushstroke or effect to get
through the channel to the image.
This section contains the following topics:
•“Creating and copying channels” (page 583)
•“Generating channels automatically” (page 585)
•“Importing and exporting alpha channels” (page 586)
•“Selecting and viewing channels” (page 586)
•“Setting channel attributes” (page 588)
•“Deleting and clearing channels” (page 589)
•“Editing channels” (page 589)
Creating and copying channels
You can create a channel from a selection, create a blank channel, or create a new channel by copying an existing channel. The channels
are saved with the image and remain part of the file. Channels remain inactive (for canvas control) until you load them as selections in the
image. For more information, see “To load a selection from an alpha channel” on page 610.
Corel Painter lets you create up to 32 alpha channels. The channels are listed in the Channels panel and are available for selecting,
displaying, and modifying.
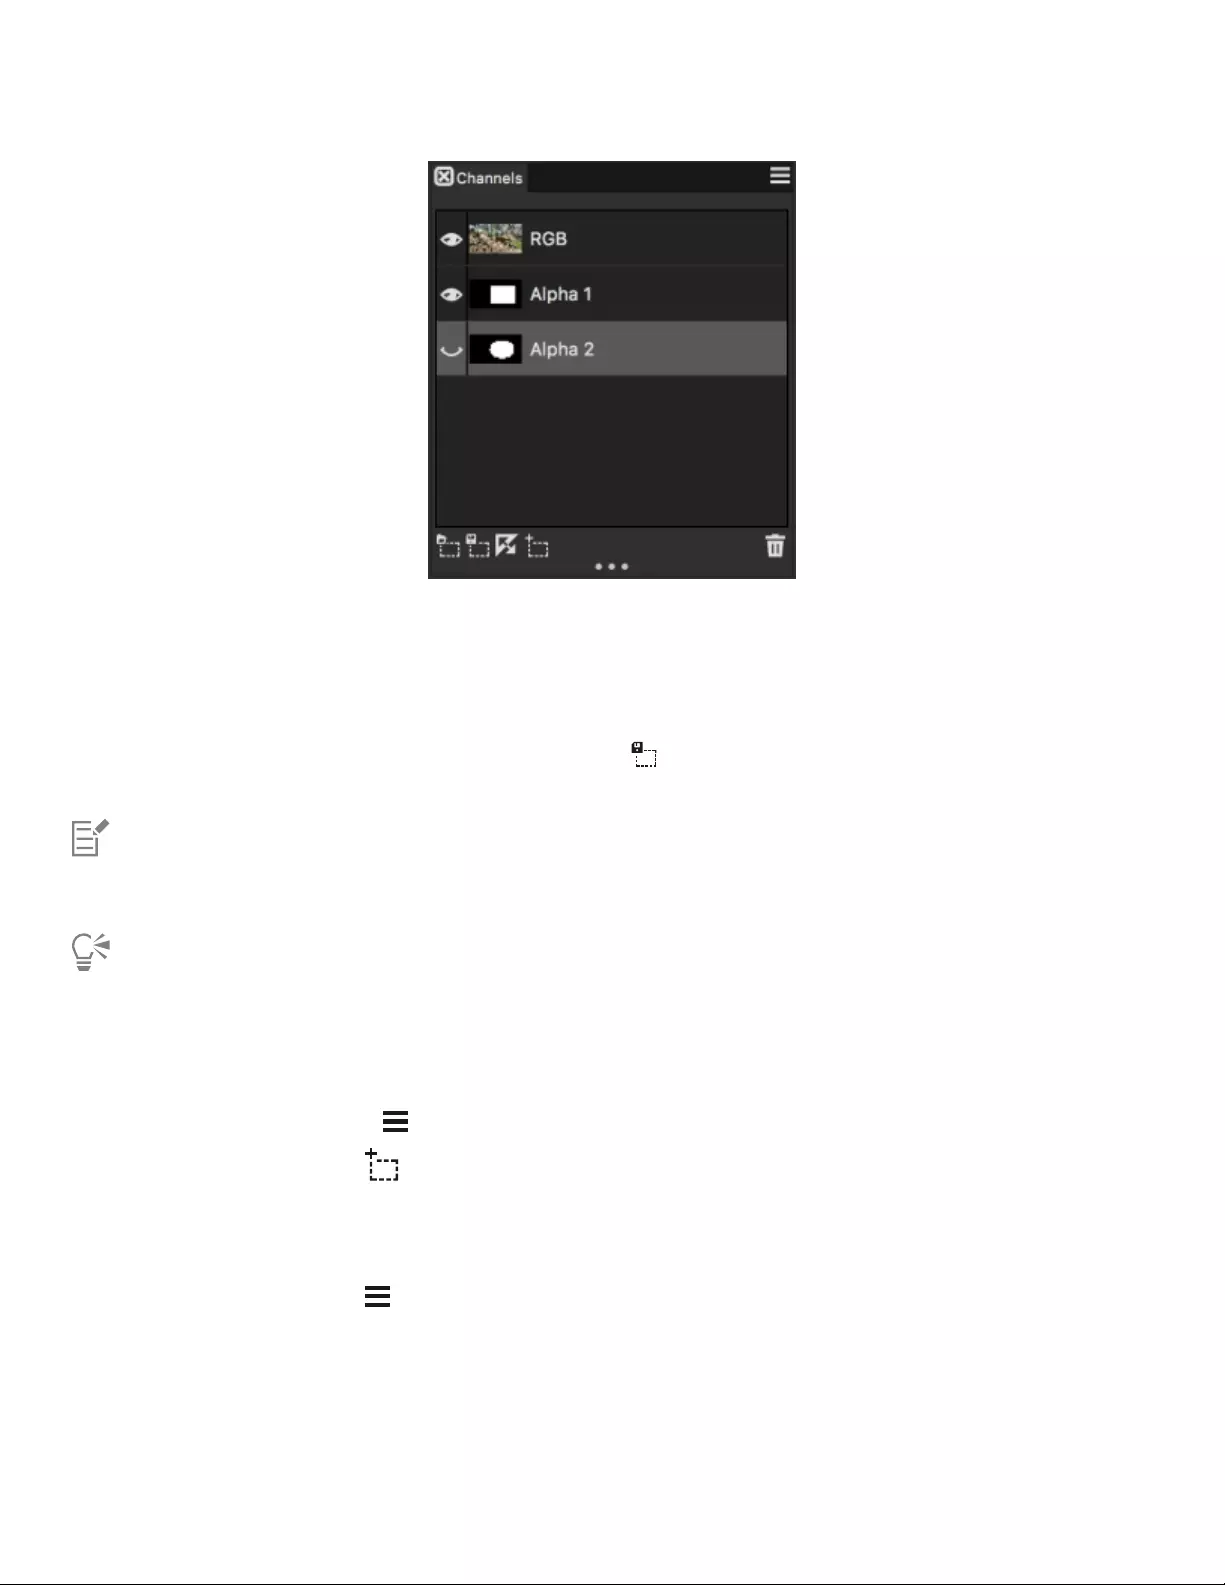
584 | Corel Painter 2022 User Guide
The Channels panel displays all alpha channels that are stored in the current document.
To create a channel from a selection
1Click a selection tool in the toolbox and make a selection.
2Choose Window Channels.
3In the Channels panel, click the Save Selection as Channel button .
4Type a name in the Name box.
To apply an alpha channel as a selection, you must load it as a selection in the document window. For more information, see “To
load a selection from an alpha channel” on page 610.
You can also open the Channels panel by pressing Command + 5 (macOS) or Ctrl + 5 (Windows).
To create a blank channel
• In the Channels panel, do one of the following:
•Click the Channel options button , and choose New.
•Click the New Channel button .
To copy a channel
1In the Channels panel, choose a channel from the list.
2Click the Channel options button , and choose Duplicate.
3In the Duplicate Channel dialog box, enable the New Alpha Channel option.
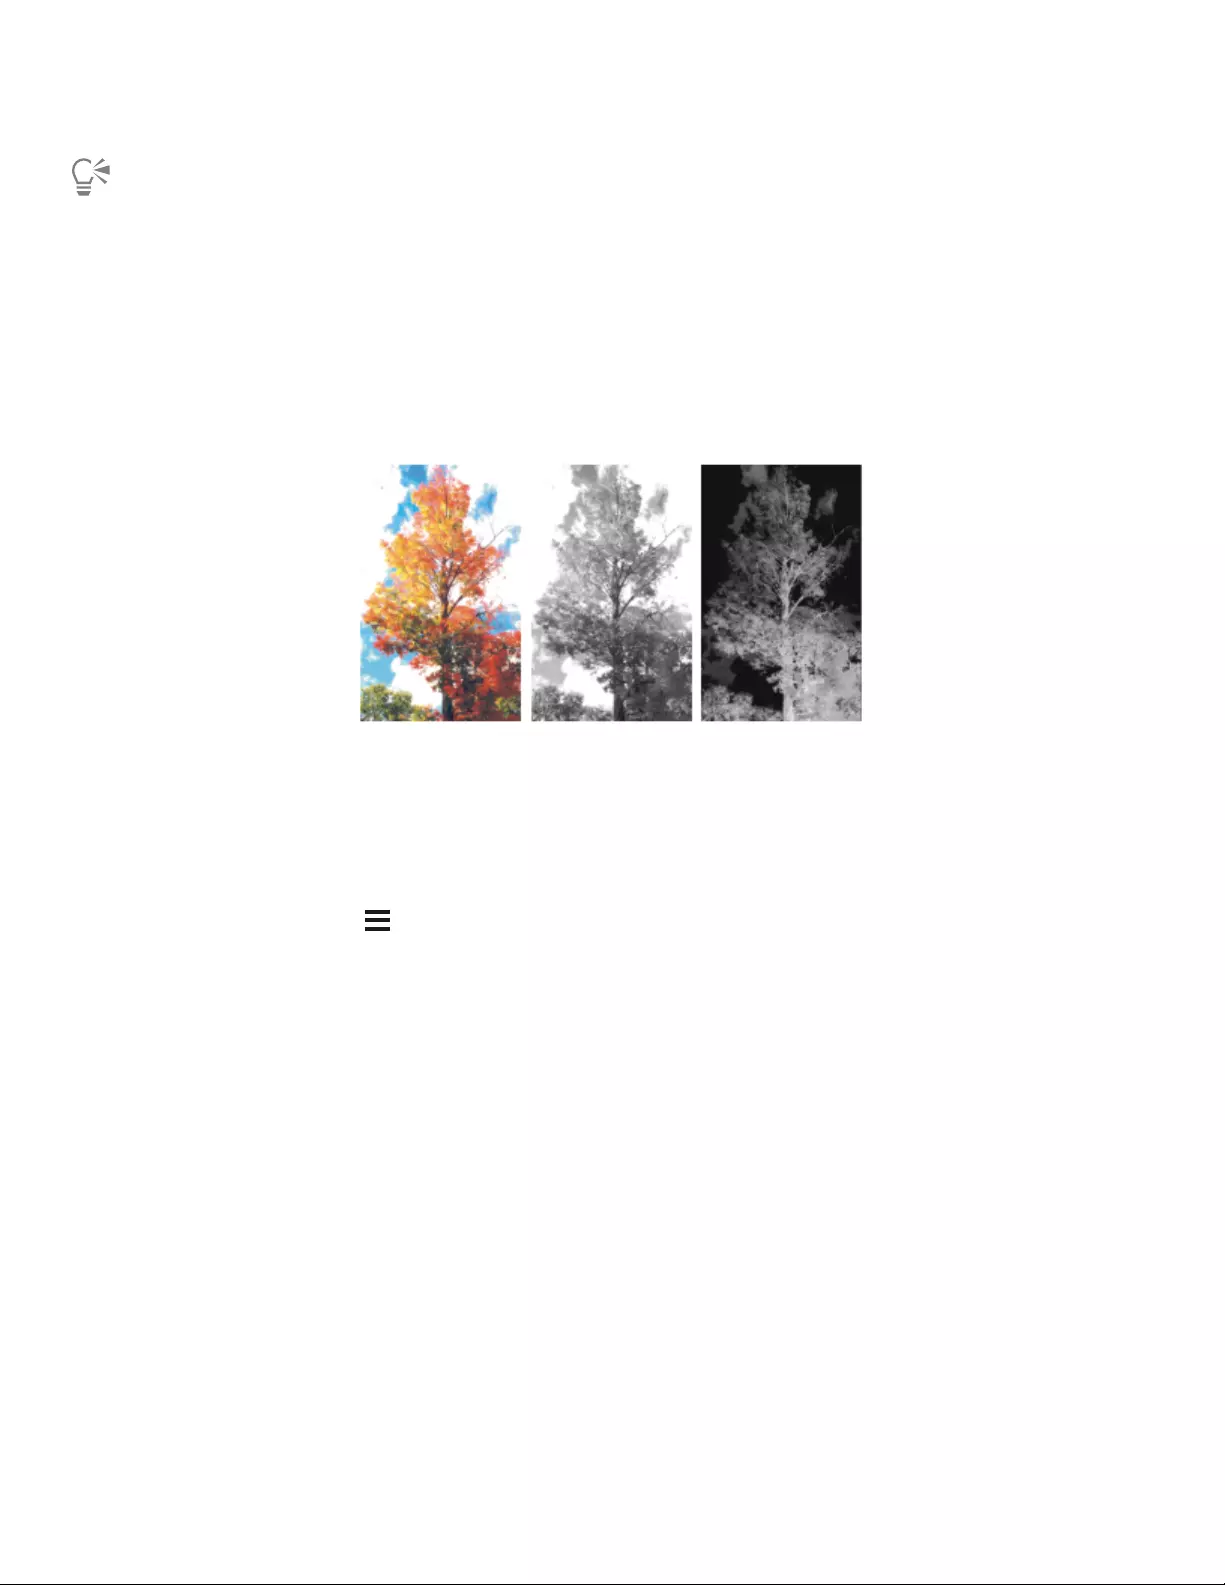
Alpha Channels | 585
You can also copy a channel to an existing channel, so that the existing channel is replaced. To do this, enable the Replace Existing
Alpha Channel option, and choose the existing channel from the list box.
Generating channels automatically
Corel Painter can automatically generate a channel based on the light and dark areas of a number of sources, including paper, pattern, and
clone source. For example, you can create a channel based on the luminance values of a clone. You can also create a channel based on a
range of colors. These methods are similar to automatically generating pixel-based selections. For more information, see “Creating pixel-
based selections” on page 603.
An image (left), the channels created using image luminance (middle), and inverted image luminance (right)
To generate a channel based on luminance
1In the Channels panel, do one of the following:
• To generate a new channel, choose the RGB channel from the list.
• To replace a channel, choose it from the list.
2Click the Channel options button , and choose New From.
3In the New From dialog box, choose one of the following options from the list box:
•Paper — uses the current paper texture to create the channel
•3D Brush Strokes — creates a channel based on the difference between the current image and the clone source. If no clone source is
selected, Corel Painter uses the current pattern.
•Original Selection — works only when performing offset sampling between documents. It allows you to create a channel in the
sampling destination document that is based on a selection made in the sampling source document. For best results, the dimensions
of the source and destination documents should match. You must establish a link between an offset sampling source and destination
document for this option to be available. For more information, see “Cloning image areas” on page 212.
•Image Luminance — creates a channel based on the current image’s light and dark areas. For Image Luminance to be effective, the
image must have high contrast. Images with low contrast produce a semisolid channel, without clear delineation between the selected
and protected areas.
•Original Luminance — produces a channel based on the clone source’s light and dark areas. This option lets you import an image to
the channel. If no clone source is selected, Corel Painter uses the current pattern.
•Current Color — creates a channel based on pixels of the current main color. Areas of the current color are protected; the rest of the
image is selected. You might want to use the Dropper tool to pick a color from the image before using the Current Color option.
If you want to invert the channel, enable the Invert check box.

586 | Corel Painter 2022 User Guide
Like a grayscale image, a channel can have 256 values in it. Inverting a channel is equivalent to creating the negative of a grayscale
image. For example, a pixel with 80% luminance will have 20% luminance when inverted. A pixel with 30% luminance will have
70% luminance when inverted.
To generate a color-based channel
1In the Channels panel, do one of the following:
• To generate a new channel, choose the RGB channel from the list.
• To replace a channel, choose it from the list.
2Click the Channel options button , and choose New From Color Range.
3With the New Channel from Color Range dialog box open, click in the document window to pick a color.
4The color you select is the middle of the range of colors used to create the channel.
5In the New Channel from Color Range dialog box, adjust the Range slider in the Hue, Saturation, and Value areas.
These sliders control the selected range. You can drag the limits of the range in either direction.
6In the New Channel from Color Range dialog box, adjust the Feather slider in the Hue, Saturation, and Value areas.
This helps soften the edges of the channel.
If you want to invert the channel, enable the Inverted check box.
The channel displays as a red overlay on the image in the Preview window of the New Channel from Color Range dialog box. You
can drag in the Preview window to display other parts of the image.
Importing and exporting alpha channels
When you save a file to the Corel Painter file format (RIFF), the alpha channels that are stored in the file are retained. They are also retained
when exporting Corel Painter files in the Adobe Photoshop (PSD) format. In addition, if you import an Adobe Photoshop file that contains
alpha channels in Corel Painter, the alpha channels are supported.
It is important to note that when you open RGB-based Adobe Photoshop files in Corel Painter, anything in the alpha channels (4 and
above) appear as a channel in Corel Painter. Conversely, when you export your Corel Painter file in the Photoshop format, all channels are
placed into channels 4 and above.
Selecting and viewing channels
You can select and view all alpha channels that are stored in the active document from the Channels panel. Selecting and viewing a channel
are distinct operations — you can view a channel without selecting it, and you can select a channel without viewing it. If you want to edit a
particular channel, you must select it.
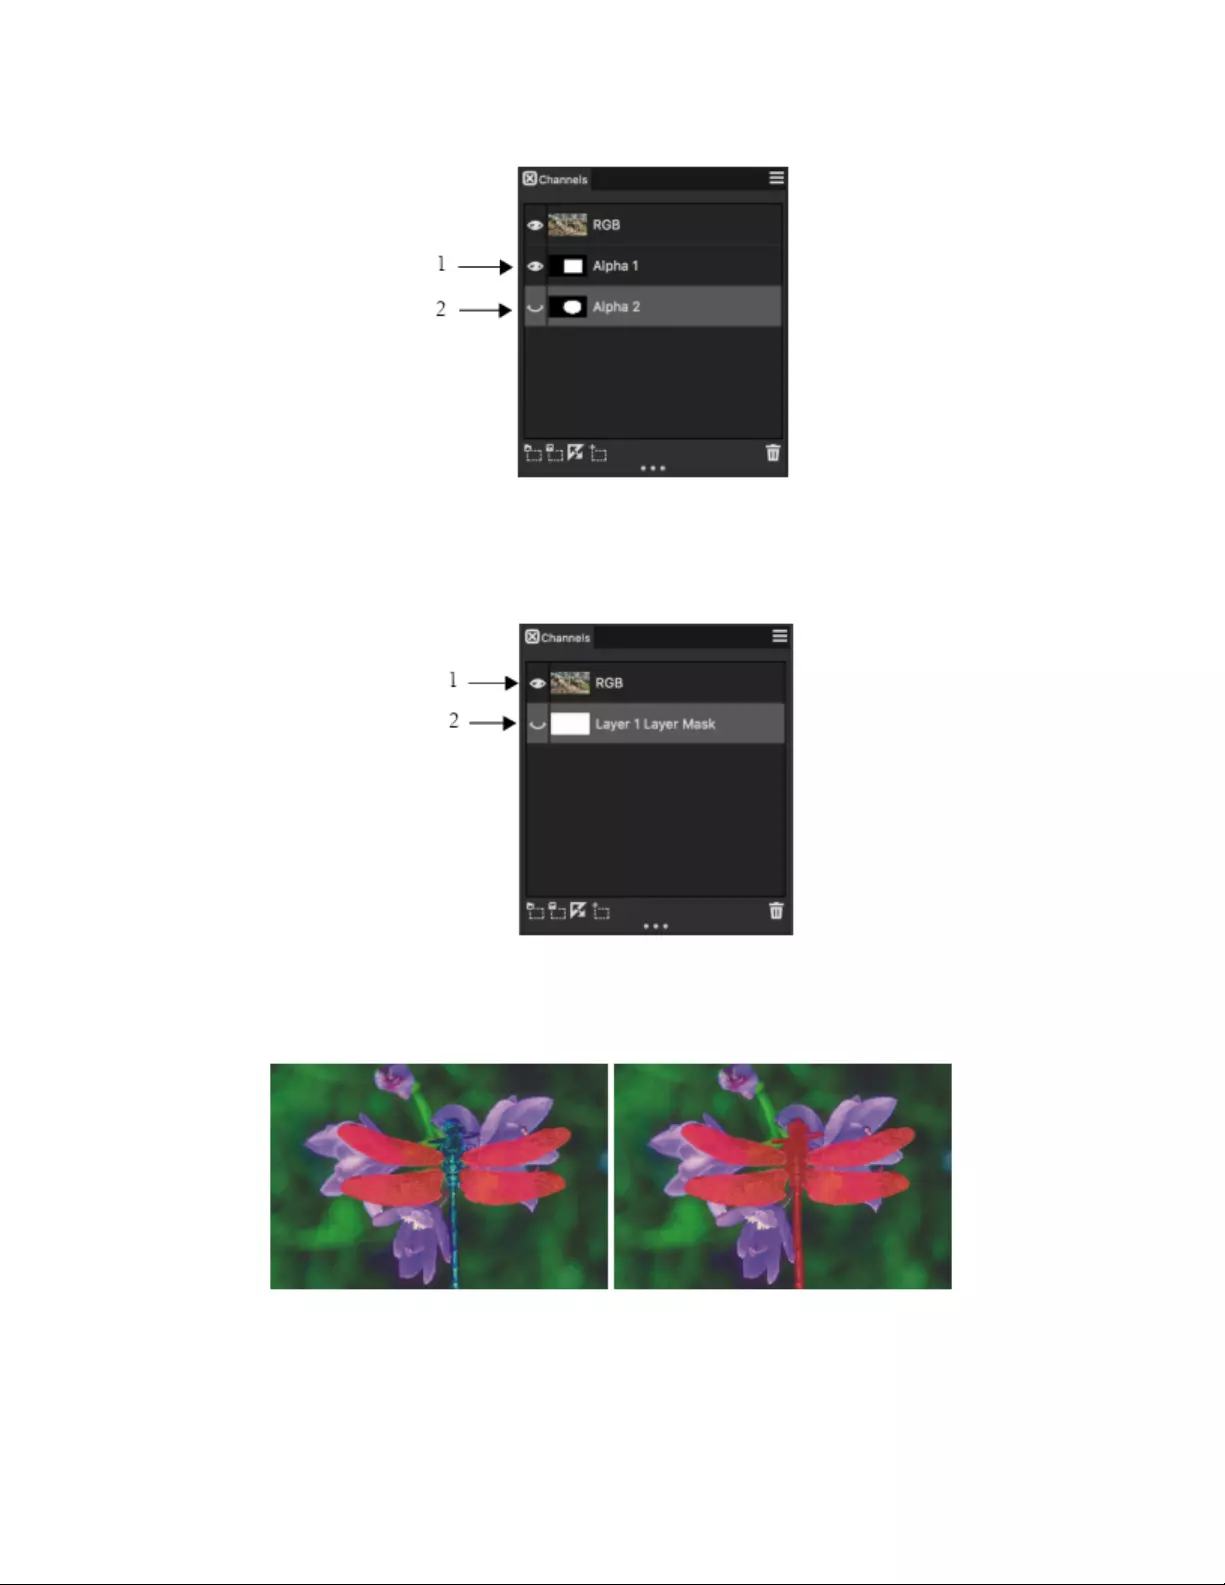
Alpha Channels | 587
You can view or hide a channel by clicking the eye icon next to the channel’s thumbnail in the Channels panel. When
the eye is open (1), the channel is displayed in the document window. When the eye is closed (2), the channel is hidden.
The Channels panel also lists the RGB color image. In addition, if a layer is selected, and the layer has a layer mask, the Channels panel also
lists the layer mask. For more information, see “Creating and deleting layer masks” on page 574.
The Channels panel displays the RGB color image (1) and the Layer Masks of selected layers (2).
You can view the RGB image and more than one channel, but your editing applies only to the one item selected in the Channels panel —
either the RGB image or a channel.
Left: The “wings” channel and the RGB image are displayed. Right: The “wings” and “body” channels
are displayed as red overlays on the RGB image. The eye icons for both channels and for RGB are open.
Corel Painter offers two ways to view a channel — as a colored overlay on the image or in grayscale. Colored overlays are red by default, but
you can change the color. For more information, see “To set channel attributes” on page 589.

588 | Corel Painter 2022 User Guide
To display the channels panel
•Choose Window Channels.
If the panel is not expanded, double-click the panel tab.
To select a channel
• In the Channels panel, choose a channel from the list.
When you want to work on the image again, choose RGB from the list.
To view or hide a channel
To Do the following
View a channel as a colored overlay In the Channels panel, click the eye icon next to the channel’s
thumbnail. In this mode, the RGB image is always displayed.
View a channel as a grayscale image In the Channels panel, make sure the channel is hidden (eye closed
) and not selected, and click the channel name. In this mode,
the RGB image is hidden.
Hide a channel Click the eye icon next to the channel item to close the eye
.
A channel protecting the wings and body is displayed in grayscale. The RGB image is hidden.
Setting channel attributes
You can change the appearance of channels by modifying their display attributes, which helps to distinguish one channel from another.
These attributes do not affect the function of the channel; they affect only how the channel displays in the document window.
Corel Painter names new channels incrementally: Alpha 1, Alpha 2, and so on. Renaming a channel makes it easier to find a specific channel,
especially if you have several in the document.

Alpha Channels | 589
To set channel attributes
1In the Channels panel, choose a channel from the list.
2Click the Channel options button , and choose Channel Attributes.
3In the Channel Attributes dialog box, move the Opacity slider to set the channel display strength.
4Click the Color chip, and choose a display color in the Color dialog box.
If you want to see the color overlay in grayscale, choose black.
A channel is easiest to use as an overlay when its color contrasts strongly with the predominant hue of the RGB image. You might want
to use a different color for each channel.
5Click OK.
6Enable one of the following options to specify where the color overlay displays:
•Masked Areas
•Selected Areas
If you want to rename the channel, type a name in the Name box.
If you want the channel displayed at its full intensity, move the Opacity slider to 100%. Choose a lower value to display the channel
more transparently so you can follow the underlying RGB image as you edit the channel.
Deleting and clearing channels
If you’ve finished working with a particular channel you can delete it. You can also clear a channel without deleting it, leaving you with a
blank channel.
To delete a channel
1In the Channels panel, choose a channel from the list.
2Click the Delete button at the bottom of the Channels panel.
You can also delete a channel by clicking the Channel options button , and choosing Delete.
To clear a channel
1In the Channels panel, choose a channel from the list.
2Click the Channel options button , and choose Clear.
Editing channels
You can edit a channel by modifying the size, shape, or opacity of its protected area, which ultimately becomes the protected area of the
selection. The changes that you make to the channel do not directly affect the image until you load it as a selection. For more information,
see “To load a selection from an alpha channel” on page 610.
Because the alpha channel is a grayscale image, you edit the channel by applying only white (to remove protected areas), black (to add
protected areas), and shades of gray (to create semi-protected areas); no colors are available.
You can apply changes by selecting a brush and painting the changes in the channel.
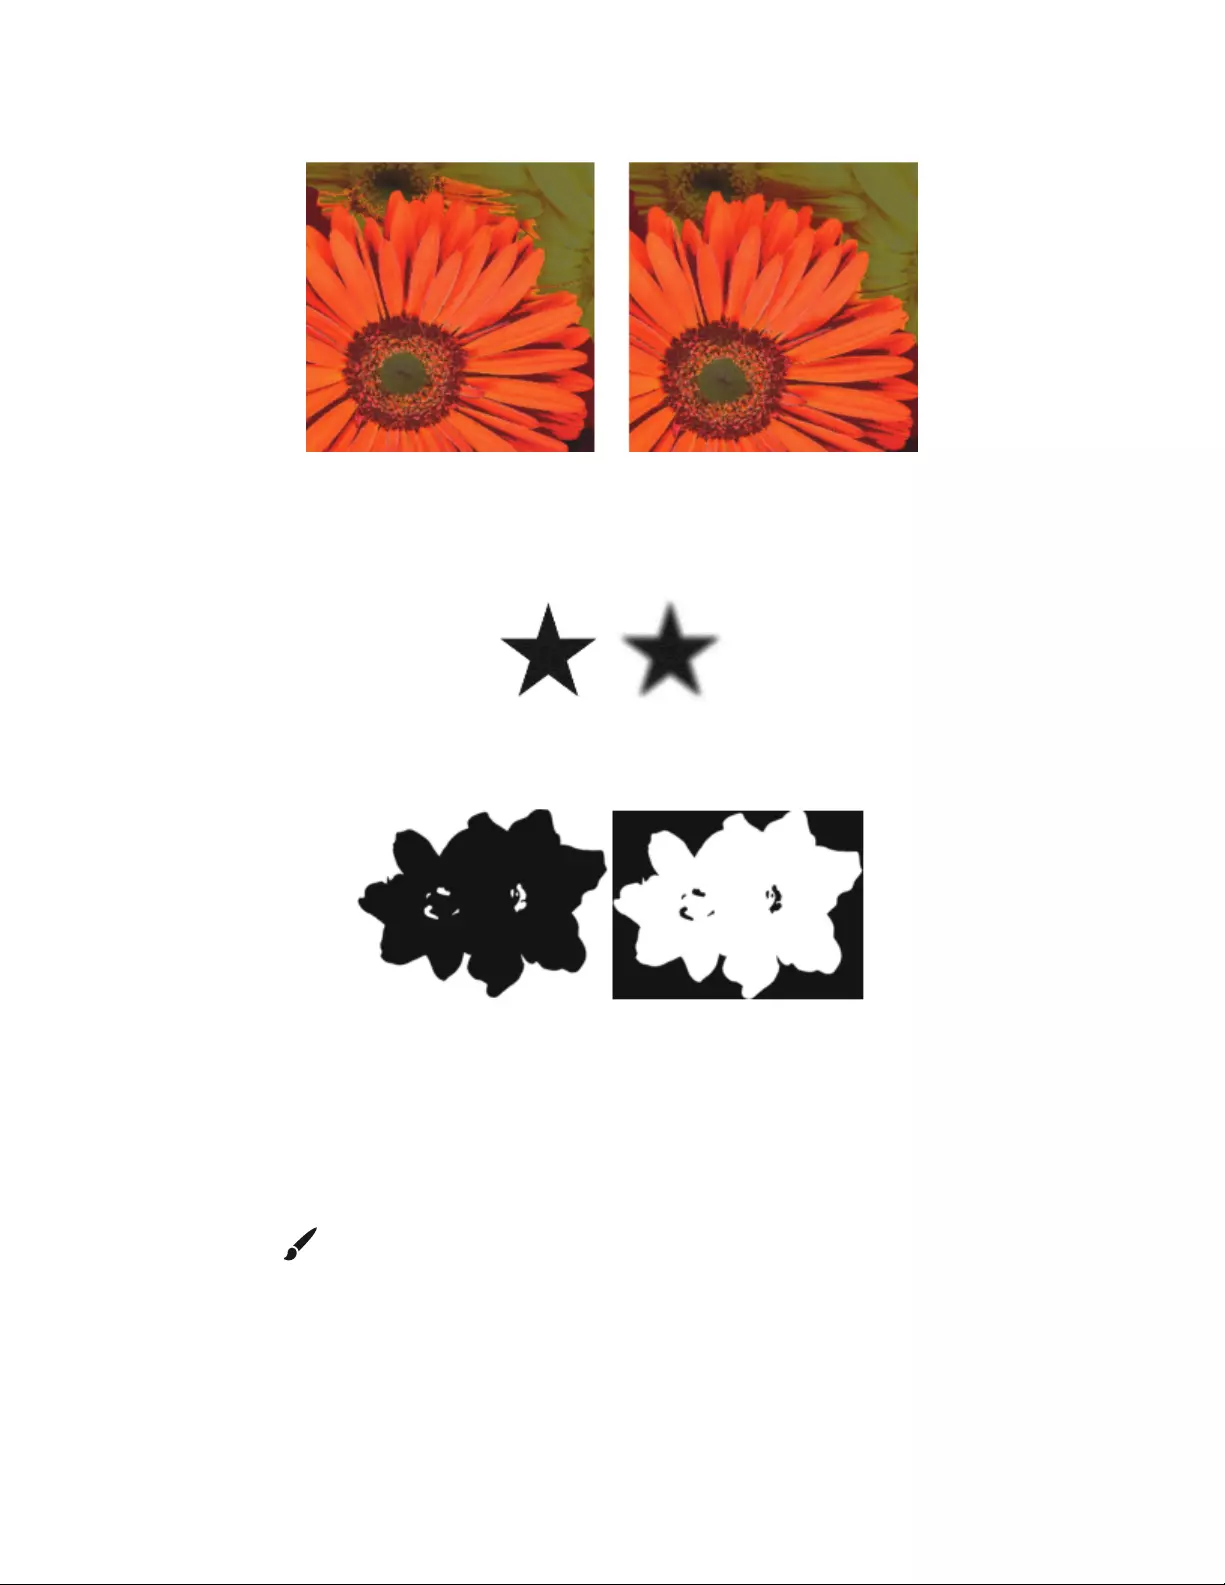
590 | Corel Painter 2022 User Guide
In this example, the channel has a few stray areas that are unprotected (left). The stray
areas were transformed into protected areas by applying black brushstroke (right).
In addition, you can apply effects, such as feathering to soften the transitions between light and dark areas. This introduces a bit of opacity
to the channel.
A channel before and after feathering
You can also invert a channel to convert a protected area into an unprotected area.
A channel before and after inversion
In addition, you can introduce interesting effects by filling a channel with a pattern, gradient, or weave. For more information, see “Working
with color fills” on page 274.
To paint in a channel
1In the Channels panel, display and select the channel you want to work with.
If you want to paint only on a specific area of the channel, make a selection.
2Choose the Brush tool from the toolbox.
3Click the Brush Selector on the Brush Selector bar.
4Click a brush category, and brush variant.
The Pen and Airbrush brush categories make good choices.
5In the Color panel, choose one of the following:
•Black — adds to the protected area
•White — removes from the protected area
Alpha Channels | 591
•Grey — applies a semi-protected area
When you paint in the channel, hue is irrelevant. The channel carries 8 bits of information and you need only set a level in that range.
The value scale is between black and white.
6Paint in the document window.
7In the Channels panel, click the eye icon next to the RGB channel’s thumbnail to display the channel in grayscale.
You can also
Control the brush opacity Adjust the Opacity slider on the property bar.
Change the brush size Type a value in the Size box, or adjust the slider.
To apply an effect to a channel
1In the Channels panel, display and select the channel you want to work with.
If you want to apply the effect to a specific area of the channel, make a selection.
2Choose an effect from the Effects menu.
To feather a channel
1In the Channels panel, display and select the channel you want to work with.
2Click the Channel options button , and choose Feather.
3In the Feather dialog box, type a number of pixels.
To invert a channel
1In the Channels panel, choose a channel from the list.
2Click the Invert Channel button .
To fill a channel with a pattern
1In the Channels panel, display and select the channel you want to work with.
If you want to fill only a specific area of the channel, make a selection.
2Click Window Media Panels Patterns.
3In the Patterns panel, click a pattern swatch.
4Choose Edit Fill.
5In the Fill dialog box, choose Original Luminance from the Fill with list box.
If you want to change the opacity, adjust the Opacity slider.
To fill a channel
1In the Channels panel, display and select the channel you want to work with.
2Choose the Paint Bucket tool from the toolbox.
3On the property bar, click the Fill Image button .
4From the Fill list box on the property bar, choose one of the following:
592 | Corel Painter 2022 User Guide
•Current Color — fills with the current color (a shade of gray). For information, see “Working with color fills” on page 274.
•Gradient — fills with the selected gradient. For information, see “Applying gradients” on page 711.
•Source Image — fills using the current clone source image. If you haven’t defined a clone source, Corel Painter fills with the current
pattern. For information, see “Filling an area with a sampled image” on page 226.
•Weave — fills with the selected weave. For information, see “Applying weaves” on page 741.
5Open the Fill selector on the property bar, and click a swatch from the media library panel.
6Click the area of the channel you want to fill.
If the result is not what you want, undo the fill, change the settings, and try again.
You can also
Specify the range of grey to be filled On the property bar, type a value in the Tolerance box, or adjust
the slider.
Specify the fill opacity for pixels outside the tolerance range On the property bar, type a value in the Feather box, or adjust the
slider.
Soften the edge of the fill Enable the Anti-Alias button on the property bar. Anti-
aliasing is desirable when Feather is zero or extremely low.
The Paint Bucket tool applies a fill only to a visible channel. Make sure the channel’s eye icon is open before using the Paint
Bucket tool.
You can return to the default Paint Bucket tool settings by clicking the Reset Paint Bucket Tool button on the property bar.

Selections and transformations | 593
Selections and transformations
Corel Painter includes various tools for selecting an area of the canvas to mark it for special treatment. You can make selections to change an
area, to protect an area from change, or to apply a transformation.
This section contains the following topics:
Creating and saving selections
•“Getting started with selections” (page 594)
•“Selecting areas by painting” (page 596)
•“Creating path-based selections” (page 601)
•“Creating pixel-based selections” (page 603)
•“Creating selections from layers” (page 606)
•“Choosing the protected area of a selection” (page 607)
•“Saving selections as alpha channels” (page 607)
Viewing and modifying selections
•“Working with the Selection Portfolio” (page 610)
•“Viewing selections” (page 610)
•“Inverting selections” (page 611)
•“Softening the edges of selections” (page 612)
•“Stroking selections” (page 612)
•“Modifying the borders of selections” (page 613)
•“Expanding or contracting selections” (page 614)
•“Adding to or subtracting from selections” (page 614)
Transforming selections
•“Preparing selections for transformations” (page 615)
•“Moving selections” (page 616)
•“Transforming a duplicate selection” (page 617)
•“Scaling and rotating path-based selections” (page 617)
•“Skewing and distorting path-based selections” (page 619)
•“Canceling transformations” (page 621)

594 | Corel Painter 2022 User Guide
Getting started with selections
You can use selections to isolate an area of the canvas to apply effects or transformations, while protecting the unselected areas from the
changes.
Selection types
Corel Painter supports two types of selections: path-based and pixel-based. The method that you use to create a selection determines its
type.
• Path-based selections are defined by a closed path, for example a circle or a square. You can make path-based selections by using the
Rectangular Selection, Oval Selection, Lasso tool, or by converting a shape. Path-based selections support many transformations that
pixel-based selections do not. In addition, it’s the only type of selection that you can store in the Selection Portfolio.
• Pixel-based selections are defined at the pixel level. You can create a pixel-based selection by using the Magic Wand tool. Corel Painter
also includes options for auto-generating selections based on various image or clone characteristics.
You can covert a pixel-based selection to a path-based selection. For more information, see “To convert a pixel-based selection to a path-
based selection” on page 603.
Selection methods
The following table describes the various methods for using selections.
To Description
Constrain brushstrokes Protects the area inside or outside the selection from painting
Transform Moves, scales, rotates, skews, or distorts an area
Apply an image effect Applies an effect to only an isolated area. You can also set different
levels of protection within a selection to create partial intensity of
the effect.
Cut or copy Removes, moves, or duplicates an area
Copy to a new layer Copies or moves an area to a new layer
Stroke the selection Applies a brushstroke along a selection’s border
Create a channel Saves a selection to a channel
Selection tools
The following table describes all of the available selections tools.
Tool Description
Rectangular Selection Creates rectangular and square selections
(path-based). For more information, see “To
Selections and transformations | 595
make a rectangular or square selection” on
page 602.
Oval Selection Creates oval selections (path-based). For
more information, see “To make an oval or
a circular selection” on page 602.
Lasso tool Creates freehand selections (path-based).
For more information, see “Make a
freehand selection” on page 603.
Polygonal Selection tool Selects an area based on different points
set in an image which are anchored by
straight line segments (path-based). For
more information, see “Make a freehand
selection with straight-edged segments” on
page 603.
Magic Wand tool Selects pixels of similar color by clicking
or dragging in an image (pixel-based). For
more information, see “To select an area
by using the Magic Wand tool” on page
604.
Selection Brush tool Lets you create a freehand selection by
painting. For more information, see “To
make a freehand selection by painting” on
page 598.
Transform tool Modifies path-based selections by using
different transformation modes
Selection Adjuster tool Selects, moves, and manipulates path-based
selections
Selection brushes
Selection brushes let you create freehand selections by painting. Explore the collection of Selection brush variants in Corel Painter to find
some useful brushes or create your own custom variants. For more information, see “Selecting areas by painting” on page 596 and
Selection brushes
Selection storage
In Corel Painter, each new selection automatically replaces the current selection, therefore, you need to store a selection in order to reuse it.
Corel Painter includes two options for storing the selections that you want to reuse.
Option Description
Alpha channels Stores both path-based and pixel-based selections for the current
document. You can modify alpha channels by combining them with
the current selection.
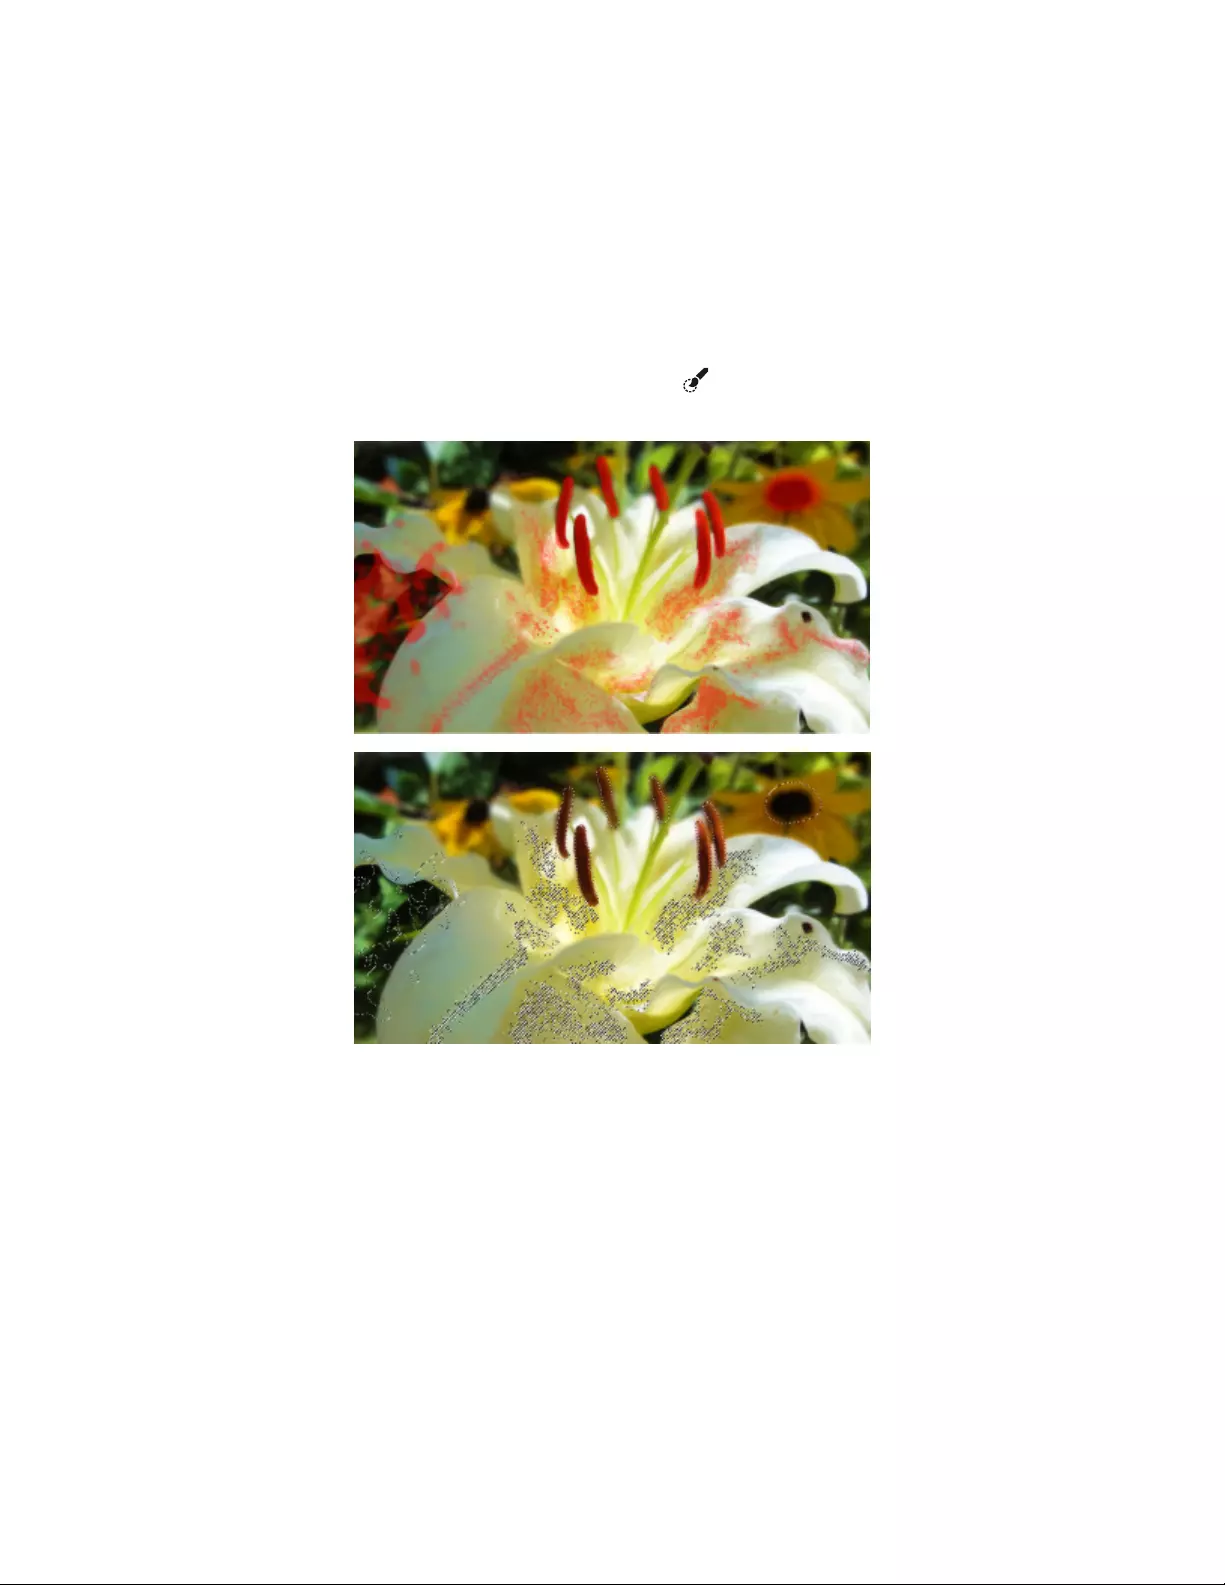
596 | Corel Painter 2022 User Guide
Option Description
Selection Portfolio Stores path-based selections in a library to make them accessible
from any document
Selecting areas by painting
You can create a freehand selection by painting with the Selection Brush tool or any brush variant that uses the Selection method.
Use Corel Painter’s interactive and dynamic brush shapes to quickly generate new, additive, or subtractive selections.
Examples of selections created with Selection brush variants using different dab types
You can choose a Selection brush from the preset selection brushes available in Corel Painter or create your own custom brush from any
brush that uses the following dab types: Circular, Computed Circular, Captured, Single-Pixel, Static Bristle, Dynamic Speckle Bristle, and
Dynamic Speckle Particle types (Flow, Gravity, and Spring). Selection brushes support grain and opacity, and work with all other selection
tools.
You can customize Selection brushes by using brush controls. For more information, see “Adjusting brushes with brush controls” on page
337.
As you brush over an image to make a selection, a color overlay appears, to help you distinguish selected areas from protected areas. By
default, the overlay is a red-tinted, transparent sheet. However, if your underlying brushstrokes are red, you can change the overlay color
so that the overlay can be seen clearly against the image colors. You can adjust the overlay opacity, and you can also choose to display the
overlay over selected or protected areas.
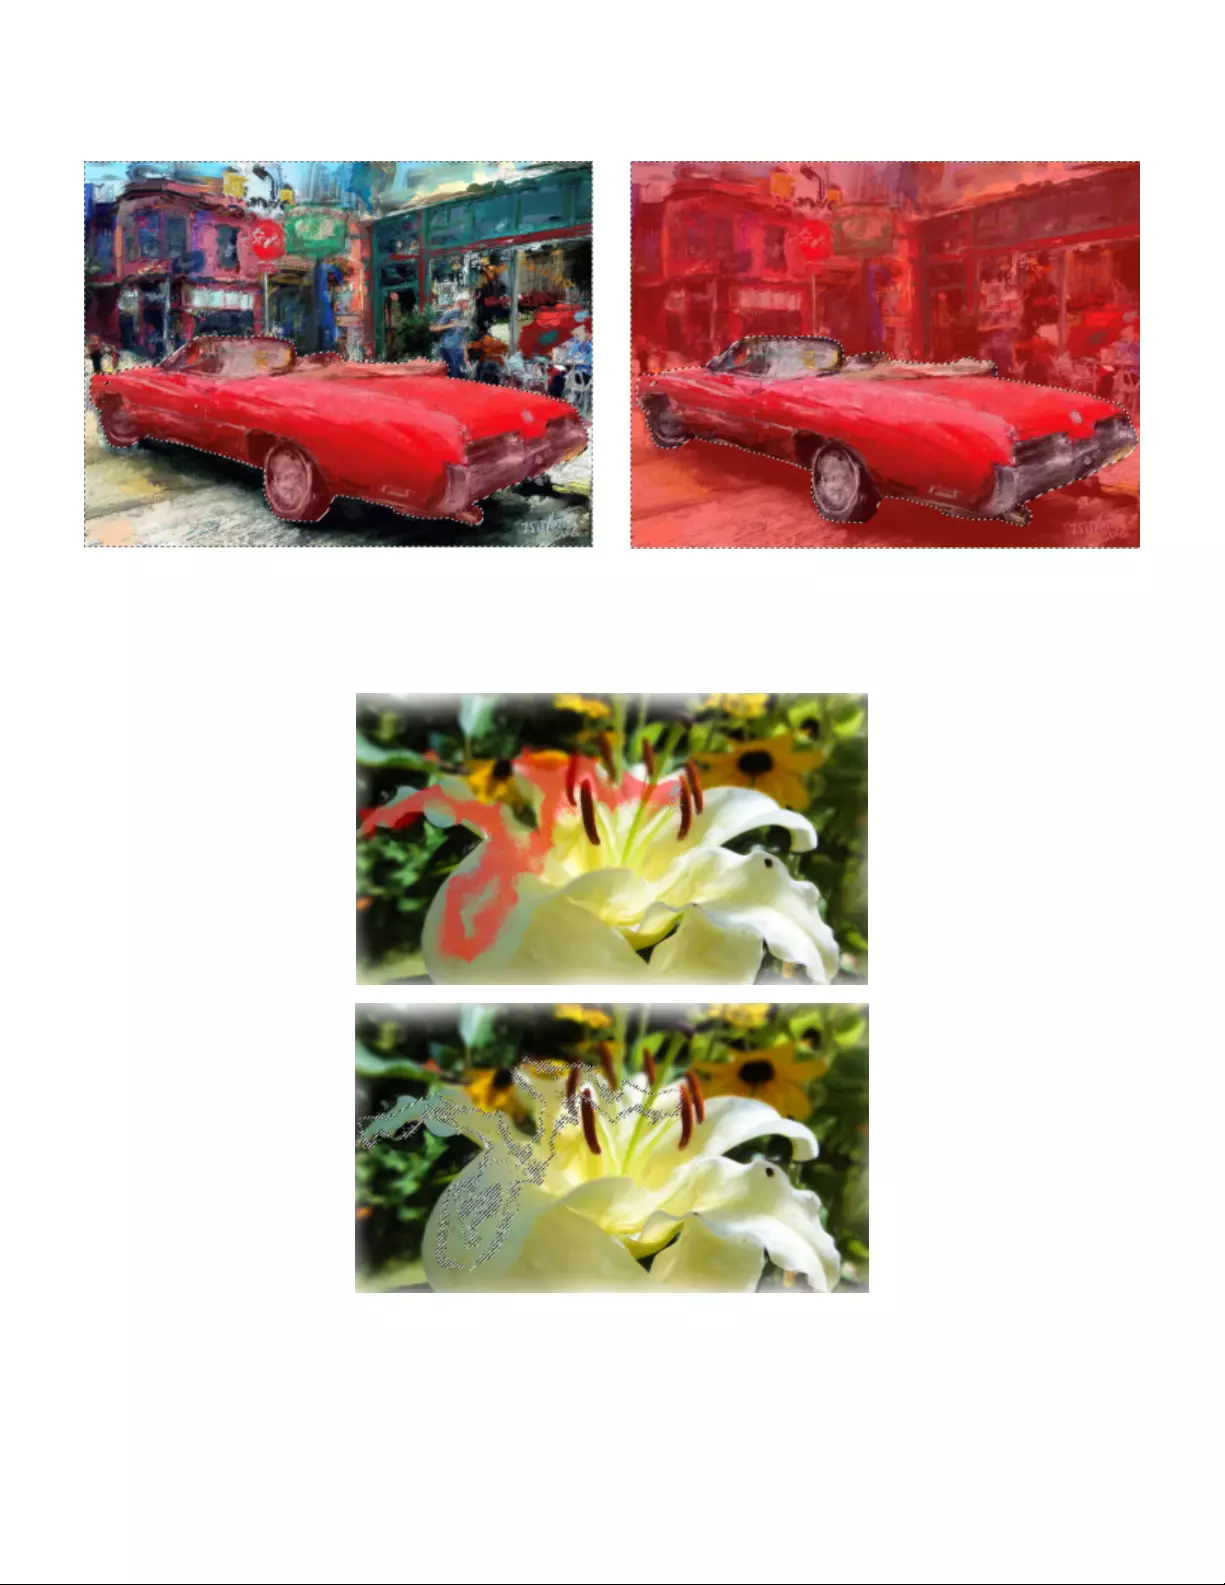
Selections and transformations | 597
You can display the overlay over selected (left) or protected (right) areas. Artwork by Jeremy Sutton
By default, the overlay is no longer visible after you complete a selection. Instead, a dashed outline — marquee — appears around the
selection to indicate the border separating the selected area from the protected area. If you find it useful to have the color overlay visible at
all times, you can easily display it.
The overlay that appears as you paint (top) and the marquee that appears when you
complete the selection (bottom) help you distinguish protected areas from editable areas.
When painting with a Selection brush, you can automatically align brushstrokes to a curve. For more information about aligning
brushstrokes to paths and shapes, see “Aligning brushstrokes to paths and shapes” on page 166.
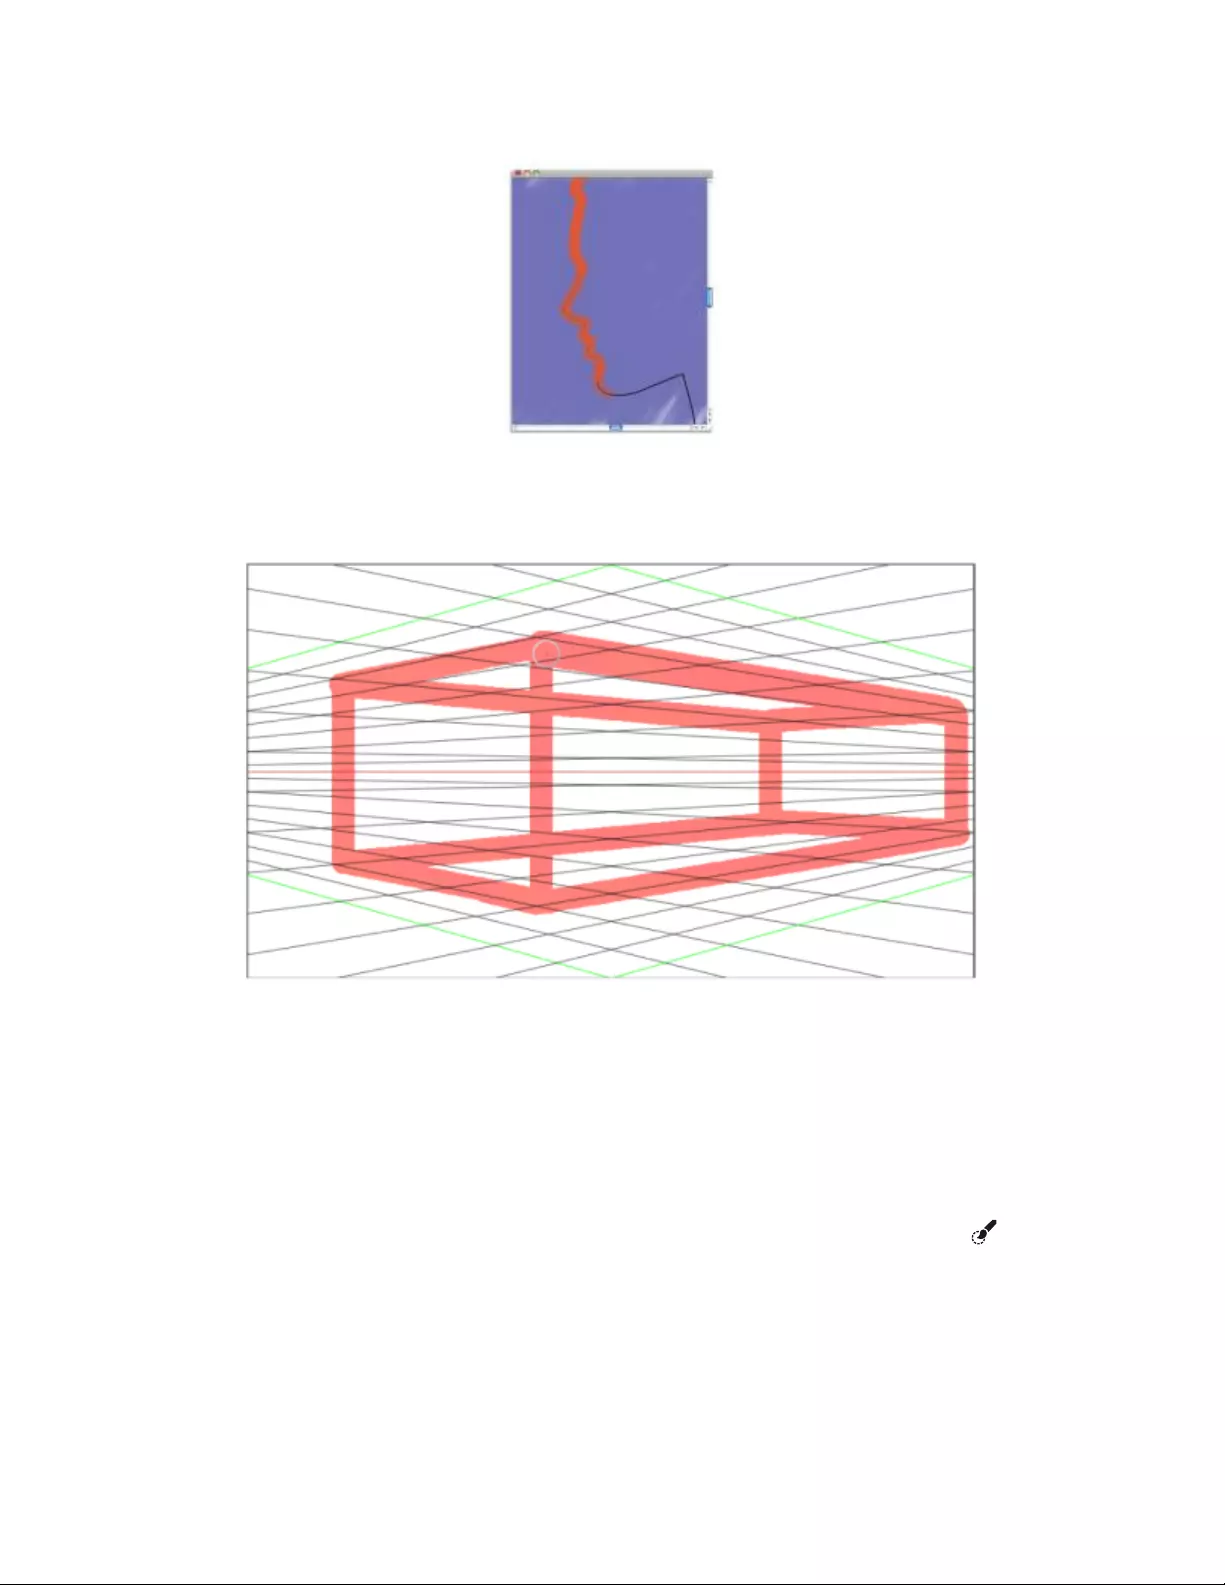
598 | Corel Painter 2022 User Guide
An example of a selection aligned to a curve
When painting with a Selection brush, you can align brushstrokes to perspective guides. For more information about perspective guides, see
“Using perspective guides” on page 236.
An example of a selection aligned to perspective guides
To make a freehand selection by painting
1Perform a task from the following table.
To Do the following
Select an area with the Selection Brush tool In the toolbox, click the Selection Brush tool .
Select an area with a Selection brush Click the Brush Selector on the Brush Selector bar. Click a brush
category, and a choose a brush variant that uses the Selection
method.
2Paint in the document to select the area you want.
Selections and transformations | 599
You can also
Choose a brush tip profile Click the Dab Options button on the property bar, and
choose a dab profile.
For more information about dab profiles, see “Changing dab
profiles” on page 368.
Set dab opacity Move the Opacity slider on the property bar.
The lower the opacity, the fewer pixels are selected.
Note: If you are painting with a brush that uses the Add to
Selection (Glazing) method, brushstrokes with opacity lower than
50% produce no marks.
For more information about opacity, see “Opacity controls” on
page 354.
Set grain Move the Grain slider on the property bar.
For more information about grain, see “Grain controls” on page
356.
To save a selection, click the Save Selection button on the property bar. For more information about saving selections, see
“Saving selections as alpha channels” on page 607.
To replace the active selection, click the New Selection button on the property bar.
You can also add to or subtract from a selection. For information, see “Adding to or subtracting from selections” on page 614.
To customize a Selection brush
1In the Brush Selector panel (Window Brush Selector Panel (Full View)), choose a brush with one of the following dab types:
Circular, Computed Circular, Captured, Single-Pixel, Static Bristle, Dynamic Speckle Bristle, and Dynamic Speckle Particle types (Flow,
Gravity, and Spring).
2In the General panel (Window Brush Control Panels General), choose Selection from the Method list box.
3From the Subcategory list box, choose one of the following categories:
•New Selection — creates a new selection
•Add to Selection — As the dab opacity builds up quickly, pixels are added quickly to a selection.
•Add to Selection (Glazing) — The dab opacity never exceeds the maximum value that you have specified, regardless of how many
times you brush over the same area in a single brushstroke or how many brushstrokes you apply to the same area. If the opacity is
below 50%, no pixels are selected.
•Add to Selection (Alpha Blend) — The opacity builds up very slowly when you brush over the same area in a single brushstroke.
•Subtract from Selection — subtracts from an existing selection
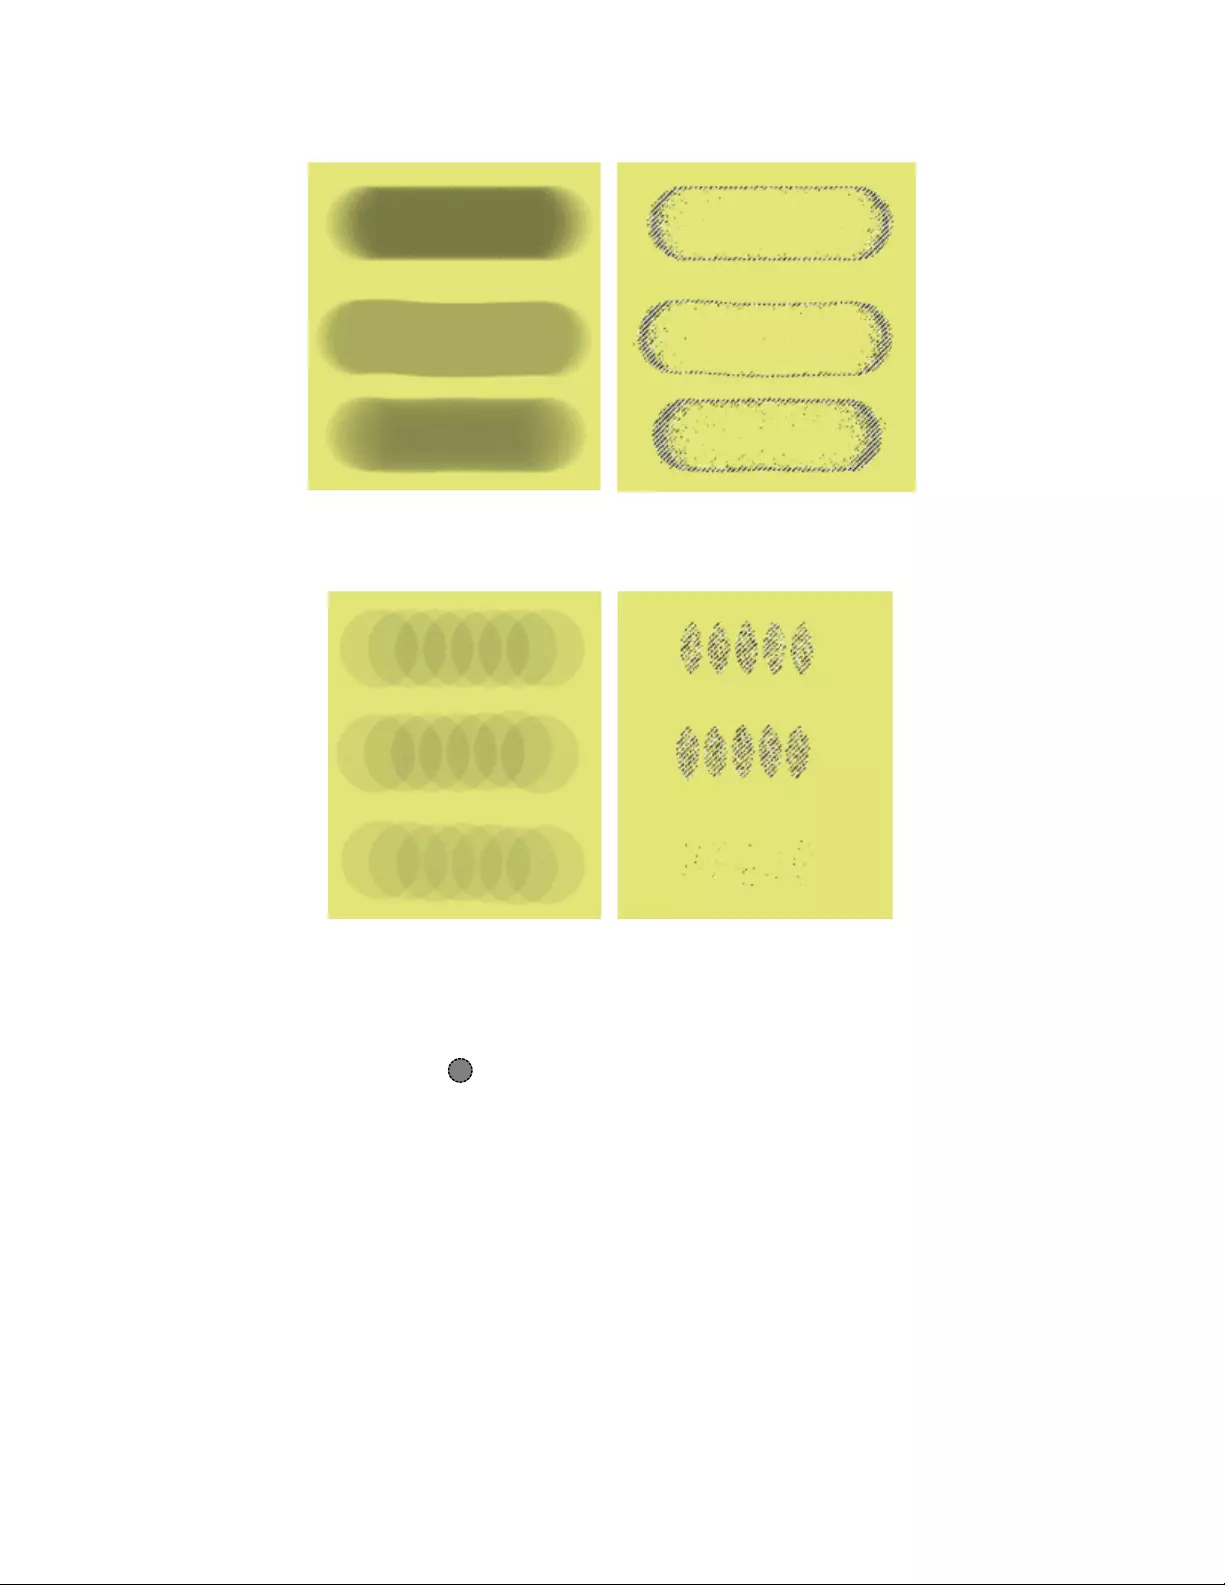
600 | Corel Painter 2022 User Guide
Brushstrokes (left) and resulting selections (right) created with a Selection brush using the
following methods: Add to Selection (top), Add to Selection (Glazing) (middle), Add to Selection
(Alpha Blend) (bottom). Opacity is set to 55%; Spacing is set to 14%; Grain is at 100%.
When the dabs are spaced out, pixels are selected only in the areas where the dabs overlap. Brushstrokes (left) and resulting
selections (right) created with a Selection brush using the following methods: Add to Selection (top), Add to Selection
(Glazing) (middle), Add to Selection (Alpha Blend) (bottom). Opacity is set to 55%; Spacing is set to 70%; Grain is at 100%.
To set selection display options
1Click the Selection Display Options button on the property bar.
2Perform a task from the following table.
To Do the following
Set the overlay color Click the color picker, and choose a color.
Set the overlay opacity Move the Opacity slider.
Overlay a selected area Choose Selected area from the Overlay list box.
Overlay a protected area Choose Masked area from the Overlay list box.
Selections and transformations | 601
To Do the following
View the overlay after you complete a selection Disable the Hide Overlay check box.
To align a selection brushstroke to a curve
1Open or create a document.
2Click the Quick Curve tool in the toolbox, and drag to create a curve.
If you prefer, you can access the Quick Curve tool by pressing Q.
3In the Brush Selector panel (Window Brush Selector Panel (Full View)), click a Selection brush.
4Click the Stroke Options flyout button on the property bar, and click the Align to Path button .
5Paint near the curve.
If the brushstrokes are within the tolerance area, they follow the curve; if they are outside the tolerance area, no brushstrokes are
applied.
To align a selection brushstroke to perspective guides
1Open or create a document.
2In the toolbox, click the Perspective Guides tool .
If you prefer, you can access the Perspective Guides tool by pressing the period key.
3Click the Perspective Guides check box on the property bar.
4Choose a preset from the Preset drop-down list.
5In the Brush Selector panel (Window Brush Selector Panel (Full View)), click a Selection brush.
6Paint in the document window.
To turn off snapping to perspective guides, hold down Shift as you paint.
Creating path-based selections
You can create path-based selections that are rectangular or oval. If you need more flexibility, you can create freehand selections by using the
Lasso or the Polygonal Selection tools. The Lasso tool creates selections based on freehand segments. The Polygonal Selection tool selects
an area with more precision by setting different points on the image and anchoring them using straight-line segments.
You can apply transformations only to path-based selections. However, you can convert any pixel-based selections to path-based selections
in order to perform transformations. It’s important to note that when converting a pixel-based selection, the modified selection is reduced to
only two levels of protection: the inside or the outside of the selection is protected. For more information, see “Choosing the protected area
of a selection” on page 607.
In addition, if you select multiple layers prior to performing a transformation on a path-based selection, the transformation applies to the
selected area across any layers that are currently selected. For example, if you select a layer group, the selection and transformation is applied
to all layers within that group. Therefore, make sure to select only the desired layers before performing a transformation.
You can also select the entire canvas or create path-based selections by converting shapes or pixel-based selections. Converting a shape to
create a path-based selection is useful for selecting an area that is identical to an existing shape or text.

602 | Corel Painter 2022 User Guide
To make an oval or a circular selection
1Choose Window Layers.
2In the Layers panel, do one of the following:
• Click a layer.
• Click a layer group.
• Hold down Command + Shift (macOS) or Ctrl + Shift (Windows), and click each layer you want to select.
3Perform a task from the following table.
To select Do the following
An oval area Choose the Oval Selection tool from the toolbox. Drag in the
document window to select an area.
A circular area Choose the Oval Selection tool from the toolbox. While
dragging the selection in the document window, hold down the
Shift key.
Whenever you create a selection, Corel Painter deactivates the previous selection.
To make a rectangular or square selection
1Choose Window Layers.
2In the Layers panel, do one of the following:
• Click a layer.
• Click a layer group.
• Hold down Command + Shift (macOS) or Ctrl + Shift (Windows), and click each layer you want to select.
3Perform a task from the following table.
To select Do the following
A rectangular area Choose the Rectangular Selection tool from the toolbox.
Drag in the document window to select an area.
A square area Choose the Rectangular Selection tool from the toolbox.
While dragging the selection in the document window, hold down
the Shift key.
To make a freehand selection
1Choose Window Layers.
2In the Layers panel, do one of the following:
• Click a layer.
• Click a layer group.
Selections and transformations | 603
• Hold down Command + Shift (macOS) or Ctrl + Shift (Windows), and click each layer you want to select.
3Perform a task from the following table.
To Do the following
Make a freehand selection Choose the Lasso tool from the toolbox. Draw a freehand
border around the area that you want to select in the document
window.
Make a freehand selection with straight-edged segments Choose the Polygonal Selection tool from the toolbox. Click
where you want to set the anchor points of the polygon selection,
and double-click to set the last anchor point.
If you draw an open path with the Lasso tool , the endpoints are connected automatically with a straight line before the
selection is created.
To select the entire canvas
•Choose Select All.
To convert a shape to a selection
1Select the shape that you want to convert.
The shape must be closed.
2On the property bar, click the Convert To Selection button .
The outline of the shape creates the selection path. Everything within the outline is fully selected.
You can also convert the current selection to a shape. For more information, see “To convert a selection to a shape” on page
775.
To convert a pixel-based selection to a path-based selection
1Create a pixel-based selection.
For more information, see “Creating pixel-based selections” on page 603.
2Choose Select Transform Selection.
Corel Painter generates paths from the outlines of the pixel-based selection. You can now use the Transform tool for
transformations.
Creating pixel-based selections
Corel Painter offers various methods for making pixel-based selections. The Magic Wand tool selects groups of pixels according to
color. You can adjust the settings to control the range of colors, and you can also choose to include only adjacent colors (contiguous) or only
nonadjacent colors (noncontiguous).
604 | Corel Painter 2022 User Guide
In addition, there are ways to auto-generate pixel-based selections by using various image, clone, and color characteristics. For example, you
can create a selection based on the luminance values of a clone.
Pixel-based selections provide 256 levels of protection to the canvas. Each pixel in the selection sets a level of protection for its corresponding
color pixel in the RGB image. Opaque areas of the selection provide 100% protection and prevent brushstrokes and effects from marking the
canvas. Clear areas of the selection provide no protection and allow brushstrokes and effects to mark the canvas. Brushstrokes and effects
are partially applied to areas where the selection is shaded or semitransparent. As a result, you can paint and apply effects with varying levels
of intensity within a selection.
You can move pixel-based selections, but you cannot resize or rotate them. To apply transformations to pixel-based selections, convert any
pixel-based selections into path-based selections. For more information, see “To convert a pixel-based selection to a path-based selection” on
page 603.
To select an area by using the Magic Wand tool
1In the toolbox, click the Magic Wand tool .
2On the property bar, adjust the Tolerance slider to control the amount of variance allowed from the selected color with higher values
creating a larger range of colors.
3In the document window, do one of the following:
• Click to select the color in the middle of the range of colors that you want to use for the selection.
• Click and drag over an area to define the range of colors that you want to use for the selection.
It may take a moment for the selection to be calculated and loaded.
You can also
Create a selection with contiguous pixels On the property bar, click the Contiguous button.
Create a new selection On the property bar, click the New Selection button and click
in the document window.
Add to the current selection On the property bar, click the Add To Selection button and
click the areas you want to add.
Remove an area from the current selection On the property bar, click the Subtract From Selection button
and click the areas you want to add.
The default tolerance for selections is 32. This can be adjusted from 1 to 255.
If you add to the current selection, you add to the range of values that the Magic Wand tool selects rather than create an
additional selection with a unique seed color.
You can restrict a selection to a rectangular area by pressing Option + Shift (macOS) or Alt + Shift (Windows), and dragging a
bounding rectangle in your image.
You can restore the default settings by clicking the Reset Tool button on the property bar.
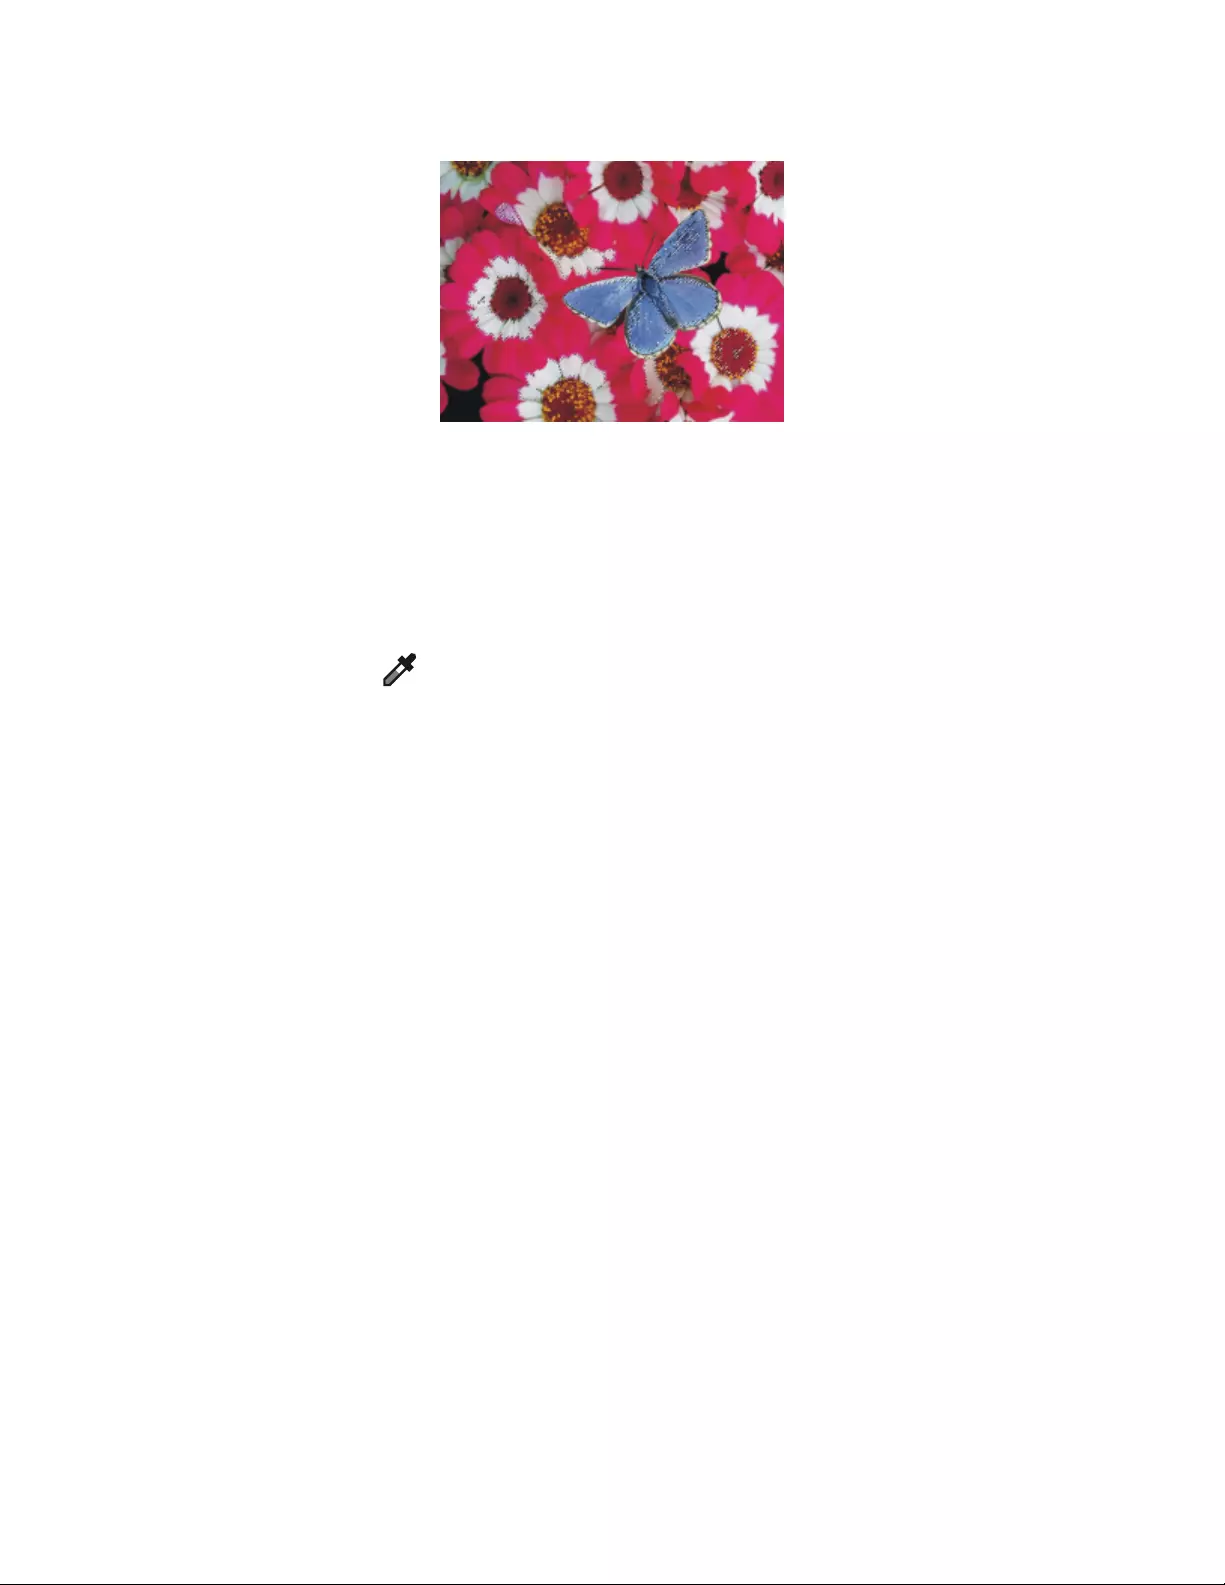
Selections and transformations | 605
Adding to a selection by using the Magic Wand tool
To auto-generate a selection based on image characteristics
1Choose Select Auto Select.
2From the Using list box, choose one of the following options:
•Paper — creates a selection by using the current paper texture
•Image Luminance — creates a selection based on the light and dark areas of the current image
•Current Color — creates a selection of pixels based on the current main color. Before using this option, you can pick a color from the
image by using the Dropper tool .
If you want to invert the selection, enable the Invert check box.
To auto-generate a selection based on clone characteristics
1Open or create an image.
2In the Clone Source panel (Window Clone Source), choose Embedded Image from the Source list box. In the Embed Source Image
dialog box, do one of the following:
• To browse for a file, enable the Browse option.
• To clone a currently open document, enable the Current Document option, and choose a document from the list box.
• To embed the active texture, enable the Current Texture option.
3Choose Select Auto Select.
4From the Using list box, choose one of the following:
•3D Brush Strokes — creates a selection that is based on the difference between the current image and the clone source. If no clone
source is selected, the current pattern is used.
•Original Luminance — produces a selection in the current document based on the light and dark areas of the clone source. If no
clone source is selected, the current pattern is used.
If you want to invert the selection, enable the Invert check box.
To auto-generate a color-based selection
1Choose Select Color Select.
2Click in the document window to pick a color.
3In the Color Select dialog box, move the Range sliders in the Hue, Saturation, and Value areas.
These sliders control the selected range of colors.
4Move the Feather sliders in the Hue, Saturation, and Value areas.
Feathering helps soften the selection edge.
5The Preview window shows the selected area as a red overlay on the image. Drag in the Preview window to see other parts of the
document.

606 | Corel Painter 2022 User Guide
Creating selections from layers
You can create a selection from a layer, multiple layers, or layer group. Selections from layers are based on layer transparency. When a
layer contains transparent areas, only the areas with content are selected. You can add the content of a layer, or layer group, to a previous
selection. To modify a layer-based selection, you can subtract or intersect the content of a layer, or layer group, with a previous selection.
Intersecting includes only those parts that are common to all selected layers.
To create a selection from a layer
1In the Layers panel, click a layer.
2Perform a task from the following table.
To Do the following
Select the content of a layer In the Layers panel, hold down Ctrl, and click the name of the layer
that you want to select.
Tip: You can also select the content of a layer by clicking the layer
in the Layers panel, and choosing Select Select Layer Content.
Select the content of a group of layers In the Layers panel, hold down Ctrl, and click the name of the layer
group that you want to select.
Tip: You can also select the content of a layer group by clicking the
group in the Layers panel, and choosing Select Select Group
Content.
Select the content of multiple layers In the Layers panel, hold down Ctrl, and click the first layer that
you want to select. Hold down Shift + Ctrl, and click the layers
that you want to add to the selection.
Tip: You can also select the content of multiple layers by selecting
the layers in the Layers panel, and choosing Select Select Layer
Content.
Add content of a layer or layer group to a selection In the Layers panel, hold down Shift + Ctrl, and click the layer that
you want to add.
Subtract the content of a layer or layer group from a selection In the Layers panel, hold down Control + Option (macOS) or Alt
+ Ctrl (Windows), and click the layer that you want to subtract.
Intersect the content of a layer or layer group with a selection In the Layers panel, hold down Shift + Option + Control (macOS)
or Shift +Alt + Ctrl (Windows), and click the layer that you want
to intersect.
Create a selection from a dynamic, shape, or text layer In the Layers panel, right-click the dynamic, shape, or text
layer, and choose Convert To Default Layer. Choose Select
Load Selection. In the Load Selection dialog box, choose the

Selections and transformations | 607
To Do the following
transparency of the selected layer from the Load From list box, and
enable the Replace Selection option.
Transparent areas on layers are excluded from layer-based selections.
You can also create a selection from a layer by choosing Load Selection from the Select menu. In the Load Selection dialog box,
choose the transparency of the selected layer from the Load From list box, and enable the Replace Selection option.
Choosing the protected area of a selection
The drawing mode determines whether the inside or the outside of a selection is protected when you paint.
To specify the protected area of a selection
1Choose Window Navigator.
2Click the Open Navigator Settings button , choose Drawing Mode, and then choose one of the following options:
•Draw Anywhere — disables protection by the selection. Brushstrokes are allowed anywhere on the canvas. The selection is active only
for applying effects and using the Cut or Copy command.
•Draw Outside — protects the area inside the selection
•Draw Inside — protects the area outside selection. This drawing mode is similar to using a stencil in that only the selected region
accepts brushstrokes.
Saving selections as alpha channels
You can create alpha channels to store multiple selections in a document. An alpha channel is a temporary storage area for both path-based
and pixel-based selections. To reuse a selection in other documents, you can store the selection in the Selection Portfolio. It is important
to note that the Selection Portfolio stores only path-based selections. For more information see, “Working with the Selection Portfolio” on
page 610.
You can create an alpha channel from the current selection to copy its editable and protected areas. You can also combine a new selection
with one that was previously stored in an alpha channel. To reactivate a selection that was previously saved as an alpha channel, simply load
it in the image. Loading a selection reactivates it on the canvas, where it controls painting and image effects.
Combining selections when saving or loading alpha channels
When you save or load alpha channels, you can combine the current selection with an existing alpha channel by adding, subtracting, or
intersecting with the selection. Adding to a selection combines it with the existing channel. Subtracting a selection cuts it out of the existing
channel. When intersecting a selection, you include only those parts that are common to the selection and the existing channel.
In the following set of owl images, the artist created and saved selections for each area that she wanted to work with separately — the eyes,
the beak, and the outline. To show the selections clearly in these images, the selections were saved to channels, reloaded, and displayed as
red overlays. For more information, see “To view or hide a channel” on page 588.
The following images show the step-by-step creation of a precise “face” selection that excludes the beak and eyes. The purpose of the
precise selection of the face is to control the brushstrokes and constrain effects.
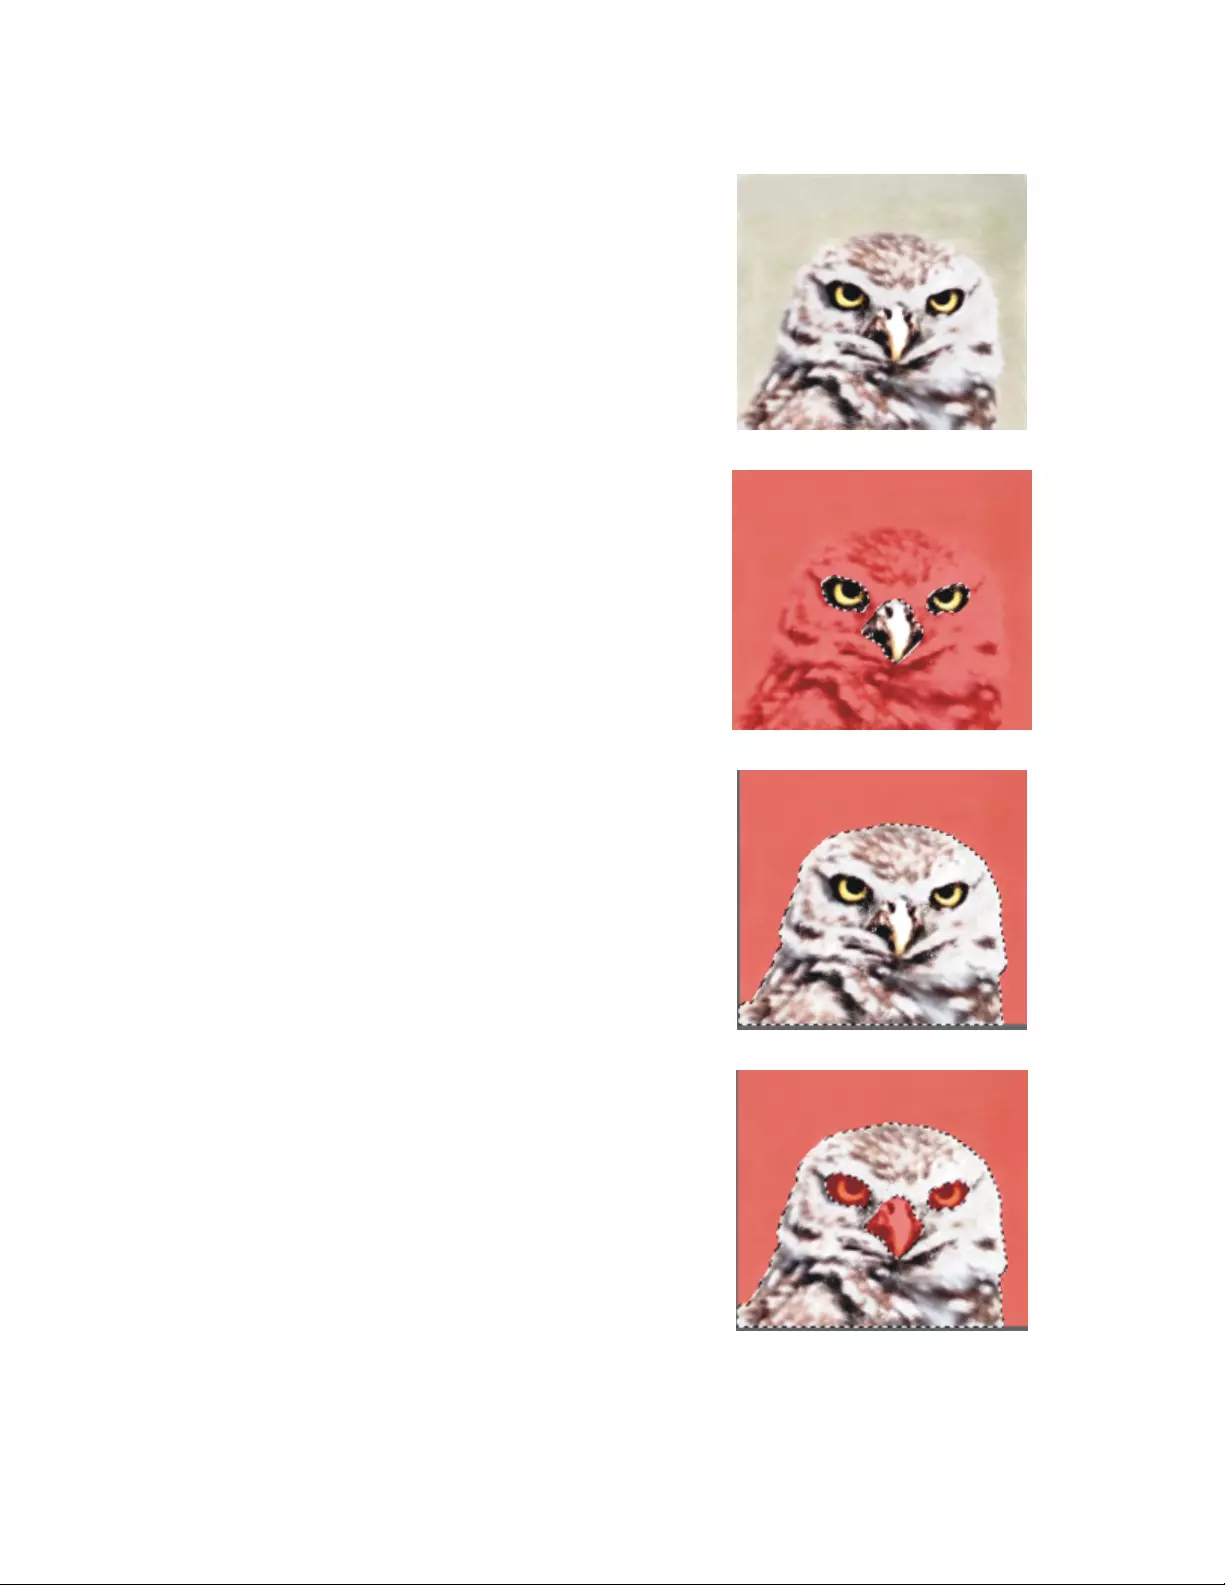
608 | Corel Painter 2022 User Guide
The image
The eye and beak channels (saved selections) are loaded and
added. The combined selection is saved to the “eyebeak” channel.
The “outline” channel is loaded.
The “eyebeak” channel is loaded and subtracted from the “outline”
channel. The resulting selection is saved to the “head” channel.
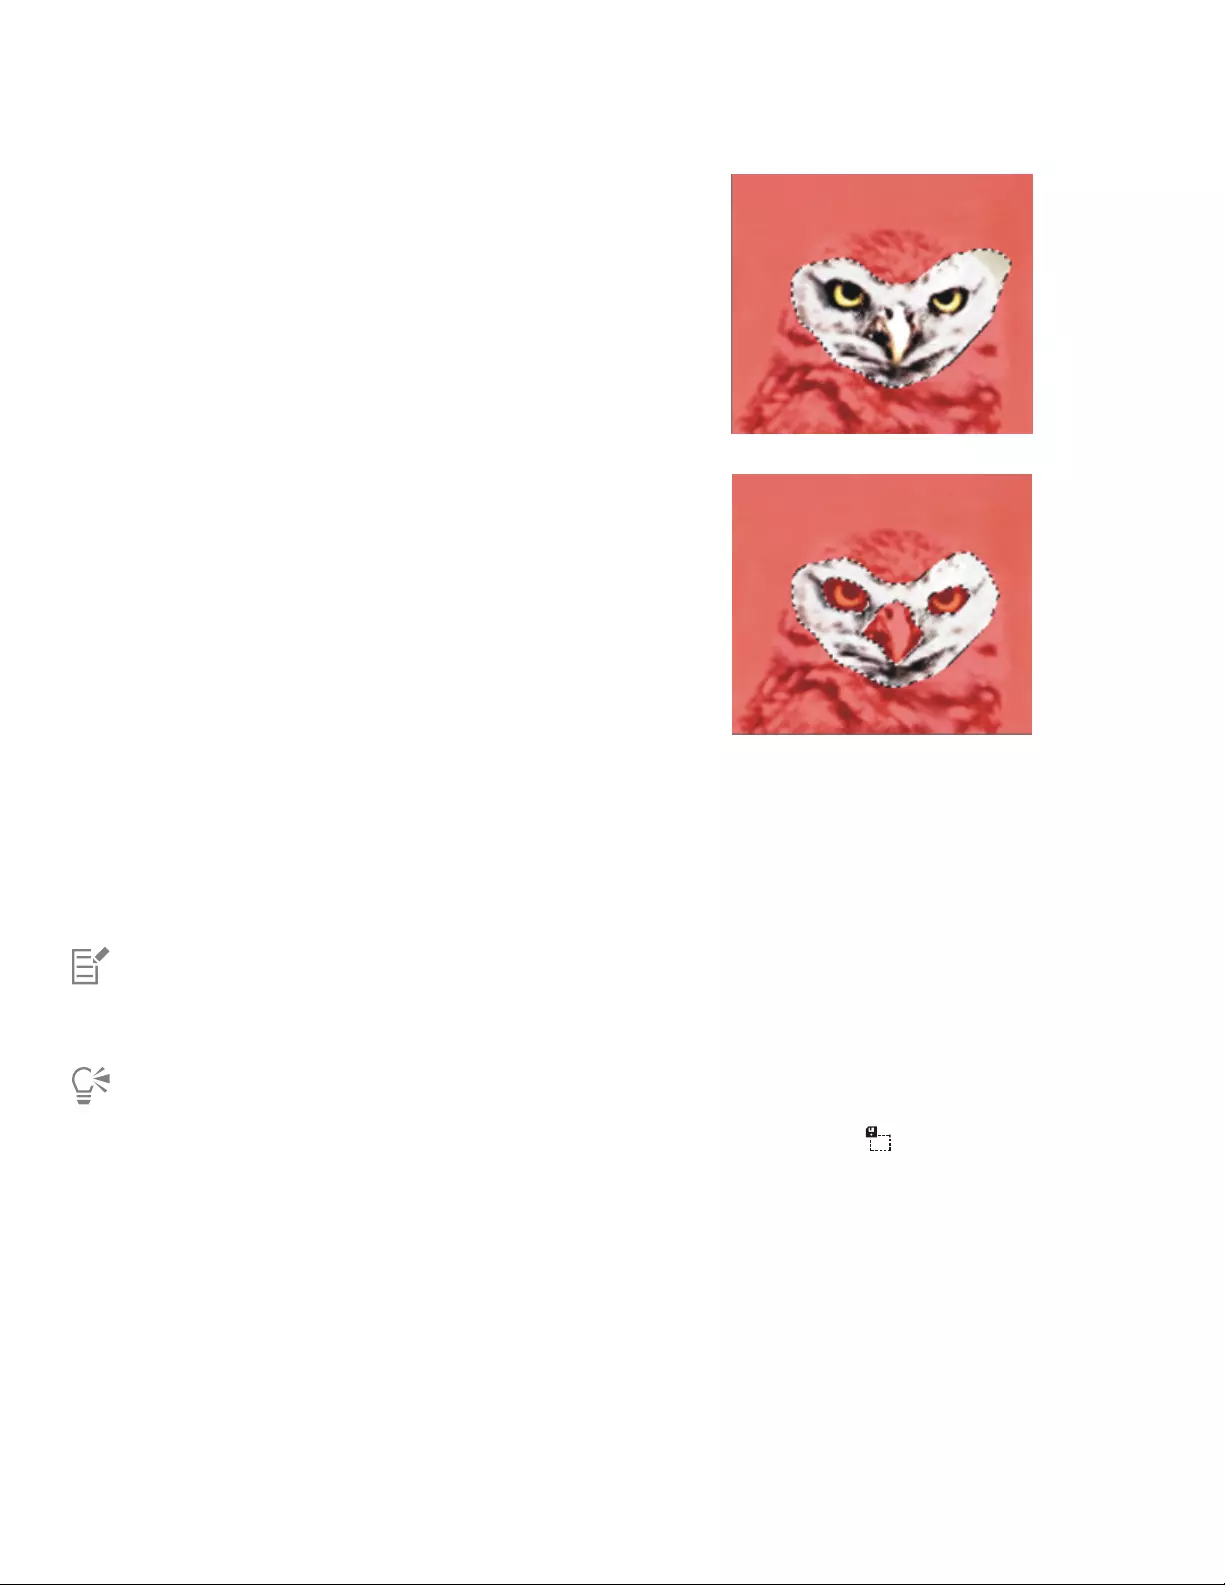
Selections and transformations | 609
A “face” selection is drawn roughly by using the Lasso tool. The
eyes, the beak, and a portion of the background are included.
The “head” channel (the outline with eyes and beak subtracted) is
loaded and intersected with the rough “face” selection. This step
removes the eyes, beak, and background portion. The resulting
selection is saved to the “face” channel.
To save a selection to a new alpha channel
1Create a selection.
2Choose Select Save Selection.
3Choose New from the Save To list box.
If you want to specify a name, type a name in the Name box.
Alpha channels are pixel based, therefore, any path-based selections are saved as pixel-based selections.
If you do not specify a name, the new channel is named incrementally with the previous channel: Alpha1, Alpha2, and so on.
You can also save a selection to a channel by clicking the Save Selection As Channel button in the Channels panel.
To combine a selection with an existing alpha channel
1Create a selection.
2Choose Select Save Selection.
3Choose a channel from the Save To list box.
4In the Operation area, enable one of the following options:
•Replace Mask — replaces the channel with the current selection
•Add to Mask — combines the current selection with the chosen channel
•Subtract From Mask — subtracts the current selection from the chosen channel
•Intersect With Mask — determines the intersection of the selection and the chosen channel, and saves the intersection to the channel

610 | Corel Painter 2022 User Guide
You can also save a selection to a channel by clicking the Save Selection As Channel button in the Channels panel.
To load a selection from an alpha channel
1Choose Select Load Selection.
2Choose a channel from the Load From list box.
3In the Operation area, enable one of the following options:
•Replace Selection — replaces the current selection with the chosen channel
•Add To Selection — adds the channel to the current selection
•Subtract From Selection — subtracts the channel from the current selection. In other words, the channel is “cut away” from the
selection.
•Intersect With Selection — determines the intersection of the channel and the current selection. This intersection becomes the new
selection.
You can also load a selection from an alpha channel by clicking the Load Channel As Selection button in the Channels
panel.
Working with the Selection Portfolio
You can store any of the path-based selections that you want to reuse in the Selection Portfolio, which is a library for storing selections. You
can add your selections to the default library, or create your own library. For more information, see “Working with libraries” on page 88. You
can also browse and use any of the available sample selections in the Selection Portfolio.
To store a selection in the portfolio
1Create the path-based selection you want to store.
2Choose Window Media Panels Selections.
3In the toolbox, click the Selection Adjuster tool .
4In the Selection Portfolio panel, click the Selection Portfolio options button , and choose Add Selection To Portfolio.
5In the Save Selection dialog box, type a name for the selection.
To use a selection from the portfolio
• Double-click a selection in the Selection Portfolio panel.
The selection replaces the previous selection and appears in its original position on the canvas, provided that the document dimensions
are the same.
Viewing selections
You can turn a selection off and reactivate it later. In addition, options are available for controlling the display of the selection marquee,
which is the visible border of the selection.
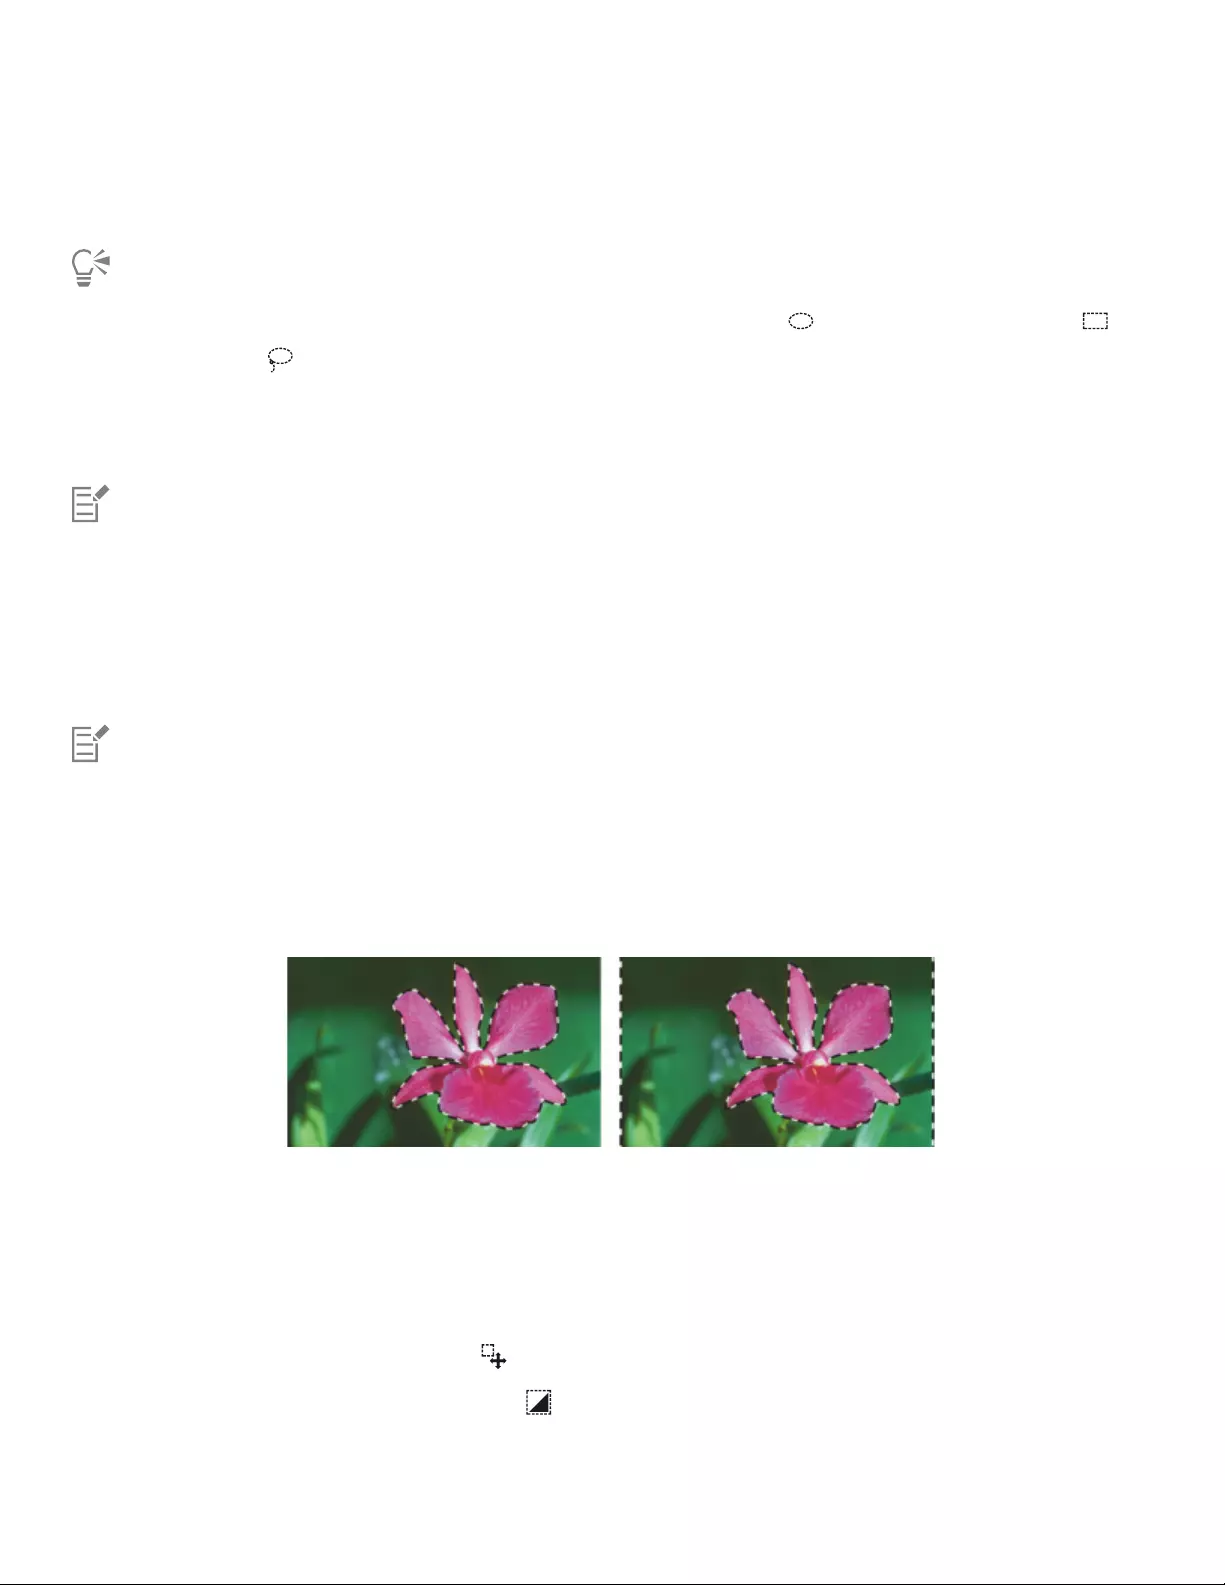
Selections and transformations | 611
To turn off a selection
•Choose Select None.
You can also turn off a selection by clicking outside it with the Oval Selection tool , the Rectangular Selection tool , or
the Lasso tool .
To reactivate a selection
•Choose Select Reselect.
This command is available only if you have previously turned off a selection.
To hide or show the selection marquee
• From the menu bar, choose one of the following:
•Select Hide Marquee.
•Select Show Marquee.
The drawing mode remains in effect even when the marquee is hidden. For more information, see “Choosing the protected area of
a selection” on page 607.
Inverting selections
You can invert a selection, which deselects the previously selected area and selects the previously unselected area.
The marquee indicates that the flower is selected (left). After inverting the selection, the marquees,
that surround both the canvas and the flower, indicate that everything but the flower is selected (right).
A pixel-based selection can include 256 values, like a grayscale image. An inverted pixel-based selection is equivalent to the negative of a
grayscale image. For example, a pixel that has 80% luminance will have 20% luminance when inverted.
To invert a selection
1In the toolbox, click the Selection Adjuster tool , and then click a selection.
2On the property bar, click the Invert Selection button .
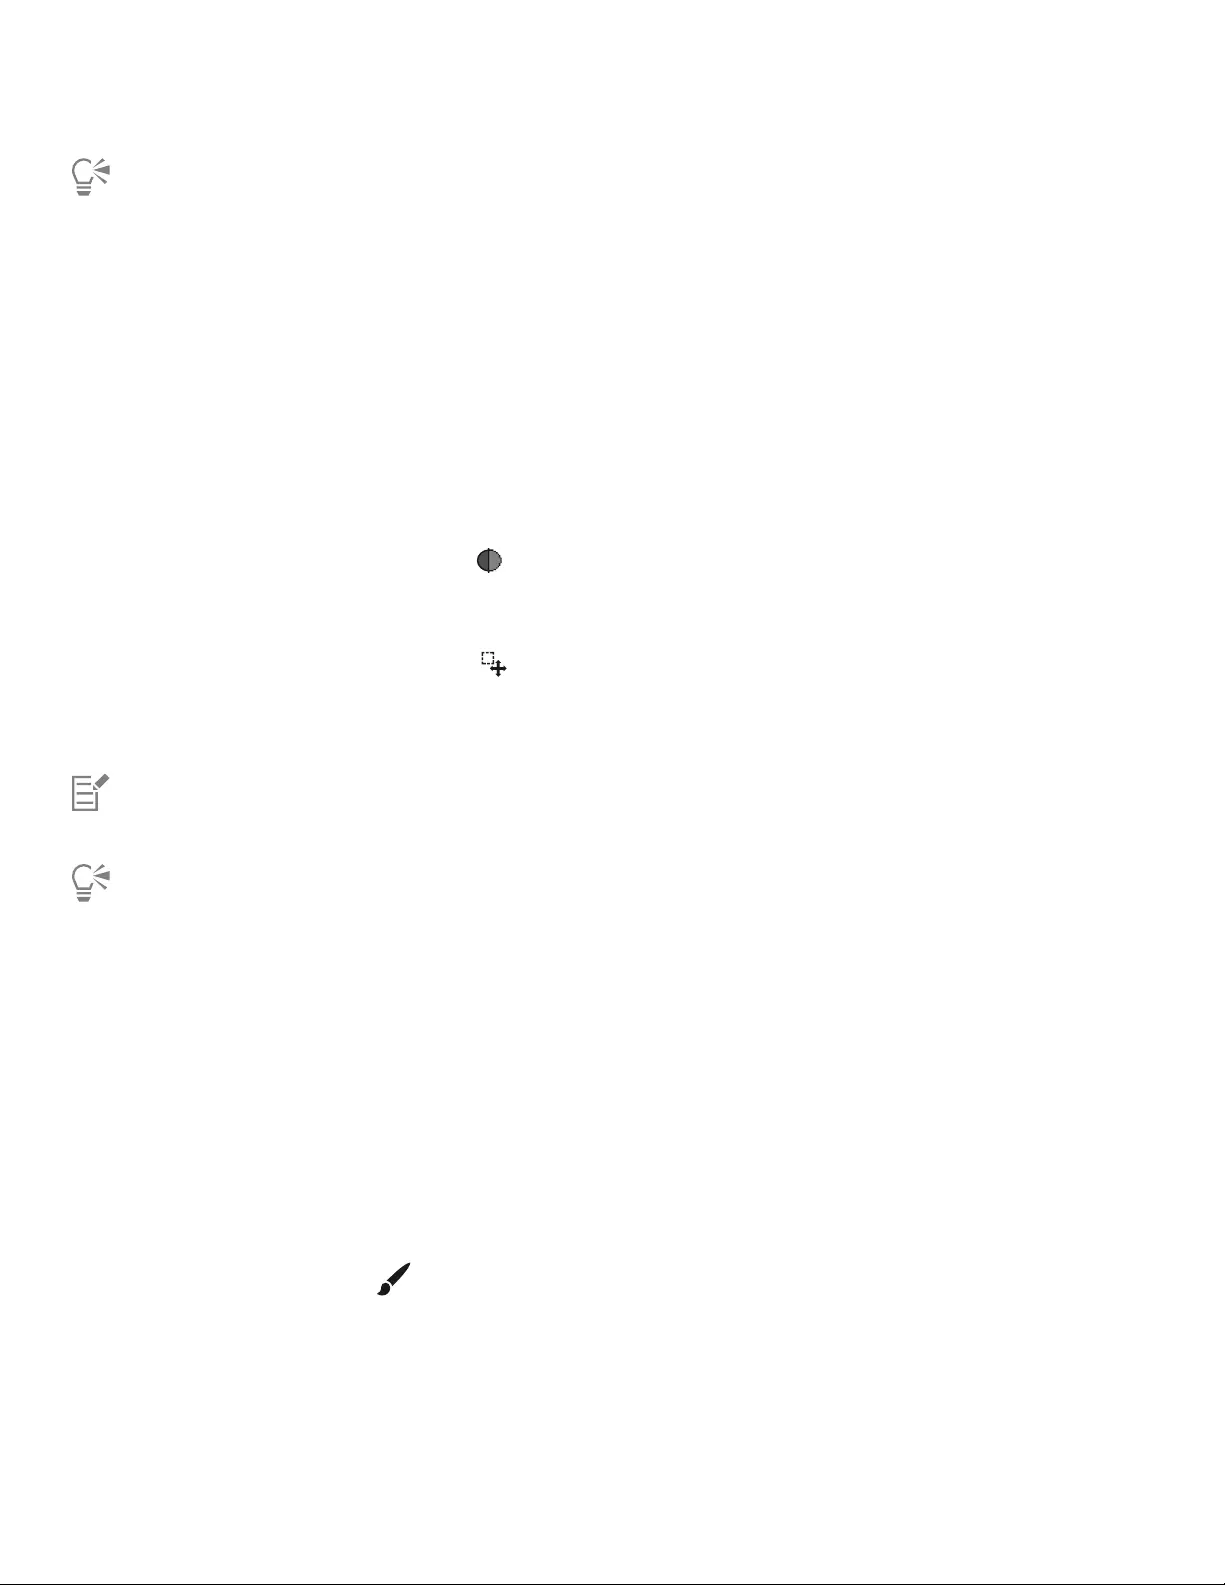
612 | Corel Painter 2022 User Guide
To produce a unique effect, you can nudge the selection by a few pixels by using the Selection Adjuster tool, clicking the selection,
and then pressing an arrow key on your keyboard a few times. This technique works only when the selection is directly on the
canvas, it does not work if the selection is on a layer.
Softening the edges of selections
You can soften the edges of a path-based selection by anti-aliasing or feathering. Anti-aliasing smooths the edges of a selection by
modifying the color transition between the pixels. Feathering, on the other hand, softens the edges by gradually increasing the transparency
of the pixels along the edge of the selection.
To apply anti-aliasing to a selection
1Create a selection by using one of the selection tools.
2On the property bar, click the Anti-alias button .
To feather the edge of a selection
1In the toolbox, click the Selection Adjuster tool , and then click a selection.
2On the property bar, click the Feather button .
3In the Feather Selection dialog box, specify the number of pixels that you want to feather.
The maximum number of pixels that you can feather is 50.
When the selection marquee is shown, feathering may be difficult to see. It is easier to see the effect of feathering if you save the
selection to a channel and view the channel. For more information, see “To view or hide a channel” on page 588.
Stroking selections
You can apply a brushstroke to a path-based selection. Corel Painter uses the current brush variant, brush size, color, and paper texture to
apply a stroke along the border of a selection. Stroking selections is an excellent way to make brushstrokes follow specific contours.
Setting the drawing mode controls whether brushstrokes are placed inside, outside, or on both sides of the selection border. For more
information, see “Choosing the protected area of a selection” on page 607.
To stroke a selection
1Create a path-based selection.
2In the toolbox, click the Brush tool .
3Click the Brush Selector on the Brush Selector bar.
4Click a brush category, and click a brush variant.
5Click a color in the Color panel.
6On the property bar, type a value in the Size box, or adjust the pop-up slider.
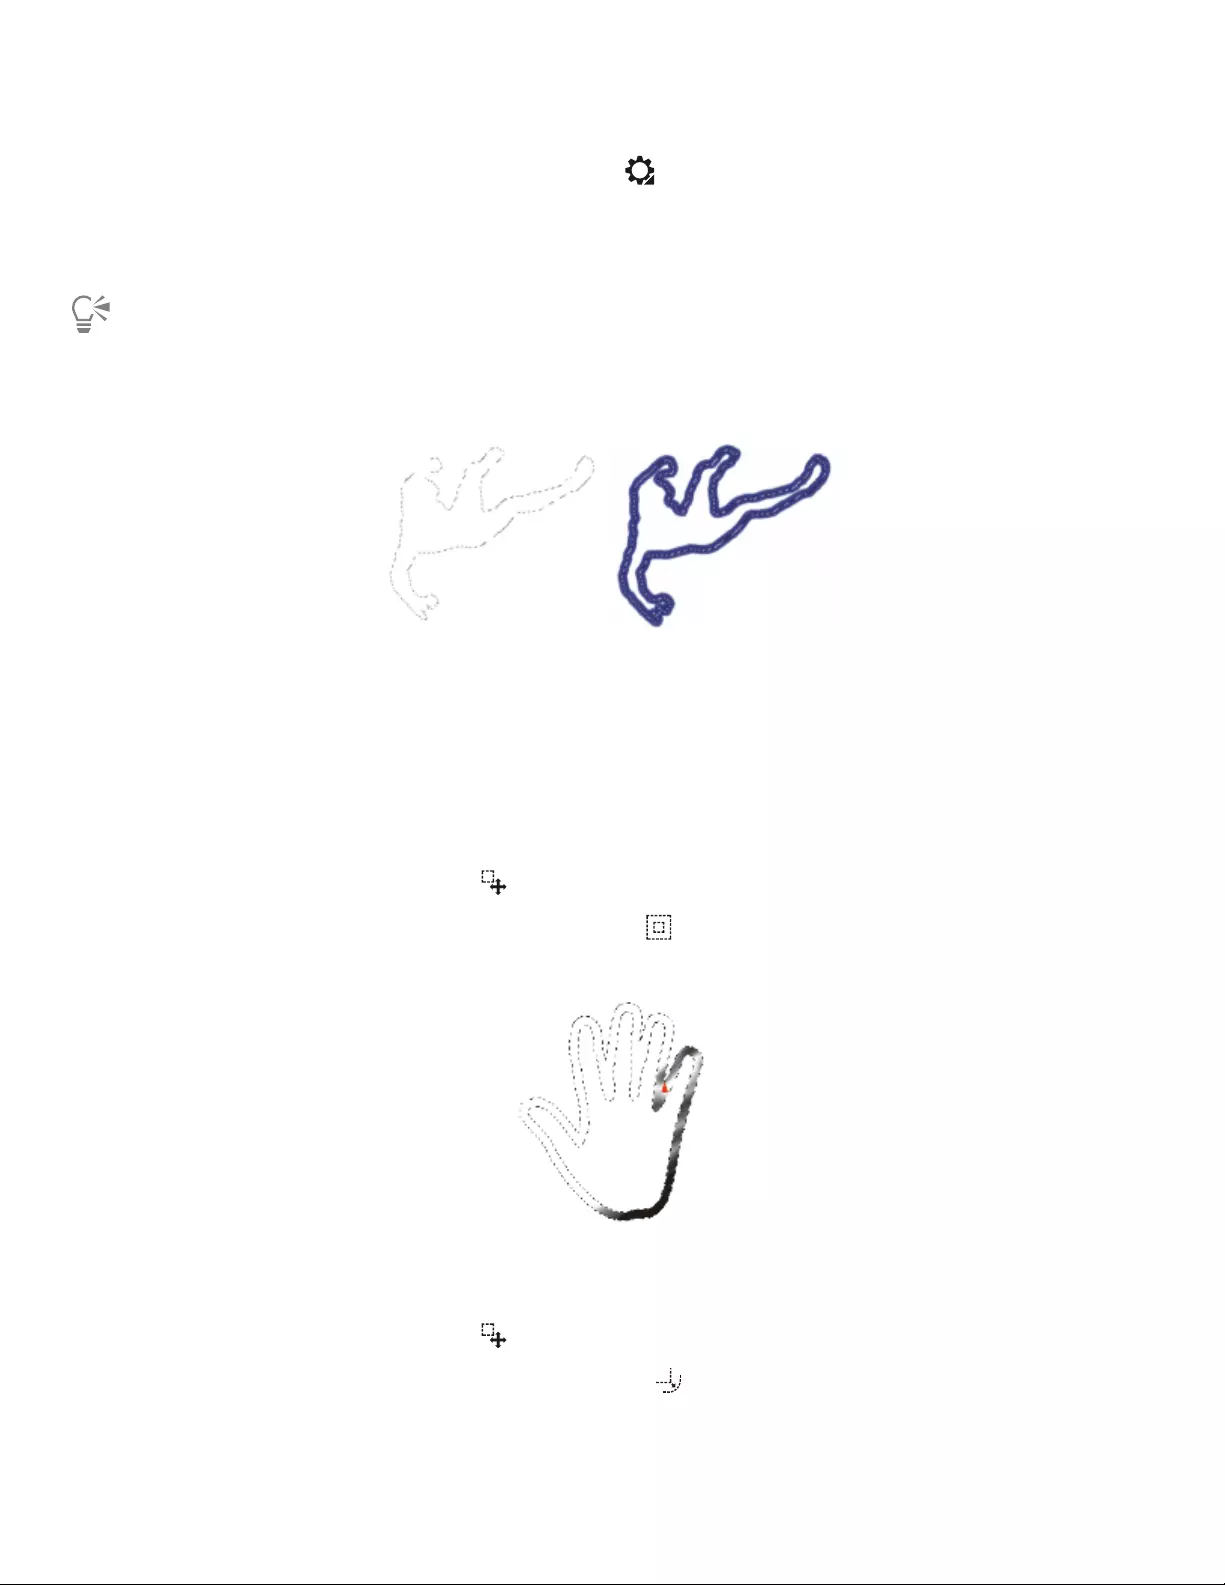
Selections and transformations | 613
7In the Navigator panel, click the Open Navigator Settings button , choose Drawing Mode, and then choose a drawing mode
option.
8From the menu bar, choose Select Stroke Selection, and repeat the command to build strokes.
You can use different brushes while building strokes.
To produce a unique effect, you can nudge the selection by a few pixels by using the Selection Adjuster tool, clicking the selection,
and then pressing an arrow key on your keyboard a few times. This technique works only when the selection is directly on the
canvas, it does not work if the selection is on a layer.
Stroking a selection while using the Draw Anywhere drawing mode lets you apply strokes to both sides of the selection border.
Modifying the borders of selections
You can modify the border width of path-based selections. You can also smooth a selection border by removing sharp edges, rounding
corners, and straightening the outline path.
To modify the border of a selection
1In the toolbox, click the Selection Adjuster tool , and then click a selection.
2On the property bar, click the Modify flyout button, and click Border .
3In the Border Selection dialog box, specify the number of pixels for the width of the border.
Border selection with airbrush strokes applied
To smooth a selection
1In the toolbox, click the Selection Adjuster tool , and then click a selection.
2On the property bar, click the Modify flyout button, and click Smooth .
3Repeat the command from the previous step until the path is sufficiently smooth.
614 | Corel Painter 2022 User Guide
Selection before (left) and after (right) smoothing
Expanding or contracting selections
You can expand or contract a selection by a set number of pixels.
To expand or contract a selection
• Perform an action from the following table.
To Do the following
Expand a selection On the property bar, click the Modify flyout button, and click
Widen . In the Widen Selection dialog box, specify the
number of pixels.
Contract a selection On the property bar, click the Modify flyout button, and click
Contract . In the Contract Selection dialog box, specify the
number of pixels.
Adding to or subtracting from selections
You can adjust the size and shape of a selection by adding or subtracting selection areas.
To add to a selection
1Create a selection by using one of the selection tools.
2On the property bar, click the Add To Selection button .
3Select the area that you want to add.
If you are using the Oval Selection tool or the Rectangular Selection tool , you can select a circular or square area by holding
down Shift while dragging.
You can also add to a selection by holding down Shift and selecting the area that you want to add. If you are using the Oval
Selection tool or the Rectangular Selection tool and you want to select a circular or square area, you need to release
Shift for a moment and then hold down Shift again while dragging.
When making selections, you can use any combination of selection tools, including the Magic Wand tool . If you combine
pixel- and path-based selections, the result is a pixel-based selection. For more information about creating pixel-based selections
with the Magic Wand tool, see “To select an area by using the Magic Wand tool” on page 604.
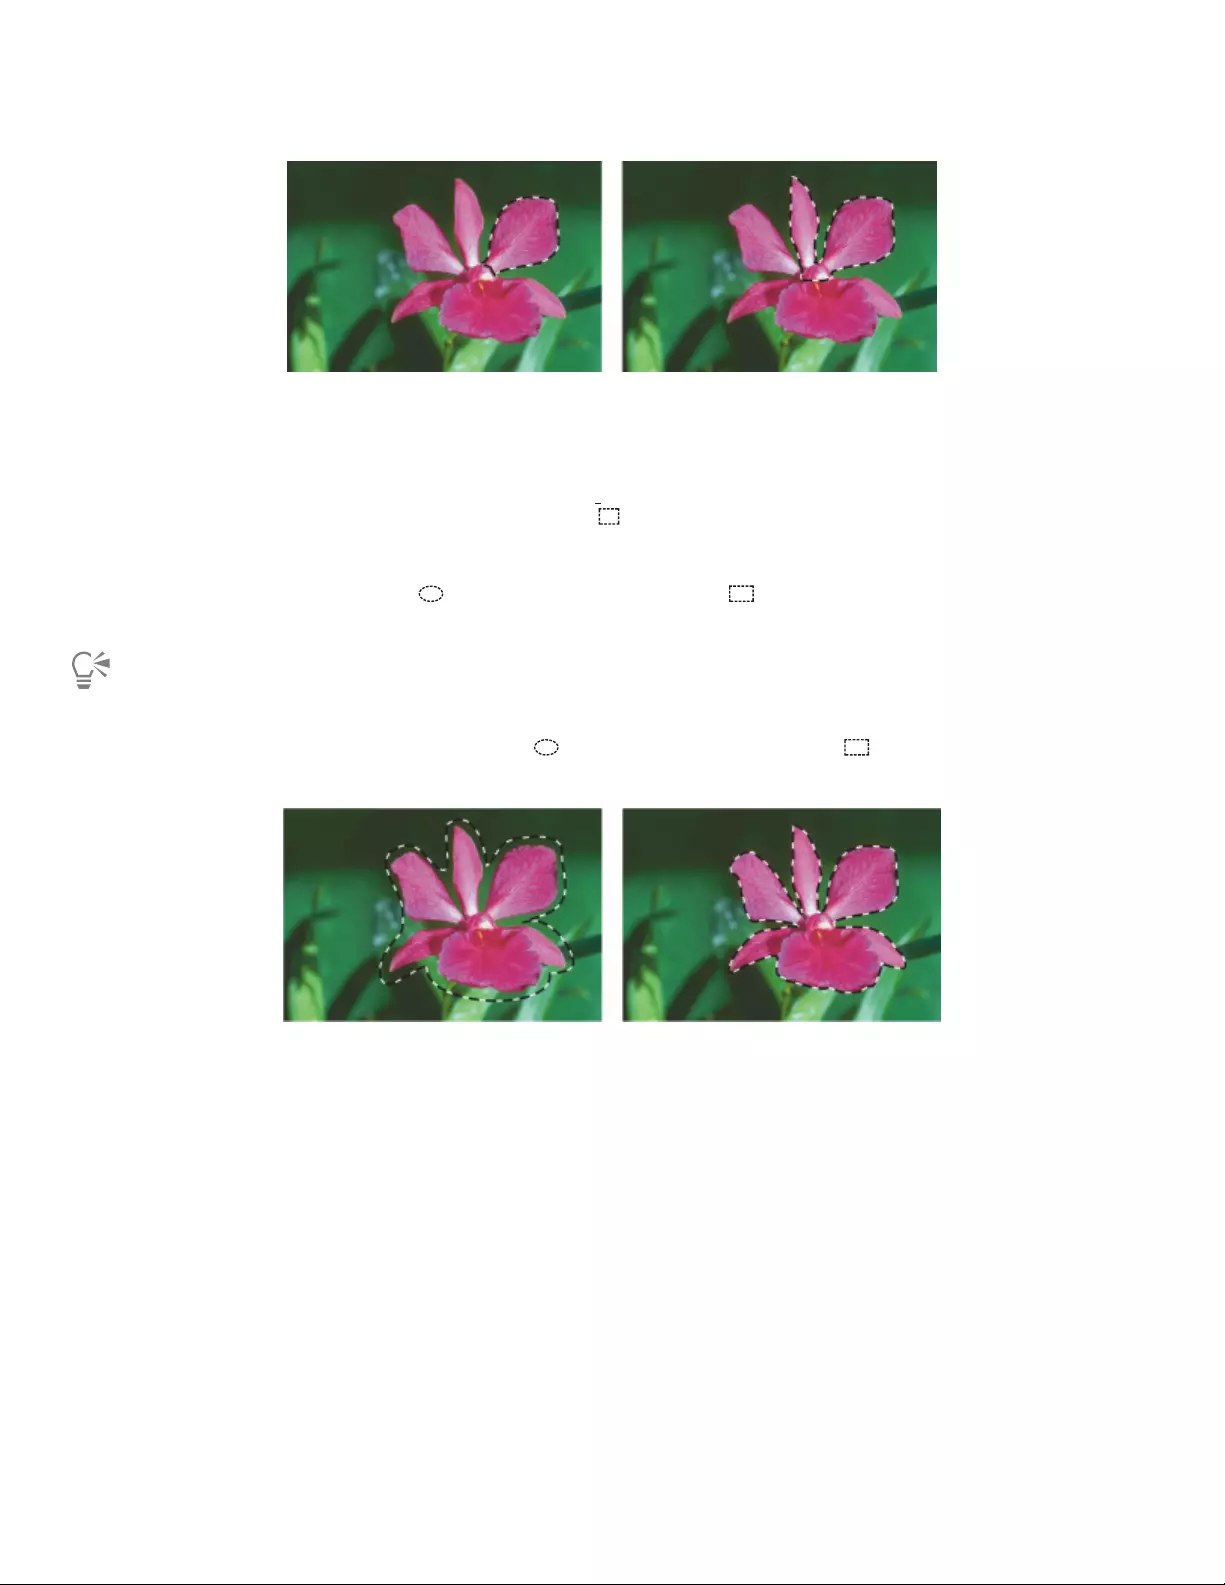
Selections and transformations | 615
Adding to a path-based selection
To subtract from a selection
1Create a selection by using one of the selection tools.
2On the property bar, click the Subtract From Selection button .
3Select the area that you want to subtract.
If you are using the Oval Selection tool or the Rectangular Selection tool , you can select a circular or square selection by
holding down Shift while dragging.
You can also subtract from a selection by holding down Option (macOS) or Alt (Windows) and selecting the area you want to
subtract. If you are using the Oval Selection tool or the Rectangular Selection tool and you want to select a circular or
square area, you need to hold down Option + Shift (macOS) or Alt + Shift (Windows) while dragging.
Subtracting from a path-based selection
You can also load selections from the Selection Portfolio, a library of ready-to-use selections. In addition, you can use Boolean operations to
combine existing selections with alpha channels.
Preparing selections for transformations
Before attempting to transform a selection, it’s important to determine if it’s path-based or pixel-based because the selection type
determines which transformations you can perform. For example, path-based selections support many transformations that pixel-based
selections do not. However, you can convert a pixel-based selection to a path-based selection to apply transformations to it. For more
information, see “To convert a pixel-based selection to a path-based selection” on page 603.
To prepare a selection for a transformation, you can set the reference point around which the transformation is performed. The reference
point is located at the center of the selection by default.
You can also apply transformation simultaneously across multiple layers. For more information, see “Transforming layers” on page 553.
616 | Corel Painter 2022 User Guide
To determine the selection type
•In the toolbox, click the Selection Adjuster tool , and then click a selection.
• If the selection displays handles, the selection is path-based.
• If the selection does not have handles, it is pixel-based.
To set the reference point for a transformation
1For a selection made by using the Selection Adjuster tool , choose the Transform tool from the toolbox.
If the Transform tool is not displayed in the toolbox, click and hold the Layer Adjuster tool to open the flyout, and then choose the
Transform tool .
2Point to the center of the selection’s bounding box.
3Drag the Reference Point to new location on the canvas.
You can place the Reference Point outside the selection.
You can reset the Reference Point to its default location by clicking the Reset Reference Point button on the property bar or
choosing the Edit Transform Reset Reference Point.
Moving selections
You can move both path-based and pixel-based selections to a new location on the canvas.
To move a selection
1For a selection made by using the Selection Adjuster tool , choose the Transform tool from the toolbox.
If the Transform tool is not displayed in the toolbox, click and hold the Layer Adjuster tool to open the flyout, and then choose the
Transform tool .
2On the property bar, click the Move button .
3While staying within the bounding box, click the selection, and then drag it to a new position on the canvas.
To display the layers in full-color before committing the transformation, disable the Fast Preview mode check box on the property bar.
4On the property bar, click the Commit Transformation button .
If you prefer, you can apply the transformation by pressing Enter.
You can move a pixel-based selection with the Transform tool ; however, if a portion of the selection moves off the canvas, it
is subtracted from the selection.
Selections and transformations | 617
To reposition a selection, use the Move tool, and drag the selection to a new
position. A rectangular marquee appears while you are dragging the selection.
Transforming a duplicate selection
You can transform a copy of a selection or the contents of an active layer.
To transform a duplicate
1Hold down Option (macOS) or Alt (Windows), and choose the Transform tool from the toolbox.
If the Transform tool is not displayed in the toolbox, click and hold the Layer Adjuster tool to open the flyout, and then choose the
Transform tool .
2On the property bar, click a transformation mode.
The transformation is applied to copied content.
You can also transform a duplicate by clicking Command + Shift + Option + T (macOS) or CTRL + Shift + Alt + T (Windows).
Scaling and rotating path-based selections
You can scale or rotate path-based selections. Scaling lets you change the dimensions of a selection. You can also scale an object
proportionally by preserving its aspect ratio.
To scale a selection
1In the toolbox, click the Transform tool .
If the Transform tool is not displayed in the toolbox, click and hold the Layer Adjuster tool to open the flyout, then select the
Transform tool .
2On the property bar, click the Scale button .
3Perform a task from the following table.

618 | Corel Painter 2022 User Guide
To Do the following
Scale a selection in one dimension Drag a side, top, or bottom handle. On the property bar, click the
Commit Transformation button .
Scale a selection in two dimensions Drag a corner handle. On the property bar, click the Commit
Transformation button .
Scale while maintaining the selection’s shape, or “aspect ratio” Hold down Shift while you drag a corner handle. On the property
bar, click the Commit Transformation button .
Scale around the reference point while maintaining the selection’s
shape, or “aspect ratio”
Hold down Alt + Shift (Windows) or Option + Shift (macOS),
and drag a corner handle. On the property bar, click the Commit
Transformation button .
Scale around the reference point Hold down Alt (Windows) or Option (macOS), and drag a corner
handle. On the property bar, click the Commit Transformation
button .
Drag a side handle to scale horizontally.
You can also scale a selection by choosing Edit Transform Scale, and specifying the horizontal and vertical scale percentages in
the dialog box.
To rotate a selection
1In the toolbox, click the Transform tool .
If the Transform tool is not displayed in the toolbox, click and hold the Layer Adjuster tool to open the flyout, and then choose the
Transform tool .
2On the property bar, click the Rotate button .
3Move the pointer outside the border of the selection’s bounding box.
4Drag a corner handle.
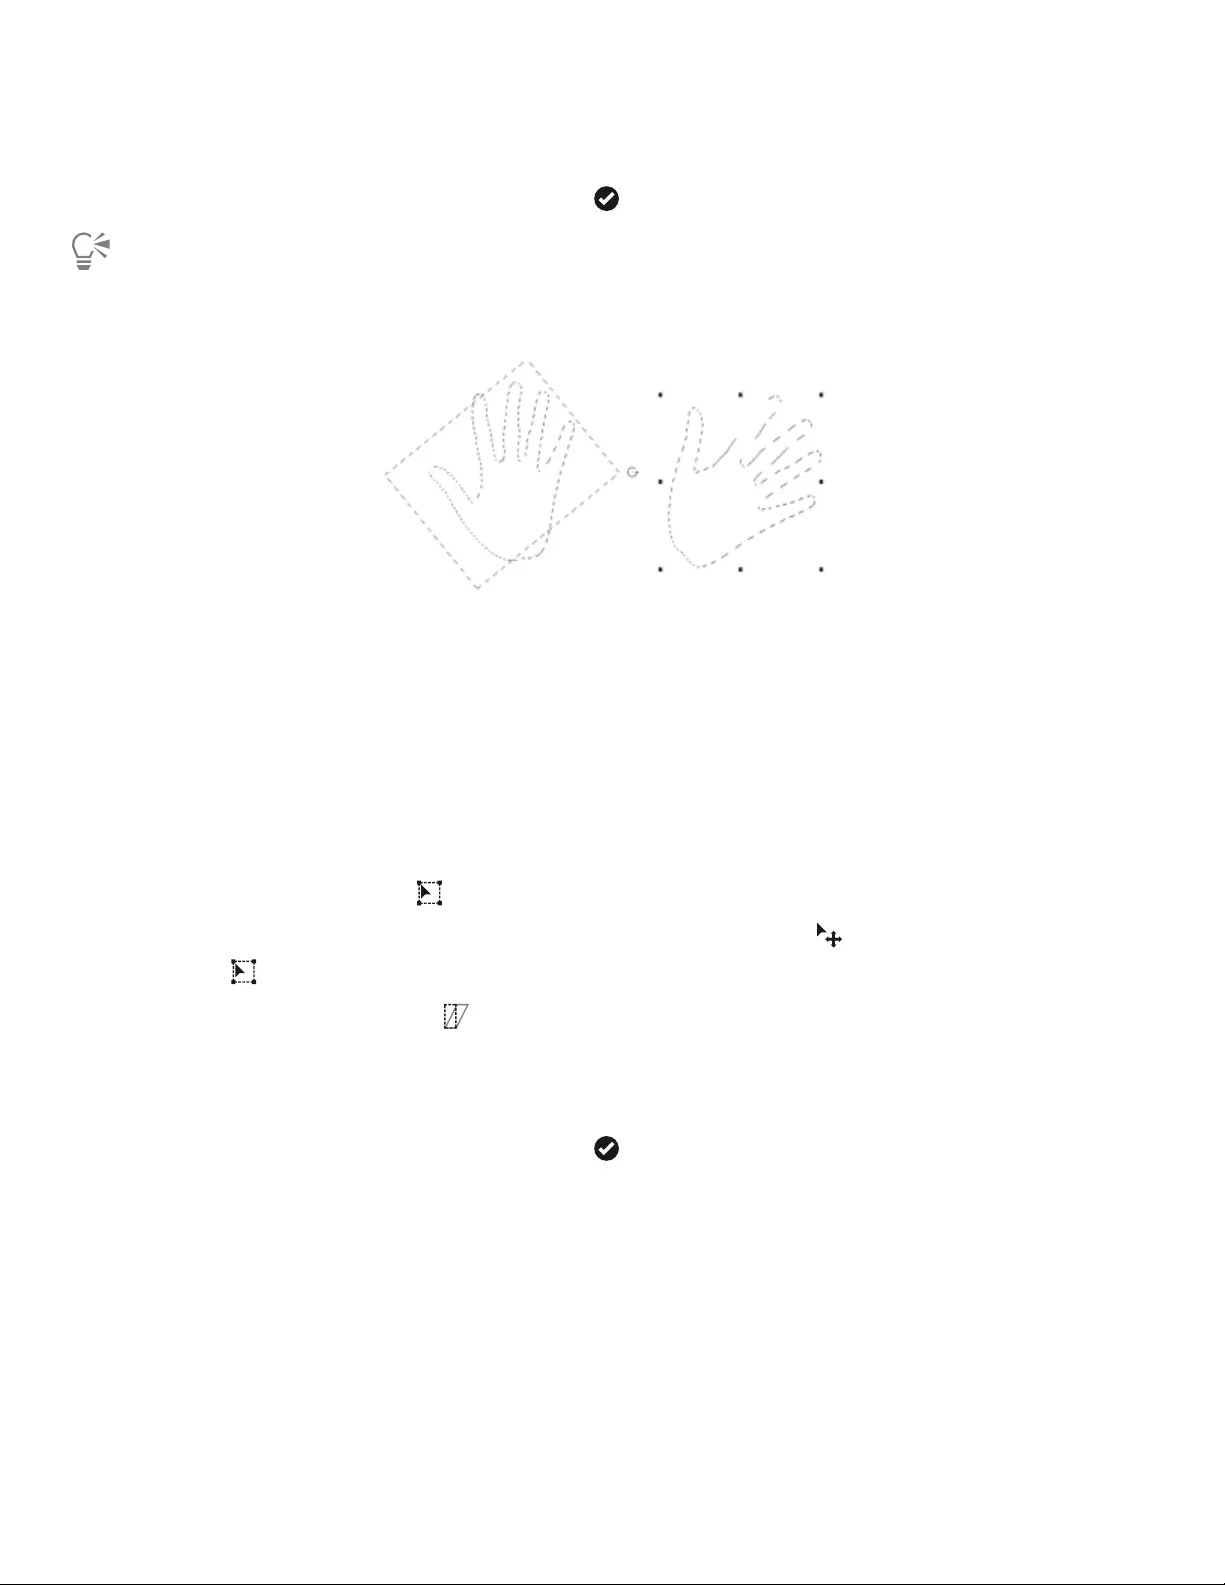
Selections and transformations | 619
If you want to constrain the rotation by 15-degree increments, hold down Shift while dragging.
5On the property bar, click the Commit Transformation button .
You can also Rotate a selection by choosing Edit Transform Rotate, and specifying the rotation angle in degrees in the dialog
box. A positive number rotates clockwise; a negative number rotates counterclockwise.
Rotating a selection
Skewing and distorting path-based selections
You can skew and distort path-based selections. Skewing slants the vertical and horizontal dimensions of a selection non-proportionally.
Distorting a selection lets you move the sides or corners of a selection in different directions. For example, you can crush or stretch the
selection. In addition, you can use perspective distortion to give an object the appearance of depth. Skewing distortion allows you to achieve
a 3D look.
To skew a selection
1In the toolbox, click the Transform tool .
If the Transform tool is not displayed in the toolbox, click and hold the Layer Adjuster tool to open the flyout, and then choose the
Transform tool .
2On the property bar, click the Skew button .
3Move the pointer outside the border of the selection’s bounding box.
4Drag a side handle.
If you want to skew only the selected side, hold down Alt (Windows) or Option (macOS) while dragging the side handle.
5On the property bar, click the Commit Transformation button .

620 | Corel Painter 2022 User Guide
Skewing a selection
To distort a selection
1In the toolbox, click the Transform tool .
If the Transform tool is not displayed in the toolbox, click and hold the Layer Adjuster tool to open the flyout, and then choose the
Transform tool .
2On the property bar, click the Distort button .
3Drag a corner handle.
If you want to constrain the distortion to the horizontal or vertical axis, hold down Shift while dragging a corner handle.
If you want to distort the selection relative to the Reference Point, hold down Alt (Windows) or Option (macOS) while dragging a
corner handle.
4On the property bar, click the Commit Transformation button .
A selection before (left) and after (right) distorting
To distort perspective in a selection
1In the toolbox, click the Transform tool .
If the Transform tool is not displayed in the toolbox, click and hold the Layer Adjuster tool to open the flyout, and then choose the
Transform tool .
2On the property bar, click the Perspective Distortion button .
3Drag a corner handle.
If you want to constrain the distortion to the horizontal or vertical axis, hold down Shift while dragging a corner handle.
4On the property bar, click the Commit Transformation button .
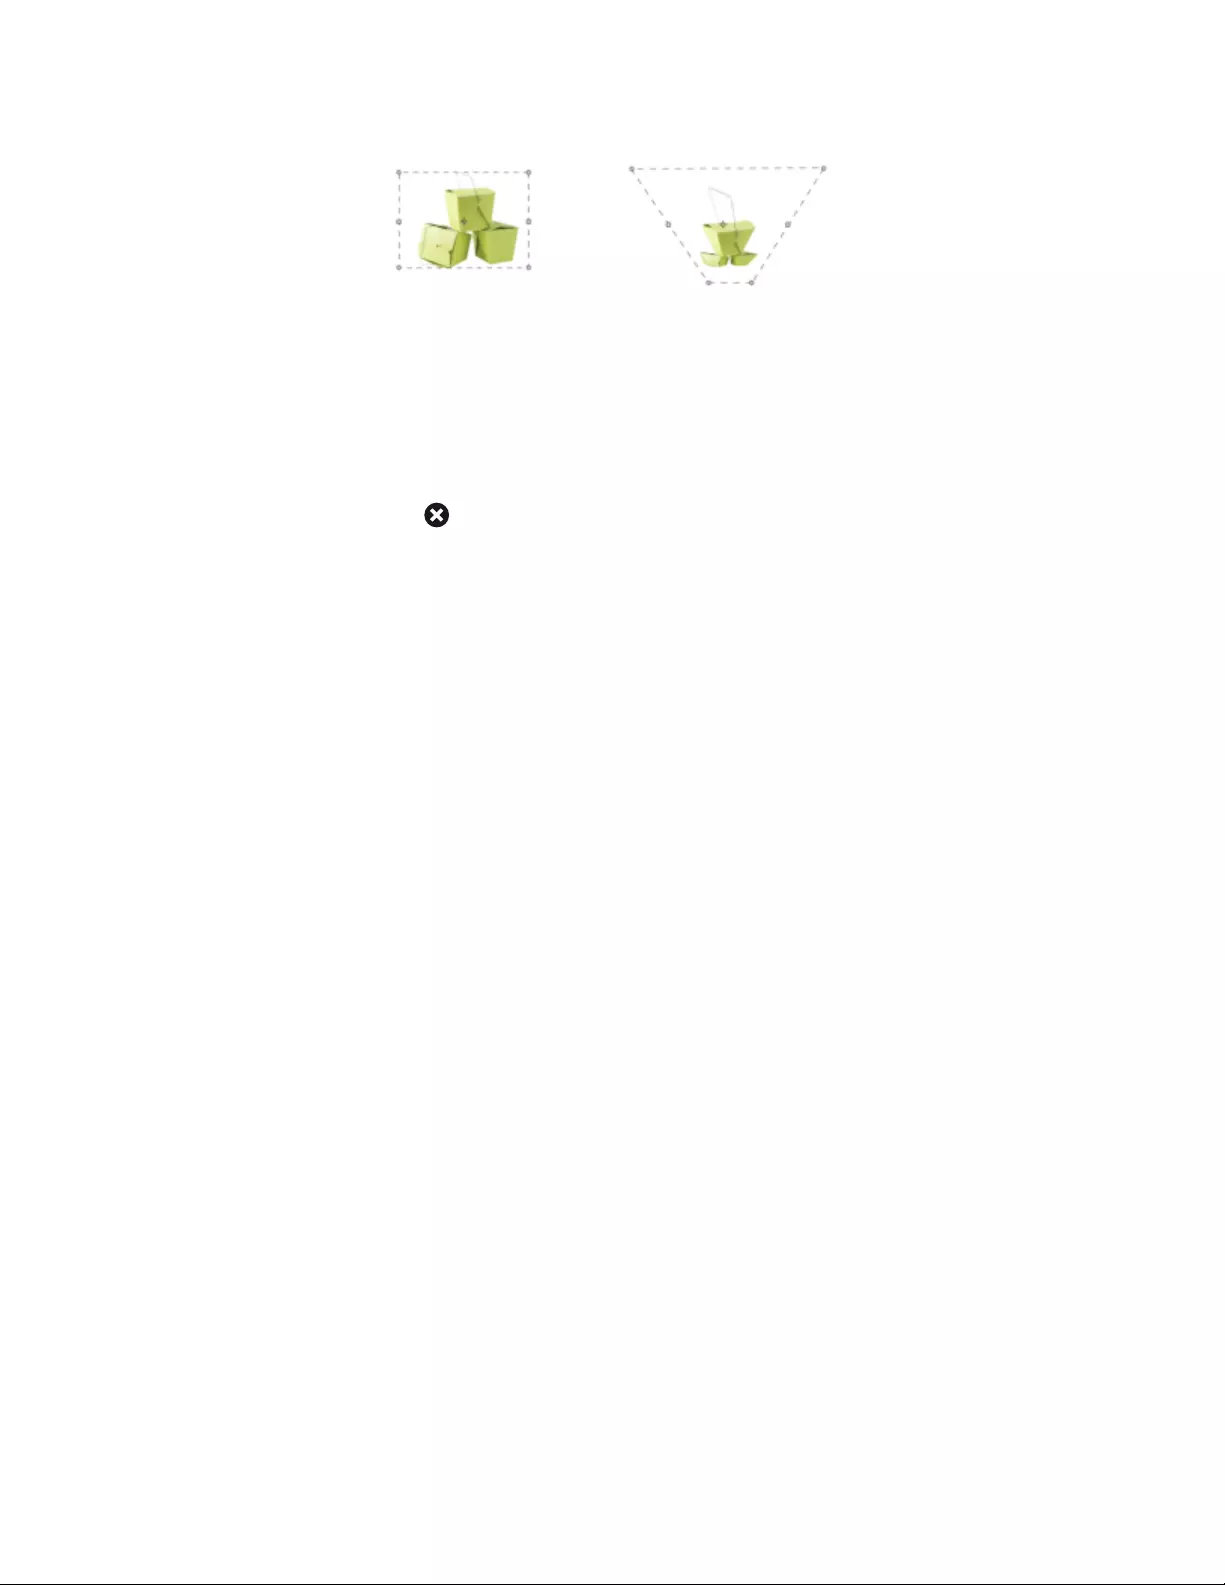
Selections and transformations | 621
A selection before (left) and after (right) perspective distorting
Canceling transformations
If you are not satisfied with the transformation, you can cancel it and return the selection to its previous state.
To cancel a transformation
•Click the Cancel Transformation button on the property bar, or press Esc.

622 | Corel Painter 2022 User Guide
Common options for effects | 623
Common options for effects
Corel Painter includes a wide array of effects that you can use to alter images. The effects are organized in four main categories:
•Tonal control
•Surface control
•Focus
•Esoterica
To control each of the effects, you need to modify their individual settings. However, the effects do have some options in common.
This section contains the following topics:
•“Fading effects” (page 623)
•“Applying recently used effects” (page 624)
•“Changing effects with open panels” (page 624)
•“Applying effects using source luminance” (page 624)
Fading effects
You use the Fade control to undo a percentage of the last effect applied to the image. You can use this feature to control the intensity of an
effect.
Fade was applied to the image (right) to undo a percentage of the last effect (left).

624 | Corel Painter 2022 User Guide
To fade an effect
1Choose Edit Fade.
To apply Fade, you must have previously applied an effect to the image.
2In the Fade dialog box, move the slider.
If you change your mind, choose Edit Undo.
Applying recently used effects
At the top of the Effects menu, Corel Painter displays the last two effects you applied. This lets you quickly reapply frequently used effects.
You can also use keyboard shortcuts to apply the last two effects.
To reapply a recently used effect
• Do one of the following:
• Choose Effects, then choose one of the options at the top of the menu.
• Press Command + / (macOS) or Ctrl + / (Windows).
You can also apply a shortcut key to the 2nd Last Effect command by clicking Corel Painter 2022 menu Preferences
Customize Keys (macOS) or Edit Preferences Customize Keys (Windows), clicking the Effects category in the Application
Commands list, clicking the 2nd Last Effect command to select it, and typing a shortcut key in the Shortcut column.
Changing effects with open panels
To experiment with an effect, you must display all required panels before choosing an effect. For example, the Color Overlay effect combines
the selected paper texture and main color to define the overlay. If the Papers and Color panels are open when you choose the effect, you
can change paper grains and colors to create different overlays before applying the effect to your image. Any changes in the paper or color
appear in the Preview window in the Color Overlay dialog box. You can move an effect’s dialog box around on your screen, if necessary, for
full access to other panels.
Applying effects using source luminance
With Corel Painter, you can apply some effects to an image by using the luminance values of a specified source, which can include an
external source or the luminance of the image itself. The intensity of the effect on the image is based on the light and dark values of the
source. A larger degree of change to the light areas of the source, and a smaller degree of change is applied to dark areas. For example,
when you choose Paper as a source, the effect is applied according to the light and dark areas of the paper selected in the Papers panel.
You can also choose a pattern or external image (clone source) as a luminance source.
The luminance source options are listed in the Using list box and they vary between effects. The luminance options can include:
•Paper
•Image luminance
•Original luminance (pattern or clone source)
•3D Brushstrokes
•Alpha channel or layer mask (Note: This option is available only if your document has a channel or a layer with a layer mask.)
These options are explained in greater detail in the Help for each of the effects. The best way to see how these options affect your images is
to try them.

Using focus and esoterica effects | 625
Using focus and esoterica effects
Corel Painter includes Focus effects for sharpening, softening, motion blurring, and distorting image. It also includes a collection of
Esoterica effects, which let you transform images in various ways.
This section contains the following topics:
Focus effects
•“Applying Smart Blur” (page 625)
•“Applying Camera Motion Blur” (page 626)
•“Applying Depth of Field” (page 627)
•“Applying Glass Distortion” (page 629)
•“Applying Motion Blur” (page 631)
•“Sharpening focus” (page 632)
•“Softening focus” (page 633)
•“Applying Zoom Blur” (page 634)
Esoterica effects
•“Applying Marbling” (page 634)
•“Automatically cloning an image” (page 636)
•“Applying the Auto Van Gogh effect” (page 637)
•“Applying Blobs” (page 638)
•“Creating custom tiles” (page 640)
•“Applying Grid Paper” (page 643)
•“Applying Growth effects” (page 643)
•“Applying Highpass” (page 644)
•“Applying the Maze effect” (page 645)
•“Placing elements” (page 645)
•“Applying the Pop Art Fill effect” (page 647)
Applying Smart Blur
The Smart Blur effect softens the appearance of an image by smoothing out the colors and sharp details. The effect produces a result that is
similar to applying soft brushstrokes. You can use Smart Blur to quickly apply a painterly effect to an image.
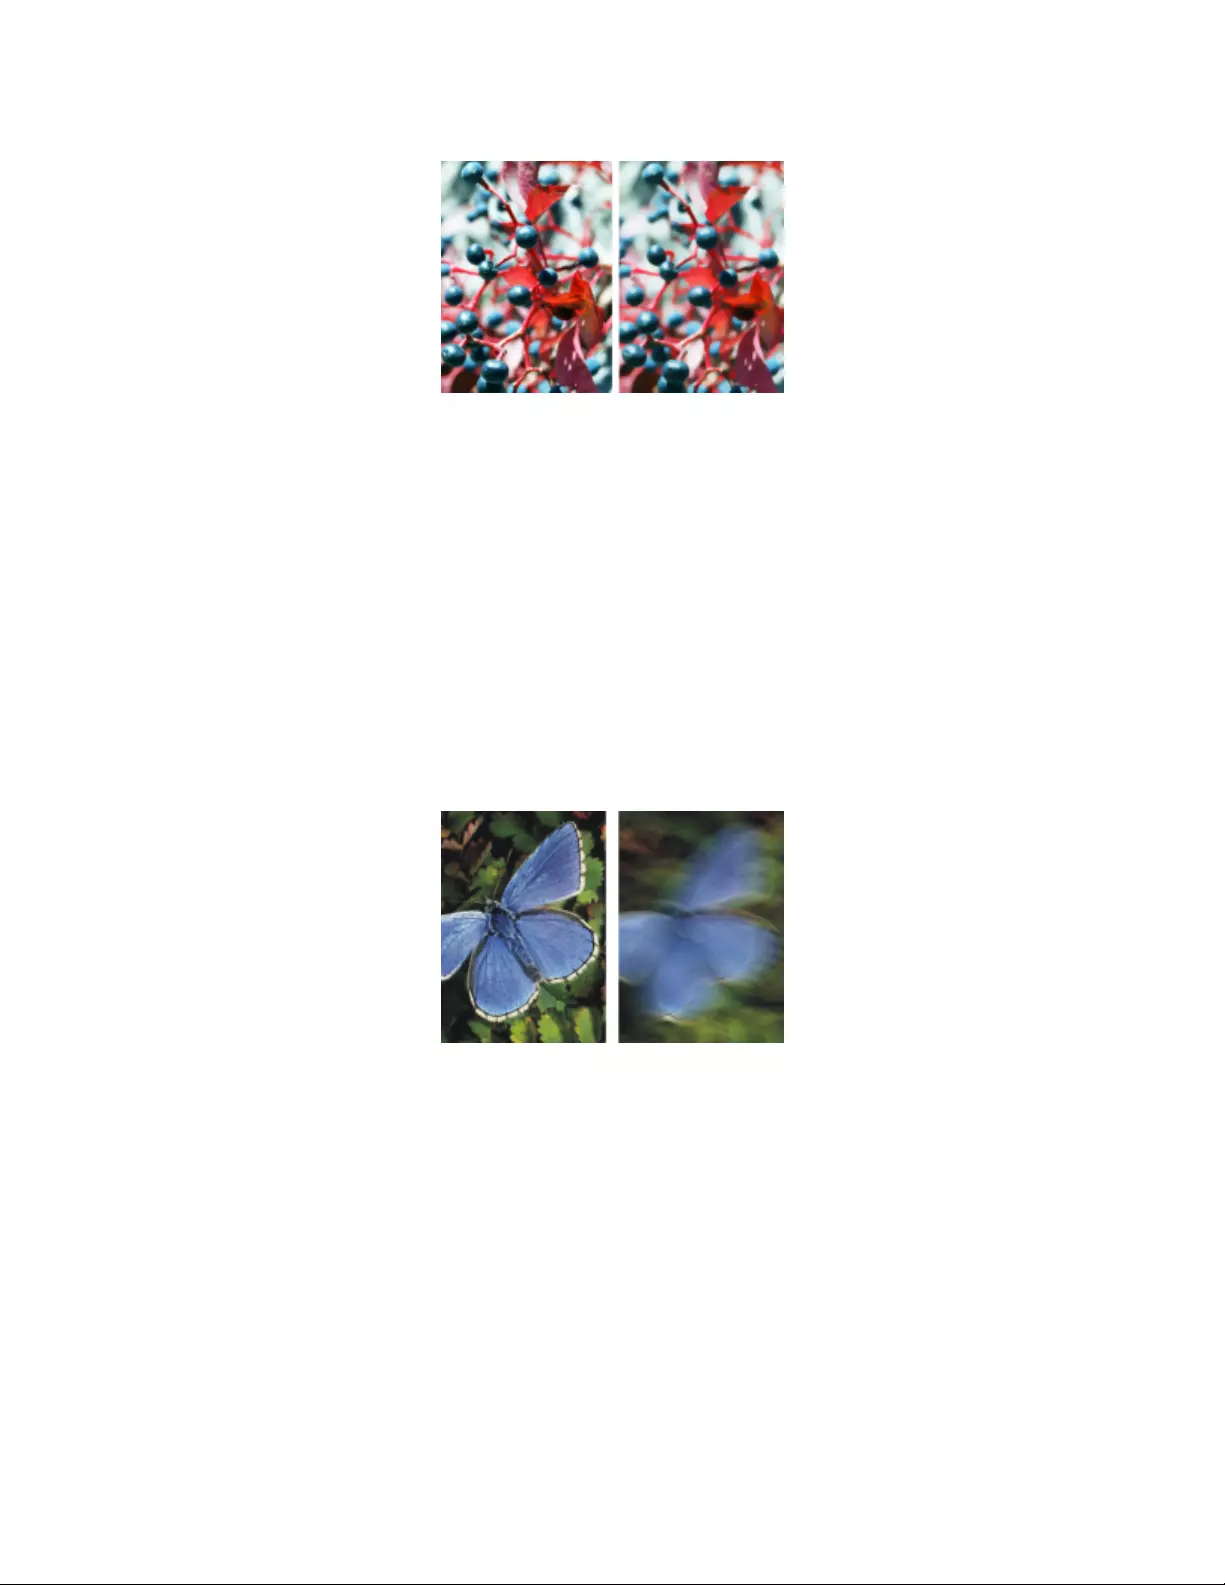
626 | Corel Painter 2022 User Guide
Before (left) and after (right) using Smart Blur
To apply Smart Blur
1To apply the effect to:
• The canvas — Click the Canvas in the Layers panel.
• A selection — Click a selection tool from the toolbox, and drag in the document window to select an area.
• A layer — Click a layer in the Layers panel.
2Choose Effects Focus Smart Blur.
3In the Smart Blur dialog box, adjust the Amount slider.
Applying Camera Motion Blur
The Camera Motion Blur effect creates a blur similar to what you’d get in a photograph by jostling the camera during a long exposure. It’s
particularly effective with an image showing lights on a dark background.
Before (left) and after (right) using Camera Motion Blur
To apply Camera Motion Blur
1To apply the effect to:
• The canvas — Click the Canvas in the Layers panel.
• A selection — Click a selection tool from the toolbox, and drag in the document window to select an area.
• A layer — Click a layer in the Layers panel.
2Choose Effects Focus Camera Motion Blur.
3In the document window, drag to create the blur motion.
The direction and intensity of the blur is determined by your cursor movement. For example, fast movement produces a different blur
than slow. A longer drag path increases the amount of blur. Straight, curved, and zigzag movements also produce different effects.
4In the Camera Motion Blur dialog box, adjust the Bias slider to move the origin of motion along the drag path.

Using focus and esoterica effects | 627
Applying Depth of Field
This effect creates a blur similar to the distance from the plane of camera focus in photography. You can specify the radius of the blurring
effect in the image.
The “M” is a floating shape. The blur on the shadow was created by using Depth of Field.
There are five different methods for applying Depth of Field:
•Uniform Color — applies the effect uniformly to the image
•Paper — applies the effect by using the paper texture luminance (brightness) as a mapping model. More of the effect is applied to the
dark areas in the paper grain; less of the effect is applied to the light areas. If you want to experiment with the effect, keep the Papers
panel open while you apply the effect. This way you can switch to different papers and modify the paper controls.
•Image Luminance — uses the image’s luminance as the model for the effect. More of the effect is applied to dark areas in the original
image; less color is applied to light areas.
•Original Luminance — uses the luminance of the clone source (or a pattern) as the model for the effect. More of the effect is applied to
dark areas in the clone source (or pattern); less color is applied to light areas.
•Alpha Channel or Layer Mask — sets the values in the channel or layer mask as the model for the effect. More of the effect is applied
to dark areas in the layer mask or channel; less color is applied to light areas. You can use this method only if you have a saved alpha
channel or a layer mask in your image.
To apply Depth of Field uniformly
1To apply the effect to:
• The canvas — Click the Canvas in the Layers panel.
• A selection — Click a selection tool from the toolbox, and drag in the document window to select an area.
• A layer — Click a layer in the Layers panel.
2Choose Effects Focus Depth of Field.
3Choose Uniform Color from the Using list box.
4Adjust any of the Depth of Field controls. For information, see “Depth of Field controls” on page 629.
To apply Depth of Field by using paper luminance
1Do one of the following:
•On the Brush tool property bar, click the Grain flyout button .
•Choose Window Media Panels Papers to open the Papers panel.
2Click a paper texture swatch in the Paper Textures area.
3To apply the effect to:
• The canvas — Click the Canvas in the Layers panel.
• A selection — Click a selection tool from the toolbox, and drag in the document window to select an area.
• A layer — Click a layer in the Layers panel.
4Choose Effects Focus Depth of Field.
5Choose Paper from the Using list box.

628 | Corel Painter 2022 User Guide
Darker regions of the source receive greater blur.
6Adjust any of the Depth of Field controls. For information, see “Depth of Field controls” on page 629.
To apply Depth of Field by using image luminance
1To apply the effect to:
• The canvas — Click the Canvas in the Layers panel.
• A selection — Click a selection tool from the toolbox, and drag in the document window to select an area.
• A layer — Click a layer in the Layers panel.
2Choose Effects Focus Depth of Field.
3Choose Image Luminance from the Using list box.
Darker regions of the source receive greater blur.
4Adjust any of the Depth of Field controls. For information, see “Depth of Field controls” on page 629.
To apply Depth of Field by using clone or pattern luminance
1Perform a task from the following table.
To Do the following
Use a clone source In the Clone Source panel (Window Clone Source), choose
Embedded Image from the Source list box.
In the Embed Source Image dialog box, do one of the following:
•To browse for a file, enable the Browse option.
•To clone a currently open document, enable the Current
Document option, and choose a document from the list box.
•To embed the active texture, enable the Current Texture option.
Click OK.
Use a pattern Choose Window Media Panels Patterns, and click a pattern
swatch in the Painter Patterns area.
2To apply the effect to:
• The canvas — Click the Canvas in the Layers panel.
• A selection — Click a selection tool from the toolbox, and drag in the document window to select an area.
• A layer — Click a layer in the Layers panel.
3Choose Effects Focus Depth of Field.
4Adjust any of the Depth of Field controls. For information, see “Depth of Field controls” on page 629.
To apply Depth of Field by using layer mask or channel luminance
1Do one of the following:
•To use a layer mask, choose Window Layers, and click the layer that contains a layer mask in the Layers panel.
•To use an alpha channel, choose Window Channels, and click the alpha channel in the Channels panel.
2To apply the effect to:
• The canvas — Click the Canvas in the Layers panel.
• A selection — Click a selection tool from the toolbox, and drag in the document window to select an area.
• A layer — Click a layer in the Layers panel.
3Choose Effects Focus Depth of Field.

Using focus and esoterica effects | 629
4Choose Original Luminance from the Using list box.
Darker regions of the source receive greater blur.
5Adjust any of the Depth of Field controls. For information, see “Depth of Field controls” on page 629.
Depth of Field controls
•Min Size — sets the minimum radius of the blur regions
•Max Size — sets the maximum radius of the blur regions
The maximum size must be greater than the minimum size.
Applying Glass Distortion
The Glass Distortion effect creates the kind of distortions you would see if you were looking at your image through a sheet of glass. You can
make your image appear as if it is behind the pebble glass of a shower door, or you can distort your image beyond recognition.
Glass Distortion works by relocating the pixels of the image based on a displacement map. The map is created by combining displacement
information from a source with a preset map type.
Before (left) and after (right) applying Glass Distortion
There are five sources of displacement information:
•Paper uses the information in a paper texture to displace pixels. More displacement is applied to light areas of the texture, and less to
dark areas. Paper texture is good for creating the pebbled glass effect. Unless you want frosted glass, you’ll probably want to increase
the scale of the paper.
•3D Brushstrokes uses the difference in luminance between the brushstrokes applied to the clone and the current document
•Image Luminance uses the light and dark areas in the current document to determine the intensity of distortions
•Original Luminance uses the clone source’s luminance. Use a tessellation as the clone source to produce a bumpy glass effect.
•[Alpha channel] or [Layer mask] uses the luminance of a channel or layer mask. More distortion appears in the light areas of the
channel. You must have a saved alpha channel or layer mask to use this source.
To create a controlled distortion map, choose an alpha channel or a layer mask as a source. For example, gradations in the channel lead
to a progressive distortion effect. Shapes in the channel produce distortions with distinct outlines.
To apply glass distortion by using paper luminance
1Do one of the following:
•On the Brush tool property bar, click the Grain flyout button .
•Choose Window Media Panels Papers to open the Papers panel.
2Click a paper texture swatch in the Paper Textures area.
3To apply the effect to:
• The canvas — Click the Canvas in the Layers panel.

630 | Corel Painter 2022 User Guide
• A selection — Click a selection tool from the toolbox, and drag in the document window to select an area.
• A layer — Click a layer in the Layers panel.
4Choose Effects Focus Glass Distortion.
5Choose Paper from the Using list box.
6Adjust any of the Glass Distortion controls. For information, see “Glass Distortion controls” on page 631.
To apply glass distortion by using 3D brushstrokes
1Open an image.
2Choose File Clone.
3Apply brushstrokes to the clone.
4To apply the effect to:
• The canvas — Click the Canvas in the Layers panel.
• A selection — Click a selection tool from the toolbox, and drag in the document window to select an area.
• A layer — Click a layer in the Layers panel.
5Choose Effects Focus Glass Distortion.
6Choose 3D Brush strokes from the Using list box.
7Adjust any of the Glass Distortion controls. For information, see “Glass Distortion controls” on page 631.
To apply glass distortion by using image luminance
1To apply the effect to:
• The canvas — Click the Canvas in the Layers panel.
• A selection — Click a selection tool from the toolbox, and drag in the document window to select an area.
• A layer — Click a layer in the Layers panel.
2Choose Effects Focus Glass Distortion.
3Choose Image Luminance from the Using list box.
4Adjust any of the Glass Distortion controls. For information, see “Glass Distortion controls” on page 631.
To apply glass distortion by using clone or pattern luminance
1Perform a task from the following table.
To Do the following
Use a clone source In the Clone Source panel (Window Clone Source), choose
Embedded Image from the Source list box.
In the Embed Source Image dialog box, do one of the following:
•To browse for a file, enable the Browse option.
•To clone a currently open document, enable the Current
Document option, and choose a document from the list box.
•To embed the active texture, enable the Current Texture option.
Click OK.
Use a pattern Choose Window Media Panels Patterns, and click a pattern
swatch in the Painter Patterns area.
2To apply the effect to:

Using focus and esoterica effects | 631
• The canvas — Click the Canvas in the Layers panel.
• A selection — Click a selection tool from the toolbox, and drag in the document window to select an area.
• A layer — Click a layer in the Layers panel.
3Choose Effects Focus Glass Distortion.
4Choose Original Luminance from the Using list box.
5Adjust any of the Glass Distortion controls. For information, see “Glass Distortion controls” on page 631.
To apply glass distortion by using layer mask or channel luminance
1Do one of the following:
•To use a layer mask, choose Window Layers, and click the layer that contains a layer mask in the Layers panel.
•To use an alpha channel, choose Window Channels, and click the alpha channel in the Channels panel.
2To apply the effect to:
• The canvas — Click the Canvas in the Layers panel.
• A selection — Click a selection tool from the toolbox, and drag in the document window to select an area.
• A layer — Click a layer in the Layers panel.
3Choose Effects Focus Glass Distortion.
4Choose Original Luminance from the Using list box.
5Adjust any of the Glass Distortion controls. For information, see “Glass Distortion controls” on page 631.
Glass Distortion controls
•Softness — controls the transitions between displaced colors
Increasing the Softness setting creates more intermediate steps, which produces a smoother distortion. If you experience aliasing in a
glass distortion, try increasing the Softness setting.
•Refraction (Map type) — displaces pixels in the same way that an optical lens bends light. This is the best map type for creating
distortions that you’d expect from looking through glass.
•Vector Displacement (Map type) — moves pixels in a specific direction
•Angle Displacement (Map type) — moves pixels in different directions. Increasing the Softness value by a small amount (from 0 to 0.1)
with this map type produces dramatic changes in the glass distortion.
•Amount — controls the degree of displacement. Moving the slider to the right increases the distortion.
•Variance — creates multiple variations in the neighborhood of the displacement. The result of increasing variance depends on the type
of image and other settings.
•Direction — controls the direction of displacement. The 3 o’clock position corresponds to 0°. The Refraction map type is not dependent
on direction.
•Inverted — inverts the selected source
•Quality — changes the quality of the distortion
Applying Motion Blur
This effect makes an image appear as if it has been blurred by movement. You can control the angle, radius, and direction of the blurring
effect.

632 | Corel Painter 2022 User Guide
The Motion Blur effect
To apply a Motion Blur effect
1To apply the effect to:
• The canvas — Click the Canvas in the Layers panel.
• A selection — Click a selection tool from the toolbox, and drag in the document window to select an area.
• A layer — Click a layer in the Layers panel.
2Choose Effects Focus Motion Blur.
In the Motion Blur dialog box, adjust the following sliders:
•Radius — sets the amount of blur. Moving the slider to the right makes the image look as though it’s moving faster.
•Angle — sets the direction in which the image appears to travel. A setting of 0° blurs in the direction of 3 o’clock.
•Thinness — blurs the image in a direction perpendicular to the angle you choose with the Angle slider.
Sharpening focus
The Sharpen effect heightens contrast by intensifying highlights and shadows. You can create sharper images by using either the Gaussian
or Circular aperture options. Gaussian aperture sharpens the red, green, and blue components of color; Circular aperture sharpens an
image based on luminance.
Before (left) and after (right) applying Sharpen
To sharpen focus
1To apply the effect to:
• The canvas — Click the Canvas in the Layers panel.

Using focus and esoterica effects | 633
• A selection — Click a selection tool from the toolbox, and drag in the document window to select an area.
• A layer — Click a layer in the Layers panel.
2Choose Effects Focus Sharpen.
3In the Sharpen dialog box, enable an aperture option.
4Use the following guidelines to adjust the sliders:
•Amount — determines how much of the edge of an element is affected
•Highlight — determines the intensity of the bright areas. Move the slider to the right to brighten the highlights.
•Shadow — determines the depth of the shadows. The higher the percentage, the darker the shadows.
If you chose the Gaussian aperture option and you want to sharpen only selected colors, enable any combination of the Red, Green, or
Blue check boxes.
Softening focus
The Soften and Super Soften effects increase the transition from one part of an image to another by enhancing the anti-aliasing of the
brushstrokes. You can apply the Soften effect to images by using either the Gaussian or Circular aperture options. The Gaussian aperture
is useful for creating smooth, optical blurs or defocusing; the Circular aperture is useful for creating shadow maps cast by a circular light
source like the sun.
The Super Soften effect lets you soften images by specifying the radius of pixels that you want to soften.
To soften focus
1To apply the effect to:
• The canvas — Click the Canvas in the Layers panel.
• A selection — Click a selection tool from the toolbox, and drag in the document window to select an area.
• A layer — Click a layer in the Layers panel.
2Choose Effects Focus Soften.
3In the Aperture area, enable one of the following options:
•Gaussian
•Circular
4Adjust the Amount slider.
The farther the slider is to the right, the more steps there are between image elements, which creates more blurring.
To soften by specifying pixel values
1To apply the effect to:
• The canvas — Click the Canvas in the Layers panel.
• A selection — Click a selection tool from the toolbox, and drag in the document window to select an area.
• A layer — Click a layer in the Layers panel.
2Choose Effects Focus Super Soften.
3Type a pixel value in the Soften box.
This value determines the radius of pixels that are softened. The lower the value, the more subtle the effect.
You can also
Wrap around the effect Enable the Wrap Around check box.
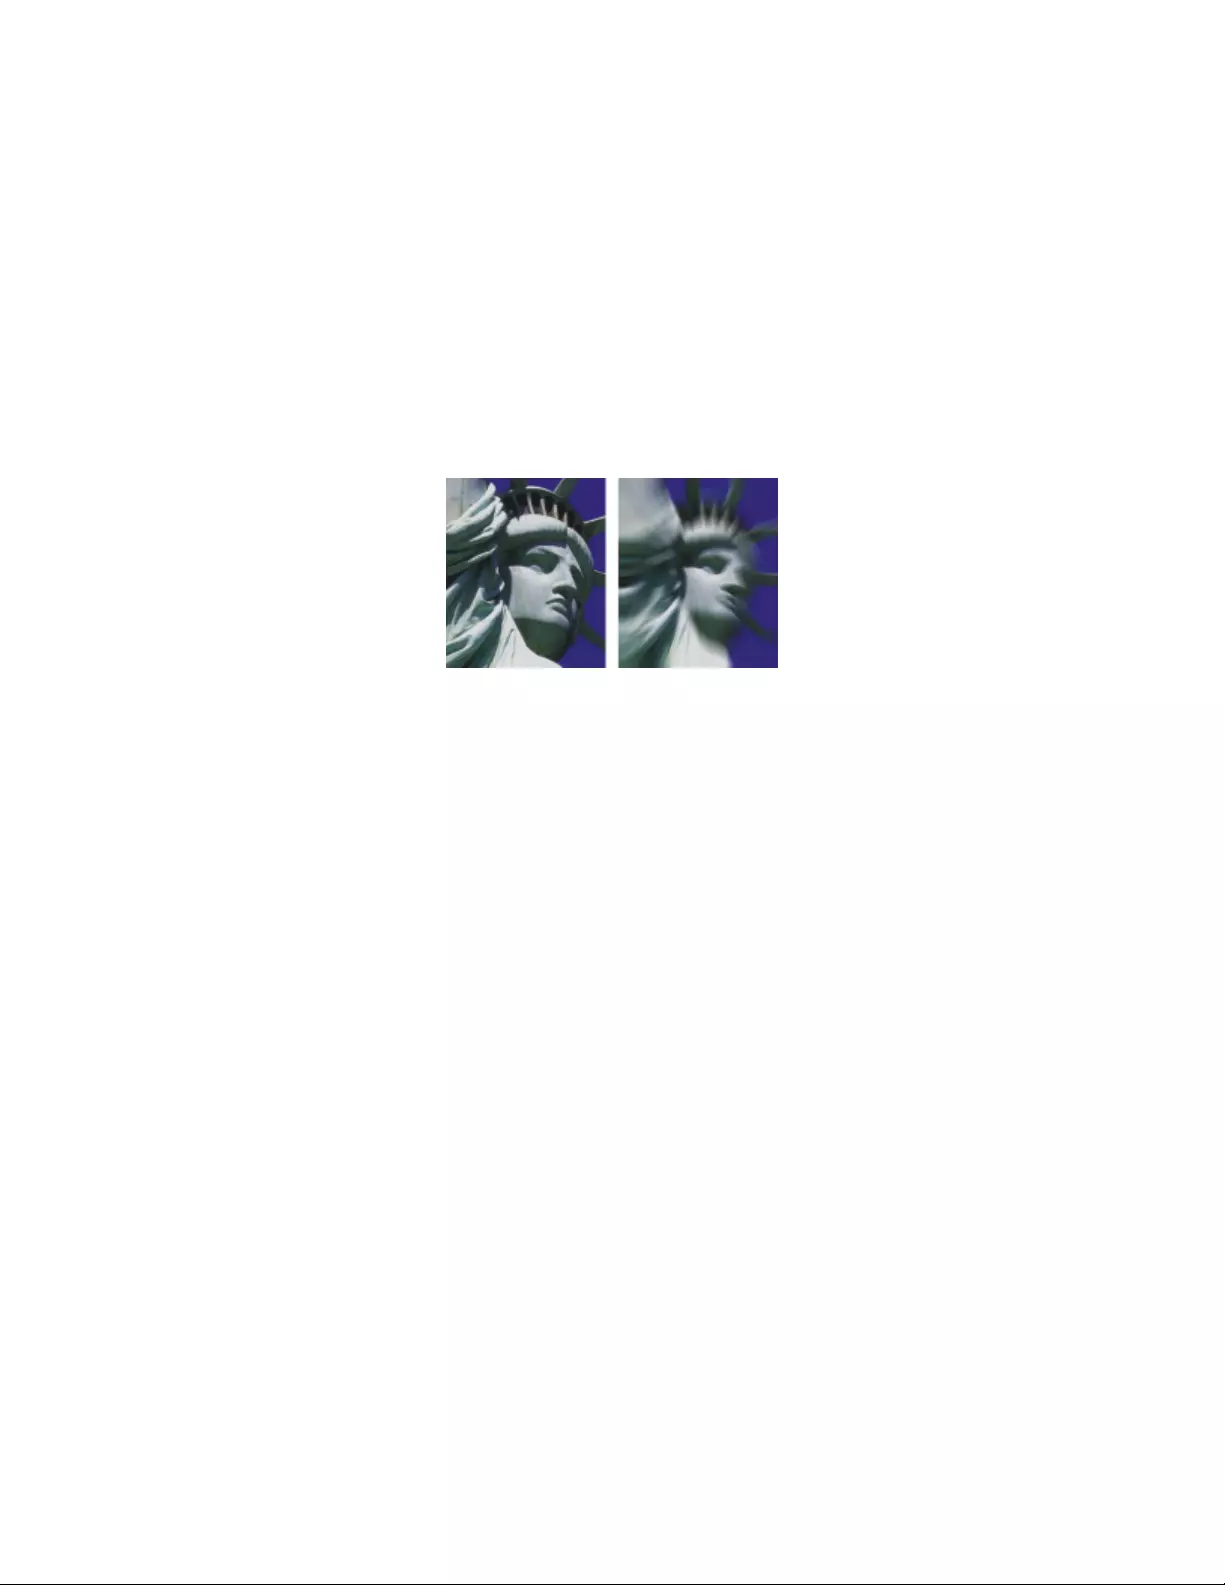
634 | Corel Painter 2022 User Guide
You can also
Preview the effect Enable the Preview check box.
Clear the effect Click Reset.
Applying Zoom Blur
This effect creates a blur by zooming in on, or out from, an area. The greater the distance from the zoom point, the more the image is
blurred. This effect lets you call attention to a particular area of the image.
Before (left) and after (right) applying the Zoom Blur
To apply Zoom Blur
1To apply the effect to:
• The canvas — Click the Canvas in the Layers panel.
• A selection — Click a selection tool from the toolbox, and drag in the document window to select an area.
• A layer — Click a layer in the Layers panel.
2Choose Effects Focus Zoom Blur.
3In the document window, click the image to specify the zoom point.
4Adjust the Amount slider to determine the amount of blur.
If you want to create the blur by zooming in, enable the Zoom In check box. If you want to create the blur by zooming out, disable the
Zoom In check box.
Applying Marbling
The Marbling effect creates intricate distortions of an image, following a technique that dates back to the 12th century. Marbling is created
by dragging a fork, or rake, across an image, which produces an effect similar to a fork dragging through a mix of chocolate syrup and
melted ice cream.
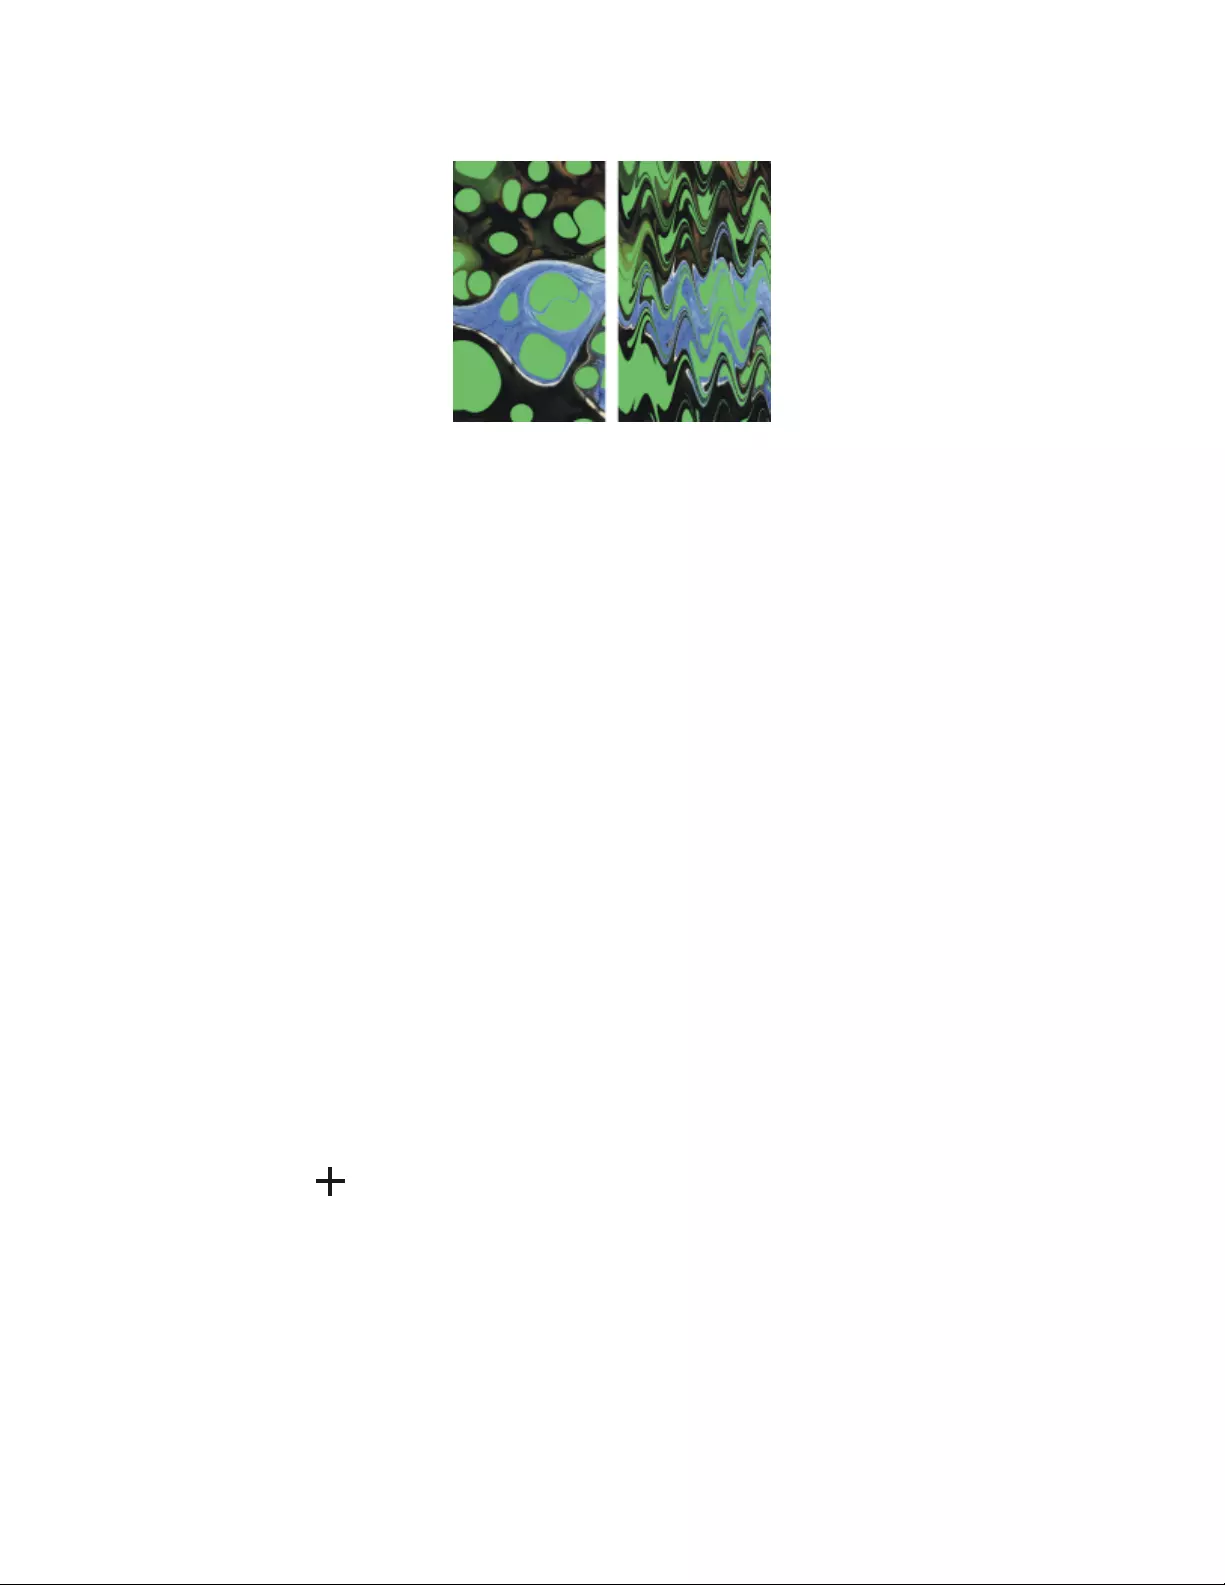
Using focus and esoterica effects | 635
Before (left) and after (right) applying the Marbling effect
Each time you drag a rake across an image, you create a step. You can create marbling “recipes” that include several steps — each one using
a different rake, direction, and waviness. You can save marbling recipes and reuse them.
Marbling works best with patterns or textures. Using the Blobs effect is an excellent way of creating the raw materials for marbling; filling
with a pattern is another. For more information, see “Applying Blobs” on page 638.
To create a marbling recipe
1To apply the effect to:
• The canvas — Click the Canvas in the Layers panel.
• A selection — Click a selection tool from the toolbox, and drag in the document window to select an area.
• A layer — Click a layer in the Layers panel.
2Choose Effects Esoterica Apply Marbling.
3Move any of the following sliders:
•Spacing — adjusts the distance between rake teeth, which controls the number of teeth in the rake. When the slider is all the way to
the right, the rake has one tooth.
•Offset — moves the rake in a perpendicular direction to the path direction, which adjusts the position of the rake lines
•Waviness — changes the amplitude (height) of the waves. When this slider is set to zero, the path is straight.
•Wavelength — determines the distance between wave peaks
•Phase — moves the wave in the rake direction. This lets you set where in the curve (peak, downslope, valley, or upslope) the rake
begins in the image.
•Pull — controls how much the rake distorts the image. Lower values produce thin, short distortions. Higher values create stronger
distortions.
•Quality — lets you control the smoothness in the marbled image. Low settings produce an aliased effect. The marbling looks rough
with scattered pixels. Increasing the Quality setting adds anti-aliasing, making color distortions appear smoother and more fluid.
As you move the sliders, the dotted lines in the preview window show the rake path.
4In the Direction area, enable an option for the rake stroke.
5Click the Add Step button .
6Repeat steps 3 to 5 for each rake step you want to create.
The Apply Marbling dialog box displays the current step number and the total number of steps in the recipe. You can move between
steps by clicking the forward and backward arrow buttons.
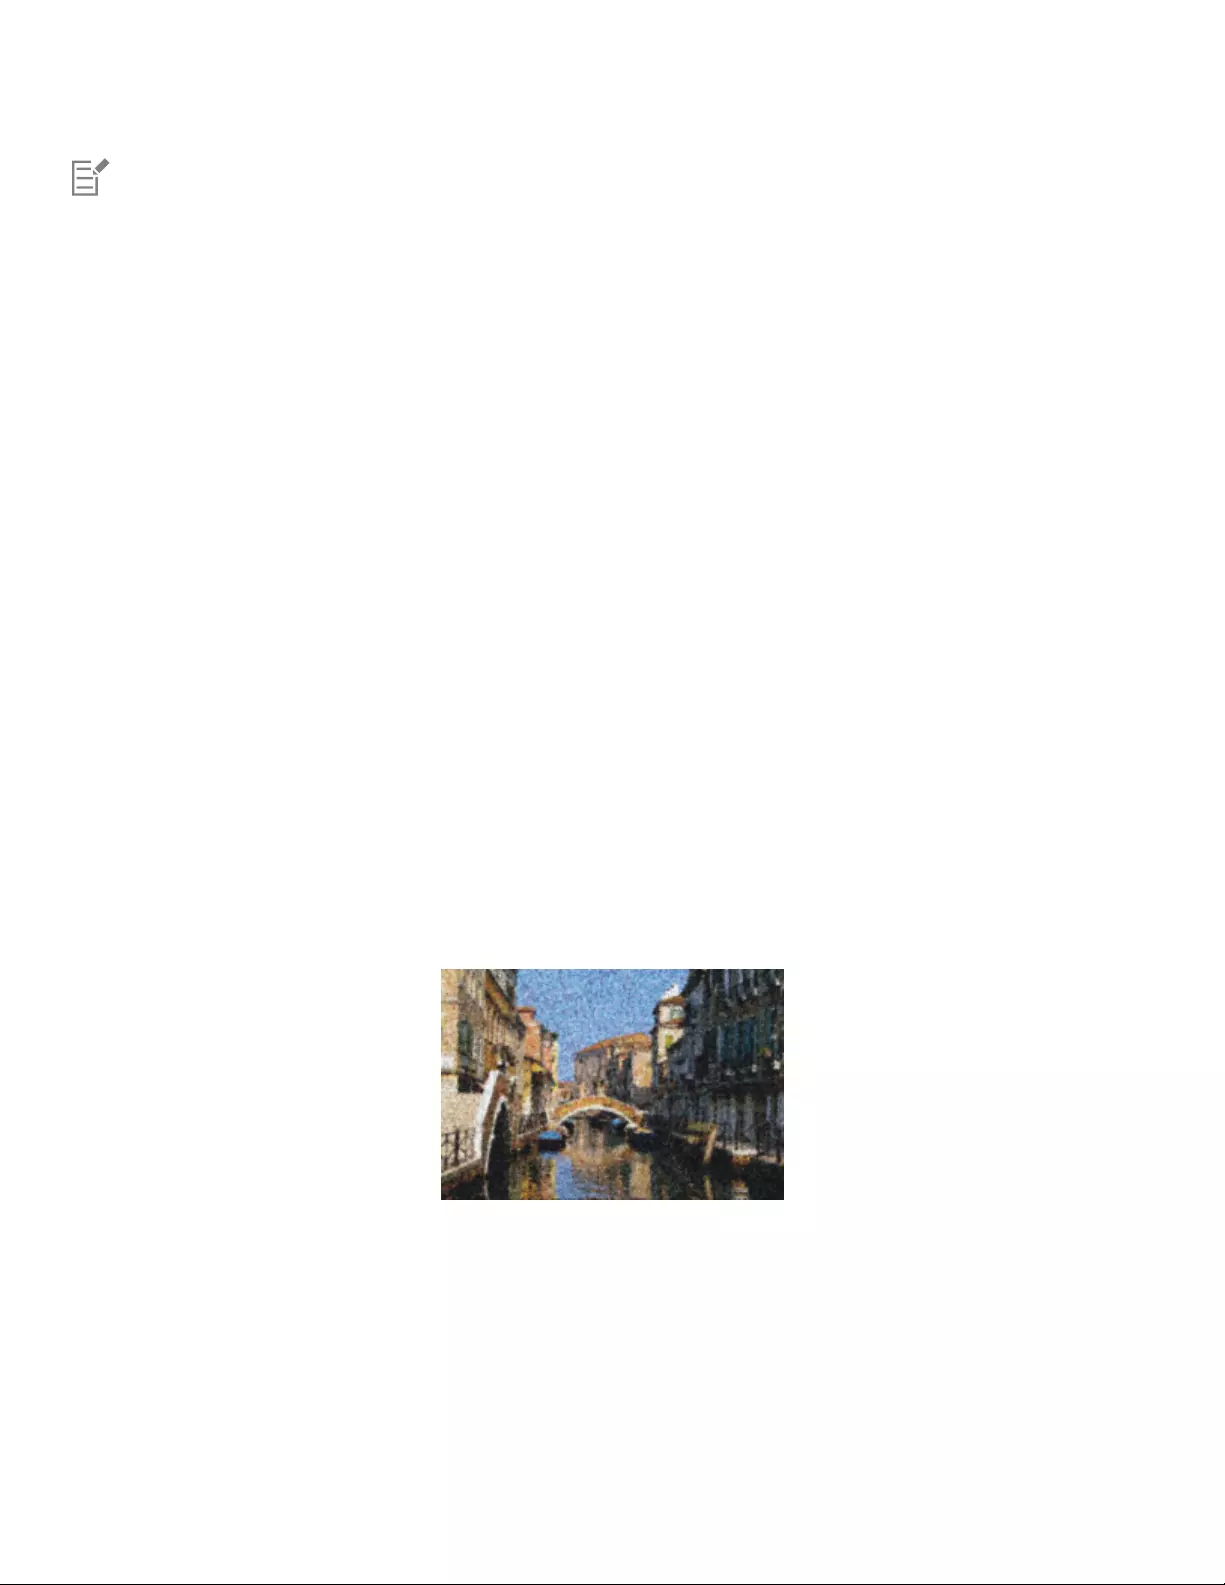
636 | Corel Painter 2022 User Guide
Selections can help you control the marbling when you have a particular effect in mind. For example, the rake path normally begins
from the edge of the image. If you want the rake path to begin in the center of a blob, select an area that begins at the blob’s
center.
Steps are applied in order, so subsequent steps are based on the result of each previous one.
The final look of the marble largely depends on whether you start horizontally or vertically, and whether you work with a fine comb
or a coarse rake.
Each step you add increases the time it takes to apply the recipe.
To save or load a recipe
• Perform an action from the following table:
To Do the following
Clear a recipe In the Apply Marbling dialog box, click Reset. The current recipe is
deleted.
Save a recipe In the Apply Marbling dialog box, click Save All Steps. In the Save
Marbling dialog box, specify a name.
Load a recipe In the Apply Marbling dialog box, click Load Marbling Steps. In
the Marbling Recipes dialog box, choose a recipe.
Automatically cloning an image
You can use the Auto Clone effect to automatically apply brush dabs to your image. The types of dabs depend on which brush you select.
The color is picked up from the clone source. Unlike most other effects, Auto Clone has no dialog box, using the current brush settings and
the clone color instead.
An example of the Auto Clone effect.
If you apply Auto Clone to a large area, the paint may fill smaller rectangular tiles one at a time. If you click to stop Auto Clone, it won’t
automatically finish the final tile of the overall selected area. To fill in non-rectangular areas, you can use Auto Clone with a selection. For
more information, see “Getting started with selections” on page 594.
When you use Auto Clone with tools that turn black as you repeat strokes, areas darken rapidly. You can slow down the color buildup when
using Auto Clone by dimming the original image.
Using focus and esoterica effects | 637
Another way to automate cloning is by recording and playing back individual brushstrokes, which is especially useful for filling in
backgrounds. For more information, see “Recording and playing back brushstrokes” on page 168 and “Image cloning and sampling” on
page 191.
To automatically fill an area with cloned brushstrokes
1Open an image file to use as a clone source.
2Choose File Clone.
If you want to apply the effect to only a portion of your image, choose a Selection tool from the toolbox and make a selection.
3Click the Brush Selector on the Brush Selector bar.
4Click the Cloners : General brush category, and then choose a brush variant such as Impressionist.
Not all Cloners are compatible with Auto Clone. If you choose an incompatible variant, the Auto Clone effect is disabled.
5Choose Effects Esoterica Auto Clone.
Dabs of paint are automatically applied to the selected area.
6Click anywhere in the image to turn off Auto Clone.
If you apply Auto Clone to a large area, the paint may fill areas sparsely. When you click to stop Auto Clone, it stops at that point.
It won’t continue to fill the selected area. To fill an area completely, you must let the Auto Clone continue.
You can transform a variant into a cloner, so you can use it with Auto Clone, by clicking the Clone Color button in the Color
panel.
You can generate more color variety in the dabs by setting the ±H, ±S, and ±V sliders in the Color Variability panel to 15% each.
You can open the Color Variability panel by choosing Window Brush Control Panels Brush Media Color Variability.
Applying the Auto Van Gogh effect
You can use the Auto Van Gogh effect to create a Van Gogh–like rendition of an image. To apply Auto Van Gogh, you must first clone the
image and then choose the Auto Van Gogh variant from the Artists brush category, which is included in the Painter 2015 brush library.
The Painter 2015 Brushes library is available for download from the Welcome book store (Help Welcome Store.)
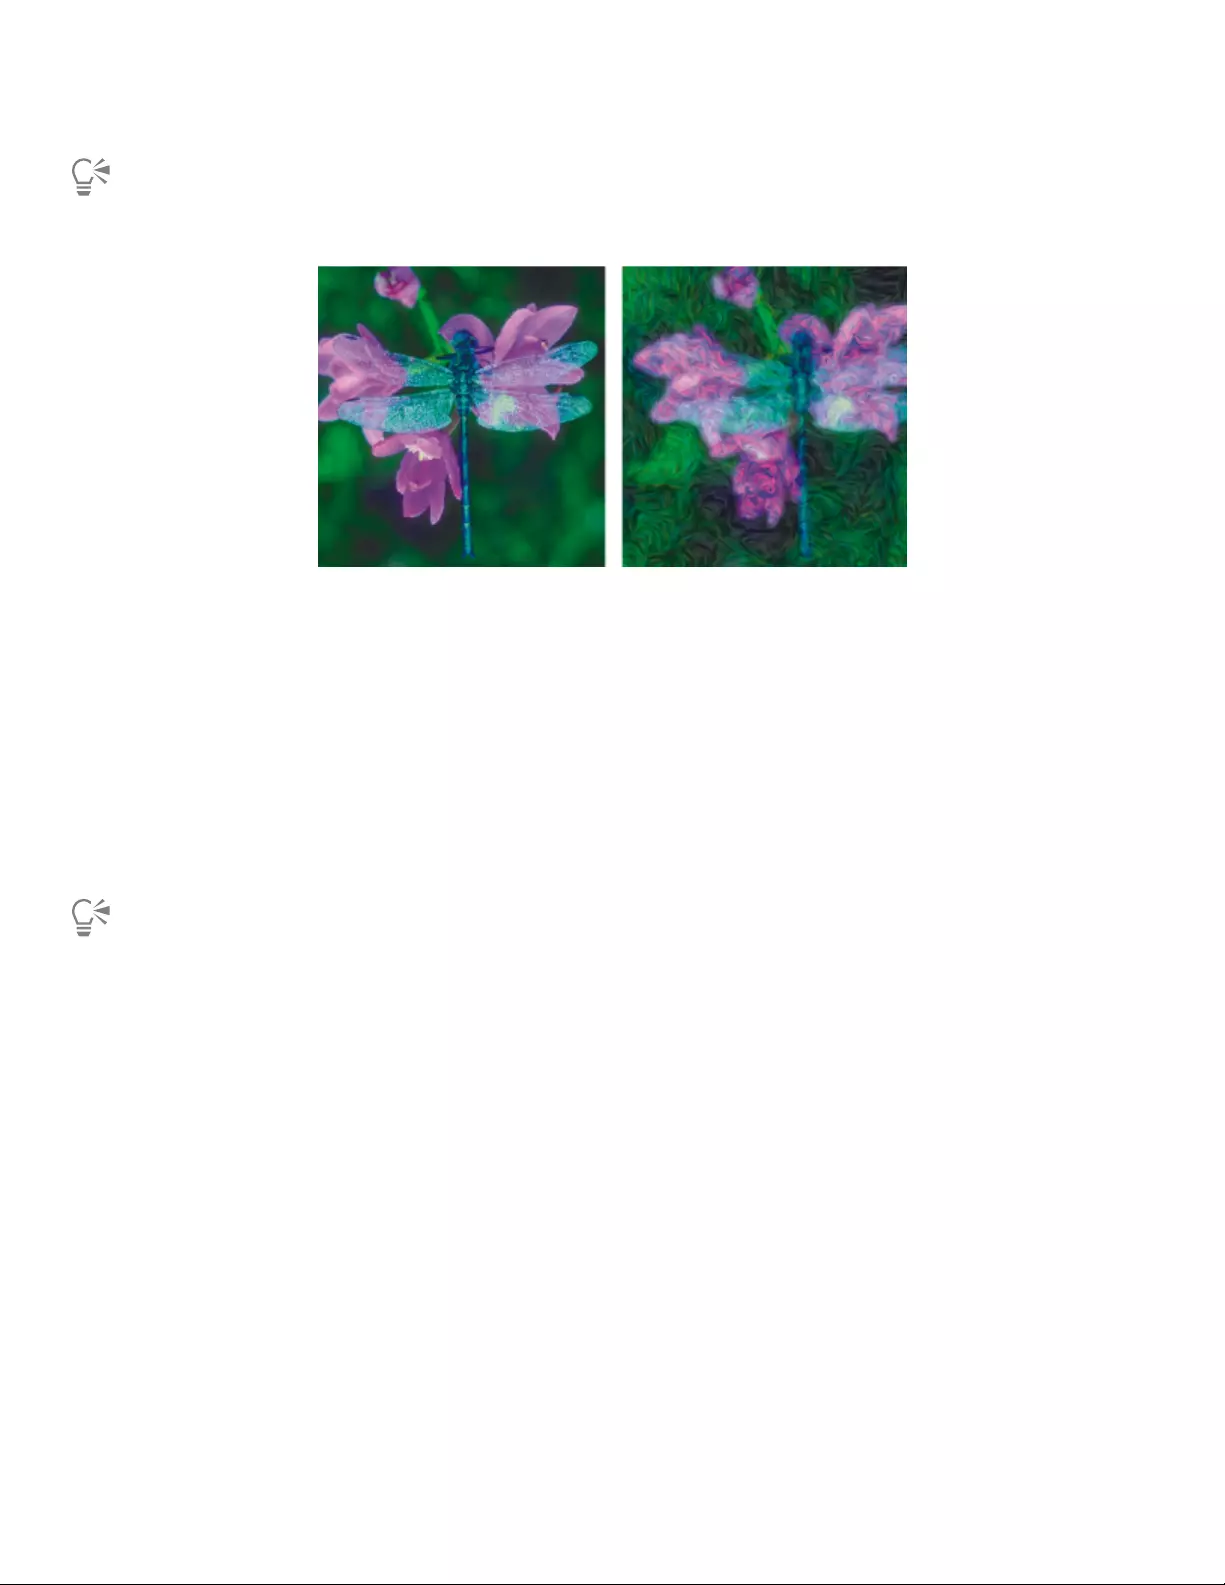
638 | Corel Painter 2022 User Guide
To access the Painter 2015 Brushes library, first download it from the Welcome book store. Next, import it, and then in the Brush
Selector, choose Painter 2015 Brushes from the Brush Library list box.
The Auto Van Gogh effect
The effect requires two passes. The first pass determines the angles of the brush dabs. The second pass applies the dabs. The image is then
rendered in a set of directional brushstrokes.
To apply Auto Van Gogh to an image
1Select the image you want to clone.
2Choose File Quick Clone.
3Click the Brush Selector on the Brush Selector bar, and choose Painter 2015 Brushes from the Brush library list box.
4Click the Artists brush category, and then click the Auto Van Gogh brush variant.
5Choose Effects Esoterica Auto Van Gogh.
You can generate more color variety in the dabs by setting the ±H, ±S, and ±V sliders in the Color Variability panel to 15% each.
You can open the Color Variability panel by choosing Window Brush Control Panels Brush Media Color Variability.
Applying Blobs
The Blobs effect creates a pattern similar to oil floating on water. The effect distorts underlying image as if it were liquid and places blobs
that are based on color, clipboard content, or a pattern, on the image.
You can use one of three sources to fill in the blobs. You can produce blobs that look like bubbles by creating a circular selection that’s
shaded like a sphere, and then copying it to the Clipboard.

Using focus and esoterica effects | 639
Before (left) and after (right) applying a Blob effect created from Clipboard contents
A Blob effect created from the current color source
Blobs create a nice basis for the Apply Marbling effect because they create interesting color patterns. You may want to apply this effect to
your original image before Apply Marbling. For more information, see “Applying Marbling” on page 634.
To apply a blob effect
1Perform an action from the following table:
To Do the following
Fill blobs with Clipboard contents Copy an image to the Clipboard. You can copy images outside of
Corel Painter.
Fill blobs with the current color Choose a color in the Color panel.
Fill blobs with a pattern Choose a pattern in the Patterns panel.
2Open the image.
3To apply the effect to:
• The canvas — Click the Canvas in the Layers panel.
• A selection — Click a selection tool from the toolbox, and drag in the document window to select an area.
• A layer — Click a layer in the Layers panel.
4Choose Effects Esoterica Blobs.
5Choose one of the following options from the Using list box:
•Paste Buffer — fills blobs with the current contents of the Clipboard
•Current Color — fills blobs with the color currently selected in the Color panel
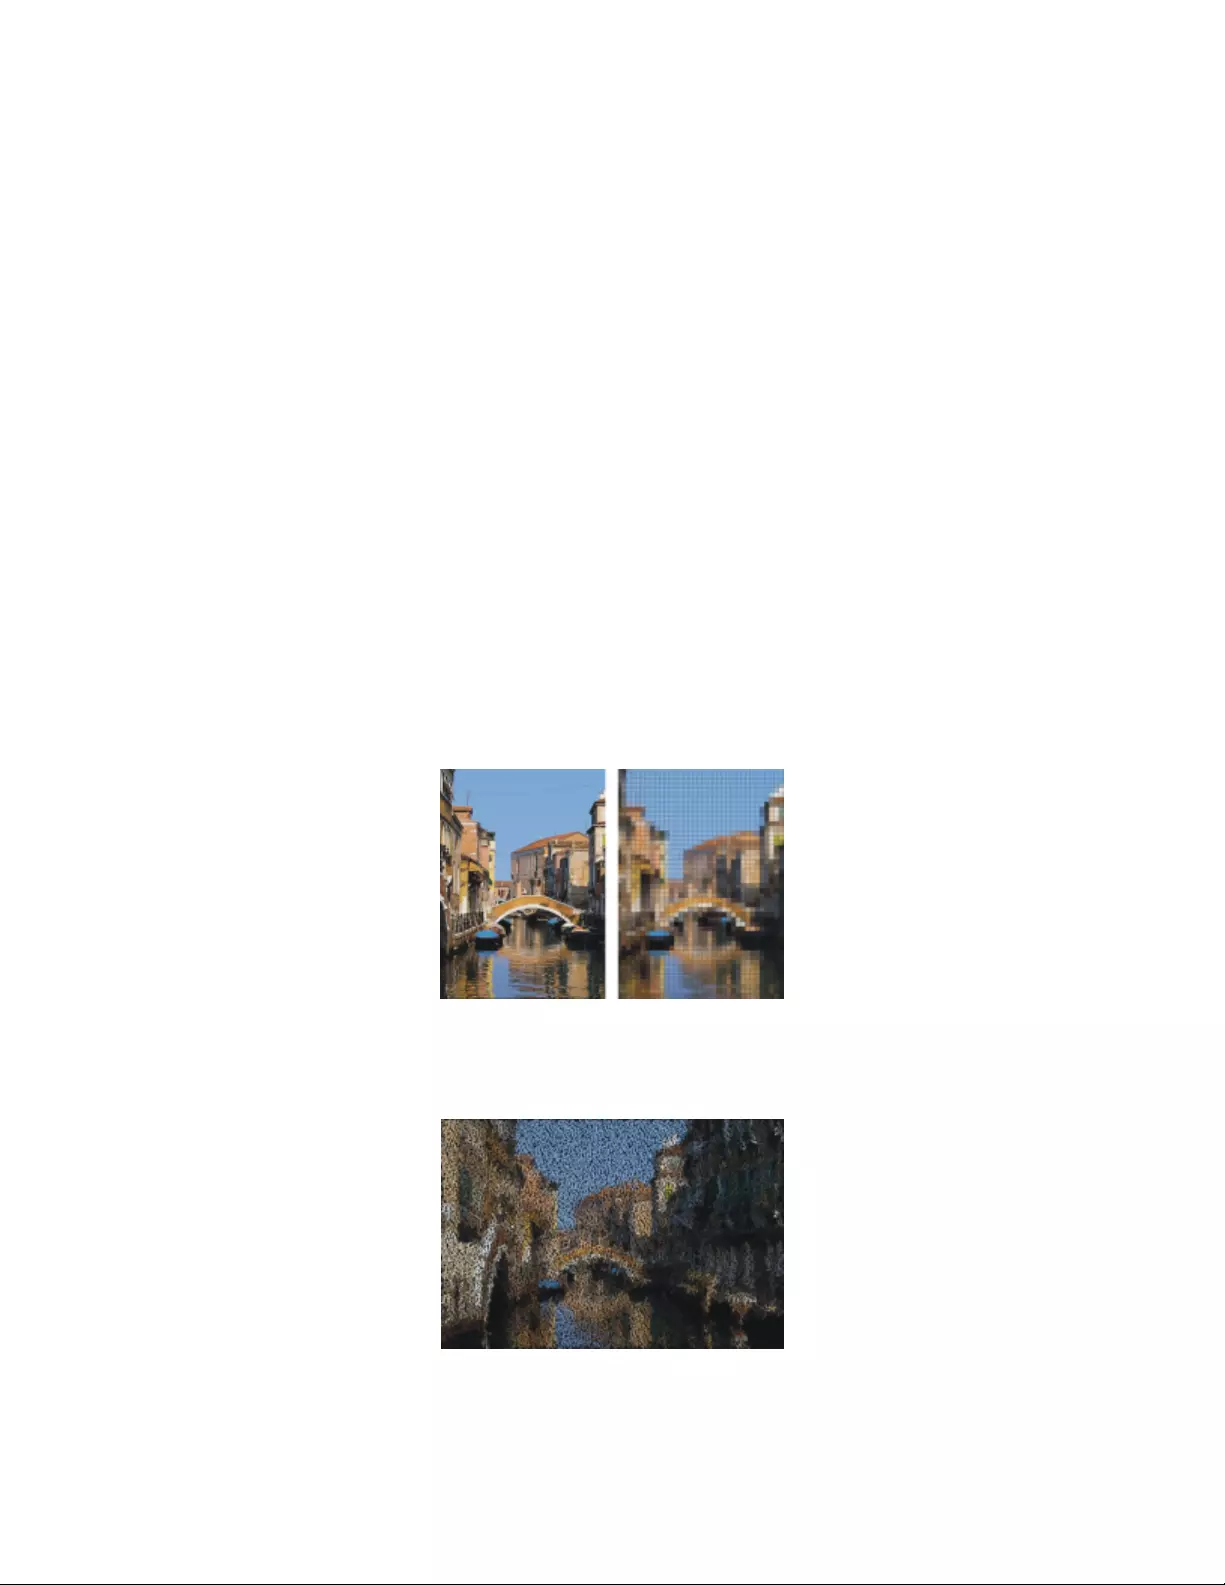
640 | Corel Painter 2022 User Guide
•Pattern — fills blobs with the pattern currently selected in the Patterns panel
Each time you apply the effect, a different seed number is generated in the Seed box.
6Type a value in the Number of Blobs box.
7Specify the minimum and maximum sizes of the blobs.
You can also
Set the number of anti-aliasing steps Type a value in the Subsample box.
Create repeating patterns Disable the Random Seed check box, and type a value in the Seed
box.
Change the random pattern of the blobs With the Random Seed check box enabled, click the Refresh
button next to the Seed box.
Creating custom tiles
Corel Painter transforms images into tiles based on a preset pattern, like bricks or hexagons, or from a paper pattern, clone source, or
channel. If you use a preset pattern, the tiles are uniform in size and cover the entire image evenly.
The color of each tile is determined by applying the average color of the image pixels it covers.
Before (left) and after (right) applying tiles generated from a preset pattern
When you generate tiles from either a paper pattern, clone source, or channel, tiles are based on light and dark concentrations in the
selected source. In this case, the shape of the tiles is varied and may not cover an image evenly.
Tiles generated from a paper pattern
The Custom Tile effect functions differently from the Make Mosaic and Make Tessellation effects. For more information, see “Creating a
mosaic” on page 726.
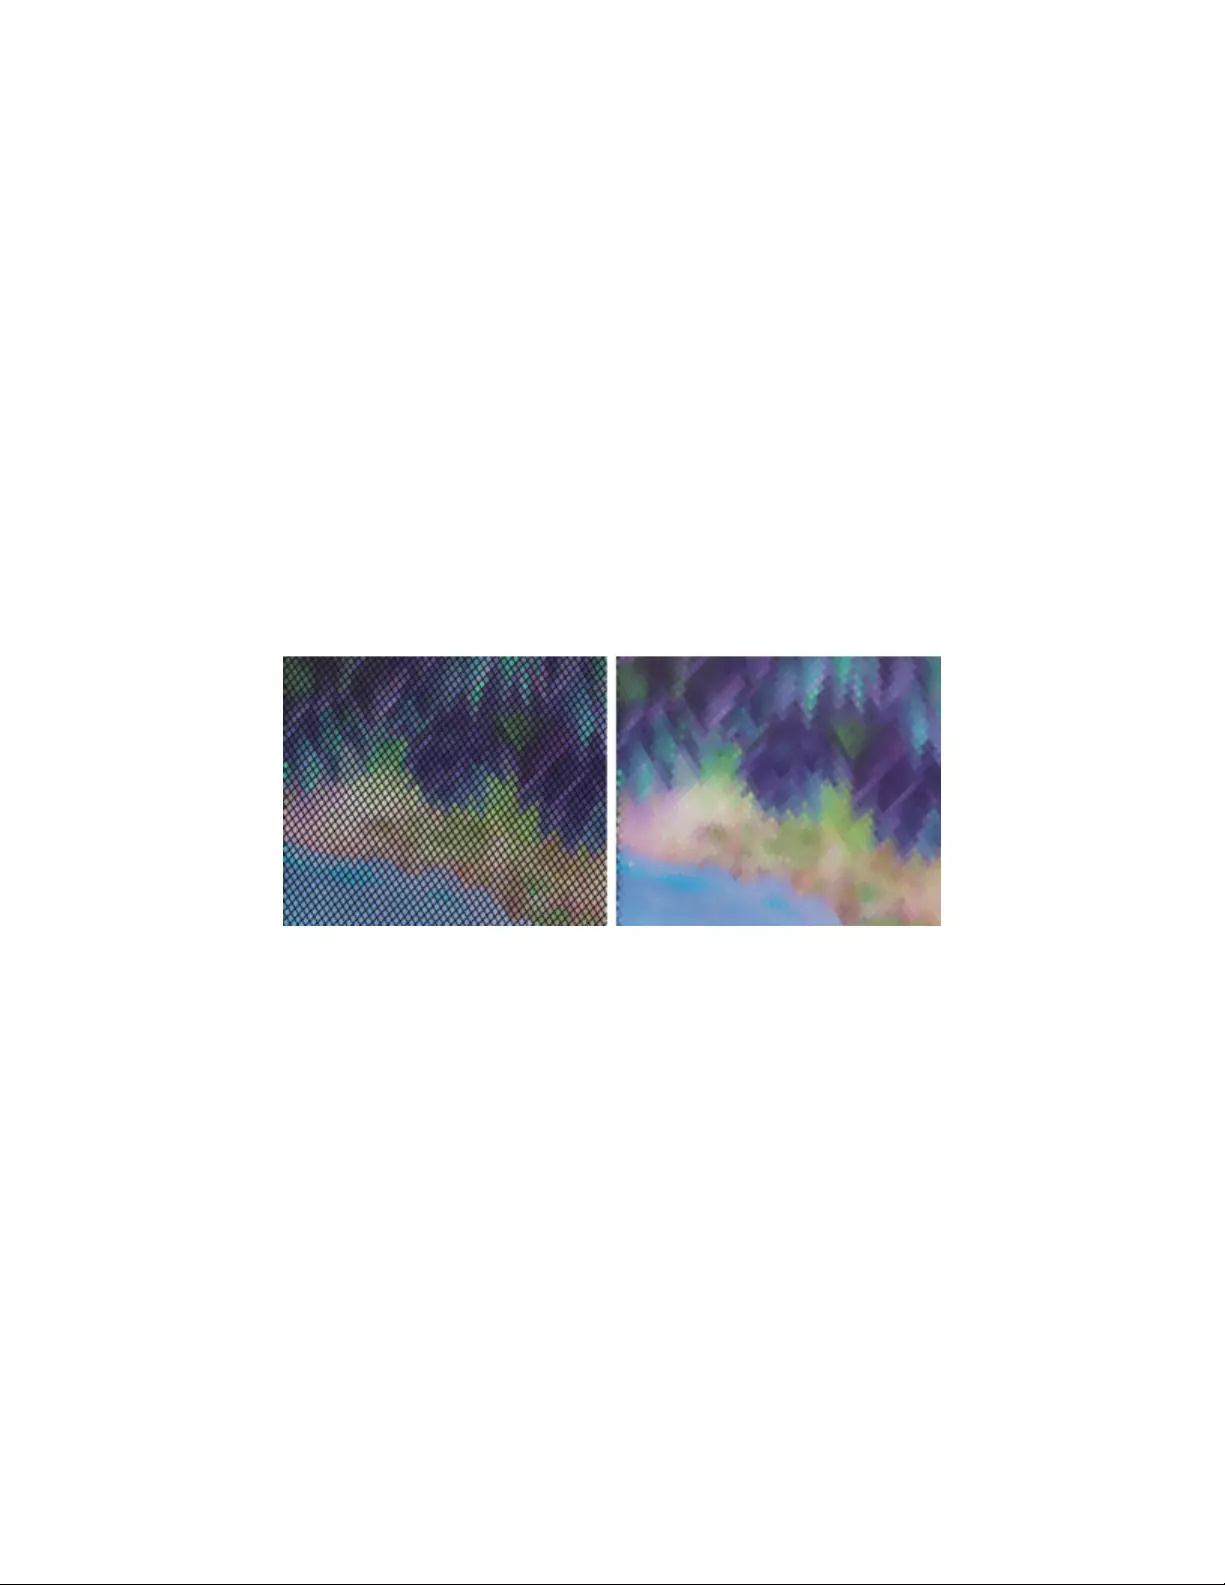
Using focus and esoterica effects | 641
To apply custom tiles
1To apply the effect to:
• The canvas — Click the Canvas in the Layers panel.
• A selection — Click a selection tool from the toolbox, and drag in the document window to select an area.
• A layer — Click a layer in the Layers panel.
2Choose Effects Esoterica Custom Tile.
3Choose one of the following patterns from the Using list box:
•Brick
•Hex
•Square
•Triangle
•Cross
•12-6-4
•12-6-4 V2
4Adjust any of the Custom Tile controls. For information, see “Custom tile controls” on page 642.
The original grout appearance (left) is changed by blurring (right).
To apply custom tiles by using clone or pattern luminance
1Perform a task from the following table.
To Do the following
Use a clone source In the Clone Source panel (Window Clone Source), choose
Embedded Image from the Source list box.
In the Embed Source Image dialog box, do one of the following:
•To browse for a file, enable the Browse option.
•To clone a currently open document, enable the Current
Document option, and choose a document from the list box.
•To embed the active texture, enable the Current Texture option.
Click OK.
Use a pattern Choose Window Media Panels Patterns, and click a pattern
swatch in the Painter Patterns area.

642 | Corel Painter 2022 User Guide
2To apply the effect to:
• The canvas — Click the Canvas in the Layers panel.
• A selection — Click a selection tool from the toolbox, and drag in the document window to select an area.
• A layer — Click a layer in the Layers panel.
3Choose Effects Esoterica Custom Tile.
4Choose Original Luminance from the Using list box.
5Adjust any of the Custom Tile controls. For information, see “Custom tile controls” on page 642.
To apply custom tiles by using paper luminance
1Choose Window Media Panels Papers.
2Choose a paper swatch in the Paper Textures area.
3To apply the effect to:
• The canvas — Click the Canvas in the Layers panel.
• A selection — Click a selection tool from the toolbox, and drag in the document window to select an area.
• A layer — Click a layer in the Layers panel.
4Choose Effects Esoterica Custom Tile.
5Choose Paper from the Using list box.
6Adjust any of the Custom Tile controls. For information, see “Custom tile controls” on page 642.
To apply custom tiles by using layer mask or channel luminance
1Do one of the following:
•To use a layer mask, choose Window Layers, and click the layer that contains a layer mask in the Layers panel.
•To use an alpha channel, choose Window Channels, and click the alpha channel in the Channels panel.
2To apply the effect to:
• The canvas — Click the Canvas in the Layers panel.
• A selection — Click a selection tool from the toolbox, and drag in the document window to select an area.
• A layer — Click a layer in the Layers panel.
3Choose Effects Esoterica Custom Tile.
4Choose the channel or layer mask from the Using list box.
5Adjust any of the Custom Tile controls. For information, see “Custom tile controls” on page 642.
Custom tile controls
•Brick Width and Brick Height — adjusts the size of bricks
•Angle and Scale — adjusts the tile orientation and size of built-in tile shapes
•Blur Radius — sets the sampling radius for blurring the crack or grout color. Increasing the Blur Radius adds more neighboring colors to
the crack pixels in each pass.
•Blur Passes — sets the number of times the crack pixels are blurred. More passes mix more tile color into the cracks. Blurring occurs only
when Blur Passes is greater than zero.
•Threshold — draws the line between light and dark. Everything above the Threshold value becomes tiles, and everything below becomes
grout.
•Use grout — adds grout between the tiles
•Grout Color — sets the grout color
•Grout Thickness — controls the width of the cracks between tiles or the grout lines (if grout is enabled)
Using focus and esoterica effects | 643
Applying Grid Paper
The Grid Paper effect adds a grid of horizontal lines, vertical lines, rectangles, or dots to an image.
Unlike the grid overlay, which is a transparent layer that floats as a reference above an image, Grid Paper becomes part of an image. It is
best to apply Grid Paper to a blank canvas and then apply color to the canvas or layers.
To apply Grid paper
1Choose Effects Esoterica Grid Paper.
2Choose an option from the Grid Type list box.
3Set the grid dimensions by entering values in the following boxes:
•Horizontal Spacing — determines the amount of space between horizontal lines
•Vertical Spacing — determines the amount of space between vertical lines
•Line Thickness — sets the width of grid lines
4Click the Grid Color chip, and choose a color from the color picker to set the grid color.
5Click the Background chip, and choose a color from the color picker to set the background color.
Applying Growth effects
The Growth Effect generates branchlike designs from a central point and adds them to your image. The designs resemble architectural
renderings of trees.
Examples of Growth patterns
Growth patterns are created from the current main color. You have access to the Color panel while the Growth dialog box is open, so you
can change the main color at any time.
To create growth patterns
1In the Color panel, choose a color.
2Choose Effects Esoterica Growth.
3Enable any of the following check boxes:
•Hard edges — creates growth patterns with hard edges; disable to create growth patterns with soft, feathery edges
•Fractal — creates open-ended (fractal) patterns; disable to create nonfractal patterns, which are closed on the outside by a ring
4Adjust any of the following sliders:
•Flatness — reshapes the growth pattern like a lens effect. Move the slider to the left for a concave lens effect. Move the slider to the
right for a “fish-eye” lens effect.
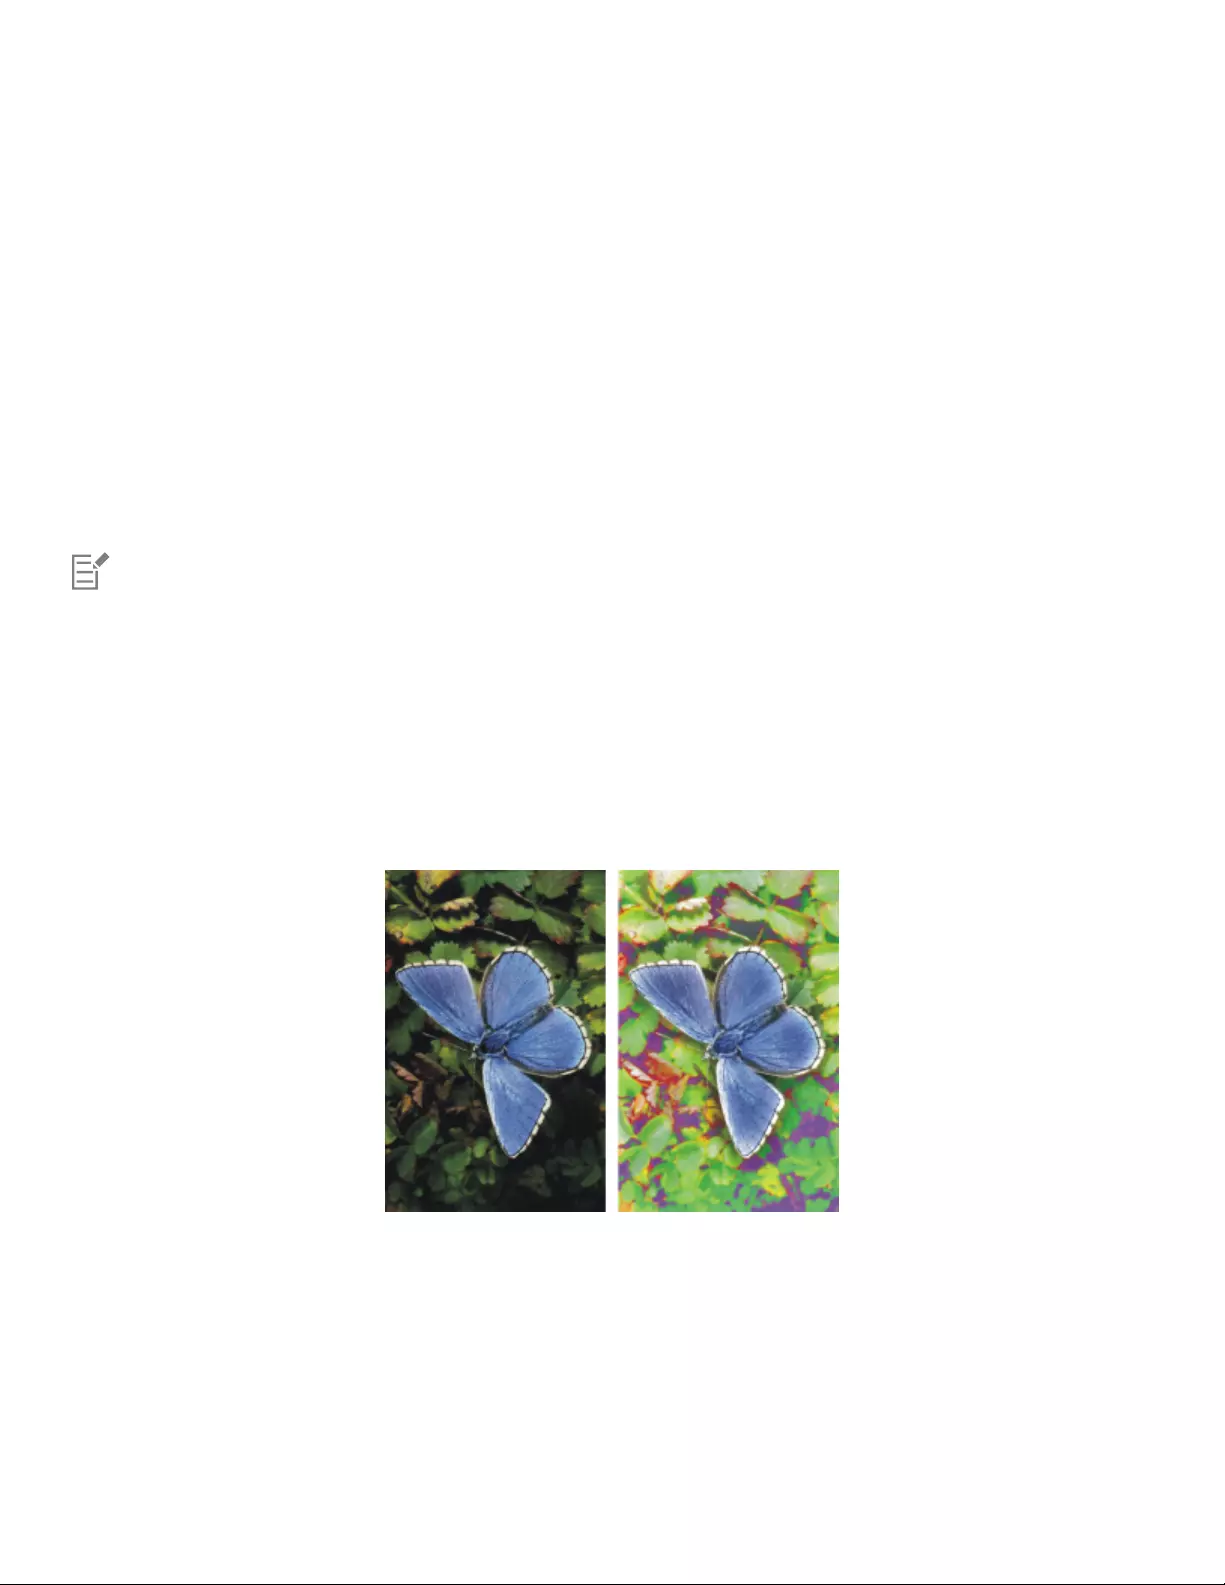
644 | Corel Painter 2022 User Guide
•Thinout — affects how the size of the growth pattern is distributed from the center to the outside edges. At settings over 100%, the
outside edges become thicker. At settings under 100%, the edges become finer and more delicate.
•Random — affects how symmetrical the growth patterns appear. Lower values generate straight-line, geometrical designs. Higher
values generate distorted, crooked designs.
•Thickness — uniformly adjusts the weight of the lines within the design. Move the slider to the left for thinner lines, and to the right
for thicker lines. The growth pattern cannot be made thinner than one pixel.
•Branch — determines how many branches come from the center to the outside edge. The range is 1 through 20.
•Max Level — determines the number of levels or sublevels that appear in the tree. Specifically, Max Level determines how the
branches split to the outside edge.
•Fork — adjusts the overall intricacy of the outermost branches
•Fork Ratio — is similar to Fork, but it affects only the tips of the outermost branches
5Without closing the Growth dialog box, drag in the document window to create a growth pattern.
6Do one of the following:
• To apply the current growth pattern, click OK.
• To discard all patterns, click Cancel.
The sliders in the Growth dialog box affect both fractal and nonfractal growth patterns in a similar way, with the exception of Fork
and Fork Ratio, which affect only fractal growth patterns.
Applying Highpass
The Highpass effect suppresses low-frequency areas containing gradual or smooth transitions of brightness levels. This leaves high-frequency
areas, or just the edges of an image, containing stark shifts between brightness levels.
Highpass uses either the Gaussian or Circular aperture options. Gaussian aperture affects the red, green, and blue components of color;
Circular aperture uses image luminance. You can make the highpass more pronounced by using the Equalize effect.
The Highpass effect introduces stark shifts between brightness levels.
To apply a Highpass effect
1To apply the effect to:
• The canvas — Click the Canvas in the Layers panel.
• A selection — Click a selection tool from the toolbox, and drag in the document window to select an area.
• A layer — Click a layer in the Layers panel.
2Choose Effects Esoterica Highpass.
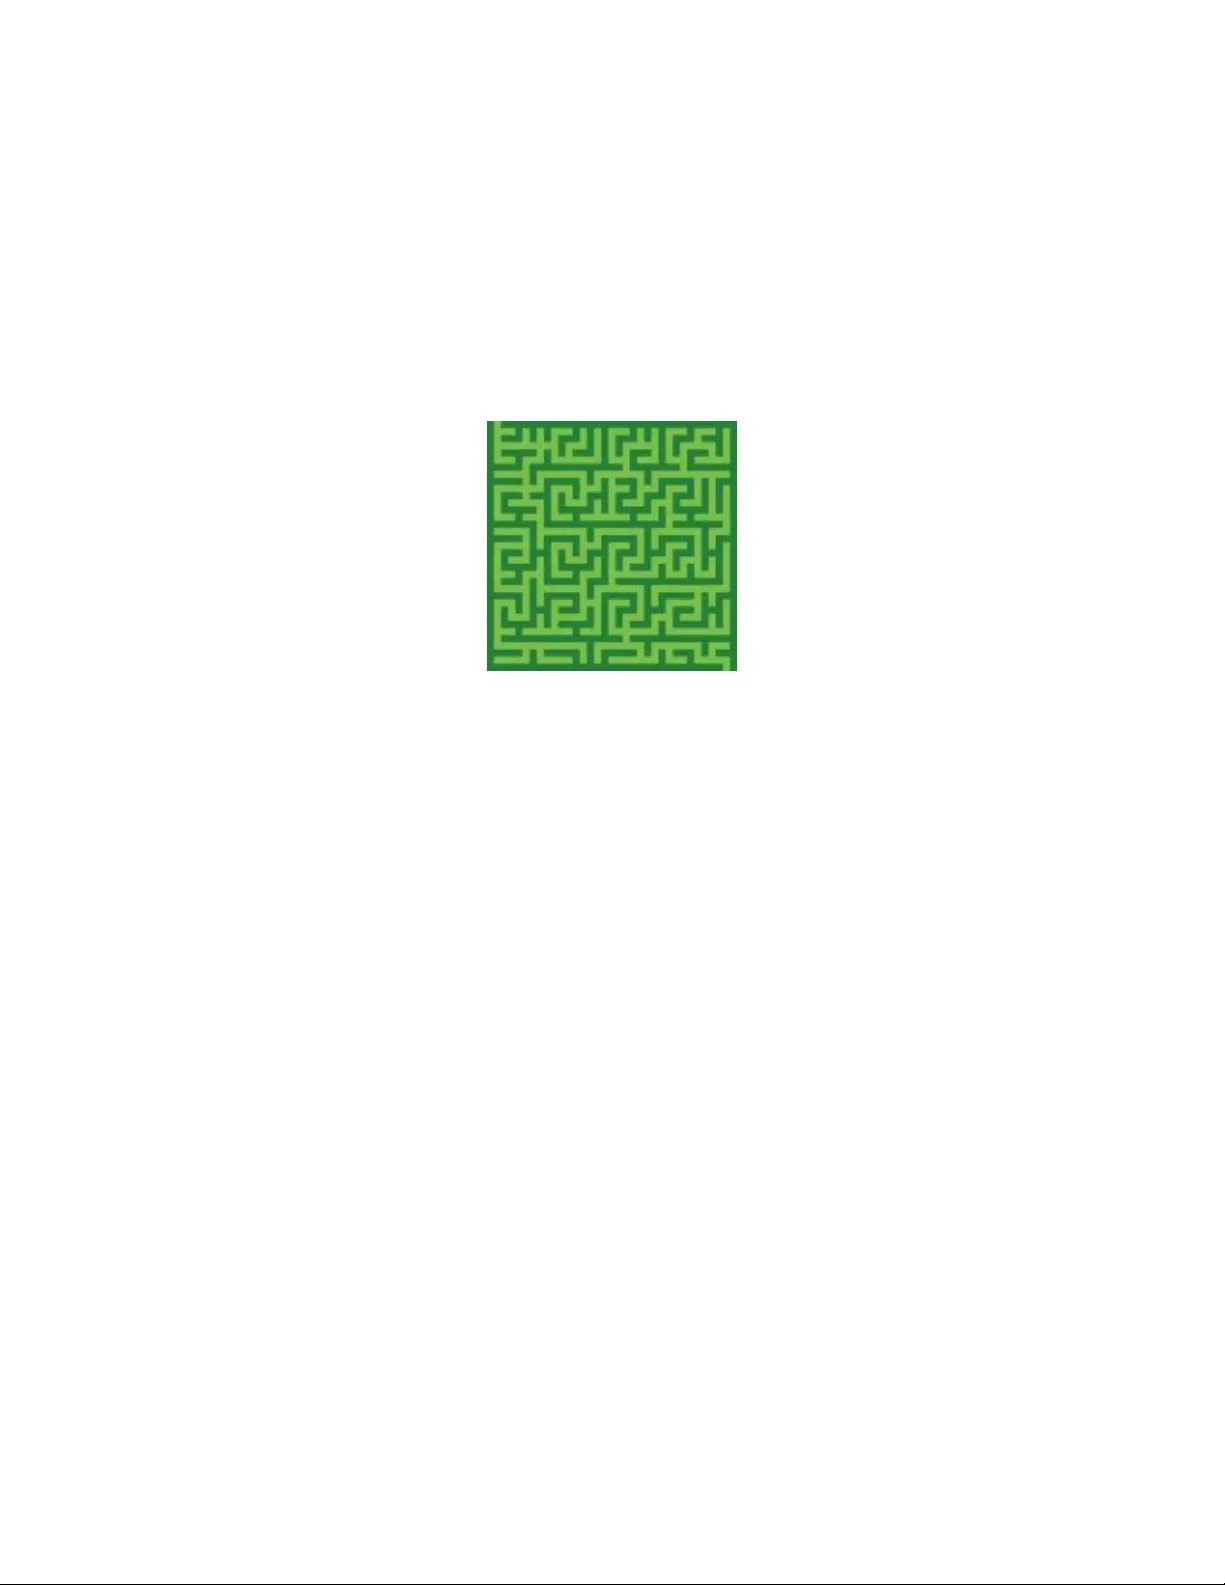
Using focus and esoterica effects | 645
3In the Highpass dialog box, choose an aperture option.
4Move the Amount slider to determine how much to suppress the low-frequency areas.
This value defines a radius, in pixels, around each pixel in the selected image area. Moving the slider to the left suppresses larger
amounts of low-frequency information. Moving the slider to the right suppresses smaller amounts of low-frequency information.
Applying the Maze effect
The Maze effect generates an image of a maze. Typically, you’ll create a maze in a new, blank image. Each maze has one “solution” — that
is, an open path from the entrance to the exit.
The Maze effect produces interesting designs.
You can capture a portion of the maze as a pattern or paper texture, or use the maze as a source for other effects. Mazes must be
rectangular and cannot be applied to non-rectangular selections.
To apply a Maze effect
1Choose Effects Esoterica Maze.
2Click the Maze Color chip, and choose a maze color.
3Click the Background chip, and choose a background color.
4Enable any of the following check boxes:
•Patterned — constrains barriers to the horizontal
•Display solution — displays the path from the entrance to the exit
5Type a value in the Seed box to generate a random maze pattern.
6Type a value in the Thickness box to set the width of barriers and paths.
Placing elements
Place Elements is an effect designed to automate the application of brush dabs. It’s particularly useful when applying it with an Image hose
brush variant. For more information, see “Painting with the Image hose” on page 487.
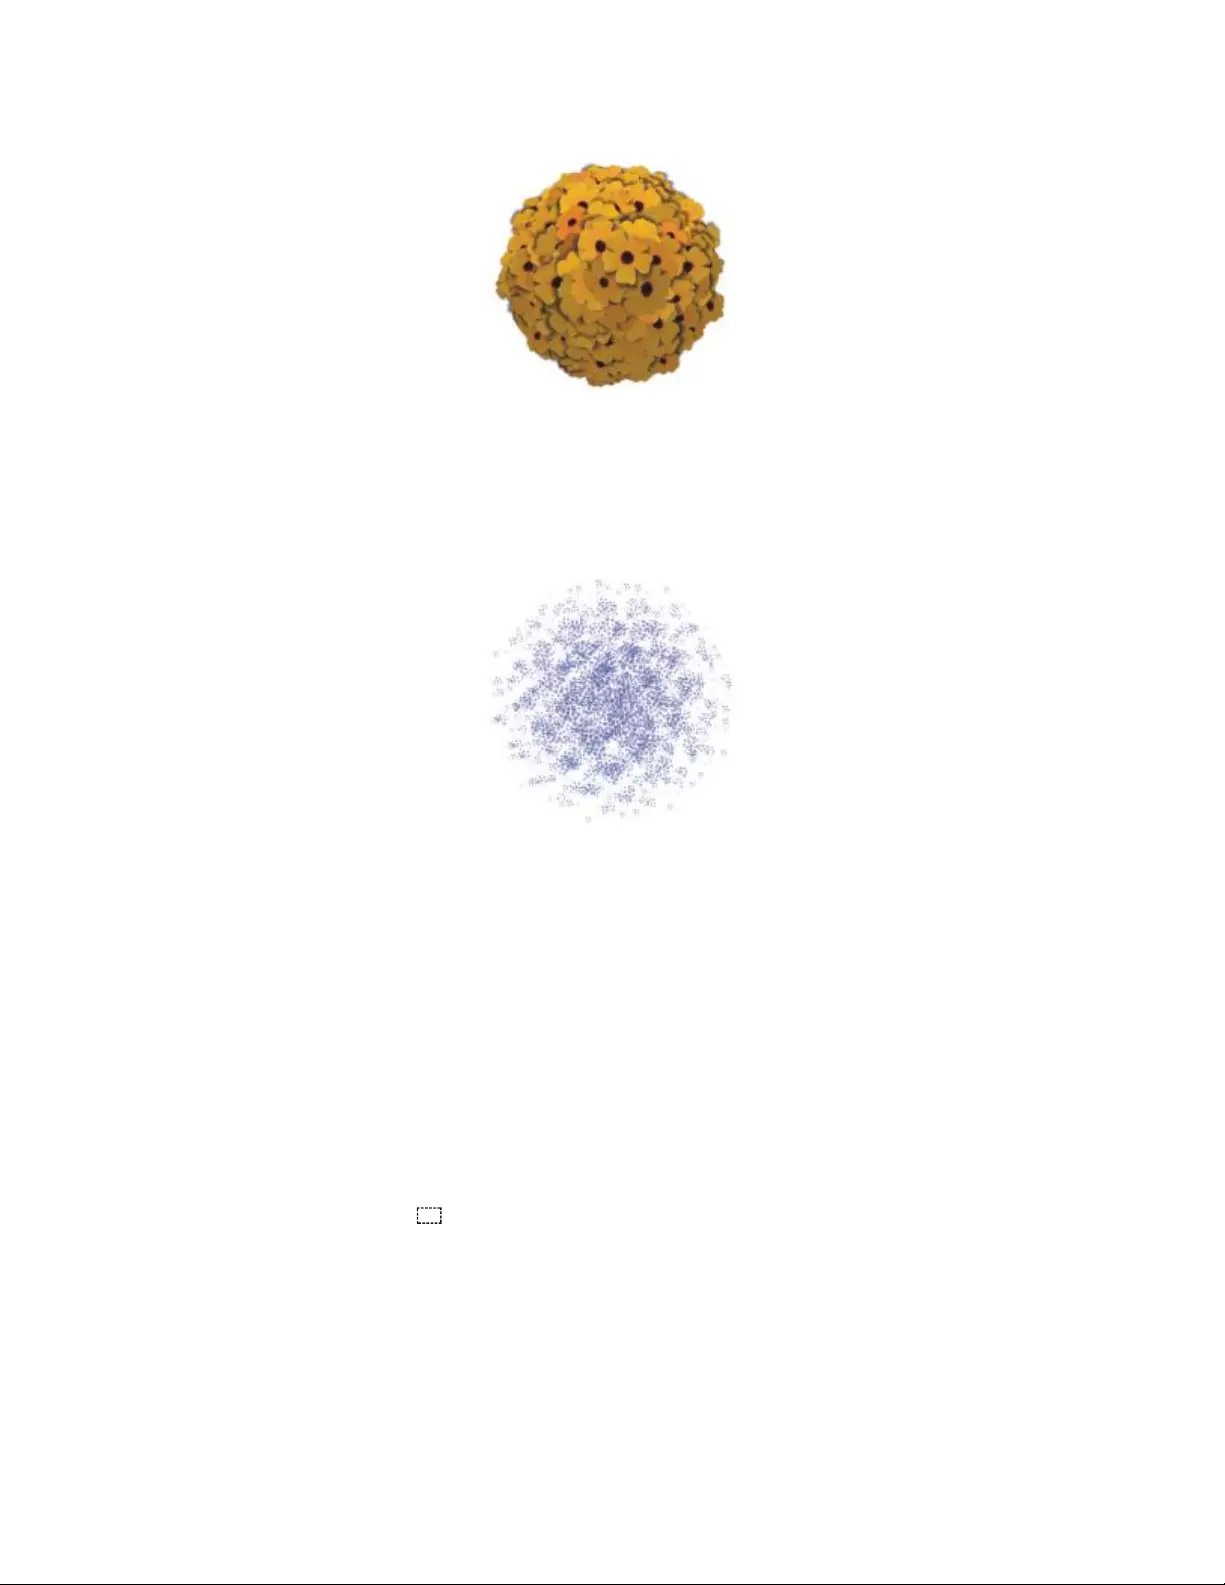
646 | Corel Painter 2022 User Guide
An example of the Place Elements effect used with the Image hose
The Place Elements effect creates a virtual sphere within the confines of a selection rectangle. When the selection is square, the sphere is
perfectly round; when the selection is rectangular, the sphere is elongated or flattened.
A number of points are created at random locations on the sphere. The points are then distanced from each other, and a brush dab is placed
at each point. Each dab’s appearance is adjusted according to its location on the sphere.
An example of the Place Elements effect used with a brush
To place elements
1Do one of the following:
• To use an Image hose, choose an Image hose brush variant from the Brush library, and then choose a nozzle from the Nozzle selector
on the Media Selector bar.
• To apply paint dabs, select a brush from the Brush library. Not all brush variants are supported by Place Elements.
2Choose Window Color Panels Color Panel (Full View).
3In the Color panel, do one of the following:
• If using an Image hose brush variant, set the additional color to black.
• If using another brush variant, set the main color.
If using the Image hose, the effect automatically controls mixing of the additional color with nozzle elements to produce depth shading.
Shadows tend toward black, so black is a good color to use.
4Choose the Rectangular Selection tool from the toolbox.
5Drag to create a selection.
This selection determines the location and size of the effect.
6Choose Effects Esoterica Place Elements.
7Adjust any of the following sliders:
•Iterations — controls the spacing of iterations. In each iteration, the points distance themselves from each other on the surface of
the virtual sphere. The points start at random locations, so if you set zero as the number of iterations, the placement of the points is
completely random. Higher numbers of iterations increase the regularity of the spacing.
•Points — sets the number of points to create on the virtual sphere. Each point correlates to an image element placed.
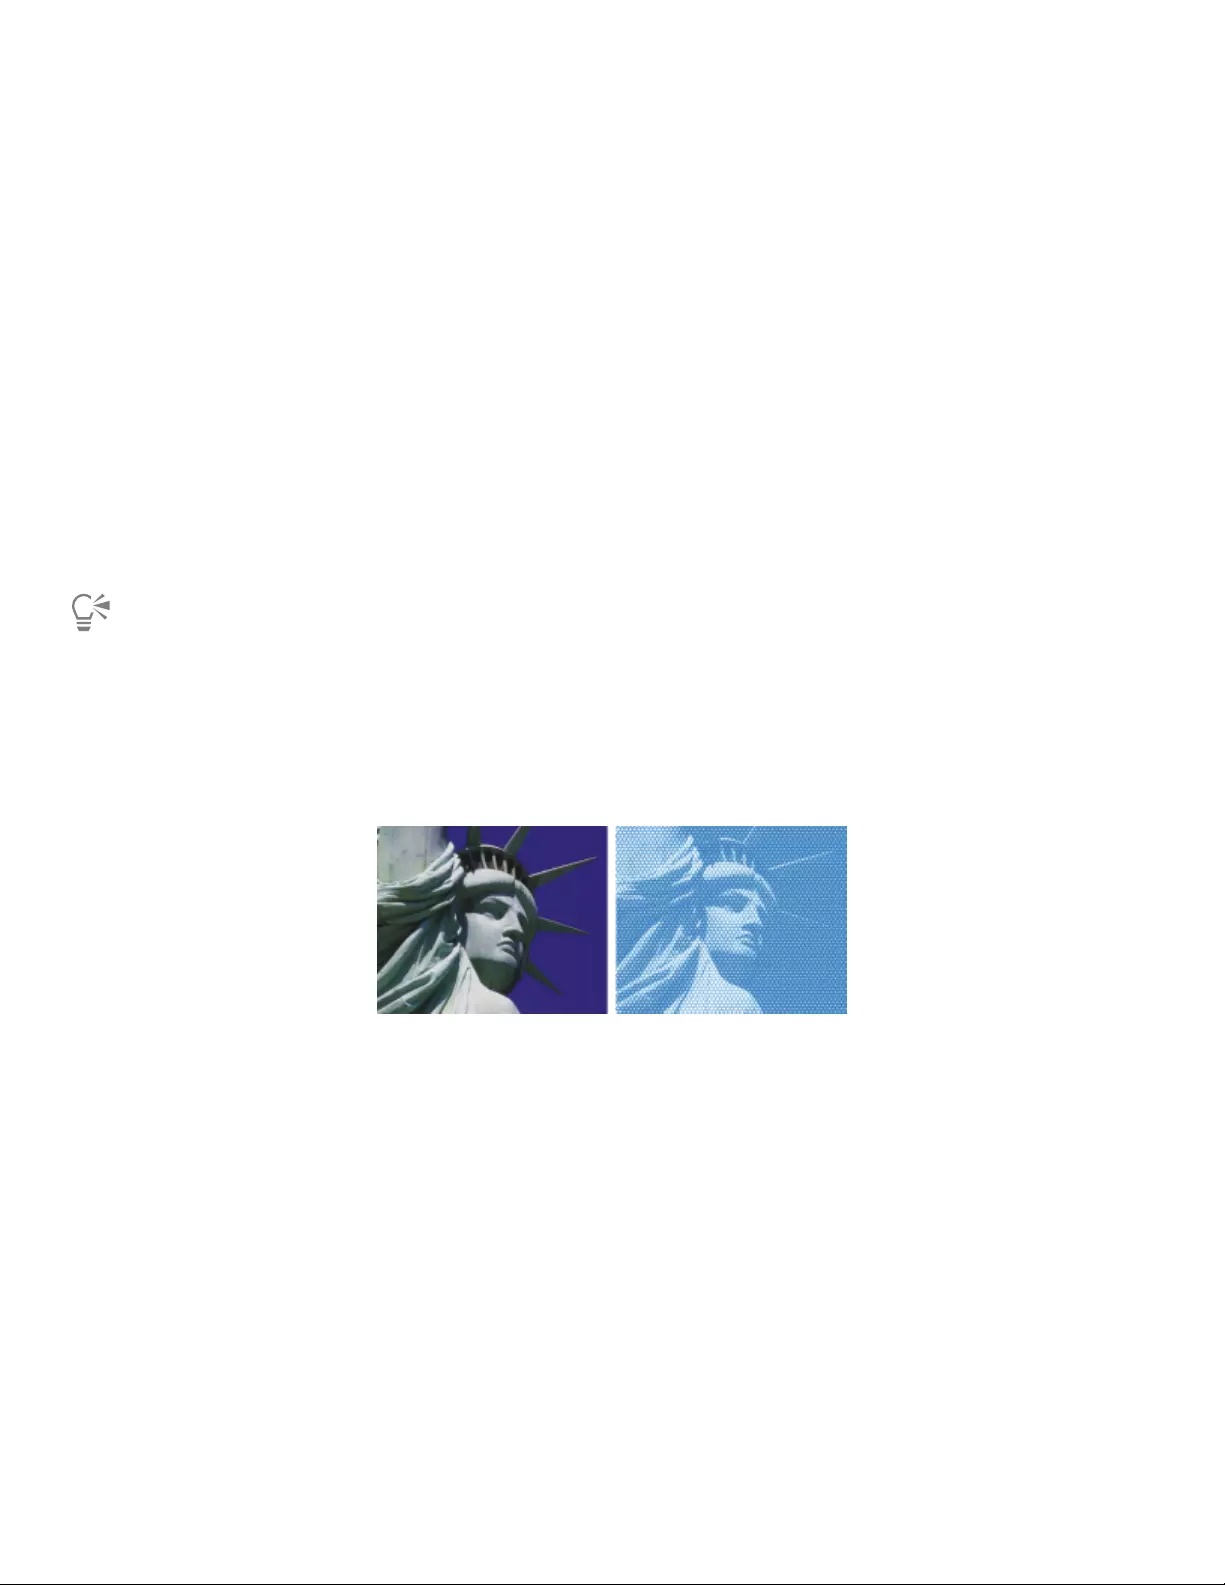
Using focus and esoterica effects | 647
•Radius Fraction — determines the size of the virtual spheres created at the second and third levels. The first-level radius is multiplied
by the fraction amount to determine the radius of the second-level spheres.
The fraction is used again between the second and third levels. Higher values (above 1.0) increase overlapping of the spheres. Lower
values (below 1.0) preclude overlapping (when sufficient iterations are used to distribute the points).
•Oversizing — controls the diameter of the first-level virtual sphere in relation to the selection marquee. At a setting of 2.5, the sphere
fits within the selection. Higher settings shrink the sphere. Lower settings stretch it beyond the selection.
•Ambient Amount — controls the use of the additional color in elements that appear on the virtual sphere away from the light source.
This is how the clump of placed elements exhibits coherent three-dimensional shading when black is used as the additional color. The
default setting is 0.7, which produces good shading results. Increasing the value brings in more of the additional color. Decreasing it
reduces additional color mixing.
8In the Levels area, enable one of the following options:
•1 — specifies that each point receives only one element
•2 — specifies that each point receives an element and then is used as the center for another virtual sphere on which point iteration
and element placement repeats
•3 — extends sphere creation and element placement once more
The number of elements increases rapidly with more than one level. For example, if you choose 12 points and three levels, you’ll create
12 + (12 × 12) + (12 × 12 × 12) = 1,884 elements. Of course, many of these elements will probably be covered by later placements.
If you choose two or three levels, you can prevent overlapping elements by enabling the Cull Interiors check box. This removes
points that occur inside other spheres, before elements are placed. This option increases processing time for the effect.
Applying the Pop Art Fill effect
This effect lets you cover an image with pseudo-halftone dots so you can create a Pop Art image.
Before (left) and after (right) applying the Pop Art Fill effect
To apply a Pop Art Fill
1To apply the effect to:
• The canvas — Click the Canvas in the Layers panel.
• A selection — Click a selection tool from the toolbox, and drag in the document window to select an area.
• A layer — Click a layer in the Layers panel.
2Choose Effects Esoterica Pop Art Fill.
3Choose Image Luminance from the Using list box.
If you want to work with an inverted version of the source, enable the Invert colors check box.
4Adjust the Scale slider to set the dot size.
5Adjust the Contrast slider to mix in the luminance of the control medium.
6Click the Dab Color chip, and choose a dot color.
7Click the Background chip, and choose a background color.

648 | Corel Painter 2022 User Guide

Using lighting and surface texture effects | 649
Using lighting and surface texture effects
Corel Painter includes a collection of effects that let you control image lighting and surface texture.
For general information about using effects, see “Common options for effects” on page 623.
This section contains the following topics:
Lighting effects
•“Applying preset lighting effects” (page 650)
•“Adding, deleting, and repositioning lights” (page 650)
•“Adjusting light properties” (page 651)
Surface texture effects
•“Using paper to create texture” (page 652)
•“Using 3D brushstrokes to create texture” (page 653)
•“Using image luminance to create texture” (page 654)
•“Using clone source or pattern luminance to create texture” (page 654)
•“Creating embossed effects” (page 655)
•“Using channels and layer masks to create texture” (page 656)
Adjusting surface texture using lighting effects
•“Creating reflection maps” (page 657)
•“Adjusting texture lighting” (page 658)
Other surface effects
•“Applying the Apply Screen effect” (page 660)
•“Applying the Color Overlay effect” (page 661)
•“Applying the Dye Concentration effect” (page 663)
•“Applying the Express Texture effect” (page 665)
•“Applying a warp effect” (page 666)
•“Applying the Woodcut effect” (page 668)
•“Applying the Distress effect” (page 670)
•“Applying the Serigraphy effect” (page 671)
•“Applying the Sketch effect” (page 672)

650 | Corel Painter 2022 User Guide
Applying preset lighting effects
Corel Painter includes a series of preset lighting effects that you can apply to your images. The lighting effects allow you to quickly change
the intensity or direction of the image lighting. You can apply a preset lighting environment without making any changes, or you can use
it as a starting point for customized lighting. For more information, see “Adding, deleting, and repositioning lights” on page 650 or
“Adjusting light properties” on page 651.
Before (left) and after (right) applying a preset lighting effect
To apply preset lighting effects
1To apply the effect to:
• The canvas — Click the Canvas in the Layers panel.
• A selection — Click a selection tool from the toolbox, and drag in the document window to select an area.
• A layer — Click a layer in the Layers panel.
2Choose Effects Surface Control Apply Lighting.
3In the Apply Lighting dialog box, choose a preset from the Preset list box.
The lighting effect displays in the preview window.
If you apply an effect to a shape, dynamic layer, text layer, or reference layer, you must first commit the layer to an image layer.
Adding, deleting, and repositioning lights
You can add one or more light sources to an image to create unique lighting effects. Adding a light source is similar to hanging your artwork
in a gallery and adjusting spotlights to illuminate it. You can also delete and reposition lights.
When you add a light, a new indicator appears in the preview window of the Apply Lighting dialog box. The preview window displays the
current position of each light and the angle of its projection. You can use the light indicators to move and direct lights. The large part of the
light indicator controls the light source (the point from which the light is shining). The small part of the indicator controls the light direction
(the point toward which the light is shining).
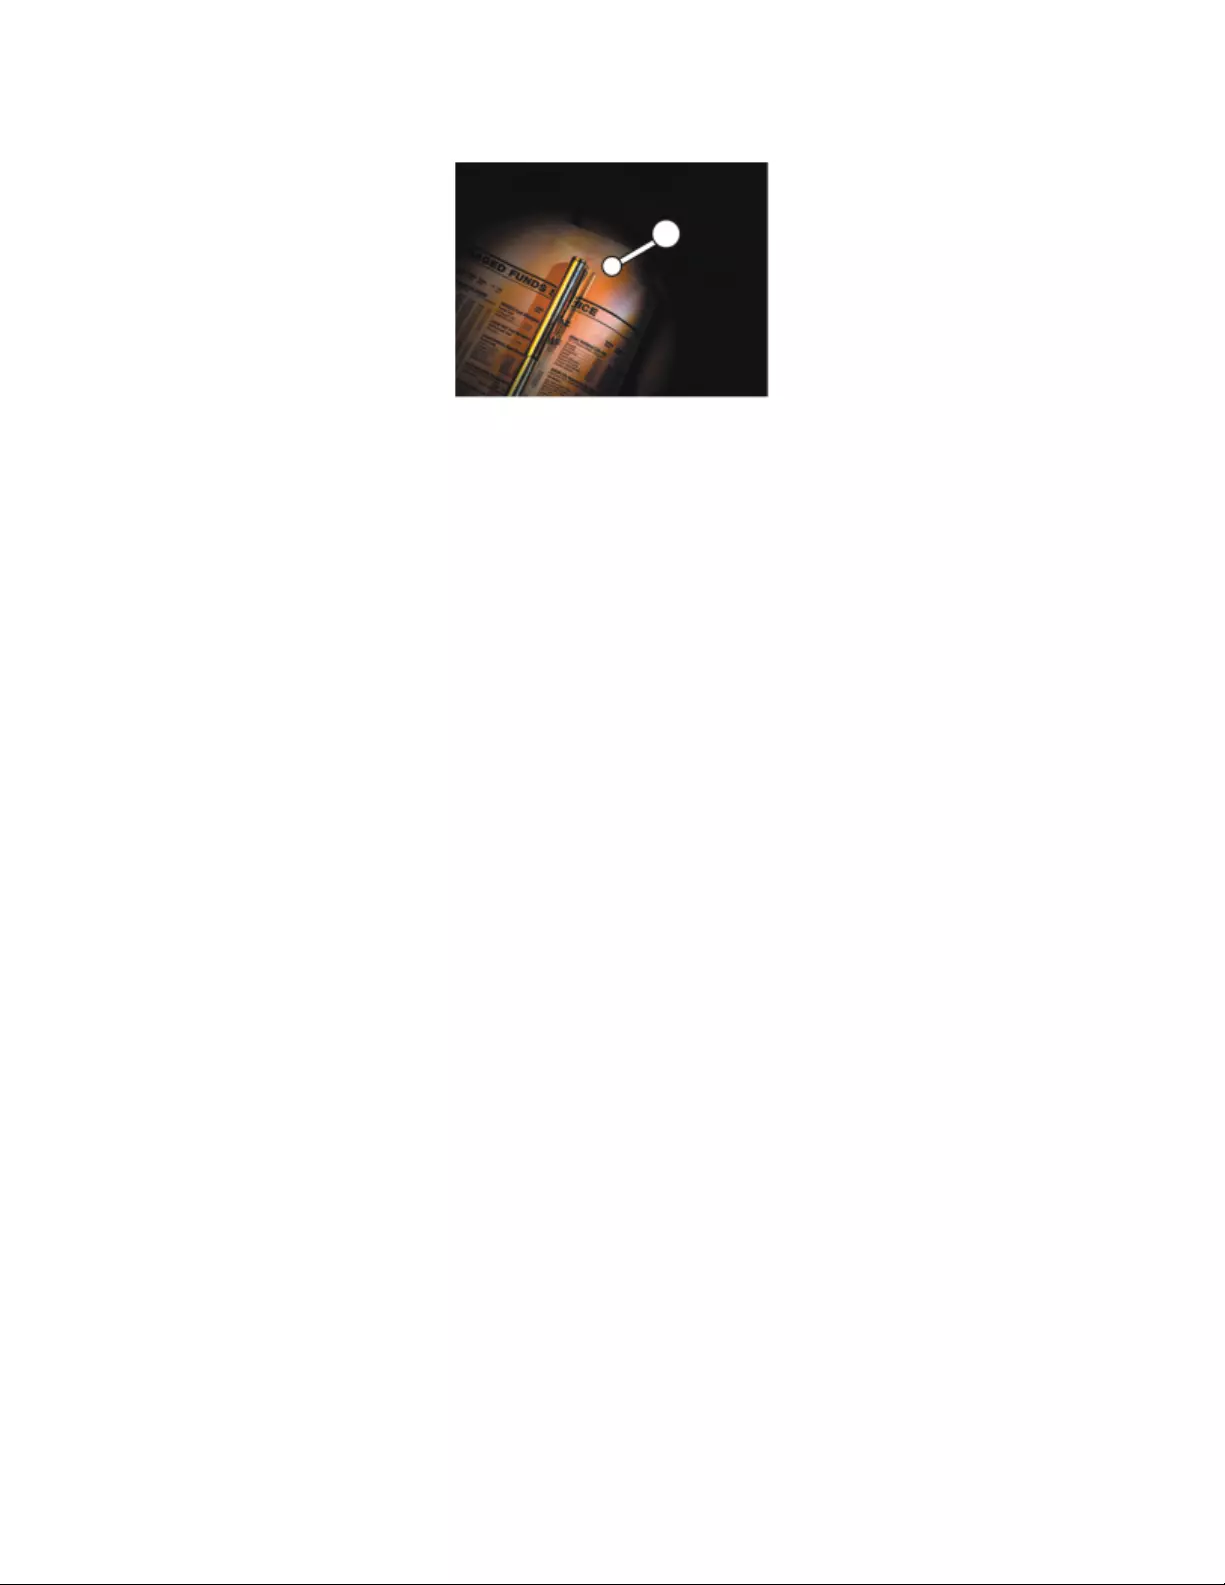
Using lighting and surface texture effects | 651
The small circle (left) controls the light direction. The large circle (right) controls the light source.
In addition, you can change the light properties, such as intensity and spread. For more information, see “Adjusting light properties” on
page 651.
To add, delete, and reposition a light
1To apply the effect to:
• The canvas — Click the Canvas in the Layers panel.
• A selection — Click a selection tool from the toolbox, and drag in the document window to select an area.
• A layer — Click a layer in the Layers panel.
2Choose Effects Surface Control Apply Lighting.
3Perform a task from the following table.
To Do the following
Add a light Click anywhere in the preview window.
Delete a light Click an indicator, and press Delete (macOS) or Backspace
(Windows).
Move a light Drag the large end of the indicator to the point where you want
the light to originate.
Change the direction of a light Drag the small end of the light indicator until the light is pointing
in the desired direction.
Adjusting light properties
You can adjust light properties such as brightness, distance, elevation, and color. Light properties have a cumulative effect. For example, if
you turn up a light’s brightness, you might need to adjust exposure.
To adjust the light properties
1To apply the effect to:
• The canvas — Click the Canvas in the Layers panel.
• A selection — Click a selection tool from the toolbox, and drag in the document window to select an area.
• A layer — Click a layer in the Layers panel.

652 | Corel Painter 2022 User Guide
2Choose Effects Surface Control Apply Lighting.
3In the preview window, click an indicator to select it.
4In the Directional Lighting area, move any of the following sliders:
•Brightness — controls the light intensity
•Distance — controls how far the light is from the image. If you move the light source closer, you can compensate for the increased
light by adjusting the Exposure slider.
•Elevation — sets the light’s angle in relation to the canvas. At 90°, the light is shining straight down, and at 1°, it’s nearly horizontal.
•Spread — sets the angle of the light cone
To change the light color, click the Color chip, and choose a color.
5In the Ambient Lighting area, move any of the following sliders:
•Exposure — controls the image’s brightness, as in photography. Moving the slider to the left decreases exposure and darkens the
image; moving it to the right increases exposure and lightens the image.
•Ambient — controls the surrounding light in an image. If you have no light indicators in the preview window, the ambient lighting
controls the overall lightness of the image. Moving the slider to the left darkens the overall lighting; moving it to the right increases
the light.
To change the color of the ambient light, click the Color chip, and choose a color.
Using paper to create texture
You can add texture to an image by incorporating paper texture. This allows you to give the appearance of depth to brushstrokes. Corel
Painter uses the paper surface and grain to produce the effect. You can choose a specific paper texture, or Corel Painter applies the currently
selected paper texture to the image by default.
If you want to experiment with the effect, keep the Papers panel open while you apply the effect. This way you can switch to different
papers and modify the paper controls.
Before (left) and after (right) creating texture by using paper grain
To create surface texture by using paper
1Choose Window Media Panels Papers.
2Choose a paper swatch in the Paper Textures area.
3To apply the effect to:
• The canvas — Click the Canvas in the Layers panel.
• A selection — Click a selection tool from the toolbox, and drag in the document window to select an area.
• A layer — Click a layer in the Layers panel.
4Choose Effects Surface Control Apply Surface Texture.
5Choose Paper from the Using list box.
If you want to apply an inverted paper texture, enable the Inverted check box.
6Adjust any of the Apply Surface Texture controls. For more information, see “Apply Surface Texture controls” on page 659.
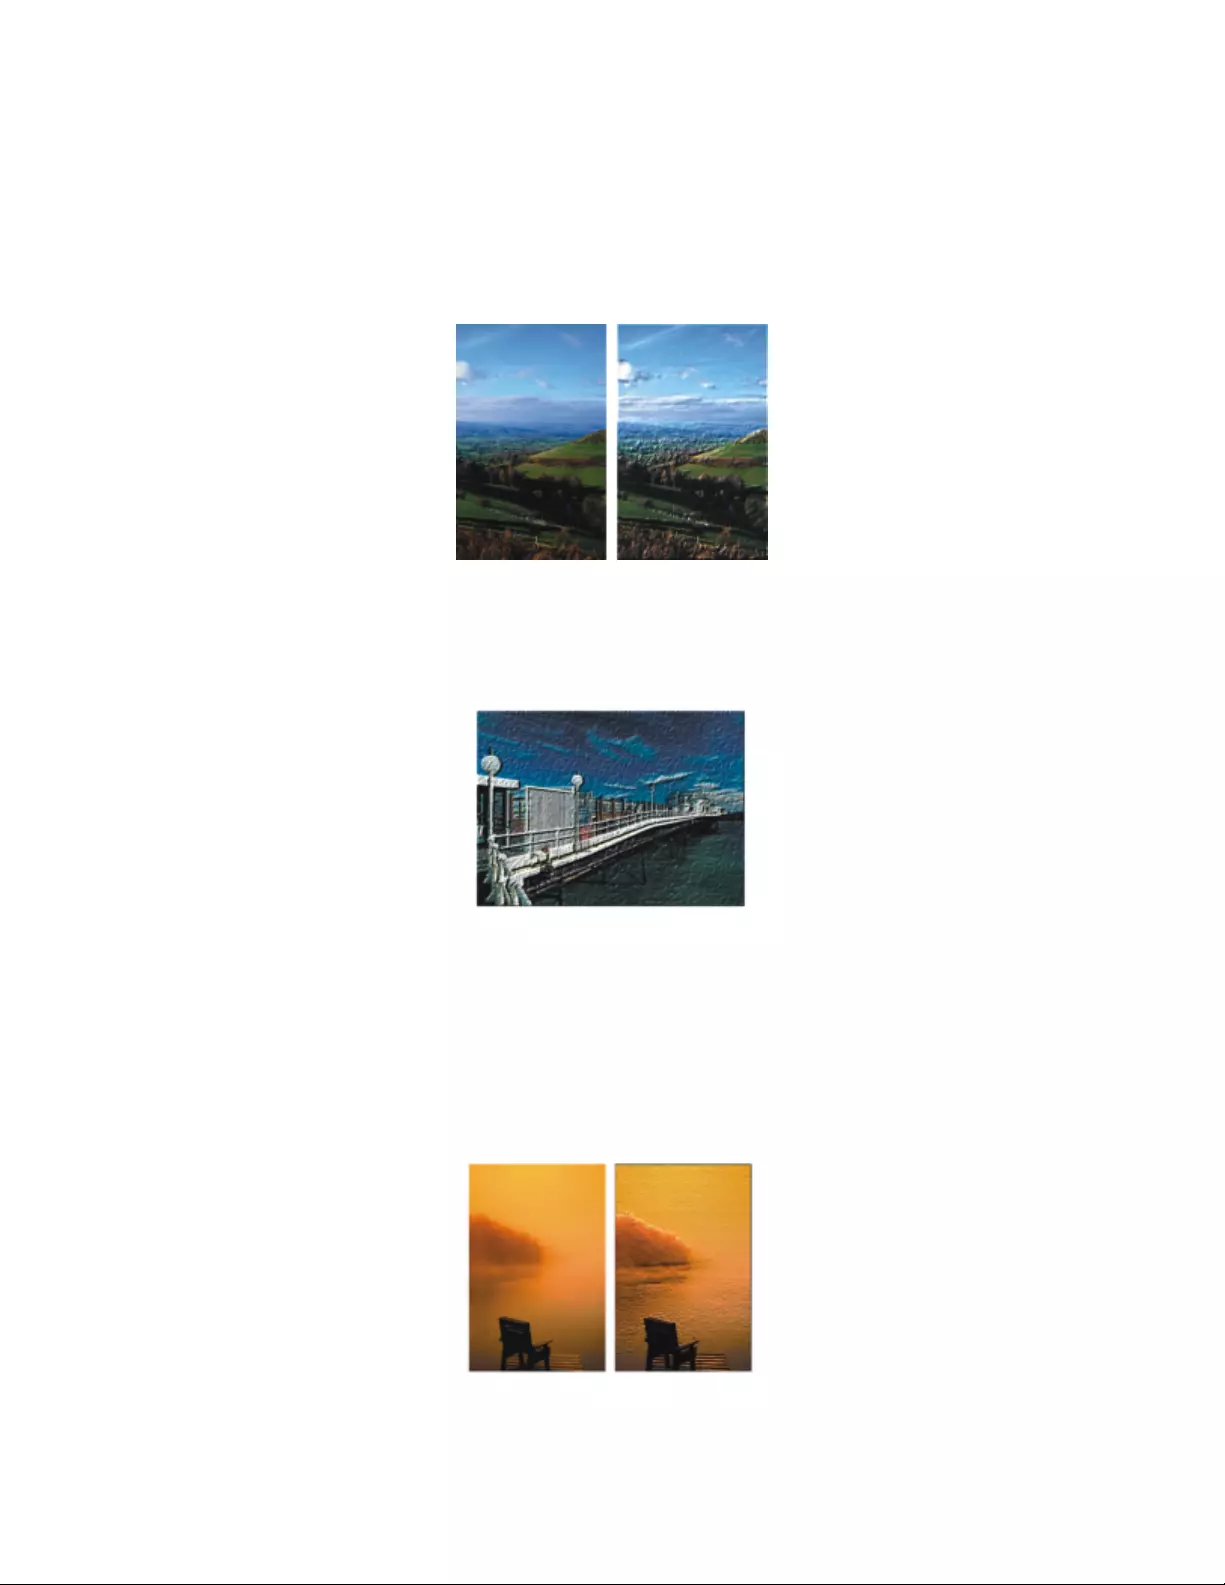
Using lighting and surface texture effects | 653
Using 3D brushstrokes to create texture
You can create the illusion of textured brushstrokes by applying the 3D Brushstrokes effect to an image. To use this effect, you need to clone
the image, apply brushstrokes to the clone using cloners, and then apply the effect to the image. Corel Painter then uses the difference in
luminance between the clone source and the image to produce the texture.
An example of an image before (left) and after (right) the 3D Brushstrokes method is applied to the image
If you use this method, the look of the brushstrokes on the clone determines how realistic the final 3D brushstrokes appear. So, you may
want to set up a more complex brush before painting. For example, you can apply a paper texture to the stroke. Many of the brush variants
reveal the paper texture automatically in their brushstrokes.
An example of 3D Brushstrokes with paper texture
You can apply a paper texture when you first create an image, and then paint or draw over it to make a textured canvas for your
brushstrokes. However, the texture is erasable, so you might not end up with the same texture across the document surface. As a rule, you
add the paper texture as the last step in producing artwork.
You can also use advanced brush settings to make realistic brushstrokes. For example, you can use the Brush Loading option to move
underlying colors as you make brushstrokes. For more information, see “Using brush loading” on page 209. You can also apply other
settings, like Bleed, or adjust brush size to create complex brushstrokes. For more information, see “Adjusting brushes with brush controls”
on page 337.
An example of 3D Brushstrokes with Brush Loading (left) and bleed (right) settings applied
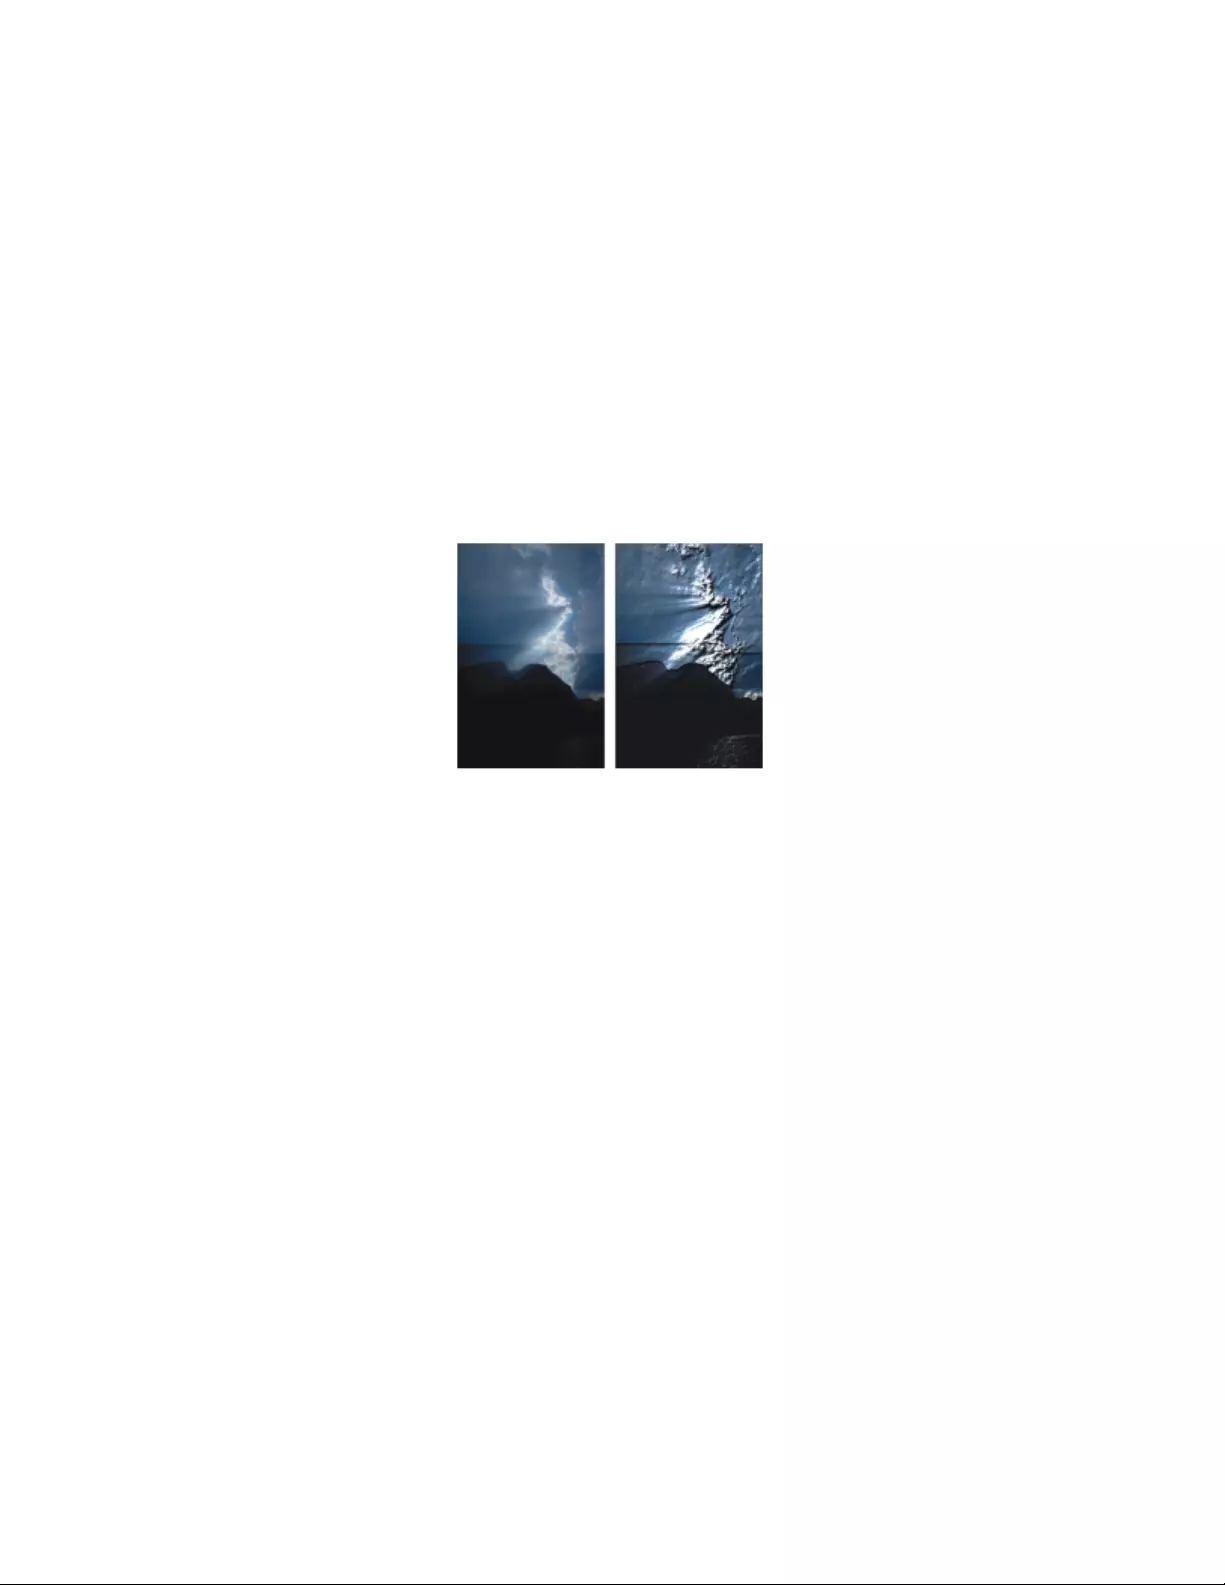
654 | Corel Painter 2022 User Guide
To apply 3D brushstrokes to an image
1Open an image.
2Choose File Quick Clone.
3Apply brushstrokes to the clone.
4Choose Effects Surface Control Apply Surface Texture.
5Choose 3D Brushstrokes from the Using list box.
6Adjust any of the Apply Surface Texture controls. For more information, see “Apply Surface Texture controls” on page 659.
Using image luminance to create texture
You can use the currently selected image’s luminance, or lightness, to produce surface texture. Light parts of the image create dents;
whereas darker parts create raised areas. The overall effect gives an embossed look to the image.
Before (left) and after (right) adding texture based on image luminance
To create surface texture by using image luminance
1To apply the effect to:
• The canvas — Click the Canvas in the Layers panel.
• A selection — Click a selection tool from the toolbox, and drag in the document window to select an area.
• A layer — Click a layer in the Layers panel.
2Choose Effects Surface Control Apply Surface Texture.
3Choose Image Luminance from the Using list box.
4Adjust any of the Apply Surface Texture controls. For more information, see “Apply Surface Texture controls” on page 659.
Using clone source or pattern luminance to create texture
You can add texture to an image by using the luminance of a clone source or a pattern. The method uses the light and dark areas in the
clone source or pattern to produce the illusion of dents and bumps. To experiment with different looks, you can change the clone source or
pattern.

Using lighting and surface texture effects | 655
The clone source luminance helps produce a textured effect.
Any image effects or brushstrokes that you apply to the clone source result in different textures. For example, you can create raised areas in
the clone by darkening the area in the source image.
To create surface texture based on clone source or pattern luminance
1Open an image.
2Perform a task from the following table.
To Do the following
Use a clone source In the Clone Source panel (Window Clone Source), choose
Embedded Image from the Source list box.
In the Embed Source Image dialog box, do one of the following:
•To browse for a file, enable the Browse option.
•To clone a currently open document, enable the Current
Document option, and choose a document from the list box.
•To embed the active texture, enable the Current Texture option.
Click OK.
Use a pattern Choose Window Media Panels Patterns, and click a pattern
swatch in the Painter Patterns area.
3To apply the effect to:
• The canvas — Click the Canvas in the Layers panel.
• A selection — Click a selection tool from the toolbox, and drag in the document window to select an area.
• A layer — Click a layer in the Layers panel.
4Choose Effects Surface Control Apply Surface Texture.
5Choose Original Luminance from the Using list box.
6Adjust any of the Apply Surface Texture controls. For more information, see “Apply Surface Texture controls” on page 659.
Creating embossed effects
You can generate an image that appears embossed by cloning the image and then using the luminance of the clone source to produce the
effect. You can control the height of the texture, as well as the lighting, color, and material properties of the embossing.
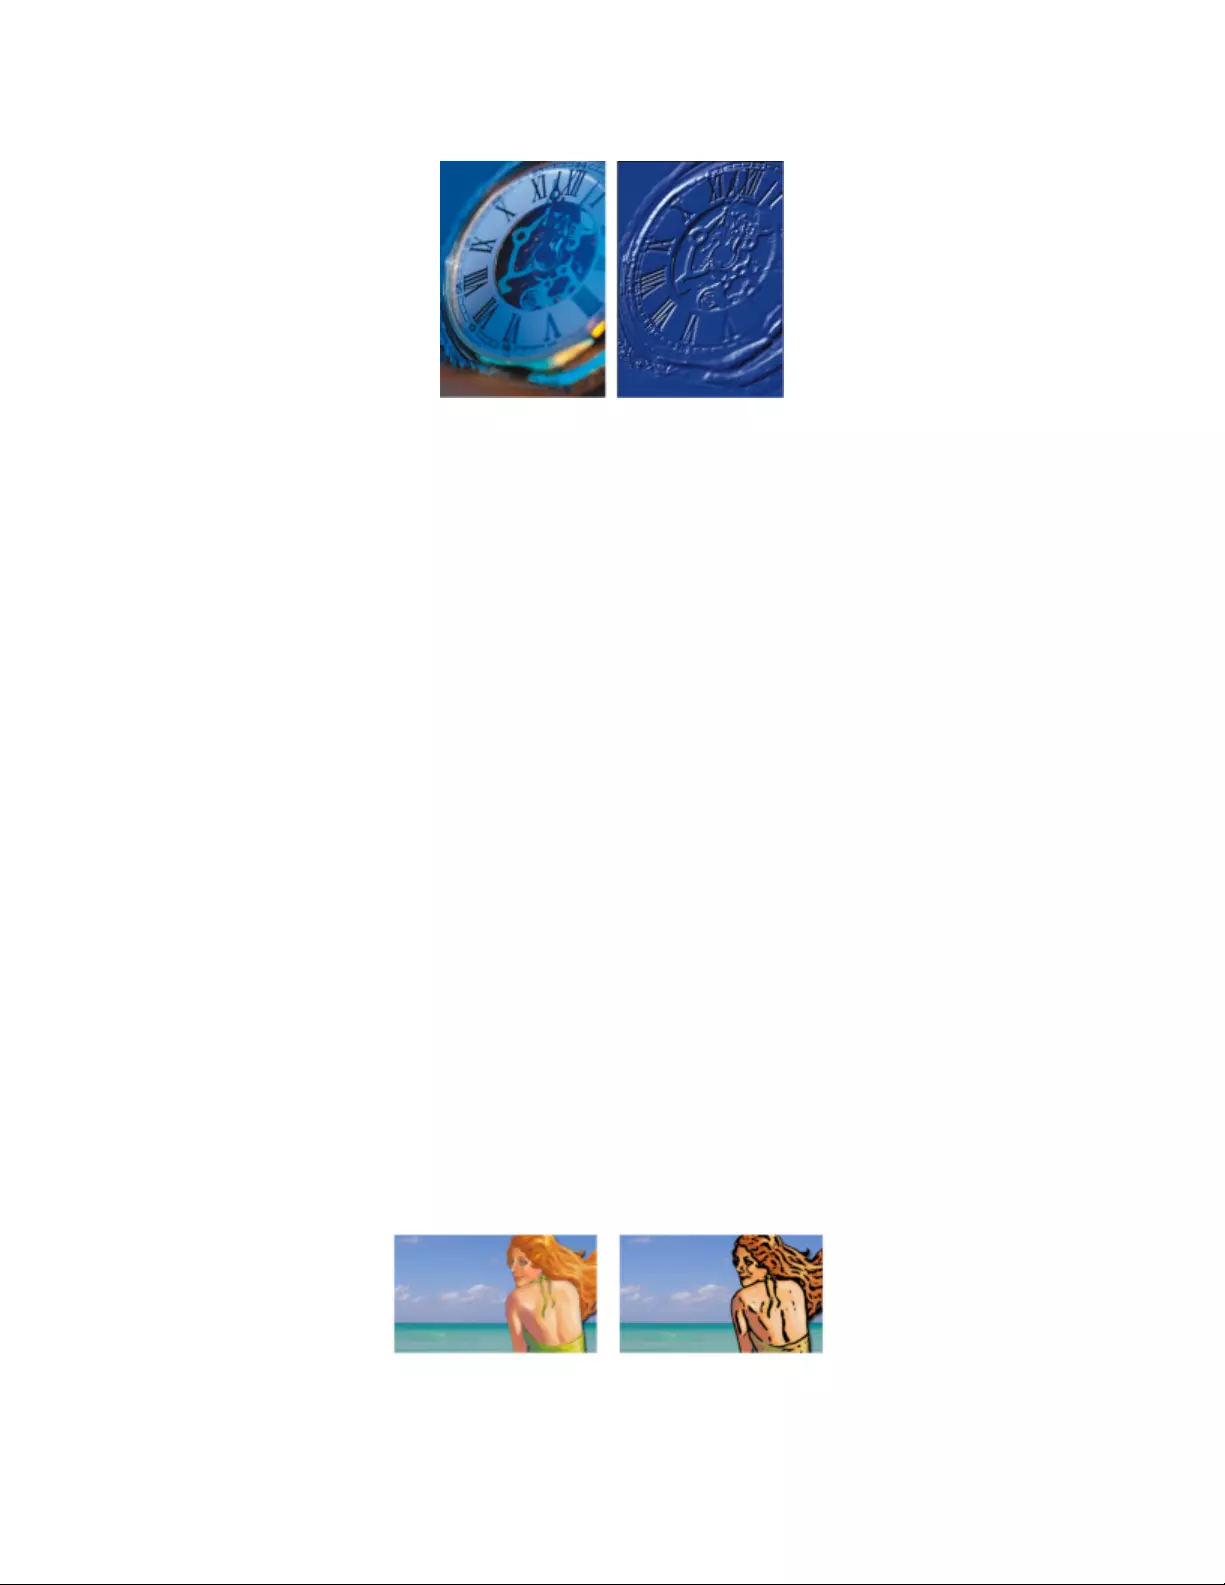
656 | Corel Painter 2022 User Guide
Before (left) and after (right) applying the embossed effect
To create an embossed effect
1Open an image.
2Choose File Clone.
3Choose a color other than black from the Colors or Color Sets panel.
If you want the embossed image to be white, select all, and then press Delete (macOS) or Backspace (Windows).
4Choose Edit Fill.
5In the Fill dialog box, choose Current Color from the Fill with list box.
6Adjust the Opacity slider to set the opacity of the fill.
7Click OK to fill the clone file with color.
8Choose Effects Surface Control Apply Surface Texture.
9Choose Original Luminance from the Using list box.
The preview window shows how the embossed image will look.
10 In the Light Controls area, adjust any of the following sliders:
•Brightness — controls the light intensity
•Concentration— adjusts the spread of the light’s shine over the surface
•Exposure — adjusts the overall lighting amount from darkest to brightest
11 Enable the Simple lighting check box, and click a light indicator on the sphere to change the location of highlights and shadows.
If you want to change the light color, click the Light Color chip, and choose a color from the color picker.
Using channels and layer masks to create texture
Corel Painter lets you produce surface texture based on an alpha channel or a layer mask. You can use this method only if you added an
alpha channel, or a layer that contains a layer mask, to the image.
When you apply the texture to a channel, the area that surrounds the edges of the channel appears raised. When you apply texture to a
layer mask, the layer mask acts as a boundary for the texture and the texture appears around the edges. For more information, see “Creating
and deleting layer masks” on page 574.
Before (left) and after (right) adding texture based on a saved alpha channel

Using lighting and surface texture effects | 657
Before (left) and after (right) adding texture based on a layer mask
To create surface texture based on a channel or layer mask
1In the Layers panel, select a layer or the canvas.
If you want to use a layer mask, you must select the layer to which the layer mask is attached. Make sure that the layer mask is not blank.
2Choose Effects Surface Control Apply Surface Texture.
3Choose the channel or layer mask from the Using list box.
4Adjust any of the Apply Surface Texture controls. For more information, see “Apply Surface Texture controls” on page 659.
Creating reflection maps
A reflection map is an image that is mapped onto a texture to produce the illusion that it’s reflecting light from the surrounding
environment. You can use either a pattern or a clone source image as a reflection map. Choosing a pattern allows you to quickly apply a
realistic reflection. Reflection maps are useful to create the appearance of chrome or polished metal.
Before (left) and after (right) applying a typical reflection map
You can control how much of the image appears in the texture. If you add a reflection map to a clone, the clone source is mapped onto the
texture. Otherwise, Corel Painter uses the current pattern as the reflection map.
You can use the Image Warp effect to approximate the reflection from a curved surface. For more information, see “Applying a warp effect”
on page 666.
To create a reflection map from a clone source
1Open an image or create a new image to use as the reflection.
If you want to approximate the reflection from a curved surface, apply the Image Warp effect.
2Choose File Clone.
3Click a selection tool from the toolbox, and select the area that you want to be reflective.
4In the toolbox, click the Selection Adjuster tool .
5Right-click the selection and choose Layer Via Copy.
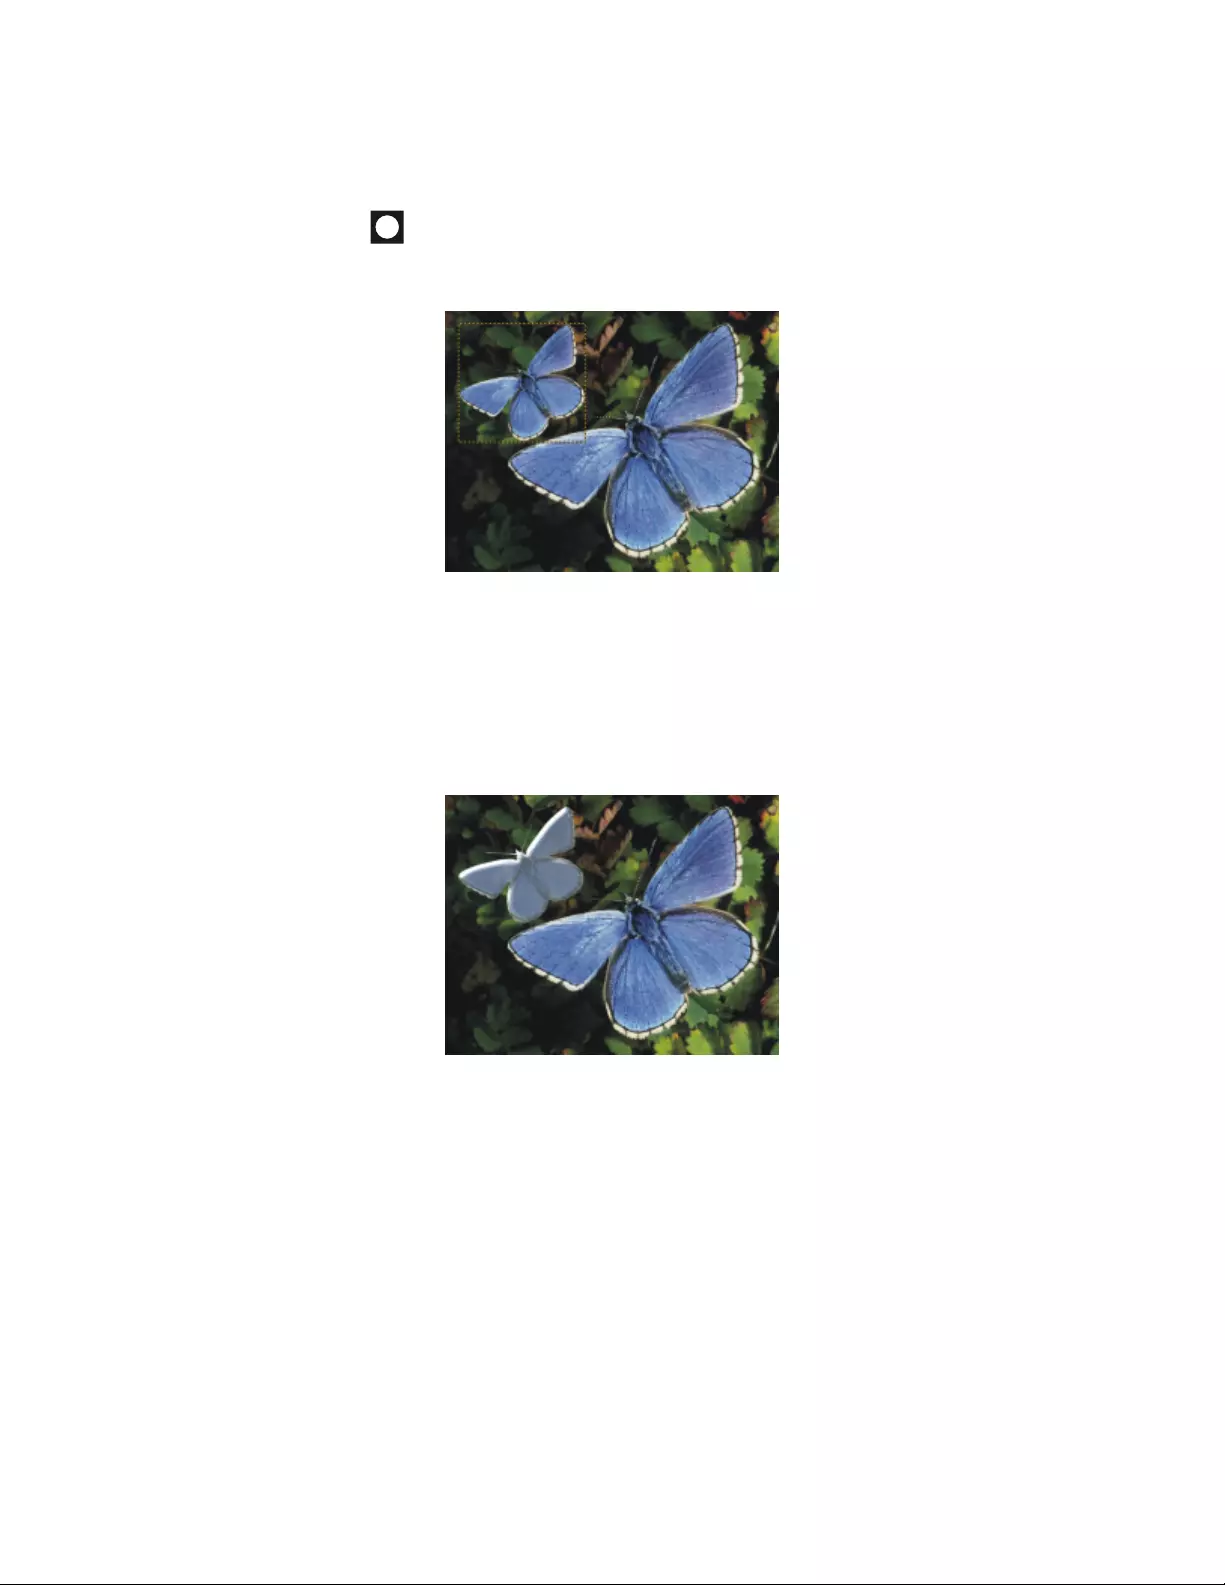
658 | Corel Painter 2022 User Guide
A new layer is created.
6In the Layers panel, click the Canvas, and then select the layer you just created.
7Click the New Layer Mask button .
Using a layer mask simplifies the process because the layer mask exactly matches the shape of the reflection area. For more information,
see “Creating and deleting layer masks” on page 574.
A selected image area, ready to become reflective
8Choose Effects Surface Control Apply Surface Texture.
9Choose the layer mask from the Using list box.
10 Move the Reflection slider to adjust the amount of reflection you want.
11 Move the Softness slider to adjust the mapping from the edges of the layer’s image.
Increasing softness gives a rounder, more 3D look to the surface.
The resulting chrome-plated butterfly
Adjusting texture lighting
Lighting determines a large part of the final look of a texture. Bad lighting can obscure details in a pattern or surface. Good lighting,
however, can add interesting highlights and enhance reflections.
You can use preset (simple) lighting or custom lighting. With simple lighting, you can choose one of eight preset lights. With custom
lighting, you can add more lights, and you can move and delete light sources.
The lighting sphere shows all possible surface angles and how the lights illuminate them. The light indicators on the sphere show the
position of all light sources.

Using lighting and surface texture effects | 659
The lighting sphere with a light indicator
You can also change the following light properties: brightness, concentration, and exposure. In addition, you can change a light’s color.
To adjust texture lighting
1To apply the effect to:
• The canvas — Click the Canvas in the Layers panel.
• A selection — Click a selection tool from the toolbox, and drag in the document window to select an area.
• A layer — Click a layer in the Layers panel.
2Choose Effects Surface Control Apply Surface Texture.
3Do one of the following
• For preset lighting, enable the Simple lighting check box, and click a light indicator on the lighting sphere.
• For custom lighting, disable the Simple lighting check box, and perform an action from the following table.
To Do the following
Add a custom light Click on the lighting sphere where you want to add a new light
source.
A new light indicator (small circle) appears where you click.
Delete a custom light Click a light indicator, and press Delete (macOS), or Backspace
(Windows).
Add custom lights along a circular path Move the Lights slider.
Move a custom light Drag a light indicator to a new position on the sphere.
Change the light color Click a lighting indicator, click the Light Color chip, and then
choose a color.
4Adjust any of the Apply Surface Texture controls. For information, see “Apply Surface Texture controls” on page 659.
Apply Surface Texture controls
•Using — lets you choose a method for applying the surface texture. The following methods are available: Paper, 3D Brushstrokes, Image
Luminance, and Original Luminance.
•Softness — lets you adjust the amount of distortion created by the texture. Increasing softness creates more intermediate steps, which
produces a smoother distortion.
•Inverted — lets you apply an inverted texture
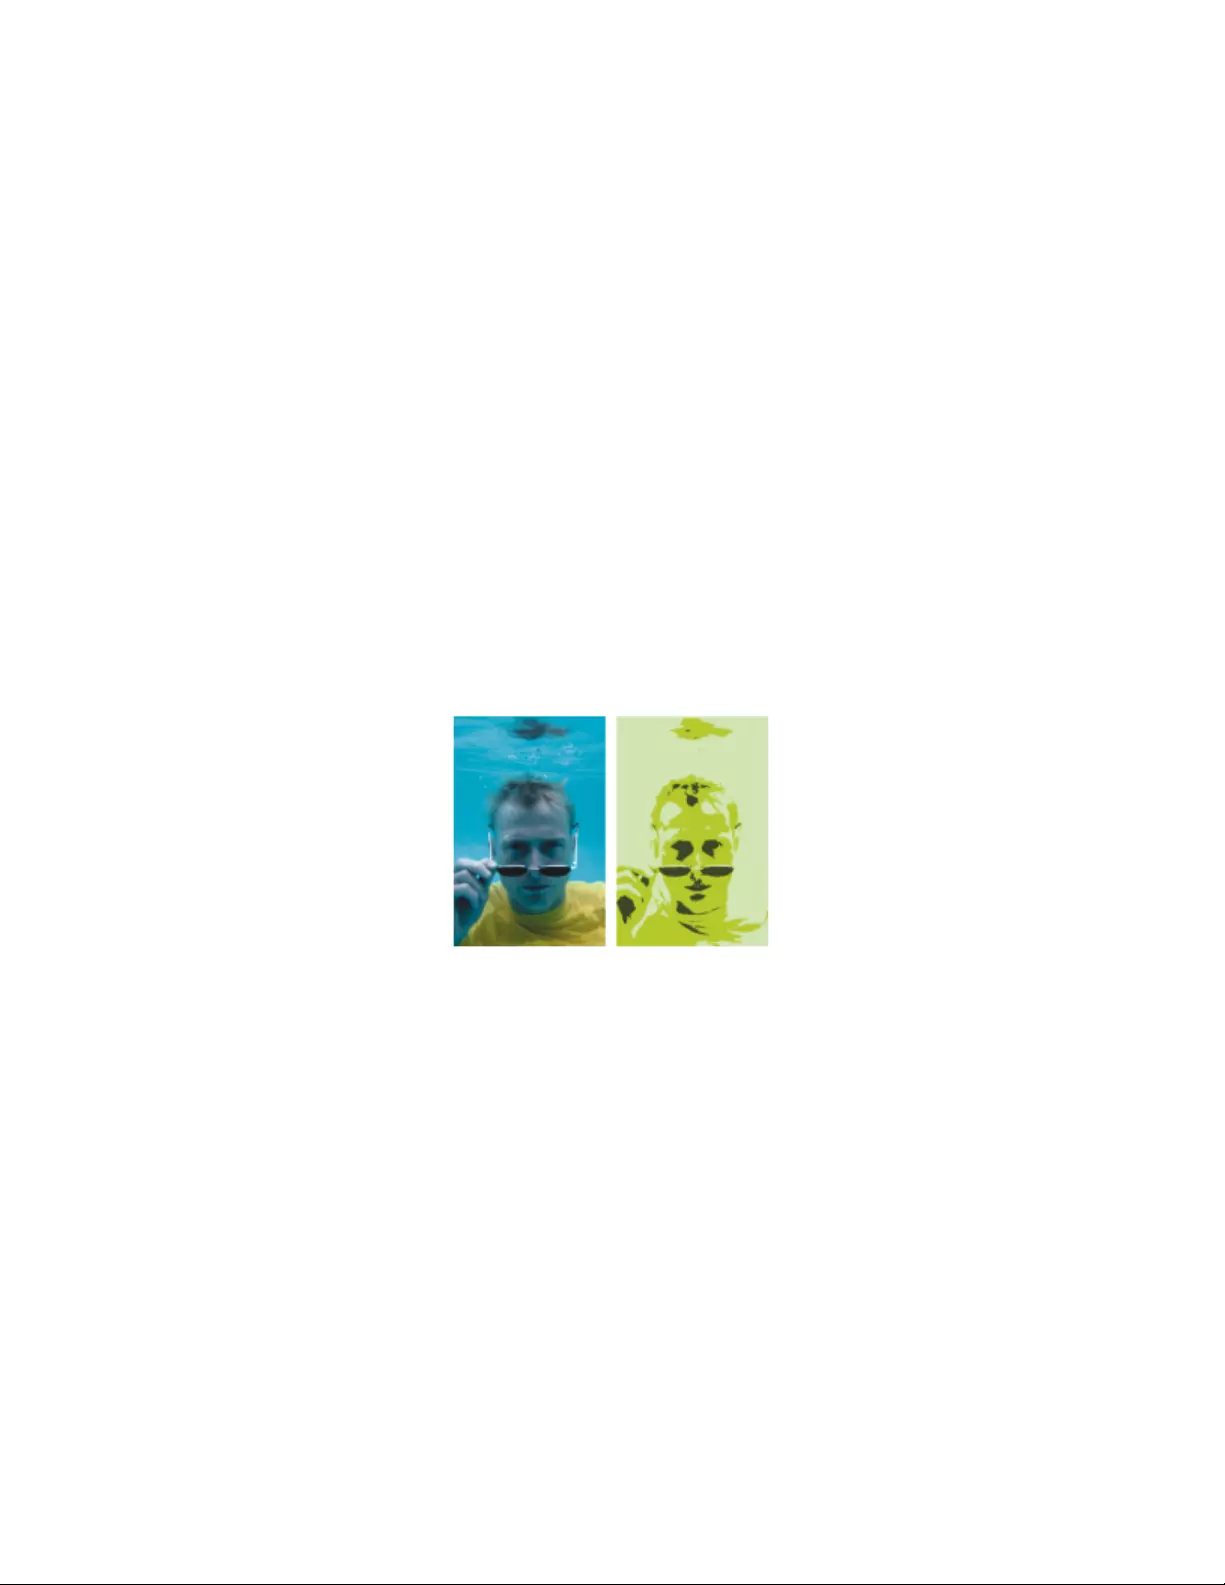
660 | Corel Painter 2022 User Guide
Appearance of Depth
•Amount — controls how much surface texture is applied to the image. Moving the slider all the way to the right applies the maximum
amount.
•Picture — controls how much of the color from the original image is applied to the texture. At 100%, the full color of the picture shines
through. Moving the slider to the left displays more black, leaving only the shine.
•Shine — controls how much highlight appears on the surface of the texture. Higher Shine values make the texture look metallic.
•Reflection — maps a clone source image or pattern onto the texture at a variable percentage
Light Controls
•Brightness — controls the light intensity
•Concentration — adjusts the spread of the light’s shine over the surface
•Exposure — adjusts the overall lighting amount from darkest to brightest
•Light Color — lets you change the light color
•Simple lighting — lets you choose one from eight preset lights
•Lighting sphere — lets you add, move, and delete custom lights when the Simple lighting check box is disabled.
Applying the Apply Screen effect
You can simulate the appearance of a silk-screened print by using the Apply Screen effect. This effect lets you combine image luminance
and the three selected colors, to produce a multi-color rendition of the image. When you use this effect, anti-aliasing is automatically
applied to the image.
Before (left) and after (right) using Apply Screen using the image luminance
To apply a screen
1Open an image.
2Choose Effects Surface Control Apply Screen.
3Choose Image Luminance from the Using list box.
4Choose three colors by clicking each color chip and choosing a color from the color picker.
5Adjust any of the following sliders:
•Threshold 1 — determines how much of the two colors below the slider display in the image
Moving the slider increases the amount of one color and decreases the amount of the other color.
•Threshold 2 — determines how much of the color below the slider displays in the image
Moving the slider to the left decreases the color amount. Moving it to the rightincreases the color amount.

Using lighting and surface texture effects | 661
You can also apply a screen that is based on paper texture by choosing Paper from the Using list box, and then clicking the Paper
Textures chip, and choosing a texture.
Applying the Color Overlay effect
You can simultaneously add color and texture to an image by using the Color Overlay effect. This effect allows you to coat an image with
color. You can control the opacity and intensity of the color. To use the Color Overlay effect, you need to choose a color that you want to
apply and then choose the method for applying the effect.
There are five different methods for applying color:
•Uniform Color — adds a flat tint to the image
•Paper — overlays a color using the paper texture as a mapping model. More color is applied to light areas in the paper grain; less color
is applied to dark areas. If you want to experiment with the effect, keep the Papers panel open while you apply the effect. This way you
can switch to different papers and modify the paper controls.
•Image Luminance — uses the image’s brightness as the model for the color overlay. More of the effect is applied to light areas in the
original image; less color is applied to dark areas.
•Original Luminance — uses the luminance of the clone source (or a pattern) as the model for the color overlay. Light areas in the clone
source produce more color in the image.
•Alpha Channel or Layer Mask — sets the values in the channel or layer mask as the model for the color overlay. More color is applied to
the light areas of the channel or mask; less color is applied to dark areas. You can use this method only if you have a saved alpha channel
or a layer mask in your image.
Before (left) and after (right) applying the Color Overlay effect using the Paper method
To apply a uniform tint to an image
1To apply the effect to:
• The canvas — Click the Canvas in the Layers panel.
• A selection — Click a selection tool from the toolbox, and drag in the document window to select an area.
• A layer — Click a layer in the Layers panel.
2Choose Effects Surface Control Color Overlay.
3Choose a color from the Use Color chip.
4Choose Uniform Color from the Using list box.
5Adjust any of the Color Overlay controls. For information, see “Color Overlay controls” on page 663.
To use image luminance to apply a color overlay
1To apply the effect to:
• The canvas — Click the Canvas in the Layers panel.

662 | Corel Painter 2022 User Guide
• A selection — Click a selection tool from the toolbox, and drag in the document window to select an area.
• A layer — Click a layer in the Layers panel.
2Choose Effects Surface Control Color Overlay.
3Choose a color from the Use Color chip.
4Choose Image Luminance from the Using list box.
5Adjust any of the Color Overlay controls. For information, see “Color Overlay controls” on page 663.
To use paper texture to apply a color overlay
1Choose Window Media Panels Papers.
2Choose a paper swatch in the Paper Textures area.
3To apply the effect to:
• The canvas — Click the Canvas in the Layers panel.
• A selection — Click a selection tool from the toolbox, and drag in the document window to select an area.
• A layer — Click a layer in the Layers panel.
4Choose Effects Surface Control Color Overlay.
5Click the Use Color chip, and choose a color.
6Choose Paper from the Using list box.
7Adjust any of the Color Overlay controls. For information, see “Color Overlay controls” on page 663.
To use clone source or pattern luminance to apply a color overlay
1Open an image.
2Perform a task from the following table.
To Do the following
Use a clone source In the Clone Source panel (Window Clone Source), choose
Embedded Image from the Source list box.
In the Embed Source Image dialog box, do one of the following:
•To browse for a file, enable the Browse option.
•To clone a currently open document, enable the Current
Document option, and choose a document from the list box.
•To embed the active texture, enable the Current Texture option.
Click OK.
Use a pattern Choose Window Media Panels Patterns, and click a pattern
swatch in the Painter Patterns area.
3Choose Effects Surface Control Color Overlay.
4Choose a color from the Use Color chip.
5Choose Original Luminance from the Using list box.
To use a layer mask or channel to apply a color overlay
1Do one of the following:
•To use a layer mask, choose Window Layers, and click the layer that contains a layer mask in the Layers panel.
•To use an alpha channel, choose Window Channels, and click the alpha channel in the Channels panel.

Using lighting and surface texture effects | 663
2Choose Window Color Panels Color Panel (Full View).
3Choose a color from the Color panel.
4Choose Effects Surface Control Color Overlay.
5Choose the layer mask or alpha channel from the Using list box.
6Adjust any of the Color Overlay controls. For information, see “Color Overlay controls” on page 663.
Color Overlay controls
•Use Color — lets you choose the overlay color
•Opacity — controls how transparent the effect is
•Dye Concentration— allows the paper to absorb the color
•Hiding Power — allows the color to cover what lies beneath it
Applying the Dye Concentration effect
You can adjust the dye concentration in an image to control color intensity and play with surface texture. For example, use this effect to
lighten an underexposed photo or to darken an overexposed one. You need to choose a method for applying the effect. Some methods,
such as Paper, generate more texture than other methods, such as Uniform Color. There are five different methods for applying dye
concentration:
•Uniform Color — allows you to adjust only color density
•Paper — adjusts color by using the paper texture as a mapping model. If you want to experiment with the effect, keep the Papers panel
open while you apply the effect. This way you can switch to different papers and modify the paper controls.
•Image Luminance — uses the image’s brightness as the model for the color adjustment
•Original Luminance — uses the luminance of the selected pattern or clone source as the model for the adjustment
•Alpha Channel or Layer Mask — sets the values in the alpha channel or layer mask as the model for the dye concentration adjustment.
You can use this method only if you have a saved channel or a layer mask in your image.
To uniformly adjust dye concentration
1To apply the effect to:
• The canvas — Click the Canvas in the Layers panel.
• A selection — Click a selection tool from the toolbox, and drag in the document window to select an area.
• A layer — Click a layer in the Layers panel.
2Choose Effects Surface Control Dye Concentration.
3Choose Uniform Color from the Using list box.
4Adjust any of the Dye Concentration controls. For information, see “Dye Concentration controls” on page 664.
To adjust dye concentration using image luminance
1To apply the effect to:
• The canvas — Click the Canvas in the Layers panel.
• A selection — Click a selection tool from the toolbox, and drag in the document window to select an area.
• A layer — Click a layer in the Layers panel.
2Choose Effects Surface Control Dye Concentration.
3Choose Image Luminance from the Using list box.
4Adjust any of the Dye Concentration controls. For information, see “Dye Concentration controls” on page 664.
To adjust dye concentration using paper luminance
1Choose Window Media Panels Papers.

664 | Corel Painter 2022 User Guide
2Choose a paper swatch in the Paper Textures area.
3To apply the effect to:
• The canvas — Click the Canvas in the Layers panel.
• A selection — Click a selection tool from the toolbox, and drag in the document window to select an area.
• A layer — Click a layer in the Layers panel.
4Choose Effects Surface Control Dye Concentration.
5Choose Paper from the Using list box.
6Adjust any of the Dye Concentration controls. For information, see “Dye Concentration controls” on page 664.
To adjust dye concentration using clone source or pattern luminance
1Open an image.
2Perform a task from the following table.
To Do the following
Use a clone source In the Clone Source panel (Window Clone Source), choose
Embedded Image from the Source list box.
In the Embed Source Image dialog box, do one of the following:
•To browse for a file, enable the Browse option.
•To clone a currently open document, enable the Current
Document option, and choose a document from the list box.
•To embed the active texture, enable the Current Texture option.
Click OK.
Use a pattern Choose Window Media Panels Patterns, and click a pattern
swatch in the Painter Patterns area.
3Choose Effects Surface Control Dye Concentration.
4Choose Original Luminance from the Using list box.
5Adjust any of the Dye Concentration controls. For information, see “Dye Concentration controls” on page 664.
To adjust dye concentration using a layer mask or alpha channel
1Do one of the following:
•To use a layer mask, choose Window Layers, and click the layer that contains a layer mask in the Layers panel.
•To use an alpha channel, choose Window Channels, and click the alpha channel in the Channels panel.
2Choose Effects Surface Control Dye Concentration.
3Choose the Layer mask or alpha channel from the Using list box.
4Adjust any of the Dye Concentration controls. For information, see “Dye Concentration controls” on page 664.
Dye Concentration controls
•Presets — the controls in this area let you choose a preset effect, save the current settings as a preset, and delete a preset
•Maximum — controls the amount of dye on the peaks of the texture
If you think of texture as peaks and valleys, the Maximum slider controls the amount of dye on the peaks, and the Minimum slider
controls the amount of dye in the valleys.
•Minimum — controls the depth of the texture. The lower the values, the higher the contrast between the peaks and valleys. The higher
the values, the flatter the image appears.

Using lighting and surface texture effects | 665
•Preview — enable this check box to preview the effect in the document window
•Reset — resets the sliders to their default settings
Applying the Express Texture effect
You can apply the Express Texture to generate a high-contrast version of an image in grayscale, which creates a visual effect similar to a
custom halftone screen, like a mezzotint or line screen. When you use this effect, anti-aliasing is automatically applied to the image.
You need to choose a method for applying the effect. There are five different methods for applying Express Texture:
•Paper — adjusts light intensity by using the paper texture as a mapping model. If you want to experiment with the effect, keep the
Papers panel open while you apply the effect. This way you can switch to different papers and modify the paper controls.
•Image Luminance — uses the image’s brightness as the model for the adjustments
•Original Luminance — uses the luminance of the clone source as the model for the adjustment
•Alpha Channel or Layer Mask — sets the values in the alpha channel or layer mask as the model for the adjustments. You can use this
method only if you have a saved channel or a layer mask in your image.
An image with the Express Texture effect applied
To apply Express Texture using image luminance
1To apply the effect to:
• The canvas — Click the Canvas in the Layers panel.
• A selection — Click a selection tool from the toolbox, and drag in the document window to select an area.
• A layer — Click a layer in the Layers panel.
2Choose Effects Surface Control Express Texture.
3Choose Image Luminance from the Using list box.
4Adjust any of the Express Texture controls. For information, see “Express Texture controls” on page 666.
To apply Express Texture using paper texture
1Choose Window Media Panels Papers.
2Choose a paper swatch in the Paper Textures area.
3To apply the effect to:
• The canvas — Click the Canvas in the Layers panel.
• A selection — Click a selection tool from the toolbox, and drag in the document window to select an area.
• A layer — Click a layer in the Layers panel.
4Choose Effects Surface Control Express Texture.
5Choose Paper from the Using list box.
6Adjust any of the Express Texture controls. For information, see “Express Texture controls” on page 666.

666 | Corel Painter 2022 User Guide
To apply Express Texture using clone source or pattern luminance
1Open an image.
2Perform a task from the following table.
To Do the following
Use a clone source In the Clone Source panel (Window Clone Source), choose
Embedded Image from the Source list box.
In the Embed Source Image dialog box, do one of the following:
•To browse for a file, enable the Browse option.
•To clone a currently open document, enable the Current
Document option, and choose a document from the list box.
•To embed the active texture, enable the Current Texture option.
Click OK.
Use a pattern Choose Window Media Panels Patterns, and click a pattern
swatch in the Painter Patterns area.
3Choose Effects Surface Control Express Texture.
4Choose Original Luminance from the Using list box.
5Adjust any of the Express Texture controls. For information, see “Express Texture controls” on page 666.
To apply Express Texture using a layer mask or alpha channel
1Do one of the following:
•To use a layer mask, choose Window Layers, and click the layer that contains a layer mask in the Layers panel.
•To use an alpha channel, choose Window Channels, and click the alpha channel in the Channels panel.
2Choose Effects Surface Control Express Texture.
3Choose the layer mask or alpha channel from the Using list box.
4Adjust any of the Express Texture controls. For information, see “Express Texture controls” on page 666.
Express Texture controls
•Gray Threshold — determines where the threshold is, between pure black and pure white
•Grain — determines how deeply the texture penetrates the surface
•Contrast — determines the number of levels of black and white. For example, low contrast generates pure gray, medium contrast
produces levels of grayscale, and high contrast produces a black and white screen.
Applying a warp effect
Corel Painter offers different options for warping images. The Image Warp effect lets you distort the surface of an image as if it were a sheet
of pliable film. You can make images look as though they’re reflected in a fun house mirror.
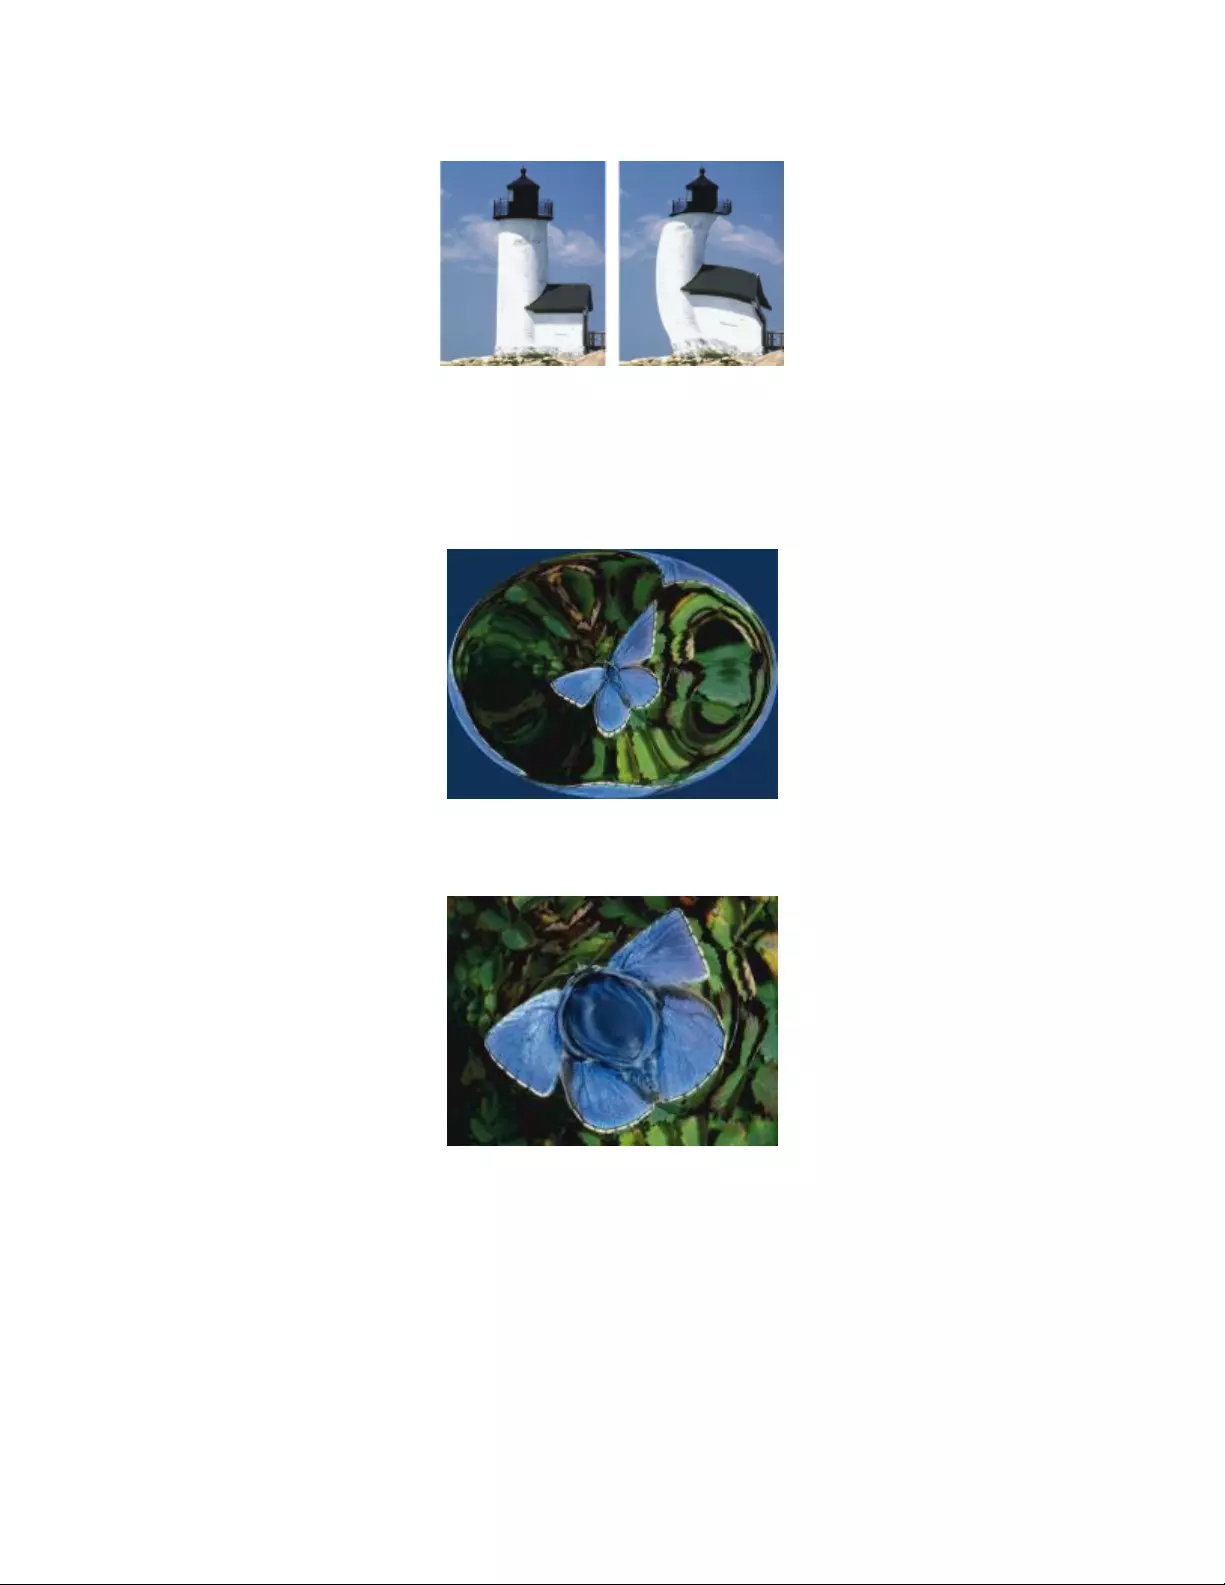
Using lighting and surface texture effects | 667
Before (left) and after (right) applying the Image Warp effect
You can also use the Quick Warp effect to create some basic distortions, like stretch or bulge. These distortions are useful for preparing
images for reflection maps when applying surface texture. For more information, see “Creating reflection maps” on page 657.
Quick Warp lets you create five types of distortions:
•Sphere — warps the image spherically, like a reflection on a polished silver ball
An example of the Quick Warp effect using Sphere distortion
•Bump — warps the center of the image toward you, making it appear convex
An example of the Quick Warp effect using Bump distortion
•Valley — warps the center of the image away from you, making it appear concave
•Swirl — distorts the image in a spiral
•Ripple — distorts the image in concentric rings, like the rings created when you drop a stone into a pool of water
You can apply Image Warp and Quick Warp to the canvas, selections, and layers. However, Image Warp allows you to better target areas
for warping, which is useful if you need to warp only a small portion of an image.
To warp an image using Image Warp
1To apply the effect to:

668 | Corel Painter 2022 User Guide
• The canvas — Click the Canvas in the Layers panel.
• A selection — Click a selection tool from the toolbox, and drag in the document window to select an area.
• A layer — Click a layer in the Layers panel.
2Choose Effects Surface Control Image Warp.
3In the Image Warp dialog box, enable one of the following options:
•Linear — pulls the selected area as if you were pulling from the top of a cone
•Cubic — pulls a flat surface outward
•Sphere — pulls a surface as if it were a lens
4Adjust the Size slider.
This slider controls the size of the area affected by dragging the cursor. The higher the number, the smaller the affected area.
5In the document window, drag to distort the image.
A circle displays as you drag, which indicates the area affected.
To warp an image using Quick Warp
1To apply the effect to:
• The canvas — Click the Canvas in the Layers panel.
• A selection — Click a selection tool from the toolbox, and drag in the document window to select an area.
• A layer — Click a layer in the Layers panel.
2Choose Effects Surface Control Quick Warp.
3In the Quick Warp dialog box, enable one of the following options:
•Sphere — warps the image spherically, like a reflection on a polished silver ball
•Bump — warps the center of the image toward you, making it appear convex
•Valley — warps the center of the image away from you, making it appear concave
•Swirl — distorts the image in a spiral
•Ripple — distorts the image in concentric rings, like the rings created when you drop a stone into a pool of water
4Adjust any of the following sliders:
•Power — controls the intensity of the Sphere and Ripple effects
•Angle Factor — controls the appearance of twisting and swirling in all effects
Applying the Woodcut effect
You can apply the Woodcut effect to create an image that appears like a woodcut or linoleum block print. You can specify either black and
white or colored Woodcut effects. You can also save preset Woodcut effects to apply to other images.
Before (left) and after (right) applying the Woodcut effect

Using lighting and surface texture effects | 669
To apply a black and white Woodcut effect
1To apply the effect to:
• The canvas — Click the Canvas in the Layers panel.
• A selection — Click a selection tool from the toolbox, and drag in the document window to select an area.
• A layer — Click a layer in the Layers panel.
2Choose Effects Surface Control Woodcut.
3Enable the Output Black check box to use the black part of the effect in the final image.
4Disable the Output Color check box if you want to use black and white only in the final image.
5Adjust any of the following sliders:
•Black Edge — determines the detail of the black edge. Larger values produce thick, black edges around objects. Smaller values
produce more intricate edges.
•Erosion Time — determines the number of erosion iterations performed on the black edge. The higher the erosion, the simpler the
edge.
•Erosion Edge — controls the amount of smoothing on the black edge. Larger values produce a rounded appearance of the black
edge.
•Heaviness — determines the amount of black in the final image
To apply a colored Woodcut effect
1To apply the effect to:
• The canvas — Click the Canvas in the Layers panel.
• A selection — Click a selection tool from the toolbox, and drag in the document window to select an area.
• A layer — Click a layer in the Layers panel.
2Choose Effects Surface Control Woodcut.
3Enable the Output Color check box to use the color part of the effect in the final image.
4Disable the Output Black check box if you want to use color only in the final image.
5Enable one of the following options:
•Auto Color — computes the color set from the original image’s colors automatically
•Use Current Color Set — uses a predefined color set. Next, choose a color from the Color Set box.
6Adjust any of the following sliders:
•Number of Colors — determines the number of colors used in the effect, ranging from 2 to 256. This control is available only with
the Auto Color option.
•Color Edge — determines the thickness of a colored edge applied to the image boundaries. Moving the slider to the right increases
edge thickness, which is measured in pixels. The edge color is selected by choosing a color swatch below the preview window.
You can change the colors in a color set by clicking a color and then clicking a new color in the Change Color chip.
To save a Woodcut effect as a preset
1Choose Effects Surface Control Woodcut.
2In the Woodcut dialog box, modify any of the settings.
3Click the Add button .
4In the Add Preset dialog box, type a name in the Preset Name box.
You can choose the saved preset from the Preset list box.
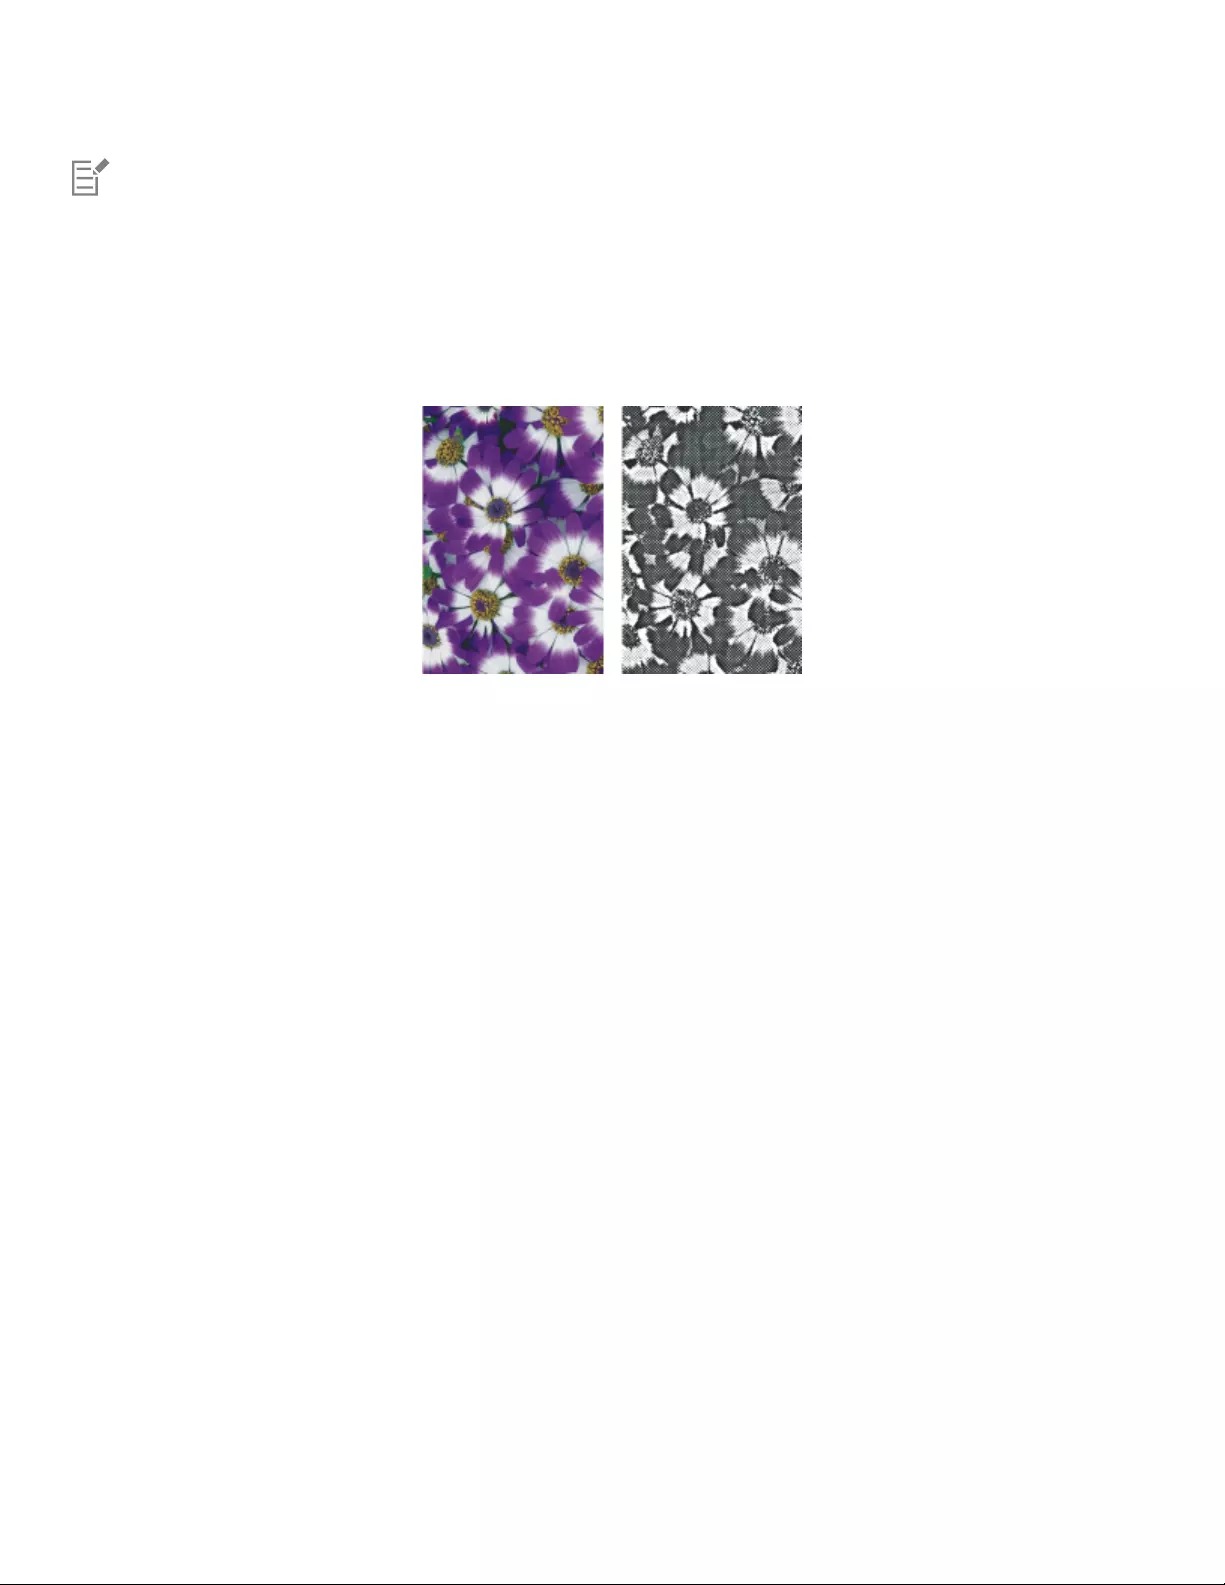
670 | Corel Painter 2022 User Guide
Color options cannot be saved with a preset.
Applying the Distress effect
You can apply the Distress effect to generate a high-contrast, black and white rendering of an image. You can control the edges,
smoothness, variability, and threshold of the effect. The effect interacts with either the currently selected paper grain, pattern, clone source,
layer mask, or channel.
Before (left) and after (right) applying the Distress effect
To apply the Distress effect using paper luminance
1Choose Window Media Panels Papers.
2Choose a paper swatch in the Paper Textures area.
If you want to experiment with the effect, keep the Papers panel open while you apply the effect. This way you can switch to different
papers and modify the paper controls.
3To apply the effect to:
• The canvas — Click the Canvas in the Layers panel.
• A selection — Click a selection tool from the toolbox, and drag in the document window to select an area.
• A layer — Click a layer in the Layers panel.
4Choose Effects Surface Control Distress.
5Choose Paper from the Using list box.
6Adjust any of the Distress controls. For information, see “Distress controls” on page 671.
To apply the Distress effect using clone source or pattern luminance
1Open an image.
2Perform a task from the following table.
To Do the following
Use a clone source In the Clone Source panel (Window Clone Source), choose
Embedded Image from the Source list box.
In the Embed Source Image dialog box, do one of the following:
•To browse for a file, enable the Browse option.
•To clone a currently open document, enable the Current
Document option, and choose a document from the list box.
•To embed the active texture, enable the Current Texture option.
Click OK.

Using lighting and surface texture effects | 671
To Do the following
Use a pattern Choose Window Media Panels Patterns, and click a pattern
swatch in the Painter Patterns area.
3To apply the effect to:
• The canvas — Click the Canvas in the Layers panel.
• A selection — Click a selection tool from the toolbox, and drag in the document window to select an area.
• A layer — Click a layer in the Layers panel.
4Choose Effects Surface Control Distress.
5Choose Original Luminance from the Using list box.
6Adjust any of the Distress controls. For information, see “Distress controls” on page 671.
To apply the Distress effect using a layer mask or alpha channel luminance
1Do one of the following:
•To use a layer mask, choose Window Layers, and click the layer that contains a layer mask in the Layers panel.
•To use an alpha channel, choose Window Channels, and click the alpha channel in the Channels panel.
2To apply the effect to:
• The canvas — Click the Canvas in the Layers panel.
• A selection — Click a selection tool from the toolbox, and drag in the document window to select an area.
• A layer — Click a layer in the Layers panel.
3Choose Effects Surface Control Distress.
4Choose the layer mask or channel from the Using list box.
5Adjust any of the Distress controls. For information, see “Distress controls” on page 671.
Distress controls
•Edge Size — determines the size of the edge enhancement
•Edge Amount — determines the amount of edge enhancement
•Smoothing — determines the roundness of the edge between black and white
•Variance — determines the amount of grain added to the edge
•Threshold — determines how much black is in the image
•Preview — enable this check box to preview the effect in the document window
Applying the Serigraphy effect
With the Serigraphy effect, you can use photographs to generate images that appear silk-screened or look like woodblock cuts. When
applying the effect, Corel Painter saves each color reduction as a separate layer, so you can edit each layer individually.
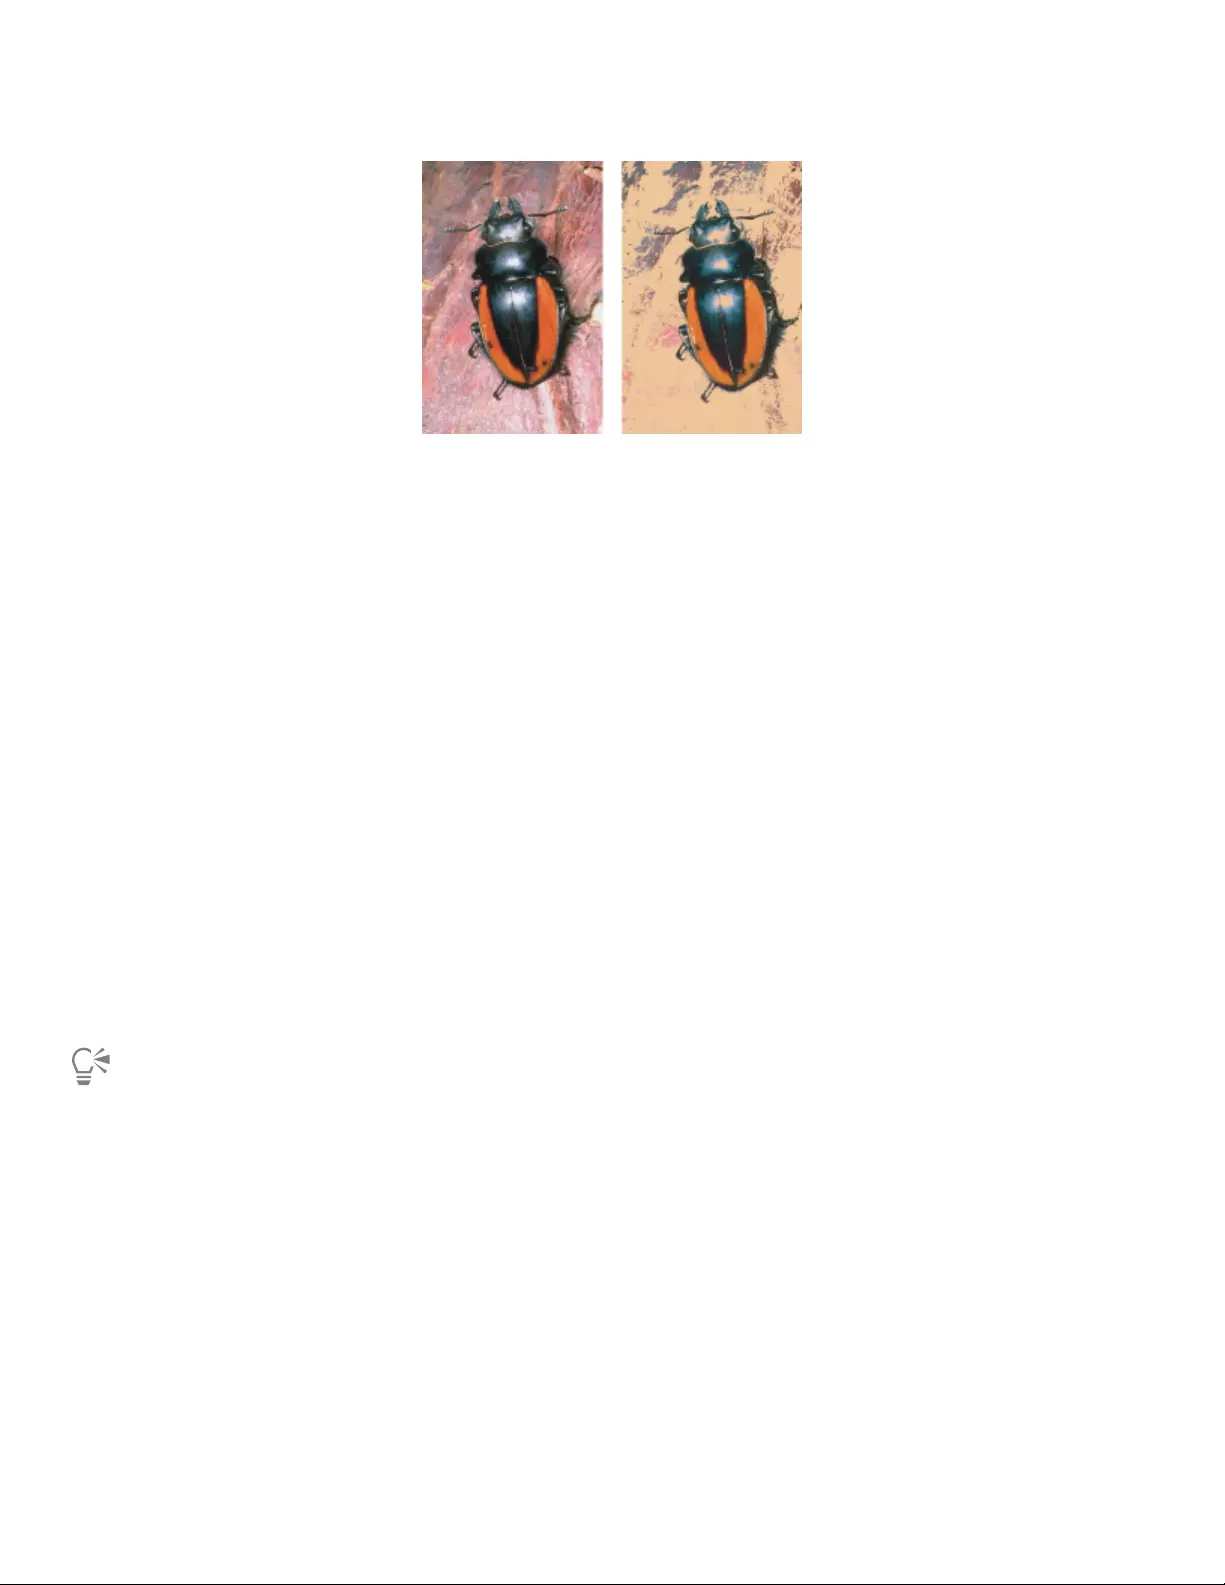
672 | Corel Painter 2022 User Guide
Before (left) and after (right) applying the Serigraphy effect
To apply Serigraphy effects
1To apply the effect to:
• The canvas — Click the Canvas in the Layers panel.
• A selection — Click a selection tool from the toolbox, and drag in the document window to select an area.
• A layer — Click a layer in the Layers panel.
2Choose Effects Surface Control Serigraphy.
3Click the Match to color chip, and choose a color from the color picker.
This is the center color — the color on which the effect will be based.
4Click the Fill with color chip, and choose a color from the color picker.
This color is used on the new layer.
5In the Serigraphy color dialog box, adjust any of the following sliders:
•Smoothing — determines the smoothness of the black edge
•Threshold — determines the total amount of color difference from the center color
•Distance Weighting — determines the amount of color distance from the center color
•Hue Weighting — determines how much hue contributes to the effect
•Sat Weighting — determines how much saturation contributes to the effect
•Lum Weighting — determines how much luminance contributes to the effect
6Click Create Serigraphy Layer.
7Click OK.
You can also specify Match and Fill colors by clicking a color in the image.
Applying the Sketch effect
You can use the Sketch effect to generate a black and white pencil outline of a photograph. You can then use the outline as a guide for
applying color, which is a useful technique for starting a painting. For more information, see “Choosing a painting workflow” on page 151.
To store the settings for the effect, you can create a preset. This allows you to quickly apply the settings to another image.
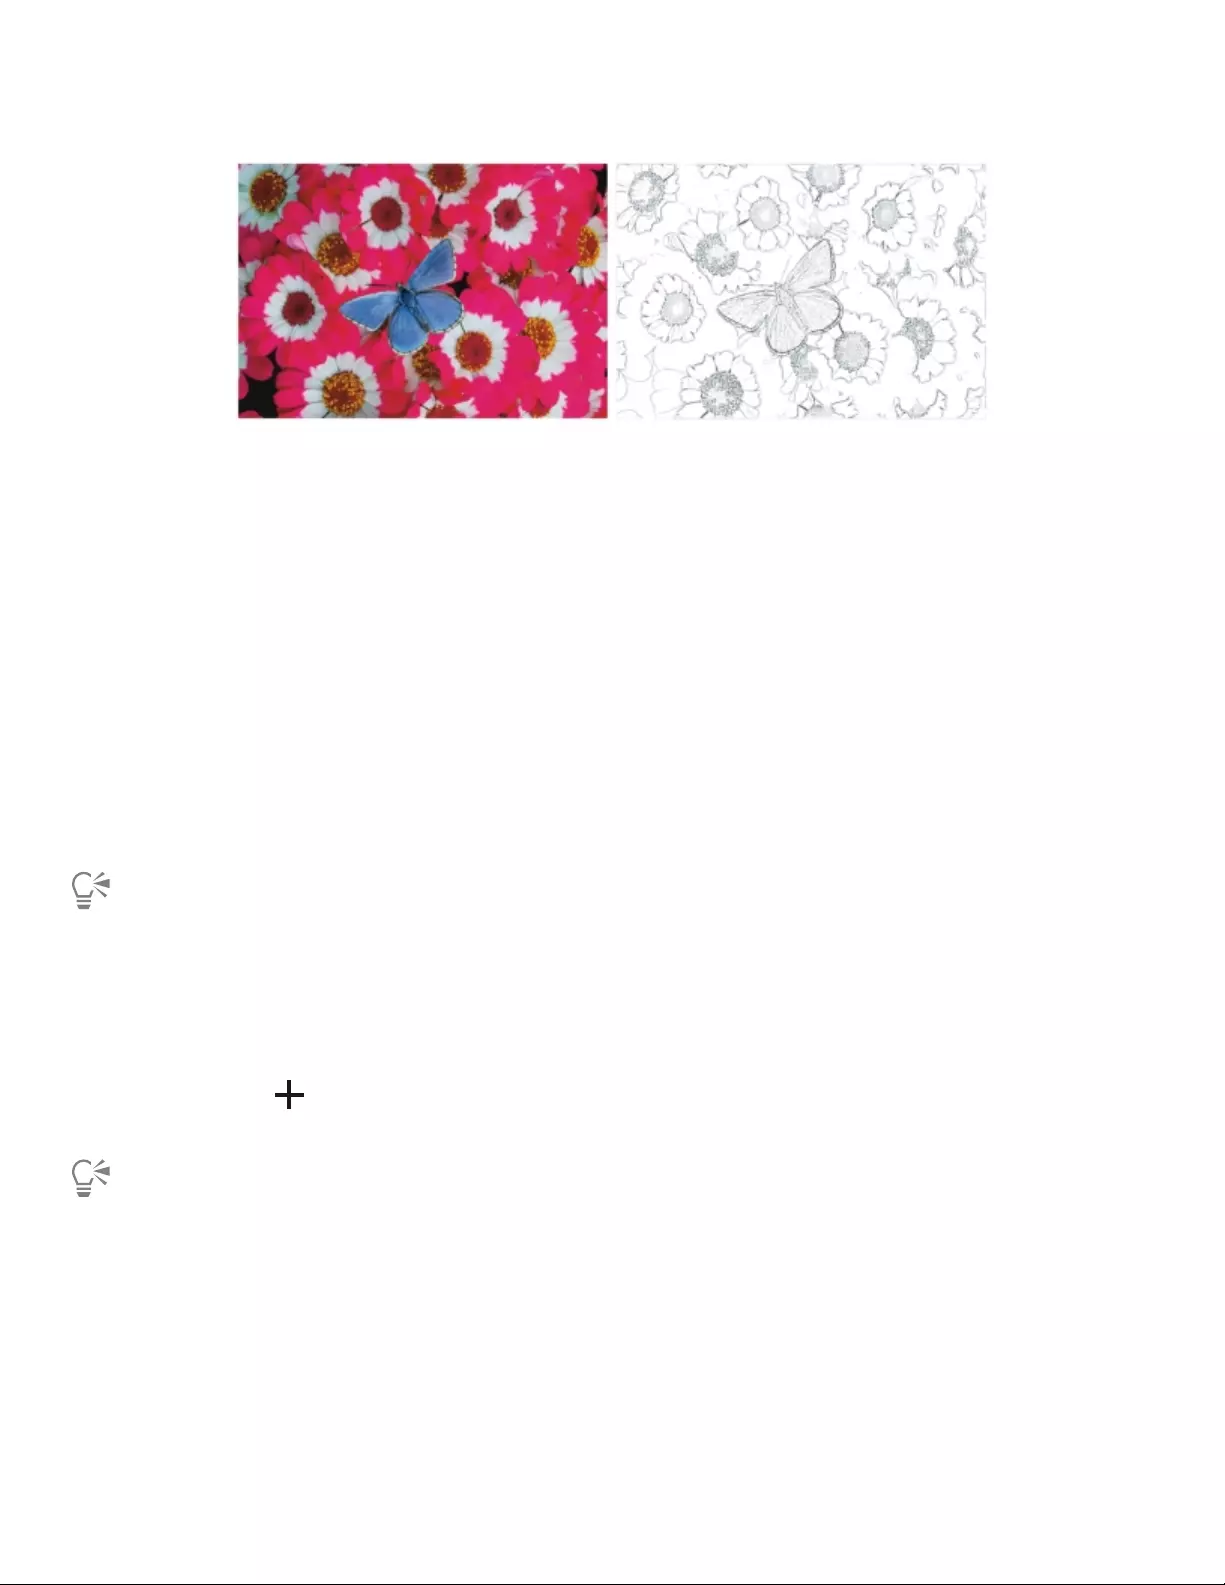
Using lighting and surface texture effects | 673
Before (left) and after (right) applying the Sketch effect
To apply the Sketch effect
1To apply the effect to:
• The canvas — Click the Canvas in the Layers panel.
• A selection — Click a selection tool from the toolbox, and drag in the document window to select an area.
• A layer — Click a layer in the Layers panel.
2Choose Effects Surface Control Sketch.
3In the Sketch dialog box, adjust any of the following sliders:
•Sensitivity — determines sensitivity to detail. Low values detect only the main edges. High values detect the main edges as well as thin
lines, such as the lines around a person’s eyes.
•Smoothing — determines how much noise is filtered out. Higher values result in wider, lighter, and blurrier lines.
•Grain — determines how much of the paper grain is revealed in the sketch marks. Move this slider to the right to show more of the
paper grain.
•Threshold High and Threshold Low — removes noise after edge detection. Threshold High is used to flag light pixels which may be
just noise in the image. Threshold Low is used to test surrounding pixels.
You can also apply a preset sketch effect by choosing a preset from the Preset list box.
To save a sketch effect as a preset
1Choose Effects Surface Control Sketch.
2In the Sketch dialog box, modify any of the settings.
3Click the Add button .
4In the Add Preset dialog box, type a name in the Preset Name box.
You can delete a preset sketch effect by choosing it from the Preset list box and clicking the Delete button.

674 | Corel Painter 2022 User Guide
Dynamic Plug-ins | 675
Dynamic Plug-ins
Dynamic plug-ins are a category of floating layers that give you the ability to manipulate, transform, and adjust underlying images non-
destructively. In other words, you can apply and modify the dynamic plug-effects any number of times without altering the source image.
The Liquid Metal dynamic plug-in lets you introduce metallic droplets to an image by using a dynamic layer.
This section contains the following topics:
•“Getting started with dynamic plug-ins” (page 676)
•“Modifying and deleting dynamic layers” (page 676)
•“Converting dynamic layers” (page 676)
•“Applying the Brightness and Contrast dynamic plug-in” (page 677)
•“Applying the Burn dynamic plug-in” (page 677)
•“Applying the Tear dynamic plug-in” (page 679)
•“Applying the Bevel World dynamic plug-in” (page 680)
•“Applying the Equalize dynamic plug-in” (page 681)
•“Applying the Glass Distortion dynamic plug-in” (page 682)
•“Applying the Kaleidoscope dynamic plug-in” (page 684)
•“Applying the Liquid Lens dynamic plug-in” (page 685)
•“Applying the Liquid Metal dynamic plug-in” (page 688)
•“Applying the Posterize dynamic plug-in” (page 695)
676 | Corel Painter 2022 User Guide
Getting started with dynamic plug-ins
Dynamic plug-ins allow you to apply effects to images without altering the original image. For example, you can add a burnt effect to the
edge of an image or increase the image brightness. The Dynamic plug-ins are accessible from the Layers panel.
When you apply an effect using a dynamic plug-in, a dynamic layer is automatically generated in the document. Like all floating objects,
dynamic layers appear in the layer list in the Layers panel, where they are identified by the plug icon . You can select, move, group,
hide, show, and lock dynamic layers, as well as change their display order, opacity, and composite method, as you would with other layers.
For more information, see “Layers” on page 539.
The steps for applying dynamic plug-ins vary slightly depending on which dynamic plug-in you choose. For most dynamic plug-ins, you can
apply the effect to:
• a constrained area by making a selection in the document window
• a selected layer
• to the content of the entire canvas
If you apply the effect to a selection, the dynamic layer conforms to the dimensions and location of the selection. If you apply the effect to
the canvas, the dynamic layer is the same size as the canvas. For a few dynamic plug-ins, such as Kaleidoscope, you can specify the size of
the new layer before you create it. For more information, see “Applying the Kaleidoscope dynamic plug-in” on page 684.
When you save the file in RIFF format, the dynamic layer retains its dynamic nature. Therefore, if you plan on modifying the dynamic layer in
the future, you should save the file to RIFF.
To access the dynamic plug-ins
1Choose Window Layers.
2In the Layers panel, click the Dynamic Plug-ins button to display a list of dynamic plug-ins.
Modifying and deleting dynamic layers
After creating a dynamic layer, you can change its settings. You can also delete a dynamic layer at any time.
To change a dynamic layer’s settings
1Select the dynamic layer in the document window or in the Layers panel.
2Double-click the dynamic layer in the Layers panel.
3In the dialog box, change any settings.
To delete a dynamic layer
•In the Layers panel, select the dynamic layer, and click the Delete button .
You can also delete a dynamic layering by choosing Edit Undo.
Converting dynamic layers
At some point, you may want to finalize the dynamic plug-in effect and convert the result to a default layer. This allows you to work with the
image in ways not possible when the effect is held in a dynamic layer.

Dynamic Plug-ins | 677
Converting a dynamic layer captures its current appearance to a pixel-based layer. After a dynamic layer is converted, you can no longer
adjust the effect. The following operations automatically generate a prompt to convert a dynamic layer:
• painting on a dynamic layer
• applying an additional effect or dynamic plug-in
• dropping a dynamic layer
• collapsing a group that contains a dynamic layer
• saving to a non-RIFF format
To convert a dynamic layer to a default layer
1In the Layers panel, choose a dynamic layer.
2Click the Layer options button , and choose Convert To Default Layer.
Applying the Brightness and Contrast dynamic plug-in
The Brightness and Contrast dynamic plug-in creates a layer that lets you adjust the brightness and contrast of the image beneath it.
The Brightness and Contrast dynamic layer affects all images beneath it.
To create a Brightness and Contrast dynamic layer
1Do one of the following:
• In the Layers panel, choose the Canvas.
•Choose the Rectangular Selection tool from the toolbox, and then drag in the document window to select an area.
2In the Layers panel, click the Dynamic Plug-ins button , and choose Brightness and Contrast.
3In the Brightness/Contrast dialog box, drag the sliders to adjust the image contrast and brightness.
Corel Painter automatically creates a new layer when you apply the dynamic plug-in.
If you don’t like the results, you can click Cancel or you can click Reset to restore the default settings.
You can also use the Opacity slider in the Layers panel to adjust the effect.
Applying the Burn dynamic plug-in
The Burn dynamic plug-in lets you add a burn effect to the edges of a selection or layer. You can adjust the amount and character of the
burn.

678 | Corel Painter 2022 User Guide
Different Burn settings produce different results.
To burn a layer or selection
1Do one of the following:
•In the Layers panel, choose the Canvas, and choose Select All.
• In the Layers panel, choose a layer.
•Choose the Rectangular Selection tool from the toolbox, and then drag in the document window to select an area.
2In the Layers panel, click the Dynamic Plug-ins button , and choose Burn.
3In the Burn Options dialog box, adjust any of the following sliders and controls:
•Burn Margin — specifies the width of the burn effect in relation to the layer’s size
•Flame Breadth — specifies the width of the scorched region. The burn color appears in the scorch.
•Flame Strength — specifies how much of the layer is consumed by the burn. Increasing Flame Strength shrinks the layer.
•Wind Direction — changes the burn amount for different sides of the layer
•Wind Strength — determines how much change the Wind Direction control imparts
•Jaggedness — specifies the amount of irregularity in the burnt edges
If you apply the effect a selection, Corel Painter 2022 automatically creates a new layer when you apply the dynamic plug-in.
If you apply the effect to an existing layer, Corel Painter converts the layer to a dynamic layer.
You can also
Use the current paper to vary the dye concentration in the scorch
region
Enable the Use paper texture check box.
Burn the interior edges as well as the exterior edges of the selection Enable the Burn Interior Edges check box. Disable this check box
to protect the interior edges.
Change the scorch color Click the Color chip, and choose a color from the color picker.
Restore the default settings Click the Reset button.
You can view only the dynamic layer by hiding the canvas in the Layers panel.
You can apply a Burn to a specific area of the canvas by selecting the area, right-clicking the selection and choosing Layer via
Copy, then applying the effect to the new layer.
You can use the Revert to Original command in the Layers panel menu to restore a source image to its original condition. For
more information, see “Modifying and deleting dynamic layers” on page 676.
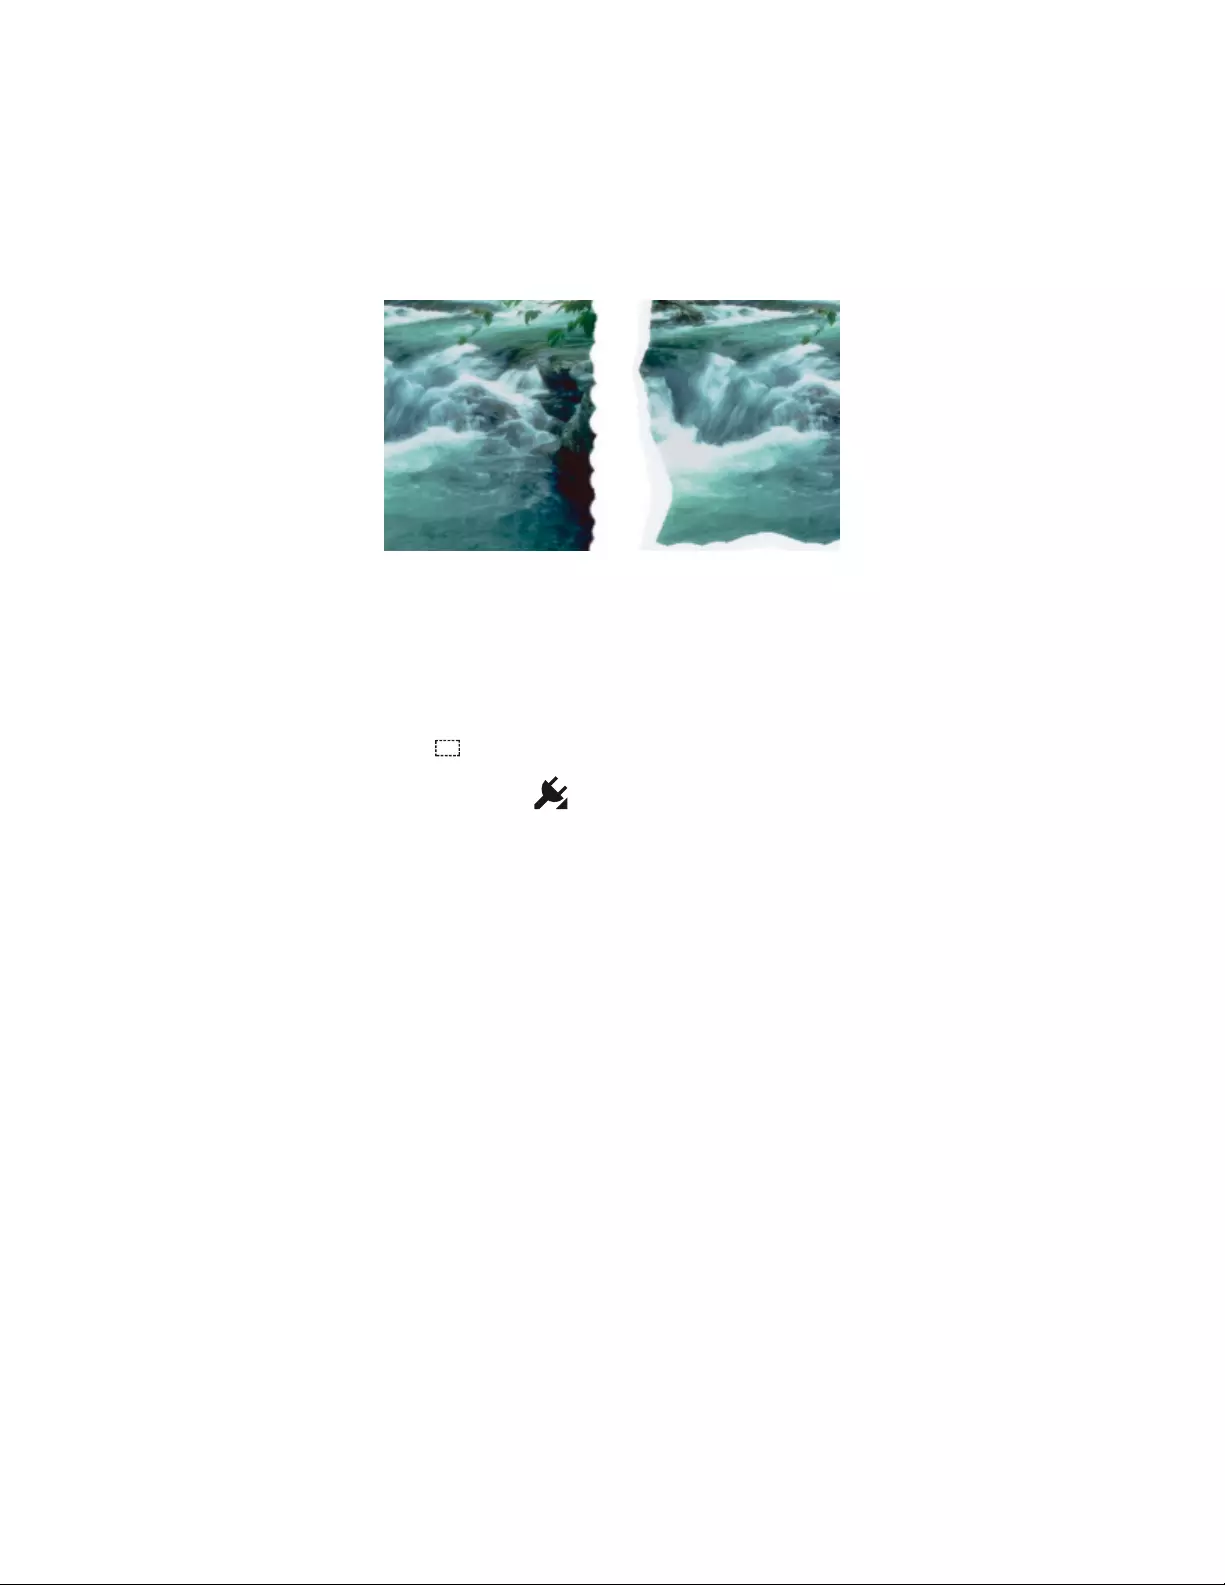
Dynamic Plug-ins | 679
Applying the Tear dynamic plug-in
The Tear dynamic plug-in lets you apply a torn-paper effect to the edge of a selection or layer. You can also control the amount of tearing
that the effect produces.
You can tear a little (left) or a lot (right).
To apply the Tear dynamic plug-in
1Do one of the following:
•In the Layers panel, choose the Canvas, and choose Select All.
• In the Layers panel, choose a layer.
•Choose the Rectangular Selection tool from the toolbox, and then drag in the document window to select an area.
2In the Layers panel, click the Dynamic Plug-ins button , and choose Tear.
3In the Tear Options dialog box, set the following sliders and controls to adjust the tear effect:
•Margin — specifies the width of the tear effect from the edge of the layer
•Strength — specifies how much of the layer is torn away
•Jaggedness — specifies the amount of irregularity in torn edges
If you apply the effect a selection, Corel Painter automatically creates a new layer when you apply the dynamic plug-in.
If you apply the effect to an existing layer, Corel Painter converts the layer to a dynamic layer.
You can also
Tear the interior edges as well as the exterior edges Enable the Tear interior edges check box. Disable this check box to
protect interior edges.
Change the tear color Click the Color chip, and choose a color from the color picker.
Restore the default settings Click the Reset button.

680 | Corel Painter 2022 User Guide
You can view only the dynamic layer by hiding the canvas in the Layers panel.
Use a rough paper texture to create a better tear by clicking the Paperselector in the toolbox and choosing a paper texture from
the list.
You can use the Revert to Original command in the Layers panel menu to restore a source image to its original condition. For
more information, see “Modifying and deleting dynamic layers” on page 676.
Applying the Bevel World dynamic plug-in
The Bevel World dynamic plug-in lets you create three-dimensional (3D) objects by adding bevel effects, or angled edges, to selections or
layers. You can control both bevel shape and lighting to create unique effects.
Examples of various bevel profiles
For example, you can even use Bevel World to create a 3D button with text on it. First, create the background button, and then add text to
float over the button. You can then group the text and button together and collapse the layer group.
You can also change the 3D appearance of the bevel by adjusting the lighting.
To apply a bevel effect
1Do one of the following:
• In the Layers panel, choose a layer.
•Choose a selection tool from the toolbox, and then drag in the document window to select an area.
2In the Layers panel, click the Dynamic Plug-ins button , and choose Bevel World.
3In the Bevel area, adjust any of the following sliders:
•Bevel Width — specifies the width of the bevel in relation to the layer diameter
•Outside Portion — controls the portion of the bevel that appears outside the layer
•Rim Slope — specifies the angle of the rim (innermost portion) of the bevel
•Cliff Portion — specifies the horizontal distance between the base and the rim
•Cliff Height — specifies the vertical distance between the base level and rim level
•Cliff Slope — specifies the angle of the cliff (middle portion) of the bevel
•Base Slope — specifies the angle of the base (outermost portion) of the bevel
•Smoothing — controls the roundness of the transitions between base, cliff, and rim as well as the sharpness of the resulting ridges
4In the Light area, adjust any of the following sliders:
•Light Direction — specifies the angle of the light source

Dynamic Plug-ins | 681
•Light Height — specifies the light’s angle in relation to the canvas. At 90°, the light is shining straight down, and at 1°, it’s nearly
horizontal. With Light Height set to 90%, the Light Direction setting has no effect. When set to 90% or less, the light rotates around
the center.
•Brightness — controls the light’s intensity
•Scatter — adjusts the spread of the light’s shine over the surface
•Shine — controls the prevalence of highlights
•Reflection — controls how much of the source image is visible in the bevel. If you are working with a clone, the clone source is
mapped onto the surface at a variable percentage.
You can also
Add beveling on the interior edges of the bevel area Enable the Bevel inner edges check box.
Change the color of the outside portion Click the Outside Color chip, and choose a color from the color
picker. This control applies only when Outside Portion is greater
than zero.
Change the light color Click the Light Color chip, and choose a color from the color picker
Add a preset light source In the Light area, enable the Simple lighting check box, and click a
light indicator on the lighting sphere.
Add a custom light source In the Light area, disable the Simple lighting check box, and click
on the lighting sphere where you want to add a new light source.
A new light indicator (small circle) appears where you click.
Delete a custom light source Click on a light indicator and press Delete.
Restore the default settings Click the Reset button.
You can use the Revert to Original command in the Layers panel menu to restore a source image to its original condition. For
more information, see “Modifying and deleting dynamic layers” on page 676.
Applying the Equalize dynamic plug-in
The Equalize dynamic plug-in creates a layer that lets you adjust the contrast in underlying images. It does this by adjusting black and white
points and distributing the brightness levels throughout the entire range of available levels.
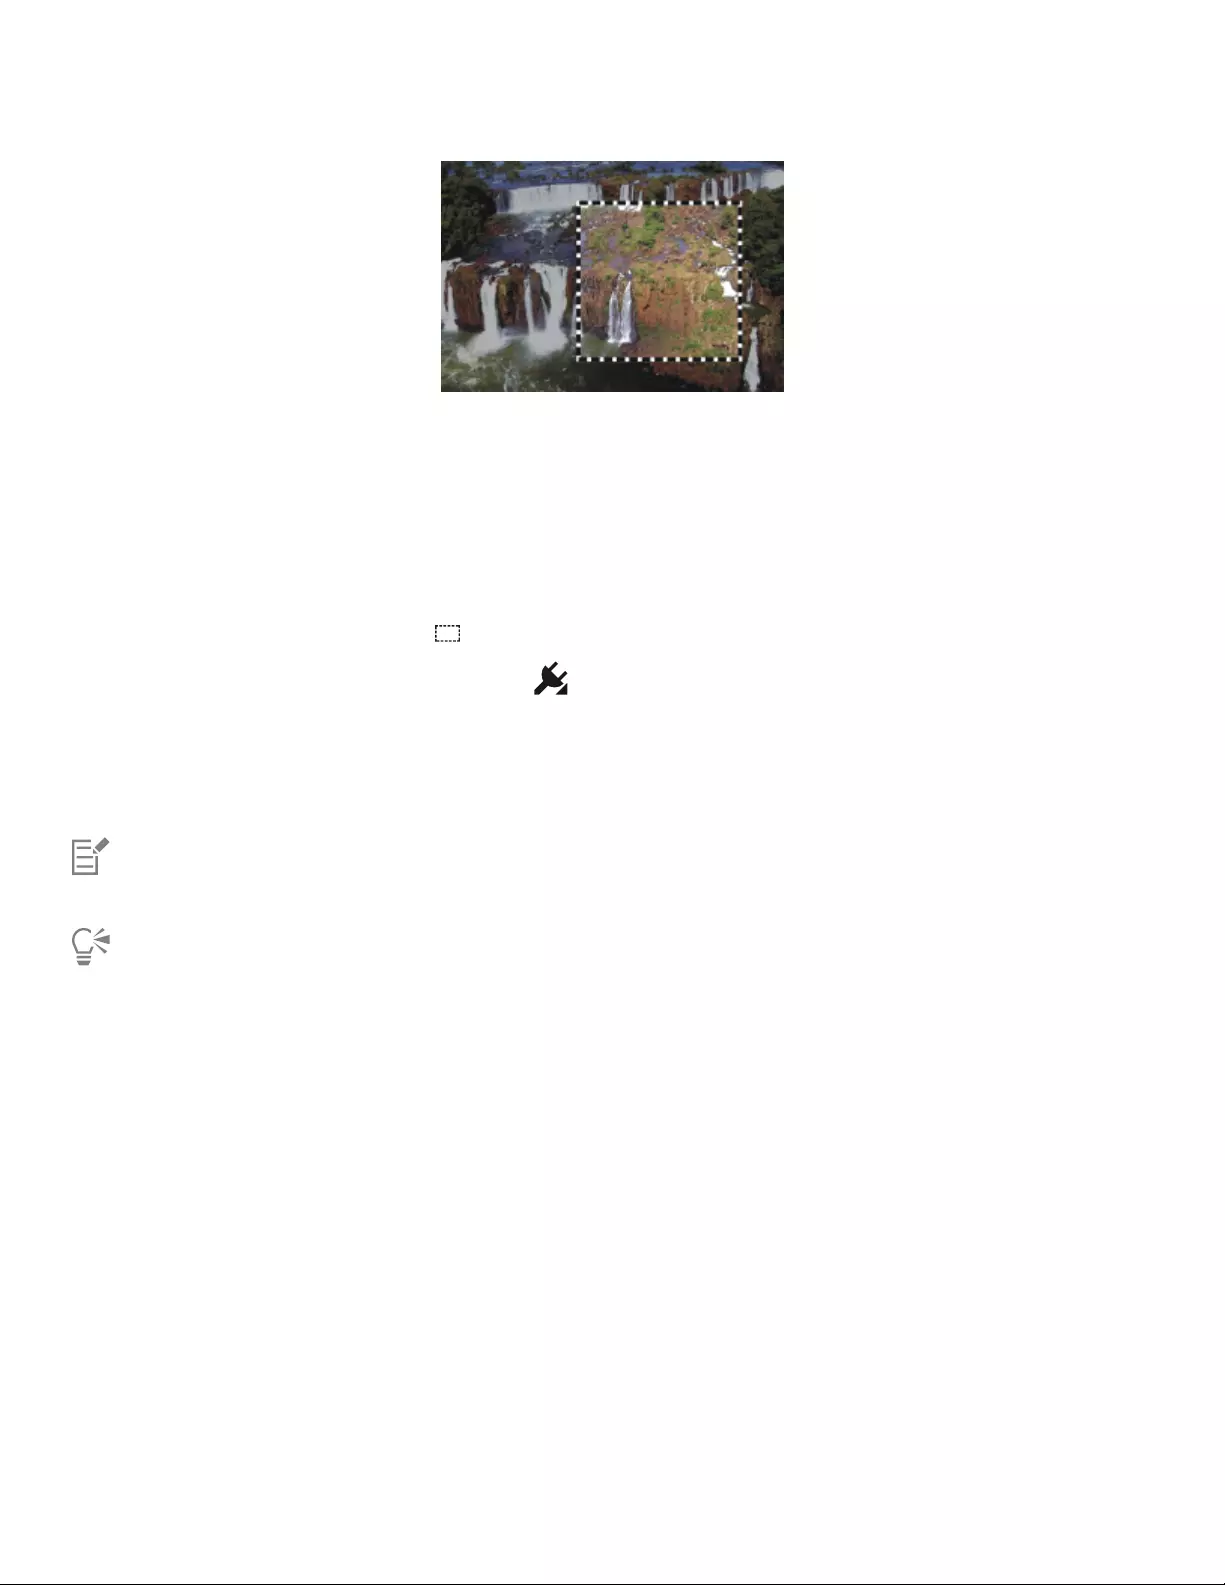
682 | Corel Painter 2022 User Guide
The Equalize dynamic layer is applied to a rectangular selection.
The Equalize dynamic plug-in creates a histogram showing the number of pixels for each brightness level value. Equalize allows gamma
adjustment, which lightens or darkens an image without changing highlights or shadows.
To create an Equalize dynamic layer
1Do one of the following:
• In the Layers panel, choose the Canvas.
•Choose the Rectangular Selection tool from the toolbox, and then drag in the document window to select an area.
2In the Layers panel, click the Dynamic Plug-ins button , and choose Equalize.
3In the Equalize dialog box, adjust the contrast by dragging the small black and white markers under the histogram.
Any values in the image located to the right of the white marker become black; any values to the left of the black marker become white.
4Drag the Gamma slider to adjust only the midtones of an image and leave the white and black areas untouched.
Corel Painter automatically creates a new layer when you apply the dynamic plug-in.
If you don’t like the results, click Reset to restore the default settings.
You can also use the Opacity slider in the Layers panel to adjust the effect.
Applying the Glass Distortion dynamic plug-in
The Glass Distortion dynamic plug-in creates a layer that simulates the appearance of viewing the image through textured glass. You can
move the layer in the document to view the distortion over different parts of an image.
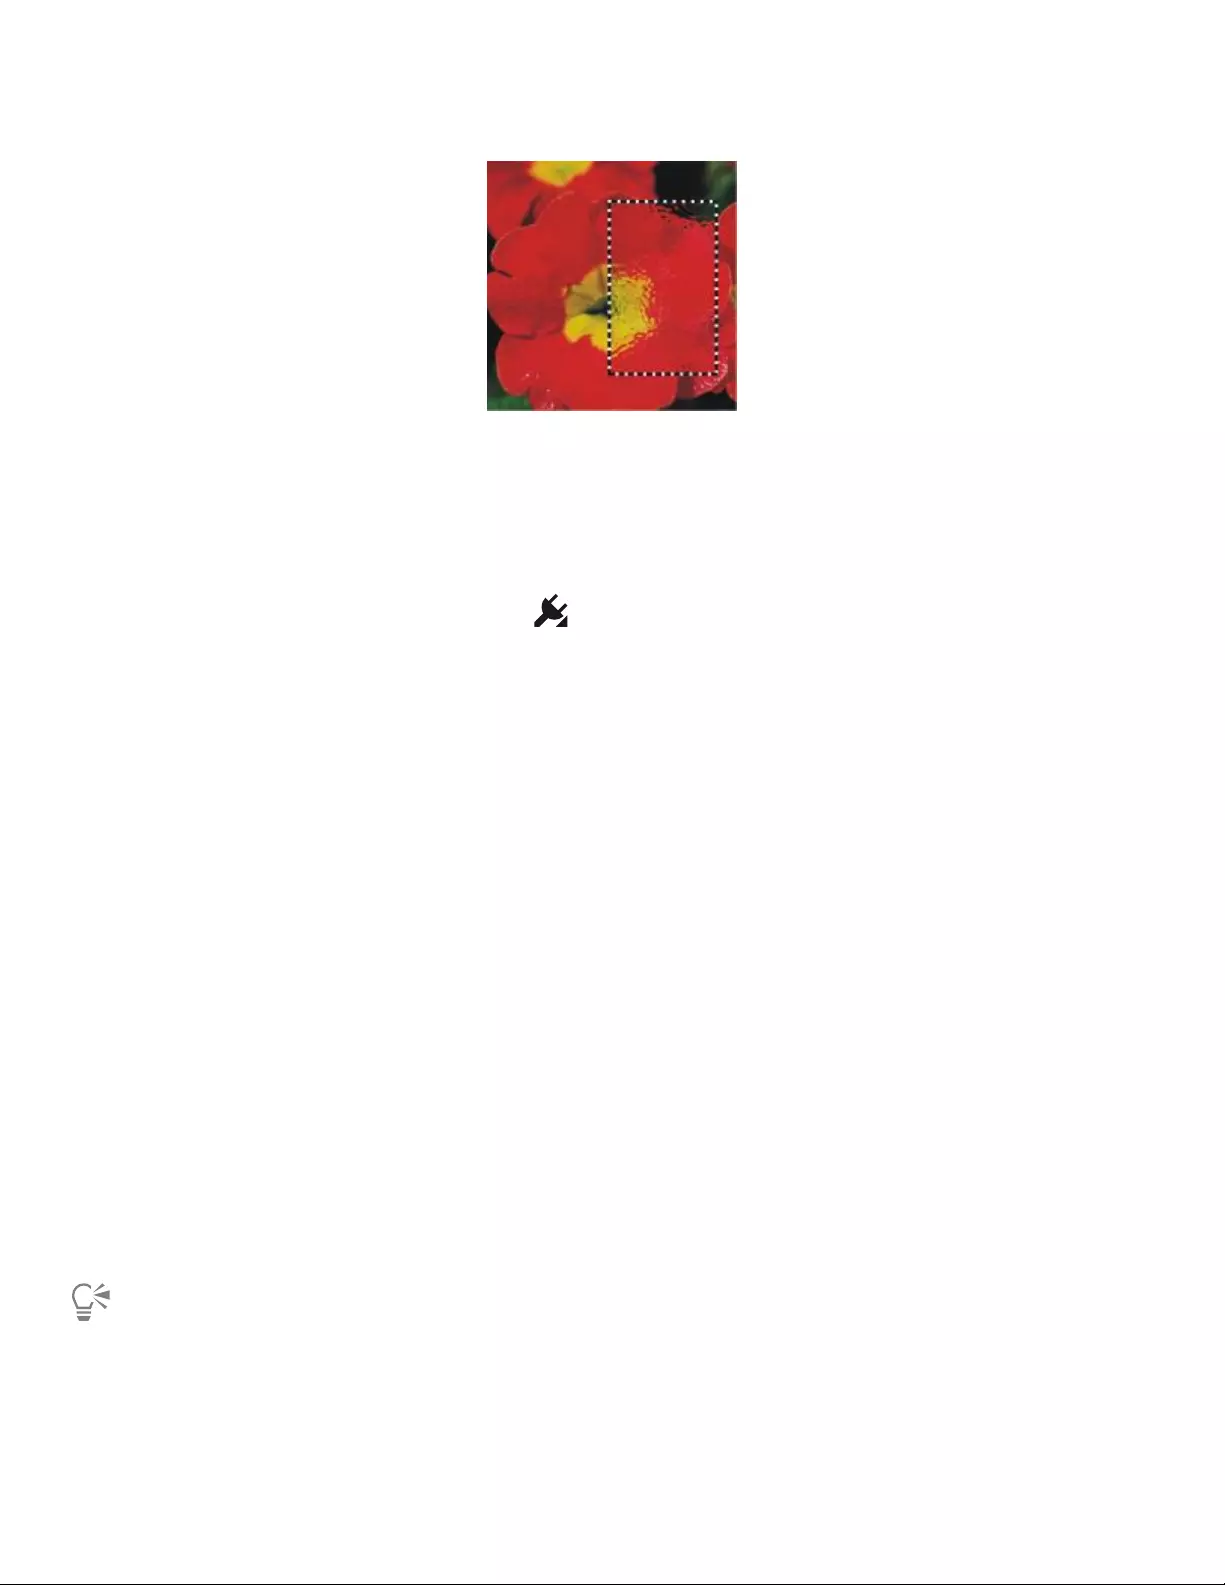
Dynamic Plug-ins | 683
A section of an image with Glass Distortion applied
To create a Glass Distortion dynamic layer
1Do one of the following:
• In the Layers panel, choose the Canvas.
• Choose a selection tool from the toolbox, and then drag in the document window to select an area.
2In the Layers panel, click the Dynamic Plug-ins button , and choose Glass Distortion.
3In the Glass Distortion Options dialog box, choose one of the following displacement sources from the Using list box:
•Paper — uses the selected paper texture. Paper texture is good for creating the pebbled glass effect. Unless you want frosted glass,
you’ll probably want to increase the scale of the paper.
•Current Selection — uses the currently selected area in the document window
•Image Luminance — uses the current document’s luminance
•Original Luminance — uses the clone source’s luminance
Image pixels are displaced, based on the light and dark areas of the source.
4To modify the distortion effect, adjust any of the following sliders:
•Softness — controls the transitions between displaced colors. Increasing softness creates more intermediate steps and produces a
smoother distortion. If you experience aliasing in a glass distortion, try increasing the softness.
•Amount — controls the degree of displacement. A higher amount leads to more distortion.
•Variance — creates multiple variations in the neighborhood of the displacement. The result of increasing variance depends on the type
of image and other settings.
Corel Painter automatically creates a new layer when you apply the dynamic plug-in.
You can also
Inverts the selected source Enable the Inverted check box.
Display changes before applying them to the image Enable the Preview check box.
Restore the default settings Click the Reset button.
You can also use the Opacity slider in the Layers panel to adjust the effect.
You can drag the Glass Distortion layer or selection in the document window to distort other areas of the image.

684 | Corel Painter 2022 User Guide
The Glass Distortion dynamic layer using Paper (left) and Image Luminance (right) displacement sources
Applying the Kaleidoscope dynamic plug-in
The Kaleidoscope dynamic plug-in creates a square layer that produces kaleidoscopic effects from underlying images. The traditional
kaleidoscope is a hollow tube with a set of mirrors and colored chips at one end. You peer into the other end and enjoy the highly
symmetrical patterns that the mirrors create from the colored chips. When you add a Kaleidoscope dynamic layer, you first specify its size.
You can move the layer over different parts of an image to produce different effects.
To create a Kaleidoscope dynamic layer
1In the Layers panel, click the Dynamic Plug-ins button , and choose Kaleidoscope.
2In the Kaleidoscope dialog box, specify the size of the dynamic layer.
Kaleidoscopes must be square, and no bigger than the shorter dimension of the document (width or height).
3Drag the Kaleidoscope layer to different areas of the image to alter the effect.
Move the Kaleidoscope layer to produce different effects.
To preserve the Kaleidoscope layer, you need to save the image in RIFF format.
To create and capture a Kaleidoscope pattern
1Drag the Kaleidoscope layer on the canvas until it displays an image that you like.
2In the Layers panel, select the Kaleidoscope layer.
3Click the Layers panel menu arrow, and choose Drop and Select to commit the layer.
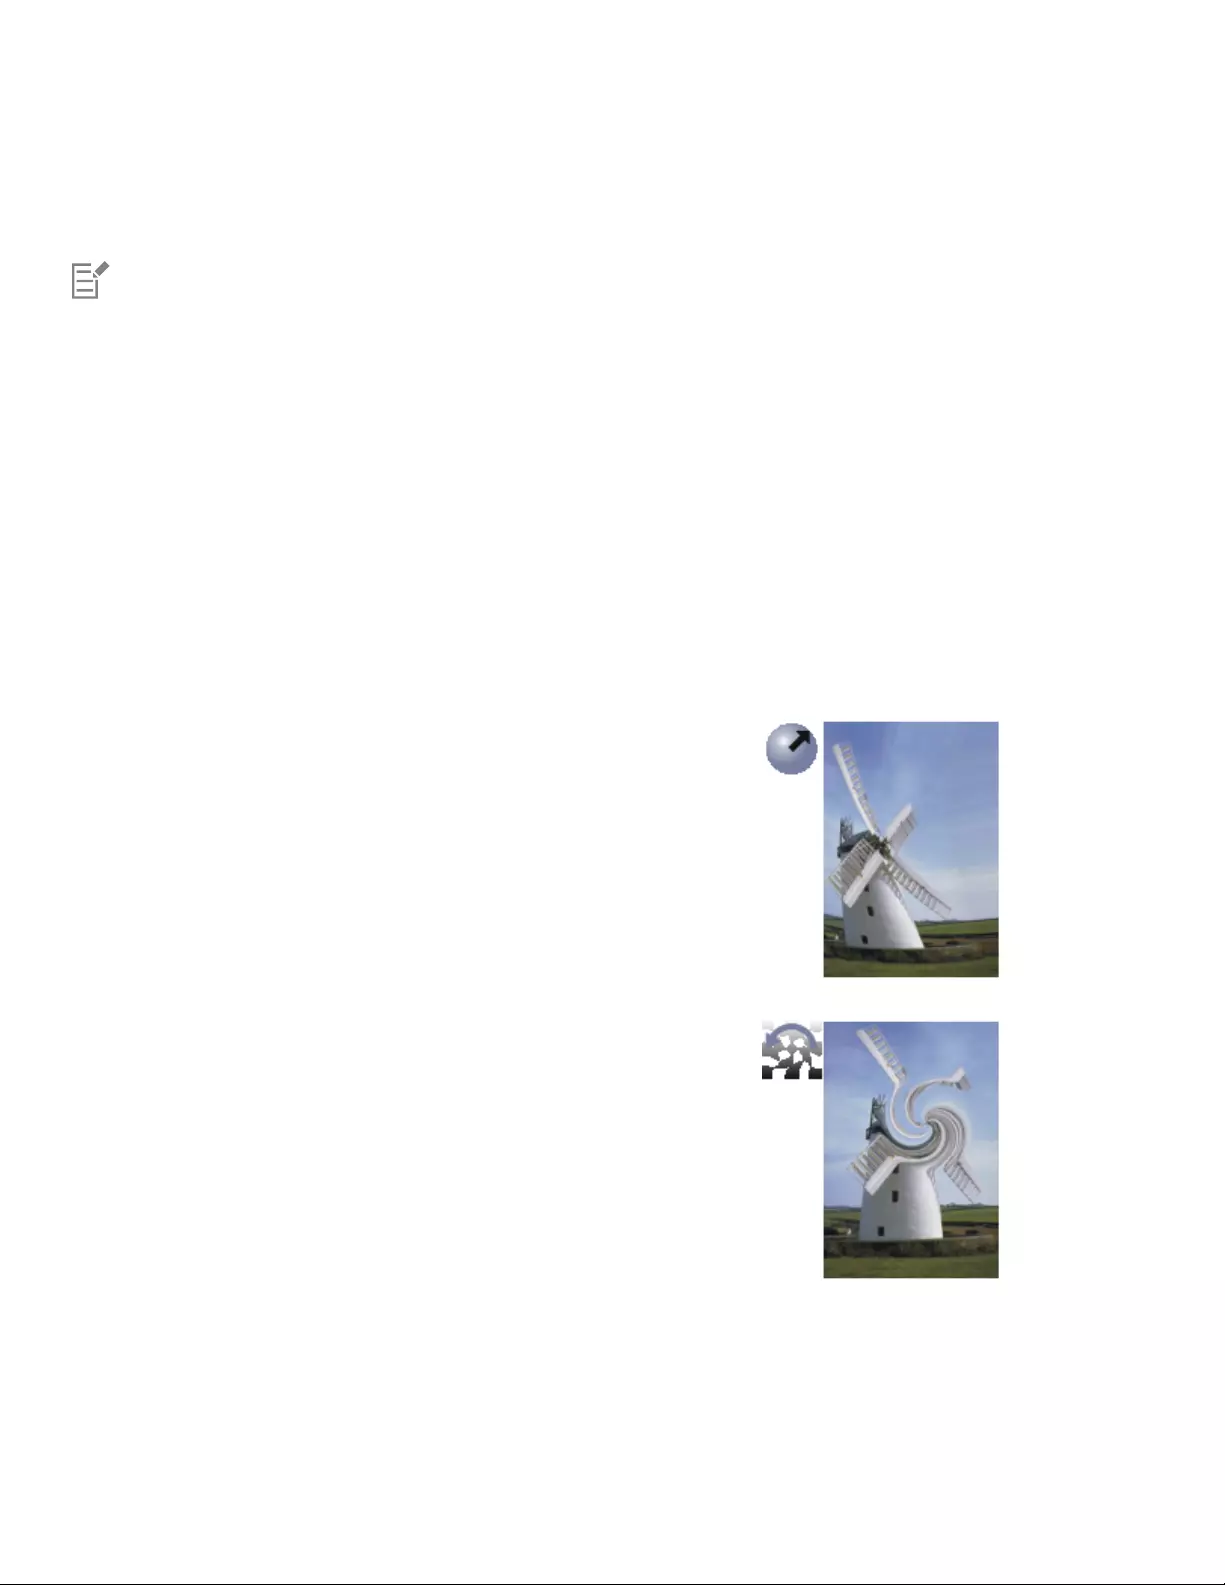
Dynamic Plug-ins | 685
4Choose Window Media Panels Patterns.
5In the Patterns panel, click the Capture Pattern button.
For more information, see “Patterns” on page 697.
When you create a pattern from a Kaleidoscope layer, the selection is dropped to the canvas and cut out. If you want to preserve
the original image and the Kaleidoscope layer so that you can continue working with the effect, save the image in RIFF format
before you choose Drop and Select. As an alternative, you can set the number of Undo levels high enough so that you can back
out of the steps to restore the original image.
Applying the Liquid Lens dynamic plug-in
Liquid Lens creates a dynamic layer that lets you distort and smear the underlying image. You can create “fun house” mirror effects, melting
images, and more. You can also erase any of the changes that you make.
Liquid Lens tools
You can apply different distortion effects by using any of the following tools:
Liquid Lens tool Example
The Circular Distortion tool creates circular rings of distortion. Drag
in the direction you want the distortion to move. Size and Spacing
have no effect on the Circular Distortion tool.
The Left Twirl tool distorts in counterclockwise spirals.
686 | Corel Painter 2022 User Guide
Liquid Lens tool Example
The Right Twirl tool distorts in clockwise spirals.
The Bulge tool distorts outward, pushing images out.
The Pinch tool distorts inward, drawing images closer.
The Brush tool distorts in the direction you drag.

Dynamic Plug-ins | 687
To create a Liquid Lens dynamic layer
1In the Layers panel, choose the Canvas.
2Click the Dynamic Plug-ins button , and choose Liquid Lens.
3In the Liquid Lens dialog box, choose a Liquid lens tool.
4Adjust any of the following sliders:
•Size — changes the diameter of the distortion tool and the size of rain, which scatters distortion droplets in the layer
Examples of how the Size slider affects distortion
•Spacing — changes the distance between distortion dabs
Low spacing makes a smooth, continuous stroke (left); high spacing lets the dabs appear individually (right).
•Amount — controls the degree of distortion applied
•Smooth — changes the blending between the distortion stroke and the unaffected images
Higher values create a smooth, continuous distortion (right). Lower values create individual dabs of distortion (left).
5Drag in the document window to create distortion.
If you don’t like the distortion, click Clear.
You can also
Simulate a melting image by scattering distortion droplets
downwards in the layer
In the Liquid Lens dialog box, click Rain, then click anywhere in the
image to stop the rain.

688 | Corel Painter 2022 User Guide
You can also
If Smooth and Size settings are very high, the rain might continue
for a moment after you click.
Restore the default settings Click the Reset button.
You cannot use Undo to restore the image to its previous state, however, you can use the Eraser tool in the Liquid Lens dialog box.
You can move the Liquid Lens layer to different regions of the document to distort other images.
Rain melts the image.
To erase Liquid Lens distortion
1 In the Liquid Lens dialog box, choose the Eraser tool .
2 Adjust the Size, Spacing, and Smooth sliders to modify the Eraser tool settings.
Higher settings on the Smooth slider create softer transitions from the erased area to the remaining distortion.
3Drag in the document window.
The original underlying image returns.
Remove distortion by using the Eraser tool.
Applying the Liquid Metal dynamic plug-in
The Liquid Metal dynamic plug-in lets you paint on a layer with liquid and metal. This text uses the term “metal” to refer to the media
applied — even if the settings create an effect more like water.
Dynamic Plug-ins | 689
You can apply droplets of liquid that distort the underlying image through refraction. You can also create globs of shiny metal that flow
together and move like mercury. The Refraction slider sets the difference between water and metal, which lets you achieve intermediate
effects. Negative metal can be used to create holes in metal.
The Liquid Metal dynamic plug-in creates either liquid metal or translucent, refractive liquid.
A stroke of metal is made up of a series of discrete droplets. You can select one or several droplets and move them or change their
properties.
The “handles” show the droplet’s circle and center point. Showing the handles on the droplets isn’t necessary for selecting them, but it
can make your work easier. The droplets applied in the last stroke are automatically selected. Each new stroke deselects the droplets of the
previous one.
The Undo feature is not available when working with metal; however, you can remove selected metal, the last metal applied, or all metal on
the layer.
Metal is highly reflective. You can customize the look by using a clone source or a pattern as a reflection map. For more information, see
“Image cloning and sampling” on page 191 and “Patterns” on page 697.
Liquid metal tools
You can apply metal with the Brush tool, the Circular Drop tool, or the Rain feature. You can adjust the size of your brush or rain droplets.
The Brush is the default applicator. You can use the Brush tool to paint with metal. You can use the Circular Drop tool to create circles of
metal. The Rain feature lets you scatter metallic droplets on the layer.
Liquid Metal tool Example
You can create strokes of metal by using the Brush tool.

690 | Corel Painter 2022 User Guide
Liquid Metal tool Example
You can create circles of metal by using the Circular Drop tool.
You can create randomly falling metal raindrops by applying the
Rain feature.
To create a Liquid Metal dynamic layer
1In the Layers panel, choose the Canvas.
2Click the Dynamic Plug-ins button , and choose Liquid Metal.
3In the Liquid Metal dialog box, choose one of the following tools:
•Circular Drop tool
•Brush tool
4In the Settings area, move any of the following sliders:
•Size — changes the diameter of the selected droplets that you apply by using the Brush tool or Rain. It does not affect the Circular
Drop tool.
•Spacing — adjusts the spacing between droplets in strokes created with the Brush tool
Dynamic Plug-ins | 691
A stroke with low spacing (left): the droplets flow together. A stroke with high spacing (right): each droplet is distinct.
•Volume — adjusts visibility along the perimeter
Decreasing volume below 100% shrinks the visible portion of the droplet, “drying it up” (left). Increasing
volume beyond 100% extends visibility beyond the droplet circle into the perimeter range (right).
•Smooth — changes the perimeter range, which determines the droplet’s tendency to “join” its neighbors
Low settings on the Smooth slider keep droplets distinct (left); higher settings make the droplets flow together (right).
5In the Rendering area, choose one of the following metal types from the Map list box:
•Standard Metal
•Chrome 1
•Chrome 2
•Interior
•Clone Source
6Move any of the following sliders:
692 | Corel Painter 2022 User Guide
•Amount — controls the emphasis of the metal effect from the Refraction slider and applies to all droplets in the layer. To create water
effects, you can set the Amount to –0.5 so the droplets magnify the underlying images.
Reflection and Refraction are inverted when you move the Amount slider to either extreme.
•Refraction — controls droplet appearance. The slider represents a scale between reflection and refraction.
Low refraction means high reflection (left). High refraction creates translucent, refractive liquid. As Refraction
nears 100%, the metal becomes transparent. The droplets look like a simple liquid — oil or water (right).
7Drag in the document window to apply the metal.
If you want to clear the effect and start again, click Clear.
You can also
Makes the droplets appear more round and three-dimensional Enable the Surface tension check box.
Scatter metal droplets in the layer In the Liquid Metal dialog box, click Rain, then click anywhere in
the image to stop the rain.
If Smooth and Size settings are very high, the rain might continue
for a moment after you click.
Restore the default settings Click the Reset button.
The Map type that you choose applies to the entire layer. You can change the type at any time.
To create negative metal
•Press Option (macOS) or Alt (Windows), and drag with the Circular Drop tool or Brush tool over existing metal droplets.
You will create holes in your metal. As you drag through positive pools, the negative metal will divide and separate the existing metal.
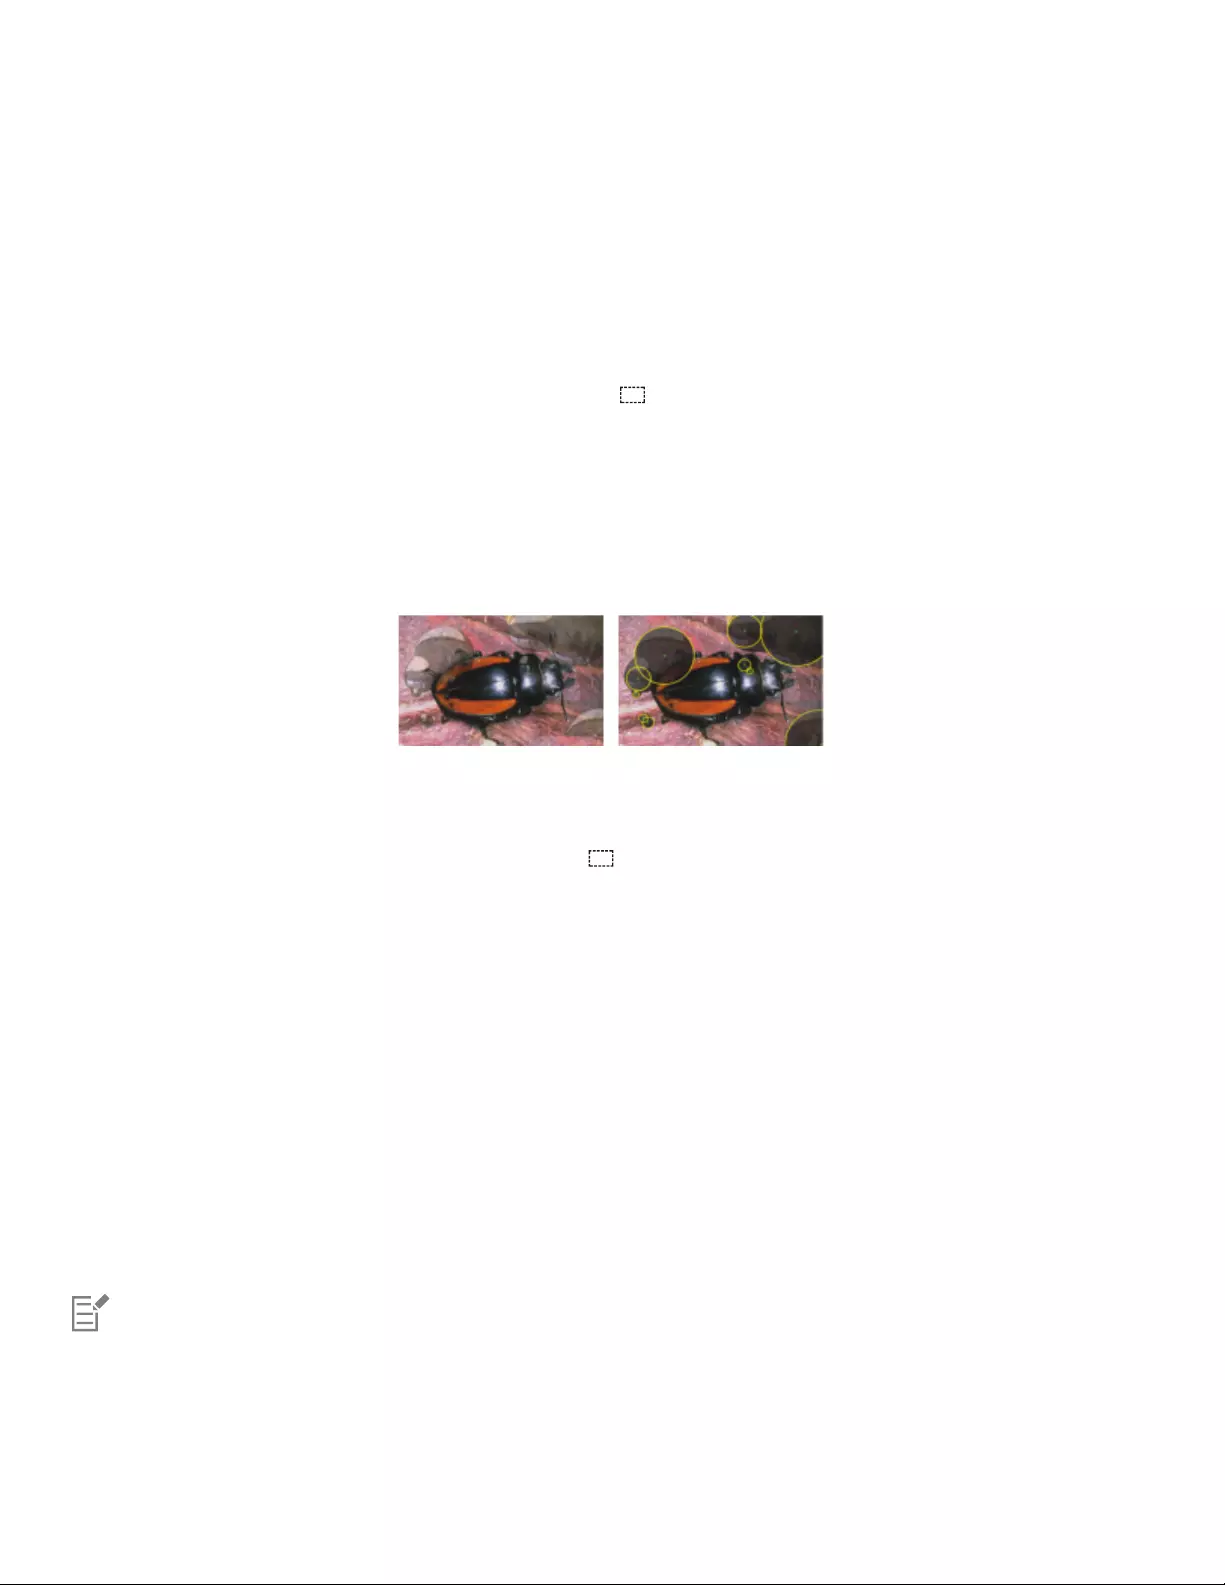
Dynamic Plug-ins | 693
To remove metal
To Do the following
Remove the last metal applied Press Delete (macOS) or Backspace (Windows).
Remove the selected metal droplets In the Liquid Metal dialog box, click the Select Drops tool
, select the metal, and press Delete (macOS) or Backspace
(Windows).
Remove all metal on the layer In the Liquid Metal dialog box, click Clear.
To show metal droplet handles
• In the Liquid Metal dialog box, enable the Display handles check box.
When you enable the Display Handles check box (right), you can see the droplet circles and center points.
To select metal droplets
1In the Liquid Metal dialog box, choose the Select Drops tool .
2Perform an action from the following table.
To Do the following
Select a single droplet If the Display Handles check box is enabled, click the center point
handle of a droplet. If handles are not displayed, click anywhere on
a droplet.
Select a group of droplets Drag across the droplets you want to select.
Add droplets to a selection Hold down Shift, and click additional droplets to add to the
selection.
Subtract droplets from a selection Hold down Shift, and click droplets to subtract from the selection.
When a droplet is selected, the center point handle is displayed as a solid.
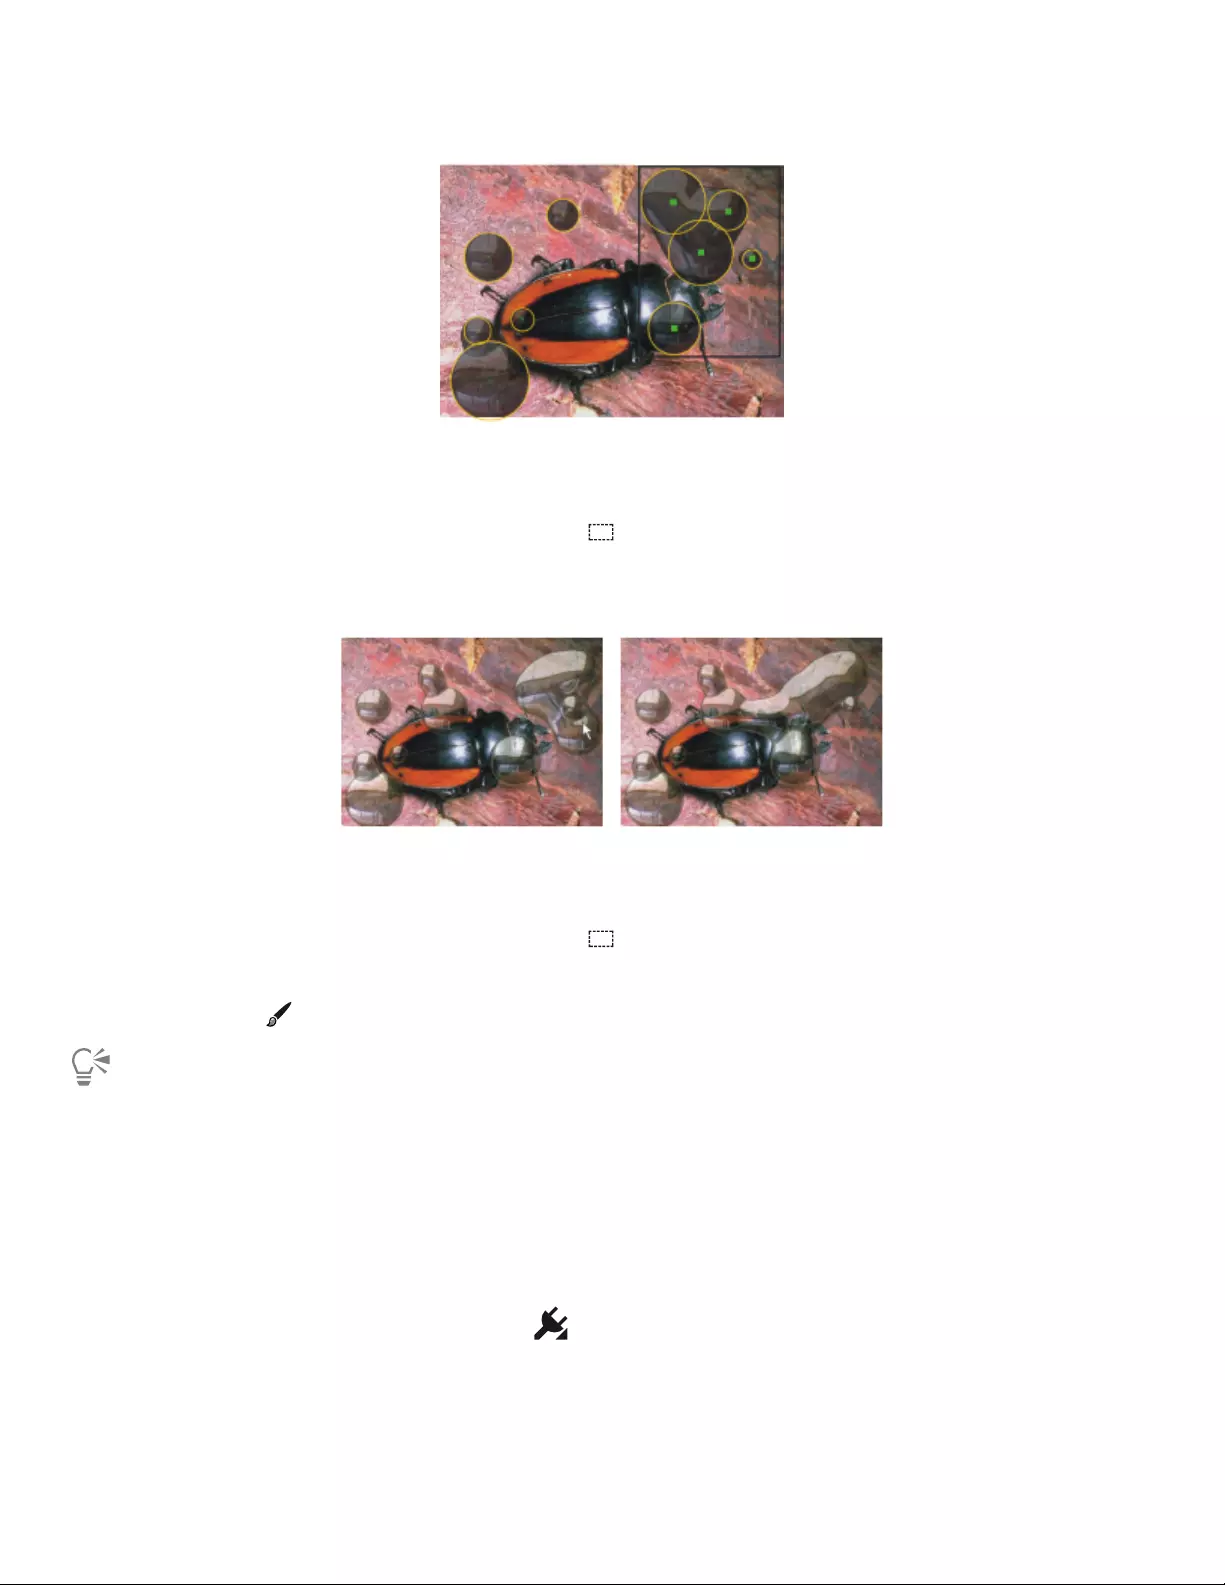
694 | Corel Painter 2022 User Guide
Drag over the droplets you want to select.
To move metal droplets
1In the Liquid Metal dialog box, choose the Select Drops tool , and select the droplets that you want to move.
2Choose the Move Drop tool, and drag the droplets to a new position.
Notice how the droplets seek to join other droplets they encounter. You can control this tendency by adjusting the Smooth slider.
You can drag the center of one of the droplets to move the selected group.
To adjust the size of the Liquid Metal brush
1In the Liquid Metal dialog box, choose the Select Drops tool , and click outside the droplets to deselect all.
2Move the Size slider to the desired value.
3Click the Brush tool and paint, or click Rain.
You can also adjust the size of existing metal by selecting the droplets and moving the Size slider.
To apply a clone source or pattern to the Liquid Metal reflection
1Do one of the following:
• Choose a pattern by clicking the Pattern selector from the Media Selector bar, and clicking a pattern from the list.
• Set a clone source.
2In the Layers panel, choose the Canvas.
3In the Layers panel, click the Dynamic Plug-ins button , and choose Liquid Metal.
4In the Liquid Metal dialog box, choose Clone Source from the Map list box.
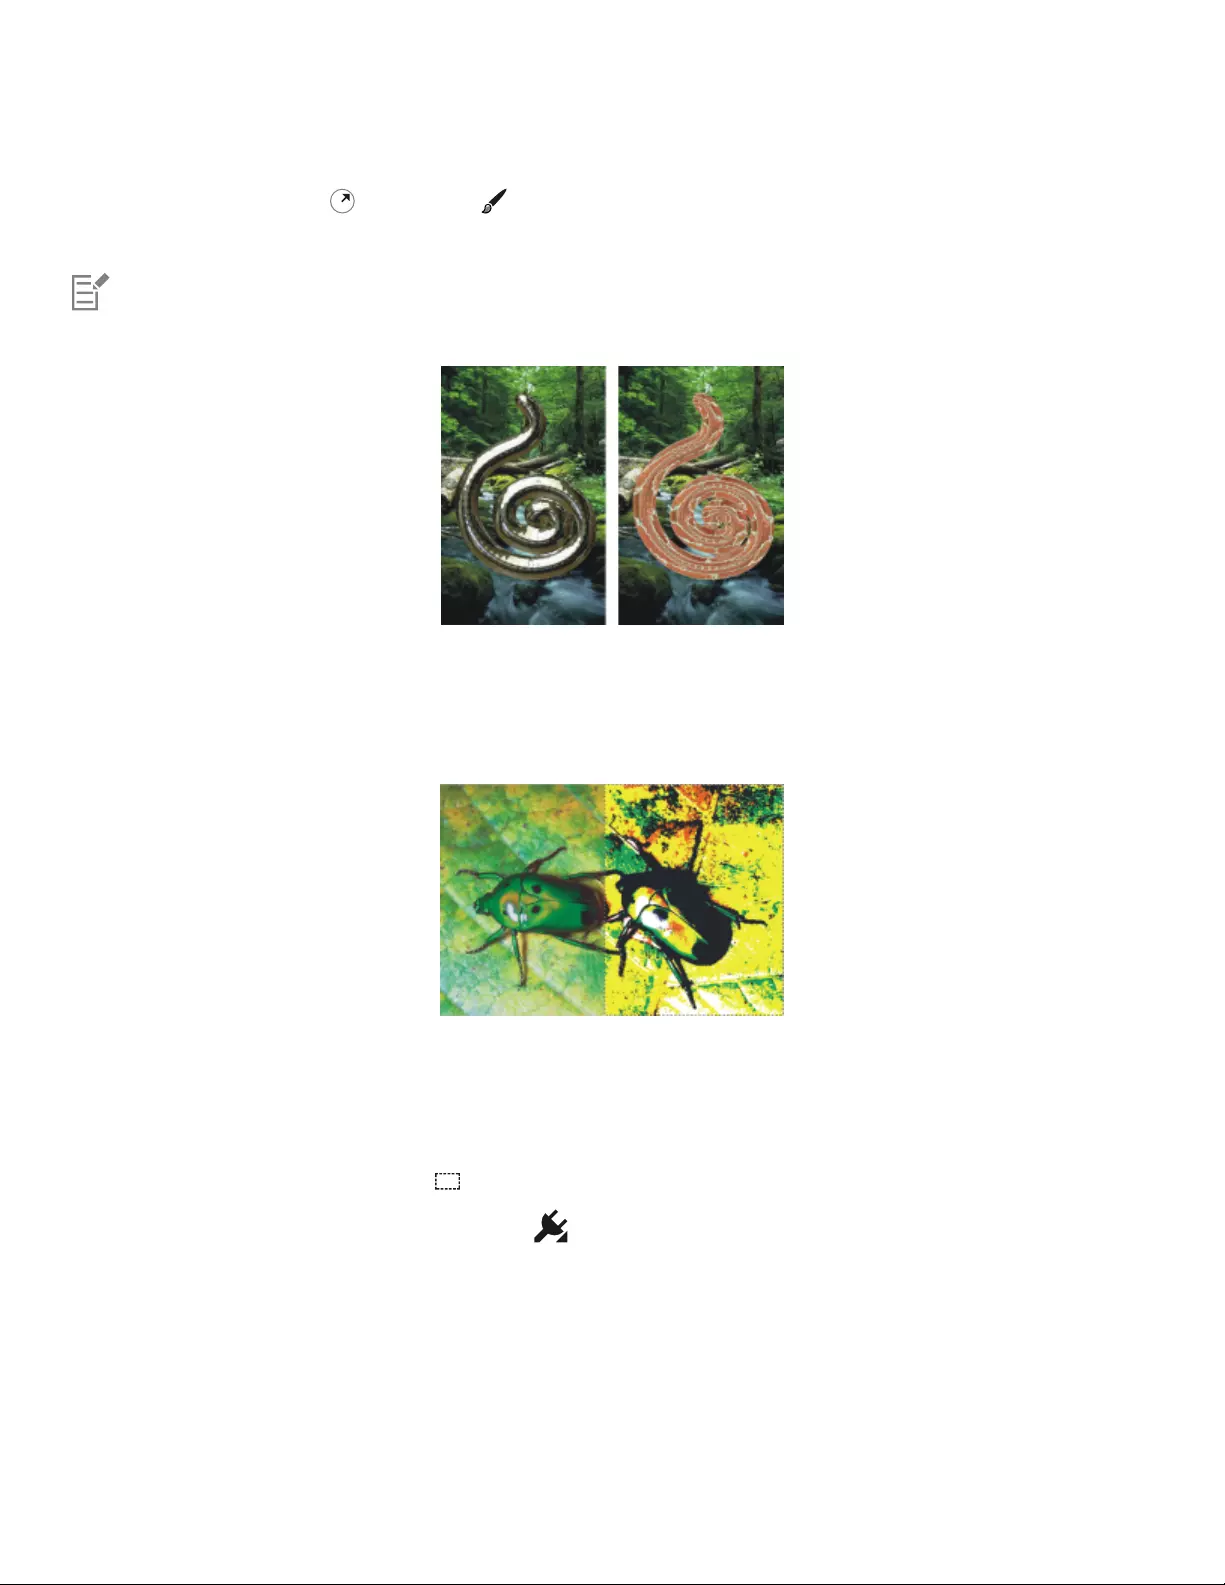
Dynamic Plug-ins | 695
5Adjust any settings.
6With the Circular Drop tool or Brush tool , drag in the document window to apply the metal.
If you want to clear the effect and start again, click Clear.
If no clone source has been specified, Corel Painter uses the current pattern as the reflection map.
The same piece of metal changes appearance when a pattern is used as the reflection map.
Applying the Posterize dynamic plug-in
The Posterize dynamic plug-in creates a layer that reduces the number of color levels in the images it floats over.
A Posterize dynamic layer modifies the right half of this image.
To create a Posterize dynamic layer
1Do one of the following:
• In the Layers panel, choose the Canvas.
•Choose the Rectangular Selection tool from the toolbox, and then drag in the document window to select an area.
2In the Layers panel, click the Dynamic Plug-ins button , and choose Posterize.
3In the Posterize dialog box, specify the number of color levels you want.
The maximum number of color levels is 128. The value applies to each color channel — red, green, and blue.
Corel Painter automatically creates a new layer when you apply the dynamic plug-in.

696 | Corel Painter 2022 User Guide
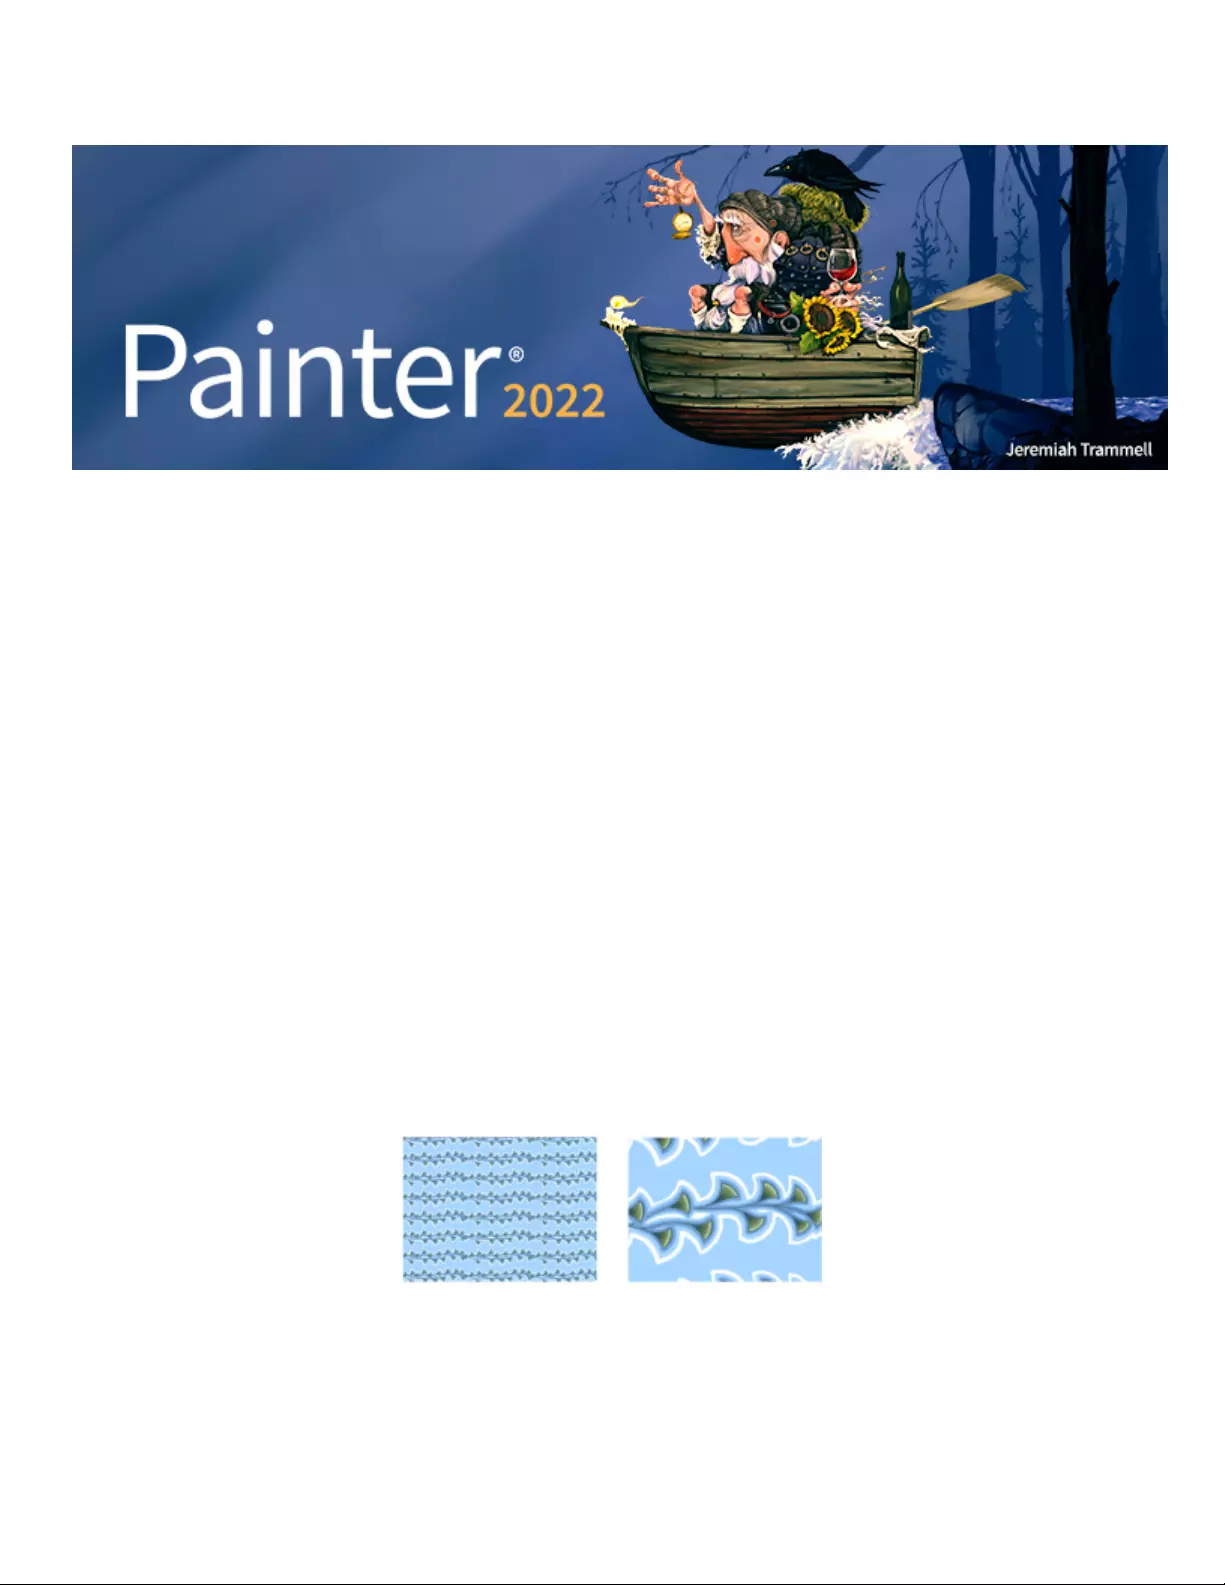
Patterns | 697
Patterns
With Corel Painter, you can apply patterns to an image by filling or painting. In addition, you can customize patterns by modifying sample
patterns or by creating them from scratch.
All patterns, including both the sample and custom patterns, reside in libraries. You’ll find more libraries, with additional materials, on the
Corel website. For more information, see “Working with libraries” on page 88.
This section contains the following topics:
•“Applying pattern fills” (page 697)
•“Painting with patterns” (page 699)
•“Creating and editing patterns” (page 700)
•“Creating seamless patterns” (page 703)
•“Creating fractal patterns” (page 705)
Applying pattern fills
Corel Painter lets you apply preset pattern fills to images. A pattern is a repeating design, and the smallest unit of a pattern is known as a
“tile.” When you fill an area with a pattern, the tile, which is rectangular, is repeated across the selected area.
You can adjust the appearance of a pattern in various ways. For example, you can change the tile size, also known as the scale, and offset
tiles in a fill. When you offset the tiles, you adjust the horizontal or vertical position of the first tile, relative to the top of the object, which
affects the rest of the pattern fill.
Left: A pattern scaled at 20%. Right: The same pattern scaled at 100%.
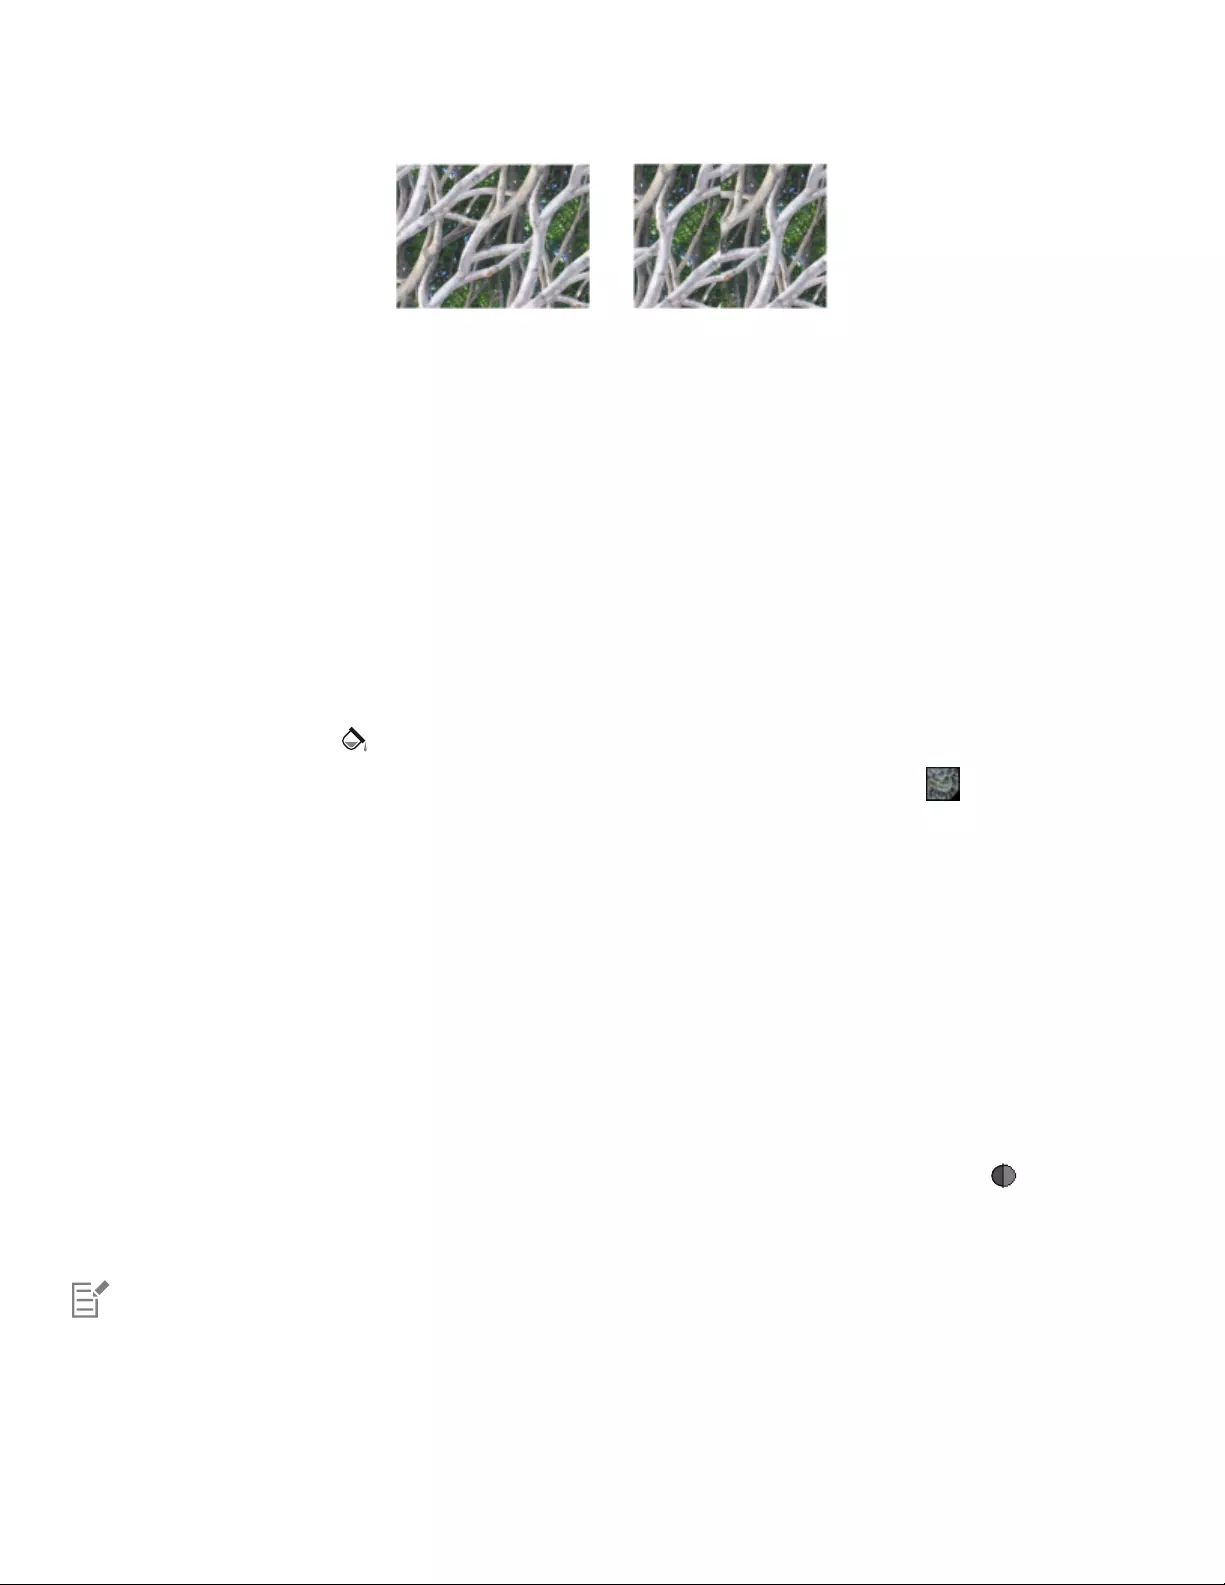
698 | Corel Painter 2022 User Guide
Left: The pattern offset set to 50% produces a seamless pattern. Right: The pattern
offset set to 100% increases the pattern tile visibility. The tiles also appear misaligned.
To apply a pattern as a fill
1Perform a task from the following table.
To apply a pattern to Do the following
The canvas Click Canvas in the Layers panel.
A selection Click a selection tool from the toolbox, and drag in the document
window to select an area.
A layer Click a layer in the Layers panel.
2Choose the Paint Bucket tool in the toolbox.
3Choose Clone Source from the Fill with list box on the property bar, click the Clone Source flyout button , and choose Current
Pattern from the Source list box.
4Click a pattern swatch in the Painter Patterns area.
5In the document window, click the canvas, selection, or layer.
You can also
Specify the range of colors to be filled On the property bar, type a value in the Tolerance box or move the
slider.
Specify the pattern opacity for pixels outside the tolerance range On the property bar, type a value in the Feather box or move the
slider.
Soften the edges of the pattern On the property bar, click the Anti-Alias button .
Anti-aliasing is recommended when the Feather setting is
extremely low or set to zero.
The image must be larger than the tile in order for the tiling to be visible in an image.

Patterns | 699
You can also choose a pattern from the Pattern Selector in the toolbox (Window Media Selector) or by choosing Edit Fill. In
the Fill dialog box, choose Pattern from the Fill With list box, and click the Pattern selector.
To adjust the appearance of a pattern
1Choose Window Media Panels Patterns.
2Click a pattern swatch in the Painter Patterns area.
3Click one of the following buttons:
•Rectangular — places the tiles in a rectangular grid for fills. This option disables the Offset slider.
•Horizontal — offsets the tiles in subsequent rows
•Vertical — offsets the tiles in subsequent columns
If applicable, move the Offset slider to control the amount of offset.
4Move the Scale slider to control the size of each tile in the pattern.
After you set these options, the pattern is ready to use.
Painting with patterns
Corel Painter lets you paint patterns directly onto an image using a brush that uses the rendered dab type. When painting with a pattern,
you can apply the pattern as is, or you can modify its appearance. For example, you can paint a pattern with a mask, which generates a
pattern with a transparent background. You can also paint subtle patterns by adjusting the opacity, which produces a translucent effect.
Painted pattern type Example
Pattern
Pattern with mask
Pattern with opacity
To paint with a pattern
1In the Brush Selector, choose a brush variant that supports patterns.
For example, the Pattern Pens brush category supports patterns. If a brush does not support patterns, the Source list box in the General
control panel (Window Brush Control Panels General) is disabled (appears gray).
2In the General controls panel, choose a dab type from the Dab Type list box.
For example, the Projected and Rendered dab types support patterns. If a dab type does not support patterns, the Source list box in the
General controls panel is disabled.
3From the Source list box in the General controls panel, choose one of the following options:

700 | Corel Painter 2022 User Guide
•Pattern — paints with a pattern containing no mask information
•Pattern with Mask — paints using the mask data contained in the pattern (not all patterns contain mask data)
If you want to change the size of the painted pattern, you should resize the brush instead of scaling the pattern. To achieve the best
results, set the Scale in the Patterns panel to 100%.
4Click the Patterns flyout button on the property bar, and click a pattern.
5Paint in the image.
You can also paint with a pattern by choosing a brush variant from the Pattern Pens category.
If you have not set a clone source, Corel Painter uses the current pattern in any operation related to clone source colors or
luminance. This means you can paint with a pattern by using a Cloner brush.
When painting with a pattern, keep in mind that direction matters. Corel Painter flips the pattern you’re painting when you change
directions, so apply strokes in the same direction to achieve a uniform effect.
To paint with pattern opacity
1In the Brush Selector, choose a brush variant that supports patterns.
For example, the Pattern Pens brush category supports patterns. If a brush does not support patterns, the Source list box in the General
control panel (Window Brush Control Panels General) is disabled (appears gray).
2In the General controls panel, choose a dab type from the Dab Type list box.
For example, the Projected and Rendered dab types support patterns. If a dab type does not support patterns, the Source list box in the
General controls panel is disabled.
3In the General controls panel, choose Pattern As Opacity from the Source list box.
Pattern As Opacity is the only computed dab type that responds to methods (Cover and Buildup), allowing it to respond to Graininess.
4Click the Patterns flyout button on the property bar, and click a pattern.
5Apply a brushstroke to the image.
You can also paint with a pattern by choosing a brush variant from the Pattern Pens category.
Corel Painter applies the current color, using luminance in the pattern to control opacity. Light colors in the pattern are rendered as
transparent (or as having very low opacity). Dark colors in the pattern are rendered as very dark (or as having high opacity).
Creating and editing patterns
You can create a pattern from scratch or from an existing image. When creating a pattern from an existing image, you can base the pattern
on the entire image or a selected area. You can also create a pattern from a mask, which produces a pattern with a transparent background.
The image or selection that you choose is converted into a tile that, when repeated, generates a pattern.
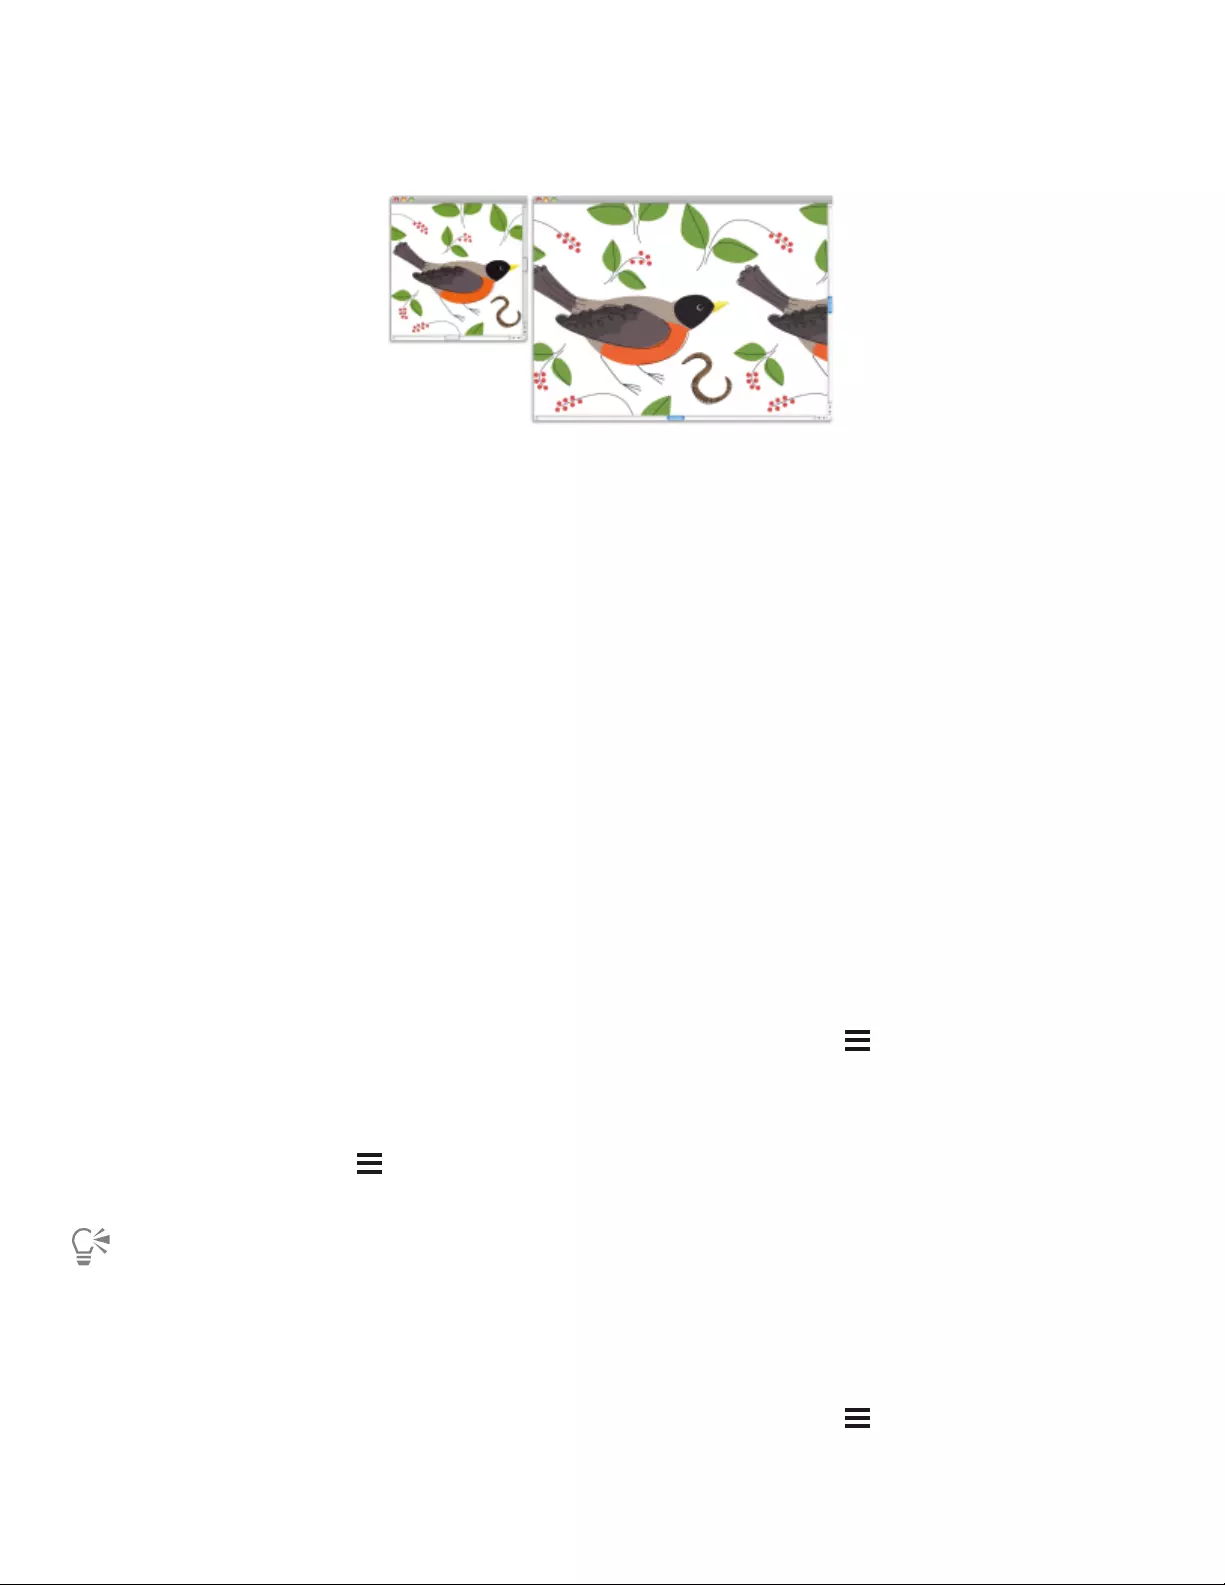
Patterns | 701
A pattern tile was created by applying brushstrokes to the canvas.
If you want to edit an existing pattern, or if a pattern preview isn’t detailed enough, you can open the pattern tile in its own window so
that you can view the pattern closely to modify it. For example, you can manipulate a pattern to be a half-drop design, traditionally used in
wallpaper designs.
After creating a pattern tile, you may want to refine it so that it tiles seamlessly. For more information, see “Creating seamless patterns” on
page 703.
Images that you turn into patterns are saved in the RIFF format, and they maintain their pattern characteristics even after you save and
reopen them. You can switch libraries whenever you want to use a different set of patterns. For more information, see “Working with
libraries” on page 88.
Creating patterns on layers
You can use the same techniques to create patterns on layers as you do to create them on the canvas. However, a pattern’s wrap-around
features do not apply to layers. This is because the canvas has edges, but layers do not — they are unlimited in size. If you shift a pattern on
a layer, the pattern does not wrap around.
To create a pattern from scratch
1Choose File New.
2Type values in the Width and Height boxes.
If you want to create a pattern, you should set a small canvas size, such as 400 pixels by 300 pixels at 300 ppi.
3In the Patterns panel (Window Media Panels Patterns), click the Pattern options button , and choose Define Pattern.
4Apply brushstrokes to the canvas.
If you apply a brushstroke to the edge of the canvas, wrap-around colors are enabled so that you can drag a brushstroke off one edge of
an image, while simultaneously applying the brushstroke to the other side of the image.
5Click the Pattern options button , and choose Add Image to Library.
6In the Save Image dialog box, type a name for the pattern.
You can also create a pattern by choosing an existing pattern, modifying it, and then choosing Define Pattern.
To create a pattern from an image
1Open the image file that you want to use in creating a pattern.
2In the Patterns panel (Window Media Panels Patterns), click the Pattern options button , and choose Define Pattern.
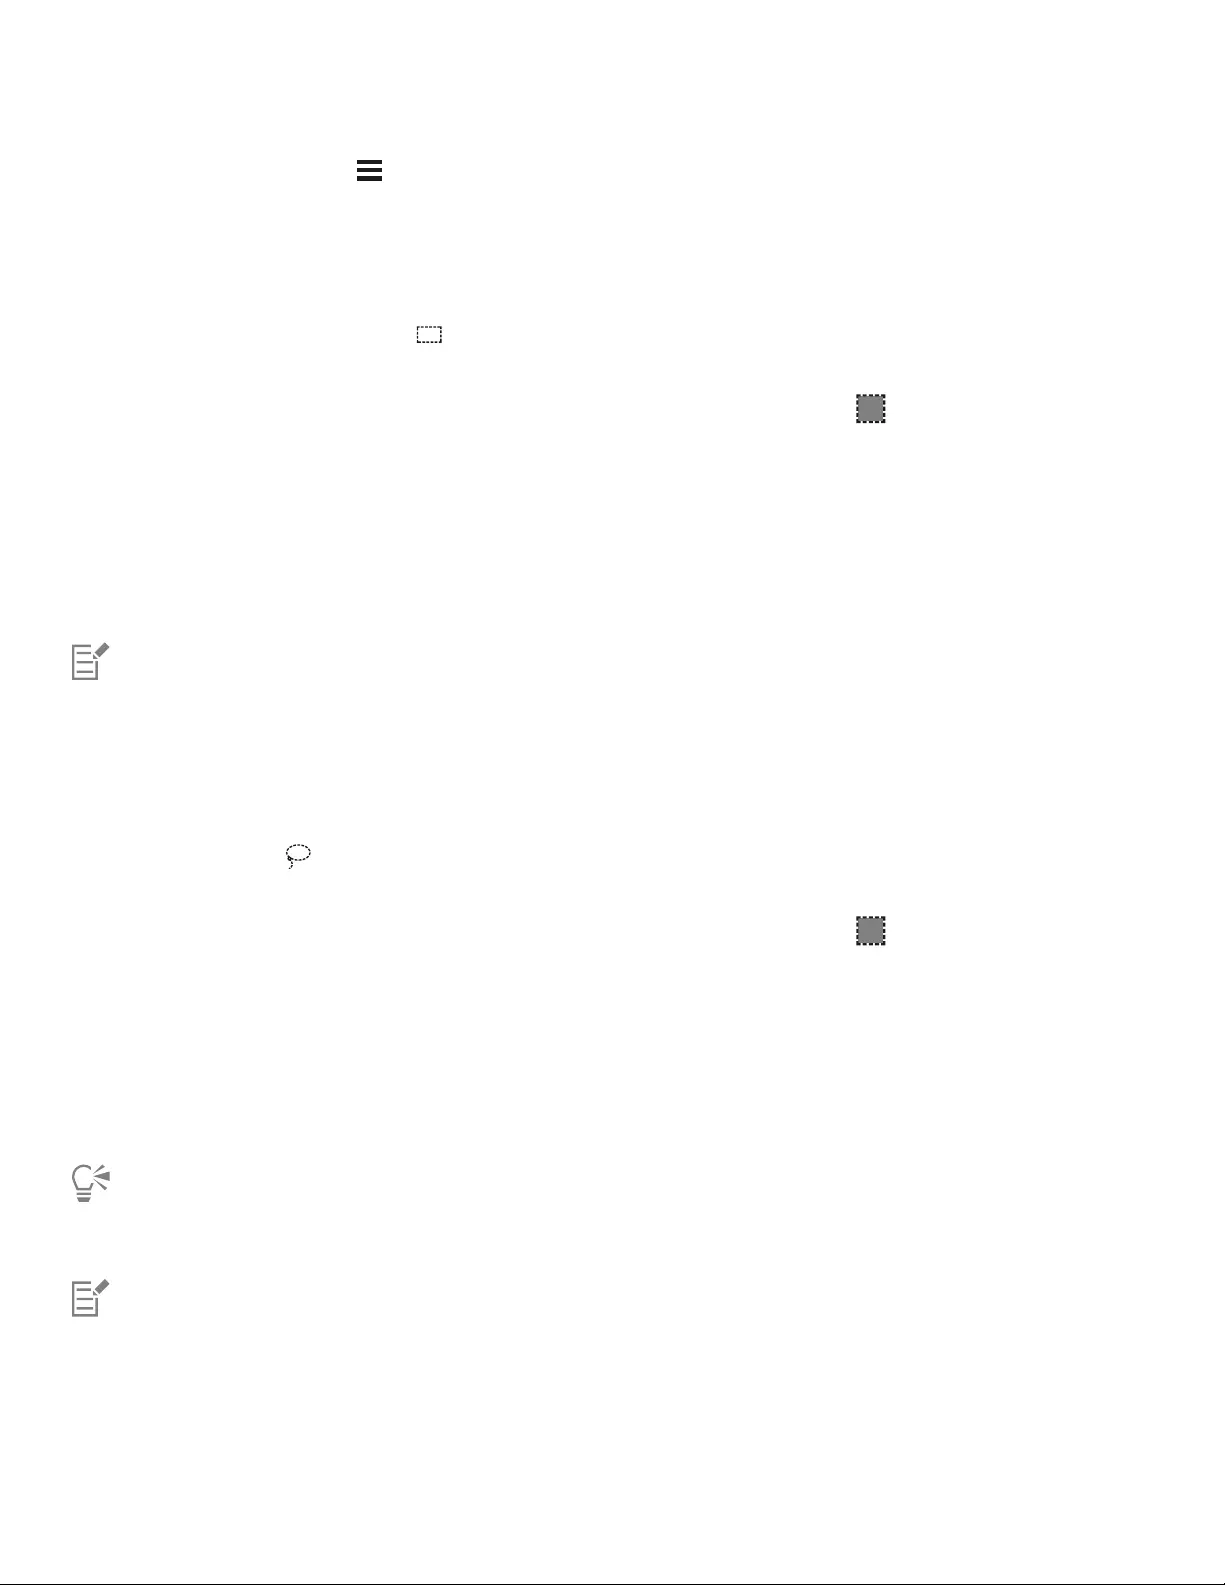
702 | Corel Painter 2022 User Guide
3Click the Pattern options button , and choose Add Image to Library.
4In the Save Image dialog box, type a name for the pattern.
To create a pattern from a selection
1Open or create an image.
2Choose the Rectangular Selection tool in the toolbox.
3Drag in the document window to select the area that you want to save as a pattern tile.
4In the Patterns panel (Window Media Panels Patterns), click the Capture Pattern button .
5In the Capture Pattern dialog box, enable one of the following options:
•Rectangular tile — places the tile in a rectangular grid for fills. This option disables the Bias slider.
•Horizontal shift — offsets the tiles in subsequent rows
•Vertical shift — offsets the tiles in subsequent columns
If applicable, move the Bias slider to adjust the amount of offset.
6Type a name in the Name text box.
7Click OK to save the pattern tile to the current library.
You can also create a pattern that is based on a 4-point clone source, such as perspective or bilinear. For more information, see
“Multi-point cloning” on page 214.
To create a masked pattern
1Open the image file that you want to use in creating a pattern.
2Choose the Lasso tool in the toolbox.
3In the document window, draw a freehand border around the area that you want to convert to a masked pattern.
4In the Patterns panel (Window Media Panels Patterns), click the Capture Pattern button .
5In the Capture Pattern dialog box, enable one of the following options:
•Rectangular tile — places the tile in a rectangular grid for fills. This option disables the Bias slider.
•Horizontal shift — offsets the tiles in subsequent rows
•Vertical shift — offsets the tiles in subsequent columns
If applicable, move the Bias slider to adjust the amount of offset.
6Type a name in the Name text box.
7Click OK to save the masked pattern to the current library.
To quickly apply a pattern mask, click the Brush Selector. In the Brush Selector, choose the Pattern Pens category, and then choose
the Pattern Pen Masked variant.
You can apply pattern masks by using any brush variant that supports them. For more information, see “Painting with patterns” on
page 699.

Patterns | 703
To edit a pattern
1In the Patterns panel (Window Media Panels Patterns), click a pattern swatch in the Painter Patterns area.
2Click the Pattern options button , and choose Check Out Pattern.
The pattern tile appears in a separate document window.
3On the canvas, modify the pattern tile image.
4Click the Pattern options button , and choose Add Image to Library.
5In the Save Image dialog box, click OK to save the pattern to the library.
If you want to rename the pattern, type a new name in the Save As text box. For example, you may want to modify a default pattern,
but keep a copy of the default pattern intact.
The Check Out Pattern mode supports wrap-around colors. When you drag a brushstroke off one edge of an image, the
brushstroke is simultaneously applied to the other side of the image. This allows you to quickly modify the edges of an individual
pattern tile.
Creating seamless patterns
Patterns are created by repeating a rectangular image tile across an area. Ideally, the pattern tiles should seamlessly blend into one another
so that the eye doesn’t distinguish the tile edges. Corel Painter allows you to generate seamless patterns by modifying the edges of a pattern
tile before applying the pattern. However, you can also fix a pattern’s seams by directly modifying the pattern fill.
Left: The pattern tile includes a visible white edge, which delimits each tile. Right:
The white edge was filled with the background color to produce a seamless pattern.
To achieve seamless tiling, Corel Painter gives documents defined as pattern tiles two special characteristics: wrap-around colors and wrap-
around seams.
• The wrap-around colors feature lets you drag a brushstroke off one edge of an image, while simultaneously applying the stroke to the
other side of the image. This allows you to quickly modify the edges of an individual pattern tile.
• The wrap-around seams feature lets you shift the edges of pattern tiles to the center of the image, where their tonal differences are more
apparent and easier to correct. This allows you to modify a pattern after applying it as a fill.
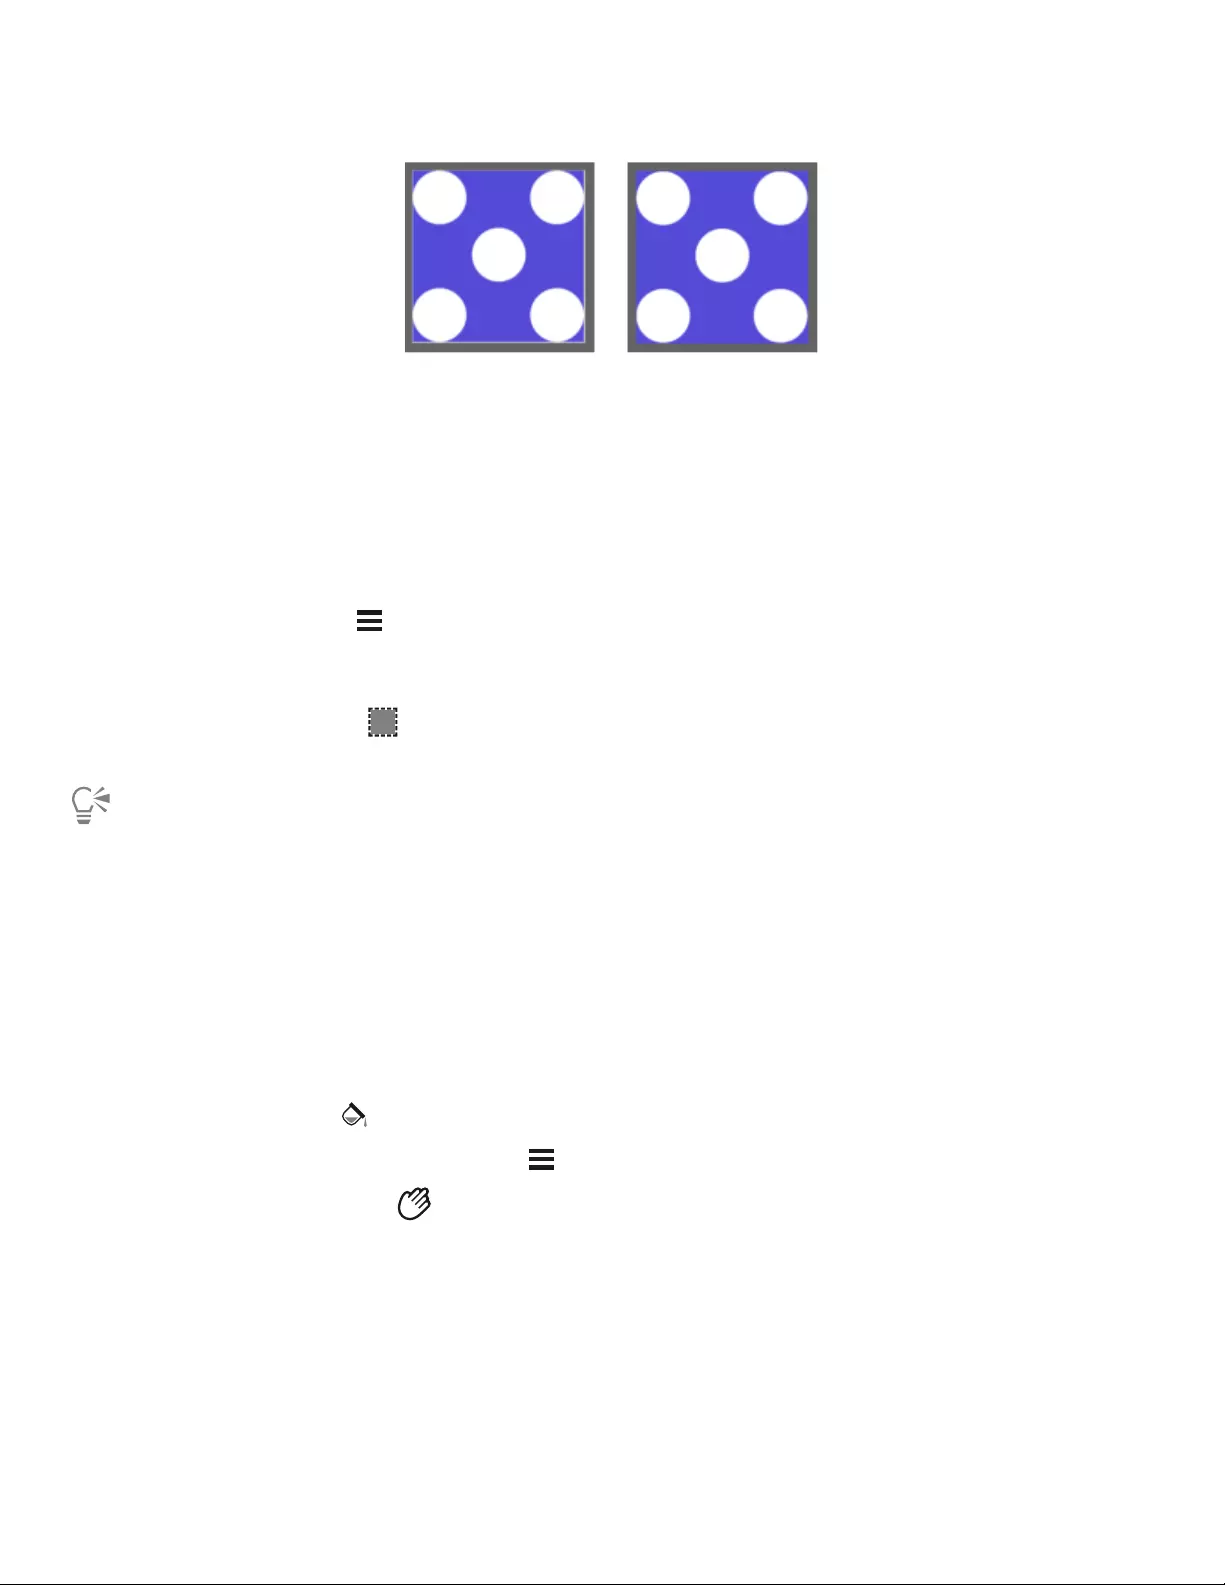
704 | Corel Painter 2022 User Guide
Left: The pattern tile before the edges were modified. Right: The same pattern tile after the
edges were painted by using the Straight Cloner brush and the wrap-around colors feature.
To ensure a seamless pattern, you can also apply an effect, such as the Glass Distortion effect, the Super Soften effect (with the Wrap
Around check box enabled), and most of the Tonal Control effects. Some effects, such as Apply Surface Texture, can result in a noticeable
seam. For information, see “Applying Glass Distortion” on page 629.
To create a seamless pattern from a pattern tile
1In the Patterns panel (Window Media Panels Patterns), choose the pattern whose tile you want to fix.
2Click the Pattern options button , and choose Check Out Pattern.
The pattern tile appears in a separate document window.
3Use any color brush to paint out the edge lines, or use a brush with a Water or Drip method to smear across the lines.
4Click the Capture Pattern button .
5In the Capture Pattern dialog box, type a name in the Name box.
To preserve detailed images, set the Straight Cloner brush to clone from somewhere inside the image. For more information, see
“Painting in the clone” on page 195.
You can also copy a selection to a layer and move it over the edge. To produce clean transitions, feather the layer, and reduce
opacity. Drop the layer when you’re satisfied with the result. For more information, see “Layers” on page 539.
To create a seamless pattern from a pattern fill
1Create a blank document.
2In the Patterns panel (Window Media Panels Patterns), choose the pattern whose seams you want to modify.
3Click Canvas in the Layers panel.
4Choose the Paint Bucket tool from the toolbox, and click the canvas in the document window.
5In the Patterns panel, click the Pattern options button , and choose Define Pattern.
6In the toolbox, click the Grabber tool .
7Hold down the Shift key and drag the image to display the area where the tile’s horizontal and vertical edges meet.
8Do any of the following:
• Use any color brush to paint out the edge lines, or use a brush with a Water or Drip method to smear across the lines.
• Use the Straight Cloner brush to paint out the edge lines to preserve image details. For more information, see “Painting in the clone”
on page 195.

Patterns | 705
You can also copy a selection to a layer and move it over the edge. To produce clean transitions, feather the layer, and reduce
opacity. Drop the layer when you’re satisfied with the result. For more information, see “Layers” on page 539.
The changes that you make to a pattern fill are not reflected in the original pattern tile.
Creating fractal patterns
You can create interesting landscapes by using fractal patterns. You can also convert a fractal pattern into a paper texture and save it to the
Paper library. For more information, see “Working with paper texture and grain” on page 171.
Using Fractal Pattern controls
When you create fractal patterns, the following controls allow you to fine-tune your creation:
•Power controls the intricacy of the pattern’s definition, as if you were “zooming” in and out on a textured surface with a microscope.
The Power slider determines the degree ofdetail. The image on the left is set to -200% and the image on the right is set to 0%.
•Feature Size defines the number of prominent features within the tile.
The Feature Size slider determines the number of repetitions per tile. The
image on the left is set to 90% and the image on the right is set to 20%.
•Softness adjusts the edge softness of the pattern.
•Angle changes the direction from which you view the fractal.
•Thinness emphasizes the direction suggested by the lines of the fractal pattern. Thinner lines produce a more linear look.
•Size determines the size of the tile you are creating. If your computer has a lot of memory, you can make a large file with a high
resolution. If you do not have a lot of available memory on your computer, some of the size options may not be available.

706 | Corel Painter 2022 User Guide
Low Thinness settings display the fractal as streaks. Use the Angle slider to change the direction of streaking.
Corel Painter uses four channels to store graphic information: Red, Green, Blue, and Alpha. When creating fractal patterns, you can place
information other than color values in these channels, which allows you to visualize this information in different ways.
To create fractal patterns
1In the Patterns panel (Window Media Panels Patterns), click the Make Fractal Pattern button .
2In the Make Fractal Pattern dialog box, perform a task from the following table.
To Do the following
Control the intricacy of the pattern Move the Power slider to the right to zoom out and see many
small features, or move it to the left to zoom in and see a few large
features.
Modify the number of prominent features within the tile Move the Feature Size slider to the right to decrease the repetitions
per tile, or move it to the left to increase the number of repetitions
per tile.
Adjust the edge softness of the pattern Move the Softness slider to the left to decrease the softness, or
move it to the right to increase the softness.
Change the direction from which you view the fractal Move the Angle slider to the left to decrease the angle, or move it
to the right to increase the angle.
Create a more linear pattern by emphasizing the direction
suggested by the lines of the fractal pattern
Move the Thinness slider to the left to increase the appearance of
lines, or move it to the right to decrease the appearance of lines.
3In the Size area, enable the option that corresponds to the size of the tile that you want to create.
4From the Channel list box, choose one of the following options:
•Height as Luminance — displays pseudo-height information as luminance. White areas are represented as peaks, and dark areas
become depressions. Images generated with this option can be used with the Apply Surface Texture effect.
•Gradient Bearing — uses the Red channel to display the bearing of the down angle of a height field.
•Surface Normal — uses the Green and Blue channels to represent the X and Y components of the surface normal (angle
perpendicular to the surface at a given point) of the height field (Green=X, Blue=Y).
5Click OK.
Creating the new pattern may take some time. When the pattern file is ready, it appears in a new document window.
6In the Patterns panel, click the Capture Pattern button .
7In the Capture Pattern dialog box, type a name in the Name box.

Patterns | 707
The Gradient Bearing and Surface Normal options for viewing a fractal texture are offered for purely aesthetic reasons. One way
to take advantage of them is to create color variations of the texture with the Adjust Colors feature.
To colorize a fractal pattern, you can replace the grayscale tones with colors from a gradient fill by using the Express in Image
feature. For information, see “To replace image colors with gradient colors” on page 723.
To convert a fractal pattern into a paper texture
1In the Patterns panel (Window Media Panels Patterns), choose a pattern.
2Click the Pattern options button , and choose Check Out Pattern.
The fractal pattern is displayed in a new image window.
3Choose Effects Tonal Control, and adjust image elements such as brightness, contrast, and luminance.
For more information, see “Equalizing images” on page 301.
4Choose Select All.
5In the Papers panel (Window Media Panels Papers), click the Capture Paper button .
6In the Capture Paper dialog box, set the crossfade to 0.
7Type a name in the Save As box.

708 | Corel Painter 2022 User Guide

Gradients | 709
Gradients
A gradient is a type of fill that gradually changes from one color to the next, along a linear, radial, circular, or spiral path. Gradient fills are
also known as blends or fountain fills.
Gradients were used in this artwork by Aaron Rutten.
You can use gradients to add depth, texture, and realism to your paintings and illustrations.

710 | Corel Painter 2022 User Guide
A gradient is used to add background depth and lighting in this artwork by
Manuel Sanz (left), and to add a vignette in this artwork by Eric Holmen (right).
In comic, manga, or anime art, gradients can help artists to quickly color sketches and add visual interest.
A gradient is applied to quickly color the girl’s hair. Artwork by Tricia Flohr.
Corel Painter lets you apply a wide variety of painting styles to gradients to achieve interesting artistic and painterly effects.
Start a painting by filling the background with a gradient and experimenting with different preset styles.
Corel Painter offers a wide selection of preset gradients, but you can also create gradients.
This section contains the following topics:
•“Applying gradients” (page 711)
•“Editing gradients” (page 714)

Gradients | 711
•“Applying paint effects to gradients” (page 718)
•“Creating gradients” (page 720)
•“Replacing image colors with gradient colors” (page 723)
Applying gradients
Corel Painter allows you to apply a gradient to an image by filling an area, such as the canvas, a selection, layer, or channel. For more
information, see “Selections and transformations” on page 593, “Layers” on page 539, and “Alpha Channels” on page 583.
Before you apply a gradient, you can specify the gradient type, padding, opacity, size, and the direction of the gradient color blend by using
the controls on the property bar
Gradients types: (left to right) linear, conical, circular, and spiral
The gradient order is set to display from Left to Right (left) and Right to Left (right).
The gradient angle is set to display at a vertical angle (left) and at a horizontal angle (right).
Padding options: A gradient is (left to right) extended, mirrored, or repeated on either side of the start and end nodes.
You can also use merge modes to create a wide range of colorful effects. Merge modes let you specify how a gradient blends with the
underlying image. For detailed information about merge modes, see “Blending layers by using composite methods” on page 566.
After you draw a gradient, you can modify its appearance interactively in the image window. For more information, see “Editing gradients”
on page 714.

712 | Corel Painter 2022 User Guide
You can edit a gradient preset before you apply it. For more information, see “To edit a gradient preset” on page 716.
You can also paint with a gradient by using a brush and dab type that support gradient painting. For more information, see “General
controls: Dab types” on page 344. Painting with gradients does not support gradient node transparency.
To apply a gradient
1Click the Interactive Gradient tool in the toolbox.
2Click the Preset flyout button on the property bar, and click a gradient fill thumbnail in the Painter Gradients area.
Tip: You can load alternate libraries of gradients to increase your choices. For more information about working with libraries, see
“Working with libraries” on page 88.
3Choose settings from the property bar. For more information, see “To set gradient options” on page 712.
4Perform a task from the following table:
To apply a gradient to Do the following to set the gradient scale and direction
The canvas Click and drag on the canvas.
A selection Click and drag inside the selection.
A layer Select a layer in the Layers panel. Click and drag on the layer.
A channel Select a channel in the Channels panel. Click and drag on the
channel.
Tip: To snap the gradient line to the horizontal, vertical, or diagonal axis, hold down Shift key while you drag.
5Double-click anywhere outside the gradient.
If the Edit nodes option on the property bar is not enabled, the gradient is applied automatically when you lift the stylus or release the
mouse button.
If the Edit nodes option on the property bar is enabled, the gradient is applied only after you double-click outside the gradient or click
the Commit Gradient button on the property bar.
Once you commit a gradient, it can no longer be edited.
To discard a gradient before you have committed it, click the Discard Gradient button on the property bar.
To remove a gradient from your document after you have committed the gradient, click Edit Undo Gradient Fill.
You can also choose a gradient by choosing Window Media Panels Gradients, and clicking a gradient in the Painter
Gradients area.
You can also apply a gradient by choosing the Paint Bucket tool in the toolbox, choosing Gradient from the Fill list box on
the property bar, and then clicking the selected area, layer, or channel.
To set gradient options
• Perform a task from the following table.
Gradients | 713
To Do the following
Choose a gradient type Click one of the following buttons on the property bar:
•Linear Gradient
•Radial Gradient
•Circular Gradient
•Spiral Gradient
Tip: You can also set the gradient type by choosing Window
Media Panels Gradients, clicking a gradient in the Painter
Gradients area, and choosing a gradient type.
Set the gradient padding Click the Padding flyout button on the property bar, and
choose one of the following options:
•Extend — lets you fill the document or selection by
extending the color of the start and end nodes
•Mirror — lets you fill the document or selection by
mirroring a gradient on either side of the start and end nodes
(applies only to liner gradients)
•Repeat — lets you fill the document or selection by
repeating a gradient on either side of the start and end nodes
Set the gradient opacity On the property bar, move the Opacity slider, or type a percentage
in the Opacity box.
Set the direction of a gradient Click the Preset flyout button on the property bar, and click
Gradients panel . Click one of the gradient order buttons:
•Left to Right Gradient
•Right to Left Gradient
Tip: You can also reverse the order of colors in the gradient by
clicking the Reverse Gradient Direction button on the
property bar.
Specify how a gradient blends with the underlying image Choose a merge mode from the Merge Mode list box on the
property bar. For a detailed explanation of merge modes, see
“Blending layers by using composite methods” on page 566.
To paint with a gradient
1Click Window Media Panels Gradients.
2In the Painter Gradients area, click a gradient fill thumbnail.
3Click the Brush Selector on the Brush Selector bar.
4Click a brush category, and a brush variant that supports gradients.
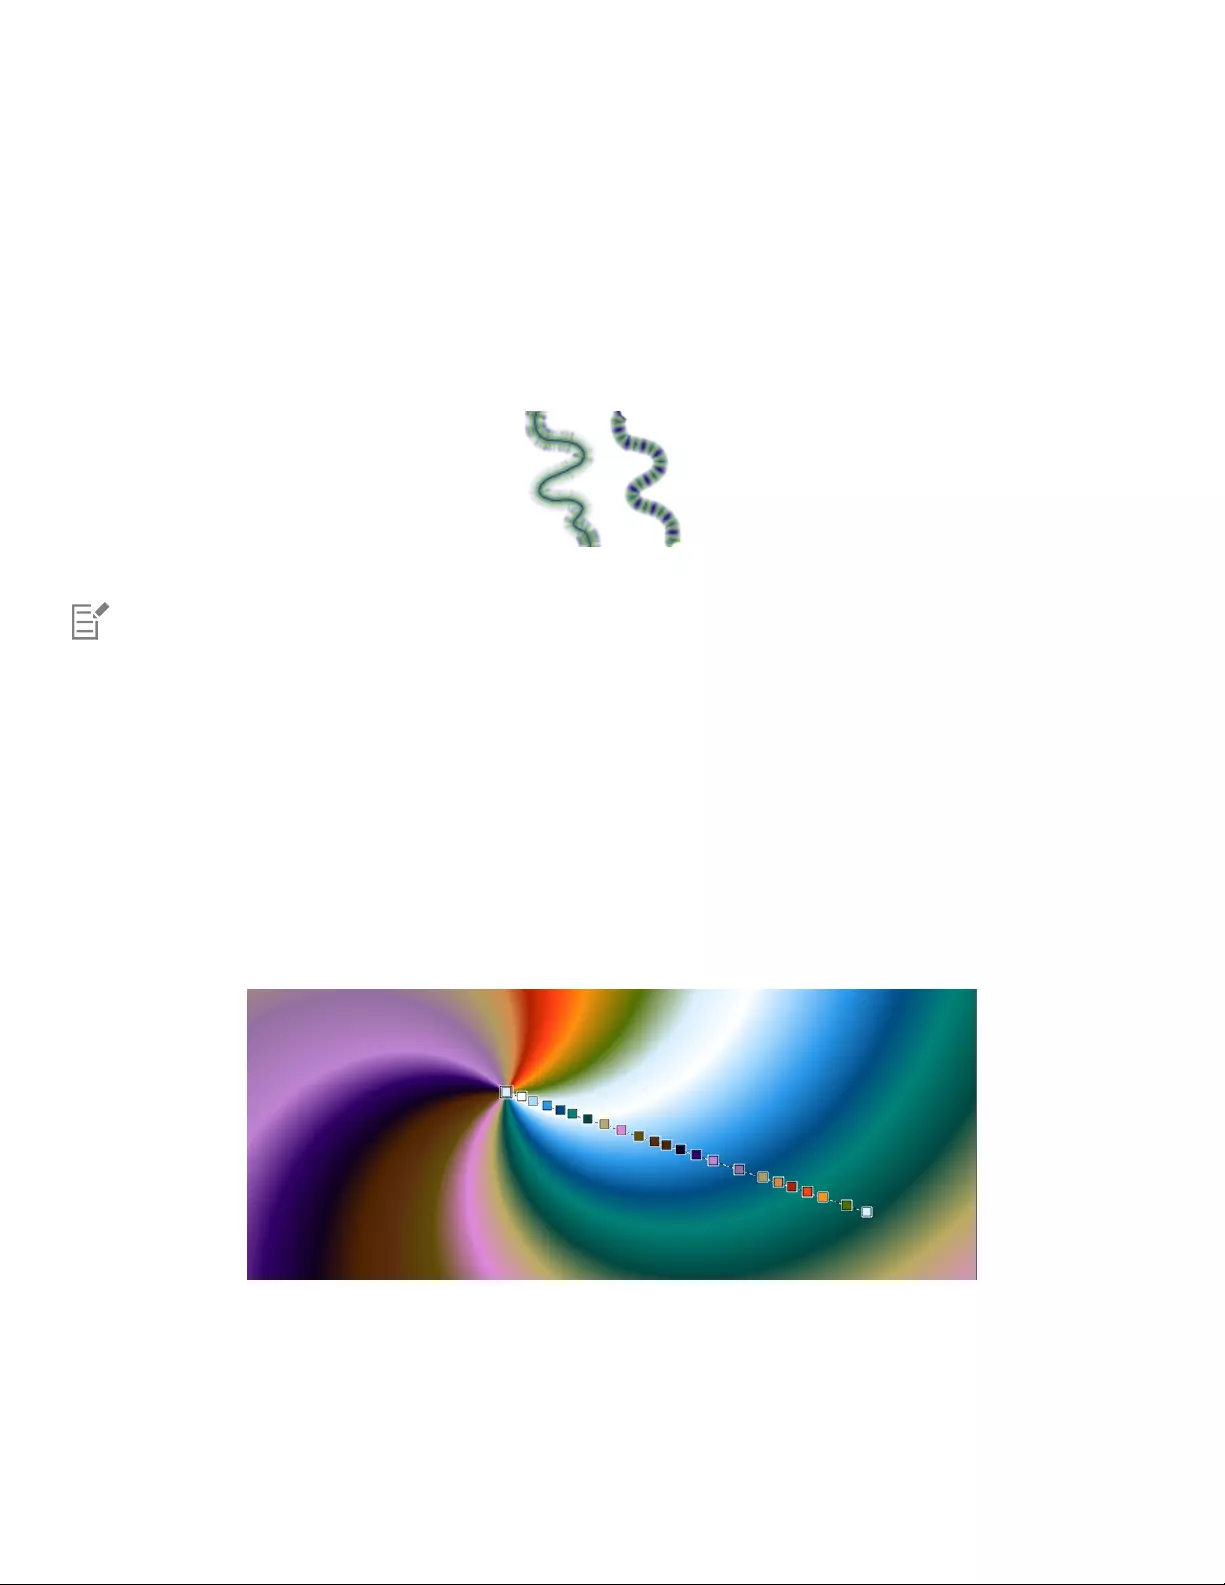
714 | Corel Painter 2022 User Guide
If the Source pop-up menu in the General controls panel (Window Brush Control Panels General) is not available (appears gray),
the selected brush category or variant does not support gradients. For example, the Pattern Pens brush category supports gradients.
5In the General controls panel (Window Brush Control Panels General), choose a dab type from the Dab Type pop-up menu.
If the Source pop-up menu in the General controls panel is not available (appears gray), the selected dab type does not support
gradients. For example, the Line Airbrush, Projected, and Rendered dab types support gradients.
6From the Source pop-up menu in the General controls panel, choose one of the following options:
•Gradient — applies the current gradient across the width of the stroke
•Gradient Repeat — repeats the current gradient along the length of the stroke
7Paint in the document window.
Painting with a gradient by using Gradient (left) and Gradient Repeat (right)
Brushes using gradients ignore gradient node transparency.
When painting with a gradient, only the Linear gradient type is supported.
Direction matters when you paint with a gradient. Corel Painter flips the gradient when you change direction. To achieve a uniform
effect, apply strokes in the same direction.
Editing gradients
After you draw a gradient with the Interactive Gradient tool, you can edit it in the document window. An interactive gradient control
appears, which marks the transition from one color to another. The direction and size of the gradient depend on where you first click in the
document window, the distance that you drag, and the direction in which you drag. Each color in the gradient fill is represented by a square
node on the interactive gradient control. You can modify the gradient appearance by repositioning nodes, adding and removing nodes, and
changing the color of nodes.
Change a color, add a new color, or adjust the position and direction of a gradient by editing nodes interactively.
You can edit gradient attributes such as the gradient size, the direction of a gradient’s color blend, the gradient colors, and the gradient’s
angle.
You can also edit existing gradient presets or custom gradients before you apply them or save them for future use.
Gradients | 715
To edit a gradient interactively
1Click the Interactive Gradient tool in the toolbox.
2Click the Preset flyout button on the property bar, and click a gradient fill thumbnail.
Make sure the Edit nodes option on the property bar is enabled.
3Draw a gradient.
4Perform a task from the following table.
To Do the following
Adjust the size of a gradient Drag the start or end node on the interactive gradient control.
Adjust the position of a gradient To set where you want the gradient to start, drag the start handle.
To set where you want the gradient to end, drag the end handle.
Tip: To snap the gradient line to the horizontal, vertical, or diagonal
axis, hold down Shift key while you drag.
Change the direction of a gradient fill Drag the end node in the opposite direction.
Tip: You can also reverse the order of colors in the gradient by
clicking the Reverse Gradient Direction button on the
property bar.
Adjust the angle of a gradient Drag the end node.
Change a color Click a node, click the Color chip, and choose a color in the color
picker.
Tip: You can also change the color by clicking a node, clicking
the Gradient Node panel toggle button on the property
bar, clicking the Color Selector in the Gradient Node panel, and
choosing a color.
Add a color Click anywhere along the interactive gradient control, click the
Color chip, and choose a color in the color picker.
Tip: You can also add a color by clicking anywhere along the
interactive gradient control, clicking the Gradient Node panel
toggle button on the property bar, clicking the Color Selector
in the Gradient Node panel, and choosing a color.
Delete a color Click a node. Click the Gradient Node panel toggle button on
the property bar. In the Gradient Node panel, click Delete Node.
Note: You cannot delete an end node.
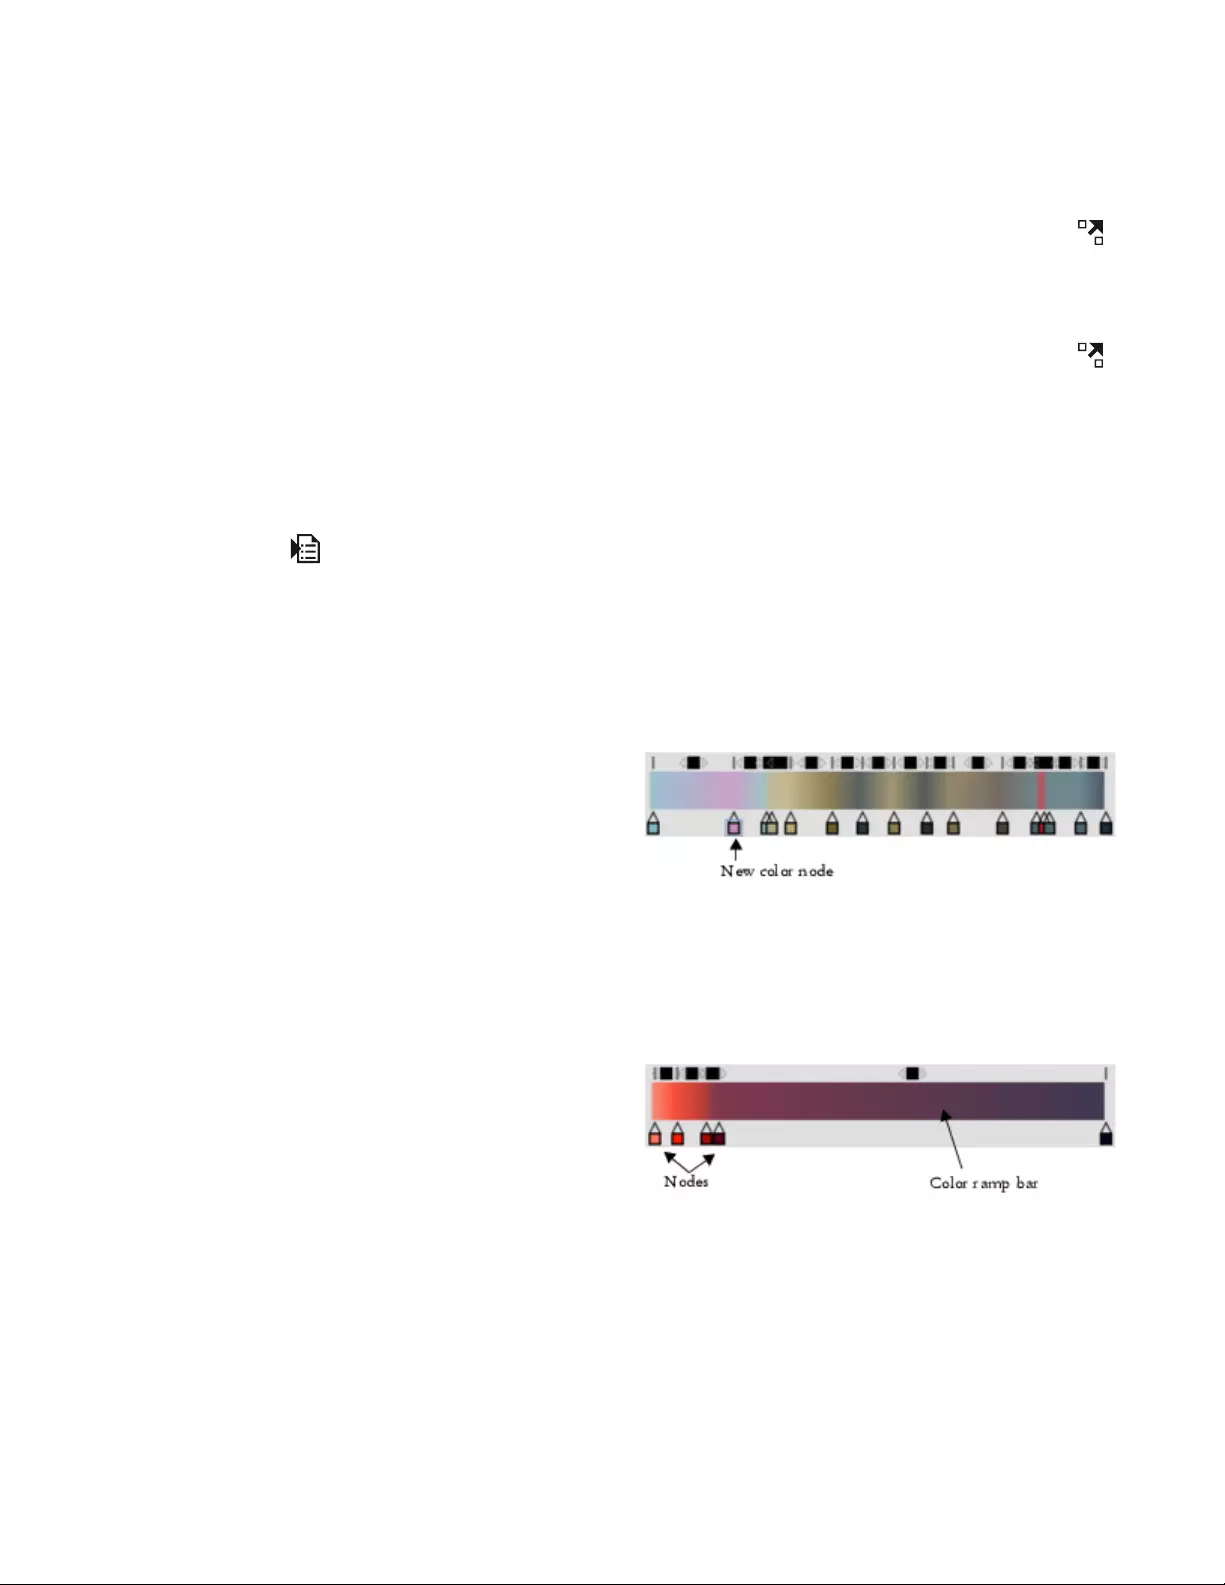
716 | Corel Painter 2022 User Guide
To Do the following
Set the transparency of a color Click a node. Click the Gradient Node panel toggle button on
the property bar. In the Gradient Node panel, move the Opacity
slider or enter a value in the box.
Specify the position of an intermediate node relative to the first and
the last nodes Click a node. Click the Gradient Node panel toggle button on
the property bar. In the Gradient Node panel, move the Position
slider or enter a value in the box.
To edit a gradient preset
1In the Gradient Libraries panel (Window Media Panels Gradients), choose a preset.
2Click the Edit Gradient button.
3In the Edit Gradient dialog box, perform a task from the following table.
To Do the following
Add a color Click in the color ramp bar where you want to add a color, click the
Color chip, and choose a color in the color picker.
A new color was added to the gradient
by adding a node to the color ramp bar.
Delete a color Click a node in the color ramp bar, and click Delete Node.
Modify the color transition Drag a node in the color ramp bar.
Set the transparency of a color Click a node in the color ramp bar and move the Opacity slider.
Blend the gradient colors Disable the Linear check box and drag the Color Spread slider to
control the color smoothness at each node.
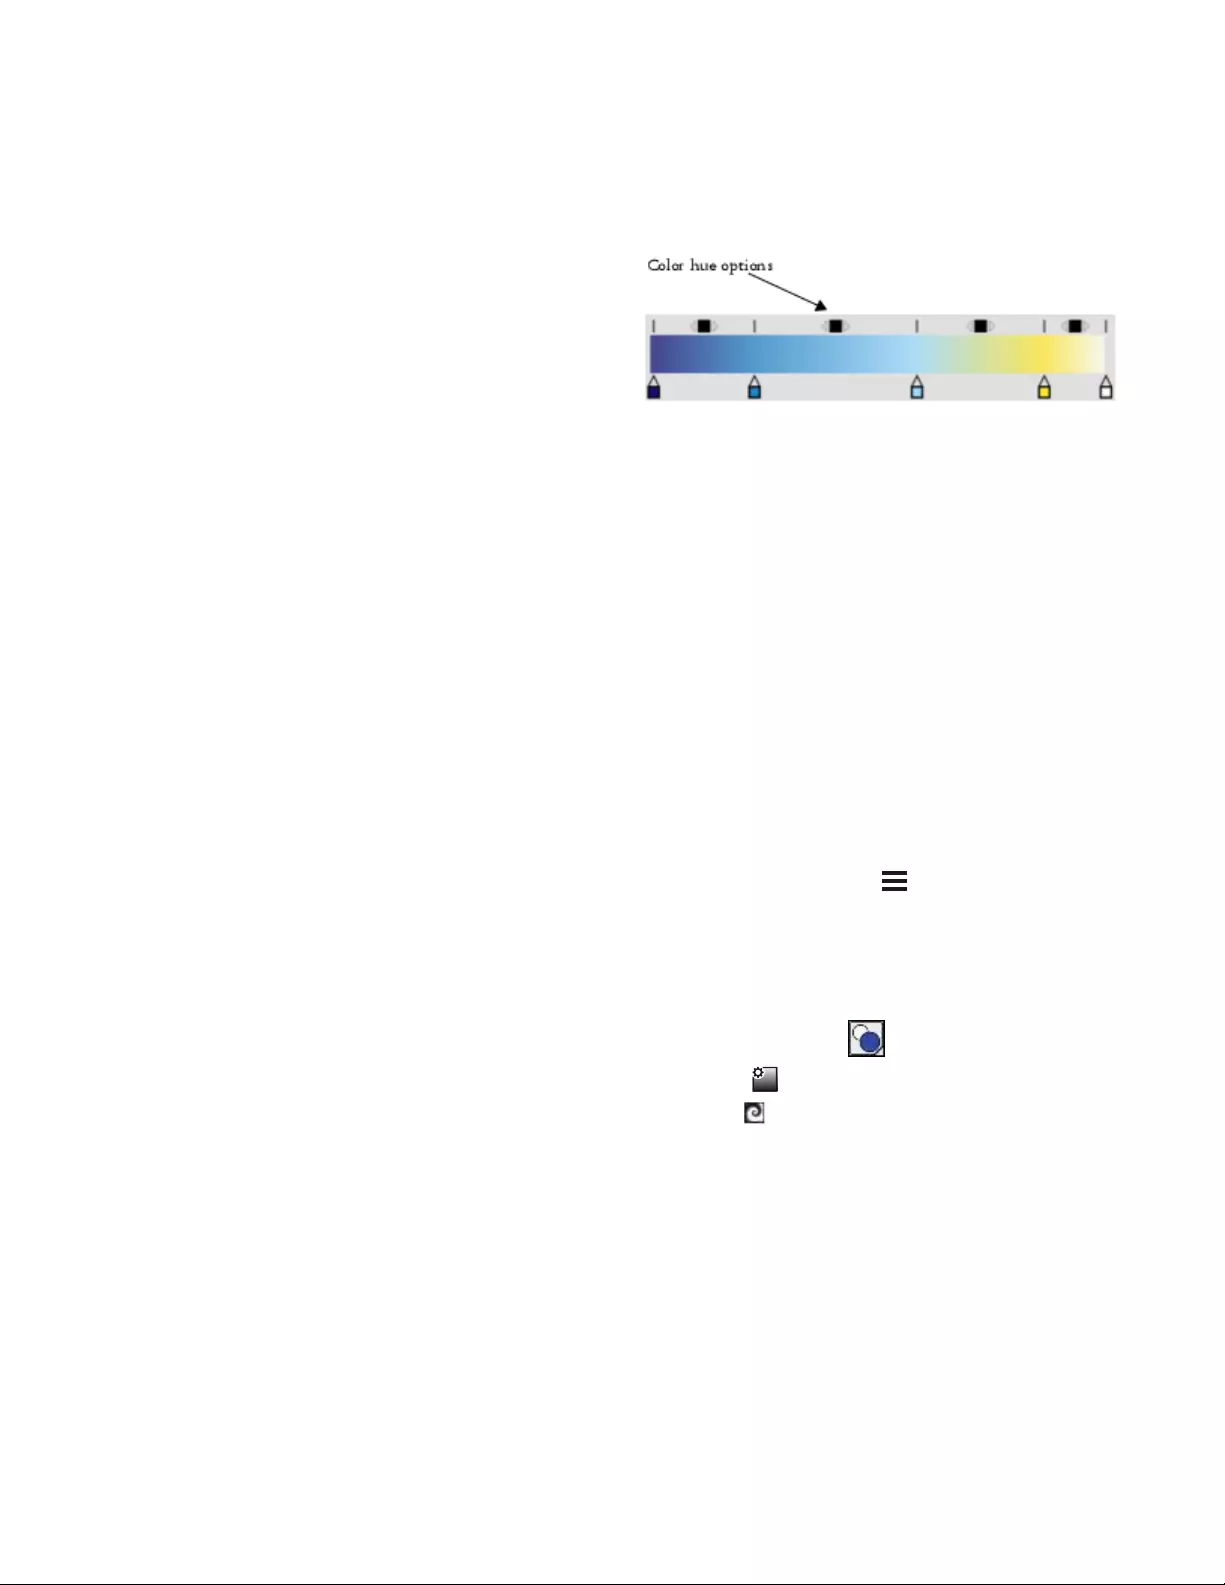
Gradients | 717
To Do the following
Specify how colors blend between two nodes Click a square box above the color ramp bar.
The Color hue options allow you to change
the hue of the blend within that segment.
Select one of the following options in the Color Blend Method
area:
•RGB — blends the red, green, and blue components of the two
colors
•Clockwise around the color wheel — blends the end node
colors along a clockwise path around the color wheel
•Counterclockwise around the color wheel — blends the end
node colors along a counterclockwise path around the color
wheel
Tip: To understand this concept better, refer to the standard display
of the Color panel (Hue Ring and Saturation/Value Triangle), and
note the order of the colors on the Hue Ring.
Create a node that is set to the current color Press Option + click (macOS) or Alt + click (Windows) in the color
ramp bar.
4In the Gradients panel (Window Media Panels Gradients), click the Gradient options button , and choose Save Gradient.
5In the Save Gradient dialog box, enter a name for the gradient.
You can also
Modify the appearance of a spiral gradient Click the Preset flyout button on the property bar, and click
Gradients Panel to display the Gradients panel. Click the
Spiral Gradient button in the Type area, and do any of the
following:
•Drag the Spiral Rate slider to the right or left to increase or
decrease the spiral tension.
•Enable the Invert Spiral check box.

718 | Corel Painter 2022 User Guide
A gradient with low spiral tension
(left) and high spiral tension (right)
Adjust the angle of a gradient Drag the Ramp Angle slider or type an angle in the corresponding
numeric value box.
Applying paint effects to gradients
You can apply different paint styles to gradients created with the Interactive Gradient tool.
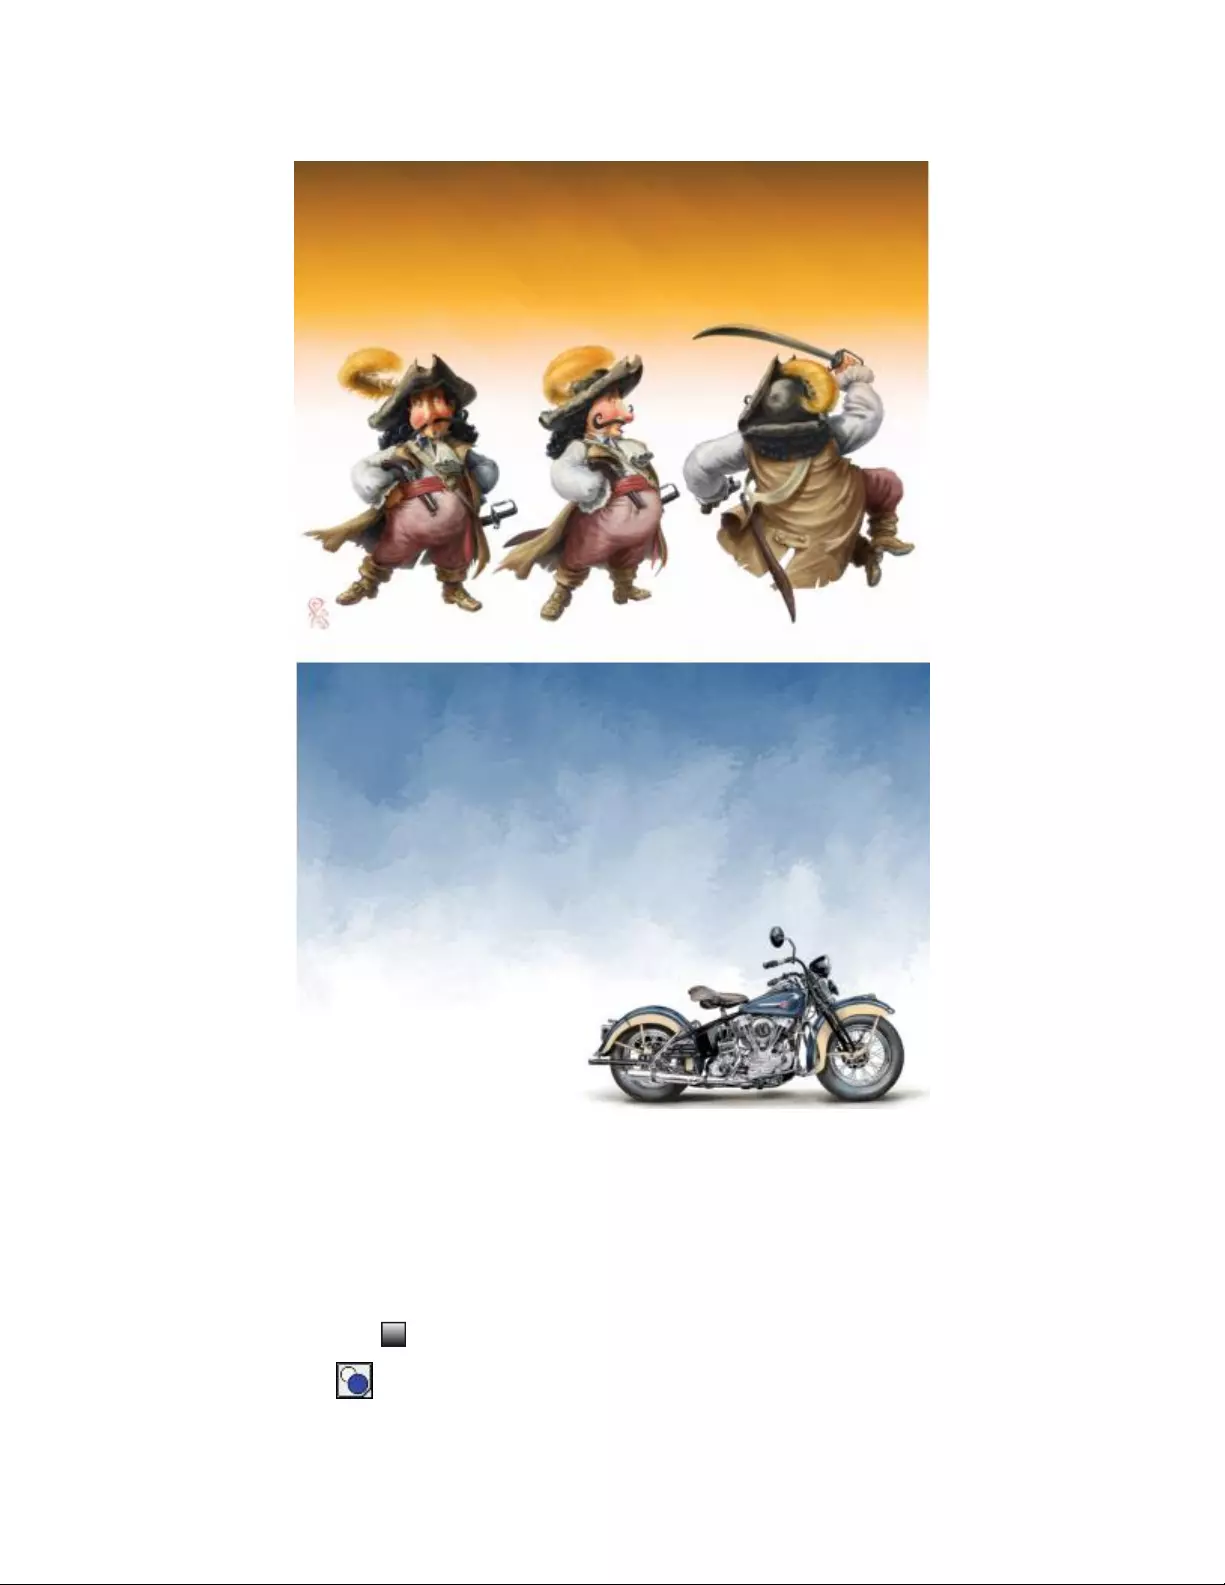
Gradients | 719
Different paint styles were applied to the gradients used in these images.
(Top) Artwork by Fiona Sansom. (Bottom) Artwork by Greg Newman.
You can preview a paint effect before committing a gradient. If you have experimented with the preset gradient auto-painting styles and you
know which style you want to apply, you can quickly draw and commit the gradient without previewing the paint effect.
To apply a paint effect to a gradient
1Click the Interactive Gradient tool in the toolbox.
2Click the Preset flyout button on the property bar, and choose a gradient.
3Choose settings from the property bar.

720 | Corel Painter 2022 User Guide
Make sure the Edit nodes option on the property bar is enabled.
4Perform a task from the following table:
To apply a gradient to Do the following to set the gradient scale and direction
The canvas Click and drag on the canvas.
A selection Click and drag inside the selection.
A layer Select a layer in the Layers panel. Click and drag on the layer.
A channel Select a channel in the Channels panel. Click and drag on the
channel.
5Click the Express Paint button on the property bar and choose an auto-painting style.
To preview the paint effect in the image window, enable the Preview Effect option.
To change the size of the brushstrokes that the paint effect will apply, move the Size slider.
To set the number of the brushstrokes that the paint effect will apply, move the Amount slider. The smaller the size, the more
brushstrokes you need to render the entire gradient.
6Click the Commit Gradient button on the property bar.
If you choose a very small size and amount, the brushstrokes may cover only part of the gradient, especially on a very large canvas.
When you apply a paint effect to a small selection, you may need to lower the size and amount of brushstrokes to achieve the
result you want.
The smaller the brushstroke size, the longer it takes to apply the paint effect.
You can apply a paint effect only to a gradient that you draw with the Interactive Gradient tool.
To stop the auto-painting at any time, click in the document window.
To quickly draw and commit a gradient without previewing a paint effect, click the Interactive Gradient tool in the toolbox,
click the Preset flyout button on the property bar, and choose a gradient. Disable the Edit nodes option on the property bar,
click the Express Paint button on the property bar, choose an auto-painting style, and then draw the gradient. The paint effect
will be applied automatically as you lift the stylus to commit the gradient.
Creating gradients
Although Corel Painter comes with preset gradients, you can create custom gradients.
You can create from very simple to very complex gradients. For a simple two-point gradient, you choose a main and an additional color, and
then Corel Painter generates the gradient colors between them.
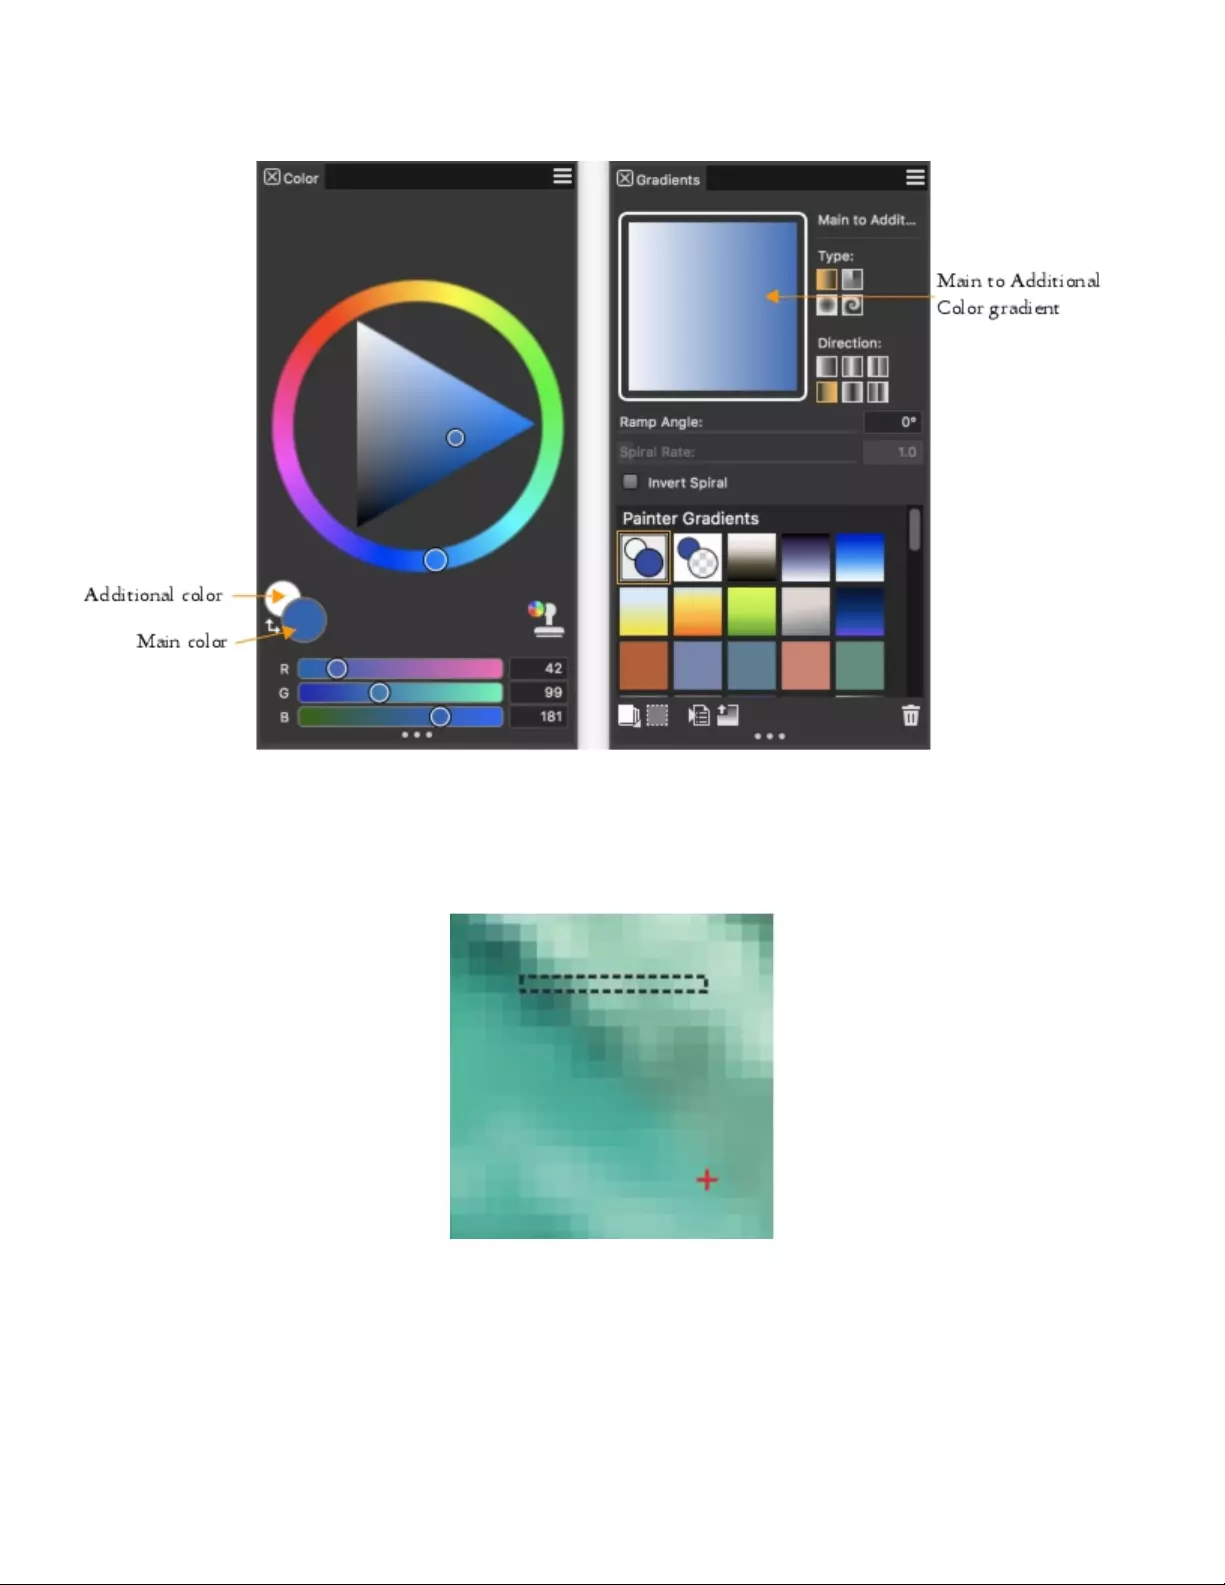
Gradients | 721
A two-point gradient (right) generated from the main and additional colors (left)
You can also create a new gradient by editing an existing gradient. For information, see “To edit a gradient preset” on page 716.
You can use any existing image as a source for creating new gradients. For example, you can capture the colors in a photo of a sunset, or
paint your own range of colors as the content of a gradient.
To create a perfect blend between a series of colors, it is better to
work with a row of single pixels than a large piece of an image.
You can save your custom gradients in the Gradient Library so you can use them in future projects. When you save a gradient, it is stored in
a library. For more information about working with libraries, see “Working with libraries” on page 88.
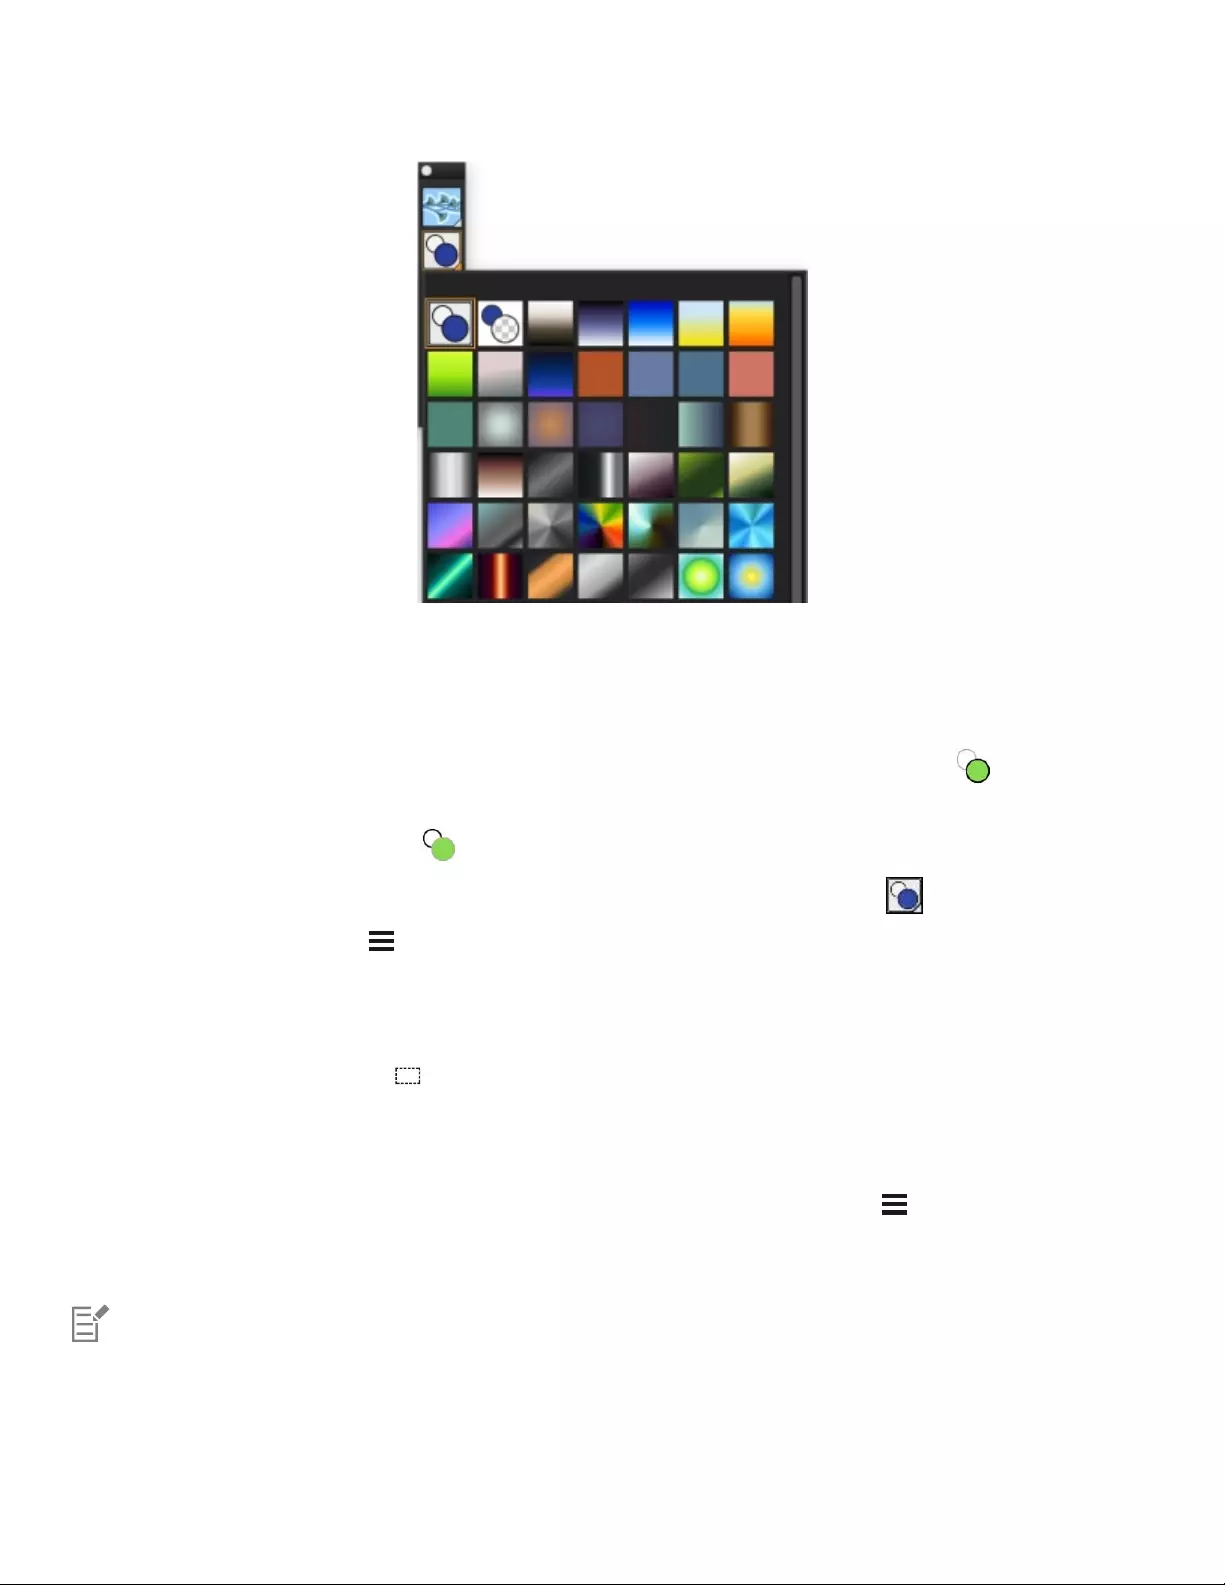
722 | Corel Painter 2022 User Guide
All gradients are stored in the Painter Gradients library, which is accessible from the Media Selector bar.
To create a two-point gradient
1In the Color panel (Window Color Panels Color Panel (Full View)), click the Main Color (front) swatch , and choose a
main color.
2Click the Additional Color (back) swatch , and choose an additional color.
3In the Gradients panel (Window Media Panels Gradients), choose Main to Additional Color in the Painter Gradients area.
4Click the Gradient options button , and choose Save Gradient.
5In the Save Gradient dialog box, type a name for the gradient in the Save as box.
To create a gradient from an image
1Click the Rectangular Selection tool in the toolbox.
2Drag in the document window to select a horizontal or vertical area, making the selection as narrow as possible.
If the selection is horizontal, Corel Painter creates the gradient from the first row of pixels starting at the upper left.
If the selection is vertical, Corel Painter creates the gradient from the first column of pixels, starting at the upper left.
3In the Gradients panel (Window Media Panels Gradients), click the Gradient options button , and choose Capture Gradient.
4In the Capture Gradient dialog box, type a name for the gradient in the Save as box.
The new gradient is saved in the current library. In the future, you can choose it by name from the Gradients panel.
After a gradient is captured, it can no longer be edited. To change a captured gradient, change the artwork from which it was
captured, and then recapture the gradient.

Gradients | 723
Replacing image colors with gradient colors
You can replace an image’s colors with those of a gradient. This effect applies gradient colors to the pixels of the image, based on their
luminance values. For more information, see “Using image luminance to create texture” on page 654.
You can choose an image (left) and replace its colors with the colors of a selected gradient (right).
To replace image colors with gradient colors
1Open the image that you want to use.
Select part of the image, or use the entire image.
2In the Gradients panel (Window Media Panels Gradients), choose a gradient in the Painter Gradients area.
3Click the Gradient options button , and choose Express In Image.
4In the Express in Image dialog box, adjust the Bias slider to define how the gradient is mapped.
Corel Painter replaces the colors in the image with the colors in the gradient, based on matching luminance.

724 | Corel Painter 2022 User Guide

Mosaics and tessellations | 725
Mosaics and tessellations
Mosaic is a decorative art technique that involves creating images by assembling colored tiles and setting them on a surface by using grout.
A tessellation is also a form of mosaic that involves repeating a geometric shape, without overlaps, to create an image. In Corel Painter, you
create images by using mosaic or tessellation effects.
When you create a mosaic in Corel Painter, it’s similar to applying color by using brushstrokes, however, instead of applying paint to the
canvas, you’re laying down tiles. You can create a mosaic from scratch or from an existing photo by using a clone source. You can also
integrate mosaic effects in an existing image.
You can erase and/or reshape tiles to create the perfect mosaic design.
You can apply tiles to the canvas to create a mosaic.
You can use the tessellation technique to generate a mosaic that resembles stained glass. Tessellating divides your image into polygonal
shapes and then converts the shapes into tiles.

726 | Corel Painter 2022 User Guide
You can use the tessellation technique to create a stained-glass effect.
You can alter the appearance of mosaics and tessellations in many ways. For example, you can give a three-dimensional (3D) appearance to
mosaics or add points to tessellations to increase the number of shapes.
This section contains the following topics:
•“Creating a mosaic” (page 726)
•“Selecting and removing tiles” (page 728)
•“Specifying tile and grout color” (page 729)
•“Adjusting mosaic tile dimensions and randomness” (page 730)
•“Filling an area with tiles” (page 733)
•“Creating 3D tiles” (page 734)
•“Re-rendering mosaic tiles” (page 735)
•“Stroking and filling a selection with mosaic tiles” (page 735)
•“Adding mosaic effects to an image” (page 736)
•“Creating tessellations” (page 737)
Creating a mosaic
You can create a mosaic from scratch or from a clone source. When you create a mosaic, it is applied directly to the canvas. You cannot
apply mosaic tiles inside a layer.
After you exit the Mosaic and Tessellation dialog box, you can treat this rendered image just like any photograph or painting. You can
paint it, apply effects to it, select portions of it, or increase the canvas size. You can also integrate mosaic effects into an existing image. For
information, see “Adding mosaic effects to an image” on page 736.
After you apply tiles to a mosaic, you can select, deselect, or remove tiles to change their color or apply effects to them. For information, see
“Selecting and removing tiles” on page 728 and “Specifying tile and grout color” on page 729.
When creating mosaics from scratch, you can follow these helpful guidelines:
• Use your first few courses of mosaic tiles to delineate the most important contours of your subject — just as if you were drawing with a
pencil. Describe the most important lines of your scene first. Additional courses of tiles should follow the initial contours.

Mosaics and tessellations | 727
Tiles applied to the outline of an image
• Use larger tiles in areas of flat color and smaller tiles in regions where you must add more detail. In flat-color areas, you may want to
introduce some color variability for a more realistic effect. Tiles used in traditional mosaics rarely have uniform color.
• Each mosaic tile is stored as a resolution-independent object within the Corel Painter image database. This means that if you resize
an image composed of mosaic tiles, your image can be displayed at the same quality as if it had been created at a higher resolution
originally.
• If you’re working with a clone, tracing paper is enabled by default to help you follow the source image.
You can create a mosaic from a clone with tracing paper turned off to hide the clone source image.
• If you want to continue working on the mosaic at a later date, you need to save mosaic in the RIFF format. RIFF is the only file format
that saves resolution-independent mosaic tile objects. Saving in any other format prohibits you from resuming working on the mosaic.
All file formats will save the rendered image of the mosaic tiles on the canvas. For more information, see “Saving and backing up files”
on page 118.
To create a mosaic from scratch
1Start a new document by choosing File New.
2Choose Effects Esoterica Make Mosaic and Tessellation.
3Click the Grout color chip, and choose a color.
4Click the Tile color chip, and choose a color
5Drag in the document window to apply tiles.
6If you want to continue working on the mosaic, keep the Mosaic and Tessellation dialog box open.

728 | Corel Painter 2022 User Guide
For more information about changing the grout and tile color, see “Specifying tile and grout color” on page 729.
You can also change tile dimensions and shape. For more information, see “Adjusting mosaic tile dimensions and randomness” on
page 730.
You can also specify that Corel Painter automatically fill an area with tiles by choosing Stroke/Fill Selection from the Action list box
in the Mosaic and Tessellation dialog box. For more information, see “Stroking and filling a selection with mosaic tiles” on page
735.
To create a mosaic from a clone source
1Choose File Open, and locate the file that you want to clone.
2Choose File Quick Clone.
3Choose Effects Esoterica Make Mosaic and Tessellation.
4In the Mosaic and Tessellation dialog box, choose Apply Tiles from the Action list box.
If you don’t want to work with tracing paper, disable the Use tracing paper check box.
5Enable the Clone color check box.
6Drag in the document window to apply tiles.
If you want to continue working on the mosaic, keep the Mosaic and Tessellation dialog box open.
You can monitor the progress of the clone-based mosaic by viewing the image with the Use tracing paper check box enabled. This
lets you see a faded out version of the clone source.
Selecting and removing tiles
You can select and deselect tiles so you can add or modify them. You can also remove individual tiles, a selection of tiles, or remove all tiles
from the document at once. If you remove all tiles from the document, Corel Painter clears the canvas, leaving only the grout color.
Similar to working with real ceramic tiles, you cannot merge or overlap Corel Painter mosaic tiles. You can place them close to each
other, but you can’t make them occupy the same space. Corel Painter adjusts the shape of the tiles to fit them close to one another while
maintaining the grout line spacing. So, when you want to re-lay the tiles in an area, you must remove the existing tiles.
To select tiles
1In the Mosaic and Tessellation dialog box, choose Select Tiles from the Action list box.
2Perform a task from the following table.
To Do the following
Select tiles Drag across the tiles you want to select. Red borders appear on
selected tiles.
Select contiguous tiles of the same color (no variability allowed) Press Command + Control (macOS), or Ctrl (Windows), and
drag across part of a line of tiles, so that the whole line of tiles is
selected. A magic wand appears as you select the tiles.

Mosaics and tessellations | 729
To Do the following
Select all tiles Click Select All Tiles, or press the A key.
To deselect tiles
1In the Mosaic and Tessellation dialog box, choose Select Tiles from the Action list box.
2Perform a task from the following table.
To Do the following
Deselect an individual tile Click on a tile that is already selected to deselect it.
Deselect all tiles Click Deselect All Tiles, or press the D key.
To remove tiles
To Do the following
Remove specific tiles In the Mosaic and Tessellation dialog box, choose Remove Tiles
from the Action list box. Click or drag across the tiles you want to
remove.
Remove all tiles In the Mosaic and Tessellation dialog box, click Clear.
Specifying tile and grout color
When creating a mosaic from scratch, you can adjust the tile color by adjusting the value, hue, or randomize color variability to build visual
interest. You can adjust the color for individual tiles or for larger areas across the mosaic. The tile color is determined by the main color
selected in the Colors panel.
If you’re creating a mosaic from a clone source, the tiles are based on the clone source colors. For more information, see “To create a mosaic
from a clone source” on page 728.
Normally, each tile is given a single color. If you want more options for coloring tiles, render the tiles to a channel. You can then convert
the channel to a selection to paint directly on the tiles, apply effects, or fill them with a pattern, weave, gradient, or image. For more
information, see “Creating 3D tiles” on page 734.
In a mosaic, any area that is not covered by tiles is considered grout. A default grout color is assigned to the mosaic background when you
begin working, but you can change the color.
To change the color of selected tiles
1Choose Effects Esoterica Make Mosaic and Tessellation.
2In the Mosaic and Tessellation dialog box, choose Select Tiles from the Action list box.
3Click or drag across the tiles you want to select.
4Red borders appear on selected tiles.
5Choose a color from the Color panel.
6Press one of the following keys to apply the described color change to the selected tiles:

730 | Corel Painter 2022 User Guide
•C (Color) — changes the tiles to the current main color
•T (Tint) — applies a small amount (10%) of the current main color. Repeat to accentuate.
•V (Vary) — adds color variability, based the settings in Brush Controls Panels Color Variability
To change tile color individually
1In the Mosaic and Tessellation dialog box, choose Change Tile Color from the Action list box.
2Enable one of the following color adjustment options:
•Color — changes the tiles to the current main color. You can click the Color chip and choose another color.
•Darken — applies a small amount of black
•Lighten — applies a small amount of white
•Tint — applies a small amount (10%) of the current main color
•Vary — adds color variability based on the settings in Brush Controls Panels Color Variability.
3Click individual tiles that you want to change or drag across a group of tiles.
To apply color variability to tiles
1In the Mosaic and Tessellation dialog box, choose Change Tile Color from the Action list box.
2In the Color Adjustments area, enable the V (Vary) option.
3Click Color Variability to display the Color Variability panel.
4In the Color Variability panel, move the sliders or type values in the boxes to adjust the color variability settings.
To change the grout color
1In the Mosaic and Tessellation dialog box, choose Apply Tiles from the Action list box.
2Click the Grout Color chip.
3Choose a color on the Color panel or the Painter Colors panel that appear.
Changing the grout color automatically re-renders the mosaic, which erases any part of the image that is not a tile or grout.
Adjusting mosaic tile dimensions and randomness
You can change the shape of mosaic tiles by adjusting the tile dimensions and spacing. You can also control the variability of tile shapes by
setting the degree of randomness. Increasing randomness makes the shapes more erratic, each different from the last. For example, if the
length dimension is 10 pixels, a length randomness of 25% creates tiles that are randomly given a length in the range of 7.5 to 12.5 pixels.
To adjust tile dimensions
1Choose Effects Esoterica Make Mosaic and Tessellation.
2Choose the Dimensions option from Settings list box.
3Adjust any of the following dimension sliders:
Dimension control Description
Width
Sets the width of the tiles in pixels.
In this example, the width is set to 3.5 pixels (top) and 30.4 pixels
(bottom).

Mosaics and tessellations | 731
Dimension control Description
Length Sets the length of the tiles in pixels.
In this example, the length is set to 4.1pixels (top) and 24.2 pixels
(bottom).
Pressure Determines how tile dimensions are affected by stylus pressure,
which allows you to control the width variance under differently
weighted strokes.
With the Pressure slider set to zero, a light stroke produces narrow
tiles, and a heavier stroke creates wider tiles.
Increasing the Pressure slider also increases the effect of pressure
on the width of the tiles and prevents the creation of narrow tiles
in response to a light stroke. Setting Pressure to 100% creates
uniformly wide tiles, regardless of the pressure.
In this example, the Pressure slider is set to 0% (top) and 100%
(bottom).
Grout Sets the spacing between tiles in pixels.
In this example, the spacing between tiles is 0% (top) and 15%
(bottom).

732 | Corel Painter 2022 User Guide
Dimension control Description
To adjust tile variability
1Choose Effects Esoterica Make Mosaic and Tessellation.
2Choose the Randomness option from Settings list box.
3Adjust any of the following dimension controls:
Randomness control Description
Width Allows the tile width to vary by a set percentage.
The lowest setting, 0%, produces no variability and the highest
setting, 100%, produces the most variability.
In this example, Width randomness is set to92%.
Length Allows the length of a tile to vary by a set percentage.
The lowest setting, 0%, produces no variability and the highest
setting, 100%, produces the most variability.
In this example, the Length slider is set to98%.
Pressure Cut Controls the variability of the angle of the tile ends.
The lowest setting, 0%, produces no variability and the highest
setting, 100%, produces the most variability.
In this example, the Cut slider is set to 90°.
Mosaics and tessellations | 733
Randomness control Description
Grout Controls the variability of the length of space found between tiles.
The lowest setting, 0%, produces no variability and the highest
setting, 100%, produces the most variability.
In this example, the Grout randomness is set to 100%.
Filling an area with tiles
You can use different modes to fill an area of a mosaic with tiles. You can use the Start with triangle mode to fill a wedge-shaped area by
applying a brushstroke that starts with a triangular shaped tile.
The Start with triangle mode creates a perfect wedge in the “V.”
You can use the Respect edge of image mode to automatically insert a space at the perimeter of the image so that the tiles you insert at the
edge of the image do not pass the edge.
734 | Corel Painter 2022 User Guide
The white tiles that surround the image respect the edge, while the black tiles do not.
To choose a method for filling an area with tiles
1Choose Effects Esoterica Make Mosaic and Tessellation.
2In the Options area, enable one or both of the following check boxes:
•Start with triangle
•Respect edge of image
3Drag in the document window to apply tiles.
Creating 3D tiles
You can create mosaics with a 3D appearance by rendering tiles into a mask. This technique places the tile shapes in a new channel named
Mosaic Mask (in the Channels panel), which allows you to add depth to the tiles by using surface texture to create a 3D appearance.
You can render tiles to a mask to create a look of 3Dtiles.
With the tiles in a channel, you can also load the mosaic pattern as a selection or you can invert the channel to use the grout as a selection.
The result can be particularly interesting when you work with a tessellated mosaic.
To give mosaic tiles a 3D look
1Choose Effects Esoterica Make Mosaic and Tessellation.
2Drag in the document window to apply tiles.
When the mosaic is complete, you can proceed to step 3.
3Choose Render To Mask from the Action list box.
4Click Render To Mask, and then click OK.
This action uses tile data to create a new channel in the Channels panel (Window Channels).
5Choose Effects Surface Control Apply Surface Texture.

Mosaics and tessellations | 735
6In the Apply Surface Texture dialog box, choose Mosaic Mask from the Using list box.
7Adjust the Amount or Softness sliders to achieve the level of relief that you want.
In most cases, the best results are obtained with the Picture slider set at 100%. For more information, see “Using 3D brushstrokes to
create texture” on page 653.
Because Corel Painter uses the tile shapes from the channel, the resulting surface texture gives the tiles a realistic 3D appearance.
Re-rendering mosaic tiles
If you increase the dimensions of a document that contains a mosaic, you need to re-render the mosaic to ensure the mosaic resolution
matches that of the document. This command re-creates the mosaic from the grout color and the tile object information. Re-rendering fills
the image with the grout color and then re-renders the mosaic tiles at the resolution of the document. It is important to note that the re-
rendering process erases any image that is not a tile or grout.
To re-render tiles
1Open an image that is the size you want.
2Choose Effects Esoterica Make Mosaic and Tessellation.
3Create a mosaic, and click OK.
4Choose Canvas Resize.
5In the Resize dialog box, disable the Maintain original file size check box, and type a higher value in the Width or Height box.
When Corel Painter finishes resizing, you’ll notice that the tiles have blurred. You can correct this problem by re-rendering the mosaic.
6Choose Effects Esoterica Make Mosaic and Tessellation.
7Click Rebuild.
8Click OK.
Corel Painter replaces the resized, blurry tiles with tiles rendered at the higher resolution.
After you click Rebuild, Corel Painter erases any part of the image that is not a tile or grout.
Stroking and filling a selection with mosaic tiles
You can stroke or fill path-based selections that were created with the Rectangular Selection, Oval Selection, and Lasso tools with mosaic
tiles. If you want to stroke or fill a channel-based selection with mosaic tiles, you need to use the Transform Selection command to convert
a channel-based selection to a path-based selection. For more information, see “Getting started with selections” on page 594.
Stroking and filling a selection are appropriate only when you change a parameter between operations — for example, if you change the
tile color or dimensions. The Stroke Selection command applies a single row of tiles as an outline along the selection path. To fill an entire
selection with tiles, you can make the selection using the Lasso tool. To fill an oval or rectangular selection, you must first use the Stroke
Selection command to apply tiles to the selection path, and then use the Fill Selection command to fill the rest of the selection.
736 | Corel Painter 2022 User Guide
To fill an oval or rectangular selection, you must first use the Stroke Selection command to apply tiles to
the selection path (left), and then use the Fill Selection command to fill the rest of the selection (right).
To create a mosaic in a selection
1Set up the area you want to tile as an active selection.
2Choose Effects Esoterica Make Mosaic and Tessellation.
3In the Mosaic and Tessellation dialog box, choose Dimensions or Randomness from the Settings list box.
4Choose the color for the tile and the grout.
5From the Action list box, choose Stroke/Fill Selection.
6Click one of the following buttons:
•Stroke Selection — creates one row of tiles along each selection path
•Fill Selection — applies multiple rows of tiles, working in from the path until the selected area is filled with tiles
The Fill Selection command works with selections made by using the Lasso tool . To fill an oval selection, you must first choose the
Stroke Selection command, and then choose the Fill Selection command.
In some cases, Corel Painter might not put a tile in every space. You can fill openings by choosing Apply Tiles from the Action list
box and applying the tiles.
If you want to change the tiling of an area, you can use the Remove Tiles action to clear it. Then you can reapply tiles.
Adding mosaic effects to an image
You can add mosaic effects to an image that already contains brushstrokes, layers, or objects. However, because mosaics are applied directly
to the canvas, you need to incorporate mosaic effects carefully or you could lose some of the existing content.
When you create a mosaic, the entire canvas is automatically covered with the grout color. This obliterates images that are currently on the
canvas, but leaves objects that hover above the canvas, such as layers and shapes. These objects are not deleted, but they do cover up the
mosaic that you’re working on.
If you want to incorporate a mosaic with another image, you have several options:
• Using selections — You can add the mosaic effect to a portion of an image by filling a selection with a mosaic effect. For information,
see “Stroking and filling a selection with mosaic tiles” on page 735.
• Using multiple documents — You can create the mosaic in its own document. When you’re satisfied with the result, float and copy
the mosaic to the document where you want to composite it. For more information, see “Converting selections into layers or floating
objects” on page 546.
• Using layers — You cannot add a mosaic to a layer. However, you can float the non-mosaic portion of the image using a layer. Create the
mosaic on the canvas and when you’re satisfied with the mosaic, you can drop the layers.

Mosaics and tessellations | 737
Creating tessellations
A tessellation is a type of mosaic that is made up of nonrectangular tiles. With Corel Painter, you can create a tessellation from scratch or
from a clone source. A tessellation that is based on a clone source is a powerful option. The tessellation points are distributed according to
the luminance of the clone source. Lighter regions receive a greater density of points, so the shapes are smaller.
You can create a tessellation from a clone source.
A finished tessellation resembles stained glass.
When creating a tessellation, Corel Painter divides the canvas into shapes, such as triangles, cracks, or pieces, which become the mosaic tiles.
The shapes themselves are sets of points, connected by line segments. You can control the type of shape, the number of points, and their
distribution.
You can base your Tessellation on Triangles, Cracks or Pieces.
You can also add points to a specified area to create a different effect.
738 | Corel Painter 2022 User Guide
Adding points in the shape of a letter. The letters appear as a swath of smaller polygons.
After creating a tessellation, the shapes appear as mosaic tiles that are given the main color and are surrounded by grout lines. You can
change the color of the tiles.
You can set the tile color to white, the grout color to black, and then fill in the tessellation with color.
To create a tessellation
1Choose Effects Esoterica Make Mosaic and Tessellation.
2Choose Dimensions from the Settings list box.
3Move the Grout slider to set the grout line thickness.
4Click the Grout Color chip, and select a color.
5Choose Make Tessellation from the Action list box.
6Choose one of the following tile shapes from the Tile Shape list box.
•Triangles
•Cracks
•Pieces
7Choose one of the following from the Spacing list box:
Mosaics and tessellations | 739
•Even — generates a tessellation by using evenly-spaced points
•Random — generates a tessellation by using random points
Corel Painter forms polygons by connecting the points according to the spacing type.
8Do one of the following:
• Click Add 500 Points, and repeat if necessary.
• Click or drag in the image.
9Click Apply.
If you want to modify the tessellation, choose an action from the Action list box.
If you want to clear all tessellation points, click Clear.
To create a tessellation from a clone source
1Choose File Open, and locate the file that you want to clone.
2Choose File Quick Clone.
3Click the Clone Color button in the Color panel.
Enabling the Clone Color option disables the Color panel. This is a reminder that the color information is pulled from the clone source.
4Choose Effects Esoterica Make Mosaic and Tessellation.
5Choose Make Tessellation from the Action list box.
6Choose one of the following tile shapes from the Tile Shape list box.
•Triangles
•Cracks
•Pieces
7Choose one of the following from the Spacing list box:
•Clone — generates a tessellation by using the clone source. Darker image areas produce a greater density of points.
•Inverted Clone — generates a tessellation by using the clone source. Lighter image areas produce a greater density of points.
8Do one of the following:
• Click Add 500 Points, and repeat if necessary. The points accumulate and the total number of points appears below the Action list
box.
• Click or drag in the image. You can add higher concentrations of polygons in very specific areas to create specific patterns or shapes.
If you want to specify the grout thickness, you must do so before creating the tessellation. First, choose Apply Tiles from the
Action list box, and move the Grout slider.
It is possible to create a huge number of points. More points mean more polygons, which increase the time it takes to convert to a
mosaic. Keep this in mind to avoid overwhelming your system.
To color tessellations
1In the Mosaic and Tessellation dialog box, choose Change Tile Color from the Action list box.
2In the Color Adjustments area, enable the Color option.
3Click the color chip, and choose a bright main color.

740 | Corel Painter 2022 User Guide
4Drag to create a stroke in the document, or click individual tiles.
Colored, tessellated tiles appear beneath your stroke.
You can also base the color on the color in a clone source if you enable Clone Color in the Colors panel.

Weaves | 741
Weaves
Corel Painter includes an assortment of weave samples that you can apply as fills. On Windows, you can also edit a weave sample to make it
your own. In addition, Corel Painter includes a powerful programing language that allows you draft custom weave patterns from scratch.
Weaves reside in default libraries. You’ll find more libraries, with additional materials, on the Corel Painter DVD and on the Corel Web site.
For more information, see “Working with libraries” on page 88.
This section contains the following topics:
•“Applying weaves” (page 741)
•“Editing and saving weaves” (page 742)
•“Creating weave patterns” (page 744)
•“Using the Edit Weave dialog box” (page 744)
•“Defining warp and weft expressions” (page 745)
•“Defining warp and weft color expressions” (page 747)
•“Designing the tie-up” (page 748)
•“Reference: Expression operators” (page 750)
Applying weaves
You can choose a weave from the Weaves panel, or from one of the Weave libraries that are included with Corel Painter, and apply it as a
fill. For more information, see “Working with libraries” on page 88.
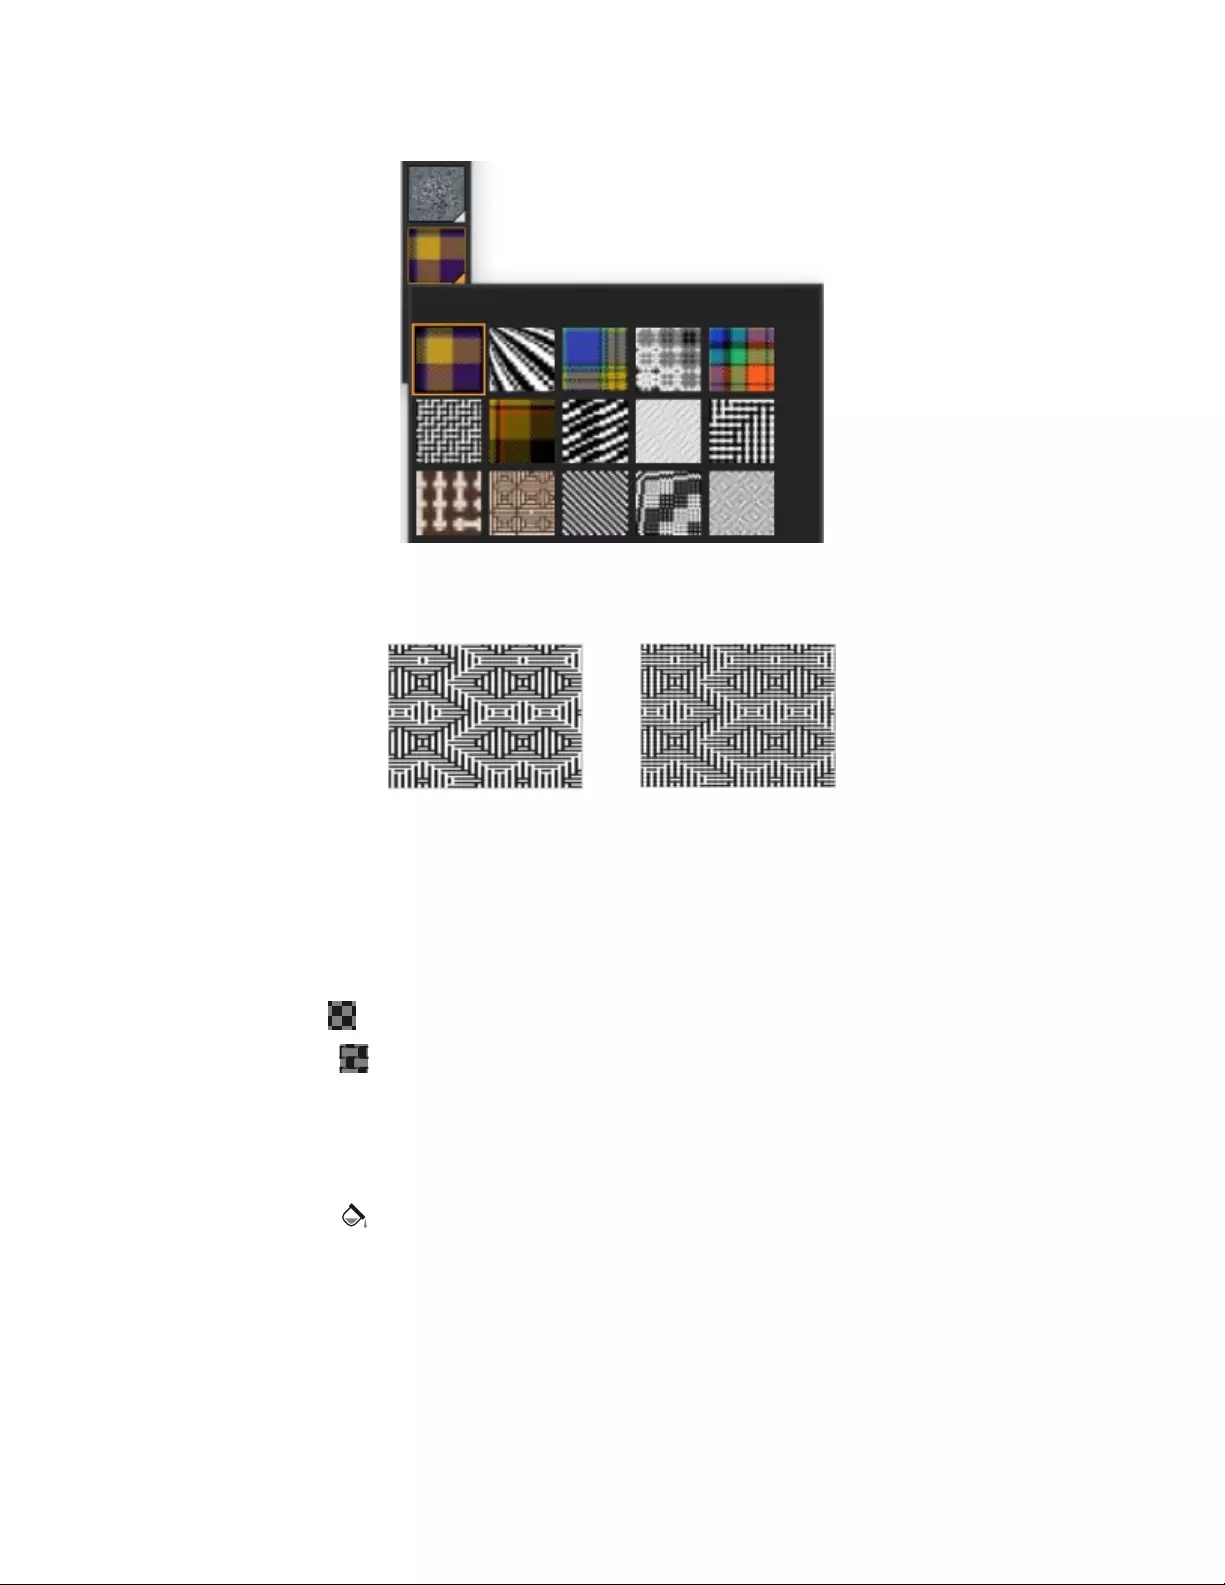
742 | Corel Painter 2022 User Guide
The Weave Library is accessible from the Media Selector bar.
You can also display a weave as two-dimensional or show the interwoven threads three-dimensionally, complete with shadows.
Left: A weave displayed as two-dimensional. Right: The same weave
displayed as three-dimensional produces a more jagged effect.
To apply a weave as a fill
1Choose Window Media Panels Weaves Control Panel.
2Click the Weave selector, and click a weave in the Painter Weaves library panel.
3Click one of the following buttons:
•Two-Dimensional Weave — produces a weave that looks like blocks
•Three-Dimensional Weave — produces a weave that looks like textured fabric
4To apply a weave to:
• The canvas — Click the Canvas in the Layers panel.
• A selection — Click a selection tool from the toolbox, and drag in the document window to select an area.
• A layer — Click a layer in the Layers panel.
5Choose the Paint Bucket tool from the toolbox.
6In the document window, click the canvas, selection, or layer.
Editing and saving weaves
You can edit a sample weave from the Weaves panel to make it your own. For example, you can scale the weave or modify the thickness of
the threads.

Weaves | 743
After altering the scale, thickness, or color of a weave, you can save the changes as a new weave to the Weaves library for future use. For
more information, see “Working with libraries” on page 88.
To adjust weave scaling and thickness
1Choose Window Media Panels Weaves Control Panel.
2Click the Weave selector, and click a weave in the Painter Weaves library panel.
The weave appears in the Weave Preview Window.
3Click the Three-Dimensional Weave button .
For most weaves, the preview does not change until you adjust the scale and thickness values.
4Move the Horizontal Scale slider and Vertical Scale slider to the right to increase the scale or to the left to decrease the scale.
5Move the Horizontal Thickness slider and Vertical Thickness slider to the right to increase the thickness or to the left to
decrease the thickness.
Thickness sliders affect only the three-dimensional display. When you select a two-dimensional display, the thickness sliders have no
effect.
To edit weave colors
1Choose Window Color Panels Color Sets.
2In the Weaves panel (Window Media Panels Weaves Control Panel), click the Weave selector, and click a weave on the Painter
Weaves library panel.
3Click the Weave Options button , and choose Get Color Set.
The color set for the selected weave appears in the Color Set Libraries panel.
4Click a color on the Color panel.
5Hold down Command (macOS) or Ctrl (Windows), and then click the color swatch that you want to replace on the Color Set Libraries
panel.
6In the Weaves panel, click the Weave Options button , and choose Put Color Set.
If you fill an image with the modified weave colors, Corel Painter applies the new color set.
To save a weave
1In the Weaves panel (Window Media Panels Weaves Control Panel), click the Weave options button , and choose Save
Weave.
2In the Save Weave dialog box, type a name for the weave.
If you want to preserve the default weave, type a new name for the modified weave. If you don’t type a new name, Corel Painter
saves the modified weave using the default weave’s name.
The new weave pattern appears in the current Painter Weaves library.

744 | Corel Painter 2022 User Guide
Creating weave patterns
(Windows only)
Corel Painter lets you create weave patterns to simulate fabrics, such as wallpaper, carpet, clothing, and furniture, using the Edit Weave
dialog box combined with the Corel Painter weaving language.
In this section, actual weaving terminology is used so that weavers can become familiar with these techniques more easily.
Introduction to weaving
A weave consists of vertical threads (warp) and horizontal threads (weft) that are interlaced on a loom to form a fabric. Each warp thread
is connected to exactly one harness in the loom. The harnesses are connected in a pattern to treadles. Pressing a treadle raises a set of
harnesses, lifting the associated warp threads. A weft thread is then passed horizontally through the loom. The particular set of harnesses
that are raised determines which warp threads are in front of the weft thread and which are behind. For the next weft thread, a different
treadle is pressed, raising a different set of harnesses and, hence, a different set of warp threads.
An example of a simple weave using 1) grey horizontal weft threads and 2) black vertical warp threads
In traditional weaving, you need to follow a draft to create a weave. A draft is a set of instructions for setting up a loom to produce a
weave. The draft contains the following details:
• warp threading definition — describes how to set up the loom for threading the vertical threads (number of threads, sequence, and
color)
• weft threading definition — describes how to set up the loom for treadling the horizontal threads (number of threads, sequence, and
color)
• tie-up — instructs the weaver which of the warp rows to use when weaving a given weft thread
In Corel Painter, the Edit Weave dialog box allows you to draft a weave pattern. For information, see “Using the Edit Weave dialog box” on
page 744.
Using the Edit Weave dialog box
(Windows only)
You can draft a weave using the Edit Weave dialog box, which is intended for an 8-harness, 8-treadle loom.
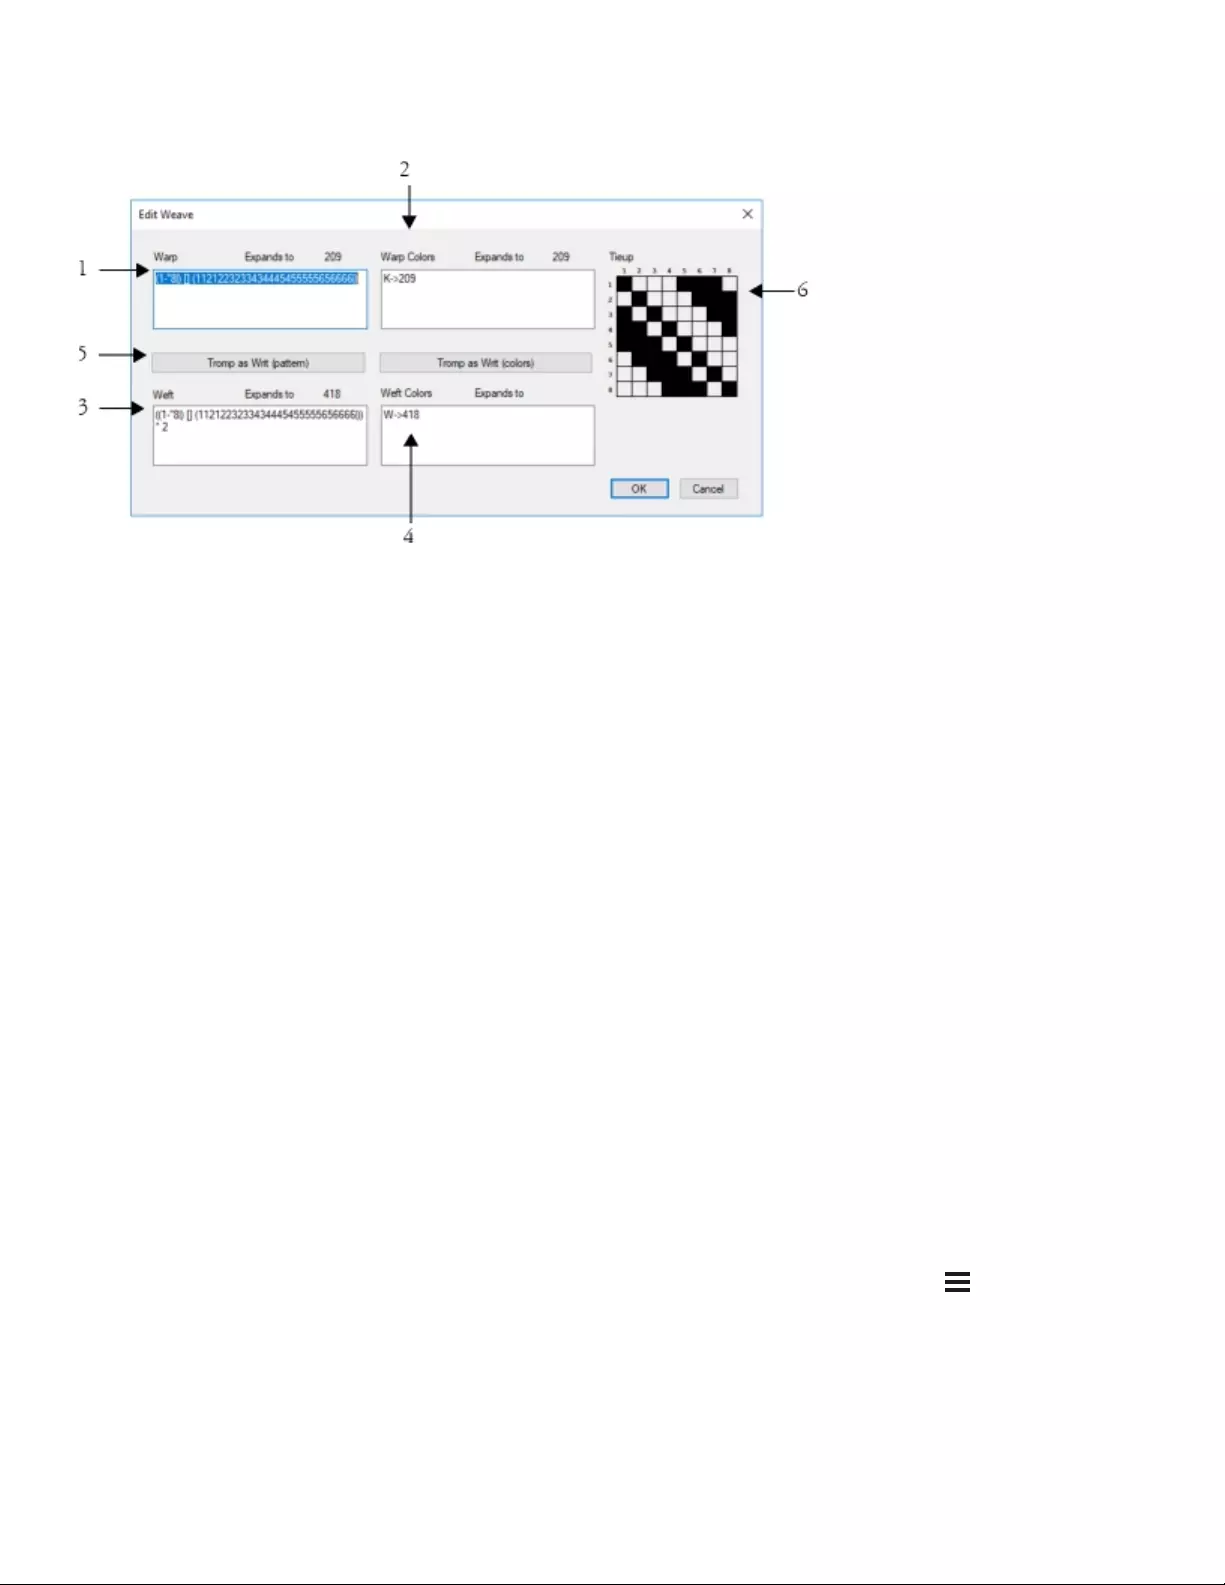
Weaves | 745
Edit Weave dialog box: The numbers above correspond to the numbers in
the following table, which describes the main components of the dialog box.
Component Description
1. Warp The values in the Warp area specify the threading sequence of the
vertical threads in the weave.
2. Warp Colors The values that appear in the Warp Colors area control the color
and number of vertical threads in the weave.
3. Weft The values in the Weft area specify the treadling sequence of the
horizontal threads in the weave.
4. Weft Colors The values that appear in the Weft Colors area control the color
and number of horizontal threads in the weave.
5. Tromp as Writ The Tromp as Writ button allows you to copy the warp values and
apply them to the weft threads.
6. Tieup The Tieup area allows you to control the interlacing of the threads
by determining which warp rows to use when weaving a weft
thread.
To access the Edit Weave dialog box
•In the Weaves panel (Window Media Panels Weaves Control Panel), click the Weave options button , and choose Edit Weave.
Defining warp and weft expressions
(Windows only)

746 | Corel Painter 2022 User Guide
The warp and weft expressions use the information in the tie-up to extend and evolve the weave into larger, more complex patterns. For
more information, see “Designing the tie-up” on page 748.
Warp and weft expressions in traditional weaving
In traditional weaving, the warp expression represents the threading sequence, in other words, it describes which warp threads are
connected to which harnesses. The weft expression is the treadling sequence that determines which treadle is pressed (and therefore which
harnesses are raised) for each successive weft thread.
The following table describes which warp threads are connected to which harnesses for the warp sequence 234123:
Connect warp thread To harness
1 2
2 3
3 4
4 1
5 2
6 3
The sequence repeats for subsequent threads.
7 2
8 3
9 4
The threading sequence above, 234123, has a length of 6, which indicates that the pattern runs for 6 threads before repeating.
The following table describes which treadle is pressed (and therefore which harnesses are raised) for each successive weft thread for the weft
sequence 654:
Press treadle For weft thread
6 1
5 2
4 3
The sequence repeats for subsequent threads.

Weaves | 747
Press treadle For weft thread
6 4
5 5
4 6
Warp and weft expressions in Corel Painter
In Corel Painter, you need to use the weave pattern expression language to generate a weave. You may find working with the pattern
expression language more logical than working with very complex expanded sequences. For more information see, “Reference: Expression
operators” on page 750.
The following table includes an example of a traditional pattern expression expressed in the Corel Painter pattern language.
Traditional expression Pattern language expression
1223334444333221 (1-4-1)[](1-4-1)
To define a warp or weft expression
• In the Edit Weave dialog box, type an expression in the Warp box.
As you type a warp or weft sequence, the “Expands to n”message above the panel displays the length n (number of digits) of the
expression. This describes the number of threads in the sequence.
If Corel Painter cannot resolve the expression, the expansion length message displays “!” (error).
If you want to copy the Warp expression to the Weft expression, click the Tromp as Writ (pattern) button.
Defining warp and weft color expressions
(Windows only)
You can use one color for all the warp threads and another for all the weft threads, or you can set up a sequence of colors for each.
When defining thread color sequences using the pattern expression language, you must identify the colors alphabetically. Therefore, you are
limited to 26 colors of thread in the weaving.
Using the warp and weft color panels, you can create expressions that describe the color sequences that you want. You can also use any
letters that you like and then change the associated color later by modifying the color set. For more information, see “To edit weave colors”
on page 743.
The following table includes an example of a simple color sequence expressed in the Corel Painter pattern language.
Thread color sequence Description
[B 8 D 4] Use color B for 8 threads, use color D for 4 threads.
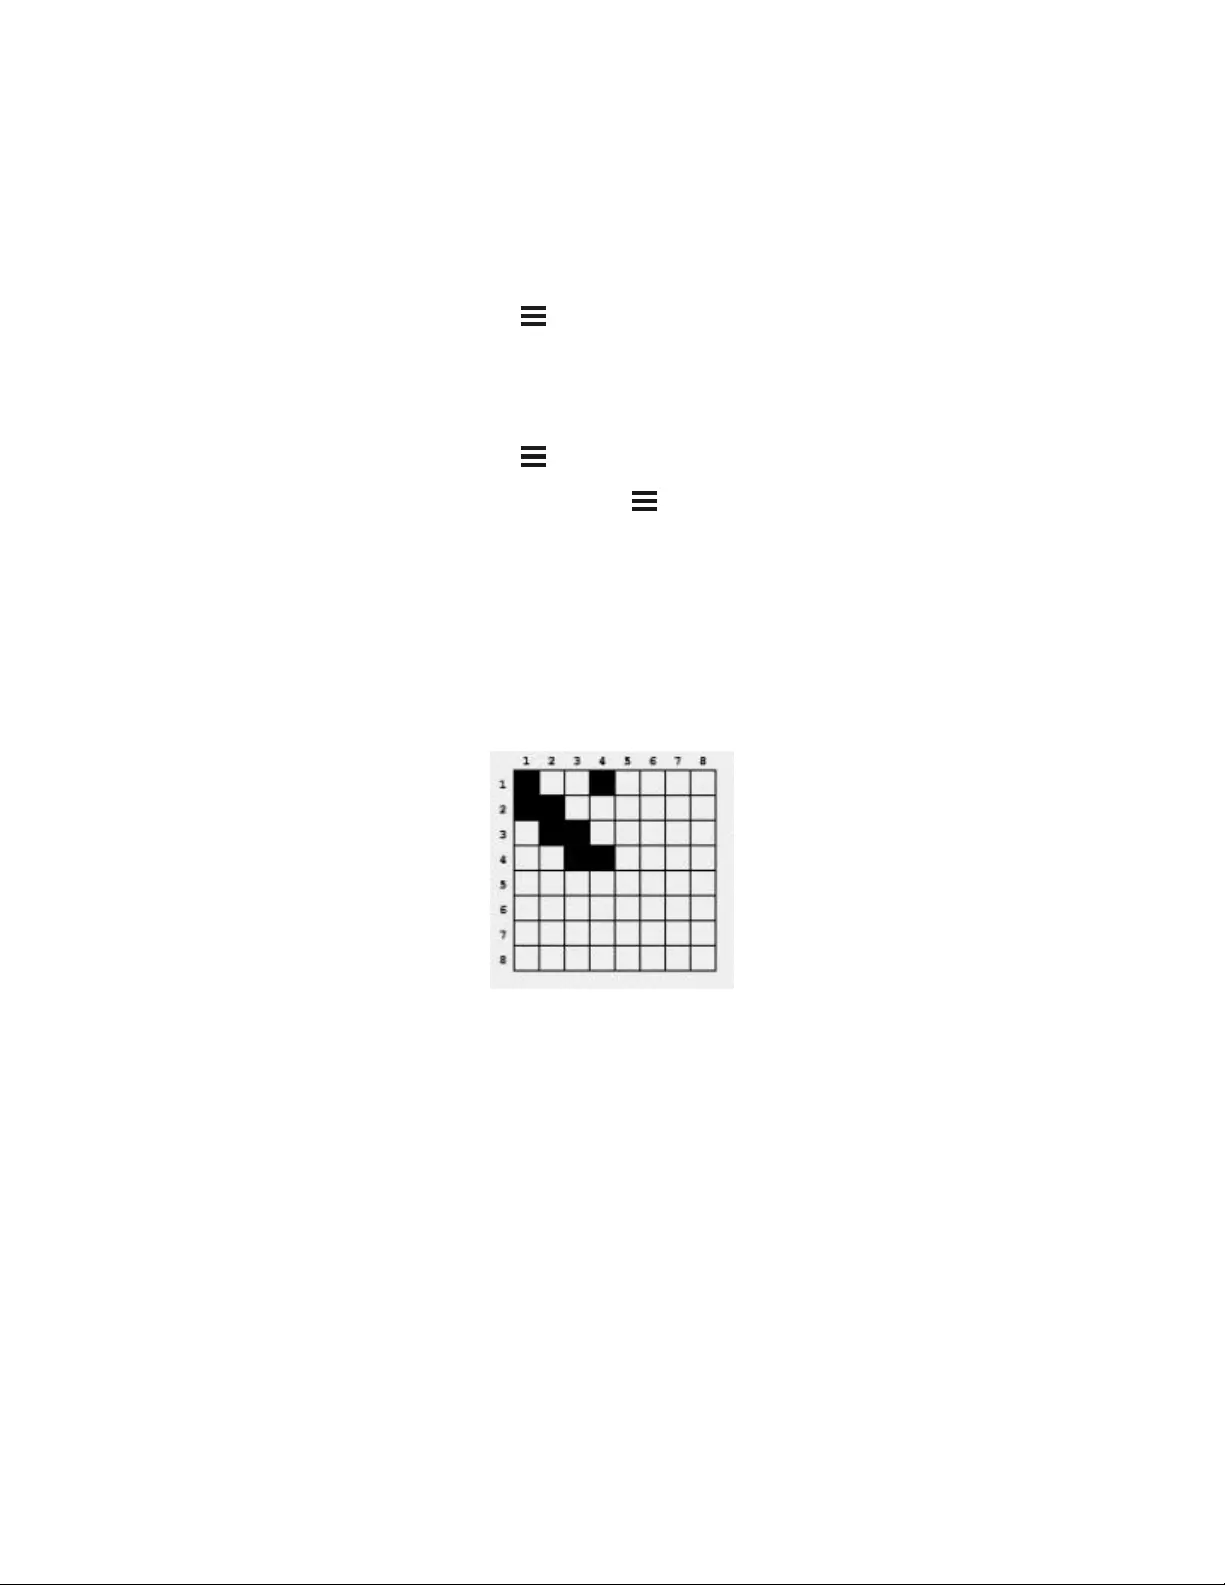
748 | Corel Painter 2022 User Guide
To define a warp or weft color expression
• In the Edit Weave dialog box, type an expression in the Warp Colors box.
To display the weave color set
•In the Weaves panel, click the Weave options button , and choose Get Color Set.
The color set for the selected weave appears in the Color Set Libraries panel in its own color set library.
To display the letter associated with a color set color
1In the Weaves panel, click the Weave options button , and choose Get Color Set.
2In the Color Set Libraries panel, click the Color Sets options button , choose Color Set Library View List.
Scroll to the newly created color set to view the letters associated with the weave colors.
Designing the tie-up
(Windows only)
The purpose of the tie-up is to describe which of the warp rows to use when weaving a given weft thread. It works in conjunction with the
warp and weft expressions to generate the weave pattern.
The tie-up describes which threads are in front at which point in the weaving process.
In the Edit Weave dialog box, the tie-up is a grid that measures 8 threads wide by 8 threads high. A black cell indicates that the warp thread
should be placed in front of the weft. A white cell indicates that the weft thread should be placed in front of the warp.

Weaves | 749
In this tie-up, the white cells instruct the weft thread (black) to be placed in front of the warp
thread (white) in the weave pattern. Notice that the white cells that are positioned in the fourth
row and column cause the weft thread (black) to be more prominent in the weave pattern.
In this tie-up, alternate black cells that are positioned in the fourth row and column instruct
the warp thread (white) to be placed in front of the weft thread (black). Notice that the
addition of the black cells in the fourth row and column produces a checkerboard effect.
To modify the tie-up
• In the Edit Weave dialog box, click a cell in the grid.
If you click a white cell, the cell changes to black, which places the warp thread in front of the weft.
If you click a black cell, the cell changes to white, which places the weft thread in front of the warp.

750 | Corel Painter 2022 User Guide
Reference: Expression operators
You need to learn how to use the weaving pattern language expression operators to effectively draft a weave pattern.
The Weaving Pattern Expression Language is designed around a group of values, called the domain of the pattern. For the warp or weft
sequences, the domain is made up of the numbers 1 through 8, which correspond to the harnesses and treadles in the tie-up.
Patterns wrap around on their domain so the number one higher than 8 is actually 1, and the number one lower than 1 is actually 8. This is
called modular arithmetic. For example, some are found in the sequences 5678123 or 3218765.
The following table defines a few commonly used terms.
Term Definition
Operands In all examples, the operands used for the operators are numeric
sequences. However, the operands may be other patterns created
from other operators. In this case, use parentheses to distinguish
operands.
Expansion Refers to the actual warp or weft numeric sequence created when
the expression is translated from the shorthand pattern language.
Length Describes the number of elements in the expanded sequence. For
example, (1-4-1)[](1-4-1) expands to 1223334444333221, which
has a length of 16.
BLOCK
Operator usage Short form
<pattern> block <count> []
The left operand is a sequence of any length. The right operand is a pattern of digit characters for specifying block lengths from 0 to 9.
If either operand is shorter than the other, it is extended (via repeating) to exactly the length of the other operand.
Then, with equal length operands, each element of the left operand is repeated individually by the value of the corresponding digit in the
right operand.
The length of the expansion is the sum of the digits in the (possibly lengthened) right operand.
Individual elements of the right operand (lengths) can be replaced by {number} for counts from 1 to 127.
Example Expansion
1234 [] 2 11223344
34512 [] 23 334445511122
12345678 [] 87654321 111111112222222333333444445555666778

Weaves | 751
Example Expansion
12 [] 123494321 12211122221111111112222111221
123 [] 1{12}3 1222222222222333
Block Expressions
Block expressions may be used in an interleaved format. This is particularly useful for color sequences like those used in the Scottish tartan
plaids. For example, one of the Drummond color sequences is expressed as follows:
[G 8 R 2 G 2 R 56 G 16 B 2 G 2 B 2 G 36 R 2 G 2 R 8|].
REPEAT
Operator usage Short form
<pattern> repeat <count> rep, *
The left operand is a pattern of any length. The right operand is an integer count. The expansion is the <pattern> repeated <count> times.
Example Expansion
1234567 repeat 3 123456712345671234567
EXTEND
Operator usage Short form
<pattern> extend <count> ext, ->
The left operand is a pattern of any length. The right operand is an integer that is interpreted as a length. The left operand is reshaped to be
the length as specified by the right operand. If the left operand is shorter that the desired length, it is repeated out to the right length. If the
left operand is shorter, it is merely trimmed.
Example Expansion
123 -> 8 12312312
123456787654321 -> 10 1234567876
CONCAT
Operator usage Short form
<pattern> concat <pattern> ,
The left and right operands are both patterns of any length. The result is the left operand concatenated with the right operand. Note that
when a pattern is spelled out (e.g. 1234), the concat operation is implicit between each of its members (i.e. 1234 is equivalent to 1,2,3,4).
The concat operator is used only when needed — for example, to separate parenthetical operands.

752 | Corel Painter 2022 User Guide
Example Expansion
(1-4|),(4-1|) 1234321
1-8,(1-8 [] 2) 123456781122334455667788
INTERLEAVE
Operator usage Short form
<pattern> interleave <pattern> int, ~
The left and right operands are both patterns of any length. If either operand is shorter than the other, it is extended (via repeating) to
exactly the length of the other operand. Then, the operands are interleaved. Interleaving alternates the elements of the left operand with the
elements of the right (like lacing your fingers together). The expansion contains the first element of the left, the first element of the right, the
second element of the left, the second element of the right, and so on.
Example Expansion
123 interleave 76 172637
12345678 ~ 4321 1423324154637281
123456787654321 ~ 121221222 112231425261728272615241322211
UPTO
Operator usage Short form
<pattern> upto <pattern> <, —
The“-” may be used as an upto operator only when the last element of the left operand is strictly less than the first element of the right
operand.
The left and right operands are both patterns of any length.
The expansion is the left operand concatenated with the sequence between the last element of the left operand and the first element of the
right operand, concatenated with the rest of the right operand.
Upto wraps around on the domain. For example, 7 upto 2 expands to 7812.
The upto operator may be followed immediately (with no intervening characters) by any number of tick marks ( ‘ ). A tick mark indicates to
cycle through the domain before running up to the right operand. The number of tick marks sets the number of cycles.
Example Expansion
1-8 12345678
1-»5 123456781234567812345

Weaves | 753
Example Expansion
123-765 123456765
2<1 23456781
13 upto» 5812 13456781234567812345812
DOWNTO
Operator usage Short form
<pattern> extend <count> ext, ->
Operator usage: <pattern> downto <pattern> Short form: >, —
The “-” may be used as an downto operator only when the last element of the left operand is strictly greater than the first element of the
right operand.
The left and right operands are both patterns of any length.
The expansion is the left operand concatenated with the descending sequence between the last element of the left operand and the first
element of the right operand, concatenated with the rest of the right operand.
Downto wraps around on the domain. For example, 2 downto 7 expands to 2187.
The downto operator may be followed immediately (with no intervening characters) by any number of tick marks ( ‘ ). A tick mark indicates
to cycle through the domain before running down to the right operand. The number of tick marks sets the number of cycles.
Example Expansion
8-1 87654321
1-8-1 123456787654321
5-»1 543218765432187654321
567-321 567654321
2>1 21
13 downto» 5812 132187654321876543218765812
TEMPLATE
Operator usage Short form
<pattern> template <pattern> temp, :
The right and left operands are patterns of any length.

754 | Corel Painter 2022 User Guide
Template allows texturing (sub-articulation) of a master pattern (the left operand) with a texture pattern (the right operand).
The first element of the template is taken as the root. All other elements in the template sequence are considered with respect to their
difference from the root. For example, if 342 is the template pattern, the first element (3) is the root (r). The second element (4) is r+1, and
the third element (2) is r-1. The template is then r, r+1, r-1.
This template is then applied to each element in the left operand, with the element’s value replacing the root.
Remember that the values wrap around on the domain.
Example Expansion
1-8 temp 121 121232343454565676787818
1-8 : 12121 1212123232343434545456565676767878781818
12321 temp 878 878181212181878
12321 : 3 34543
PALINDROME
Operator usage Short form
<pattern> palindrome pal, |
This operator takes only one operand, the left operand. That operand can be a pattern of any length. The resultant expansion is the left
operand concatenated with itself backwards.
However, the center element is not repeated, and the last element of the result is dropped automatically. This is essential when the
palindromed sequence is repeated and helps to remove flaws from a weaving draft.
A palindrome word is the same, spelled backwards or forwards, like “madam.”
Example Expansion
1-8| 12345678765432
1223334444555| 122333444455555444433322
PERMUTE
Operator usage Short form
<pattern> permute <permutation> perm
The left operand is a pattern of any length. The right operand is a permutation vector.
The left operand is extended to a length that is an integer multiple of the right operand’s length.
Then the left operand is permuted in chunks of the right operand’s length. The organization of the permutation pattern is used to reorganize
the elements in each chunk of the pattern.

Weaves | 755
For example, a permutation of 312 puts “the third element first, the first element second and the second element third.”
Example Expansion
123456787654321 permute 312 312645778465132
1-8 perm 1324 13245768
PBOX
Operator usage Short form
<pattern> pbox <permutation> none
The left operand is a pattern of any length. The right operand is a permutation vector. Its length will be adjusted, if necessary, (by trimming
or repeating) to equal the length of the left operand.
Then, the organization of the permutation pattern is used to reorganize the elements of the pattern.
Pbox maintains the length of the left operand pattern.
Example Expansion
123456787654321 pbox 21436587 214365878563412
1-‘8 pbox 4-18-5 4321876543218765
UPDOWN
Operator usage Short form
<pattern> updown <pattern> <>
The left and right operands are both patterns of any length. If either operand is shorter than the other, it is extended (via repeating) to
exactly the length of the other operand.
Then, UPDOWN generates alternating ascending and descending runs. An odd number of runs is always generated. The expansion contains
the ascending run from the first element of the left operand to the first element of the right operand, followed by the descending run from
there to the second element of the first operand, etc. The operation is complete with the ascending run from the last element of the left
operand to the last element of the right operand.
The updown operator may be followed immediately (with no intervening characters) by any number of tick marks ( ‘ ). A tick mark indicates
to cycle through the domain before completing the up and down runs. The number of tick marks sets the number of cycles.
Example Expansion
1234 updown 5678 12345432345654345676545678
12 <>’ 567 123456781234543218765432345678123456543218765432123456781234567

756 | Corel Painter 2022 User Guide
DOWNUP
Operator usage Short form
<pattern> downup <pattern> ><
The left and right operands are both patterns of any length. If either operand is shorter than the other, it is extended (via repeating) to
exactly the length of the other operand.
Then, DOWNUP generates alternating descending and ascending runs. An odd number of runs is always generated. The expansion contains
the descending run from the first element of the left operand to the first element of the right operand, followed by the ascending run from
there to the second element of the first operand, etc. The operation is complete with the descending run from the last element of the left
operand to the last element of the right operand.
The downup operator may be followed immediately (with no intervening characters) by any number of tick marks ( ‘ ). A tick mark indicates
to cycle through the domain before completing the up and down runs. The number of tick marks sets the number of cycles.
Example Expansion
1234 downup 5678 18765678121876781232187812343218
12 ><‘ 567 18765432187656781234567812187654321876781234567818765432187
ROTATE
Operator usage Short form
<pattern> rotate <number> rot,
The left operand is a pattern of any length. The right operand is an integer (which may be negative) that is interpreted as a length. Rotate
takes the set of elements specified by <number> from the start of the pattern and moves them to the end. A negative number takes a set
of elements from the end of the pattern and moves them to the beginning.
Example Expansion
12345678 rotate 3 45678123
1-4-1 rotate -3 3211234
REVERSE
Operator usage Short form
<pattern> reverse rev, `
This operator takes only one operand, the left operand. That operand may be a pattern of any length. The resulting expansion is the left
operand written backwards.

Weaves | 757
Example Expansion
1-8 reverse 87654321
1223334444555` 5554444333221
Precedence Ordering
When several operators are used in an expression, they are evaluated in order of precedence. That is, some operations are performed before
others. The precedence levels for the pattern language are shown in the following:
• upto, downto, concat
• downup, updown
• repeat, extend, template, interleave,
• permute, pbox
• palindrome
When two operators have the same precedence, left to right ordering is followed.
Example Interpreted as
1-4-2 ((1 upto 4) downto 2)
1234[]4321| ((1234 block 4321) palindrome)
1-4 block 4-1 ((1 upto 4) block (4 upto1))
(1-4|),(4-1|)| ((((1 upto 4) palindrome) concat ((4 upto 1) palindrome))
palindrome)
• If precedence does the wrong thing, or if it is unclear, use parentheses to bring out the intended order of evaluation.

758 | Corel Painter 2022 User Guide
Shapes | 759
Shapes
Shapes are vector-based objects that you can draw, modify, and fill. They can be open shapes, such as lines and curves, or closed shapes,
such as circles and squares. You can create and edit shapes with the precision of a drawing program and integrate them with the Natural-
Media environment in Corel Painter.
For information about printing shapes, see “Printing shapes” on page 816.
An image created with shapes
This section contains the following topics:
Creating shapes
•“Getting started with shapes” (page 760)
•“Drawing shapes” (page 760)
•“Drawing lines and curves” (page 762)
•“Setting preferences for drawing shapes” (page 765)
Selecting and modifying shapes
•“Selecting a shape” (page 767)
•“Modifying shape outlines and fills” (page 767)
•“Adding, deleting, and moving anchor points” (page 769)
•“Adjusting curvature” (page 771)
•“Cutting and joining shape segments” (page 772)
Converting shapes
•“Converting shapes to image layers” (page 774)
•“Converting selections to shapes” (page 774)

760 | Corel Painter 2022 User Guide
Transforming shapes
•“Resizing, rotating, skewing, and flipping shapes” (page 775)
•“Duplicating shapes” (page 777)
•“Combining shapes” (page 777)
•“Blending shapes” (page 778)
•“Saving a shape outline as a selection” (page 780)
Sharing shapes
•“Exporting Adobe Illustrator shapes” (page 780)
Getting started with shapes
In Corel Painter, you work mainly with bitmaps, also known as raster images. Shapes, however, are vector objects. You can work with them
in Corel Painter in much the same way you work with vector objects in drawing programs like CorelDRAW® and Adobe Illustrator. For more
information, see “Exporting Adobe Illustrator shapes” on page 780. Vector graphics are made up of lines, curves, objects, and fills that are
all calculated mathematically.
Corel Painter draws shapes in an anti-aliased fashion. This anti-aliasing gives objects a smooth edge, as opposed to the jagged edges
apparent in some drawing programs. Some clipart objects actually look like photographic elements when they are imported into Corel
Painter and displayed with anti-aliasing.
Anti-aliased shapes are typically slower to appear on the screen in Corel Painter than are aliased objects in drawing programs, so you may
want to use your drawing program for most of your object creation. You can then import the vector artwork into Corel Painter, tweak it with
the drawing tools, and add some Natural-Media effects.
When you create a shape in Corel Painter, the shape appears on a special shape layer. To maintain all of the editing properties of a shape,
the shape must remain on the shape layer. However, you convert the shape to a pixel-based default image layer, so you can apply effects,
transformations, or use painting tools. For more information, see “Converting shapes to image layers” on page 774.
You can also convert shapes to selections and vice versa. The tools for adjusting shapes allow precise control over the outline path, so you
may want to use shapes to create some of your selection paths. For more information, see “Converting selections to shapes” on page 774.
When you save a file that contains a shape in the RIFF format, Corel Painter maintains shapes as vector objects on separate layers. In other
formats, shapes merge with the canvas. In the Photoshop (PSD) format, shapes are converted to bitmaps and are assigned to appropriate
layers.
Drawing shapes
You can draw shapes by using the Rectangular Shape or Oval Shape tools.
As you create shapes, Corel Painter gives them default attributes for stroke and fill. However, you can change the default settings for shapes.
For more information, see “Setting preferences for drawing shapes” on page 765.
Shapes | 761
Shapes created with the Rectangular Shape tool and Oval Shape tool
To draw a rectangle or square
1Choose the Rectangular Shape tool from the toolbox.
2On the property bar, enable the Stroke check box, click the Stroke Color flyout button, and choose an outline color.
3On the property bar, enable the Fill check box, click the Fill Color flyout button, and choose a fill color.
4Perform a task from the following table.
To draw Do the following
A rectangle Drag in the document window to draw the shape.
A square While dragging in the document window, hold down the Shift key.
The property bar and the Navigator panel display information about the shape. To display the Navigator panel, choose Window
Navigator.
You can toggle between the Shape Selection tool and any of the shape design and editing tools by holding down Command
(macOS) or Ctrl (Windows). Toggling makes it convenient to quickly select a wing handle or anchor point before editing it.
To draw an oval or circle
1Choose the Oval Shape tool from the toolbox.
2On the property bar, enable the Stroke check box, click the Stroke Color flyout button, and choose an outline color.
3On the property bar, enable the Fill check box, click the Fill Color flyout button, and choose a fill color.
4Perform a task from the following table.
To draw Do the following
An oval Drag in the document window to draw the shape.
A circle While dragging in the document window, hold down the Shift key.
762 | Corel Painter 2022 User Guide
The property bar and the Navigator panel display information about the shape. To display the Navigator panel, choose Window
Navigator.
You can toggle between the Shape Selection tool and any of the shape design and editing tools by holding down Command
(macOS) or Ctrl (Windows). Toggling makes it convenient to quickly select a wing handle or anchor point before editing it.
Drawing lines and curves
You can draw straight lines or smooth, flowing curves by drawing freehand. You can combine the lines and curves to create shapes. The lines
and curves that you draw are known as Bézier lines.
Shapes created with straight line segments
Shapes created with curved line segments
Working with Bézier lines
Bézier Lines can be straight or curved, and they consist of anchor points connected by line segments (or paths). When the path is a curve,
“wings” extend from the anchor points. The wings are represented by a straight line and are tangent to the curve. The wings have control
“handles” on them. By dragging the wing handle, you can change the curvature of the line segment.
Paths can be modified by using anchor points and wing handles.
Shapes can be open (with endpoints) or closed (without endpoints).
Shapes | 763
Open paths contain endpoints; closed paths do not.
Anchor points can be either smooth or corner points. A smooth point allows you to manipulate the segments on both sides of an anchor
point by dragging a handle. A corner point restricts the manipulation of the segments to the one side of the anchor point that has a handle.
You can also convert between smooth and corner points. For more information, see “To convert a smooth or corner point” on page 772.
An anchor point can be a smooth point (top) or a corner point (bottom).
You can easily adjust shapes after you create them. For more information, see “Adding, deleting, and moving anchor points” on page 769.
Clicking creates anchor points connected by straight line segments.
Dragging curves the segments between points.
To draw a line segment
1Choose the Pen tool in the toolbox.
2On the property bar, enable the Stroke check box, click the Stroke Color flyout button, and choose a color.
3Perform an action from the following table:
764 | Corel Painter 2022 User Guide
To Do the following
Draw a straight line segment Click where you want to start the line segment, and then click
where you want to end it. Corel Painter draws a straight line
between the two points.
Draw a curved line segment Draw a straight line segment, and then drag the first endpoint to
create a curve. The angle and length of the wing determine the
curvature of the path. The farther you drag, the longer the wing
and the deeper the curve.
4Repeat step 3 as often as necessary, combining straight and curved segments until you have the shape you want.
5Finish the shape by doing one of the following:
• Close the shape by clicking or dragging the first anchor point.
•Close the shape by clicking the Edit flyout button on the property bar, and choosing Close Shape .
•Hold down Command (macOS) or Ctrl (Windows) to temporarily access the Shape Selection tool , and click outside the shape to
deselect it.
You can constrain the placement of the points by snapping to the grid. For more information, see “Using the grid” on page 247.
Each click or drag adds to the path. If you unintentionally add to the path, press Delete (macOS) or Backspace (Windows) to
remove the last anchor point.
To add to an open shape path
1Click an endpoint with the Pen tool .
2Click or drag where you want to add an anchor point.
You can add to a path from an endpoint only. You cannot add to a closed path, or to the middle of an open path.
You can also select an endpoint by holding down Command (macOS) or Ctrl (Windows) and clicking the endpoint or dragging a
marquee over it.
To draw a freehand shape
1Choose the Quick Curve tool in the toolbox.
2On the property bar, click the Stroke Color flyout button, and choose a color.
3Click where you want to start the shape or line, and drag.
As you drag, a dotted line appears. When you stop dragging, the Quick Curve shape appears.
If you want to close the shape, finish at the same point where you began or right-click the shape and choose Close.
You can add to either endpoint of a Quick Curve shape by selecting the endpoint and dragging out from it. To select an endpoint,
hold down Command (macOS) or Ctrl (Windows), and click the endpoint or drag over it.

Shapes | 765
Draw freehand shapes with the Quick Curve tool.
Setting preferences for drawing shapes
You can set the default appearance for all new shapes that you draw by modifying the shape preferences. For example, you can set the color
for the shape outline and fill. You can also modify the appearance of Bezier handles and various elements such as outlines and wings, to
make it easier for drawing.
To set preferences for drawing shape outlines
1Choose a shape tool from the toolbox.
2On the property bar, perform an action from the following table:
To Do the following
Apply an outline to a shape Enable the Stroke check box.
Remove an outline from a shape Disable the Stroke check box.
Change the outline color Click the Stroke Color flyout button, and choose a color from the
color selector.
Adjust the outline opacity Click the Shape Attributes flyout button , and move the
Opacity slider in the Stroke area.
Adjust the outline width Move the Stroke Width slider.
Modify the appearance of endpoints of open shapes Click the Shape Attributes flyout button , and click one of the
following Endcap buttons: Projecting , Round , or Butt
.
Modify the appearance of corners where two line segments
connect Click the Shape Attributes flyout button , and click one of the
following Miter buttons: Miter , Round , or Bevel .
Set the miter limit to smooth out the sharpness of lines that join at
a sharp angle Click the Shape Attributes flyout button , and move the Miter
Limit slider.
766 | Corel Painter 2022 User Guide
You can also set preferences for drawing shape outlines in the Shape Attributes panel (Window Shape Attributes).
To set preferences for filling shapes
1Choose a shape tool from the toolbox.
2On the property bar, perform an action from the following table:
To Do the following
Apply a fill Enable the Fill check box.
Remove a fill Disable the Fill check box.
Change the fill color Click the Fill Color flyout button, and choose a color in the color
selector.
Fill overlapping areas of multiple shapes Click the Shape Attributes flyout button , and click the Fill
Overlaps button.
Leave overlapping areas unfilled Click the Shape Attributes flyout button , and click the Don’t
Fill Overlaps button. Multiple overlaps alternate between
filled and not filled.
Adjust the fill opacity Click the Shape Attributes flyout button , and move the
Opacity slider in the Fill area.
You can also set preferences for filling shapes in the Shape Attributes panel (Window Shape Attributes).
You can also adjust shape flatness by adjusting the Flatness slider.
To set preferences for shape tools
1Do one of the following:
•(macOS) Choose Corel Painter 2022 menu Preferences Shapes.
•(Windows) Choose Edit Preferences Shapes.
2Perform a task from the following table.
To Do the following
Control the size of the anchor points and the direction of the wing
handles
In the Drawing Options area, enable the Big Handles check box.
This can make them easier to grab and drag. If you want big
points, enable this option.
Shapes | 767
To Do the following
Set the color of the wings, Bezier, and handles In the Colors area, click Wing/Bezier Handle, and choose a color.
Set the color of the selected anchor points In the Colors area, click Selected Point/Anchor, and choose a
color. The unselected anchor points appear “hollow.”
Selecting a shape
You need to select a shape before moving or modifying it. When a shape is selected, you can see the shape’s outline path and anchor points.
You can also select a shape layer to modify it. For more information, see “Selecting layers” on page 548.
To select shapes
To Do the following
Select a shape Choose the Shape Selection tool from the toolbox, and click
a shape.
Select multiple shapes Hold down Shift, and click the shapes with the Shape Selection
tool .
If you are using the Layer Adjuster tool, you can switch to the Shape Selection tool by double-clicking a shape.
Modifying shape outlines and fills
You can choose the color, opacity, and width of the path outlining the shape, which is also known as a stroke. You can also control the way
line ends are drawn and joined. In addition, you can apply a fill to a shape by choosing the color and opacity of the fill.
Stroke and fill attributes apply to both open and closed shapes. Before filling an open shape, Corel Painter closes the shape by connecting
the endpoints with a straight line.
The Flatness slider controls how many straight lines the program uses to approximate a curve when printing. PostScript output devices
create curved lines by linking a series of short, straight lines that progress in angle. The smaller the flatness setting, the greater the number
of straight lines, and the more accurate the curve.
You can also change the default shape attributes. For more information, see “Setting preferences for drawing shapes” on page 765. In
addition, you can paint a shape after the shape has been committed to a pixel-based image layer. For information, see “Converting shapes to
image layers” on page 774.
To modify a shape’s outline attributes
1Choose the Shape Selection tool from the toolbox, and click a shape.
You can select multiple shapes by holding down Shift while clicking the shapes.
2On the property bar, perform an action from the following table:
768 | Corel Painter 2022 User Guide
To Do the following
Apply an outline to a shape Enable the Stroke check box.
Remove an outline from a shape Disable the Stroke check box.
Change the outline color Click the Stroke Color flyout button, and choose a color in the
color selector.
Adjust the outline opacity Click the Shape Attributes flyout button , and move the
Opacity slider in the Stroke area.
Adjust the outline width Move the Stroke Width slider.
Modify the appearance of endpoints of open shapes Click the Shape Attributes flyout button , and click one of the
following Endcap buttons: Projecting , Round , or Butt
.
Modify the appearance of corners where two line segments
connect On the property bar, click the Shape Attributes flyout button ,
and click one of the following Miter buttons: Miter , Round
, or Bevel .
Set the miter limit to smooth out the sharpness of lines that join at
a sharp angle On the property bar, click the Shape Attributes flyout button ,
and move the Miter Limit slider.
You can also set shape outline attributes in the Shape Attributes panel (Window Shape Attributes).
To set shape fill attributes
1Choose the Shape Selection tool from the toolbox, and click a shape.
You can select multiple shapes by holding down Shift while clicking the shapes.
2On the property bar, perform an action from the following table:
To Do the following
Apply a fill Enable the Fill check box.
Remove a fill Disable the Fill check box.
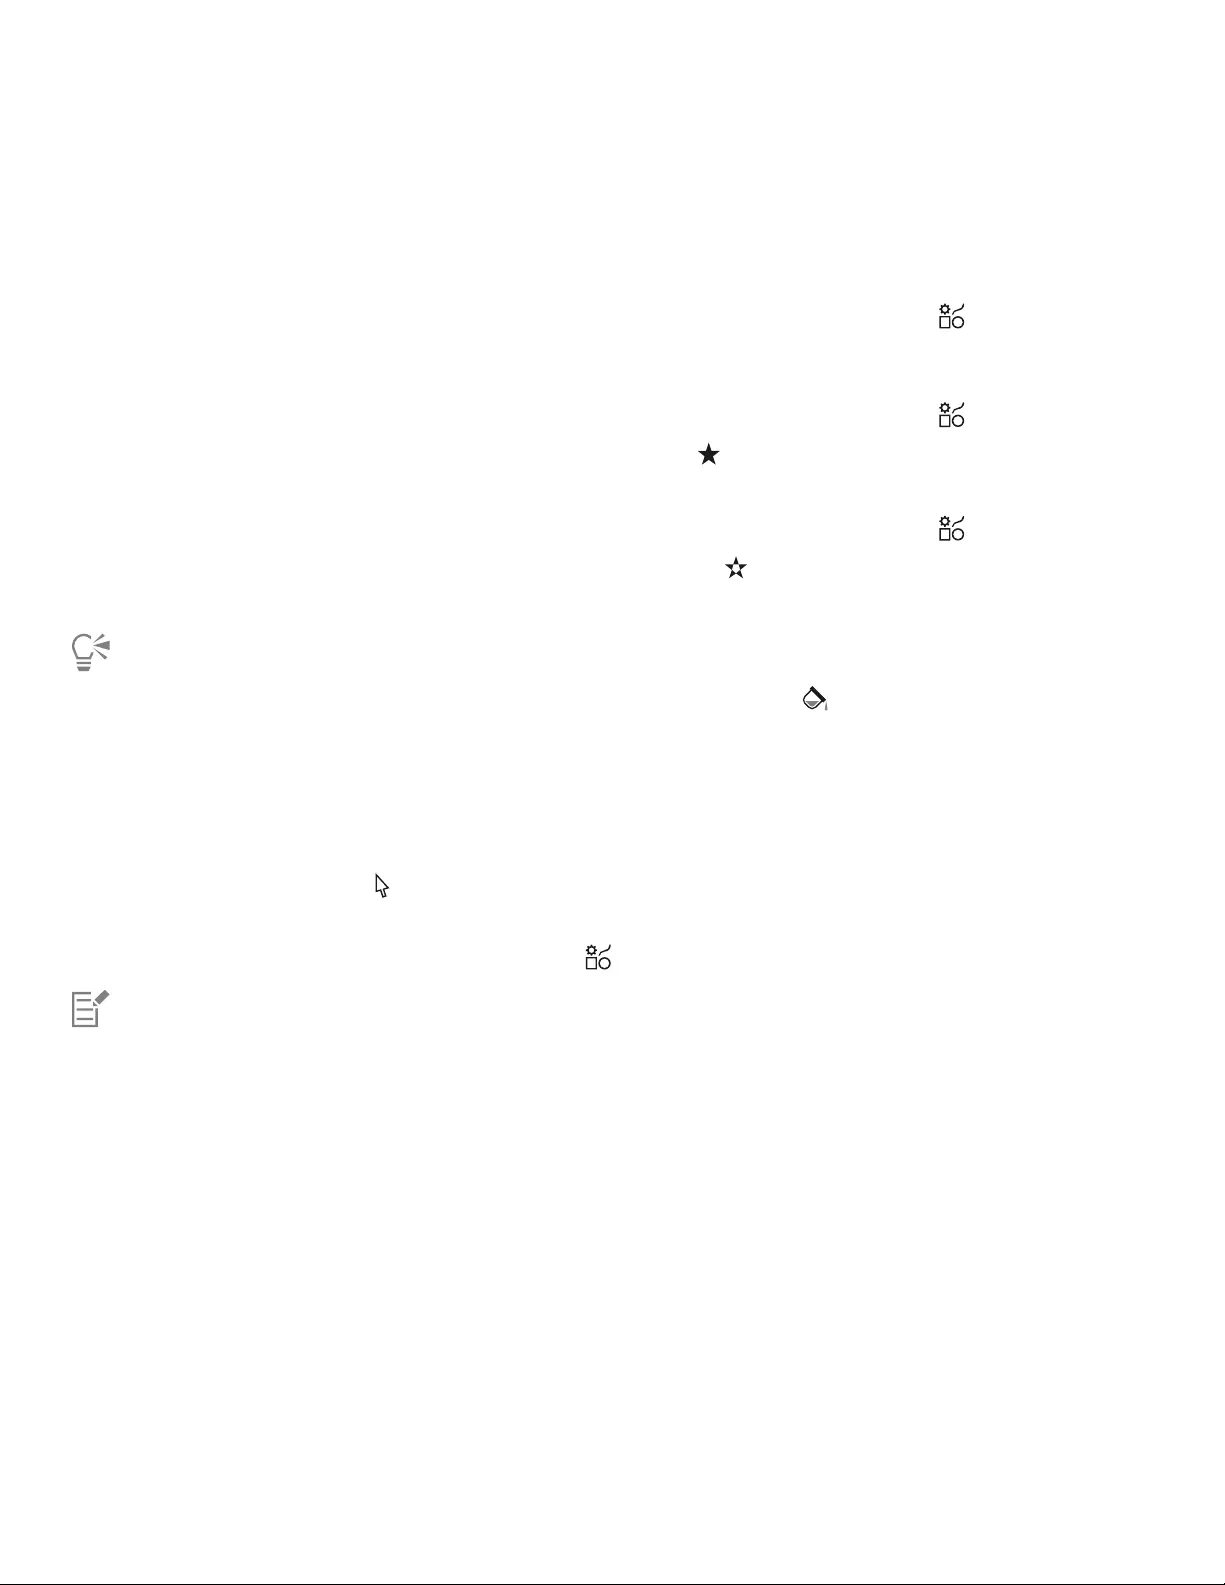
Shapes | 769
To Do the following
Change the fill color Click the Fill Color flyout button, and choose a color in the color
selector.
Adjust the fill opacity Click the Shape Attributes flyout button , and move the
Opacity slider in the Fill area.
Fill overlapping areas of multiple shapes Click the Shape Attributes flyout button , and click the Fill
Overlaps button.
Leave overlapping areas unfilled Click the Shape Attributes flyout button , and click the Don’t
Fill Overlaps button. Multiple overlaps alternate between
filled and not filled.
You can also fill a shape by choosing Edit Fill command or the Paint Bucket tool . Because these methods apply pixel data
to the region, Corel Painter first converts the shape to a pixel-based layer. For more information, see “Applying a color as a fill” on
page 275. After you commit the shape, you cannot re-access the shape-specific controls.
You can also set shape fill attributes in the Shape Attributes panel (Window Shape Attributes).
To set shape flatness
1Choose the Shape Selection tool from the toolbox, and click a shape.
You can select multiple shapes by holding down Shift while clicking the shapes.
2On the property bar, click the Shape Attributes flyout button , and adjust the Flatness slider.
Usually, it is not necessary to change the flatness setting. You may want to change it to adjust for a particular high resolution
printer or to avoid a PostScript limitcheck error. Check with your output service to find out if they have a recommended flatness
setting.
A change in flatness appears only in your output, not on your screen.
Adding, deleting, and moving anchor points
You can add anchor points to create new vertices or curves. You can also delete anchor points to change the shape of the path or to smooth
a contour that has unnecessary points. This might occur when you draw with the Quick Curve tool or create a shape from a selection.
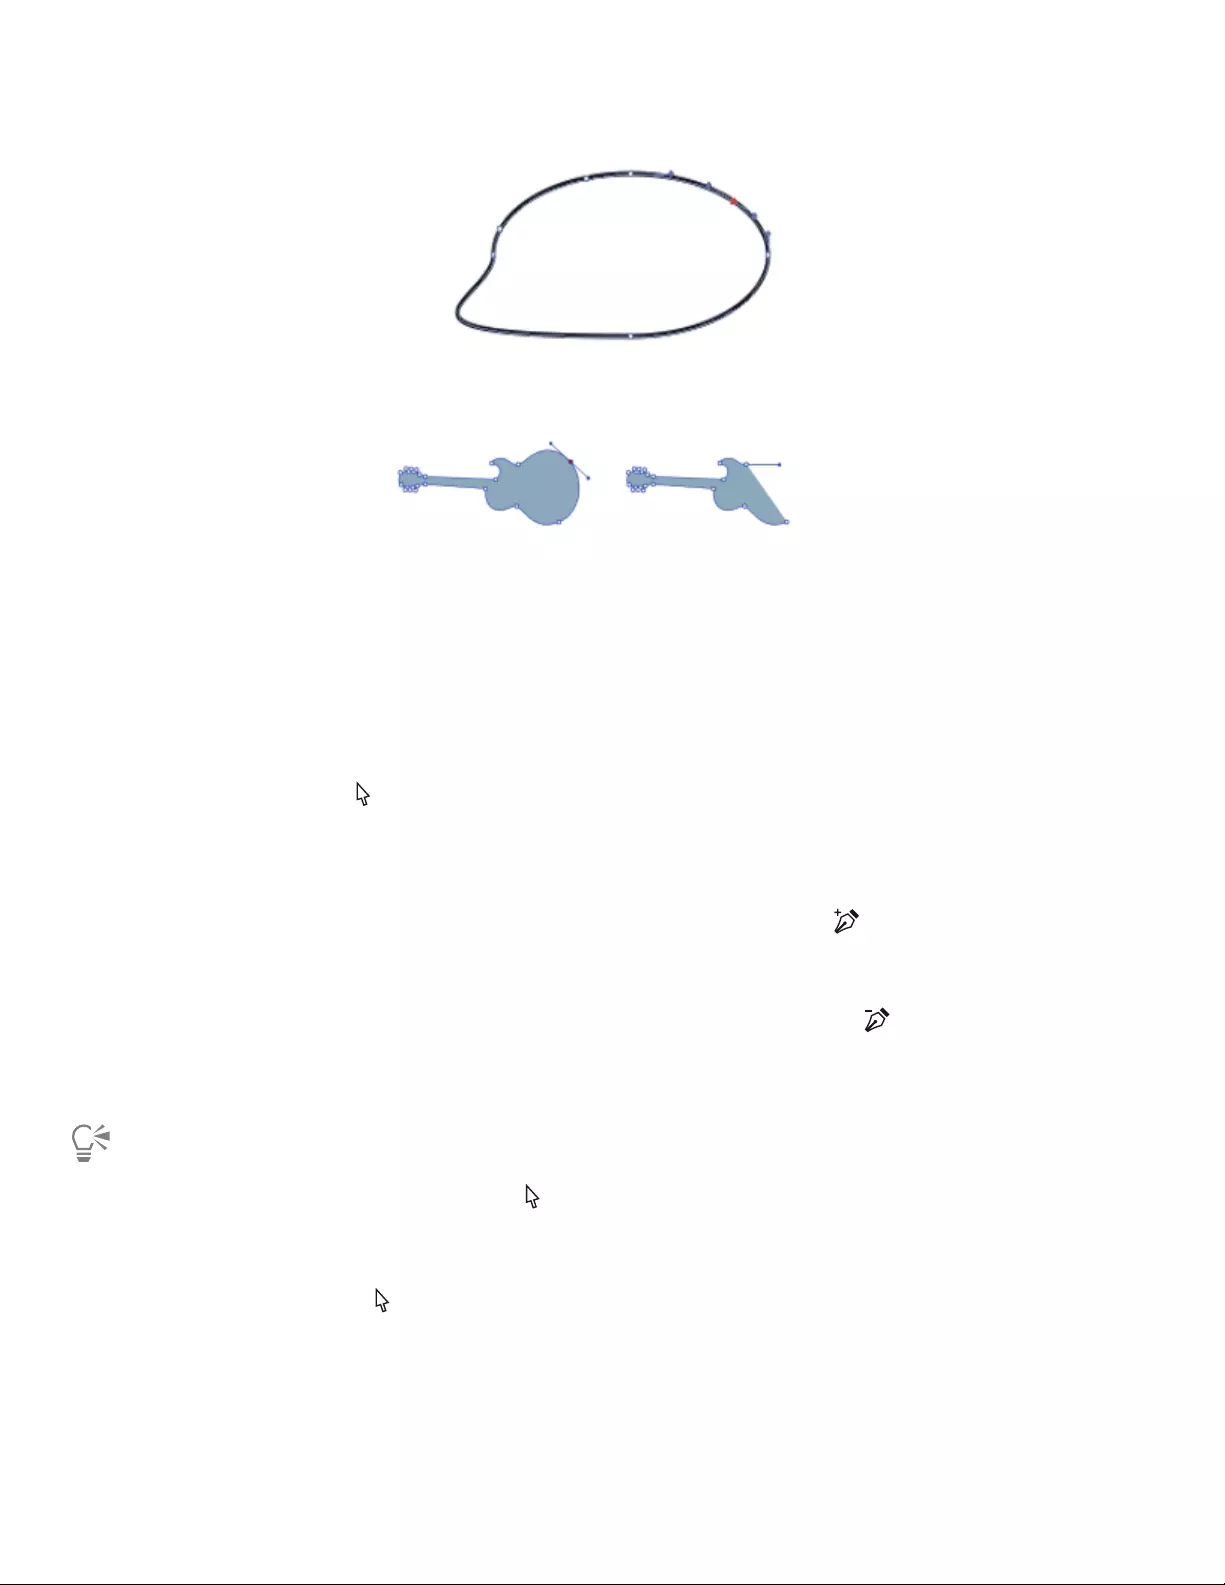
770 | Corel Painter 2022 User Guide
Use the Add Point tool to add anchor points to the path.
Use the Remove Point tool to delete anchor points.
You can also move one or several points by averaging, which moves two or more anchor points with respect to each other. Averaging is
useful when you need to join the endpoint of one curve to the endpoint of another. Averaging the endpoints in both directions brings them
precisely on top of each other. Now, when you join the endpoints, Corel Painter merges them to a single point, through which the path
continues. If you don’t average points that are near each other, Corel Painter joins them with a segment.
To add or delete an anchor point
•With the Shape Selection tool , select a shape.
To Do the following
Add an anchor point Choose the Add Point tool on the property bar, and click
where you want to add the point.
Delete an anchor point Choose the Remove Point tool on the property bar, and click
the anchor point you want to delete.
The anchor point is deleted, but the path remains connected.
You can quickly switch to Shape Selection tool by holding down Command (macOS) or Ctrl (Windows).
To move anchor points
1Choose the Shape Selection tool from the toolbox.
2Click an anchor point to select it, or marquee select a point by dragging over it.
If you want to select several points, marquee select them by dragging over them. All anchor points within the marquee are selected,
including those from other shapes.
If you want to add to the selection, hold down Shift and select more points.
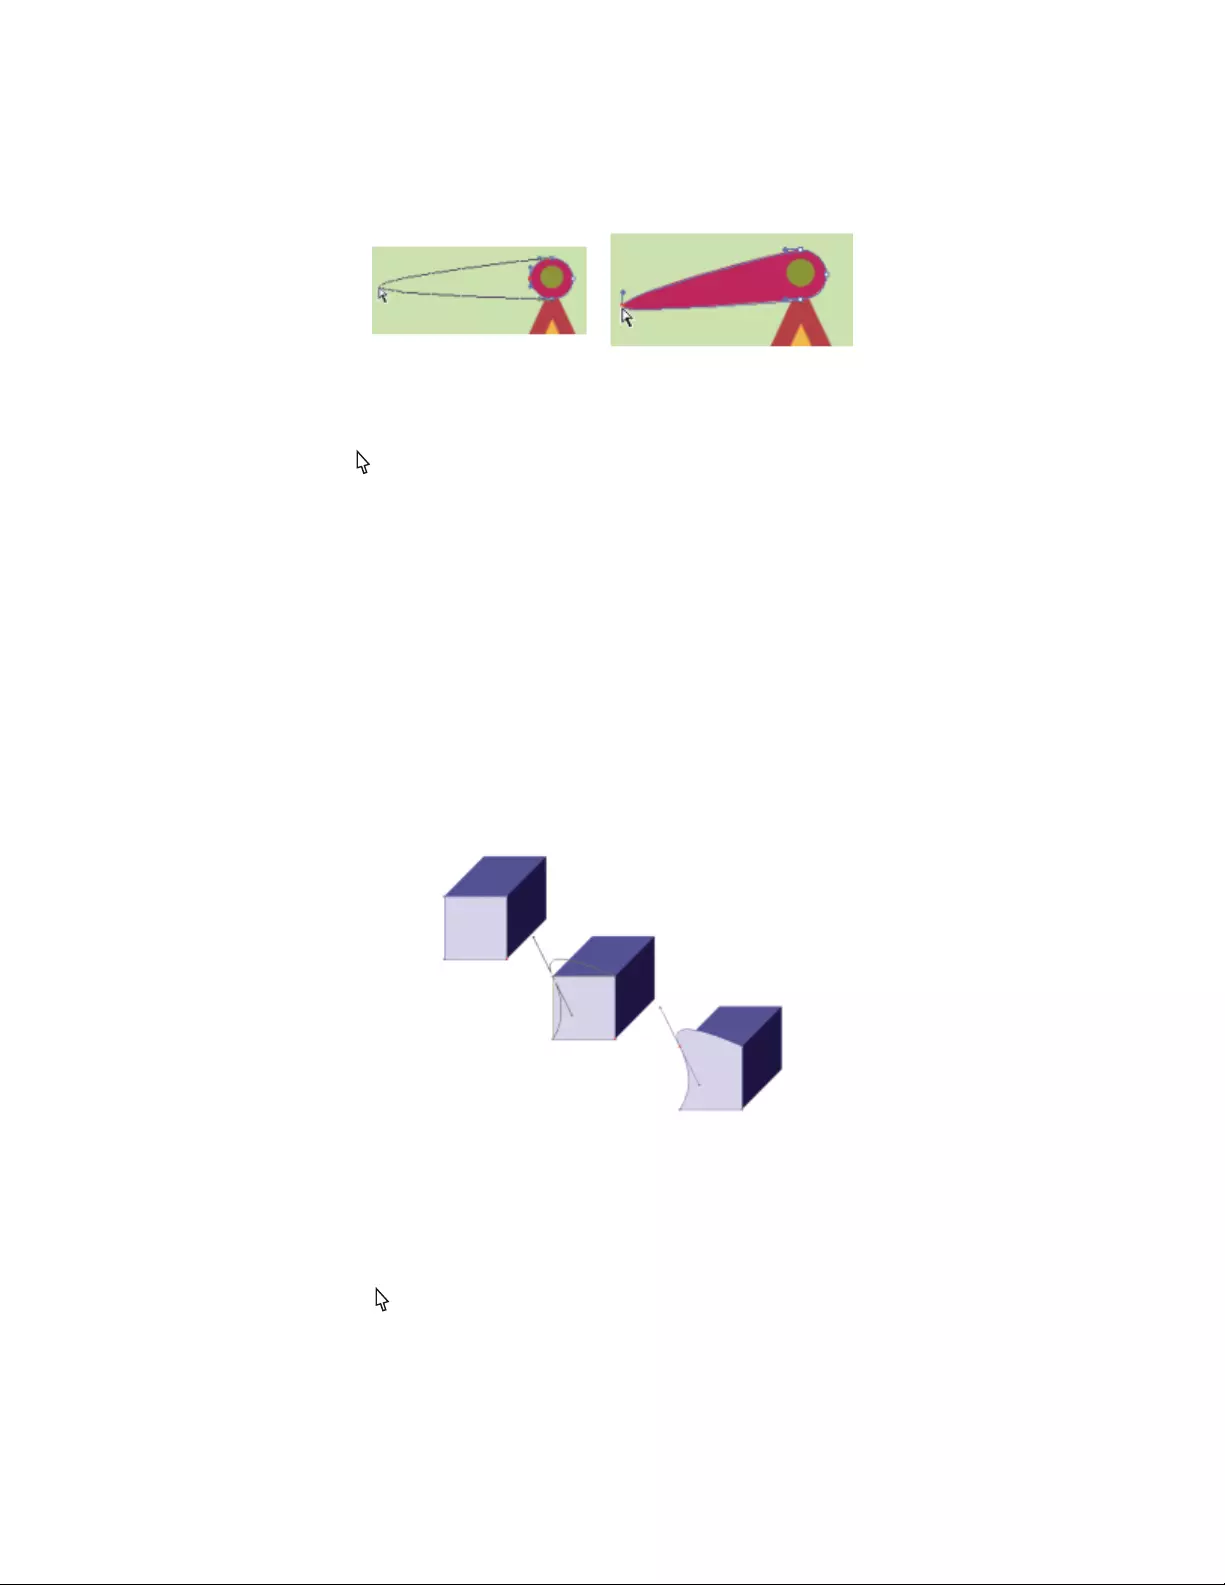
Shapes | 771
3Drag the point to a new location.
If you have selected several points, dragging one moves them all.
Drag an anchor point to move it.
To average anchor points
1With the Shape Selection tool , select the anchor points you want to average.
It is often easiest to drag a marquee around the points you want.
2Choose Shapes Average Points.
3In the Average Points dialog box, enable an option to determine the axis for the averaging.
Adjusting curvature
The angle and length of the wing determine the curvature of the segments on either side of the anchor point. The longer the wing, the
deeper the curve.
The result of moving a wing depends on whether the anchor point is defined as a smooth point or a corner point. Two connecting curves (or
straight lines) share one anchor point, which can be a smooth or corner point. The wings on smooth and corner points behave differently.
When you drag the handle on one wing of a smooth point, the curves on both sides of the point change. With a smooth point, you adjust
the angle of the wings concurrently.
A corner point is converted to a smooth point.
When you drag the handle on one wing of a corner point, only the curve on that side of the point changes. With a corner point, you can
adjust the angle of the wings independently.
To adjust a curve
1Choose the Shape Selection tool from the toolbox.
2Click a shape to select it.
If an anchor point’s wings are not displayed, drag over the anchor point to display them.
3Drag a wing handle to set the curve you want.

772 | Corel Painter 2022 User Guide
You can also adjust a curve by dragging a line segment with the Shape Selection tool .
Use the Shape Selection tool to drag a wing handle.
To convert a smooth or corner point
1With the Shape Selection tool , select an anchor point.
If the anchor point’s wings are not displayed, drag over the anchor point to display them.
2Choose the Convert Point tool on the property bar.
3Click one of the anchor point’s wing handles.
After converting a point, you must use the Shape Selection tool for further adjustments. If you try to adjust an anchor point
with the Convert Point tool , the anchor point will be converted again.
Cutting and joining shape segments
You may want to open a shape so that you can add new curves or connect to another open shape. You can do this with the Scissors tool.
You can also connect any two endpoints — of the same shape or of different shapes. This lets you close an open shape or attach one shape
to another.
To cut a shape
1Choose the Scissors tool from the toolbox.
2Click where you want to split the shape (you cannot click an endpoint).
The hot spot of the Scissors tool is where the blades cross. Position the cross on the line.
The scissors snap closed momentarily, and two new anchor points are created.
Shapes | 773
The Scissors tool opens and closes to cut the path.
3Choose the Shape Selection tool on the property bar, and drag the new anchor points or segments.
The new anchor points are on top of each other, and both are selected. If you try to drag one of the new anchor points with the Shape
Selection tool and both move, deselect them, then drag one point away.
After a path is cut, it can be moved.
To join endpoints
1Choose the Shape Selection tool from the toolbox.
2Select the two anchor points you want to join.
You can do this either by marquee selecting both points, or by clicking the first point and then holding down Shift and clicking the
second point.
3On the property bar, click the Edit flyout button , and choose Join Endpoints .
A straight line is created between the two points.
Use the Shape Selection tool to select two endpoints.
774 | Corel Painter 2022 User Guide
Use the Join Endpoints command to connect two endpoints.
Converting shapes to image layers
In Corel Painter, the shapes that you create are added to shape layers. If you want to alter a shape by painting, applying effects, or
transforming, you must convert the shape to a pixel-based image layer. You can convert an individual shape or a group of shapes to an
image layer.
Shape layers vs. image layers
Some of the options and controls for working with pixel-based image layers also apply to shapes. For example, you can move shapes in
the same way you move image layers, and you can change the composite method to control how the shape interacts with the underlying
image. Shapes also follow the same layering rules as pixel-based image layers, and you can manipulate them in many of the same ways.
However, shapes differ from pixel-based image layers by the type of data they contain. Shapes are vector objects; pixel-based image layers
are constructed of pixels. If you want to apply brushstrokes, transformations (using the Transform tool), or effects to a shape, you must
convert the shape to a pixel-based layer. Moreover, if you attempt to perform any of these actions with a shape selected, Corel Painter
automatically displays a warning message to instruct you to commit the shape to an image layer. After you commit the shape to an image
layer, you cannot re-access the shape-specific controls.
For more information, see “Layers” on page 539.
To convert a shape to a pixel-based layer for painting
• Right-click (Windows) or Control-click (macOS) a shape in the Layers panel, and choose Convert To Default Layer.
If you want to confine the painting to only the shape, enable the Preserve Transparency button in the Layers panel.
You cannot paint on a shape using Watercolor brushes or Liquid Ink brushes because they automatically create their own special
layers.
In some cases, Corel Painter will prompt you to convert a shape. For example, if you attempt to apply an effect to a shape, Corel
Painter asks if you want to commit the shape to an image layer.
You can also convert a shape to a pixel-based layer by clicking the shape in the Layers panel, clicking the Layer options button
, and choosing Convert To Default Layer.
You can also convert a shape to an image layer by choosing Shapes Convert To Layer.
Converting selections to shapes
You can convert a selection to a shape to edit its contour. When you are satisfied with the contour, you can convert the shape outline back
to a selection. For more information, see “To convert a shape to a selection” on page 603.
Shapes | 775
If you are scaling, rotating, or skewing a selection path, use the Selection Adjuster tool. If you must edit the profile of the curve, convert the
selection to a shape.
Working from a selection path also lets you create shapes based on regions of the image. For example, if you used the Magic Wand tool
to select a region of common color, you could convert the Magic Wand selection path to a shape. When the selection is pixel-based, Corel
Painter may create multiple shapes.
You can convert a selection to a shape.
To convert a selection to a shape
1Choose a selection tool from the toolbox and create a selection in the image.
2On the property bar, click the Convert To Shape button .
Corel Painter converts the selection to a shape, giving it the default shape attributes. The new shape appears in the Layers panel.
For best results, the selection should be path-based. If the selection is pixel-based, from the menu bar choose Select Transform
Selection to convert it to a path-based selection.
Resizing, rotating, skewing, and flipping shapes
Corel Painter lets you resize, rotate, flip, or skew an individual shape, or a group of shapes. Before you can work with a shape, you must
select it.
Resizing a shape
Rotating a group of shapes
776 | Corel Painter 2022 User Guide
A rectangle (upper left) is skewed by dragging a side middle handle
(upper right) and by dragging the top middle handle (bottom).
To resize a shape
1Choose the Layer Adjuster tool from the toolbox.
2Select the shape or group you want to resize.
A selection rectangle appears around the shapes. The rectangle has a handle on each corner and side.
3Drag one of the handles to resize the selected shape.
To resize in one dimension, drag one of the side handles. To resize in both dimensions, drag one of the corner handles.
You can maintain the proportions by holding down Shift as you drag.
To rotate a shape
1Choose the Layer Adjuster tool from the toolbox.
2Select the shape or group you want to rotate.
A selection rectangle appears around the shapes. The rectangle has a handle on each corner and side.
3Hold down Command (macOS) or Ctrl (Windows) and drag a corner handle.
This command works for both shapes and pixel-based layers.
To skew a shape
1Choose the Layer Adjuster tool from the toolbox.
2Select the shape or group you want to skew.
3Hold down Command (macOS) or Ctrl (Windows), and drag a middle handle.
To flip a shape
1Choose the Shape Selection tool from the toolbox, and click a shape.
2On the property bar, click the Edit flyout button , and choose one of the following options:
•Flip Horizontally
•Flip Vertically
You can also flip a shape by first selecting it with the Layer Adjuster tool . Then, to flip horizontally, drag a top or bottom
handle past the opposite handle. To flip vertically, drag a side handle past the opposite handle.
Shapes | 777
Duplicating shapes
Duplicating creates an identical copy of the selected shape. Corel Painter also lets you duplicate shapes by using compound transformations.
Transformed duplicates are created according to the options you set.
To duplicate a shape
1Choose the Shape Selection tool from the toolbox, and click a shape.
2Choose Shapes Duplicate.
To change duplication settings
1Choose Shapes Set Duplicate Transform.
2In the Set Duplicate Transform dialog box, specify any of the following settings:
•Translation — controls where Corel Painter creates duplicate shapes in relation to the original. The offset values are in pixels. When
H. Offset and V. Offset are both zero, the duplicate is created precisely on top of the original. If both values are 100, the duplicate
appears 100 pixels lower and 100 pixels to the right. Negative values offset the duplicate up and to the left, respectively.
•Scaling — controls the size of duplicates in relation to the original. The scale values are percentages.
•Constrain Aspect Ratio — maintains the aspect ratio of the shape. If you want to create distorted duplicates, disable this option and
specify different percentages for horizontal and vertical scaling.
•Rotation — lets you specify a number of degrees to rotate duplicates. Positive values rotate counterclockwise, and negative values
rotate clockwise.
•Slant — controls the degree of slant applied to duplicates. Positive values slant duplicates to the right. Negative values slant them to
the left. Slant accepts values between –90° and 90°. However, as values approach the extremes, the duplicate shape becomes a streak.
To create a transformed duplicate
1Select the shape you want to transform.
2Choose Shapes Duplicate.
Corel Painter creates a duplicate shape according to the specifications you’ve set.
This duplicate is now the selected shape. You can choose the Duplicate command again, or press Command + ] (macOS) or Ctrl + ]
(Windows), to repeat the transformation on the new shape.
The oval shape was duplicated by using rotation only (left). The number
5 shape was duplicated by using translation, scaling, and rotation (right).
Combining shapes
You can combine shapes in various ways to achieve particular results. You can compound two or more shapes to create a single shape.
The resulting shape takes on the attributes of the shape on the topmost layer. If the shape is filled, any overlapping areas are not filled.
Compound shapes can be used to cut a void in one shape using another shape. You can release a compound shape, which reverts it to the
original shapes.
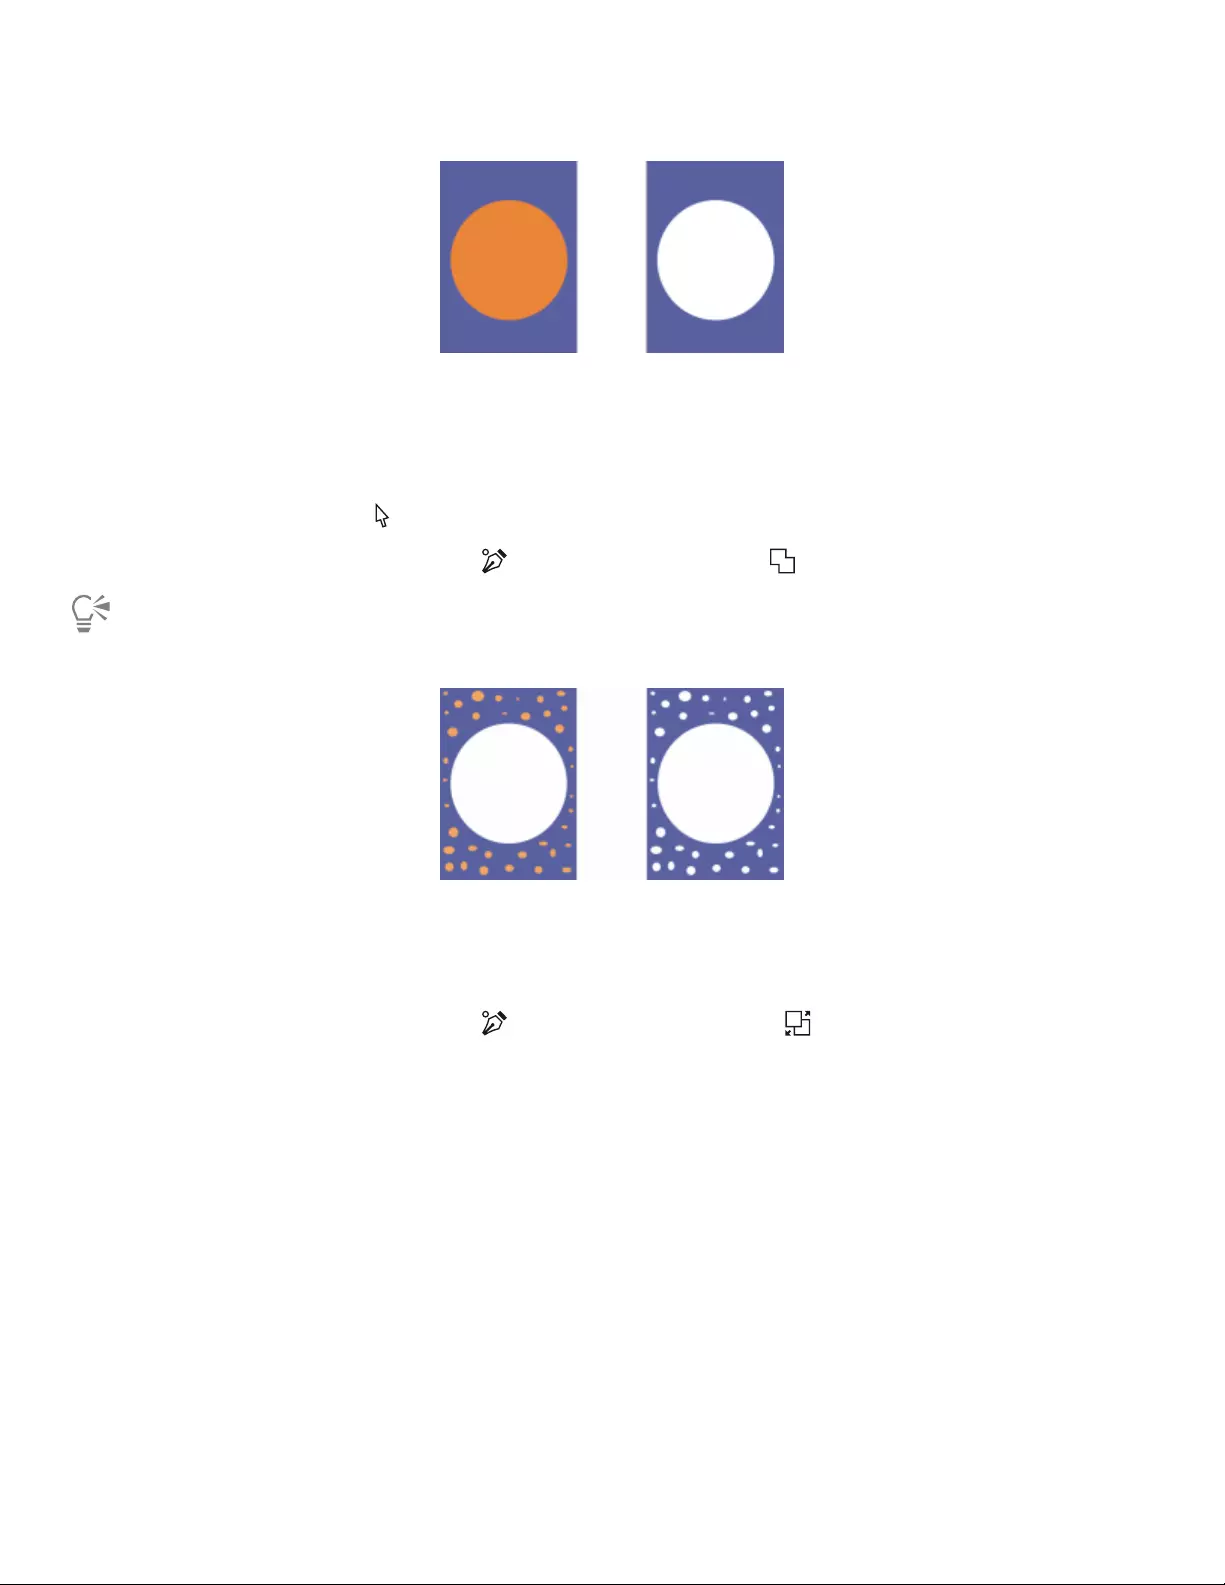
778 | Corel Painter 2022 User Guide
The rectangle and the oval are combined to create a compound shape.
You can also compound shapes to create a shape group, which allows you to manipulate multiple shapes as a single unit.
To create a compound shape
1Choose the Shape Selection tool , hold down Shift and select both shapes, or drag over the shapes to marquee select them.
2On the property bar, click the Edit flyout button , and choose Make Compound .
You can combine a shape with a compound shape to create a nested compound shape.
The resulting compound shape can itself be used again to create another compound shape.
To release a compound shape
1Select a compound shape.
2On the property bar, click the Edit flyout button , and choose Release Compound .
Blending shapes
You can blend single shapes, or groups of shapes, so that they appear to be one shape morphing into another. Blending creates
intermediate shapes between two or more selected shapes. It is also used to simulate shading on irregular shapes. Blending applies to stroke
and fill attributes as well as to the shape size.
You can blend a shape group with another group, but you can’t blend a single shape with a group.
Blending groups with other groups offers interesting effects, especially if the groups are blends themselves.

Shapes | 779
The small circle is blended with the large circle to create a shading effect.
To blend shapes
1Position the shapes you want to blend.
You can arrange the shape layers in the Layers panel. Blends will progress from lower to higher layers.
2Choose the Shape Selection tool from the toolbox.
3Hold down Shift, and select the shapes you want to blend.
4Choose Shapes Blend.
5In the Blend dialog box, type a value in the Number of Steps box to control how many intermediate shapes are created.
6In the Spacing area, enable one of the following options:
•Equal — blends shapes with equal spacing
•Decrease toward end — starts blending with wide spacing and decreases toward the end of the blend
•Increase toward end — starts blending with small spacing and increases toward the end of the blend
•Increase toward/from middle — widens spacing in the middle and decreases toward both ends
7In the Color area, choose one of the following options:
•RGB — progresses color directly over the course of the blend
•Hue CW — progresses color clockwise in the color wheel to reach the destination color
•Hue CCW — progresses color counterclockwise in the color wheel to reach the destination color
8Type a value between 0.01 and 100 in the Perspective Factor box to control the spacing of intermediate shapes.
With a Perspective Factor of 1.0, the shapes are spaced evenly. With a Perspective Factor of less than 1.0, shapes are closer at the
beginning of the blend and farther apart at the end of the blend. With a Perspective Factor greater than 1.0, shapes are farther apart at
the beginning of the blend and closer at the end of the blend.
9Enable any of the following check boxes:
•Arc Length Matching — blends shapes containing a different number of anchor points
•Align Shape Start Points — bases the orientation of intermediate shapes on the orientation of the start and end shapes. When
disabled, Corel Painter bases the orientation of intermediate shapes on the starting point (first anchor point) of the start and end
shapes. This can create a “tumbling” appearance in the intermediate shapes.
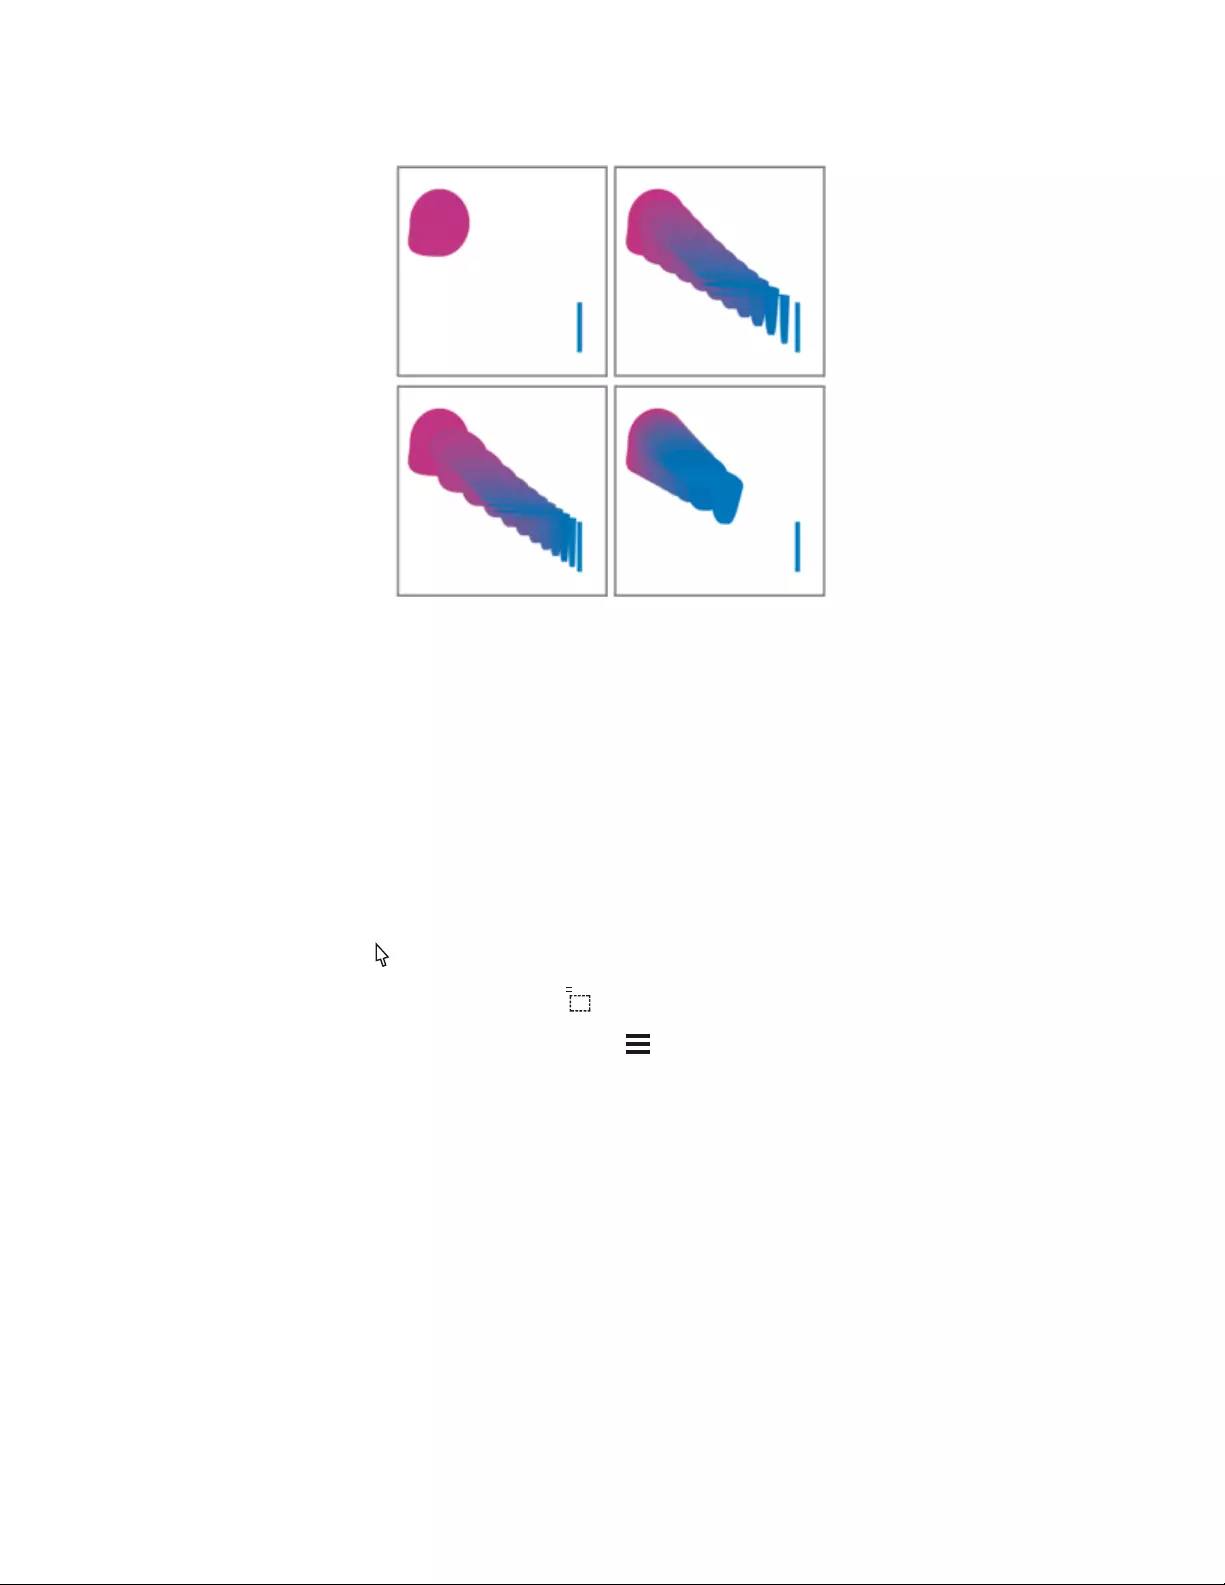
780 | Corel Painter 2022 User Guide
Clockwise from the top left picture: Two shapes with no blending; blending with a perspective factor
of 1.0; blending with a perspective factor of 4.0; and blending with a perspective factor of 0.1.
Saving a shape outline as a selection
You can save the outline of a shape as a selection. Corel Painter doesn’t have a shapes library. However, because of the close relationship
between shape outlines and selection paths, you can save shape outlines as selections in the Selection Portfolio. Then, you can easily convert
the saved selection to a shape. For more information, see “Working with the Selection Portfolio” on page 610. For information about
converting selections to shapes, see “To convert a selection to a shape” on page 775.
To save a shape outline as a selection
1Choose Window Media Panels Selections.
2Choose the Shape Selection tool from the toolbox, and click a shape.
3On the property bar, click the Convert To Selection button .
4In the Selection Portfolio panel, click the Selection options button , and choose Add Selection to Portfolio.
5In the Save Selection dialog box, type a name in the Save As box.
Exporting Adobe Illustrator shapes
Corel Painter lets you export shape data to the Adobe Illustrator (AI) format. Exporting to the AI format saves only the shapes, not the canvas
or any other layers in the document. Transparency and compositing methods are lost when shape data is exported to the AI format.
If both Corel Painter and Adobe Illustrator are running on your computer, you can copy content from Adobe Illustrator and paste it in Corel
Painter.
To export shapes to Adobe Illustrator
1Choose File Export Adobe Illustrator File.
2In the Export as Illustrator File dialog box, specify a location and filename, and click Save.

Adding text | 781
Adding text
Corel Painter lets you position and manipulate editable text on your image.
This section contains the following topics:
•“Adding text to images” (page 781)
•“Aligning text” (page 782)
•“Adjusting text kerning and leading” (page 783)
•“Stretching, rotating, and skewing text” (page 783)
•“Adding drop shadows to text” (page 784)
•“Applying effects to text” (page 784)
•“Applying curves to text” (page 785)
•“Converting text layers” (page 787)
•“Dropping text” (page 787)
Adding text to images
You can add text to an image by using the Text tool . The text that you add is then stored in a text layer, which is automatically created
for you as soon as you place the text cursor on the canvas. Each text layer holds a single text block. The text layer is visible in the Layers
panel, and is represented by a T icon .
The text layer lets you work with your image without changing any text attributes. However, you can select the text layer and edit it at any
time. The text remains fully editable until you drop it onto the canvas. For more information, see “Dropping text” on page 787.
To add text to an image
1Choose the Text tool from the toolbox.
2Click anywhere in the document window, and type.
782 | Corel Painter 2022 User Guide
You can also format text by choosing options from the property bar.
You can also format text by clicking the Show or hide the Text panel button on the property bar, and choosing options from
the Text panel.
Formatting text
You can format text by changing the font, point size, and color. You can also perform these tasks from the property bar or from the Text
panel (Window Text), where you’ll find additional text controls. The changes that you make are applied to all of the text in the text layer.
To change the font, point size, and color of text
1Choose the Text tool from the toolbox.
2In the Layers panel, select a text layer.
To Do the following
Choose a font On the property bar, choose a font from the Font list box.
Choose a point size On the property bar, choose or type a point size in the Point Size
box .
Choose a color On the property bar, click the Color picker, and choose a color.
You can also format text by clicking the Show or hide the Text panel button on the property bar, and choosing options from
the Text panel.
Aligning text
You can align a text block to the left, right, or center. The text baseline origin is used as the reference point for the text alignment.
To align text
1Choose the Text tool from the toolbox.
2In the Layers panel, select a text layer.
3On the property bar, enable one of the following buttons:
•Align Left
•Align Center
•Align Right
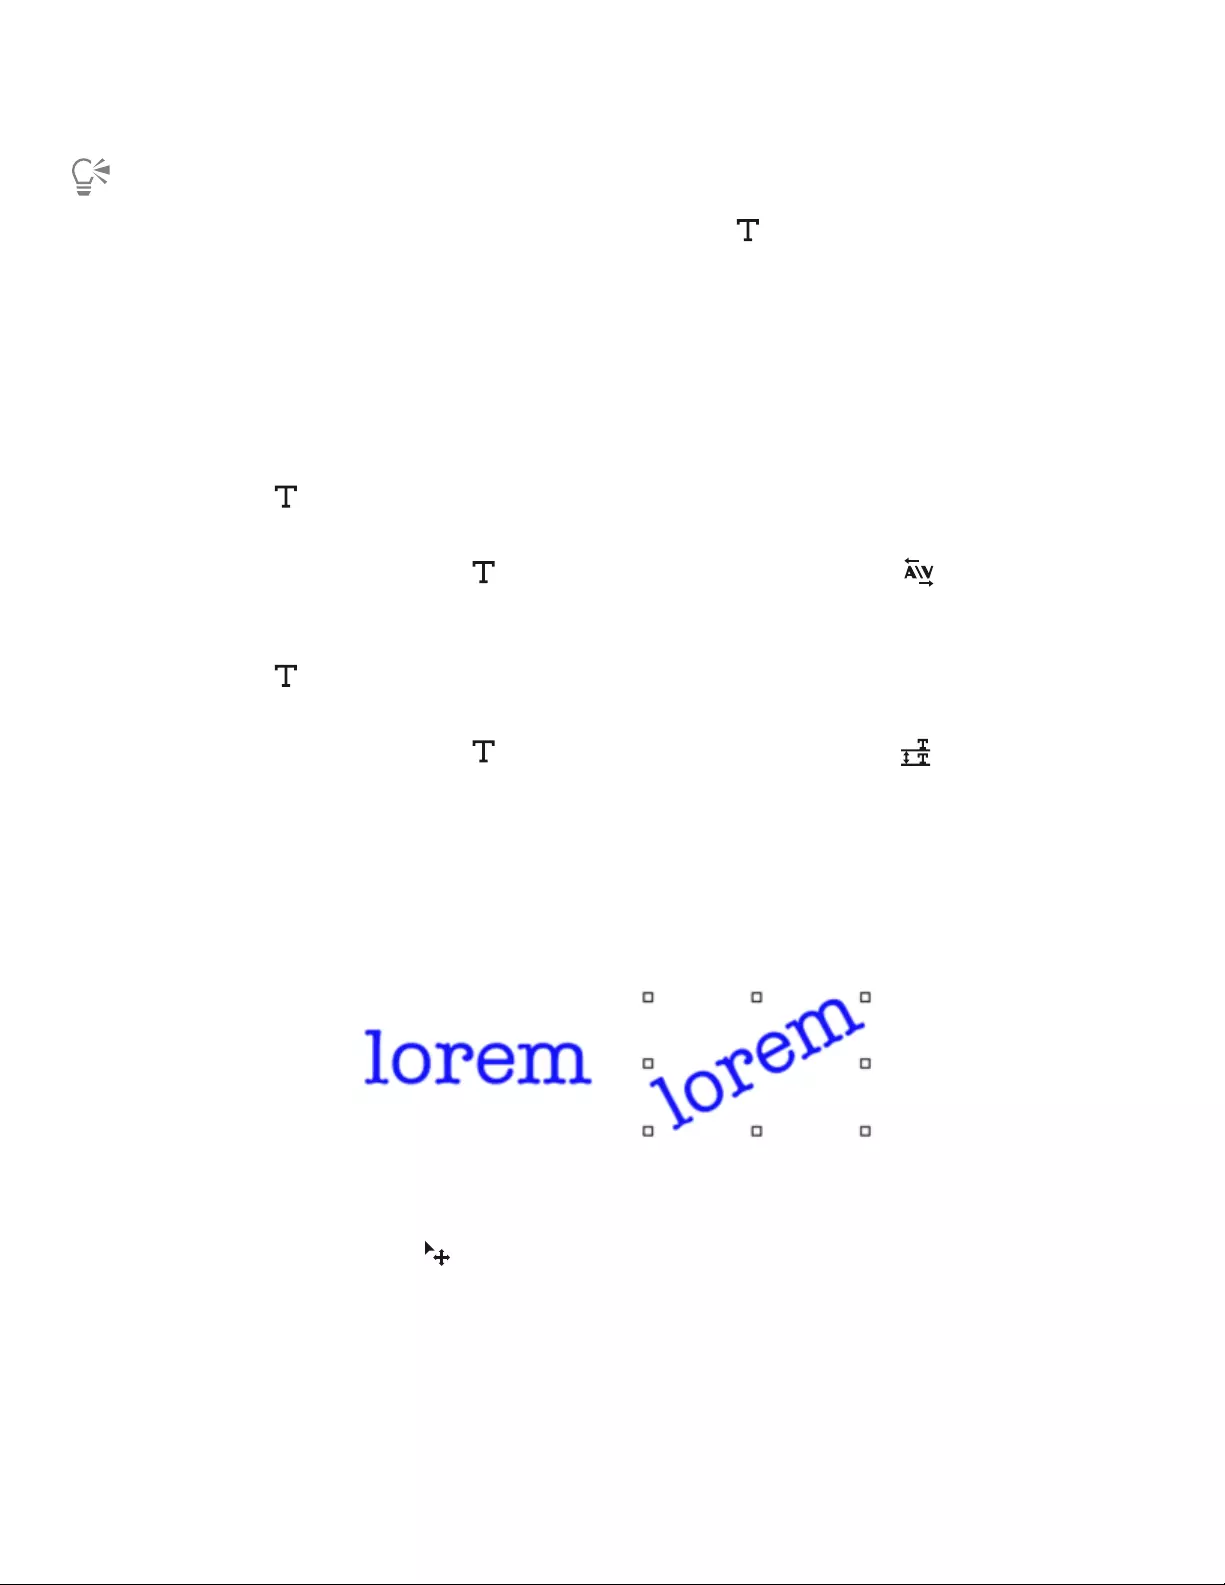
Adding text | 783
You can also align text by clicking the Show or hide the Text panel button on the property bar, and clicking one of the
alignment buttons in the Text panel.
Adjusting text kerning and leading
You can fine-tune the spacing between letters by adjusting the kerning. You can also adjust the amount of space between lines of text by
adjusting the leading. You may want to change the leading from the default setting which is set at 100%.
To kern text
1Choose the Text tool from the toolbox.
2In the Layers panel, select a text layer.
3Click the Show or hide the Text panel button on the property bar, and adjust the Tracking slider in the Text panel.
To adjust leading
1Choose the Text tool from the toolbox.
2In the Layers panel, select a text layer.
3Click the Show or hide the Text panel button on the property bar, and adjust the Leading slider in the Text panel.
Stretching, rotating, and skewing text
You can change the appearance of text by stretching, rotating, or skewing the text. Stretching text affects both the horizontal and vertical
size. As you stretch vertically, the text appears thinner and taller. As you stretch horizontally, the text appears flatter and shorter.
Rotating pivots the text from the end point of the text block. Depending on the alignment of the text, it pivots from the lower-left corner,
lower-right corner, or center. You can also skew the text by slanting the text to the right or left.
Rotated text (right)
To stretch, rotate, or skew text
1Select text using the Layer Adjuster tool .
2Choose a task from the following table:
To Do the following
Stretch text Drag a handle in the direction you want to stretch the text.

784 | Corel Painter 2022 User Guide
To Do the following
Rotate text Hold down Command (macOS) or Ctrl (Windows), and drag one
of the corner handles.
Skew text Hold down Command (macOS) or Ctrl (Windows), and drag one
of the center handles on either side of the text.
If the bounding box is not shown, click the Layer options button and choose Show Layer Indicators.
Adding drop shadows to text
You can apply a drop shadow to text. You can choose between two drop shadow styles: external, which places the shadow behind the text,
or internal, which places the shadow inside the text.
You can also change the composite method for text or the drop shadow of text. For more information, see “Blending layers by using
composite methods” on page 566.
To add a drop shadow to text
1Choose the Text tool from the toolbox.
2In the Layers panel, select a text layer.
3On the property bar, enable one of the following buttons:
•External Shadow — makes your letters look as though they’re casting a shadow onto a sheet of paper held beneath them
•Internal Shadow — makes your letters look like cutouts held above a sheet of paper that is the same color as the text
•No Shadow — removes a shadow
You can also add a shadow by clicking the Show or hide the Text panel button on the property bar, and choosing one of the
shadow buttons in the Text panel.
Applying effects to text
You can alter the appearance of text or text drop shadows by applying different effects. You can apply a composite method to text, as you
would with other types of layers, to control how the text interacts with the underlying image.
You can also adjust opacity, which controls the transparency of text or shadows. Your text’s shadow should be semitransparent. You can also
use opacity to fade the color of text.
In addition, you can add either a focus blur or a directional blur to text and shadows. Focus blurs make text fuzzy. You can use the focus blur
to soften the edges of text characters. With directional blurs, you can specify the direction in which the blur occurs.
To apply a composite method to text
1Choose the Text tool from the toolbox.
Adding text | 785
2In the Layers panel, select a text layer.
3On the property bar, click on the following buttons:
•Text Attributes
•Shadow Attributes
4Choose an option from the Composite Method list box.
To adjust text opacity
1On the property bar, click on the following buttons:
•Text Attributes
•Shadow Attributes
2Move the Opacity slider to the left to increase transparency or to the right to increase opacity.
To blur text
1In the Layers panel, select the Text layer or the Shadow layer.
2On the property bar, click on the following buttons:
•Text Attributes
•Shadow Attributes
3Click the Show or hide the Text panel button on the property bar, and adjust the Blur slider in the Text panel.
If you want to apply a directional blur, enable the Directional Blur check box, and adjust the Directional Blur slider .
The first half of the slider adds a left-to-right blur on the text; the second half adds an up-and-down blur.
Applying curves to text
You can apply a curve style and modify the path (baseline) along which your text will flow. The baseline created by a curve style is a Bézier
curve, meaning that the shape can be controlled by using control handles and anchor points. For more information, see “Drawing lines and
curves” on page 762.
There are four curve styles to choose from:
Curve Style Example
The Curve Flat style flows along a straight line.
786 | Corel Painter 2022 User Guide
Curve Style Example
The Curve Ribbon style flows the text along a curve and keeps the
letters in an upright position. When you apply the Curve Ribbon
style, you can use the Shift key and the Rotate tool to control how
the text moves around the baseline.
The Curve Perpendicular style places the text along the curve, with
each letter perpendicular to the curve.
The Curve Stretch style actually changes the shape of the letters
to fill in the space that would be left when the curve bends. For
example, if text is set on a circular path, Corel Painter makes the
tops of the letters heavier and thicker to fill in space.
You can control how the text is centered on the baseline. You can also move the center point by dragging on the slider or by changing the
alignment. Dragging the Centering slider also changes where the text starts and stops on a line. The Centering slider has no effect on the
Curve Flat style. After you apply a curve style, you can change the curve of the path.
To set a curve style and change centering
1Choose the Text tool from the toolbox.
2In the Layers panel, select a text layer.
3Click the Show or hide the Text panel button on the property bar, and click a curve style icon in the Text panel:
•Curve Flat
•Curve Ribbon
•Curve Perpendicular
•Curve Stretch
4Drag the Centering slider to the right or left.
The text moves along the curve.
Adding text | 787
You can also change the alignment of text on a path by clicking a text layer in the Layers panel and clicking an alignment button in
the Text panel. For more information, see “To align text” on page 782.
To change the text path
1In the Layers panel, select a text layer.
2Choose the Shape Selection tool from the toolbox.
3Click an end point on the path.
Drag the handles to change the shape of the path.
Converting text layers
You can convert a text layer into a standard layer so that you can apply effects such as gradations, blends, or surface textures. For example,
you can also apply surface control textures to give the text a three-dimensional appearance. For more information, see “Adjusting light
properties” on page 651.
You can also convert a text layer to shapes, which allows you to move and edit individual characters. For more information, see “Shapes” on
page 759.
To convert a text layer to a standard layer
1In the Layers panel, choose a text layer.
2Click the Layer options button , and choose Convert To Default Layer.
If the text has an outside or an inside shadow, then two layers — one for the text and one for the shadow — are created within a
group.
To convert a text layer to shapes
1In the Layers panel, choose a text layer.
2Click the Layer options button , and choose Convert Text To Shapes.
The text layer is replaced by a group of shape layers.
Text shadows and blurring effects are not converted when you use this command.
Dropping text
While you are working with text, it resides on a layer and is not yet a part of the image. When a text layer is dropped, it integrates with the
canvas and can no longer be edited.
To drop a text layer onto the canvas
1In the Layers panel, select a text layer.

788 | Corel Painter 2022 User Guide
If you want to select more than one text layer, highlight several layers and group them.
2Click the Layer Commands button at the bottom of the Layers panel, and choose Drop.

Working with animation and digital videos (Windows) | 789
Working with animation and digital videos (Windows)
Corel Painter lets you create animations frame-by-frame from scratch, as well as open existing digital videos (QuickTime or AVI) for editing
frames on Windows. Whichever workflow you choose, you can use Corel Painter’s Natural Media brushes and effects to create or modify
animation frames. You can also use features such as onion skinning or cloning in the creation of animations.
This section contains the following topics:
•“Choosing an animation workflow” (page 789)
•“Creating frame-by-frame animation” (page 791)
•“Opening a Corel Painter movie” (page 792)
•“Importing QuickTime and AVI files” (page 793)
•“Selecting movie frames” (page 793)
•“Editing frame content” (page 793)
•“Applying effects to a single frame” (page 794)
•“Previewing animations” (page 794)
•“Using onion skinning” (page 795)
•“Animating with layers” (page 795)
•“Adding, deleting, and erasing frames” (page 796)
•“Repeating frames” (page 796)
•“Inserting movies” (page 797)
•“Rotoscoping” (page 798)
•“Applying scripts to movies” (page 798)
•“Exporting movies as QuickTime” (page 799)
•“Exporting movies as AVI” (page 800)
•“Importing and exporting numbered files” (page 801)
•“Exporting animated GIFs” (page 802)
Choosing an animation workflow
Corel Painter offers different animation workflows:
• Create animation frames from scratch
• Edit digital video frames
• Create animations by cloning
790 | Corel Painter 2022 User Guide
• Create animations by tracing
• Create animations from layers
Customizing an animation-specific color set
You can customize a color set for the animation to better control the use of color. For example, using a particular color set prevents the
colors of your characters from shifting between frames. You might want to set up an image of each character with annotations to specify
which colors to use in which areas.
Not all colors are suitable for video.
You can’t display different sections of a movie at different rates. What you can do is create sections separately at different rates and then
modulate them to the same rate before joining them. This is the kind of work you’ll do in your video-editing application.
For more information, see “To set the preview rate” on page 795.
Frame Stacks panel
In Corel Painter, digital video and animation files are known as movies or frame stacks. Whether you’re working with an imported digital
video or building an animation from scratch, you can select and navigate frames from the Frame Stacks panel.
The Frame Stacks panel appears whenever you open or create a movie file and it must stay open while you work with a movie.
The number of frames displayed in the Frame Stacks panel is determined by the
number of onion skin layers. A red triangle appears above the current frame.
You work in one frame at a time — the one appearing in the document window. The Frame Stacks panel helps you navigate the frames in
the stack and choose which frame to modify.
Each frame in a frame stack can have one layer. For example, if you add an item from the image portfolio onto a frame, Corel Painter places
the image on a layer. You can move the image around the layer. However, when you move between frames or close the file, Corel Painter
drops all layers — the layer is deleted, and the layer’s content is flattened onto the background canvas. For more information about working
with layers, see “Layers” on page 539.
The Frame Stacks panel displays thumbnails of several frames. The frame numbers appear under the thumbnails. The current frame is shown
with a red triangle over it.
The number of thumbnails is determined by the layers of onion skin you’ve chosen. By default, QuickTime and AVI files are opened with two
layers of onion skin. For more information about onion skinning, see “Using onion skinning” on page 795.
Setting movie file sizes
Keep in mind that video and animation can produce huge files. When planning a project, be careful not to overestimate your available disk
space. For an idea of disk requirements, consider this example: Each 640 by 480-pixel, 24-bit color frame is 1.2 MB. At this size, a 12-fps,
30-second animation would consume more than 400 MB of disk space.
To calculate the disk space required for a frame stack
1Using pixels as the unit of measurement for width and height, calculate the number of bytes required to save the frame stack with the
following formula:
(Frame Width) × (Frame Height) × (Bytes per Pixel) × (Number of Frames)
2Divide the product of the formula in step 1 by 1,024 to convert to kilobytes.

Working with animation and digital videos (Windows) | 791
Bytes per pixel are determined by the storage type. For example, 24-bit color with an 8-bit alpha channel uses 4 bytes per pixel. For
more information about storage types, see “Creating frame-by-frame animation” on page 791.
When you save a movie as QuickTime or AVI, the file size can be reduced by compression. For more information about
compression, see “Exporting movies as QuickTime” on page 799 and “Exporting movies as AVI” on page 800.
Creating frame-by-frame animation
In Corel Painter, you can build animations one frame at a time. Then, when you complete a series of frames, also known as a frame stack,
you can preview them as a movie.
The first step in creating a new animation is to create a movie. You can specify options such as the number of frames and the frame size.
You can also choose how many onion skin layers you want to display. Onion skinning allows you to see multiple frames at the same time.
You can view up to five frames at a time: the current frame and four other frames adjacent to it. This will help you determine where the next
frame of motion should be drawn. For more information, see “Using onion skinning” on page 795.
Once you create a movie file, a blank frame appears in the document window so you can begin adding content by using brushes and other
tools. After you complete a frame, you can use the navigation tools in the Frame Stacks panel to display the next frame in the sequence, or
whichever frame you want to work on next. You can play back the animation as you create it, to make sure that you have the correct flow of
movement. The Frame Stacks panel must stay open when you create or edit movies. For more information, see “Editing frame content” on
page 793.
In Corel Painter, movies are saved to the Painter Framestack file format (FRM), which stores a series of images equal in size and resolution.
To create a new movie
1Choose Movie New Movie.
2Type a filename in the Movie Name text box.
3In the Canvas Settings area, type values in the Width and Height boxes.
The standard digital video frame is 640 by 480 pixels, which is a 4:3 aspect ratio. Many people work at sizes consistent with this aspect
ratio.
4Type a value in the Resolution box.
5In the Movie Settings area, type a value in the Number of Frames box.
You can also add or remove frames at a later time.
6From the Layers of Onion Skin options, choose the number of onion skin layers that you want.
The number of onion skin layers determines the number of frames displayed in the Frame Stacks panel. For more information, see
“Using onion skinning” on page 795.
7From the Storage Type list box, choose one of the following options:
•8-bit gray — displays 256 levels of gray
•8-bit System Palette — displays the system palette for 256 colors
•15-bit color with 1-bit alpha — displays 32,768 colors and a layer for a channel
•24-bit color with 8-bit alpha — displays 16.7 million colors and a layer for an anti-aliased channel
8In the Enter Movie Name dialog box, specify a location to save the file.
9Click Save.
The movie file is saved to the Painter Framestack (FRM) format.
When the movie opens, the Frame Stacks panel appears, and the document window displays the first frame of the movie.

792 | Corel Painter 2022 User Guide
You can also
Choose a paper color Click the Color chip, and choose a color from the color picker.
Choose a paper texture Click the Paper chip, and choose a paper texture from the Papers
Textures panel.
The storage type lets you specify the color depth for saving each frame. This applies to the saved frame stack, not to your work in
the current frame. For example, choosing 256 colors as the storage type still allows you to work with a selection and 24-bit tools in
the document window for the current frame. As soon as you change frames, however, the image is saved in the 256-color format,
and the selection is lost. If you want to maintain selections in saved frames, you must choose the 15-bit or 24-bit storage type.
These storage types allow you to take advantage of compositing options that require a selection layer.
To create frame-by-frame animation
1With the Frame Stacks panel open in the document window, navigate to frame 1.
2In the toolbox, click the Brush tool.
3Click the Brush Selector on the Brush Selector bar.
4Click a brush category, and click a brush variant.
5Paint the animation frame in the document window.
6In the Frame Stacks panel, click the Step Forward button .
Changing frames automatically saves the frame. You cannot undo changes after the frame has been saved.
Repeat steps 5 and 6 until you complete all frames.
You can view previous and future frames while working in the current frame with the onion skin view. You can enable the onion
skin view by clicking Movie Show Onion Skin Layers.
You can also step forward one frame by pressing Page Up or step back one frame by pressing Page Down. For more information
about keyboard shortcuts for animation, see “Animation” on page 147.
Opening a Corel Painter movie
You can open movies (frame stacks) that were previously created in Corel Painter so you can edit them.
To open a Corel Painter movie
1Choose File Open.
2In the Open dialog box, locate the FRM file, and click Open.
3In the Open Frame Stack dialog box, choose the number of onion skin layers you want to appear in the Frame Stacks panel.
The number you choose determines the number of thumbnails visible in the Frame Stacks panel.
4Click OK.
The Frame Stacks panel appears and the document window displays the first frame in the stack.

Working with animation and digital videos (Windows) | 793
Importing QuickTime and AVI files
You can import QuickTime or AVI digital videos so you can edit them using any of the Corel Painter brushes, textures, and effects. When you
import a QuickTime or AVI file, Corel Painter automatically converts it into a frame stack. A frame stack is a series of images equal in size and
resolution.
Corel Painter does not provide features for working with audio.
When you’re finished editing the digital video in Corel Painter, you can save it as a QuickTime, AVI, or animated GIF file. You can then open
the QuickTime or AVI file in a video-editing application to add sound effects and other finishing touches.
For efficiency, import only the video frames that you plan to edit. For example, if you have a two-minute video clip and you want to paint
on the first 10 seconds, don’t import the entire clip in Corel Painter. Instead, separate the first 10 seconds in a video-editing application and
import only those frames. After finishing that clip in Corel Painter, you can open the frames in the video-editing application and join them to
the other frames.
You can also import movies that are saved as a series of numbered files. For more information, see “Importing and exporting numbered
files” on page 801.
To open a QuickTime or AVI movie
1Choose File Open.
2In the Open dialog box, locate the movie, and click Open.
3In the Enter Movie Name dialog box, type a name in the File Name box, and click Save.
The Frame Stacks panel appears, and the document window displays the first frame of the movie.
When you open a QuickTime or AVI movie, Corel Painter makes a frame stack copy of the movie. This ensures that the original file
does not change.
Frame stacks are uncompressed, so you need an adequate amount of disk space to create them. For example, a 1MB QuickTime or
AVI movie can become a 20MB frame stack.
Selecting movie frames
You can select a frame by clicking its thumbnail in the Frame Stacks panel. You can also easily jump to any frame in a movie.
To select a frame
• Do one of the following
• In the Frame Stacks panel, click the frame’s thumbnail.
•Choose Movie Go to Frame, and type the frame number in the Go to Frame dialog box.
Editing frame content
Frames can be added to, or deleted from, a movie. You can also erase the contents of a frame while leaving the frame in the movie. These
changes cannot be undone, so it’s best that you create your animation in segments and combine them when you are finished.
794 | Corel Painter 2022 User Guide
Applying effects to a single frame
You can paint on, or apply effects to, any frame in a movie. You can do anything in a frame that you can do in a single image: paint with a
brush, add layers, or apply an effect to a selection or to the entire image. Frames are automatically saved when you select another frame,
and the changes cannot be undone.
To paint on or apply an effect to a single frame
1In the Frame Stacks panel, click the thumbnail of the frame that you want to work in, or click the Step Forward button to advance
to the frame.
The selected frame appears in the document window.
2Modify the image in the document window.
3When you’re ready to work on the next frame, click the Step Forward button .
Changing frames automatically saves the frame. You cannot undo changes after the frame is saved.
Previewing animations
The Frame Stacks panel provides the tools that you need to preview and navigate animations. For example, you can navigate to various
frames in the stack for editing purposes or play the animation to preview how the frames link together. You can also set the preview frame
rate to control how many frames are displayed per second.
To preview an animation
• In the Frame Stacks panel, perform an action from the following table.
To Do the following Keyboard shortcut
Play the frame stack Click the Play button .
Stop playing the frame stack Click the Stop button . Ctrl + .
Return to the first frame in a stack Click the Rewind button . Home
Move back one frame Click the Step Reverse button . Page Down
Advance to the next frame Click the Step Forward button .
When a frame is the last in the stack, Corel
Painter adds a new frame to the end and
advances.
Page Up
Advance to the last frame in the stack Click the Fast Forward button .End
Working with animation and digital videos (Windows) | 795
To set the preview rate
• In the Frame Stacks panel, move the Playback slider.
Using onion skinning
Onion skinning is a feature animators use to view previous and future frames while working in the current frame. Traditional animators work
on an onion skin paper that allows them to see a sequence of frames through transparent layers. They then draw successive frames, using
the previous frames for reference. Seeing several images superimposed helps increment the action evenly.
Scrolling a background is another example of a cycled action. Commonly, a subject remains in one place while the background slides by.
Onion skin view (with Show Onion Skin Layers on). Each frame in the frame stack represents one onion skin layer.
Corel Painter lets you work with two to five onion skin layers. You can specify the number of onion skin layers when you first open a frame
stack or create a movie. To change the number of onion skin layers, you must close the file and reopen it.
The Frame Stacks panel displays a linear view of the onion skin layers. Each thumbnail represents one onion skin layer, and the thumbnail of
the current frame has a red triangle above it.
You can change the current frame by clicking any thumbnail in the Frame Stacks panel. This lets you view a frame in any position of the
onion skin sequence. For example, if you want to display the reference frames before the current frame, set the current frame to the far-right
position in the panel. If you want to display the frames before and after the current frame, set the current frame to the middle thumbnail in
the panel.
To show onion skin layers
•Choose Movie Show Onion Skin Layers.
In the document window, the current frame appears darkest. Each frame moving away is progressively fainter.
Animating with layers
One of the simplest ways to create animation in Corel Painter is to add an item from the Image Portfolio panel across a series of frames.
This is the most basic example of animating with layers. Adding multiple layers allows you to make more complex animations.
You can also group layers and move them simultaneously, but be careful. When you leave a frame, Corel Painter drops the layers in that
frame. When a layer is dropped, its contents are merged with the canvas and can no longer be accessed separately. For this reason, you
may want to work from the background forward; start by animating what’s farthest from your point of view. For more information, see
“Dropping layers with the canvas” on page 562.
You can also rotate a layer. Rotating a layer can degrade its on-screen image quality, but this does not affect its printed quality.

796 | Corel Painter 2022 User Guide
To create motion with layers
1Choose Movie New Movie.
2Type 1 in the Number of Frames box.
3Enable one of the Layers of Onion Skin options, and click OK.
4In the Enter Movie Name dialog box, choose a location, type a name for the file, and click Save.
5Choose Window Media Panels Images.
6Double-click an item in the Image Portfolio panel to add it to the document window.
A new layer is created.
7Position the layer to the far left of the document window.
8Click the Step Forward button in the Frame Stacks panel.
A new frame is added and becomes the current frame. The layer in the previous frame is merged with the canvas. In the new, current
frame, the layer is active.
9On the keyboard, press the arrow keys to move the portfolio image.
10 Repeat steps 8 and 9 for as many frames as you want to add.
11 In the last frame, click the Layer options button in the Layers panel, and choose Drop.
12 Click the Play button in the Frame Stacks panel.
The portfolio image moves across the screen.
Adding, deleting, and erasing frames
You can add frames at the end or beginning of a movie, or in between any frames in the stack. You can also delete frames from a movie and
all subsequent frames are renumbered as necessary. In addition, you can clear the frame contents, but retain the paper color. You cannot
undo the actions of deleting and erasing frames, so it’s best to create animations in small segments and then combine them when you are
finished. For more information, see “Inserting movies” on page 797.
To add frames
1Choose Movie Add Frames.
2In the Add Frames dialog box, type the number of frames in the Add box.
3Enable an option for frame placement.
For example, to add six blank frames before frame 10, type 6 in the Add box, enable the Before option, and type 10 in the Frame box.
To delete frames
1Choose Movie Delete Frames.
2In the Delete Frames dialog box, enter the range of frames to delete.
To erase frames
1Choose Movie Erase Frames.
2In the Erase Frames dialog box, enter the range of frames to erase.
Repeating frames
You can repeat actions to create an animated cycle. You can also repeat the last frame at the end of the stack.
Working with animation and digital videos (Windows) | 797
Take, for example, a blinking eye. For this type of action, draw the cycle once, and repeat it as many times as needed.
This example shows a blinking eye as an animated cycle. You draw the frames once, and then repeat them.
To create a clean cycle, the beginning and ending images must be the same. For example, in an animation of a blinking eye, the eye would
be open at the beginning and at the end. That way, when the end of one cycle is “hooked up” to the beginning of the next, the action
continues smoothly.
To repeat the last frame
1In the Frame Stacks panel, click the Fast Forward button .
2Choose Movie Clear New Frames to disable this command.
The check mark beside the Clear New Frames command is removed.
3Click the Step Forward button in the Frame Stacks panel.
You can add blank frames at the end of a movie with the Step Forward button when the Clear New Frames command is
enabled.
Inserting movies
You can combine movies by inserting the frames of one movie into another. You can insert a movie before or after a specific frame, at the
start of a movie, or at the end of a movie.
You can insert only Corel Painter movie (FRM) files. You cannot insert frames from QuickTime, AVI, or numbered files. However, if you open a
QuickTime or AVI file in Corel Painter, you can save it to the FRM format in order to insert it into another CorelPainter movie.
To insert a movie
1Choose Movie Insert Movie.
2Enable an option in the Insert Movie area.
3In the Select Movie dialog box, locate the movie that you want to insert.
4Click Open.
The movie you insert must have the same frame size (width and height) as the current movie. You will also get better results if both
movies use the same frame rate.
798 | Corel Painter 2022 User Guide
Rotoscoping
Rotoscoping is the process of painting on a movie, applying effects to a movie, or compositing a portion of the images from one movie with
the images of another. This is often done to make the action of a person filmed in one place appear on a background filmed in another. You
can also use rotoscoping to remove an element from a video clip, as shown below in the frames from a short movie of an owl on a roost.
After the video was captured digitally, it was imported into Corel Painter, and the roost was removed frame by frame by using the masking
tools.
(1) The frame shows an owl perched on a roost. (2) The frame shows the
owl without the roost. (3) The frame shows the mask used to hide the roost.
Rotoscoping is also useful for adding a background to an animation. The process is the same whether you work with digitized video or
painted animation cells.
Applying scripts to movies
The Script feature lets you repeat the same actions for each frame in a movie. For example, you might want to apply an effect like Glass
Distortion to a video clip. You can record a script that applies the Glass Distortion effect to a single image and then, with a single command,
apply that script to the entire movie. A script can contain almost any action — a single command, a series of commands, or the many steps
in creating an original drawing. You’ll devise scripts based on the needs of your project.
You cannot undo changes after applying a script to a movie. Before applying the script, you should become familiar with scripting and
experiment with a separate sample image. You might want to work with a copy of the movie, or you might apply the script to a short
sample movie to test it. For complete information on working with scripts, see “Using scripts to automate tasks” on page 805.
Using scripts to set grain position
You can use a script to apply a surface texture (paper grain) to an entire movie. In this case, you have several options for the position of the
grain in each frame. You can put the grain in exactly the same position, move the grain randomly, or move it linearly by a set number of
pixels.
Using scripts to apply brushstrokes
You can apply a recorded brushstroke to a movie. Corel Painter divides the stroke into as many segments as there are frames and places
the segments in successive frames. This feature is most useful when used with the Image Hose. When you apply a brushstroke to a movie
using the Image Hose brush, one or more Nozzle images are deposited on each frame. If the Nozzle file is an animated sequence — for
example, a person walking — Corel Painter can drop successive images on successive frames. Play the movie back, and the person walks
across the document window. For this to work, you must set up the Nozzle file appropriately and have the right Image Hose brush size. For
more information, see “Painting with the Image hose” on page 487.
To create a script for a movie
1Choose Window Scripts.
2In the Scripts panel, click the Script options button in the upper-right corner, and choose Record Script.
Working with animation and digital videos (Windows) | 799
3Perform the actions you want included in the script, and click the Stop button in the Scripts panel.
4In the Script Name dialog box, type a name for the script in the Save as box.
To apply a script to a movie
1Open the movie to which you want to apply the script.
2Choose Window Scripts.
3In the Scripts panel, click the Script options button , and choose Apply Script To Movie.
4In the Apply Script To Movie dialog box, double-click a script.
Corel Painter applies that script to each frame in the stack. If you have a few small frames in your movie, and the script is not a
complicated one, the script can be applied quickly. If the movie has several large frames, a complicated script could take a long time.
You can apply only scripts that do not create new images.
To set grain position with a script
1Record a script that applies surface texture or dye concentration to an entire image.
2Choose Movie Set Grain Position.
3In the Set Grain Position dialog box, enable one of the following options:
•Grain Stays Still — allows the grain to remain in the same position throughout the movie
•Grain Moves Randomly — moves the grain as the movie plays. To use this option, you must disable the Record Initial State option
when recording your script. In the Scripts panel, click the Script options button , and choose Script Options. In the Script
Options dialog box, disable the Record Initial State check box.
•Grain Moves Linearly — increments the grain movement. Specify the number of pixels you want the grain to move horizontally and
vertically from one frame to the next.
4Click OK.
5Choose Window Scripts.
6In the Scripts panel, click the Script options button , and choose Apply Script To Movie to apply the grain script. Each frame is
textured according to your selected method.
To apply a brushstroke script
1Choose Brushes Record Stroke.
2Create a brushstroke in the document window.
3Open a movie file.
4Choose Movie Apply Brush Stroke To Movie.
Exporting movies as QuickTime
You can export a movie as a QuickTime movie on the Windows platform.
QuickTime supports several compression schemes. The following descriptions should help you choose one; however, you’ll probably want
to experiment with different compressors and settings to identify the best settings for your work. You may also have additional compression
methods available.
• The Animation method works well with areas of continuous tone. If you set the Quality in the Compression Settings dialog box to Best
and make every frame a key frame, this compressor is lossless. For most Corel Painter animations, this compressor is a good choice.

800 | Corel Painter 2022 User Guide
• The Cinepak method produces acceptable motion and image quality at remarkably small file sizes. It is the preferred format for CD
delivery and transfer across the Internet. Cinepak can take a long time to compress, and it can be difficult to find the best compression
settings for certain image types and frame rates.
• The Graphics method is limited to 256 colors. It compresses the file at a greater ratio than the Animation compressor, but does not play
as quickly.
• The None option uses no compression, so the images retain all of their quality. With a large frame size, some computers might not be
fast enough to play at a high frame rate.
• The Photo-JPEG method allows high compression ratios while maintaining excellent image quality. However, it does not play at high
rates. JPEG is an international standard for image compression.
• The Video method is designed for recording and playing back digitized video at high rates. Because of the spatial compression method
it uses, the Video compressor does not provide optimal results for images with large areas of continuous tone, such as those in most
animations.
The compression ratio is inversely proportional to image quality. The Quality slider allows you to set an optimum level between the amount
of compression and image quality. For most work in Corel Painter, it is best to set the Quality slider to High.
You can specify the number of frames you want displayed per second and, with some compression methods, the frequency of key frames.
Key frames are used in temporal compression methods. Each key frame is stored in its entirety. The next set of frames, up to the next key, are
saved only as changes.
With some compression methods, you can also limit the speed of data transmission with the Limit Data Rate option. The data rate limit
overrides the Quality setting, if necessary, to keep the compressed movie within the set limit.
To export a Corel Painter movie as a QuickTime movie
1Choose File Save As.
2In the Save Movie dialog box, enable the Save Movie As QuickTime option.
3In the Enter Movie Name dialog box, choose a location, enter a name for the file, and click Save.
4In the Compression Settings dialog box, choose a compression method from the list box.
5Specify the options you want.
Exporting movies as AVI
The AVI format supports several compression schemes. The following descriptions should help you choose one; however, you’ll probably
want to experiment with different compressors and settings to identify the best settings for your work. You may also have different
compression methods available.
• The Cinepak method produces acceptable motion and image quality at remarkably small file sizes. It is the preferred format for CD
delivery and transfer across the Internet. Cinepak takes a long time to compress, and it can be difficult to find the best compression
settings for certain image types and frame rates.
• The Microsoft Video 1 method is designed for recording and playing back digitized video at high rates.
• The Full Frames (Uncompressed) method uses no compression, so the images retain all of their quality. With a large frame size, some
computers might not be fast enough to play at a high frame rate. This is the preferred format for transferring Corel Painter movies to
AVI-editing applications.
The compression ratio is inversely proportional to image quality. In the Video Compression dialog box, the Compression Quality slider
allows you to set an optimum level between the amount of compression and image quality.
Key frames are used in temporal compression methods. Each key frame is stored in its entirety. The next set of frames, up to the next key, are
saved only as changes. With some compression methods, you can specify the frequency of key frames with the Key Frame Every [Number]
Frames option.
With some compression methods, you can also limit the speed of data transmission with the Data Rate option. The data rate limit overrides
the Quality slider setting, if necessary, to keep the compressed movie within the set limit.

Working with animation and digital videos (Windows) | 801
Understanding frame rate
Frame rate describes the number of image frames displayed per second (fps). The frame rate can determine not only how big a file your
animation is, but also how smooth the motion appears.
When you save a movie as an AVI file, you can specify the rate of display. This doesn’t necessarily mean that what you specify is what you’ll
experience. Factors like frame size, compression method, and computer speed can prevent some movies from achieving their set rate. If
your animations will be viewed on the computer only, frame rates of 8, 10, and 12 fps are good choices. If your animations will be viewed
elsewhere, you should consider the following frame rates:
• The frame rate of film is 24 fps.
• The frame rate of National Television System Committee (NTSC) video is 30 fps (29.97 fps in broadcast video). NTSC is the video standard
used in the United States.
• The frame rate of Phase Alternating Line (PAL) video is 25fps.
These frame rates are sufficient to produce smooth, continuous motion with filmed or video-recorded subjects.
Animation drawings contain far less detail than live-action images. The difference in the level of detail allows animations to be produced at
frame rates significantly lower than those designed for live action. Because of the smoothness of color fills and continuity between images,
animations can look quite nice at rates between 10 and 15fps.
You must consider frame rates to know how many drawings are needed to make actions smooth, natural, and consistent throughout the
project.
The computer can display frames at any reasonable rate. The Frame Stacks panel provides control over frame display rates. You can preview
an animation at a rate of 1 to 40 fps.
To export a Corel Painter movie as an AVI movie
1Choose File Save As.
2In the Save Movie dialog box, enable the Save Movie As AVI option, and specify the number of frames per second.
3In the Enter Movie Name dialog box, choose a location, enter a name for the file, and click Save.
4In the Video Compression dialog box, choose a compression method from the Compressor list box.
5Specify the options you want.
For some compression methods, you can click Configure to specify additional options.
Importing and exporting numbered files
Corel Painter supports importing and exporting numbered files. Numbered files are any series of files that are the same size and resolution,
and named following a specific style, which includes a number at the beginning or end of each file name. For example, the first frame might
be called “Movie01,” the second frame “Movie02,” and so on.
When you export a movie as numbered files, you can import the numbered files into an application that may not support other movie
formats. When exporting, you specify the filename for the first file. You must include zeros so that all numbered files have the same number
of digits. For example, to create numbered files from 1 to 24, include “01” in the filename. To create numbered files from 89 to 110, include
“089” in the filename.
Importing numbered files is an excellent method of bringing an animation from another 3D or animation program into Corel Painter. The file
format of the numbered files you are importing must be supported by Corel Painter, and the number of digits in each filename must be the
same. When you import numbered files, you create a new frame stack, and you are prompted to choose a number of onion skin layers and a
storage type. For more information, see “Creating frame-by-frame animation” on page 791.
To export a movie as numbered files
1Choose File Save As.

802 | Corel Painter 2022 User Guide
2In the Save Movie dialog box, enable the Save Movie As Numbered Files option, and click OK.
3In the Save Numbered File As dialog box, choose a location and file format, enter a name for the first file, and click Save.
You must begin or end the filename with a number — for example, “01Movie” or “Animation14.”
To import numbered files
1Choose File Open.
2Enable the Open Numbered Files check box in the Open dialog box.
3Select the first numbered file, and click Open. Then, select the last numbered file, and click Open.
4In the Enter Movie Name dialog box, choose a location to save the imported movie, enter a filename, and click Save.
5In the Open Frame Stack dialog box, choose a number of onion skin layers and a storage type, and click OK.
Corel Painter sequences the images into the frames of a new frame stack.
Exporting animated GIFs
Corel Painter lets you export a frame stack as an animated GIF file. The animated GIF format is ideal for displaying simple animations on the
web.
You can use a GIF as a link anchor or as an image map. However, you cannot use it as a background.
There are many options available when you save images to a GIF file.
You can apply transparency to the animation and choose a background option. However, you must set up a selection for each frame. For
more information, see “Getting started with selections” on page 594.
The Disposal Method options let you specify what happens to an image after it has been displayed (and its frame delay has passed), and
before the next image is displayed. The disposal method is significant only when you use transparency that differs between frames.
The Loop option lets you play the animation repeatedly in the client browser. The animation appears in the browser one frame at a time, at
the speed at which it is downloaded. In most cases, this is significantly slower than the intended display rate. With the Loop option enabled,
the browser will loop the animation after all frames have been downloaded, with the specified delay between frames. Because the animation
plays from the browser’s cache, it’s much faster.
If your movie is intended for the web, you should consider reducing its file size so the movie is small enough to download within in a
reasonable amount of time. You can minimize file size by doing any of the following:
• Reduce the frame size. You choose the frame size when you create a new movie. If you import an existing animation or video, you
cannot resize the frames.
• Limit the number of frames because each frame increases the file size.
• Limit the number of colors. When you reduce the number colors in the image, you are also reducing the size of the color palette, which
leads to smaller files.
To export a frame stack as an animated GIF
1With the frame stack open, choose File Save As.
2In the Save Movie dialog box, enable the Save Movie As GIF Animation option.
3In the Enter Movie Name dialog box, choose a location, type a filename, and click Save.
The Save as GIF Options dialog box appears.
4Enable an option in the Number of Colors area.
5In the Imaging Method area, enable one of the following options:
•Quantize to Nearest Color — reduces the number of similar colors in the image without affecting the overall image. This is useful for
images with broad areas of a single color.
•Dither Colors — simulates a greater number of colors when only a limited number of colors are available

Working with animation and digital videos (Windows) | 803
6In the Animation Options area, type a value in the Frame Delay box to specify a pause (in 100ths of a second) between frames.
7In the Disposal Method area, choose one of the following options:
•Default — uses the client browser’s default disposal method
•Background — Restores to the background color the region covered by the image
•None — leaves the image on-screen while rendering the next frame over it
•Previous — displays the imagery of the previous frame to the region covered by the image
You can now use your browser to open the file and view the animation. You can place the animation on a web page using the same
HTML image tag you’d use for a simple GIF file.
You can also
Gradually display images in the web browser as they load In the Misc Options area, enable the Interlaced option.
Enable server-side image map In the Map Options area, enable the NCSA Map File or CERN Map
File option.
Enable client-side image maps In the Map Options area, enable the Client Side Map File option.
Apply transparency In the Transparency area, enable the Output Transparency option,
and then enable a background option. Move the Threshold slider
to specify the selection mask value at which the image becomes
transparent.
Repeat the animation Enable the Loop check box, and type the number of times to
repeat the animation. If you want it to repeat indefinitely, type 0.
If you do not set a frame delay, the frames appear as quickly as the system can load and display them. The display of each image
(especially with larger frames) varies between computer systems, so the actual animation display rate may be lower. You can use
frame delay to approximate a particular frame rate. For example, you capture some one-quarter size video at 8 frames per second
(fps). You want 8 frames to appear in one second, so you divide one second (100 hundredths of a second) by 8. The result is 100/8
= 12.5. Discard the decimal portion and enter 12 as the frame delay. Discarding the decimal is the only allowance for the time
required to display each image. For a large frame size, you might want to allow more time for display.
If the animation in the browser window stops playing, it’s probably finished the set number of loops. In some browsers, you can
get it started again by resizing the window. In all browsers, you can get it started again by reloading the page.

804 | Corel Painter 2022 User Guide

Using scripts to automate tasks | 805
Using scripts to automate tasks
You can use scripts to speed up repetitive tasks, combine multiple or complex actions, or make an option more easily accessible.
This section contains the following topics:
Working with scripts
•“Getting started with scripts” (page 805)
•“Displaying the Scripts panel” (page 806)
•“Recording and playing scripts” (page 806)
•“Enabling and playing background scripts” (page 808)
•“Creating resolution-independent scripts” (page 808)
•“Editing, renaming, and deleting scripts” (page 809)
•“Converting scripts to movies” (page 810)
•“Importing and exporting scripts” (page 811)
Managing script libraries
•“Importing and exporting script libraries” (page 811)
•“Creating and deleting script libraries” (page 812)
Getting started with scripts
Using a script is similar to using the speed-dialing feature on a phone. On many phones, you can set a frequently dialed number to a speed-
dial button; then, the next time you need to dial that number, you can save time by pressing its speed-dial button. Similarly, a script lets you
set the actions that you want to repeat; then, the next time you need to repeat those actions, you can save time by playing the script.
You can record anything in a script — from a single edit command to an entire work session.
There are a number of ways to take advantage of scripting:
• You can record a script to replace repetitive tasks.
• You can use background scripts to back up your work, which gives you the ability to revert to any stage in the project by playing the
script and stopping it at the stage you want. This technique is similar to using multiple levels of undo. For more information, see
“Enabling and playing background scripts” on page 808.
• You can play back a script at a different resolution. You can record at a low resolution, then automatically produce the same results at a
higher resolution. For information, see “Creating resolution-independent scripts” on page 808.

806 | Corel Painter 2022 User Guide
• You can record a script that plays back using the current art materials. For example, you can record a script of a pencil drawing, then
open a new document, choose a different paper texture, color, and brush, and play back the script. Then, you can watch Corel Painter
repeat your drawing with the selected art materials. For more information, see “Recording and playing scripts” on page 806.
• (Windows only) You can record a script to use as a tutorial so you can show someone the step-by-step process used to create an image.
It’s like looking over the artist’s shoulder. You can then convert the script to an .avi movie to share techniques with others. Every action
you take becomes a frame in the movie. For more information, “Converting scripts to movies” on page 810.
• (Windows only) You can use scripts with movies. When you have an operation that you want to apply to each frame in a movie, record
the set of commands in a script. You can then apply the script to the entire movie as one command. For more information, see “Applying
scripts to movies” on page 798.
Displaying the Scripts panel
The Scripts panel supplies the basic tools for recording, playing, and editing scripts. It also gives you access to the Scripts library viewer,
which is used for storing and managing the scripts and script libraries that you create.
The Scripts panel
The Script options button in the Scripts panel gives you several commands to choose from.
To show or hide the Scripts panel
•Choose Window Scripts.
Recording and playing scripts
Scripts allow you to record every action you make so you can repeat all actions with only one click of a button. For example, if you need to
apply color adjustments to a collection of images, you can record a script while performing the process for the first image, and then play the
script to apply the changes to the other images in the collection. From the Scripts panel, you can access the basic functions for recording
and playing scripts.
Using scripts to automate tasks | 807
Script buttons, from left to right: Stop, Play, Record, and Pause.
When recording scripts, you have the option of recording the initial state of the application. This includes the tools and art materials that
you use during the session, including brushes, colors, and paper textures. Corel Painter plays the session using the materials that you
recorded. If you disable this option, Corel Painter uses the tools and art materials selected at the time you play back the script. For example,
you can use a different brush, color, and paper texture each time you play the script to produce different results.
To prepare for a script recording session, you may find it useful to write down the individual steps that you want to perform so you don’t
forget any steps while recording. However, you can edit or delete a script if you’re not satisfied with the result. For more information, see
“Editing, renaming, and deleting scripts” on page 809.
To record a script
1Choose Window Scripts.
2In the Scripts panel, click the Record button .
3Perform the actions that you want to record.
4Click the Stop button .
5In the Script Name dialog box, type a name in the Save As box.
Corel Painter automatically adds an icon for the script in the Scripts library viewer.
You can record a script that enables you to change art materials on playback by clicking the Script options button , choosing
Script Options, and disabling the Record Initial State option.
When you create a new script, it is automatically saved to the currently selected library. You can move a script from the library panel
by dragging a resource from one library to another.
To play a script
1Choose Window Scripts.
2In the Scripts panel, choose a script from the Scripts library viewer.
To load another script library, click the Script options button , and choose Import Script Library.
3Click the Play button .
You can also
Stop the script Click the Stop button.
Temporarily interrupt the script Click the Pause button .
You can also use Command + . (macOS) or Ctrl + . (Windows) to stop a script from playing.
808 | Corel Painter 2022 User Guide
If the script requires brushes, papers, patterns, or other materials that are stored in alternate libraries, these libraries must be open
during playback.
Enabling and playing background scripts
You can enable Corel Painter to automatically record background scripts. The background script starts recording all of the operations that
you perform from the moment you open the application until you close the application. Background scripts are saved in the Scripts panel
with a timestamp, along with the other scripts that you create. You can specify how long Corel Painter saves background scripts before
deleting them.
You can play background scripts; however, unlike custom scripts, you cannot edit background scripts.
To enable background scripts
1Do one of the following:
•(macOS) Choose Corel Painter menu Preferences General.
•(Windows) Choose Edit Preferences General.
2Enable the Auto-record script check box.
3Specify the number of days for which you want Corel Painter to store background scripts in the Auto-save scripts for box.
Because Corel Painter always saves your script data, the data can build up in your Corel Painter Script Data file.
To play a background script
1Choose Window Scripts.
2In the Scripts panel, choose a background script from the Scripts library viewer.
Background scripts are listed by the date and time they were created.
3Click the Play button .
Creating resolution-independent scripts
You can create a resolution-independent script that allows you to record a script that automatically adjusts to the resolution of the image
in which you’re playing the script. When you’re creating the script, you can get smoother, more responsive performance by working at low
resolution. Then, when you play back the script at a higher resolution, you get the benefit of a higher quality image.
The record-to-playback scaling ratio is limited. A factor of 4 is probably too much. For best results, you may need to experiment.
To record a resolution-independent script
1Before you start recording, open a new document at the resolution in which you want to work.
2Choose Window Scripts.
3Before painting or drawing, choose Select All, or press Command + A (macOS) or Ctrl + A (Windows).
This action creates a reference rectangle that is part of the recording. The rectangle must be recorded to play a session back into a higher
resolution file later.
4In the Scripts panel, click the Record button .

Using scripts to automate tasks | 809
5Deselect the reference rectangle by doing one of the following:
•Choose Select None.
• Draw inside the selected area.
•Press Command + D (macOS) or Ctrl + D (Windows).
6Proceed with recording the script.
To play a script at a different resolution
1Create a new document with the resolution at which you want to play the script.
If you want the resulting image to be a higher resolution than the original, create a document with proportionally larger dimensions. For
example, if the original document is 500 X 500 pixels, make the new document 1000 X 1000 pixels to double the size.
If the destination document has a different aspect ratio from the original, the image created by the script will be proportionally distorted.
2In the Scripts panel, click the resolution-independent script you recorded in the Scripts library viewer.
3Before playing the script, choose Select All, or press Command + A (macOS) or Ctrl + A (Windows) in the new document.
The rectangle recorded at the outset of the original script is referenced to the selected rectangle in this document.
4Click Play.
The original script replays into the new document. All brushes, paper textures, and related functions are appropriately scaled for the new
resolution.
Editing, renaming, and deleting scripts
Corel Painter lets you modify scripts in different ways. You can edit script instructions in order to change a recorded action sequence. You
can also rename and delete scripts.
You can edit a script by opening it as a series of instructions that contain parameters, most of which are editable. You can also edit a script
by exporting the script (.txt file) and then opening the file in a text editor. For more information, see “Importing and exporting scripts” on
page 811.
To edit script parameters
1Choose Window Scripts.
2In the Scripts panel, click the script that you want to edit from the Scripts library viewer.
3Click the Scripts options button , and choose Edit Script.
Corel Painter displays a list of the script’s instructions in the Edit Script dialog box.
4Double-click the instruction line that you want to edit.
5Double-click a parameter within the instruction.
6In the parameter’s dialog box, make the necessary changes.
7Close the dialog box.
8In the Edit Script dialog box, click Done to save the changes to the script.
The open script becomes the current script and is displayed in the Scripts library viewer. If you choose another script from the
Scripts library viewer, the open script does not change.
You can also edit a script by exporting the script and then opening the script file in a text editor. You can export a script by clicking
the Scripts options button in the Scripts panel, and then choosing Export Script.
810 | Corel Painter 2022 User Guide
To rename a script
1Choose Window Scripts.
2In the Scripts panel, choose a script from the Scripts library viewer.
3Click the Script options button , and choose Script Library View Rename Script.
4Type a new name in the Save As box.
To delete a script
1Choose Window Scripts.
2In the Scripts panel, choose a script from the Scripts library viewer.
3Click the Delete button .
Converting scripts to movies
(Windows only)
You can convert a script into a Corel Painter movie, which you can save as a QuickTime or AVI file. Every action you perform in the script
becomes a frame in the movie. For more information, see “Exporting movies as AVI” on page 800 and “Exporting movies as QuickTime” on
page 799.
If the script is resolution-independent, you can replay the session into a movie using different dimensions. For more information, see
“Creating resolution-independent scripts” on page 808. However, if the script is resolution-dependent and the new image window is
larger, the script plays back in the upper-left corner of the movie. If the new image is smaller than the script dimensions, only the upper-left
portion of the scripted session appears in the movie.
You can also apply a script to a movie. For example, you can record a script that applies the Motion Blur effect to a single image. Then, with
a single command, you can apply the script to each frame of a movie. You can also use a script to set grain position in a movie. For more
information, see “Applying scripts to movies” on page 798.
To convert a script into a movie
1Choose Window Scripts.
2In the Scripts panel, click a script in the Scripts library viewer.
3Open a new image at the size you want the movie to be.
4In the Scripts panel, click the Script options button , and choose Script Options.
5In the Script Options dialog box, enable the Save Frames on Playback check box.
This option creates a movie on playback.
6Type the number of tenths of a second that you want between frames.
The lower the number, the more frequently a frame is created and the more fluid the movie is. More frames, however, use more disk
space.
7In the Scripts panel, click Play.
8In the Enter Movie Name dialog box, type a name in the File name box, choose a destination folder, and click Save.
9In the Open Frame Stack dialog box, enable an option in the Layers of Onion Skin area.
10 In the Storage Type area, enable an option for storing color.
Corel Painter plays the script into the Frame Stacks dialog box.
Using scripts to automate tasks | 811
Not all actions can be converted into a movie. For example, a script that contains a File New command will not be converted.
Importing and exporting scripts
You can import and export scripts. For example, you can import a script that was created by someone else, or export a script to share it
with others. Corel Painter scripts are exported as .txt files. In addition, you can import or export script libraries. For more information, see
“Importing and exporting script libraries” on page 811.
To import a script
1Choose Window Scripts.
2In the Scripts panel, click the Import a script button .
3Choose the drive and folder where the script is stored.
4Click the script file.
5Click Open.
To export a script
1Choose Window Scripts.
2In the Scripts panel, click the Export the currently selected script button .
3In the Export script dialog box, choose the drive and folder where you want to store the script.
4Click Save.
Importing and exporting script libraries
You can import multiple scripts at once if they are stored in a script library. This includes script libraries that were created in a previous
version of Corel Painter. You can also export script libraries. In the Script library viewer, you can open and view multiple libraries at once.
To import a script library
1Choose Window Scripts.
2In the Scripts panel, click the Script options button , and choose Import Script Library.
3Choose the drive and folder where the library is stored.
4Choose the library.
5Click Open.
The imported library is displayed at the bottom of the panel window.
To import a script created in a previous version of Corel Painter
1Choose Window Scripts.
2In the Scripts panel, click the Script options button , and choose Import Legacy Script Library.
3Choose the drive and folder where the library is stored.
4Choose the library.
812 | Corel Painter 2022 User Guide
5Click Open.
The imported library is displayed at the bottom of the panel window.
To export a script library
1Choose Window Scripts.
2In the Scripts panel, click the Script options button , and choose Export Script Library.
3In the Choose Library dialog box, choose the library that you want to export from the Library list box, and click OK.
4Choose the drive and folder where you want to store the library.
5Click Save.
Creating and deleting script libraries
You can store and organize scripts to make it easier to locate and access them. When you create a new script, it is automatically saved to the
currently selected script library. However, you can move a script to a new library. If you no longer need a script library, you can delete it.
To create a script library
1Choose Window Scripts.
2In the Scripts panel, click the Script options button , and choose New Script Library.
3In the New Library dialog box, type a name in the Save As box, and click OK.
A header bar for the new library appears at the bottom of the library panel and its title appears in the list of available libraries. The new
library contains one script by default.
To delete a script library
1Choose Window Scripts.
2In the Scripts panel, click the Script options button , and choose Remove Script Library.
3In the Choose Library dialog box, choose a library from the Library list box, and click OK.
4Click Yes.

Printing images | 813
Printing images
Corel Painter provides extensive options for printing your work.
This section contains the following topics:
•“Printing basics” (page 813)
•“Printing images” (page 814)
•“Saving files in EPS format for printing” (page 815)
•“Printing composite images” (page 816)
•“Printing shapes” (page 816)
Printing basics
Whether you are planning to print your artwork to your desktop printer or send it to a print service provider, keep the following
considerations in mind to ensure that the finished image appears as intended.
Image size, resolution, and print quality
The size and resolution of an image affect its print quality. For best results, set the image resolution and size when you create your
document. Choose image dimensions and resolution that match your print intent. For information about image resolution, see “Resolution
and print quality” on page 101. For information about image dimensions, see “Canvas size and aspect ratio” on page 98.
Printing colors accurately
Corel Painter allows you to manage colors when printing to ensure accurate color reproduction. Color management is not enabled by
default. If you want to use color management while working on or printing a document, you must first set up color management for your
system. For more information, see “Color management” on page 279.
Proofing and soft-proofing documents
Soft-proofing lets you look at the final result without committing ink to paper. You can verify whether the color profile of the document is
suitable for a specific printer or monitor and avoid unwanted results. For more information, see “What is soft-proofing?” on page 282.
If you’re sending your images to a print service provider for printing, it is recommended that you first obtain proofs. You can use proofs
from a black-and-white printer to check page size and image placement. Proofs from a color printer provide a general impression of what
your final image will look like. Keep in mind that the proof is not an accurate representation of a final print produced by an offset printing
process. The final output is affected by a combination of the print process, inks, and paper types used.

814 | Corel Painter 2022 User Guide
Printing images
Before printing an image, you can specify printer properties, including paper size and device options. For example, you can specify printer
features such as duplexing stapling. The preferences that you choose depend on several factors: the type of output device to be used,
whether the printed output will be in color or in black and white, and whether you are printing separations. You can print Corel Painter
images on a wide variety of printers, including PostScript, Windows Graphics Device Interface (GDI), and QuickDraw, and high-resolution
imagesetters.
You can manually adjust the page size, orientation, and margin settings to match the standard paper settings for printing. You can also print
an image that is larger than a selected page size by automatically resizing the image to fit the page. For example, you can automatically
resize a 12-by-12-inch image to fit on an 8.5-by-11-inch page.
You can also print an image to a file, so you can send the file to a print service provider for printing. Some of these options are available only
on the Windows operating system.
To set printer properties
1Choose File Print.
2Do one of the following:
• (macOS) Click the Show Details button, and choose an option from the list box (such as Page Attributes, Layout, Color Matching, or
Paper Feed).
• (Windows) On the General page, click Preferences.
3Set any properties in the dialog box.
To print an image
1Choose File Print.
2Do one of the following:
• (macOS) Choose a printer from the Printer list box, choose an option from the Pages list box, and type a value in the Copies box.
• (Windows) On the General page, choose a printer from the Select Printer area, enable an option in the Page Range area, and type a
value in the Number of copies box.
3Click Print.
You can also
Print a grayscale version of the image Do one of the following:
•(macOS) Click the Show Details button, choose Corel Painter
2022 from the list box, and enable the Print Grayscale check
box.
•(Windows) Choose the Painter 2022 tab, and enable the Print
Grayscale check box.
Print to a non-PostScript printer (Windows only) Choose the Painter 2022 tab, and enable the GDI Printing option.
Print an image to a color PostScript device (Windows only) Choose the Painter 2022 tab, and enable the Color PostScript
option.
Print separations (Windows only) Choose the Painter 2022 tab, and enable the Separations option.

Printing images | 815
You can also
The output consists of four pages, one each for cyan, magenta,
yellow, and black. You can print separations from Corel Painter with
PostScript devices, including high-resolution imagesetters. Corel
Painter places a color bar, registration marks, and the color name
on each of the four separated plates.
Print an image to a black-and-white PostScript laser printer
(Windows only)
Choose the Painter 2022 tab, and enable the B & W PostScript
option.
To manually adjust page layout for printing
1Do one of the following:
•(macOS) Choose File Print, click the Show Details button, and choose Page Attributes from the list box.
•(Windows) Choose File Page Setup.
2Choose a preset page size from the Paper Size list box (macOS) or the Size list box (Windows).
3In the Orientation area, choose one of the following options:
•Portrait — sets the page’s height to be greater than its width
•Landscape — sets the page’s width to be greater than its height
4Do one of the following:
• (macOS) Choose Margins and Layout from the list box, and choose any margins and layout options you want.
• (Windows) In the Margins area, specify values in the Left, Right, Top, and Bottom boxes.
To automatically resize an image to fit the page
1Choose File Print.
2Do one of the following:
• (macOS) Click the Show Details button, choose Corel Painter 2022 from the list box, and enable the Fit to page check box.
• (Windows) Click the Painter 2022 tab, and enable the Size to Fit Page check box.
You must enable this option to print images larger than the page size.
To print to a file (Windows only)
1Choose File Print.
2On the General page, enable the Print to file check box.
3Click Print.
4In the Save Print Output As dialog box, type a filename in the File name box.
Saving files in EPS format for printing
You can save files in EPS-DCS format for printing. It is important to note that you cannot reopen EPS-DCS files in Corel Painter. Therefore,
you should also save a copy in another format first so that you can reopen it in Corel Painter.
When saving to EPS-DCS, you can enable an output preview, such as color preview. Corel Painter uses the loaded ICC profiles to control
separation. If the output preview is disabled, Corel Painter uses the default separation tables. For more information, see “Understanding
color management” on page 279.
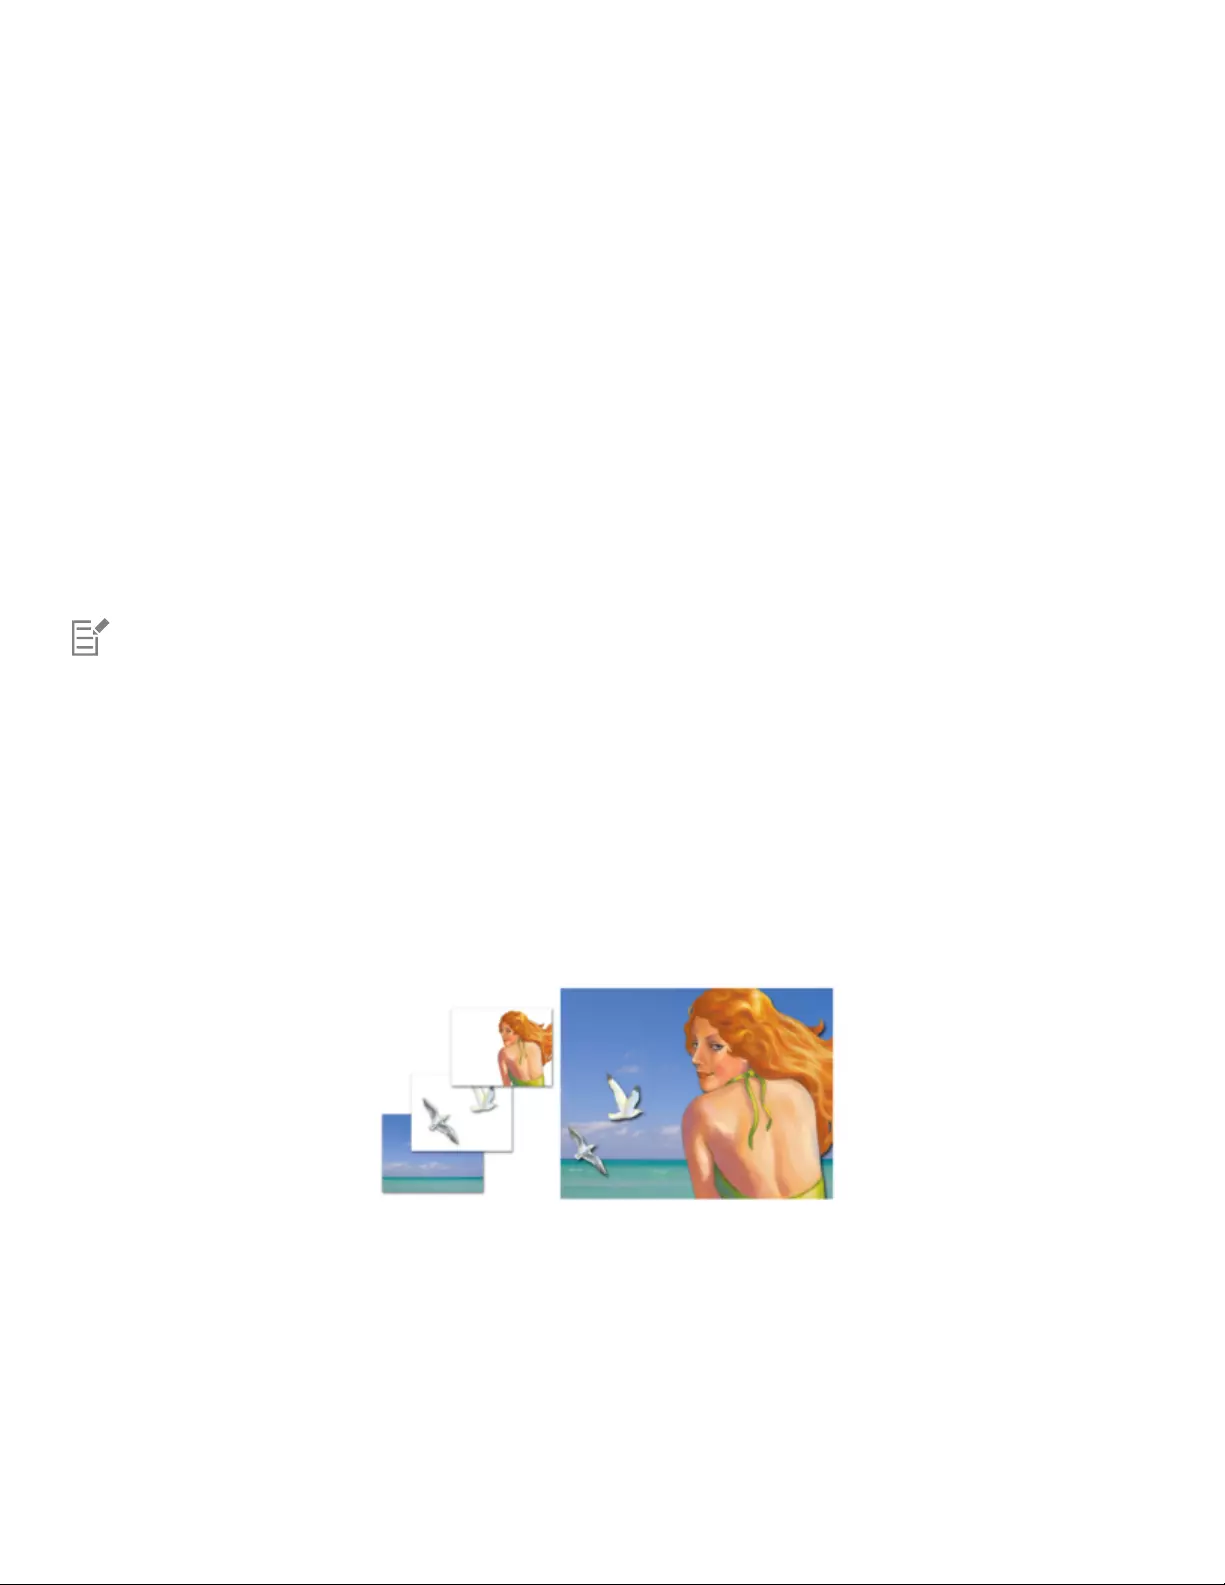
816 | Corel Painter 2022 User Guide
The images that you save as encapsulated PostScript (EPS) files conform to the Desktop Color Separation (EPS-DCS) format.
To save a file in EPS format for printing
1Choose File Save As.
2In the Save Image As dialog box, choose PostScript EPSF from the Format (macOS) or Save as type (Windows) list box, and click Save.
3In the EPS Save Options dialog box, enable the Hex (ASCII) picture data check box to change the data format.
Enabling this check box allows another method of storing PostScript information, but it approximately doubles the size of the saved file.
Some programs require this option to be enabled.
4Enable one of the following output preview options:
•No preview
•Black and white preview
•Color preview
You may need to enable the Black and white preview option to print EPS files on some laser printers. Although the preview or display is
in black and white, the color information remains intact.
If you are creating a document that is destined for printing as well as online viewing (for example, a PDF file), enable the Color preview
option.
Corel Painter uses the device’s default screening information to produce high-quality color separations. If the No preview option
is enabled when you save a file in EPS format, Corel Painter uses the Color Studio separation tables with your device’s default
screening.
Printing composite images
Printing a composite image that contains many layers and shapes can be time-consuming. You can print a single-layer version of the image
much more quickly.
Instead of flattening a composite image by dropping each layer to the canvas, you can clone the file to produce a flattened image,
which you can then print. This method lets you preserve the layers in the saved RIFF file in case you want to change them later. For more
information, see “To clone an image by using Quick Clone” on page 198.
You can print a single-layer version of a composite image
Printing shapes
In Corel Painter, you can interleave shapes with layers in the Layers panel, which can affect how your document is printed. Shapes are vector
objects, as opposed to pixel-based objects, which makes them resolution-independent. Corel Painter attempts to preserve shapes as vector
paths in order to print at the full native resolution of PostScript printers.
When printing to PostScript devices, Painter will rasterize shapes that use effects such as transparency and certain composite methods.

Printing images | 817
Any object in a lower position in the Layers list “touched” by a rasterized shape must also be rasterized to preserve the effect. For example, if
you have a shape with transparency on top of a number of other shapes, all shapes below it must be rasterized to preserve the transparency
on the canvas even if the overlap area is small. Similarly, if part of an image from a layer is placed over a shape, the shape must be rasterized
to be correctly printed.
If you want to print shapes at the full resolution of your printer, ensure that the shapes are not transparent, that their composite method is
set to Default, and that they are not under any other transparent layers or objects.
For more information about shapes, see “Shapes” on page 759.

818 | Corel Painter 2022 User Guide

Notes for users of Adobe Photoshop | 819
Notes for users of Adobe Photoshop
If you have previously worked with Adobe Photoshop, you may notice the differences in the tools and terminology of Corel Painter. This
section describes these differences and provides additional tips to help you move smoothly between these applications.
This section contains the following topics:
•“Comparing terminology in Corel Painter and Adobe Photoshop” (page 819)
•“Comparing tools in Corel Painter and Adobe Photoshop” (page 820)
•“Frequently asked questions from users of Adobe Photoshop” (page 821)
Comparing terminology in Corel Painter and Adobe Photoshop
Certain terms and concepts in Corel Painter differ from those of similar features in Adobe Photoshop. The following table lists some common
terms in Photoshop with their equivalent terms in Corel Painter.
Adobe Photoshop term Corel Painter term
Action Script
Adjustment layer Layer
Animation Movie
Blending mode Composite method
Indexed color mode Web-safe color palette
Smart Object Reference layer
Layer effect Dynamic plug-ins
820 | Corel Painter 2022 User Guide
Adobe Photoshop term Corel Painter term
Layer style Composite method
Palette Panel
Selection Selection
Snapshot Clone
Comparing tools in Corel Painter and Adobe Photoshop
The following table lists Adobe Photoshop tools and the corresponding Corel Painter tools. Many of these tools create similar results but
operate slightly differently. For that reason, we also provided a link to a corresponding help topic that describes the Corel Painter tool.
Adobe Photoshop tool Corel Painter tool For more information
Actions palette Scripts panel See “Displaying the Scripts panel” on page
806.
Blur tool Focus effect See “Using focus and esoterica effects” on
page 625.
Burn tool Burn tool See “Dodging and burning” on page 305.
Clone Stamp tool Rubber Stamp tool See “Cloning image areas” on page 212.
Crop tool Crop tool See “Cropping images” on page 115.
Dodge tool Dodge tool See “Dodging and burning” on page 305.
Drop shadow Drop shadow See “Adding drop shadows to layers” on
page 565.
Elliptical Marquee tool Oval Selection tool See “Creating pixel-based selections” on
page 603.
Eyedropper tool Dropper tool See “Sampling colors from images” on page
258.
Filter Gallery Effects menu See “Common options for effects” on page
623.
Notes for users of Adobe Photoshop | 821
Adobe Photoshop tool Corel Painter tool For more information
Freeform Pen tool Quick Curve tool See “Drawing lines and curves” on page
762.
Gradient tool Interactive Gradienttool
Gradients panel
Gradient fill, available with the Paint Bucket
tool
See “Applying gradients” on page 711.
Hand tool Grabber tool See “Repositioning images” on page 114.
Lasso tool Lasso tool See “Creating path-based selections” on
page 601.
Magic Wand tool Magic Wand tool See “Creating pixel-based selections” on
page 603.
Move tool Move mode of Transform tool See “Moving selections” on page 616.
Paint Bucket tool Paint Bucket tool See “Exploring painting media” on page
157.
Path Selection tools Shape Selection tools See “Selecting a shape” on page 767.
Pen tool Pen tool See “Drawing lines and curves” on page
762.
Polygon Lasso tool Polygonal Selection tool See “To make a freehand selection” on page
602.
Rectangular Marquee tool Rectangular Selection tool See “Creating path-based selections” on
page 601.
Type tool Text tool See “Adding text to images” on page 781.
Frequently asked questions from users of Adobe Photoshop
When I open Photoshop (PSD) files, which elements are preserved and which are lost or modified?
The following table lets you know what changes to expect when you open a PSD file in Corel Painter.

822 | Corel Painter 2022 User Guide
Adobe Photoshop element When the PSD file is opened in Corel Painter
Alpha channels Alpha channels are preserved.
Blending modes Most blending modes are preserved as composite methods. If no
equivalent composite method exists for a particular blending mode,
the blending mode is converted to the Default composite method.
Color If the file does not use the RGB color model, you are prompted to
convert the file to the default RGB color profile in Corel Painter.
To avoid this step, you may want to convert your files to the RGB
color model in Photoshop before opening them in Corel Painter. For
more information, see “Color management” on page 279.
Layers Layers and layer masks are preserved.
Layer effects and adjustment layers are not supported. To preserve
the results of using these elements, you may want to merge or
flatten them in Photoshop before opening the file in Corel Painter.
Shape layers, layer clipping paths, and clipping groups are not
preserved.
When I save files to the PSD file format, which elements are preserved and which are lost or modified?
The following table lets you know what changes to expect when you save a file to the PSD file format.
Corel Painter element When saved to PSD file format
Color RGB options are available when you save to the PSD file format.
Impasto Most Impasto brushstrokes are preserved if you save the individual
layers in the PSD file. If you drop the layers before saving, you may
lose some of the Impasto information.
Layers All layers are converted to standard Photoshop transparent layers.
All Corel Painter layer composite methods are converted to
Photoshop blend modes. For information about comparing Corel
Painter composite methods with Photoshop blending modes, see
“Importing and exporting layers” on page 579.
Masks Layer masks are preserved in the PSD file.
Shapes Shapes are converted to bitmaps and assigned to appropriate
layers.
Text Text is converted to a bitmap and assigned to the appropriate layer.

Setting preferences | 823
Setting preferences
Corel Painter preferences allow you to customize the program to complement your work style and to achieve optimal performance. The
purpose of this section is to describe all Corel Painter preferences and, when applicable, provide references to more detailed information.
This section contains the following topics:
•“General preferences” (page 823)
•“Brush cursor preferences” (page 824)
•“Special layers preferences” (page 826)
•“Interface preferences” (page 827)
•“Performance preferences” (page 828)
•“Shapes preferences” (page 830)
•“Cloning preferences” (page 831)
•“Tablet and trackpad preferences” (page 832)
•“Connections preferences” (page 833)
You can also find set preferences for setting up the drawing cursor, brush tracking and customizing keyboard shortcuts. For more
information, see “Setting up the drawing cursor” on page 159, “Brush tracking and calibration” on page 153, and “Customizing keys” on
page 132.
General preferences
The general preferences affect various aspects of Corel Painter. For example, you can specify preferences for saving documents, controlling
brushes, and saving. The following tables categorize, list, and describe all general preferences.
Brush preference Description
Align constrained brushstroke to canvas Matches the brush rotation angle to the canvas rotation angle
Disable feature scaling when resizing brush Disables the Scale feature with brush size option in all areas of
the application
Simplified brush resizing control (Legacy-style) Removes the green highlight from the onscreen brush resizing
control

824 | Corel Painter 2022 User Guide
Create backup on Save Creates a backup file every time you save a document. For more
information, see “Saving and backing up files” on page 118.
Show Using Audio Expression dialog box Displays the Using Audio Expression dialog box every time you
use Audio Expression. Enable this check box if you previously
enabled the Do not show this again check box in the Using Audio
Expression dialog box.
Warn me to save texture
Auto-save dabs to the active captured dab library Automatically saves the dabs to the active captured dab library
Notify me when a new captured dab may not paint due to a
dab effect
Lets you know if brush has a dab effect, so you can remove it
or reduce its Strength in the Captured panel if the brush is not
painting.
Auto-record script Enables the automatic saving of Corel Painter background scripts
Brush size increment Lets you set the brush size increment value in pixels. For more
information, see “Setting basic brush attributes” on page 320.
Align Brush to Path tolerance Determines how close the brushstroke must be to the path or
shape for automatic alignment to occur
For more information, see “Aligning brushstrokes to paths and
shapes” on page 166.
Paint hidden shape Aligns a brushstroke with a hidden shape or path
Notify me of available product updates Notifies you automatically when a product update is available for
Corel Painter 2022
Tooltips:
•Text and images
•Text only
Displays tooltips with accompanying illustrations (if available), or
hides illustrations from tooltips, displaying only text
To access the general preferences
• Do one of the following:
•(macOS) Choose Corel Painter 2022 menu Preferences General.
•(Windows) Choose Edit Preferences General.
Brush cursor preferences
By default, when you paint, the drawing cursor appears as an icon; when you hover over the canvas, the Enhanced brush ghost shows a
representation of the brush variant onscreen and gives information about the tilt, bearing, and rotation of your pen.

Setting preferences | 825
The Enhanced brush ghost gives visual feedback about your pen in relation to the tablet. The outer ring
indicates the brush size, and the line indicates the tilt and bearing of the pen. If you have a flat-tip Intuos
Art Pen that supports 360-degree rotation, a dot appears along the outer ring to indicate the pen rotation.
Corel Painter provides a range of options to customize the appearance of the drawing cursor. You can change the cursor type; for example,
you can choose a brush ghost that shows the brush shape and size, or you can use a single pixel when painting with brushes from the Pen
and Pencils category.
The Brush ghost (left) gives you information about the size of your brush variant. The Enhanced
brush ghost (right) gives you information about the tilt, bearing, and rotation of your pen.
You can also specify a number of icon settings, such as the icon shape, color, and orientation.
To set drawing cursor options
1Choose Corel Painter 2022 menu Preferences Brush Cursor (macOS) or Edit Preferences Brush Cursor (Windows).
2In the Cursor Type area, choose a cursor type:
•Enhanced brush ghost — provides visual feedback about the brush shape and size as well as the tilt, bearing, and rotation of the
pen. If you want to see the Enhanced brush ghost when painting, disable the Show icon when painting check box.
•Brush ghost — When you paint, the cursor appears as an icon; when you hover over the canvas, it provides visual feedback about the
shape and size of the selected brush.
•Icon — displays the drawing cursor as an icon both when you paint and when you hover over the canvas
•Single pixel — displays the drawing cursor as a single pixel both when you paint and when you hover over the canvas
You can also
Choose a drawing cursor icon Choose an icon from the Shape list box:
•Default
•Brush
•Cross
•Small cross
•Torus

826 | Corel Painter 2022 User Guide
You can also
•Triangle
•Hollow triangle
•Gray triangle
Change the icon color Click the Color button, and click a color in the Colors dialog box.
Change the icon orientation Drag the Angle slider.
Special layers preferences
The special layers preferences affect how Corel Painter behaves when you paint on Thick Paint, Watercolor, and Liquid Ink Layers.
While many brushes are compatible with special layers, there are times when a chosen brush may produce brush marks that appear different
than you would expect. There are also brushes that are simply not recommended for the current layer. In these cases, Painter will prompt you
so that you can choose how to proceed.
In addition, you can set the default behavior when painting with Gel brushes, which include Fringe Watercolor, Markers, and brush variants
that use the Buildup brush method.
You can also set a default visible depth for Thick Paint layers, so that Thick Paint brushstrokes are consistent. For more information about
adjusting the appearance of Thick Paint on a layer, see “Adjusting Thick Paint layers” on page 518.
To access the special layers preferences
1Do one of the following:
•(macOS) Choose Corel Painter 2022 menu Preferences Special Layers.
•(Windows) Choose Edit Preferences Special Layers.
2Perform a task from the following table.
Special layers preference Description
Thick Paint layer Lets you set a Default Visible Depth by dragging the slider
Compatible Brushes Lets you set a default behavior when you paint with compatible
brushes on special layers
You can choose from the following options:
•Prompt me to choose
•Allow painting on special layers
Brushstrokes may look different than expected
•Create a new default layer
Incompatible Brushes Lets you set a default behavior when you paint with incompatible
brushes on the current layer
You can choose from the following options:
•Prompt me that the brush is not compatible

Setting preferences | 827
Special layers preference Description
•Create a new compatible layer
Gel Brushes
Fringe Watercolor, Markers, and variants that use the Buildup brush
method
Lets you set a default behavior when you paint with brushes that
use the Gel composite method
You can choose from the following options:
•Prompt me to choose a composite method
•Switch the composite method to Gel
Brushstrokes will have an ink-like, semi-transparent look.
•Maintain the Default composite method
Some brushes may produce white artifacts.
Merging Special, Plug-in, and Shape Layers Lets you set a default behavior when converting special, plugin,
and shape layers to a default layer
Interface preferences
Corel Painter lets you modify a variety of settings that affect the look and feel of your application. You can choose a theme, change the
background color of the document, specify the default document view, and set the orientation and layout of the toolbox, command bar,
and Media Selector bar, so that the program looks the way you want. Some user interface elements, such as the document window border
color and the color of the document title bar are controlled by the theme of your operating system. To change the appearance of these user
interface elements, explore the personalization options of your operating system.
The following table describes the Corel Painter preferences for modifying the display of the application interface.
Color Theme Lets you choose a color theme for your workspace. The default
color theme is Dark Gray. To make the workspace lighter or darker,
you can choose one of the following themes: Medium Gray, Light
Gray, Frost, Sepia.
Workspace Options preferences Description
Units Lets you choose the unit of measurement used by the application’s
various sliders and other measurement options
Background Color Sets the background color of the document window
Brush Icons in Custom Palettes preference Description
Stroke (wide icons) Lets you add wide custom icons that display the brushstrokes to a
custom palette
Category Lets you add regular-width custom icons that display the brush
category to a custom palette
Default View Mode preferences Description

828 | Corel Painter 2022 User Guide
Multi-document View Sets the default workspace view to display all standard tools in the
workspace and all open documents
Single Document View Sets the default workspace view to hide your computer’s desktop
and view the document window without scroll bars
Toolbox Layout Sets the orientation and layout of the toolbox in the document
window
Media Layout Sets the orientation and layout of the Media Selector bar in the
document window
Command Bar Layout Sets the orientation of the command bar in the document window
Property Bar preferences Description
Tall (with group labels) Lets you display group labels
Short (without group labels) Lets you hide group labels
Brush Selector Bar Height preferences Description
Same as Property Bar with Group Labels Sets the height of the Brush Selector bar to match the height of the
property bar when group labels are displayed
Same as Property Bar without Group Labels Sets the height of the Brush Selector bar to match the height of the
property bar when group labels are not displayed
Display preference Description
Area Averaging: Increases performance by using pixel averaging
below 50% zoom
Increases the speed at which the screen is drawn when you are
viewing an image at less than 50% magnification. Enabling this
option may decrease accuracy.
To access the interface preferences
• Do one of the following:
•(macOS) Choose Corel Painter 2022 menu Preferences Interface.
•(Windows) Choose Edit Preferences Interface.
Performance preferences
You can set various performance preferences to optimize Corel Painter. For example, you can change memory options such as the amount of
memory (RAM) used by the application, choose processor (CPU) or graphics processor (GPU) settings, or specify the volume name (macOS)
or drive (Windows) that you want to assign as a scratch disk.
In addition, you can optimize performance by disabling or hiding certain features that you don’t need. For more information, see “What
settings do I use to ensure the optimal performance of Corel Painter?” on page 848.

Setting preferences | 829
You can also run the Brush Accelerator utility to evaluate your system’s GPU, CPU, and memory. The test results indicate whether your
system’s GPU, CPU, and memory meet, exceed or are below the recommended specifications.
The performance preferences are described in the following table.
Processor (CPU) preference Description
Thread Allocation Allows you to specify the number of cores that you want Corel
Painter to use. If you use all of the computer’s available cores, it
may impact the performance of any applications that you have
running in the background.
You must restart Corel Painter for this change to take effect.
Graphics Processor (GPU) preference Description
Use the Graphics Processor (GPU) to accelerate brush
performance
Allows you to enable or disable your system’s graphic processor
(GPU)
You must restart Corel Painter for this change to take effect.
Configure Allows you to select which graphics processor (GPU) Painter uses to
accelerate brush performance
Memory (RAM) preferences Description
Allocate to Painter Changes the percentage of RAM memory used by Corel Painter,
which is set to 80% by default. You can dedicate as much as 100%
of the memory to Corel Painter. The lowest percentage you can
choose is 5%.
You must restart Corel Painter for this change to take effect.
Undo Levels Allows you to undo and redo up to 256 levels of changes
The number of Undo levels applies across all open documents. For
example, if you set 5 undo levels and have two open documents,
undoing three operations on the first document leaves you with
only two undo operations on the second document.
In addition, setting multiple undo levels uses a significant amount
of disk space. If you perform multiple operations on the entire
image, the whole image must be saved for each undo.
Scratch Drive Allows you to specify the volume name (macOS) or drive
(Windows) that has free memory to allow Corel Painter to perform
an operation if your computer runs out of RAM
To ensure the optimal performance of scratch disks, consider the
following:
•Choose a drive that does not contain the files that you are
currently working on.
•Choose a different drive than the one used by the operating
system’s virtual memory.

830 | Corel Painter 2022 User Guide
•Defragment the scratch disk drive on a regular basis.
Display preferences Description
High Quality Display (disable to improve performance of high
resolution paintings)
Applies smoothing to the current view to minimize pixelation when
zooming. Disabling this check box improves performance when
working on high-resolution paintings.
Use memory (RAM) to cache application UI (enable to improve
performance)
Uses RAM to cache the application UI to improve performance.
Enabling this check box may require a restart of Corel Painter.
Brush Accelerator preferences Description
Run Brush Accelerator Now Runs the Brush Accelerator test to evaluate your system’s processor
(CPU), graphics processor (GPU), and memory (RAM). The test
typically takes a few minutes. It is recommended to save and close
all open documents and to not run any unnecessary applications
during the test.
View Report Displays a report of the Brush Accelerator test results in the
Welcome Screen
Help with Performance Settings Displays the Help for Performance preferences
To specify performance preferences
• Do one of the following:
•(macOS) Choose Corel Painter 2022 menu Preferences Performance.
•(Windows) Choose Edit Preferences Performance.
Shapes preferences
The shapes preferences allow you to set the default fill and stroke for creating new shapes. You can also change the appearance of the
Bézier handles when drawing or the wing, point, path, outline, and anchor colors.
Shape preference Description
On Draw — Fill with current color Fills both open and closed shapes with the currently selected color
when drawing
On Draw — Stroke in current color Outlines both open and closed shapes with the currently selected
color when drawing
On Close — Fill with current color Fills the shape with the currently selected color when the shape
paths are closed

Setting preferences | 831
Shape preference Description
On Close — Stroke in current color Outlines the shapes with the currently selected color when the
shape paths are closed
Big handles Controls the size of the anchor points and the direction of the wing
handles to help you grab and drag them easily. If you want big
points, enable this option.
Colors — Wing/Bézier/Handle Sets the color of the wings, Bézier, and handles
Colors — Outline/Path Sets the color of the shape outline paths
Colors — Selected Point/Anchor Sets the color of the selected anchor points. The unselected anchor
points appear “hollow.”
To change shape preferences
• Do one of the following:
•(macOS) Choose Corel Painter 2022 menu Preferences Shapes.
•(Windows) Choose Edit Preferences Shapes.
If you set default preferences for the shape outline and fill color by using the Set Default Shape Attributes dialog box, the settings
in the Preferences dialog box are ignored.
Cloning preferences
The Cloning preferences let you customize the cloning and Quick Clone behavior. For example, you can choose to always use the last
selected cloner brush variant or automatically open the Clone Source panel. For more information, see “To clone an image by using Quick
Clone” on page 198.
Quick Clone preferences Description
Close source image Closes the clone source image automatically when the image is
cloned. The clone source is embedded in the clone document, but
the original image is closed.
Open Clone Source panel Displays the Clone Source panel automatically when Quick Clone
is used
Clear Canvas Lets you start cloning with a blank canvas
Turn on Tracing Paper Activates Tracing Paper
Switch to cloner brushes Activates the last Cloner brush variant

832 | Corel Painter 2022 User Guide
Clone color Uses the current brush variant to clone the underlying color.
To enable the Clone Color check box, you must disable the Switch
to cloner brushes check box.
Start painting on a layer Lets you start painting on a Default, Thick Paint, Liquid Ink, or
Watercolor layer, which you can choose from the Layer Type list
box
Apply AI style Lets you set a default AI style, which you can choose from the A.I.
Style Preset list box
Insert original image source as a new layer Creates a new layer with your clone source image
Cloning preferences Description
Show Edit Source Image dialog box Displays a dialog box every time you switch to the Source Image
window from the clone document window. The dialog box warns
you that any source image editing needs to be updated, saved,
exported, or discarded.
To change Cloning preferences
• Do one of the following:
•(macOS) Choose Corel Painter 2022 menu Preferences Cloning.
•(Windows) Choose Edit Preferences Cloning.
Tablet and trackpad preferences
You can choose a suitable option for the tablet and other devices that you use to paint with the application. Before setting these options,
make sure your devices are connected and have the latest driver software installed.
You can also enable trackpad behavior on supported Apple devices. For more information, see “Trackpad support (macOS)” on page 123.
In addition, you can access multi-touch options for both macOS and Windows. For more information about multi-touch options, see “Multi-
touch support” on page 122.
To specify tablet preferences
•Choose (macOS) Corel Painter 2022 menu Preferences Tablet and Trackpad or (Windows) Edit Preferences Tablet.
To choose an input device (Windows)
1In the Tablet settings area, choose an input device.
•Wacom-compatible device (Wintab) — configures Painter to use Wacom tablets and Wacom-compatible devices
•RTS-compatible device (Real-Time Stylus) — configures Painter to use a tablet or device that has the RTS feature
2Restart Corel Painter.

Setting preferences | 833
Connections preferences
The Connections preferences allow you to connect Corel Painter to companion applications.
Connections preferences Description
Allow companion applications to connect to Painter Allows you to connect Corel Painter to companion applications
Service Name Gives your copy of Corel Painter a unique name
Authentication Code Ensures that only a legitimate user can access your copy of Corel
Painter from a remote application
To change Connections preferences
• Do one of the following:
•(macOS) Choose Corel Painter 2022 menu Preferences Connections.
•(Windows) Choose Edit Preferences Connections.

834 | Corel Painter 2022 User Guide

Web | 835
Web
Corel Painter includes various options for creating images for the web.
This section contains the following topics:
•“Choosing web-safe colors” (page 835)
•“Posterizing using color sets” (page 835)
•“Choosing web-friendly brushes” (page 836)
•“Creating transparent GIFs” (page 837)
•“Reducing the number of colors in GIF files” (page 838)
•“Creating image maps” (page 839)
•“Creating server-side image maps” (page 841)
•“Creating web page backgrounds” (page 841)
•“Creating web buttons” (page 843)
Choosing web-safe colors
Using a web-safe color table becomes important when you expect to deliver your web page to viewers who use monitors displaying 256
or fewer colors. On such a monitor, web browsers dither colors that aren’t found in the web-safe palette. So, depending on your audience,
making sure that some or all of your image conforms to the web-safe palette can make good sense.
To select a web-safe color palette
1Click the Options button in the Color Set Libraries panel, and choose Import Color Set.
2In the Select Color Set dialog box, select the Hexadecimal folder within the Color Sets folder.
3Choose a hex file from the list, and click Open.
The selected color palette is displayed in the Color Set Libraries panel.
Posterizing using color sets
You can use the Posterize Using Color Set option to force your image to use the default color set. Posterize Using Color Set can help make
the colors in your image ready for delivery to the web — without a lot of dithering or shifting of colors.
836 | Corel Painter 2022 User Guide
Posterizing means adjusting the number of color levels an image contains. Corel Painter can automatically constrain all colors in your image
to a web-safe, 216-color palette. Although the Posterize Using Color Set option is not designed to be a highly sophisticated method of
reducing color (it offers you no control over exactly how color reduction is performed), it can be a real time-saver.
In addition, you can constrain the colors you use to the default or another Corel Painter web-safe palette, utilize web-safe single-color
brushes, and keep the number of colors in your image to a minimum.
It’s important to note that exporting to GIF format can compromise the color set values used when Posterize Using Color Set has been
performed. For best results in those cases, do the following:
• First, save your reduced-color image in a 24-bit format, such as Windows Bitmap, TIFF, or PICT. This maintains the benefits of defining
web-safe colors in Corel Painter.
• Next, open the image in a tool that supports indexed color to save the GIF — one that offers “constrain to color set” features.
• Finally, save the image to GIF format. The web-safe colors from Corel Painter are maintained and your image is ready to go on the web.
To posterize using a color set
1Select an area of your image you want affected or select nothing if you want the entire image affected.
2Make sure the proper color set is active.
3Choose Effects Tonal Control Posterize Using Color Set.
Choosing web-friendly brushes
Web artists are pulled between the desire for beautiful images and the need for small image file sizes, with faster download times. Corel
Painter includes brushes that are designed for creating images for the web, making it easier to create smaller files without compromising
image quality.
Bitmapped images can be roughly divided into two general types — images with areas of flat color and continuous-tone images.
Continuous-tone images (which most of the normal features in Corel Painter produce) are best saved as JPEG images. Images with flat areas
of color are best saved as GIF images. The more regions of flat color there are in an image, the more compressed (smaller) the resulting GIF
file is.
The strength of Corel Painter is its Natural-Media brushes; however, Corel Painter is also versatile in the creation of flat color suitable for GIF
images on the web.
One-color brushes
You can set the brush controls to create areas of flat color, while keeping all the feeling and nuance of a Natural-Media brush. These brush
edges are aliased, meaning they have jagged edges. For example, if a brush color is black, there are no intermediate gray pixels at the
brush’s edge. There is either black or the background color. In addition to a flat color, this brush type responds to paper texture.
Magnified detail of the stroke is shown to the left of each W-stroke. In this
image, the same brushstroke is applied using a different paper texture.
Web | 837
To make a brush with a flat-edged appearance, change the method to Cover and the subcategory to Grainy Edge Flat Cover. If you have
created some of your own brush variants in Corel Painter, you can convert them to web-friendly brushes, too.
Web brushes are also included with the extra content in Corel Painter, which is available online.
To change the brush method and subcategory
1Choose Window Brush Control Panels General.
2From the Method list box, choose Cover.
3From the Subcategory list box, choose Grainy Edge Flat Cover.
The result is the current brush with a web-friendly hard edge.
4Save your creation as a variant.
For more information, see “Saving and deleting brush variants” on page 327 and “Creating and deleting brush categories” on page 329.
Brushes that require a particular method, such as Wet, Eraser, or Plug-in, will not work as well with the Cover method. If you use
another brush method, you will not be working with a one-color brush.
To load Corel Painter web-friendly brushes into a library
1Click the Brush Selector.
2Click the Brush library options button , and choose Import Brush Library.
3In the Import Brush Library dialog box, locate a web brushes library that you have downloaded or created.
4Click Open.
Creating transparent GIFs
Corel Painter lets you create web-ready transparent GIFs. If designed correctly, GIFs with transparent areas are very effective when displayed
over background colors or tiles.
A GIF with a transparent background (the airplane) is displayed over a blue background image.
In Corel Painter, the method of defining transparency during GIF export is to define the transparent areas based on the content of the
selected layers. The edges of the floating elements on the layers help define the transparent areas. For more information, see “Layers” on
page 539.
When saving to the GIF file format, you can reduce the number of colors, which translates into smaller files.

838 | Corel Painter 2022 User Guide
To create a transparent GIF from a layer or group of layers
1From the Layers panel, select a layer or group of layers.
To output transparency in a GIF, you need an active selection.
2Choose Select Select Layer Content.
3Choose File Save As.
4Choose GIF from the Save As Type list box.
5Specify a location and filename, and click Save.
6In the Save As GIF Options dialog box, enable the Output Transparency check box to make the selected area the only part of the canvas
displayed on your web page.
7Enable one of the following options:
•Background is WWW Gray — sets the transparent color to 75% gray
•Background is BG Color — sets the transparent color using the additional color specified in the Color panel. Note that this setting
does not refer to the background color of the HTML page.
8In the Preview window, verify that the selected area is correctly masked and that the transparent area is correctly positioned. Transparent
areas appear as a grid.
If necessary, drag in the Preview window to view all parts of the image.
9Choose one of the following imaging methods:
•Quantize to Nearest Color — causes Corel Painter to look at each pixel and pick the nearest color. This is useful when the image you
are saving has broad areas of a single color.
•Dither Colors — causes Corel Painter to apply a stippled effect to the chosen colors to generate a more accurate, less banded result.
Dither Colors can reduce the effectiveness of GIF file compression.
The RIFF format contains image data that is lost when saving to GIF or JPEG. To edit the file later, save a RIFF copy before saving to
the GIF or JPEG file format.
Reducing the number of colors in GIF files
Web designers are always seeking a careful balance when creating graphics for the web. Artwork and images must be as rich and vibrant as
possible while remaining small and easily downloadable.
One way of keeping the file size small is to reduce the number of colors used to create the image. Reducing the number of colors reduces
file size and, therefore, download time.
A web artist may end up saving multiple versions of the same graphic element, varying the number of colors used. These versions must then
be placed on a web page to determine if the quantity of colors used is acceptable. This whole process can be time-consuming.
In Corel Painter, you can make this decision during the process of saving the image to GIF format, by using the Preview window on the Save
As GIF Options dialog box.
To reduce the number of colors in a GIF
1Choose File Save As and name your image file.
2Choose the GIF file format, and click Save.
Click OK to dismiss the layer warning, if displayed.
3In the Save As GIF Options dialog box, in the Number of Colors area, enable the 256 Colors option.
In the preview window, the image appears in 256 colors.
4Enable the 128 Colors option.
In the preview window, the image appears in 128 colors.
Web | 839
5Continue reducing the number of colors in the image until you find the minimum number of colors necessary for adequate display on
your web page.
6Choose one of the following imaging methods:
•Quantize to Nearest Color — causes Corel Painter to look at each pixel and pick the nearest color. This is useful when the image you
are saving has broad areas of a single color.
•Dither Colors — causes Corel Painter to apply a stippled effect to the chosen colors to generate a more accurate, less banded result.
The RIFF format contains data about your image that is lost when you convert it to GIF. If you want to edit the file later, save a RIFF
copy before you generate a GIF version.
Creating image maps
An image map is a web feature that lets you jump to different locations by clicking specific areas within an image.
There are two types of image maps:
• Client-side image maps store image map information right in your HTML document. URL information appears at the bottom of the
browser window when a pointer is moved over the mapped areas.
• In a server-side image map, image map information is saved in a separate file that is stored on a server and accessed by a Common
Gateway Interface (CGI) script. Coordinate information, not URL information, is displayed at the bottom of the browser window when a
pointer is moved over a mapped area.
Client-side image maps are faster and more efficient because all the image information is present in the HTML code for the page. A server—
side image map, in contrast, requires an extra round trip of information between the browser and the web server. However, client-side image
maps are not supported by very old browsers.
When a hotspot is clicked (left), the browser jumps to the page referenced by that link (right).
Client-side image mapping
A client-side image map is an image that has “hotspots” directly associated with URL information. When a hotspot is clicked, the browser
jumps to the page referenced by that link.
A client-side image map recognizes circular and rectangular “hotspots.” Therefore, Corel Painter treats a circular area as a circle and a
rectangle as a rectangle. Oval areas are exported as rectangles.
Image maps are created using layers. The size of the layer determines the clickable area. For more information, see “Layers” on page 539.

840 | Corel Painter 2022 User Guide
The size of the layer determines the size of the clickable area, or hotspot.
Server-side image mapping handles circles and ovals differently. With server-side mapping, you can export ovals. For more information on
server-side image maps, see “Creating server-side image maps” on page 841.
To define a client-side image map
1Select or create a layer or shape in the exact place in your image where you want a link created.
If you can’t see the layer’s marquee, click the Layer options button in the Layers panel, and choose Show Layer Indicators.
2Click the Layer options button , and choose Layer Attributes.
3In the Layer Attributes dialog box, specify a name for the layer.
4Enable the WWW Map Clickable Region check box.
5In the URL box, specify a URL to associate with this portion of your image (for example, http://www.painterartist.com).
6Click OK to return to the image.
7Deselect the layer, and then define the next area of your image map.
If there are two or more overlapping areas in an image map, the topmost one takes priority.
8Export your image to the GIF or JPEG file format. In the Save As GIF Options or Save as JPEG Options dialog box, enable the Client
Side Map File check box to indicate that Corel Painter should export an HTML file containing the image map definition.
The RIFF format contains data about your image that is lost when you convert it to GIF or JPEG. If you want to edit the file later,
save a RIFF copy before you generate a GIF or JPEG version.
When a client-side image map is exported, Corel Painter exports both the image and an HTML file. You can then open the HTML file
in a text or HTML editor and copy the code into another web page.
To define a default URL for an image map
1To define a default, or base, URL to use when a user clicks outside the defined hotspot areas in an image map, choose File Get Info
when no layers, shapes, or plug-ins are selected.
2In the File Information dialog box, enable the WWW Map Default URL check box.
3Enter a URL address.
4Click OK.
If you don’t provide a default URL, clicking outside the defined hotspot areas has no effect.

Web | 841
Creating server-side image maps
In Corel Painter, you can define a layer as a clickable region. Corel Painter saves this image map information within a separate text file, which
you can upload to your web server. It can then be accessed by a CGI script.
Because server-side image mapping is becoming obsolete, be sure to read the previous section on client-side image mapping support.
To create a server-side image map
1Select or create a layer or shape in the exact place in your image where you want a link created.
2In the Layers panel, select a layer.
3Click the Layer options button , and choose Layer Attributes.
4In the Layer Attributes dialog box, specify a name for the layer.
5Enable the WWW Map Clickable Region check box.
6In the URL box, specify a URL to associate with this portion of your image (for example, http://www.painterartist.com).
7Click OK to return to the image.
8Deselect the layer, then select the next hotspot in your image map. Try to avoid overlapping hotspot areas within an image map.
You can set a default URL to use if the user clicks outside of your defined hotspot areas. For more information, see “To define a default
URL for an image map” on page 840.
9Export your image to the GIF or JPEG file format. In the Save As GIF Options or Save As JPEG Options dialog box, enable either the
NCSA Map File check box or the CERN Map File check box, depending on which format is recommended by your Internet Service
Provider.
When you save the image, Corel Painter creates an additional text file that describes the clickable regions and their associated URLs.
10 Store both files (the image file and its associated image map definition file) on your web server, as directed in the documentation for
your image mapping CGI script/program. Both files must be present for the server-side image map to work.
The RIFF format contains data about your image that is lost when you convert it to GIF or JPEG. If you want to edit the file later,
save a RIFF copy before you generate a GIF or JPEG version.
Creating web page backgrounds
Corel Painter offers tools for creating web page backgrounds.
An effective web page background should be subtle and unobtrusive. This is particularly important if the background is used behind text.
You can lighten patterns by using the Edit Fade command, to make them more suitable for displaying behind text.

842 | Corel Painter 2022 User Guide
Use the Fade command to lighten a pattern.
Controlling background color
Using a background color closely matched to your background image takes no additional download time and creates a pleasing transition.
For example, suppose your page loads a dark green seamless background tile. The tile takes a little time to download. While it’s loading,
the browser displays the page, using the page background color (which, if not explicitly defined, is usually gray or white). This can cause
a jarring visual transition. Depending on the text color used, it can even make a page impossible to read until the background image has
finished loading.
Using HTML, you can specify a solid background color for a page, table, or Cascading Style Sheet (CSS) element. Although Corel Painter
can’t assist you with actually setting the background color in your HTML code, you can use Corel Painter to determine the hexadecimal
format of a color, which is used in HTML.
Using tiled backgrounds
When a background image is smaller than the boundaries of the display area for a page, table, or Cascading Style Sheet (CSS) layer, web
browsers automatically repeat the image, effectively creating a tiled pattern. Corel Painter makes it easy to create tiling background images
for use in web pages.
The CSS features in modern browsers let you apply background tiles to more elements than ever before. In the past, you could apply them
only to the page itself, or possibly to a table. Now, with CSS, layers or block-level elements — anything you can display on its own line in
traditional HTML layout — can have a background image. Since authors are no longer limited to using tiled backgrounds for just pages,
possibilities open up for the creative use of tiles behind such elements as borders, call-out boxes, or sidebars.
You can use any image or selection to define a pattern. An image designed for use as part of a pattern is normally created so that it tiles
seamlessly. That is, the eye should not be able to distinguish the edges between tile repetitions. Corel Painter has features that can help you
create seamless tiles, which you can then use as interesting web backgrounds. For information about creating, editing, saving, and filling
with patterns, see “Patterns” on page 697.
The Glass Distortion effect, the Super Soften effect (with the Wrap Around check box enabled), and most of the Tonal Control effects
preserve the seamless quality of the pattern. Some effects, such as Apply Surface Texture, can result in a noticeable seam, so experiment.
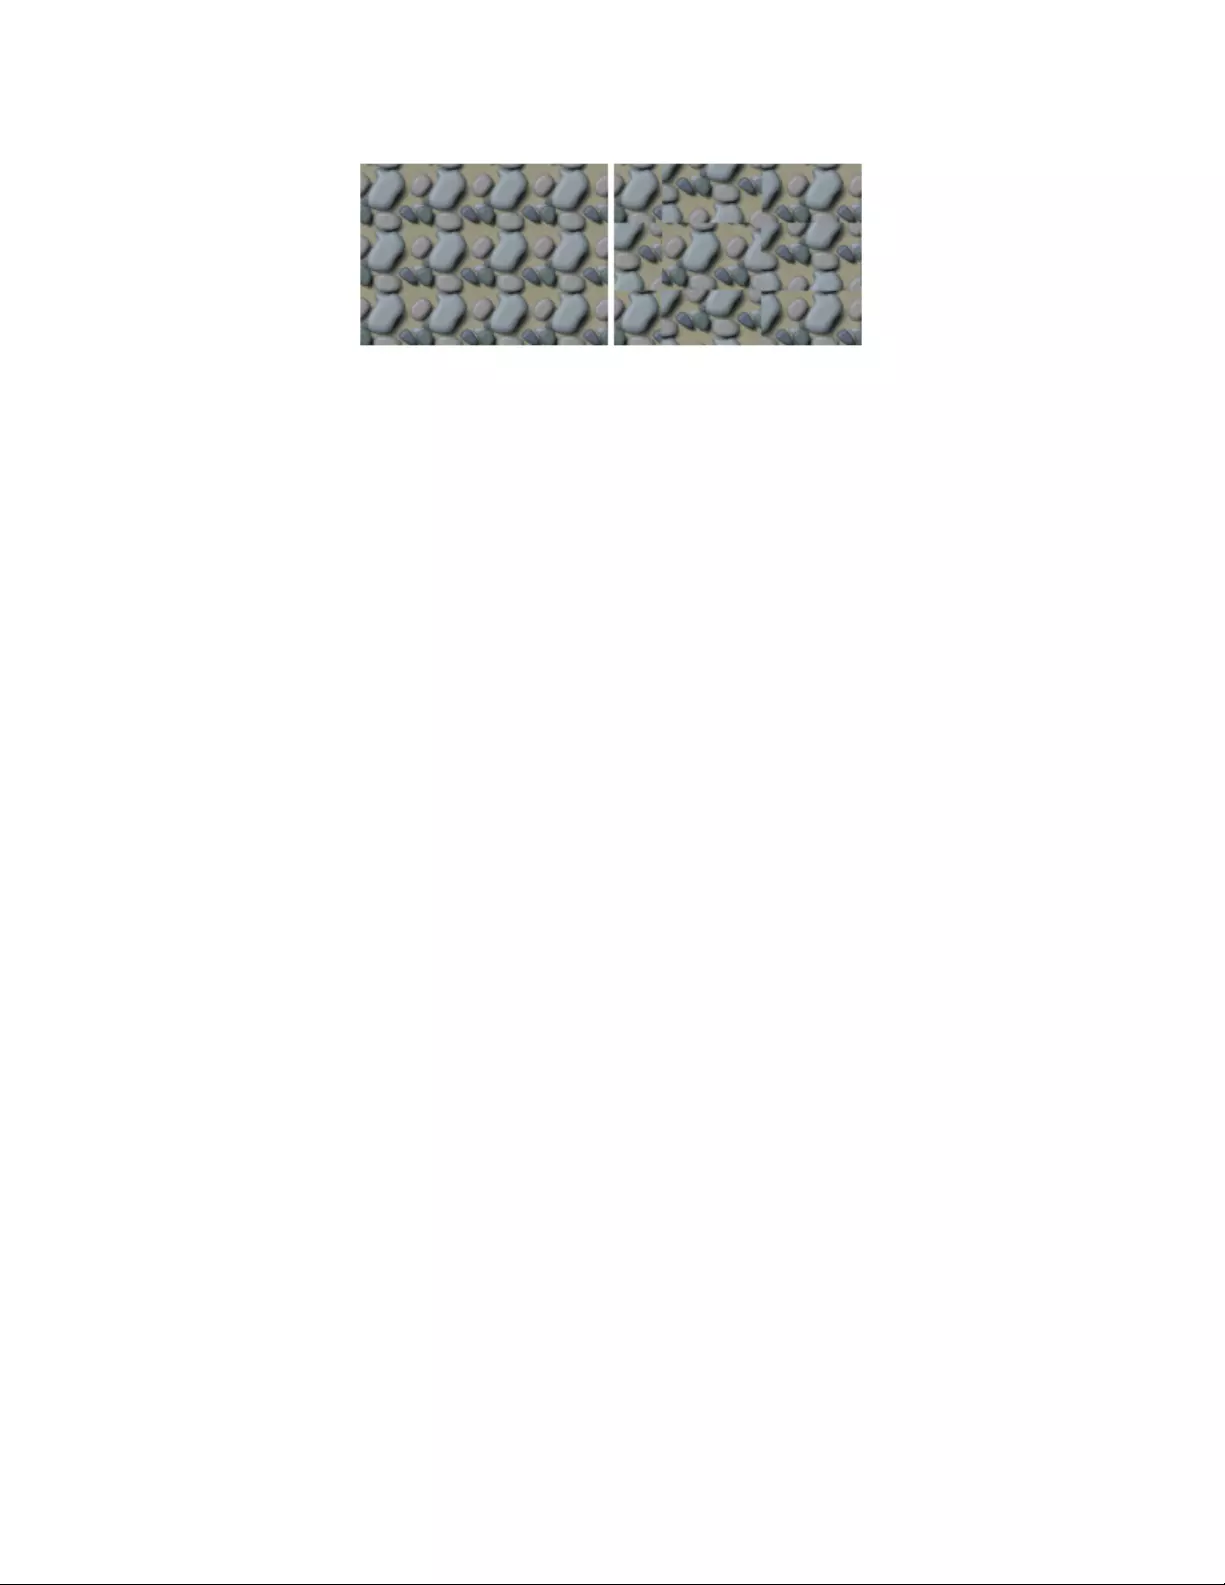
Web | 843
Example of using seamless and non-seamless tiles in a pattern
A way to partially avoid seams that occur with effects such as Apply Surface Texture is to apply the effect several times at lower strengths
(by moving the Amount slider). Shift the pattern a little (using Shift + Spacebar) between applications. This tends to “distribute” the seams
and make them less noticeable.
Tile dimensions should be as small as practical, but in most cases should not go below 20 x 20 pixels. If a tile is too small, it takes the
browser longer to render it over a large area.
When you’ve finished creating your tile, save the image in RIFF format, in case you must work with it later in Corel Painter. Then, save it in
either JPEG or GIF format for use on the web.
Web backgrounds should, ideally, be saved as GIFs, with as few colors as possible, to reduce file size. You can also use JPEGs, but they often
have larger file sizes. As a rule of thumb, any background tile over 20 KB is probably too large. For more information about saving an image
in GIF or JPEG format, see “Saving and backing up files” on page 118.
Creating tiles with fractal patterns
Another easy way to design seamless tiles is to take advantage of the effects you can create with the Make Fractal Pattern command. Make
Fractal Pattern is a pattern generator that creates organic patterns, which can make interesting background tiles. The patterns it generates
can be filled with color and even enhanced with a paper texture. For more information, see “Creating fractal patterns” on page 705.
Color Overlay, the Watercolor brushes, and Cloning are other options you can apply to a pattern. Beautiful, complex effects can also be
achieved by applying Glass Distortion to a pattern created with Make Fractal Pattern.
Creating web buttons
Corel Painter has a wide array of features that help you create web buttons. You can apply textures and effects to your web buttons.
Using shapes and selections
You can create web buttons using shapes or by choosing a selection from the Selection Portfolio. For more information, see “Drawing
shapes” on page 760. For information about using selections, see “To use a selection from the portfolio” on page 610.
Using 3D techniques
You may want to use one or more of the texturing options in Corel Painter to create 3D effects. The following sections describe several
powerful ways to quickly add 3D effects to the buttons you create.
After you’ve added a desired 3D effect, try altering the light source to create a second image that represents the button in a different state,
or try using the Hue Shift slider in the Effects Tonal Control Adjust Colors dialog box.
Adding shadows
Shadows lend a definite 3D flare to a web page. You can quickly add drop shadows to text, buttons, shapes, and layers. When you apply
a drop shadow to a shape, the shape loses its vector quality and becomes a pixel-based layer. For more information about creating drop
shadows, see “Adding drop shadows to layers” on page 565.
844 | Corel Painter 2022 User Guide
Applying surface texture
Leading the array of Corel Painter web-friendly tools, the Apply Surface Texture feature could easily become a web designer’s best friend.
You can use Apply Surface Texture to apply 3D effects to web buttons, bars, or other elements.
You can use the Reflection slider to create an effect you would expect to see in objects made of glass or polished metal, like a chrome
bumper on a classic car. The Image Luminance option in the Using list box gives your buttons an embossed look. For more information
about applying surface texture, see “Using paper to create texture” on page 652.
Using the Impasto technique
The Impasto feature lets you create the illusion of depth by applying thick paint to the canvas. You can use the Impasto technique to add a
3D appearance to all or discrete areas of your image. For more information, see “Impasto” on page 529.
Using Bevel World
No discussion of creating web buttons would be complete without mentioning Bevel World. Bevel World is a dynamic plug-in that can add
3D angled edges to your shapes and selections.
You can bevel any element in your painting, and then turn it into a 3D button.
Bevel World has controls that affect the 3D bevel shape being applied, as well as controls to adjust lighting. Try experimenting with lighting
controls. By changing the lighting on a bevelled surface, you can easily create different states for your web buttons.
Altering lighting in the Bevel World dialog box is an easy way to create images that indicate button states.
For more information about Bevel World, see “Applying the Bevel World dynamic plug-in” on page 680.
You can decide later to change the settings, as long as you have not committed the layer. To understand more about committing a layer, see
“Converting dynamic layers” on page 676.

Troubleshooting tips | 845
Troubleshooting tips
This section provides troubleshooting tips and offers answers to frequently asked questions. If your problem or question is not included in
the following list, visit the Corel Knowledge Base.
Installation
•“I am trying to install/reinstall Corel Painter but I get a warning that my serial number is invalid. What do I do?” (page 846)
•“How do I deploy Corel Painter to my organization’s network?” (page 846)
•“How do I repair my Corel Painter installation (Windows)?” (page 846)
•“How do I uninstall Corel Painter properly (Windows)?” (page 846)
•“How can I get the thumbnails of my Painter files to show in Windows Explorer?” (page 846)
Brushes and tablets
•“My brushes stopped working.” (page 846)
•“I can no longer find some of my brushes.” (page 847)
•“My blending and smearing brushes paint with white or don’t interact with underlying colors.” (page 847)
•“My brush doesn’t use the color I chose or doesn’t work as expected.” (page 847)
•“Where do I find my previously purchased brushes after reinstalling Corel Painter or installing it on another computer?” (page 847)
•“My tablet doesn’t work as expected with Corel Painter. What do I do?” (page 847)
Workspaces, user files, and layouts
•“What’s the difference between user files and a workspace?” (page 847)
•“What’s the difference between a layout and a workspace?” (page 848)
•“I was given a custom workspace, but I can’t use it.” (page 848)
•“Some palettes in the workspace I just imported appear cutoff (Windows).” (page 848)
Performance
•“Lately Corel Painter has been taking longer to start. Can I do something to shorten its startup time?” (page 848)
•“What settings do I use to ensure the optimal performance of Corel Painter?” (page 848)
•“I was using Corel Painter without any problems for a while, and now it no longer works as expected. What do I do?” (page 849)
•“I know that restoring Corel Painter to its default settings may help with unexpected performance problems, but I don’t want to lose
my custom brushes and palettes. How do I keep my custom items?” (page 849)
•“I have read that renaming my application data folder (Windows) or application library folder (macOS) may help improve the
performance of Corel Painter? How do I rename this folder?” (page 849)
•“Corel Painter stops responding on startup (macOS)? What do I do?” (page 850)
846 | Corel Painter 2022 User Guide
Installation
I am trying to install/reinstall Corel Painter but I get a warning that my serial number is invalid. What do I do?
Make sure you have pasted or typed the correct serial number, and that you are using a serial number provided by Corel. It may help to
paste your serial number into a basic text editor, such as Notepad (Windows) or TextEdit (macOS). Next, copy the serial number from the
text editor, and paste it into the Serial Number box.
If you have uninstalled or reinstalled Corel Painter several times, you may have reached the maximum number of times you can use the
serial number to activate the product. Contact Corel Customer Service for help.
How do I deploy Corel Painter to my organization’s network?
If you purchased multiple licenses of Corel Painter, you have the option of deploying the software to your organization’s network. See
the Corel Painter 2022 Deployment Guide for information about network installations.
How do I repair my Corel Painter installation (Windows)?
If you suspect that your installation of Corel Painter is corrupt, you may need to repair it. To do this, close all applications, and click
Uninstall or change a program on the Windows Control Panel. Double-click the product name on the Uninstall or change a program
page. In the Installation wizard, enable the Repair option, and follow the instructions.
How do I uninstall Corel Painter properly (Windows)?
Always use the Corel Painter Installation wizard to uninstall Corel Painter. Close all applications, and click Uninstall a program on the
Windows Control Panel. Double-click the product name on the Uninstall or change a program page. In the Installation wizard, enable
the Remove option and the Remove User Files check box, and follow the instructions.
The Corel Painter installation includes Corel Painter Thumbnail Previewer, which lets you view the contents of Corel Painter (RIFF) files
in Windows Explorer by generating thumbnail images. This utility must be uninstalled separately. To do so, double-click Corel Painter
Thumbnail Previewer on the Uninstall or change a program page.
How can I get the thumbnails of my Painter files to show in Windows Explorer?
• Upgrade to the latest version of Corel Painter. It comes with Corel Painter Thumbnail Previewer, which lets you view the contents of
Corel Painter (RIFF) files in Windows Explorer by generating thumbnail images.
• If you change the Corel Painter file association, thumbnails may become unavailable. To fix the issue, you must uninstall Corel Painter
together with Corel Painter Thumbnail Previewer, and then reinstall the application.
Brushes and tablets
My brushes stopped working.
•Check the Layers palette to make sure that the Preserve Transparency button is disabled.
•Make sure the active layer is visible. If the eye icon next to the layer name in the Layers palette is shut, click the icon to make the
layer visible.
• Sometimes the brush marks don’t show because the brush opacity is set to 0. Increase the opacity in the Opacity box on the property
bar.
• You may be painting underneath a layer that is hiding your brushstrokes. Check the Layers palette, and make sure you are painting on
the layer you want. If there are layers blocking the active layer, hide these layers by clicking the eye icon.
• There may be a small selection in the image, and brushes cannot paint outside selections. Choose the Select menu, and click None (if
it is not already grayed out) to remove the selection.
• You may be trying to paint on a white canvas with a brush that uses the Glow technology. Glow brushes don’t leave a mark on white
or very light backgrounds. To make sure you are indeed using a glow brush, check if there is an enabled Glow control on the property
bar, or if the brush uses the Glow subcategory.
• Click the Reset Tool button on the property bar to restore the brush to its default settings.
• Some composite methods can make the paint appear invisible. For example, if the layer’s composite method is set to Multiply or
Gel and you are painting on black, you won’t be able to see your brushstrokes. In general, if you are having difficulty seeing your
brushstrokes, try changing the layer’s composite method to Default.
• Blender brushes do not add color; they blend existing colors.
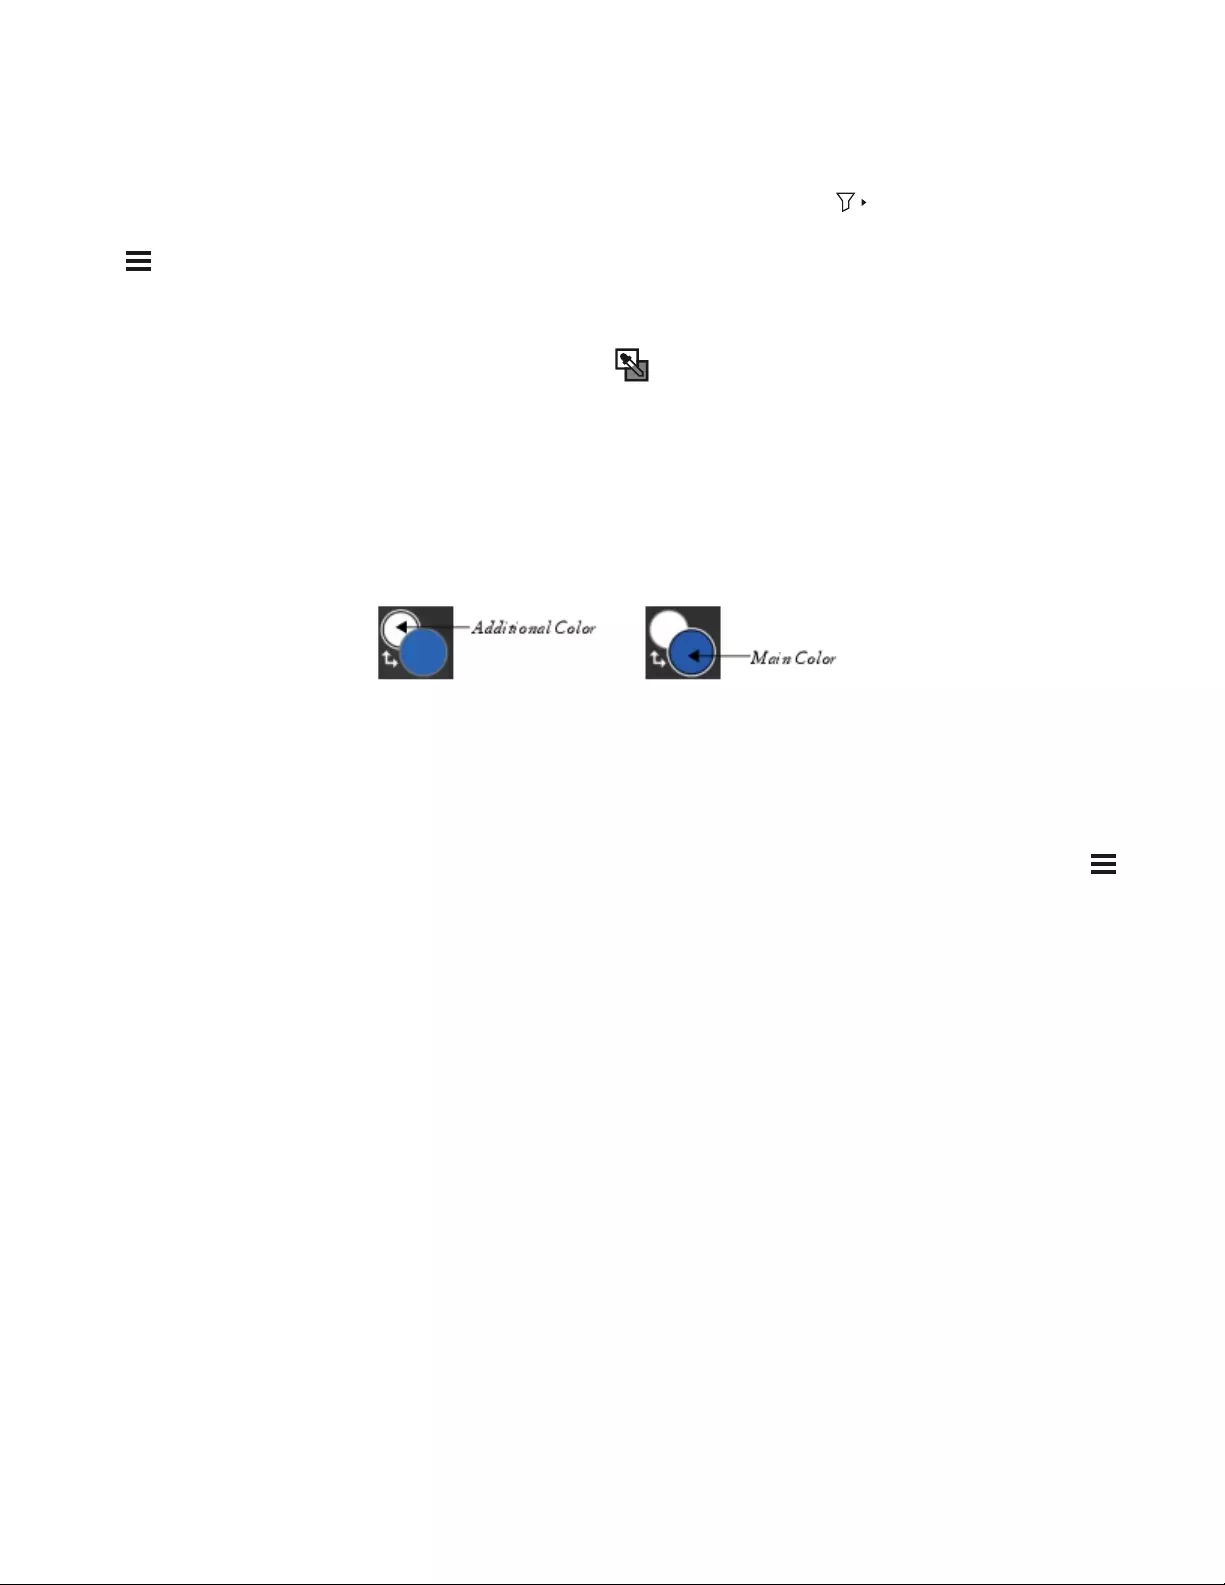
Troubleshooting tips | 847
I can no longer find some of my brushes.
•Make sure to clear all brush filters in the Brush Selector by clicking the Filter Brushes button , and clicking Clear Filters.
• Some brush categories and brush variants may be hidden. To show all hidden brush categories, click the Brush library options button
in the Brush Selector, choose Category Display, and choose Show All Categories. To show all hidden brushes, click the Brush
library options button in the Brush Selector, choose Variant Display, and choose Show All Variants.
My blending and smearing brushes paint with white or don’t interact with underlying colors.
•In the Layers panel, click the Pick Up Underlying Color button to enable it. If the brush still doesn’t work as expected on the
active layer, choose the canvas in the Layers palette and try painting over existing colors. If it works, consider painting on the canvas —
some brushes use methods that don’t work on layers.
• For brushstrokes without white fringes, take advantage of enhanced blending, which is supported by many brushes. Choose Window
Brush Control Panels Brush Media Blending, and enable the Enhanced Layer Blending check box (if available for the selected
brush).
My brush doesn’t use the color I chose or doesn’t work as expected.
• In the Colors palette, check if the Additional Color swatch appears selected. If so, click the Main Color swatch so that your brush
uses the main color.
• In the Layers panel, check the composite method assigned to the active layer in the Composite Method list box, and make sure it is
set to Default, not Gel, Multiply, Overlay, or another method that changes the appearance of the main color when it interacts with
underlying colors.
• Make sure that the Hue ring and Saturation/Value triangle in the Color palette do not appear grayed out. If they are, then the Clone
Color option is enabled, which means that the brush is using a color or pattern from a clone source. In the Color palette, click the
Clone Color control to disable it.
•Sometimes your brush may be customized beyond recognition. In the Brush Selector, click the Brush library options button ,
and choose Restore Default Variant.
Where do I find my previously purchased brushes after reinstalling Corel Painter or installing it on another computer?
Click Help menu Restore Purchases, and follow the instructions to download and install your previously purchased items. This method
can help you restore only brush packs that you purchased from within Corel Painter. For more detailed information, see “To restore your
purchases” on page 320.
My tablet doesn’t work as expected with Corel Painter. What do I do?
Start by making sure that your tablet preferences are set properly — Wacom-compatible device (Wintab) or RTS-compatible device (Real-
Time Stylus). For more information, see “Support for tablets and other devices” on page 121.
Make sure the tablet and the tablet driver are supported by the operating system, and that you have the latest version of the tablet driver
installed. After installing the latest driver, you may find that tablet performance has become worse. In such cases, you may want to go
back to the previous version of the driver. Remember to restart your computer each time you install or uninstall device drivers.
Unplug the tablet, and try to connect it to your computer by using another USB port.
User files, workspaces, and layouts
What’s the difference between user files and a workspace?
User files are created when you customize content (such as a brush, paper or texture) or reposition a workspace element in Corel Painter.
For example, when you change the settings of a brush or add a new item to a library, your new settings are saved to user files.
A workspace lets you create a customized version of Corel Painter to suit your workflow needs. A workspace can include custom brush
libraries, paper libraries, texture libraries, nozzles, portfolios, and more. In addition, you can easily create multiple workspaces, each
with different libraries and portfolios. You can switch workspaces from the Window Workspace menu. For more information about
workspaces, see “Creating, importing, exporting, and deleting workspaces” on page 89.

848 | Corel Painter 2022 User Guide
What’s the difference between a layout and a workspace?
A layout (also known as “palette arrangement”) displays, hides, and positions workspace elements such as palettes and panels to suit a
specific workflow. For example, the New to Painter layout displays only the most essential controls together with the Hints panel to help
you get started quickly with Corel Painter. You can switch layouts while working in the same workspace by clicking Window Layout.
A layout arranges the elements of a workspace in a specific way; a workspace includes specific content such as brushes, textures, papers,
and more.
You can arrange palettes and panels and save the arrangement as a custom layout. For more information, see “To save an arrangement
of palettes as a workspace layout” on page 81. When you restore Corel Painter to its default settings, you can choose to keep custom
brushes, papers, textures, and other assets, but all your custom layouts will be lost.
I was given a custom workspace, but I can’t use it.
Workspace files have a .pws extension. To use a custom workspace that was shared with you, you must import it by choosing Window
Workspace Import Workspace.
You can double-click a workspace file to import it on the macOS, but not on Windows. If you double-clicked the workspace file on
Windows, and then tried to import it unsuccessfully, you need to download the file again.
Some palettes in the workspace I just imported appear cutoff (Windows).
The location of palettes is saved with the custom workspace. If the imported custom workspace is too wide, some of its palettes may
appear cutoff or be completely hidden. Try decreasing the UI scaling value in Windows, and then move the palettes to the left. Next, set
the UI scaling to your preferred value.
Performance
Lately Corel Painter has been taking longer to start. Can I do something to shorten its startup time?
Before closing Corel Painter, make sure to close all panels and palettes that you rarely use.
What settings do I use to ensure the optimal performance of Corel Painter?
• Run the Brush Accelerator to optimize your system hardware. For more information, see “Using the Brush Accelerator to achieve optimal
performance” on page 127.
• If you have multiple GPUs, you can select which one Painter will use. For more information, see “Adjusting GPU settings” on page 129.
• Set performance options in the Preferences dialog box. For more information, see “Performance preferences” on page 828.
• If you frequently use the hard disk rather than an external hard drive or cloud storage, consider investing in a system that has at least
500GB of disk space with solid state technology (for example, 500GB SSD Drive) to safely store each project.
• For ease of connectivity with your drawing tablet, ensure there are easily accessible USB ports or wireless Bluetooth support on your
system. Wacom offers an impressive range of drawing tablets and displays with pressure-sensitive pens that closely mimic the traditional
drawing experience.
• (Windows) Optimize the settings of your device, be it a Microsoft Surface Pro laptop, Cintiq Companion, or a desktop computer. Change
the power settings of your device from Power Save mode to High performance (Control Panel Hardware and Sound Power
Options). You can also disable programs that are running in the background, turn off search indexing, clean the registry, disable visual
effects, and more. For detailed information, see https://www.computerworld.com/article/3029168/microsoft-windows/windows-10-
quick-tips-8-ways-to-speed-up-your-pc.html.
• Set the rotation of the canvas to 0°, especially when using impasto.
•If you are using impasto but you don’t need to see the impasto effect while painting, choose Canvas Hide Impasto to improve
performance.
•Hide the Navigator panel (Window Navigator) if you don’t need it.
• Adjust the following brush settings:
•Move the Boost slider on the Spacing panel (Window Brush Control Panels Brush Shape Spacing) to optimize the
performance of brushstrokes. Start with low boost values (under 10%) to significantly increase brush performance. Note that high
boost values may produce less accurate brushstrokes.This setting applies only to specific brush dab types, such as Flat and Camel
hair.
•Check if the selected brush uses Brush Loading by choosing Window Brush Control Panels Brush Media Blending, and
disable it to improve performance. For more information about this control, see “Blending controls” on page 402.
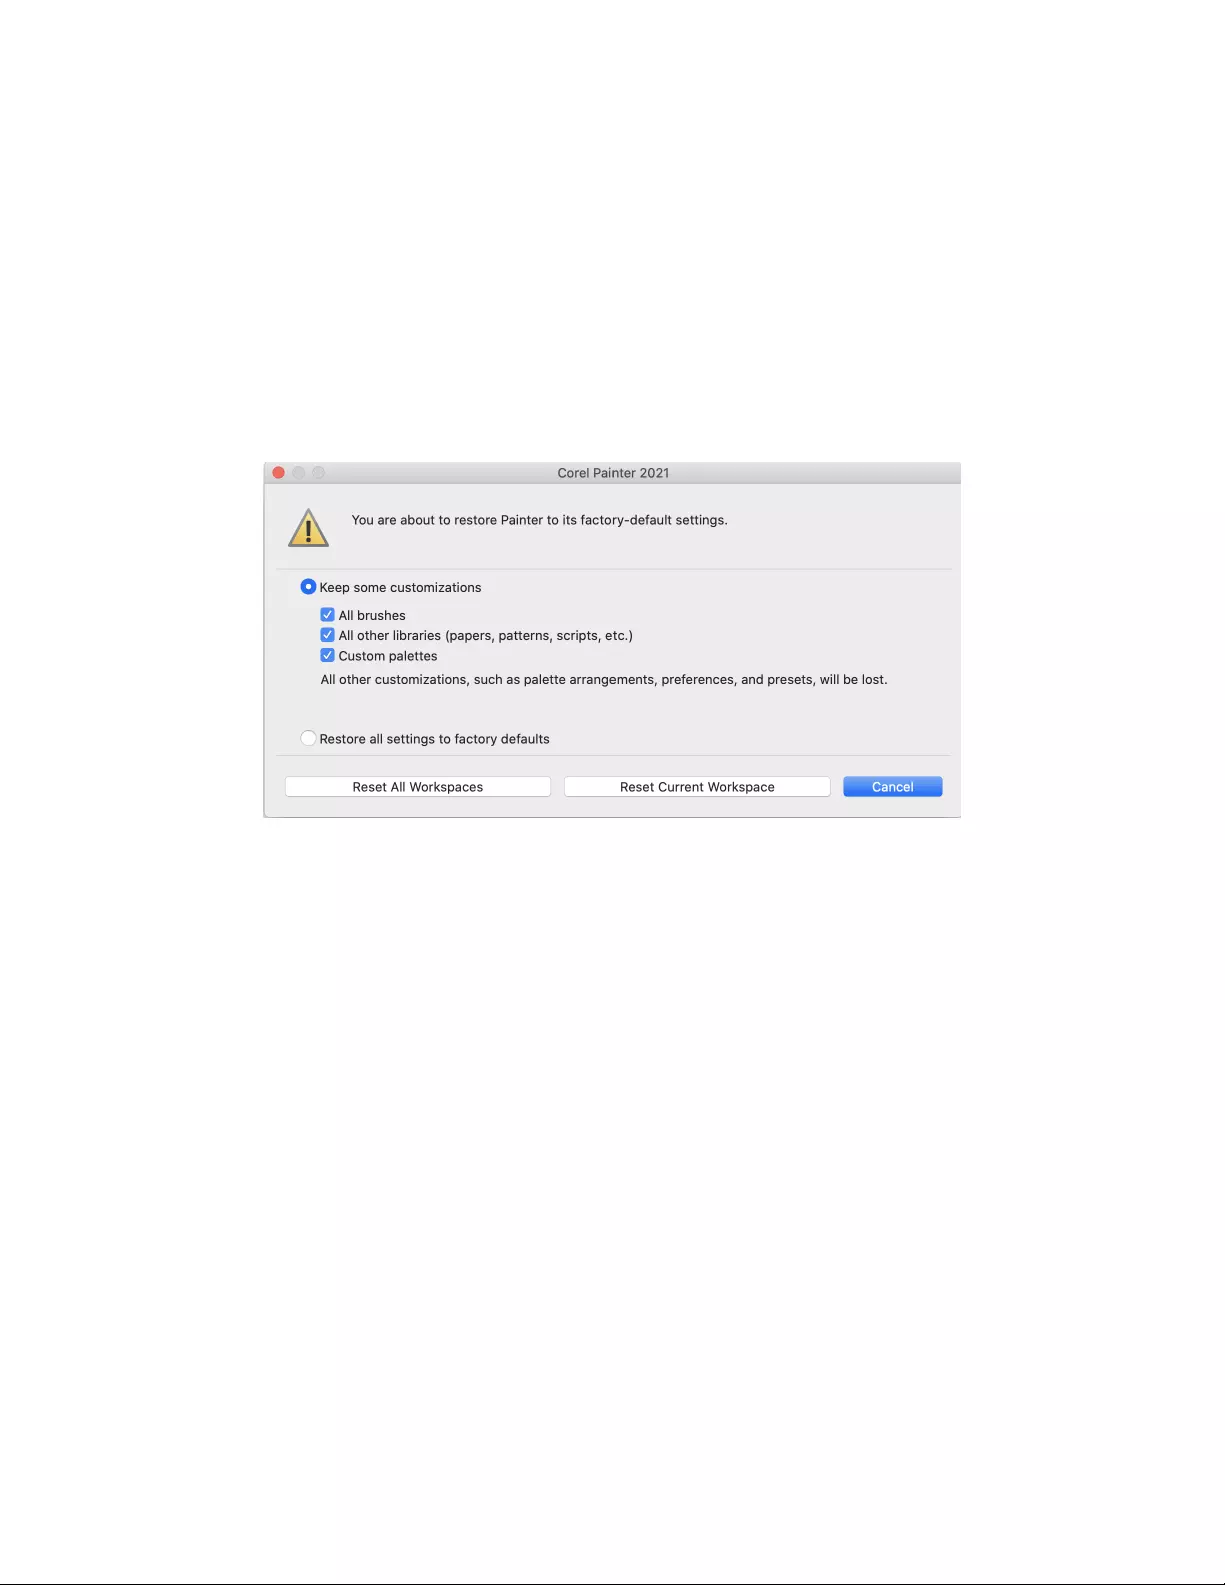
Troubleshooting tips | 849
I was using Corel Painter without any problems for a while, and now it no longer works as expected. What do I do?
We recommend that you follow these troubleshooting tips in the order they are listed.
• Restart Corel Painter. This may improve application performance.
• Sometimes, silent hardware and operating system (OS) updates may cause Corel Painter to slow down. Its performance should be
improved after the updates are installed. In general, we recommend that you restart your computer after installing any hardware, OS,
or Corel Painter updates.
• Start Corel Painter by holding down Shift. This action will restore Corel Painter to its default settings and may solve unexpected
problems. For more information, see “Restoring the default Corel Painter settings” on page 90.
• If restoring Corel Painter to its default settings did not improve performance, the problem may be some custom items such as
brushes, papers, or custom palettes that you created earlier and decided to keep. Start Corel Painter while holding down Shift again,
and try disabling one or more items under the Keep some customizations option.
• Another fix to try on Windows is to rename the Corel Painter folder in your User folder. For more information, see “I have read that
renaming my application data folder (Windows) or application library folder (macOS) may help improve the performance of Corel
Painter? How do I rename this folder?” on page 849.
• If you are still having problems using the application and suspect that the installation has become corrupt, you may need to repair
the installation. For more information, see “How do I repair my Corel Painter installation (Windows)?” on page 846.
• If nothing else seems to work, you may need to uninstall and re-install Corel Painter. Before you uninstall the application, make sure
you have your Corel Painter serial number handy. For information about how to uninstall Corel Painter on Windows, see “How do I
uninstall Corel Painter properly (Windows)?” on page 846.
I know that restoring Corel Painter to its default settings may help with unexpected performance problems, but I don’t want to lose
my custom brushes and palettes. How do I keep my custom items?
• When you restore the application to its default settings by holding down Shift and starting it, choose the Keep some customizations
option in the dialog box that comes up. You can choose to keep your custom brushes, custom palettes, and customized libraries
(papers, patterns, scripts, textures, and more).
• You can also export custom content or custom palettes before restoring Corel Painter to its default settings.
I have read that renaming my application data folder (Windows) or application library folder (macOS) may help improve the
performance of Corel Painter? How do I rename this folder?
(Windows) Press the Windows key + R, type %appdata% in the Run dialog box, and press Enter. Next, browse to the Corel/Painter
[XX] folder, where XX is the version number of the product, and rename the folder to Painter XX_old. Start Corel Painter.
(macOS) Start Finder. Choose Go Go to Folder, type ~/library in the Go to folder box, and click Go. Next, browse to the Corel/Painter
[XX] folder, where XX is the version number of the product, and rename the folder to Painter XX_old. Start Corel Painter.

850 | Corel Painter 2022 User Guide
Corel Painter stops responding on startup (macOS)? What do I do?
For troubleshooting tips, check out this article on the Corel Knowledge Base.
Corel Painter – кроссплатформенный графический редактор полного цикла, предназначенный для цифровой живописи, а также адаптированный под работу с помощью компьютерной мыши и через подключаемое к компьютеру творческое оборудование, включая графические планшеты или стилусы. Основной функционал заточен под имитацию привычных художественных приемов, включая рисование карандашами, пастелью, масляными красками, акварелью, но разработчики разрешают обрабатывать исходные материалы, накладывая фильтры или эффекты из заготовленного комплекта с шаблонами.
Содержание
- 1 Назначение Corel Painter
- 2 Сфера использования программы
- 3 Курсы и книги по работе с Corel Painter
- 4 Функциональные возможности Corel Painter
- 5 Особенности
- 6 Плюсы и минусы
- 7 Итоги
- 8 Полезное видео
Назначение Corel Painter
Целевая аудитория графического редактора – концепт-художники, иллюстраторы, а также энтузиасты, разрабатывающие дизайн или медиаконтент для сферы развлечений (кино, игровая индустрия), веб-сайтов, рекламных агентств. С помощью доступных в Corel Painter инструментов специалисты способны автоматически превращать фотографии в рукописные картины, накладывать на белоснежные (или с заранее подобранными текстурами) холсты реалистичные мазки, а вместе с тем рисовать персонажей с нуля или с помощью зарисовок, подготовленных в том же Photoshop.

Сфера использования программы
Назвать Corel Painter узкоспециализированным софтом сложно – редактор часто применяется новичками для подготовки экспериментальных иллюстраций в домашних условиях (картины с различными красками, масляными кистями, необычными текстурами), но встречается на компьютерах профессиональных иллюстраторов или художников, верстающих иллюстрации или медиаконтент по техническому заданию заказчиков.
Справка! Если рассматривать конкретные сферы, то CP незаменим в игровой индустрии (живописные декорации для изометрических RPG, мобильные декорации), киноискусстве, веб-программировании, маркетинге. Corel Painter давно стал платформой для подготовки базовых иллюстраций, в дальнейшем переносимых в сторонние редакторы, вроде Photoshop (или ту же Canva в сети) для оформления рекламных креативов, верстки навигационных панелей, баннеров или иконок.
Редкий случай – обработка фотографий: полноценно работать над экспозиций, цветами или оформлением снимков редактор не разрешает, а потому лучше довериться профессиональному программному обеспечению.
Курсы и книги по работе с Corel Painter
Официальное текстовое руководство пользователя Corel Painter. Оно доступно лишь на английском языке, но затрагивает ключевые возможности, связанные также с настройкой рабочего пространства, выбором подходящих инструментов. Если разбираться в деталях некогда, то ниже список из адаптированных под русскоговорящую аудиторию курсов:
- Corel Tutorials. Сайт с разрозненными уроками, текстовыми материалами, методическими пособиями, сосредоточенными вокруг Painter. Новые материалы появляются не слишком регулярно, но затрагивают базовую информацию, вроде настройки рабочего пространства, а заодно профессиональные навыки: рисунки по шаблону, добавление текстур, оформление кожи, волос. Советы и рекомендации сопровождаются подробными тематическими иллюстрациями.
- Corel DemiArt. Подробный, хотя давно не обновлявшийся курс по Corel Painter, охватывающий колоссальное количество информации: подготовка, импорт или экспорт материалов, смена разрешения, настройка рабочего места, добавление палитры, инструментов рисования, выбор шаблонов, текстур, бумаги. Даже слои, формы или текстовые блоки и те разобраны до мельчайших подробностей. Бонус – никаких многочасовых видеороликов с лишними комментариями: инструкции снабжены иллюстрациями и дополнены текстом.
- 4 Creates. Видеокурс для тех, кто привык слушать, а затем повторять за преподавателем, не читая текст. Темы поднимаются различные, но не фундаментальные: после настройки рабочего пространства предстоит почти сразу переходить к рисованию – глаз, волос, пейзажей или персонажей с помощью шаблонов или на пустом холсте. Информация выдается порционно, а уроки длятся по 30-45 минут в зависимости от сложности итоговой работы.
- Render. Исчерпывающее руководство для новичков, наглядно демонстрирующее процесс подготовки иллюстраций на основе заданного шаблона (используется в качестве «подложки» для последующего рисования). Кроме рисования разобраны детали, вроде переноса контента в тот же Photoshop для дальнейшей работы – добавления графических элементов, надписей, рамок, геометрических фигур. Нацелено руководство преимущественно на новичков, но профессионалы тоже могут обновить или дополнить знания.
Встречаются тематическое Corel Painter обучение на площадке Ютуб: в роликах разбирают базовые особенности цифрового рисунка, верстки иллюстраций для последующего внедрения в интерфейсы или на веб-страницы.
Функциональные возможности Corel Painter
Выдающихся особенностей у редактора предостаточно:
- Оптимизация и автоматическая настройка. Система Brush Accelerator автоматически оценивает производительность компьютера и подбирает подходящие настройки.
- Обновление интерфейса и выбора кистей. Оформление редактора сменилось: запутанные меню остались в прошлом – на экране лишь выпадающие тематические блоки, разрешающие мгновенно переключаться между кистями, текстурами или бумагой.
- Специальная палитра и смешиваемые цвета. Красный, черный, белый – профессиональному художнику достаточно трех цветов. А в Corel Painter коллекция оттенков почти не ограничена. При желании с помощью технологии Mixer каждый способен собрать новый цвет на основе других.
- Работа со слоями, расширениями и плагинами. Раньше редактор разрешал рисовать лишь на конкретной области экрана, но после обновлений появились слои, накладываемые в выбранном порядке и разрешающие работать над цветом, текстурой и иными деталями в разрыве от основной работы. Справляется Corel Painter в том числе со сторонним контентом, добавляемым в качестве тематических расширений: энтузиасты-разработчики давно подготовили коллекцию шаблонов, а также специальные кисти, подготовленные для работы в определенных условиях.
Особенности
Хотя идея совместного взаимодействия между продуктами не нова и реализована хотя бы специалистами из Adobe, любопытная механика добралась и до специалистов из Corel. Речь о возможности выгружать подготовленные материалы в фирменное облако или мгновенно переносить и дорабатывать иллюстрации в том же CorelDraw.
Внимание! При этом исходники хранятся годами и доступны для загрузки на сторонние компьютеры или даже мобильные операционные системы после авторизации в том же аккаунте.
Частично добавлена система сетевого взаимодействия – при передаче доступа коллегам появится шанс наблюдать за чужими правками или читать добавляемые комментарии на полях. Больше не придется пересылать материалы по электронной почте или проводить молниеносные коррективы по не слишком очевидным замечаниям заказчика.
Плюсы и минусы
Преимущества Corel Painter напрямую связаны с версией графического редактора: с каждым новым обновлением разработчики внедряют и дополнительный контент, и эксклюзивные технологии:
- Наличие кистей Natural-Media, разрешающих имитировать различные художественные техники рисования, добавляя реалистичности наброскам, цифровым картинам, живописным иллюстрациям;
- Встроенная коллекция инструментов Painter – специальных кистей, основанных на частицах (Particles) и представленных в нескольких категориях: сухие, влажные, толстые и тонкие. Кроме добавленных наборов предусмотрена поддержка стороннего контента – расширений, плагинов, текстур;
- Система полноценной обработки фотографий: фильтры, эффекты – выгруженные материалы меняются за считанные минуты. Альтернативный способ подготовить новый шедевр – воспользоваться автоматическим рисованием, превращающим каждый снимок в рукописную картину;
- Композиция в Corel Painter выстраивается через симметрию, перспективу, технологии «зеркального рисования», «калейдоскопа», «золотого сечения». Допущенные ошибки редактор способен исправить в фоновом режиме;
- Каждое рабочее место настраивается – совсем необязательно выводить на экран инструменты для художников или иллюстраторов: разработчики разрешают скрыть лишние панели или добавить новые для ускорения и оптимизации работы.
Осторожно! Недостатки Corel Painter связаны с переводом (русификатор до сих пор не появился и, если привыкнуть к интерфейсу не слишком сложно, то с всплывающими подсказками и дополнительными обучающими материалами от разработчика возникают проблем) и системой распространения контента – стандартная версия редактора обойдется в 429 долларов США (более 30 000 рублей), не включая дополнительного контента. Сразу приобретать базовый комплект необязательно – художникам и энтузиастам доступен 30-дневный пробный период.
Итоги
Corel Painter – программа для рисования, без которой до сих пор не обходится создание цифровой живописи. Она крайне производительна, потому справляется с любыми поставленными задачами – подготовкой иллюстраций, цифровой живописью, обработкой растровых исходников. Проблемы могут возникнуть лишь у новичков – из-за обилия доступных инструментов необходимо научиться работать с утилитой, пройти обучение Corel Painter, иначе даже с рисованием будут сложности, ведь русский язык интерфейса до сих пор официально недоступен.
Полезное видео
Туториал для начинающих:
4 — 2015
Corel Painter — одно из лучших решений для профессиональной компьютерной живописи; доказательством тому служат многочисленные работы цифровых художников, написанные в среде этого решения. Возможности пакета впечатляющи и многогранны, они позволяют работать в самых разных изобразительных техниках и направлениях. Однако на освоение Painter потребуется некоторое время. Начните с малого: создайте парутройку палитр инструментов (убрав с глаз долой все остальные), настройте базовую палитру цветов, освойте основные горячие клавиши, разберитесь с палитрой слоев и просто начинайте рисовать…
Разумная организация рабочего пространства
В идеале каждый художник хотел бы, наверное, понастоящему творить — «вне времени и пространства», отражая в создаваемых изображениях свои мечты, мысли и вдохновение. Но реалии таковы, что на подготовку рисунков отводится совсем немного времени, ведь заказчик ждать не будет. Поэтому важно удобно организовать рабочее пространство под решение ежедневных творческих задач и быстрое выполнение стандартных операций.
Поскольку кисть (карандаш, перо и т.д.) — основной инструмент любого художника, то на первом месте в плане организации пространства оказывается настройка быстрого доступа к часто используемым кистям. Тут следует подойти избирательно и создать несколько отдельных индивидуальных палитр кистей (Custom Palettes) с любимыми инструментами — специальными для отдельных типов проектов (создания эскизов, живописи, работы с фотографиями и т.п.) и часто используемых рабочих пространств. Для этого достаточно просто перетащить нужные кисти в новую палитру при нажатой клавише Shift, и тогда в процессе работы не потребуется затрачивать время на поиск нужного инструмента, да и экран не будет загромождаться лишними палитрами и открытыми окнами. Профессионалы, кроме того, рекомендуют тщательно продумать состав кистей в наборах, ограничившись минимумом, иначе вы рискуете буквально запутаться в бесконечных возможностях Corel Painter. Например, известный кельнский иллюстратор Торстен Волбер (Torsten Wolber) при работе в Painter использует всего три набора кистей, в каждом из которых содержится не более 12 инструментов (рис. 1), что позволяет практически мгновенно выбирать нужную кисть, не отвлекаясь от работы. Управление пользовательскими палитрами кистей производится через меню Window -> Custom Palette -> Organizer. Также важно настроить след кисти (Edit -> Preferences -> Brush Tracking) — это позволит программе запомнить ваш оригинальный стиль рисования на планшете (силу нажатия и скорость работы кистью).
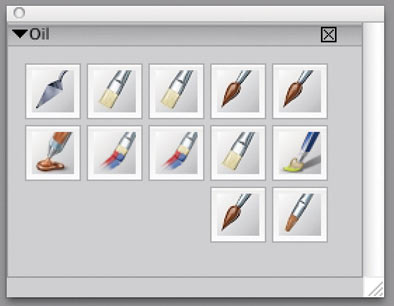
Рис. 1. Пример палитры кистей для масляной живописи (художник —Торстен Волбер (Torsten Wolber))
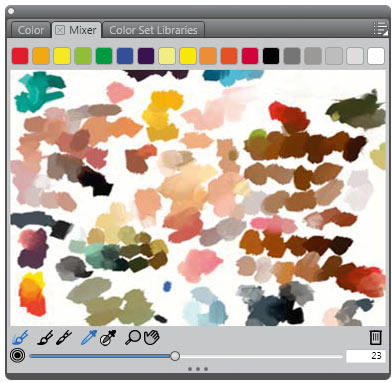
Рис. 2. Пример рабочей базовой палитры цветов художника Майка Томпсона (Mike Thompson)
Немало времени удается сэкономить на подборе цветов, если при начальной работе над изображением подготовить пользовательскую палитру цветов (Color Sets) для проекта. Подобная палитра может создаваться вручную в ходе смешивания красок на интерактивной палитре Mixer (в этом случае все равно лучше иметь в арсенале некий базовый набор цветов, которые чаще всего используются в работе, — рис. 2) либо через взятие образцов цвета с холста эталонного изображения. Для начала можно попробовать поработать с палитрами таких признанных мастеров Corel Painter, как Джереми Саттон (Jeremy Sutton), Джон Малколм (John Malcom), Карен Бонекер (Karen Bonaker) и Скайп Аллен (Skip Allen), доступных через меню палитры Mixer (рис. 3).
Что касается взятия образцов цвета с холста эталонного изображения, то в роли последнего может выступать как цветной эскиз, созданный при начальной работе над изображением, так и фотография, если таковая используется в качестве образцаоригинала. Возможно автоматическое заполнение пользовательской палитры цветов по оригинальному изображению (New Color Set from Image), что существенно ускоряет процесс, избавляя от необходимости подбирать цвета вручную (рис. 4). В дополнение к перечисленному также не стоит забывать о возможности перегруппировки панелей и палитр в соответствии с собственными потребностями.
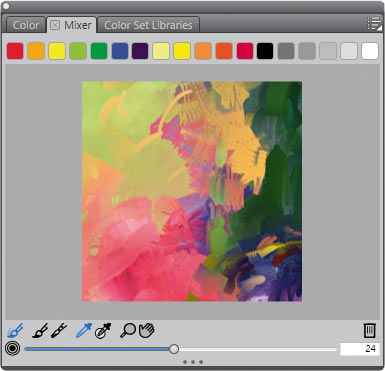
Рис. 3. Палитра цветов Джереми Саттона (Jeremy Sutton), загруженная в Mixer
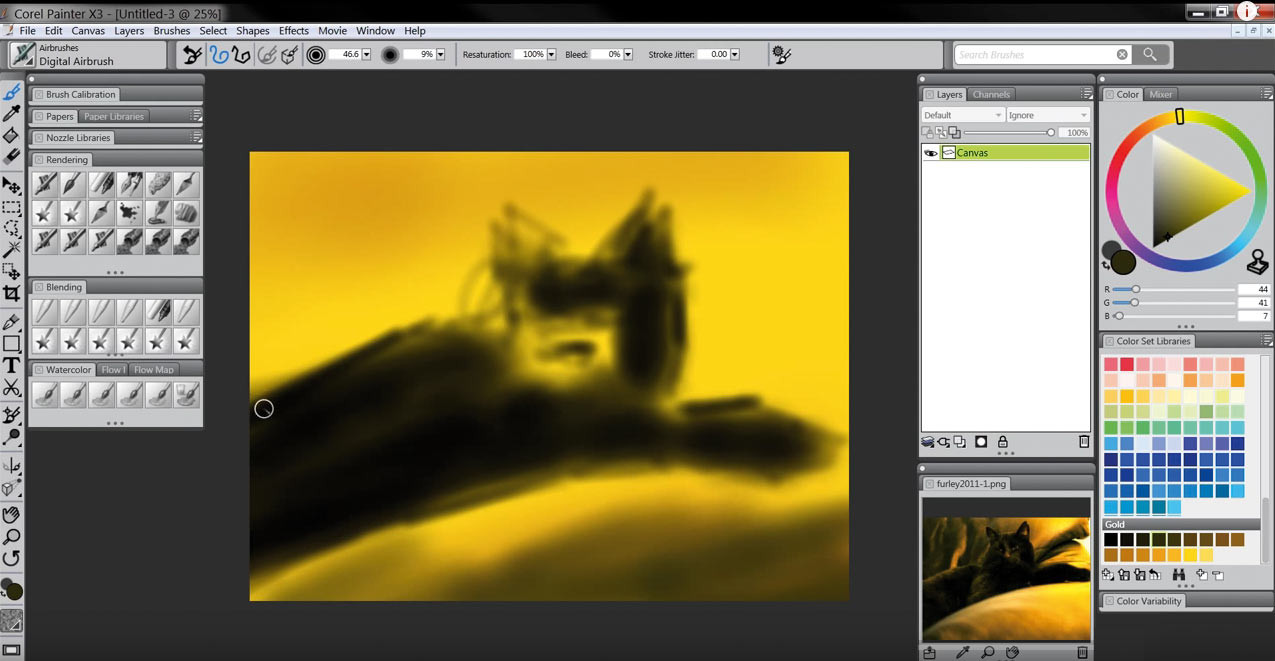
Рис. 4. Рисование по фото с автоматически заполненной палитрой цветов
(автор — Аарон Раттен (Aaron Rutten))
«Подключение к делу» горячих клавиш
В процессе рисования в программе приходится затрачивать немало времени на выполнение зачастую совершенно нетворческих повторяющихся операций. С помощью горячих клавиш все окажется на порядок быстрее, что подчеркивают в своих блогах и многие профессионалы, постоянно работающие в Corel Painter. Поэтому ряд базовых клавиатурных комбинаций (Ctrl + Z отвечает за отмену действия, Ctrl + +
и Ctrl + – производят увеличение и уменьшение масштаба рисунка соответственно и т.п.) стоит запомнить «назубок», чтобы в дальнейшем довести использование горячих клавиш до автоматизма.
Так, нажав комбинацию Ctrl + Z,
вы сможете быстро отменить неудачный мазок кисти; с помощью комбинации Shift + X — мгновенно переключаться между основным и дополнительным цветами; нажав клавишу Alt при работе с кистью — быстро выбрать нужный цвет на изображении (при нажатии на клавишу кисть превращается в пипетку), и, отпустив Alt, вновь вернуться к рисованию и т.д.
Разработчиками предусмотрена возможность для автоматической генерации списка всех поддерживаемых в Corel Painter горячих клавиш в HTMLфайл, для чего достаточно воспользоваться командой Edit -> Preference -> Customize Key и щелкнуть на кнопке Create HTML Summary (рис. 5). Это окажется удобным в плане ознакомления с горячими клавишами и распечатки их списка. Правда, стоит иметь в виду, что работают горячие клавиши только при английской раскладке клавиатуры.
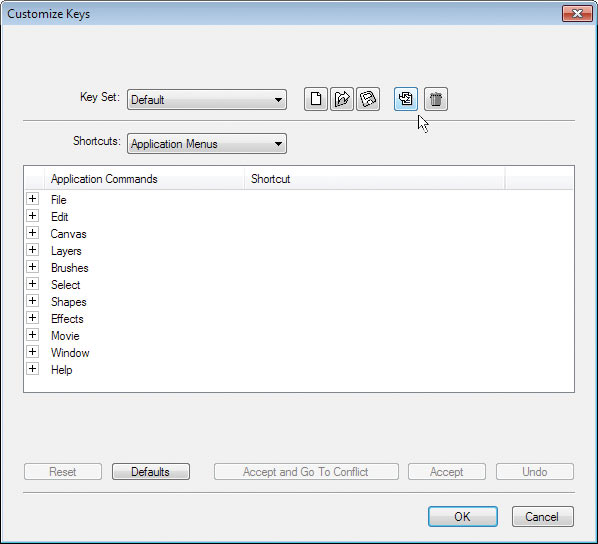
Рис. 5. Генерация списка поддерживаемых клавиатурных комбинаций
Создание многослойных изображений
Corel Painter поддерживает работу со слоями с учетом режимов смешивания и прозрачности, а также масок слоя; многослойные изображения могут сохраняться в формате PSD. Благодаря этому становится возможным рисовать на отдельных слоях, разграничивая таким образом разные этапы работы — например, на одном слое работать с эскизом, на другом сделать подмалевок, на третьем заняться детальной проработкой рисунка и т.д. Это удобно, поскольку расширяет возможности по обработке изображения, а также позволяет производить ряд быстрых манипуляций с ним в соответствии с потребностями проекта — изменять композицию, перемещать отдельные элементы и т.п. В итоге обеспечивается определенная творческая свобода и экономится много времени, когда дела идут не совсем так, как первоначально предполагалось, и требуется внести соответствующие изменения в проект. Многослойность оказывается на руку и при окончательной цветовой настройке рисунка, поскольку избавляет от необходимости перекрашивать все изображение. Наконец, дополнительные слои (включая фоновые) с разными режимами смешивания просто незаменимы при подготовке ярких, образных и эмоционально наполненных иллюстраций, что с успехом используется иллюстраторами и концептхудожниками (рис. 6).
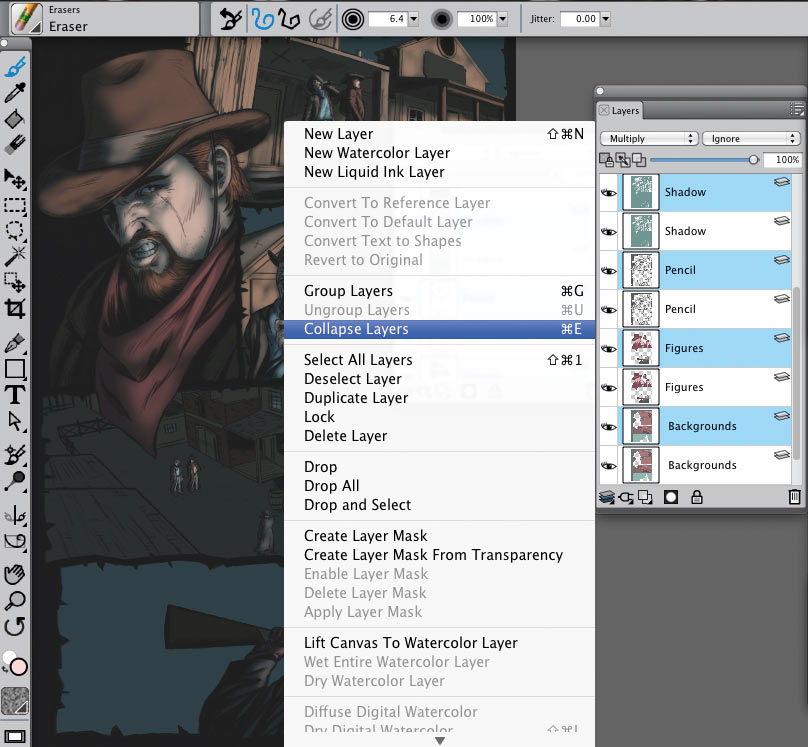
Рис. 6. Подготовка многослойной иллюстрации (автор — Дуглас А. Сайрос (Douglas A. Sirois))
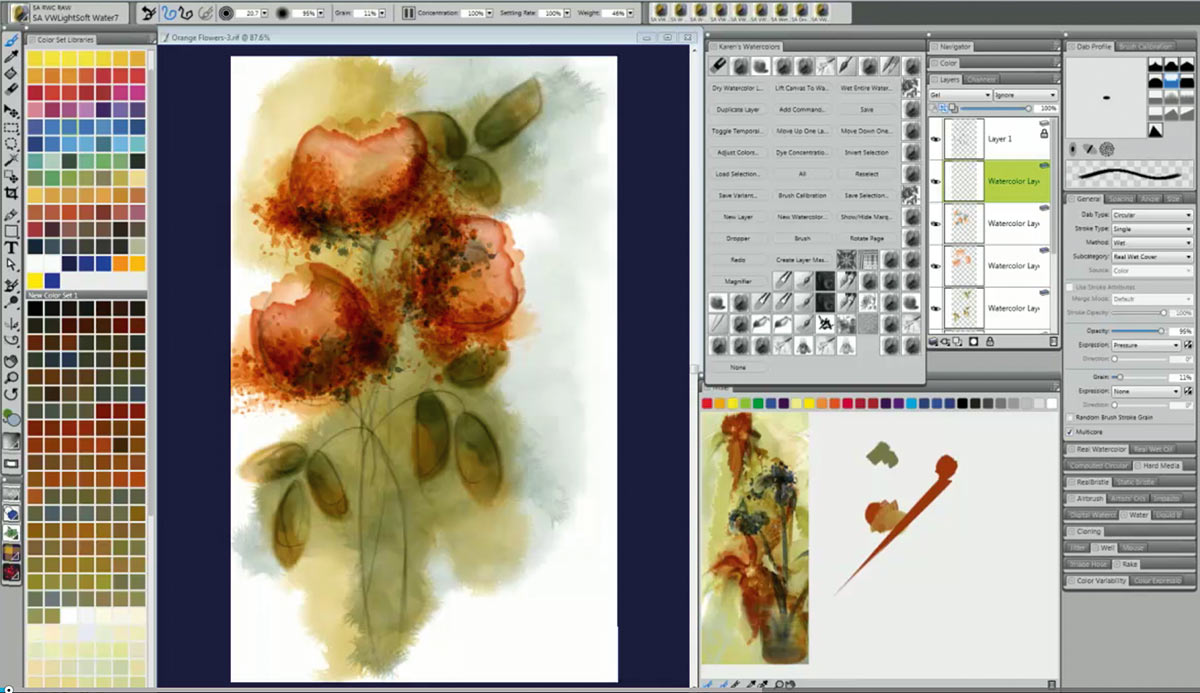
Рис. 7. Создание акварельного рисунка в Corel Painter
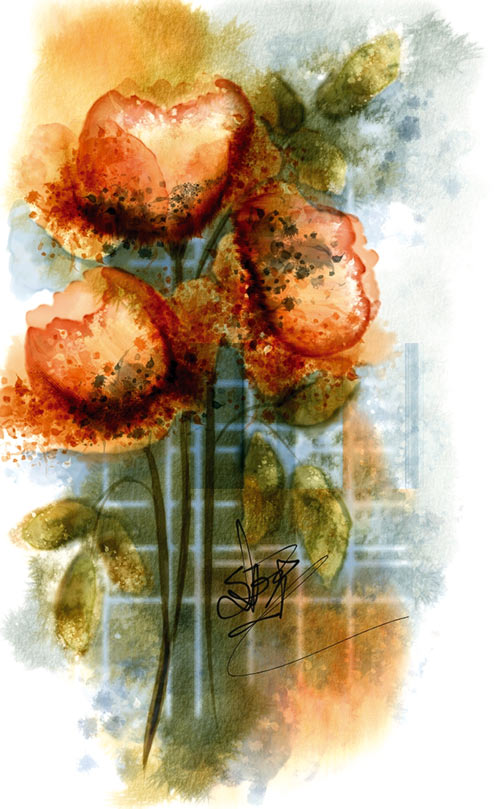
Рис. 8. Готовая акварель (автор —
Скайп Аллен (Skip Allen))
И это лишь одна сторона вопроса. С другой — без слоев не обойтись при имитации традиционных изобразительных техник и стилей. Скажем, использование множества слоев также позволяет усиливать эффект глубины и таким способом имитировать объем композиции, что актуально, например, для имитации масляной живописи. Рисование в Corel Painter акварельными кистями Watercolor немыслимо без создания специальных акварельных слоев Watercolor Layer (рис. 7 и 8), для рисования кистями типа Liquid Ink потребуются чернильные слои Liquid Ink Layer и т.д.
При большом количестве слоев для удобства работы с палитрой Layers, которая по умолчанию жестко закреплена и не растягивается, стоит сделать ее самостоятельной, просто перетащив на свободное поле. После этого палитру можно будет растягивать до нужной высоты, а следвательно, уже не затрачивать время на постоянный скроллинг.
Использование Corel Painter в содружестве с Adobe Photoshop
Corel Painter и Adobe Photoshop, вне сомнения, являются самыми популярными приложениями
у художников, работающих в сфере цифровой живописи. Причем более эффективным оказывается сочетание работы в названных продуктах. Почему? Тут все просто — ни одно из программных решений не в состоянии охватить всё и вся (у каждого есть свои «изюминки»), а используя сильные стороны каждого из приложений, удается добиваться более впечатляющих результатов, причем зачастую проще и быстрее.
Если Corel Painter применяется непосредственно для рисования и не имеет себе равных в плане имитации традиционных изобразительных техник, то Adobe Photoshop предоставляет более внушительный инструментарий для осуществления разнообразных манипуляций с изображениями, композитинга и допечатной подготовки и потому незаменим для художественной ретуши. Большинство профессионалов, выбирающих в качестве базового решения Corel Painter, переключаются в Photoshop для наведения завершающих штрихов при работе над рисунком или иллюстрацией (цветовой коррекции, регулирования контраста, насыщенности, освещенности и т.п.). Кроме того, ряд художников, которые предпочитают по старинке рисовать эскизы на бумаге 1, используют Photoshop для сканирования набросков с последующим сохранением их в требуемом формате (бывает, с последующим регулированием яркости и контрастности средствами этого решения в целях получения более четких линий на эскизном изображении) — соответствующие файлы затем открываются в Corel Painter для проведения основной работы (рис. 9 и 10).

Рис. 9. Открытие отсканированного в Photoshop эскиза для создания рисунка в Corel Painter
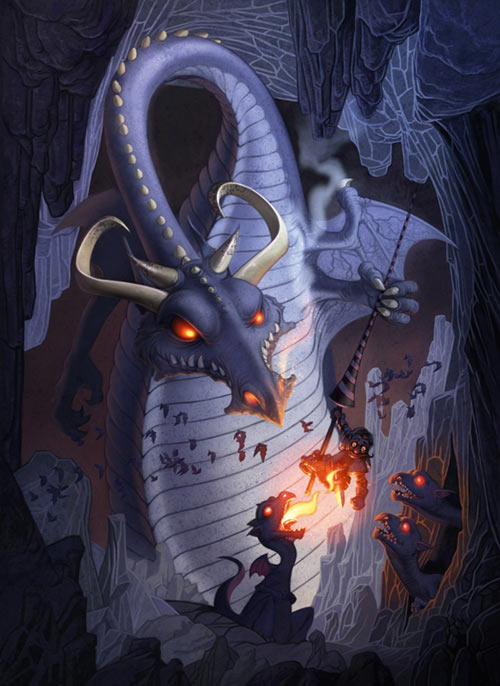
Рис. 10. Готовая иллюстрация (автор —
Дон Сигмиллер (Don Seegmiller))
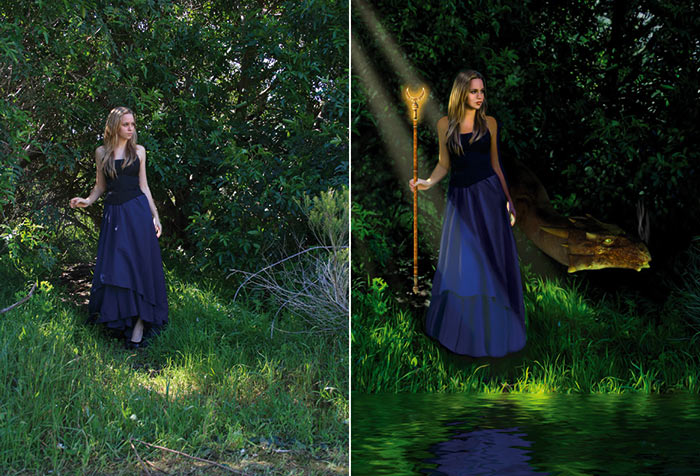
Рис. 11. Создание по фото сказочно-фантазийной иллюстрации (исходное фото и рисунок; автор — Дэн Космайер (Dan Kosmayer))
При рисовании по фотографии, которая нередко играет роль эталонного изображения, также может оказаться удобнее вначале прибегнуть к загрузке снимка в Photoshop для осуществления цветокоррекции с последующим переключением в Corel Painter. Это позволяет не только рисовать, видя перед собой эталонное изображение, загружаемое прямо на рабочий экран через соответствующую панель изображения 2, но и ускорить рабочий процесс, поскольку отпадет необходимость в создании цветов с нуля.
Наконец, в процессе подготовки разного рода иллюстраций (например, по сказочнофантазийной тематике) может потребоваться применение Corel Painter в связке с другими решениями, включая Adobe Photoshop, — для внедрения готовых фонов, добавления готовых персонажей и иных дополнительных элементов и т.п. Примером такого подхода может служить работа Дэна Космайера (Dan Kosmayer) — рис. 11, созданная в Corel Painter на базе обычного фото с подключением сторонних решений в виде приложения Photoshop и плагина Flaming Pear. Продукт компании Adobe в этом случае применялся для выполнения базовых операций (трансформации, регулирование контраста, коррекция цвета и т.п.), а также фотомонтажа и внедрения эффектов, а плагином Flaming Pear художник воспользовался для добавления воды.
***
Corel Painter — очень мощный и гибкий профессиональный инструмент для цифровой живописи, с помощью которого (в одиночку или в тесном тандеме с Adobe Photoshop) можно создавать впечатляющие изображения, что по праву оценили сегодня многие профессионалы. Поэтому, если вы стоите перед выбором приложения, функциональность которого обеспечивала бы превращение компьютера в настоящую цифровую студию изобразительного искусства, то стоит отдать предпочтение Corel Painter. И, скорее всего, это решение вас не разочарует.
Коротко о продукте
Corel Painter 2015
Разработчик: Corel Corporation
Сайт программы: http://www.painterartist.com/rw/product/paintprogram/
Размер дистрибутива: 32битная Windowsверсия — 186,99 Мбайт; 64битная Windowsверсия — 196,61 Мбайт; Macверсия — 193,66 Мбайт
Работа под управлением: Windows 8.1(64bit)/7(32 и 64bit) с последними обновлениями; Mac OS X 10.7/10.8/10.9 с последними обновлениями
Способ распространения: shareware (30дневная демоверсия)
Цена: 429 долл.
1 Эскизы можно создавать сразу в Corel Painter, так как в данном решении за счет уникальности инструментов, а также благодаря поддержке технологии рисования RealBristle достигается высокий уровень реалистичности рисования маркерами, карандашами и пр. Это позволяет существенно сэкономить время на подготовке набросков, поскольку исключается процесс сканирования.
2 Эталонное изображение удобно загружать прямо на рабочий экран через панель эталонного изображения (Reference Image Panel) — это избавит от необходимости переключаться между окнами.
КомпьюАрт 4’2015
Продолжаем обзор программ для рисования и рассмотрим то, что будет полезно для будущих дизайнеров, гейм дизайнеров, профессиональных цифровых художников, да и просто любителей рисовать. И сегодня мы порисуем и попытаемся разобраться в Corel Painter.
Немного о программе
Corel Painter – программа, изначально предназначенная для рисования. В отличие от Photoshop, который позволяет не только обрабатывать существующие изображения, но и создавать новые, Corel Painter является настоящим симулятором живого рисования.
Сразу уточним, что Painter – программа не для всех. Функционал ее не предусматривает решения максимально широкого круга задач, и это отнюдь не универсальная программа. Однако в области цифрового рисования Corel Painter продуман до мелочей. Это настоящее профессиональное средство, предназначенное для художников. При этом художниками и разработанное.
С чего все начиналось

Программа на протяжении своей истории разрабатывалась разными компаниями. Первый релиз состоялся в 1992 году. Прорывом же можно назвать версию Painter v6, вышедшую в 1999 году. Именно эта версия программы завоевала признание профессиональных художников, благодаря реализованным в ней цифровым инструментам и концепциям.
На сегодняшний день последней версией программы является Corel Painter 2017, выпущенная в 2016 году.
Возможности Corel Painter

Painter предоставит в Ваше распоряжение впечатляющий набор профессиональных инструментов художника. Кисти, масляные палитры, акварельные палитры, различные бумажные текстуры – для того чтобы собрать все эти инструменты в реальном мире, художнику понадобилась бы кругленькая сумма денег, а также настоящая личная студия. Или хотя бы отдельная каморка, где он мог бы сложить все это добро, забив ее до отказа. Теперь же можно просто сидеть на диване с планшетом с такой волшебной мастерской под рукой. Интересно, могли ли вообразить такое Ван Гог и Гоген? Вряд ли.

Программа имитирует не только результат применения того или иного инструмента, но и сам процесс работы с инструментом. Данная технология называется Real Bristle. Например, при работе с карандашом толщина линии будет напрямую зависеть от угла наклона стилуса к экрану Вашего планшета. Кисть, которую только что обмакнули в краску, будет оставлять более широкий и насыщенный след, нежели кисть, которой уже какое-то время рисовали. Как Вы поняли, программа Corel Painter имитирует условия реального мира и всю физику процессов рисования. Статья в помощь титульный лист презентации образец для студента.
Помимо двух сотен инструментов, имитирующих реальные средства живописи, в Corel Painter присутствует более чем две тысячи цифровых средств рисования (различные эффекты), есть возможность работы со слоями и масками.
Настройки Сorel Painter весьма гибкие. Вы можете «запоминать» цвета, созданные в палитрах, создавать собственные инструменты и пресеты для работы.
Painter поддерживает множество стандартных отраслевых форматов, таких, как PNG, PSD, TIFF (CMYK и RGB), BMP, TGA, GIF, JPEG, MOV, AVI и FRM. Также существует возможность сохранения файлов в формате EPS.
Более того, Painter совместим с Photoshop, что открывает еще большие возможности. Так, например, при преобразовании файлов из Painter в Photoshop и наоборот цвета изображения сохраняются.
Даже если Вы новичок, освоить программу будет достаточно просто. Уроки Сorel Painter, также называемый корел паинтер, широко представлены в интернете в совершенно свободном доступе.
Системные требования

Последняя версия программы потребует процессора с тактовой частотой не менее 2-х ГГц, минимум 2 гигабайта оперативной памяти, гигабайт свободного места на жестком диске, а также разрешение экрана не менее чем 1280 x 800. Corel Painter 2017 поддерживается операционными системами Windows 10 (64-Bit), Windows 8.1 (64-Bit), или Windows 7 (64-Bit).
Все без исключения авторы компании Zaochnik являются профессионалами своего дела. Каждый из них посвятил своему предмету жизнь, и занимается им с удовольствием. Они знают, что такое учеба не понаслышке и готовы взять на себя ту часть рутинной работы, которая является проблемой для Вас.
Иван Колобков, известный также как Джони. Маркетолог, аналитик и копирайтер компании Zaochnik. Подающий надежды молодой писатель. Питает любовь к физике, раритетным вещам и творчеству Ч. Буковски.