
-
Подключите IP-телефон к локальной сети и запишите IP-адрес, полученный устройством.
Для выяснения IP-адреса, который назначен IP-телефону после включения и загрузки, необходимо выполнить следующие действия:
Нажмите на телефоне кнопку с символом для входа в меню настроек.

Выберите пункт Сеть или нажмите на кнопку с цифрой 9.
Текущий IP-адрес будет отображен на экране.
-
Откройте WEB-браузер (Firefox, Chrome, Yandex) и в адресной строке наберите http://[IP-адрес телефона с предыдущего шага]/admin/advanced для подключения к интерфейсу управления Cisco SPA504G.
-
Проверьте версию прошивки Cisco SPA504G. Раздел Voice, вкладка Info, параметр Software Version. Если версия младше 7.5.7, обновите прошивку, следуя инструкции.
-
Получение MAC-адреса IP-телефона.
В интерфейсе управления Cisco SPA504G откройте раздел Voice и выберите вкладку Info.
В открывшемся окне параметр MAC Address содержит необходимые сведения. -
В системе управления вАТС в разделе «Автонастройка телефонов» / «Телефоны» нажмите на кнопку «Добавить»для создания конфигурации IP-телефона.
-
В открывшемся окне укажите параметры для настройки IP-телефона и нажмите кнопку «Сохранить».
Название: название конфигурации, по которому можно идентифицировать устройство.
Модель: выберите модель оборудования. В данном случае — Cisco SPA504G.
MAC-адрес: MAC-адрес устройства. См. шаг 4.
Пароль: формируется нажатием на кнопку «Создать».
Линии: выберите внутренние номера пользователей, которые будут использоваться при подключении IP-телефона к вАТС.
Расположение кнопок: не обязательно. Используется для настройки кнопок телефона в режиме BLF (отслеживание состояний линии других пользователей). -
В разделе «Автонастройка телефонов» / «Телефоны» скопируйте ссылку «Адрес (URL) для автонастройки» и вставьте её в интерфейс управления IP-телефоном в раздел «Voice», вкладка «Provisioning», параметр «Profile Rule»и нажмите на кнопку «Submit All Changes».
Ссылка конфигурации для Cisco SPA504G в системе управления вАТС.
Параметры Cisco SPA504G для автонастройки.
-
Перезагрузите IP-телефон для того, чтобы он принял конфигурацию, и им можно было управлять из вАТС. Для перезагрузки в адресной строке WEB-браузера (Firefox, Chrome, Yandex) наберите http://[IP-адрес телефона]/admin/reboot


Latest UCS Platform and EMC SAN on 5100 Series Blade Severs with 256 GB of RAM and OC48 Fiber Connection -Tylon Robinson, CCIE, CCVP, MCITP
Configuring the Cisco SPA504G/SPA508G series phones to work on Asterisk platforms can be simple. That’s the goal here at least! I’m going to break it down for you step by step using pictures and easy to follow instructions, including how to setup BLF’s, call pickup, speed dials and the paging feature. Shoot, if you pay attention and do good I might even let you know when your girlfriend calls.
This will work with the firmware that the Cisco SPA504G/SPA508G phones come shipped with. Upgrading the firmware isn’t a problem, I just won’t be covering it in this lesson. We can’t have CD’s in prison cuz these fools up the block were breaking them into pieces and stabbing each other with them. One dude was even making ninja stars out of them and you could get one for just a couple loosies. So, I had no choice but to get my firmware offline and I’m sorry, but there’s no way I’m giving up my Cisco username/password and you can believe that!
First, lets get the IP address out of your phone by pressing the Settings button. The settings button looks like a piece of paper with a bent ear in the top right corner, underneath the Voice mail button which is labeled with a envelope and to the right of the 3 digit on the keypad. Press 9 and you will see the IP address displayed below the WAN connection type on the screen. Using a computer connected to the same network as the phone, open up an Internet browser and type that IP address into the address bar (where you would type www…) and press Enter. If you did it correctly, you will see a blue configuration screen.
In the top right hand corner of the screen, click on ‘Admin Login’ and after that click on ‘advanced.’ Click on the System tab. There are 2 things you need to enter here and they are also shown in the picture below:
- In the ‘System Configuration’ section, make sure the Signaling Protocol is set to SIP
- In the ‘Optional Network Configuration’ section, Primary NTP Server = ntp.yourprovider.com

Click on the Regional Tab and Delete every Vertical Service Activation Code you see. Then at the bottom under the Miscellaneous section you can set the propper Time Zone (Mountain Standard = GMT-07:00). We don’t observe daylight savings, so you’re on your own with that one! 🙂
Click on the Phone Tab. This is where you are going to enter what you want displayed in the top right corner of the phone’s screen, setup the voice mail key, and define the line buttons. In the General section:
- ‘Station Name’ = theExtensionNumberOnAsteriskPBX
- ‘Voice Mail Number’ = *theExtensionNumberOnAsteriskPBX
- ‘Station Display Name’ = Whatever you want to appear in the top right corner of the phone screen

Before we move on, there are some things we need to understand first. We haven’t gotten to the Ext tabs yet, but they are where you setup your phone’s extensions by entering the configuration information associated with your Asterisk extension. Cisco did a really great job on the design of this website configuration. Anyways, please note that your phone’s extensions and your Asterisk extensions are different. In this example, my Asterisk extension is 101 and registered under extension 1 of the phone. The Cisco SPA504G/SPA508G, which is what we are using, has 8 Ext tabs. That means this phone is capable of using 8 different SIP accounts, potentially from all different service providers. Personally, I use Coredial and have been delighted with their service. You don’t need to worry about remembering what each phone extension is after you leave the phone’s Configuration Utility because you just label the line buttons, shown below. This comes into play twice in the next section. Don’t worry. It’s all good baby, baby!
In the Line Key section:
- ‘Extension’ = The number of the corresponding Ext tab that this Line Key (button on your phone) is using to access dial tone. Your Asterisk account can be setup under the Ext 1 tab and your home SIP account could be setup under the Ext 2 tab, for example. Again, so I know you got this, in the picture below, I am telling Line Key 1 (a button on my phone) to associate itself to Extension 1 of the Cisco SPA504g/508g phone, which is my Asterisk account.
- ‘Short Name’ = what is displayed on the phone’s screen next to the button.
- ‘Extended Function’ = where you define BLF’s and/or speed dials (you can also define different speed dials with the ‘Personal Directory’ link at the very top of the Configuration Utility Screen, but they are separate from these speed dials).
In the following picture:
- Line Key 1 accept calls from the SIP account I have configured as Extension 1 (Ext 1 tab) in my phone and displays “Asterisk 101” next to the line key on my phone screen. This is my Asterisk account. Whatever account is configured under the Ext 1 tab is going to be the default account your phone will use when you initiate a call. If you wanted to make a call using another SIP account, then you would need to press the line key associated with that SIP account before dialing to draw dial tone from that provider.
- Line Key 2 is a Busy Lamp Field (BLF), Speed Dial and Call Pickup button for the Mr. Fowler’s extension. He’s our warden. On the phone’s screen the letters ‘H.N.I.C.’ are displayed. If we had another SIP account on this phone configured on Extension 2 (Ext 2 tab) then we would need to have vid=2 added like this: fnc=blf+sd+cp;sub=102@$PROXY;ext=102@$PROXYvid=2;nme=Warden. This must be done for any BLF which monitors a phone on a shared SIP account and is set up under any Ext# tab besides Ext 1. Line Key 2 will show solid red if the warden is on the phone. It will also flash red if his phone is ringing and if I pressed this button while that was happening then I would answer the call ringing his phone. In a separate incident, if I am on the phone with someone and I wanted to transfer the caller to the warden I would just push his button and hangup because the phone would automatically initiate a blind transfer to his phone.
- In case you were wondering, the DOC has their own phone system and I can’t pick up bossman’s real calls cuz they won’t give me one of those extensions. It’s OK, their PBX is a PIECE OF CRAP and I don’t want one anyway. They don’t even know what disaster recovery is. It’s sad. Whatever, I got the warden tripped out on what’s actually transpiring when we intercom each other and speak and he can’t believe the quality. I gave him the SPA525G2 and he’s in love! I think he just like my voice haha, you know, because sometimes we be talking for like an hour. Man, for real for real… he’s an alright dude. And Mrs. Fowler is real sweet too. Good peoples.
- Line Key 3 is a speed dial to an external number (555)333-4444. nme=Lawyer means my phone will display ‘To: Lawyer’ whenever I press the button. ‘Gold Steinberg’ is displayed on the phone screen next to Line Key 3. Another good dude, btw. I think he has one of these phone systems in his office… not sure though.
- Line Key 4 Pages all the Cisco SPA504g/5068g phones that are on the same physical network as this phone.

Click on the User tab. All the way at the bottom in the LCD section and to the right is a drop down option where you can keep the phone’s backlight from going out. This is optional. Click on the Attendant Console tab. At the top in the General section you must enable Unit 1 and/or Unit 2 if you are using expansion modules 1 and/or 2, respectively. Either way, no matter what, change ‘Server Type’ to Asterisk and the ‘Attendant Console Call Pickup Code’ to *8#. This is important if you want to use the call pickup feature on your BLF’s. Click on the Ext 1 tab. This is where you need to enter the registration settings that your service provider or another SIP provider has given you. With this provider, inside the SIP Config tab in all standard extensions, find the user name and password. Inside the next tab over (Device), uncheck Generate Device Configuration Files and set the Device Type to ‘Bring Your Own Device.’ Don’t forget to click Save in the portal!
- In the ‘Proxy and Registration’ section enter the Registration Server, listed inside the portal under the PBX info tab.
- Register Expires I have set to 300 in order to force a re-registration every 5 minutes. If you are using an Edgemarc (which is what I believe Coredial still recommending) then you can leave this at 3600 because the router automatically sends keep alive packets. Unfortunately, I can’t have any routers in my room except for when I’m studying for an exam. But then they shut down my OC48 so I don’t have access to the WAN. It’s alright though, I got a pretty sweet setup here and I’m back on line now!! Word up.
- User ID and Password. Again, found in your portal.

All the way at the bottom of the Ext tabs is where the dial plan is defined for that particular extension. This is important because the phone will act certain ways depending on what you dial. For example, this is the dial plan I use: (*xxxxx|[3469]11|0|00|[2-9]xxxxxx|1xxx[2-9]xxxxxxS0|xxxxxxxxxxxx.) I had to add extra x’s into the beginning to account for logging in as an agent. If it read *xx and I picked up the phone to dial *01101, then the phone would actually not wait and just start trying to dial when i got the *01 out. Now the phone knows to wait for 5 digits after the *.
If anyone needs anything or has any questions, holla at me. I love this stuff!
That’s it, I’m done. You got this!
Word up.

-
Contents
-
Table of Contents
-
Bookmarks
Quick Links
USER GUIDE
Cisco Small Business Pro
SPA 504G IP Phone
for 8×8 Virtual Office
Related Manuals for Cisco SPA 504G
Summary of Contents for Cisco SPA 504G
-
Page 1
USER GUIDE Cisco Small Business Pro SPA 504G IP Phone for 8×8 Virtual Office… -
Page 2
Cisco and the Cisco Logo are trademarks of Cisco Systems, Inc. and/or its affiliates in the U.S. and other countries. A listing of Cisco’s trademarks can be found at www.cisco.com/ go/trademarks. Third party trademarks mentioned are the property of their respective owners. The use of the word partner does not imply a partnership relationship between Cisco and any other company. -
Page 3: Table Of Contents
Connecting Wired and Wireless Headsets (Optional) Verifying Phone Startup Upgrading Your Phone’s Firmware Determining Your Current Firmware Version Download the Firmware Get Your Phone’s IP Address Install the Firmware Cisco Small Business Pro IP Phone SPA 504G User Guide (SIP)
-
Page 4
Forwarding Calls — Phone-based Setup Forwarding All Calls Forwarding Calls When Your Phone is Busy Forwarding Calls When You Don’t Answer the Phone Delaying Call Forwarding When You Don’t Answer the Phone Cisco Small Business Pro IP Phone SPA 504G User Guide (SIP) -
Page 5
Creating Speed Dials Creating Speed Dials on Unused Line Buttons Creating Numerical Speed Dials Using Speed Dials Customizing Your LCD Screen Changing the LCD Screen Contrast Changing the Screen Backlight Settings Cisco Small Business Pro IP Phone SPA 504G User Guide (SIP) -
Page 6
Viewing Call History Lists Creating Speed Dials Adjusting Audio Volume Changing the LCD Contrast Configuring the Phone Screen Saver Appendix A: Where to Go From Here Product Resources 61 Cisco Small Business Pro IP Phone SPA 504G User Guide (SIP) -
Page 7: Chapter 1: Getting Started
Understanding Your Phone’s Lines and Buttons, page 4 About This Document This guide describes the concepts and tasks necessary to use and configure your Cisco Small Business Pro IP Phone. Cisco Small Business Pro IP Phone SPA 504G User Guide (SIP)
-
Page 8
Getting Started About This Document Organization This document describes using the Cisco SPA 504G with the 8×8 Virtual Office. This table describes the contents of each chapter in this document. Title Description Chapter 1 Getting Started A description of this book and an overview of the Cisco Small Business Pro IP Phones. -
Page 9: Overview Of The Cisco Spa 504G
Overview of the Cisco SPA 504G Overview of the Cisco SPA 504G The Cisco SPA504G is a full-featured VoIP (Voice over Internet Protocol) phone that provides voice communication over an IP network. The phone provide traditional features, such as call forwarding, redialing, speed dialing, transferring calls, conference calling and accessing voice mail.
-
Page 10: Understanding Your Phone’s Lines And Buttons
Displays solid red when you have a new voice mail message. Indicator Flashes red during an incoming call. LCD Screen Displays date and time, phone station name, line extensions, and softkey options. Cisco Small Business Pro IP Phone SPA 504G User Guide (SIP)
-
Page 11
Push to turn the speaker on or off. When the speaker is on, the button glows green. Keypad Use to dial phone numbers, enter letters, and choose menu items. Cisco Small Business Pro IP Phone SPA 504G User Guide (SIP) -
Page 12: Softkey Buttons
The softkey buttons on your phone display may vary depending on your phone model and the phone system setup. (Softkey buttons are not available on the Cisco SPA 501G.) Press the Right Arrow or Left Arrow keys on the navigation button to view additional softkey buttons.
-
Page 13
Performs a call transfer. xfer2vm Transfers an active call to voice mail. Enters a submenu and when pressed, toggles between Yes or No to enable or disable an option. Cisco Small Business Pro IP Phone SPA 504G User Guide (SIP) -
Page 14: Using Keypad Shortcuts
When using the phone menus, you can use the keypad to enter the number shown next to the menu or sub-menu item on the LCD screen. For example, to obtain your IP address on the Cisco SPA 504G, press the Setup button and dial The IP address is displayed on the Network screen.
-
Page 15: Chapter 2: Installing Your Phone
Installing Your Phone This chapter describes how to install your Cisco Small Business Pro IP Phone and connect it to your network. It contains the following sections: • Before You Begin, page 10 • Phone Connections, page 10 • Connecting the Handset, page 11 •…
-
Page 16: Before You Begin
The RJ-11 port marked “AUX” is reserved for connection with the Cisco SPA 500S Attendant NOTE Console that works with the IP phones.
-
Page 17: Connecting The Handset
Do not attach the desk stand if you want to mount the phone to the wall. If you are attaching a NOTE Cisco SPA 500S attendant console, attach the console before attaching the desk stand. Connect the phone stand by lining up the tabs on the stand with the slots on the phone body.
-
Page 18: Mounting The Phone To The Wall (Optional)
Mounting the Phone to the Wall (Optional) To mount the phone to the wall, you must purchase the MB100 wall mount bracket kit. Figure 2 MB100 Wall Mount Kit Cisco Small Business Pro IP Phone SPA 504G User Guide (SIP)
-
Page 19
Orient the MB such that the phone’s Ethernet and handset ports are accessible after STEP 2 installation. Push the MB onto the phone’s base. Slide the MB upwards to lock it in place. STEP 3 Cisco Small Business Pro IP Phone SPA 504G User Guide (SIP) -
Page 20
Installing Your Phone Mounting the Phone to the Wall (Optional) (Optional) If a Wi-Fi or PoE dongle is installed, place in the tray. STEP 4 Cisco Small Business Pro IP Phone SPA 504G User Guide (SIP) -
Page 21
Installing Your Phone Mounting the Phone to the Wall (Optional) Plug in the Ethernet and power cables. Cisco Small Business Pro IP Phone SPA 504G User Guide (SIP) -
Page 22: Reversing The Handset Retention Tab
Push the latch in. STEP 1 Slide the retention tab up until it detaches from the phone. STEP 2 Cisco Small Business Pro IP Phone SPA 504G User Guide (SIP)
-
Page 23: Connecting The Power
If you are using an external power source, insert one end of the power cord into an outlet and insert the other end of the power cord into the power port on the phone body. Cisco Small Business Pro IP Phone SPA 504G User Guide (SIP)
-
Page 24: Connecting Your Phone To The Network
Connecting the Phone to the Wireless Network You can use the Cisco WBP54G Wireless-G Bridge for Phone Adapters to connect the IP phone to a Wireless-G network instead of the wired local network. This procedure requires the optional Cisco SPA 9000 Voice System IP Phone PA100 power NOTE adapter to provide power to the WBP54G.
-
Page 25: Connecting A Pc To Your Phone (Optional)
IP Phone. • Wired headsets—Connect the 2.5mm connector from the headset into the headset port on the right side of the IP phone as shown in the following graphic: Cisco Small Business Pro IP Phone SPA 504G User Guide (SIP)
-
Page 26: Verifying Phone Startup
Verifying Phone Startup After receiving power and network connectivity, the phone executes a boot-up sequence. During this sequence, phones with screens display the Cisco logo and then “Initializing Network”. All of the lights on the phone will flash. After your phone is successfully connected to the network and receives a basic configuration, your phone line keys should glow green.
-
Page 27: Upgrading Your Phone’s Firmware
To upgrade your phone’s firmware, do one of the following: • Download the firmware from the Cisco website and install it from your PC. See the following section for instructions. •…
-
Page 28: Get Your Phone’s Ip Address
Do not disconnect your phone’s power until the upgrade is complete (the lights on your phone NOTE are no longer blinking). Click OK to dismiss the status message of the upgrade. STEP 7 Cisco Small Business Pro IP Phone SPA 504G User Guide (SIP)
-
Page 29: Chapter 3: Using Basic Phone Functions
• Placing a Three-Way Conference Call, page 38 • Using Conference Bridges, page 39 • Using the Phone Directories, page 41 • Using the Call History Lists, page 42 Cisco Small Business Pro IP Phone SPA 504G User Guide (SIP)
-
Page 30: Using Phone Hardware And Accessories
(If you are switching from the handset to a wireless headset, however, do not replace the handset or you will disconnect the call.) Cisco Small Business Pro IP Phone SPA 504G User Guide (SIP)
-
Page 31: Sending Audio To The Phone Speaker
Choose Preferred Audio Device and press edit. STEP 3 Press option to view your choices. When the option you want is displayed, press ok. STEP 4 Press save. STEP 5 Cisco Small Business Pro IP Phone SPA 504G User Guide (SIP)
-
Page 32: Adjusting Call Volume And Muting
You may have to dial a number or numbers to reach an outside line. Ask your phone NOTE administrator. To place or answer a call, do one of these: • Pick up the receiver. • Press the Speaker button. Cisco Small Business Pro IP Phone SPA 504G User Guide (SIP)
-
Page 33: Using Dial Assistance
Hold button places the active call on hold. Resuming a Call To resume the call, press the flashing red line button for the call or press the resume soft key. Cisco Small Business Pro IP Phone SPA 504G User Guide (SIP)
-
Page 34: Ending A Call
Blind Transfer—You transfer the call without speaking to the other party to which you are transferring the call. • Voicemail—You transfer the call to another’s voicemail so that the caller can leave a recorded message. Cisco Small Business Pro IP Phone SPA 504G User Guide (SIP)
-
Page 35: Performing An Attended Transfer
STEP 1 During an active call, press xfer2vm. STEP 2 Enter the number to which you want to transfer the call and press Dial. The call is transferred with no further action required on your part. Cisco Small Business Pro IP Phone SPA 504G User Guide (SIP)
-
Page 36: Transferring A Held Call To An Active Call
(Optional) Press edit to select a number and modify it (for example, to add an area code). STEP 2 When you’re done, press ok. Lift the handset or press dial to automatically dial the selected number. STEP 3 Cisco Small Business Pro IP Phone SPA 504G User Guide (SIP)
-
Page 37: Viewing And Returning Missed Calls
If the LCD screen shows a missed call, press the miss softkey to view a list of missed calls. • If the LCD screen does not show a missed call: a. Press the Setup button. b. Select Call History. c. Select Missed Calls. Cisco Small Business Pro IP Phone SPA 504G User Guide (SIP)
-
Page 38: Turning The Missed Calls Shortcut On And Off
STEP 2 Dial the number you wish to intercom to and then press Dial. If you are receiving an intercom call, the phone rings, then automatically connects to your speakerphone. Cisco Small Business Pro IP Phone SPA 504G User Guide (SIP)
-
Page 39: Forwarding Calls — Online Setup
If forwarding calls to an outside line, be sure to use any access and area codes required. Press dial. The LCD screen displays Calls Forwarded. STEP 3 Cisco Small Business Pro IP Phone SPA 504G User Guide (SIP)
-
Page 40: Forwarding Calls When Your Phone Is Busy
Right navigation button, press the alpha softkey, and enter letters using the keypad. Press the Left navigation button. Press ok. STEP 4 Press save. STEP 5 Cisco Small Business Pro IP Phone SPA 504G User Guide (SIP)
-
Page 41: Forwarding Calls When You Don’t Answer The Phone
In the Call Forward Screen, make sure CFWD No Ans Delay is highlighted and press the edit STEP 1 softkey. Enter the number of seconds to delay forwarding calls, if there is no answer at your phone. STEP 2 Cisco Small Business Pro IP Phone SPA 504G User Guide (SIP)
-
Page 42: Stopping Call Forwarding
Press the Setup button and select Preferences > Do Not Disturb. STEP 1 Press the edit softkey. STEP 2 Press y/n to choose y, then press ok. STEP 3 Press save. STEP 4 Cisco Small Business Pro IP Phone SPA 504G User Guide (SIP)
-
Page 43: Deactivating Do Not Disturb
Choose Call Waiting and press edit. STEP 3 Press the y/n softkey to turn call waiting on or off. STEP 4 Press ok. STEP 5 Press save. STEP 6 Cisco Small Business Pro IP Phone SPA 504G User Guide (SIP)
-
Page 44: Parking A Call
Press the conf softkey during an active call. The first call is placed on hold, a second line is STEP 1 opened, and you hear a dial tone. Dial the second person’s telephone number. STEP 2 Cisco Small Business Pro IP Phone SPA 504G User Guide (SIP)
-
Page 45: Conferencing A Held Call With An Active Call
STEP 2 Follow the Conference Bridge voice prompts. Conference Menu Options Enter a Conference — (Option 1): STEP 1 Enter your extension then press #. STEP 2 Enter conference ID then press #. Cisco Small Business Pro IP Phone SPA 504G User Guide (SIP)
-
Page 46
STEP 1 Enter your extension then press #. STEP 2 Enter your password then press #. (Voicemail Password) STEP 3 Enter the conference ID you want to delete then press #. Cisco Small Business Pro IP Phone SPA 504G User Guide (SIP) -
Page 47: Using The Phone Directories
Press the play softkey to play the selected ring tone or the select softkey to assign that ringtone to the person whose number you are adding to the directory. Cisco Small Business Pro IP Phone SPA 504G User Guide (SIP)
-
Page 48: Using The Corporate Directory
Select the Call History list you want to view. Available Call History lists are: STEP 3 • Redial List—Shows the last 60 numbers dialed from your phone. • Answered Calls—Shows the caller ID of the last 60 answered calls. Cisco Small Business Pro IP Phone SPA 504G User Guide (SIP)
-
Page 49: Calling From The Call History Lists
Use the navigation button to scroll to the right to access more softkey button options, and press STEP 2 save. Edit the information (if desired) and press save again. The entry is added to your directory. STEP 3 Cisco Small Business Pro IP Phone SPA 504G User Guide (SIP)
-
Page 50: Setting Or Changing A Phone Password
STEP 2 Press the record soft key. You will see a «Recording is ON» confirmation message on the phone screen. To turn Call Recording off: STEP 1 Press the exit soft key. Cisco Small Business Pro IP Phone SPA 504G User Guide (SIP)
-
Page 51: Chapter 4: Using Advanced Phone Features
STEP 1 Select Preferences. STEP 2 Choose Dial Preferences and press edit. STEP 3 Press y/n to choose yes. STEP 4 Press ok. STEP 5 Press save. STEP 6 Cisco Small Business Pro IP Phone SPA 504G User Guide (SIP)
-
Page 52: Creating Speed Dials
STEP 2 For a new speed dial, scroll to select an unused speed dial (marked with Not Assigned). To edit STEP 3 a previously existing speed dial, select it. Cisco Small Business Pro IP Phone SPA 504G User Guide (SIP)
-
Page 53: Using Speed Dials
Use the navigation button to adjust the screen contrast. Pressing the Left navigation button STEP 2 decreases the contrast. Pressing the Right navigation button increases the contrast. Press save. STEP 3 Cisco Small Business Pro IP Phone SPA 504G User Guide (SIP)
-
Page 54: Changing The Screen Backlight Settings
PC using the IP Phone Web Interface. See “Configuring the Phone Screen Saver,” on page To configure your screen saver: Press the Setup button. STEP 1 Select Screen Saver Mode. STEP 2 Cisco Small Business Pro IP Phone SPA 504G User Guide (SIP)
-
Page 55
Lock—Overlays a lock graphic onto the picture. • Phone—Overlays a phone graphic onto the picture. • Date/Time—Overlays the date and time onto the picture. Press ok. STEP 3 Press save. STEP 4 Cisco Small Business Pro IP Phone SPA 504G User Guide (SIP) -
Page 56: Turning On The Screen Saver
Choose the extension for which to choose a ring tone and press change. STEP 3 Scroll through the ring tones and press play to play the highlighted ring tone. Press select to STEP 4 choose the highlighted ringtone for that extension. Cisco Small Business Pro IP Phone SPA 504G User Guide (SIP)
-
Page 57: Configuring Date And Time Parameters On Your Phone
8×8 Support Team. Errors can interrupt your service. To access advanced menus, follow the procedures below. Press the Setup button. STEP 1 Cisco Small Business Pro IP Phone SPA 504G User Guide (SIP)
-
Page 58
8×8 Support team. Your phone will no longer be connected to 8×8 service if it is reset it to the Cisco factory default. Cisco Small Business Pro IP Phone SPA 504G User Guide (SIP) -
Page 59: Rebooting Your Phone
To reboot your phone: Press the Setup button. STEP 1 Scroll to Reboot and press select. STEP 2 Press ok. STEP 3 Cisco Small Business Pro IP Phone SPA 504G User Guide (SIP)
-
Page 60: Chapter 5: Using The Web Interface
Using the Web Interface Your Cisco IP Phone provides a web interface to the phone that allows you to configure some features of your phone using a web browser. This chapter contains the following sections: • Logging in to the Web Interface, page 54 •…
-
Page 61
Call History—Displays calls received and made from your phone. • Personal Directory—Contains your personal address book. • Attendant Console Status—Provides information about Cisco SPA 500S attendant consoles, if installed. Cisco Small Business Pro IP Phone SPA 504G User Guide (SIP) -
Page 62: Setting Do Not Disturb
If you set your call forwarding rules on your phone, they will not be in effect if your phone is disconnected from an Internet connection. Log in to the web interface. STEP 1 In the Voice tab, click the User tab. STEP 2 Cisco Small Business Pro IP Phone SPA 504G User Guide (SIP)
-
Page 63: Configuring Call Waiting
Under Supplementary Services, locate the CW Setting field. STEP 3 Choose yes or no to enable or disable. STEP 4 At the bottom of the page, click Submit All Changes. STEP 5 Cisco Small Business Pro IP Phone SPA 504G User Guide (SIP)
-
Page 64: Using Your Personal Directory
Placed—Shows the last 60 numbers dialed from your phone. • Answered—Shows the caller ID of the last 60 answered calls. • Missed—Shows the last 60 missed calls. Click the tab for each list to view it. Cisco Small Business Pro IP Phone SPA 504G User Guide (SIP)
-
Page 65: Creating Speed Dials
Ringer Volume • Speaker Volume • Handset Volume • Headset Volume Enter a volume between 1 and 10, with 1 being the lowest. Click Submit All Changes. STEP 3 Cisco Small Business Pro IP Phone SPA 504G User Guide (SIP)
-
Page 66: Changing The Lcd Contrast
“Press any key to unlock your phone.” A moving phone icon. The station date and time in the middle of the screen. Click Submit All Changes. STEP 3 Cisco Small Business Pro IP Phone SPA 504G User Guide (SIP)
-
Page 67: Appendix A: Where To Go From Here
Where to Go From Here Cisco provides a wide range of resources to help you obtain the full benefits of the Cisco SPA 504G. Product Resources Support Cisco Small Business Support www.cisco.com/go/smallbizsupport Community Online Technical Support and www.cisco.com/support Documentation (Login Required) Phone Support Contacts www.cisco.com/en/US/support/tsd_cisco_small_…
-
Page 68
Cisco WBP54G Wireless-G Bridge for Phone Adapters User Guide—Installation and use of the WBP54G wireless bridge with your Cisco IP phone. Other Cisco-provided documentation may be useful as a reference, but it often refers to features NOTE that are supported only on specific plans of specific providers or PBXs. It also may exclude some cloud-provided services for your business that are provided by 8×8, Inc.
Настройка IP телефонов Cisco серий SPA3xx-5xx
Данная инструкция описывает настройку ip-телефона «Cisco (Linksys) SPA504G» для работы с телефонной сетью компании НТК. Также эта инструкция подходит ко всем телефонам «spa5xx-3xx»
«Cisco (Linksys) SPA504G» Ip-телефон бизнес класса достаточно надежный удобный и практичный. Настраивается данная модель полностью через WEB-интерфейс.
-
Если вам в руки попал ненастроенный ip-телефон, то этот пункт инструкции вы можете пропустить. Однако если вы уверены, что этот ip-телефон уже где-то использовался, то его лучше всего сбросить на заводские настройки. Чтобы сбросить данный ip-телефон к заводским настройкам на самом аппарате требуется нажать
 кнопку-Меню. Далее при помощи
  кнопки-Навигации перейти к пункту (14) «Factory Reset». Далее нажимаем
  софт клавишу «ОК». IP-телефон перезагрузится и вернется к настройкам по умолчанию.
 -
Имея в наличии ip-телефон с заводскими настройками, подключаем сетевой кабель в «Switch port»

-
IP-телефон по умолчанию получает ip-адрес по DHCP (автоматически). Посмотреть полученный ip-адрес можно нажав
кнопку-Меню, далее при помощи кнопки-Навигации перейти к пункту (9) Network, и нажать софт-клавишу «select».
Далее мы видим тип подключения DHCP и полученный автоматически ip-адрес
 .
.
 софт клавишу «ОК». IP-телефон перезагрузится и вернется к настройкам по умолчанию.

 .
.Если в вашей локальной сети нет DHCP сервера, телефон должен находится на каком-то определенном ip-адресе, или должен будит находится на внешнем ip-адресе требуется изменить тип подключения на статический, для этого как было описано выше, переходим в пункт меню (9) «Network». Далее находясь на пункте (1) «WanConnectionType» нажимаем на софт-клавишу «edit»
 . Далее нажимаем софт-клавишу «option» вместо DCHP на экране высветится StaticIP и жмем софт-клавишу «ok»
 .После чего при помощи
![]() кнопки-Навигации перейти к пункту (8) «Non-DHCP IP Address» и нажать софт-клавишу «edit»
кнопки-Навигации перейти к пункту (8) «Non-DHCP IP Address» и нажать софт-клавишу «edit» . Далее вводим ip-адрес используя в качестве разделителя вместо точки клавишу «*» , после нажимаем софт клавишу «ok». По аналогии с предыдущим пунктом заполняем (9) «Non-DHCP Subnet Mask» , (10) «Non-DHCP Default Route», (11) «Non-DHCP DNS» 1 и (12) «Non-DHCP DNS 2». После того как ввели все необходимые параметры сетевого подключения нажимаем софт-клавишу «save»
 . После чего при помощи клавиши навигации переходим на пункт (12) «Reboot» и нажимаем софт-клавишу «ок», после перезагрузки аппарата будут применены статические настройки подключения.
-
После того как ip-телефон подключен к сети и мы узнали его ip-адрес, в любом браузере вводим в адресную строку http://<ip-адрес>/ (например : http://10.0.2.41/ или http://192.168.1.15/ ). Вы должны увидеть подобное окно:
 Для дальнейших настроек мы должны перейти в привилегированный режим, для этого жмем в правом верхнем углу сначала «Admin Login»
  , нам открывается еще часть настроек , но нам нужен полный расширенный функционал , далее нажимаем «advanced».
 . Или просто вводим а адресной строке браузера http://<ip-адрес>/admin/advanced/ (например http://192.168.0.12/admin/advanced/ или http://10.0.2.41/admin/advanced/ ). После чего перед нами вкладки для настройки на ip-телефоне сетевого подключения, региональных параметров, функционала телефона, настройке линий, и прочего.
-
Все дальнейшие настройки сетевого подключения можно производить теперь из WEB-интерфейса во вкладке «System»
 В данной вкладке также устанавливаются пароли пользовательский и администратора. Не рекомендуется устанавливать пользовательский пароль, при назначенном пользовательском пароле без его ввода на телефоне не будут доступны просмотр журнала звонков, повтор последнего набранного номера, и большая часть функционала. «Admin Passwd» назначаем обязательно. Так же все что мы ранее настраивали на самом телефоне , мы можем отредактировать в данной вкладке
-
После того как мы подключили телефон к сети, зашли на WEB-интерфейс и установили пароль администратора, переходим к вкладке «SIP»
 .В данной вкладке важно поставить значение поля «RFC 2543 Call Hold» в положение «NO». Данная функция может конфликтовать со старым voip оборудованием других операторов, некорректно отрабатывая HOLD.
-
Далее переходим во вкладку «Regional»
Здесь стоит отметить что при использовании виртуальных АТС, в нашем случае «BroadWorks», могут совпадать коды активации услуг локальные (на телефоне) с короткими кодами активации услуг на виртуальной АТС. Вследствие чего отрабатываются локальные коды, а коды виртуальной АТС не задействуются. Для правильной работы в такой среде нужно все заполненные поля раздела «Vertical Service Activation Codes» , которые показаны на картинке, очистить Так же в данной вкладке задается часовой пояс (временная зона) и язык локализации интерфейса телефона (по умолчанию русский не установлен, по этому выставляем en-US). -
Переходим к вкладке «Phone»
В данной вкладке настраивается соотношение
 кнопок линий к учетным записям заведенным на ip-телефоне
  . А также отображаемое на экране имя линии
  . По умолчанию все настроенное 1линия-1 учетная запись , 2линия-2 учетная запись, 3линия-3 учтеная запись, 4линия-4 учетная запись. Но можно при использовании одной учетной записи на телефоне выстевить на всех 4х линия значение поля «Extension : 1» (если учетная запись заведена в Ext.1).Также в данной вкладке присутствует возможность отключить софт-клавиши локальных сервисов которые можно случайно активировать. Значание «Yes» оставляем только в выделенных полях, остальные функции отключаем выставляя «NO»
-
Далее переходим к вкладке «User»

В данной вкладке выставляем формат даты и времени для более удобного просмотра журнала звонков
 Для дальнейших настроек мы должны перейти в привилегированный режим, для этого жмем в правом верхнем углу сначала «Admin Login»
  , нам открывается еще часть настроек , но нам нужен полный расширенный функционал , далее нажимаем «advanced».
 . Или просто вводим а адресной строке браузера
 В данной вкладке также устанавливаются пароли пользовательский и администратора. Не рекомендуется устанавливать пользовательский пароль, при назначенном пользовательском пароле без его ввода на телефоне не будут доступны просмотр журнала звонков, повтор последнего набранного номера, и большая часть функционала. «Admin Passwd» назначаем обязательно. Так же все что мы ранее настраивали на самом телефоне , мы можем отредактировать в данной вкладке
 .В данной вкладке важно поставить значение поля «RFC 2543 Call Hold» в положение «NO». Данная функция может конфликтовать со старым voip оборудованием других операторов, некорректно отрабатывая HOLD.
 Здесь стоит отметить что при использовании виртуальных АТС, в нашем случае «BroadWorks», могут совпадать коды активации услуг локальные (на телефоне) с короткими кодами активации услуг на виртуальной АТС. Вследствие чего отрабатываются локальные коды, а коды виртуальной АТС не задействуются. Для правильной работы в такой среде нужно все заполненные поля раздела «Vertical Service Activation Codes» , которые показаны на картинке, очистить
  Так же в данной вкладке задается часовой пояс (временная зона) и язык локализации интерфейса телефона (по умолчанию русский не установлен, по этому выставляем en-US).

 кнопок линий к учетным записям заведенным на ip-телефоне
  . А также отображаемое на экране имя линии
  . По умолчанию все настроенное 1линия-1 учетная запись , 2линия-2 учетная запись, 3линия-3 учтеная запись, 4линия-4 учетная запись. Но можно при использовании одной учетной записи на телефоне выстевить на всех 4х линия значение поля «Extension : 1» (если учетная запись заведена в Ext.1).Также в данной вкладке присутствует возможность отключить софт-клавиши локальных сервисов которые можно случайно активировать. Значание «Yes» оставляем только в выделенных полях, остальные функции отключаем выставляя «NO»


Переходим к вкладке «Ext 1»
 Здесь мы будем настраивать SIP учетную запись. Для начала убедимся что наша учетная запись включена , параметр «Line Enable» должен быть выставлен «Yes»
  Далее для работы в нашей сети нужно прописать адрес SIP-proxy сервера , в нашем случае «Proxy» будет sip.new-tc.ru , адрес к которому будет обращатся аппарат для регистрации или попытки совершить вызов. «Use Outbound Proxy» выставляем «NO», нужно только если адрес «Proxy» не соответствует адресу исходящего адреса «Proxy» для регистрации и инициализации вызовов. Поле «Register» выставляем «YES», нам нужно чтобы наша учетная запись регистрировалась на заданном выше «Proxy» сервере. «Register Expires» и «Proxy Fallback Intvl» выставляем значение «600», по умолчания «3600». Период перерегистрации не должен быть очень маленьким, так как может быть рассмотрен как спам «Proxy» сервером, и слишком большим, так как при кратких потерях на интернет канале придется либо очень долго ждать пока регистрации восстановится, либо перезагружать телефон вручную.
  Далее заполняем поля «Display Name» судя вводим , то что хотим чтобы отображалось на дисплее. В поле «User ID» вводим значение вашего Sip User Id. В поле «Auth ID» вводим значение SIP Auth ID. В поле «Password» вводим значение SIP password. Так же выставляем «Use Auth ID» значение «YES», чтобы при регистрации использовалось аутентификационное имя.
  Далее нам нужно выставить кодеки, для обработки голосового потока. Наиболее приоритетным кодеком необходимо выставить G711A, так как он обеспечивает наилучшее качество звука при полосе пропускания около 100кбит\с на один разговор. G711U стоит оставить вторым приоритетом, так как этот кодек хоть и дает качество звука, сравнимое с G711A, но является менее распространенным в России и Европе
G729 является кодеком с наименьшей требуемой пропускной способностью ( примерно 30 кбит\с ) однако он более чувствителен к потерям на канале, потребляет больше ресурсов устройства и выдает наихудшее качество звука. Кодек G723 хоть и обладает наименьшей пропускной способностью (около 28 кбит\с) желательно не использовать вообще из-за наиболее низкого качества звука. А также значение поля «Use Pref Codec Only» выставляем «No», чтобы при автосогласовании была возможность выбрать наиболее подходящий кодек. Еще нужно прописать в поле «Dial Plan» (*xx|[3469]11|0|00|[2-9]xxxxxx|1xxx[2-9]xxxxxxS0|xxxxxxxxxxxx.|**xx)
 .
.
По аналогии настраиваются Ext_2-4.
-
По завершению всех настроек нажимаем в нижней части страницы «Submit all change»
 После чего ip-телефон отправится в перезагрузку, для применения всех настроек, на экране будет
-
Позавершению настроек переходим к вкладке «Info»
 После чего ip-телефон отправится в перезагрузку, для применения всех настроек, на экране будет
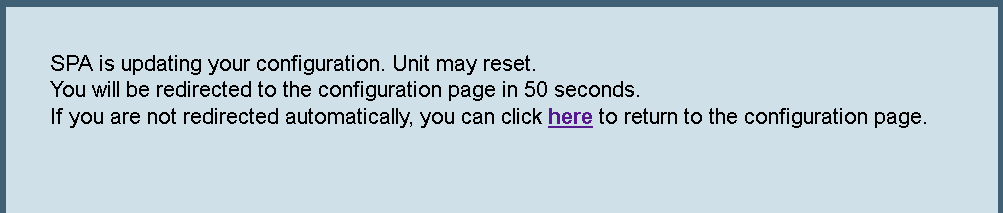

Здесь мы можем увидеть статус учетной записи «Regisration State» (в примере Ext 1), время и дату последней удачной регистрации «Last Registrarion At», и время оставшееся до следующей регистрации «Next Registration In». Если все прошло успешно вы увидите аналогичную картину как в примере ниже.

1. Данные для настройки в личном кабинете 1АТС
1.1 В личном кабинете системы необходимо перейти во вкладку “Настройки”. Выбирать в боковом меню “Внутренние номера” и кликнуть на пиктограмму с изображением шестеренки напротив нужного номера.

1.2 Нужные для настройки данные отображены в полях: “имя SIP-пира”, “сервер” и “пароль”.

2. Как произвести настройку IP-телефона?
2.1 IP-телефон подключаем к роутеру. Нам необходимо определить IP-адрес, для этого — нажимаем кнопку “Menu”-“Network”-“DHCP”.
Открываем веб-браузер и в адресную строку вводим этот IP-адрес. Откроется форма авторизации для доступа к настройкам SIP-телефона. По умолчанию логин — “Admin Login”, пароль — “admin”.

2.2 В веб-интерфейсе телефона открываем вкладку “SIP”.
Заполняем следующим образом:
- поле «RTP Port Min» — значение 1000;
- поле «RTP Port Max» — значение 65000;
- поле «RTP Packet Size» — значение 0.020;
- важно поставить значение поля «RFC 2543 Call Hold» в положение «No»;
2.3 В веб-интерфейсе телефона открываем вкладку “Ext1”.


Поля “Proxy“”, “Display Name”, “User ID” и “Password” заполняем данными, которые получили из пункта 1.1-1.2.
Нажимаем кнопку “Submit All Changes” и проверяем статус регистрации. Если всё сделано правильно, то значение будет “Registered”.
11.11.2020