-
Contents
-
Table of Contents
-
Bookmarks
Quick Links
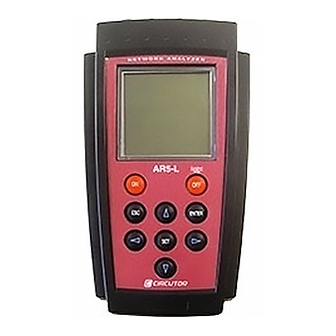
SUPPLY NETWORK ANALYZER
AR5-L
( Code M 80111 )
(CHECK-METER Program)
( Cod. M 80225 )
INSTRUCTION MANUAL
( M98110301-03-04A )
CIRCUTOR S.A.
(c)
Related Manuals for Circutor AR5-L
Summary of Contents for Circutor AR5-L
-
Page 1
SUPPLY NETWORK ANALYZER AR5-L ( Code M 80111 ) (CHECK-METER Program) ( Cod. M 80225 ) INSTRUCTION MANUAL ( M98110301-03-04A ) CIRCUTOR S.A. -
Page 2: Table Of Contents
5.4.- FILES Menu ………………18 5.4.1.- DIR: Directory …………….18 5.4.2.- DELETE: Deleting a file …………… 18 5.4.3.- FORMAT: Formatting the AR5-L internal memory ……. 19 5.5.- Menu OFF: Enable / Disable Password……….19 5.6.- Menu LANGUAGE …………….19…
-
Page 3
AR5-L COMMUNICATIONS …………… 28 TECHNICAL SPECIFICATIONS…………29 SAFETY WARNINGS …………….. 31 10.- MAINTENANCE……………… 31 11.- TECHNICAL SERVICE…………… 31 CABLE ARRANGEMENT …………..32 QUICK GUIDE (AR5-L) …………….. 33 C. QUICK GUIDE FOR AR5 — CHECK-METER……… 33 D. EXAMPLE OF TRANSFORMATION RELATIONS …….. 34… -
Page 4: Basic Instructions
1.3.- Connection instructions Before powering and connecting the analyzer check the following points: a) Supply voltage: Through and external power supplier set. Input mains 80 V a.c. – 265 V a.c. / output to AR5-L 12V d.c. b) Frequency : 45…65 Hz.
-
Page 5: Analyzer Startup
(LOAD PROGRAM). Press [ENTER] or wait for a while to confirm this operation. • Select the position to save the program into. • The AR5-L will perform a test to check that the cartridge has been properly connected. • If an inserted cartridge is detected, then the program will be loaded.
-
Page 6: Choice Of The Operation Mode Program
Page nº 2.2.- Choice of the operation mode program The AR5-L can hold in memory different operation mode programs. The choice of the program to be used is done when starting the AR5-L up. • Turn the AR5-L on. •…
-
Page 7: Connection Modes
————— SUPPLY NETWORK ANALYZER AR5-L ———— Page nº 3.- CONNECTION MODES A.- THREE-PHASE MODE CONNECTION DIAGRAM B.- SINGLE-PHASE MODE CONNECTION DIAGRAM…
-
Page 8
————— SUPPLY NETWORK ANALYZER AR5-L ———— Page nº C.- ARON MODE CONNECTION DIAGRAM… -
Page 9: Data Visualization On Display
Energy values are partial values. The value is always reset to zero when accessing this screen. These values are not accumulated. Pressing the key [SET] from this screen m the set-up menu is accessed. When powering the AR5-L on, the display will show: CHECK-METER INST…
-
Page 10: Screen For Energy Meter Check
————— SUPPLY NETWORK ANALYZER AR5-L ———— Page nº Inductive reactive power: The inductive reactive power is calculated from instantaneous voltage and current data. The readout gives the instantaneous values of the inductive reactive power of each phase and also the three phase total instantaneous inductive reactive power, which is the addition of each phase value.
-
Page 11: Warning Messages
5.6.-). 5.1.- Set-up of Instantaneous Values To accessing AR5-L setup options press the key [SET], on the instantaneous values screen The analyzer will then inquiry for a password that consists of a key sequence to be pressed (the user has 15 seconds to press this sequence). If the…
-
Page 12
————— SUPPLY NETWORK ANALYZER AR5-L ———— Page nº All programs have an independent setup, therefore, the setup must be always check to ensure a proper operation, since any modification will only affect the active operation program. Diverse setting MENUS are available:… -
Page 13: Setup Menu
————— SUPPLY NETWORK ANALYZER AR5-L ———— Page nº 5.1.1.- SETUP menu The AR5-L meter can be user-configured to different performances involving its data analysis and recording modes, as it is followed shown: SETUP MEASURE COMM SETUP menu. CLOCK PASSWORD RECALL…
-
Page 14: 1.- Wiring: Circuit Type
AR5-L analyzer (Never directly connect the 5 A signal to the AR5-L.). For this case, the C.T. primary must be set at the primary value of the C.T. used for measuring purposes.
-
Page 15: Clock: Internal Clock
————— SUPPLY NETWORK ANALYZER AR5-L ———— Page nº Though keys [6], [5] the value of the selected position is increased or decreased. [ENTER] to validate the total value or [ESC] to exit with no modification. 5.1.4.- CLOCK: Internal clock Use this section to set the analyzer internal clock in time: date / time and displaying format.
-
Page 16: Recall: Read Configuration
A confirmation is requested: “Recall Setup sure <yes> or <no>“. With keys [4] & [3] select yes or no, and then press [ENTER]. A “Standard” operation program for the AR5-L is available to be user-recalled. Its features are: — C.T. Ratio (SET + A) — V.T.
-
Page 17: Display Menu
… 5.2.1.- CONTRAST: Screen contrast The user can here vary the contrast of the AR5-L display: With the [4] you can intensify the display contrast and with the key [3] this can be lowered: CONTRAST 5.2.2.- POWER FACTOR…
-
Page 18: Files Menu
Page nº 5.3.- FILES Menu Non-volatile AR5-L internal memory is storing data up to its maximum capacity. Once full, no new data will not be saved in, nor stored data will be lost (provided no incorrect operation is done). When memory is full, the display will show: «MEMORY FULL».
-
Page 19: Format: Formatting The Ar5-L Internal Memory
5.4.- Menu OFF: Enable / Disable Password. In order to avoid an accidental manipulation of the analyser, the AR5-L can be set to request for a password when the user wants to turn it off.
-
Page 20: Setup For Energy Meter Check
6. RECORD: To save in memory the record of the performed check. 7. This section will show the real value measured by the AR5-L and also the value that the CHECK-METER should have measured according to the user-programmed values (points: 3, 4 &…
-
Page 21: Operation Mode
————— SUPPLY NETWORK ANALYZER AR5-L ———— Page nº 6.- Operation mode When checking energy meters it is advisable to: • For any type of energy meter: To perform the energy meter check when the installation is at full operation conditions. The higher the consumption is, the higher the check reliability will be.
-
Page 22: Checking Mechanic Energy Meters
————— SUPPLY NETWORK ANALYZER AR5-L ———— Page nº 7.- Checking energy meters 7.1.- Checking mechanic energy meters AR5 CHECK-METER (1) User’s data User Name 1/1V 5/5A (2) P.T. and C.T. ratios (3) Check of energy meters TURNS/IMP (4) Check of number turns or pulses…
-
Page 23
————— SUPPLY NETWORK ANALYZER AR5-L ———— Page nº 7.- During some moments of data recording: 8.- You will see again at the bottom of the screen: STOP 9.- The energy meter checking process will be stopped when pressing again [ENTER]. -
Page 24: Checking Electronic Energy Meters
————— SUPPLY NETWORK ANALYZER AR5-L ———— Page nº 7.2.- Checking electronic energy meters AR5 CHECK-METER (1) User’s data User Name 1/1V 5/5A (2) P.T. and C.T. ratios (3) Check of energy meters TURNS/IMP nTURNS? kWh START (5) Check start and end energy test…
-
Page 25
————— SUPPLY NETWORK ANALYZER AR5-L ———— Page nº 7.- During some moments of data recording 8.- You will see again at the bottom of the screen: STOP 9.- The energy meter checking process will be stopped when pressing again [ENTER]. -
Page 26: Checking Electronic Energy Meters Using The Optical Reader
————— SUPPLY NETWORK ANALYZER AR5-L ———— Page nº 7.3.- Checking electronic energy meters using the optical reader. It is possible to connect an optical reader (ref XXXXXXX) for those meters that have a LED. Connect the optical reader into AUX plugin…
-
Page 27
Page nº 6.- Connect the optical reader, if it is not connected yet , to the Ar5-l and align optical head with the LED of the meter. 7.- Press [ENTER] to start the energy meter checking process. After requesting a… -
Page 28: Ar5-L Communications
Perform the connection using the two wires factory-delivered with the AR5-L. One cable will link the AR5-L to the power supplier set, and another cable is a standard RS232 connector. When starting communication tasks take into account: •…
-
Page 29: Technical Specifications
————— SUPPLY NETWORK ANALYZER AR5-L ———— Page nº 9.- TECHNICAL SPECIFICATIONS Supply voltage: Through an external power supplier set 230 V a.c. (+10% / -15%) Frequency : 50…60 Hz Burden : 8 VA Operation temperature : 0 / 50 ºC…
-
Page 30
— 1000 case (with protection rubber CPR-1000) ….CODE M 89923 — 2000 case (with protection rubber CPR-2000) ….CODE M 89921 − Adapters — connector adapter AR5 clamp to AR5L ..……..CODE. M 89927 — Connector adapter AR5-L C-FLEX clamp to AR5-L ..CODE. M 89928… -
Page 31: Safety Warnings
11.- MAINTENANCE The AR5-L does not require any special maintenance. No adjustment, maintenance or repairing actions should be done over the instrument open and, should those are essential, high-qualified operators must perform them.
-
Page 32: Cable Arrangement
————— SUPPLY NETWORK ANALYZER AR5-L ———— Page nº A. CABLE ARRANGEMENT Different cables used with the AR5-L have following arrangements: • Communication cable RS232: PC — Power supplier set POWER SUPPLIER • Power supply/Communication: Power supplier set — AR5-L. POWER…
-
Page 33: Quick Guide (Ar5-L)
————— SUPPLY NETWORK ANALYZER AR5-L ———— Page nº B. QUICK GUIDE (AR5-L) Menu Description Options Standard Setup Measure Circuit Choice type of measuring circuit. Three-phase Three-phase Single-phase Tr. Rel Rel. V Voltage transformers ratio. Primary=1 Secondary=1 Rel. A Current transformers ratio.
-
Page 34: Example Of Transformation Relations
————— SUPPLY NETWORK ANALYZER AR5-L ———— Page nº D. EXAMPLE OF TRANSFORMATION RELATIONS Clamps connected in the secondary one 27000 V 500 A 110 V 5 A 5A clamps METER CHECK-METER USER 27000/110V 500/5 Clamps connected in the primary one…

3
6.1.- SETUP menu ………………………………………………………………………….. 31
6.1.1.- MEASURE ………………………………………………………………………… 32
6.1.1.1.- WIRING: Circuit type……………………………………………………… 32
6.1.1.2.- PT/CT : Transformation ratios…………………………………………. 32
6.1.2.- RECORD menu …………………………………………………………………. 32
6.1.2.1.- PERIOD: recording period ……………………………………………… 33
6.1.2.2.- TRIGGER: Trigger conditions …………………………………………. 34
6.1.2.3.- NAME: recording file name …………………………………………….. 37
6.1.2.4.- PARAM: Choosing the parameters to be saved…………………. 38
6.1.3.- COMM: Communication parameters……………………………………… 39
6.1.4.- CLOCK: Internal clock ………………………………………………………… 39
6.1.5.- PASSWORD: Safety setting. ……………………………………………….. 40
6.1.6.- RECALL: Read configuration ……………………………………………….. 41
6.2.- DISPLAY menu……………………………………………………………………….. 42
6.2.1.- BAR.GR. …………………………………………………………………………… 42
6.2.2.- EXPAND …………………………………………………………………………… 42
6.2.3.- CONTRAST: Screen contrast ………………………………………………. 42
6.2.4.- ANGLE……………………………………………………………………………… 43
6.3.- RUN: data recording process status …………………………………………… 43
6.4.- FILES Menu……………………………………………………………………………. 43
6.4.1.- DIR: Directory ……………………………………………………………………. 43
6.4.2.- DELETE: Deleting a file ………………………………………………………. 43
6.4.3.- FORMAT: Formatting the analyzer internal memory………………… 44
6.5.- CLEAR menu: Deleting data……………………………………………………… 44
6.6.- Menu OFF: Enable / Disable Password. ……………………………………… 45
6.7.- Menu LANGUAGE …………………………………………………………………… 45
7.-
ANALYZER COMMUNICATIONS ………………………………………………. 45
8.-
TECHNICAL SPECIFICATIONS…………………………………………………. 46
9.-
SAFETY WARNINGS ……………………………………………………………….. 48
10.- MAINTENANCE……………………………………………………………………….. 49
11.- CHANGING THE BATTERY………………………………………………………. 49
12.- TECHNICAL SERVICE……………………………………………………………… 50
(Ocr-Read Summary of Contents of some pages of the Circutor AR5-L Document (Main Content), UPD: 10 June 2023)
-
7, Page nº 7 3.- ANALYZER STARTUP 3.1.- Loading a new program The device has an internal memory to save diverse operation mode programs to be used by the user. Before starting this action, check that analyzer is supplied through the power supplier set. To load any program, follow these instructions precisely: • Turn the meter off. • It is necessary to load a coprocessor that comes in a cartridge to part, an…
-
11, Page nº 11 5.1.- SETUP menu The analyzer can be user-configured to different performances involving its data analysis and recording modes, as it is followed shown: SETUP SETUP menu. · CIRCUIT RECORD COMM CLOCK PASSWORD CIRCUIT Single-phase / Three-phase RECORD · TRIGGER NAME Level, rated voltage, rated frequency, % limit V File name ( 8 characters) COMM Baud / Parity / Bits / Stop bits …
-
16, Circutor AR5-L Page nº 16 5.4.2.- DELETE: Deleting a file You can here delete any file from the internal memory. AR5-L – DELETE STD-PROG. A5M xxxxx bytes File name / File size TEST1. A5D xxxxx bytes STD-PROG. A5I xxxxx bytes …… ………… — With keys [6] & [5] select the file to be deleted. — [ENTER] to confirm selected file erasing. Once press, a confirmation is requ…
-
13, Page nº 13 5.1.2.2.- NAME: recording file name Type here the file name (8 characters, no extension). NAME STD-PROG NOTE! Extension for disturbance files is always A5D. Whether the name of the working file is change, previous file will not be deleted, since several files can be at the same time saved in the device internal memory provided these are differently named. All data will be automatically saved …
-
10, Page nº 10 5.- PROGRAMMING THE ANALYZER To access analyzer setup options press the key [SET]. The analyzer will then inquiry for a password that consists of a key sequence to be pressed (the user has 15 seconds to press this sequence). ). If the default password has not been modified, then the following key sequence must be followed: PASSWORD [3] [SET] [5] [SET] Once th…
-
3, Page nº 3 1.- DESCRIPTION This manual is aimed to familiarize de user with the operation of the portable analyzer models AR5 / AR5-L when working with the “Disturbances version” of the power line quality program. To get all necessary information about operation instructions and safety warnings of the portable analyzer consult its instruction manual (code M98151101). An analyzer loaded with the “disturbances” program permi…
-
20, Page nº 20 A.- QUICK GUIDE – DISTURBANCES Menu Description Options Standard Circuit Choice type of measuring circuit. Single-phase Three-phase Three-phase Level Sensitivity level setting 1.2 VNOM Rated voltage of monitored power line 230 V HZNOM Rated frequency of monitored power line 50 Hz Trigger V.LOW % of voltage limit. Sag voltage 50% — 100% 75% …
-
12, Page nº 12 5.1.2.- RECORD menu. The recording conditions are here user-programmed: RECORD · TRIGGER NAME Level, Rated Voltage, Rated Frequency & % limit V File name ( 8 digits ) 5.1.2.1.- TRIGGER: Trigger conditions. TRIGGER LEVEL VNOM HZNOM V.LOW You can program here certain conditions (Trigger) so that disturbance wave forms are recorded in memory only w…
-
8, Page nº 8 3.2.- Choice of the operation mode program The analyzer can hold in memory different operation mode programs. The choice of the program to be used is done when starting the meter up. • Turn the device on. • A list of available programs will be shown on display. • Use keys [5] & [6] for the choice of the desired program. • Press [ENTER] or wait for a while to confirm this operation. CHECK THE SETUP…
-
15, Circutor AR5-L Page nº 15 5.2.- CONTRAST: Screen contrast The user can here vary the contrast of the analyzer display: — With the [4] you can intensify the display contrast and with the key [3] this can be lowered: CONTRAST LOW HIGH % 5.3.- RUN: data recording process status You can here enable or disable the data collection and logging action in the device. RUN Run / Stop — With keys [6], …
-
4, Page nº 4 1.2.- Operation mode The analyzer takes 40 samples per cycle between the L1 and Neutral voltage inputs when working in single-phase mode. The analyzer takes 40 samples per phase and cycle when working in three-phase mode (40×3=120 samples per cycle). The difference between each sample and the previous one is calculated by the analyzer, so that this difference is then compared with the maximum slope calculated. That way, whether the diff…
-
6, Page nº 6 Figure 2 Previous figures (Figure 1 & 2) show disturbances detected due to the maximum slope permissible value (according to user-define magnitudes) has been exceeded between two successive samples. Figure 3 Figure 3 shows another type of disturbance (voltage sag) where no value exceed for a cycle the 75% of the pre-defined peak voltage (Vpeak = Vn · √2). 2.- Chec…
-
18, Circutor AR5-L Page nº 18 6.- TECHNICAL SPECIFICATIONS Voltage measurement: Measuring range : Single-phase mode 30 to 500 V a.c. (L1-Neutral) Three-phase mode 30 to 500 V a.c. (Phase-Neutral) Frequency : 45 to 65 Hz Disturbance detection: Disturbances > 500 µs Voltage sags < 75% of peak voltage CONSTRUCTIVE CHARACTERISTICS OF THE CARTRIDGE Case : Anti-chock plastic Dimensions : 64 x 19…
-
5, Page nº 5 Values to be user-programmed: — Rated Voltage : Vn = 10 to 500 V — Voltage limits : From 100% to 50% of peak voltage — Trigger Level : TL = de 1.2 a 5 — Rated Frequency: Fn = 45 to 65 Hz Calculated parameters : — Scale : Auto-scaling according to the rated voltage. — Scale 1 : Rated voltage from 151 V to 500 V ( multiplied x 1 ) — Scale 2 : Rated voltage from 10 V to 150 V (multiplied x 2 ) — Sampling time : tm = 500 �…
-
14, Circutor AR5-L Page nº 14 5.1.5.- PASSWORD: Safety setting. Set here the analyzer password configuration. This password will be required to access the Setup menu. Thus, the manipulation of the analyzer by not-authorized people can be avoided. The password can be also required for turning the analyzer off. The default password is: PASSWORD [3] [SET] [5] [SET] Change of Setup access password: Firstly enter the old password: OLD PASSWORD * * * * Then ent…
-
1, SUPPLY NETWORK ANALYZER AR5 & AR5-L Power line quality program (Disturbances version) ( Code M80224 ) INSTRUCTION MANUAL ( M98151201-20-05A ) (c) CIRCUTOR S.A.
… -
19, Page nº 19 7.- SAFETY WARNINGS The user should take into account all installation instructions referred in sections INSTALLATION AND STARTUP, CONNECTION INSTRUCTIONS and TECHNICAL SPECIFICATIONS of the analyzer. Note that with the instrument powered on, the terminals could be dangerous to touching, and cover opening or elements removal actions may allow accessing dangerous parts. The analyzer has been d…
-
17, Page nº 17 5.6.- Menu LANGUAGE It allows to select the language in which the menus will be presented. Language English — With keys [6] & [5] select the language. — [ENTER] to confirm selected language Press key [ESC] to exit with no modification. — NOTE: This configuration is commune for all the programs.
…
![]()
SUPPLY NETWORK ANALYZER
AR5 and AR5-L
INSTRUCTION MANUAL
(M98151101-03-10B )
(c)CIRCUTOR S.A.

|
CONTENTS |
page |
|
|
1.- |
BASIC INSTRUCTIONS ……………………………………………………………… |
4 |
|
1.1.- Introduction: check the contents of your package…………………………… |
4 |
|
|
1.2.- Safety conditions……………………………………………………………………….. |
4 |
|
|
1.3.- Connection instructions………………………………………………………………. |
4 |
|
|
1.4.- Operation instructions………………………………………………………………… |
5 |
|
|
2.- |
ANALYZER MAIN FEATURES…………………………………………………….. |
6 |
|
2.1.- Basic features …………………………………………………………………………… |
6 |
|
|
2.2.- Other characteristics………………………………………………………………….. |
6 |
|
|
3.- |
KEYBOARD FUNCTIONS…………………………………………………………… |
9 |
|
4.- |
Installation AND START-UP ………………………………………………………… |
9 |
|
4.1.- Steps necessary for the START-UP …………………………………………….. |
9 |
|
|
4.2.- Connection diagram…………………………………………………………………. |
11 |
|
|
4.3.- Starting the analyzer up……………………………………………………………. |
16 |
|
|
4.4.- Loading a new program ……………………………………………………………. |
18 |
|
|
4.5.- Turn the analyzer off………………………………………………………………… |
19 |
|
|
4.6.- Back-light ……………………………………………………………………………….. |
19 |
|
|
4.7.- Choice of the working program ………………………………………………….. |
19 |
|
|
4.8.- Recharging the analyzer battery ………………………………………………… |
20 |
|
|
4.9.- Energy saving …………………………………………………………………………. |
20 |
|
|
5.- DATA VISUALIZATION ON DISPLAY…………………………………………. |
21 |
|
|
5.1.- Base screen……………………………………………………………………………. |
21 |
|
|
5.1.1.- Screen of instantaneous values……………………………………………. |
21 |
|
|
5.1.2.- Screen of maximum and minimum values …………………………….. |
22 |
|
|
5.2.- Other visualization screens……………………………………………………….. |
23 |
|
|
5.2.1.- Visualization of 3 parameters in a big size mode…………………….. |
23 |
|
|
5.2.2.- Bar graphs ………………………………………………………………………… |
24 |
|
|
5.2.3.- Oscilloscope………………………………………………………………………. |
25 |
|
|
5.2.3.1.- Three phases: Voltage — Current……………………………………… |
25 |
|
|
5.2.3.2.- Zoom…………………………………………………………………………… |
26 |
|
|
5.2.3.3.- Harmonic factorization. ………………………………………………….. |
27 |
|
|
5.2.4.- Setup visualization……………………………………………………………… |
29 |
|
|
5.3.- Warning messages ………………………………………………………………….. |
29 |
|
|
6.- |
PROGRAMMING THE ANALYZER…………………………………………….. |
30 |
|
2 |

|
6.1.- SETUP menu………………………………………………………………………….. |
31 |
|
|
6.1.1.- MEASURE ………………………………………………………………………… |
32 |
|
|
6.1.1.1.- WIRING: Circuit type……………………………………………………… |
32 |
|
|
6.1.1.2.- PT/CT : Transformation ratios…………………………………………. |
32 |
|
|
6.1.2.- RECORD menu …………………………………………………………………. |
32 |
|
|
6.1.2.1.- PERIOD: recording period ……………………………………………… |
33 |
|
|
6.1.2.2.- TRIGGER: Trigger conditions …………………………………………. |
34 |
|
|
6.1.2.3.- NAME: recording file name …………………………………………….. |
37 |
|
|
6.1.2.4.- PARAM: Choosing the parameters to be saved…………………. |
38 |
|
|
6.1.3.- COMM: Communication parameters……………………………………… |
39 |
|
|
6.1.4.- CLOCK: Internal clock ………………………………………………………… |
39 |
|
|
6.1.5.- PASSWORD: Safety setting. ……………………………………………….. |
40 |
|
|
6.1.6.- RECALL: Read configuration……………………………………………….. |
41 |
|
|
6.2.- DISPLAY menu……………………………………………………………………….. |
42 |
|
|
6.2.1.- BAR.GR……………………………………………………………………………. |
42 |
|
|
6.2.2.- EXPAND …………………………………………………………………………… |
42 |
|
|
6.2.3.- CONTRAST: Screen contrast ………………………………………………. |
42 |
|
|
6.2.4.- ANGLE……………………………………………………………………………… |
43 |
|
|
6.3.- RUN: data recording process status …………………………………………… |
43 |
|
|
6.4.- FILES Menu……………………………………………………………………………. |
43 |
|
|
6.4.1.- DIR: Directory ……………………………………………………………………. |
43 |
|
|
6.4.2.- DELETE: Deleting a file ………………………………………………………. |
43 |
|
|
6.4.3.- FORMAT: Formatting the analyzer internal memory………………… |
44 |
|
|
6.5.- CLEAR menu: Deleting data……………………………………………………… |
44 |
|
|
6.6.- Menu OFF: Enable / Disable Password………………………………………. |
45 |
|
|
6.7.- Menu LANGUAGE…………………………………………………………………… |
45 |
|
|
7.- |
ANALYZER COMMUNICATIONS ………………………………………………. |
45 |
|
8.- |
TECHNICAL SPECIFICATIONS…………………………………………………. |
46 |
|
9.- |
SAFETY WARNINGS……………………………………………………………….. |
48 |
|
10.- |
MAINTENANCE……………………………………………………………………….. |
49 |
|
11.- |
CHANGING THE BATTERY………………………………………………………. |
49 |
|
12.- |
TECHNICAL SERVICE……………………………………………………………… |
50 |
3

1.- BASIC INSTRUCTIONS
This manual is aimed to familiarize de user with the operation of the portable power analyzers model AR5-L and AR5 in order to get the best from its features.
These analyzers have been built with components incorporating the most advanced technology in microelectronics and offer benchtop features over the market in measurement and recording of electrical magnitudes in industrial power supply networks.
You are kindly requested to carefully read this manual before connecting and powering the analyzer in order to avoid irreversible damage, which might be caused by an improper connection.
1.1.- Introduction: check the contents of your package
After receiving the analyzer, please check the following points:
a)The analyzer model corresponds with your order specifications.
b)After unpacking, check that the instrument has not been damaged in transit.
c)The standard set includes the following items:
•Kit AR5-L or AR5
•1 Power supplier set 100 V a.c. – 240 V a.c. / 12 V d.c.
•1 Connection cord between the power supplier set and the main.
•1 Connection cable between the analyzer and the power supplier set.
•1 RS-232 communication cable.
•4 Voltage leads.
•4 Alligator clamps (3 in AR5 model).
•1 Instruction Manual.
•CD with the PC program
1.2.- Safety conditions
The manual you hold in your hands contains information and warnings about the analyzer that the user should respect in order to guarantee a proper operation of all the instrument functions and keep its safety conditions.
1.3.- Connection instructions
Before powering and connecting the analyzer check the following points:
a) Supply voltage: Through and external power supplier set.
Input mains 100 V a.c. – 240 V a.c. / output to AR5/AR5-L 12V d.c.
|
b) Frequency |
: 45…65 Hz. |
c)Maximum voltage at the voltage measuring circuit:
500 V a.c. Phase-to-neutral (CAT III)
4

d) Current measuring range: according to the Current clamp used
|
Current clamps |
Measuring range |
|
|
CP-2000-200 |
10 to 2000 A a.c. (switch at 2000) |
|
|
1 to 200 A a.c. (switch at 200) |
||
|
CPR-1000 |
5 to 1000 A a.c. |
|
|
CPR-500 |
2,5 to 500 A a.c. |
|
|
CP-100 (M1-U) |
0, 5 to 100 A a.c. |
|
|
CP-5 |
25 mA to 5 A a.c. |
|
|
Flexible clamp |
Measuring range |
|
C-FLEX 200-2000-20000 |
100 to 20000 A a.c (scale 20000 |
|
A) |
|
|
10 to 2000 A a.c. (scale 2000 A) |
|
|
1 to 200 A a.c. (scale 200 A) |
NOTE: It is advisable to measure near of full-scale value to get better accuracy.
1.4.- Operation instructions
The analyzer is a programmable instrument so offering diverse operation modes, which can be selected from the available programming menus (6.- PROGRAMMING THE ANALYZER).
Please read carefully the paragraphs involving (4.- Installation AND STARTUP 6.- PROGRAMMING THE ANALYZER) in order to select the most suitable operation mode for your requirements.
If the instrument is not used according to manufacturer’s specifications, the protection of the instrument can be damaged.
5

2.- ANALYZER MAIN FEATURES 2.1.- Basic features
The AR5 series analyzers are programmable instruments that measure, calculate and store to memory the main parameters of three phase electrical supply networks.
Clamp inputs (.. 2 V a.c.).*
|
IL3 |
IL2 |
IL1 |
IN |
|
|
VL3 |
VL2 |
VL1 |
N |
AUX |
|
* |
a.c. Voltage inputs
Power Supply: 12 V c.c. / Serial input
* IN only in AR5-L models
Setup: Analyzer’s setting is completed through a system of spreadable menus that provide a friendly-use and intuitive configuration process.
Data visualization: By means of a liquid crystal graphical display, 160 x 160 pixels and with backlight ability, the user can view instantaneous, maximum and minimum values of each parameter at each phase.
Internal battery: permits the user to accomplish with analysis works without the need of an external auxiliary power supply. The analyzer is equipped with an intelligent battery charging system, which expands the battery life span. For recharge the battery is necessary to connect the power supplier.
Installation: Analyzer is suitable for analysis works over any type of electric networks (single-phase, bi-phase, 3-wire and 4-wire).
Measuring: Measurement of average values of main electrical parameters, as well as, recording of maximum and minimum values. To execute these measurements, the analyzer is equipped with three a.c. voltage inputs and four a.c. current inputs (through current clamps ../ 2 V a.c.).
Data collection: The analyzer has a 1 Mb on-board memory to save into all the parameters measured or calculated by the analyzer, in order to be further retrieved from a PC.
PC software: together with the analyzer, it is also factory supplied a friendlyuse, powerful software that permits data downloading from the internal memory to a PC and a further complex analysis of recorded data.
2.2.- Other characteristics
6

—Small size, low weight, portable instrument.
—True R.M.S. measuring system.
—Instantaneous, maximum and minimum values of each discrete electric parameter.
—Electrical energy meters incorporated
—Harmonic measurement
—Neutral current measurement (only in AR5-L model)
—RS-232 communication to PC
—Ability of setting a recording threshold, so that data is only recorded in memory when measured values are not within the defined threshold (see Section 6.1.2.2.-TRIGGER: Trigger conditions).
—Automatic data collection in memory at regular user-definable periods.
Depending on the type of circuit under analysis, following enumerated parameters are measured and can be saved in memory:
NOTE: It’s not allow to save cosϕ data in memory. Only can be read on display.
•4-wire three-phase system:
|
Parameter |
Symbol |
L1 |
L2 |
L3 |
Three-phase value |
|
Phase-to-Neutral voltage |
V |
x |
x |
x |
|
|
Current |
A |
x |
x |
x |
x |
|
Neutral current |
IN |
x |
|||
|
(only in AR5-L model) |
|||||
|
Frequency |
Hz |
x |
|||
|
Active power |
kW |
x |
x |
x |
x |
|
Reactive power L |
kvarL |
x |
x |
x |
x |
|
Reactive power C |
kvarC |
x |
x |
x |
x |
|
Apparent power |
kVA |
x |
|||
|
Power factor |
PF |
x |
x |
x |
x |
|
Active energy |
kW h |
x |
x |
x |
x |
|
Reactive-energy (inductive) |
kvaLh |
x |
x |
x |
x |
|
Reactive-energy (capacitive) |
kvaCh |
x |
x |
x |
x |
|
Voltage harmonics |
x |
x |
x |
||
|
Current harmonics |
x |
x |
x |
||
|
Current Neutral harmonics |
x |
||||
|
(only in AR5-L model) |
7

•3-wire three-phase system:
|
Parameter |
Symbol |
L1-L2 |
L2-L3 |
L3-L1 |
Three-phase value |
|
Phase-to-Phase voltage |
V |
x |
x |
x |
|
|
Current |
A |
x |
x |
x |
x |
|
Frequency |
Hz |
x |
|||
|
Active power |
kW |
x |
x |
x |
x |
|
Reactive power L |
kvarL |
x |
x |
x |
x |
|
Reactive power C |
kvarC |
x |
x |
x |
x |
|
Apparent power |
x |
||||
|
Power factor |
PF |
x |
x |
x |
x |
|
Active energy |
kW h |
x |
x |
x |
x |
|
Reactive-energy (inductive) |
kvahL |
x |
x |
x |
x |
|
Reactive-energy (capacitive) |
kvahC |
x |
x |
x |
x |
|
Voltage harmonics |
x |
x |
x |
||
|
Current harmonics |
x |
x |
x |
|
• Single-phase system: |
|||||||||||
|
Parameter |
Symbol |
L1 |
|||||||||
|
Voltage |
V |
x |
|||||||||
|
Current |
A |
x |
|||||||||
|
Frequency |
Hz |
x |
|||||||||
|
Active power |
kW |
x |
|||||||||
|
Reactive power L |
kvarL |
x |
|||||||||
|
Reactive power C |
kvarL |
/(-C) |
x |
||||||||
|
Apparent power |
x |
||||||||||
|
Power factor |
PF |
x |
|||||||||
|
Active energy |
kW h |
x |
|||||||||
|
Reactive-energy (inductive) |
kvahL |
x |
|||||||||
|
Reactive-energy (capacitive) |
kvahC |
x |
|||||||||
|
Voltage harmonics |
x |
||||||||||
|
Current harmonics |
x |
||||||||||
|
• Bi-phase system: |
|||||||||||
|
Parameter |
Symbol |
L1-N |
L2-N |
Bi-phase |
|||||||
|
value |
|||||||||||
|
L1-L2 |
|||||||||||
|
Voltage |
V |
x |
x |
x |
|||||||
|
Current |
A |
x |
x |
x |
|||||||
|
Neutral current* |
IN |
x |
|||||||||
|
Frequency |
Hz |
x |
|||||||||
|
Active power |
kW |
x |
x |
x |
|||||||
|
Reactive power L |
kvarL |
x |
x |
x |
|||||||
|
Reactive power C |
kvarC |
x |
x |
x |
|||||||
|
Apparent power |
x |
||||||||||
|
Power factor |
PF |
x |
x |
x |
|||||||
|
Active energy |
kW h |
x |
|||||||||
|
Reactive-energy (inductive) |
kvahL |
x |
x |
x |
|||||||
|
Reactive-energy (capacitive) |
kvahC |
x |
x |
x |
|||||||
|
Voltage harmonics |
x |
x |
|||||||||
|
Current harmonics |
x |
x |
|||||||||
|
Neutral current harmonics |
x |
||||||||||
|
*only in AR5-L model |
8

3.- KEYBOARD FUNCTIONS
The analyzer has a 9 buttons keyboard to perform configuration and control actions of all the instrument options.
—[ON] to turn the analyzer on.
—[OFF] (Quick press) to turn on/off the display back-light.
—[OFF] (5 seconds press) to turn analyzer off.
—[6], [5], [4] & [3]. To select among several options.
—[SET] to access setting options.
—[ENTER] to validate a setting option or to program some parameters of the visualization screens.
—[ESC] to select different visualization screens or to exit the setting actions.
However, most of keys are double functional: The own instrument understands the meaning of the order at each case.
4.- Installation AND START-UP
The manual you hold in your hands contains information and warnings that the user should respect in order to guarantee a proper operation of all the instrument functions and keep its safety conditions.
If the instrument is not used according to manufacturer’s specifications, the protection of the instrument can be damaged. Note that with the instrument powered on, cover opening or elements removal actions may allow accessing dangerous parts. Therefore, before any adjustment, replacement, maintenance or repairing operation is carried out, the instrument must be disconnected from any power supply source.
When any protection failure is suspected to exist, the instrument must be immediately put out of service. Contact then with a qualified service representative.
4.1.- Steps necessary for the START-UP
9

For the Star-up of the equipment and to let it ready to begin to register is necessary to make the following steps.
1)Plug the battery, see point 11.-CHANGING THE BATTERY
2)Format the memory, see 6.4.3.-FORMAT: Formatting the analyzer internal memory
3)Set the analyzer in hour, see point 6.1.4.-CLOCK: Internal clock
4)Charge the battery by a period of minimum 14 hours. .
10

4.2.- Connection diagram
A.- CONNECTION DIAGRAM FOR THREE-PHASE — 4-WIRE – SYSTEM
This connection is only available for AR5-L model
|
( SET —> SETUP —> MEASURE —> WIRING —> 3Φ 4 WIRES) |
||||
|
L1 |
||||
|
L2 |
||||
|
L3 |
||||
|
N |
||||
|
IL3 |
IL2 |
IL1 |
IN |
|
|
VL3 |
VL2 |
VL1 |
N |
AUX |
|
11 |

B.- CONNECTION DIAGRAM FOR THREE-PHASE — 3-WIRE — SYSTEM.
( SET —> SETUP —> MEASURE —> WIRING —> 3Φ 3 WIRES )
L1
L2
L3
|
IL3 |
IL2 |
IL1 |
IN |
|
|
VL3 |
VL2 |
VL1 |
N |
AUX |
12

C.- CONNECTION DIAGRAM FOR THREE-PHASE — 3-WIRE (ARON)
( SET —> SETUP —> MEASURE —> WIRING —> 3 PT – 2 CT
L1
L2
L3
|
IL3 |
IL2 |
IL1 |
IN |
|
|
VL3 |
VL2 |
VL1 |
N |
AUX |
13

D.- CONNECTION DIAGRAM FOR SINGLE-PHASE — SYSTEM
|
( SET —> SETUP —> MEASURE —> WIRING —> 1Φ) |
||||
|
L1 |
||||
|
N |
||||
|
IL3 |
IL2 |
IL1 |
IN |
|
|
VL3 |
VL2 |
VL1 |
N |
AUX |
|
14 |

E.- CONNECTION DIAGRAM FOR BI-PHASE — SYSTEM
This connection is only available for AR5-L model
|
( SET —> SETUP —> MEASURE —> WIRING —> 1Φ Split ) |
||||
|
L1 |
||||
|
L2 |
||||
|
N |
||||
|
IL3 |
IL2 |
IL1 |
IN |
|
|
VL3 |
VL2 |
VL1 |
N |
AUX |
|
15 |

4.3.- Starting the analyzer up
Before connecting the instrument to the mains, please consider following points: 5) Supply voltage: 100 V a.c. – 240 V a.c. , 50… 60 Hz.
The instrument must be energized by a supply circuit with protection earth terminal.
6)Maximum input voltage at the voltage measuring circuit:
500 V a.c. phase-neutral (CAT III)
Use always the voltage leads factory-shipped with the instrument.
7)Burden: 15 VA.
 Operation conditions:
—Operation temperature: 0 ºC to 40 ºC.
—Operation humidity: 80% for temperatures up to 31ºC decreasing linearly to 50% relative humidity at 40ºC.
9)Safety : Designed to meet protection category III 600V as per EN 61010.
10)Current measuring range: according to the current clamp used
|
Current clamps |
Measuring range |
|
CP-2000-200 clamp |
10 to 2000 A a.c. (scale 2000 A) |
|
1 to 200 A a.c. (scale 200 A) |
|
|
CPR-1000 clamp |
5 to 1000 A a.c. |
|
CPR-500 clamp |
2,5 to 500 A a.c. |
|
CP-100 (M1-U) clamp |
0´5 to 100 A a.c. |
|
CP-5 clamp |
25 mA to 5 A a.c. |
|
Flexible clamp |
Measuring range |
|
C-FLEX 200-2000-20000 |
100 to 20000 A a.c. (scale 20000 A) |
|
10 to 2000 A a.c. (scale 2000 A) |
|
|
1 to 200 A a.c. (scale 200 A) |
NOTE: It is always advisable to take measurements at the high range of the scale to obtain a better accuracy.
To start measurement works with the analyzer:
11)Connect to the main with the factory-shipped cables. Also connect the protection earth terminal to avoid possible disturbances over the analyzer.
12)Connect the voltage leads at each phase of the monitored system, as well as the neutral when it exists.
13)Connect the Current clamps at each phase conductor. Each current phase must coincide with its voltage phase.
14)Respect the connection modes shown at each diagram to correctly achieve powers, PF and energies readouts.
16
 Loading…
![]()
SUPPLY NETWORK ANALYZER
AR5 and AR5-L
INSTRUCTION MANUAL
(M98151101-03-10B )
(c)CIRCUTOR S.A.
|
CONTENTS |
page |
|
|
1.- |
BASIC INSTRUCTIONS ……………………………………………………………… |
4 |
|
1.1.- Introduction: check the contents of your package…………………………… |
4 |
|
|
1.2.- Safety conditions……………………………………………………………………….. |
4 |
|
|
1.3.- Connection instructions………………………………………………………………. |
4 |
|
|
1.4.- Operation instructions………………………………………………………………… |
5 |
|
|
2.- |
ANALYZER MAIN FEATURES…………………………………………………….. |
6 |
|
2.1.- Basic features …………………………………………………………………………… |
6 |
|
|
2.2.- Other characteristics………………………………………………………………….. |
6 |
|
|
3.- |
KEYBOARD FUNCTIONS…………………………………………………………… |
9 |
|
4.- |
Installation AND START-UP ………………………………………………………… |
9 |
|
4.1.- Steps necessary for the START-UP …………………………………………….. |
9 |
|
|
4.2.- Connection diagram…………………………………………………………………. |
11 |
|
|
4.3.- Starting the analyzer up……………………………………………………………. |
16 |
|
|
4.4.- Loading a new program ……………………………………………………………. |
18 |
|
|
4.5.- Turn the analyzer off………………………………………………………………… |
19 |
|
|
4.6.- Back-light ……………………………………………………………………………….. |
19 |
|
|
4.7.- Choice of the working program ………………………………………………….. |
19 |
|
|
4.8.- Recharging the analyzer battery ………………………………………………… |
20 |
|
|
4.9.- Energy saving …………………………………………………………………………. |
20 |
|
|
5.- DATA VISUALIZATION ON DISPLAY…………………………………………. |
21 |
|
|
5.1.- Base screen……………………………………………………………………………. |
21 |
|
|
5.1.1.- Screen of instantaneous values……………………………………………. |
21 |
|
|
5.1.2.- Screen of maximum and minimum values …………………………….. |
22 |
|
|
5.2.- Other visualization screens……………………………………………………….. |
23 |
|
|
5.2.1.- Visualization of 3 parameters in a big size mode…………………….. |
23 |
|
|
5.2.2.- Bar graphs ………………………………………………………………………… |
24 |
|
|
5.2.3.- Oscilloscope………………………………………………………………………. |
25 |
|
|
5.2.3.1.- Three phases: Voltage — Current……………………………………… |
25 |
|
|
5.2.3.2.- Zoom…………………………………………………………………………… |
26 |
|
|
5.2.3.3.- Harmonic factorization. ………………………………………………….. |
27 |
|
|
5.2.4.- Setup visualization……………………………………………………………… |
29 |
|
|
5.3.- Warning messages ………………………………………………………………….. |
29 |
|
|
6.- |
PROGRAMMING THE ANALYZER…………………………………………….. |
30 |
|
2 |
|
6.1.- SETUP menu………………………………………………………………………….. |
31 |
|
|
6.1.1.- MEASURE ………………………………………………………………………… |
32 |
|
|
6.1.1.1.- WIRING: Circuit type……………………………………………………… |
32 |
|
|
6.1.1.2.- PT/CT : Transformation ratios…………………………………………. |
32 |
|
|
6.1.2.- RECORD menu …………………………………………………………………. |
32 |
|
|
6.1.2.1.- PERIOD: recording period ……………………………………………… |
33 |
|
|
6.1.2.2.- TRIGGER: Trigger conditions …………………………………………. |
34 |
|
|
6.1.2.3.- NAME: recording file name …………………………………………….. |
37 |
|
|
6.1.2.4.- PARAM: Choosing the parameters to be saved…………………. |
38 |
|
|
6.1.3.- COMM: Communication parameters……………………………………… |
39 |
|
|
6.1.4.- CLOCK: Internal clock ………………………………………………………… |
39 |
|
|
6.1.5.- PASSWORD: Safety setting. ……………………………………………….. |
40 |
|
|
6.1.6.- RECALL: Read configuration……………………………………………….. |
41 |
|
|
6.2.- DISPLAY menu……………………………………………………………………….. |
42 |
|
|
6.2.1.- BAR.GR……………………………………………………………………………. |
42 |
|
|
6.2.2.- EXPAND …………………………………………………………………………… |
42 |
|
|
6.2.3.- CONTRAST: Screen contrast ………………………………………………. |
42 |
|
|
6.2.4.- ANGLE……………………………………………………………………………… |
43 |
|
|
6.3.- RUN: data recording process status …………………………………………… |
43 |
|
|
6.4.- FILES Menu……………………………………………………………………………. |
43 |
|
|
6.4.1.- DIR: Directory ……………………………………………………………………. |
43 |
|
|
6.4.2.- DELETE: Deleting a file ………………………………………………………. |
43 |
|
|
6.4.3.- FORMAT: Formatting the analyzer internal memory………………… |
44 |
|
|
6.5.- CLEAR menu: Deleting data……………………………………………………… |
44 |
|
|
6.6.- Menu OFF: Enable / Disable Password………………………………………. |
45 |
|
|
6.7.- Menu LANGUAGE…………………………………………………………………… |
45 |
|
|
7.- |
ANALYZER COMMUNICATIONS ………………………………………………. |
45 |
|
8.- |
TECHNICAL SPECIFICATIONS…………………………………………………. |
46 |
|
9.- |
SAFETY WARNINGS……………………………………………………………….. |
48 |
|
10.- |
MAINTENANCE……………………………………………………………………….. |
49 |
|
11.- |
CHANGING THE BATTERY………………………………………………………. |
49 |
|
12.- |
TECHNICAL SERVICE……………………………………………………………… |
50 |
3
1.- BASIC INSTRUCTIONS
This manual is aimed to familiarize de user with the operation of the portable power analyzers model AR5-L and AR5 in order to get the best from its features.
These analyzers have been built with components incorporating the most advanced technology in microelectronics and offer benchtop features over the market in measurement and recording of electrical magnitudes in industrial power supply networks.
You are kindly requested to carefully read this manual before connecting and powering the analyzer in order to avoid irreversible damage, which might be caused by an improper connection.
1.1.- Introduction: check the contents of your package
After receiving the analyzer, please check the following points:
a)The analyzer model corresponds with your order specifications.
b)After unpacking, check that the instrument has not been damaged in transit.
c)The standard set includes the following items:
•Kit AR5-L or AR5
•1 Power supplier set 100 V a.c. – 240 V a.c. / 12 V d.c.
•1 Connection cord between the power supplier set and the main.
•1 Connection cable between the analyzer and the power supplier set.
•1 RS-232 communication cable.
•4 Voltage leads.
•4 Alligator clamps (3 in AR5 model).
•1 Instruction Manual.
•CD with the PC program
1.2.- Safety conditions
The manual you hold in your hands contains information and warnings about the analyzer that the user should respect in order to guarantee a proper operation of all the instrument functions and keep its safety conditions.
1.3.- Connection instructions
Before powering and connecting the analyzer check the following points:
a) Supply voltage: Through and external power supplier set.
Input mains 100 V a.c. – 240 V a.c. / output to AR5/AR5-L 12V d.c.
c)Maximum voltage at the voltage measuring circuit:
500 V a.c. Phase-to-neutral (CAT III)
4
d) Current measuring range: according to the Current clamp used
|
Current clamps |
Measuring range |
|
|
CP-2000-200 |
10 to 2000 A a.c. (switch at 2000) |
|
|
1 to 200 A a.c. (switch at 200) |
||
|
CPR-1000 |
5 to 1000 A a.c. |
|
|
CPR-500 |
2,5 to 500 A a.c. |
|
|
CP-100 (M1-U) |
0, 5 to 100 A a.c. |
|
|
CP-5 |
25 mA to 5 A a.c. |
|
|
Flexible clamp |
Measuring range |
|
C-FLEX 200-2000-20000 |
100 to 20000 A a.c (scale 20000 |
|
A) |
|
|
10 to 2000 A a.c. (scale 2000 A) |
|
|
1 to 200 A a.c. (scale 200 A) |
NOTE: It is advisable to measure near of full-scale value to get better accuracy.
1.4.- Operation instructions
The analyzer is a programmable instrument so offering diverse operation modes, which can be selected from the available programming menus (6.- PROGRAMMING THE ANALYZER).
Please read carefully the paragraphs involving (4.- Installation AND STARTUP 6.- PROGRAMMING THE ANALYZER) in order to select the most suitable operation mode for your requirements.
If the instrument is not used according to manufacturer’s specifications, the protection of the instrument can be damaged.
5
2.- ANALYZER MAIN FEATURES 2.1.- Basic features
The AR5 series analyzers are programmable instruments that measure, calculate and store to memory the main parameters of three phase electrical supply networks.
Clamp inputs (.. 2 V a.c.).*
|
IL3 |
IL2 |
IL1 |
IN |
|
|
VL3 |
VL2 |
VL1 |
N |
AUX |
|
* |
a.c. Voltage inputs
Power Supply: 12 V c.c. / Serial input
* IN only in AR5-L models
Setup: Analyzer’s setting is completed through a system of spreadable menus that provide a friendly-use and intuitive configuration process.
Data visualization: By means of a liquid crystal graphical display, 160 x 160 pixels and with backlight ability, the user can view instantaneous, maximum and minimum values of each parameter at each phase.
Internal battery: permits the user to accomplish with analysis works without the need of an external auxiliary power supply. The analyzer is equipped with an intelligent battery charging system, which expands the battery life span. For recharge the battery is necessary to connect the power supplier.
Installation: Analyzer is suitable for analysis works over any type of electric networks (single-phase, bi-phase, 3-wire and 4-wire).
Measuring: Measurement of average values of main electrical parameters, as well as, recording of maximum and minimum values. To execute these measurements, the analyzer is equipped with three a.c. voltage inputs and four a.c. current inputs (through current clamps ../ 2 V a.c.).
Data collection: The analyzer has a 1 Mb on-board memory to save into all the parameters measured or calculated by the analyzer, in order to be further retrieved from a PC.
PC software: together with the analyzer, it is also factory supplied a friendlyuse, powerful software that permits data downloading from the internal memory to a PC and a further complex analysis of recorded data.
2.2.- Other characteristics
6
—Small size, low weight, portable instrument.
—True R.M.S. measuring system.
—Instantaneous, maximum and minimum values of each discrete electric parameter.
—Electrical energy meters incorporated
—Harmonic measurement
—Neutral current measurement (only in AR5-L model)
—RS-232 communication to PC
—Ability of setting a recording threshold, so that data is only recorded in memory when measured values are not within the defined threshold (see Section 6.1.2.2.-TRIGGER: Trigger conditions).
—Automatic data collection in memory at regular user-definable periods.
Depending on the type of circuit under analysis, following enumerated parameters are measured and can be saved in memory:
NOTE: It’s not allow to save cosϕ data in memory. Only can be read on display.
•4-wire three-phase system:
|
Parameter |
Symbol |
L1 |
L2 |
L3 |
Three-phase value |
|
Phase-to-Neutral voltage |
V |
x |
x |
x |
|
|
Current |
A |
x |
x |
x |
x |
|
Neutral current |
IN |
x |
|||
|
(only in AR5-L model) |
|||||
|
Frequency |
Hz |
x |
|||
|
Active power |
kW |
x |
x |
x |
x |
|
Reactive power L |
kvarL |
x |
x |
x |
x |
|
Reactive power C |
kvarC |
x |
x |
x |
x |
|
Apparent power |
kVA |
x |
|||
|
Power factor |
PF |
x |
x |
x |
x |
|
Active energy |
kW h |
x |
x |
x |
x |
|
Reactive-energy (inductive) |
kvaLh |
x |
x |
x |
x |
|
Reactive-energy (capacitive) |
kvaCh |
x |
x |
x |
x |
|
Voltage harmonics |
x |
x |
x |
||
|
Current harmonics |
x |
x |
x |
||
|
Current Neutral harmonics |
x |
||||
|
(only in AR5-L model) |
7
•3-wire three-phase system:
|
Parameter |
Symbol |
L1-L2 |
L2-L3 |
L3-L1 |
Three-phase value |
|
Phase-to-Phase voltage |
V |
x |
x |
x |
|
|
Current |
A |
x |
x |
x |
x |
|
Frequency |
Hz |
x |
|||
|
Active power |
kW |
x |
x |
x |
x |
|
Reactive power L |
kvarL |
x |
x |
x |
x |
|
Reactive power C |
kvarC |
x |
x |
x |
x |
|
Apparent power |
x |
||||
|
Power factor |
PF |
x |
x |
x |
x |
|
Active energy |
kW h |
x |
x |
x |
x |
|
Reactive-energy (inductive) |
kvahL |
x |
x |
x |
x |
|
Reactive-energy (capacitive) |
kvahC |
x |
x |
x |
x |
|
Voltage harmonics |
x |
x |
x |
||
|
Current harmonics |
x |
x |
x |
|
• Single-phase system: |
|||||||||||
|
Parameter |
Symbol |
L1 |
|||||||||
|
Voltage |
V |
x |
|||||||||
|
Current |
A |
x |
|||||||||
|
Frequency |
Hz |
x |
|||||||||
|
Active power |
kW |
x |
|||||||||
|
Reactive power L |
kvarL |
x |
|||||||||
|
Reactive power C |
kvarL |
/(-C) |
x |
||||||||
|
Apparent power |
x |
||||||||||
|
Power factor |
PF |
x |
|||||||||
|
Active energy |
kW h |
x |
|||||||||
|
Reactive-energy (inductive) |
kvahL |
x |
|||||||||
|
Reactive-energy (capacitive) |
kvahC |
x |
|||||||||
|
Voltage harmonics |
x |
||||||||||
|
Current harmonics |
x |
||||||||||
|
• Bi-phase system: |
|||||||||||
|
Parameter |
Symbol |
L1-N |
L2-N |
Bi-phase |
|||||||
|
value |
|||||||||||
|
L1-L2 |
|||||||||||
|
Voltage |
V |
x |
x |
x |
|||||||
|
Current |
A |
x |
x |
x |
|||||||
|
Neutral current* |
IN |
x |
|||||||||
|
Frequency |
Hz |
x |
|||||||||
|
Active power |
kW |
x |
x |
x |
|||||||
|
Reactive power L |
kvarL |
x |
x |
x |
|||||||
|
Reactive power C |
kvarC |
x |
x |
x |
|||||||
|
Apparent power |
x |
||||||||||
|
Power factor |
PF |
x |
x |
x |
|||||||
|
Active energy |
kW h |
x |
|||||||||
|
Reactive-energy (inductive) |
kvahL |
x |
x |
x |
|||||||
|
Reactive-energy (capacitive) |
kvahC |
x |
x |
x |
|||||||
|
Voltage harmonics |
x |
x |
|||||||||
|
Current harmonics |
x |
x |
|||||||||
|
Neutral current harmonics |
x |
||||||||||
|
*only in AR5-L model |
8
3.- KEYBOARD FUNCTIONS
The analyzer has a 9 buttons keyboard to perform configuration and control actions of all the instrument options.
—[ON] to turn the analyzer on.
—[OFF] (Quick press) to turn on/off the display back-light.
—[OFF] (5 seconds press) to turn analyzer off.
—[6], [5], [4] & [3]. To select among several options.
—[SET] to access setting options.
—[ENTER] to validate a setting option or to program some parameters of the visualization screens.
—[ESC] to select different visualization screens or to exit the setting actions.
However, most of keys are double functional: The own instrument understands the meaning of the order at each case.
4.- Installation AND START-UP
The manual you hold in your hands contains information and warnings that the user should respect in order to guarantee a proper operation of all the instrument functions and keep its safety conditions.
If the instrument is not used according to manufacturer’s specifications, the protection of the instrument can be damaged. Note that with the instrument powered on, cover opening or elements removal actions may allow accessing dangerous parts. Therefore, before any adjustment, replacement, maintenance or repairing operation is carried out, the instrument must be disconnected from any power supply source.
When any protection failure is suspected to exist, the instrument must be immediately put out of service. Contact then with a qualified service representative.
4.1.- Steps necessary for the START-UP
9
For the Star-up of the equipment and to let it ready to begin to register is necessary to make the following steps.
1)Plug the battery, see point 11.-CHANGING THE BATTERY
2)Format the memory, see 6.4.3.-FORMAT: Formatting the analyzer internal memory
3)Set the analyzer in hour, see point 6.1.4.-CLOCK: Internal clock
4)Charge the battery by a period of minimum 14 hours. .
10
4.2.- Connection diagram
A.- CONNECTION DIAGRAM FOR THREE-PHASE — 4-WIRE – SYSTEM
This connection is only available for AR5-L model
|
( SET —> SETUP —> MEASURE —> WIRING —> 3Φ 4 WIRES) |
||||
|
L1 |
||||
|
L2 |
||||
|
L3 |
||||
|
N |
||||
|
IL3 |
IL2 |
IL1 |
IN |
|
|
VL3 |
VL2 |
VL1 |
N |
AUX |
|
11 |
B.- CONNECTION DIAGRAM FOR THREE-PHASE — 3-WIRE — SYSTEM.
( SET —> SETUP —> MEASURE —> WIRING —> 3Φ 3 WIRES )
L1
L2
L3
|
IL3 |
IL2 |
IL1 |
IN |
|
|
VL3 |
VL2 |
VL1 |
N |
AUX |
12
C.- CONNECTION DIAGRAM FOR THREE-PHASE — 3-WIRE (ARON)
( SET —> SETUP —> MEASURE —> WIRING —> 3 PT – 2 CT
L1
L2
L3
|
IL3 |
IL2 |
IL1 |
IN |
|
|
VL3 |
VL2 |
VL1 |
N |
AUX |
13
D.- CONNECTION DIAGRAM FOR SINGLE-PHASE — SYSTEM
|
( SET —> SETUP —> MEASURE —> WIRING —> 1Φ) |
||||
|
L1 |
||||
|
N |
||||
|
IL3 |
IL2 |
IL1 |
IN |
|
|
VL3 |
VL2 |
VL1 |
N |
AUX |
|
14 |
E.- CONNECTION DIAGRAM FOR BI-PHASE — SYSTEM
This connection is only available for AR5-L model
|
( SET —> SETUP —> MEASURE —> WIRING —> 1Φ Split ) |
||||
|
L1 |
||||
|
L2 |
||||
|
N |
||||
|
IL3 |
IL2 |
IL1 |
IN |
|
|
VL3 |
VL2 |
VL1 |
N |
AUX |
|
15 |
4.3.- Starting the analyzer up
Before connecting the instrument to the mains, please consider following points: 5) Supply voltage: 100 V a.c. – 240 V a.c. , 50… 60 Hz.
The instrument must be energized by a supply circuit with protection earth terminal.
6)Maximum input voltage at the voltage measuring circuit:
500 V a.c. phase-neutral (CAT III)
Use always the voltage leads factory-shipped with the instrument.
7)Burden: 15 VA.
Operation conditions:
—Operation temperature: 0 ºC to 40 ºC.
—Operation humidity: 80% for temperatures up to 31ºC decreasing linearly to 50% relative humidity at 40ºC.
9)Safety : Designed to meet protection category III 600V as per EN 61010.
10)Current measuring range: according to the current clamp used
|
Current clamps |
Measuring range |
|
CP-2000-200 clamp |
10 to 2000 A a.c. (scale 2000 A) |
|
1 to 200 A a.c. (scale 200 A) |
|
|
CPR-1000 clamp |
5 to 1000 A a.c. |
|
CPR-500 clamp |
2,5 to 500 A a.c. |
|
CP-100 (M1-U) clamp |
0´5 to 100 A a.c. |
|
CP-5 clamp |
25 mA to 5 A a.c. |
|
Flexible clamp |
Measuring range |
|
C-FLEX 200-2000-20000 |
100 to 20000 A a.c. (scale 20000 A) |
|
10 to 2000 A a.c. (scale 2000 A) |
|
|
1 to 200 A a.c. (scale 200 A) |
NOTE: It is always advisable to take measurements at the high range of the scale to obtain a better accuracy.
To start measurement works with the analyzer:
11)Connect to the main with the factory-shipped cables. Also connect the protection earth terminal to avoid possible disturbances over the analyzer.
12)Connect the voltage leads at each phase of the monitored system, as well as the neutral when it exists.
13)Connect the Current clamps at each phase conductor. Each current phase must coincide with its voltage phase.
14)Respect the connection modes shown at each diagram to correctly achieve powers, PF and energies readouts.
16