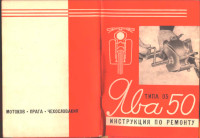
Руководство по техническому обслуживанию и ремонту мопедов Jawa 50 тип 05.
- Издательство: Мотоков
- Год издания: 1963
- Страниц: 61
- Формат: PDF
- Размер: 3,9 Mb
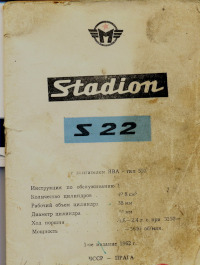
Руководство по эксплуатации и техническому обслуживанию мопедов Jawa Stadion S22.
- Издательство: —
- Год издания: 1962
- Страниц: 27
- Формат: JPG
- Размер: 9,1 Mb
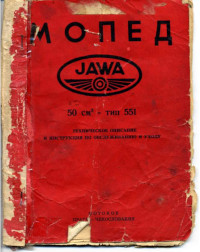
Техническое описание и инструкция по обслуживанию и уходу мопедов Jawa 50 тип 551.
- Издательство: Мотоков
- Год издания: —
- Страниц: 17
- Формат: DOC
- Размер: 2,0 Mb
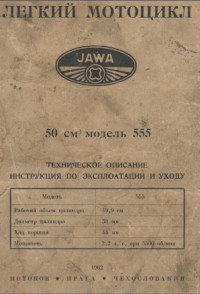
Техническое описание и инструкция по эксплуатации и уходу мокиков Jawa 50 тип 555.
- Издательство: Мотоков
- Год издания: 1962
- Страниц: 24
- Формат: PDF
- Размер: 5,8 Mb
Руководство по техническому обслуживанию и ремонту мотоциклов Jawa-CZ 125 cc модели 355 и 175 сс модели 356.
- Издательство: CZM
- Год издания: 1959
- Страниц: 34
- Формат: PDF
- Размер: 18,9 Mb
Руководство на чешском языке по техническому обслуживанию и ремонту мотоциклов Jawa 125 тип 355, 175 тип 356, 250 тип 353 и 350 тип 354.
- Издательство: —
- Год издания: —
- Страниц: 80
- Формат: PDF
- Размер: 2,4 Mb
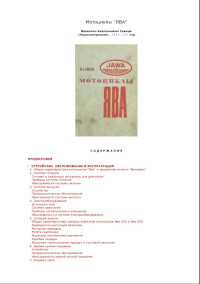
Руководство по эксплуатации и техническому обслуживанию мотоциклов Jawa.
- Издательство: Машиностроение
- Год издания: 1969
- Страниц: 135
- Формат: PDF
- Размер: 3,4 Mb

Руководство по ремонту мотоциклов Jawa-250 и Jawa-350.
- Издательство: Машиностроение
- Год издания: 1971
- Страниц: 163
- Формат: PDF
- Размер: 78,3 Mb
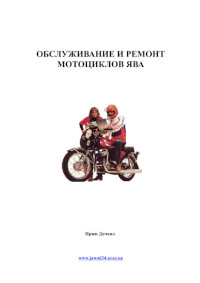
Руководство по техническому обслуживанию и ремонту мотоциклов Jawa.
- Издательство: —
- Год издания: —
- Страниц: 254
- Формат: PDF
- Размер: 10,7 Mb
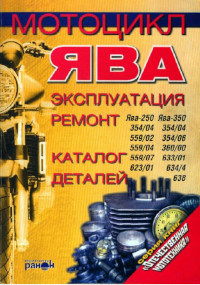
Руководство по эксплуатации и ремонту + каталог запчастей мотоциклов Jawa.
- Издательство: Ранок
- Год издания: 2004
- Страниц: 248
- Формат: PDF
- Размер: 20,0 Mb
Руководство по эксплуатации, техническому обслуживанию и ремонту мотоциклов Jawa моделей 353/04 и 354/04.
- Издательство: —
- Год издания: —
- Страниц: 46
- Формат: DOC
- Размер: 2,1 Mb
Руководство по эксплуатации, техническому обслуживанию и ремонту мотоциклов Jawa моделей 353/04, 354/04, 359/07 и 360/00.
- Издательство: РусьАвтокнига
- Год издания: 2001
- Страниц: 156
- Формат: PDF
- Размер: 2,0 Mb
Руководство по ремонту мотоциклов Jawa 250/350 моделей 353/04, 354/04, 559/02, 559/07 и 360/00.
- Издательство: —
- Год издания: —
- Страниц: 312
- Формат: DOC
- Размер: 3,4 Mb
Руководство по техническому обслуживанию мотоциклов Jawa 250/350 моделей 559/04 и 360/00.
- Издательство: —
- Год издания: 1967
- Страниц: 63
- Формат: DOC
- Размер: 1,4 Mb
Руководство на английском языке по техническому обслуживанию и ремонту мотоциклов Jawa 350 моделей 634 и 568.
- Издательство: —
- Год издания: 1989
- Страниц: 53
- Формат: PDF
- Размер: 35,7 Mb
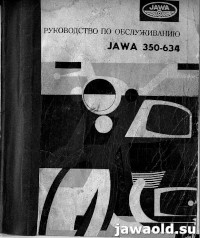
Руководство по техническому обслуживанию мотоциклов Jawa 350-634.
- Издательство: —
- Год издания: 1975
- Страниц: 47
- Формат: JPG
- Размер: 13,3 Mb
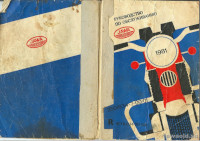
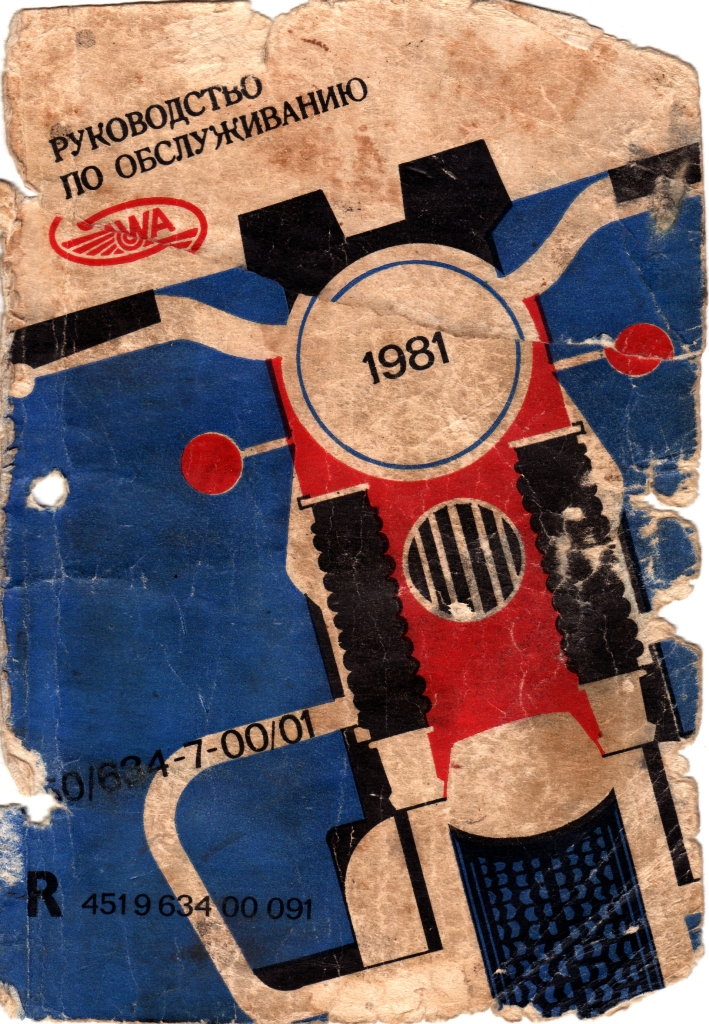
Руководство по техническому обслуживанию мотоциклов Jawa 350/634-7-00/01.
- Издательство: —
- Год издания: 1981
- Страниц: 53
- Формат: JPG
- Размер: 17,7 Mb
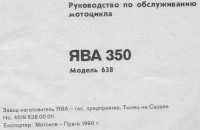
Руководство по техническому обслуживанию мотоциклов Jawa 350-638.
- Издательство: —
- Год издания: 1990
- Страниц: 49
- Формат: JPG
- Размер: 2,6 Mb
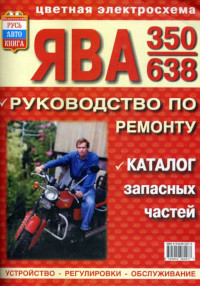
Руководство по техническому обслуживанию и ремонту + каталог запчастей мотоциклов Jawa 350-638.
- Издательство: РусьАвтокнига
- Год издания: —
- Страниц: 134
- Формат: PDF
- Размер: 4,9 Mb
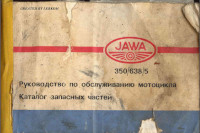
Руководство по техническому обслуживанию и каталог запчастей мотоциклов Jawa 350/638/5.
- Издательство: —
- Год издания: 1984
- Страниц: 92
- Формат: PDF
- Размер: 19,2 Mb
Руководство на чешском языке по техническому обслуживанию и ремонту мотоциклов Jawa 3638/640/640-1.
- Издательство: —
- Год издания: —
- Страниц: 88
- Формат: DOC
- Размер: 6,2 Mb
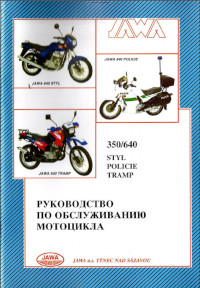
Руководство по техническому обслуживанию мотоциклов Jawa 350/640 Styl/Policie/Tramp.
- Издательство: ЯВА
- Год издания: 1995
- Страниц: 67
- Формат: PDF
- Размер: 5,2 Mb
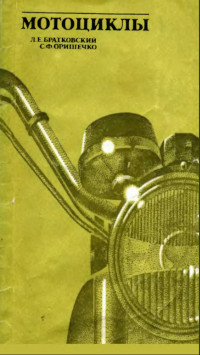
В практическом пособии приведены устройство и технические данные легких (без коляски) мотоциклов отечественного производства, чехословацких ЯВА и ЧЗ, а также спортивных. Помещены указания по их демонтажу, сборке и ремонту отдельных деталей, сведения по обкатке, эксплуатации и техническому обслуживанию.
- Издательство: Техника
- Год издания: 1984
- Страниц: 98
- Формат: DjVu
- Размер: 2,6 Mb
В руководстве представлена информация об устройстве и работе всех узлов и агрегатов мотоцикла.
- Издательство: Алфамер
- Год издания: —
- Страниц: 220
- Формат: —
- Размер: —
Сборник инструкций на русском и чешском языках по монтажу и настройке комплекта боковой коляски Велорекс для мотоциклов Jawa.
- Издательство: —
- Год издания: —
- Страниц: —
- Формат: PDF
- Размер: 10,2 Mb

|
Автор |
|
||||||
|
||||||
|
||||||
|
||||||
|
||||||
Здесь был Гугл – 10-09-23, 22:44
С большим трудом нашёл электронную версию руководства по обслуживанию «Явы»-634.7.00 www.jawaold.com/main.php?sec=books&am, уже скачал, сейчас буду изучать более подробнее. Огромное спасибо интернету, иначе подобное раритетное издание я бы уже нигде не нашёл, а так теперь его уже и распечатать можно для удобства изучения материала
Комментарии
6
Войдите или зарегистрируйтесь, чтобы писать комментарии, задавать вопросы и участвовать в обсуждении.
-
Contents
-
Table of Contents
-
Bookmarks
Quick Links
WORKSHOP MANUAL
JAWA 350/638,639,640
© JAWA Moto spol. s r.o. Týnec nad Sázavou
2004
Related Manuals for JAWA 350
Summary of Contents for JAWA 350
-
Page 1: Workshop Manual
WORKSHOP MANUAL JAWA 350/638,639,640 © JAWA Moto spol. s r.o. Týnec nad Sázavou 2004…
-
Page 2
The Jawa Moto spol. s r.o. reserves the right to change its products any time without a previous notice. Any changes and or deviations from the standard version for certain territories will be published in the form of Supplements to this Manual. -
Page 3
WORKSHOP MANUAL ___________________________________________________________________________ PRE-SALE SERVICE Unpack the motorcycle, free it from preservation grease, assemble the separately delivered units and parts of accessories /control of completeness/. Check engine and frame numbers – to be conform with the documentation. Take out the accumulator – charging – forming, assemnbly. Control the oil level in the gearbox –… -
Page 4
WORKSHOP MANUAL ___________________________________________________________________________ GEARBOX Type mechanical with gears, double shaft Number of gears Control by foot lever Overall ratio climbing capacity with full load 1.st gear 1 : 14,50 2.nd gear 1 : 8,60 3.rd gear 1 : 6,10 4.th gear 1 : 4,96 9,5 % primary chain… -
Page 5
WORKSHOP MANUAL ___________________________________________________________________________ LIST OF REPAIR TOOLS FOR TYPE 638, 639, 640… -
Page 6
Primar chain adapter S-201 9.96.55407.3 Lever S-203 28-86-767 Pliers S-205 28-86-725-2 Pressing jig with accessories List of lubricants recommended for motorcycle JAWA 350 Use of oil type of oil in the Czech rep. Viscosity Class notes gearbox Mogul Trans 90 API GL 4 temperature over 0°C… -
Page 7
WORKSHOP MANUAL ___________________________________________________________________________ Telescopic front fork Mogul Super 15W/40 API SD/CB or Mogul Super stabil API SF/CC 15W/40 SAE 15W/40 accelerator twist grip energrease LA2 ISO-L-XBCEB 2 Swinging rear arm energrease LA2 ISO-L-XBCEB 2 rear sprocket bearings energrease LA2 ISO-L-XBCEB 2 wheel bearings energrease LA2 ISO-L-XBCEB 2… -
Page 8
WORKSHOP MANUAL ___________________________________________________________________________ List of main bearings and sealing rings Designation name of part pcs. positin 324 594 043 400 needle bearing INA HN (15x22x12) 1 engine – leftt side 324 163 030 100 bearing 6303 A engine – leftt side 324 163 059 566 bearing 6305 A engine –… -
Page 9
WORKSHOP MANUAL ___________________________________________________________________________ Piston grading Grading + 0,000 — 0,010 Standard 57,972 57,982 57,992 1. re-bore 58,222 58,232 58,242 2. re-bore 58,472 58,482 58,492 3. re-bore 58,722 58,732 58,742 4. re-bore 58,972 58,982 58,992 Cylinder grading Note: The manufacturer delivers spare cylinders exclusively with the basic /standardú bore. The other dimensions given in the table are guides for cylinder reboring. -
Page 10
WORKSHOP MANUAL ___________________________________________________________________________ List of gudgeon-pin bearings Connecting rod Gudgeon pin Needle roller Clearance Ø 2 x 13,8 Blue 1,994+1,996 0,005+0,016 19,994+19,998 15,994+15,997 1,993+1,995 0,007+0,018 1,994+1,996 0,006+0,017 Blue 15,997+16,000 1,993+1,995 0,008+0,019 19,998+20,002 Blue 1,996+1,998 0,005+0,016 15,994+15,997 1,995+1,997 0,007+0,018 Blue 1,996+1,998 0,006+0,017 White 15,997+16,000… -
Page 11
WORKSHOP MANUAL ___________________________________________________________________________ using the torque spanner at the force of 17,6 Nm. If the engine is mounted in the frame, first remove seat and tank, separate the exhaust elbows and disconnect the coils, cables and cable shoes. 1.2. Pistons – demounting and mounting Since the piston is mounted in the cageless needle bearing, use special tools for demounting the piston. -
Page 12
WORKSHOP MANUAL ___________________________________________________________________________ Piston must have signing L (left side) or P (right side) for the corresponding cylinder and the arrow must be oriented forward to the exhaust ports. Use the press-out pin S-87 to push the piston pins. Make sure, that the lightening holes of the piston pins are oriented to the engine outside. -
Page 13
WORKSHOP MANUAL ___________________________________________________________________________ 1.3. Primary gear, clutch — dissasebly CAUTION: First drain oil from the gearbox. Take off the starting lever (first move it to the star position) and remove the bolts holding the left engine cover. After compressing the springs take off the clutch pins, dismantle the washers and springs and plates and insert the securing plate S-66 into the clutch drum. -
Page 14
WORKSHOP MANUAL ___________________________________________________________________________ 1.4. Clutch — assembly Fit the oiled clutch rod with rest in the mainshaft. On the outer drum put one by one the friction and steel discs. If we change the plates, before the assembly, measure their overall thickness, wich should be 18,25 +/- 19 mm (5 plates). -
Page 15
WORKSHOP MANUAL ___________________________________________________________________________ 1.6. Starter spring (primary gear dismounted) Turn the starter shaft to the left and take it out of its mounting Take off the starter segment and spring. When remounting the spring, fit its one end on the segment edge. Turn the segment to get it in its true position, with the segment hole centre aligned with the carrier hole center. -
Page 16
WORKSHOP MANUAL ___________________________________________________________________________ 1.9. Adjusting of semi-automatic clutch disengagement set • Remove the right engine cover • Screw home the clutch cable adjusting bolts on bowden (make bowden shorter) to loosen the cable socket on clutch control set. • Adjust the play between the foot clutch disengagement cam and the disengagement roller with the clutch disengagement bolt M8 to make them touch. -
Page 17
WORKSHOP MANUAL ____________________________________________________________________________ Take off the outer cover sprocket, loosen the gear nut and unscrew with nr.32 socket spanner. Pull out the sprocket with inner cover from mounting. It is not necessary to uncouple the chain. Remove the right footrest, bolts and pins holding engine into the frame. -
Page 18
WORKSHOP MANUAL ___________________________________________________________________________ Suggestion: Use grease (f.ex.PM-NH2, LITOL 24, CASTROLEASE LH-2 …) to avoid needles falling out of countershaft bearings. 2.3. Gearbox – shifting, crank mechanism With the engine in this dismantled condition, it is possible to repair the gearbox and the gear shift mechanism. -
Page 19
WORKSHOP MANUAL ___________________________________________________________________________ Also after unlocking and driving wheel inside the case. Mounting of all bearing is realised to heated case (100-120°C). Put the bearings into the pre- heated halfs of engine case, getting them inline with the machined surface intended for the crank mechanism flywheel. -
Page 20
WORKSHOP MANUAL ___________________________________________________________________________ Set the gear shift gate in one of the centre positions (extreme positions are unsuitable). Then fit the mainshaft with the spacer and gear locked in the position with wireformed ring into the bearing in the left crankcase half. Fit the 16 tooth gear on the shaft splines with its three claws pointing downward. -
Page 21
WORKSHOP MANUAL ___________________________________________________________________________ 2.8. Joining the housing halves Heat the right half of engine housing the same way as the left one. Coat the left housing half sealing surface with sealing putty. Coat the gearbox shaft end and the right crank pin with oil. Engage the idling between the 1 and 2 gears and move the right… -
Page 22
WORKSHOP MANUAL ___________________________________________________________________________ III. CRANK MECHANISM DISMANTLING AND REASSEMBLY 3.1. Crank mechanism dismantling Using the nr.12 tubular spanner, unscrew the nuts holding together the two part face plate and separate two halves of the plate. Never use a chiesel or a screwdriver for this operation. -
Page 23
WORKSHOP MANUAL ___________________________________________________________________________ c) Then put the left half of the crank mechanism into the jig and use the S-204 guiding insert to press in the centre pin. Fit the bearing Nr. 6206 C 36 (packed with grease) and the distance ring on the centre pin. Smear the distance ring with grease and fit on it the labyrinth packing so that its lower part under the collar is turned toward the right half of the crank mech. -
Page 24
WORKSHOP MANUAL ___________________________________________________________________________ – –… -
Page 25
WORKSHOP MANUAL ___________________________________________________________________________ Pic.1: Flywheel surfaces are not in a single plane (do not coincide). On the surface of the flywheel, mark with the chalk points where the indicator shows the maximum value. Take the crank mechanism out of the centres and support the middle flywheels so that the outside flywheel markings are on the top. -
Page 26
WORKSHOP MANUAL ___________________________________________________________________________ CHASSIS 4.1. Front wheel remove Loosen and unscrew the nut of wheel shaft and remove the dust protecting ring. Loosen the clamping bolt of the wheel and shift out the shaft. Be carefull not to loose the brake pads when removing the front wheel from the fork. -
Page 27
WORKSHOP MANUAL ___________________________________________________________________________ 4.3. Secondary chain Proper care and correct tensioning of the chain are decisive for its function and lifetime. It is important for the chain to have necessary slack in every position of swing arm. For example the chain must never be stretched fully, whatever the position of swing arm. -
Page 28
WORKSHOP MANUAL ___________________________________________________________________________ b) Loosen the screw of rear top clamping sleeve of the rubber chain guard, and lift off the clamping sleeve. Pull the top part of the chainguard out of its mounting at the guard rear part. c) Turn the rear wheel until the master chain link (connection) appears in the accesible area. -
Page 29
WORKSHOP MANUAL ___________________________________________________________________________ After disassembly of the front fork a mudguard, put back the fork plugs to avoid pouiring oil out of fork. Remove the headlight and indicators and let them hang on cabling or attach them to the frame in the suitable way. On releasing and screwing out the upper nut of the steering column (key S-81), take off the upper bearer. -
Page 30
WORKSHOP MANUAL ___________________________________________________________________________ Front fork oil exchange a) Loosen the drain screw from the fork. b) For faster draining remove also the top plugs. c) After all oil is drained out, flush the tube with flushing oil. d) Chech sealing washers under the screw heads and tighten the screws. -
Page 31
When the indicator reaches its extreme position, exchange the brake shoes to ensure safe riding. 4.11. Disc brake Jawa Front disc brake Jawa is composed of four main components. 1. Master cylinder with lever, a part of which is a can for brake fluid and a front brake light switch. -
Page 32
WORKSHOP MANUAL ___________________________________________________________________________ Disc brake – put into operation (new or after repair) Tighten all pressure tight joints, pour the brake fluid into the reservoir of main brake cylinder. By repeatedly pressing the front brake lever pump the fluid into the entire brake system. -
Page 33
WORKSHOP MANUAL ___________________________________________________________________________ Check every 50.000 km or 5 years Complete dismantling of brake system (master cylinder, caliper). Check functional surfaces, exchange all rubber parts (sealings, dust rings, connecting hoses). Untertake this work in authorised service. Service limits have to be checked every 50.000 km or once after 5 years. Dismantling of the brake caliper First properly clean caliper with denatured alcohol (pads removed). -
Page 34
WORKSHOP MANUAL ___________________________________________________________________________ 4.12 Exchange the ball bearing of the rear sprocket. After removing of rear wheel, unscrew with 32 mm spanner the nut of sprocket, which we remove from the swing arm also with cover. Detach the sleeves on the rear end of chain cover, remove two M5 bolts and separate both halves of the chaincover. -
Page 35
WORKSHOP MANUAL ___________________________________________________________________________ 4.14. Removing of fuel tank Close the fuel cock and detach the fuel hose. Take off the saddle, side cases and unscrew the M6 bolts holding the tank in the rear. After removing the silentblocks pull up the tank a bit in the rear part, pull it out to the back. -
Page 36
WORKSHOP MANUAL ___________________________________________________________________________ Legend 1 – Sleeve valve, complete 2 – Needle valve, Ø 2 complete 3 – Idle jet (40) 4 – Jet of auxiliary system (72) 5 – Main jet (640 — 100) 6 – Fuel metering needle 7 –… -
Page 37
WORKSHOP MANUAL ___________________________________________________________________________ Adjustment of headlamp and rear suspension Load of motorcycle Rear suspension setting Position II. Position III. Position IV. No load 1 person 2 persons 2 persons + baggage 1 – headlamp in basic position –1,3% 2 – headlamp in inclination position 5.2. -
Page 38
WORKSHOP MANUAL ___________________________________________________________________________ Set of source and ignition system Vape (technical description for service purposes) The set contains : — electronic switch Z67 — ignition coil with two high voltage outlets for two plugs of two stroke engine, controlling element of performance which governs primary coil winding — regulator R67 — electronically controlled semiconduct power — rectifier , which maintains the central value of direct-current voltage=14 V in electrical network and on battery of 12 V. -
Page 39
WORKSHOP MANUAL ___________________________________________________________________________ On testing machine it´ s not recommended to let turn alternator A67 to opposite side than the engine operation is prescribed, i.e to more than 1.300 engine revolutions/min . During this working operation the voltage on condenser is getting increased over 400V. When opposite side of alternator working, the coil Z67 will only run on 2.000 revolut./min. -
Page 40
WORKSHOP MANUAL ___________________________________________________________________________ Notes to individual components : Sensor S01 Sensor resistance = 200Ω +- 20%, measured by direct-current ohmmeter. This value is valid when environs temperature reaches 20 C. If this motorcycle component is heated over the named temperature, the resistance will be increased on 250Ω approx. On the other side when freezing,, the resistance value is inferior to reach approx. -
Page 41
WORKSHOP MANUAL ___________________________________________________________________________ 4. The resistance of secondary winding (measured on Vn outlets) = 6kΩ÷10%. For first series (7th month of 1996) the coils with resistance of 7kΩ +- 10%- have been used. The measurement is in principle direct-current (PU 120 etc.) Attention !! There cannot be in any case red, white a blue conductors Z67 connected to battery (even for short period). -
Page 42
WORKSHOP MANUAL ___________________________________________________________________________ Alternator A 67 The stator of alternator contains two types of winding. 1. Charging winding for feeding Z67. The resistance of winding = 820Ω (measured direct- current). In heated state in operation the resistance will reach 1.000Ω — 1.200Ω. The voltage impulses of even 400 V are generating during operation. -
Page 43
WORKSHOP MANUAL ___________________________________________________________________________ Regulator R67 is warmed up during operation the more the higher performance it is providing to bulbs and battery. It has to be cooled by air circulation. When motorcycle is on stand, slight current from battery flows through regulator to frame. This current represents less than 0,5 mA. -
Page 44
WORKSHOP MANUAL ___________________________________________________________________________ The steps detecting defects in circuit of charging of battery and regulator R67 1. Provided that ignition set is operational and motorcycle can start 2. Check-up the winding circuit on A67 (0,5 Ω) by means of ohmmeter 3. -
Page 45
WORKSHOP MANUAL ___________________________________________________________________________ 5. By ohmmeter verify resistance of yellow conductor against frame (120Ω) at switch Z67 ; resistance of red and white conductors and blue conductor has to be > 40kΩ — more details in article conc. Z67 6. Measure Vn coil — resistance = 6kΩ±10% 7. -
Page 46
WORKSHOP MANUAL ___________________________________________________________________________ Dimensions of accumulator : height 130 mm length 121 mm width 61 mm net weight of accumulator 1,7 kg gross weight of filled in accumulator 2,07 kg 5.6.1. Preparing the battery for operation Electrolyte filling of accumulator Adhesive tape placed over the deaeration hole and filler caps is removed and filler caps are uncapped. -
Page 47
WORKSHOP MANUAL ___________________________________________________________________________ Electrical schema of Jawa 350… -
Page 48
The used oil pump MIKUNI IM 137-22 is adjusted from producer to basic optimum supplied quantity of oil for motorcycles JAWA 350 and it cannot be replaced with any other type or execution without preceding authorization of JAWA MOTO. -
Page 49
A — original gauge MIKUNI X — space for gauge 2 – attachment B — new gauge JAWA 6.3. Cleaning out of the oil pipe system In case of blocked oil pump with filth, it´s necessary to proceed as follows : 1. -
Page 50
WORKSHOP MANUAL ___________________________________________________________________________ CONTENS Presale service Technical data List of special tools Lubricants Maintenance plan List of main bearings and sealing rings Piston grading Cylinder grading List of gudgeon pin bearings ENGINE 1.1 Removing and refitting cylinder heads and cylinders 1.2. -
Page 51
WORKSHOP MANUAL ___________________________________________________________________________ 4.3. Secondary chain 4.3.1.Exchange of secondary chain without removing closed chain guard 4.4. Steering – replacement of bearing on the lower bearer. 4.5. Front fork 4.6. Locking of motorcycle 4.7. Removing seat 4.8. Rear suspension 4.9. Rear swingarm 4.10. -
Page 52
Taking over the text and illustrative information provided in this manual for its further copyright or publishing is prohibited. All claims arising from the copyright laws fall axclusively to JAWA Moto. ISSUED BY: Commercial Technical Service JAWA Moto spol. s r.o. Týnec nad Sázavou, Czech republic. © JAWA Týnec nad Sázavou…
СОДЕРЖАНИЕ
I. ТЕХНИЧЕСКОЕ ОПИСАНИЕ МОТОЦИКЛА ЯВА 634 ( JAWA 634 )
1. Техническая характеристика мотоцикла Ява 634 ( Jawa 350 634 8 15 )
2. Описание мотоцикла Ява 634
3. Описание электрооборудования
4. Перечень инструмента
5. Руководство по обслуживанию Ява 350 634
А. Обкатка нового мотоцикла
Б. Перед выездом
В. Пуск двигателя
Г. Движение
6. Чего следует избегать
7. Пояснения с данными о максимальной скорости мотоцикла
II. ТЕХНИЧЕСКОЕ ОБСЛУЖИВАНИЕ МОТОЦИКЛА ЯВА 634
1. План работ по техническому обслуживанию
2. Смазка мотоцикла
3. Очистка мотоцикла
4. Шины
5. Регулировка тормозов
6. Регулировка натяжения
7. Сцепление и его регулировка
8. Карбюратор
9. Воздухоочиститель (микрофильтрующий элемент)
10. Уход за электрооборудованием
11. Аккумуляторная батарея
12. Удаление нагара
13. Хранение мотоцикла в зимний период
III. ДЕМОНТАЖ И МОНТАЖ БЕЗ СПЕЦИАЛЬНОГО ИНСТРУМЕНТА
1. Снятие родного колеса
2. Снятие заднего колеса
3. Снятие задней цепи, кожуха задней цепи и звездочки
4. Монтаж задней цепи
5. Смена шарикоподшипника
6. Смена шарикоподшипников колес
7. Демонтаж головки цилиндра и цилиндра
8. Смена поршневых колец
9. Монтаж цилиндров
10. Снятие карбюратора
11. Смена дисков сцепления
12. Демонтаж спидометра
13. Демонтаж вращающейся рукоятки газа
14. Снятие замка головки руля и седла
15. Снятие аккумуляторной батареи
16. Демонтаж топливного бака
17. Снятие правой и левой крышек двигателя
18. Снятие двигателя с рамы
19. Демонтаж головки руля
20. Демонтаж пера вилки
21. Задняя подвеска
22. Демонтаж задней вилки
23. Смена руля
24. Замена корпуса фары
25. Вынимание замка зажигания
26. Замена контрольных ламп
27. Демонтаж панели приборов
28. Демонтаж передних блинкеров
29. Смена переключателя стоп
IV. НЕИСПРАВНОСТИ ЯВЫ 634 И ИХ УСТРАНЕНИЕ
V. ДОПОЛНЕНИЕ ДЛЯ JAWA 350 ТИПА 634-7-01
Вступление
Покупая мотоцикл Ява чехословацкого производства, Вы становитесь владельцем изделия, которое по своим качествам относится к лучшим мировым маркам. Доказательством широкой популярности чехословацких мотоциклов является тот факт, что они поставляются более чем в сто стран мира.
С удовлетворением констатируем, что при выборе марки мотоцикла Вы учли высокое качество машин чехословацкого производства. В целях полного удовлетворения Ваших интересов мы считаем своим долгом следить за состоянием мотоцикла в процессе его эксплуатации и оказывать Вам помощь в устранении возможных дефектов. Выполнение этой задачи возложено на сеть гарантийных ремонтных мастерских, организованных на территории Советского Союза в городах, где имеются магазины по продаже этих изделий.
Гарантийные ремонтные мастерские бесплатно устраняют дефекты, возникшие в Вашем мотоцикле в течение гарантийного срока в том случае, если причина возникновения дефекта будет отвечать действующим гарантийным условиям. В задачу этих мастерских входит также консультация покупателей по эксплуатации и ремонту мотоциклов.
По всем вопросам, касающимся эксплуатации Вашего мотоцикла, обращайтесь исключительно в гарантийную ремонтную мастерскую, где имеются специально подготовленные работники. Завод-изготовитель не имеет возможности содержать специальный аппарат для ответов на многочисленные письма владельцев чехословацких мотоциклов.
К сведению сообщаем, что журнал «За рулем» на своих страницах публикует материалы по эксплуатации, техническому обслуживанию и ремонту мотоциклов Jawa ( ЯВА ).
Следите за выходом из печати этого журнала.
Хотим обратить Ваше внимание на то, что с нашей стороны не могут быть также удовлетворены Ваши просьбы относительно посылки запасных частей, специальных мотоциклов, колясок к мотоциклам и т. д., которые Вы направляете в адрес заводов-изготовителей в ЧССР.
По вопросу приобретения запасных частей к мотоциклам чехословацкого производства после гарантийного срока Вам следует обращаться только в торговую сеть по месту покупки мотоцикла или направлять заказы в адрес специализированной базы Посылторга: г. Москва, Ж-211, Овчиниковская набережная, 8, обязательно указав марку, модель и год выпуска приобретеннго Вами мотоцикла. Владельцев мотоциклов, проживающих в г. Москве, база не обслуживает. Они могут приобрести запасные часта в специализированном магазине «Мотолюбитель»
Заказы должны быть оформлены на специальных бланках «Посылторга», которые имеются во всех почтовых отделениях связи.
Вопросами заказа на поставку запчастей и их распределением по магазинам занимаются республиканские и областные Спортторги и Культторги. Другие организации в опросами продажи запасных частей владельцам мотоциклов не занимаются.
Условия продажи, гарантии и рекомендации
1. При продаже мотоцикла представитель магазина обязан в присутствии покупателя проверить комплектность мотоцикла, работу его узлов и агрегатов на ходу.
2. На мотоцикл установлен гарантийный срок, в течение которого гарантийная мастерская бесплатно производит ремонт мотоцикла, замену его деталей и агрегатов, вышедших из строя по вине завода-изготовителя.
3. Гарантийный срок исчисляется со дня продажи мотоцикла покупателю и действует в течение 6 месяцев. Рекламация подлежит удовлетворению в том случае, если пробег мотоцикла в гарантийный период не превысил 6000 км.
4. Гарантия не распространяется на мотоцикл, вышедший из строя в связи с невыполнением условий эксплуатации, технического обслуживания, изложенных в заводской инструкции.
5. В гарантийный период подлежит удовлетворению рекламация (подтвержденная актом ГАИ и гарантийной мастерской) на мотоцикл, потерпевший аварию по вине завода-изготовителя.
6. Рекламация на мотоцикл в гарантийный период подлежит удовлетворению только при наличии рекламационного акта, оформленного гарантийной мастерской.
ПРЕДОСТЕРЕЖЕНИЕ
Обращаем Ваше внимание на необходимость правильной зарядки аккумулятора и ухода за ним во время эксплуатации; его описание находится в инструкции по обслуживанию. Вследствие невыполнения требовании инструкций аккумулятор может выйти из строя или из него будет вытекать электролит, попадая на ящик и глушитель.

