В данном материале постараемся объяснить общий принцип настройки времени в G-Shock-ах на примере конкретных популярных моделей [которых очень много на рынке], подробно разобрать последовательность действий. Логика работы в целом повторяется от модели к модели, вам лишь важно разобраться в базовых процессах настройки. Имейте ввиду, настройка стрелок и электронного времени совершенно разная. Цифровым дисплеем легче оперировать, а вот для стрелок нужно чуть ли не запоминание последовательности действий. В рамках статьи будет описан процесс настройки времени для: GA-100, GA-110, GA-120, G-2900, GA-1000.
Если же ваши часы не попали в данный список, все равно можете ознакомиться с настройкой, либо перейти к полному список инструкций для G-Shock-ов.
Выберите одну из серий
[tabs slidertype=”top tabs”] [tabcontainer] [tabtext]GA-100[/tabtext] [tabtext]GA-110[/tabtext] [tabtext]GA-120[/tabtext][tabtext]G-2900[/tabtext][tabtext]GA-1000[/tabtext] [/tabcontainer] [tabcontent] [tab]
Рассмотрим настройку времени для серии GA-100

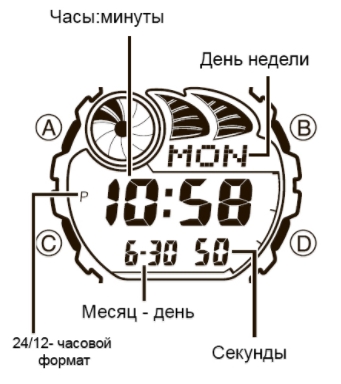
Для начала нужно убедиться, что часы находятся в режиме текущего времени. В этом режиме на дисплее отображается время [или дата] и день недели, а индикатор режима часов указывает на Time [не у всех часов есть такой индикатор]. Примерно так выглядит режим текущего времени:

Далее нам нужно перейти в режим настройки времени.
- Зажмите кнопку “A” [в левом верхнем углу] примерно на 3 секунды. На цифровом дисплее начнет мигать код города, для которого настроено текущее время.
- Нажимайте кнопку “C” для перехода к нужному параметру настройки в следующей. последовательности:
- Если вы выбрали для коррекции секунды (изображение секунд мигает), нажмите кнопку “D” для сброса значения счетчика секунд в 00. Если вы нажмете кнопку “D” при значении счетчика секунд между 30 и 59, то значение счетчика установится в 00 и 1 прибавится к счетчику минут, если значение счетчика секунд будет между 00 и 29, то изменение счетчика минут не произойдет.
- Для изменения значений минут и т.д., используйте кнопку “D” для увеличения и кнопку “ В” для уменьшения значений.
- После окончания установок нажмите кнопку “ А” для возврата в Режим Текущего Времени.
- Удерживание кнопок в нажатом состоянии позволяет изменять значения с большей скоростью.
- День недели устанавливается автоматически в соответствии с датой.
- Вы можете установить значение времени в диапазоне от 2000г. до 2099г.
Бывают ситуации, когда аналоговое время не совпадает с цифровым, т.е. стрелки и цифры показывают разное время. Это может произойти по нескольким причинам: сильно магнитное воздействие на часы или удар и т.п. В таком случае нужно вручную откорректировать положение стрелок.
- В Режиме Текущего Времени нажимайте и удерживайте кнопку “D” до появления индикатора “H-SET” в верхнем левом дисплее и индикатора “Sub” в правом верхнем дисплее.
- Проверьте положение стрелки скорости – она должна указывать на значение 50, то есть находиться в положении 12-ти часов. Если этого не происходит, нажмите кнопку “D” для перемещения стрелки в нужное положение.

- После этого нажмите кнопку “С”.
- Проверьте положение стрелок часов и минут – они должны находиться в положении 12-ти часов. Если этого не происходит, нажимайте кнопки “D” и “В”для перемещения стрелок в нужное положение.
- После этого нажмите кнопку “А” для возврата к дисплею текущего времени.
- Часовая и минутная стрелки при этом должны перейти в положения значения текущего времени, а стрелка скорости – в положение 0.
- Нажатие кнопки “С” на данном этапе вернет Вас к установкам пункта 2.

[/tab] [tab]
Рассмотрим настройку времени для серии GA-110

Сперва нужно перевести часы в режим текущего времени. В этом режиме на дисплее отображается время [или дата] и день недели, а индикатор режима часов указывает на Time [не у всех часов есть такой индикатор]. Так выглядит режим текущего времени у GA-110:

- Зажмите кнопку “ А” [около 3 секунд] в Режиме Текущего Времени. Изображение кода города начнет мигать.
- Нажимайте кнопку “ С” для перехода из разряда в разряд в следующей последовательности:

- Если вы выбрали для коррекции секунды (изображение секунд мигает), нажмите кнопку “D” для сброса значения счетчика секунд в 00. Если вы нажмете кнопку “D” при значении счетчика секунд между 30 и 59, то значение счетчика установится в 00 и 1 прибавится к счетчику минут, если значение счетчика секунд будет между 00 и 29, то изменение счетчика минут не произойдет.
- Для изменения значений минут и т.д., используйте кнопку “D” для увеличения и кнопку “ В” для уменьшения значений.

- Удерживание кнопок в нажатом состоянии позволяет изменять значения с большей скоростью.
- День недели устанавливается автоматически в соответствии с датой.
- Вы можете установить значение времени в диапазоне от 2000г. до 2099г.
- По окончании установок нажмите кнопку “ А” для возврата в Режим Текущего Времени.
- Если вы не будете нажимать кнопки в течение некоторого времени, то часы автоматически перейдут в Режим Текущего Времени.
В случае отклонения стрелочного времени от цифрового [от магнитного воздействия или сильного удара] нужно произвести следующие действия:
- В Режиме Текущего Времени нажимайте и удерживайте кнопку “D” до появления индикатора “H-SET” в верхнем левом дисплее и индикатора “Sub” в правом верхнем дисплее.
- Проверьте положение стрелки скорости – она должна указывать на значение 50, то есть находиться в положении 12-ти часов. Если этого не происходит, нажмите кнопку “D” для перемещения стрелки в нужное положение.

- После этого нажмите кнопку “С”.
- Проверьте положение стрелок часов и минут – они должны находиться в положении 12-ти часов. Если этого не происходит, нажимайте кнопки “D” и “В”для перемещения стрелок в нужное положение.
- После этого нажмите кнопку “А” для возврата к дисплею текущего времени.

-
- Часовая и минутная стрелки при этом должны перейти в положения значения текущего времени, а стрелка скорости – в положение 0.
- Нажатие кнопки “С” на данном этапе вернет Вас к установкам пункта 2.
[/tab] [tab]
Рассмотрим настройку времени для серии GA-120

Переведите часы в режим текущего времени [он как правило по умолчанию]. На дисплее отображается время [или дата] и день недели, а индикатор режима часов указывает на Time [не у всех часов есть такой индикатор]. Вот так это выглядит:

Далее нам нужно перейти в режим настройки времени.
- Зажмите кнопку “ А” [около 3 секунд] в Режиме Текущего Времени. Изображение кода города начнет мигать.
- Нажимайте кнопку “ С” для перехода из разряда в разряд в следующей последовательности:

- Если вы выбрали для коррекции секунды (изображение секунд мигает), нажмите кнопку “D” для сброса значения счетчика секунд в 00. Если вы нажмете кнопку “D” при значении счетчика секунд между 30 и 59, то значение счетчика установится в 00 и 1 прибавится к счетчику минут, если значение счетчика секунд будет между 00 и 29, то изменение счетчика минут не произойдет.
- Для изменения значений минут и т.д., используйте кнопку “D” для увеличения и кнопку “ В” для уменьшения значений.
- Удерживание кнопок в нажатом состоянии позволяет изменять значения с большей скоростью.
- День недели устанавливается автоматически в соответствии с датой.
- Вы можете установить значение времени в диапазоне от 2000г. до 2099г.

- По окончании установок нажмите кнопку “ А” для возврата в Режим Текущего Времени.
-
- Если вы не будете нажимать кнопки в течение некоторого времени, то часы автоматически перейдут в Режим Текущего Времени.
При сильном ударе или воздействии магнитного поля на часы, стрелочное время может не совпадать с цифровым. Для этого производитель предусмотрел возможность ручной корректировки стрелок:
- В Режиме Текущего Времени нажимайте и удерживайте кнопку “D” до появления индикатора “H-SET” в верхнем левом дисплее и индикатора “Sub” в правом верхнем дисплее.
- Проверьте положение стрелки скорости – она должна указывать на значение 50, то есть находиться в положении 12-ти часов. Если этого не происходит, нажмите кнопку “D” для перемещения стрелки в нужное положение.

- После этого нажмите кнопку “С”.
- Проверьте положение стрелок часов и минут – они должны находиться в положении 12-ти часов. Если этого не происходит, нажимайте кнопки “D” и “В”для перемещения стрелок в нужное положение.
- После этого нажмите кнопку “А” для возврата к дисплею текущего времени.
- Часовая и минутная стрелки при этом должны перейти в положения значения текущего времени, а стрелка скорости – в положение 0.
- Нажатие кнопки “С” на данном этапе вернет Вас к установкам пункта 2.

[/tab] [tab]
Рассмотрим настройку времени для серии G-2900

Сначала нужно перевести часы в режим текущего времени. В этом случае на циферблате отображается текущее время и дата. Так выглядит режим текущего времени в G-Shock G-2900:
- Нажмите и удержите кнопку “ А” в Режиме Текущего времени, до тех пор, пока значение секунд не замигает на дисплее, что означает переход к режиму установки.
- Нажмите кнопку “ С” для перехода мигающего значения из разряда в разряд в следующей последовательности:

- Когда разряд, который Вы хотите изменить, находится в мигающем состоянии, используйте кнопки «D» и « В» для увеличения или уменьшения значения.
- Установив желаемые значения для всех параметров, нажмите кнопку “ А”, чтобы вернуться к показу текущего времени.
- Выбранная в Режиме Текущего времени 12- или 24-часовая система измерения времени распространяется также на все остальные режимы.
- При использовании 12-часового формата слева от значения часа в диапазоне от полудня до 11:59 вечера появляется индикатор Р. От полуночи до 11:59 утра на экране находится индикатор А.
- При использовании 24-часового формата время отображается в диапазоне от 0:00 до 23:59 без индикатора.
- День недели устанавливается автоматически в соответствии с датой.

[/tab] [tab]
Рассмотрим настройку времени для серии GA-1000

Перед настройкой убедитесь, что часы находятся в режиме текущего времени — на экране отображается текущее время и дата, а стрелка режимов указывает на Time. Так выглядит режим текущего времени у GA-1100:

- В Режиме Текущего Времени зажмите и удерживайте кнопку “ А” до то появления мигающей индикации “ADJ”. Отпустите кнопку, после этого на дисплее появляется индикация “SET”, что означает начало установок.

- Нажимайте кнопку “D” для перехода от установки к установке в следующей последовательности:

- Если вы выбрали для коррекции секунды (изображение секунд мигает), нажмите кнопку “ Е” для сброса значения счетчика секунд в 00. Если вы нажмете кнопку “ Е” при значении счетчика секунд между 30 и 59, то значение счетчика установится в 00 и 1 прибавится к счетчику минут, если значение счетчика секунд будет между 00 и 29, то изменение счетчика минут не произойдет.
- Для изменения значений минут и т.д. используйте кнопку “ Е” для увеличения и кнопку “ В” для уменьшения выбранного значения.
- Для выбора кода города используйте кнопки “ Е” и “ В”.
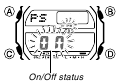
- Для включения (ON)/выключения (OFF) летнего времени нажимайте кнопку “Е”.
- Для переключения 12/24 часового формата представления времени нажимайте кнопку “ Е”. При выбранном 12-ти часовом формате представления времени индикатор “ Р” обозначает значение времени после полудня.
- По окончании установок нажмите кнопку “ А”.


Сильный удар или воздействие магнитного поля могут сбить стрелки, и аналоговое время не будет совпадать с цифровым. В таком случае нужно вручную откорректировать положение стрелок:

- В Режиме Текущего Времени нажимайте и удерживайте кнопку “ А” до появления индикации “H-SET” в верхнем дисплее. Секундная стрелка при этом переместится в положение 12:00 часов. После нажатия кнопки “ А” на дисплее часов сначала появится индикатор “ADJ”, будьте внимательны и не отпускайте кнопку “ А” до появления индикации “HSET”.
- Для выбора стрелок при корректировке используйте кнопку “D”: секундная стрелка – часовая стрелка – минутная стрелка – стрелка дисплея режимов. При этом соответствующая стрелка будет переходить в положение 12-ти часов, а на нижнем дисплее часов будут появляться следующие значения: 00 при выборе секундной стрелки, 0:00 часовой и минутной стрелки, Sub стрелки дисплея режимов
- Если стрелка не переходит в положение 12-ти часов, перейдите к 3 пункту.
- Для корректировки положения стрелок используйте кнопки “ Е” и “ В”. Удерживание кнопки в нажатом состоянии позволяет изменять значение с большей скоростью.
- По окончании установок нажмите кнопку “ А”.
[/tab] [tab]
[/tab] [/tabcontent] [/tabs]
Мы рассмотрели настройку времени только для самых популярных серий часов G-Shock. Если у вас другая модель, тогда инструкцию для нее вы можете найти по номеру модуля часов G-Shock:
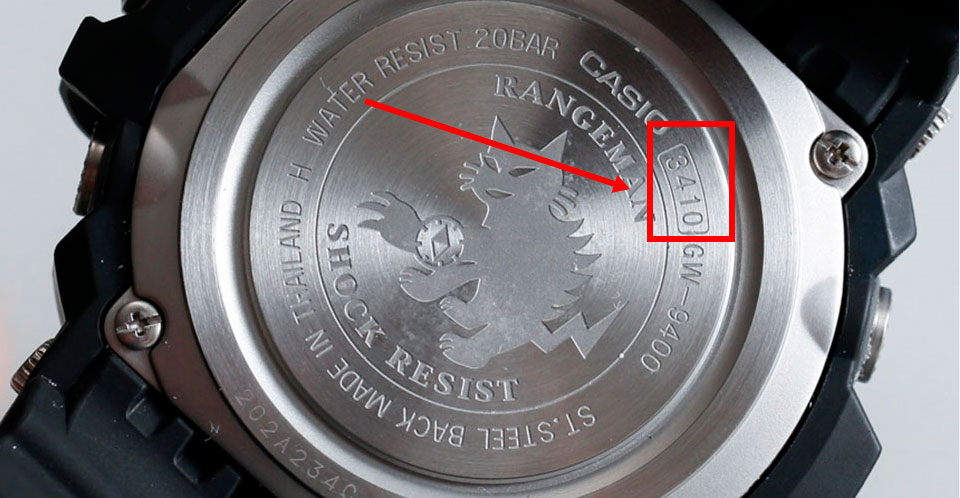
*номер модуля расположен на задней крышке часов — как правило 4 цифры (легче всего искать с помощью поиска CTRL + F на клавиатуре)
1545 — DW-5600
2548 — G-2900
3031 — G-9000
3088 — G-9100
3095 — G-7700
3095 — G-7710
3147 — GW-9200
3150 — GW-9010
3151 — GLX-5600
3159 — GW-M5610
3159 — GW-5000
3159 — GW-5510
3178 — GLS-5600
3179 — GW-6900
3184 — GWF-1000
3193 — GW-7900
3194 — G-7900
3194 — GLX-6900
3195 — GW-2310
3217 — GW-9110
3221 — GX-56
3222 — GWX-5600
3230 — DW-6900
3230 — DW-6901
3232 — DW-9052
3255 — GDF-100
3261 — G-9300
3261 — GW-9300
3263 — GD-100
3266 — GF-8250
3267 — GD-200
3269 — GR-8900
3279 — GWX-8900
3285 — G-8900
3295 — GLX-150
3400 — GD-110
3402 — GD-X6900
3402 — GLS-100
3403 — GD-350
3405 — GW-M500
3410 — GW-9400
3417 — GB-6900
3418 — GB-X6900
3419 — GB-5600
3420 — GD-X6930E
3422 — GLS-8900
3427 — GD-120
3434 — GD-400
3436 — GMD-S6900
3445 — GWF-D1000
3450 — GLS-6900
4778 — AW-590
4778 — AW-591
5081 — GA-100
5087 — GW-4000
5121 — GW-3000
5146 — GA-110
5158 — G-100
5173 — GW-3500
5229 — GA-120
5229 — GA-200
5229 — GA-201
5230 — AWG-M100
5230 — AWG-M510
5240 — GW-A1000
5255 — GA-150
5259 — GA-300
5277 — GAC-100
5302 — GA-1000
5311 — GW-A1100
5357 — GA-310
5369 — MTG-S1000
5371 — GWN-1000
5398 — GA-400
5410 — GPW-1000
5411 — MRG-G1000
5413 — GBA-400
5425 — GMA-S110
5441 — GA-1100
5443 — GN-1000
5444 — GST-W100
5444 — GST-W110
5444 — GAW-100
5445 — GST-S100
5445 — GST-S110
5445 — GAS-100
5455 — MTG-G1000
5463 — GWG-1000
5475 — GST-210
5475 — GST-200
5476 — GG-1000
5477 — GWN-Q1000
5478 — GA-500
5485 — GAX-100
5502 — GPW-2000
5513 — GST-B100
5515 — GST-W120
5515 — GST-W130
5518 — GMA-S120
5522 — GA-700
5522 — GA-710
5524 — GST-W300
5524 — GST-W310
5531 — MRG-G2000
5535 — GA-800
5540 — GMA-S130
Все равно не нашли инструкцию и не знаете как настроить точное время? Тогда вам нужно посмотреть на наш главный каталог инструкций. Вероятно, у вас не G-Shock, а другое модельное направление (либо мы еще не успели обновить информацию).
Если вы по какой-то причине потеряли или изначально не имели инструкцию к вашим джишокам, то не стоит отчаиваться, так как мы готовы вам помочь в настройке ваших часов. Каждая G-SHOCK инструкция на нашем блоге предоставляется нашим читателям не только совершенно бесплатно, но и на русском языке, что даст возможность разобраться с функциональностью той или иной модели часов.
Следите за медийным футболом в России? Читайте актуальные новости здесь.
Выбор инструкции по внешнему виду часов
Чтобы выбранная G-SHOCK инструкция идеально подходила именно к вашей модели часов, необходимо следовать довольно простым правилам. Во-первых, выбор инструкции в первую очередь осуществляется по внешнему виду часов, представленных на фото ниже. Во-вторых, цвет корпуса, стрелок, циферблата и т.д., а также материал браслета могут различаться, но если внешние параметры сходятся – скачивайте инструкцию, она должна вам подойти.
Предоставленный нами выбор инструкций включает в себя как старые, уже классические модели, которые уже не выпускаются производителем, так и новые модели, недавно появившиеся на рынке. Если из предоставленного списка моделей вам так и не удастся подобрать подходящую инструкцию, то мы расскажем еще об одном способе, который точно поможет вам разобраться с настройкой ваших часов.
!!! Чтобы скачать нужную инструкцию, нажмите на фото !!!


Поиск инструкции по модулю
Компания Casio заботится о своих пользователях, поэтому каждый сможет скачать себе инструкцию по специальному модулю, обозначенному на задней крышке часов. Как правило, модуль – это значение из четырех цифр, которые обведены в прямоугольник. Воспользовавшись этой ссылкой, введите в специальное поле число модуля и вам будет предложено произвести скачивание любой инструкции, которые предоставляются пользователям на разных языках. Русская G-SHOCK инструкция также будет в этом списке, что позволит произвести правильную настройку часов, а также познакомиться с их функциональностью и различными техническими особенностями.
12.01.2023
36266
СОДЕРЖАНИЕ:
- Кнопочная система управления часами Casio G-SHOCK
- Как настроить время на часах Casio G-SHOCK
- Как настроить дату на часах Casio G-SHOCK
- Как настроить дополнительные функции
- Настраиваем G-SHOCK на примере популярных моделей
- Инструкция при покупке часов в Kronostime
Casio G-SHOCK – одни из самых популярных моделей часов, ежедневно приобретаемых по всему миру. Однако у многих пользователей после их приобретения могут возникнуть сложности с настройкой. Команда Kronostime создала подробную инструкцию, как настроить время, дату и другие функции на G-SHOCK’ах, а чтоб вам было еще легче, мы сделали это на примере конкретных моделей.
Кнопочная система управления часами Casio G-SHOCK
%20(1)%20(1).webp)
Casio всегда старались создавать максимально удобные и эргономичные модели наручных часов. Поэтому неудивительно, что они отдали предпочтение кнопочной системе управления – она проста в использовании, очень надежна и до сих пор не теряет своей актуальности.
Кнопки на часах бывают двух видов:
- Выступающие;
- «Утопленные».
Отметим, что кнопочная система управления имеет ряд преимуществ над, к примеру, сенсорной – крупными кнопками часов Casio G-SHOCK удобно пользоваться даже в перчатках (например, зимой).
Как настроить время на часах Casio G-SHOCK

Большая часть самых популярных моделей G-SHOCK’ов оснащается четырьмя главными торцевыми кнопками (более сложные часы имеют пять или даже шесть кнопок):
- Mode – слева снизу;
- Adjust – слева сверху;
- Reverse – справа сверху;
- Forward – справа снизу.
Главная кнопка на часах – это кнопка «Mode», она отвечает за переключение между следующими режимами:
- Секундомер;
- Будильники;
- Календарь;
- Другие дополнительные функции.
Переключение с одного режима на другой сопровождается звуковым сигналом.
Если перед вами модель, сочетающая аналоговый и цифровой циферблат, убедитесь, что значение времени на них совпадает. Если оно разное – зажмите кнопку «Forward» («Вперед») – таким образом стрелки переместятся в положение 00:00.
В случае, если погрешность времени между циферблатами минимальна, попробуйте скорректировать ее, поочередно нажимая кнопки «Forward» и «Reverse» («Вперед» и «Назад»). После этого, для более точной синхронизации, нажмите кнопку «Adjust» («Настройка») и переходите к установке времени:
- Зажмите кнопку «Adjust» и держите до тех пор, пока светодиод не начнет мигать;
- С помощью кнопки «Reverse» выберите нужный часовой пояс;
- С помощью кнопки «Mode» выберите зимний или летний режим времени. Если вам не нужно автоматическое переключение между режимами, отключите его, нажав кнопку «Forward».
- Затем, нажимая кнопку «Mode», выберите режим отображения времени: в 12-ти или 24-х часовом формате. Для того, чтоб переключиться с одного формата на другой, нажмите кнопку «Forward».
- Снова зажимаем кнопку «Mode» и переходим к режиму установки часов, секунд и минут, а затем с помощью кнопки «Forward» устанавливаем нужные цифры.
Как только вы настроили время на часах G-SHOCK, еще раз нажмите кнопку «Adjust» для сохранения всех настроек.
Как настроить дату на часах Casio G-SHOCK

Дата на часах Casio G-SHOCK настраивается по тому же принципу, как и время:
- Последний режим при еще одном нажатии «Mode» (после того, как вы установили время) — это календарь;
- Нажимаем «Mode», переходим к режиму установки года, месяца и дня, а затем с помощью кнопки «Forward» устанавливаем нужные цифры.
Как только вы настроили дату на часах G-SHOCK, снова нажмите кнопку «Adjust» для сохранения всех настроек.
Как настроить дополнительные функции
.webp)
Чтобы настроить на G-SHOCK’ах дополнительные параметры вроде будильника или таймера, используйте следующие кнопки:
- Зажмите кнопку «Forward», чтоб отобразить таймер и секундомер;
- Зажмите кнопку «Reverse», чтоб включить автоматическую подсветку;
- Зажмите кнопку «Mode», чтобы отобразить будильник (при необходимости нажмите на нее несколько раз, чтоб дойти до нужного режима). Затем для ввода времени срабатывания будильника нажмите кнопку «Reverse» — индикатор начнет мигать, установите нужное время кнопкой «Mode» и сохраните настройки нажатием кнопки «Reverse». Отключить будильник можно нажатием той же кнопки — «Reverse».
Данные советы универсальны и подходят для настройки большинства моделей G-SHOCK. Для настройки специфических редких функций, а также при возникновении сложностей лучшим вариантом будет обратиться за помощью к официальной инструкции.
Настраиваем G-SHOCK на примере популярных моделей
Для начала, определитесь, какая именно модель G-SHOCK’ов у вас на руке. В данном блоке мы приведем пример настройки необходимых функций на примере наиболее популярных моделей GA-100 и GA-110. Если среди них нет вашей модели, но внешние параметры часов в целом сходятся – попробуйте воспользоваться универсальной инструкцией.
Настройка модели Casio G-Shock GA-100CF-1A :

- Убедитесь, что часы находятся в режиме текущего времени — в этом режиме на дисплее отображается время или дата и день недели, а индикатор режима часов указывает на «Time»;
- Зажмите кнопку «Adjust», дождитесь мигания индикатора. На цифровом дисплее начнет мигать код города, для которого настроено текущее время;
- Нажмите кнопку «Mode» для выбора нужного параметра для настройки;
- Если вы настраиваете секунды (изображение секунд мигает), нажмите кнопку «Mode» для сброса значения счетчика секунд к 00;
- Для изменения значений, зажимайте кнопку «Forward» для их увеличения и кнопку «Reverse» для уменьшения;
- После окончания настройки нажмите кнопку «Adjust» для их сохранения;
- День недели устанавливается автоматически в соответствии с датой.

Значение времени можно установить в диапазоне от 2000г. до 2099г. Для того, чтоб менять значения с большей скоростью, удерживайте кнопки в зажатом состоянии.
Если вы решите прекратить настройку, не нажимайте кнопки в течение нескольких минут и часы автоматически перейдут в режим текущего времени.

Настройка модели Casio G-Shock GA-110-1B :
%20(1)%20(2).webp)
- Зажмите кнопку «Adjust», дождитесь мигания индикатора. На цифровом дисплее начнет мигать код города, для которого настроено текущее время;
- Нажмите кнопку «Mode» для выбора нужного параметра для настройки;
- Если вы настраиваете секунды (изображение секунд мигает), нажмите кнопку «Mode» для сброса значения счетчика секунд к 00;
- Для изменения значений, зажимайте кнопку «Forward» для их увеличения и кнопку «Reverse» для уменьшения;
- После окончания настройки нажмите кнопку «Adjust» для их сохранения;
- День недели устанавливается автоматически в соответствии с датой.

Важно! Иногда, как мы уже упоминали выше, аналоговое время может не совпадать с цифровым. Это происходит по разным причинам: сильное магнитное воздействие на часы, очень сильный удар и так далее. В таком случае время на данных моделях корректируется вручную следующим образом:
- Нажмите и удерживайте кнопку «Forward» до появления индикатора “H-SET” в верхнем левом дисплее и индикатора «Sub» в правом верхнем дисплее;
- Проверьте положение стрелки скорости – она должна указывать на значение 50 (находиться в положении 12 часов);
- Если стрелка не там, нажмите кнопку «Forward» для перемещения стрелки в нужное положение;
- Нажмите кнопку «Mode»;
- Проверьте, находятся ли стрелки и минуты в положении 12 часов;
- Если нет, нажимайте кнопки «Forward» и «Reverse» для перемещения стрелок в нужное положение;
- Нажмите кнопку «Adjust» для сохранения настроек;
Часовая и минутная стрелки должны перейти в положение значения установленного времени, а стрелка скорости – в положение 0.
Важно! Для всех моделей действует следующее условие: если вы нажмете кнопку «Forward», когда счетчик находится между 30 и 59, то значение счетчика установится на положении 00, а к счетчику минут прибавится единица. Если же значение счетчика секунд будет между 00 и 29, то изменение счетчика минут не произойдет.
Инструкция при покупке часов в Kronostime
Компания Casio любит и ценит своих покупателей, а команда Kronostime – заботится о своих клиентах, поэтому каждый из вас при покупке наручных часов Casio G-SHOCK получает инструкцию по их эксплуатации. Очень важно, что мы предоставляем инструкции почти на всех языках мира, в том числе и на русском, что позволит вам не только правильно настроить свои часы, но и основательно ознакомиться с их характеристиками и функциями.
CASIO G-SHOCK GXW GX-56 — Watch Manual

Getting Acquainted
Keep the watch exposed to bright light
The electricity generated by the solar cell of the watch is stored by a rechargeable battery. Leaving or using the watch where it is not exposed to light causes the battery to run down. Make sure the watch is exposed to light as much as possible.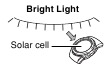
- The actual level at which some functions are disabled depends on the watch model.
- Frequent display illumination can run down the battery quickly and require charging. The following guidelines give an idea of the charging time required to recover from a single illumination operation.
Approximately 5 minutes exposure to bright sunlight coming in through a window
Approximately about 8 hours exposure to indoor fluorescent lighting - Be sure to read «Power Supply» for important information you need to know when exposing the watch to bright light.
If the display of the watch is blank…
If the display of the watch is blank, it means that the watch’s Power Saving function has turned off the display to conserve power.
- See «Power Saving Function» for more information.
About This Manual
- Depending on the model of your watch, display text appears either as dark figures on a light background or light figures on a dark background. All sample displays in this manual are shown using dark figures on a light background.
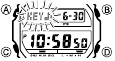
- Button operations are indicated using the letters shown in the illustration.

- Each section of this manual provides you with the information you need to perform operations in each mode. Further details and technical information can be found in the «Reference» section.
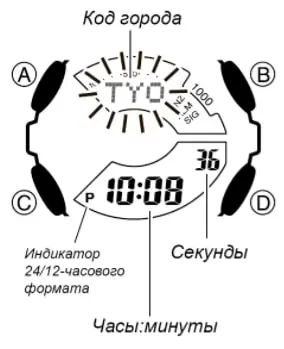
General Guide
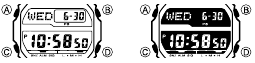
Timekeeping
Press the A button to toggle the upper display between the day of the week and date, and the currently selected World Time city and time (Dual Time). Use the Timekeeping Mode to set and view the current time and date.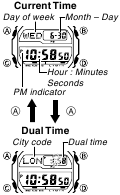
Read This Before You Set the Time and Date!
This watch is preset with a number of city codes, each of which represents the time zone where that city is located.
When setting the time, it is important that you first select the correct city code for your Home City (the city where you normally use the watch). If your location is not included in the preset city codes, select the preset city code that is in the same time zone as your location.
- Note that all of the times for the World Time Mode city codes are displayed in accordance with the time and date settings you configure in the Timekeeping Mode.
To set the time and date
- In the Timekeeping Mode, hold down until the city code starts to flash, which indicates the setting screen.
- Press and to select the city code you want.
 until the city code starts to flash, which indicates the setting screen.
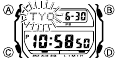
- Make sure you select your Home City code before changing any other setting.
- For full information on city codes, see the «City Code Table».
- Press to move the flashing in the sequence shown below to select the other settings.
 to move the flashing in the sequence shown below to select the other settings.
- The following steps explain how to configure timekeeping settings only.
- When the timekeeping setting you want to change is flashing, press or to change it as described below.
| Screen: | To do this: | Do this: |
 |
Change the city code | Press  (east) and (east) and  (west). (west). |
 |
Toggle between Daylight Saving Time ( ON ) and Standard Time ( OFF ). | Press . |
 |
Toggle between 12-hour (  ) and 24- hour ( ) and 24- hour (  ) timekeeping ) timekeeping |
Press . |
 |
Reset the seconds to  |
Press . |
 |
Change the hour and minutes | Press (+) and (–). |
 |
Change the year, month, or day | Press (+) and (–). |
 |
Toggle the button operation tone between  (on) and (on) and  (off) (off) |
Press . |
 |
Toggle the illumination duration between  (approximately 1.5 seconds) and (approximately 1.5 seconds) and  (approximately 3 seconds). (approximately 3 seconds). |
Press . |
 |
Toggle between Power Saving on (  ) and off ( ) and off (  ) ) |
Press . |
- Press to exit the setting screen.
- The day of the week is displayed automatically in accordance with the date (year, month, and day) settings.
12-hour and 24-hour timekeeping
- With the 12-hour format, the P (PM) indicator appears to the left of the hour digits for times in the range of noon to 11:59 p.m. and no indicator appears to the left of the hour digits for times in the range of midnight to 11:59 a.m.
- With the 24-hour format, times are displayed in the range of 0:00 to 23:59, without any indicator.
- The 12-hour/24-hour timekeeping format you select in the Timekeeping Mode is applied in all other modes.
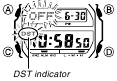
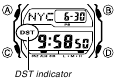
Daylight Saving Time (DST)
Daylight Saving Time (summer time) advances the time setting by one hour from Standard Time. Remember that not all countries or even local areas use Daylight Saving Time.
To change the Daylight Saving Time (summer time) setting
- In the Timekeeping Mode, hold down until the city code starts to flash, which indicates the setting screen.
- Press and the DST setting screen appears.
- Press to toggle the DST settings ON and OFF.
- When the setting you want is selected, press to exit the setting screen.

- The DST indicator appears to indicate that Daylight Saving Time is turned on.
Worild Time
World Time shows the current time in 48 cities (31 time zones) around the world.
To view the time in another city
While in the World Time Mode, press the (eastward) to scroll through the city codes (time zones).
To toggle a city code time between Standard Time and Daylight Saving Time
- In the World Time Mode, press to display the city code (time zone) whose Standard Time/Daylight Saving Time setting you want to change.
- Hold down to toggle between Daylight Saving Time (DST indicator displayed) and Standard Time (DST indicator not displayed).
- The DST indicator is shown on the World Time Mode screen while Daylight Saving Time is turned on.
- Note that the Standard Time/Daylight Saving Time setting affects only the currently displayed city code. Other city codes are not affected.
- Note that you cannot switch between Standard Time and Daylight Saving Time while UTC is selected as the city code.
Alarms
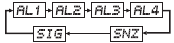
The Alarm Mode gives you a choice of four one-time alarms and one snooze alarm.
Also use the Alarm Mode to turn the Hourly Time Signal (  ) on and off.
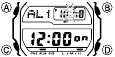
To set an alarm time
- In the Alarm Mode, press to scroll through the alarm screens until the one whose time you want to set is displayed.
- After you select an alarm, hold down until the hour setting of the alarm time starts to flash, which indicates the setting screen.
- This operation turns on the alarm automatically.
- Press to move the flashing between the hour and minute settings.
- While a setting is flashing, press (+) and (–) to change it.
- With the 12-hour format, set the time correctly as a.m. or p.m. (P indicator).
- Press to exit the setting screen.
Alarm Operation
The alarm tone sounds at the preset time for 10 seconds, regardless of the mode the watch is in. In the case of the snooze alarm, the alarm operation is performed a total of seven times, every five minutes, until you turn the alarm off.
- Alarm and Hourly Time Signal operations are performed in accordance with the Timekeeping Mode time.
- To stop the alarm tone after it starts to sound, press any button.
- Performing any one of the operations below during a 5-minute interval between snooze alarms cancels the current snooze alarm operation.
Displaying the Timekeeping Mode setting screen
Displaying the setting screen
 setting screen
 To test the alarm
In the Alarm Mode, hold down to sound the alarm.
To turn an alarm on and off
- In the Alarm Mode, press to select an alarm.
- Press to toggle it on and off.
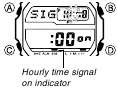
To turn the Hourly Time Signal on and off
- In the Alarm Mode, press to select the Hourly Time Signal ( ).
- Press to toggle it on and off.
- The Hourly Time Signal on indicator is shown on the display in all modes while this function is turned on.
Stopwatch

The stopwatch lets you measure elapsed time, split times, and two finishes.
- The display range of the stopwatch is 23 hours, 59 minutes, 59.99 seconds.
- The stopwatch continues to run, restarting from zero after it reaches its limit, until you stop it.
- The stopwatch measurement operation continues even if you exit the Stopwatch Mode.
- Exiting the Stopwatch Mode while a split time is frozen on the display clears the split time and returns to elapsed time measurement.
- All of the operations in this section are performed in the Stopwatch Mode, which you enter by pressing .
To measure times with the stopwatch

Elapsed Time

Split Time

Two Finishes
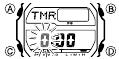
Countdown Timer

You can set the countdown timer within a range of one minute to 24 hours. An alarm sounds when the countdown reaches zero.
- All of the operations in this section are performed in the Countdown Timer Mode, which you enter by pressing C.
Countdown End Beeper
The countdown end beeper lets you know when the countdown reaches zero. The beeper stops after about 10 seconds or when you press any button.
To configure the countdown timer
- While the countdown start time is on the display in the Countdown Timer Mode, hold down until the current countdown start time starts to flash, which indicates the setting screen.
- If the countdown start time is not displayed, use the procedure under «To use the countdown timer» to display it.
- Press to move the flashing in the sequence shown below to select other settings.
- When the setting you want to change is flashing, press and to change it as described below.

- To specify a countdown start time of 24 hours, set .
 .
.- Press to exit the setting screen.
To use the countdown timer
Press while in the Countdown Timer Mode to start the countdown timer.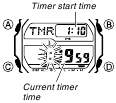
Illumination
This watch has an EL (electro-luminescent) panel that causes the entire display to glow for easy reading in the dark. The watch’s auto light switch turns on illumination automatically when you angle the watch towards your face.
- The auto light switch must be turned on (indicated by the auto light switch on indicator) for it to operate.
- See «Illumination Precautions» for other important information about using illumination.

To illuminate the display manually
In any mode (except when a setting screen is on the display), press to turn on illumination.
- The above operation turns on illumination regardless of the current auto light switch setting.
- You can use the procedure below to select either 1.5 seconds or 3 seconds as the illumination duration. When you press , the illumination will remain on for about 1.5 seconds or 3 seconds, depending on the current illumination duration setting.
To specify the illumination duration
- In the Timekeeping Mode, hold down until the display contents start to flash. This is the setting screen.
- Press 10 times until the current illumination duration setting ( or ) appears.
- Press to toggle the setting between (approximately 1.5 seconds) and (approximately 3 seconds).
- Press to exit the setting screen.
 or
or  ) appears.
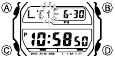
About the Auto Light Switch
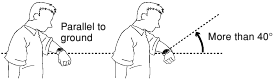
Turning on the auto light switch causes illumination to turn on, whenever you position your wrist as described below in any mode. Note that this watch features a «Full Auto EL Light», so the auto light switch operates only when available light is below a certain level. It does not turn on the backlight under bright light.
Moving the watch to a position that is parallel to the ground and then tilting it towards you more than 40 degrees causes illumination to turn on.
- Wear the watch on the outside of your wrist.
Always make sure you are in a safe place whenever you are reading the display of the watch using the auto light switch. Be especially careful when running or engaged in any other activity that can result in accident or injury. Also take care that sudden illumination by the auto light switch does not startle or distract others around you.
When you are wearing the watch, make sure that its auto light switch is turned off before riding a bicycle or operating a motorcycle or any other motor vehicle. Sudden and unintended operation of the auto light switch can create a distraction, which can result in a traffic accident and serious personal injury.
To turn the auto light switch on and off
In the Timekeeping Mode, hold down for about three seconds to toggle the auto light switch on (auto light switch on indicator displayed) and off (auto light switch on indicator not displayed).
- The auto light switch on indicator is on the display in all modes while the auto light switch is turned on.
Power Supply
This watch is equipped with a solar cell and a rechargeable battery that is charged by the electrical power produced by the solar cell. The illustration shown below shows how you should position the watch for charging.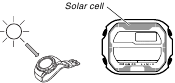
Example: Orient the watch so its face is pointing at a light source.
- The illustration shows how to position a watch with a resin band.
- Note that charging efficiency drops when any part of the solar cell is blocked by clothing, etc.
- You should try to keep the watch outside of your sleeve as much as possible. Charging is reduced significantly if the face is covered only partially.

- Storing the watch for long periods in an area where there is no light or wearing it in such a way that it is blocked from exposure to light can cause rechargeable battery power to run down. Be sure that the watch is exposed to bright light whenever possible.
- This watch uses a rechargeable battery to store power produced by the solar cell, so regular battery replacement is not required. However, after very long use, the rechargeable battery may lose its ability to achieve a full charge. If you experience problems getting the rechargeable battery to charge fully, contact your dealer or CASIO distributor about having it replaced.
- Never try to remove or replace the watch’s rechargeable battery yourself. Use of the wrong type of battery can damage the watch.
- All data stored in memory is deleted, and the current time and all other settings return to their initial factory defaults whenever battery power drops to Level 5 and when you have the battery replaced.
- Turn on the watch’s Power Saving function and keep it in an area normally exposed to bright light when storing it for long periods. This helps to keep the rechargeable battery from going dead.
Battery Power Indicator and Recover Indicator

The battery power indicator on the display shows you the current status of the rechargeable battery’s power.
| Level | Battery Power Indicator | Function Status |
| 1 |  |
All functions enabled. |
| 2 |  |
All functions enabled. |
| 3 |  (Charge Soon Alert) |
Illumination, and beeper disabled. |
| 4 |  |
Except for timekeeping and the CHG (charge) indicator, all functions and display indicators disabled. |
| 5 |  |
All functions disabled. |
- The flashing indicator at Level 3 tells you that battery power is very low, and that exposure to bright light for charging is required as soon as possible.
- At Level 5, all functions are disabled and settings return to their initial factory defaults. Once the battery reaches Level 2 after falling to Level 5, reconfigure the current time, date, and other settings.
- The watch’s Home City code setting will change automatically to TYO (Tokyo) whenever the battery drops to Level 5.
- Display indicators reappear as soon as the battery is charged from Level 5 to Level 2.
- Leaving the watch exposed to direct sunlight or some other very strong light source can cause the battery power indicator to show a reading temporarily that is higher than the actual battery level. The correct battery level should be indicated after a few minutes
 indicator at Level 3 tells you that battery power is very low, and that exposure to bright light for charging is required as soon as possible.
- Performing illumination, or beeper operations during a short period may cause the recover indicator to appear on the display.
After some time, battery power will recover and the recover indicator will disappear, indicating that the above functions are enabled again. - If the recover indicator appears frequently, it probably means that remaining battery power is low. Leave the watch in bright light to allow it to charge.

Charging Precautions
Certain charging conditions can cause the watch to become very hot. Avoid leaving the watch in the areas described below whenever charging its rechargeable battery.
Also note that allowing the watch to become very hot can cause its liquid crystal display to black out. The appearance of the LCD should become normal again when the watch returns to a lower temperature.
Leaving the watch in bright light to charge its rechargeable battery can cause it to become quite hot. Take care when handling the watch to avoid burn injury.
The watch can become particularly hot when exposed to the following conditions for long periods.
- On the dashboard of a car parked in direct sunlight
- Too close to an incandescent lamp
- Under direct sunlight
Charging Guide
The following table shows the amount of time the watch needs to be exposed to light each day in order to generate enough power for normal daily operations.
| Exposure Level (Brightness) | Approximate Exposure Time |
| Outdoor Sunlight (50,000 lux) | 5 minutes |
| Sunlight Through a Window (10,000 lux) | 24 minutes |
| Daylight Through a Window on a Cloudy Day (5,000 lux) | 48 minutes |
| Indoor Fluorescent Lighting (500 lux) | 8 hours |
- For details about the battery operating time and daily operating conditions, see the «Power Supply» section of the Specifications.
- Stable operation is promoted by frequent exposure to light.
Recovery Times
The table below shows the amount exposure that is required to take the battery from one level to the next.
| Exposure Level (Brightness) |
Approximate Exposure Time | |||
| Level 5 | Level 4 | Level 3 | Level 2 | Level 1 |
 |
 |
 |
||
| Outdoor Sunlight (50,000 lux) | 2 hours | 20 hours | 6 hours | |
| Sunlight Through a Window (10,000 lux) | 8 hours | 98 hours | 27 hours | |
| Daylight Through a Window on a Cloudy Day (5,000 lux) | 15 hours | 199 hours | 53 hours | |
| Indoor Fluorescent Lighting (500 lux) | 169 hours | — — — — — — — — | — — — — — — — — |
- The above exposure time values are all for reference only. Actual required exposure times depend on lighting conditions.
Reference
This section contains more detailed and technical information about watch operation. It also contains important precautions and notes about the various features and functions of this watch.
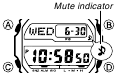
Button Operation Tone
The button operation tone sounds any time you press one of the watch’s buttons. You can turn the button operation tone on or off as desired.
- Even if you turn off the button operation tone, alarms, the Hourly Time Signal, and other beepers all operate normally.
To turn the button operation tone on and off
- In the Timekeeping Mode, hold down until the city code starts to flash, which indicates the setting screen.
- Press nine times until the current button operation tone setting ( or ) appears.
- Press to toggle the setting between (tone on) and (tone off).
- Press to exit the setting screen.
- The mute indicator is displayed in all modes when the button operation tone is turned off.
Power Saving Function
When turned on, the Power Saving function enters a sleep state automatically whenever the watch is left in an area for a certain period where it is dark. The table below shows how watch functions are affected by the Power Saving function.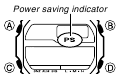
| Elapsed Time in Dark | Display | Operation |
| 60 to 70 minutes | Blank, with Power Saving indicator flashing | All functions enabled, except for the display |
| 6 or 7 days | Blank, with Power Saving indicator not flashing | Beeper tone, illumination, and display are disabled. |
- Wearing the watch inside the sleeve of clothing can cause it to enter the sleep state.
- The watch will not enter the sleep state between 6:00 AM and 9:59 PM. If the watch is already in the sleep state when 6:00 AM arrives, however, it will remain in the sleep state.
To recover from the sleep state
Perform any one of the following operations.
- Move the watch to a well-lit area.
- Press any button.
- Angle the watch towards your face for reading.
To turn Power Saving on and off
- In the Timekeeping Mode, hold down until the city code starts to flash, which indicates the setting screen.
- Press 11 times until the Power Saving on/off screen appears.
- Press to toggle Power Saving on ( ) and off ( ).
- Press to exit the setting screen.
 ) and off (
  ).
).- The Power Saving indicator is on the display in all modes while Power Saving is turned on.
Auto Return
- If you do not perform any operation for about two or three minutes while a setting screen (with a flashing setting) is on the display, the watch will exit the setting screen automatically.
Scrolling
Initial Screens
- When you enter the World Time Mode or Alarm Mode, the data you were viewing when you last exited the mode appears first.
Timekeeping
- Resetting the seconds to 00 while the current count is in the range of 30 to 59 causes the minutes to be increased by 1. In the range of 00 to 29, the seconds are reset to 00 without changing the minutes.
- The year can be set in the range of 2000 to 2099.
- The watch’s built-in full automatic calendar makes allowances for different month lengths and leap years. Once you set the date, there should be no reason to change it except after you have the watch’s battery replaced.
- The current time for all city codes in the Timekeeping Mode and World Time Mode is calculated in accordance with the Coordinated Universal Time (UTC) for each city, based on your Home City time setting.
World Time
- The seconds count of the World Time is synchronized with the seconds count of the Timekeeping Mode.
Illumination Precautions
- The electro-luminescent panel that provides illumination loses power after very long use.
- Illumination may be difficult to see when viewed under direct sunlight.
- The watch may emit an audible sound whenever the display is illuminated. This is due to vibration of the EL panel used for illumination, and does not indicate malfunction.
- Illumination turns off automatically whenever an alarm sounds.
- Frequent use of illumination runs down the battery.
Auto light switch precautions
- Avoid wearing the watch on the inside of your wrist. Doing so causes the auto light switch to operate when it is not needed, which shortens battery life. If you want to wear the watch on the inside of your wrist, turn off the auto light switch feature.
- Illumination may not turn on if the face of the watch is more than 15 degrees above or below parallel. Make sure that the back of your hand is parallel to the ground.
- Illumination turns off after a preset amount of time (1.5 or 3 seconds), even if you keep the watch pointed towards your face.
- Static electricity or magnetic force can interfere with proper operation of the auto light switch. If illumination does not turn on, try moving the watch back to the starting position (parallel with the ground) and then tilt it back toward you again. If this does not work, drop your arm all the way down so it hangs at your side, and then bring it back up again.
- Under certain conditions, illumination may not turn on until about one second after you turn the face of the watch towards you. This does not necessarily indicate malfunction of the auto light switch.
- You may notice a very faint clicking sound coming from the watch when it is shaken back and forth. This sound is caused by mechanical operation of the auto light switch, and does not indicate a problem with the watch.

Specifications
Accuracy at normal temperature: ± 15 seconds a month
Timekeeping: Hour, minutes, seconds, p.m. (P), month, day, day of the week
Time format: 12-hour and 24-hour
Calendar system: Full Auto-calendar pre-programmed from the year 2000 to 2099
Other: Home City code (can be assigned one of 48 city codes); Standard Time / Daylight Saving Time (summer time)
World Time: 48 cities (31 time zones)
Other: Daylight Saving Time/Standard Time
Alarms: 5 daily alarms (four one-time alarms; one snooze alarm); Hourly TIme Signal
Stopwatch:
Measuring unit: 1/100 second
Measuring capacity: 23:59′ 59.99»
Measuring modes: Elapsed time, split time, two finishes
Countdown Timer:
Measuring unit: 1 second
Input range: 1 minute to 24 hours (1-minute increments and 1-hour increments)
Illumination: EL (electro-luminescent panel); FUll Auto Light Switch; Selectable illumination duration
Other: Power Saving: Button operation tone on/off
Power Supply: Solar cell and one rechargeable battery
Approximate battery operating time: 11 months (from full charge to Level 4) under the following conditions:
- Watch not exposed to light
- Internal timekeeping
- Display on 18 hours per day, sleep state 6 hours per day
- 1 illumination operation (1.5 second) per day
- 10 seconds of alarm operation per day
Frequent use of illumination runs down the battery. Particular care is required when using the auto light switch.
City Code Table


- Based on data as of December 2009.
- The rules governing global times (UTC offset and GMT differential) and summer time are determined by each individual country.

Documents / Resources
Download manual
Here you can download full pdf version of manual, it may contain additional safety instructions, warranty information, FCC rules, etc.
Download CASIO G-SHOCK GXW GX-56 — Watch Manual
24.08.2021
Новые G-Shock в индустриальном стиле – GA-2200
Casio GA-2200 — продолжение развития 2000-ой линейки GA.
G-Shock GA-2200 — это новая модель с легким корпусом, усиленным углеродным …
20.04.2021
GSW-H1000 – первые смарт-часы G-Shock от Casio
После долгих ожиданий Casio выпустила умные часы G-Shock с Wear OS от Google.
GSW-H1000 — это первые умные часы G-Shock, которые …
03.04.2021
G-Shock GST-B400 – самые тонкие G-Steel
Casio анонсировала выпуск модели GST-B400.
Часы имеют самый тонкий профиль (12,9 мм) из всех представленных моделей в линейке G-Steel. …
15.09.2020
Первые Gravitymaster c квадро-сенсором Quad Sensor – G-Shock GR-B200
CASIO представила новую авиационную модель линейки Master of G.
G-Shock GR-B200 обладают характерным внешний видом, вдохновленным ручкой …