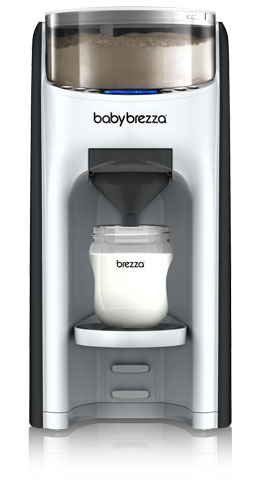
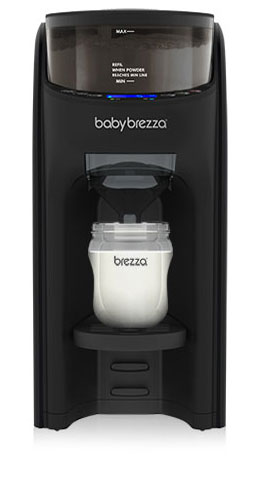
FORMULA PRO

Formula Pro & Formula Pro Advanced Setting Guides
Formula Pro Advanced: Instruction Manual
Formula Pro Advanced WiFi: Instruction Manual
Formula Pro: Instruction Manual
Formula Pro Mini: Instruction Manual

ONE STEP BABY FOOD MAKER


One Step Baby Food Maker
Baby Brezza Food Maker Complete or Deluxe Baby Food Maker: Instruction Manual
Baby Brezza Food Maker Complete or Deluxe Baby Food Maker: Recipe Book
Baby Brezza Glass One Step Baby Food Maker: Instruction Manual
Baby Brezza Glass One Step Baby Food Maker: Recipe Book

Washer & Sterilizer Family


Bottle Washer Pro: Instruction Manual
One Step Sterilizer Dryer Advanced: Instruction Manual
One Step Sterilizer Dryer: Instruction Manual
One Step Sterilizer: Instruction Manual
Superfast Sterilizer Dryer
INSTANT WARMER
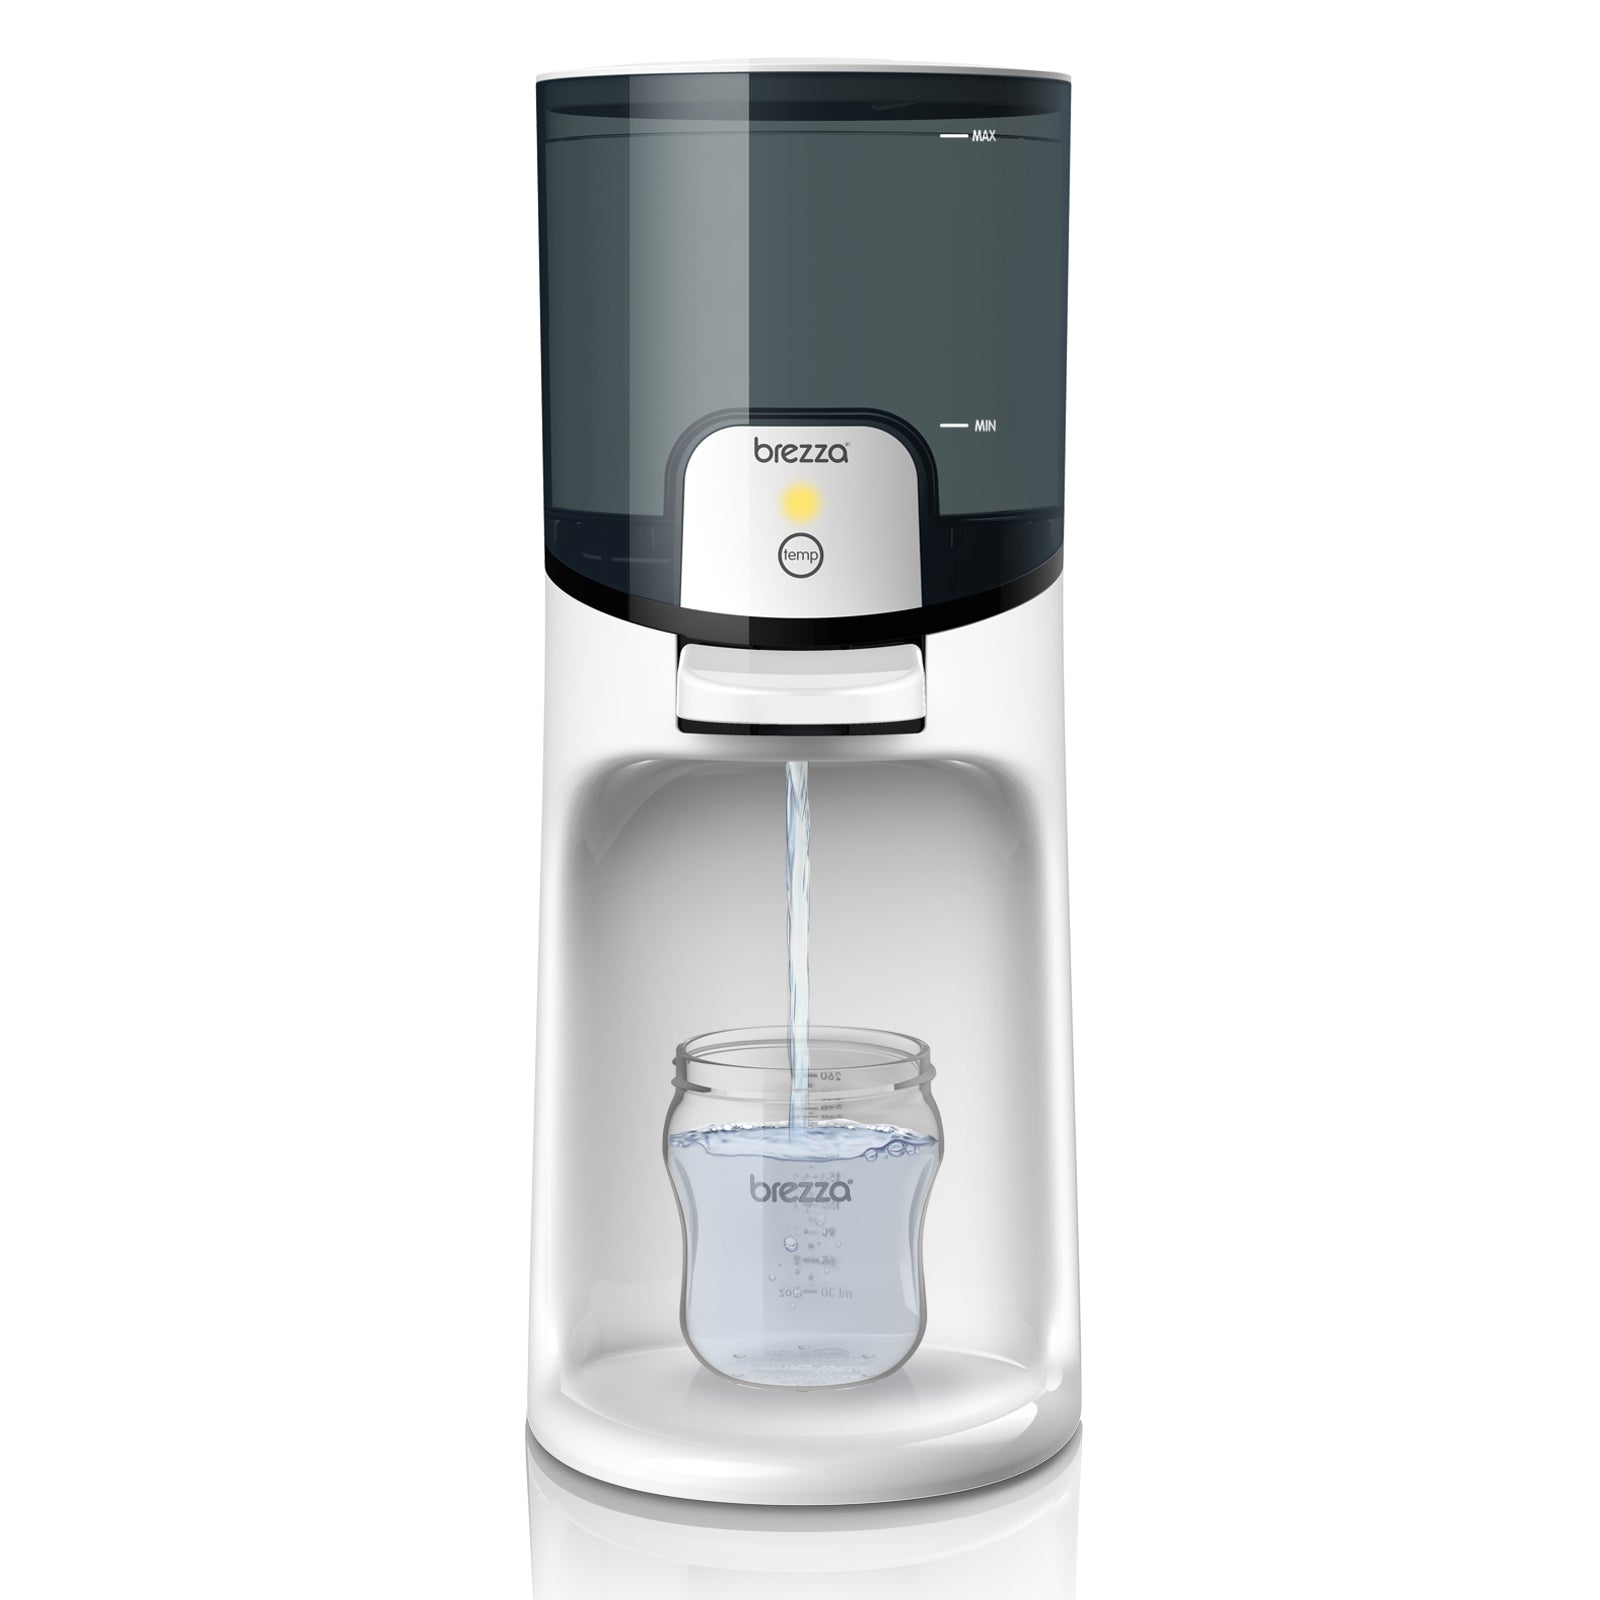
Instant Warmer: Instruction Manual

Baby Brezza Safe + Smart Bottle Warmer


Baby Brezza Safe + Smart Bottle Warmer: Instruction Manual
Bottle & Breatmilk Warmer: Instruction Manual
Baby Brezza Formula Mixer

Baby Brezza Formula Mixer: Instruction Manual
SMART SOOTHING MAT

Smart Soothing Mat: Instruction Manual
BABY SOOTHE MASSAGER

Baby Soothe Massager: Instruction Manual
SAFE SLEEP SWADDLER

Safe Sleep Swaddler: Instruction Manual

FAILURE TO SET UP THE FORMULA PRO® CORRECTLY WILL RESULT IN IMPROPER FORMULA DISPENSING.
READ THE INSTRUCTION MANUAL and CAREFULLY follow the step-by-step directions for cleaning, set up and use.
Important Safeguards
When using electrical appliances, basic safety precautions should always be followed, including the following:
- Read all instructions before using.
- Do not touch hot surfaces.
- To protect against electric shock and injury to persons do not immerse cord, plug, water tank or appliance in water or other liquid.
- Close supervision is necessary when any appliance is used by or near children.
- Unplug from outlet when not in use and before cleaning. Allow to cool before inserting or removing parts, and before cleaning the appliance.
- Do not operate this appliance with a damaged cord or plug. If the appliance malfunctions or has been damaged in any manner, return appliance to the nearest authorized service facility for examination, repair or adjustment.
- The use of accessory attachments not recommended by the appliance manufacturer may cause fire, electric shock or injury.
- Use on level surface and be sure there is no debris under the unit and the rubber pads are touching the surface.
- Household use only. Do not use outdoors.
- Do not let cord hang over edge of table or counter, or touch hot surfaces.
- Do not place on or near hot gas or electric burner, or in a heated oven.
- Do not use appliance for other than intended use.
- Do not attempt to use the machine without water in the water tank.
- This appliance has a polarized plug (one blade wider than the other). To reduce risk of electric shock, this plug is intended to fit into a polarized outlet only one way. If the plug does not fit fully into the outlet, reverse the plug. If it still does not fit, contact a qualified electrician. Do not attempt to modify the plug in any way.
- Make sure machine is turned off before unplugging.
- A short power-supply cord is provided to reduce risks of becoming entangled in or tripping over a longer cord. Longer detachable power-supply cords or extension cords are available and may be used if care is exercised in their use. If using the machine with an extension cord, make sure the cord is the proper electrical rating for the machine. The extension cord should be arranged so that it does wash before not drape over countertop or tabletop where it can be pulled on by children or tripped over unintentionally.
- Before serving make sure formula mixture is at safe temperature for baby.
- Avoid contact with moving parts. Never remove powder container, powder container lid, funnel or water tank while machine is in operation.
- Do not disassemble
For infants less than 6 months old, always use bottled water suitable for infant formula preparation. Tap wash before water and/or unsterilized baby bottles can potentially lead to adverse effects for the health of your baby. Only prepare one bottle at a time, feed immediately and follow all instructions carefully. Do not keep leftover formula mix. Always hold baby while feeding. Leaving baby unattended may cause choking.
TECHNICAL DATA
Supply voltage: 120V ~ 60Hz
Model: FRP0045
Current: 2.5A
Heater Power: 250W
Motor Power: 20W
Save these instructions
Formula Pro® Controls & Indicator Lights

Formula Pro Components
Powder Container Parts
wash all before use


Powder Container set up
Wash: Funnel, Funnel Cover, Inside of Water Tank, and all Powder Container parts.
After washing, make sure all Powder Container parts are COMPLETELY DRY before assembly.
Set up the Measuring Wheel to work with your powder type.
- Select Measuring Wheel setting 1 — 10 by using the chart on the back cover of this booklet. Numbers on Lower Measuring Wheel

-
2a. Example: Assembled Measuring Wheel set to #5


Press upper & lower halves of Measuring Wheel together so your powder’s setting number shows through window on the Upper Measuring Wheel. You have now assembled your Measuring Wheel.
Set up the Powder Container and parts.
- Place Powder Container on Base with «MIN» & «MAX» lines facing front.
- Place assembled Measuring Wheel In Powder Container.
- ⠀
1. Place the front edge of Locking Cover under the tab in the Powder Container.
2. Press down on back edge to lock in place.
5a. Locking Cover should look like this when inserted properly.


- Place Stirring Wheel In Powder Container, align with axle and push down so it touches the Locking Cover.

Don’t add powder yet. Follow the next steps to run an internal cleaning cycle BEFORE using the Formula Pro® with powder.
Measuring Wheel Setting Selection
Find your formula type below and set the measuring wheel to the corresponding number.
| Formula Brand/Type | Setting # |
| Similac | |
| Advance® Stage 1 | 5 |
| Advance® Stage 2 | 4 |
| Advance® Organic | 7 |
| Alimentum® | 5 |
| Go & Grow® | 7 |
| Go & Grow® Soy | 5 |
| NeoSure® | 9 |
| Soy | 6 |
| Sensitive® for fussiness & gas | 7 |
| Sensitive® for Spit-up | 6 |
| Supplementation | 5 |
| Total Comfort™ | 5 |
| PM 60/40 Low Iron | 7 |
| Abbott Elecare® infant | 7 |
| Gerber® | |
| Good Start® Gentle | 5 |
| Good Start® Gentle for Supplementing | 5 |
| Good Start® Nourish | 9 |
| Good Start® Protect | 5 |
| Good Start® Soy | 7 |
| Good Start® Soothe | 7 |
| Graduates® Gentle | 6 |
| Graduates® Protect | 6 |
| Graduates® Soothe | 9 |
| Graduates® Soy | 7 |
| Enfanmil ™ | |
| A.R.® | 5 |
| EnfaCare® | 7 |
| Gentlease® | 5 |
| Nutrimigen™ | 9 |
| Pregestimil™ | 4 |
| Premium infant | 4 |
| Premium Newborn | 3 |
| Prosobee® | 5 |
| Reguline® | 4 |
| For Supplementing | 5 |
| Enfagrow® Gentlease® toddler | 7 |
| Enfagrow® Premium older toddler | 8 |
| Enfagrow® Soy toddler | 7 |
| Earth’s Best Organic® | |
| Infant | 7 |
| Sensitivity® | 7 |
| Soy | 7 |
| Baby’s Only Organic® | |
| Dairy | 6 |
| Dairy DHA & ARA | 7 |
| Soy | 6 |
| LactoRelief™ | 6 |
| Store Brand Formula | |
| For the following store brands, use the insertindicated for the type of formula in the chart below |
|
| 365™, America’s Choice™, BabiesRUs®, Baby basics®, Bear Essentials, Berkley & Jensen® Baby, Bright Beginnings®, Comforts™, CVS®, Giant®, Giant Eagle Baby, H-E-B Baby™, Home 360º ™ Baby, Kirkland Signature™, Kuddles®, Little Ones™, Meijer™, Mom to Mom™, Mother’s Choice, Parent’s Choice™, President’s Choice®, Rite Aid®, Simply Right™, Top Care®, Up & Up®, Vermont Organics™, Wegmans, Walgreens Well Beginnings™ |
|
| Advantage | 6 |
| Added Rice | 9 |
| Gentle | 6 |
| Infant with Iron | 5 |
| Newborn | 6 |
| Organic Milk Based | 8 |
| Organic Soy Based | 7 |
| Premium | 6 |
| Sensitivity | 8 |
| Soy | 10 |
| Tender | 8 |
| Toddler & Older infant | 8 |
Occasional clumping may occur due to the nature and composition of powdered formula. Always check for clumps and shake or stir the bottle if necessary.
If you do not see your formula brand or type on this list, check babybrezza.com for updates or contact customer service at 1-888-396-6552 for assistance.
Clean internal parts — before first use — without powder
After setting up the powder container, run a cleaning cycle to rinse internal parts.
- Place Powder Container Lid on Powder Container as shown.
Don’t add powder. Make sure tab is in the back - Turn Powder Container Lid Clockwise to lock into place.
- Plug in machine and turn power switch to on position.
- Fill water tank to MAX line with distilled water.
Don’t add powder. - Place 10 ounce or larger container to catch water.
- The Formula Pro® will stop after dispensing 10oz of water.
Dispose of the water captured in the container.
Choose 10 oz. size by pressing ounce button 4 times.
Press start to begin rinsing.


Your Formula Pro® is now ready to use with powder.
Always use a clean and sterilized bottle, nipple or other feeding equipment.
Wash and dry hands before handling sterilized bottles.
Make each bottle as needed, and do not store mixed formula for later use.
Bottle Preparation
Follow the steps on these pages to prepare bottles with the Formula Pro®
- Fill water to MAX line
- Fill powder container with powder and close Lid


Pour powder loosely and evenly into Powder Container. Never fill past the MAX line.
Never pack powder in the Powder Container or overfill.
Powder can be spread evenly with the 3 arms on the Powder Container Lid before closing.
Temperature Indicator Lights
About water temperature
The heater in the Water Tank will warm the water and keep it warm as long as the machine is powered on.
If you refill the Water Tank with cool or room temperature water and need to use the machine right away, the machine can be used while water is heating (flashing yellow light).
If you run the machine with cool or room temperature water, before the water is warm and ready, always make sure formula is mixed properly and check for clumps.
For quickest warming time, always fill the water tank with room temperature or cool water. Flashing green & yellow lights mean the water poured into in the Water Tank is too hot or too cold. The machine will not work while the green & yellow lights flash. If you don’t want to wait long for the water to heat, do not fill with water stored in the refrigerator
Never fill Water Tank with hot water.
If you boil water before using it in the machine, let the water cool to body or room temperature before pouring it into the Water Tank.
Bottle Preparation Continued
- Select correct height for Drip Tray based on bottle height. Lift up and pull out to remove. Push in and down to install.
Adjust the drip tray so the bottle is as close to the Funnel outlet as possible. This will make sure no formula spills outside of the bottle. - Select bottle size by pressing the ounce button.
With each push, the amount will increase 2 ounces. - When desired ounce size is selected, press start to dispense formula.
- Machine will dispense formula into bottle and stop when done.
- Check level of mixed formula. Level will appear higher due to added powder volume and/or variance in bottle markings.
- Check for clumps and shake or stir the bottle if necessary. Test temperature and feed baby.


Never remove Water Tank, Funnel or Powder Container while machine is in operation.
Always hold the bottle when feeding baby. Never prop the bottle up and leave your baby to feed unsupervised.
After baby stops feeding from bottle, discard any leftover formula mixture.
Daily Cleaning
Unplug the appliance before cleaning. Do not use abrasive pads to clean the machine.
The Funnel, Funnel Cover and underside of Powder Container MUST BE CLEANED once per day (if machine is used daily).
Follow these steps to clean the Formula Pro® parts every day.
- Remove Funnel & Funnel Cover by pulling out and down.
- Remove Funnel Cover from Funnel by lifting up on Funnel Cover.
- Wash and rinse Funnel & Funnel Cover thoroughly.
Funnel and Funnel Cover are top rack dishwasher safe and are also safe for steam sterilization. - Wipe the hole the on underside of Powder Container.


With the Funnel removed and Powder Container attached to machine, wipe any dry formula powder from the hole on the underside of the Powder Container & Funnel Compartment in a circular motion with a DRY paper towel or DRY soft cloth.
Never use a wet or damp cloth to clean the Funnel Compartment or underside of Powder Container.
Always make sure the Funnel and Funnel Cover are completely DRY before placing in machine.
Monthly Cleaning
The Powder Container parts, Water tank and Base should be cleaned once a month.
- The Powder Container and Powder Container Parts should be cleaned once a month by emptying any remaining powder (powder can be saved for refill) and cleaned with mild detergent and soft cloth or sponge. Never place Powder Container in dishwasher.
- The Water Tank should be cleaned once a month with mild detergent and soft cloth or sponge. Rinse inside of Water Tank thoroughly before refilling with clean, purified water. Wipe the outside of the Water Tank with a damp clean cloth. Never immerse Water Tank or get the electronics in the base of the Water Tank wet. If the electronics in the base of the Water Tank get wet, allow to air dry thoroughly before placing back on base. Never place Water Tank in dishwasher.
- The machine Base should be wiped with a damp, soft cloth or sponge and dried immediately. Never submerge the base or plug in water or other liquids. Dry machine Base after cleaning.


ALWAYS FOLLOW INSTRUCTIONS AND NOTE EXPIRY DATE ON POWDER MANUFACTURER LABEL
User Tips
Always make sure powder level is above the top of the Stirring Wheel. You will know it’s time to refill the Powder Container when any of the four horizontal arms of the Stirring Wheel are visible through the powder.
Do not use the machine when the powder level is below the MIN line marked on the Powder Container.
To easily separate the Upper Measuring Wheel from the Lower Measuring Wheel, press the raised center area while holding the outside edge as shown in photo at right.
Do not remove the Water Tank from the base to refill. Simply lift the Water Tank Lid at the front and pour water in. Make sure to keep water above «MIN» line.
Refill Water Tank regularly with room temperature water and keep machine powered on. This way, the water will always be warm and ready to serve.
If the powder forms a cone shape mound when refilling the Powder Container, use the 3 arms on the bottom of the Powder Container Lid to gently level the powder before closing. Always keep the powder level below the MAX line and never pack powder in the Powder Container.
The Formula Pro can be used at any time during the water heating cycle, but not all powders mix well with cool or room temperature water. Always check for clumps & shake or stir the closed bottle gently to mix the powder completely with the water.
Troubleshooting
| Condition | Possible Cause | Remedy |
Machine will not start. |
Unit is unplugged. | Make sure the plug is securely inserted into the power outlet. |
| Unit is not turned on. | Turn switch on lower back of unit from off to on. | |
| Funnel is removed or not fully inserted. | Insert funnel or push front of funnel until flush with machine. | |
| Water Tank is removed or not fully seated. | Place water tank on base or push down all the way. | |
| Water level is below «MIN» line. | Add more water to water tank. | |
| Powder container is removed or not fully seated. | Place powder container on base or push down all the way. | |
| Powder container lid is not completely closed. | Turn Powder container lid clockwise to close completely. | |
| Powder container lid is on backwards. | Make sure tab on outer edge of Powder Container Lid is facing the back of the machine and engaged with safety switch. | |
| Water in Water Tank is too cold. ( Green & Yellow Temp LEDs Flashing) | Allow water to warm up or pour warmer water in Water Tank to raise temperature faster. | |
| Water in Water Tank is too hot. ( Green & Yellow Temp LEDs Flashing) | Allow water to cool down or pour cool water in Water Tank to lower temperature faster. | |
Temperature of dispensed formula is too cold. |
Water has not yet been heated to correct temperature. | Wait for heater to warm water in tank. Green LED in «temp» section of control panel will illuminate when water reaches correct temperature. |
Not enough powder dispensed. |
Powder level in powder container is too low. | Refill Powder Container with more powder. |
| Powder is stuck in powder measuring wheel. | Make sure silicone scraper is installed correctly. | |
| Measuring wheel is set to incorrect number for powder type. | Make sure the measuring wheel is set to the correct number for your powder type. See Back Cover. | |
Too much powder dispensed. |
Measuring wheel is set to incorrect number for powder type. | Make sure the measuring wheel is set to the correct number for your powder type. See Back Cover. |
| Locking cover is not locked under tab in powder container. | Check locking cover and make sure the edge is locked under the tab in the powder container. | |
Not dispensing water |
Water Tank not fully seated. | Push Water Tank down all the way on Base. |
Scaling on water tank heater plate. |
Mineral rich water used persistently. | Clean heater plate and use purified/distilled water. |
Powder build-up on funnel cover and underside of powder container. |
Frequent use without cleaning underside of powder container. | Clean funnel cover and powder container bottom frequently, every 5-6 bottles, or at least once a day. |
Water Tank is full, red no water light is on. is on. |
Water Tank not fully seated. | Push Water Tank down all the way on Base. |
Funnel will not fit all the way in Funnel Compartment. |
Funnel Cover is not straight on funnel or not pushed down completely. | Align tab on front of Funnel Cover with notch in Funnel and push down Funnel Cover completely. |
If you can not remedy problems with the machine by using the troubleshooting chart above, do not return the your Formula Pro® to the store, please contact Customer Service at 1-888-396-6552. Any other servicing should be performed by an authorized service representative.
Customer Service and Warranty
If you are experiencing problems with your Baby Brezza Formula Pro, please call our Customer Service department at 1-888-396-6552 before returning the product so that we can offer you our best service customized to your particular situation.
Limited 1-Year Warranty
The limited warranty is valid only on products bought through authorized resellers and used in the United States and Canada. Buying through an unauthorized reseller or using this product outside of the United States and Canada automatically voids this warranty.
This warranty is available to consumers only. You are a consumer if you own a Baby Brezza Formula pro that was purchased at retail for personal, family or household use. Except as otherwise required under applicable state law, this warranty is not available to retailers or other commercial purchasers or owners. We warrant that your Baby Brezza Formula Pro will be free of defects in material or workmanship under normal home use for one year from the date of original purchase. Customer will be required to present original proof of purchase in order to obtain the warranty benefits. In the event that you do not have proof of purchase date, the purchase date for purposes of this warranty will be the date of manufacture. If your Baby Brezza Formula Pro should prove to be defective within the warranty period, we will repair it or, if we consider it necessary, replace it.
To obtain warranty services, please call Customer Service at 1-888-396-6552 or write to:
Baby Brezza, 250 Passaic Street, Newark, NJ 07104 Attn: Customer Service.

babybrezza.com
Here you can download full pdf version of manual, it may contain additional safety instructions, warranty information, FCC rules, etc.

AUSTRIA


Manuals:
Formula Pro Advanced: German
Formula Pro Advanced: English
Formula Pro Mini: German
Formula Pro Mini: English
Instant Warmer: German
Instant Warmer: English
Food Maker Deluxe: German
Food Maker Deluxe: English
Safe & Smart Bottle Warmer: German
Safe & Smart Bottle Warmer: English
Customer Service:
contact@gamin-tout-terrain.com
Formula Settings:
Europe — Setting List

BELGIUM

Manuals:
Formula Pro Advanced: Dutch
Formula Pro Advanced: French
Formula Pro Advanced: English
Instant Warmer: Dutch
Instant Warmer: French
Instant Warmer: English
Food Maker Deluxe: Dutch
Food Maker Deluxe: French
Food Maker Deluxe: English
Customer Service:
contact@gamin-tout-terrain.com
Formula Settings:
Europe — Setting List
BULGARIA
Manuals:
Formula Pro Advanced: Bulgaria
Food Maker Deluxe: Bulgaria
Instant Warmer: Bulgaria
Safe+Smart Bottle Warmer: Bulgaria
Customer Service:
contact@taticool.bg
+359.88.934.9836
Formula Settings:
Europe — Setting List
CROATIA
Manuals:
Formula Pro Advanced: Croatian
Formula Pro Advanced: English
Food Maker Deluxe: Croatian
Food Maker Deluxe: English
Customer Service:
info@minime.si
Formula Settings:
Europe — Setting List
CYPRUS
Manuals:
Formula Pro Advanced: English
Food Maker Deluxe: English
Customer Service:
info@newbabycity-online.com
Formula Settings:
Europe — Setting List
CZECHIA
Manuals:
Formula Pro Advanced: English
Food Maker Deluxe: English
Customer Service:
contact@gamin-tout-terrain.com
Formula Settings:
Europe — Setting List
DENMARK


Manuals:
Formula Pro Advanced: English
Formula Pro Advanced: Danish
Instant Warmer: Danish
Instant Warmer: English
Food Maker Deluxe: English
Food Maker Deluxe: Danish
Safe & Smart Bottle Warmer: Danish
Safe & Smart Bottle Warmer: English
Customer Service:
kontakt@ibpscandinavia.se
Formula Settings:
Europe — Setting List
ESTONIA
Manuals:
Formula Pro Advanced: Estonian
Formula Pro Advanced: English
Instant Warmer: Estonian
Instant Warmer: English
Food Maker Deluxe: Estonian
Food Maker Deluxe: English
Customer Service:
info@progressio.ee
Formula Settings:
Europe — Setting List
FINLAND


Manuals:
Formula Pro Advanced: English
Instant Warmer: Finnish
Instant Warmer: English
Food Maker Deluxe: Finnish
Food Maker Deluxe: English
Safe & Smart Bottle Warmer: Finnish
Safe & Smart Bottle Warmer: English
Customer Service:
kontakt@ibpscandinavia.se
Formula Settings:
Europe — Setting List
FRANCE
Manuals:
Formula Pro Advanced: French
Formula Pro Advanced: English
Instant Warmer: French
Instant Warmer: English
Food Maker Deluxe: French
Food Maker Deluxe: English
Safe & Smart Bottle Warmer: English
Customer Service:
contact@gamin-tout-terrain.com
Formula Settings:
Europe — Setting List
GERMANY
Manuals:
Formula Pro Advanced: German
Formula Pro Advanced: English
Formula Pro Mini: German
Formula Pro Mini: English
Food Maker Deluxe: German
Food Maker Deluxe: English
Safe & Smart Bottle Warmer: German
Safe & Smart Bottle Warmer: English
Customer Service:
contact@gamin-tout-terrain.com
Formula Settings:
Europe — Setting List
GREECE
Manuals:
Formula Pro Advanced: Greek
Formula Pro Advanced: English
Instant Warmer: Greek
Instant Warmer: English
Safe + Smart Bottle Warmer: Greek
Safe + Smart Bottle Warmer: English
Food Maker Deluxe: Greek
Food Maker Deluxe: English
Formula Settings:
Europe — Setting List
HUNGARY
Manuals:
Formula Pro Advanced: English
Food Maker Deluxe: English
Customer Service:
info@taticoolshop.ro
Formula Settings:
Europe — Setting List
ICELAND
Manuals:
Formula Pro Advanced: English
Food Maker Deluxe: English
Customer Service:
info@babybrezza.is
Formula Settings:
Europe — Setting List
ITALY

![]()

Manuals:
Formula Pro Advanced: Italian
Formula Pro Advanced: English
Formula Pro Advanced Mini: Italian
Formula Pro Mini: English
Sterilizer Dryer Advanced: Italian
Steriliser Dryer Advanced: English
Instant Warmer: Italian
Instant Warmer: English
Safe + Smart Bottle Warmer: Italian
Safe + Smart Bottle Warmer: English
Food Maker Deluxe: Italian
Food Maker Deluxe: English
Customer Service:
info@minime.si
Formula Settings:
Europe — Setting List
KAZAKHSTAN
Manuals:
Formula Pro Advanced: Russian
Formula Pro Advanced: English
Food Maker Deluxe: Russian
Food Maker Deluxe: English
Customer Service:
contact@gamin-tout-terrain.com
Formula Settings:
Europe — Setting List
LATVIA
Manuals:
Formula Pro Advanced: Latvian
Formula Pro Advanced: Russian
Formula Pro Advanced: English
Food Maker Deluxe: Latvian
Food Maker Deluxe: Russian
Food Maker Deluxe: English
Customer Service:
info@progressio.ee
Formula Settings:
Europe — Setting List
LITHUANIA
Manuals:
Formula Pro Advanced: Lithuanian
Formula Pro Advanced: English
Food Maker Deluxe: Lithuanian
Food Maker Deluxe: English
Customer Service:
info@progressio.ee
Formula Settings:
Europe — Setting List
LUXEMBURG
Manuals:
Formula Pro Advanced: English
Food Maker Deluxe: English
Customer Service:
contact@gamin-tout-terrain.com
Formula Settings:
Europe — Setting List
NETHERLANDS
Manuals:
Formula Pro Advanced: Dutch
Formula Pro Advanced: English
Instant Warmer: Dutch
Instant Warmer: English
Food Maker Deluxe: Dutch
Food Maker Deluxe: English
Customer Service:
contact@gamin-tout-terrain.com
Formula Settings:
Europe — Setting List
NORWAY


Manuals:
Formula Pro Advanced: Norwegian
Formula Pro Advanced: English
Instant Warmer: Norwegian
Instant Warmer: English
Safe & Smart Bottle Warmer: Norwegian
Safe + Smart Bottle Warmer: English
Food Maker Deluxe: Norwegian
Food Maker Deluxe: English
Customer Service:
kontakt@ibpscandinavia.se
Formula Settings:
Europe — Setting List
PORTUGAL
Manuals:
Formula Pro Advanced: English
Food Maker Deluxe: English
Customer Service:
contact@gamin-tout-terrain.com
Formula Settings:
Europe — Setting List
ROMANIA
Manuals:
Formula Pro Advanced: Romanian
Formula Pro Advanced: English
Food Maker Deluxe: Romanian
Food Maker Deluxe: English
Customer Service:
office@taticoolshop.ro
Formula Settings:
Europe — Setting List
RUSSIA
Manuals:
Formula Pro Advanced: Russian
Formula Pro Advanced: English
Food Maker Deluxe: Russian
Food Maker Deluxe: English
Customer Service:
contact@gamin-tout-terrain.com
Formula Settings:
Europe — Setting List
SERBIA
Manuals:
Formula Pro Advanced: Serbian
Formula Pro Advanced: English
Food Maker Deluxe: English
Customer Service:
office@babycare-srbija.com
Formula Settings:
Europe — Setting List
SLOVAKIA
Manuals:
Formula Pro Advanced: English
Food Maker Deluxe: English
Customer Service:
info@babybrezza.sk
Formula Settings:
Europe — Setting List
SLOVENIA
Manuals:
Formula Pro Advanced: Slovenian
Formula Pro Advanced: English
Food Maker Deluxe: Slovenian
Food Maker Deluxe: English
Customer Service:
info@minime.si
Formula Settings:
Europe — Setting List
SPAIN
Manuals:
Formula Pro Advanced: Spanish
Formula Pro Advanced: English
Safe + Smart Warmer: Spanish
Safe + Smart Bottle Warmer: English
Instant Warmer: Spanish
Instant Warmer: English
Food Maker Deluxe: Spain
Food Maker Deluxe: English
Customer Service:
contact@gamin-tout-terrain.com
Formula Settings:
Europe — Setting List
SWEDEN
Manuals:
Formula Pro Advanced: Swedish
Formula Pro Advanced: English
Instant Warmer: Swedish
Instant Warmer: English
Safe + Smart Bottle Warmer: Swedish
Safe + Smart Bottle Warmer: English
Food Maker Deluxe: Swedish
Food Maker Deluxe: English
Customer Service:
kontakt@ibpscandinavia.se
Formula Settings:
Europe — Setting List
SWITZERLAND
Manuals:
Formula Pro Advanced: German
Formula Pro Advanced: French
Formula Pro Advanced: Italian
Formula Pro Advanced: English
Food Maker Deluxe: German
Food Maker Deluxe: French
Food Maker Deluxe: Italian
Food Maker Deluxe: English
Sterilizer Dryer Advanced: Italian
Steriliser Dryer Advanced: English
Safe & Smart Bottle Warmer: German
Safe & Smart Bottle Warmer: English
Bottle & Breastmilk Warmer: English
Customer Service:
mail@luna-swiss.ch
Formula Settings:
Europe — Setting List
TURKEY
Manuals:
Formula Pro Advanced: Turkish
Customer Service:
info@babybrezzaturkey.com
UKRAINE
Manuals:
Formula Pro Advanced: English
Food Maker Deluxe: English
Customer Service:
newlife2011@ukr.net
Formula Settings:
Europe — Setting List
Baby Brezza Formula Pro® Advanced — это инновационный прибор для приготовления детских смесей, предназначенный для того, чтобы помочь родителям сэкономить время и уменьшить разочарование, когда дело доходит до кормления их детей. Этот уникальный продукт оснащен расширенными функциями, которые позволяют легко приготовить бутылочку со смесью за считанные секунды. Однако перед использованием Formula Pro® Advanced важно прочитать и понять инструкции, содержащиеся в руководстве пользователя. Руководство содержит важную информацию о том, как безопасно и эффективно эксплуатировать машину. В нем также содержатся рекомендации по очистке и обслуживанию устройства для обеспечения его оптимальной работы. Руководство содержит важные меры предосторожности, которые должны соблюдать пользователи, чтобы предотвратить поражение электрическим током, травмы или повреждение машины. Кроме того, в руководстве приведены пошаговые инструкции по установке, разборке и сборке Formula Pro® Advanced. Это руководство является важным ресурсом для родителей, которые хотят безопасно и эффективно использовать усовершенствованный дозатор Baby Brezza Formula Pro®.
Baby Brezza Формула Про Усовершенствованный Диспенсер

ПОЗДРАВЛЕНИЯ! Благодарим вас за покупку корма Baby Brezza Formula Pro® Advanced. При этом вы выбрали самый уникальный и инновационный производитель детских смесей по запросу на рынке. В Baby Brezza мы разработали Formula Pro® Advanced, чтобы помочь родителям сэкономить время и нервы, когда дело доходит до кормления их детей.
ВАЖНЫЕ МЕРЫ БЕЗОПАСНОСТИ
- Перед использованием прочтите все инструкции.
- Не касайтесь горячих поверхностей.
- Во избежание поражения электрическим током и травмирования людей не погружайте шнур, вилку или прибор в воду или другую жидкость.
- Это устройство не предназначено для использования людьми (включая детей) с ограниченными физическими, сенсорными или умственными способностями или с недостатком опыта и знаний, если они не находятся под тщательным наблюдением и не проинструктированы по использованию устройства лицом, ответственным за их безопасность. Когда какой-либо прибор используется детьми или находится рядом с ними, необходим тщательный присмотр. Следите за детьми, чтобы они не играли с прибором.
- Выключайте и отсоединяйте прибор от розетки, когда он не используется, перед сборкой или разборкой деталей и перед очисткой. Чтобы отключить, возьмитесь за вилку и вытащите ее из розетки. Никогда не тяните за шнур питания.
- Запрещается использовать какой-либо прибор с поврежденным шнуром или вилкой или после того, как прибор неисправен, упал или был поврежден каким-либо образом. Свяжитесь с производителем по номеру телефона службы поддержки клиентов для получения информации о проверке, ремонте или настройке.
- Использование насадок, не рекомендованных производителем прибора, может привести к возгоранию, поражению электрическим током или травме.
- Используйте на ровной поверхности и убедитесь, что под устройством нет мусора, а резиновые колеса касаются поверхности.
- Только бытовое использование. Не используйте на открытом воздухе.
- Следите за тем, чтобы шнур не свешивался с края стола или прилавка или касался горячих поверхностей.
- Не ставьте на горячую газовую или электрическую горелку или рядом с ней, а также в нагретую духовку.
- Не используйте прибор не по назначению.
- Не пытайтесь использовать машину без воды в резервуаре для воды.
- Этот прибор имеет поляризованную вилку (одна розетка шире другой). Чтобы снизить риск поражения электрическим током, эта вилка предназначена только для одностороннего подключения к поляризованной розетке. Если вилка не полностью входит в розетку, переверните вилку. Если он по-прежнему не подходит, обратитесь к квалифицированному электрику. Не пытайтесь каким-либо образом модифицировать вилку.
- Короткий шнур питания предназначен для снижения риска запутаться в более длинном шнуре или споткнуться о него. Доступны более длинные съемные шнуры питания или удлинители, которые можно использовать, если соблюдать осторожность при их использовании. Если вы используете машину с удлинителем, убедитесь, что шнур соответствует электрическим параметрам машины. Удлинительный шнур должен располагаться так, чтобы он не свисал со столешницы или столешницы, где за него могут потянуть дети или случайно споткнуться.
- Перед подачей убедитесь, что смесь смеси имеет безопасную для ребенка температуру.
- Избегайте контакта с движущимися частями. Никогда не снимайте емкость для порошка, крышку емкости для порошка, воронку или резервуар для воды во время работы машины.
- Не разбирайте и не открывайте основание машины. При использовании электроприборов необходимо соблюдать основные меры предосторожности, в том числе следующие:
ПРЕДУПРЕЖДЕНИЕ:
- Настройка и очистка имеют решающее значение для работы вашего Formula Pro® Advanced. Пожалуйста, следуйте всем инструкциям должным образом.
- Всегда используйте дистиллированную или кипяченую воду, охлажденную до комнатной температуры.
- Никогда не наливайте кипящую/горячую воду в резервуар для воды.
- Некипяченая водопроводная вода и/или нестерилизованные детские бутылочки потенциально могут привести к неблагоприятным последствиям для здоровья вашего ребенка. Используйте очищенную воду, подходящую для приготовления детских смесей.
- Готовьте только одну бутылочку за раз, кормите немедленно и тщательно следуйте всем инструкциям.
- Не храните оставшуюся смесь формулы. Если ваш ребенок родился недоношенным, с низким весом при рождении или с иммунодефицитом, проконсультируйтесь с педиатром перед использованием этого аппарата.
Внимание: пока ничего не разбирайте. Выполните эти шаги, прежде чем делать что-либо еще.
- Поместите Formula Pro® Advanced на прилавок или другую ровную поверхность и поверните его задней стороной к себе.
Извлеките резервуар для воды из задней части машины, вымойте его теплой мыльной водой и тщательно ополосните, затем высушите. - Наполните резервуар для воды бутилированной водой, подходящей для приготовления детской смеси, или кипяченой водой, охлажденной до комнатной температуры.
- Установите резервуар для воды обратно на основание, поверните машину лицевой стороной к себе, а затем подключите ее к сети. Машина включится, и ЖК-экран загорится.
- Устройство подаст один звуковой сигнал, чтобы сообщить вам, что оно включено. Вы также увидите, как включается ЖК-дисплей. Если ЖК-экран не загорается при подключении к сети, нажмите кнопку питания, чтобы включить устройство.
Теперь давайте промоем внутреннюю часть машины.
- Возьмите чашку или бутылку объемом более 10 унций и поместите ее под воронку.
- Несколько раз нажмите кнопку «унция» на панели управления, пока на ЖК-экране не появится надпись «10 унций».
- Теперь нажмите кнопку «Только вода» на панели управления. Formula Pro® Advanced выдает 10 унций воды.
- Утилизируйте разлитую воду или используйте ее для полива растений.
Теперь вы можете выключить машину и отключить ее от сети, снять все детали, показанные на следующей странице, и настроить новую Формулу Pro® Advanced. Ознакомьтесь с названиями деталей на следующей странице, затем приступайте к настройке на следующих страницах.
Formula Pro®Advanced – детали
Разберите и промойте все детали (кроме основания) и тщательно высушите. Соберите, как показано на стр. 5 и 6.
Совет по разборке:
Инструкции по установке
Видео по настройке и очистке доступны на babybrezza.com/video.
- После мытья этих деталей вручную убедитесь, что они полностью высохли перед сборкой.
- Соберите воронку и крышку воронки. Затем вставьте узел воронки в отделение для воронки, сдвинув его вверх, а затем внутрь.

- Поместите ось на основание, как показано на рисунке.
- Теперь поместите контейнер с порошком на основание так, чтобы напечатанная маркировка была обращена к вам.

- Поместите мерное колесо в емкость для порошка, надев его на ось плоской стороной вниз. Убедитесь, что отверстия в измерительном колесе находятся в том же положении, что и показано выше.
-
- Поместите передний край фиксирующей крышки в углубление внутри/передней части контейнера для порошка, ПОД ЯЗЧИКОМ.
- Совместите отверстие в стопорной крышке поверх оси. Он не будет лежать абсолютно ровно.

- Убедитесь, что стопорная крышка и измерительное колесо выглядят так, как показано на рисунке.
- Теперь поместите мешалку на ось и сильно надавите, пока не услышите щелчок. Убедитесь, что мешалка защелкнулась на месте и не поднимается легко.
Теперь вы готовы добавить порошок и сделать свою первую бутылку.


Подготовка первой бутылки
- Аккуратно засыпьте порошковую смесь в контейнер для порошка. Вытрите любой пролитый порошок формулы.
- Убедитесь, что порошок находится между отметками MIN и MAX на контейнере для порошка.

- Поместите крышку контейнера для порошка на контейнер для порошка и поверните по часовой стрелке до упора. Это активирует защитный выключатель и зафиксирует контейнер для порошка на основании. Чтобы снять контейнер для порошка, поверните крышку против часовой стрелки.
- Установите поддон для сбора капель на основание, чтобы он соответствовал высоте вашей бутылки. Отрегулируйте его так, чтобы горлышко бутылки было как можно ближе к воронке. Плотно прижмите поддон к основанию, чтобы установить его на место. Теперь давайте реview элементы управления на следующей странице.

Formula Pro®Advanced – управление и работа

Чтобы удалить всю воду из машины, нажмите и удерживайте кнопку «Только вода» в течение 5 секунд. Вода будет поступать непрерывно, пока машина не опустеет.
Символы индикатора температуры
Параметры порошка и воды

Предупреждающие символы
Formula Pro® Advanced не будет работать, если на ЖК-дисплее горит любой из этих символов.
Убедитесь, что ваш Formula Pro® Advanced подключен к сети и включен.

- Нажимайте кнопку «настройка порошка» несколько раз, чтобы выбрать настройку от 1 до 10. Очень важно, чтобы вы выбрали правильную настройку для марки и типа вашей смеси. Перейдите на сайт babybrezza.com/FPA, чтобы найти правильную настройку для порошковой смеси.
- Нажимайте кнопку «унция» несколько раз, чтобы выбрать унции воды, которые вы хотите раздать. Размер унции указывает только на объем воды. Он не включает объем порошка, добавляемого при смешивании.

- Нажмите кнопку «temp», чтобы выбрать температуру.
= Чуть теплее, чем температура тела
= Температура тела
= Комнатная температура
Индикатор температуры будет мигать при нагревании и будет гореть постоянно, когда будет достигнута заданная температура. - Нажмите кнопку «Пуск», чтобы дозировать смесь. Formula pro запомнит настройку и размер унции, даже если он отключен от сети или
выключено. Вам не нужно выбирать настройку порошка каждый раз, когда вы делаете бутылку. Вы всегда можете изменить размер унции или настройку порошка, снова нажав кнопки.
- Formula Pro® Advanced будет дозировать порошок и воду вместе, а затем автоматически остановится, когда дозирование будет завершено. Некоторое комкование может произойти с некоторой формулой
порошки по своей природе трудно смешиваются с водой. - ПОЖАЛУЙСТА, ОБРАТИТЕ ВНИМАНИЕ: Уровень будет казаться выше, чем выбранный размер унции, из-за добавленного объема порошка и/или различий в маркировке бутылок.
Пример: 4 унции воды плюс объем порошка составляют примерно 4.5-4.75 унции в зависимости от типа порошка вашей формулы.
- Проверьте наличие комков и при необходимости встряхните или перемешайте бутылку. Проверьте температуру и покормите ребенка. Досыпьте порошок, когда станут видны плечи мешалки. Это очень важно для точного измерения формулы.


Инструкции по легкой ежедневной очистке
ЧРЕЗВЫЧАЙНО ВАЖНО очищать воронку после каждых 4 изготовленных бутылок. Это обеспечит точное дозирование Formula Pro® Advanced. Всегда убедитесь, что воронка и крышка воронки ПОЛНОСТЬЮ СУХИЕ перед повторной сборкой.
- Снимите воронку и крышку воронки, потянув наружу и вниз.
- Промойте воронку и крышку воронки теплой водой с мылом и хорошо ополосните. Полностью высушите перед повторной установкой.

- Протрите отверстие дозатора порошка на нижней стороне контейнера для порошка, используя сухое бумажное полотенце или мягкую сухую ткань.


Предложение облегчить уборку
Чтобы сделать ежедневную уборку еще проще, вы можете приобрести дополнительную воронку и крышку на воронку. BabyBrezza.com Затем вы можете заменить запасную воронку на воронку, которую необходимо очистить. ПРИМЕЧАНИЕ: вам все равно нужно будет протереть отверстие дозатора порошка, как показано на шаге 3.
ПОЖАЛУЙСТА, ОБРАТИТЕ ВНИМАНИЕ: Вам не нужно снимать контейнер для порошка или детали контейнера для порошка для ежедневной очистки.
Инструкции по ежемесячной очистке
Раз в месяц проводите тщательную чистку Formula Pro® Advanced. Пожалуйста, посмотрите видео по настройке и очистке на babybrezza.com/видео.

- Вымойте вручную все детали, показанные выше, в теплой мыльной воде, хорошо ополосните и тщательно высушите.
- Вымойте резервуар для воды вручную теплой водой с мылом, хорошо ополосните и тщательно высушите.
Ежемесячные инструкции по удалению накипи
Вы можете оставить порошок формулы в резервуаре для порошка во время процесса удаления накипи.
Чтобы предотвратить образование минерального налета на водонагревателе внутри вашего Formula Pro® Advanced, выполните следующие простые действия:
- Снимите резервуар для воды, опорожните его и наполните 20 унциями дистиллированного уксуса и 20 унциями очищенной воды.
- Поместите резервуар для воды на основание машины и поставьте чашку объемом более 10 унций под воронку.
- Выберите «10 унций» с помощью кнопки «Унция», затем нажмите кнопку «Только вода» для дозирования.
- Опорожните чашку, поставьте обратно под воронку, затем снова нажмите кнопку «Только вода», чтобы вылить еще 10 унций.
- Теперь отключите машину от сети, снимите резервуар для воды и опорожните его. Оставьте машину на 4 часа.
- Вымойте, ополосните и наполните резервуар для воды до отметки max очищенной водой, затем поместите его обратно на основание.
- Включите машину, поставьте чашку, чтобы набрать 10 унций воды, и используйте кнопку «Только вода», чтобы запустить цикл на 10 унций. Утилизируйте воду, налитую в чашку, а затем повторите этот шаг, чтобы пропустить весь резервуар очищенной воды через машину. Когда загорится индикатор «Низкий уровень воды», промывка окончена.
- Заполните резервуар для воды очищенной водой и вернитесь к обычному использованию.
Инструкции по долгосрочному хранению
ЧРЕЗВЫЧАЙНО ВАЖНО очистить машину и удалить все остатки порошковой смеси перед хранением. Если вы собираетесь хранить Formula Pro® Advanced для последующего использования или не будете использовать его какое-то время, следуйте приведенным ниже инструкциям:
- Снимите с основания детали контейнера для порошка, воронку, крышку воронки, поддон для сбора капель и резервуар для воды.
- Протрите основание чистойamp тряпкой и обязательно удалите все остатки смеси. Хорошо просушите основу.
- Опорожните контейнер для порошка, промойте все детали контейнера для порошка, тщательно высушите, соберите и снова установите на основание.
- Следуйте Ежемесячным инструкциям по удалению накипи на стр. 12, только шаги 1–7. Не снимайте и не наполняйте резервуар для воды после шага 7.
- Теперь поместите чашку, чтобы набрать 10 унций воды под воронку, затем нажмите и удерживайте кнопку «Только вода» в течение 5 секунд. Вода будет поступать непрерывно, пока машина не будет полностью опорожнена, а затем автоматически остановится.
- Отключите машину от сети, снимите воронку, крышку воронки и резервуар для воды, тщательно высушите их и снова установите на машину.
- Теперь ваша машина готова к хранению. Упакуйте машину в коробку или поместите в сумку, чтобы на ней не было пыли.
Коды ошибок
В маловероятном случае неисправности электрического компонента или прерывания работы на ЖК-экране будут отображаться следующие коды. Нажатие и удержание кнопки питания удалит код, и работа должна вернуться в нормальный режим. Если код возвращается или его невозможно сбросить, обратитесь в службу поддержки клиентов Baby Brezza.
УСТРАНЕНИЕ НЕПОЛАДОК
| состояние | Возможная причина | Возможное средство |
| Машина не заводится. | Машина отключена от сети. | Убедитесь, что вилка надежно вставлена в розетку. |
| Машина не включена. | Нажмите кнопку питания, чтобы включить машину. | |
| Воронка снята или вставлена не полностью. | Вставьте воронку или надавите на переднюю часть воронки, пока она не окажется на одном уровне с машиной. | |
| Уровень воды ниже линии «MIN». | Добавьте больше воды в резервуар для воды. | |
| Контейнер для порошка снят или установлен не полностью. | Убедитесь, что емкость для порошка правильно установлена на основании. | |
| Крышка контейнера для порошка закрыта не полностью. | Поверните крышку контейнера для порошка по часовой стрелке, чтобы полностью закрыть. Подробности см. на стр. 7, шаг 3. | |
| Крышка контейнера для порошка находится задом наперед. | Убедитесь, что язычок на краю крышки контейнера для порошка обращен к задней части машины и зацеплен с защитным выключателем. Подробности см. на стр. 7, шаг 3. | |
| Вода в резервуаре для воды слишком холодная. (Символ температуры на ЖК-дисплее мигает) | Подождите, пока вода нагреется. | |
| Вода в резервуаре для воды слишком горячая.
(Символ температуры на ЖК-дисплее мигает) |
Подождите, пока вода остынет. | |
| Температура выдаваемой смеси слишком низкая. | Вода еще не нагрета до нужной температуры. | Подождите, пока нагреватель нагреет воду. Убедитесь, что выбранный символ температуры горит постоянно, а не мигает. |
| Воронка не полностью помещается в отделение для воронки. | Крышка воронки не установлена прямо на воронке и/или не полностью опущена. | Совместите язычок на передней части крышки воронки с пазом в воронке и полностью нажмите на крышку воронки. |
| Горит символ чистой воронки, Formula Pro подает звуковой сигнал при нажатии кнопки запуска. | Воронка и отверстие на нижней стороне контейнера для порошка требуют очистки. | Выполните шаги на стр. 7, чтобы очистить и высушить воронку и отверстие на нижней стороне контейнера для порошка. |
| Высыпано слишком много порошка. | Запорная крышка установлена неправильно. | Проверьте фиксирующую крышку и убедитесь, что передний край зафиксирован под выступом в контейнере для порошка.
Подробности см. на стр. 4, шаг 6. |
| Выбрана неправильная настройка порошка. | Убедитесь, что вы выбрали правильный номер настройки для вашего типа порошка. Для получения подробной информации перейдите по ссылке: babybrezza.com/settings | |
| Недостаточно дозированного порошка. | Уровень порошка в контейнере для порошка слишком низкий. | Наполните контейнер для порошка большим количеством порошка. |
| Машину плохо почистили. | Разберите, вымойте вручную, полностью высушите все детали и соберите обратно. | |
| Силиконовый скребок установлен неправильно. | Убедитесь, что силиконовый скребок установлен правильно. | |
| Выбрана неправильная настройка порошка. | Перейдите на страницу: babybrezza.com/fpa, чтобы подтвердить настройки марки и типа присыпки, затем выберите правильную настройку с помощью кнопки «Настройка присыпки» на панели управления. | |
| Не сливает воду. | Резервуар для воды установлен не полностью. | Полностью опустите резервуар для воды на базу. |
| Скопления порошка на крышке воронки и нижней стороне контейнера для порошка. | Частое использование без очистки нижней части контейнера для порошка. Подробности см. на стр. 7, шаг 3. | Очищайте воронку, крышку воронки и нижнюю часть контейнера для порошка каждые 4 флакона. |
Если вы не можете устранить проблему с помощью приведенной выше таблицы устранения неполадок, не возвращайте Formula Pro® Advanced в магазин. Пожалуйста, свяжитесь со службой поддержки клиентов Baby Brezza по телефону 1-888-396-6552 или посетите babybrezza.com для видео.
ТЕХНИЧЕСКИЕ ХАРАКТЕРИСТИКИ
|
наименование товара |
Усовершенствованный дозатор Baby Brezza Formula Pro® |
|
Особенности |
Производитель детских смесей по требованию |
|
Применение |
Для приготовления бутылочки со смесью за считанные секунды |
|
Важные гарантии |
|
|
Настройка и очистка |
Следуйте всем инструкциям должным образом. Всегда используйте дистиллированную или кипяченую воду, охлажденную до комнатной температуры. Видео по установке и очистке доступны на странице babybrezza.com/video. |
|
Запчасти |
Разберите и промойте все детали (кроме основания) и тщательно высушите. Соберите, как показано на стр. 5 и |
|
Управление и эксплуатация |
|
|
Коды ошибок |
FAQS
Какие коды ошибок могут появляться на Formula Pro Advanced?
Некоторые коды ошибок, которые могут появиться на Formula Pro Advanced, включают E1, E2, E3, E4, E5, E6 и E7.
Как чистить Formula Pro Advanced?
Чтобы очистить Formula Pro Advanced, снимите воронку и крышку воронки, потянув и опустив ее, разберите и промойте все части (кроме основания) и тщательно высушите.
Как мне подготовить свою первую бутылку с Formula Pro Advanced?
Чтобы приготовить первую бутылочку с помощью Formula Pro Advanced, осторожно насыпьте порошок в контейнер для порошка, убедитесь, что порошок заполнен между отметками MIN и MAX на контейнере для порошка, поместите крышку контейнера для порошка на контейнер для порошка и поверните по часовой стрелке. пока он не остановится, установите поддон для сбора капель на основание, чтобы он соответствовал высоте вашей бутылочки, отрегулируйте его так, чтобы горлышко бутылочки находилось как можно ближе к воронке, и нажмите кнопку запуска, чтобы дозировать смесь.
Могу ли я использовать некипяченую воду из-под крана в Formula Pro Advanced?
Нет, некипяченая водопроводная вода и/или нестерилизованные детские бутылочки потенциально могут привести к неблагоприятным последствиям для здоровья вашего ребенка. Используйте очищенную воду, подходящую для приготовления детских смесей.
Какие важные меры предосторожности необходимо соблюдать при использовании Formula Pro Advanced?
Некоторые важные меры предосторожности, которые необходимо соблюдать при использовании Formula Pro Advanced, включают в себя: прочтите все инструкции перед использованием, не прикасайтесь к горячим поверхностям, не погружайте шнур, вилку или прибор в воду или другую жидкость, а также выключайте и отсоединяйте прибор от розетки, когда в использовании.
Что такое продвинутая формула Baby Brezza Formula Pro?
Baby Brezza Formula Pro Advanced — это устройство для приготовления детских смесей по требованию, разработанное, чтобы помочь родителям сэкономить время и уменьшить разочарование, когда дело доходит до кормления их детей.
Документы / Ресурсы
Рекомендации
FAILURE TO SET UP THE FORMULA PRO® CORRECTLY WILL RESULT IN IMPROPER FORMULA DISPENSING.
READ THE INSTRUCTION MANUAL and CAREFULLY follow the step-by-step directions for cleaning, set up and use.
Important Safeguards
When using electrical appliances, basic safety precautions should always be followed, including the following:
- Read all instructions before using.
- Do not touch hot surfaces.
- To protect against electric shock and injury to persons do not immerse cord, plug, water tank or appliance in water or other liquid.
- Close supervision is necessary when any appliance is used by or near children.
- Unplug from outlet when not in use and before cleaning. Allow to cool before inserting or removing parts, and before cleaning the appliance.
- Do not operate this appliance with a damaged cord or plug. If the appliance malfunctions or has been damaged in any manner, return appliance to the nearest authorized service facility for examination, repair or adjustment.
- The use of accessory attachments not recommended by the appliance manufacturer may cause fire, electric shock or injury.
- Use on level surface and be sure there is no debris under the unit and the rubber pads are touching the surface.
- Household use only. Do not use outdoors.
- Do not let cord hang over edge of table or counter, or touch hot surfaces.
- Do not place on or near hot gas or electric burner, or in a heated oven.
- Do not use appliance for other than intended use.
- Do not attempt to use the machine without water in the water tank.
- This appliance has a polarized plug (one blade wider than the other). To reduce risk of electric shock, this plug is intended to fit into a polarized outlet only one way. If the plug does not fit fully into the outlet, reverse the plug. If it still does not fit, contact a qualified electrician. Do not attempt to modify the plug in any way.
- Make sure machine is turned off before unplugging.
- A short power-supply cord is provided to reduce risks of becoming entangled in or tripping over a longer cord. Longer detachable power-supply cords or extension cords are available and may be used if care is exercised in their use. If using the machine with an extension cord, make sure the cord is the proper electrical rating for the machine. The extension cord should be arranged so that it does wash before not drape over countertop or tabletop where it can be pulled on by children or tripped over unintentionally.
- Before serving make sure formula mixture is at safe temperature for baby.
- Avoid contact with moving parts. Never remove powder container, powder container lid, funnel or water tank while machine is in operation.
- Do not disassemble
For infants less than 6 months old, always use bottled water suitable for infant formula preparation. Tap wash before water and/or unsterilized baby bottles can potentially lead to adverse effects for the health of your baby. Only prepare one bottle at a time, feed immediately and follow all instructions carefully. Do not keep leftover formula mix. Always hold baby while feeding. Leaving baby unattended may cause choking.
TECHNICAL DATA
Supply voltage: 120V ~ 60Hz
Model: FRP0045
Current: 2.5A
Heater Power: 250W
Motor Power: 20W
Save these instructions
Formula Pro® Controls & Indicator Lights
Formula Pro Components
Powder Container Parts
wash all before use
Powder Container set up
Wash: Funnel, Funnel Cover, Inside of Water Tank, and all Powder Container parts.
After washing, make sure all Powder Container parts are COMPLETELY DRY before assembly.
Set up the Measuring Wheel to work with your powder type.
- Select Measuring Wheel setting 1 — 10 by using the chart on the back cover of this booklet. Numbers on Lower Measuring Wheel
-
2a. Example: Assembled Measuring Wheel set to #5
Press upper & lower halves of Measuring Wheel together so your powder’s setting number shows through window on the Upper Measuring Wheel. You have now assembled your Measuring Wheel.
Set up the Powder Container and parts.
- Place Powder Container on Base with «MIN» & «MAX» lines facing front.
- Place assembled Measuring Wheel In Powder Container.
- ⠀
1. Place the front edge of Locking Cover under the tab in the Powder Container.
2. Press down on back edge to lock in place.
5a. Locking Cover should look like this when inserted properly.
- Place Stirring Wheel In Powder Container, align with axle and push down so it touches the Locking Cover.
Don’t add powder yet. Follow the next steps to run an internal cleaning cycle BEFORE using the Formula Pro® with powder.
Measuring Wheel Setting Selection
Find your formula type below and set the measuring wheel to the corresponding number.
| Formula Brand/Type | Setting # |
| Similac | |
| Advance® Stage 1 | 5 |
| Advance® Stage 2 | 4 |
| Advance® Organic | 7 |
| Alimentum® | 5 |
| Go & Grow® | 7 |
| Go & Grow® Soy | 5 |
| NeoSure® | 9 |
| Soy | 6 |
| Sensitive® for fussiness & gas | 7 |
| Sensitive® for Spit-up | 6 |
| Supplementation | 5 |
| Total Comfort™ | 5 |
| PM 60/40 Low Iron | 7 |
| Abbott Elecare® infant | 7 |
| Gerber® | |
| Good Start® Gentle | 5 |
| Good Start® Gentle for Supplementing | 5 |
| Good Start® Nourish | 9 |
| Good Start® Protect | 5 |
| Good Start® Soy | 7 |
| Good Start® Soothe | 7 |
| Graduates® Gentle | 6 |
| Graduates® Protect | 6 |
| Graduates® Soothe | 9 |
| Graduates® Soy | 7 |
| Enfanmil ™ | |
| A.R.® | 5 |
| EnfaCare® | 7 |
| Gentlease® | 5 |
| Nutrimigen™ | 9 |
| Pregestimil™ | 4 |
| Premium infant | 4 |
| Premium Newborn | 3 |
| Prosobee® | 5 |
| Reguline® | 4 |
| For Supplementing | 5 |
| Enfagrow® Gentlease® toddler | 7 |
| Enfagrow® Premium older toddler | 8 |
| Enfagrow® Soy toddler | 7 |
| Earth’s Best Organic® | |
| Infant | 7 |
| Sensitivity® | 7 |
| Soy | 7 |
| Baby’s Only Organic® | |
| Dairy | 6 |
| Dairy DHA & ARA | 7 |
| Soy | 6 |
| LactoRelief™ | 6 |
| Store Brand Formula | |
| For the following store brands, use the insertindicated for the type of formula in the chart below |
|
| 365™, America’s Choice™, BabiesRUs®, Baby basics®, Bear Essentials, Berkley & Jensen® Baby, Bright Beginnings®, Comforts™, CVS®, Giant®, Giant Eagle Baby, H-E-B Baby™, Home 360º ™ Baby, Kirkland Signature™, Kuddles®, Little Ones™, Meijer™, Mom to Mom™, Mother’s Choice, Parent’s Choice™, President’s Choice®, Rite Aid®, Simply Right™, Top Care®, Up & Up®, Vermont Organics™, Wegmans, Walgreens Well Beginnings™ |
|
| Advantage | 6 |
| Added Rice | 9 |
| Gentle | 6 |
| Infant with Iron | 5 |
| Newborn | 6 |
| Organic Milk Based | 8 |
| Organic Soy Based | 7 |
| Premium | 6 |
| Sensitivity | 8 |
| Soy | 10 |
| Tender | 8 |
| Toddler & Older infant | 8 |
Occasional clumping may occur due to the nature and composition of powdered formula. Always check for clumps and shake or stir the bottle if necessary.
If you do not see your formula brand or type on this list, check babybrezza.com for updates or contact customer service at 1-888-396-6552 for assistance.
Clean internal parts — before first use — without powder
After setting up the powder container, run a cleaning cycle to rinse internal parts.
- Place Powder Container Lid on Powder Container as shown.
Don’t add powder. Make sure tab is in the back - Turn Powder Container Lid Clockwise to lock into place.
- Plug in machine and turn power switch to on position.
- Fill water tank to MAX line with distilled water.
Don’t add powder. - Place 10 ounce or larger container to catch water.
- The Formula Pro® will stop after dispensing 10oz of water.
Dispose of the water captured in the container.
Choose 10 oz. size by pressing ounce button 4 times.
Press start to begin rinsing.
Your Formula Pro® is now ready to use with powder.
Always use a clean and sterilized bottle, nipple or other feeding equipment.
Wash and dry hands before handling sterilized bottles.
Make each bottle as needed, and do not store mixed formula for later use.
Bottle Preparation
Follow the steps on these pages to prepare bottles with the Formula Pro®
- Fill water to MAX line
- Fill powder container with powder and close Lid
Pour powder loosely and evenly into Powder Container. Never fill past the MAX line.
Never pack powder in the Powder Container or overfill.
Powder can be spread evenly with the 3 arms on the Powder Container Lid before closing.
Temperature Indicator Lights
About water temperature
The heater in the Water Tank will warm the water and keep it warm as long as the machine is powered on.
If you refill the Water Tank with cool or room temperature water and need to use the machine right away, the machine can be used while water is heating (flashing yellow light).
If you run the machine with cool or room temperature water, before the water is warm and ready, always make sure formula is mixed properly and check for clumps.
For quickest warming time, always fill the water tank with room temperature or cool water. Flashing green & yellow lights mean the water poured into in the Water Tank is too hot or too cold. The machine will not work while the green & yellow lights flash. If you don’t want to wait long for the water to heat, do not fill with water stored in the refrigerator
Never fill Water Tank with hot water.
If you boil water before using it in the machine, let the water cool to body or room temperature before pouring it into the Water Tank.
Bottle Preparation Continued
- Select correct height for Drip Tray based on bottle height. Lift up and pull out to remove. Push in and down to install.
Adjust the drip tray so the bottle is as close to the Funnel outlet as possible. This will make sure no formula spills outside of the bottle. - Select bottle size by pressing the ounce button.
With each push, the amount will increase 2 ounces. - When desired ounce size is selected, press start to dispense formula.
- Machine will dispense formula into bottle and stop when done.
- Check level of mixed formula. Level will appear higher due to added powder volume and/or variance in bottle markings.
- Check for clumps and shake or stir the bottle if necessary. Test temperature and feed baby.
Never remove Water Tank, Funnel or Powder Container while machine is in operation.
Always hold the bottle when feeding baby. Never prop the bottle up and leave your baby to feed unsupervised.
After baby stops feeding from bottle, discard any leftover formula mixture.
Daily Cleaning
Unplug the appliance before cleaning. Do not use abrasive pads to clean the machine.
The Funnel, Funnel Cover and underside of Powder Container MUST BE CLEANED once per day (if machine is used daily).
Follow these steps to clean the Formula Pro® parts every day.
- Remove Funnel & Funnel Cover by pulling out and down.
- Remove Funnel Cover from Funnel by lifting up on Funnel Cover.
- Wash and rinse Funnel & Funnel Cover thoroughly.
Funnel and Funnel Cover are top rack dishwasher safe and are also safe for steam sterilization. - Wipe the hole the on underside of Powder Container.
With the Funnel removed and Powder Container attached to machine, wipe any dry formula powder from the hole on the underside of the Powder Container & Funnel Compartment in a circular motion with a DRY paper towel or DRY soft cloth.
Never use a wet or damp cloth to clean the Funnel Compartment or underside of Powder Container.
Always make sure the Funnel and Funnel Cover are completely DRY before placing in machine.
Monthly Cleaning
The Powder Container parts, Water tank and Base should be cleaned once a month.
- The Powder Container and Powder Container Parts should be cleaned once a month by emptying any remaining powder (powder can be saved for refill) and cleaned with mild detergent and soft cloth or sponge. Never place Powder Container in dishwasher.
- The Water Tank should be cleaned once a month with mild detergent and soft cloth or sponge. Rinse inside of Water Tank thoroughly before refilling with clean, purified water. Wipe the outside of the Water Tank with a damp clean cloth. Never immerse Water Tank or get the electronics in the base of the Water Tank wet. If the electronics in the base of the Water Tank get wet, allow to air dry thoroughly before placing back on base. Never place Water Tank in dishwasher.
- The machine Base should be wiped with a damp, soft cloth or sponge and dried immediately. Never submerge the base or plug in water or other liquids. Dry machine Base after cleaning.
ALWAYS FOLLOW INSTRUCTIONS AND NOTE EXPIRY DATE ON POWDER MANUFACTURER LABEL
User Tips
Always make sure powder level is above the top of the Stirring Wheel. You will know it’s time to refill the Powder Container when any of the four horizontal arms of the Stirring Wheel are visible through the powder.
Do not use the machine when the powder level is below the MIN line marked on the Powder Container.
To easily separate the Upper Measuring Wheel from the Lower Measuring Wheel, press the raised center area while holding the outside edge as shown in photo at right.
Do not remove the Water Tank from the base to refill. Simply lift the Water Tank Lid at the front and pour water in. Make sure to keep water above «MIN» line.
Refill Water Tank regularly with room temperature water and keep machine powered on. This way, the water will always be warm and ready to serve.
If the powder forms a cone shape mound when refilling the Powder Container, use the 3 arms on the bottom of the Powder Container Lid to gently level the powder before closing. Always keep the powder level below the MAX line and never pack powder in the Powder Container.
The Formula Pro can be used at any time during the water heating cycle, but not all powders mix well with cool or room temperature water. Always check for clumps & shake or stir the closed bottle gently to mix the powder completely with the water.
Troubleshooting
| Condition | Possible Cause | Remedy |
Machine will not start. |
Unit is unplugged. | Make sure the plug is securely inserted into the power outlet. |
| Unit is not turned on. | Turn switch on lower back of unit from off to on. | |
| Funnel is removed or not fully inserted. | Insert funnel or push front of funnel until flush with machine. | |
| Water Tank is removed or not fully seated. | Place water tank on base or push down all the way. | |
| Water level is below «MIN» line. | Add more water to water tank. | |
| Powder container is removed or not fully seated. | Place powder container on base or push down all the way. | |
| Powder container lid is not completely closed. | Turn Powder container lid clockwise to close completely. | |
| Powder container lid is on backwards. | Make sure tab on outer edge of Powder Container Lid is facing the back of the machine and engaged with safety switch. | |
| Water in Water Tank is too cold. ( Green & Yellow Temp LEDs Flashing) | Allow water to warm up or pour warmer water in Water Tank to raise temperature faster. | |
| Water in Water Tank is too hot. ( Green & Yellow Temp LEDs Flashing) | Allow water to cool down or pour cool water in Water Tank to lower temperature faster. | |
Temperature of dispensed formula is too cold. |
Water has not yet been heated to correct temperature. | Wait for heater to warm water in tank. Green LED in «temp» section of control panel will illuminate when water reaches correct temperature. |
Not enough powder dispensed. |
Powder level in powder container is too low. | Refill Powder Container with more powder. |
| Powder is stuck in powder measuring wheel. | Make sure silicone scraper is installed correctly. | |
| Measuring wheel is set to incorrect number for powder type. | Make sure the measuring wheel is set to the correct number for your powder type. See Back Cover. | |
Too much powder dispensed. |
Measuring wheel is set to incorrect number for powder type. | Make sure the measuring wheel is set to the correct number for your powder type. See Back Cover. |
| Locking cover is not locked under tab in powder container. | Check locking cover and make sure the edge is locked under the tab in the powder container. | |
Not dispensing water |
Water Tank not fully seated. | Push Water Tank down all the way on Base. |
Scaling on water tank heater plate. |
Mineral rich water used persistently. | Clean heater plate and use purified/distilled water. |
Powder build-up on funnel cover and underside of powder container. |
Frequent use without cleaning underside of powder container. | Clean funnel cover and powder container bottom frequently, every 5-6 bottles, or at least once a day. |
| Water Tank is full, red no water lightis on. |
Water Tank not fully seated. | Push Water Tank down all the way on Base. |
Funnel will not fit all the way in Funnel Compartment. |
Funnel Cover is not straight on funnel or not pushed down completely. | Align tab on front of Funnel Cover with notch in Funnel and push down Funnel Cover completely. |
If you can not remedy problems with the machine by using the troubleshooting chart above, do not return the your Formula Pro® to the store, please contact Customer Service at 1-888-396-6552. Any other servicing should be performed by an authorized service representative.
Customer Service and Warranty
If you are experiencing problems with your Baby Brezza Formula Pro, please call our Customer Service department at 1-888-396-6552 before returning the product so that we can offer you our best service customized to your particular situation.
Limited 1-Year Warranty
The limited warranty is valid only on products bought through authorized resellers and used in the United States and Canada. Buying through an unauthorized reseller or using this product outside of the United States and Canada automatically voids this warranty.
This warranty is available to consumers only. You are a consumer if you own a Baby Brezza Formula pro that was purchased at retail for personal, family or household use. Except as otherwise required under applicable state law, this warranty is not available to retailers or other commercial purchasers or owners. We warrant that your Baby Brezza Formula Pro will be free of defects in material or workmanship under normal home use for one year from the date of original purchase. Customer will be required to present original proof of purchase in order to obtain the warranty benefits. In the event that you do not have proof of purchase date, the purchase date for purposes of this warranty will be the date of manufacture. If your Baby Brezza Formula Pro should prove to be defective within the warranty period, we will repair it or, if we consider it necessary, replace it.
To obtain warranty services, please call Customer Service at 1-888-396-6552 or write to:
Baby Brezza, 250 Passaic Street, Newark, NJ 07104 Attn: Customer Service.
babybrezza.com
Here you can download full pdf version of manual, it may contain additional safety instructions, warranty information, FCC rules, etc.
AUSTRIA

Manuals:
Formula Pro Advanced: German
Formula Pro Advanced: English
Food Maker Deluxe: German
Food Maker Deluxe: English
Formula Pro Original: English
Customer Service:
contact@gamin-tout-terrain.com
Formula Settings:
Europe — Setting List
BELGIUM
Manuals:
Formula Pro Advanced: Dutch
Formula Pro Advanced: French
Formula Pro Advanced: English
Food Maker Deluxe: Dutch
Food Maker Deluxe: French
Food Maker Deluxe: English
Formula Pro Original: English
Customer Service:
contact@gamin-tout-terrain.com
Formula Settings:
Europe — Setting List
BULGARIA
Manuals:
Formula Pro Advanced: Bulgaria
Food Maker Deluxe: Bulgaria
Instant Warmer: Bulgaria
Safe+Smart Bottle Warmer: Bulgaria
Formula Pro Original: English
Customer Service:
contact@taticool.bg
+359.88.934.9836
Formula Settings:
Europe — Setting List
CROATIA
Manuals:
Formula Pro Advanced: Croatian
Formula Pro Advanced: English
Food Maker Deluxe: Croatian
Food Maker Deluxe: English
Formula Pro Original: English
Customer Service:
info@minime.si
Formula Settings:
Europe — Setting List
CYPRUS
Manuals:
Formula Pro Advanced: English
Food Maker Deluxe: English
Formula Pro Original: English
Customer Service:
info@newbabycity-online.com
Formula Settings:
Europe — Setting List
CZECHIA
Manuals:
Formula Pro Advanced: English
Food Maker Deluxe: English
Formula Pro Original: English
Customer Service:
contact@gamin-tout-terrain.com
Formula Settings:
Europe — Setting List
DENMARK
Manuals:
Formula Pro Advanced: English
Formula Pro Advanced: Danish
Food Maker Deluxe: English
Formula Pro Original: English
Customer Service:
kontakt@ibpscandinavia.se
Formula Settings:
Europe — Setting List
ESTONIA
Manuals:
Formula Pro Advanced: Estonian
Formula Pro Advanced: English
Food Maker Deluxe: Estonian
Food Maker Deluxe: English
Formula Pro Original: English
Customer Service:
info@progressio.ee
Formula Settings:
Europe — Setting List
FINLAND
Manuals:
Formula Pro Advanced: English
Food Maker Deluxe: English
Formula Pro Original: English
Customer Service:
kontakt@ibpscandinavia.se
Formula Settings:
Europe — Setting List
FRANCE
Manuals:
Formula Pro Advanced: French
Formula Pro Advanced: English
Food Maker Deluxe: French
Food Maker Deluxe: English
Formula Pro Original: English
Customer Service:
contact@gamin-tout-terrain.com
Formula Settings:
Europe — Setting List
GERMANY
Manuals:
Formula Pro Advanced: German
Formula Pro Advanced: English
Food Maker Deluxe: German
Food Maker Deluxe: English
Formula Pro Original: English
Customer Service:
contact@gamin-tout-terrain.com
Formula Settings:
Europe — Setting List
GREECE
Manuals:
Formula Pro Advanced: Greek
Formula Pro Advanced: English
Food Maker Deluxe: Greek
Food Maker Deluxe: English
Formula Pro Original: English
Formula Settings:
Europe — Setting List
HUNGARY
Manuals:
Formula Pro Advanced: English
Food Maker Deluxe: English
Formula Pro Original: English
Customer Service:
info@taticoolshop.ro
Formula Settings:
Europe — Setting List
ICELAND
Manuals:
Formula Pro Advanced: English
Food Maker Deluxe: English
Formula Pro Original: English
Customer Service:
info@babybrezza.is
Formula Settings:
Europe — Setting List
ITALY
Manuals:
Formula Pro Advanced: Italian
Formula Pro Advanced: English
Food Maker Deluxe: Italian
Food Maker Deluxe: English
Formula Pro Original: English
Customer Service:
info@minime.si
Formula Settings:
Europe — Setting List
KAZAKHSTAN
Manuals:
Formula Pro Advanced: Russian
Formula Pro Advanced: English
Food Maker Deluxe: Russian
Food Maker Deluxe: English
Formula Pro Original: English
Customer Service:
contact@gamin-tout-terrain.com
Formula Settings:
Europe — Setting List
LATVIA
Manuals:
Formula Pro Advanced: Latvian
Formula Pro Advanced: Russian
Formula Pro Advanced: English
Food Maker Deluxe: Latvian
Food Maker Deluxe: Russian
Food Maker Deluxe: English
Formula Pro Original: English
Customer Service:
info@progressio.ee
Formula Settings:
Europe — Setting List
LITHUANIA
Manuals:
Formula Pro Advanced: Lithuanian
Formula Pro Advanced: English
Food Maker Deluxe: Lithuanian
Food Maker Deluxe: English
Formula Pro Original: English
Customer Service:
info@progressio.ee
Formula Settings:
Europe — Setting List
LUXEMBURG
Manuals:
Formula Pro Advanced: English
Food Maker Deluxe: English
Formula Pro Original: English
Customer Service:
contact@gamin-tout-terrain.com
Formula Settings:
Europe — Setting List
NETHERLANDS
Manuals:
Formula Pro Advanced: Dutch
Formula Pro Advanced: English
Food Maker Deluxe: Dutch
Food Maker Deluxe: English
Formula Pro Original: English
Customer Service:
contact@gamin-tout-terrain.com
Formula Settings:
Europe — Setting List
NORWAY
Manuals:
Formula Pro Advanced: English
Food Maker Deluxe: English
Formula Pro Original: English
Customer Service:
kontakt@ibpscandinavia.se
Formula Settings:
Europe — Setting List
PORTUGAL
Manuals:
Formula Pro Advanced: English
Food Maker Deluxe: English
Formula Pro Original: English
Customer Service:
contact@gamin-tout-terrain.com
Formula Settings:
Europe — Setting List
ROMANIA
Manuals:
Formula Pro Advanced: Romanian
Formula Pro Advanced: English
Food Maker Deluxe: Romanian
Food Maker Deluxe: English
Formula Pro Original: English
Customer Service:
office@taticoolshop.ro
Formula Settings:
Europe — Setting List
RUSSIA
Manuals:
Formula Pro Advanced: Russian
Formula Pro Advanced: English
Food Maker Deluxe: Russian
Food Maker Deluxe: English
Formula Pro Original: English
Customer Service:
contact@gamin-tout-terrain.com
Formula Settings:
Europe — Setting List
SERBIA
Manuals:
Formula Pro Advanced: Serbian
Formula Pro Advanced: English
Food Maker Deluxe: English
Formula Pro Original: English
Customer Service:
office@babycare-srbija.com
Formula Settings:
Europe — Setting List
SLOVAKIA
Manuals:
Formula Pro Advanced: English
Food Maker Deluxe: English
Formula Pro Original: English
Customer Service:
info@babybrezza.sk
Formula Settings:
Europe — Setting List
SLOVENIA
Manuals:
Formula Pro Advanced: Slovenian
Formula Pro Advanced: English
Food Maker Deluxe: Slovenian
Food Maker Deluxe: English
Formula Pro Original: English
Customer Service:
info@minime.si
Formula Settings:
Europe — Setting List
SPAIN
Manuals:
Formula Pro Advanced: Spanish
Formula Pro Advanced: English
Food Maker Deluxe: Spain
Food Maker Deluxe: English
Formula Pro Original: English
Customer Service:
contact@gamin-tout-terrain.com
Formula Settings:
Europe — Setting List
SWEDEN
Manuals:
Formula Pro Advanced: Swedish
Formula Pro Advanced: English
Food Maker Deluxe: Swedish
Food Maker Deluxe: English
Formula Pro Original: English
Customer Service:
kontakt@ibpscandinavia.se
Formula Settings:
Europe — Setting List
SWITZERLAND
Manuals:
Formula Pro Advanced: German
Formula Pro Advanced: French
Formula Pro Advanced: Italian
Formula Pro Advanced: English
Food Maker Deluxe: German
Food Maker Deluxe: French
Food Maker Deluxe: Italian
Food Maker Deluxe: English
Formula Pro Original: English
Customer Service:
mail@luna-swiss.ch
Formula Settings:
Europe — Setting List
TURKEY
Manuals:
Formula Pro Advanced: Turkish
Customer Service:
info@babybrezzaturkey.com
UKRAINE
Manuals:
Formula Pro Advanced: English
Food Maker Deluxe: English
Formula Pro Original: English
Customer Service:
newlife2011@ukr.net
Formula Settings:
Europe — Setting List
Всем добрый день,
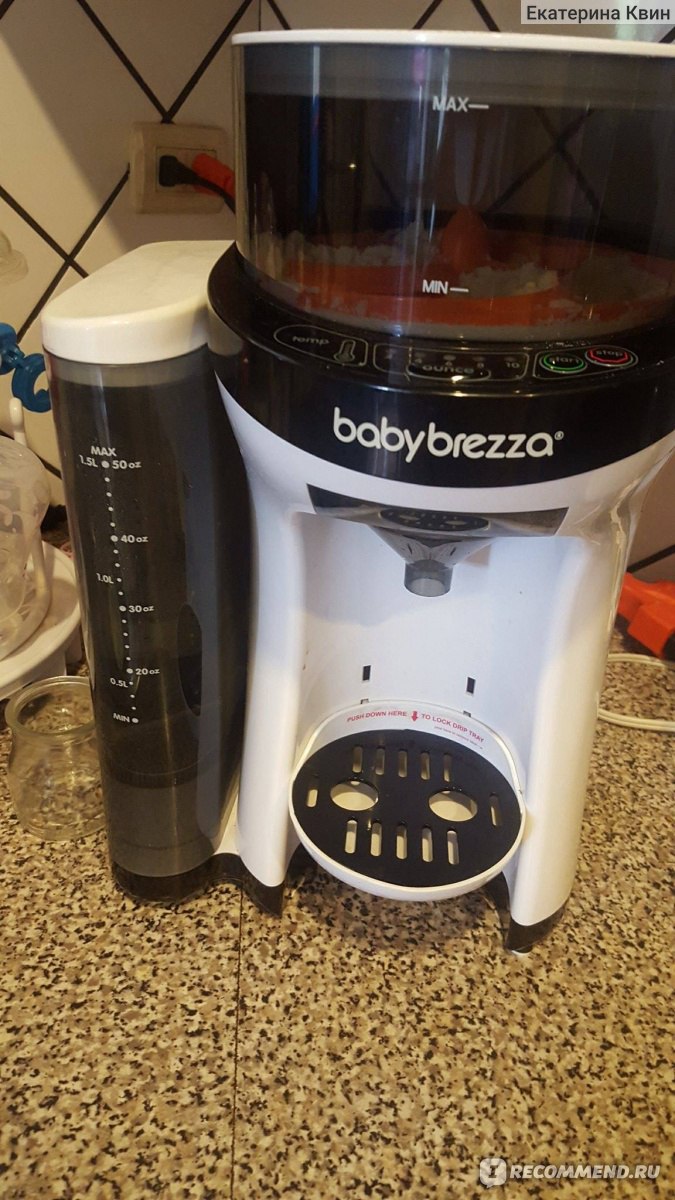
С появлением малыша, стараешься облегчить себе быт, моей отличной помощницей стала машина для приготовления детской смеси Formula Pro Baby Brezza.

Узнала я о ней с американских видеороликов, все очень хвалили ее, и так как я не была уверена, будет ли мой малыш на грудном вскармливании или на искусственном, то я решила приобрести этот чудо аппарат.

Информация от производителя:
Машина Formula Pro для быстрого приготовления детской смеси. Идеальная температура и однородная консистенция смеси без пузырьков воздуха — без лишних хлопот.
Просто выберите размер бутылочки и за несколько секунд смесь готова!Характеристики:
• Лёгкая подготовка смеси без хлопот: не нужно измерять и смешивать
• Запатентованная технология смешивания: смешивает сухую молочную смесь с водой для идеальной консистенции без пузырьков воздуха
• Контроль температуры: нагревает воду почти до температуры тела, это оптимальная температура для кормления ребёнка
• Герметичное хранение сухой смеси: вмещает 700г сухой смеси, чтобы быстро приготовить до 20 бутылочек на 280мл
• Съёмный резервуар для воды: легко заполнить и чистить
• Универсальность: готовит смесь в бутылочках на 60,120, 180, 240 или 300мл
• Подходит для всех размеров бутылочек
• Подходят смеси любого типа
• Приготовление смеси занимает всего несколько секунд
• Габаритные размеры: 39 х 25 х 22 см
К счастью, мой ребенок был на полном грудном вскармливании и машина стояла в стороне первые полгода. Начала я ей пользоваться, когда ввела прикорм кашами, делала их на смеси.
Безумно удобно!
В инструкции есть все виды смесей, что бы настроить машину именно под вашу, это занимает пару секунд. Залить воду, подождать пока она нагреется, это занимает около минуты и все! Выбираем сколько мл нам надо и нажимаем кнопочку! Машина сама насыпает смешивает смесь с водой, причем без пузырьков и отличной температуры 36 градусов.
А что еще надо?)
Кухня чистая, не надо отмерять воду, смесь специальной ложкой, взбалтывать, что бы не было пузырьков, и еще, не дай Бог, вода будет горячая.
Контейнер для смеси герметичный, сразу высыпаю туда всю банку.
Моется машина очень легко. Подходит для всех размеров бутылочек, подножка регулируется.
Мамам, чье детки на искусственном вскармливании я очень рекомендую эту машину. Когда ночью, ребенок плачет и надо быстро приготовить смесь, лучшего помощника просто не найти. Всегда нужная температура, всегда готовая смесь!
Рекомендую!