- Manuals
- Brands
- Autel Manuals
- Tablet
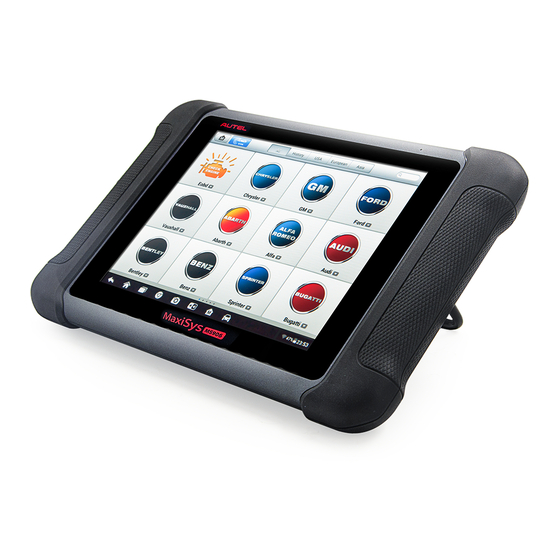
- MAXISYS MS906
- User manual
-
Contents
-
Table of Contents
-
Troubleshooting
-
Bookmarks
Quick Links
Related Manuals for Autel MAXISYS MS906
Summary of Contents for Autel MAXISYS MS906
-
Page 1
MS 9 0 6… -
Page 2: Copyright Information
Autel will not be liable for any direct damages or for any special, incidental, or indirect damages or for any economic consequential damages (including the loss of profits).
-
Page 3: Safety Information
Safety Instructions The safety messages herein cover situations Autel is aware of. Autel cannot know, evaluate or advise you as to all of the possible hazards. You must be certain that any condition or service procedure encountered does not jeopardize your personal safety.
-
Page 4
Safety Information Important Safety Instructions Do Not Turn the Volume Up Too Loud When Using Headphones Listening at high volumes that over-stimulate the ear for long periods of time may result in loss of hearing. SAFETY WARNINGS: Always perform automotive testing in a safe environment. … -
Page 5: Table Of Contents
Contents SAFETY INFORMATION ……………….. II CHAPTER 1 USING THIS MANUAL …………..1 ………………..1 ONVENTIONS 1.1.1 Bold Text ………………… 1 1.1.2 Note ………………..1 1.1.3 Important ……………….. 1 1.1.4 Hyperlink………………… 1 1.1.5 Procedures ………………1 CHAPTER 2 GENERAL INTRODUCTION …………… 3 MS906 D …………..
-
Page 6
4.3.4 Alternative Vehicle Identification …………23 ………………..24 AVIGATION 4.4.1 Diagnostics Screen Layout …………..24 4.4.2 Screen Messages …………….27 4.4.3 Making Selections …………….27 ………………..28 ………………..28 IAGNOSIS 4.6.1 ECU Information ……………..32 4.6.2 Read Codes ………………33 4.6.3 Erase Codes ………………34 4.6.4 Live Data ………………..34 4.6.5 Active Test ………………41 4.6.6 Special Functions …………….42… -
Page 7
7.1.1 Unit………………..64 7.1.2 Language ……………….65 7.1.3 Printing Setting ………………65 7.1.4 Notification Center …………….65 7.1.5 About ………………..66 7.1.6 System Settings ………………66 7.1.7 Firmware ……………….67 CHAPTER 8 SHOP MANAGER OPERATIONS …………68 ……………….69 EHICLE ISTORY 8.1.1 Historical Test Record ……………..70 …………….71 ORKSHOP NFORMATION ………………72 USTOMER ANAGER… -
Page 8: Chapter 1 Using This Manual
Using This Manual Chapter 1 This manual contains device usage instructions. Some illustrations shown in this manual may contain modules and optional equipment that are not included in your system. Contact your sales representative for availability of other modules and optional tools or accessories. Conventions The following conventions are used.
-
Page 9
Using This Manual Conventions To use the camera: Tap the Camera button. The camera screen opens. Focus the image to be captured in the view finder. Tap the blue circle. The view finder now shows the captured picture and auto-saves the taken photo. -
Page 10: Chapter 2 General Introduction
MaxiSys MS906 Display Tablet 2.1.1 Functional Description Figure 2-1 MaxiSys MS906 Tablet Front View 8.0” LED Capacitive Touch Screen Power LED – indicates battery level & charging or system status Vehicle Communication LED – flashes green when the Display Tablet is communicating/linking with the vehicle’s system…
-
Page 11
Illuminates red when the Display Tablet is powered on and the battery level is below 15% Blue: Illuminates blue when the MaxiSys system is fault Figure 2-2 MaxiSys MS906 Tablet Back View Camera Lens Camera Flash Collapsible Stand – extends from the back to allow hands-free viewing of… -
Page 12: Power Sources
General Introduction MaxiSys MS906 Display Tablet Figure 2-3 MaxiSys MS906 Tablet Top View Mini SD Card Slot — holds the mini SD Card Mini USB Port DC Power Supply Input Port — Connects the 12 volt power adapter to charge DB15-Pin Port — connects the vehicle DLC cable Lock/Power Button –…
-
Page 13: Technical Specifications
General Introduction MaxiSys MS906 Display Tablet Vehicle Power The Display Tablet can be powered from the cigarette lighter or other suitable power port on the test vehicle through a direct cable connection. The vehicle power cable connects to the DC power supply port on the top side of the display unit.
-
Page 14: Accessory Kit
General Introduction MaxiSys MS906 Display Tablet 270.8 mm (10.0”) x 176.0 mm (6.9”) x 36.0mm Dimensions ( W x H x D (1.4”) NW: 0.96 kg (2.12 lb.), Weight ISO 9142-2, ISO 14230-2, ISO 15765-4, K-Line, Protocols L-Line, Flashing Code,…
-
Page 15: Other Accessories
General Introduction Accessory Kit Benz-14 Chrysler-16 BMW-20 Kia-20 Honda-3 GM/Daewoo-12 Nissan-14 VW/Audi-2+2 Mitsubishi/ Benz-38 Fiat-3 PSA-2 Hyundai -12+16 2.2.3 Other Accessories AC/DC External Power Adapter Connects the Display Tablet to the external DC power port for power supply. Compact Disc (CD) Includes the User Manual, printer driver program etc.
-
Page 16
General Introduction Accessory Kit Lighter Fuse A safety device for the cigarette lighter. -
Page 17: Chapter 3 Getting Started
Getting Started Chapter 3 Make sure the Display Tablet has sufficient battery level or is connected to the DC power supply (see on page 5). 2.1.2 Power Sources Powering Up Press the Lock/Power button on the top right side of the Display Tablet to switch the unit on.
-
Page 18: Application Buttons
Getting Started Powering Up Almost all operations on the Display Tablet are controlled through the touch screen. The touch screen navigation is menu driven, which allows you to quickly locate the test procedure, or data that you need, through a s eries of choices and questions.
-
Page 19: Locator And Navigation Buttons
See Remote Desk Operations page 90. Launches Support platform which synchronizes Autel’s on-line service base Support station with the MaxiSys tablet. See Support on page 78. Operations Allows you to store and play technical tutorial and training videos about the device usage or Training vehicle diagnostic techniques.
-
Page 20: System Status Icons
Getting Started Powering Up Button Name Description Opens the camera with short press; takes and saves screenshot image with long press. The saved files are auto-stored in the Data Camera Manager application for later reviews. See on page 50. Data Manager Operations Allows you to adjust the brightness of the Display &…
-
Page 21: Powering Down
Getting Started Powering Down Table 3-3 Shortcuts Panel Buttons NOTE: The shortcuts buttons will be highlighted when enabled, and dimmed when disabled. Button Name Description Launches calculator when pressed. Calculator Launches clock when pressed. Clock Enables/disables Wi-Fi when pressed. Wi-Fi Turns on/off the torch when pressed.
-
Page 22: Installing Computer Software
Getting Started Installing Computer Software Installing Computer Software The MaxiSys MS906 Diagnostic Platform allows you to print the information needed for your convenience. To realize the printing function, you need to install the printer driver program. To install the printer driver program Insert the CD into the CD-ROM of the computer and open the CD folder.
-
Page 23
Getting Started Installing Computer Software Tap the Print button on the toolbar. A temporary file will be created and sent to the computer for printing. The MaxiSys Printer will print the received document automatically when the Auto Print option is selected. If you need to print the document later, click Open PDF file and select the document, and double click the Print button on the MaxiSys Printer interface to start the printing. -
Page 24: Chapter 4 Diagnostics Operations
(ABS), airbag system (SRS) and more. Establishing Vehicle Communication The Diagnostics operations require connecting the MaxiSys MS906 diagnostic platform to the test vehicle using the main cable. 4.1.1 Vehicle Connection The method used to connect the Display Tablet to a vehicle’s DLC depends on the vehicle’s configuration as follows:…
-
Page 25: Getting Started
Diagnostics Operations Establishing Vehicle Communication Non-OBD II Vehicle Connection This type of connection requires both the main cable and a required OBD I adapter for the specific vehicle being serviced. To connect to a Non-OBD II Vehicle Connect the main cable’s female adapter to the Vehicle Data Connector on the Display Tablet, and tighten the captive screws.
-
Page 26
Diagnostics Operations Getting Started Figure 4-1 Sample Vehicle Menu Screen Top Toolbar Buttons Manufacturer Buttons Top toolbar Buttons The operations of the Toolbar buttons at the top of the screen are listed and described in the table below: Table 4-1 Top Toolbar Buttons Button Name Description… -
Page 27: Vehicle Identification
Getting Started Getting Started Button Name Description Europe Displays the European vehicle menu. Displays the Asian vehicle menu. Asia Displays the Domestic vehicle menu. Domestic Touching this button opens the virtual keyboard, allowing you to manually enter the Search specific vehicle make required. Touching this button exits the search screen, Cancel or cancels an operation.
-
Page 28: Auto Vin Scan
Diagnostics Operations Vehicle Identification 4.3.1 Auto VIN Scan The MaxiSys diagnostic system features the latest VIN-based Auto VIN Scan function to identify CAN vehicles in just one touch, which allows the technician to quickly detect vehicles, scan all the diagnosable ECUs on every vehicle and run diagnostics on the selected system.
-
Page 29: Manual Vin Input
VIN manually. 4.3.2 Manual VIN Input For some vehicles that do not support the Auto VIN Scan function, the MaxiSys MS906 diagnostic system allows you to enter the vehicle VIN manually. …
-
Page 30: Manual Vehicle Selection
Diagnostics Operations Vehicle Identification Figure 4-4 Manual VIN Input Tap Done. The vehicle will be identified in a few seconds, and once the matching is successful, the system will guide you to the Vehicle Diagnostics screen directly. (Figure 4-2) Tap Cancel to exit Manual Input. 4.3.3 Manual Vehicle Selection When the vehicle’s VIN is not automatically retrievable through the vehicle’s ECU, or the specific VIN is unknown, you can choose to select the vehicle…
-
Page 31: Navigation
Diagnostics Operations Navigation Navigation This section describes how to navigate the Diagnostics interface and select test options. 4.4.1 Diagnostics Screen Layout The diagnostic screens typically include four sections. (Figure 4-5) Figure 4-5 Sample Diagnostics Screen Diagnostics Toolbar Status Information Bar Main Section Functional Buttons Diagnostics Toolbar…
-
Page 32
Diagnostics Operations Navigation Button Name Description Touching this button allows you to exit the diagnostic session of the currently identified test Vehicle vehicle, and returns you to the vehicle menu screen Swap to select another vehicle for testing. Opens the setting screen. See Settings Operations Settings on page 64. -
Page 33
Diagnostics Operations Navigation Tap Print whenever you want to make a printing. A drop-down menu appears. Print This Page – prints a screenshot copy of the current screen Print All Page – prints a PDF copy of all displayed data A temporary file will be created and send to the computer for printing. -
Page 34: Screen Messages
Diagnostics Operations Navigation depending on the stage of operations. They can be used to navigate, save or clear the diagnostic data, exit scanning as well as make other functional controls. The functions of these buttons will be introduced respectively in the following sections of the corresponding test operations.
-
Page 35: Main Menu
Diagnostics Operations Diagnosis Main Menu The Diagnostics application allows you to establish a data link to the electronic control system of the test vehicle for vehicle diagnosis or service. You can operate functional tests, retrieve vehicle diagnostic information such as trouble codes, event codes and live data for various vehicle control systems, such as engine, transmission, ABS and more.
-
Page 36
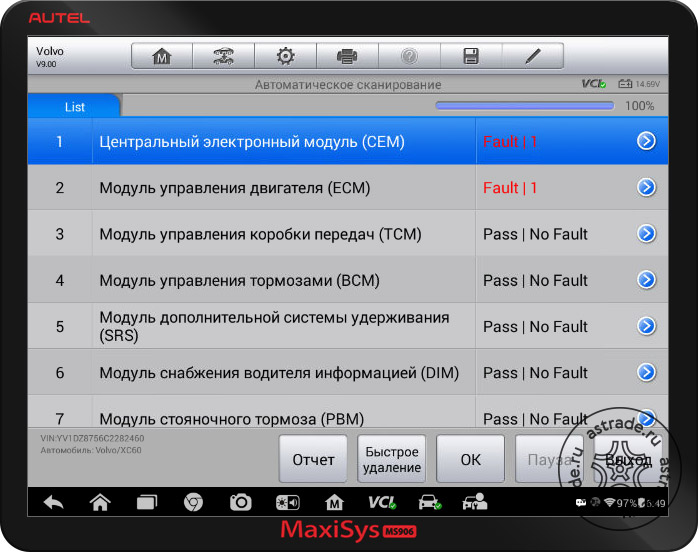
Diagnostics Operations Diagnosis Figure 4-6 Sample Auto Scan Operation Screen Navigation Bar Main Section Functional Buttons Navigation Bar List Tab – displays the scanned data in list format Tree Tab – display the scanned data in system distribution diagram format Progress Bar –… -
Page 37
Diagnostics Operations Diagnosis and the control system. Indicates that the vehicle control system has been detected, but -?-: the tester cannot accurately locate it. Indicates there is/are detected fault code(s) present; “#” Fault | #: indicates the number of the detected faults. Indicates the system has passed the scanning Pass | No Fault: process and no fault has been detected. -
Page 38
Diagnostics Operations Diagnosis Name Description Saves the diagnostic session as a history record, this Save allows you to quickly restore access to the test systems. Control Units This option allows you to manually locate a required control system for testing through a series of choices. -
Page 39: Ecu Information
Diagnostics Operations Diagnosis Active Test – provides specific subsystem and component tests. This selection may appear as Actuators, Actuator Test, or Function Tests, etc., and the tests options vary depending on the manufacturer and model. NOTE: With the diagnostic toolbar on top of the screen throughout the whole diagnostic procedures, you are allowed to make various controls of the diagnostic information at anytime, such as printing and saving the displayed data, getting help information, or performing data logging, etc.
-
Page 40: Read Codes
Diagnostics Operations Diagnosis Diagnostics Toolbar Buttons – see Table 4-2 Diagnostics Toolbar on page 24 for detailed descriptions of the operations for each Buttons button. Main Section – the left column displays the item names; the right column shows the specifications or descriptions. Functional Button –…
-
Page 41: Erase Codes
Diagnostics Operations Diagnosis Description Column – detailed descriptions for the retrieved codes. Snowflake Icon – only displays when freeze frame data is available for viewing; Selecting this icon will display a data screen, which looks very similar to the Read Codes interface, therefore same operation method may be applied.
-
Page 42
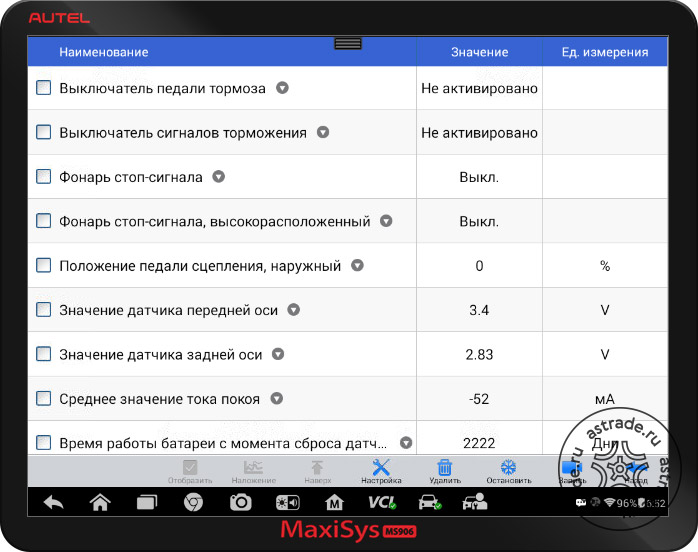
Diagnostics Operations Diagnosis Gesture scrolling allows you to quickly move through the data list. Simply swipe the screen up or down to locate the data you want. The figure below shows a typical Live Data screen: Figure 4-10 Sample Live Data Screen Diagnostics Toolbar Buttons –… -
Page 43
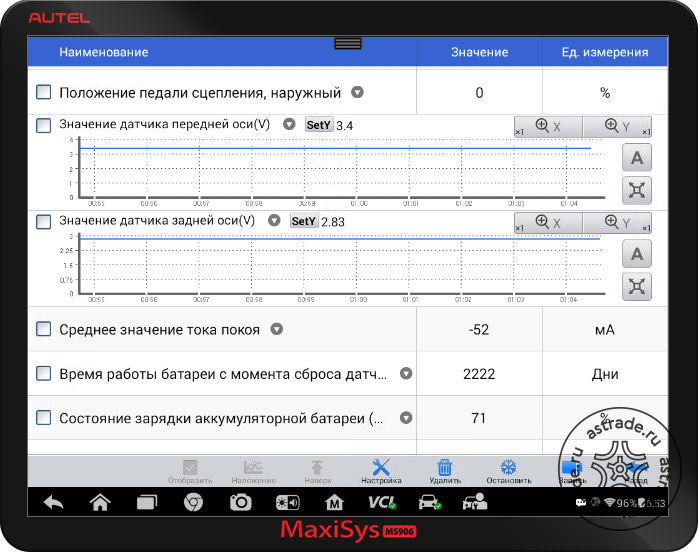
Diagnostics Operations Diagnosis information. Display Mode There are 4 types of display modes available for data viewing, allowing you to view various types of parameters in the most suitable way. Tapping the drop-down button on the right side of the parameter name opens a s ubmenu. -
Page 44
Diagnostics Operations Diagnosis Scale Button — changes the scale values, which are displayed below the waveform graph. There are 4 scales available: x1, x2, x4 and x8. Zoom-out Button – exits full screen display. To edit the waveform color and line thickness in a data graph Select 1 to 3 parameter items to display in Waveform Graph mode. -
Page 45
Diagnostics Operations Diagnosis When playing back the recorded video clip later in Data Manager, the preset flag will enable a popup to allow input of text to take notes. Clear Data – clears all previously retrieved parameter values at a cutting point whenever you choose. -
Page 46
Diagnostics Operations Diagnosis Range Button – displays the configuration screen on which you can set the threshold values, an upper limit and a lower limit, for triggering the buzzer alarm. This function is only applied to the Waveform Graph display mode. MIN –… -
Page 47
Diagnostics Operations Diagnosis Trigger Type – sets the trigger mode for data recording, mainly of two kinds: Manual and Auto. There are four options available: Manual – allows you to manually start and stop data recording DTC – auto triggers data recording when any DTC is detected DTC Check Mode –… -
Page 48: Active Test
Diagnostics Operations Diagnosis 4.6.5 Active Test The Active Test function is used to access vehicle-specific subsystem and component tests. Available tests vary depending on the manufacturer, year, and model, and only the available tests display in the menu. During an active test, the tester outputs commands to the ECU in order to drive the actuators.
-
Page 49: Special Functions
Diagnostics Operations Diagnosis 4.6.6 Special Functions These functions perform various component adaptations, allowing you to recalibrate or configure certain components after making repairs or replacement. The main section of the Adaptation Operation screen displays a list of operational and vehicle status information, which mainly consists of four parts: The first part in the top line shows the description of the operation being performed, and the execution status is displayed on the right, such as Completed, Activated, etc.
-
Page 50: Service
Diagnostics Operations Service Read the information carefully and check the vehicle condition accordingly, when you are sure that the vehicle is ready to perform the adaptation, simply follow the instruction provided to make appropriate selections. When the operation is done, an execution status message such as Completed, Finished or Successful, displays.
-
Page 51: Generic Obd Ii Operations
Diagnostics Operations Generic OBD II Operations Electric Parking Brake (EPB) Service This function has a multitude of usages to maintain the electronic braking system safely and effectively. The applications include deactivating and activating the brake control system, assisting with brake fluid control, opening and closing brake pads, and setting brakes after disc or pad replacement, etc.
-
Page 52: General Procedure
Diagnostics Operations Generic OBD II Operations 4.8.1 General Procedure To access the OBD II/EOBD diagnostics functions Tap the Diagnostics application button from the MaxiSys Job Menu. The Vehicle Menu displays. Tap the EOBD button. There are two options to establish communication with the vehicle.
-
Page 53: Function Descriptions
Diagnostics Operations Generic OBD II Operations Select a function option to continue. DTC & FFD I/M Readiness Live Data O2 Sensor Monitor On-Board Monitor Component Test Vehicle Information Vehicle Status NOTE: Some functions are supported only on certain vehicle makes. 4.8.2 Function Descriptions This section describes the various functions of each diagnostic option: DTC &…
-
Page 54
Diagnostics Operations Generic OBD II Operations Stored Codes Stored codes are the current emission related DTCs from the ECM of the vehicle. OBD II/EOBD Codes have a priority according to their emission severity, with higher priority codes overwriting lower priority codes. The priority of the code determines the illumination of the MIL and the codes erase procedure. -
Page 55
Diagnostics Operations Generic OBD II Operations I/M Readiness This function is used to check the readiness of the monitoring system. It is an excellent function to use prior to having a vehicle inspected for compliance to a state emissions program. Selecting I/M Readiness opens a submenu with two choices: Since DTCs Cleared –… -
Page 56: Exiting Diagnostics
Diagnostics Operations Exiting Diagnostics Vehicle Information The option displays the vehicle identification number (VIN), the calibration identification, and the calibration verification number (CVN), and other information of the test vehicle. Vehicle Status This item is used to check the current condition of the vehicle, including communication protocols of OBD II modules, retrieved codes amount, status of the Malfunction Indicator Light (MIL), and other additional information.
-
Page 57: Chapter 5 Data Manager Operations
Data Manager Operations Chapter 5 The Data Manager application is used to store, print, and review the saved files. Most operations are controlled through the toolbar. Selecting the Data Manager application opens the file system menu. Different file types are sorted separately under different options, there are six types of information files to be viewed or played back.
-
Page 58
Data Manager Operations Operations Figure 5-2 Sample Image Database Screen Toolbar Buttons – used to edit, print and delete the image files. See on page 51 for detailed Table 5-1 Toolbar Buttons in JPG Database information. Main Section – displays the stored images. Table 5-1 Toolbar Buttons in JPG Database Button Name… -
Page 59: Pdf Files
Data Manager Operations Operations To edit image information Select Data Manager application from the MaxiSys Job Menu. Select Image to access the JPG database. Select an image to display it in full screen. Tapping the screen once displays the editing toolbar. Tap the Info button to open a window displaying the image information.
-
Page 60: Review Data
Data Manager Operations Operations 5.1.3 Review Data The Review Data section allows you to playback the recorded data frames of live data streams. On the Review Data main screen, select a record file to playback. Figure 5-3 Sample Data Playback Screen Drop-down Toolbar –…
-
Page 61: Data Logging
Data Manager Operations Operations Delete button on the top bar to delete the software from the system database. 5.1.5 Data Logging The Data Logging section allows you to launch Support platform directly to view all records of all sent or unsent (saved) data loggings on the diagnostic system.
-
Page 62: Chapter 6 Maxifix Operations
MaxiFix Operations Chapter 6 The MaxiFix application launches the on-line troubleshooter database, which not only provides you virtually all common diagnostic trouble code (DTC) database for most vehicles, but also serves as a forum allowing you to network with other MaxiSys users, and gives you access to a vast database of repair and diagnostic tips along with proven filed fixes.
-
Page 63
MaxiFix Operations Navigation The MaxiFix screen layout consists of 3 main areas: The Header –the tool bar across the top of the screen which allows you to select vehicles and perform searches. The Main Screen –located at the center of the screen displaying content based on the vehicle attributes and keywords specified. -
Page 64: Terminology
MaxiFix Operations Navigation Select the submodel of the vehicle from the list. Select the engine of the vehicle from the list. After completing the vehicle selection procedure, the identified vehicle is shown on the Header. 6.1.1 Terminology MaxiFix Tip A MaxiFix Tip provides practical information of real fix of a specific vehicle repair issue with detailed descriptions.
-
Page 65: Operations
MaxiFix Operations Operations OBDII Fault Codes description and reference—helps in diagnostic assessment by making clear the nature of an automotive problem so that beginner and advanced technicians can make effective repairs Real Fix Tips—provides repair tips from actual shop practices and are presented in an e asy to understand Complaint, Cause, Correction format.
-
Page 66: Home
MaxiFix Operations Operations to your activities in the Question section. Support – opens the FAQ page, or a message box for contacting Customer Service by email. 6.2.1 Home Home is the first option on the Navigation Menu at the bottom of the screen. Tapping it opens your MaxiFix home page.
-
Page 67: My Maxifix
MaxiFix Operations Operations To ask a MaxiFix Question If not already done, click Select Vehicle on the Header to specify the vehicle you are asking about. Click Ask on the Navigation Menu at the bottom of the screen to open the Ask page.
-
Page 68
Marked Posts – opens a list with links to Tips and discussions that you are actively participating in. My Profile –allows you to view your Autel account information including: your Autel ID, personal information, MaxiFix score, phone number and register time, and edit your portrait. -
Page 69: My Messages
MaxiFix Operations Operations View Profile Information You can view your personal profile by clicking on your account ID or “My Profile” in My MaxiFix section or edit portrait where applicable, and visit other community members’ profile by clicking their portrait. Information included in your profile determines how you are presented to the community, and what type of information will be sent to you from the community.
-
Page 70: Support
MaxiFix Operations Operations Close a Question When a repair question that you’ve posted to the community is resolved, you are encouraged to write down the case as a way to share a good solution. This will help the other MaxiFix members to find useful information for practical fix. To close a question, you need to select the question’s response message from the message list on “My Messages”…
-
Page 71: Chapter 7 Settings Operations
Settings Operations Chapter 7 Selecting Settings application opens a setup interface, on which you can adjust default setting and view information about the MaxiSys system. There are seven options available for the MaxiSys system settings: Unit Language Printing Setting …
-
Page 72: Language
It is highly recommended to keep this function on all the time, so you won’t miss out any new update for MaxiSys or event from Autel. Internet access is required for receiving on-line messages.
-
Page 73: About
Settings Operations Operations To enable the Notification Center function Tap the Settings application on the MaxiSys Job Menu. Tap the Notification Center option on the left column. Tap the ON/OFF button to enable or disable the Notifications function. If the function is enabled the button turns blue, or if disabled the button turns gray.
-
Page 74: Firmware
Settings Operations Operations To enable the App Switcher function Tap the Settings application on the MaxiSys Job Menu. Tap the System settings option on the left column. Tap the App Switcher option on the left column. Mark the checkbox beside “Always show the App Switcher” on the right side of the screen, then the App Switcher icon shows.
-
Page 75: Shop Manager Operations
Shop Manager Operations Chapter 8 The Shop Manager application helps you to manage the workshop information, customer information records, and keep test vehicle history records, which can be a great assist in dealing with daily workshop business and improves customer service. There are three main functions available: …
-
Page 76: Vehicle History
Shop Manager Operations Vehicle History Button Name Description Touching this button opens a no te form, which allows you to create audio record, attach picture or History Notes video, or edit text notes, etc. Touching this button opens the Vehicle History Vehicle screen which displays the correlated test vehicle History…
-
Page 77: Historical Test Record
Shop Manager Operations Vehicle History To activate a test session for the recorded vehicle Tap the Shop Manager application on the MaxiSys Job Menu. Select Vehicle History Tap the Diagnostics button at the bottom of the thumbnail of a vehicle record item.
-
Page 78: Workshop Information
Shop Manager Operations Workshop Information To edit the Historical Test record sheet Tap the Shop Manager application on the MaxiSys Job Menu. Select Vehicle History. Select the specific vehicle history record thumbnail from the main section. The Historical Test record sheet displays. Tap the Edit button to start editing.
-
Page 79: Customer Manager
Shop Manager Operations Customer Manager Figure 8-3 Sample Workshop Information Sheet To edit the Workshop Information sheet Tap the Shop Manager application on the MaxiSys Job Menu. Select Workshop Information. Tap the Edit button on the top toolbar. Tap on each field to input the appropriate information. Tap Done to save the updated workshop information sheet, or tap Cancel to exit without saving.
-
Page 80
Shop Manager Operations Customer Manager □ Tap the + photo frame beside the Name chart to add a p hoto. A sub menu displays, select Take Photo to take a new photo for the account, or select Choose Photo to choose from the existing files. Some customers may have more than one vehicle for service;… -
Page 81: History Notes
Shop Manager Operations Customer Manager 8.3.1 History Notes The History Notes function allows you to add audio and video records, text notes and photos, to keep multi-media work logs for the associated customer account, which can be very helpful when dealing with repeat customers. Keeping notes for each vehicle serviced for each customer will keep you always on track and well organized in business.
-
Page 82
Shop Manager Operations Customer Manager Table 8-2 Function Buttons in History Notes Button Name Description Returns to the previous screen. Back Touching this button deletes the selected note. Delete Quickly locates the required note by entering Search the note title. Touching this button to cancel edit or file Cancel search. -
Page 83: Chapter 9 Update Operations
Update Operations Chapter 9 The internal programming of the MaxiSys Diagnostic System can be updated through the Update application. The updates improve the MaxiSys applications’ capabilities, typically by adding new tests, new models, or enhanced applications to the database. The display device automatically searches for available updates for all of the MaxiSys components when it is connected to the internet.
-
Page 84
Update Operations Operations Left Column – displays vehicle logos and update software version information; tap the About button displays a function list in PDF showing more details about the software. Middle Column – displays a brief introduction about the new changes to the … -
Page 85: Chapter 10 Support Operations
On the Sign In page, input your account ID and other information to log in, if you already have an account. If you are a new member to Autel and do not have an account yet, click the Create Autel ID button on the left side.
-
Page 86: Support Screen Layout
Support Operations Support Screen Layout 10.2 Support Screen Layout The Support application interface is navigated by 4 simple buttons on the top navigation bar, operation of each is described below in turn from left to right: Home Button – returns to the MaxiSys Job Menu. …
-
Page 87: My Account
Service Info The Service Info section displays a detailed record list of the device’s service history information. Every time the device has been sent back to Autel for repair, the device’s serial number and the detailed repair information, such as the fault type, changed components, system reinstallation, etc.
-
Page 88
Support Operations User Complaint Screen Layout Figure 10-2 Sample Complaint Screen The User Complaint screen consists of two parts. Option Bar Period Filter – displays only the complaint records within the defined period on the list Status Filter – displays the corresponding complaint records … -
Page 89
Select the required processing time on the last section according to the urgency of the case. Tap Submit to send the completed form to Autel’s online service center, or tap Reset to refill it. The submitted complaints will be carefully read and handled by the service personnel, and the respond speed may depend on the processing time you’ve… -
Page 90: Data Logging
Support Operations Data Logging Tap Complaint on the Main Menu. Select an existing complaint case item on the record list by tapping ○ > button on i ts right side. The screen displays the complaint session details. Tap the Post Reply button on the upper right side after viewing, to make a reply.
-
Page 91: Communities
Forums on Autel’s official website www.autel.com, where you are allowed to discuss technical topics or share information with, as well as ask for technical advices or offer technical supports to all other members in Autel’s online support communities. Figure 10-4 Sample Communities Home Screen …
-
Page 92
Support Operations Communities Select a desired group according to the subject you are about to discuss. For example, if you are going to ask a question about the MaxiSys tablet, tap MaxiSys to start a discussion. Enter your topic and the discussion content in the appropriate input field. -
Page 93: Training Channels
10.7 Training Channels The Training section provides quick links to Autel’s online video accounts. Select a video channel by the language to see all the available online tutorial videos from Autel for various technical supports, such as product usage techniques and vehicle diagnostics practice, etc.
-
Page 94: Faq Database
10.8 FAQ Database The FAQ section provides you comprehensive and abundant references for all kinds of questions frequently asked and answered about the use of Autel’s online member account, and shopping and payment procedures. Account – displays questions and answers about the use of Autel’s …
-
Page 95: Chapter 11 Training Operations
The application also allows you to download or watch more associated videos online, by providing quick links to Autel’s online video database. Figure 11-1 Sample Training Application Screen Navigation Buttons –…
-
Page 96
Training Operations Operations Select a video file from the main section. Select a Player from the popup window if necessary. Now you can watch the video, it is played in full screen mode. -
Page 97: Chapter 12 Remote Desk Operations
You can use the application to receive ad-hoc remote support from Autel’s support center, colleagues, or friends, by allowing them to control your MaxiSys tablet on their PC via the TeamViewer software.
-
Page 98
Remote Desk Operations Operations To receive remote support from a partner Power on the Display Tablet. Tap the Remote Desk application on the MaxiSys Job Menu. The TeamViewer interface displays and the device ID is generated and shown. Your partner must install the Remote Control software to his/her computer by downloading the TeamViewer full version program online (http://www.teamviewer.com), and then start the software on his/her computer at the same time, in order to provide support and… -
Page 99: Chapter 13 Quick Link Operations
Quick Link Operations Chapter 13 The Quick Link application provides you with convenient access to Autel’s official website and many other well-known sites in automotive service, which offers you abundant information and resources, such as technical help, knowledge base, forums, training, and expertise consultations, etc.
-
Page 100: Chapter 14 Maintenance And Service
Maintenance and Service Chapter 14 To ensure that the MaxiSys diagnostic tablet performs at its optimum level, we advise that the product maintenance instructions covered in this section is read and followed. 14.1 Maintenance Instructions The following shows how to maintain your devices, together with precautions to take.
-
Page 101: Troubleshooting Checklist
Your device may have not been connected to the charger properly. Check the connector. NOTE: If your problems persist, please contact Autel’s technical support personnel or your local selling agent. 14.3 About Battery Usage Your tablet is powered by a b uilt-in Lithium-ion Polymer battery. This means that, unlike other forms of battery technology, you can recharge your battery while some charge remains without reducing your tablet’s autonomy due to…
-
Page 102: Service Procedures
Maintenance and Service About Battery Usage Do not use a damaged battery charger. Do not disassemble or open crush, bend or deform, puncture or shred. Do not modify or remanufacture, attempt to insert foreign objects into the battery, expose to fire, explosion or other hazard.
-
Page 103
Repair Service If it becomes necessary to return your device for repair, please download the repair service form from www.autel.com, and fill in the form. The following information must be included: Contact name Return address … -
Page 104: Chapter 15 Compliance Information
Compliance Information Chapter 15 FCC Compliance FCC ID: WQ8MAXISYSMY906 This equipment has been tested and found to comply with the limits for a Class B digital device, pursuant to Part 15 of the FCC Rules. These limits are designed to provide reasonable protection against harmful interference in a residential installation.
-
Page 105: Chapter 16 Warranty
12-Month Limited Warranty Autel Intelligent Technology Corp., Ltd. (the Company) warrants to the original retail purchaser of this MaxiSys MS906 Diagnostic Device, that should this product or any part thereof during normal consumer usage and c onditions, be proven defective in…
![]()
Эл. почта: sales@autel.com
Web: www.autel.com
Краткое руководство
Максисис MS906 Pro
Благодарим вас за покупку Autel MaxiSys MS906 Pro. Наши инструменты изготавливаются в соответствии с высокими стандартами и — при использовании в соответствии с этими инструкциями и надлежащем обслуживании — обеспечат долгие годы бесперебойной работы.
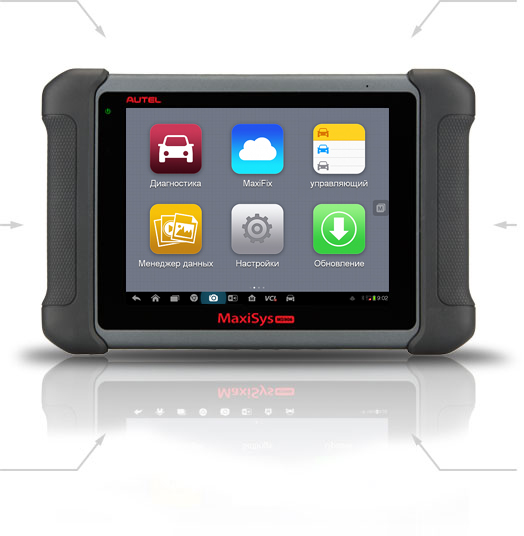
Планшет MaxiSys MS906 Pro Display


| 1. 8-дюймовый емкостный сенсорный экран со светодиодной подсветкой 2. Датчик внешней освещенности — определяет яркость окружающей среды. 3. Индикатор питания 4, передняя камера 5. Микрофон 6. Складная подставка — выдвигается сзади, освобождая руки. viewиспользование планшета 7. Основная камера 8. Вспышка камеры |
9. Слот для TF-карты 10. Входной порт источника питания постоянного тока 11. Порт мини-USB. 12. Порт USB (для подключения VCI) 13. Порт HDMI 14. Разъем для гарнитуры (8-диапазонный 3.5 мм) 15. Кнопка блокировки/питания — нажмите и удерживайте, чтобы включить/выключить планшет, или нажмите, чтобы заблокировать экран. |
Устройство VCI (интерфейс связи с автомобилем) — MaxiVCI V200

| 1. Кнопка включения фонарика. 2. Индикатор питания 3. Индикатор транспортного средства/подключения |
4. Разъем данных автомобиля (16-контактный) 5. Порт USB. |
Описание светодиода VCI
| LED | Цвет | Описание |
| Индикатор питания | Жёлтые | VCI включен и выполняет самопроверку. |
| Зелёная | VCI готов к использованию. | |
| Мигающий красный | Прошивка обновляется. | |
| Светодиод автомобиля/подключения | Зелёная | • Горит зеленым: VCI подключается через USB-кабель. • Мигающий зеленый: VCI обменивается данными через USB-кабель. |
| Синии | • Сплошной синий: VCI подключается через Bluetooth. • Мигающий синий: VCI обменивается данными через Bluetooth. |
![]() ВАЖНО: Перед эксплуатацией или обслуживанием этого устройства внимательно прочитайте эти инструкции, обращая особое внимание на предупреждения и меры предосторожности. Неправильное использование этого продукта может привести к повреждению и/или травме и аннулированию гарантии на продукт.
ВАЖНО: Перед эксплуатацией или обслуживанием этого устройства внимательно прочитайте эти инструкции, обращая особое внимание на предупреждения и меры предосторожности. Неправильное использование этого продукта может привести к повреждению и/или травме и аннулированию гарантии на продукт.

Заявление FCC
Изменения или модификации, прямо не одобренные стороной, ответственной за соответствие, могут лишить пользователя права на эксплуатацию оборудования. Это устройство соответствует требованиям части 15 правил FCC. Эксплуатация возможна при соблюдении следующих двух условий:
- это устройство не должно вызывать вредных помех, и
- это устройство должно принимать любые помехи, включая помехи, которые могут вызвать сбои в работе.
Этот передатчик не должен располагаться рядом или работать вместе с любой другой антенной или передатчиком.
Примечание: Это оборудование было протестировано и признано соответствующим ограничениям для цифровых устройств класса B в соответствии с частью 15 правил FCC. Эти ограничения разработаны для обеспечения разумной защиты от вредных помех при установке в жилых помещениях. Это оборудование генерирует, использует и может излучать радиочастотную энергию, и, если оно установлено и используется не в соответствии с инструкциями, может создавать вредные помехи для радиосвязи. Однако нет гарантии, что помехи не возникнут при конкретной установке. Если это оборудование действительно создает недопустимые помехи для приема радио или телевидения, что можно определить путем включения и выключения оборудования, пользователю рекомендуется попытаться устранить помехи одним или несколькими из следующих способов:
- Изменить ориентацию или местоположение приемной антенны.
- Увеличьте расстояние между оборудованием и приемником.
- Подключить оборудование к розетке в цепи, отличной от той, к которой подключен приемник.
- Обратитесь за помощью к дилеру или опытному радио / телевизионному технику.
Устройство было проверено на соответствие общим требованиям к радиочастотному излучению. Прибор можно использовать в условиях портативного облучения без ограничений. Данное оборудование соответствует ограничениям по радиационному излучению Федеральной комиссии по связи (FCC), установленным для неконтролируемой среды. Конечный пользователь должен следовать специальным инструкциям по эксплуатации для соблюдения требований к радиочастотному излучению.
Устройство разработано с учетом требований по воздействию радиоволн, установленных Федеральной комиссией по связи (США). Эти требования устанавливают предел SAR в 1.6 Вт/кг в среднем на один грамм ткани. Максимальное значение SAR, указанное в соответствии с этим стандартом во время сертификации продукта для использования при надлежащем ношении на теле, составляет 0.665 Вт/кг.
Заявление IC
Это устройство содержит не требующие лицензии передатчики / приемники, которые соответствуют не требующим лицензирования RSS-каналам Канады по инновациям, науке и экономическому развитию.
Эксплуатация возможна при соблюдении следующих двух условий:
- Это устройство не должно вызывать помех.
- Это устройство должно принимать любые помехи, включая помехи, которые могут вызвать сбои в работе устройства.
Этот передатчик не должен располагаться рядом или работать совместно с какой-либо другой антенной или передатчиком.
Устройство было проверено на соответствие общим требованиям к воздействию радиочастотного излучения. Устройство можно использовать в условиях переносного воздействия без ограничений.
Устройство разработано в соответствии с требованиями к воздействию радиоволн, установленными Министерством инноваций, науки и экономического развития Канады. Эти требования устанавливают предел SAR в 1.6 Вт/кг в среднем на один грамм ткани. Максимальное значение SAR, указанное в соответствии с этим стандартом при сертификации продукта для использования при надлежащем ношении на теле, составляет 0.665 Вт/кг.
ПримечаниеИспользование только в помещении
Документы / Ресурсы
Диагностический сканер MaxiSYS 906BT (MS906BT) — профессиональный универсальный сканер для диагностики всех легковых автомобилей и малого коммерческого транспорта.
Автосканер Autel MaxiSys MS 906BT уникальный сбалансированный прибор для любых задач СТО. Это один из немногих сканеров, в деталях продуманный для совершения всех диагностических операций:
Автосканеры Autel обеспечивают диагностику с широчайшим охватом функций
Идентификация блоков управления
Сканер для диагностики Autel MaxiSys MS906 BT отображает хранящуюся в блоке управления информацию о конфигурации автомобиля, версии прошивки блока, номере детали, VIN номер автомобиля и прочее (разную информацию в зависимости от логики работы самого блока
управления)
Чтение ошибок
Автосканеры MaxiSys имеют объемную встроенную информационную базу по ошибкам самодиагностики. По ряду ошибок сканер MaxiSys MS906BT не только даст расшифровку ошибки, но и отобразит возможные причины ее возникновения с рекомендациями по дальнейшим действиям.
Отображение диагностических параметров
Диагостические параметры могут отображаться в любом удобном виде — графическом, цифровом, аналоговом (в виде динамической стрелки и шкалы значений). Все параметры могут быть записаны в реальном времени для их последующего анализа.
Специальные тесты (тест-блоки)

|
Тест-блоки позволят включать специальные режимы проверки в блоке управления, в которых электронная система сама создает условия проверки и оценивает ее результаты с дальнейшими рекомендациями специалисту. |
Активации исполнительных механизмов с подбором параметров

|
Автосканеры Autel MaxiSYS позволяют вручную подавать исполнительные команды на различные узлы и системы автомобиля для их проверки (например, управление катушками зажигания, форсунками, вентиляторами, элементами индикации и другими). |
Не все электронные блоки поддерживают функцию специальных тест-блоков исполнительных механизмов. Поэтому для таких блоков используется возможность параллельно с управлением механизмами отобразить параметры в реальном времени, по которым будет легче диагностировать
необходимый механизм или исполнительное устройство.
Адаптации и инициализации

|
После обслуживания некоторых датчиков и исполнительных элементов электронных систем может потребоваться проведение адаптации или инициализации этого узла (например, адаптация дросселя после его промывки). При проведении этой процедуры устанавливаются |
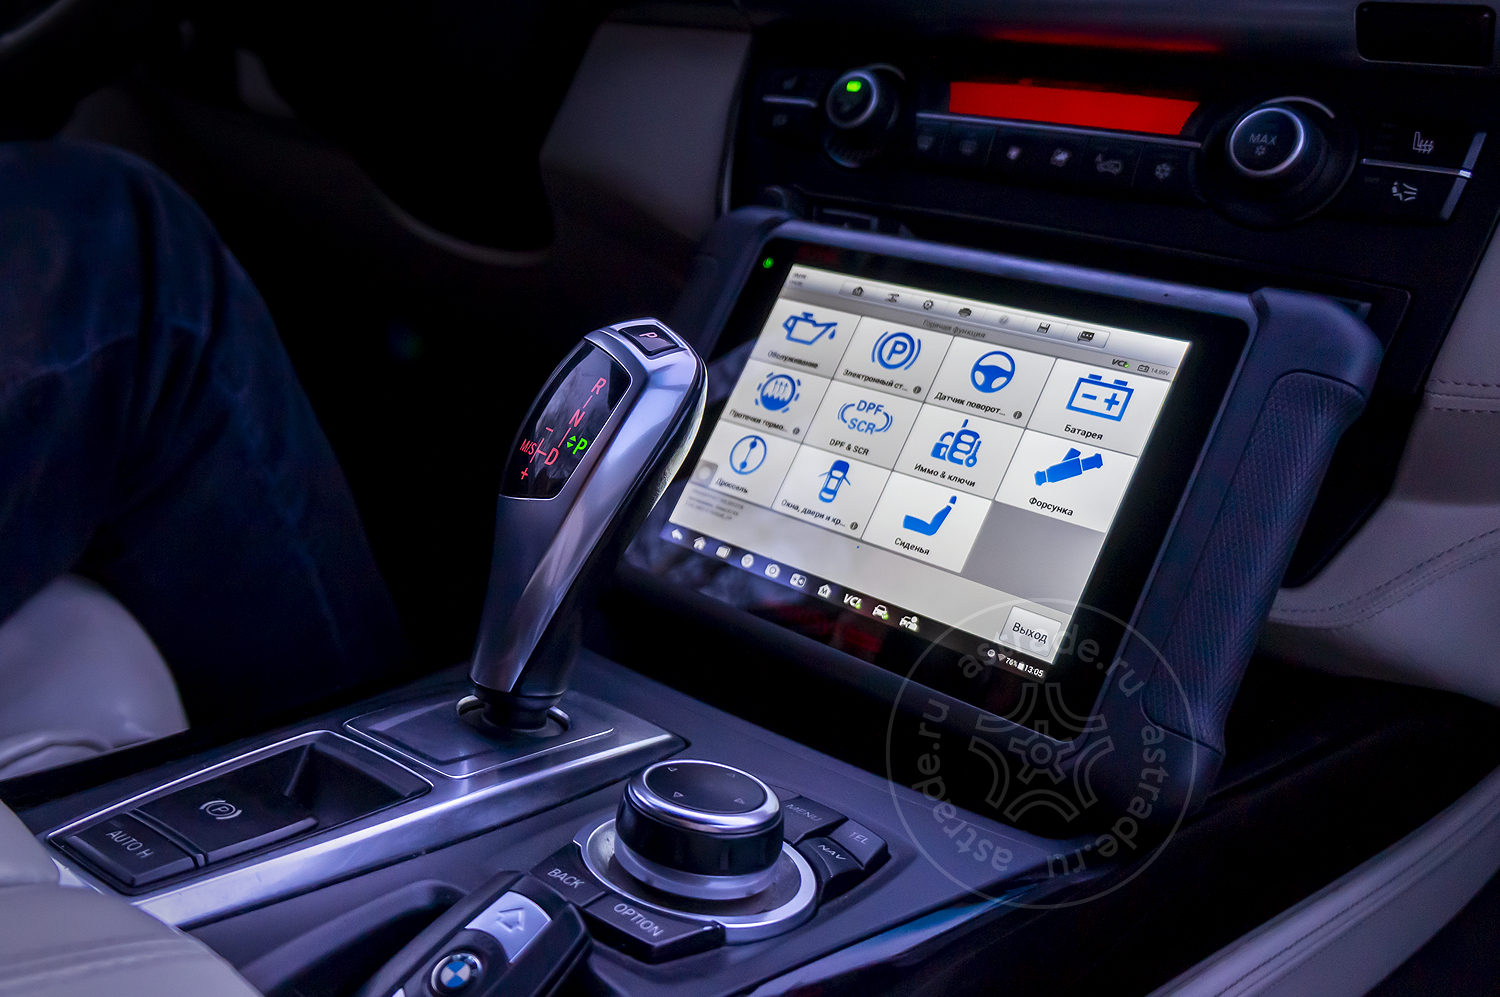
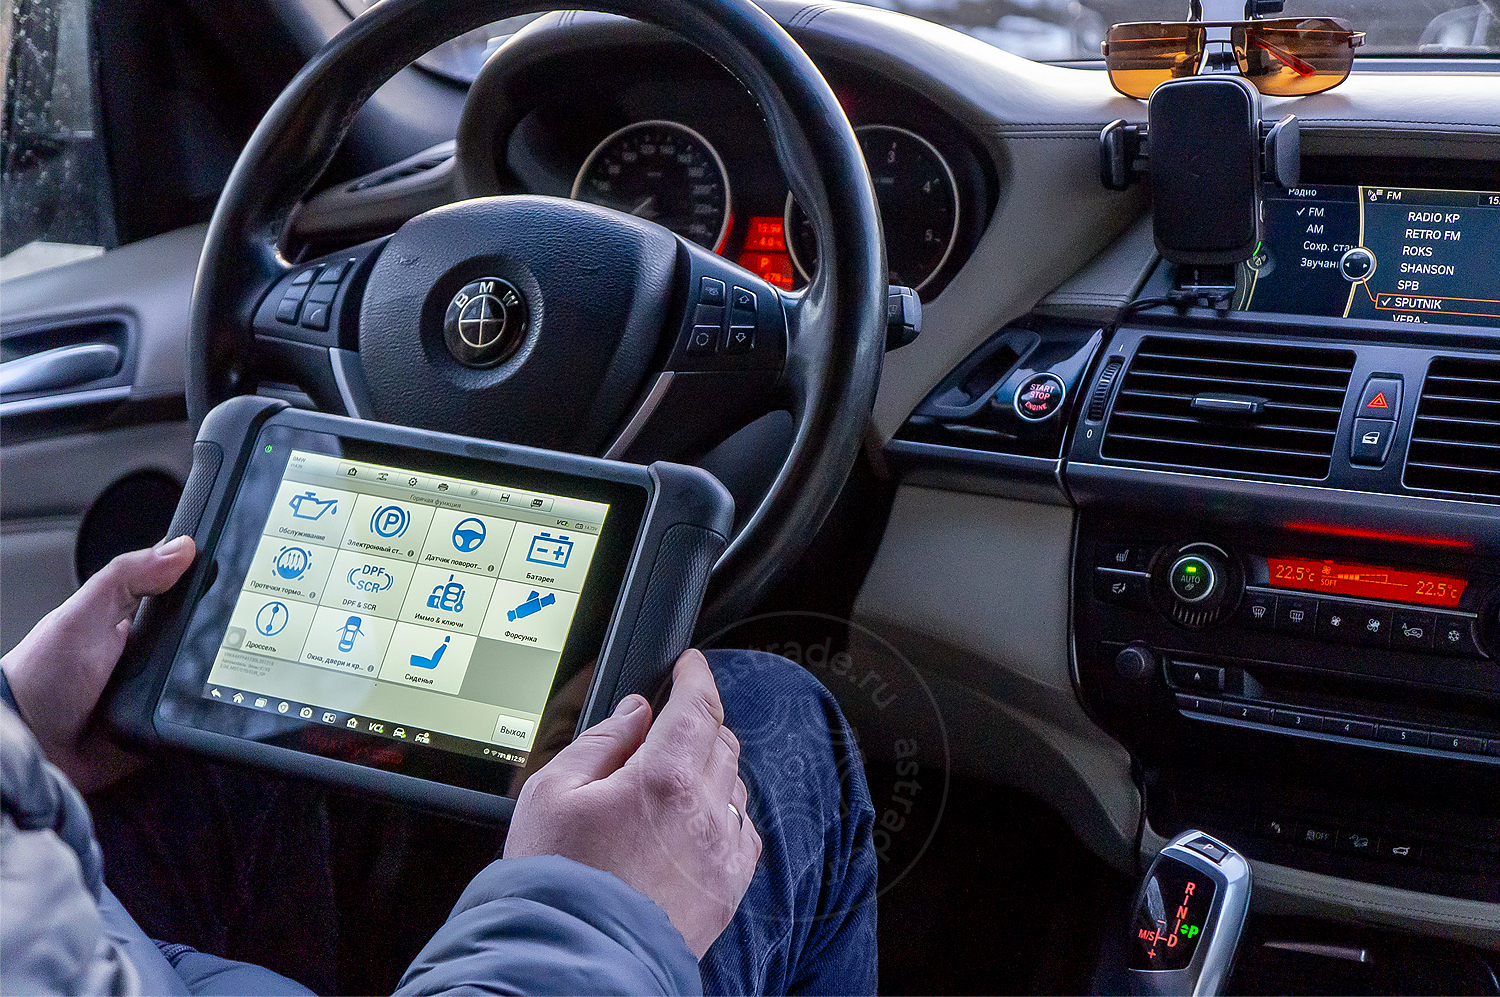
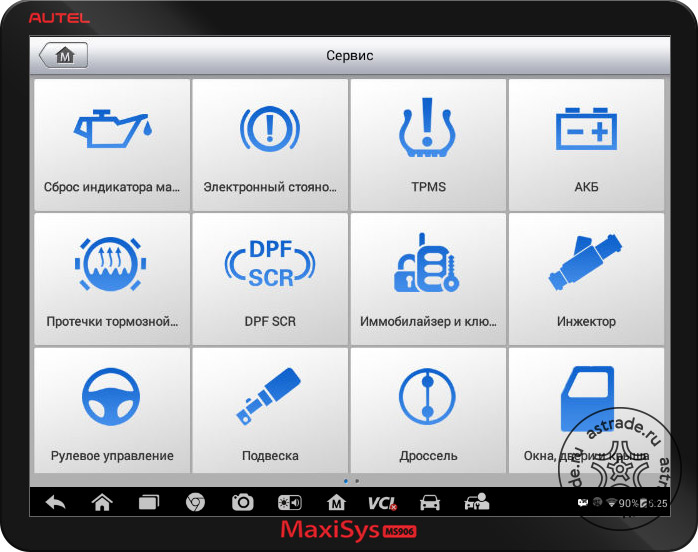
Сервисные функции

|
Большинство современных автомобилей требует проведение специальных функций с использованием автосканера даже при рядовом ТО. Диагностический сканер Autel MaxiSys MS 906 BT позволяет произвести все необходимые функции:
|
Функции кодирования:

|
|

|

|

|
|
|---|---|---|---|
| Основные функциональные характеристики | MaxiSys MS906 | MaxiSys MS906BT | MaxiSys Pro (MS908Pro) |
| Кол-во поддерживаемых марок | 76 + EOBD | 76 + EOBD | 76 + EOBD |
| Кол-во адаптеров OBD-I | 11 | 10 | 11 |
| Беспроводная диагностика | |||
|
Функция AutoVIN |
|||
| Функция кодирования ECU | Расширенные | Расширенные | |
| Функции программирования ECU | |||
| Интерфейс MaxiFlash (под-жка J2534) | |||
| Модуль осциллографа | (опция) | (опция) | |
| Модуль видеоэндоскопа | (опция) | (опция) | |
| Характеристики планшета | |||
| Процессор | Samsung Exynos Hexa-Core Processor (1.3 Ghz + 1.7 Ghz) | Samsung Exynos Hexa-Core Processor (1.3 Ghz + 1.7 Ghz) | Samsung Exynos Hexa-Core Processor (1.4Ghz) |
| Жесткий диск | 32 Gb, SSD | 32 Gb, SSD | 32 Gb, SSD |
| ОС | Android 4.4.2 KitKat | Android 4.4.2 KitKat | Android 4.0 Cream Sandwich |
| Аккумулятор | 5 000 mAh | 10 000 mAh | 11 000 mAh |
| Экран |
8.0″ 1024X768 LED емкостной тачскрин |
8.0″ 1024X768 LED емкостной тачскрин |
9.7″ 1024X768 LED емкостной тачскрин |
| Передняя камера | 8 Мп | 8 Мп | 5 Мп |
Программный интерфейс
Уникальная система автоматического распознавания конфигурации автомобиля

|
Система идентификации автомобиля по VIN номеру в один клик из главного меню программы позволяет максимально быстро подключиться к автомобилю, минуя фазы выбора марки, года сброки, рынка и комплектации (функция работает на автомобилях с шиной CAN и поддержкой |

|
Функция автоматического опроса всех установленных блоков управления значительно ускоряет процесс первичной диагностики автомобиля. |
Для быстрого повторного подключения прибор поддерживает восстановление соединения с автомобилем из истории.
Высокий уровень русификации
Автосканер MaxiSYS MS906BT качественно русифицирован более чем на 73%. Перевод производится русскоговорящими специалистами, а не машинным способом. Это практически исключает вероятность ошибок трактовки перевода, которые могут привести к неправильным
действиям диагноста.
Информационные подсказки на русском языке
Рекомендации по ремонту и диагностике, пошаговые описание сервисных функций, адаптаций, тест-блоков на русском языке. Позволят Вам быстро и корректно выполнять необходимые процедуры при диагностике большинства автомобилей.
Удобное меню диагностики.
Каждый производитель автомобиля создает свою структуру даигностического протокола, поэтому в большинстве автосканеров интерфейс диагностической программы будет отличаться в зависимости от выбранного автомобиля. Однако для повышения удобства пользователей
компания Autel стандартизировала структуру основного меню для всех марок, где это было возможно.
Отображение диагностических параметров в графическом и цифровом режимах.

|
В интерфейсе диагностического сканера MaxiSYS 906BT вы можете выбрать удобный для вас режим отображения текущих данных. Часть параметров удобнее отслеживать в аналоговом виде (в виде динамичной стрелки и шкалы значений) (например |
Обновления в один клик

|
Встроенное беспроводное соединение Wi-Fi позволяет подключить автосканер MaxiSys MS906 BT напрямую к Wi-Fi сети вашего сервиса и получать обновления в автоматическом режиме нажатием одной кнопкию Обновления на все сканеры бесплатны |
Аппаратное исполнение
Ударопрочный надежный корпус MaxiSYS MS906 BT
Компания Autel проектирует диагностические планшеты MaxiSYS 906BT с учетом агрессивной среды эксплуатации. Корпус надежно защищен от падений, а с сенсорным экраном можно работать даже в условиях технической грязи и масла.
Использование твердотельных жестких дисков (SSD) делает безопасным использование сканера в условиях регулярных падений, вибрации и неаккуратного обращения с планшетом.
Беспроводной диагностический адаптер

|
Беспроводной диагностический адаптер автосканера MaxiSys MS 906 BT оснащен светодиодной подсветкой, значительно облегчающей поиск диагностического разъема в автомобиле. Дистанционный доступ к адаптеру диагностики позволяет работать с различным узлами автомобиля вне салона — управлять исполнительными механизмами для отслеживания реакции систем, просматривать состояние узлов в зависимости от воздействия на них и т. д. |
Емкая батарея
Емкий аккумулятор позволяет работать с прибором всю смену диагноста без перерыва, оставляя сканер на подзарядку на ночь. Также прибор можно использовать с внешним питанием.
Качественный экран
Качественный цветной сенсорный экран с широкими углами обзора выполнен таким образом, чтобы его было максимально комфортно использовать как внутри автосервиса, так и на открытом воздухе под ярким солнцем.
Полноценный комплект диагностических адаптеров старого и нового формата и широчайший перечень марок автомобилей
Комплектация сканера включает в себя все диагностические разъемы, устанавливавшиеся на различных автомобилях в разных годах. Диагност может быть уверен, что сможет подключиться к любому приехавшему автомобилю.
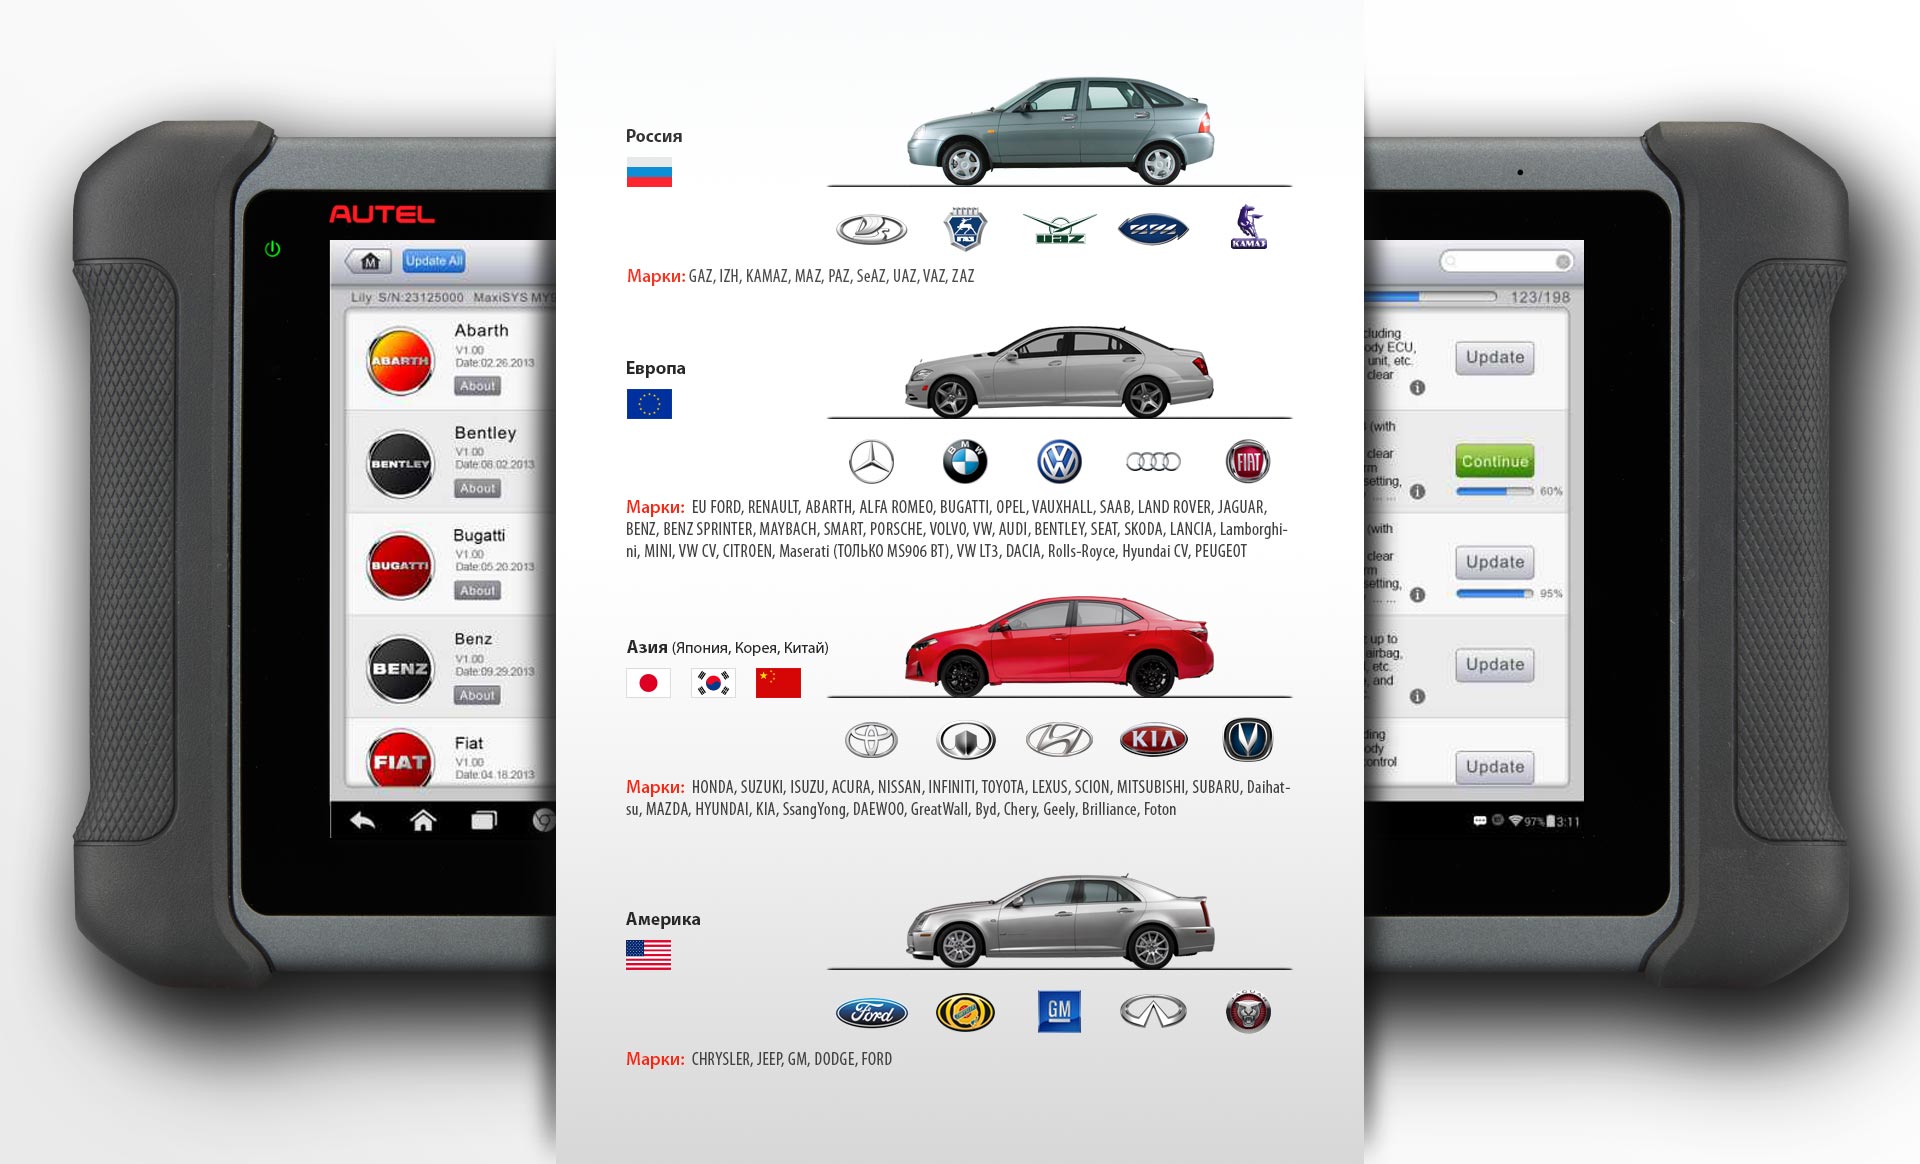
Прибор равноценно поддерживает все автомобильные регионы — Россия (Lada, ГАЗ, УАЗ), Европа, Америка, Азия (Япония, Корея, Китай)
Дополнительные функции
Удобная система ведения отчетов диагностики

|
Вы можете сохранять все отчеты о проведенной диагностике и просматривать историю работы с отдельным автомобилем. Удобная система печати отчетов по беспроводному соединению с принтером через общую Wi-Fi сеть позволяет оперативно создавать отчет о проведенной диагностике. Возможность составления быстрых отчетов с перечислением всех ошибок во всех системах и распечатка их одним списком делает прибор Autel MaxiSYS 906BT максимально удобным для задач быстрой оценки автомобиля или Trade-in |
Полноценная операционная система Android

|
Использование открытой операционной системы Android позволяет работать со всеми программами сторонних разработчиков на основном планшете Autel (например, с диагностической базой Motordata) |

|
Быстрый и удобный доступ в Интернет, наличие удобных офисных приложений (календарь, контакты, записная книжка) делают работу диагноста намного комфортнее. |
Возможность подключения видеоэндоскопа и осциллографа
Доступные и простые в использовании видеоэнодоскопы Autel Maxi Video, всегда присутствующие в продаже, значительно упрощают работу с электропроводкой, трудоступными узлами и анализ цилиндро-поршневой группы. Весь видеопоток может быть записан для дальнейшего
предоставления отчета автовладельцу.
Дополнительный осциллограф от компании Autel позволяет производить углубленный анализ системы зажигания и работы различных датчиков и узлов автомобиля.
Высокий уровень корректности работы ПО

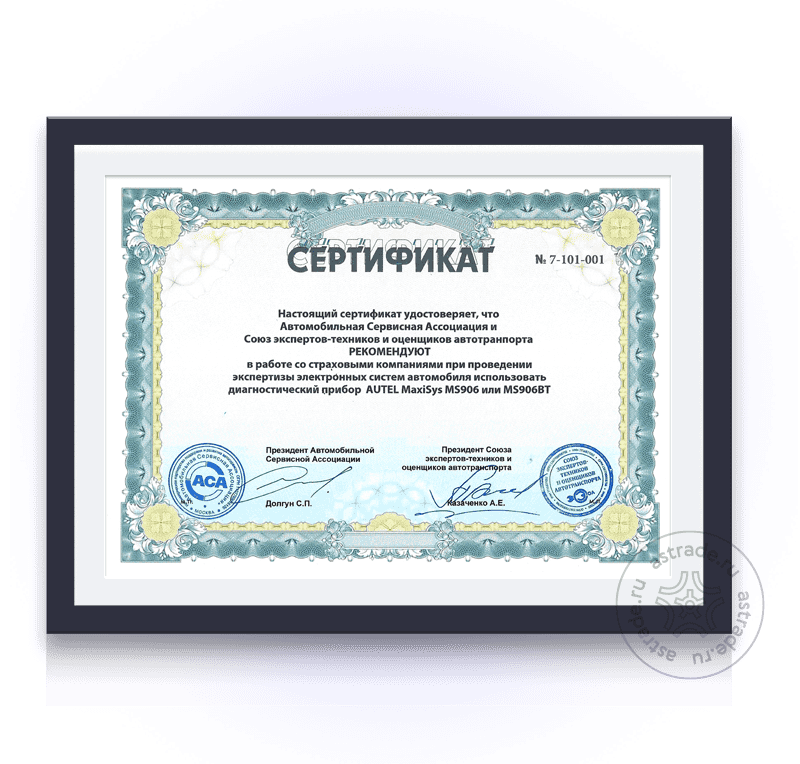
Рекомендован в работе со страховыми компаниями
Автосканер Autel MaxiSys MS906BT рекомендован Автомобильной Сервисной Ассоциацией и Союзом экспертов-техников и оценщиков для проведения диагностики (экспертизы) электронных систем автомобиля в работе со страховыми компаниями.
Комплектация
- Сканер Autel MaxiSys MS906BT – 1 шт.
- Беспроводной адаптер MaxiVCI V100 – 1 шт.
- Mini USB кабель – 1 шт.
- Адаптер питания AC\DC (12 В) – 1 шт.
- Кабель для работы от прикуривателя – 1 шт.
- Предохранители – 2 шт.
- Мягкая ткань для экрана – 1 шт.
- Адаптер Honda-3 – 1 шт.
- Адаптер Nissan-14 – 1 шт.
- Адаптер Mitsubishi/Hyundai-12+16 – 1 шт.
- Адаптер Kia-20 – 1 шт.
- Адаптер Benz-38 – 1 шт.
- Адаптер BMW-20 – 1 шт.
- Адаптер VW/AUDI-2+2 – 1 шт.
- Адаптер GM/Daewoo-12 – 1 шт.
- Адаптер Benz-14 (только для Европы) – 1 шт.
- Инструкция – 1 шт.
- Руководство пользователя – 1 шт.
- Упаковочный лист – 1 шт.
- Кейс для хранения и транспортировки – 1 шт.
Завод-производитель оставляет за собой право менять комплектацию без согласования с покупателем. Сверяйте комплект поставки с листом комплектации.
Технические характеристики
|
Процессор: |
Samsung Exynos Hexa-Core Processor (1.3 GHZ + 1.7 GHZ) |
|
Операционная система: |
Android 4.4.2 KitKat |
|
Жесткий диск: |
32 GB SSD |
|
Дисплей: |
8′ 1024 x 768 Емкостный сенсор |
|
Возможности связи: |
Wi-Fi (802.11 b/g/n), USB: 2.0, Mini USB 2.0, Wireless BT V2.1 + EDR, Class 1, HDMI 1.4a, microSD Card (до 32 GB) |
|
Встроенная батарея: |
10000 mAh, 3.7 V Li-Pol |
|
Вес (головного модуля): |
0.93 кг. |
|
Основная камера: |
8.0 Мп, автофокус со вспышкой |
Самая функциональная диагностическая линейка в мире
Широкая поддержка специальных дилерских функций
- Специальные тест (тест-блоки)
- Адаптации и инициализации
- Сервисные функции
- Расширенные функции кодирования
Средний уровень русификации > 73%
Лучший в мире автосканер иностранного производства по степени поддержки русского языка.
Опрос всех систем автомобиля за считанные секунды
- Мощный процессор Samsung Exynos Hexa-Core Processor (1.3 GHz + 1.7 GHz)
- Твердотельный винчестер SDD 32Gb
- Восстановление подключения авто из истории
- Беспроводная диагностика по Bluetooth
Базовые функции с комфортом
- Опрос всех систем с расшифровкой ошибок
- Цифровое и графическое отображение параметров
- Активации с подбором параметров
- Удобное стандартизированное меню
- Информационные подсказки на русском языке
80 марок авто в базовом комплекте
Поддержка всех рынков, включая Россию
- Россия (Lada, ГАЗ, УАЗ)
- Европа
- Америка
- Азия (Япония, Корея, Китай)
Уникальные возможности MaxiSys
Поддержка всех рынков, включая Россию
- Функция AutoVIN (автоопределение авто по VIN — коду)
- Функция AutoScan (автоопрос всех систем автомобиля)
- Своя база данных по клиентам и авто
- Сообщество диагностов MaxiFIX
Базовые функции: делаем с комфортом
Ежедневная диагностика с MaxiSys MS906BT станет удобной как никогда
- Чтение ошибок и расшифровка
- Цифровое и графическое отображение параметров
- Активации с подбором параметров
- Удобное меню
- Информационные подсказки на русском
Информация по ошибкам самодиагностики
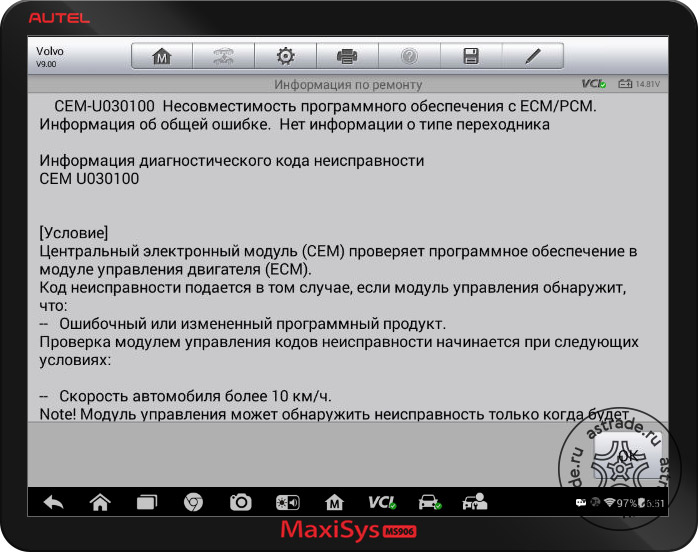
Линейка MaxiSys обладает самой объемной информационной базой по ошибкам самодиагностики. При наличии информации от производителя, MaxiSys не только расшифрует ошибки, но и выдаст возможные причины ее возникновения с рекомендациями по дальнейшему ремонту.
3 способа отображения параметров с записью и анализом
Используя MaxiSys можно отображать параметры систем так, как удобно именно Вам:
- Некоторые параметры привычнее отслеживать в аналоговом варианте, например, давление.
- Часть параметров удобнее просматривать в графическом виде, наблюдая за их изменением во времени (потенциометры, датчик кислорода).
- Часть параметров необходимо накладывать в графике для наблюдения изменений относительно друг друга (например, массовый расход воздуха и обороты двигателя).
Только в MaxiSys все эти способы отображения доступны для любых параметров и блоков, независимо от марки и модели автомобиля.
Подбирайте параметры для проверки самостоятельно
Не все электронные блоки поддерживают функцию тест-блоков исполнительных механизмов.
Для таких блоков в режиме активации мы создали функцию, которая позволит Вам выбрать параметры в реальном времени, по которым Вам будет легче диагностировать необходимый механизм или исполнительное устройство.
Стандартное меню диагностики для всех марок и моделей
Каждый производитель создает свою структуру диагностической программы.
Не имея достаточного опыта в работе с определенной маркой, Вы потратите много времени на поиски необходимой функции.
Для минимизации потерь времени мы стандартизировали основное меню для всех марок, где это было возможно.
Информационное сопровождение процедур на русском языке
Высокая степень русификации позволит быстро и корректно выполнять необходимые процедуры при диагностике большинства автомобилей.
Рекомендации по ремонту и диагностике, пошаговые описания сервисных функций, адаптаций, тест-блоков на русском языке.
MaxiSys MS906BT с поддержкой 80 марок
Первый иностранный автосканер с полноценной поддержкой российских автомобилей
Сравнение линейки сканеров Autel MaxiSys
Выбирайте прибор, который идеально подойдет для решения именно Ваших профессиональных задач!
Особенности Autel MaxiSys MS906BT
* 1. Чрезвычайно мощный шестиядерный процессор Samsung Exynos
* 2. Самый обширный полный охват системы для более чем 80 американских, азиатских и европейских марок и моделей.
* 3. Исключительная функциональность OE-Level от комплексной диагностики и услуг OBDII до расширенного кодирования ECU
* 4.8.0-дюймовый глянцевый емкостный дисплей Multi-Touch со светодиодной подсветкой и разрешением 1024×768 с технологией IPS для сверхмобильности
* 5. Улучшенное беспроводное соединение BT между планшетным дисплеем и устройством VCI обеспечивает большую мобильность и удобство в работе.
* 6. Улучшенное беспроводное соединение BT между планшетным дисплеем и устройством VCI обеспечивает большую мобильность и удобство в работе.
* 7. Внутренний надежный твердотельный накопитель емкостью 32 ГБ для повышения производительности
* 8. Встроенная 8-мегапиксельная задняя камера с автофокусом и фонариком
* 9. Простая и интуитивно понятная навигация позволяет легко и быстро найти то, что вам нужно.
* 10. Встроенный перезаряжаемый литий-полимерный аккумулятор, обеспечивающий до 14 часов непрерывной работы.
* 11.802.11b/g/n Wi-Fi для доступа к вашим любимым веб-ресурсам
* 12. Уникальный эргономичный дизайн с прорезиненной внешней защитой и прочным внутренним корпусом
* 13.USB, аудио и вспомогательные порты облегчают подключение аксессуаров
* 14. Операционная система Android с открытым исходным кодом для быстрой загрузки и многозадачности
* 15.Полные возможности для кодов, оперативных данных, активного теста, информации ЭБУ, адаптации, сопоставления, кодирования и т. д.
* 16. Технология Smart AutoVIN для легкой идентификации автомобиля
* 17. Автоматические обновления системы и программного обеспечения с push-уведомлениями в режиме реального времени через Интернет
* 18. Мгновенная техническая поддержка дистанционного управления в любое время и в любом месте
* 19. Облачное онлайн-сообщество MaxiFix предоставляет обширную базу данных по диагностике и ремонту, а также проверенные исправления.
* 20. Интерактивные сеансы регистрации данных позволяют напрямую связаться со службой технической поддержки Autel для непосредственного устранения диагностических ошибок и ошибок.
* 21. Универсальная многозадачность, разработанная для идеального управления работой мастерской, чтобы все файлы данных, информация о клиентах и записи транспортных средств были хорошо организованы.
* 22.Удобная система управления данными для управления внутренними программными приложениями и просмотра данных
| Operating System | Android™ 4.4.2, КитКат |
| процессор | 5260-ядерный процессор Samsung Exynos T6 (четырехъядерный процессор ARM Cortex-A1.3 с частотой 7 ГГц + двухъядерный процессор ARM Cortex-A1.7 с частотой 15 ГГц) |
| Память | 2 ГБ ОЗУ и 32 ГБ ПЗУ |
| Блок с механическими кнопками | 8.0-дюймовый емкостный сенсорный экран со светодиодной подсветкой и разрешением 1024x768P |
| связь |
Wi-Fi (802.11 б / г / п) USB: 2.0, мини-USB 2.0 Беспроводная связь BT V2.1+EDR Class1, HDMI 1.4a SD-карта (поддержка до 32 ГБ) |
| Камера (сзади) |
Задняя панель, 8.0 мегапикселей автофокус с фонариком |
| Датчики | Гравитационный акселерометр, датчик внешней освещенности (ALS) |
| Аудио вход / выход |
Микрофон, один динамик 3-диапазонный 3.5-мм разъем для стерео/стандартной гарнитуры |
| Питание и батарея |
Литий-полимерный аккумулятор 10,000 мАч 3.7 В Зарядка от источника питания 12 В переменного/постоянного тока |
| Входное напряжение | 12 В (9-35 В) |
| потребляемая мощность | 5 W |
| Рабочая Температура | От -10 до 55 ° C (от 14 до 131 ° F) |
| Температура хранения | От -20 до 70 ° C (от -4 до 158 ° F) |
| Размеры (Ш х В х Г) | 270.8 мм (10.0 дюйма) x 176.0 мм (6.9 дюйма) x 36.0 мм (1.4 дюйма) |
| Вес | СЗ: 1.05 кг (2.3 фунта) |
|
MaxiSys Elite |
MaxiSys CV |
MaxiSys MS908S Про |
MaxiSys MS908S |
MaxiSys МС906ТС |
MaxiSys МС906БТ |
MaxiSys MS906 |
|
| Функция | |||||||
| Сканирование DTC всех систем | √ | √ | √ | √ | √ | √ | √ |
| Сервисная функция | √ | √ | √ | √ | √ | √ | √ |
| Двунаправленный контроль | √ | √ | √ | √ | √ | √ | √ |
| Авто VIN технология | √ | √ | √ | √ | √ | √ | √ |
| Кодирование ЭБУ | √ | — | √ | √ | √ | √ | — |
| Программирование ЭБУ | √ | — | √ | — | — | — | — |
|
Облачная информационная система МаксиФикс |
√ | √ | √ | √ | √ | √ | √ |
| Менеджер данных | √ | √ | √ | √ | √ | √ | √ |
| Менеджер магазина | √ | √ | √ | √ | √ | √ | √ |
| Дистанционное поддержка | √ | √ | √ | √ | √ | √ | √ |
| Отчет до сканирования и отчет после сканирования | Только Северная Америка | — | Только Северная Америка | Только Северная Америка | √ | Только Северная Америка | Только Северная Америка |
| Функция печати | √ | √ | √ | √ | √ | √ | √ |
| Многоязычная поддержка | √ | √ | √ | √ | √ | √ | √ |
| Покрытие | |||||||
| Внутреннее/азиатское/европейское покрытие (с 1996 г. по настоящее время) | √ | √ | √ | √ | √ | √ | √ |
| аппаратные средства | |||||||
| Размер дисплея | 9.7 « | 9.7 « | 9.7 « | 9.7 « | 8″ | 8″ | 8″ |
| Беспроводной VCI | МаксиФлэш Элита | МаксиФлэш Элита | МаксиФлэш Элита | Беспроводная диагностика Интерфейс |
МаксиВКИ V100 | МаксиВКИ V100 | — |
| Срок службы батареи | 15400 мАч 3.7 В | 11000 мАч 3.7 В | 11000 мАч 3.7 В | 11000 мАч 3.7 В | 10000 мАч 3.7 В | 10000 мАч 3.7 В | 5000 мАч 3.7 В |
| Память для хранения | 64GB | 64GB | 64GB | 64GB | 32GB | 32GB | 32GB |
| Комплект соединителей | √ | √ | √ | √ | √ | √ | √ |
| Опции | |||||||
| TPMS | — | — | — | — | √ | — | — |
| осциллограф | √ | √ | √ | √ | √ | √ | — |
| Контрольная камера | √ | √ | √ | √ | √ | √ | — |
| ADAS | √ | — | √ | √ | — | √ | √ |
-
Руководство пользователя MaxiSys MS906 TS и BT V2.0 EN190613(9)
-
Руководство пользователя MaxiSys MS906BT (традиционный китайский), версия 1.0
-
Сравнительная таблица MS905 и MS906(1)
-
Сравнительная таблица MS906-MS908-Elite