Преимущества сервиса Port
Авторизованный сервисный центр для 22 производителей
Услуги по монтажу, настройке, ремонту всего спектра оборудования
Аккредитованные специалисты
Доставка оборудования в сервисный центр
БОЛЬШЕ О СЕРВИСНОМ ЦЕНТРЕ
Обязательная гарантия на услуги
Наша компания является авторизованным сервисным центром, поэтому мы всегда следим за качеством своего обслуживания.Воспользовавшись нашими услугами вы получаете:
Штат специалистов, готовый ответить на вопросы
Бесплатный выезд специалиста
Актуальную документацию по обслуживанию оборудования
БОЛЬШЕ О СЕРВИСНОМ ЦЕНТРЕ
Вам могут быть интересны:
перейти к содержанию
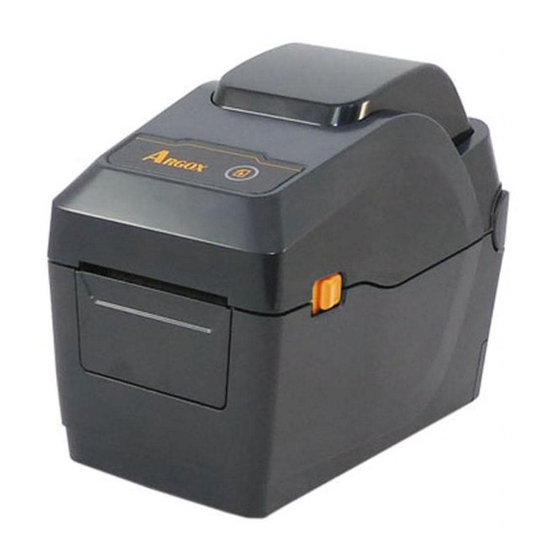
ARGOX D2-250 Настольный принтер штрих-кодов

Пакет внутри

Методология

Болееview настольного принтера штрих-кодов ARGOX D2-250

- Верхняя крышка
- Показатель 1
- Показатель 2
- Кнопка подачи
- Защелка открытой крышки
Как мы начинаем?
 Выключатель
- Разъем питания
- USB Тип B
- USB Тип A
- Слот для бумаги
 Выключатель
внутренний view ARGOX D2-250 Desktop Barcode Printe

- Термопечатающая головка
- Передающий датчик
- Держатели рулонов носителей
- Медиагиды
- Отражающий датчик
- Опорный ролик
Пользователь предупрежден о том, что любые изменения или модификации, не рекомендованные Arg0x nformation Co. Ltd., влекут за собой право пользователя на эксплуатацию оборудования. Чтобы обеспечить соответствие требованиям, пользователи должны использовать аксессуары и периферийные устройства, одобренные Argox hformation Co. Ltd. Дополнительная информация: Это устройство соответствует требованиям правил FOC. Эксплуатация осуществляется в соответствии с двумя условиями FC. Это устройство не может вызывать интерференцию хамфада, и это устройство должно принимать любые получаемые помехи, включая интерференцию, которая может привести к нежелательным срабатываниям.
УВЕДОМЛЕНИЕ ПРОМЫШЛЕННОСТИ КАНАДЫ
Это устройство соответствует требованиям hdustry Canada ICES-003 ckss A. CE EMC: EN 55o32-2012/AC2013 EN 55024 2010 A12015 Argox Infomation Co. Ltd удостоверяет, что следующие продукты и их компоненты соответствуют действительным требованиям Европейского союза RoHS.
Документы / Ресурсы
Рекомендации

Аргокс | компания Sato
- Manuals
- Brands
- SATO Manuals
- Printer
- Argox D2-250
- User manual
-
Contents
-
Table of Contents
-
Troubleshooting
-
Bookmarks
Quick Links
D2 Series Printer
User’s Manual
D2-250 / D2-350
Version: 1.4
[ Media ]
http://www.argox.com
[ Installation Video ]
Related Manuals for SATO Argox D2-250
Summary of Contents for SATO Argox D2-250
-
Page 1
D2 Series Printer User’s Manual D2-250 / D2-350 Version: 1.4 [ Media ] http://www.argox.com [ Installation Video ]… -
Page 2
D2 Series User Manual FCC ID In a domestic environment this product may cause radio interference in which case the user may be required to take adequate measures. FCC Warning This equipment has been tested and found to comply with the limits for a Class A digital device, pursuant to Part 15 of the FCC Rules. -
Page 3
D2 Series User Manual Bluetooh/Wireless LAN Communication Compliance Statement This product has been certified for compliance with the relevant radio interference regulations of your country or region. To make sure continued compliance, do not: ∙ Disassemble or modify this product. ∙… -
Page 4
D2 Series User Manual Liability Disclaimer ARGOX Corporation takes steps to assure that the company’s published engineering specifications and manuals are correct; however, errors do occur. ARGOX reserves the right to correct any such errors and disclaims any resulting liability. In no event shall ARGOX or anyone else involved in the creation, production, or delivery of the accompanying product (including hardware and software) be liable for any damages whatsoever (including, without limitation, damages for loss of business profits, business… -
Page 5: Table Of Contents
D2 Series User Manual Contents Introduction ………………….1 Features ………………..1 Unpacking ………………..2 Understand your printer …………….3 1.3.1 Perspective view …………….3 1.3.2 Back view ………………4 1.3.3 Interior view …………….5 Printer lights ………………… 6 1.4.1 Status lights……………… 6 1.4.2 System mode …………….
-
Page 6
D2 Series User Manual 4.4 Logging in to the web setting tool …………… 49 Maintenance ………………… 51 5.1 Cleaning ………………….. 51 5.1.1 Printhead ………………51 5.1.2 Media housing ……………… 52 5.1.3 Sensor ………………..52 5.1.4 Platen roller ………………53 Troubleshooting ………………..54 6.1 Printer issues ……………….. -
Page 7: Introduction
1 Introduction Features 1 Introduction Thank you for purchasing an Argox D2 Series industrial barcode printer. This manual provides information about how to set up and operate your printer, load media and solve common problems. Illustrations are provided to help you quickly become familiar with the printer.
-
Page 8: Unpacking
1 Introduction Unpacking 1.2 Unpacking Make sure all of the following items are included in your package. ARGOX D2 Printer Quick Installation Guide Power Supply AC Power Cord USB Cable When you receive the printer, open the package immediately and inspect for shipping damage.
-
Page 9: Understand Your Printer
1 Introduction Understand your printer 1.3 Understand your printer 1.3.1 Perspective view Top Cover Feed Button LED Indicator LED 2 LED 1 Cover Latch…
-
Page 10: Back View
1 Introduction Understand your printer 1.3.2 Back view RS232/Ethernet(Option) USB A USB B Power Switch Power Jack Caution To avoid injury, be careful not to trap your fingers in the Paper Slot while opening or closing the Top Cover.
-
Page 11: Interior View
1 Introduction Understand your printer 1.3.3 Interior view Printhead See-through Sensor Media Roll Holders Media Guides Reflective Sensor Platen Roller TPH Replacement Video Roller Replacement Video…
-
Page 12: Printer Lights
1 Introduction Printer lights 1.4 Printer lights There are two LED lights that show the status of D2 Series printer. The Upside light is defined in LED2. LED1 is below LED2 and Feed symbol. 1.4.1 Status lights Status lights help you check printer’s condition. The following tables show the blinking speed of status lights and the conditions they indicate.
-
Page 13
1 Introduction Printer lights Blinking LED 2 LED 1 Description pattern The printer is ready to print. Green Green In pause. Green Green The printer is transmitting data. Green Green Green Green TPH high temperature. The printer is writing data to the flash or USB memory. Green Green The USB memory is being initialized. -
Page 14
1 Introduction Printer lights The print module is opened when the printer is Top Cover turned on. Open Cover (Thermal Head) open error during printing. Flash ROM on the CPU board error or USB memory error. USB R/W An erase error has occurred when formatting Error the USB memory. -
Page 15: System Mode
1 Introduction Printer lights 1.4.2 System mode The system mode consists of status light color combinations. It contains a list of commands for you to select and run. To enter the system mode and run the command, do the following: 1.
-
Page 16: Get Started
2 Get started Attach the power cord 2 Get started This chapter describes how to set up your printer. Caution Do not use your printer in areas exposed to splashing water or any other liquid. Caution Do not drop your printer, or place it in an area subject to humidity, vibration or shock.
-
Page 17: Turn On/Off Your Printer
2 Get started Turn on/off your printer 2.2 Turn on/off your printer When your printer is connected to a host (a computer), it is good to turn on the printer before turning on the host, and turn off the host before turning off the printer.
-
Page 18: Load Media
2 Get started Load media 2.3 Load media There are various types and sizes for the media roll. Load the applicable media to satisfy your need. 2.3.1 Prepare media The inside wound and outside wound media roll can be loaded into the printer the same way.
-
Page 19: Place A Media Roll
2 Get started Load media 2.3.2 Place a media roll 1. Pull the head latch to open the top cover of the printer. 2. Pull the Media Roll Holders to slide them outward, and place the media roll between the holders. Make sure the print side is up, and the media roll is clamped tightly by the holders.
-
Page 20
2 Get started Load media 3. Pull the media until it reaches out of the printer. Thread the media under the media guides. 4. Close the top cover on both side. -
Page 21
2 Get started Load media Flexibility If you usually use the same width media or fanfold media, scroll the “Media Roll Holder Wheel” to adjust width to the same media guide. Media Holder Stop Adjustment… -
Page 22: Test Media Feed
2 Get started Load media 2.3.3 Test media feed 1. Turn on the printer, and press the FEED button to feed a label. 2. Flip the media and tear it along the edge of the front cover.
-
Page 23: Media Types
2 Get started Media types 2.4 Media types Your printer supports various media types, including non-continuous media, continuous media, and fanfold media. The following table provides details about them. Media Type Looks Like Description Non-Continuous Non-continuous media is the typical media for Media bar code printing.
-
Page 24
2 Get started Media types Media Type Looks Like Description Continuous Continuous media does not have gaps, holes, Media notches or black marks. It allows you to print data anywhere on the media. A cutter may be used for splitting labels. Fanfold Media Fanfold media is in continuous form, but it can be used as non-continuous media, because its… -
Page 25: Media Sensing
2 Get started Media sensing 2.5 Media sensing D4 printers offer two types of media sensor: transmissive and reflective. They are used for detecting specific media types. 2.5.1 Transmissive sensor The transmissive sensor is fixed and placed near the center line with 6.27 mm offset of the printhead.
-
Page 26: Reflective Sensor
2 Get started Media sensing 2.5.2 Reflective sensor The reflective sensor is movable within the entire width of the media. It detects gaps, notches and black marks not located at the center of the media. Multi Columns Notch Black Mark Flip the media so the black-mark side is facing down to align with the sensor.
-
Page 27: Printer Operation
3 Printer operation Printing Media Calibration & Configuration 3 Printer operation This chapter provides information about printer operation. 3.1 Printing Media Calibration & Configuration You will want the printer to work properly before starting your print jobs. To do this, you need to calibrate the media sensor. Printers provide transmissive and reflective sensor calibration.
-
Page 28: Self Test
3 Printer operation Self Test 3.2 Self Test The printer can run a self test to print a configuration label, which helps you understand current settings of the printer. 1. Turn off the printer. 2. Press and hold the FEED button, and turn on the printer. 3.
-
Page 29
3 Printer operation Self Test PPLZ… -
Page 30
3 Printer operation Self Test 1. Version Information The firmware version and its build date. 2. Standard RAM Display SDRAM size. 3. Available RAM RAM is able to be used. 4. Flash Type The flash memory type and size. 5. Available Flash Flash is able to be used. -
Page 31
3 Printer operation Self Test Printing speed unit is inch per second (ips). 17. ABS. Darkness Display the current darkness. You can use the PPLZ command ~SD to define 18. Trim. Darkness Display the adjustment of the current darkness. You can use the PPLZ command ^MD to define it. -
Page 32
3 Printer operation Self Test 28. Reprint After Error When it is enabled, your printer reprints the label after the error fixed if it is printed incorrectly due to the error. 29. Backfeed Enabled/Disabled Enable or disable backfeed during the printing process. When it is enabled, the printer moves the paper forward in a predefined length 1 second after printing, and pulls the paper back in a predefined length once the printing begins again. -
Page 33
3 Printer operation Self Test This is for developers to debug. 43. Reflective Sensor Offset This is for developers to debug. 44. See-Through Sensor Offset This is for developers to debug. 45. See-Through Sensor Automatic Gain Control This is for developers to debug. 46. -
Page 34
3 Printer operation Self Test Option Parts If your printer has a RS-232 module, your PPLZ configuration label will contain the following entries: RS232 Protocol It lists RS-232C settings in the following order: baud rate, data length, parity check, stop bit and flow control. If your printer has an Ethernet module, your PPLZ configuration label will contain the following entries: IP Address… -
Page 35
3 Printer operation Self Test When it is enabled, the host communicates with the printer via the socket. Socket Port Display printer port number. IPv6 Mode It determines how you get the IPv6 address of your printer. There are three modes: MANUAL, DHCPv6 or AUTO. -
Page 36
3 Printer operation Self Test DHCP When DHCP is enabled, it assigns an IP address to your printer automatically. DHCP Hostname Display the name of a DHCP client in Wi-Fi module. Socket Port Display the socket number of the printer in Wi-Fi module. SSID Short for service set identifier. -
Page 37
3 Printer operation Self Test PPLA… -
Page 38
3 Printer operation Self Test PPLB… -
Page 39: Reset Your Printer
3 Printer operation Reset your printer 3.3 Reset your printer By resetting your printer, you can return your printer to the state it was in when you receive it. This can help you solve some problems caused by settings changed during the printing. Do the following to reset your printer: 1.
-
Page 40: Communications
3 Printer operation Communications 3.4 Communications 3.4.1 Interfaces and Requirements This printer comes with USB type A and type B interface, a nine-pin Electronics Industries Association (EIA) RS-232 serial data interface. USB Interface Requirements The Universal Serial Bus (USB) interface is compatible with your existing PC hardware. The USB’s “plug and play”…
-
Page 41
3 Printer operation Communications On: 100 Mbps link Green Speed LED Off: 10 Mbps link On: link up Amber Link/Activity LED Off: link down Blinking: activity… -
Page 42: Driver Installation
3 Printer operation Driver installation 3.5 Driver installation The bundled printer driver can be applied to all applications under Windows Vista/ Windows 7/ Windows 8/ Windows 10, supporting 32-bit/ 64-bit operation systems. With this driver you can operate any popular Windows software applications including Argox Bartender UL label editing software or MS Word, etc., to print to this printer.
-
Page 43: Installing A Plug And Play Printer Driver (For Usb Only)
3 Printer operation Driver installation 3.5.1 Installing a Plug and Play printer driver (for USB only) 1. Turn off the printer. Plug the power cable into the power socket on the wall, and then connect the other end of the cable to printer’s power socket. Connect the USB cable to the USB port on the printer and on the PC.
-
Page 44
3 Printer operation Driver installation 3. Assign the directory to keep Seagull driver, (for example: C:\Seagull) and click «Next». 4. Click «Finish». -
Page 45
3 Printer operation Driver installation 5. Select Install printer drivers and Click «Next» 6. On the Seagull Driver Wizard prompt, select the first radio button to “Install a driver for a Plug and Play printer” Then click “Next.”… -
Page 46
3 Printer operation Driver installation 7. Enter Printer name (i.e. Argox D2-250 PPLZ) and select «do not share this printer”, and click «Next» 8. Check all the data on the showing screen, if it is correct, click «Finish». -
Page 47
3 Printer operation Driver installation 9. After the related files have been copied to your system, click «Finish». 10. After driver installation is complete, click «Close». The driver should now be installed. -
Page 48: Installing A Printer Driver (For Other Interfaces Except Usb)
3 Printer operation Driver installation 3.5.2 Installing a Printer Driver (for other interfaces except USB) 1. Turn off the printer. Plug the power cable into the power socket on the wall, and then connect the other end of the cable to printer’s power socket. Connect the Parallel cable, Serial cable, or Ethernet cable to the proper port on the printer and on your computer.
-
Page 49
3 Printer operation Driver installation 3. Assign the directory to keep Seagull driver, (for example: C:\Seagull) and click «Next». 4. Click «Finish». -
Page 50
3 Printer operation Driver installation 5. Select Install printer drivers and Click «Next» 6. Make sure printer is connected to PC, select “Other” and click “Next”:… -
Page 51
3 Printer operation Driver installation 7. Select model & emulation — the following examples are based on model D2-250 PPLZ: 8. Select the port of the printer and click «Next». -
Page 52
3 Printer operation Driver installation 9. Enter Printer name (i.e. Argox D2-250 PPLZ) and select «do not share this printer”, and click «Next». 10. Check all the data on the showing screen, if it is correct, click «Finish». -
Page 53
3 Printer operation Driver installation 11. After the related files have been copied to your system, click «Finish». 12. After driver installation is complete, click «Close». The driver should now be installed. -
Page 54: Configuring Your Lan Printer By Web Setting Tool
4 Configuring Your LAN Printer by Web Setting Tool 4 Configuring Your LAN Printer by Web Setting Tool Before doing settings for your printer, be sure that you have a LAN cable. The cable is connected to the LAN connector of your printer. The LAN connector is an 8-PIN RJ45 type modular connector.
-
Page 55: Getting The Ip Address Of Your Lan Printer
4 Configuring Your LAN Printer by Web Setting Tool 4.3 Getting the IP address of your LAN printer You can have the printer run a self test to print a configuration label, which helps you get the IP address of your printer connected to the LAN hub. 1.
-
Page 56
4 Configuring Your LAN Printer by Web Setting Tool When the connection is successful, the Login page will be displayed. Input the user name and password to log in to the web setting tool. The default user name and the default password are given below: Default user name: admin Default password: admin… -
Page 57: Maintenance
5 Maintenance 5 Maintenance This chapter describes routine cleaning procedure. 5.1 Cleaning To maintain print quality and prolong the printer’s life, you need to perform some routine maintenance. Daily maintenance should be done for high volume printing, and weekly for low volume printing. Caution Always turn off the printer before cleaning.
-
Page 58: Media Housing
5 Maintenance Note Printhead warranty becomes void if printhead serial number is removed, altered, defected, or made illegible, under every circumstance. 5.1.2 Media housing Use a soft cloth to clean the dust, dirt or debris built up on the Media Roll Holders, Media Guides and media path.
-
Page 59: Platen Roller
5 Maintenance 5.1.4 Platen roller The platen roller is also important for print quality. Dirty platen roller may damage the printhead. Clean the platen roller right away if the adhesive, dirt or dust accumulates on it. 1. Moisten a soft cloth with absolute ethyl alcohol. 2.
-
Page 60: Troubleshooting
6 Troubleshooting 6 Troubleshooting This chapter provides the information about printer problems and solutions. 6.1 Printer issues The printer is not turned on Did you attach the AC power cord? Make sure the power supply’s connector is inserted into the printer power jack. …
-
Page 61: Media Issues
6 Troubleshooting 6.2 Media issues The media is out Load a new media roll. The paper is jammed Open the printer and clear the jammed paper. Make sure the paper is held properly by the Media Guides. The printing position is not correct …
-
Page 62: Other Issues
6 Troubleshooting 6.3 Other issues There are broken lines in the printed label The printhead is dirty. Clean the printhead. An error occurred when writing data to the USB memory Did you insert the USB drive? Make sure the USB drive is plugged tightly into the port. …
-
Page 63: Specifications
7 Specifications 7 Specifications This chapter provides specifications for the printer. Specifications are subject to change without notice. 7.1 Printer Model D2-250 D2-350 Print method Direct Thermal Resolution 203 dpi (8 dots/mm) 300 dpi (12 dots/mm) Media Alignment Centered Standard: Continuous mode, Tear-off mode Operation Mode Optional: Cutter mode, Peeler mode Reflective Sensor (Movable)
-
Page 64
7 Specifications CPU Type 32 bit RISC microprocessor Software—Label Windows Driver (Windows Vista/ Win 7/ Win 8/ Win 10), editing BarTender® from Seagull Scientific Software— Utility Printer Tool Agency Listing CE, FCC, TUV/cTUVus, Energy Star, RoHS, BSMI… -
Page 65: Media
7 Specifications 7.2 Media Properties Description Media Size Max. width: 60mm Min. width: 12mm Thickness: 0.00236”~0.00787” (0.06mm~0.2mm) 5”(127mm) OD on a 1”/1.5” (25.4/38 mm) ID core 4.5”(115mm) OD on a 0.5” (12.7mm) ID core Dealer Option external media stand 8” OD on 1”/3” ID Core Min.
-
Page 66: Fonts, Barcodes, And Graphics Specification
7 Specifications 7.5 Fonts, Barcodes, and Graphics Specification The specifications of fonts, bar codes and graphics depends on the printer emulation. The emulations PPLA, PPLB, and PPLZ are printer programming languages, through which the host can communicate with your printer. Printer Programming Language PPLA Programming Language PPLA…
-
Page 67
7 Specifications Printer Programming Language PPLB Programming Language PPLB Internal fonts 5 fonts with different point size 8 bits code page : 437, 850, 852, 860, 863, 865, 857, 861, 862, 855, 866, 737, 851, 869, 1252, 1250, 1251, 1253, 1254, 1255 Symbol sets 7 bits code page: USA, BRITISH, GERMAN, (Code pages) -
Page 68
7 Specifications Printer Programming Language PPLZ Programming Language PPLZ 8 (A~H) fonts with different point size. 8 AGFA fonts: 7 (P~V) fonts with fixed different Internal fonts point size (not scalable). 1 (0) font with scaling point size. USA1, USA2, UK, HOLLAND, DENMARK/NORWAY, SWEDEN/FINLAND, GERMAN, FRANCE1, FRANCE2, ITALY, Symbol sets… -
Page 69: Ethernet(Option)
7 Specifications 7.6 Ethernet(Option) Properties Description Port RJ-45 Speed 10Base-T/100Base-T (Auto Detecting) Protocol ARP, IP, ICMP, UDP, TCP, HTTP, DHCP, Socket, LPR, IPv4, IPV6, SNMPv2 Mode TCP Server/Client, UDP Client Technology HP Auto-MDIX, Auto-Negotiation 7.7 Bluetooth (Option) Properties Bluetooth I/F Standard Bluetooth 4.2 Enable Device…
-
Page 70: Wireless Lan (Option)
7 Specifications 7.8 Wireless LAN (Option) Properties Wireless LAN I/F Hardware Protocol IEEE 802.11 b/g/n Enabled Device WIRELESS PRINTER Operating -20°C ~ +85°C Temperature Destination Europe Frequency 2412 ~ 2462 MHz 2412 ~ 2472 MHz (Center Channel) Channel 1 ~ 11 ch 1 ~ 13 ch Spacing 5 MHz…
-
Page 71
7 Specifications Properties Wireless LAN I/F 72.2M(Auto-sensing) Antenna External antenna Aerial power 802.11b Max +15 dBm 802.11g Max +17 dBm 802.11n Max +17 dBm Software Connection mode Infrastructure, Adhoc Default IP Address 192.168.1.1 Default Subnet Mask 255.255.0.0 Default ESSID WIRELESS PRINTER Security IEEE 802.11i Cryptograp… -
Page 72: Ports
7 Specifications 7.9 Ports This section provides information about IO port specifications for the printer. 7.9.1 USB There are two common USB connectors. Typically, type A is found on hosts and hubs; type B is found on devices and hubs. The figure below shows their pinouts.
-
Page 73: Ethernet(Option)
7 Specifications 7.9.2 Ethernet(Option) The Ethernet uses RJ-45 cable, which is 8P8C (8-Position 8-Contact). The figure below shows its pinout. Signal Transmit+ Transmit- Receive+ Reserved Reserved Receive- Reserved Reserved…
-
Page 74: Rs-232C(Option)
7 Specifications 7.9.3 RS-232C(Option) The RS-232C on the printer is DB9 female. It transmits data bit by bit in asynchronous start-stop mode. The figure below shows its pinout. Signal Description No Function Transmit Receive No Function Ground No Function Clear to Send Request to Send No Connection Host (DB9)
Перейти к контенту
Решаем любые проблемы с техникой.
Сервисный центр «ПОРТ»
-
Авторизованный сервисный центр для 22 производителей
-
Услуги по монтажу, настройке, ремонту всего спектра оборудования
-
Аккредитованные специалисты
-
Выезд по городу
-
25 лет на рынке
-
Доставка оборудования в сервисный центр

Хочу скидку!
Самовывоз — бесплатно
Доставка — любым удобным способом по согласованию ₽
Характеристики
Страна производства
—
ТАЙВАНЬ (КИТАЙ)
Гарантия производителя
—
12 мес
Объем оперативной памяти
—
32 Мб
Объем физической памяти
—
16 Мб
Все характеристики
1996 год — год основания компании Argox. Сразу же начал исследования и разработки для принтеров штрих-кодов и вышел на рынок. Цель Argox — разработать лучшие технологии и удовлетворить требования международных стандартов.
Стоимость и сроки доставки
Бесплатная доставка осуществляется только до грузового терминала ТК СДЭК, если клиент находится в городе, где нет пункта самовывоза ТК СДЭК, до бесплатно доставляем до ближайшего терминала данной компании (СДЭК). Сроки по данной доставке устанавливаются согласно тарифам ТК и на усмотрение отправителя.
Срочного тарифа и адресной доставки, в услуге «Бесплатная доставка» нет.
Бесплатной доставкой можно воспользоваться только при заказе ККТ с полным комплектом услуг (касса под ключ). При данном условии, бесплатно доставляется только касса.
Если клиент покупает ККТ с полным комплектом услуг + другой товар (весы, денежный ящик, счетчик банкнот, принтер этикеток, 10 коробок чековой ленты и т.д), то бесплатно доставляем только ККТ, доставку на все остальное клиент оплачивает отдельно.
Условия бесплатной доставки по Москве и МО
Ваш заказ доставляет курьерская служба:
- — Грастин (Москва и МО до 25 км от МКАД);
- — ETGO (Москва и МО до 25 км от МКАД)
- — Алгоритм (Москва и МО до 25 км от МКАД);
- — CDEK (от 25км от МКАД и более);
Бесплатной доставкой можно воспользоваться только при заказе ККТ с полным комплектом услуг (касса под ключ)! При данном условии, бесплатно доставляется только касса.
Если клиент покупает ККТ с полным комплектом услуг + другой товар (весы, денежный ящик, счетчик банкнот, принтер этикеток, 10 коробок чековой ленты и т.д), то бесплатно доставляем только ККТ, доставку на все остальное клиент оплачивает отдельно.
Бесплатная доставка осуществляется по Москве на следующий день после её оформления. По МО (до 25 км от МКАД) — 1-2 дня. В день планируемой доставки Вам необходимо ответить на звонок курьера, иначе он будет вынужден перенести доставку на следующий день.
Если Вы находитесь более чем 25 км от МКАД, то доставку осуществляет ТК CDEK до ближайшего к Вам пункта выдачи данной компании, согласно параметрам для данного направления (сроки сообщаются логистом при оформлении заказа на доставку).
Выбор ТК, по условиям бесплатной доставки, производится на усмотрение отправителя.
Производитель Argox представляет абсолютно новый принтер этикеток D2-250 на современной платформе. Такое устройство применяется для производства, торговли, логистики и складских процессов. Применяя его, можно повысить эффективность вашего среднего и малого бизнеса. Чтобы купить прибор, достаточно заказать его на нашем сайте через корзину или позвонив менеджерам. Доставка осуществляется по Москве и регионам России.
Особенности
Принтер этикеток D2-250подсоединяется к другому оборудованию посредством USB-разъема и USB-хоста, а поддержка различных языков программирования: PPLA+PPLB+PPLZ (DPL+EPL+ZPL) дает возможность быстро подключаться. Относительно небольшие размеры (215х116х170) и вес (1,05 кг) позволят разместить его даже при дефиците свободного места. Разрешение полученного изображение будет иметь 203 dpi. Встроенная память SDRAM 32 Мб и процессор 32-bit осуществляет хорошую скорость печати (до 178 мм в секунду) и избавляет от ожидания.
- Компактность.
- Удобная загрузка бумаги.
- Установка опций после покупки самостоятельно.
- Нанесение всех видов линейных и двумерных штрих-кодов.
- Быстродействие.
- Стильный дизайн.
В нашем интернет-магазине favorit-scan.ru — вы можете приобрести Принтер этикеток Argox D2-250 по доступной цене, с доставкой. Вы можете убедиться в этом самостоятельно — сделав заказ у нас. Если у вас возникли трудности с выбором и вам нужна помощь, позвоните по телефону 8 (800) 777-02-59 и вы получите консультацию специалиста.

Термопринтер печати этикеток Argox, интерфейс USB, USB-Host, ширина печати 54 мм, скорость 178 мм/с 43640
Расходные материалы
Argox D2-250 – это новая модель термопринтера этикеток на абсолютно новой платформе.
Особенностями данной модели являются:
- высокая скорость печати (178 мм/с);
- автоматическое распознавание языков (EPL, DPL, ZPL);
- компактный размер и удобная загрузка бумаги;
- возможность установки опций после покупки;
- Smart-режим использования бумаги.
Традиционно для принтеров Argox, установка таких опций, как нож или отделитель, может производиться пользователем, также самостоятельно устанавливается и дополнительный интерфейс связи Ethernet 10/100.
Возможности установки опций в процессе развития бизнеса позволяют применять оборудование без существенных вложений на доработку.
Используя режим Smart, принтер выполняет калибровку носителя без затрат этикеток, печать происходит с первой этикетки. Возможна печать на узкой этикетке шириной от 12 мм.
Благодаря автоматическому распознаванию языков и поддержке большинства операционных систем, принтер D2-250 может быть легко интегрирован в любую инфраструктуру.
|
Арт. 1020403 Argox D2-250 99-D2202-000
17 956 ₽ Купить |
|---|
|
USB, USB Host |

Технические характеристики
Панель управления
1 клавиша
2 светодиода
Язык программирования
PPLA, PPLB, PPLZ
Индикация и датчики
Датчики
на просвет, на отражение, открытой печатающей головки
Интерфейсы
Интерфейс подключения
USB, USB Host
Характеристики печати
Разрешение печати
203 dpi
Скорость печати
178 мм/сек
Свойства материалов для печати
Этикет лента
рулонная термолента, термоэтикетки, с черной меткой, с фланцем
Минимальная ширина ленты этикеток
12 мм
Максимальная ширина ленты этикеток
60 мм
Толщина бумаги
0.06 — 0.2 мм
Диаметр втулки ленты этикеток
0.5″ (12,7 мм), 1″ (25,4 мм)
Минимальный диаметр втулки ленты этикеток
12.7 мм
Максимальный диаметр втулки ленты этикеток
25.4 мм
Максимальный диаметр рулона этикеток
127 мм
Шрифты / графика / символы
Встроенные шрифты
9 шрифтов с разным размером
6 с гладким шрифтом ASD
Загружаемые шрифты
программные шрифты от Print Tool
Наборы символов
Roman-8, ECMA-94, PC, PC-A, PC-B, Legal и PC437 (греческий), русский
Графика
PCX, BMP, IMG, GDI, HEX
Обработка изображений
поворот шрифта на 0/90/180/270°
увеличение шрифта от 1×1 до 24×24
Штрих-код
Типы штрих-кодов
1D: Code 39, UPC-A, UPC-E, Code 128 subset A/B/C, EAN-13, EAN-8, HBIC, Codabar, Plessey, UPC2, UPC5, Code 93, Postnet, UCC/EAN-128, UCC/EAN-128 K-MART, UCC/EAN-128 Random weight, Telepen, FIM, Interleaved 2 of 5 (Standard/with modulo 10 checksum/ with human readable check digit/ with modulo 10 checksum & shipping bearer bars) , GS1 Data bar (RSS)
2D: MaxiCode, PDF417, Data Matrix (ECC 200 only), QR code, Composite Codes, Aztec
ОС и программные утилиты
Программное обеспечение
BarTender® от Seagull Scientific
Драйверы
Windows Driver (Windows Vista/ Win 7/ Win 8/ Win 10)
Электронные параметры
Питание
от сети 100-240 V ±10%, 50-60 Hz ±5%, через адаптер
Физические характеристики
Габариты товара (ДxШxВ)
215x116x170 мм
Габариты товара (ДxШxВ) в упаковке
21.5/11.6/17 см
Условия эксплуатации и стандарты
Температура эксплуатации
+5°C ~ +40°C
Температура хранения
-20°C ~ +60°C
Влажность при хранении
10-90%, без конденсации
Влажность при эксплуатации
25-85%, без конденсации
Стандарт качества
CB, CE, FCC, TUV/cTUVus, Energy Star
Авторизуйтесь, чтобы оставить отзыв
Оставляйте отзывы, делитесь опытом или просто задавайте интересующие Вас вопросы! Мы оперативно ответим Вам!
Мы поддерживаем контакты с основными официальными сервисными центрами по ремонту техники, предлагаемой в нашем интернет-магазине.
При наступлении случая, требующего ремонта в авторизованном центре, Вы можете обратиться к менеджерам нашей фирмы и мы сами возьмем на себя хлопоты по доставке техники в сервис. Все работы по обслуживанию выполняют квалифицированные мастера в самые краткие сроки . По дополнительным условиям и гарантии обращайтесь к менеджерам за подробной консультацией.
Преимущества покупки Argox D2-250 99-D2202-000 в «Элайтс»
- Широкий модельный ряд и необходимые аксессуары, всегда поможем подобрать оптимальные комплекты оборудования.
- Удобное расположение пунктов выдачи товаров в Ростове-на-Дону, возможна доставка (подробности уточняйте по телефону).
- На товар Argox D2-250 99-D2202-000 предоставляется официальная гарантия.
Похожие товары
+7 (495) 664 99 13
Обратный звонок
mail@ctoretail.ru
г. Москва, Кутузовский проспект , д.36, стр. 3 , оф.211
Мы в соцсетях
© 1993-2023 ТЕХЦЕНТР® Все права защищены