Состояние перевода: На этой странице представлен перевод статьи Installation guide. Дата последней синхронизации: 18 сентября 2023. Вы можете помочь синхронизировать перевод, если в английской версии произошли изменения.
Этот документ является руководством по установке Arch Linux с помощью live-системы, загруженной из официального установочного образа. Данный образ включает в себя специальные возможности, описанные на странице Установка Arch Linux с использованием специальных возможностей. Также на странице Category:Installation process перечислены альтернативные методы установки.
Перед установкой рекомендуется прочитать часто задаваемые вопросы. В тексте используются понятия, обозначения и стили, смысл которых описан на странице Help:Чтение. В частности, примеры кода могут содержать заполнители (отформатированные в курсиве), на месте которых необходимо вручную вписать нужные вам значения.
Данное руководство состоит из кратко описанных шагов, которым рекомендуется следовать в указанном порядке. Более подробные инструкции приведены в соответствующих статьях ArchWiki и на страницах справочных руководств (man) различных программ. Ссылки и на то, и на другое присутствуют в этом руководстве. Также вы можете получить помощь в IRC-канале, на англоязычном форуме или в русскоязычных сообществах Arch Linux.
Arch Linux способен работать на любой x86_64-совместимой машине, имеющей хотя бы 512 МиБ ОЗУ, однако для загрузки live-системы нужно больше памяти.[1] Базовая установка занимает менее 2 ГиБ места на диске. Так как во время установки скачиваются пакеты из удалённого репозитория, необходимо работающее интернет-соединение.
Перед установкой
Загрузка установочного образа
Перейдите на страницу загрузок и, в зависимости от желаемого способа загрузки live-системы, скачайте ISO-файл или netboot-образ, а также соответствующую подпись GnuPG.
Проверка подписи
Рекомендуется проверять подпись образа перед его использованием, особенно когда он был загружен с зеркала HTTP, где загрузки обычно подвержены перехвату для подмены образа на вредоносный.
На системах с установленным GnuPG вы можете сделать это, скачав ISO PGP signature (ссылка на него есть на странице загрузок в разделе Checksums) в каталог с образом и выполнив команду:
$ gpg --keyserver-options auto-key-retrieve --verify archlinux-версия-x86_64.iso.sig
Также можно проверить подпись из установленного Arch Linux:
$ pacman-key -v archlinux-версия-x86_64.iso.sig
Примечание:
- Самой подписью можно манипулировать, если загрузить её с зеркала, а не с archlinux.org, как указано выше. В этом случае убедитесь, что открытый ключ, который используется для декодирования подписи, подписан другим надёжным ключом. Команда
gpgвыведет отпечаток (fingerprint) открытого ключа. - Ещё один метод проверки подлинности подписи — убедиться, что отпечаток открытого ключа идентичен отпечатку ключа разработчиков Arch Linux, которые подписали ISO-образ. Для получения дополнительной информации о процессе проверки подлинности открытых ключей смотрите статью Wikipedia:ru:Криптосистема с открытым ключом.
Подготовка установочного носителя
Загрузить установочный образ на машине, на которой будет проводиться установка, можно с помощью USB-накопителя, оптического диска или сети (при помощи PXE) — инструкции для подготовки установочного носителя описаны в соответствующих статьях.
Загрузка live-окружения
Примечание: Установочные образы Arch Linux не поддерживают Secure Boot, в связи с чем необходимо отключить данную функцию перед загрузкой. Однако при желании возможно настроить Secure Boot после завершения установки Arch Linux.
- Загрузите компьютер с установочного носителя с Arch Linux. Для выбора загрузочного устройства обычно при включении компьютера нажимается специальная клавиша (иногда она указывается на заставке) во время фазы POST. Обратитесь к руководству вашей материнской платы для получения более подробных инструкций.
- Когда появится меню установочного носителя, выберите Arch Linux install medium и нажмите
Enterдля входа в установочное окружение.Совет:
- Установочный образ использует GRUB при загрузке в UEFI-режиме и syslinux в BIOS-режиме. Используйте клавишу
eилиTabдля редактирования параметров загрузки. Список доступных параметров описан в README.bootparams. - Распространённый пример ручной установки параметра загрузки — размер шрифта. Для улучшения читабельности на экране HiDPI (если он не распознался автоматически) может помочь добавление параметра
fbcon=font:TER16x32. Смотрите раздел HiDPI (Русский)#Консоль Linux (tty) для более подробной информации.
- Установочный образ использует GRUB при загрузке в UEFI-режиме и syslinux в BIOS-режиме. Используйте клавишу
- После загрузки вы попадёте в первую виртуальную консоль как пользователь root и увидите приглашение командной оболочки Zsh.
Чтобы переключиться на другую виртуальную консоль в процессе установки (например, для просмотра этого руководства в Lynx), используйте горячие клавиши Alt+стрелка. Для редактирования файлов доступны программы mcedit(1), nano и vim. Список пакетов, присутствующих в установочном образе, доступен на странице pkglist.x86_64.txt.
Установка раскладки клавиатуры и шрифта
По умолчанию используется раскладка консоли US. Посмотреть список доступных раскладок можно с помощью команды:
# ls /usr/share/kbd/keymaps/**/*.map.gz
Чтобы выбрать раскладку, передайте имя соответствующего файла команде loadkeys(1), не указывая полного пути и расширения. Например, чтобы выбрать русскую раскладку, выполните команду:
# loadkeys ru
Используйте Ctrl+Shift для переключения между английской и русской раскладками.
Для корректного отображения кириллицы нужно выбрать подходящий консольный шрифт. Консольные шрифты расположены в каталоге /usr/share/kbd/consolefonts/ и могут быть выбраны аналогичным способом с помощью команды setfont(8).
Например, для загрузки шрифта стандартного размера с русскими буквами выполните:
# setfont cyr-sun16
Для экрана HiDPI можно выбрать один из самых больших доступных шрифтов с русскими буквами:
# setfont ter-c32b
Проверка режима загрузки
Чтобы проверить режим загрузки, проверьте разрядность UEFI:
# cat /sys/firmware/efi/fw_platform_size
Если команда выведет 64, то система загружена в режиме UEFI и имеет 64-битный x64 UEFI. Если команда выведет 32, то система загружена в режиме UEFI и имеет 32-битный IA32 UEFI — такой вариант тоже поддерживается, но в качестве загрузчика получится использовать только systemd-boot. Если же такого файла не существует, возможно, система загружена в режиме BIOS (или CSM). Если система загрузилась не в том режиме, который вам нужен (UEFI или BIOS), обратитесь к руководству пользователя вашей материнской платы.
Соединение с интернетом
Для настройки сетевого соединения в live-окружении выполните следующие действия:
- Убедитесь, что ваш сетевой интерфейс обнаружен и включён, например, с помощью ip-link(8):
# ip link
- Если планируется использовать Wi-Fi или WWAN, убедитесь, что беспроводная карта не заблокирована с помощью rfkill.
- Подключитесь к сети:
- Ethernet: подключите кабель.
- Wi-Fi: подключитесь к беспроводной сети с помощью iwctl.
- Мобильный широкополосный модем: подключитесь к мобильной сети с помощью утилиты mmcli.
- Настройте сетевые соединения:
- DHCP: установка динамического IP-адреса и адреса DNS-сервера (при помощи systemd-networkd и systemd-resolved) должна срабатывать автоматически для проводных и беспроводных сетевых интерфейсов.
- Статический IP: смотрите Настройка сети#Статический IP-адрес.
- Соединение можно проверить с помощью утилиты ping:
# ping archlinux.org
Примечание: Установочный образ включает в себя преднастроенные и активированные службы systemd-networkd, systemd-resolved, iwd и ModemManager. Если вы хотите использовать их в устанавливаемой системе, нужно будет установить, настроить и активировать их вручную.
Синхронизация системных часов
В live-окружении по умолчанию включен systemd-timesyncd, который выполнит синхронизацию времени автоматически после подключения интернета.
Чтобы удостовериться, что время задано правильно, используйте timedatectl(1):
# timedatectl
Разметка дисков
Когда запущенная система распознает накопители, они становятся доступны как блочные устройства, например, /dev/sda, /dev/nvme0n1 или /dev/mmcblk0. Чтобы посмотреть их список, используйте lsblk или fdisk.
# fdisk -l
Результаты, оканчивающиеся на rom, loop и airoot, можно игнорировать.
Совет: Перед разметкой NVMe-накопителей и жёстких дисков с расширенным форматом (Advanced Format) проверьте, что они используют оптимальный логический размер сектора.
На выбранном накопителе должны присутствовать следующие разделы:
- Раздел для корневого каталога
/. - Для загрузки в режиме UEFI также необходим системный раздел EFI.
Если вы хотите создать составное блочное устройство для LVM, шифрования системы или RAID, сделайте это сейчас.
Для изменения таблицы разделов используйте fdisk или parted. Например:
# fdisk /dev/диск_для_разметки
Примечание:
- Если диск не отображается, убедитесь, что контроллер диска не находится в режиме RAID.
- Если диск, с которого планируется загрузка системы, уже содержит системный раздел EFI — не создавайте новый раздел, а используйте существующий.
- Подкачка может быть размещена в файле подкачки, если выбранная вами файловая система поддерживает его.
Примеры схем
| Точка монтирования | Раздел | Тип раздела | Рекомендуемый размер |
|---|---|---|---|
/mnt/boot1
|
/dev/системный_раздел_efi
|
Системный раздел EFI | Минимум 300 МиБ. При установке нескольких ядер лучше 1 ГиБ или более. |
[SWAP]
|
/dev/раздел_подкачки
|
Linux swap | Более 512 МиБ |
/mnt
|
/dev/корневой_раздел
|
Linux x86-64 root (/) | Остаток |
- Можно использовать другие точки монтирования, например
/mnt/efi, если используемый загрузчик будет способен загрузить ядро и initramfs с корневого раздела. Смотрите соответствующее предупреждение в статье Процесс загрузки Arch#Загрузчик.
| Точка монтирования | Раздел | Тип раздела | Рекомендуемый размер |
|---|---|---|---|
[SWAP]
|
/dev/раздел_подкачки
|
Linux swap | Более 512 МиБ |
/mnt
|
/dev/корневой_раздел
|
Linux | Остаток |
Также смотрите Разметка дисков#Примеры схем.
Форматирование разделов
После создания разделов их нужно отформатировать в подходящую файловую систему. Для получения дополнительной информации смотрите раздел Файловые системы#Создание файловой системы.
Например, чтобы отформатировать /dev/корневой_раздел в файловую систему Ext4, выполните следующую команду:
# mkfs.ext4 /dev/корневой_раздел
Если вы создали раздел для подкачки (swap), инициализируйте его с помощью утилиты mkswap(8):
# mkswap /dev/раздел_подкачки
Примечание: В случае с многоуровневыми (stacked) блочными устройствами замените /dev/*_раздел соответствующим путём к блочному устройству.
Если вы создали системный раздел EFI, отформатируйте его в FAT32 с помощью mkfs.fat(8).
Важно: Выполняйте форматирование, только если вы создали новый раздел в процессе разметки. Если системный раздел EFI уже существует, его форматирование уничтожит загрузчики других установленных операционных систем.
# mkfs.fat -F 32 /dev/системный_раздел_efi
Монтирование разделов
Смонтируйте корневой раздел в каталог /mnt. Например, если корневой раздел — /dev/корневой_раздел, выполните следующую команду:
# mount /dev/корневой_раздел /mnt
Создайте точки монтирования для всех остальных разделов (например, /mnt/boot) и примонтируйте соответствующие разделы.
Совет: Команда mount(8), запущенная с опцией --mkdir, автоматически создаст требуемую точку монтирования. Можно создать их и вручную с помощью mkdir(1).
Для UEFI примонтируйте системный раздел EFI:
# mount --mkdir /dev/системный_раздел_efi /mnt/boot
Если вы ранее создали раздел подкачки (swap), активируйте его с помощью swapon(8):
# swapon /dev/раздел_подкачки
В дальнейшем genfstab(8) обнаружит смонтированные файловые системы и пространство подкачки.
Установка
Выбор зеркал
Пакеты для установки будут скачиваться с серверов-зеркал, прописанных в файле /etc/pacman.d/mirrorlist. В установочном образе используется reflector, который после подключения к сети обновит список зеркал (выбрав 20 наиболее актуальных HTTPS-зеркал) и отсортирует их по скорости загрузки.
Чем выше зеркало расположено в списке, тем больший приоритет оно имеет при скачивании пакета. Вы можете проверить этот файл и, при необходимости, отредактировать его вручную, переместив наверх наиболее географически близкие зеркала. При этом также учитывайте и другие критерии.
Позже pacstrap скопирует этот файл в новую систему, так что это действительно стоит сделать.
Установка основных пакетов
Примечание: Никакие программы или настройки (кроме файла /etc/pacman.d/mirrorlist) из live-окружения в устанавливаемую систему не переносятся.
Используйте скрипт pacstrap(8), чтобы установить пакет base, ядро Linux и прошивки часто встречающихся устройств:
# pacstrap -K /mnt base linux linux-firmware
Совет:
- linux можно заменить на другой желаемый пакет ядра. Можно вообще не устанавливать ядро, если установка происходит в контейнере.
- Можно пропустить установку пакета прошивок, если установка происходит в контейнере или виртуальной машине.
Пакет base содержит не все инструменты, имеющиеся на установочном носителе, из-за чего может потребоваться установка дополнительных пакетов для получения полностью функциональной базовой системы. Чтобы установить другие пакеты или группы, добавьте их названия к команде pacstrap (разделяя их пробелом) или используйте pacman во время этапа #Chroot. В частности, вам могут пригодиться следующие программы:
- утилиты для управления файловыми системами в пользовательском пространстве, которые будут использоваться в системе, например, для их создания или для проверки на ошибки;
- утилиты для работы с RAID или LVM, если они будут использоваться;
- специфические прошивки других устройств, не включённые в linux-firmware (например, sof-firmware для некоторых звуковых карт, linux-firmware-marvell для беспроводных сетевых карт Marvell или прошивки для карт Broadcom);
- ПО, необходимое для организации сети (например, сетевой менеджер или автономный DHCP-клиент, программу аутентификации для Wi-Fi, ModemManager для мобильного интернета);
- текстовый редактор;
- пакеты для доступа к документации в man и info: man-db, man-pages и texinfo.
Список пакетов, присутствующих в установочном образе, доступен на странице pkglist.x86_64.txt.
Настройка системы
Fstab
Сгенерируйте файл fstab (используйте ключ -U или -L, чтобы для идентификации разделов использовались UUID или метки, соответственно):
# genfstab -U /mnt >> /mnt/etc/fstab
После этого проверьте файл /mnt/etc/fstab и отредактируйте его в случае необходимости.
Chroot
Перейдите к корневому каталогу новой системы:
# arch-chroot /mnt
Часовой пояс
Задайте часовой пояс:
# ln -sf /usr/share/zoneinfo/Регион/Город /etc/localtime
Запустите hwclock(8), чтобы сгенерировать /etc/adjtime:
# hwclock --systohc
Эта команда предполагает, что аппаратные часы настроены в формате UTC. Для получения дополнительной информации смотрите раздел System time (Русский)#Стандарт времени.
Локализация
Отредактируйте файл /etc/locale.gen, раскомментировав en_US.UTF-8 UTF-8 и другие необходимые UTF-8 локали (например, ru_RU.UTF-8 UTF-8), после чего сгенерируйте их:
# locale-gen
Создайте файл locale.conf(5) и задайте переменной LANG необходимое значение:
/etc/locale.conf
LANG=ru_RU.UTF-8
Если вы меняли раскладку клавиатуры или шрифт, сделайте эти изменения постоянными, прописав их в файле vconsole.conf(5):
/etc/vconsole.conf
KEYMAP=ru
FONT=cyr-sun16
Настройка сети
Создайте файл hostname:
/etc/hostname
имявашегохоста
Завершите настройку сети для вновь установленной среды. В частности, установите подходящее ПО для управления сетевым подключением, настройте его по необходимости и включите соответствующий юнит systemd, чтобы подключение к сети выполнялось сразу при загрузке системы.
Initramfs
Как правило, создание нового образа initramfs не требуется, поскольку pacstrap автоматически запускает mkinitcpio после установки пакета ядра.
Если вы используете LVM, шифрование системы или RAID, отредактируйте файл mkinitcpio.conf(5) и пересоздайте образ initramfs:
# mkinitcpio -P
Пароль суперпользователя
Установите пароль суперпользователя:
# passwd
Загрузчик
Выберите и установите загрузчик с поддержкой Linux. Если вы используете процессор Intel или AMD, включите также обновление микрокода.
Перезагрузка
Выйдите из окружения chroot, набрав exit или нажав Ctrl+d.
Вы можете размонтировать все разделы с помощью команды umount -R /mnt, чтобы убедиться в том, что ни один из разделов не остался занят какой-либо программой. Если нужно, для поиска таких программ используйте fuser(1).
Теперь перезагрузите компьютер, набрав reboot: если какие-нибудь разделы остались смонтированными, systemd их размонтирует. Не забудьте извлечь установочный носитель. После загрузки войдите в систему в качестве суперпользователя.
После установки
Дальнейшие указания по настройке системы после установки (например, создание аккаунта обычного пользователя, настройка графического интерфейса, звука или тачпада) описаны на странице Основные рекомендации.
Множество интересных и полезных программ вы найдёте на странице Список приложений.
Table of Contents
- Table of Contents
- Установка Arch Linux
- Arch Linux
- Создание образа
- Изменяем приоритет загрузки в BIOS/UEFI
- Начало установки
- Настройка сети
- Выбор файловой системы
- Размечаем диск
- Вариант 1: LVM
- Вариант 2: Btrfs
- Устанавливаем ядро
- Генерируем fstab
- arch-chroot
- Настраиваем дату и локаль
- Прописываем хосты
- Initramfs
- Ставим пакеты
- Пользователи
- Установка grub
- Ставим Gnome
- Завершение установки
- man & help
- Типы файлов в выводе ls и других стандартных команд
- Пакетные менеджеры
- Нужные пакеты
- Заменяем ядро на стабильное
- Масштабировавние 150% как в Windows
- Расширения для Gnome
- Пользовательские сочетания клавиш
- Запуск исполняемых файлов по двойному клику в Nautilus
- Добавляем новые действия в контекстное Nautilus
- Шаблоны файлов
- Гибернация
- RAID
- Права
- Монтирование
- Добавляем путь в PATH
- bin в домашнем каталоге
- Монтируем Windows разделы
- Шрифты
- Emoji
- Спецсимволы
- Сетевые интерфесы
- Блокируем сайты с рекламой через hosts
- Информация о железе
- Редактирование DConf
- ZSH
- Установка ZSH
- Oh My Zsh
- Темы Oh My Zsh!
- Bullet Train for oh-my-zsh
- Jovial
- Powerlevel10k
- Подробнее про ZSH
- Разноцветный cat
- Цветовые схемы для терминала
- Бекап системы
- asdf-vm
- NVM
- Настройка Docker
- Настройка Visual Code
- LVM
- Btrfs
- Snapper
- Timeshift
- Логи
- Установка и настройка Postgres
- Мониторинг процессов
- systemd
- Git
- Работаем с github через ssh
- Tor Service
- Менеджер паролей pass
- Частые проблемы
- Система не грузится дальше rootfs
- Grub Rescue
- Случайно нажали Ctrl + Alt + F* и экран стал темным
- Что делать, если каталоги открываются в VSCode?
- Enter password to unlock your login keyring
- Справка по командам и т.д.
- Cheat.sh
- Marker
- TLDR
- Шпаргалка по командам Shell
- i3: Введение
- i3: Установка и настройка
- XTerm
- Termite: горячие клавиши
- Termite: цветовые схемы
- i3: заставка lockscreen
- i3: сохранение/восстановление рабочего пространства
Arch Linux
Arch Linux ‒ это один из немногих дистрибутивов Linux, использующих модель роллинг-релизов. Это означает, что в нем доступны самые последние версии пакетов. Это одновременно является его как преимуществом так и недостатком. Пересесть на него меня заставила необходимость: мое компьютерное железо (процессор ryzen 5 2600 и видеоадаптер rx 590) оказались не совместимы с версией Linux Kernel младше 4.20.

На самом деле все не так плохо, но неприятные инциденты имеют место хотя и очень редко.
Создание образа
Качаем образ и записываем его с помощью команды:
$ sudo dd if=/path/to/iso of=/dev/sdX bs=8M status=progress; sync
Где sdX – имя нашего USB устройства. Перегружаемся после удачного завершения операции.
В Windows для создания загрузочной флешки можно использовать Rufus.

Изменяем приоритет загрузки в BIOS/UEFI
При загрузке системы нажимаем F2 или Del (зависит от производителя материнской платы). Во вкладке BIOS в приоритете загрузки делаем первым наше USB-устройство. Нажимаем F10 и сохраняем настройки.
Начало установки
Инструкцию по установке Arch Linux можно посмотреть так:
Небольшой лайфхак: во время установки можно переключаться между терминалами с помощью Ctrl+Alt+F1..6. Если мы нажмем Ctrl+Alt+F2 откроется второй терминал (по-умолчанию мы работаем в первом) и потребуется ввести пароль root, во втором терминале мы можем открыть инструкцию и периодически подсматривать ее, переключаясь между терминалами.
Настройка сети
При подключении от кабеля ничего настраивать не надо. Настройка wifi требует ввода пары команд:
rfkill unblock wifi
wifi-menu
Следует отметить, что не все usb wifi адаптеры гараниторованно поддерживаются. Например, у меня не захотел работать dexp wfa 301, а вот с tp-link все ок.
Проверить соединение можно с помощью команды ping:
$ ping -c 3 ya.ru
PING ya.ru (87.250.250.242) 56(84) bytes of data.
64 bytes from ya.ru (87.250.250.242): icmp_seq=1 ttl=53 time=12.1 ms
64 bytes from ya.ru (87.250.250.242): icmp_seq=2 ttl=53 time=12.1 ms
64 bytes from ya.ru (87.250.250.242): icmp_seq=3 ttl=53 time=12.1 ms

--- ya.ru ping statistics ---
3 packets transmitted, 3 received, 0% packet loss, time 5ms
rtt min/avg/max/mdev = 12.137/12.139/12.141/0.127 ms
Выбор файловой системы
Самыми удобными являются три варианта: LVM+ext4 либо Btrfs, либо Btrfs под LVM.
Теперь нужно разметить раздел по LVM. Касательно LVM: единственное удобство в нем для меня – это возможность динамически менять размер разделов. Самая частая проблема, которая у меня была раньше – это то, что я не угадывал размер для корня. Мы можем добавлять в группу другие разделы (не обязательно на одном устройстве) и устройства. Нет ограничений как для обычных разделов, когда не возможно расширить раздел за счет предыдущего, нам вообще об этом не нужно заботиться. В LVM у нас есть группы разделов и логическите разделы. У логических разделов свои файловые системы. Увеличение размера логического раздела в отличии от уменьшения размонтирования не требует. resize2fs в LVM работает заметно быстрее.
Файловая система Btrfs может размещаться на одном и более устройствах/разделах. Устройства и разделы можно как добавлять так и удалять после создания. У нас тут нет групп и логических разделов со своими файловыми системами. У нас есть только подразделы с динамическим размером, что удобно. Так же мы можем ограничить размер подраздела.
LVM и Btrfs имеют механизм снапшотов, которые позволяют сохранять состояние системы.
Размечаем диск
Для начала посмотрим все доступные устройства:
Создадим новый раздел:
# fdisk /dev/nvme0n1
# Более удобная утилита чем fdisk, в ней можно выбирать все стрелочками
cfdisk /dev/nvme0n1
# При разметке swap размещайте после home, т.е. самым последним на случай, если потребуется увеличить его размер
Если есть раздел с Windows сделайте от него отступ 1-2 MB, т.к. Windows выходит за установленные лимиты и портит соседние разделы.
Если не установлен Windows:
Создаем раздел в FAT-32 размером 300-1000 Мб, а затем форматируем его:
mkfs.fat -F32 /dev/nvme0n1p1
В дальнейших примерах предполагается, что у нас установлена Windows, которая занимает 4 раздела: recovery, efi, reserved, Windows. Поэтому в примерах новый раздел nvme0n1p5.
Вариант 1: LVM
# Создадим группу на разделе без файловой системы
vgcreate linux /dev/nvme0n1p5
# Теперь создадим в ней логические разделы:
lvcreate -L 30G linux -n root
lvcreate -L 20G linux -n home
# Можно для раздела отдать все оставшееся место
lvcreate -L +100%FREE linux -n home
mkfs.ext4 /dev/linux/root
mkfs.ext4 /dev/linux/home
mount /dev/linux/root /mnt
mkdir /mnt/home
mount /dev/linux/home /mnt/home
# Создаем файл подкачки. Не нужно верить дурачкам: он нужен всегда. Без него система будет лагать
fallocate -l 2G /mnt/swapfile
# Если хотим использовать гибернацию, то размер файла подкачки должен составлять около 2/5 от размера оперативной памяти на современном компьютере, в идеале он должен быть ему равен либо даже больше
# fallocate -l `awk '/Mem:/ {print $2}' <(free -m)`M /mnt/swapfile
chmod 600 /mnt/swapfile
mkswap /mnt/swapfile
swapon /mnt/swapfile
mkdir -p /mnt/boot/efi
mount /dev/nvme0n1p2 /mnt/boot/efi
Вариант 2: Btrfs
# Сначала монтируем раздел
mount /dev/nvme0n1p5 /mnt
# Потом создаем на нем подразделы
btrfs subvolume create /mnt/@
btrfs subvolume create /mnt/@home
# Теперь мы демонтируем устройство
umount /mnt
# и монтируем созданные подразделы
mount -o noatime,compress=lzo,space_cache,subvol=@ /dev/nvme0n1p5 /mnt
mkdir /mnt/home
mount -o noatime,compress=lzo,space_cache,subvol=@home /dev/nvme0n1p5 /mnt/home
# Файл подкачки нужно создавать так
# И что очень важно: поддержка файлов подкачки в Btrfs доступна в версией ядра linux, начниная с 5.0.0
truncate -s 0 /mnt/swapfile
chattr +C /mnt/swapfile
btrfs property set /mnt/swapfile compression none
# fallocate -l 2G /mnt/swapfile
# С fallocate могут возникнуть проблемы
dd if=/dev/zero of=/mnt/swapfile count=2000 bs=1M
chmod 600 /mnt/swapfile
mkswap /mnt/swapfile
swapon /mnt/swapfile
mkdir -p /mnt/boot/efi
mount /dev/nvme0n1p2 /mnt/boot/efi
Эта инструкция лучше
Устанавливаем ядро
pacstrap /mnt base base-devel
base-devel содержит набор утилит для компиляции, позже пригодится
Генерируем fstab
genfstab -U /mnt >> /mnt/etc/fstab
arch-chroot
При использовании LVM нужно выполнить чуть больше действий:
# Предотвращаем ошибки lvm:
#   WARNING: Failed to connect lvmetad...
#   WARNING: Device /dev/nvme0n1 not initialized in udev database...
mkdir /mnt/hostlvm
mount --bind /run/lvm /mnt/hostlvm
arch-chroot /mnt
ln -s /run/lvm /hostlvm
Настраиваем дату и локаль
ln -sf /usr/share/zoneinfo/Europe/Moscow /etc/localtime
hwclock --systohc
Далее:
Раскоментируем:
Генерируем локаль:
locale-gen
echo "LANG=en_US.UTF-8" > /etc/locale.conf
Если пропустить этот шаг, то не будет запускаться терминал.
Прописываем хосты
echo "sergey-pc" > /etc/hostname
Добавляем в файл такие строки:
127.0.0.1 localhost
::1 localhost
127.0.1.1 sergey-pc.localdomain sergey-pc
Initramfs
mkinitcpio это Bash скрипт используемый для создания начального загрузочного диска системы. Из mkinitcpio man page:
⚠ Это обязательный шаг даже, если не используется LVM, а так же при изменение пути до корня
При использовании LVM нужно отредактировать /etc/mkinitcpio.conf и модифицировать список HOOKS, добавив lvm2 ДО ЗНАЧЕНИЯ filesystems:
HOOKS=(base udev autodetect modconf block lvm2 filesystems keyboard fsck)
Генерация:
Ставим пакеты
Эти пакеты понадобятся далее:
pacman -S linux linux-headers linux-firmware btrfs-progs sudo grub efibootmgr ntfs-3g os-prober alsa-utils xf86-video-ati xorg xorg-server
linux больше в base не входит, linux-headers для любителей покомпилировать, linux-firmware содержит набор драйверов.
btrfs-progs нужен только, если используется файловая система btrfs.
xf86-video-ati – свободный драйвер для видеокарт AMD. xorg и xorg-server можно не ставить, они являются зависимостями пакета gnome.
Пользователи
Задаем пароль для супер-пользователя:
Создаем пользователя:
useradd -m -g users -G wheel -s /bin/bash sergey
Устанавливаем пароль для нового пользователя:
passwd sergey
chage -d 0 sergey
Пароль для пользователя можно ставить 1, так как при логине придется его сменит.
Теперь в файле /etc/sudoers нужно раскоментировать строку:
%wheel ALL=(ALL:ALL) ALL
Установка grub
grub-install --target=x86_64-efi --efi-directory=/boot/efi --bootloader-id="Arch Linux"
Чтобы отключить автоматическую загрузку Linux, редактируем дефолтный конфиг груба:
Меняем GRUB_TIMEOUT:
GRUB_TIMEOUT=-1
Затем генерируем grub:
grub-mkconfig -o /boot/grub/grub.cfg
Ставим Gnome
pacman -S gnome
# Включаем Gnome Display Manager
systemctl enable gdm
Вместо Gnome можно попробовать тайловый менеджер i3.
Завершение установки
Включаем NetworkManager для автоматического подключения к сети:
systemctl enable NetworkManager
Надо еще настроить звук:
# Сохраним на всякий случай состояние
alsactl store
# Для автоматического сохранения/восстановления значения громкости звука:
systemctl enable alsa-restore
Теперь можно выходить и перегружаться:
man & help
$ man [ <section> ] <page>

# Section	Description
# 1	General Commands
# 2	System Calls
# 3	Library functions, covering in particular the C standard library
# 4	Special files (usually devices, those found in /dev) and drivers
# 5	File formats and conventions
# 6	Games and screensavers
# 7	Miscellanea
# 8	System administration commands and daemons

# Узнать где хранятся страницы манулов можно так
$ manpath
/usr/local/man:/usr/local/share/man:/usr/share/man

$ man -w printf
/usr/share/man/man1/printf.1.gz

# Поиск страниц по ключевому слову
$ man -k printf

# Смотрим все страницы
$ man -f printf
printf (1)           - format and print data
printf (1p)          - write formatted output
printf (3)           - formatted output conversion
printf (3p)          - print formatted output

# Выбираем конкретную
$ man 1p printf

# Краткая справка по функции
$ command -h
$ command --help
Типы файлов в выводе ls и других стандартных команд
There is only 1 command you need to know, which will help you to identify and categorize all the seven different file types found on the Linux system.
Here is an example output of the above command.
 $ ls -ld /etc/services
-rw-r--r-- 1 root root 19281 Feb 14  2012 /etc/services
ls command will show the file type as an encoded symbol found as the first character of the file permission part. In this case it is «-«, which means «regular file». It is important to point out that Linux file types are not to be mistaken with file extensions. Let us have a look at a short summary of all the seven different types of Linux file types and ls command identifiers:
- : regular file
d : directory
c : character device file
b : block device file
s : local socket file
p : named pipe
l : symbolic link
Пакетные менеджеры
Пакетным менеджером по-умолчанию для Arch Linux является pacman. Для подсветки вывода pacman в /etc/pacman.conf нужно раскомментировать Color. Пользовательским репозиторием является AUR. Пакеты из него можно использовать только на свой страх и риск. Чтобы не собирать пакеты из него ручками можно поставить yay:
sudo pacman -S git
cd /tmp
git clone https://aur.archlinux.org/yay.git
cd yay
makepkg -si
Пакеты всегда нужно ставить из репозиториев. Смысла собирать их из исходников нет, так как в AUR и так самые последние версии. Так будет меньше хлама оставаться в системе после их удаления.
В AUR много пакетов, оканчивающихся на -git. При их установке исходники копируются с github, а затем собираются, что занимает много времени и требуется дополнительное дисковое пространство для создания временных файлов и т.п., а еще для сборки могут потребоваться дополнительные пакеты. Поэтому лучше избегать установки таких пакетов, если есть альтернативы.
Синтаксис команды Yay аналогичен pacman. Так что будет полезным почитать справку по pacman.
Ссылки:
- Сравнеие пакетных менеджеров.
Нужные пакеты
Это список необходимых для меня пакетов:
yay -Sy linux-headers \ # нужны для компиляции некоторых программ
  wget \ # позволяет выполнять HTTP-запросы, скачивать файлы
  curl \ # делает то же самое, что и предыдущий
  adobe-source-code-pro-fonts \ # шрифт для терминала, нужен для темы Oh My Zsh! agnoster
  ttf-droid \ # шрифт по-умолчанию для VScode
  \ # шрифты по-умолчанию для Chrome
  \ # consolas-font \
  \ # ttf-ms-fonts \
  arc-gtk-theme-git \ # тема для интерфейса
  apache \ # самый популярный веб-сервер
  apache-tools \ # содержит ab, нагрузочный клиент
  \ # blender \ # самый простой 3D-редактор
  dconf-editor \ # все настройки gnome в одном месте
  dmraid \ # утилита для работы с raid-массивами дисков
  docker-compose \ # содержит docker и docker compose
  exfat-utils \ # добавляет поддержку файловой системы exfat
  firefox \ # один из лучших браузеров, единственный конкурент Chrome и единственный популярный non-chromium браузер
  flat-remix-git \ # тема с иконками
  \ # gimp \ # скромненький аналог Photoshop
  gnome-panel \ # я ставил только чтобы ярлыки из GUI создавать
  google-chrome \ # лучший браузер, противники проприетарщины предпочитают chromium
  chrome-gnome-shell \ # позволяет устанавливать расширения для Gnome
  gparted \ # графическая оболочка для разметки дисков
  htop \ # показывает запущенные процессы, загрузку cpu и потребление памяти
  \ # inkscape \ # векторный графический редактор
  \ # mariadb \ # свободная реализация самой популярной СУБД MySQL
  mc \ # аналог виндового Far + mcedit, замена nano
  \ # mongodb-bin \ # лучшая NoSQL база данных
  net-tools \ # содержит netstat
  neofetch \ # выводит в консоль информацию о системе
  nginx \ # самый быстрый веб-сервер
  ntfs-3g \ # добавляет поддержку файловой системы ntfs
  \ # nvm \ # менеджер версий для Node.js
  \ # postgresql \ # лучшая SQL база данных
  \ # phpenv \ # менеджер версий для PHP
  \ # pyenv \ # менеджер версий для Python
  asdf-vm \ # Заменяет собой все выше перечисленные менеджеры версий + умеет управлять базами
  \ # pgadmin4 \ # админка для Postgres
  \ # pgmodeler \ # визуальный редактор для моделирования в Postgres
  \ # redis \ # СУБД в оперативной памяти, используемая для межпроцессового взаимодействия
  smartmontools \ # утилита для проверки состояния SSD
  telegram-desktop-bin \ # лучший мессенджер
  texmaker \ # редактор LaTex, генерирует PDF
  tor \ # сервис, который можно использовать для подключения к сети Tor
  torsocks \ # утилита torify, которая заставляет другие программы работать через Tor
  transmission-qt \ # торрент-клиент
  thunderbird \ # email-клиент
  virtualbox \ # виртуальная машина, позволяет запускать Windows и Linux
  visual-studio-code-bin \ # лучший бесплатный текстовый редактор
  vlc \ # видеоплеер
  websocat-bin \ # утилита для тестированя вебсокетов
  woeusb \ # создание загрузочных флешек с Windows
  xclip \ # копирование файла в буффер обмена из консоли
  seahorse \ # Приложение для управления паролями, а так же PGP и SSH ключами
  baobab \ # Приложения для мониторинга дисков
  jq \ # Утилита для работы с JSON
  pv \ # получает на вход поток и перенаправляет его, показывая статистику
  httpie \ # лучшая замена curl с подсветкой вывода
  tor-browser \ # Tor браузер
Заменяем ядро на стабильное
Если надоело, что что-то ломается почти после каждого обновления ядра, запускаем терминал и выполняем:
yay -S linux-lts linux-headers-lts
yay -R linux linux-headers
mkinitcpio -p linux
Масштабировавние 150% как в Windows
По-умолчанию в Gnome масштабирование кратно 100. Чтобы добавить варианты масштабирования 125% и 150% нужно выполнить в терминале:
gsettings set org.gnome.mutter experimental-features "['scale-monitor-framebuffer']"
Отключение:
gsettings reset org.gnome.mutter experimental-features
Расширения для Gnome
Устанавливаем расширение для Chrome.

Управление расширениями осуществляется через Tweaks.

Расширения для установки:
| Название | Описание |
|---|---|
| Dash to Dock. | Выезжающий Dash — панель с избранными приложениями |
| Desktop Icons | Иконки на рабочем столе |
| ShellTile | Тайловый менеджер |
| Log Out Button | Добавляет кнопку, которая выполняет выход из системы |
Пользовательские сочетания клавиш
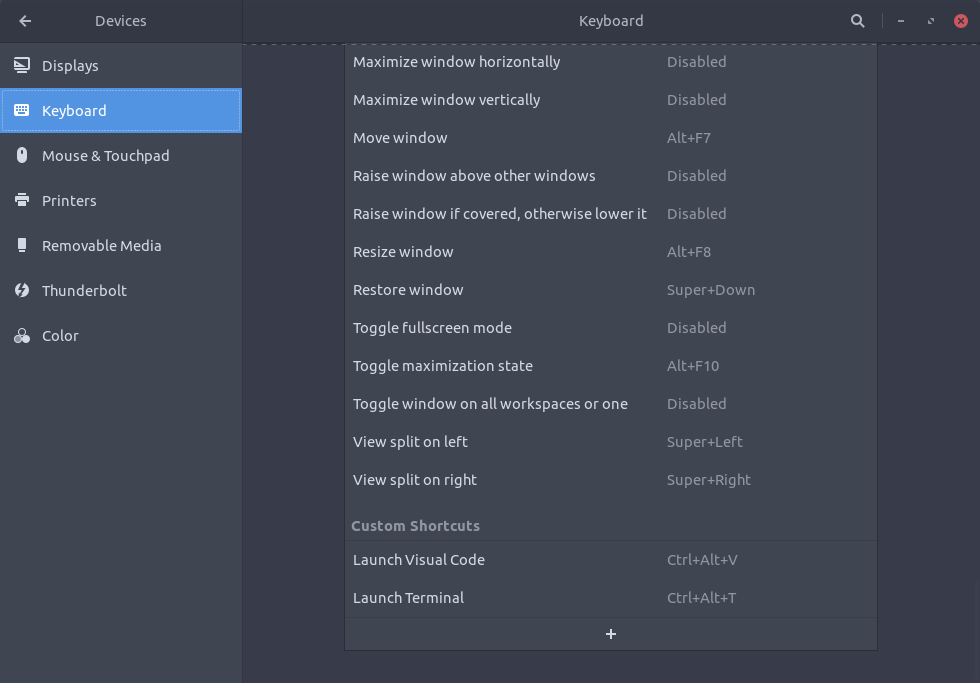
В Settings → Devices → Keyboard добавляем сочетания клавиш:
Ctrl + Alt + Tдля запуска терминала (gnome-terminal);Ctrl + Alt + Vдля запуска Visual Code (code).
Запуск исполняемых файлов по двойному клику в Nautilus
Заставляем Nautilus выполнять исполняемые файлы вместо открытия их в текстовом редакторе. Нужно нажать на три точки, а потом выбрать Preferences:

Добавляем новые действия в контекстное Nautilus
$ yay -S filemanager-actions
У программы есть интерфейс, который позволяет добавлять свои команды. Существуют два плейсхолдера: %d для текущего каталога и %f для файла.
To install nautilus-action on Ubuntu, run simply this command via the Terminal:
sudo apt-get install nautilus-actions
(or equivalant packet manager as yum or pacman)
After the installation is complete, let’s now see a quick example of how to add an extra action to the right-click menu with nautilus-actions.
The example consists of adding to the right-click menu the «Edit With Gimp» action to edit, for example, image files using The Gimp (Image Editor).
_Using the dash search «nautilus-actions» and click Nautilus-Actions Configuration.
_Under the Action tab, fill the following fields:
Context label: The text that will be displayed in the right-click menu, in our example, it’s «Edit With Gimp»
Icon: This option allows to select an icon for your action (optional)
_Open now the Command tab and fill in the following fields:
Label: Enter any label of your choice for your action.
Path: Enter the path to the program you want to use using the Browse button. For our example, we will simply type «gimp».
Parameters: Click the Legend button to get suggested parameters. In our example, we will use the %f parameter to be able to edit image files with The Gimp.
_Log out the current session and log on again, or simply restart Nautilus with these commands from the Terminal:
nautilus -q
nautilus
Страница проекта.
Шаблоны файлов
Чтобы в Nautilus в контекстном меню отображался пункт New Document, нужно в ~/Templaytes создать шаблоны файлов:
touch ~/Templates/{Empty\ Document,Text\ Document.txt,README.md,pyfile.py}
Гибернация
Режим гибернациии от режима сна отличается тем, что в первом случае содержимое оперативной памяти сохраняется на жесткий диск и питание полностью отключается, во втором — питание подается только на оперативку. Чем хороша гибернация? — Например, мы работаем в Linux, вошли в режим гибернации, а затем загрузились в Windows и играем. Когда мы в следующий раз загрузимся в Linux, то увидим все то, что было перед выключением. Прекрасно?! Но часто ли такое нужно?
При переходе в режим гибернации делается дамп используемой оперативной памяти на диск. Размер файла/раздела подкачки для этих целей советуют делать не менее 2/5 от объема RAM на современных компьютерах. Так же можно применять сжатие при дампе. Про гибернацию лучше почитать здесь.
Режим гибернации по-умолчанию отключен. Чтобы его включить для начала нужно узнать UUID раздела, где расположен своп, а так же смещение своп-файла относительно начала раздела:
$ lsblk `df /swapfile | awk '/^\/dev/ {print $1}'` -no UUID
217df373-d154-4f2e-9497-fcac21709729
$ sudo filefrag -v /swapfile | awk 'NR == 4 {print $5}' | cut -d ':' -f 1
1423360

В /etc/default/grub прописать:
GRUB_CMDLINE_LINUX_DEFAULT="quiet resume=UUID=217df373-d154-4f2e-9497-fcac21709729 resume_offset=1423360"
resume_offset нужен только для файла. Для дисков и разделов вместо UUID можно указывать /dev/sda3 или /dev/mapper/linux-swap.
Теперь нужно изменить /etc/mkinitcpio.conf:
# resume должен следовать после filesystems
HOOKS=(...filesystems resume...)
Обновляем grub и генерируем initramfs:
sudo grub-mkconfig -o /boot/grub/grub.cfg
sudo mkinitcpio -p linux
Сам переход в режим гибернации выглядит так:
Чтобы появилась кнопка для перехода в режим гибернации ставим расширение.

RAID
Аппаратный RAID
В Linux RAID на аппаратном уровне называют FakeRAID. Для работы с FakeRAID используется пакет dmraid.
Редактируем конфиг mkinitcpio:
sudo nano /etc/mkinitcpio.conf
В хуки добавляем dmraid:
HOOKS=(base udev autodetect modconf block lvm2 dmraid filesystems keyboard fsck)
И генерируем mkinitcpio:
На моей материнке с чипсетом b450 с апаратным RAID из Linux работать нельзя: нет драйвера.
Программный Windows RAID
Этот раздел можно было бы озаглавит как RAID, доступный в Windows и в Linux. В Windows, в Disk Management нужно создать Striped Volume, аналог RAID 0 (правой кнопкой мыши по нужному диску). Это когда данные пишутся параллельно на разные устройства без дублирования. Одтн блок пишется на один диск, другой на второй, причем одновременно. Чтение происходит также. Таким образом при использовании 2 дисков мы получаем двойную скорость чтения/записи.
$ yay -S ldmtool

$ sudo ldmtool scan
[
  "8d0cc1a7-b10c-11e9-80d3-b42e9916909d"
]

$ sudo ldmtool show diskgroup 8d0cc1a7-b10c-11e9-80d3-b42e9916909d
{
  "name" : "DESKTOP-VR9KKHM-Dg0",
  "guid" : "8d0cc1a7-b10c-11e9-80d3-b42e9916909d",
  "volumes" : [
    "Volume1"
  ],
  "disks" : [
    "Disk1",
    "Disk2"
  ]
}

$ sudo ldmtool create all
[
  "ldm_vol_DESKTOP-VR9KKHM-Dg0_Volume1"
]
Теперь можно монтировать устройство /dev/mapper/ldm_vol_DESKTOP-VR9KKHM-Dg0_Volume1.
Но нам нужно чтобы устройство автоматически создавалось. Для этого нужно создать сервис /etc/systemd/system/ldmtool.service:
[Unit]
Description=Windows Dynamic Disk Mount
Before=local-fs-pre.target
DefaultDependencies=no
[Service]
Type=simple
User=root
ExecStart=/usr/bin/ldmtool create all
[Install]
WantedBy=local-fs-pre.target
Включим его:
$ sudo systemctl enable ldmtool.service
Редактируем /etc/fstab:
/dev/mapper/ldm_vol_DESKTOP-VR9KKHM-Dg0_Volume1 /mnt/d ntfs-3g rw,user,fmask=0111,dmask=0000 0 0
В Windows есть так же технология Storage Spaces, но ее поддержка в Linux не реализована.
Права
4 — Чтение (r)
2 — Запись (w)
1 — Выполнение (x)
Сумма этих чисел дает разные сочетания типа:
1 + 2 + 4 = 7 или 1 + 4 = 5
Права задаются тремя числами, например, 755, где первое число – права владельца, далее: группа и остальные пользователи. Владелец может делать все (1 + 2 + 4 = 7), другие пользователи – только читать и исполнять файлы (1 + 4 = 5).
Для работы с правами на файлы используется команда chroot:
В Python права можно записывать так:
$ ll
total 20K
drwxr-xr-x 3 sergey sergey 4,0K июн 20 17:22 backend
...

d         | rwx      | r-x    | r-x
тип файла | владелец | группа | остальные
Ссылки:
- Права доступа к файлам и каталогам
Монтирование
$ sudo mount [ -t <fs> ] <device> <path> [ -o <options> ]

# Можно монтировать образы, созданные через dd
mount -t fstype -o loop,ro image.dd /mntpoint
Опции:
ro     Mount the filesystem read-only.

rw     Mount the filesystem read-write.

sync   All I/O to the filesystem should be done synchronously.  In  the
	case  of  media with a limited number of write cycles (e.g. some
	flash drives), sync may cause life-cycle shortening.

user   Allow an ordinary user to mount the filesystem.  The name of the
	mounting  user  is  written  to the mtab file (or to the private
	libmount file in /run/mount on systems without a  regular  mtab)
	so  that  this same user can unmount the filesystem again.  This
	option implies the options noexec,  nosuid,  and  nodev  (unless
	overridden   by  subsequent  options,  as  in  the  option  line
	user,exec,dev,suid).

noexec ‒ запретить выполнение файлов
noatime ‒ не обновлять время домступа к файлу
defaults = rw,suid,dev,exec,auto,nouser,async
uid ‒ 1000 для первого пользователя
gid ‒ см. далее

$ id
uid=1000(sergey) gid=985(users) groups=985(users),969(docker),998(wheel)

users  Allow any user to mount and to unmount the filesystem, even when
	some other ordinary user mounted it.  This  option  implies  the
	options  noexec,  nosuid, and nodev (unless overridden by subse‐
	quent options, as in the option line users,exec,dev,suid).

umask=value
	Set the umask (the bitmask  of  the  permissions  that  are  not
	present).  The default is the umask of the current process.  The
	value is given in octal.

dmask=value
	Set the umask applied to directories only.  The default  is  the
	umask of the current process.  The value is given in octal.

fmask=value
	Set the umask applied to regular files only.  The default is the
	umask of the current process.  The value is given in octal.

Указываются права не в виде восьмиричного числа!

    0   1   2   3   4   5   6   7
r   +   +   +   +   -   -   -   -
w   +   +   -   -   +   +   -   -
x   +   -   +   -   +   -   +   -

Например, 0755 = 0022
- mount.
Добавляем путь в PATH
- Bash Shell:
~.bash_profile,~/.bashrcor~/.profile - Korn Shell:
~/.kshrcor~/.profile - Z Shell:
~/.zshrcor~/.zprofile
export PATH=/path/to/bin:$PATH
bin в домашнем каталоге
mkdir ~/bin
echo 'export PATH=$HOME/bin:$PATH' >> ~/.zprofile
# or
echo 'export PATH=$HOME/bin:$PATH' >> ~/.zshrc
Теперь самописные скрипты можно кидать в ~/bin, так они будут доступны только для текущего пользователя.
~/bin/hello:
#!/usr/bin/env bash
function hello() {
  local name=${1:-World}
  printf "Hello, %s!\n" $name
}
hello $@
Сделаем скрпит исполняемым:
Проверка:
# Если не перелогинивались после добавления пути в ~/.zprofile, то сначала выполняем
$ source ~/.zprofile
$ hello $USER
Hello, sergey!
Монтируем Windows разделы
Редактируем /etc/fstab:
/dev/nvme0n1p4 /mnt/c ntfs-3g rw,user,fmask=0111,dmask=0000 0 0
Шрифты
Шрифты надо кидать в /usr/share/fonts либо в ~/.fonts или в ~/.local/share/fonts.
# Обновить шрифты
$ fc-cache -f -v

# Чтобы проверить установлен ли шрифт
$ fc-list | grep "<name-of-font>"
Шарим Windows шрифты:
$ sudo ln -sf /mnt/c/Windows/Fonts /usr/share/fonts/WindowsFonts

Наборы шрифтов:
- Powrline Fonts;
- Nerd Fonts.
Emoji
yay -S ttf-joypixels
Я не совсем понимаю как отображаются emoji. В гномовских приложения они выглядят одинаково, а в сторонних, в том же VScode рендерятся по-другому.
Спецсимволы
Для вставки специальных символов в Gnome применяется сочетание клавиш Ctrl+Shift+U, далее вводим 4-х значный код символа.
| Символ | Unicode |
|---|---|
| « | 00ab |
| » | 00bb |
| © | 00a9 |
| ™ | 2122 |
| § | 00a7 |
| – | 2013 |
| € | 20ac |
| ₽ | 20bd |
| → | 2192 |
| λ | 03bb |
Сетевые интерфесы
$ ifconfig -a
...
enp5s0: flags=4163<UP,BROADCAST,RUNNING,MULTICAST>  mtu 1500
        inet 192.168.0.106  netmask 255.255.255.0  broadcast 192.168.0.255
...

# inet 192.168.0.106 ‒ это наш адрес в локальной сети, если запустить на локальной машине nginx, то перейдя по ссылке http://192.168.0.106 мы увидим приветствие Nginx
Расшифрорвка имен:
Two character prefixes based on the type of interface:
 *   en -- ethernet
 *   sl -- serial line IP (slip)
 *   wl -- wlan
 *   ww -- wwan
Так же можно менять свой локальный ip.
Ссылки:
(Linux ifconfig command)[https://www.computerhope.com/unix/uifconfi.htm].
Блокируем сайты с рекламой через hosts
# Сохраняем копию оригинального файла
$ cp /etc/hosts ~/Documents/hosts.bak
$ wget -qO- https://raw.githubusercontent.com/StevenBlack/hosts/master/hosts | sudo tee --append /etc/hosts
Информация о железе
$ lspci
00:00.0 Host bridge: Intel Corporation 2nd Generation Core Processor Family DRAM Controller (rev 09)
00:01.0 PCI bridge: Intel Corporation Xeon E3-1200/2nd Generation Core Processor Family PCI Express Root Port (rev 09)
00:02.0 VGA compatible controller: Intel Corporation 2nd Generation Core Processor Family Integrated Graphics Controller (rev 09)
00:14.0 USB controller: Intel Corporation 7 Series/C210 Series Chipset Family USB xHCI Host Controller (rev 04)
00:16.0 Communication controller: Intel Corporation 7 Series/C216 Chipset Family MEI Controller #1 (rev 04)
00:1a.0 USB controller: Intel Corporation 7 Series/C216 Chipset Family USB Enhanced Host Controller #2 (rev 04)
00:1b.0 Audio device: Intel Corporation 7 Series/C216 Chipset Family High Definition Audio Controller (rev 04)
00:1c.0 PCI bridge: Intel Corporation 7 Series/C216 Chipset Family PCI Express Root Port 1 (rev c4)
00:1c.4 PCI bridge: Intel Corporation 7 Series/C210 Series Chipset Family PCI Express Root Port 5 (rev c4)
00:1c.5 PCI bridge: Intel Corporation 7 Series/C210 Series Chipset Family PCI Express Root Port 6 (rev c4)
00:1c.6 PCI bridge: Intel Corporation 7 Series/C210 Series Chipset Family PCI Express Root Port 7 (rev c4)
00:1d.0 USB controller: Intel Corporation 7 Series/C216 Chipset Family USB Enhanced Host Controller #1 (rev 04)
00:1f.0 ISA bridge: Intel Corporation H77 Express Chipset LPC Controller (rev 04)
00:1f.2 IDE interface: Intel Corporation 7 Series/C210 Series Chipset Family 4-port SATA Controller [IDE mode] (rev 04)
00:1f.3 SMBus: Intel Corporation 7 Series/C216 Chipset Family SMBus Controller (rev 04)
00:1f.5 IDE interface: Intel Corporation 7 Series/C210 Series Chipset Family 2-port SATA Controller [IDE mode] (rev 04)
03:00.0 Ethernet controller: Realtek Semiconductor Co., Ltd. RTL8111/8168/8411 PCI Express Gigabit Ethernet Controller (rev 09)
04:00.0 Network controller: Qualcomm Atheros AR9485 Wireless Network Adapter (rev 01)
05:00.0 IDE interface: Marvell Technology Group Ltd. 88SE9172 SATA III 6Gb/s RAID Controller (rev 11)

# Видеоадаптер(ы)
$ lspci -v | grep "VGA" -A 12

# SATA-устройства
$ lsscsi

# Список USB-устройств
$ lsusb

# Очень подробная информация о всех устройствах
$ inxi -Fx

$ hwinfo --short
cpu:
                       Intel(R) Core(TM) i7-2600 CPU @ 3.40GHz, 3500 MHz
                       Intel(R) Core(TM) i7-2600 CPU @ 3.40GHz, 3480 MHz
                       Intel(R) Core(TM) i7-2600 CPU @ 3.40GHz, 3500 MHz
                       Intel(R) Core(TM) i7-2600 CPU @ 3.40GHz, 3491 MHz
                       Intel(R) Core(TM) i7-2600 CPU @ 3.40GHz, 3550 MHz
                       Intel(R) Core(TM) i7-2600 CPU @ 3.40GHz, 3484 MHz
                       Intel(R) Core(TM) i7-2600 CPU @ 3.40GHz, 3492 MHz
                       Intel(R) Core(TM) i7-2600 CPU @ 3.40GHz, 3496 MHz
keyboard:
  /dev/input/event2    Logitech Keyboard K120
mouse:
  /dev/input/mice      Logitech M-U0004 810-001317 [B110 Optical USB Mouse]
monitor:
                       SAMSUNG SMS24A650
                       SAMSUNG SMB2340
graphics card:
                       Intel 2nd Generation Core Processor Family Integrated Graphics Controller
sound:
                       Intel 7 Series/C216 Chipset Family High Definition Audio Controller
storage:
                       Intel 7 Series/C210 Series Chipset Family 4-port SATA Controller [IDE mode]
                       Intel 7 Series/C210 Series Chipset Family 2-port SATA Controller [IDE mode]
                       Marvell 88SE9172 SATA III 6Gb/s RAID Controller
network:
  enp3s0               Realtek RTL8111/8168/8411 PCI Express Gigabit Ethernet Controller
  wlp4s0               Qualcomm Atheros AR9485 Wireless Network Adapter
network interface:
  docker0              Ethernet network interface
  enp3s0               Ethernet network interface
  lo                   Loopback network interface
  wlp4s0               Ethernet network interface
  br-1d7c88a3dc61      Ethernet network interface
disk:
  /dev/sdb             WDC WD5000AZLX-0
  /dev/sda             INTEL SSDSC2CW24
partition:
  /dev/sdb1            Partition
  /dev/sda1            Partition
  /dev/sda2            Partition
  /dev/sda3            Partition
usb controller:
                       Intel 7 Series/C216 Chipset Family USB Enhanced Host Controller #2
                       Intel 7 Series/C216 Chipset Family USB Enhanced Host Controller #1
                       Intel 7 Series/C210 Series Chipset Family USB xHCI Host Controller
bios:
                       BIOS
bridge:
                       Intel 7 Series/C216 Chipset Family PCI Express Root Port 1
                       Intel H77 Express Chipset LPC Controller
                       Intel Xeon E3-1200/2nd Generation Core Processor Family PCI Express Root Port
                       Intel 7 Series/C210 Series Chipset Family PCI Express Root Port 6
                       Intel 2nd Generation Core Processor Family DRAM Controller
                       Intel 7 Series/C210 Series Chipset Family PCI Express Root Port 7
                       Intel 7 Series/C210 Series Chipset Family PCI Express Root Port 5
hub:
                       Intel Integrated Rate Matching Hub
                       Linux Foundation 2.0 root hub
                       Linux Foundation 3.0 root hub
                       Linux Foundation 2.0 root hub
                       Intel Integrated Rate Matching Hub
                       Linux Foundation 2.0 root hub
memory:
                       Main Memory
unknown:
                       FPU
                       DMA controller
                       PIC
                       Keyboard controller
  /dev/lp0             Parallel controller
                       Intel 7 Series/C216 Chipset Family MEI Controller #1
                       Intel 7 Series/C216 Chipset Family SMBus Controller
                       Serial controller
  /dev/input/event3    Logitech Keyboard K120

# Список блочных устройств
$ lsblk

# Покажет разделы и занимаемое ими место
$ df -h

# Fdisk is a utility to modify partitions on hard drives, and can be used to list out the partition information as well.

$ sudo fdisk -l

Disk /dev/sda: 500.1 GB, 500107862016 bytes
255 heads, 63 sectors/track, 60801 cylinders, total 976773168 sectors
Units = sectors of 1 * 512 = 512 bytes
Sector size (logical/physical): 512 bytes / 512 bytes
I/O size (minimum/optimal): 512 bytes / 512 bytes
Disk identifier: 0x30093008

   Device Boot      Start         End      Blocks   Id  System
/dev/sda1   *          63   146801969    73400953+   7  HPFS/NTFS/exFAT
/dev/sda2       146802031   976771071   414984520+   f  W95 Ext'd (LBA)
/dev/sda5       146802033   351614654   102406311    7  HPFS/NTFS/exFAT
/dev/sda6       351614718   556427339   102406311   83  Linux
/dev/sda7       556429312   560427007     1998848   82  Linux swap / Solaris
/dev/sda8       560429056   976771071   208171008   83  Linux

# The mount is used to mount/unmount and view mounted file systems.

$ mount | column -t
/dev/sda6    on  /                                            type  ext4             (rw,errors=remount-ro)
proc         on  /proc                                        type  proc             (rw,noexec,nosuid,nodev)
sysfs        on  /sys                                         type  sysfs            (rw,noexec,nosuid,nodev)
none         on  /sys/fs/cgroup                               type  tmpfs            (rw)
none         on  /sys/fs/fuse/connections                     type  fusectl          (rw)
none         on  /sys/kernel/debug                            type  debugfs          (rw)
none         on  /sys/kernel/security                         type  securityfs       (rw)
udev         on  /dev                                         type  devtmpfs         (rw,mode=0755)
devpts       on  /dev/pts                                     type  devpts           (rw,noexec,nosuid,gid=5,mode=0620)
tmpfs        on  /run                                         type  tmpfs            (rw,noexec,nosuid,size=10%,mode=0755)
none         on  /run/lock                                    type  tmpfs            (rw,noexec,nosuid,nodev,size=5242880)
none         on  /run/shm                                     type  tmpfs            (rw,nosuid,nodev)
none         on  /run/user                                    type  tmpfs            (rw,noexec,nosuid,nodev,size=104857600,mode=0755)
none         on  /sys/fs/pstore                               type  pstore           (rw)
/dev/sda8    on  /media/13f35f59-f023-4d98-b06f-9dfaebefd6c1  type  ext4             (rw,nosuid,nodev,errors=remount-ro)
/dev/sda5    on  /media/4668484A68483B47                      type  fuseblk          (rw,nosuid,nodev,allow_other,blksize=4096)
binfmt_misc  on  /proc/sys/fs/binfmt_misc                     type  binfmt_misc      (rw,noexec,nosuid,nodev)
systemd      on  /sys/fs/cgroup/systemd                       type  cgroup           (rw,noexec,nosuid,nodev,none,name=systemd)
gvfsd-fuse   on  /run/user/1000/gvfs                          type  fuse.gvfsd-fuse  (rw,nosuid,nodev,user=enlightened)

# Again, use grep to filter out only those file systems that you want to see

$ mount | column -t | grep ext

# The dmidecode command is different from all other commands. It extracts hardware information by reading data from the SMBOIS data structures (also called DMI tables).

# display information about the processor/cpu
$ sudo dmidecode -t processor

# memory/ram information
$ sudo dmidecode -t memory

# bios details
$ sudo dmidecode -t bios

# cpu information
$ cat /proc/cpuinfo

# memory information
$ cat /proc/meminfo

$ cat /proc/version
Linux version 3.11.0-12-generic (buildd@allspice) (gcc version 4.8.1 (Ubuntu/Linaro 4.8.1-10ubuntu7) ) #19-Ubuntu SMP Wed Oct 9 16:20:46 UTC 2013

# SCSI/Sata devices

$ cat /proc/scsi/scsi
Attached devices:
Host: scsi3 Channel: 00 Id: 00 Lun: 00
  Vendor: ATA      Model: ST3500418AS      Rev: CC38
  Type:   Direct-Access                    ANSI  SCSI revision: 05
Host: scsi4 Channel: 00 Id: 00 Lun: 00
  Vendor: SONY     Model: DVD RW DRU-190A  Rev: 1.63
  Type:   CD-ROM                           ANSI  SCSI revision: 05
Partitions

$ cat /proc/partitions
major minor  #blocks  name

   8        0  488386584 sda
   8        1   73400953 sda1
   8        2          1 sda2
   8        5  102406311 sda5
   8        6  102406311 sda6
   8        7    1998848 sda7
   8        8  208171008 sda8
  11        0    1048575 sr0

# The hdparm command gets information about sata devices like hard disks.

$ sudo hdparm -i /dev/sda

/dev/sda:

 Model=ST3500418AS, FwRev=CC38, SerialNo=9VMJXV1N
 Config={ HardSect NotMFM HdSw>15uSec Fixed DTR>10Mbs RotSpdTol>.5% }
 RawCHS=16383/16/63, TrkSize=0, SectSize=0, ECCbytes=4
 BuffType=unknown, BuffSize=16384kB, MaxMultSect=16, MultSect=16
 CurCHS=16383/16/63, CurSects=16514064, LBA=yes, LBAsects=976773168
 IORDY=on/off, tPIO={min:120,w/IORDY:120}, tDMA={min:120,rec:120}
 PIO modes:  pio0 pio1 pio2 pio3 pio4
 DMA modes:  mdma0 mdma1 mdma2
 UDMA modes: udma0 udma1 udma2 udma3 udma4 udma5 *udma6
 AdvancedPM=no WriteCache=enabled
 Drive conforms to: unknown:  ATA/ATAPI-4,5,6,7

 * signifies the current active mode
Редактирование DConf
DConf хранит профили терминала в ~/.config/dconf/user, в формате GVDB пруф.

# Делаем дамп
$ dconf dump / > /tmp/dconf
# Редактируем и загружаем
$ dconf load / < /tmp/dconf
ZSH
Установка ZSH
Меняем shell на /bin/zsh:
Чтобы изменения вступили в силу нужно залогиниться по-новой.
## [Oh My Zsh](https://github.com/robbyrussell/oh-my-zsh)
Установка:
sh -c "$(curl -fsSL https://raw.githubusercontent.com/robbyrussell/oh-my-zsh/master/tools/install.sh)"
Пакет из репозитория ставится вне домашнего каталога, а потому требует root права при установке плагинов, что не удобно.
Так же для некоторых тем Oh My Zsh нужны шрифты наподобие Powerline:
Ставим must-have плагины:
git clone https://github.com/zsh-users/zsh-autosuggestions ${ZSH_CUSTOM:-~/.oh-my-zsh/custom}/plugins/zsh-autosuggestions
git clone https://github.com/zsh-users/zsh-completions ${ZSH_CUSTOM:=~/.oh-my-zsh/custom}/plugins/zsh-completions
git clone https://github.com/zsh-users/zsh-syntax-highlighting.git ${ZSH_CUSTOM:-~/.oh-my-zsh/custom}/plugins/zsh-syntax-highlighting
Изменяем .zshrc:
ZSH_THEME="agnoster"
...
plugins=(
  command-not-found
  extract
  git
  zsh-autosuggestions
  zsh-completions
  zsh-syntax-highlighting
)

autoload -Uz compinit && compinit

source $ZSH/oh-my-zsh.sh
Для темы Agnoster настройках терминала выбираем шрифт Source Code Pro Regular, чтобы отображались стрелочки.
- Встроенные темы;
- Сторонние темы;
- Так же можно поискать на Github’е.
ZGen
Позволяет избавиться от мусора в ~/.zshrc.
Пример файла ~/.zshrc:
# load zgen
source /usr/share/zsh/share/zgen.zsh

# if the init script doesn't exist
if ! zgen saved; then

  # specify plugins here
  zgen oh-my-zsh
  zgen oh-my-zsh plugins/git
  zgen oh-my-zsh plugins/sudo
  zgen oh-my-zsh plugins/command-not-found
  zgen oh-my-zsh plugins/extract
  zgen load zsh-users/zsh-autosuggestions
  zgen load zsh-users/zsh-completions
  zgen load zsh-users/zsh-syntax-highlighting
  zgen load caiogondim/bullet-train-oh-my-zsh-theme bullet-train

  # generate the init script from plugins above
  zgen save
fi
После изменения .zshrc делаем zgen reset, а потом exec "$SHELL"?
См. справку:
Темы Oh My Zsh!
Bullet Train for oh-my-zsh
$ wget -P $ZSH_CUSTOM/themes https://raw.githubusercontent.com/caiogondim/bullet-train-oh-my-zsh-theme/master/bullet-train.zsh-theme
Jovial
# Сначала сохраняем копию zhsrc, потому как jovial изменить оригинальеный файл
$ cp ~/.zshrc ~/.zshrc.bak
$ curl -sSL git.io/jovial | sudo bash -s $USER
У меня эта тема упорно устанавливается в /root/.oh-my-zsh.
Powerlevel10k
Это красивая тема для ZSH.
git clone https://github.com/romkatv/powerlevel10k.git $ZSH_CUSTOM/themes/powerlevel10k
~/.zshrc:
ZSH_THEME=powerlevel10k/powerlevel10k
Изменим prompt:
cd && curl -fsSLO https://raw.githubusercontent.com/romkatv/dotfiles-public/master/.purepower
echo 'source ~/.purepower' >>! ~/.zshrc
Подробнее про ZSH
- Приемы при работе с ZSH.
Разноцветный cat
- ccat;
- lolcat.
Цветовые схемы для терминала
# Интерактивная установка
# Падает с ошибкой, если нет профиля по-умолчаниюю для терминала
# Для всех созданных профилей будет использовавться шрифт профиля по-умолчанию
bash -c  "$(wget -qO- https://git.io/vQgMr)"
# Удаление всех профилей
dconf reset -f /org/gnome/terminal/legacy/profiles:/
Ссылки:
- Обзор тем.
Бекап системы
Предполагается, что бекап мы будем делать с установочной флешки.
mkdir /mnt/{backup,root}
mount /path/to/backup /mnt/backup
mount /path/to/root /mnt/root

# Делаем бекап
cd /mnt/root
tar -cvpzf /mnt/backup/root.tar.gz .

# Извлекаем бекапа
tar -xzpvf /mnt/backup/root.tar.gz -C /mnt/root
Ссылки:
- Делаем бекап системы с помощью tar.
asdf-vm
Установка asdf через Git:
git clone https://github.com/asdf-vm/asdf.git ~/.asdf
cd ~/.asdf
git checkout "$(git describe --abbrev=0 --tags)"

echo -e '\n. $HOME/.asdf/asdf.sh' >> ~/.zshrc
echo -e '\n. $HOME/.asdf/completions/asdf.bash' >> ~/.zshrc
Установка asdf через AUR:
В ~/.zshrc (после compinit) добавляем строки:
. /opt/asdf-vm/asdf.sh
. /opt/asdf-vm/completions/asdf.bash
В ~/.zprofile:
export PATH=/opt/asdf-vm/bin:$PATH
Эту строку можно и в ~/.zshrc.
Удаление:
rm -rf ~/.asdf/ ~/.tool-versions
Примеры:
$ asdf plugin-add python
$ asdf install python 3.7.3
$ asdf install python 2.7.15
$ asdf list python
  2.7.15
  3.7.3
$ asdf uninstall python 2.7.15
$ asdf global python 3.7.3
# Сделать системную версию Python глобальной
$ asdf global python system
$ which python
/home/sergey/.asdf/shims/python

$ asdf plugin-add nodejs
# see: <https://github.com/asdf-vm/asdf-nodejs#install>
$ bash ~/.asdf/plugins/nodejs/bin/import-release-team-keyring
$ asdf install nodejs 10.16.0
$ asdf global nodejs 10.16.0
$ which node
/home/sergey/.asdf/shims/node
$ which npm
/home/sergey/.asdf/shims/npm
$ asdf list
golang
  1.12
nodejs
  10.16.0
postgres
  11.4
python
  2.7.15
  3.7.3
sqlite
  3.29.0
Все доступные плагины. При установке, использовании плагинов могут возникать проблемы. Например, плагин для Python работает поверх pyenv и при возникновении проблем, следует изучить страницу «Common build problems».
If you use pip to install a module like ipython that has a binaries. You will need to run asdf reshim python for the binary to be in your path.
После установки через pip пакетов, которые добавляют команды, чтобы те были доступны, нужно всегда выполнять asdf reshim python.
Ссылки:
- Документация.
NVM
⚠️ Использование asdf-vm предпочительнее.
Устанавливаем последнюю версию Node.js:
Настройка Docker
$ yay -S docker
$ sudo systemctl start docker
$ sudo systemctl enable docker
# sudo groupadd docker
# groupadd: group 'docker' already exists
sudo usermod -aG docker $USER
Нужно выйти и войти в систему, а потом проверить:
Ссылка.
Настройка Visual Code
{
  "editor.fontSize": 16,
  "editor.rulers": [
    72,
    80,
    100,
    120
  ],
  "editor.tabSize": 2,
  "editor.wordWrap": "bounded",
  "editor.wordWrapColumn": 120,
  "files.insertFinalNewline": true,
  "files.trimFinalNewlines": true,
  "files.trimTrailingWhitespace": true,
  "terminal.integrated.fontFamily": "Source Code Pro"
}
LVM
Список логических разделов LVM:
$ sudo lvscan
  ACTIVE            '/dev/linux/root' [40.00 GiB] inherit
  ACTIVE            '/dev/linux/home' [20.00 GiB] inherit
Изменение размера логического раздела:
# Ключ -r выполняет resizefs
$ lvresize -r -L +10G /dev/linux/home

# Аналогично двум командам:

# Увеличиваем размер логического раздела
$ sudo lvresize -L +10GB /dev/mapper/linux-home

# После lvresize нужно обязательно изменить размер файловой системы
$ sudo resize2fs /dev/mapper/linux-home

# Делает то же самое, что и две команды выше
$ sudo lvresize -r -L +10GB /dev/mapper/linux-root
Переименование логического раздела:
$ sudo lvrename <oldname> <newname>
После нужно отредактировать /etc/fstab, изменив пути до разделов, а затем выполнить:
$ sudo grub-mkconfig -o /boot/grub/grub.cfg
Btrfs
Про снапшоты. В Btrfs есть механизм, аналогичный git, который позволяет фиксировать изменения снимками. Снапшоты хранят в себе только изменения между снимками, поэтому занимают мало места и по этой же причине не могут быть созданы вне текущей файловой системы. Они содержат только диффы. Как только мы создали снапшот, состояние системы зафиксировалось. Например у нас есть три файла: foo, bar, baz. Мы сделали снапшот, а потом удалили foo и baz, но пока существует снапшот эти файлы продолжат занимать место + если мы изменим bar, то и его первоначальная копия продолжит свое существование. Так что чтобы освободить место придется периодически удалять ненужные снапшоты.
Обнаружил баг: из-за своп-файла не делались снапшоты корня.
# Создать subvolume
$ sudo btrfs sub create /path/to/@name

# Создание снапшота
# Снапшоты являются разновидностью полдазделов, потому с ними можно выполнять те же операции
$ sudo mkdir /.snapshots
$ sudo chmod 750 /.snapshots

# Этой командой не получится создать снапшот на другой Btrfs (на флешке)
$ sudo btrfs sub snap -r /home /.snapshots/@home_`date +%F-%s`
Create a readonly snapshot of '/home' in '/.snapshots/@home_2019-07-15-1563181292'

$ sudo btrfs sub li -a /
ID 257 gen 1457 top level 5 path <FS_TREE>/@
ID 258 gen 1458 top level 5 path <FS_TREE>/@home
ID 281 gen 1458 top level 5 path <FS_TREE>/@var
ID 283 gen 1458 top level 257 path <FS_TREE>/@/.snapshots/@home_2019-07-15-1563181292

# Удаление снапшота аналогично удалению подраздела
$ sudo btrfs sub del /.snapshots/@home_2019-07-15-1563181292
Delete subvolume (no-commit): '/.snapshots/@home_2019-07-15-1563181292'

# Смонтировать subvolume/снапшот по указанному пути
$ sudo btrfs sub set-default <ID> /

# Восстановление данных

# С сохранением снапшота
$ cp -aR --reflink /.snapshots/@home_YYYY-MM-DD-ssssssssss /@home

# С удалением снапшота
# Таким же способом можно переименовывать подразделы/снапшоты
$ mv /.snapshots/@home_YYYY-MM-DD-ssssssssss /@home

$ btrfs filesystem df /
Data, single: total=15.01GiB, used=12.42GiB
System, single: total=4.00MiB, used=16.00KiB
Metadata, single: total=1.01GiB, used=772.20MiB
GlobalReserve, single: total=44.47MiB, used=0.00B

# Как сделать бекап и восстановить его в другой ФС
$ btrfs send /source/subvolume >/another/filesystem/subvolume-image   # just a file
# (or you can gzip it and/or send with nc on the fly, whatever)
# then later
$ </another/filesystem/subvolume-image btrfs receive /some/btrfs/directory

# Можно так же добавлять новые разделы и устройства в уже существующую ФС
# Можно так же сделатиь ограничения на размер подраздела, добавив его в группу и включив для него квоту
$ man btrfs
бтрфс ничего не жмет.
наилучший вариант сделать ридонли снапшот системы, потом из снапшота сделать образ через send и уж его можно жать и в хвост и в гриву
к примеру

sudo btrfs filesystem sync /
sudo btrfs subvolume snapshot -r / /mnt/backup/root_base
sudo btrfs send /mnt/b11/root_base | gzip > root_`date '+%F'`.gz

но почему бы не воспользоваться обыденным tar ??
так-то формат упаковки btrfs-stream (формат выхода btrfs send) не фундаментально отличается от формата tar. выполнить на сервере

sudo tar -czpf %backup%/srv4full-`date "+%F"`.tgz -X /etc/backupfull_exclude /

в файл /etc/backupfull_exclude пишешь список того что не нужно упаковывать в архив с системой (кроме классических /dev /proc /run /sys и прочих еще докинуть саму директорию куда архивишься  и плюс рабочие директории сервисов, к примеру база данных такую архивацию не всегда переживет)
а далее восстановление из tar архива

если свободного места на сервере будет меньше трети всего объема то такой бекап может не прокатить, либо жать сильнее к примеру через lzma (жрет памяти и проц очень хорошо) либо писать напрямую по интернету к себе (если будет разрыв то передача обломится)
Типы файловых систем:
Flat:

toplevel         (volume root directory, not to be mounted by default)
  +-- root       (subvolume root directory, to be mounted at /)
  +-- home       (subvolume root directory, to be mounted at /home)
  +-- var        (directory)
  |   \-- www    (subvolume root directory, to be mounted at /var/www)
  \-- postgres   (subvolume root directory, to be mounted at /var/lib/postgresql)

Nested:

toplevel                  (volume root directory, to be mounted at /)
+-- home                  (subvolume root directory)
+-- var                   (subvolume root directory)
    +-- www               (subvolume root directory)
    +-- lib               (directory)
         \-- postgresql   (subvolume root directory)
Snapper
Snapper ‒ это утилита для управления снапшотами для LVM и Btrfs.
# Установка
$ yay -S snapper

# Глобальные настройки
$ sudo nano /etc/conf.d/snapper

# Из этого шаблона генерируются другие конфиги
# Тут мы увеличим время после которого снапшоты будут удаляться до 24 часов
$ sudo sed -ri 's/MIN_AGE="[0-9]+"/MIN_AGE="86400"/g' /etc/snapper/config-templates/default

# Создаем конфиги для каждого подраздела отдельно
$ sudo snapper -c root create-config /
$ sudo snapper -c home create-config /home
$ sudo snapper -c var create-config /var

# Сгенерированные шаблоны находятся в /etc/snapper/configs

# Список конфигов
$ sudo snapper list-configs
Config | Subvolume
-------+----------
home   | /home
root   | /
var    | /var

# Созданные конфиги меют такой адрес: /etc/snapper/configs/<config>

# Список снапшотов для конфига
$ snapper -c CONFIG list

# Удаление конфига
$ sudo snapper -c CONFIG delete-config

# Создать новый снапшот
$ snapper -c CONFIG snapshot

# Удалить снапшот
$ snapper -c CONFIG delete snapshot_number

# Удалить диапазон снапшотов
$ snapper -c CONFIG delete snapshot_X-snapshot_Y

<<<<<<< HEAD
# Включаем автоматическое создания снапшотов
# Запускаем бекап через 5 минут после загрузки и далее каждые 24 часа
=======
# Добавляем .snapshots в исключения для mlocate
$ sudo nano /etc/updatedb.conf
...
PRUNENAMES = ".git .hg .svn .snapshots"
...

# Делаем снимки через 5 минут после загрузки и далее каждые 24 часов
>>>>>>> c67ee04f7511ffe5c7ed83f2c751da05ac42de29
$ sudo nano $(locate snapper-timeline.timer)
...
[Timer]
OnBootSec=5min
OnUnitActiveSec=24h
...

# Включаем автоматическое создания снапшотов
$ sudo systemctl enable snapper-timeline.timer && sudo systemctl start snapper-timeline.timer

# Можно так же периодичность очистки снапшотов изменить
$ sudo nano $(locate snapper-cleanup.timer)

# Автоматически  удаляет снапшоты при превышении квот
$ sudo systemctl enable snapper-cleanup.timer && sudo systemctl start snapper-cleanup.timer

# Просмотр логов
$ tail -f /var/log/snapper.log
Описание настроек:
### SNAPPER-CONFIGS(5)# Filesystem Snapshot Management
### Boolean values must be "yes" or "no".

SUBVOLUME="/"
        # Path of the subvolume or mount point.
        # There is no default value. The value must always be specified.

FSTYPE=btrfs
        # Filesystem type for the subvolume.
        # Default value is "btrfs" but it's recommended to always specify the
        # filesystem type.

ALLOW_USERS=""
        # List of users allowed to operate with the config. The user-names
        # must be separated by spaces. Spaces in usernames can be escaped with
        # a "\".
        # Also see the PERMISSONS section in snapper(8).
        # Default value is "" but "root" is always implicitly included.

ALLOW_GROUPS="snapper"
        # List of groups allowed to operate with the config. The group-names
        # must be separated by spaces. Spaces in group-names can be escaped
        # with a "\".
        # Also see the PERMISSONS section in snapper(8).
        # Default value is "".

SYNC_ACL=yes
        # Defines whether snapper will sync the users and groups from
        # ALLOW_USERS and ALLOW_GROUPS to the ACL of the .snapshots directory.
        # Also see the PERMISSONS section in snapper(8).
        # Default value is "no".
        # New in version 0.2.0.

BACKGROUND_COMPARISON=yes
        # Defines whether pre and post snapshots should be compared in the
        # background after creation.
        # Default value is "yes".

### CLEANUP ALGORITHMS
######################

### NUMBER
NUMBER_CLEANUP=no
        # Defines whether the number cleanup algorithm should be run for the
        # config.
        # Default value is "no".

NUMBER_MIN_AGE=1800
        # Minimal age for snapshots to be deleted by the number cleanup
        # algorithm.
        # Default value is "1800".

NUMBER_LIMIT=50
        # Defines how many snapshots the number cleanup algorithm should
        # keep. The youngest snapshots will be kept.
        # Default value is "50".

NUMBER_LIMIT_IMPORTANT=10
        # Defines how many important snapshots the number cleanup algorithm
        # should keep. Important snapshots have important=yes in the userdata.
        # The youngest important snapshots will be kept.
        # The number of normal and important snapshots are counted
        # independently.
        # Default value is "10".
        # New in version 0.1.8.

### TIMELINE
TIMELINE_CREATE=yes
        # Defines whether hourly snapshots should be created.
        # Together with the timeline cleanup algorithm this will create a
        # collection of snapshots with more snapshots is the near past and less
        # snapshots in the far past.
        # Default value is "no".

TIMELINE_CLEANUP=yes
        # Defines whether the timeline cleanup algorithm should be run for
        # the config.
        # Default value is "no".

TIMELINE_MIN_AGE=14400
        # Minimal age for snapshots to be deleted by the timeline cleanup
        # algorithm.
        # Default value is "1800".

TIMELINE_LIMIT_HOURLY=23
        # Defines how many hourly snapshots the timeline cleanup algorithm
        # should keep. An hourly snapshot is the first snapshot in an hour. The
        # youngest hourly snapshots will be kept.
        # Default value is "10".

TIMELINE_LIMIT_DAILY=14
        # Defines how many daily snapshots the timeline cleanup algorithm
        # should keep. A daily snapshot is the first snapshot in a day. The
        # youngest daily snapshots will be kept.
        # Default value is "10".

TIMELINE_LIMIT_MONTHLY=6
        # Defines how many monthly snapshots the timeline cleanup algorithm
        # should keep. A monthly snapshot is the first snapshot in a month. The
        # youngest monthly snapshots will be kept.
        # Default value is "10".

TIMELINE_LIMIT_YEARLY=1
        # Defines how many yearly snapshots the timeline cleanup algorithm
        # should keep. A yearly snapshot is the first snapshot in a year. The
        # youngest yearly snapshots will be kept.
        # Default value is "10".

### EMTPY PRE POST
EMPTY_PRE_POST_CLEANUP=yes
        # Defines whether the empty-pre-post cleanup algorithm should be run
        # for the config.
        # Default value is "no".

EMPTY_PRE_POST_MIN_AGE=1800
        # Minimal age for snapshots to be deleted by the empty-pre-post
        # cleanup algorithm.
        # Default value is "1800".
GUI:
# Не запускается
$ yay -S snapper-gui-git
Ссылки:
- Snapper;
- Systemd/Timers.
Timeshift
Программа для управления бекапами. Работает с Btrfs и в rsync-режиме (полный дамп).
Логи
# Как посмотреть логи?
$ less /var/log/messages
$ more -f /var/log/messages
$ cat /var/log/messages
$ tail -f /var/log/messages
$ grep -i error /var/log/messages

# Сообщения ядра Linux
$ dmesg | less
| Файл | Описание |
|---|---|
/var/log/messages |
General message and system related stuff |
/var/log/auth.log |
Authenication logs |
/var/log/kern.log |
Kernel logs |
/var/log/cron.log |
Crond logs (cron job) |
/var/log/maillog |
Mail server logs |
/var/log/qmail/ |
Qmail log directory (more files inside this directory) |
/var/log/httpd/ |
Apache access and error logs directory |
/var/log/lighttpd/ |
Lighttpd access and error logs directory |
/var/log/boot.log |
System boot log |
/var/log/mysqld.log |
MySQL database server log file |
/var/log/secure or /var/log/auth.log |
Authentication log |
/var/log/utmp or /var/log/wtmp |
Login records file |
/var/log/yum.log |
Yum command log file. |
Установка и настройка Postgres
[sergey@sergey-pc ~]$ sudo pacman -S postgresql
[sergey@sergey-pc ~]$ sudo chown postgres /var/lib/postgres/data
[sergey@sergey-pc ~]$ sudo -i -u postgres
[postgres@sergey-pc ~]$ initdb  -D '/var/lib/postgres/data'
[postgres@sergey-pc ~]$ logout
[sergey@sergey-pc ~]$ sudo systemctl start postgresql
[sergey@sergey-pc ~]$ sudo systemctl enable postgresql
[sergey@sergey-pc ~]$ sudo -u postgres -i initdb --locale $LANG -E UTF8 -D /var/lib/postgres/data
[sergey@sergey-pc ~]$
[postgres@sergey-pc ~]$ createuser --interactive -P
Enter name of role to add: sergey
Enter password for new role:
Enter it again:
Shall the new role be a superuser? (y/n)
Please answer "y" or "n".
Shall the new role be a superuser? (y/n) n
Shall the new role be allowed to create databases? (y/n) y
Shall the new role be allowed to create more new roles? (y/n) y
[postgres@sergey-pc ~]$ createdb -O sergey sergey # создаем пользователя и БД с именами совпадающими с пользователем системы, чтобы psql запускать без параметров
[postgres@sergey-pc ~]$ logout
[sergey@sergey-pc ~]$ psql
psql (11.1)
Type "help" for help.

sergey=>

# Дамп базы схемы БД
$ pg_dump -d db -f /tmp/dump.sql
# Загрузка дампа
$ psql db < /tmp/dump.sql
Мониторинг процессов
# Замена стандартному top
$ yay -S htop
$ htop
systemd
# Все сервисы

# Покажут только включенные
$ systemctl
$ systemctl list-units --type service

# + выключенные
$ systemctl list-unit-files --type service

$ sudo systemctl enable docker

$ sudo systemctl disable docker

$ sudo systemctl restart nginx.service

$ sudo systemctl start application.service

$ sudo systemctl start application.service

$ systemctl status nginx.service

$ sudo systemctl is-enabled service
Создание своего сервиса:
/etc/systemd/system/rot13.service:
[Unit]
Description=ROT13 demo service
After=network.target
StartLimitIntervalSec=0
[Service]
Type=simple
Restart=always
RestartSec=1
User=centos
ExecStart=/usr/bin/env php /path/to/server.php

[Install]
WantedBy=multi-user.target
Ссылки:
- Timers.
Git
# Установка
$ yay -S git

# Глобальные настройки
$ git config --global user.name <yourname>
$ git config --global user.email <email>

# Цветной вывод
$ git config --global color.ui true

# Сменить ветку
$ git checkout <branchname>

# Создать ветку и переключится на нее
$ git checkout -b <branchname>

# Объединить текущую ветку с branchname
$ git merge <branchname>

# Добавить изменения (все файлы в каталоге и вложеннхы)
$ git add .

# Закоммитить изменения (сделать описание)
$ git commit -m "Тест"

# Если не были добавлены новые файлы, а лишь производились изменения в уже добавленных, то можно использовать только одну команду
$ git commit -am "Тест"

# Обновить репозиторий на сервере
$ git push

# Выгрузить изменения с сервера (тоже самое, что git fetch + git merge)
$ git pull

# Копировать репозиторий
$ git clone https://github.com/someuser/repo.git [<assigneddirectory>]

# Посмотреть историю
$ git log --graph --oneline --decorate --all

# Посмотреть отличия по сравнения с предыдущей версией
$ git diff 871d36b [<filename>]

# Сохранить изменения
$ git stash [save "my stash message here"]

# Удалить stach и применить его
$ git stash pop [stash@{1}]

# Список stash
$ git stash list

# Посмотреть что там лежит
$ git stash show stash@{0}

$ git stash apply
$ git stash drop stash@{2}
$ git stash clear

# List all the tags:

$ git tag

# Search tags for a particular pattern:

$ git tag -l <tag-pattern>

# Show a tag data:

$ git show <tag-name>

# Create a Lightweight Tag:

$ git tag <tag-name>

# Create an Annotated Tag:

$ git tag -a <tag-name> -m <tag-message>

# Create a tag for a specific commit:

$ git tag -a <tag-name> <commit-checksome>

# Push a specific tag to remote:

$ git push origin <tag-name>

# Push all the tags to remote:

$ git push origin --tags

# Checkout a specific to local:

$ git checkout -b <branch-name> <tag-name>
Работаем с github через ssh
Генерация нового ключа:
$ ssh-keygen -t rsa -b 4096 -C "<email>"
Generating public/private rsa key pair.
Enter file in which to save the key (/home/sergey/.ssh/id_rsa): /home/sergey/.ssh/github_rsa
Created directory '/home/sergey/.ssh'.
...
В настройках нужно добавить сгенерированный ключ, скопировав содержимое pub-файла (для примера — github_rsa.pub), который лежит в ~/.ssh.
Если уже есть проекты, которые были ранее склонированы по https, то нужно изменить .git/config проекта. :
...
[remote "origin"]
url = git@github.com:<username>/<project>.git
...
Правильный адрес проекта можно посмотреть на странице репозитория:

Для проекта можно указать локальные email и имя:
git config user.email <email>
git config user.name <name>
Tor Service
Включаем Tor:
sudo systemctl start tor
sudo systemctl enable tor
Проверка:
$ torify curl http://httpbin.org/ip
{
  "origin": "173.244.209.5, 173.244.209.5"
}
Менеджер паролей pass
$ yay -S pass
# Далее нужно сгенерировать PGP ключ. Сгенерированный ключ можно удалить через seahorse
$ gpg2 --gen-key
gpg (GnuPG) 2.2.16; Copyright (C) 2019 Free Software Foundation, Inc.
This is free software: you are free to change and redistribute it.
There is NO WARRANTY, to the extent permitted by law.

Note: Use "gpg --full-generate-key" for a full featured key generation dialog.

GnuPG needs to construct a user ID to identify your key.

Real name: Sergey M
Email address: tz4678@gmail.com
You selected this USER-ID:
    "Sergey M <tz4678@gmail.com>"

Change (N)ame, (E)mail, or (O)kay/(Q)uit? O
We need to generate a lot of random bytes. It is a good idea to perform
some other action (type on the keyboard, move the mouse, utilize the
disks) during the prime generation; this gives the random number
generator a better chance to gain enough entropy.
We need to generate a lot of random bytes. It is a good idea to perform
some other action (type on the keyboard, move the mouse, utilize the
disks) during the prime generation; this gives the random number
generator a better chance to gain enough entropy.
gpg: key 82AD537DDC8DD344 marked as ultimately trusted
gpg: revocation certificate stored as '/home/sergey/.gnupg/openpgp-revocs.d/<gpg_id>.rev'
public and secret key created and signed.

pub   rsa2048 2019-07-13 [SC] [expires: 2021-07-12]
      <gpg_id>
uid                      Sergey M <tz4678@gmail.com>
sub   rsa2048 2019-07-13 [E] [expires: 2021-07-12]

# Теперь инициализируем хранилище
$ pass init gpg_id

# Можем сгенерировать пароль (будет автоматически сохранен)
$ pass generate example.com 15
The generated password for example.com is:
'.kXKEs<lx4dcKM

# Посмотреть пароль (потребует passphrase)
$ pass example.com
'.kXKEs<lx4dcKM

# Копировать пароль в буфер обмена
$ pass -c example.com
Copied example.com to clipboard. Will clear in 45 seconds.

# Удалить пароль
$ pass rm example.com
Are you sure you would like to delete example.com? [y/N] y
removed '/home/sergey/.password-store/example.com.gpg'
Базу паролей можно разместить на Google Диск.
Ссылки:
- Pass — утилита для хранения паролей в Linux;
- Приложение для Android;
- Устаревшее расширение для Chrome.
Частые проблемы
Система не грузится дальше rootfs
Нужно пофиксить разделы:
Пример: у нас на диске есть два ntfs раздела раздела, а за ними идет раздел Linux, мы в Windows удаляем ntfs-2, а размер ntfs-1 увеличиваем на все освободившееся пространство, в итоге Windows выходит за свои границы и портит раздел Linux. Вывод: нужно между разделами Windows и Linux оставлять пару мегабайт свободного места.
Grub Rescue
Чаще всего эта ошибка происходит после переименования логических разделов LVM, подразделов Btrfs, переноса системы на новый раздел (когда не совпадают GUID’ы).
error: ... not found.
Entering rescue mode...

# Для начала нужно посмотреть все устройства и разделы
grub rescue> ls
(hd0) (hd1) (hd1,gpt1) (hd2) (hd2,gpt5) (hd2,gpt4) (hd2,gpt3) (hd2,gpt2) (hd2,gpt1) (hd3,gpt2) (hd3,gpt1) (hd4) (hd5)

# Мы помним, что наша система находится на 5 разделе, так что тут гадать не нужно
grub rescue> set prefix=(hd2,gpt5)/@/boot/grub
# «@» ‒ это имя подраздела Btrfs. Для обычного Ext4 раздела, команда будет выглядеть так:
#
#   set prefix=(hd2,gpt5)/boot/grub
#
# А для LVM:
#
#  set prefix=(lvm/arch-root)/boot/grub
grub rescue> set root=(hd2,gpt5)

# Проверим
grub rescue> ls /
@/ @home

# Да, это наш корневой раздел Linux
# Теперь можно загрузиться в систему
grub rescue> insmod normal
grub rescue> normal
После загрузки системы нужно переустановить grub:
$ sudo grub-install --target=x86_64-efi --efi-directory=/boot/efi --bootloader-id="Arch Linux"
$ sudo grub-mkconfig -o /boot/grub/grub.cfg
Случайно нажали Ctrl + Alt + F* и экран стал темным
Это переключение между виртуальными терминалами. с 1-6 текстовые, остальные ‒ графические. В gdm Ctrl+Alt+F1 ‒ логин в систему, Ctrl+Alt+F2 ‒ рабочий стол. В lightdm переключиться на рабочий стол можно нажатием Ctrl+Alt+F7.
Что делать, если каталоги открываются в VSCode?
Существует файл /usr/share/applications/mimeinfo.cache. В нем хранятся ассоциации между mime-типами и приложениями. Его редактирование исправляет проблему, НО такое решение является временным, так как этот файл генерируется при каждом обновлении системы из *.desktop файлов.
Нужно отредактировать MimeType (я его просто закомментировал) в /usr/share/applications/visual-studio-code.desktop и обновить mimeinfo.cache:
$ sudo nano /usr/share/applications/visual-studio-code.desktop
...
# MimeType=text/plain;inode/directory;
...
$ sudo update-desktop-database /usr/share/applications
Enter password to unlock your login keyring
В один прекрасный день Chrome выдаст такое предупреждение, после чего перестанут сохраняться пароли и не будет работать автозаполнение форм для логина.
Решение:
# можно нажать `Super+A` и поискать приложение `passwords and keys`
$ seahorse &

# Если пакет не установлен
$ yay -S seahorse

Удаляем вкладку Login:

Другой вариант удалить все кейринги вручную:
$ rm -rf ~/.local/share/keyrings
Далее удаляем настройки Chrome:
$ rm -rf ~/.config/google-chrome
Теперь остается только перезапустить Chrome.
Справка по командам и т.д.
Cheat.sh
Ищет на stackoverflow и других ресурсах справку по командам и языкам программирования.
Установка:
curl https://cht.sh/:cht.sh | sudo tee /usr/local/bin/cht.sh
sudo chmod +x /usr/local/bin/cht.sh

# Так же требуются пакеты xsel и rlwrap
yay -S xsel rlwrap
Использование:
# Интерактивный режим
$ cht.sh --shell <language>
$ cht.sh --shell bash
type 'help' for the cht.sh shell help
cht.sh/bash> for
# shell - Bash 'for' loop syntax?
#
# Replace

for (($i=0...

# with

for ((i=0;i<10;i++))

# [jman] [so/q/6854118] [cc by-sa 3.0]
cht.sh/bash>

$ cht.sh go create file
/*
 * go - Create an empty text file
 *
 * Don't try to check the existence first, since you then have a race if
 * the file is created at the same time. You can open the file with the
 * O_CREATE flag to create it if it doesn't exist:
 */

os.OpenFile(name, os.O_RDONLY|os.O_CREATE, 0666)

// [JimB] [so/q/35558787] [cc by-sa 3.0]

# Небольшой туториал по языку
$ cht.sh python :learn
Marker
Установка:
$ git clone --depth=1 https://github.com/pindexis/marker ~/.marker && ~/.marker/install.py
- Ctrl-space: search for commands that match the current written string in the command-line.
- Ctrl-k (or marker mark): Bookmark a command.
- Ctrl-t: place the cursor at the next placeholder, identified by ‘{{anything}}’
- marker remove: remove a bookmark

Пользовательские команды хранятся в ~/.local/share/marker/user_commands.txt.
Пример:
yay -S {{package}}##install package
yay -S --noconfirm {{package}}##install package without confirmations
yay -Ss {{search}}##search packages
yay -Si {{package}}##package information
yay -Sc##clean
yay -Syu##update all packages
yay -Ps##print system stats
yay -Pu##print list of packages that needs to be updated
yay -Rns {{package}}##remove package
exec "$SHELL"##reload shell
«Встроенные» в /home/sergey/.marker/tldr/.
TLDR
Этим я пользовался до cht.sh.
Получаем краткую справку по команде:
$ tldr nvm
✔ Page not found. Updating cache...
✔ Creating index...

  nvm

  Install, uninstall or switch between Node.js versions.
  Supports version numbers like "0.12" or "v4.2", and labels like "stable", "system", etc.
  Homepage: https://github.com/creationix/nvm.

  - Install a specific version of Node.js:
    nvm install node_version

  - Use a specific version of Node.js in the current shell:
    nvm use node_version

  - Set the default Node.js version:
    nvm alias default node_version

  - List all available Node.js versions and highlight the default one:
    nvm list

  - Uninstall a given Node.js version:
    nvm uninstall node_version

  - Launch the REPL of a specific version of Node.js:
    nvm run node_version --version

  - Execute a script in a specific version of Node.js:
    nvm exec node_version node app.js
Шпаргалка по командам Shell
# ==============================================================================
#
# Основы синтаксиса
#
# ==============================================================================

# $1, $2, $3, ... are the positional parameters.
# "$@" is an array-like construct of all positional parameters, {$1, $2, $3 ...}.
# "$*" is the IFS expansion of all positional parameters, $1 $2 $3 ....
# $# is the number of positional parameters.
# $- current options set for the shell.
# $$ pid of the current shell (not subshell).
# $_ most recent parameter (or the abs path of the command to start the current shell immediately after startup).
# $IFS is the (input) field separator.
# $? is the most recent foreground pipeline exit status.
# $! is the PID of the most recent background command.
# $0 is the name of the shell or shell script.

# присвоить значение переменной
x=42

# Для вывода используем echo и printf
echo "x=$x"
echo "x=${x}"
printf "x=%s\n" x

# Если переменная не задана, то присваиваем ей дефолтное значение
x=${x:-default}

# $ { varname :- word }
# If varname exists and isn’t null, return its value; otherwise return word.

# Purpose:
# Returning a default value if the variable is undefined.

# Example:
# ${count:-0} evaluates to 0 if count is undefined.

# $ { varname := word}
# If varname exists and isn’t null, return its value; otherwise set it to word and then return its value. Positional and special parameters cannot be assigned this way.

# Purpose:
# Setting a variable to a default value if it is undefined.

# Example:
# $ {count := 0} sets count to 0 if it is undefined.

# $ { varname :? message }
# If varname exists and isn’t null, return its value; otherwise print varname : followed by message, and abort the current command or script (non-interactive shells only). Omitting message produces the default message parameter null or not set.

# Purpose:
# Catching errors that result from variables being undefined.

# Example:
# {count :?” undefined! " } prints “count: undefined!” and exits if count is undefined.

# $ { varname :+word }
# If varname exists and isn’t null, return word; otherwise return null.

# Purpose:
# Testing for the existence of a variable.

# Example:
# $ {count :+ 1} returns 1 (which could mean “true”) if count is defined.


# $ { varname : offset }
# $ { varname : offset:length }

# Purpose:
# Returning parts of a string (substrings or slices).

# Example:
# If count is set to frogfootman, $ {count :4} returns footman. $ {count :4:4} returns foot.

# Экспорт глобальной переменной
export VAR=42

# Генерация строк с помощью Brace expansion
$ echo a{d,c,b}e
ade ace abe

# Массивы

arr=(Hello World)

echo ${arr[0]} ${arr[1]}

${arr[*]} # Все записи в массиве
${!arr[*]} # Все индексы в массиве
${#arr[*]} # Количество записей в массиве
${#arr[0]} # Длина первой записи (нумерация с нуля)

array=(one two three four [5]=five)

echo "Array size: ${#array[*]}"  # Выводим размер массива

echo "Array items:" # Выводим записи массива
for item in ${array[*]}
do
  printf "   %s\n" $item
done

echo "Array indexes:" # Выводим индексы массива
for index in ${!array[*]}
do
  printf "   %d\n" $index
done

echo "Array items and indexes:" # Выводим записи массива с их индексами
for index in ${!array[*]}
do
  printf "%4d: %s\n" $index ${array[$index]}
done

# Следующий пример покажет, как кавычки и конструкции без кавычек возвращают строки (особенно важно, когда в этих строках есть пробелы):

array=("first item" "second item" "third" "item")

echo "Number of items in original array: ${#array[*]}"
for ix in ${!array[*]}
do
  printf "   %s\n" "${array[$ix]}"
done
echo

arr=(${array[*]})
echo "After unquoted expansion: ${#arr[*]}"
for ix in ${!arr[*]}
do
  printf "   %s\n" "${arr[$ix]}"
done
echo

arr=("${array[*]}")
echo "After * quoted expansion: ${#arr[*]}"
for ix in ${!arr[*]}
do
  printf "   %s\n" "${arr[$ix]}"
done
echo

arr=("${array[@]}")
echo "After @ quoted expansion: ${#arr[*]}"
for ix in ${!arr[*]}
do
  printf "   %s\n" "${arr[$ix]}"
done

# Циклы

for i in $(seq 1 10);
do
  echo $i
done

for ((i = 0 ; i < max ; i++ ))
do
  echo $i
done

for i in {0..10}
do
  echo $i
done

for w in word1 word2 word3
do
  doSomething($w)
done

# А вот это zsh не умеет!
for filename in *.sh
  echo "$filename"
end

i=0
while (( ++i <= num )); do
  printf 'counter is at %d\n' "$i"
done

i=1
while [ "$i" -le "$num" ]; do
  printf 'counter is at %d\n' "$i"
  i=$(( i + 1 ))
done

# Условия

if [ "$seconds" -eq 0 ]; then
  timezone_string="Z"
elif [ "$seconds" -gt 0 ]; then
  timezone_string=$(printf "%02d:%02d" $((seconds/3600)) $(((seconds / 60) % 60)))
else
  echo "Unknown parameter"
fi

# В условиях нужно использовать двойные скобки

# [ is just a regular command with a weird name.
# ] is just an argument of [ that prevents further arguments from being used.

# [[ a = a && b = b ]]: true, logical and
# [ a = a && b = b ]: syntax error, && parsed as an AND command separator cmd1 && cmd2just an argument of [ that prevents further arguments from being used.

# x='a b'; [[ $x = 'a b' ]]: true, quotes not needed
# x='a b'; [ $x = 'a b' ]: syntax error, expands to [ a b = 'a b' ]

# Подробнее тут:
#   <https://stackoverflow.com/a/47576482>

# -eq
# is equal to

[ "$a" -eq "$b" ]

# -ne
# is not equal to

[ "$a" -ne "$b" ]

# -gt
# is greater than

[ "$a" -gt "$b" ]

# -ge
# is greater than or equal to

[ "$a" -ge "$b" ]

# -lt
# is less than

[ "$a" -lt "$b" ]

# -le
# is less than or equal to

[ "$a" -le "$b" ]

# <
# is less than (within double parentheses)

(("$a" < "$b"))

# <=
# is less than or equal to (within double parentheses)

(("$a" <= "$b"))

# >
# is greater than (within double parentheses)

(("$a" > "$b"))

# >=
# is greater than or equal to (within double parentheses)

(("$a" >= "$b"))

# <http://tldp.org/LDP/abs/html/comparison-ops.html>

# [ ‒ это всего лишь команда, последним аргументом которой всегда должна быть "]"! Все операторы описаны в man'е:
man [

# Это вполне себе валидное выражение
"[" 1 -eq 0 "]" || echo fail

# Строка слева всегда имя переменной
x=42; [[ "x" -eq "42" ]] || echo fail

# выражение слева всегда переменная

case $VAR in
  foo) ... ;;
  bar) ... ;;
  # Все остальные значения
  *) ... ;;
esac

# Объявление функции
foo() {
  # Аргументы функции
  $1..$N
  # Локальная переменная
  local x=42
  ...
  # Теперь в $1 будет $2, в $2 ‒ $3 и т.д.
  shift
}

# Экспорт функции
export -f foo

die() { echo "$*" 1>&2 ; exit 1; }
...
die "Kaboom"

[ "$#" -eq 2] || die "Needs 2 arguments, input and output"

# The syntax is token-level, so the meaning of the dollar sign depends on the token it's in. The expression $(command) is a modern synonym for `command` which stands for command substitution; it means, run command and put its output here. So

echo "Today is $(date). A fine day."

# Управление выводом

# Направить stdout одной программы в stdin другой
command1 | command2

# Перенаправление stdout и stderr
command1 |& command2

# Создать либо перезаписать файл, добавив строку
command > out

# Создать файл, если его не существует и дописать строку в конец
command >> out

# Направить stderr команды в файл
command 2>&1 out

# stdout 2-ой команды, является stdin для первой
command1 <<< command2

# Вывод многострочного текста
cat <<EOF
хуй
пизда
джигурда
EOF

cat >> /path/to/file <<EOL
хуй
пизда
джигурда
EOL

# ==============================================================================
#
# Написание скриптов
#
# ==============================================================================

# Первой строкой скрипта идет Shebang, торый указывает какой интерпретатор использовать

#!/usr/bin/env bash

# При наличии ошибок прекратит выполнение сценария
set -e

# Так же часто делают каталог скрипта рабочим (по-умолчанию рабочим является тот откуда запустили скрипт)
cd "$(dirname "$0")"

# ==============================================================================
#
# Выполнение скриптов
#
# ==============================================================================

# Сделать файл исполняемым
$ chmod +x /path/to/file

# Выполнит скрипт в текущем процессе (переменные и функции, объявленные внутри скрипта станут доступны в терминале)
$ source /path/to/file

# ==============================================================================
#
# Запуск команд
#
# ==============================================================================

# Запустить процесс и вернуть его дескриптор (при закрытии терминала будет остановлена)
$ command &

# То же самое за исключением того, что процесс не будет остановлен при закрытии терминала
$ nohup command &

# ==============================================================================
#
# Пакеты
#
# ==============================================================================

# Установить пакет
$ yay -S <package>

# Удалить пакет
$ yay -Rns <package>

# Обновить все установленные пакеты
$ yay -Syu

# Обновить в т.ч. с пакетами для разработчика
$ yay -Syu --devel --timeupdate

# Очистить кеш
$ yay -Sc

# Удалить все ненужные зависимости
$ yay -Yc

# Статистика по пакетами
$ yay -Ps

# Generates development package DB used for devel updates
$ yay -Y --gendb

# Ошибки с удалением зависимостей

$ yay -Rns gnome-extra
checking dependencies...
error: failed to prepare transaction (could not satisfy dependencies)
:: nautilus: removing nautilus-sendto breaks dependency 'nautilus-sendto'
$ yay -Rdd nautilus-sendto

# Теперь можно снести gnome-extra

# ==============================================================================
#
# Текст
#
# ==============================================================================

# Замена в тексте
$ echo "This is a test" | sed 's/test/another test/'

# Ключ -e позволяет выполнить несколько команд:
#   sed -e 's/This/That/; s/test/another test/'

# Перевод регистра
$ echo lowercase | tr '[:lower:]' '[:upper:]'
LOWERCASE

# ==============================================================================
#
# Файловая система
#
# ==============================================================================

# Список разделов
$ sudo fdisk -l

$ sudo mkdir /mnt/usb1
# Монтировать устройство
$ sudo mount /dev/sdb1 /mnt/usb1

# Размонтируем устройство
$ sudo umount /dev/sdb1
# или
$ sudo umount /mnt/usb1

# Сменить владельца и группу для файла
$ sudo chown $USER:$USER /path/to/file

# В Linux все файлы. Регулярные файлы ‒ обычные файлы, каталоги ‒ это файлы содержащие список файлов и т.д.

# Перемещение/переименование файла
$ mv <src> <dst>

# Копирование файлов
$ cp <src> <dst>

# Копировать каталог и все вложенные файлы
$ cp -r <src> <dst>

# Полный путь до файла
$ realpath example.txt
/home/username/example.txt

# Листинг каталога
$ ls
$ tldr ls

# Вывести информацию о владельце и группе файла
$ ls -ld /path/to/file
$ stat /path/to/file

# Вывести все вложенные файлы
$ ls -R <path>
$ find <path> -print

# Покажет имя и размер
$ du -a <path>

# Размер всех файлов с расширеним .txt
$ du -chs *.txt

# Создание каталога
$ mkdir <target>

# Создание каталога вместе с родительскими каталогами, если тех не существует
$ mkdir -p <target>

# Создать каталог с определенными правами
$ mkdir -m 0750 <directory>

# Создание множества каталогов
$ mkdir foo bar baz
# или
$ mkdir prefix-{foo,bar,baz}

# Такой же трюк работает при создании файлов
$ touch {foo,bar,baz}.txt

# Создать мягкую ссылку на файл либо заменить ее новой
$ ln -sf path/to/new_file path/to/symlink

# Мягкая ссылка содержит путь до файла. Жесткая ссылается на inode, искомый
# файл при перемещении остается доступен по ссылке и невозможно ссылаться на
# файл на другом устройстве

# Слияние файлов в один
$ paste file1.txt file2.txt > fileresults.txt

# Удалить файлы старше 5 дней
$ find /path/to/files* -mtime +5 -exec rm {} \;

# Удалить все шрифты соответствущие шаблону *powerline* без учета регистра
# «{} \;» rm будет вызван множество раз
# «{} +» добавляет агрументы к rm
$ sudo find /usr/share/fonts -iname "*powerline*" -exec rm {} +

# Поиск фала по имени в специальной базе
$ locate -e login.keyring
/home/sergey/.local/share/keyrings/login.keyring

# Установка
$ yay -S mlocate

# Перед первым запуском следует выполнить
$ sudo updatedb

# После установки будет доступен сервис updatedb.timer, который будет ежедневно обновлять базу

# Стастика
$ locate -S
Database /var/lib/mlocate/mlocate.db:
	157 512 directories
	1 384 522 files
	119 423 666 bytes in file names
	38 722 751 bytes used to store database

# Поиск исполняемых файлов, исходников и страниц манула
$ whereis <q>

# Покажет что куда смонтировано (можно свободное место узнать)
$ df -h --total

# Узнать на каком разделе смонтирован каталог
$ df -h /tmp

# Просмотр числа inode
$ df -i

# Просмотр содержимого фйала с навигацией
$ less /path/to/file

# или более короткая версия в ZSH
$ < /path/to/file

# Просмотр логов в реальном времени
$ tail -f /var/log/syslog | less

# Вывести строки не соответствующие шаблону
$ grep -Pv <exclude_pattern> <filename>

# Создать файл, забитый null-байтами
$ dd if=/dev/zero of=/tmp/nullbytes bs=1M count=1

# Конфертировать .md в .rst
$ pip install m2r
$ m2r --help

# Конвертировать .webp в .png
$ yay -S libwebp
$ dwebp file.webp -o file.png

# Вывод содержимого файла с подсветкой синтаксиса
$ yay -S ccat
$ ccat ./file

# Вывести файлы в каталоге, отсортировав их по времени до доступа
$ ls -ltu <path>

# Изменить размер каталога /tmp
$ mount -o remount,size=4G /tmp/

# Подробная информация о диске
$ sudo smartctl -a /dev/nvme0

# ==============================================================================
#
# Работа с архивами
#
# ==============================================================================

# Заархивировать каталог
$ tar -czvf filename.tar.gz directory

# Для извлечения файлов проще всего пользоваться плагином Oh My ZSH extract

# Извлечь архив и удалить его (ключ -r)
$ extract -r <filename>

# Извлечь .tar.gz
$ tar zxvf <yourfile>.tar.gz -C /usr/src/

# Скачать и Распаковать Архив с помощью WGET
$ wget http://example.com/archive.tar -O - | tar -x
$ wget http://example.com/archive.tar.gz -O - | tar -xz
$ wget http://example.com/archive.tar.bz2 -O - | tar -xj

# Скачать и Распаковать Архив с помощью CURL
$ curl http://example.com/archive.tar | tar -x
$ curl http://example.com/archive.tar.gz | tar -xz
$ curl http://example.com/archive.tar.bz2 | tar -xj

# ==============================================================================
#
# Сеть
#
# ==============================================================================

# Показать все прослушиваемые и установленные порты TCP и UDP вместе с PID
# связанного процесса
$ netstat -plantu

# Все запущенные сервера на хосте
$ netstat -lnt

# Скачать файл в каталог
$ wget -P $ZSH_CUSTOM/themes https://raw.githubusercontent.com/caiogondim/bullet-train-oh-my-zsh-theme/master/bullet-train.zsh-theme

# ==============================================================================
#
# Шрифты
#
# ==============================================================================

# Список установленных шрифтов
$ fc-list

# Обновить базу шрифтов после добавления/удаления их в/из `/usr/share/fonts`
# либо `~/.local/share/fonts`
$ fc-cache -f -v

# ==============================================================================
#
# Буфер обмена
#
# ==============================================================================

$ yay -S xclip

# Скопировать текст в буфер обмена
$ echo 123 | xclip -sel clip

# Копировать содержимое файла в буфер обмена
$ xclip -sel clip < ~/.ssh/github_rsa.pub

# Вывести содержимое буфера обмена
$ xclip -o -sel clip

# Конвертировать файл в base64 и скопировать в буфер обмена
$ file="test.docx"
$ base64 -w 0 $file  | xclip -selection clipboard


# ==============================================================================
#
# Языковые настройки
#
# ==============================================================================

# Список влюченных локалей
$ locale -a

# Добавление локалей

# В этом файле находится список всех поддерживаемых локалей
# Раскомментируем нужную
$ sudo nano /etc/locale.gen

# Генерируем локали
$ sudo locale-gen

# Можно так же локали так добавлять
$ sudo locale-gen de_DE.UTF-8

# Меняем язык системы (нужно перегрузиться)
echo "LANG=de_DE.UTF-8" > /etc/locale.conf

# ==============================================================================
#
# Генерация паролей
#
# ==============================================================================

$ yay -S pwgen
$ pwgen -cnsy 10 1
1u_dr<ZLH;

$ pip install xkcdpass
$ xkcdpass -n 3 -d -
backdrop-unruly-yodel
$ xkcdpass -n 3 -d - --min 2 --max 6
shrank-trio-thong

# ==============================================================================
#
# Прочее
#
# ==============================================================================

# Перегрузить Shell
$ exec "$SHELL"

# Список всех доступных команд
$ compgen -c

# Ищем Chrome
$ compgen -c | grep chrome
google-chrome-stable
chrome-gnome-shell
google-chrome

# Просмотр логов в реальном времени
$ journalctl -f

# Изменить размер терминала
$ gnome-terminal --geometry 135x45

# Документация по командам
$ tldr cat
$ tldr --search create file
Ссылки:
- Цвет и форматирование текста в консоли;
- Поиск файлов на Сервере;
- Файловая система Linux;
- Inode;
- Управление разделами LVM;
- Часто используемые команды Git;
- Использование регулярных выражений
i3: Введение
i3 – это тайловый оконный менеджер для Linux. Тут настройки под меня.
i3: Установка и настройка
$ yay -S awesome-terminal-fonts bumblebee-status compton fonts-powerline dmenu i3-gaps i3lock-fancy-git lxappearance nitrogen rofi scrot termite xclip
$ sudo nano /usr/share/xsessions/i3-custom.desktop
[Desktop Entry]
Name=i3 custom
Exec=/usr/local/bin/i3-custom
Type=Application
$ sudo nano /usr/local/bin/i3-custom
#!/bin/bash
mkdir -p ~/.config/i3/logs
export TERMINAL=termite
exec i3 -V >> ~/.config/i3/logs/$(date +'%F-%T').log 2>&1
$ sudo chmod +x /usr/local/bin/i3-custom
$ i3-config-wizard
$ cp /etc/xdg/termite/config ~/.config/termite/config
$ nano ~/.config/termite/config
[options]
# ...
font pango:Inconsolata, Font Awesome 10
# ...
[colors]
# ...
# 20% background transparency (requires a compositor)
background = rgba(63, 63, 63, 0.8)
$ cp /etc/xdg/compton.conf ~/.config
$ nano ~/.config/i3/config
# ...
font pango:Droid Sans 10
# ...
# Заменяем все Mod1 на $m и создаем переменную выше вызовов bindsym
set $m Mod1

# lockscreen
bindsym Ctrl+$m+l exec i3lock

# Pulse Audio controls
bindsym XF86AudioRaiseVolume exec --no-startup-id pactl set-sink-volume 0 +5% #increase sound volume
bindsym XF86AudioLowerVolume exec --no-startup-id pactl set-sink-volume 0 -5% #decrease sound volume
bindsym XF86AudioMute exec --no-startup-id pactl set-sink-mute 0 toggle # mute sound

# Sreen brightness controls
bindsym XF86MonBrightnessUp exec xbacklight -inc 20 # increase screen brightness
bindsym XF86MonBrightnessDown exec xbacklight -dec 20 # decrease screen brightness

# Touchpad controls
bindsym XF86TouchpadToggle exec /some/path/toggletouchpad.sh # toggle touchpad

# Media player controls
bindsym XF86AudioPlay exec playerctl play
bindsym XF86AudioPause exec playerctl pause
bindsym XF86AudioNext exec playerctl next
bindsym XF86AudioPrev exec playerctl previous

# rofi
bindsym $m+t exec "rofi -combi-modi window,drun -show combi"

# захватывает весь экран и копирует в буфер обмена
bindsym --release Print exec "scrot /tmp/%F_%T_$wx$h.png -e 'xclip -selection c -t image/png < $f && rm $f'"
# захватывает область экрана и копирует в буфер обмена
bindsym --release Shift+Print exec "scrot -s /tmp/%F_%T_$wx$h.png -e 'xclip -selection c -t image/png < $f && rm $f'"
# ...
bar {
  set $disk_format "{path}: {used}/{size}"
  status_command bumblebee-status -m nic disk:root disk:home cpu memory sensors pulseaudio datetime layout pacman -p root.left-click="nautilus /" root.format=$disk_format home.path=/home home.left-click="nautilus /home" home.format=$disk_format -t solarized-powerline
  position top
}
# ...
# отступы между окнами
gaps outer -10
gaps inner 20

floating_minimum_size 75 x 50
floating_maximum_size -1 x -1
# Убрать рамки у окон:
# 1)
# new_window pixel 0
# 2)
# for_window [class="^.*"] border none
# force floating for all new windows
# for_window [class=".*"] floating enable
for_window [class="Nautilus" instance="file_progress"] floating enable
for_window [class="^Telegram"] floating enable, resize set 800 600
# Всплывающие окна браузера
for_window [window_role="pop-up"] floating enable
# no_focus [window_role="pop-up"]
# прозрачность терминала
exec --no-startup-id compton --config ~/.config/compton.conf
# смена расскладки
exec --no-startup-id setxkbmap -model pc105 -layout us,ru -option grp:ctrl_shift_toggle
# восстановление заставки рабочего стола
exec --no-startup-id nitrogen --restore
Нужно выйти из сессии и выбрать в Display Manager сессию i3 custom.
LXAppearance используется для изменения значков, шрифта по-умолчанию в приложениях.
Nitrogen позволяет менять обои.
Для изменения оформления i3 – служит i3-style:
$ yay -S i3-style
$ i3-style archlinux -o ~/.config/i3/config --reload
XTerm
Вместо Ctrl+Shift+V нужно использовать Shift+Ins, а вместо Ctrl+Shift+C – Ctrl+C. Права кнопка мыши копировать, клик по колесику – вставить.
Termite: горячие клавиши
| Сочетание | Значение |
|---|---|
ctrl-shift-x |
activate url hints mode |
ctrl-shift-r |
reload configuration file |
ctrl-shift-c |
copy to CLIPBOARD |
ctrl-shift-v |
paste from CLIPBOARD |
ctrl-shift-u |
unicode input (standard GTK binding) |
ctrl-shift-e |
emoji (standard GTK binding) |
ctrl-tab |
start scrollback completion |
ctrl-shift-space |
start selection mode |
ctrl-shift-t |
open terminal in the current directory [1]_ |
ctrl-shift-up |
scroll up a line |
ctrl-shift-down |
scroll down a line |
shift-pageup |
scroll up a page |
shift-pagedown |
scroll down a page |
ctrl-shift-l |
reset and clear |
ctrl-+ |
increase font size |
ctrl-- |
decrease font size |
ctrl-= |
reset font size to default |
Отсюда.
Termite: цветовые схемы
$ curl https://raw.githubusercontent.com/khamer/base16-termite/master/themes/base16-nord.config >> ~/.config/termite/config
$ nano ~/.config/termite/config
# 4-ое значение отвечает за прозрачность (1 - непрозрачно, 0 - абсолютная прозрачность)
background          = rgba(40, 44, 52, 0.8)
i3: заставка lockscreen
$ yay -S i3lock-fancy-git
$ nano ~/.config/i3/config
# параметр -B делает фоном lockscreen скриншот экрана с размытием
bindsym Ctrl+$m+l exec i3lock-fancy -gpf Ubuntu -- scrot -z
Репозиторий.
i3: сохранение/восстановление рабочего пространства
# Сохранение
i3-save-tree --workspace 1 > ~/.i3/workspace-1.json
# Восстановление
i3-msg "workspace 1; append_layout ~/.i3/workspace-1.json"
Требует установки зависимостей.
Документация.
—
Анимированные обои
Видео-инструкция.
Ошибки при установке расширений для Gnome
Посмотрить их можно так:
$ journalctl /usr/bin/gnome-shell -f
Либо можно нажать Alt+F2 и ввести lg и поебаться с консолечкой. Закрыть ее можно с помощью клавиши Esc.
Время на прочтение
4 мин
Количество просмотров 162K
Как установить Arch без боли??
Предисловие
Слышал, что некоторые считают Arch сложным в установке. Отчасти они правы, но для любого человека, который способен разобраться в установке и настройке linux, установка Arch довольно проста. Также это самый гибкий дистрибутив, поэтому настроить под себя его получится лучше других дистрибутивов.
Данный гайд является сборной солянкой из всех гайдов, что я прочитал (как русскоязычные, так и иноязычные). Его цель просто и без лишней технической информации показать пошаговую установку Arch и сделать это на русском языке. Главное, что статья написана от непонимающего для непонимающих. Заранее скажу, что некоторые скрины будут уже с установленного Arch, но это никак не меняет работу команд и то, что вы увидите при их использование.
Итак, начнём с простого.
Идём на сайт и качаём ISO-файл:

Там ищем зеркало(скорее всего русское) и скачиваем образ:

Для упрощения дальнейшей жизни лучше скачать Etcher, прямо на сайте есть довольно понятная инструкция в картинках, так что справятся все.
Установка
// начну с настройки VirtualBox, если вы используете её, то выполните следующие действия
1.Идём в настройки машины:
2.Во вкладке система ставим галочку около пункта »Включить EFI»:

3.Далее идём во вкладку носители, там добавляем контроллер IDE и выбираем наш дистрибутив

Далее установка будет для всех одинакова.
Начинаем с запуска

Выбираем первую строку и жмём Enter
Проверим соединение с интернетом:
Это нужно, потому что Arch требует интернет для своей установки.
Такой командой можно проверить своё соединение и увидеть время ответа сайта.
ping -c 3 google.com
Если вы используете wifi на своём ПК, то используйте утилиту :
wifi-menuВы увидите примерно это:

Разделы диска
Для того, чтоб разбить наш диск на разделы, можно сначала узнать какие диски подключены. Скорее всего у вас будет USB флешка и HDD\SSD вашего ПК.
Команда для просмотра разделов (понадобится нам ещё много раз):
lsblk
Если у вас несколько дисков, а вы хотите установить на какой-то конкретный, то можно посмотреть диски по размерам.
fdisk -l
Время размечать наш диск. Используем команду cfdisk для этого и выбираем gpt формат :
cfdisk /dev/sda
Bажно! если во время использования команды lsblk и fdisk вы увидели что sda является не тем диском, что нужен вам, то вы дописываете в конец название другого диска, например sdb.
Используя стрелочки создаём 3 раздела на диске:
- /dev/sda1 # размером 1G места под UEFI
- /dev/sda2 # размером примерно 10-15 GB под root
- /dev/sda3 # всё оставшееся место под директорию home
PS: Если вы решили переделать разметку диска, то через эту утилиту можно и удалять разделы
Для проверки используем lsblk снова. Если всё норм, что /dev/sda будет содежать в себе 3 раздела.
Далее форматируем наши разделы.
-
Форматируем тот раздел, который мы выделили под UEFi
mkfs.fat -F32 /dev/sda1 -
Раздел root
mkfs.ext4 /dev/sda2 -
Раздел home
mkfs.ext4 /dev/sda3
Монтируем root и создаём папку home:
mount /dev/sda2 /mnt
mkdir /mnt/home
mount /dev/sda3 /mnt/home
И снова lsblk для проверки

Установка
Начинается самая долгая часть, потому что нужно будет много скачать. Устанавливаем все основные пакеты, а также nano, чтоб редачить файлы системы. Если вдруг вы знакомы с vim можете скачать и его (дописать в конец).
pacstrap -i /mnt base linux linux-firmware sudo nanoВам предложат что установить выбирайте all и далее yes. Встречался с проблемой, что можно было скачать первый или второй вариант, можно просто выполнить команду дважды выбирая вначале один пакет, а затем второй.
Создадим fstab файл
genfstab -U -p /mnt >> /mnt/etc/fstabНастраиваем установленную систему
Chroot
Chroot (change root) нужен нам, чтобы мы могли сменить root пользователя (как и сказано в названии команды).
arch-chroot /mnt /bin/bash
Настройка файла локали
Для начала идём в файл локали, чтоб настроить язык
nano /etc/locale.gen
Находим там #en_US.UTF-8 и стираем #, с русским языком так же. PS: можно использовать Ctrl + W для поиска языка в файле.
Чтобы всё сохранить Ctrl + O, затем Enter и Ctrl + X, затем Enter
Далее пишем команды, которые сгенерируют локаль и создаём locale.conf с нужными настройками языка.
locale-gen
echo "LANG=en_US.UTF-8" > /etc/locale.conf
Настраиваем временную зону
ln -sf /usr/share/zoneinfo/Далее жмём 2 раза на Tab и видим список регионов, после городов.
В моём случае было так:
ln -sf /usr/share/zoneinfo/Europe/Kaliningrad /etc/localtimeЗадаём время
Тут 2 команды. Одна ставит время для системы, а другая его показывает.
hwclock --systohc --utc
date
Имя хоста и адрес
Я решил назвать ПК ArchMe, поэтому используем следующую команду:
echo ArchMe > /etc/hostnameДалее идём в файл localhosts и записываем ip. Если у вас ip статический, используйте свой.
nano /etc/hosts
127.0.1.1 localhost.localdomain ArchMe
Сетевой менеджер
Качаем и включаем.
pacman -S networkmanager
systemctl enable NetworkManager
Установка GRUB
Для начала сменим пароль root пользователя :
passwdGRUB — это загрузчик, который нужен, чтоб запускать нашу установленную систему (в режиме EFI). Далее будет куча команд, которые нужно выполнить.
pacman -S grub efibootmgr
mkdir /boot/efi
mount /dev/sda1 /boot/efi
lsblk # для проверки всё ли норм смонтировано
grub-install --target=x86_64-efi --bootloader-id=GRUB --efi-directory=/boot/efi --removable
grub-mkconfig -o /boot/grub/grub.cfg
Перезагрузка
Чтобы без потерь перезагрузить нашу систему используем эти команды:
exit
umount -R /mnt
reboot
После перезагрузки вы увидите следующее. Если это так, то наш GRUB установился правильно

Входим в root аккаунт и создаём swapfile (что-то вроде доп оперативки) и задаём ему размер как у вашей ОЗУ
fallocate -l 3G /swapfileДалее выполняем следующие команды:
chmod 600 /swapfile
mkswap /swapfile
swapon /swapfile
echo '/swapfile none swap sw 0 0' >> /etc/fstab
И проверяем, работает ли swap:
free -mДобавим пользователя и окружение
useradd -m -g users -G wheel -s /bin/bash username
passwd username
username замените на то имя, что хотите вы)
Также нужно дать ему права суперюзера:
EDITOR=nano visudoтам ищем и убираем #, а дальше Ctrl + O, затем Enter и Ctrl + X, затем Enter
# %wheel ALL=(ALL) ALLДрова
pacman -S pulseaudio pulseaudio-alsa xorg xorg-xinit xorg-serverВам будет предложен выбор, выбирайте исходя из своей графики.
Окружение
Вначале покажу как поставить довольно простое — XFCE
pacman -S xfce4 lightdm lightdm-gtk-greeter
echo "exec startxfce4" > ~/.xinitrc
systemctl enable lightdm
И моё любимое i3, там выбираем пакеты 2 4 5. Возможно вы увидите квадраты вместо символов, но это нормально, вам просто нужно будет скачать шрифт dejavu (pacman -S ttf-dejavu). Cписок горячих клавиш можно посмотреть тут
echo "exec i3"  > ~/.xinitrc
sudo pacman -S i3
Если вы решите поменять своё окружение, то нужно будет менять запись в файле xinitrc.
Для запуска вашего окружения используйте
startxIf you ask a group of developers what Linux is, most of them will probably say it’s an open-source operating system. Those with more technical knowledge will probably call it a kernel.
For me, though, Linux is not just an operating system or a kernel. For me, it’s freedom. The freedom of putting together an operating system according to my needs, and that’s where Arch Linux comes in.
According to their wiki,
Arch Linux is an independently developed, x86-64 general-purpose GNU/Linux distribution that strives to provide the latest stable versions of most software by following a rolling-release model.
The default installation is a minimal base system, configured by the user to only add what is purposely required.
In other words, Arch Linux is a distribution optimized for x86-64 architecture targeted at experienced Linux users. It lets you have full responsibility and control over your system.
You’ll get to choose what packages you want, the kernel (yes there are multiple), the boot-loader, the desktop environment, and so on.
Have you ever heard someone say,
Oh – by the way, I use Arch Linux!
This is because installing Arch Linux on a machine requires you to have proper knowledge of how different parts of a Linux distribution work. So running Arch Linux on your system is kind of a testament to your understanding of Linux.
Speaking from experience, installing Arch Linux is not very different from installing something like Fedora or Ubuntu. It’s just that you have to go through the individual steps manually instead of having an installer do the things for you. But once you’ve gone through the process, you’ll start to understand how the other distributions work in general.
In this article, I’ll walk you through the entire process of installing and configuring Arch Linux on your machine. I’ll also discuss some common tasks and troubleshooting tips near the end.
So come with me and I’ll show you how deep the rabbit hole goes.
Table of Contents
- Some Assumptions I’m Making
- How to Create a Bootable Arch Linux USB Drive
- How to Prepare Your Computer for Installing Arch Linux
- How To Install Arch Linux
- How To Set the Console Keyboard Layout and Font
- How To Verify the Boot Mode
- How To Connect to the Internet
- How To Update the System Clock
- How To Partition the Disks
- How To Format the Partitions
- How To Mount the File Systems
- How To Configure the Mirrors
- How To Install Arch Linux Base System
- How To Configure Arch Linux
- How To Generate the Fstab File
- How To Login to The Newly Installed System Using Arch-Chroot
- How To Configure the Time Zone
- How To Configure the Localization
- How To Configure the Network
- How To Set the Root Password
- How To Create a Non-root User
- How To Install Microcode
- How To Install and Configure a Boot Loader
- How To Install Xorg
- How To Install Graphics Drivers
- How To Install a Desktop Environment
- How To Install GNOME
- How To Install Plasma
- How To Finalize The Installation
- How To Switch Between Desktop Environments
- How To Manage Packages Using Pacman
- How To Install Packages Using Pacman
- How To Remove Packages Using Pacman
- How To Upgrade Packages Using Pacman
- How To Search for Packages Using Pacman
- How To Use AUR in Arch Linux
- How To Install Packages Using a Helper
- How To Install Packages Manually
- How To Troubleshoot Common Problems
- How To Use the Live Arch ISO as a Rescue Media
- Further Reading
- Conclusion
Some Assumptions I’m Making
Before I jump into the core of the tutorial, I want to clarify a few things. To make this entire article approachable, I’m making the following assumptions about you and your system:
- You know about Arch Linux at a basic level
- Arch Linux
- Frequently asked questions
- Arch compared to other distributions
- Your computer is using UEFI and not BIOS
- You have a USB drive large enough (4GB) to boot Linux from
- You have some previous experience installing Linux (Ubuntu/Fedora)
- You have enough space to install linux on your HDD or SSD
That’s pretty much it. If you have all of the above, you’re good to go.
How to Create a Bootable Arch Linux USB Drive
To download Arch Linux, head to https://archlinux.org/download/ and download the latest release (2022.01.01 as of this writing). The ISO should be around 870 megabytes in size.
Once downloaded, you’ll need to put it in your USB. You can use the Fedora Media Writer program to do that. Download and install the application on your system. Now connect your USB drive and open the application:

Click on «Custom image» and use the file browser to pick the downloaded Arch Linux ISO file.

The application will now let you pick one of your connected USB drives. Be very careful in selecting the right one if you have multiple USB drives connected to your machine. Now hit the «Write to Disk» button and wait until the process is finished.
How to Prepare Your Computer for Installing Arch Linux
In this step you’ll have to make a few changes to your system, otherwise Arch Linux may fail to boot or run properly.
The first change that you’ll have to make is disabling secure boot in your UEFI configuration. This feature helps prevent malware attacks during boot but it also prevents the Arch Linux installer from booting.
Detailed instructions on how you can disable this vary depending on your motherboard or laptop brand. You’ll have to search the internet yourself to find the right way this time.
The second thing that you should disable is only relevant if you’re installing Arch Linux alongside Windows. There is a Windows feature called fast startup that reduces the boot time of your computer by partially hibernating it.
This is generally a nice feature to have but it prevents any other operating system in a dual boot configuration from accessing the hard disk in the process.
To disable this feature, open the start menu and search for «Choose a power plan» as follows:
Then on the next window, click on «Choose what the power buttons do» from the left sidebar:

Then on the next window you’ll see a list of «Shutdown settings» and the «Turn on fast startup (recommended)» option should be shown as read only there.

Click the «Change settings that are currently unavailable» at the top and you should then be able to change the settings.

Untick the «Turn on fast startup (recommended)» option and press the «Save changes» button at the bottom. From now on the boot process may take a few moments extra but it’s all worth it.
In this article, I’ll install Arch Linux as my default operating system. So I’ll allocate my entire disk space to it.
If you’re trying to install it alongside Windows, however, I have a dedicated article on the topic. And in that article, there is a section that discusses the partitioning process in great detail.
How To Install Arch Linux
Assuming that you have a bootable USB drive and your computer is configured properly, you’ll have to boot from the USB drive. The process of booting from a USB drive differs from machine to machine.
On my machine, hitting the F12 key during boot takes me to the list of bootable devices. From there I can pick my bootable USB drive. You may already know the appropriate technique for your computer or you may have to research a bit.
Once you’ve managed to land on the list of connected bootable devices, select your USB drive to boot from and the following menu should show up:
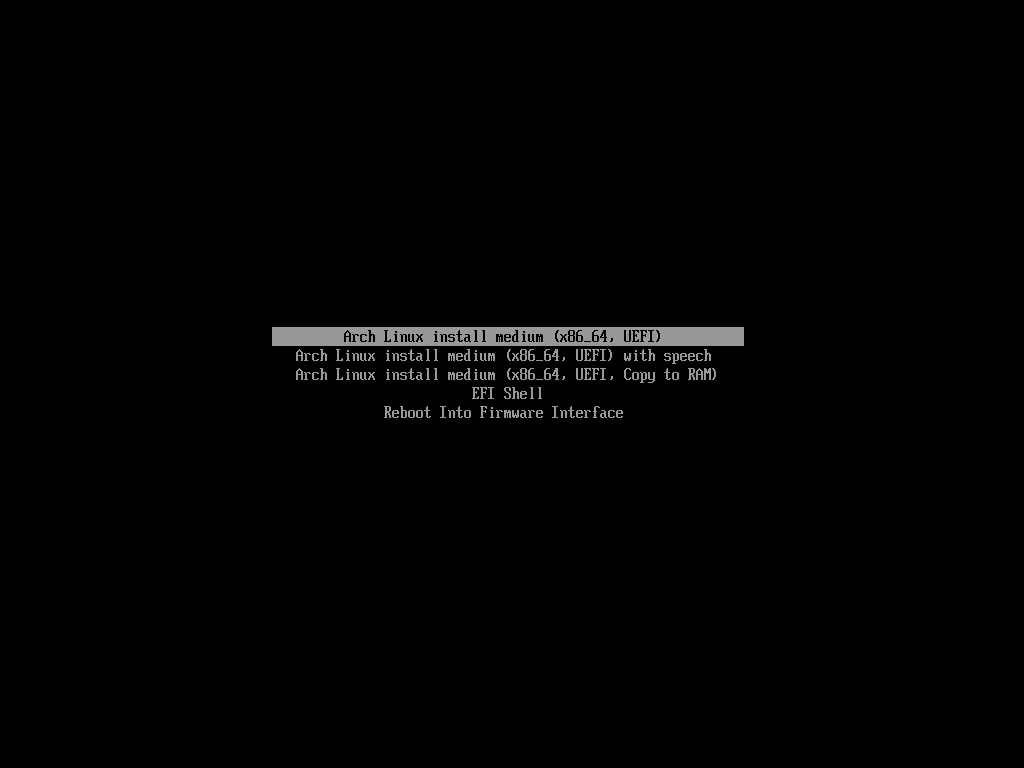
Choose the first one from the list and wait until the Arch installer finishes booting up. Once fully booted up, you’ll see something like this:

That’s it. That’s all you’ll get. Unlike other operating systems that you maybe familiar with, the Arch installer doesn’t have any graphical user interface to automate the installation.
It rather requires you to invest your time and effort and configure each part of the distribution piece by piece. It may sound daunting but, to be honest, if you understand what you’re doing, installing Arch Linux is quite fun.
How To Set the Console Keyboard Layout and Font
As I’ve already said, the Arch installer doesn’t have a graphical user interface so there’s going to be a lot of typing. Configuring your keyboard layout and a nice looking font can make the installation process a lot less frustrating.
By default, the console assumes that you have a standard US keyboard layout. This should be fine for most people but just in case if you happen to have a different one, you can change to that.
All the available keymaps are usually kept inside the /usr/share/kbd/keymaps directory in the form of map.gz files. You can see the list of them by using the ls command:
ls /usr/share/kbd/keymaps/**/*.map.gz
This will list out all the available key maps:
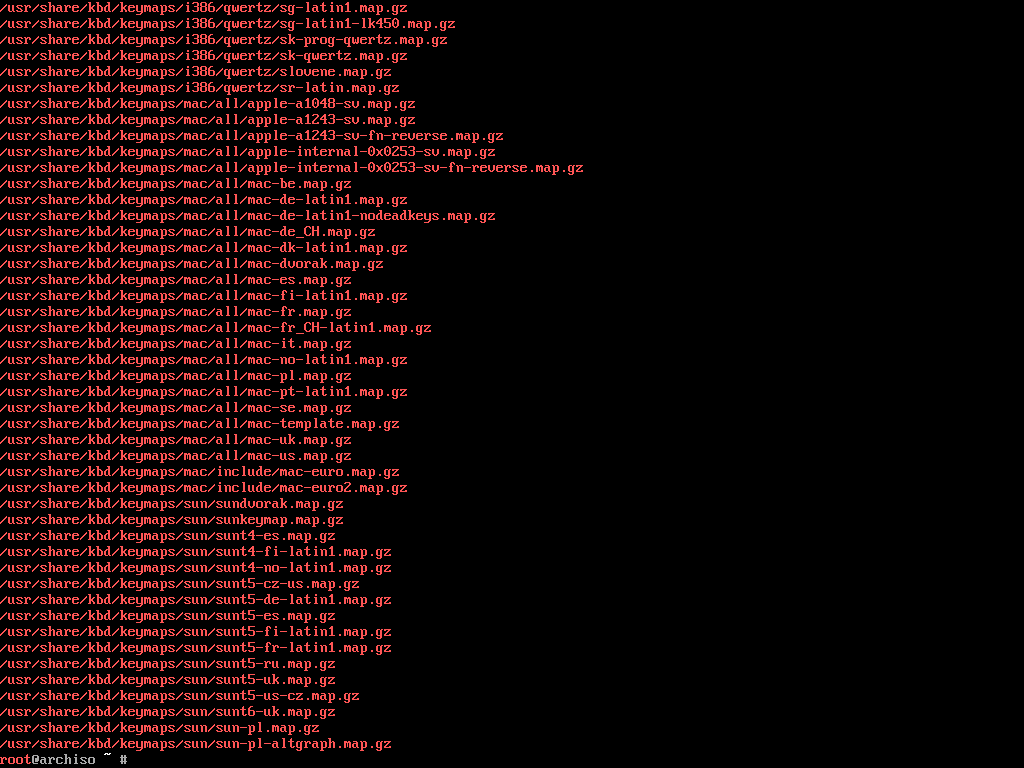
Now for example, if you have the Mac-US keyboard layout, locate the corresponding map.gz file from this list which is the mac-us.map.gz one.
You can use the loadkeys command to load the desired keymap. To set mac-us.map.gz as default, execute the following command:
loadkeys mac-usYou can also change the console font if you don’t like the default one. Just like the keymaps, the console fonts are kept inside the /usr/share/kbd/consolefonts which you can list out using the ls command:
ls /usr/share/kbd/consolefontsThis will list out all the available fonts:
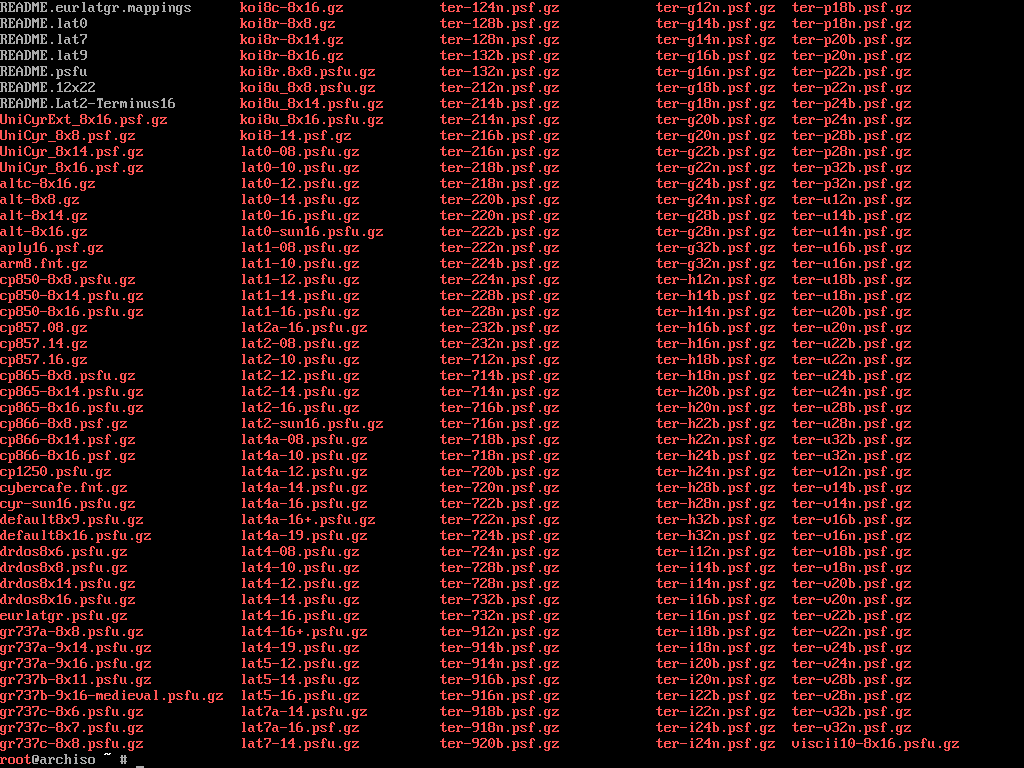
You can now use the setfont command for setting one of these. For example, if you want to set the drdos8x16 as default, execute the following command:
setfont drdos8x16Both the loadkeys and setfont commands are part of the kbd package containing essential Linux keyboard tools. They have great documentation so if you’d like to learn more, feel free to check it out.
How To Verify the Boot Mode
Now that you have your console configured, the next step is to make sure that you’ve booted in UEFI mode and not in BIOS mode.
To be honest, this step seems unnecessary to me since it literally says x86_64 UEFI in the live boot menu. But let’s do it for the sake of the official Arch installation guide.
To verify the boot mode, execute the following command:
ls /sys/firmware/efi/efivarsIf you’re in UEFI mode then, it will list out a bunch of files on your screen:
In case of a BIOS boot, the efi directory won’t even exist inside the /sys/firmware directory. If you’re in UEFI mode, (which you should be if you’ve followed everything properly) continue to the next step.
How To Connect to the Internet
Unlike a lot of other live distributions, the Arch live environment doesn’t come with all necessary packages built into it. It contains a number of bare minimum packages that you can use to install the rest of the system. So, a working internet connection is a must.
If you’re using a wired network then you should have a working internet connection from the get go. To test it out, ping any of the public addresses out there:
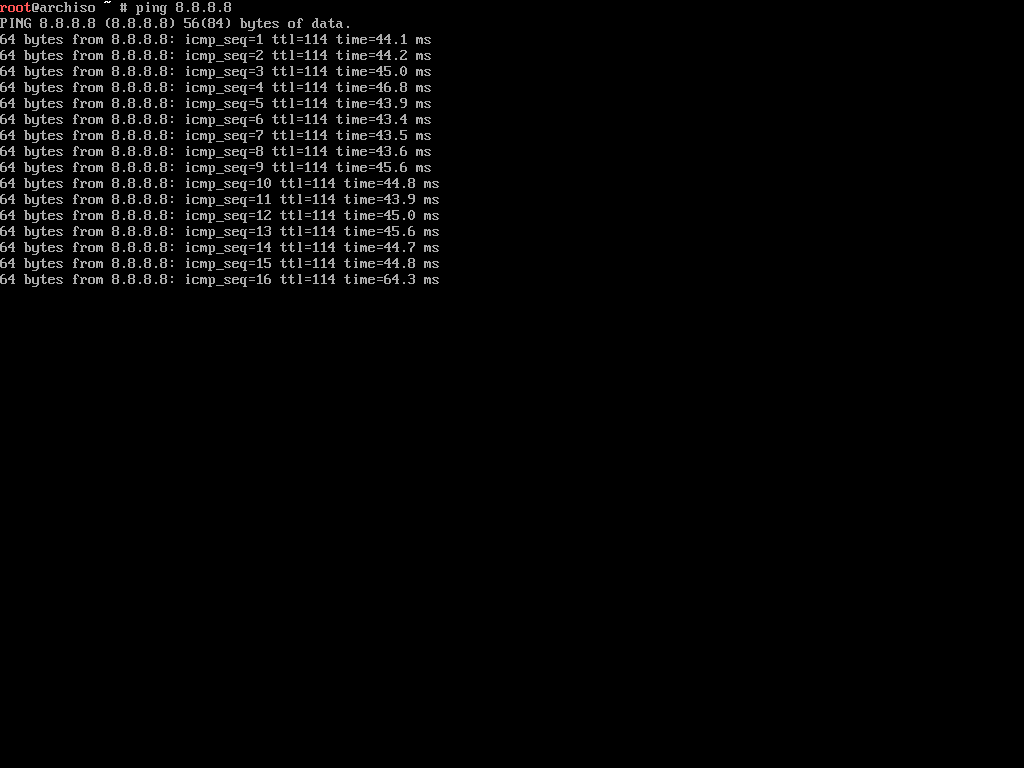
I’m making these screenshots using VirtualBox, so the internet connection works perfectly with the wired connection. But if you have a wireless connection, things can get a bit tricky.
The live environment comes with the iwd or iNet wireless daemon package. You can use this package to connect to a nearby wireless network.
To begin with, execute the following command:
iwctlThis will start an interactive prompt as follows:
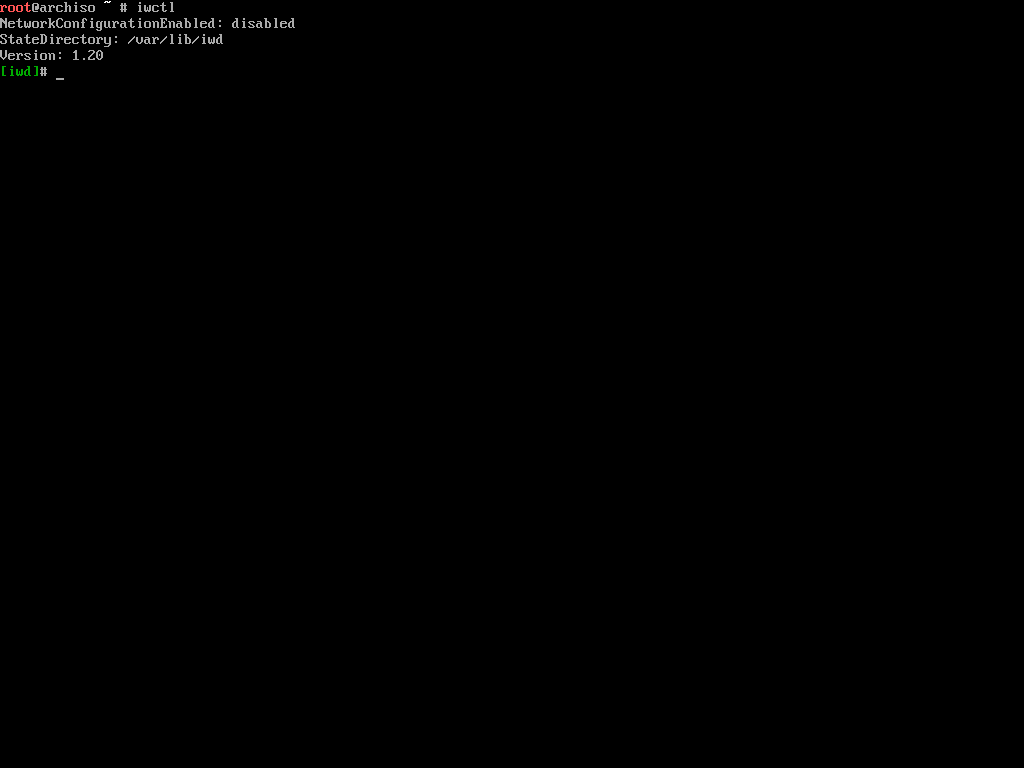
Now execute the following command to see the list of available wireless devices:
device listThis will spit out a list of available wireless devices. By wireless devices I mean any wireless adapter connected to your computer. Let’s assume wlan0 is the device name.
To scan for nearby wireless networks using the found device, execute the following command:
# station <device> scan

station wlan0 scan
You may think that this command will print out a list of all the nearby networks, but that’s not the case. To see the list of networks, execute the following command:
# station <device> get-networks

station wlan0 get-networks
Now assuming the name of your home network is called Skynet, you can connect to it by executing the following command:
# station <device> connect <SSID>

station wlan0 connect Skynet
The iwctl program will prompt you for the wi-fi password. Put it in carefully and, once connected to the network, exit the program by writing exit and hitting enter. Try pinging a public address once again and make sure that the internet is working fine.
How To Update the System Clock
In Linux, NTP or Network Time Protocol is used for synchronizing computer system clocks over a network. You can use the timedatectl command to enable NTP on your Arch live environment:
timedatectl set-ntp trueThis command will start outputting some output and after a few seconds. If you do not see the command cursor show up again, try pressing Enter. I’ve faced this inconvenience a few times in the past.
How To Partition the Disks
This is probably the most sensitive step of the entire installation process – because if you mess up your partitions, you lose your precious data. So my advice would be to not immediately follow along with this section. Instead, read the whole section first and then follow along.
To begin the partitioning process, you’ll have to first know about the different disks connected to your computer. You can use fdisk which is a dialog-driven program for creation and manipulation of partition tables.
fdisk -lThis command will list the partition tables for all the available devices on your computer.
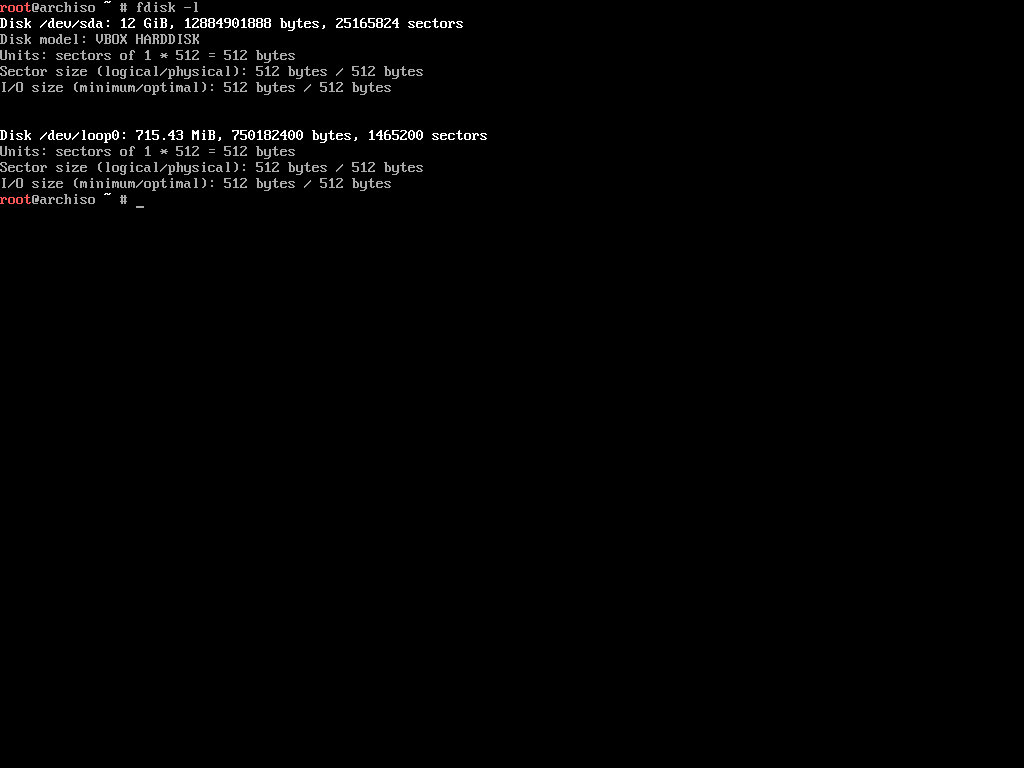
As you can see, there are two devices connected to my computer (virtual machine actually). Depending on the number of devices you have, this list can be longer so ignore any device ending with rom, loop, or airoot when reviewing the list. You can not use those devices for the installation.
So that leaves us with the /dev/sda device. Keep in mind that this can be completely different on your machine. For example, if you have an NVME drive, you may see /dev/nvme0n1 instead.
Once you’ve decided which device to use, it’s a good idea to check if there are any existing partitions inside that device. To do so, you can use the following variation of the same fdisk command:
fdisk /dev/sda -lRemember to replace /dev/sda with what you have. This command will list out all the partitions inside the given device.
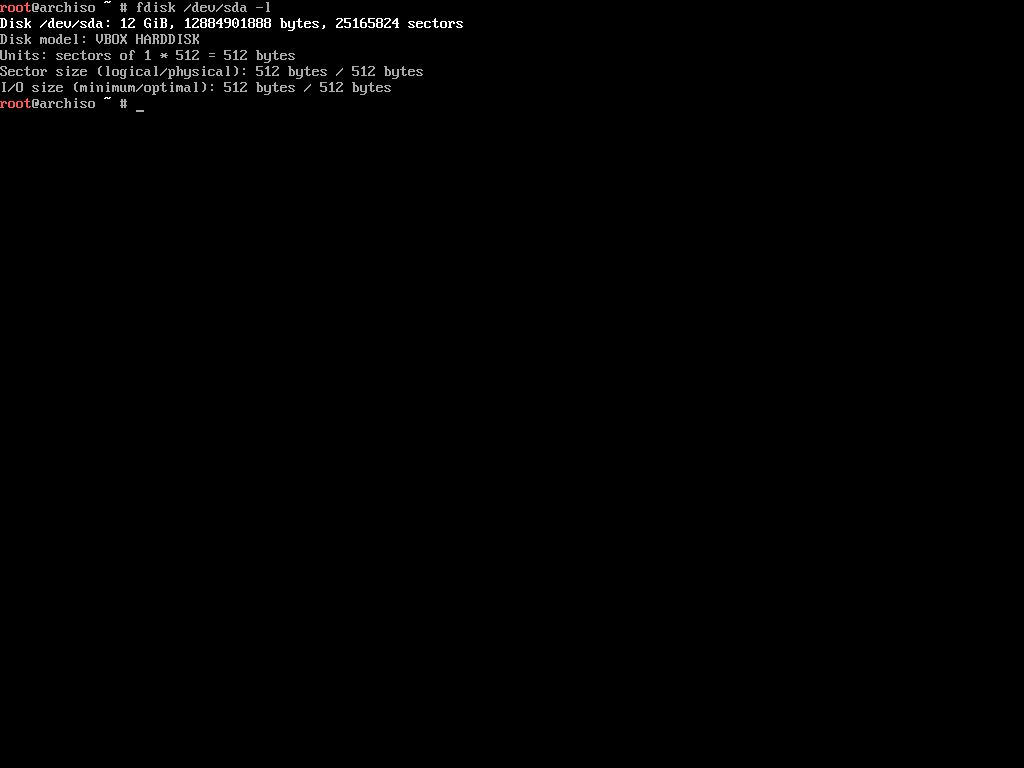
Although there are no partitions in this device, in a real life situation you may have previously created partitions. Those partitions will show up as /dev/sda1, /dev/sda2 or in the case of a NVME drive /dev/nvme0n1p1, /dev/nvme0n1p2 and so on.
The fdisk program can do a lot more than just listing partitions. Consult the corresponding ArchWiki page to know about the tasks you can perform using this program.
There is another program cfdisk which is a curses- (programming library) based disk partition table manipulator for Linux. It’s similar in functionality with fdisk but being curses-based means it has an interface which makes it easier to work with.
Execute the following command to start cfdisk on your preferred device:
cfdisk /dev/sdaRemember to replace /dev/sda with what you have. If the device has a previously created partition table, then cfdisk will directly show the list of partitions. Otherwise you’ll get to choose a partition table type to begin with:
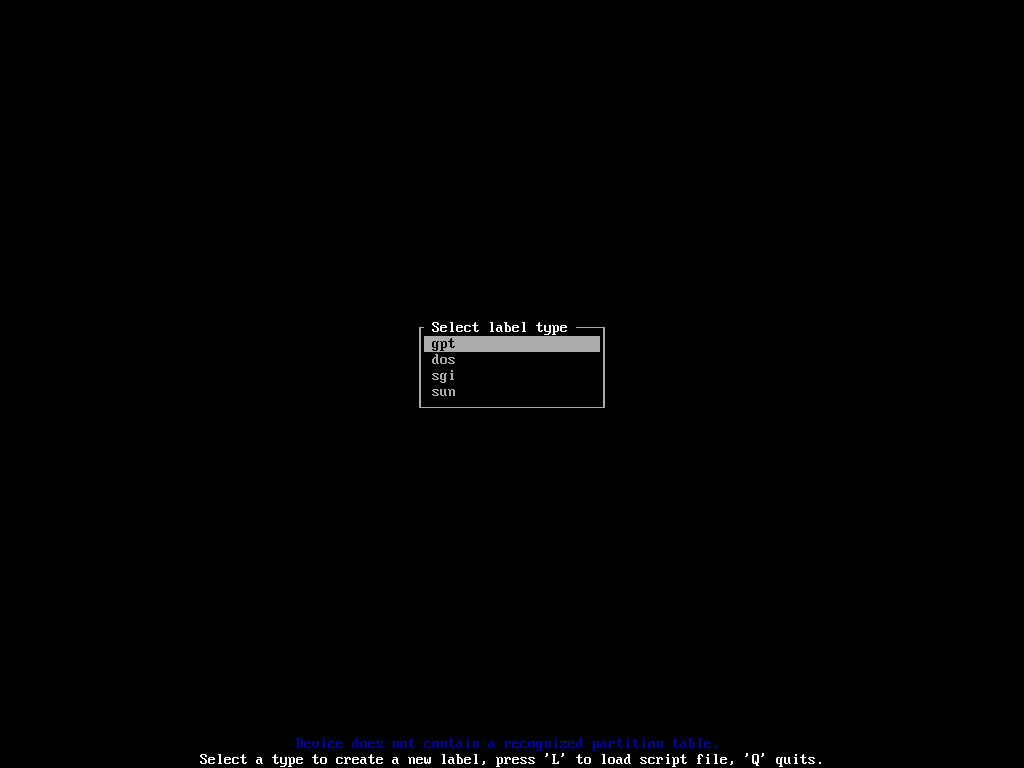
Choose gpt for your UEFI based system. Next, you’ll land on the list of partitions and free space on the device:
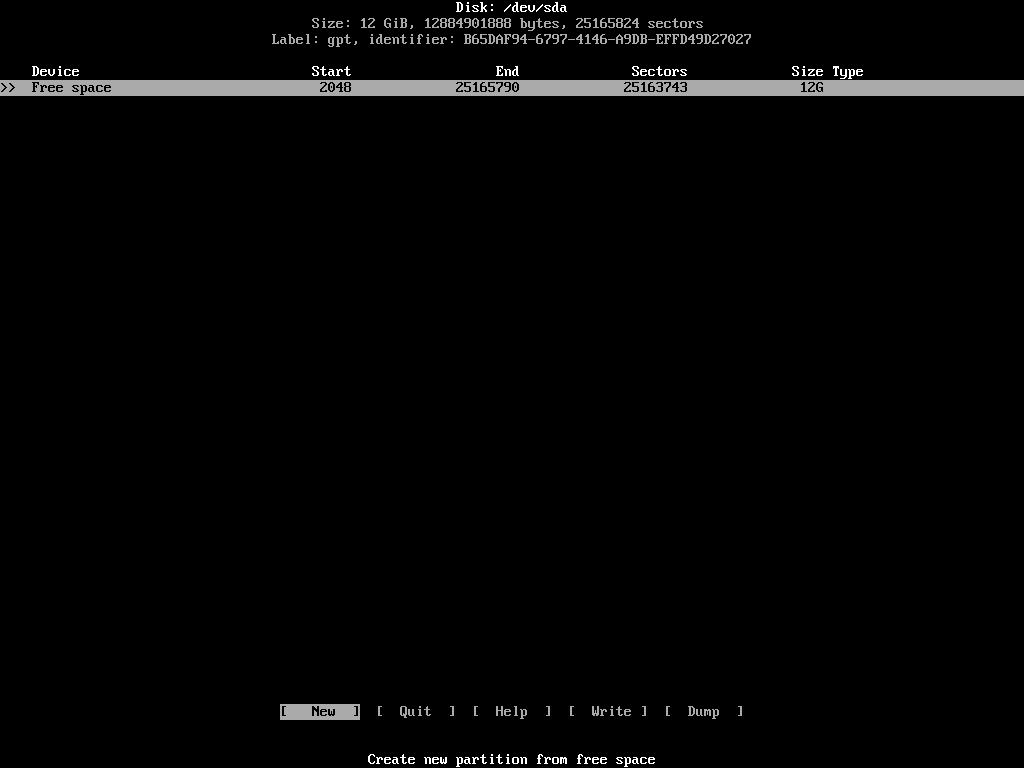
You can move vertically along the list of devices using your up/down arrow keys and move horizontally along the different actions using the left/right arrow keys.
To install Arch, or any other Linux distribution, you’ll need three separate partitions. They are as follows:
- EFI system partition – for storing files required by the UEFI firmware.
- ROOT – for installing the distribution itself.
- SWAP – for serving as the overflow space for your RAM.
Make sure the right partition/free space is highlighted in the list and select the [ New ] action.
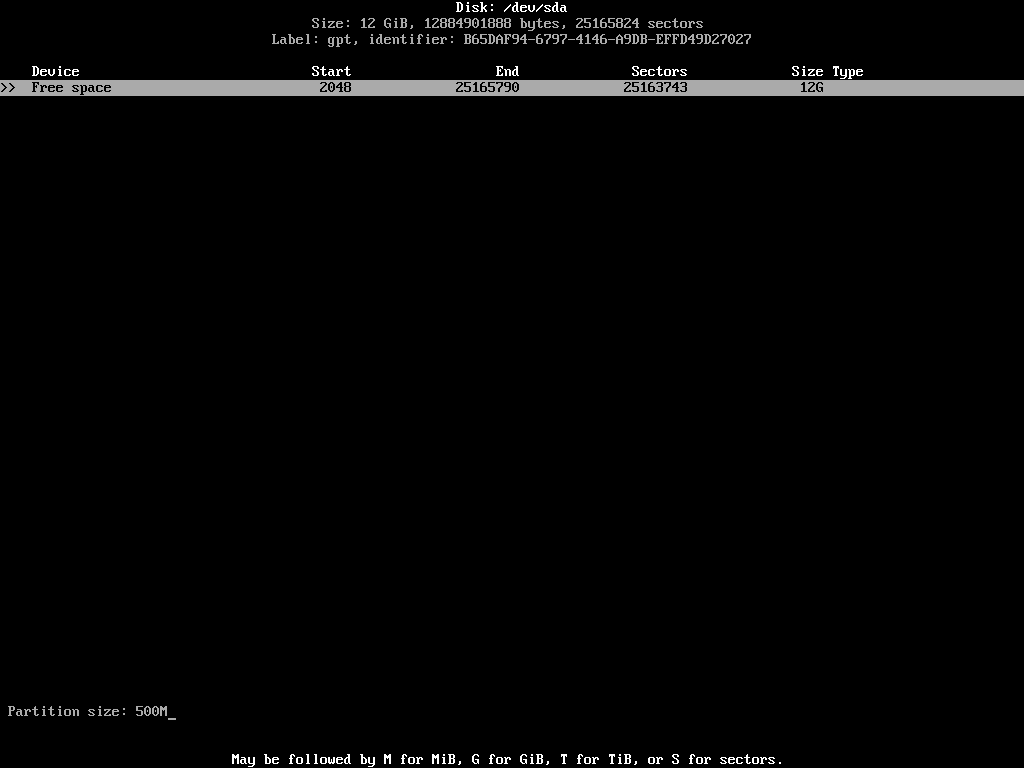
Put the desired partition size. You can use M to denote megabytes, G for gigabytes, and T for terabytes.
For an EFI system partition, you should allocate at least 500MB. Once you’ve put your desire size, press Enter to finalize. The updated list of partitions may look as follows:
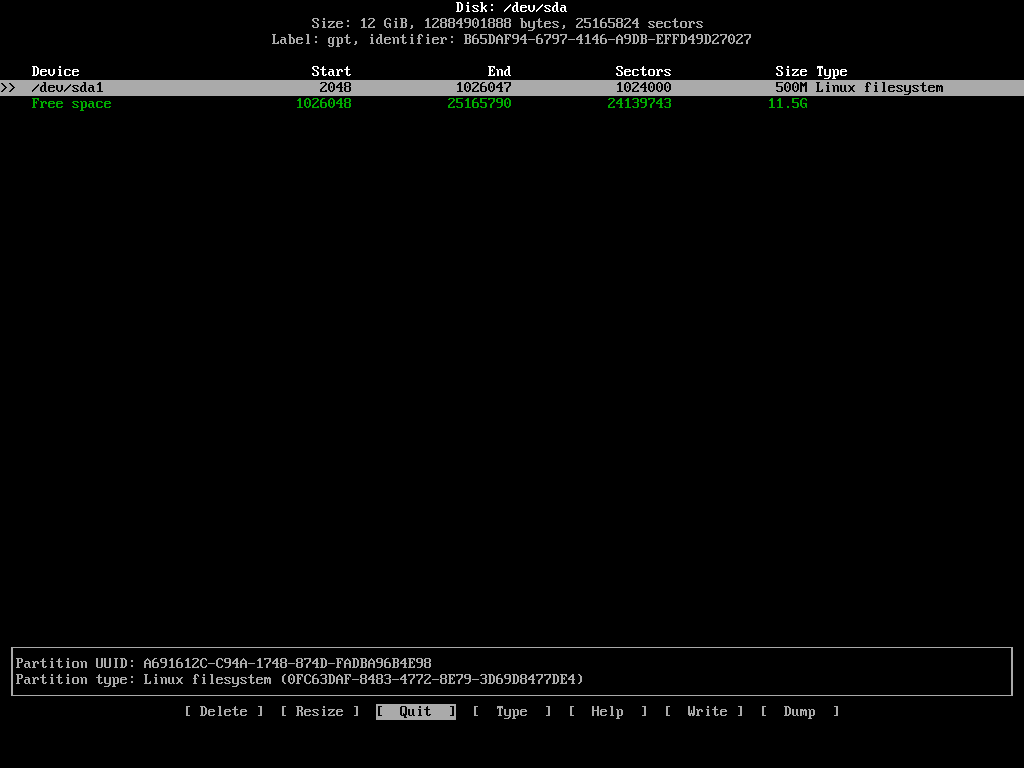
The EFI system partition is a special type of partition. It has to be in a specific type and format. To change the default type, keep the newly created partition highlighted and select [ Type ] from the list of actions.
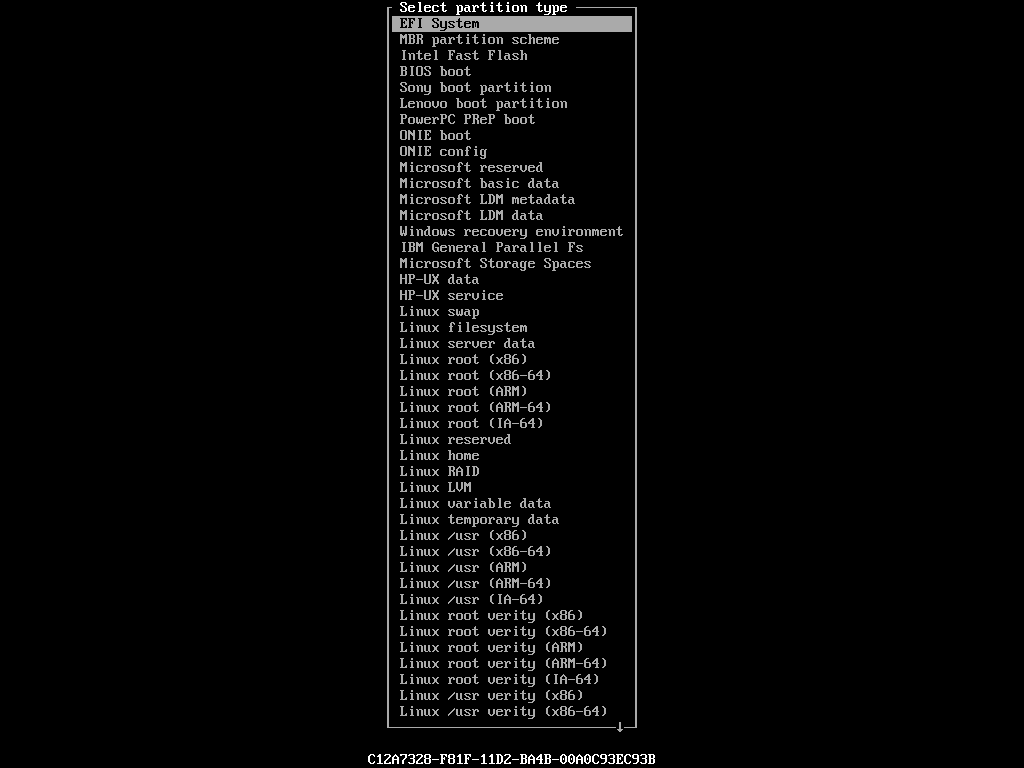
From this long list of types, highlight EFI System and press Enter. The type of the partition in the list should update accordingly:
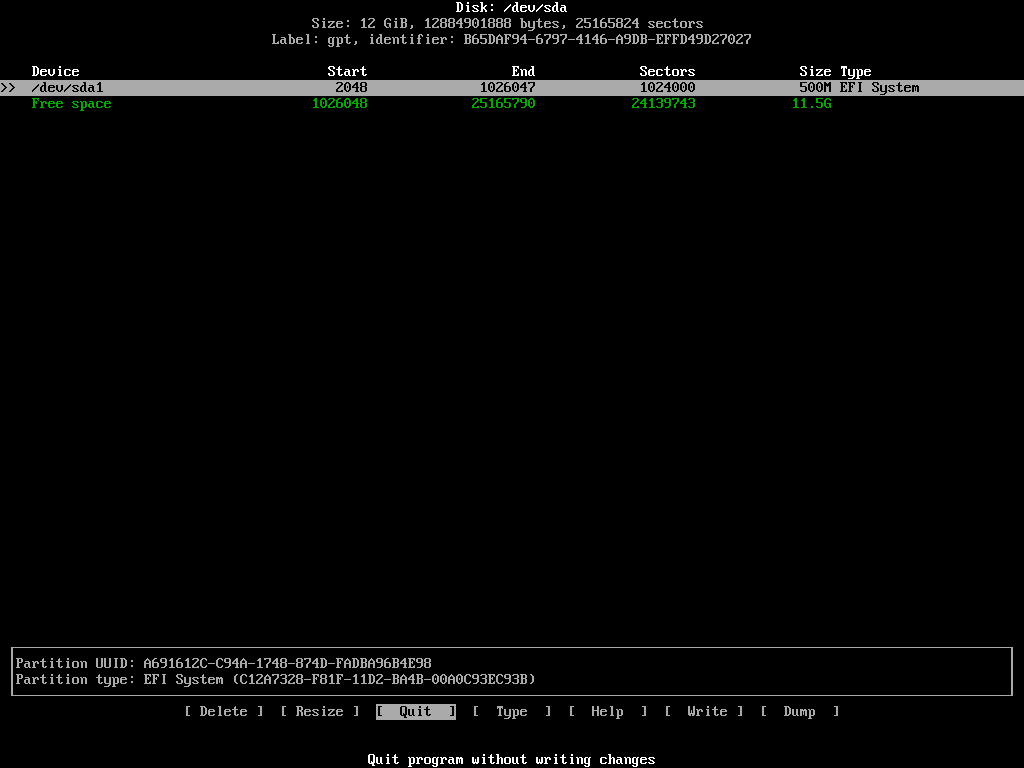
Next is the root partition. Highlight the remaining free space and select [ New ] once again. This time assign 10GB to this partition. The ideal size of the root partition depends on your necessities. Personally I allocate at least 100GB to the root partition of all my Linux installations.
You don’t need to change the type of this partition. The default Linux filesystem will do.
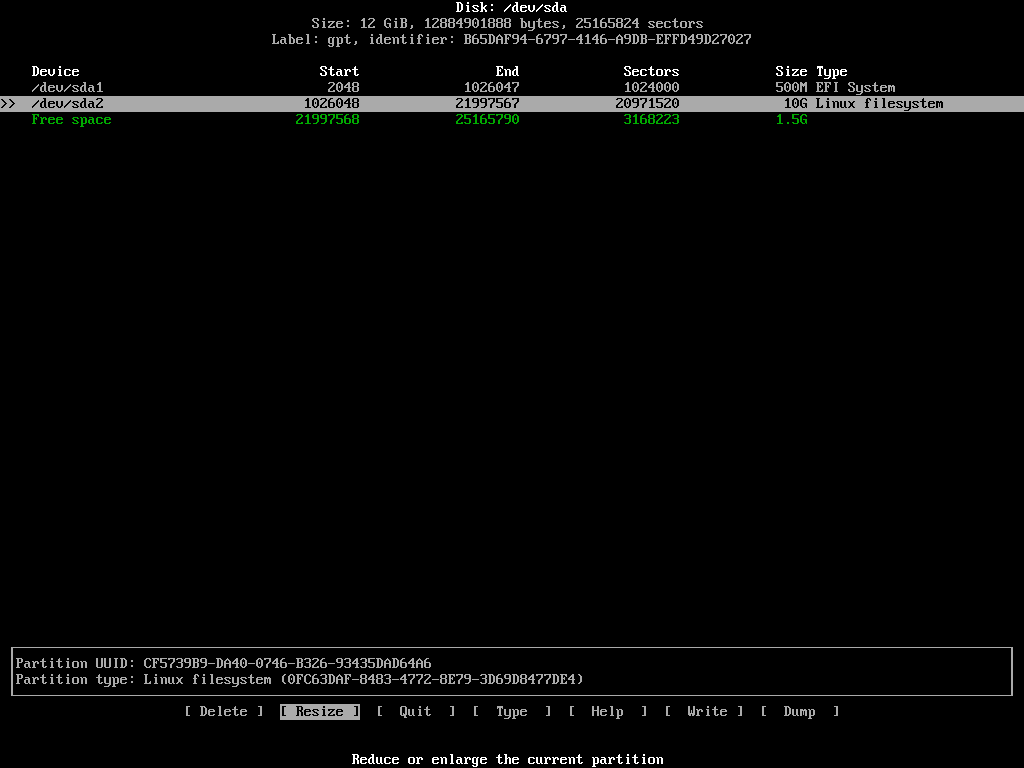
Create one last partition with the remaining space and change its type to Linux swap from the menu:
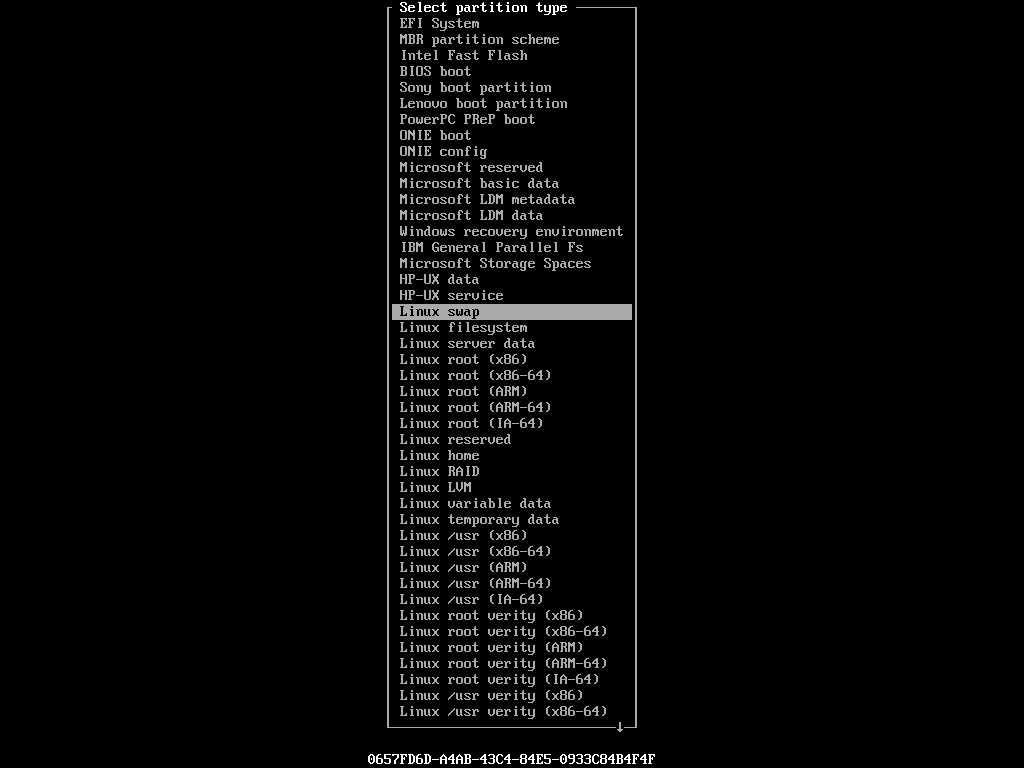
The ideal size of a swap partition is a matter of debate. Personally I don’t have swap partitions on my machines. The amount of physical RAM I have is more than enough. But if I ever feel the need for one later on, I use a swapfile instead. Anyways, the final state of your device should be as follows:
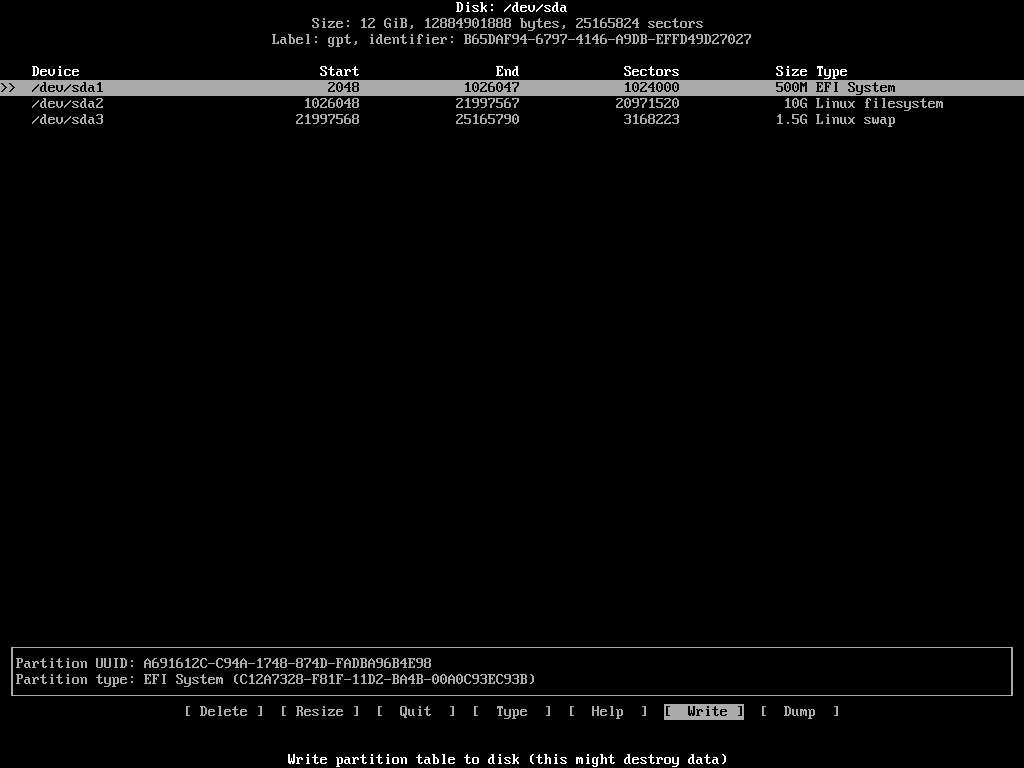
If you’re happy with the set-up, highlight [ Write ] from the action list and hit Enter. The program will ask whether you want to persist these changes or not. You’ll have to write yes and press enter if you agree. Once the partition table has been altered, select [ Quit ] to exit from the program.
One thing that I would like to mention for those trying to install Arch Linux alongside Windows is, in that case, the EFI system partition should already exist in your device. So don’t touch that. Just create the other partitions and move on.
How To Format the Partitions
Now that you’ve created the necessary partitions, you’ll have to format them accordingly. You can use the mkfs and mkswap programs to do that. Before the formatting, take a final look at your partition list by executing the following command:
fdisk /dev/sda -lThis time you’ll see the three newly created partitions with their details:
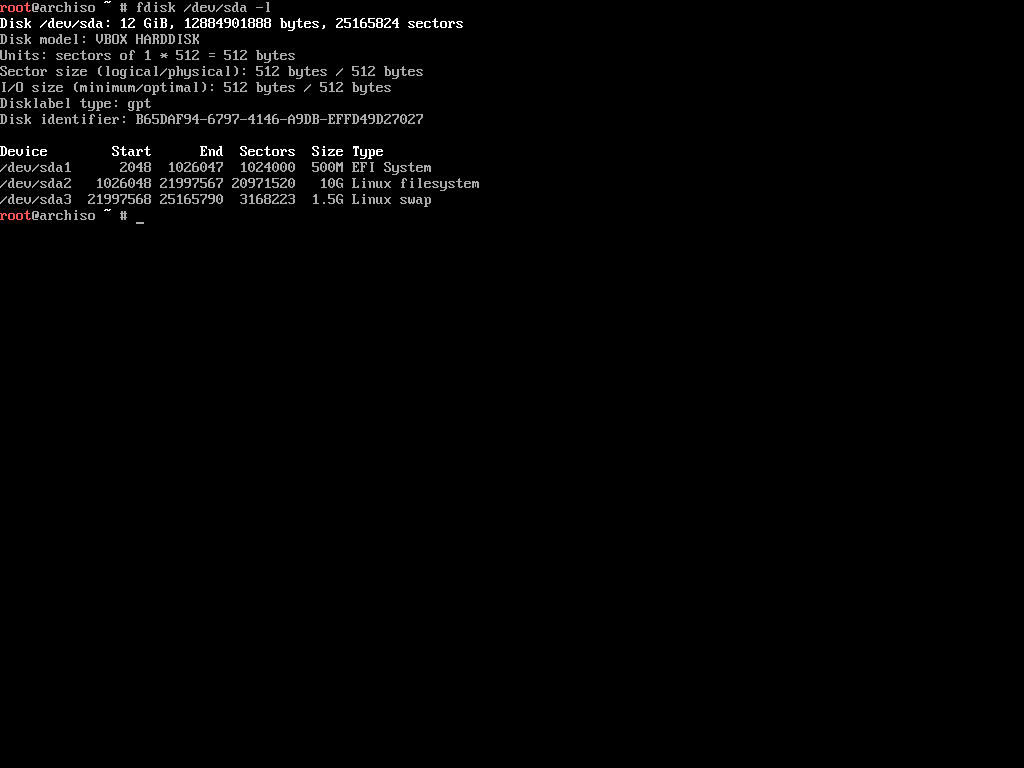
Take note of the device names, like /dev/sda1, /dev/sda2, /dev/sda3 and so on. The EFI system partition has to be in FAT32 format. Execute the following command to format a partition in FAT32 format:
mkfs.fat -F32 /dev/sda1The next one is the root partition. It can be in a number of formats, but I prefer using EXT4 for all of my Linux filesystems. Use the following command to format the partition in EXT4:
mkfs.ext4 /dev/sda2This operation may take a few moments to finish depending on your partition size. Finally, the swap partition. Use the following command to format that:
mkswap /dev/sda3With that, you’ve finished the process of preparing your partitions for the installation.
How To Mount the File Systems
Now that you’ve created and formatted your partitions, you’re ready mount them. You can use the mount command with appropriate mount points to mount any partition:
# mount <device> <mount point>

mount /dev/sda2 /mnt
I hope you remember that the /dev/sda2 partition was created to be the root partition. The /mnt mount point in Linux is for mounting a storage device temporarily. As we only need to mount the partition for installing Arch Linux on it, the /mnt mount point is perfect.
In the case of a swap partition, you won’t mount it like the other ones. You’ll have to tell Linux to use this partition as swap explicitly. To do so, execute the following command:
swapon /dev/sda3As you may have guessed, the swapon command tells the system to swap on this device. We’ll work with the EFI system partition in a later section. For now, mounting these two partitions will suffice.
How To Configure the Mirrors
There is one last step before you can install Arch Linux on your machine, and that is configuring the mirrors. Mirrors are servers located at different pointes around the world for serving the nearby population.
The installer comes with Reflector, a Python script written for retrieving the latest mirror list the Arch Linux Mirror Status page. To print out the latest mirror list, simply execute the following command:
reflectorIf you have a slow internet connection, you may encounter an error message as follows:
failed to rate http(s) download (https://arch.jensgutermuth.de/community/os/x86_64/community.db): Download timed out after 5 second(s).This happens when the default timeout (5 seconds) is lower than the actual time it’s taking to download the information.
You can remedy to this problem by using the --download-timeout option:
reflector --download-timeout 60Now reflector will wait for a whole minute before starting to scream. A long list of mirrors should show up on your screen:
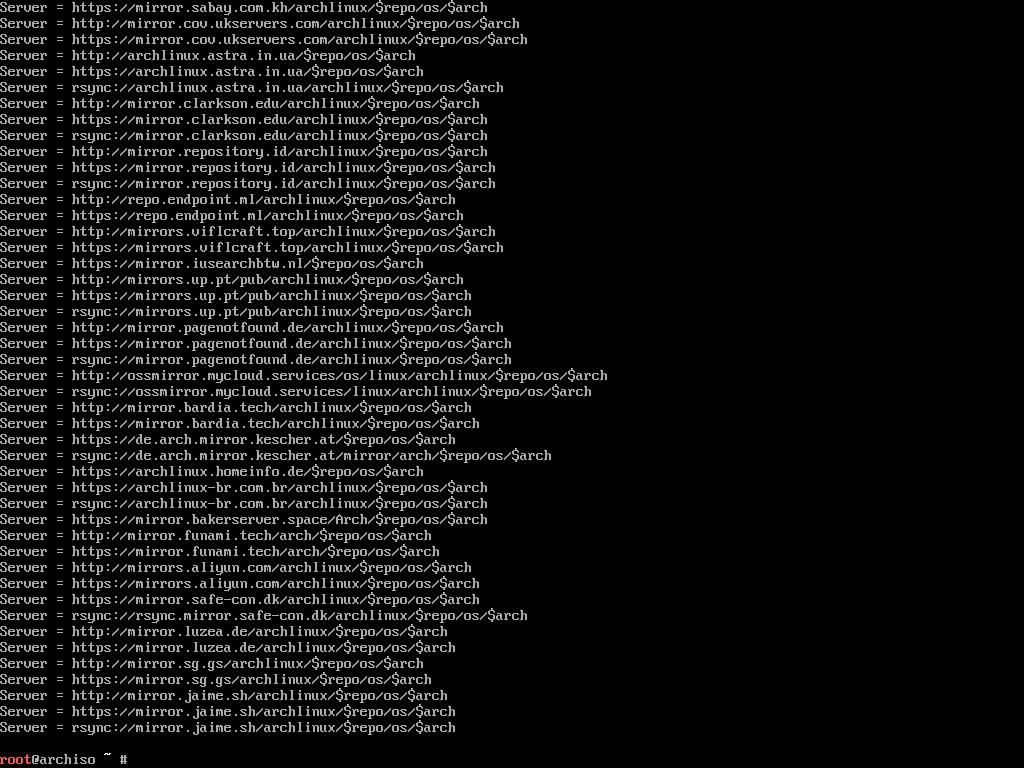
Going through the entire list to find nearby mirrors would be a pain. That’s why reflector can do that for you.
Reflector can generate a list of mirrors based on a plethora of given constraints. For example, I want a list of mirrors that were synchronized within the last 12 hours and that are located either in India or Singapore (these two are closest to my location), and sort the mirrors by download speed.
Turns out, reflector can do that:
reflector --download-timeout 60 --country India,Singapore --age 12 --protocol https --sort rateThe found servers will be listed like before:
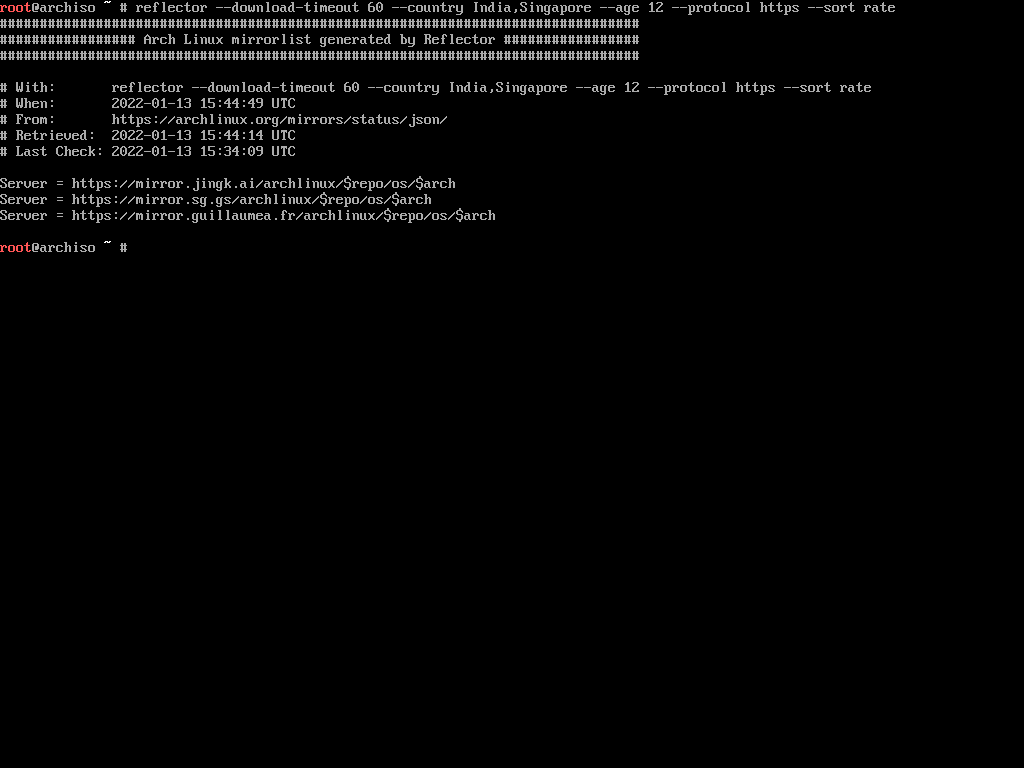
Printing out a mirror list like this is not enough. You’ll have to persist the list in the /etc/pacman.d/mirrorlist location. Pacman, the default package manager for Arch Linux, uses this file to learn about the mirrors.
Before overwriting the default mirror list, make a copy of it:
cp /etc/pacman.d/mirrorlist /etc/pacman.d/mirrorlist.bakNow execute the reflector command with the --save option as follows:
reflector --download-timeout 60 --country India,Singapore --age 12 --protocol https --sort rate --save /etc/pacman.d/mirrorlistThis command will generate the mirror list and overwrite the default one. Now you’re ready to install the base Arch Linux system.
How To Install Arch Linux Base System
Before installing the base system, it’s a good idea to update the package cache according to the new mirror list. To do so, execute the following command:
pacman -SyThe pacman program to Arch Linux is what apt is to Ubuntu or dnf is to Fedora. The -S option means sync which is equivalent to install in apt or dnf package managers.
Once the update process is finished, you can use the pacstrap script to install the Arch Linux system. Execute the following command to start the installation process:
pacstrap /mnt base base-devel linux linux-firmware sudo nano ntfs-3g networkmanagerThe pacstrap script can install packages to a specified new root directory. As you may remember, the root partition was mounted on the /mnt mount point, so that’s what you’ll use with this script. Then you’ll pass the package names you want to install:
base– Minimal package set to define a basic Arch Linux installation.base-devel– Group of packages required for building software from source.linux– The kernel itself.linux-firmware– Drivers for common hardware.sudo– You want to run commands as root right?nano– A pico editor clone with some enhancements.ntfs-3g– NTFS filesystem driver and utilities required for working with NTFS drives.networkmanager– Provides detection and configuration for systems to automatically connect to networks.
I would like to clarify that this list of seven packages is not something mandatory. To have a functional Arch Linux installation, you just need the base, linux, and linux-firmware packages. But considering you’ll need the other ones anyway, why not catch ’em all in one go.
Depending on your internet connection, the installation process may take a while. Sit back and relax until pacstrap does its thing. Once it’s done, you’ll see something as follows:
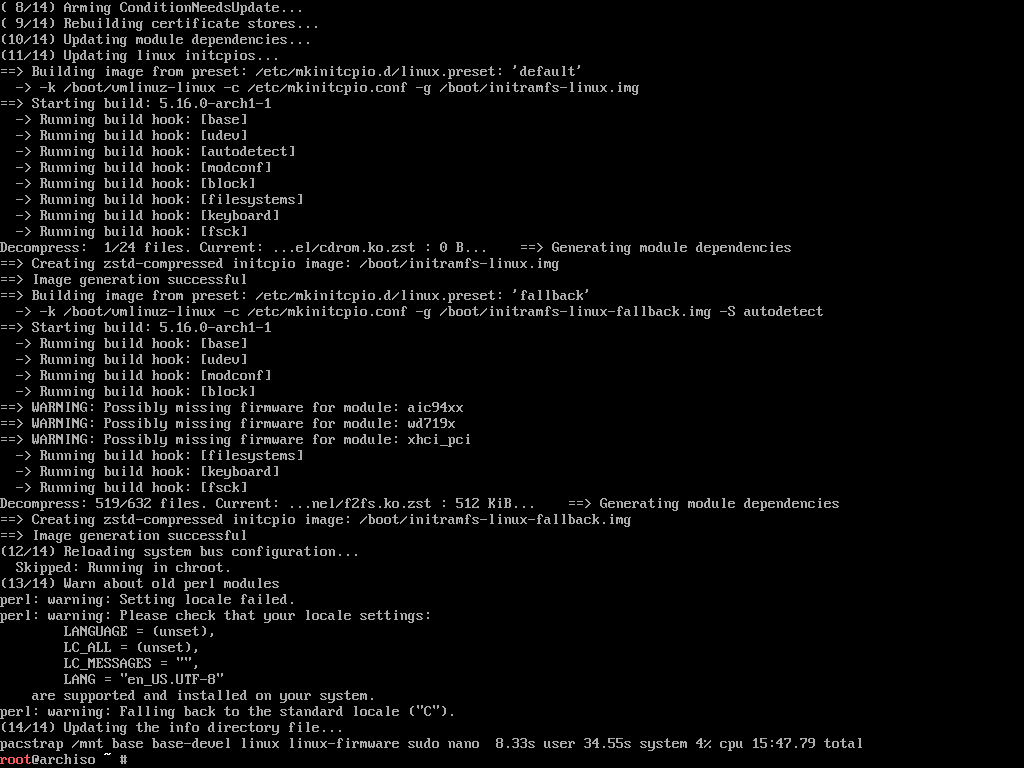
Congratulations, you’ve successfully installed Arch Linux on your computer. All that is left to do now is configuring the system.
How To Configure Arch Linux
Installing Arch Linux wasn’t that hard right? In fact in my opinion, installing it is way more straightforward than configuring it. There is a lot to do here. So let’s get started.
How To Generate the Fstab File
According to the ArchWiki,
The
fstabfile can be used to define how disk partitions, various other block devices, or remote file systems should be mounted into the file system.
In other distributions like Ubuntu or Fedora this gets generated automatically during the installation. On Arch however, you’ll have to do it manually. To do so, execute the following command:
genfstab -U /mnt >> /mnt/etc/fstabThe genfstab program can detect all the current mounts below a given mount point and print them in fstab-compatible format to standard output. So genfstab -U /mnt will output all current mounts under the /mnt mount point. We can save that output to the /mnt/etc/fstab file using the >> operator.
How To Login to The Newly Installed System Using Arch-Chroot
Right now you’re logged into the live environment and and not into your newly installed system.
To continue configuring your newly installed system, you’ll have to first log into it. To do so, execute the following command:
arch-chroot /mntThe arch-chroot bash script is part of the arch-install-scripts package and lets you change to the newly installed system’s root user without any reboot. How cool is that!
How To Configure the Time Zone
Once you’ve switched root, the first thing to configure is the time zone. To see a list of all the available zones, execute the following command:
ls /usr/share/zoneinfoAll the major zones should be in the directory.
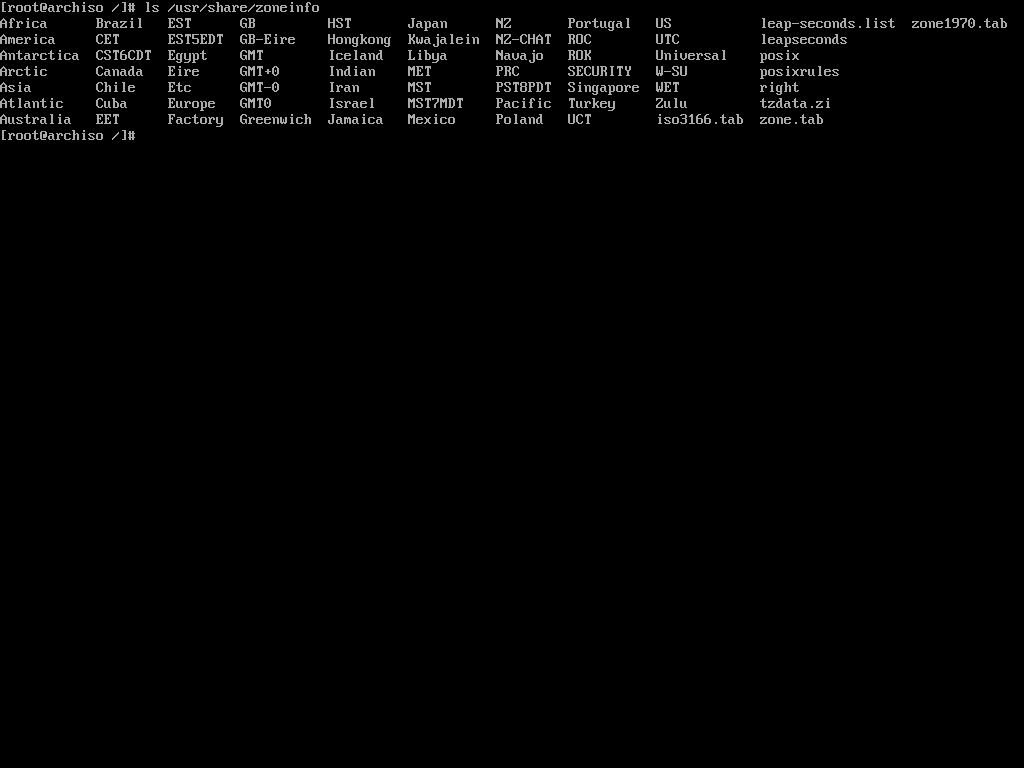
I live in Dhaka, Bangladesh which resides inside the Asia zone. If I list out the content of Asia, I should see Dhaka there:
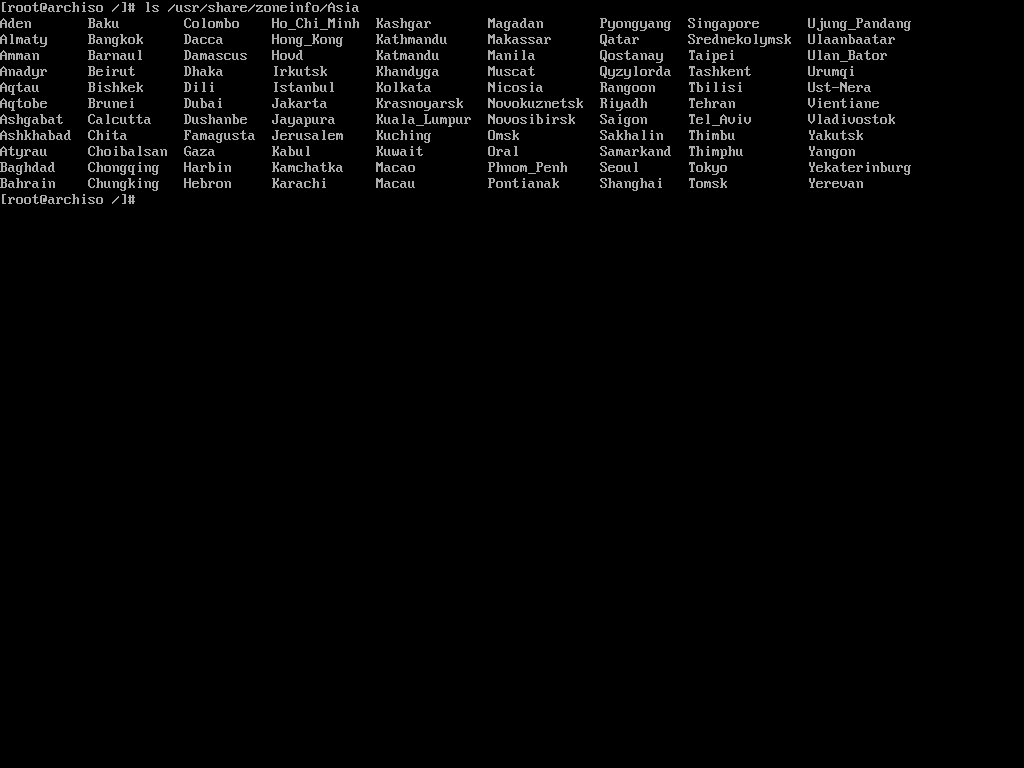
To set Asia/Dhaka as my default time zone, I’ll have to make a symbolic link of the file at the /etc/localtime location:
ln -sf /usr/share/zoneinfo/Asia/Dhaka /etc/localtimeThe ln command is used for creating symbolic links. The -sf options indicate soft and force, respectively.
How To Configure the Localization
Now you’ll have to configure your languages. Arch Linux has an easy way to set that up as well.
First, you’ll have to edit the etc/locale.gen file according to your localization. Open the file in the nano text editor:
nano /etc/locale.genYou’ll see a long list of languages:
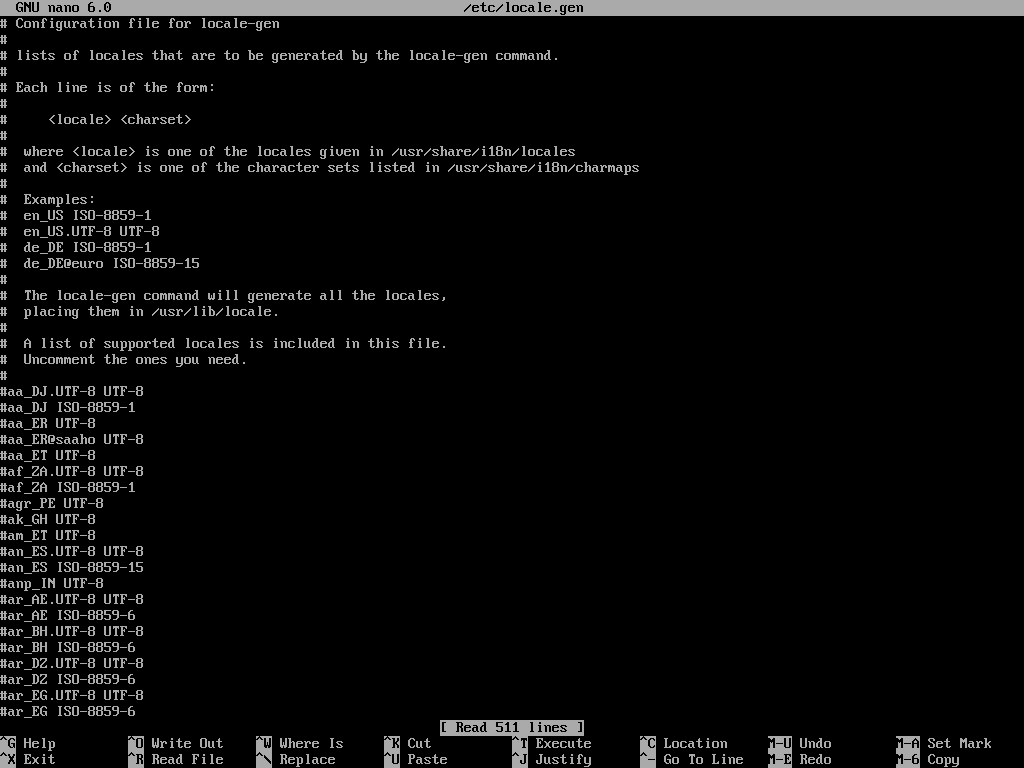
You’ll have to uncomment the languages that you want to enable. I usually only need English and Bengali. So I’ll locate the en_US.UTF-8 UTF-8, bn_BD UTF-8, and bn_IN UTF-8 languages. Save the file by pressing Ctrl + O and exit nano by pressing the Ctrl + X key combination.
Now you’ll have to execute the following command:
locale-genThe locale-gen command will read your /etc/locale.gen file and generate the locales accordingly.
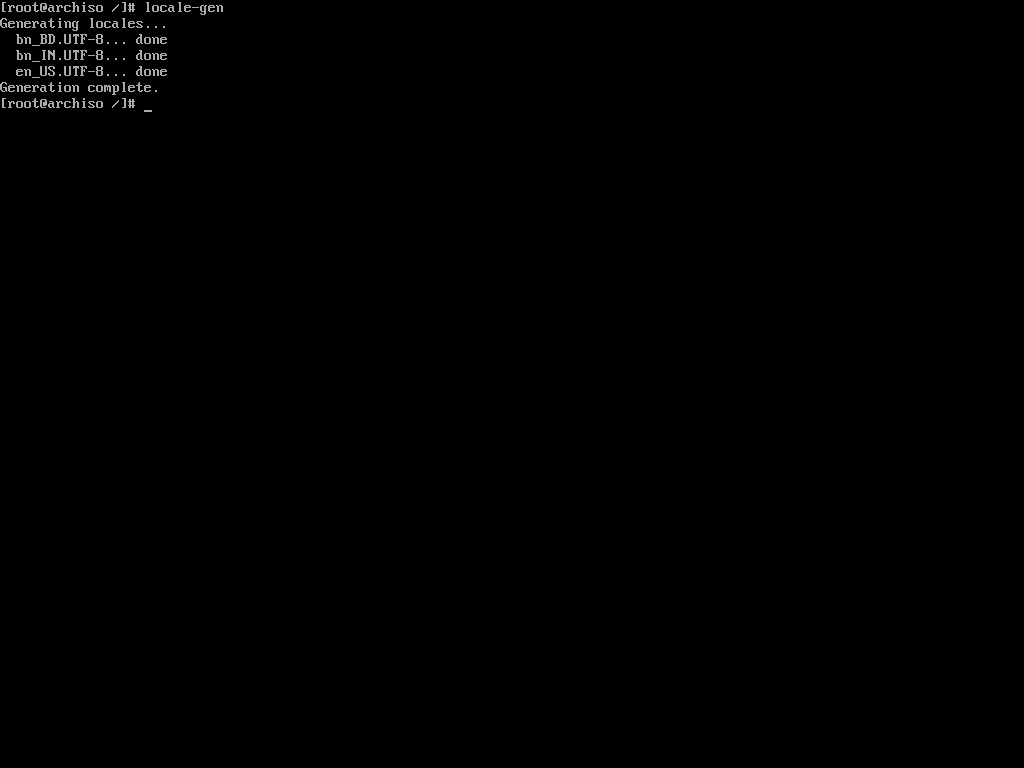
Now that you’ve enabled multiple languages, you’ll have to tell Arch Linux which one to use by default. To do so, open the /etc/locale.conf file and add the following line to it:
LANG=en_US.UTF-8That’s all you gotta do to configure your locale. You can always go back to the /etc/locale.gen file and add or remove languages from it. Just remember to run locale-gen whenever you do that.
Apart from the locales, if you’ve made any changes to your console keymaps in the first step of installation, you may want to persist them now. To do so, open the /etc/vconsole.conf file and add your preferred keymaps there.
For example, if you changed the default keymaps to mac-us in the first step, then you may want to add the following line to the vconsole.conf file:
KEYMAP=mac-usNow every time you use the virtual console, it’ll have the correct keymap and you will not have to configure it every time.
How To Configure the Network
Configuring a network manually in any Linux distribution can be tricky. That’s why I advised you to install the networkmanager package during the system installation. If you did as I said, you’re good to go. Otherwise, use pacman to install the package now:
pacman -S networkmanagerPacman is a package manager. You’ll learn more about it later. Let’s set the host name for your computer now. A host name is a unique name created to identify a machine on a network, written in the /etc/hostname file.
Open the file with nano and write your host name in it. You can use anything to identify your machine. I usually use my device brand or model as my hostname and as I’m on a legion laptop, I’ll simply write the following:
legionLocal host name resolution is provided by nss-myhostname (an NSS module provided by systemd) without having to edit /etc/hosts file. It is enabled by default.
But some software may still read the /etc/hosts file directly. Open the file in nano and add the following lines to it:
127.0.0.1        localhost
::1              localhost
127.0.1.1        legion
Make sure to replace legion with your host name. Now you may install the aforementioned package:
pacman -S networkmanagerEnable the NetworkManager service by executing the following command:
systemctl enable NetworkManagerMake sure to write NetworkManager and not networkmanager as the service name. If the command succeeds, network manager will start automatically on boot from now on and do its thing.
How To Set the Root Password
You may want to set a password for the root user because why not? To do so, execute the following command:
passwdThe passwd command lets you change the password for a user. By default it affects the current user’s password which is the root right now.
It’ll ask for a new password and confirmation password. Input them carefully and make sure you don’t forget the password.
How To Create a Non-root User
Using your Linux system as the root user for long is not a good idea. So creating a non-root user is important. To create a new user, execute the following command:
useradd -m -G wheel farhanThe useradd command lets you create a new user. Make sure to replace my name with the one you want to use. The -m option indicates that you also want it to create the corresponding home directory. The -G option will add the new user to the wheel group which is the administration user group in Arch Linux.
Now you can use the passwd command once again to set the password for the newly created user:
passwd farhanThe program will prompt you for a new password and a password confirmation. Again, don’t forget to replace my name with the one you’ve used.
Finally, you’ll have to enable sudo privilege for this new user. To do so, open the /etc/sudoers file using nano. Once open, locate the following line and uncomment it:
# %wheel ALL=(ALL) ALLThis file essentially means that all users in the wheel group can use sudo by providing their password. Save the file by hitting Ctrl + O and exit nano by hitting Ctrl + X. Now the new user will be able to use sudo when necessary.
How To Install Microcode
According to PCMag,
A set of elementary instructions in a complex instruction set computer (CISC). The microcode resides in a separate high-speed memory and functions as a translation layer between the machine instructions and the circuit level of the computer. Microcode enables the computer designer to create machine instructions without having to design electronic circuits.
Processor manufacturers such as Intel and AMD often release stability and security updates to the processor. These updates are crucial for the system’s stability.
In Arch Linux, microcode updates are available through official packages that every user should install on their systems.
# for amd processors
pacman -S amd-ucode

# for intel processors
pacman -S intel-ucode
Just installing these packages is not enough though. You’ll have to make sure that your bootloader is loading them. You’ll learn about it in the next section.
How To Install and Configure a Boot Loader
According to Wikipedia,
A bootloader, also spelled as boot loader or called boot manager and bootstrap loader, is a computer program that is responsible for booting a computer.
The internals of bootloader is out of scope of this article so I’ll just go on with the installation process. If you’ve used any other Linux distribution in the past you may have encountered the GRUB menu.
GRUB is one of the most popular bootloaders out there. Although there are a number of options available, I’ll demonstrate the installation of GRUB because it is what most people will likely use.
To install GRUB, you’ll have to first install two packages.
pacman -S grub efibootmgrIf you’re installing alongside other operating systems, you’ll also need the os-prober package:
pacman -S os-proberThis program will search for already installed operating systems on your system and will make them a part of the GRUB configuration file.
Now, you’ll have to mount the EFI system partition you created a few sections ago. To do so, you’ll have to first create an efi directory:
mkdir /boot/efiAccording to Wikipedia,
In Linux, and other Unix-like operating systems, the
/boot/directory holds files used in booting the operating system.
This directory is present in all Unix-like operating systems. The above mentioned command creates a directory called efi inside the /boot directory. After creating the directory, you’ll have to mount your EFI system partition in that directory.
mount /dev/sda1 /boot/efiI hope you remember that we formatted the /dev/sda1 device as the EFI system partition during the partitioning phase. Make sure to use the correct one for your device.
Now, we’ll use the grub-install command to install GRUB in the newly mounted EFI system partition:
grub-install --target=x86_64-efi --bootloader-id=grubYou can more or less use this command verbatim. You can change the --bootloader-id to something more expressive like arch or something else. If the installation finishes without any errors, you’ll then have to generate the GRUB configuration file.
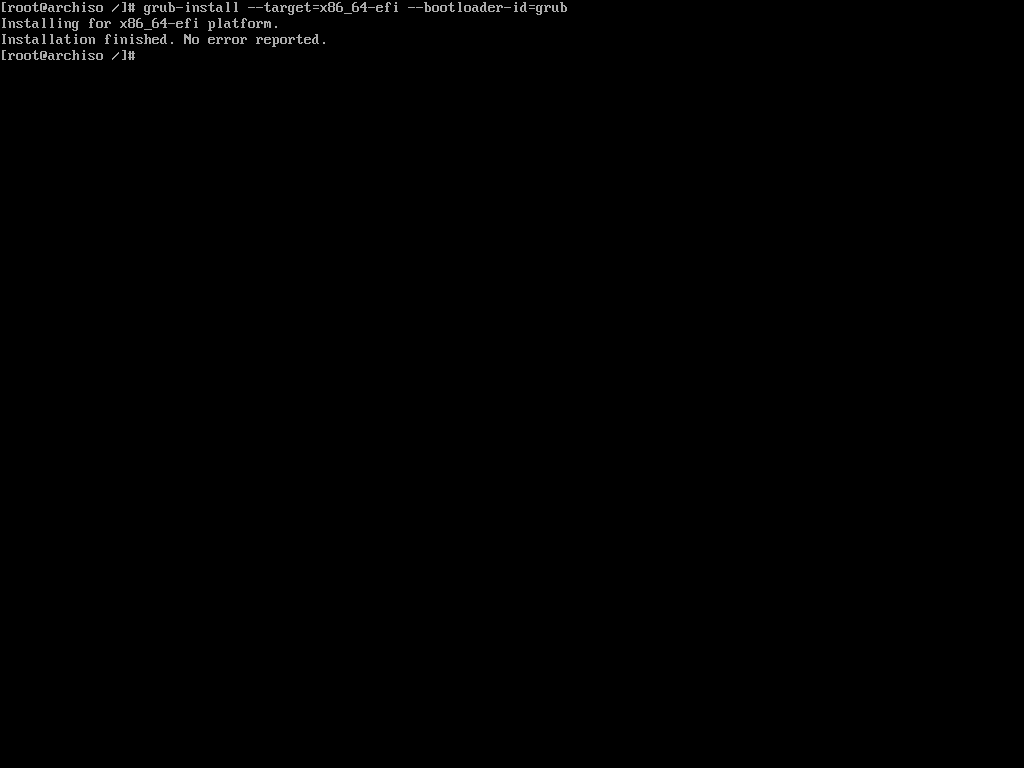
If you’re installing alongside other operating systems, you’ll have to enable os-prober before generating the configuration file. To do so, open the /etc/default/grub file in nano text editor. Locate the following line and uncomment it:
#GRUB_DISABLE_OS_PROBER=falseThis should be the last line in the aforementioned file so just scroll to the bottom and uncomment it.
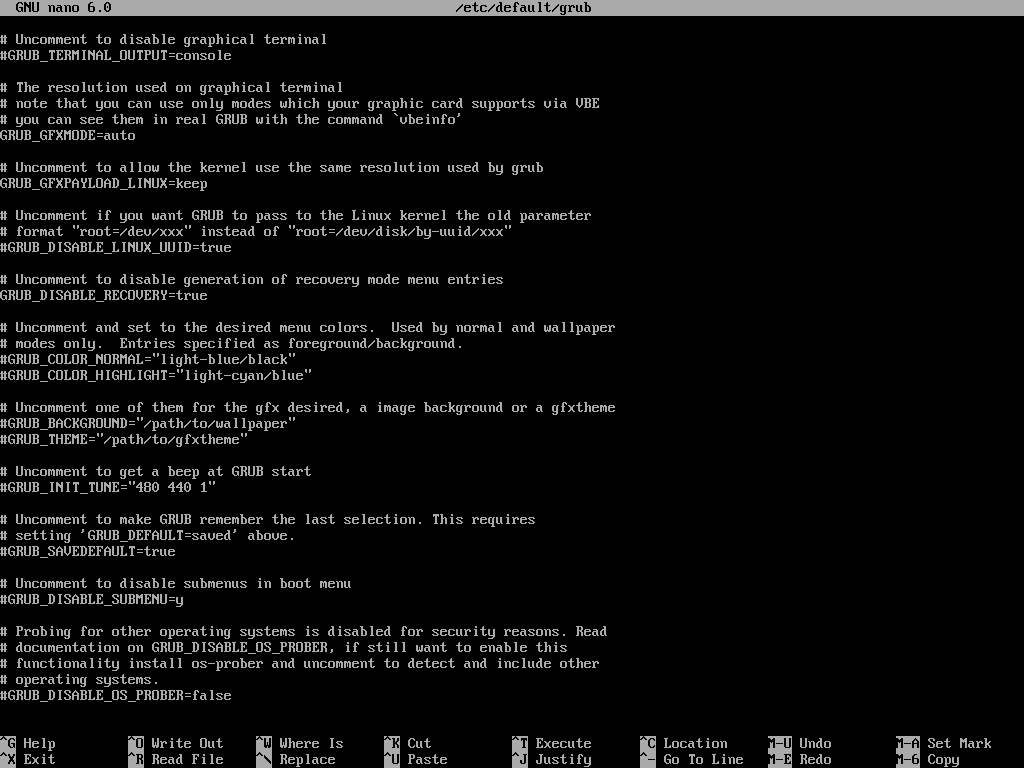
Now execute the following command to generate the configuration file:
grub-mkconfig -o /boot/grub/grub.cfgThe grub-mkconfig command generates the GRUB configuration file and saves it to a given target location. In this case /boot/grub/grub.cfg is the target location.
The command will also take into account the microcode you installed earlier and any other existing operating system on your machine.
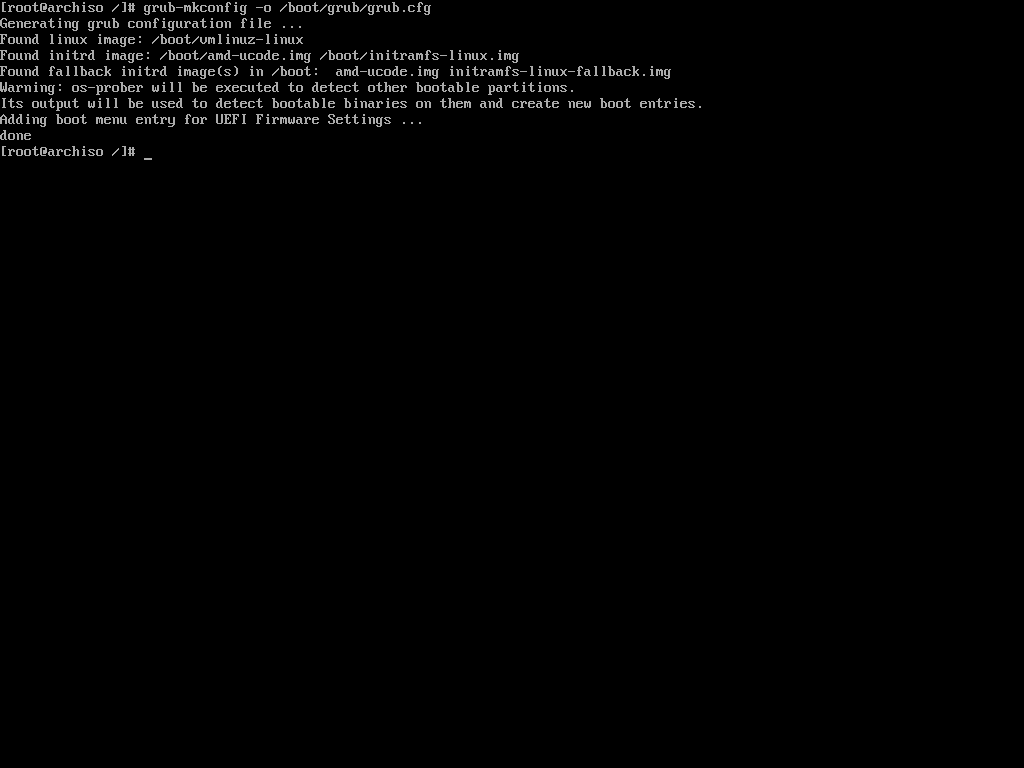
Congratulations, you now have a working Arch Linux installation. At this point, you can exit the Arch-Chroot environment, unmount the partition, and reboot. But I would suggest you to stay a bit longer and set-up the graphical user interface as well.
How To Install Xorg
To run programs with graphical user interfaces on your system, you’ll have to install an X Window System implementation. The most common one is Xorg.
To install Xorg, execute the following command:
pacman -S xorg-serverWait until the installation is done and then move on to installing the necessary graphics drivers.
How To Install Graphics Drivers
Installing graphics drivers on Arch Linux is very straightforward. You just install the packages required by your graphics processing unit and call it a day.
# for nvidia graphics processing unit
pacman -S nvidia nvidia-utils

# for amd discreet and integrated graphics processing unit
pacman -S xf86-video-amdgpu

# for intel integrated graphics processing unit
pacman -S xf86-video-intel
If you need further assistance, feel free to check the ArchWiki page.
How To Install a Desktop Environment
Now that you’ve installed Xorg and the necessary graphics drivers, you’re ready to install a desktop environment like GNOME, Plasma, or XFCE.
Arch Linux supports a long list of desktop environments but I’ve only tried out GNOME and Plasma. I’ll demonstrate how you can install either of these two.
How To Install GNOME
To install GNOME, you’ll have to install the gnome package. To do so, execute the following command:
pacman -S gnomeDuring the installation, you’ll be offered multiple choices for pipwire-session-manager and emoji-font packages. Accept the defaults by hitting Enter in both prompts. The installation may take some time to finish.
The gnome package comes with GDM or Gnome Display Manager. You can enable the service by executing the following command:
systemctl enable gdmThat’s all you need to do to get GNOME up and running on your Arch system.
How To Install Plasma
The KDE Plasma installation is not that different from GNOME. You’ll need to install Plasma related packages instead of GNOME.
pacman -S plasma plasma-wayland-sessionIf you have an NVIDIA graphics card, then avoid installing the plasma-wayland-session and use plain old X11. I own two devices with NVIDIA GPUs and both of them have shown instability when using Wayland.
During the installation, you’ll get multiple choices for ttf-font, pipwire-session-manager, and phonon-qt5-backend packages. Make sure to pick noto-fonts as your ttf-font and accept the defaults for the other two.
Like gdm in GNOME, Plasma comes with sddm as the default display manager. Execute the following command to enable the service:
systemctl enable sddmAnd that’s all you need to do to get Plasma up and running on your Arch Linux system.
How To Finalize The Installation
Now that you’ve installed Arch Linux and gone through all necessary configuration steps, you can reboot to your newly installed system. To do so, first come out of the Arch-Chroot environment:
exitNext, unmount the root partition to make sure there are no pending operations:
umount -R /mntNow reboot the machine:
rebootWait until you see the GRUB menu.
Choose Arch Linux from the list and wait until the system finishes booting up.
Log in with your user credentials and voilà!
Your shiny new Arch Linux system is ready to do wonders.
How To Switch Between Desktop Environments
Unlike other distributions coupled tightly with their default desktop environment, Arch is flexible. You can switch to another desktop environment whenever you feel like it.
To do so, first logout of your current session.
As you can see, I’m currently using Plasma. Now switch to TTY2 press Ctrl + Alt + F2 key combination. You’ll see a console login prompt:
Login with the root credentials and disable the sddm display manager.
systemctl disable sddmThen uninstall the Plasma related packages you installed earlier:
sudo pacman -Rns plasma plasma-wayland-sessionOnce the packages have been uninstalled, install the packages needed for GNOME:
pacman -S gnomeThen perform the installation according to the section you read earlier. After the gnome package has been installed, enable the gdm display manager:
systemctl enable gdmRestart the computer.
rebootWait until the Arch Linux system finishes booting.
Lo and behold, the gorgeous Gnome Display Manager. Login with your credentials.
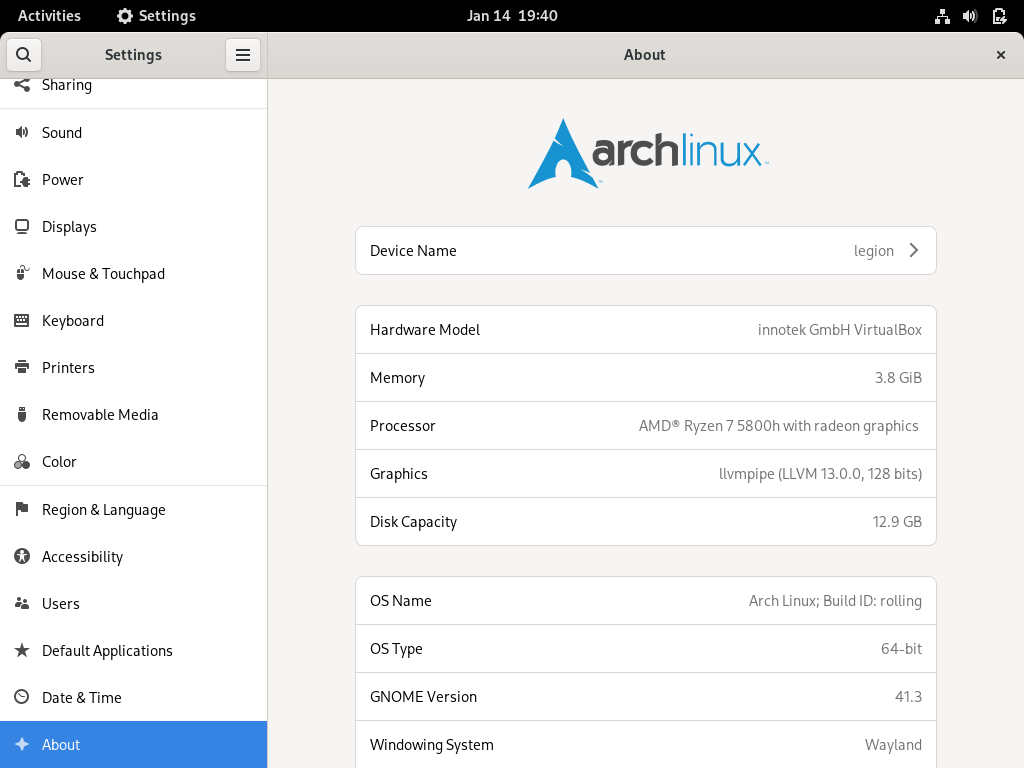
You can switch between the desktop environments as much as you want to, but I would suggest on settling down with one of them. Also, I wouldn’t recommend having multiples of them installed at the same time.
How To Manage Packages Using Pacman
You’ve already installed a number of packages using pacman. It’s equivalent to package managers like apt in Ubuntu and dnf in Fedora.
In this section, I’ll introduce you to some of the common pacman commands that you may need on a daily basis.
How To Install Packages Using Pacman
To install a package using pacman, you can use the following command syntax:
# sudo pacman -S <package name>

sudo pacman -S rust
You can install multiple packages as follows:
# sudo pacman -S <package name> <package name>

sudo pacman -S rust golang
You can also specify the repository you want to install the package from like this:
# sudo pacman -S <package repository>/<package name>

sudo pacman -S extra/rust
In this command, the -S option means synchronize which is equivalent to install in the case of apt or dnf package managers.
How To Remove Packages Using Pacman
To remove a package using pacman you can use the following syntax:
# sudo pacman -R <package name>

sudo pacman -R rust
This will remove the package but will leave the dependencies. You can remove the package with dependencies if they’re not required by any other package by executing the following command:
# sudo pacman -Rs <package name>

sudo pacman -Rs rust
Pacman often saves important configuration files when removing certain applications. You can override this behavior by using the following syntax:
# sudo pacman -Rn <package name>

sudo pacman -Rn rust
I usually use sudo pacman -Rns whenever I want to uninstall something. One last thing that I want to show is how to remove orphan packages.
In Ubuntu the sudo apt autoremove command uninstalls any unnecessary package. The equivalent command in Arch is:
sudo pacman -Qdtq | pacman -Rs -This will cleanup any leftover package from previously installed packages.
How To Upgrade Packages Using Pacman
To upgrade all the packages in your system, you can use the following syntax:
sudo pacman -SyuIn this command, the S option synchronizes the packages, y refreshes the local package cache, and u updates the system. This is like the ultimate upgrade command and I run it at least once everyday.
How To Search for Packages Using Pacman
To search for a package in the database, you can use the following syntax:
# sudo pacman -Ss <package name>

sudo pacman -Ss rust
This will print out all the packages found in the database with that search term and will also indicate if any of those are already installed.
If you would like to check if a package is already installed or not, you can use the following command:
# sudo pacman -Qs <package name>

sudo pacman -Qs rust
This is useful when you want to uninstall a package but do not know its exact name.
How To Use AUR in Arch Linux
According to It’s FOSS,
AUR stands for Arch User Repository. It is a community-driven repository for Arch-based Linux distributions users. It contains package descriptions named PKGBUILDs that allow you to compile a package from source with makepkg and then install it via pacman (package manager in Arch Linux).
AUR is one of the most attractive features of Arch Linux. It’s due to AUR that Arch Linux has a package count almost equal to Debian. You’ve already used pacman to install various packages. Sadly, you can not use that to install packages from AUR.
You’ll have to install one of the AUR helpers instead. Arch Linux doesn’t support any of these helpers and advises you to learn how to build packages manually. I’ll explain both techniques here. If you understand how a helper works, you’ll be able to do it manually as well.
How To Install Packages Using a Helper
Among the available and currently maintained AUR helpers, I like the yay or yet another yogurt package. It’s written in Go and is quite solid.
You can not install yay like other packages. You’ll have to get the source code and compile the program. You’ll need git and the base-devel package to do so. Assuming you’ve already installed base-devel during Arch Linux installation:
pacman -S gitClone the yay repository from GitHub and cd into it:
git clone https://aur.archlinux.org/yay.git && cd yayTo build and install yay from source, execute the following command:
makepkg -siThe makepkg script automates the build process of packages. The -si options stand for sync dependencies and install. The first option will install required dependencies (Golang in this case) and the later option will install the built package.
After the build process finishes, makepkg will ask for installation confirmation and your password. Input your password carefully and let the installation finish.
Check if yay has been installed properly or not:
yay --version

# yay v11.1.0 - libalpm v13.0.1
Now let’s install something using yay. One of the common packages you may want to install is the visual-studio-code-bin package. To do so, execute the following command:
yay -S visual-studio-code-binUnlike pacman, you shouldn’t run yay with sudo. Yay will look for the given package and will ask whether you would like to see the diff or not:
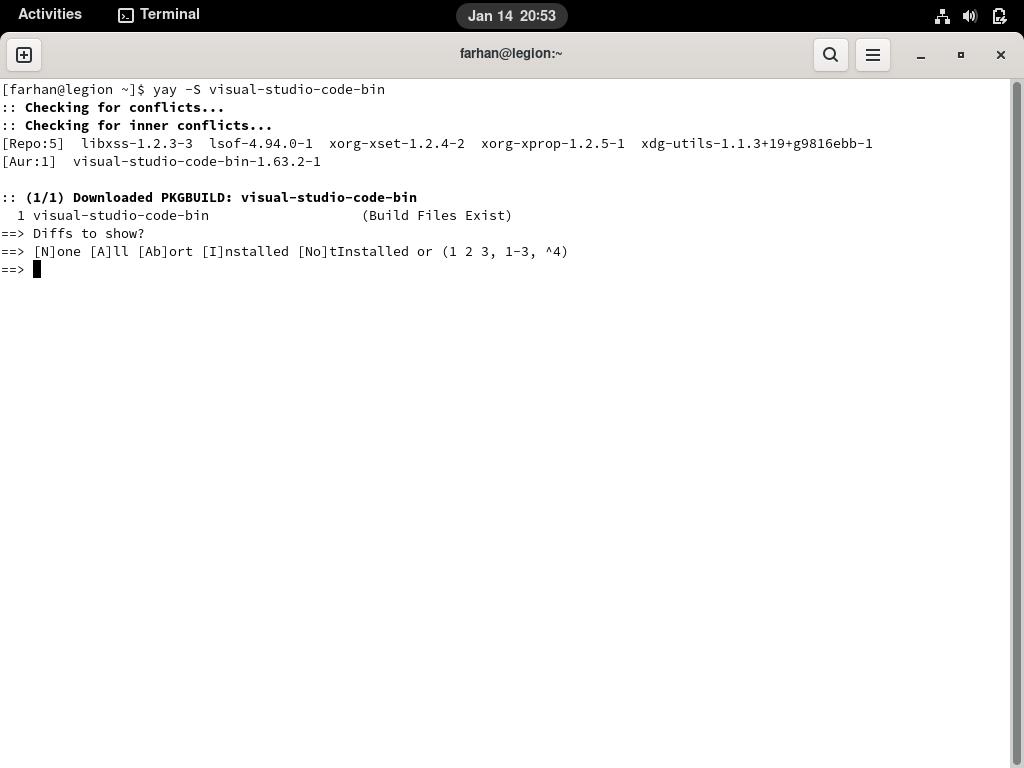
All the repositories over at AUR comes with a PKGBUILD file which contains the instructions for building this package. Yay has this nice feature where it shows you what has changed in the PKGBUILD file since the last time.
For now, I’ll pick N for none and hit enter. Yay will now look for the dependencies and ask for your password to install them.
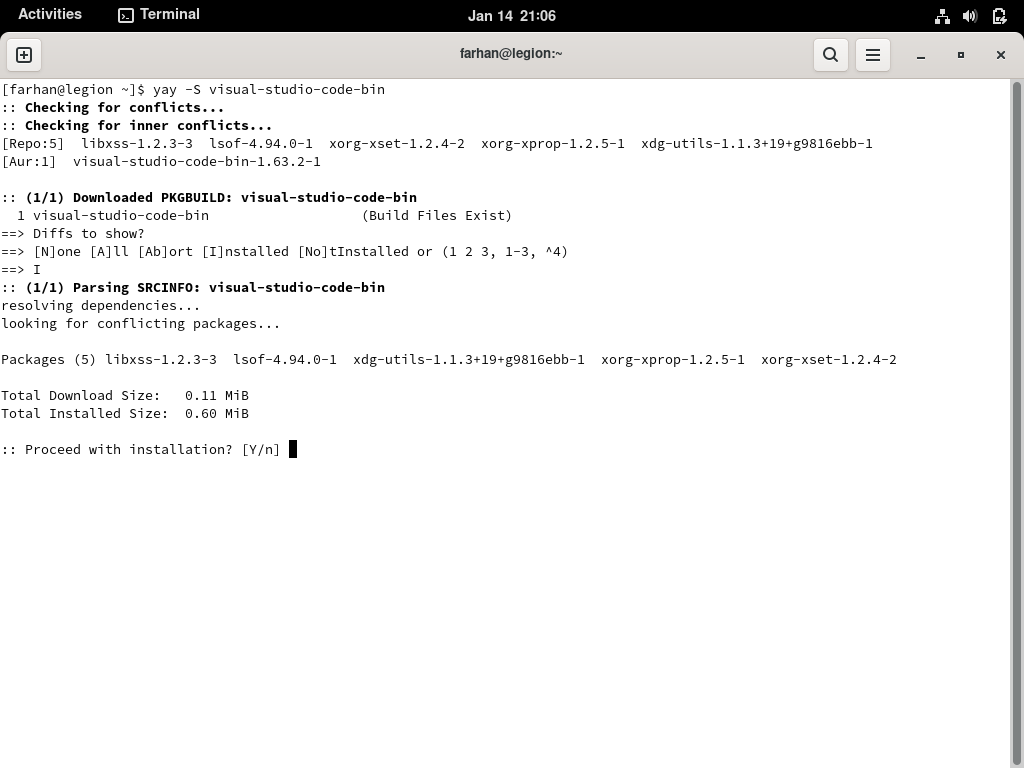
Confirm the installation and provide your password. Yay will then install the dependencies and start building the package. Once built, yay will install the package and prompt for your password where necessary.
After the installation finishes, search for Visual Studio Code in the application launcher:
Congratulations on installing your first package from AUR. Yay commands are almost identical to pacman, so if you can do something with pacman, you should be able to do that with yay as well.
In fact, yay can also install packages from official Arch Linux repositories like pacman. But I would suggest you to use yay only for installing packages from AUR when necessary and pacman for everything else.
How To Install Packages Manually
Like I said in the previous section, the ArchWiki suggests avoiding any AUR helper and installing packages from AUR manually. I’ll now show you how to do it.
Make sure you have git and base-devel packages installed. If not, use pacman to install them.
For the demonstration, let’s install Spotify this time. First visit the AUR page for the spotify package — https://aur.archlinux.org/packages/spotify/ and copy the «Git Clone URL» from there.
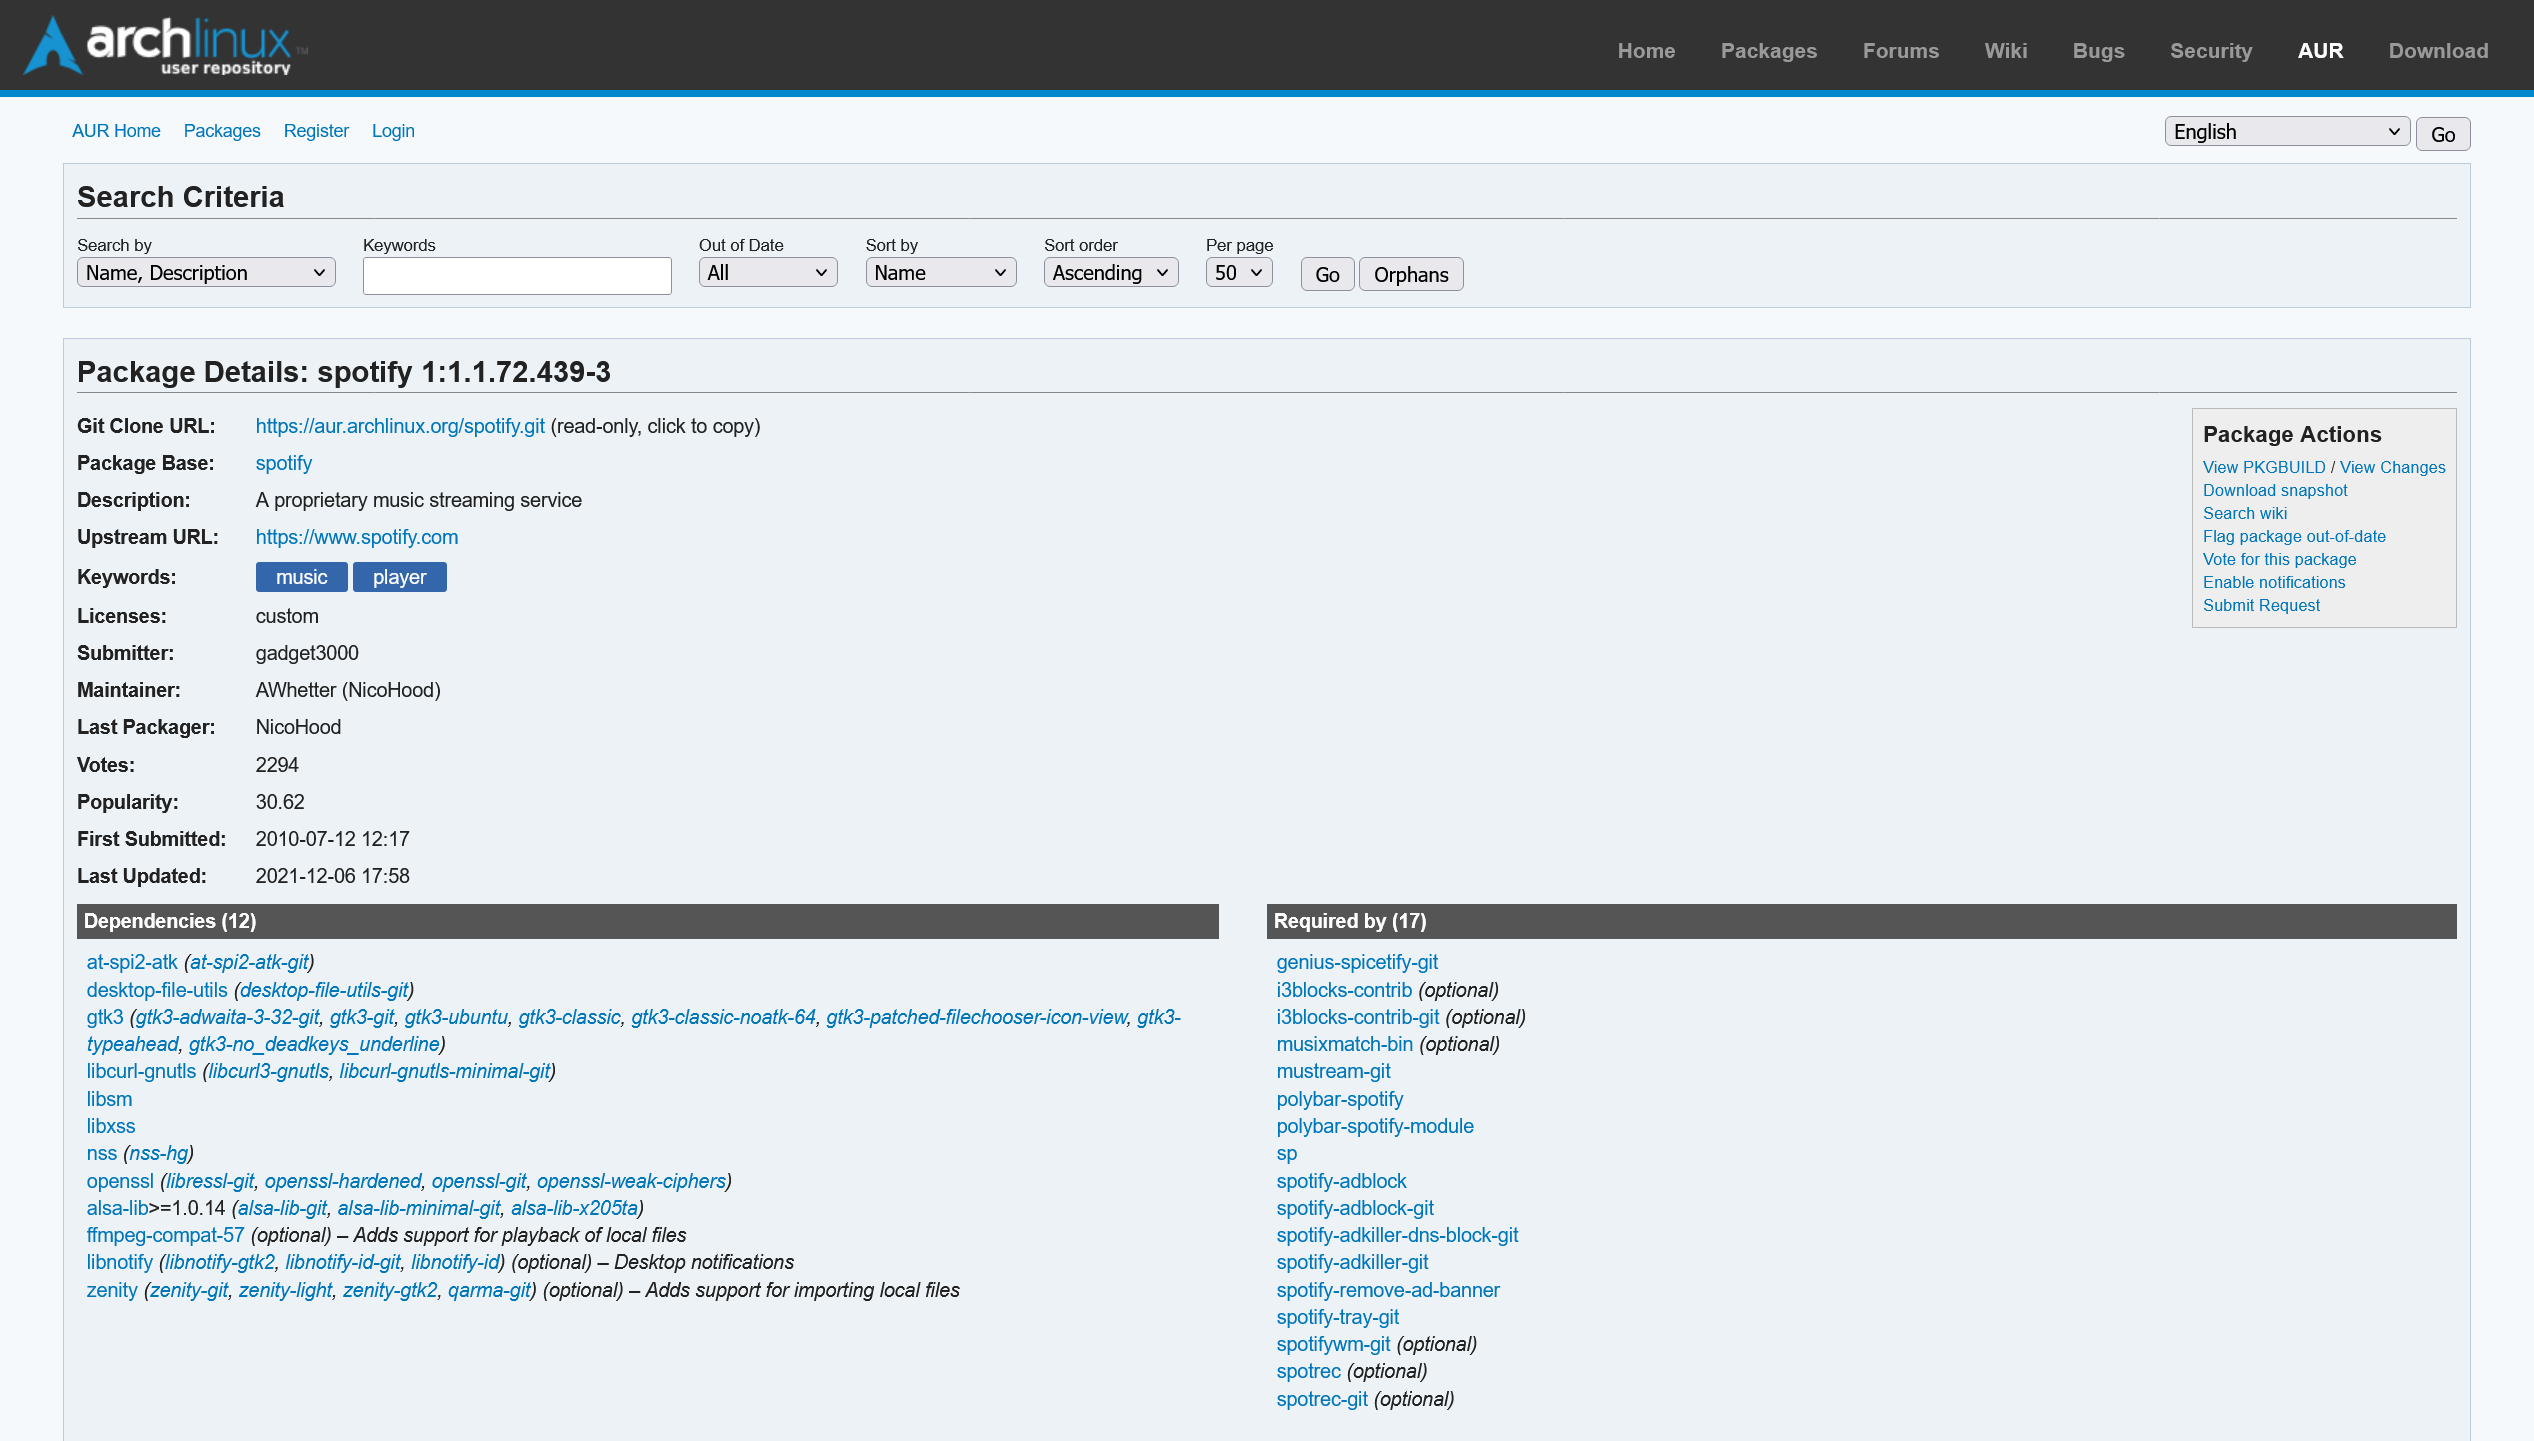
The page even lists all the dependencies you’ll need. Clone the repository to your machine:
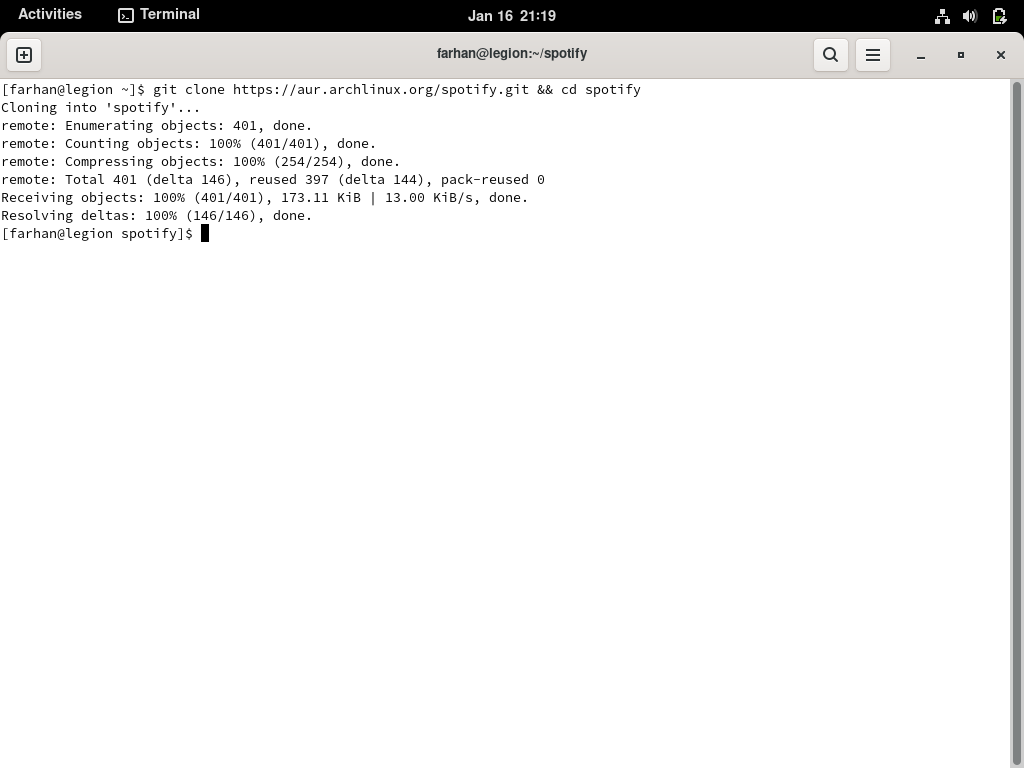
Every AUR repository comes with a PKGBUILD file containing the instructions for building the package. Whenever you’re installing a package from AUR, it’s a great idea to checkout the PKGBUILD file using something like the cat command:
Make sure there’s nothing harmful in the file. Once you’re satisfied, use makepkg to install any dependencies, build the package, and install it. Ideally there shouldn’t be any issues but sometimes, things can take an unexpected turn.
In these cases, go back to the corresponding AUR page and check the user comments. Like in this case, I found the following pinned comment:

Turns out the package requires you to add the Spotify for Linux gpg key to the user kyechain. This command downloads the gpg key using curl and pipes it as the input of the gpg --import command:
Try executing makepkg -si once again and everything should work fine this time:
See, told ya! Manually installing packages often involves such troubleshooting but help is almost always around the comment corner. Let’s enjoy some music now.
How To Troubleshoot Common Problems
Look, I’ve been using Arch as my primary on all my devices for some years now but I still run into issues. Fortunately there are some great places to look for help when you’re stuck:
- ArchWiki
- Arch Linux Forum
- r/archlinux
For the most part, the wiki should have the information you’re looking for. In fact, if you’re on a laptop and having difficulty getting something to work, there is an entire wiki category dedicated to different laptops. So look around the wiki.
If the wiki fails to solve your problem, then ask other fellow users at the forum as well as the subreddit. But whenever you’re doing that, make sure to do your research first and include as much description as you can in the post. It’s really annoying if other users have to keep asking you for more information and it’ll also lower the chance that you’ll get an answer.
Whatever people may say, Arch Linux is very stable as long as you know what you’re doing. If you go about installing every funky package you come across in the AUR or keep switching different kernels without knowing what they’re for, your system may fail to boot.
In those cases, you can use your live USB drive as a rescue media. To do so, reconnect the bootable USB to your computer and boot into the live environment. Once there, configure the time, keymaps, and fonts if you want to.
Then use fdisk to list out all your partitions and locate the one holding your Arch Linux installation. In my case it’s the /dev/sda2 partition. Mount the partition like you did before:
mount /dev/sda2 /mntNow use Arch-Chroot to log in as the root user.
arch-chroot /mntNow uninstall the bad package you installed or go back to a kernel version that used to work in the past and so on. Once done, exit the Arch-Chroot environment, unmount the partition, and reboot:
exit
umount -R /mnt
reboot
If the computer boots fine then congratulations. Otherwise try the wiki, forum, or the subreddit. If nothing works, you may have to do a fresh install.
Further Reading
If you’ve come this far then you’ve done a lot of reading already – but that’s not all. This entire handbook was written by combining information from the wiki, forum, and subreddit. I’m listing out some wiki pages that I think you should read.
- Installation guide
- Network configuration
- General recommendation
- Desktop environment
- pacman
- Arch Build System
- makepkg
- List of applications
Couldn’t think of any more at the moment but I’ll keep this list updated.
Conclusion
I would like to thank you from the bottom of my heart for the time you’ve spent on reading this article. I hope you’ve enjoyed your time and have learned a lot about not only Arch but Linux in general
Apart from this one, I’ve written full-length handbooks on other complicated topics available for free on freeCodeCamp.
These handbooks are part of my mission to simplify hard to understand technologies for everyone. Each of these handbooks takes a lot of time and effort to write.
If you’ve enjoyed my writing and want to keep me motivated, consider leaving starts on GitHub and endorse me for relevant skills on LinkedIn.
I’m always open to suggestions and discussions on Twitter or LinkedIn. Hit me with direct messages.
In the end, consider sharing the resources with others, because
In open source, we feel strongly that to really do something well, you have to get a lot of people involved. — Linus Torvalds
Till the next one, stay safe and keep learning.
Learn to code for free. freeCodeCamp’s open source curriculum has helped more than 40,000 people get jobs as developers. Get started
Cкачать образ Arch Linux можно официального сайта по этой
ссылке
.

Официальный сайт для скачивания Arch Linux
После скачивания образа его нужно записать на флешку. Для этого можно воспользоваться
Rufus
либо же
Balena Etcher
.
balenaEtcher (Etcher) – бесплатная утилита для Windows, MacOS и Linux, которая помогает быстро и просто создавать загрузочные USB флешки и SD карты из установочных образов операционных систем.
После скачивания утилиты запускаем её и нажимает на кнопку «Flash from file», указав ISO образ Arch Linux.

Выбор ISO образа с дистрибутивом
Следующим шагом нужно выбрать USB накопить, куда будет устанвливаться образ с дистрибутивом.

Теперь можно нажать на кнопку Flash, чтобы начался процесс создания загрузочной флешки. Процесс создания занимает ~ 5 минут.