
-
Contents
-
Table of Contents
-
Troubleshooting
-
Bookmarks
Quick Links
Fetal Monitor FC-700 Operating Manual
FC-700
OPERATION
MANUAL
Fetal Monitor
Operation Manual
Rev 2.41
Related Manuals for Bionet FC-700
Summary of Contents for Bionet FC-700
-
Page 1: Operation Manual
Fetal Monitor FC-700 Operating Manual FC-700 OPERATION MANUAL Fetal Monitor Operation Manual Rev 2.41…
-
Page 2
We provide a 1-year warranty period for main body, but Accessory provides a 6 months warranty period.(Two years in Europe) We will repair or replace any part of the FC-700 found to be defective in usual operating circumstance for free to you. -
Page 3
Fetal Monitor FC-700 Operating Manual How to reach us … The following are telephone numbers and addresses for contacting various service, product supplies and sales personnel Product and Bionet Co.,Ltd. Purchase Address #1101 11F E&C Venture Dream Tower3 38-21, Inquiry Digital-Ro 31-Gil, Guro-gu, Seoul, South Korea (ZIP 152-719) Overseas sales dept. -
Page 4
Fetal Monitor FC-700 Operating Manual Definition of Warning, Prohibition, Mandatory Action and Note For a special emphasis on agreement, terms are defined as listed below in operation manual. Users should operate the equipment according to all the Warning and Caution instructions. -
Page 5
Fetal Monitor FC-700 Operating Manual General Precaution on Environment Do not keep or operate the equipment in the environment listed below. Avoid placing in an area exposed to moist. Do not Avoid exposure to touch the equipment direct sunlight with wet hand . -
Page 6
Otherwise, it may cause incorrect result. Self-power line is important for FC-700. To use same power source with other electric instruments may cause incorrect result. Warning statement for class i me equipment indicating: “warning: To avoid risk of electric shock, this equipment must only be connected. -
Page 7
Fetal Monitor FC-700 Operating Manual Safety Symbols ■ The International Electrotechnical Commission (IEC) has established a set of symbols for medical electronic equipment which classify a connection or warn of any potential hazards. The classifications and symbols are shown below. -
Page 8: Table Of Contents
4) Explanation of Sections of Output Sheets ……… 16 5) CardioTocoGraph(CTG) Analysis output paper area ….17 6) Product Installation …………..19 Chapter 2. How to Use FC-700 ……..21 1) Basic operation …………….21 2) Function of Keys …………….21 3) FHR Measurement ……………
-
Page 9
Fetal Monitor FC-700 Operating Manual 3) Error Message …………….41 Chapter 6. Specifications ………. 42 Appendix A Maintenance, Care, and Service ..44 Appendix B Ultrasound Power ……… 46 Appendix C Abbreviation and Symbol ….. 50 Appendix D Electromagnetic Emissions and Immunity — Manufacturer’s declaration …. -
Page 10: Chapter 1. General Information
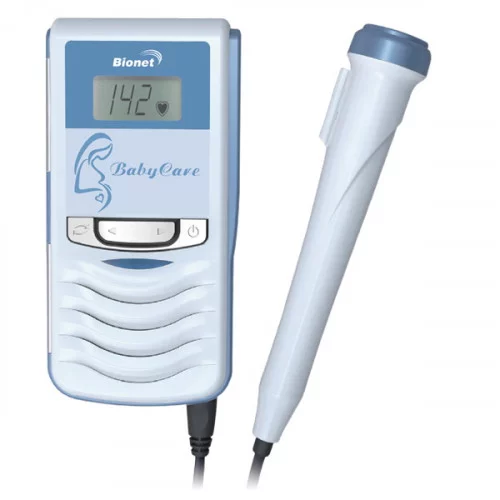
LED. Also, FC-700 provides the sound from the heart of fetus. FC-700 measures the uterine contraction of a pregnant woman by pressure sensors and displays the numerical values. And FC-700 records the heart rate of the fetus, fetal movement and the values of uterine contraction. Intended use…
-
Page 11
— A warning statement addressing hazards that can result from unauthorized modification of me equipment according to following examples: only can fix the Service person of Bionet. Power supply is specified as a part of ME Equipment. Safety Symbols Marked on the Package… -
Page 12
Fetal Monitor FC-700 Operating Manual Main Body configuration ▣ Top view ① ② ③ ④ ⑤ ① Hand Grip ② Printer door ③ Printer door release button ④ Display LED ⑤ Control panel Rev.2.41… -
Page 13: Front View
Fetal Monitor FC-700 Operating Manual ▣ Front view ① ① Printer door release button ▣ Rear view ○, ○, ○, ○, ○,1 Power adaptor connection port ○,2 Power on/off switch ○,3 RS-232C serial port ○,4 Mark Jack connection port Prohibition Please instruct the operators to avoid contact with both the RS-232C Serial port area and the patient simultaneously.
-
Page 14
① Hand Grip ▣ Right side view ① ① Doppler, UC Probe connection port Note To avoid an expected electric shock, do not open the equipment cover or disassemble the equipment. Refer servicing to qualified personnel of Bionet Co., Ltd. Rev.2.41… -
Page 15
Fetal Monitor FC-700 Operating Manual ▣ Control Panel ① ② ③ ④ ⑤ ⑥ ⑦ ⑧ ⑨ ⑩ ① Heart rhythm symbol (Green : stable, Red : unstable). ② Heart rate of the fetus (bpm). ③ UC measurement value. ④ Volume up/down key. During the use of the Menu for setup, this key is used to change the setting value. -
Page 16: Explanation Of Sections Of Output Sheets
Fetal Monitor FC-700 Operating Manual 4) Explanation of Sections of Output Sheets ① Fetal heart rate per minute ② Fetal movement point that is indicated when Event Marker is pressed ③ Uterine contraction ④ Information on the recording condition ⑤…
-
Page 17: Cardiotocograph(Ctg) Analysis Output Paper Area
Fetal Monitor FC-700 Operating Manual 5) CardioTocoGraph(CTG) Analysis output paper area (Option) ① ② CTG Analysis results is printed out every 10 minute. (Intermediate Report) Start printing by pressing print button in order to analyze CTG and repress print button to stop printing process.
-
Page 18
Fetal Monitor FC-700 Operating Manual < Final Report > CTG REPORT (PERIOD : 0 — 15 MIN 0 SEC) AVERAGE BASELINE FHR(BPM) : 123 bpm NUMBER OF UC(FREQUENCY) : 5/ 20.0/h NUMBER OF ACC(FREQUENCY) : 0/ 0.0/h NUMBER OF DEC(FREQUENCY) : 5/ 20.0/h… -
Page 19: Product Installation
If you put the plug of power adaptor in the terminal of power adaptor of the main body of FC-700 and then switch it on, the equipment will work. If the power supply is normal, LED at the operation panel indicating Power On/Off will be turned on green.
-
Page 20: Software Version
▣ Setting of Recording Paper If you release the button to open the printer cover at the front of FC-700 to the right, it will open. Put recording paper with the recording part on the upper side adjusting the paper roll parallel to the print direction and then close the cover.
-
Page 21: Chapter 2. How To Use Fc-700
Chapter 2. How to Use FC-700 1) Basic operation ① Put the plug of FC-700 in an outlet and switch it on. ② Check setup values if they are set as wished. ③ Change the setup values, as you want.
-
Page 22: Fhr Measurement
Fetal Monitor FC-700 Operating Manual ▣ LAMP POWER: If it is switched on, the lamp will be turned on green. ALARM: If the alarm is on, the lamp will be turned on red. RECORD: During printing, the lamp will be turned on green.
-
Page 23
Fetal Monitor FC-700 Operating Manual Note When the Doppler Probe is put not on the back but on the breast part of a fetus, accurate ultrasonic waves can’t be caught from the fetal heart and the fetal heat beat can be frequently missed. -
Page 24: Uc Measurement
Fetal Monitor FC-700 Operating Manual 4) UC Measurement UC (Uterine Contraction) can be measured with an externally attached pressure sensor. If the UC Probe is put on the abdomen of a pregnant woman, it measures a relative pressure changing according to the uterine contraction and records uterine contraction.
-
Page 25: Measurement Of Fetal Movements
Fetal Monitor FC-700 Operating Manual 5) Measurement of Fetal Movements ▣ How to Use Event Marker Even Marker relys on the recognition of a pregnant woman to record a fetal movement point: when she feels a fetal movement, press a button on Event Marker. When Event Marker is pressed during recording, the fetal movement point is indicated with an arrow mark on recording paper with a signal of “Beep~”…
-
Page 26: Recording
Fetal Monitor FC-700 Operating Manual 6) Recording The recording functions include AUTO NST (Non-Stress Test) and monitoring. The AUTO NST function that records FHR, UC, and fetal movements for the period of established time and stops automatically is effective in the non-contraction test. The monitoring function enables a user to operate Start/Stop of recording.
-
Page 27: Fhr Alarm
Fetal Monitor FC-700 Operating Manual 7) FHR Alarm If FHR beyond the established upper or lowest limit of normal FHR exceeds the established delay time, an alarm is made. ▣ Order to Use the FHR Alarm Function ① Use the Volume Up/Down Key to set the value of “H” menu which means the upper limit of FHR and that of “L”…
-
Page 28: Equipment State Alarm
Fetal Monitor FC-700 Operating Manual 9) Equipment State Alarm The following circumstances raise a signal of “Ding-dong~” to ask a user to pay attention: ① The contacter of Doppler Probe in use is disconnected from the main body (Er1) ② Out of paper during recording (Er2) ③…
-
Page 29: Chapter 3. Setup Modes
Fetal Monitor FC-700 Operating Manual Chapter 3. Setup Modes The setup modes include those of alarm/time, recording, and factory. The factory setup is a part having great effect on the performance of the equipment if the set-up value is easily changed;…
-
Page 30
Fetal Monitor FC-700 Operating Manual ▣ How to Set the Date and Time ① To set the year, press the Alarm key for over two seconds and then the Reference key to indicate the following. It indicates that the current year is 2002. -
Page 31
Fetal Monitor FC-700 Operating Manual ④ To set the hour, press the Alarm key for over two seconds and then Reference key to indicate the following. It indicates “ 1 o’clock “ now. Use the Volume Up/Down Key to change the set-up hour. Press the Record Key to store the changed value and then return it to the basic state after a signal of “Ding-dong”. -
Page 32: Recording Setup
The output speed can be set at one of 1, 2, and 3 cm/min, and may be changed with the Volume Up/Down Key. ② Thermal paper for a facsimile can be used for FC-700 besides those supplied. To use those for a facsimile, press the Reference key for over two seconds and then for a short time to indicate the following.
-
Page 33
Fetal Monitor FC-700 Operating Manual ③ To control the contrast of graph, press the Reference key for over two seconds and then for a short time to indicate the following. Select 1 for a medium and 2 for the darker state, and use the Volume Up/Down Key to change it. -
Page 34
Fetal Monitor FC-700 Operating Manual ▣ How to set Cardio-Toco Graph(CTG) analysis function Press REFERENCE button for at least 2 seconds and repress REFERENCE button for a short amount of time in order to set automatic CTG diagnosis function. It should appear like the figure below. -
Page 35
Fetal Monitor FC-700 Operating Manual ▣ How to set Demo mode Press REFERENCE button for at least 2 seconds and repress REFERENCE button for a short amount of time in order to set Demo mode. It should appear like the figure below. Use the Volume Up/Down Key to change it. -
Page 36: Factory Setup
Fetal Monitor FC-700 Operating Manual 3) Factory Setup ▣ How to Set the FHR Alarm Delay To set the FHR alarm delay, switch it off (and then press the Volume Down key) and switch it on again pressing the Volume Up key. Then, the following appears which indicates that the alarm delay time (‘t’) is set at ten minutes.
-
Page 37: Chapter 4. Ctg Terminology
Fetal Monitor FC-700 Operating Manual Chapter 4. CTG Terminology 1) Baseline FHR Mean FHR rounded to increments of 5 bpm during a 10 minute segment excluding periodic or episodic changes, periods of marked variability and, segments of baseline that differ by >25bpm.
-
Page 38
Fetal Monitor FC-700 Operating Manual 4) EARLY DECELERATION Visually apparent gradual decrease(onset to nadir is ≥ 30 sec.) of FHR below baseline. Return to baseline associated with a uterine contraction. Nadir of deceleration occurs at the same time as the peak of the contraction. Generally, the onset, nadir, and recovery of the deceleration occur at the same time as the onset, peak and recovery of the contraction Rev.2.41… -
Page 39
Fetal Monitor FC-700 Operating Manual 5) Variable DECELERATION Visually apparent abrupt decrease ( onset to nadir is <30sec) in FHR below baseline. Decrease is ≥15 bpm. Duration is ≥ 2 min and < 10 min. Rev.2.41… -
Page 40: Chapter 5. Trouble Shooting
Chapter 5. Trouble shooting 1) Maintenance and Cleaning You can keep FC-700 clean in many different ways. Use the following recommendations to avoid the damage or stain to the machine. If the material (not approved material) that may cause damage to the product is used, the product is not guaranteed even within the period of guarantee is not expired.
-
Page 41: Regular Inspection
1) When DOP Probe does NOT work, it is connected to the other channel or exchange the DOP Probe. Also equal UC Probe. 2) If equipment does NOT work, you have to make a phone call service person of Bionet. For more information, see the Service Manual.
-
Page 42: Chapter 6. Specifications
Fetal Monitor FC-700 Operating Manual Chapter 6. Specifications Environmental Specifications Operating Temperature:15°C to 30°C (59°F to 86°F) Storage Temperature:- 10°C to 60°C (14°F to 140°F) Operating/Storage Humidity:20% to 95% RH, non-condensing Operating Altitude:70(700) to 106Kpa(1060mbar) Power Specifications Power Adaptor ;…
-
Page 43
Fetal Monitor FC-700 Operating Manual Recorder Recorder Method : Thermal Array Type Resolution: 8(vertical)/10(horizental) dot/mm Print Speed : 1, 2, 3 cm/min Paper Feeding Function Paper Grid : On/Off Print Contrast : 1, 2 Auto Print Period : 0, 10, 20, 30, 40, 50, 60… -
Page 44: Appendix A Maintenance, Care, And Service
Fetal Monitor FC-700 Operating Manual Appendix A Maintenance, Care, and Service Mechanical hazard Warning Ultrasound probes are highly sensitive medical instruments that can easily be damaged by improper handling. Use care when handling and protect from damage when not in use.
-
Page 45
Do not to touch signal input, signal output or other connectors, and the patient simultaneously. Refer servicing to qualified personnel of Bionet Co., Ltd. Probe acoustic output hazard Warning Ultrasound can produce harmful effects in tissue and potentially result in patient injury. -
Page 46: Appendix B Ultrasound Power
Fetal Monitor FC-700 Operating Manual Appendix B Ultrasound Power Use of Diagnostic Ultrasound The American Institute of Ultrasound in Medicine (AIUM) has published a document entitled «Medical Ultrasound Safety». This three part document covers Bioeffects and Biophysics, prudent Use and Implementing ALARA.
-
Page 47
Fetal Monitor FC-700 Operating Manual Maximum Probe Temperature (Degrees C) Probe Max Temperature With TMM In Air Mode Phantom 33.8 23.6 PWD Mode Lens temperature monitored for 30 min. Measurement uncertainty: +-0.5 degree C. Ambient temperature : 23.5 degree C Table Key Meaning IEC60601-2-37 / FDA&NEMA… -
Page 48
Fetal Monitor FC-700 Operating Manual Output Power / Time average acoustic power at the source Attenuated Output Power / Time average Pα W.3(Z) acoustic power derated to depth z Bounded Output Power / Power emitted from the central 1cm of aperture… -
Page 49
Fetal Monitor FC-700 Operating Manual Acoustic Output Tables MC65R1S – Pulsed Doppler Mode Index scan Non-scan Non-scan Aaprt<= 1 Aaprt > 1 Global Maximum : Index Value 0.014874 0.010567 0.166265 0.178513 Unit Associated pr.3 (MPa) 0.0148732 Acoustic (mW) 43.7 43.7 43.7… -
Page 50: Appendix C Abbreviation And Symbol
Fetal Monitor FC-700 Operating Manual Appendix C Abbreviation and Symbol Abbreviation and Symbol of manual or system operation is arranged in alphabetical order. Abbreviations alternating current Celsius cm, CM centimeter direct current electromagnetic compatibility electromagnetic interference Fahrenheit gram heart rate, hour…
-
Page 51
Fetal Monitor FC-700 Operating Manual kg, KG kilogram liter, left lbs, LBS pounds liquid crystal display light emitting diode M mean, minute meter MIN, min minute MM, mm millimeters MM/S millimeters per second MMHG, mmHg millimeters of mercury millivolt second… -
Page 52
Fetal Monitor FC-700 Operating Manual multiplier when used with a number (2X) Symbols & ° degree(s) > greater than < less than – minus number percent ± , +/- plus or minus Rev.2.41… -
Page 53: Appendix D Electromagnetic Emissions And Immunity — Manufacturer’s Declaration
Electromagnetic Emissions and Immunity Manufacturer’s declaration — electromagnetic emission The FC-700 system is intended for use in the electromagnetic environment specified below. The customer or the user of FC-700 system should assure that it is used in such an environment Emission test…
-
Page 54
Note: Uт is the a.c. mains voltage prior to application of the test level. The FC-700 system is intended for use in the electromagnetic environment specified below. The customer or the user of the FC-700 system should assure that it is used in such an environment Immunity test… -
Page 55
Fetal Monitor FC-700 Operating Manual Radiated RF 3 V/m 3 V/m Recommended separation IEC 61000-4-3 80.0 MHz to 2.5 80.0 MHz to 2.5 distance Where P is the maximum output power rating of the transmitter in watts (W) according to the… -
Page 56
Equipment and the FC-700 system. The FC-700 system is intended for use in an electromagnetic environment in which radiated RF disturbances are controlled. The user of the FC-700 system can help prevent electromagnetic interference by maintaining a minimum distance between portable… -
Page 57
Guidance and manufacturer’s declaration — electromagnetic immunity The FC-700 system is intended for use in the electromagnetic environment specified below. The customer or the user of the FC-700 system should assure that it is used in such an environment Immunity test… -
Page 58
Name : Tel : Sales Agency Manufacturer ※ Thank you for purchasing FC-700. ※ This product is manufactured and passed through strict quality control and inspection. ※ Compensation standard concerning repair, replacement, refund of the product complies with “Consumer’s protection law” noticed by Economic Planning Dept. -
Page 59
Fetal Monitor FC-700 Operating Manual International Sales & service Bionet Co., Ltd. : #1101 11F E&C Venture Dream Tower3, 38-21, Digital-Ro, 31-Gil, Guro-Gu, Seoul, 152-719, Republic of Korea Tel : +82-70-7585-6418 / Fax : +82-2-6499-7789 / e-mail: sales@ebionet.com Website: www.ebionet.com U.S.A sales &…
Фетальный монитор Bionet FC 700, производство BIONET (Ю.Корея)
Полное описание
| Производитель | Bionet |
| Страна производителя | Ю.Корея |
| Габариты (см.) (длина, ширина, высота) : | 269 × 92.5 × 305.5 |
| Вес: | 2.9 кг |
| Гарантия | 12 месяцев |
- Обзор
- Характеристики
- Отзывы0
Высокочувствительный фетальный монитор Bionet FC 1400 семейства Fetal Care, производства BIONET (Ю.Корея) используется в акушерстве для предродовой и интранатальной диагностики состояния плода. Аппарат является современным многофункциональным кардиотокографом, отвечающими европейским стандартам качества.
- FC-1400 – это эмбриональный монитор, который обеспечивает продолжительное измерение, отображение и запись эмбрионального сердечного ритма (ЧСС), движения эмбриона (ДП) и маточного сокращения (СМ).
- FC-1400 излучает ультразвуковую волну в область живота беременной женщины, и обнаруживает доплеровский частотный сигнал, отраженный от сердца зародыша.
- FC-1400 анализирует этот сигнал и отображает сердечный ритм и движение эмбриона и позволяет услышать звук сердца зародыша. FC-1400 измеряет маточное сокращение беременной женщины с помощью сенсоров давления и отображает эмбриональный сердечный ритм (ЧСС), движение эмбриона (ДП) и маточное сокращение (СМ) посредством волновой графики и численных значений. Также FC-1400 производит запись этих показаний во внутренней памяти.
- Расчет параметров и анализ антенатальной КТГ производиться автоматически.
Особенности:
- Позволяет измерять эмбриональный сердечный ритм (ЧСС) и движениеэмбриона (ДП);
- Позволяет измерять ЧСС и движение двойняшек;
- Отслеживание сохраненные данные на цветном мониторе бездополнительного расхода бумаги;
- Распечатывает выбранные данные с большой скоростью во времяотслеживания сохраненных данных;
- Позволяет услышать естественный звук биения сердца с большойточностью, что достигается высококачественными датчиками, стойкими к помехам;
- Благодаря улучшенным качествам компонентов исключается прерывание сигнала сердечного ритма от пациента даже при его движении;
- Определяет и распечатывает данные о движении эмбриона автоматически, анализируя доплеровский сигнал;
- При использовании факсовой бумаги наносит сетку и распечатывает данные одновременно;
- Имеет коммутатор RS-232 для связи с центральной системой наблюдения;
- Использование перезаряжаемого аккумулятора позволяет беспрерывно производить наблюдение в случае отключения общего питания ( опция)
- Фетальные мониторы Bionet оснащены принтером: печать результатов исследования производится на тепловой бумаге для эмбрионального монитора, бумаге формата А4 или бумаге для факса. При использовании обычной факсовой бумаги термопринетр фетального монитора одновременно наносит сетку и распечатывает данные.
- FC-1400 имеет автоматическую функцию NST, которая производит запись СРЭ (сердечный ритм эмбриона), МС (маточные сокращения) и эмбрионального перемещения только в течение установленного времени.
Определяемые параметры фетальных мониторов Bionet:
- Частота сердечных сокращений плода (ЧСС плода). Представляет собой внешнюю, неинвазивную методику определения активности сердца плода — (ультразвук, импульсный доплеровский режим).
- Сократительная активность матки, внутриматочное давление и наружная регистрация сократительной активности.
- Сократительная активность матки, токометрия, наружная регистрация сократительной активности, движения плода осуществляется при помощи тензодатчика (ТОСО-датчик), устанавливаемого на живот.

Описание монитора:
- Установка расположения базовой линии волны сердечного ритма
- Меню установки контраста экрана
- Область статуса электропитания
- Область числовых выражений сердечного ритма- Числовой дисплей сердечного ритма- Отображения сердечного ритма и уровня сигнала- Отображение статуса звукового уровня колонок- Отображение статуса тревоги ВКЛ/ВЫКЛ- Отображение отклоняемого значения при определении сердцебиениядвойняшек
- Область отображения маточных сокращений- отображение относительного значения маточного сокращения- отображение Вкл/выкл автоматического определения движения плода(ДП)- отображение базовой линии значений маточных сокращений
- Меню настройки принтера
- Меню настройки данных о пациенте
- Меню настройки времени и даты
- Область маркировки маточных сокращений и степень движения плодав волне- ДП1, ДП2: Движение плода, Волна, показывающая степень движенияплода- ДПD1, ДПD 2: точка движения плода, Маркировка точками в техслучаях, когда интенсивность движения плода превышаетустановленное значение.- +10: отображение референтного значения маточных сокращений
- Область маркировки работником клиники
- Область маркировки пациентом
- Область маркировки волны сердечного ритма- ?: выдача ненужных данных — +20:20 добавленные к волнам сердечного ритма
Рассчитываемые показатели:
- базальный ритм;
- число акцелераций;
- число децелераций;
- поздние децелерации;
- ранние децелерации;
- вариабельные децелерации;
- пролонгированные децелерации;
- наличие тахикардии;
- наличие брадикардии;
Особенности фетального монитора FC-1400:
- Ультразвуковая частота 1,0 МГц
- Точный FHR и UC тренд
- Автоматическое обнаружение движения эмбриона (Automatic Fetal Movement)
- Легко читаемый тренд данных (FHR,UC) фетального монитора
- Диаграммная бумага формата A4
- Детальное аннотирование записей
- Лёгкость монитора фетального в установке и использовании
- Громкость, информация по UC, тревога, кнопки записи
- Функция тревоги фетального монитора FHR высокий/низкий
- Система центрального мониторинга на 8 пациентов
- 8-канальная система мониторинга в режиме реального времени
- Сохранение данных и выход на стандартный ПК-принтер
- Функция тревоги
- Удалённый мониторинг
Технические характеристики:
| Спецификации электропитания | |
| Адаптер электропитания; | |
| Вход 100~240В, 50 | |
| Защита от нарушения энергоснабжения | |
| Эксплуатационные характеристики | |
| Измерение СРЭ | |
| Входной сигнал: | Ультразвуковой Доплер пульса |
| Частота ультразвука: | 1.0 МГц |
| Мощность ультразвука: | <10мВ/cм2 |
| Метод обнаружения СРЭ: | Авто корреляция |
| Амплитуда измерения: | 50 ~ 240 ударов в минуту (уд/мин) |
| Точность СРЭ: | ±1 уд/мин сверх нормальной амплитуды СРЭ |
| Измерение МС | |
| Входной источник: | Внешний преобразователь с тензодатчиком |
| Частотная характеристика: | Постоянный ток ~ 0.5 Гц |
| Управление опорным сигналом (Нулевой): | Выключатель одного соприкосновения |
| Амплитуда измерения: | 0 ~ 99 единиц |
| Эмбриональное Измерение Перемещения | |
| Источник обнаружения: | Ультразвуковой Доплер пульса |
| Регистрация Метода: | |
| Пиковая форма волны на канале МС обозначает относительную интенсивность и продолжительность Эмбрионального Перемещения | |
| Точечные знаки между каналами СРЭ и МС отмечаются, когда интенсивность FM превышает выбранный порог. | |
| Габариты: | 296(Ш) х 305.5 (В) х 92.5 (Г) мм |
| Вес: | около 2.9 кг ( без батареи) |
| Дисплей: | 320×240 STN Цветной дисплей 4.7 дюйма |
| Регистратор | |
| Метод регистратора: | Тепловой регулярный тип |
| Разрешение: | 8 (вертикаль)/10 (горизонталь) точек/мм |
| Скорость печати: | 1, 2, 3, 12.5 см/минуту |
| Батарея | (Опция) Ni-MH Батарея 12 V, 2600 mA |
| Внешняя связь | |
| RS232C: | Программа загрузки, Центральный (Опция) |
| Температура эксплуатации: | 15°C to 30°C |
| Температуры хранения: | — 10°C to 60°C |
| Относительная влажность при эксплуатации и хранении: | 20% — 95% |
| Атмосферное давление: | 70 – 106кПа |
Комплектация:
- Основной блок фетального монитора FС 1400
- Ультразвуковой доплеровский датчик (1 шт.)
- ТОСО-датчик (1 шт.)
- Маркер для метки события (1 шт.)
- Бумага для печати (2 шт.)
- Адаптер электропитания (1 шт.)
- Шнур электропитания (1 шт.)
- Гель для ультразвука (1 шт.)
- Ремни для датчика (2 шт.)
- Руководство по эксплуатации (1 шт.)
- Перезаряжаемый аккумулятор (1 шт.) — опция
Дополнительно для фетального монитора можно приобрести тележку. Тележка имеет корзину для датчиков, геля и других принадлежностей для работы с фетальным монитором.
| Производитель | Bionet |
| Страна производителя | Ю.Корея |
| Габариты (см.) (длина, ширина, высота) : | 269 × 92.5 × 305.5 |
| Вес: | 2.9 кг |
| Гарантия | 12 месяцев |
Фетальный монитор Bionet FC 1400, производство BIONET (Ю.Корея) отзывы
Покупатели, которые приобрели Фетальный монитор Bionet FC 1400, производство BIONET (Ю.Корея), также купили
Рекомендуем посмотреть Сравнить все
")
Bionet FC 1400 – фетальный монитор, выполняющий функции регистрации ЧСС одного или двух плодов, маточных сокращений, движений плода. Устройство производит автоматический расчет и анализ КТГ и применяется в дородовой и родовой период. Также с его помощью возможно оценить степень тяжести метаболической гипоксии плода.
Аппарат оборудован встроенным цветным дисплеем 4,7” для четкого отображения параметров мониторинга. Печать информации возможна на встроенном термопринтере на бумаге формата А4, B5 и на бумаге для факса, что делает монитор экономичным. Печать возможна как вручную, так и автоматически при обнаружении движений плода.
Запись графических данных возможна на протяжении 12 часов, а числовых – в течение 72 часов. Для передачи и архивации данных в качестве опции монитор снабжается функцией интеграции в центральную систему мониторинга.
Высокую точность измерений обеспечивают устойчивые к помехам УЗ-датчики с 9-ю кристаллами, позволяющие проводить диагностику на большей площади и с более стабильным сигналом. Уникальная технология позволяет удерживать высокое качество сигнала при движении.
Среди рассчитываемых параметров присутствует базальный ритм, наличие тахикардии и брадикардии, чисто акцелераций и децелераций, а также поздние, ранние, вариабельные и пролонгированные децелерации.
Особенности:
- Водостойкие датчики на основе 9-кристалла с ультразвуковой частотой 1 МГц.
- FC1400 оценивает, как функциональное состояние, так и степень тяжести метаболической гипоксии плода/плодов.
- Производит автоматический расчет параметров и анализ антенатальной КТГ.
- Отражение в динамике КТГ — мониторинга результатов автоматического расчета параметров в виде промежуточного анализа — базальной ЧСС (каждые 10 мин) и окончательного отчета.
- Благодаря аккумулятору (опция) фетальный монитор может непрерывно следить за состоянием эмбриона даже при резком разрыве цепи или транспортировке.
- Возможность подключения Центральной станции мониторинга (беспроводная и проводная версии) для одновременного наблюдения за 8 пациентками (опция).
- Отслеживание сохраненные данные на цветном мониторе без дополнительного расхода бумаги.
- Распечатывает выбранные данные с большой скоростью во время отслеживания сохраненных данных.
- Позволяет услышать естественный звук биения сердца с большой точностью, что достигается высококачественными датчиками, стойкими к помехам.
- Благодаря улучшенным качествам компонентов исключается прерывание сигнала сердечного ритма от пациента даже при его движении.
- При использовании факсовой бумаги наносит сетку и распечатывает данные одновременно.
- Точность показаний сердцебиения плода(ов) и сигналов токограммы
- Автоматическое определение движения плода(ов)
- Клиническая интерпретация кривой КТГ с помощью запрограммированных комментариев
- Бумага формата В5. Возможность использования бумаги для факса
- Простота в эксплуатации и установке
- Функция тревоги
Комплектация:
- Главный корпус FC-1400
- Ультразвуковой доплеровский датчик — 1 шт.
- МС датчик — 1 шт.
- Маркер для метки события — 1 шт.
- Бумага для печати — 2 шт.
- Адаптер электропитания — 1 шт.
- Шнур электропитания — 1 шт.
- Гель для ультразвука — 1 шт.
- Пояс для датчика — 2 шт.
- Руководство по эксплуатации — 1 шт.
Опции:
- Ультразвуковой доплеровский датчик — 1 шт.
- Пояс для датчика — 1 шт.
- Перезаряжаемый аккумулятор — 1 шт.
Характеристики
Диапазон измерения ЧСС плода
50 ~ 240уд./мин.
Частота ультразвука
1 МГц.
Входной сигнал
Ультразвуковой импульсный доплеровский
Дисплей:
4,7” ЖК-дисплей (320х240)
Принтер
Матричный, термальный
Скорость печати
1,2,3 см/мин
Бумага формата
А4, А5, факсовая
Встроенная память
12 часов графических данных, 72 часа числовых данных
Маточное сокращение
внешний датчик с тензорезистором (ТОКО-датчик)
Диапазон измерения сокращения матки
0-99 ед.
Габариты
296х305,5х97,5мм
Фетальный монитор TwinView FC 1400 определяет состояние плода при одноплодной и двуплодной беременности. Сердечный ритм эмбрионов и активность матки отображаются в режиме реального времени на цветном LCD-дисплее 4.7 дюймов (320х240), благодаря чему пользователь может легко отслеживать в режиме real-time как текущие показания, так сохранённые за 12 часов данные, выбрать фрагменты для распечатывания, чтобы ознакомиться с ними в деталях. Специально разработанные водонепроницаемые ультразвуковые зонды, использующие 9 кристаллов и частоту 1 МГц, обеспечивают надежность непрерывного мониторинга (FHR и движения эмбрионов). Они обеспечивает наиболее точные измерения и непрерывное наблюдение, даже в предродовой шумной больничной обстановке. Внешний тензодатчик измеряет маточную активность.
При записи всплески активности на линии канала UC показывают относительную интенсивность и длительность движения эмбриона. Печать на диаграммной бумаге формата A4 (встроенный принтер высокого разрешения), скорость печати: 1, 2, 3, 12.5 см/мин. Режим высокой скорости печати — 50 см/мин. Возможность использования бумаги для факса.
По желанию покупателя для удобства использования возможна поставка тележки для прибора. Возможно подключение к системе центрального мониторинга (опция). Центральная станция Fetal Care позволяет следить в условиях больницы за 8-ю пациентами одновременно. Её уникальная способность обработки данных позволяет эффективно отслеживать изменение состояния, экономя время и денежные средства.
Фетальные мониторы Bionet FC1400 являются незаменимым оборудованием для перинатальных центров и роддомов. Благодаря компактному, эргономичному дизайну фетальные мониторы Bionet одинаково удобны для работы в условиях стационарных медицинских учреждений, учреждений амбулаторного приема (женские консультации.
Особенности:
- Водостойкие датчики на основе 9-кристалла с ультразвуковой частотой 1 МГц уменьшают прерывистость сигнала.
- Благодаря экранированию электромагнитного излучения прибор хорошо работает как в шумной, так и в строгой больничной среде.
- FC1400 оценивает, как функциональное состояние, так и степень тяжести метаболической гипоксии плода/плодов.
- Производит автоматический расчет параметров и анализ антенатальной КТГ.
- Отражение в динамике КТГ — мониторинга результатов автоматического расчета параметров в виде промежуточного анализа — базальной ЧСС (каждые 10 мин) и окончательного отчета.
- Благодаря аккумулятору (опция) фетальный монитор может непрерывно следить за состоянием эмбриона даже при резком разрыве цепи или транспортировке.
- Возможность подключения Центральной станции мониторинга (беспроводная и проводная версии) для одновременного наблюдения за 8 пациентками (подключение 2, 3, 4…8 фетальных мониторов (опция).
- Позволяет измерять эмбриональный сердечный ритм (FHR) и движение эмбриона (FM) двойняшек одновременно.
- Отслеживание сохраненные данные на цветном мониторе без дополнительного расхода бумаги.
- Распечатывает выбранные данные с большой скоростью во время отслеживания сохраненных данных.
- Позволяет услышать естественный звук биения сердца с большой точностью, что достигается высококачественными датчиками, стойкими к помехам.
- Благодаря улучшенным качествам компонентов исключается прерывание сигнала сердечного ритма от пациента даже при его движении.
- Определяет и распечатывает данные о движении эмбриона автоматически, анализируя доплеровский сигнал.
- При использовании факсовой бумаги наносит сетку и распечатывает данные одновременно.
- Имеет коммутатор RS-232 для связи с центральной системой наблюдения.
- Высокая точность с частотой 1 МГц
- Точность показаний сердцебиения плода(ов) и сигналов токограммы
- Автоматическое определение движения плода(ов)
- Клиническая интерпретация кривой КТГ с помощью запрограммированных комментариев
- Бумага формата В5. Возможность использования бумаги для факса
- Простота в эксплуатации и установке
- Функция тревоги
Комплектация:
- Главный корпус FC-1400
- Ультразвуковой доплеровский датчик — 1 шт.
- МС датчик — 1 шт.
- Маркер для метки события — 1 шт.
- Бумага для печати — 2 шт.
- Адаптер электропитания — 1 шт.
- Шнур электропитания — 1 шт.
- Гель для ультразвука — 1 шт.
- Пояс для датчика — 2 шт.
- Руководство по эксплуатации — 1 шт.
Опции:
- Ультразвуковой доплеровский датчик — 1 шт.
- Пояс для датчика — 1 шт.
- Перезаряжаемый аккумулятор — 1 шт.
Технические характеристики:
| Ультразвук | |
| Входной сигнал | Ультразвуковой импульсный доплеровский РЛС |
| Ультразвуковая частота | 1.0 МГц |
| Мощность ультразвука | |
| Метод определения FHR | Авто корреляция |
| Диапазон измерений | 50 ~ 240 ударов в минуту (bpm) |
| Точность измерения FHR | 1 bpm в нормальном диапазоне FHR |
| Маточная активность | |
| Входной источник | Внешний приёмник с тензодатчиком |
| Частотная характеристика | DC (постоянный ток) ~ 0.5 Гц |
| Контроль характеристики (тест) | Переключатель в одно касание |
| Диапазон измерений | 0 ~ 99 единиц |
| Измерение движения эмбриона | |
| Измерительный источник | Ультразвуковой импульсный доплеровский РЛС |
| Метод записи | Всплески активности на линии канала UC показывают относительную интенсивность и длительность движения эмбриона. Точки между FHR и UC каналами отмечают моменты, когда интенсивность движения эмбриона превышала установленный порог. |
| Физические характеристики | |
| Размеры | 296(Ш) x 305.5(В) x 92.5(Г) мм |
| Вес | 2.9 кг (без батареи) |
| Дисплей | |
| 320×240 STN цветной ЖК | |
| 4.7 дюймов | |
| Запись | |
| Метод записи | Термическая матрица (Thermal Array Type) |
| Разрешение | 8 (по вертикали) /10(по горизонтали) точек/мм2 |
| Скорость печати | 1, 2, 3, 12.5 см/мин |
| Питание | |
| Используется адаптер питания | |
| Адаптер питания (вход) | 100~240 В, 50~60 Гц, 1.2 A |
| Адаптер питания (выход) | 18 В, 2.5 A |
| Защита от перепадов напряжения |

- Manuals
- Brands
- Bionet Manuals
- Medical Equipment
- CardioTouch3000
- Operation manual
-
Contents
-
Table of Contents
-
Troubleshooting
-
Bookmarks
Quick Links
CardioTouch3000
Operation Manual
Ver. 7.00
2019.05.23
www.ebionet.com
Related Manuals for Bionet CardioTouch3000
Summary of Contents for Bionet CardioTouch3000
-
Page 1
CardioTouch3000 Operation Manual Ver. 7.00 2019.05.23 www.ebionet.com… -
Page 2
CardioTouch3000 Operation Manual Warranty — This product was made through strict quality control and examination. The repair and compensation standards follow the consumer damage compensation regulations of the Ministry of Finance and Economy. — The warranty for this product runs for 1 year. (2 years in EU) But the warranty for accessories runs for 6 months. -
Page 3
• E-mail: Sales@ebionet.com Service@ebionet.com • URL: http://www.ebionet.com ※ In the event of a malfunction or failure, contact Service Dept. Of Bionet Co., Ltd. along with the model name, serial number, date of purchase and explanation of failure. 3 / 120… -
Page 4
CardioTouch3000 Operation Manual Fee-Based Service If you wish to make a claim when the product is damaged through misuse, we charge repair fees. Please read the manual before you make a claim. — For simple inspection without giving instruction or… -
Page 5
CardioTouch3000 Operation Manual Definition of WARNING, CAUTIONS and NOTE In order to stress the contents of this manual, we define the terms as below. Please follow the warning and cautions instruction. The manufacturer or service agents are not responsible for damage resulting from inappropriate use or carelessness. -
Page 6
CardioTouch3000 Operation Manual Environment Instructions Please do NOT use or place the product in such environments explained below. Steamy environment. Do not use the Direct sunlight. product with wet hands. Place where the temperature and humidity condition are extreme… -
Page 7
It is not proper to use this product near a flammable anesthetic or solvent. Continuous operation. IEC/EN60601-1-2 (Electromagnetic Compatibility Requirements) standard : Class A NOTE Diagnosis provided by CardioTouch3000 must be confirmed by a qualified medical professional. 7 / 120 E3KOM-7.00… -
Page 8
CardioTouch3000 Operation Manual NOTE Additional equipment connected to medical electrical equipment must comply with the respective IEC or ISO standards (e.g. IEC 60950 for data processing equipment). Furthermore all configurations shall comply with the requirements for medical electrical systems (see IEC 60601-1-1 or clause 16 of the 3 Ed. of IEC 60601-1, respectively). -
Page 9
CardioTouch3000 Operation Manual WARNING Use of accessories, transducers and cables other than those specified or provided by the manufacturer of this equipment could result in increased electromagnetic emissions or decreased electromagnetic immunity of this equipment and result in improper operation. -
Page 10
CardioTouch3000 Operation Manual Safety Symbols Symbols Contents ATTENTION : Consult accompanying documents Consult instructions for use: This symbol advises the reader to consult the operating instructions for information needed for the proper use of the device. Safety Sign : To signify that the instruction manual must be read. -
Page 11
CardioTouch3000 Operation Manual Symbols Contents Local Area Network(LAN) Connector Power Off Power On Battery Operation Indicator AC Power Connection Indicator Manufacturer name and address Authorized European representative Waste of electrical and electronic equipment must not be disposed as unsorted municipal waste and must be collected separately. -
Page 12: Table Of Contents
CardioTouch3000 Operation Manual Contents Chapter 1. General Information ……….14 1) Product Overview …………….15 2) Indication for Use …………….15 3) Recording ECGs during Defibrillation………. 16 4) Product Features …………….16 5) Product Configuration …………..17 6) System Installation …………….27 7) System Start………………
-
Page 13
CardioTouch3000 Operation Manual 4) System Setup ………………97 5) Switching menu …………….. 99 6) Patient information …………….. 100 7) Data search ………………100 Data transfer ………………101 9) Data import ………………103 Chapter 4. System Management ……… 105 1) Maintenance and Cleaning …………106 2) Regular Check-up …………….
 -
Page 14: Chapter 1. General Information
CardioTouch3000 Operation Manual Chapter 1. General Information 1) Product Overview 2) Indications for Use 3) Recording ECGs during Defibrillation 4) Product Features 5) Product Configuration Basic Components and Accessories Optional Components Body Configuration Front Panel Graphic Display LCD Control Panel…
-
Page 15: Product Overview
QRS and P wave portions of the electrocardiogram. Transmission and reception of ECG data to and from a central ECG cardiovascular information system is optional. The CardioTouch3000 is intended to be used under the direct supervision of a licensed healthcare practitioner, by trained operators in a hospital or medical professional‘s facility.
-
Page 16: Recording Ecgs During Defibrillation
CardioTouch3000 Operation Manual conjunction with ambulatory ECG monitoring, is of particular use in the diagnosis of disorders of the cardiac rhythm and the evaluation of syncope. Contraindications No absolute contraindications to performing an electrocardiogram, other than patient refusal, exist. Some patients may have allergies, or more commonly, sensitivities to the adhesive used to affix the leads;…
-
Page 17: Product Configuration
CardioTouch3000 Operation Manual 5) Product Configuration The CardioTouch3000 system consists of the items below. Unpack the package and check the items below are included. Also, be sure to check for any damage to the body and accessories. Basic Components and Accessories ①…
-
Page 18
CardioTouch3000 Operation Manual Optional Components ① ③ ② ① Battery (1 EA) – Replaceable and Rechargeable, Lithium ion, 11.1V, 2600mA ② Hanger (1 EA) ③ Cart (1 EA) CAUTIONS You may have distortion or signal noise when you use nonstandard or other brand accessories. -
Page 19
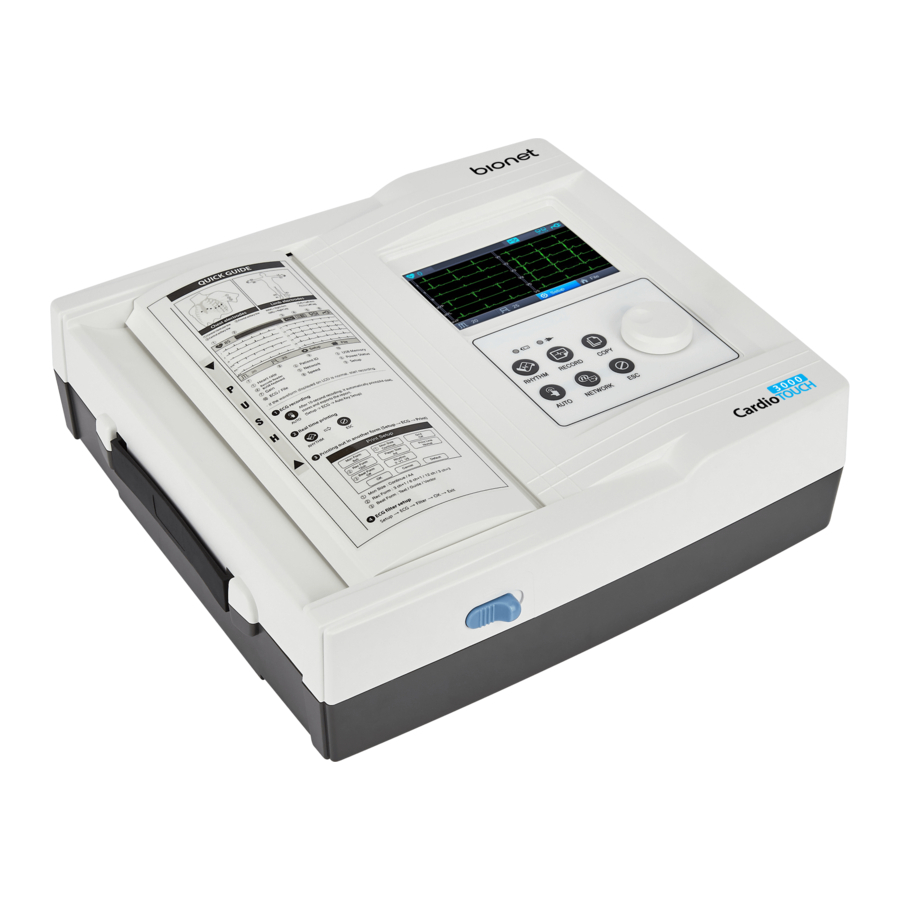
CardioTouch3000 Operation Manual Body Configuration ▣ Top View ① ② ③ ④ ⑤ ① Handle ② Printer Cover ③ Printer Cover Switch ④ LCD ⑤ Control Panel 19 / 120 E3KOM-7.00… -
Page 20
CardioTouch3000 Operation Manual ▣ Front View ① ① Printer Cover Switch ▣ Rear View ① ② ③ ④ ⑤ ① Protective Ground Terminal ② Power Switch ③ AC Power Connection Port ( Fuse : 250V , 5A ( High breaking type )) ④… -
Page 21
Do not use the product and immediately ask the manufacturer and the seller for repair NOTE To avoid an expected electric shock, do not open the equipment cover or disassemble the equipment. Refer servicing to Bionet, Inc. 21 / 120 E3KOM-7.00… -
Page 22
CardioTouch3000 Operation Manual Front Panel Graphic display window Battery status Power status Button Rotary key During device boot up, you can see the system software version and the Bionet name. 22 / 120 E3KOM-7.00… -
Page 23
CardioTouch3000 Operation Manual Graphic display LCD The following descriptions explain data on the graphic LCD. ① ② ③ ④ ⑤ ⑥ ⑦ ⑧ ⑨ ① Displays The Heart Rate. ② Displays Patient ID. ③ Displays USB Connection Status (USB Memory, Barcode) ④… -
Page 24
CardioTouch3000 Operation Manual Control Panel ⑦ ⑧ ① ② ③ ④ ⑤ ⑥ ⑨ ▣ Button ① Print out the rhythm data on A4 size or continuous paper. ② 10sec.are saed and are printed vas an output form after processing. -
Page 25
CardioTouch3000 Operation Manual ⑤ It transfers the test data, or saved data to the server PC. Cancel commands or change into the former mode for main menu ⑥ printing. ▣ LED A light indicator lets you know that the battery is on and shows your current battery charging status. -
Page 26
CardioTouch3000 Operation Manual ▣ Battery Power The device will get its power from the battery and the unit will display the battery power icon (shown above), when the system is powered on, the battery is connected to the device and the AC power is disconnected. When the battery power is low, an alarm sound will ring from the device speaker and LCD display will show a ―Battery Low‖… -
Page 27: System Installation
Paper Installation — Push the printer cover release switch to the right to open the printer door of the CardioTouch3000. Install EKG paper with the side to be recorded appearing on top. Close the cover to finish the paper installation process.
-
Page 28: System Start
CardioTouch3000 Operation Manual 7) System Start When every preference is set, the company name will be displayed when the switch is turned on, and then after approx. 10 seconds, the initial menu selection will appear on the screen, as shown in the figure below.
-
Page 29
CardioTouch3000 Operation Manual The following is the main page of ECG menu. If you remember the information shown below, it will be easier for you to use the main page of ECG. Menu Description Heart rate mark To Input or check the patient‘s information… -
Page 30
CardioTouch3000 Operation Manual The following is the main page of ECG file management, shown when selecting the ‗File‘ menu. If you remember the information shown below, it will be easier for you to use the main page of ECG file management. -
Page 31: Chapter 2. Preparation For Electrocardiography
CardioTouch3000 Operation Manual Chapter 2. Preparation For Electrocardiography 1) Location of Electrodes 2) Electrode Connection Patient Cable Connection How to Attach Electrodes Countermeasures for Bad Lead Connection 3) Starting ECG recording 4) Basic Setup General Patient Information Input Sensitivity Setup…
-
Page 32: Location Of Electrodes
CardioTouch3000 Operation Manual 1) Location of Electrodes Attach electrodes to the patient‘s body to record an electrocardiogram of twelve standard leads [ I, II, III, aVR, aVL, aVF, V1, V2, V3, V4, V5, V6 ], as shown below. Limb electrodes are located as follows.
-
Page 33: Electrode Connection
ECG signals. WARNING Use only electrodes and patient cables provided from Bionet, Inc. Bionet America, Inc. will take no responsibility for any accidents involving 3 party accessories.
-
Page 34
— Second case, signal conductivity between leads and the patient‘s body is low. In this case, replace the electrodes. If the two above cases have been performed and the operator is still experiencing noise or lead fault conditions, the patient cable may be faulty. Please contact the Bionet service center. 34 / 120… -
Page 35: Starting Ecg Recording
LCD. — Press the ‗ESC‘ key to stop the operation while printing or recording. The following buttons will be most commonly used when operating CardioTouch3000. Print out the rhythm data on A4 size or continuous paper. 10sec. are saved and are printed as an output form after processing.
-
Page 36: Basic Setup
CardioTouch3000 Operation Manual 4) Basic Setup General When turning on the system, LCD will display component values set by the current system in order of heart rate, patient information, connection status of external device, power state, size of ECG signal and output speed.
-
Page 37
CardioTouch3000 Operation Manual — Menu Navigation Operate by rotating the rotary key. Menu movement will occur in the same direction as the direction of the key‘s rotation. — Menu Selection Initiate by pressing the rotary key. Menu box for setting of the selected menu will be displayed. -
Page 38
CardioTouch3000 Operation Manual Patient Information Input In this menu, operators can input the patient‘s ID, name, age, sex, height, weight. When the user selects the line of ID, NAME, Department , a keyboard will show up on the screen. The default of every line is a blank and if there is a certain figure on the line, it should be shown exactly when loading the keyboard window. -
Page 39
CardioTouch3000 Operation Manual When the user selects the line of Age, Height or Weight, a keypad will show up on the screen. The default of every line is a blank and if there is a certain figure on the line, it should be shown exactly when loading the keypad window. -
Page 40
CardioTouch3000 Operation Manual When clicking the Gender Line, the letter Male or Female will be shown respectively. After selecting the data which you want, input all the information of the patient. When pressing OK button, the information will be saved, while pressing cancel button will cancel the setting. -
Page 41
Normally barcode scanners are compatible with all products. However, because of inconsistencies in barcode scanner manufacturers implementation of input methods, you need to verify the scanner is supported by Bionet. • Input methods supported by Bionet : International standards, USB •… -
Page 42
CardioTouch3000 Operation Manual Sensitivity Setup This is a functionality that can modify sensitivity of the output signal, when the outputting signal‘s amplitude is too large and causes overlap with neighboring signals, or too small so that signal diagnosis is difficult. -
Page 43
CardioTouch3000 Operation Manual Printing speed Setup This is a function to adjust the width of the printing signal. The values are available in 12.5mm/sec, 25mm/sec and 50mm/sec, 100mm/sec. If you set 25mm/sec up, the ECG signal will be recorded in 25mm for one second. Therefore, the 12.5 mm/sec width is equal to half of the 25 mm/sec width;… -
Page 44: Lcd Monitor Display
CardioTouch3000 Operation Manual 5) LCD Monitor display Monitor mode display shows the currently measured electrocardiogram signal in real time. The monitor mode display function is used for the following two purposes: One is to check whether the signals from all channels are coming out properly; the other one is to see the status of the electrocardiogram of the patient for an extended time.
-
Page 45
CardioTouch3000 Operation Manual Press ‘ESC‘ key to stop printing the ECG rhythm. After pressing the key, the system will stop printing and the display system setting after indicating the following message. NOTE Even if ECG output speed is set as 100 mm/sec, it is not supported when outputting monitoring. -
Page 46: Record Mode Printing
CardioTouch3000 Operation Manual 7) Record Mode Printing For the record mode display, save the electrocardiogram in the memory first, and apply the filter which is set up by the user to the saved electrocardiogram, and then extract the parameters for the heart rate, PR interval, QRS duration, QT/QTc, and P-R-T axes. Then, print out the heart rate according to the sensitivity, printing speed, and channel form that are set up by the user.
-
Page 47: Printing Form
CardioTouch3000 Operation Manual
Printing Form In this section, descriptions and samples of various printing forms are provided. Rhythm Printing Form — 3CH printing: To print 3 channels at the same time (I ~ III / aVR ~ aVF / V1 ~ V3 /… -
Page 48
CardioTouch3000 Operation Manual Rhythm Report Form (3CH) Rhythm Report Form (6CH) 48 / 120 E3KOM-7.00… -
Page 49
CardioTouch3000 Operation Manual Rhythm Report Form (12CH) Record Report Form (3CH + 1 RHY) 49 / 120 E3KOM-7.00… -
Page 50
CardioTouch3000 Operation Manual Record Report Form (3 CH + 3 RHY) Record Report Form (6 CH + 1 RHY) 50 / 120 E3KOM-7.00… -
Page 51
CardioTouch3000 Operation Manual Record Report Form (12 CH) Record Report Form (BEAT REPORT — TEXT) 51 / 120 E3KOM-7.00… -
Page 52
CardioTouch3000 Operation Manual Record Report Form (BEAT REPORT — VECTOR) Record Report Form (BEAT REPORT — GUIDE) 52 / 120 E3KOM-7.00… -
Page 53
CardioTouch3000 Operation Manual Beat Report Parameters PR : PR Interval PA : P Amplitude PD : P Duration QA : Q Amplitude QD : Q Duration RA : R Amplitude RD : R Duration … -
Page 54
CardioTouch3000 Operation Manual NOTE Dextrocardia The human heart is normally located on the left side of the chest. However, in rare cases it is located on the right side chest, which is a condition called Dextrocardia. There is potential for dextrocardia if: — P, QRS and T are all reversed on Lead I. -
Page 55: Copy Mode Printing
CardioTouch3000 Operation Manual 9) Copy Mode Printing Copy Mode Printing is a function to print out the same report as the previously printed report. In Copy Mode, users can also print out the same previous data but with changed settings such as filter type, sensitivity, printing speed, channel form, and rhythm number if more than one rhythm is recorded.
-
Page 56
CardioTouch3000 Operation Manual If you change the filters on a previously saved ECG, it will adapt to the new filter. When the new filter is adapted completely, it will start printing after showing the message as below. When printing is abnormally completed, the state of the system setting will be displayed after showing the message as shown below for a second. -
Page 57: System Setup
CardioTouch3000 Operation Manual 10) System Setup Choose the ‘Setup’ button on the initial ECG main screen to change preferences. Setup menu consists of Basic Setup, Network Setup, Hospital Setup, ECG Setup, Service Setup and you can change the setting at each window. The main page shows Basic Setup.
-
Page 58
CardioTouch3000 Operation Manual Setup date and time After choosing the Setup menu, press the Basic button then the focus will go to the ‘Date’ item. By using the touch screen or rotating the rotary switch, choose the Date (yyyy/mm/dd) or Time (hr/min/sec), then the keypad will show up. -
Page 59
CardioTouch3000 Operation Manual Touch Setup This is a menu to set up the coordinates of the touchpad. When selecting the ‘Touch’ menu at the Basic Setup page, setup page will disappear and the coordinates for setting calibration will appear as shown below. Follow the instructions shown on the screen, and then the coordinates will be set up. -
Page 60
CardioTouch3000 Operation Manual Language As shown below, when selecting ‘Language menu at the Basic Setup page, you can choose the language among English, French, German, Italian, Korean, Polish, Portuguese, Rumanian, Russian, Spanish and Turkish. Select the language you want to use and click the OK button and then you can use the service in the chosen language. -
Page 61
CardioTouch3000 Operation Manual Start Option You can set up the index page shown at the time of initial boot up, according to the common dialog. When clicking the ‗Start Option‘ button, a small menu window will appear and you can select the initial page you want to have among MAIN, FILE, ECG. -
Page 62
CardioTouch3000 Operation Manual Date Type As seen in the figure below, the date format on the top of the paper can be changed while printing out monitoring and recording results if you choose ‘Date Type’ from the Basic Setup menu. Choose the date format to be used, and then click the ‘OK’ button; the date format is converted to the one selected and can be seen on the output. -
Page 63
CardioTouch3000 Operation Manual Color Setup The device offer two type of LCD screen for easy reading of wave form. In case of choosing «Black» color, it reflect wallpaper as black color and wave color turn to green color. In case of choosing «White» color, the wallpaper reflect white, wave color turn to black. -
Page 64
Then, input the information required and press ‘OK’ button to save or ‘ESC’ to cancel the information. The server interlocking device can be selected as BMS Server of Bionet. After selecting the type of interlocking server, select the ‘Setting’ button; an appropriate setup window to the choice of server will be displayed. -
Page 65
CardioTouch3000 Operation Manual BMS Server Setting IP setup on BMS Server-installed PC can be performed by choosing either Automatic IP (DHCP) or Fixed IP (Manually) in ‘Configure‘ setup. If ‗DHCP‘ is chosen, the IP of the BMS Server-installed PC will be shown on the input box. -
Page 66
CardioTouch3000 Operation Manual Wireless Network Setting Connect the USB wireless LAN card to the USB port of CardioTouch3000, and check whether or not the wireless icon ( ) appears in the Status bar on the top of the screen. 1) Navigate to System Setup -> Network, and Set the Device as ―Wireless‖. -
Page 67
CardioTouch3000 Operation Manual : AP re-searching : Page up : Page down : Attempting to connect : Closing the window 3) Select the AP to be connected by using the rotary key or touching. Click the ―Connect‖ button. At that time, the security key input window will appear if the ―Encrypt‖… -
Page 68
CardioTouch3000 Operation Manual 4) After clicking the Key Value input line by using the rotary key or touching, enter the security key. 5) Upon the completion of input, click the «OK» button; Connection will be attempted and the message describing the connection status will appear. -
Page 69
CardioTouch3000 Operation Manual When connection with the AP is successful, set the Device IP, Subnet Mask, Gateway, etc. by selecting manually or Configuring with DHCP. Refer to the Network Setup part of the User Manual for more details. NOTE It is recommended to use English for the name of the AP wireless network (SSID). -
Page 70
CardioTouch3000 Operation Manual ECG Setup When selecting the ‗ECG‘ menu at the left side of the Setup page, ECG Setup page will show up at the right side. In ECG Setup menu, there is ‘AUTO’ button to set up and change set up related automatic diagnosis. -
Page 71
CardioTouch3000 Operation Manual Printing channel setting [Print Setup] [Monitoring Form] Set up real time-printout form. Click ‗Mon Form,‘ and then a POP-UP window for channel list will be displayed. Default is set as ‗12CH‘. — 3CH printing: To print 3 channels at the same time (I ~ III / aVR ~ aVF / V1 ~ V3 / V4 ~ V6) If you want to change the channel, press ‗RHYTHM‘… -
Page 72
CardioTouch3000 Operation Manual [Monitoring Size] You can set up the real time printing size. When you click the ‗Mon Size‘ menu, ‗Report‘ will be selected and when clicking it again, ‗Continue‘ will be selected. Default is set as ‗Continue‘. — ‗Report‘… -
Page 73
CardioTouch3000 Operation Manual [Grid] If general fax paper is used for printout, it needs to be marked with a grid. A 5mm X 5mm grid must be in a solid line with the point mark on the 1mm X 1mm location. If using standard ECG recording paper instead of general fax paper(thermal paper), undo the grid marking setup as the recording paper will already have it. -
Page 74
CardioTouch3000 Operation Manual — ‗3CH+1‘: 10-second ECG will be recorded as I, II and III for the first 2.5 seconds, aVR, aVL and aVF for the next 2.5 seconds, V1, V2, V3 for the next 2.5 seconds and V4, V5, V6 for the next 2.5 seconds. 1 channel of rhythm will be recorded for 10 seconds at the bottom. -
Page 75
CardioTouch3000 Operation Manual [Print Line] You can set the line thickness of the printouts. Three setting options are available; ―Thin‖, ―Normal‖ and ―Thick‖. [Beat Form] You can set up the additional beat report printing. When you select the ‗Beat Form‘ menu, a small POP-UP menu will appear at the bottom and it will disappear when choosing OFF, Text, Vector or Guide. -
Page 76
CardioTouch3000 Operation Manual [Rhythm] You can set up the rhythm leads for printing out the diagnosis of 3CH+1, 6CH+1, 3CH+3 and Long Time(1,3,5,10 Minute). You can choose 3 rhythm leads and when ‗3CH+3‘ is chosen, you can use all of the 3 leads, while when ‗3CH+1‘, ‗6CH+1‘ or ‗Long Time‘ is chosen, you can use the first value only. -
Page 77
CardioTouch3000 Operation Manual [Quick Print] Set up the Quick Print Options. Output time can be saved by using the buffering function during selection of 0 — 10 seconds. NOTE If setting up as ON, diagnosis button should be used only after signalling is stabilized. -
Page 78
CardioTouch3000 Operation Manual [Filter Setup] The signal output generated by the device may contain extra unwanted signals in addition to the EKG wave such as AC noise, base line drift caused by respiration, noise generated by an electrical field nearby, etc. Applying filters could help to reduce or remove those unwanted signals from the output of the device. -
Page 79
CardioTouch3000 Operation Manual Base line drift is caused by the patient‘s breathing. It can be seen as ECG signals being overlapped on a large parabola. The BASE LINE filter provides 0.05Hz, 0.1Hz and 0.2Hz, and its set values will appear as Base:0.05Hz, Base:0.1Hz and Base:0.2Hz at the bottom of the Output Form. -
Page 80
CardioTouch3000 Operation Manual If the recorded EKG signal contains a lot of noise, Low Pass Filter (LPF) may help to clear it. For Low Pass Filter, 40Hz, 100Hz, 150Hz and OFF option is offered. Here, 40Hz option means the filter will remove any unwanted signal with frequencies above 40Hz. Low Pass Filter values will appear on the bottom of the printout form;… -
Page 81
CardioTouch3000 Operation Manual Lead fault Signal Display Setting When the connection between the patient and Leads is improper, lead fault can occur. In that case, you can choose whether to have the lead fault message on the ECG Main page or not. Selecting ‗Lead Fault‘ menu will switch between ON and OFF in the menu, with ON turning on the message display and OFF switching off the message display. -
Page 82
CardioTouch3000 Operation Manual NOTE If ‗RA‘ Lead becomes Fault, the wave types of all Leads will not be indicated. If ‗LA‘ Lead becomes Fault, the wave types of I and V1-V6 Leads will not be indicated. If ‗RA‘ Lead becomes Fault, Lead Fault message might not be shown and the wave types of all Leads might be indicated. -
Page 83
CardioTouch3000 Operation Manual Pacemaker signal printing In case of using the pacemaker signals, you can choose whether to print out the location of the pacemaker when monitoring or recording . You can select ON or OFF by clicking the ‗Pacemaker‘ item. When it is on, the location of the pacemaker will be printed out, while when it is off, it will not be printed out. -
Page 84
CardioTouch3000 Operation Manual QRS Sound Setup In this menu, users can set the device to ring an alarm sound when a QRS beat has generated while it is in waiting mode. Users can either set the alarm ON or OFF by selecting the menu with ON turning on and OFF turning off the alarm sound. -
Page 85
CardioTouch3000 Operation Manual Demo Mode Setting This menu puts CardioTouch3000 in demo mode. When it is set to ON, 60bpm Sinus Normal Rhythm signal will be displayed on the device and DEMO sign will appear on the upper part of the LCD screen. Users can test rhythm, diagnostic, copy printing functions as well as PC communication and other miscellaneous functions. -
Page 86
CardioTouch3000 Operation Manual ‘AUTO’ key setting When the ‗Store‘ menu has the focus, click it to set up ‗Yes‘ or ‗No‘. When ‗Yes‘ is selected, you can operate the ECG test by pressing the ‗AUTO‘ key on the control panel and the ECG data will be automatically saved, but when ‗No‘… -
Page 87
CardioTouch3000 Operation Manual When selecting the ‗Export‘ menu, a small menu window as below will appear and it will disappear when selecting one of None, Server, USB. If it is ‗None,‘ ECG data will not be externally transferred; if is ‘USB,’ ECG data will be automatically saved to the external USB memory. -
Page 88
At ‗User Security Set‘ setup, it is possible to change Factory Setting and User Password. At ‗Manufacture Set‘ setup, it is possible to change Upgrade and Device Options; please contact the Bionet Service Center. Factory (Reset Settings) In order to reset to factory conditions, press the ‗Factory‘ button and enter the Password. -
Page 89
CardioTouch3000 Operation Manual The initialized values are as follows. Contents Setting Value Gain 10mm/mV Speed 25mm/s Start Option Main Unit Height : cm, Weight : kg Date Type YYYY-MM-DD Patient Info (File) Delete Device Name CardioTouch3000 Net Device Wired Configure… -
Page 90
CardioTouch3000 Operation Manual Low Pass Filter 150Hz EMG Filter ECG Store Print Out Export None Target Method Manual Format Delete JPEG Size 1024 x 768 Patient information initialized 90 / 120 E3KOM-7.00… -
Page 91
CardioTouch3000 Operation Manual Data Erase All data in Files will be deleted. Change PW User Password can be configured. User Password is the number entered for Factory and Data Erase. The password should be a 4-digit number. NOTE The default User Password is ‗1234‘. If you forget the password, enter ‗1234‘ and reset. -
Page 92
Use electrodes with products such as those provided or with a biocompatibility certificate certified by international standards. CAUTIONS Use CardioTouch3000 in the presence of a specialist(health care professional) for use by patients undergoing cardiac assist device surgery. 92 / 120… -
Page 93: Chapter 3. Ecg File Management
CardioTouch3000 Operation Manual ECG File Management Chapter 3. 1) Display and Function 2) Data Printing 3) Data Deleting 4) System Setup 5) Switching Menu 6) Patient Information 7) Data Search
Data Transfer 9) Data Import 93 / 120 E3KOM-7.00… -
Page 94: Display And Function
CardioTouch3000 Operation Manual 1) Display and Function ⓛ ② ③ ④ ⑤ ⑥ ⑦ ⑧ ⑨ ⑩ ① Page information — For example, [1/20] means that you see the first page among total 20 pages. 1 Page contains 24 lines of Data.
-
Page 95: Data Printing
CardioTouch3000 Operation Manual — Menu direction (Rotary Key‘s right spin) Print Delete Setup Main Page information [<] [>] Info Search Print — Menu direction (Rotary Key‘s left spin) Print Search Info [>] [<] Page information Main Setup Delete Print…
-
Page 96: Data Deleting
CardioTouch3000 Operation Manual 3) Data Deleting When pressing the ‗Delete‘ button, a small pop-up menu will show up. You can choose to press the ‗select‘ or ‗all‘ button. When you press the ‗Select‘ button, one data will be deleted, but if you press the ‗All‘…
-
Page 97: System Setup
CardioTouch3000 Operation Manual 4) System Setup When clicking the ‗Setup‘ button at the ECG data file management page, you will see a ‗System Setup‘ window as shown below. ‗PAT Info.‘ menu is to set up whether the patient information is retained or not, when you move the main screen of the ECG.
-
Page 98
CardioTouch3000 Operation Manual When clicking the ‗Export‘ button, you will see ‗Export‘ window as shown below. When clicking the ‗Target‘ button, a POP-UP window will show up and it will disappear when selecting one of BMS Server or USB. — BMS Server : To save the data in the BMS Server or USB memory. -
Page 99: Switching Menu
CardioTouch3000 Operation Manual NOTE If ‗Format‘ menu has only ‗EKG‘ options, it is possible to select ‘All’ or ‘All New’ in ‘Method‘ menu; for other formats, ‗Selected‘ is the only option. 5) Switching Menu When selecting the ‗Main‘ button at the main page of ‗File management‘, a line window will show up.
-
Page 100: Patient Information
CardioTouch3000 Operation Manual 6) Patient Information When selecting a saved data at the ECG file management page by using a rotary key or a touch screen, the focus will appear at the data list. Press the ‗Info‘ button. Then you will see a ‗Patient Information‘ window as shown below.
-
Page 101: Data Transfer
CardioTouch3000 Operation Manual
Data Transfer You can transfer the saved data to the external device at the ECG data file management page by using the ‗NETWORK‘ key on the control panel. When pressing the ‗NETWORK‘ key, a message will show up, asking which menu you want to select. -
Page 102
CardioTouch3000 Operation Manual NOTE When transmitting multiple sets of data to PC after saving, a network error could occur which may cause transmission halt and subsequent loss of data. Therefore, we recommend users to practice following procedures to minimize such loss. -
Page 103: Data Import
‗RECORD‘ key on the control panel. When pressing the ‗RECORD‘ key, ‘Import File List‘ screen will be shown as below. If the external device is not connected to CardioTouch3000, the error message will be shown as below.
-
Page 104
CardioTouch3000 Operation Manual If you select the ‗All‘ menu in the ‗Import File List‘ screen, a system message with progress speed will be shown as below. After receiving all data from the external device, a system message will be shown as below. -
Page 105: Chapter 4. System Management
CardioTouch3000 Operation Manual Chapter 4. System Management 1) Maintenance and Cleaning 2) Regular Check-up 3) Trouble Shooting 4) Manufacturer Declaration 105 / 120 E3KOM-7.00…
-
Page 106: Maintenance And Cleaning
CardioTouch3000 Operation Manual 1) Maintenance and Cleaning There are many ways to clean CardioTouch3000, but it is best to use our recommendation to avoid damage or sanitary issues. The warranty does not cover problems resulting from the use of harmful substances (unauthorized substances).
-
Page 107: Trouble Shooting
Connect the external USB keyboard to the USB port before you turn on the power of CardioTouch3000. If you connect the external USB keyboard to the USB port after you turn on the power of CardioTouch3000, you should turn off the power of CardioTouch3000 and turn on again.
-
Page 108
CardioTouch3000 Operation Manual System message Cause Solution Please contact CS (Customer Please check Internal coin battery is Support) team of Bionet to date and time discharged. replace old coin type battery with new one When wrong network Address is not… -
Page 109
CardioTouch3000 Operation Manual — Check System setup and When there is connecting network Ping : Failed failure between network — Check PC network setup and PC with BMS Server -Check LAN cable or wireless environment Please contact ‗Network Team‘ to… -
Page 110
CardioTouch3000 Operation Manual When the lead is off from Please reattach the electrode on Lead Fault! the patient body patient body When the conductivity Apply some water to reusable between patient body electrodes, and reattach them and electrode is weak… -
Page 111: Manufacturer Declaration
CardioTouch3000 Operation Manual 4) Manufacturer Declaration Electromagnetic Compatibility Information Basic EMC Phenomenon standard or test Test level/requirement method Mains terminal CISPR 11 Group1, Class A disturbance voltage Radiated disturbance CISPR 11 Group1, Class A Harmonic Current Emission IEC 61000-3-2 Class A…
-
Page 112
Electromagnetic compatibility — Guidance and manufacturer’s declaration Guidance and manufacturer’s declaration – electromagnetic emissions The CardioTouch3000 is intended for use in the electromagnetic environment specified below. The customer or the user of the CardioTouch3000 should assure that it is used in such an environment. Emissions test… -
Page 113
CardioTouch3000 Operation Manual Guidance and manufacturer’s declaration – electromagnetic immunity The CardioTouch3000 is intended for use in the electromagnetic environment specified below. The customer or the user of the CardioTouch3000 should assure that it is used in such an environment. IMMUNITY… -
Page 114
CardioTouch3000 Operation Manual Guidance and manufacturer’s declaration – electromagnetic immunity The CardioTouch3000 is intended for use in the electromagnetic environment specified below. The customer or the user of the CardioTouch3000 should assure that it is used in such an environment. IEC 60601… -
Page 115
RF transmitters, an electromagnetic site survey should be considered. If the measured field strength in the location in which the CardioTouch3000 is used exceeds the applicable RF compliance level above, the CardioTouch3000 should be observed to verify normal operation. -
Page 116
CardioTouch3000 Operation Manual For transmitters rated at a maximum output power not listed above, the recommended separation distance d in meters (m) can be estimated using the equation applicable to the frequency of the transmitter, where P is the maximum output power rating of the transmitter in watts (W) according to the transmitter manufacturer. -
Page 117: Chapter 5. Specification
CardioTouch3000 Operation Manual Chapter 5. Specification ECG Leads Simultaneous 12 Leads Resting ECG Recording Channel 3CH+1RHY, 3CH+3RHY, 6CH+1RHY, 12CH, 1CH Long Time (1min) and Beat Report Gain 2.5, 5, 10, 20, Auto (I~aVF: 10, V1~V6: 5)mm/mV Printing Speed 5, 12.5, 25, 50, 100mm/sec Sampling Rate Analysis Sampling Rate –…
-
Page 118
CardioTouch3000 Operation Manual 200 ECGs in 12 channel format at 25mm/s and 10mm/mV with a battery charged during approximately 3 hours from total discharge (with display off) Communication LAN, WIFI (option) Safety Conformity Class I, Type CF Defibrillation-proof applied Part. -
Page 119
Name: Contact No: Seller‘s Name Manufacturer‘s Name ※ Thanks for purchasing CardioTouch3000. ※ This product is a medical machine. ※ This product meets the strict quality requirements thoroughly. ※ The repairing and compensation standards follow the consumer damage compensation regulations of the Ministry of Finance and Economy. -
Page 120
CardioTouch3000 Operation Manual International Sales & service Bionet Co., Ltd. : 5F, Dreammark1 Data center 61 Digital-ro 31 gil, Guro-gu, SEOUL 08375, REPUBLIC OF KOREA Tel : +82-2-6300-6410 / Fax : +82-2-6499-7789 / e-mail: sales@ebionet.com Website: www.ebionet.com U.S.A sales & service representative Bionet America, Inc.
 Data transfer ………………101 9) Data import ………………103 Chapter 4. System Management ……… 105 1) Maintenance and Cleaning …………106 2) Regular Check-up …………….