![]()

Allen & Heath Limited
Керник Индастриал Эстейт
Пенрин, Корнуолл,
TR10 9LU, Великобритания
www.allen-heath.com
Технический паспорт
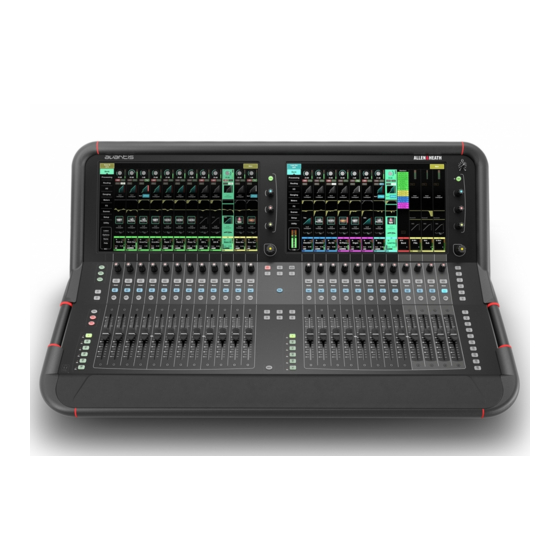
Обзор
- Ядро XCVI FPGA
-96 кГц сampле скорость
-Переменная битовая глубина
-96битный аккумулятор
Лучшая в своем классе сверхнизкая задержка (0.7 мс) - Два емкостных сенсорных экрана Full HD с диагональю 15.6 дюйма и управлением с помощью жестов
- Инновационная компактная конструкция со сверхпрочным и легким цельнометаллическим шасси
- 64 входных канала с полной обработкой (LPF / HPF, Gate, PEQ, comp, Delay)
- Конфигурируемая архитектура с 42 шинами с полной обработкой (PEQ, GEQ, Comp, Delay) на выходах Mix.
- DEEP Готово к обработке
- 144 полосы фейдеров (24 фейдера, 6 слоев) с дополнительной выделенной мастер-секцией
- СЛинк Подключение EtherCON для удаленного аудио с использованием протоколов gigaACE, GX, DX, ME и snake.
- 12 локальных микрофонных / линейных входов (XLR)
- 12 локальных линейных выходов (XLR)
- 1 стерео вход AES (XLR)
- 2 стерео выхода AES (XLR)
- 2 порта ввода / вывода, оба способны работать со 128 × 128 при 96 кГц — для дополнительных карт, вкл. Данте, МАДИ и gigaACE
- 8 группы отключения звука
- 16 групп DCA с разливом DCA
- 12 стерео FX с выделенными эффектами возврата
- 24 назначаемых программных клавиши
- 6 назначаемых настраиваемых поворотных устройств
- Комплексное измерение с многоточечным пиковым детектированием
- Встроенная подсветка фейдера
- Встроенный генератор сигналов, RTA и спектрограмма
- AMM (автоматический микрофонный микшер) до 64 каналов в 1,2 или 4 зонах
- Быстрое копирование / вставка / сброс параметров
- Полномочия пользователя для ограничения доступа оператора
- 500 воспоминаний о сценах на шоу
- Сейфы каналов, глобальные фильтры и фильтры вызова для каждой сцены
- Стереозапись и воспроизведение через USB
- USB-передача сцен, библиотек, шоу
- Драйвер управления MIDI для управления MIDI через TCP / IP
- Приложения для беспроводного удаленного микширования для iPad
- Разъем BNC Word Clock (вход или выход)
- ¼ ”TRS и 3.5 мм выход для наушников со специальным аналоговым регулятором громкости


Технические характеристики A&E
Смеситель должен быть компактным цифровым микшером, способным работать автономно. Он должен иметь 64 входных канала, 42 шины микширования и 400 системных входов и выходов с программным подключением, все они назначаются независимо. Должно быть 12 стерео рэковых эффектов FX с выделенными стерео возвратами и 16 DCA. Смеситель должен содержать двигатель смешивания. Двигатель микширования должен работать на частоте 96 кГц.ampling и использовать технологию FPGA для цифровой обработки сигналов. Системная задержка от аналогового входа до выхода не должна превышать 0.7 мс.
Поверхность должна включать 24 моторизованных сенсорных фейдера в двух банках, каждый с 6 слоями, доступ к которым осуществляется с помощью специальных клавиш. Подсветка фейдера должна быть встроена в подлокотник микшера и должна регулироваться через пользовательский интерфейс программного обеспечения. Все полосы фейдеров должны быть настроены как входные каналы, миксы, посылы FX, возвраты FX, мастеры DCA или полосы MIDI. Каждая полоса фейдера должна иметь выделенные кнопки PAFL, Mix и Mute с индикаторами и поворотным контроллером. 6 кнопок с индикаторами обеспечивают глобальную модель
для поворотных регуляторов: усиление, панорамирование, отправка и до 3-х пользовательских функций. Уровни посылов на миксы также должны регулироваться фейдерами.
Должны быть предусмотрены специальные клавиши для быстрого копирования / вставки / сброса миксов и параметров обработки, назначений до / после и микширования, сейфов сцен, замораживания в слоях и фейдера графического эквалайзера.
кувырок. Дополнительные физические элементы управления должны быть назначаемыми пользователем, включая два набора из 3 поворотных энкодеров и 24 определяемых пользователем клавиш.
Для доступа к банку каналов должны быть предусмотрены два 15.6-дюймовых емкостных сенсорных экрана Full-HD (1080p). view, блоки имен каналов, обработка каналов, измерители, эффекты, ввод / вывод, управление сценой, настройка, утилиты и диагностика. Блоки имен каналов должны отображать имя каждого видимого канала, цвет, тип, номер, статус, панорамирование, усиление, подстройку, измерение, уменьшение усиления процессора и другие параметры. Прикосновение к блоку имени канала позволяет выбрать канал с возможностью выбора одного канала для каждого сенсорного экрана.
22-сегментные индикаторы в блоке имени канала должны указывать уровни канала и микса. Для контроля сигнала PAFL должен быть предусмотрен дополнительный экранный 22-сегментный измеритель. Должен быть предоставлен субмикс Mains to PAFL по умолчанию.
Исчерпывающий и настраиваемый вход, выход, канал FX и измерение RTA должны отображаться на экране в специальном интерфейсе счетчиков.
Локальные аналоговые входы должны быть обеспечены на 12 симметричных разъемах XLR и подключаться к полностью отзывным предварительным устройствам с цифровым управлением.ampкачественные подъемники. Они должны обеспечивать усиление до +60 дБ, стандартное фантомное питание 48 В и включать переключаемый аттенюатор -20 дБ, обеспечивающий максимальный входной уровень + 30 дБн. Локальные аналоговые выходы должны быть
предусмотрен на 12 симметричных разъемах XLR. Они будут иметь номинальный линейный выход +4 дБн и максимальный выход + 22 дБн.
Один стерео вход AES3 с SRC (32–192 кГц) должен быть обеспечен на одном разъеме XLR. Два стерео выхода AES3 с SRC (96 кГц, 48 кГц, 44.1 кГц) должны быть предусмотрены на двух разъемах XLR. Должна быть возможность обойти Sample Rate Conversion на цифровых входах и выходах через пользовательский интерфейс программного обеспечения.
Должен быть локальный порт расширения аудио «SLink» Ethernet с блокируемым разъемом EtherCON, поддерживающий несколько протоколов (gigaACE, DX, GX, snake, ME) и обеспечивающий доступ максимум к 128 × 128 цифровым каналам, подключенным по одному кабелю ». цифровая змейка ‘и позволяя удаленное предварительноеamp управление удаленными аудиоустройствами Allen & Heath, а также подключение к персональным микшерным системам Allen & Heath ME.
Также должны быть предусмотрены два 128-канальных порта ввода / вывода для дополнительных модулей цифрового интерфейса. Дополнительные интерфейсные модули должны включать: MADI, Dante, Waves SoundGrid, gigaACE и AES / EBU.
На устройстве должен быть предусмотрен разъем BNC для ввода или вывода Wordclock, переключаемый программно.
Все входные каналы должны содержать следующую обработку: триммер, полярность, фильтр высоких частот, фильтр низких частот, две точки разрыва, гейт, параметрический эквалайзер, компрессор и задержку.
Все выходные каналы микширования должны содержать следующую обработку: внешний вход, полярность, триммер, вставка, параметрический эквалайзер и графический эквалайзер с RTA и режимом переключения фейдера, компрессором и задержкой.
Обработка каналов также должна включать качественные эмуляции классических предварительныхamps, компрессоры и эквалайзеры. Эти эмуляции должны быть вставлены на лету на любой
канал без использования внутренних эффектов и без каких-либо внешних плагинов. Использование любой эмуляции не должно приводить к дополнительной задержке или влиять на возможности обработки где-либо еще в системе.
Все задержки сигналов в системе должны регулироваться в миллисекундах, метрах, футах и секундах.ampим.
12 назначаемых пользователем стоек эффектов должны быть снабжены библиотекой заводских предустановленных эмуляций эффектов. Стойки FX должны индивидуально настраиваться как отправка / возврат из канала или
FX / Mix или вставленные во входные или выходные каналы. Система микширования должна обеспечивать возможность обработки сигналов стоек FX для возврата в другие миксы через выделенные входные каналы FX, с параметром PEQ, назначенным в качестве источников для входных каналов, гирляндным соединением с другой стойкой FX посредством внутреннего патчинга или направленным на выход. сокет или интерфейсный канал.
Должно быть 16 групп DCA с функцией DCA Spill и 8 групп отключения звука.
Микшер должен обеспечивать автоматическое микширование микрофонов (AMM) до 64 микрофонных источников в 1, 2 или 4 зоны. AMM должен быть способен работать в классическом режиме разделения усиления или, опционально, в качестве алгоритма NOM (количество открытых микрофонов).
На экране маршрутизации должна быть предусмотрена опция глобального источника для прямого выхода из каждого входного канала. Точка отвода должна быть отрегулирована в следующие положения в
путь обработки: post Preamp, post-LPF, post-Gate, post-Insert A return, post PEQ, post Compressor, post-Insert B return и post Delay. Должны быть дополнительные глобальные опции для отслеживания фейдера, DCA и отключения звука. Прямые выходы назначаются через программный патч-бэк микшера.
Должна быть обеспечена возможность двусторонней связи с возможностью отправки на любой выходной микс с индикацией состояния на экране. Должна быть предусмотрена возможность включения фиксации двусторонней связи и HPF.
Генератор сигналов должен иметь возможность посылать сигнал переменного уровня на любой вход и выход с визуальным отображением статуса назначения на экране. Доступны следующие типы сигналов: синусоидальный, белый шум, розовый шум и полоса пропускания.
Микшер должен иметь два порта Gigabit Ethernet (1,000 Мбит / с) для подключения кабеля Cat5 к компьютеру или MIDI через CP / IP для управления параметрами микшера через беспроводной маршрутизатор (точку доступа) для управления микшированием в реальном времени, а система микширования должна включать прикладное программное обеспечение для планшетных устройств, подключенных через маршрутизатор беспроводной сети к порту LAN.
Обработка входных и выходных каналов и параметры в микшере должны сохраняться по запросу как элемент пользовательской библиотеки для использования в других каналах. Все элементы библиотеки должны быть заархивированы.
с шоу file. Элементы библиотеки можно переносить на USB-накопитель в качестве переносных данных для использования в других системах.
Микшер должен обеспечивать возможность сохранения 500 сцен. Сцены должны иметь возможность именования и вводить описательный текст для каждой сцены. Должна быть предоставлена исчерпывающая таблица сейфов для сцен, чтобы выбранные элементы не менялись по сравнению с их состоянием, когда сейф был включен. А
Для каждой сцены должен быть предусмотрен комплексный фильтр сцены, чтобы разрешить / заблокировать каждый параметр, сохраненный в сцене, от изменения при вызове этой сцены. Должен быть предоставлен список сцен для облегчения последовательности сцен из главного списка. Перекрестное затухание до 20 секунд должно регулироваться для каждой сцены. Вызов сцены может быть встроен в сцену с возможностью отложить начало вызова встроенной сцены до 4 минут.
Должна быть предусмотрена опция защиты паролем для входа в систему нескольких пользователей с разными уровнями доступа к системе и разрешениями. При желании можно выбрать конкретную сцену для вызова при изменении логина пользователя.
Система смешивания должна периодически записывать все текущие настройки и возвращать миксер в это состояние после перезагрузки, следующей за циклом включения питания.
Поверхность управления смешиванием должна иметь встроенный источник питания, принимающий напряжение сети переменного тока.tag100 ~ 240 В, 50/60 Гц, 150 Вт макс. через заземленный 3-контактный штекер IEC, установленный на заднем шасси. Рядом с входом сети должен быть предусмотрен двухполюсный кнопочный переключатель.
Рекомендуемая рабочая температура миксера должна составлять от 5 до 40 градусов Цельсия.
Смесителем будет Allen & Heath Avantis.
Габаритные размеры:

Технические характеристики миксера
входные
| Микрофонные / линейные входы XLR | Сбалансированный XLR, фантомное питание + 48 В |
| Микрофонный / линейный предусилительamp | Полностью отзывный |
| Чувствительность входа | От -60 до +15 дБн |
| Аналоговое усиление | От +5 до +60 дБ, с шагом 1 дБ |
| Аттенюатор | -20 дБ Active PAD |
| Максимальный уровень входного сигнала | + 30 дБн (PAD, вход) |
| Входное сопротивление | > 4 кОм (выход Pad),> 10 кОм (вход Pad) |
| EIN микрофона | -127 дБ с источником 150 Ом |
| Индикация фантомного питания | На розетку, внутреннее или внешнее фантомное питание, срабатывающее при +24 В |
| Цифровые входы | AES3, 2 канала, XLR, 2.5 В (размах), симметричный, с оконечной нагрузкой, 110 Ом Диапазон SRC 24 бит, 32 кГц — 192 кГц, с возможностью обхода |
Выходы
| Аналоговые выходы XLR | Сбалансированный, с релейной защитой |
| Выходное сопротивление | <75 Ом |
| Номинальная мощность | + 4dBu = показание счетчика 0 дБ |
| Максимальный выходной уровень | + 22dBu |
| Остаточный выходной шум | -95dBu (без звука, 22-22 кГц) -90dBu (без звука, 0-80 кГц) |
| Цифровые выходы | AES3, 2 канала, XLR, 2.5 В (размах), симметричный, с оконечной нагрузкой, 110 Ом 96 кГц сampскорость передачи, глобальное переключение на 48 кГц, 44.1 кГц |
Размеры и вес
| распакованный | В штучной упаковке | ||
| Ширина x Глубина x Высота | 917 x 627 х 269 мм 36.1 «х» х 24.7 10.6 « |
Ширина x Глубина x Высота |
1100 x 850 х 425 мм 43.3 «х» х 33.5 16.7 « |
| Вес | 26кг 57.4lbs |
Вес | 34кг 75lbs |
Система
Измеренный балансный XLR Into XLR Out, 22-40 кГц, минимальное усиление, выход Pad Out
| Динамический диапазон | 109dB |
| Системный сигнал-шум | -92dB |
| Частотный отклик | 20 Гц — 30 кГц (+ 0 / -0.8 дБ) |
| THD + N (аналоговый на выход) | 0.0015% при выходе +16 дБн, усиление 1 кГц 0 дБ |
| Габаритная высота | + 18dB |
| Внутренний рабочий уровень | 0 дБн |
| Выравнивание dBFS | + 18 дБн = 0 дБFS (+22 дБн на выходе XLR) |
| Калибровка метра | Измеритель 0 дБ = -18 дБFS (+4 дБн на выходе XLR) |
| Индикация пикового значения счетчика | -3dBFS (+ 19dBu на выходе XLR) |
| Sampскорость | 96kHz |
| Диапазон рабочих температур | От 0 ° C до 40 ° C От 32 до 104 градусов по Фаренгейту |
| Питание от сети | 100-240 В переменного тока, 50-60 Гц, 150 Вт макс. |
| Воспроизведение аудио с USB | Моно / стерео .WAV files, 16/24bit, 44.1/48/96kHz MP3 files FLAC files |
| Запись звука через USB | Стерео .WAV files, 24 бит 96 кГц |
Технический паспорт Avantis
Allen & Heath Ltd
Документы / Ресурсы
Рекомендации

Аллен и Хит | Микширование мирового уровня
- Manuals
- Brands
- ALLEN & HEATH Manuals
- Music Mixer
- Avantis
- Getting started manual
-
Contents
-
Table of Contents
-
Bookmarks
Quick Links
Getting Started Guide
Avantis
i
Before starting please check www.allen-heath.com for the latest
Avantis firmware and documentation.
AP11558 Issue 3
Related Manuals for ALLEN & HEATH Avantis
Summary of Contents for ALLEN & HEATH Avantis
-
Page 1
Getting Started Guide Avantis Before starting please check www.allen-heath.com for the latest Avantis firmware and documentation. AP11558 Issue 3… -
Page 2
Check with your Allen & Heath distributor or agent for any additional warranty information which may apply. If further assistance is required please contact Allen & Heath Ltd. Avantis Getting Started Guide Copyright © 2019 Allen & Heath. All rights reserved. -
Page 3: Important — Read Before Starting
System operating firmware The function of Avantis is determined by the firmware (operating software) that runs it. Firmware is updated regularly as new features are added and improvements made.
-
Page 4: Table Of Contents
Packed items Check you have received the following: • Avantis Digital Mixing Console • Getting Started Guide AP11558 • Safety Sheet • IEC mains lead Contents IMPORTANT — Read before starting ………………….3 Safety instructions ………………………. 3 System operating firmware ……………………3 Software licence agreement ……………………
-
Page 5: Introduction
1. Introduction Avantis is a 64 channel 96kHz digital mixing console providing a powerful solution for any live sound application. Pristine audio quality is delivered at ultra-low latency, and comprehensive signal routing and processing options are easily accessible via the dual 15.6” Full HD touchscreens.
-
Page 6: Connect And Power Up
2.3 Recall a Template Show Avantis has a fully configurable audio architecture, control layout, and socket patching. We have provided a set of Template Shows to give a choice of classic console formats to load as a quick starting point with a familiar architecture and logical layout.
-
Page 7: Rear Panel
The Audio Sync Locked indicator illuminates when a valid clock source is present. 8. Word Clock I/O BNC connector for syncing from an external audio clock or providing a clock to other devices. In and Out LEDs indicate the current mode. Avantis Getting Started Guide AP11558 Issue 3…
-
Page 8: Front Panel
See the Expander Connection section of this document for more information on supported devices. 11. Network 2 RJ45 Gigabit Ethernet ports. Connect a laptop or a wireless router to use with Avantis Editor or iOS apps. All devices on the network must have compatible IP addresses. The default settings are:…
-
Page 9: Top Panel
Reset — Hold down Reset and press a Name Block, Mix key or a highlighted area of the touchscreen to reset the related parameters to factory default. Hold down Reset and nudge a fader up or down to quickly set it to 0dB or off. Avantis Getting Started Guide AP11558 Issue 3…
-
Page 10: Fader Strip
PAFL – Sends the channel signal PFL (pre-fade listen) or AFL (after-fade listen) to the headphones and monitoring system. Preferences for the PAFL system are set using the Setup / Audio / PAFL screen. Avantis Getting Started Guide AP11558 Issue 3…
-
Page 11: Screens
5.2 Screens Avantis has two screens, both showing channel processing, bank overview, system setup & status, memory management menus and more. Each touchscreen integrates with a trio of user-configurable soft rotaries in addition to a Touch & Turn rotary control for quick and easy parameter modification.
-
Page 12: Mix Basics
Press a Main Mix (i.e. LR) master strip Mix key. This is the default mixing mode: The Input strips present the channel faders. The Master strips present the master mix faders. Channel levels to LR Mix Avantis Getting Started Guide AP11558 Issue 3…
-
Page 13: Working With Sends — Master Mix Mode
Use this to work with Aux and FX sends. The Input strips remain as Channel Faders. The Master strips present all sends from the Input channel. Send levels from IP 1 To LR Avantis Getting Started Guide AP11558 Issue 3…
-
Page 14: Assigning And Un-Assigning A Channel To A Mix, Group Or Dca
Name Block. You can quickly set all assignments on or off, or all sources pre or post fader, by touching the Mix Master Name Block while holding Pre. Avantis Getting Started Guide AP11558 Issue 3…
-
Page 15: Dimensions
7. Dimensions Avantis Getting Started Guide AP11558 Issue 3…
-
Page 16: Flightcase Information
( ) at the sides of the mixer in the area indicated. Leave adequate space for (1) ventilation headphone/USB connections at front of mixer. Leave adequate space for (1) ventilation audio/power connections at rear of mixer. Avantis Getting Started Guide AP11558 Issue 3…
-
Page 17: Technical Specifications
917 x 627 x 269 mm Width x Depth x Height 1100 x 850 x 425 mm 36.1″ x 24.7″ x 10.6″ 43.3″ x 33.5″ x 16.7″ Weight 26kg Weight 34kg 57.4lbs 75lbs Avantis Getting Started Guide AP11558 Issue 3…
3.0
Rated 3 out of 5
3 out of 5 stars (based on 1 review)
Your overall rating
ALLEN & HEATH AVANTIS (01) PDF MANUAL
Click here to download ALLEN & HEATH AVANTIS (01) PDF MANUAL
ALLEN & HEATH AVANTIS (01) PDF MANUAL
FREE ENGLISH PDF
OPERATING INSTRUCTIONS
USER GUIDE – USER MANUAL
OWNER GUIDE – OWNER MANUAL
REFERENCE GUIDE – REFERENCE MANUAL
INSTRUCTION GUIDE – INSTRUCTION MANUAL
Your overall rating
- YouTube
ALLEN & HEATH AVANTIS (01) PDF MANUAL
ALLEN & HEATH AVANTIS (01) PDF MANUAL
![]()
Getting Started Guide
Avantis
iBefore starting please check www.allen-heath.com for the latest Avantis firmware and documentation.
AP11558 Issue 3

Limited One Year Manufacturer’s Warranty
Allen & Heath warrants the Allen &Heath -branded hardware product and accessories contained in the original packaging («Allen & Heath Product”) against defects in materials and workmanship when used in accordance with Allen & Heath’s user manuals, technical specifications and other Allen & Heath product published guidelines for a period of ONE (1) YEAR from the date of original purchase by the end-user purchaser («Warranty Period«).
This warranty does not apply to any non-Allen & Heath branded hardware products or any software, even if packaged or sold with Allen & Heath hardware.
Please refer to the licensing agreement accompanying the software for details of your rights with respect to the use of software/firmware (“EULA”).
Details of the EULA, warranty policy and other useful information can be found on the Allen & Heath website: www.allen-heath.com/legal.
Repair or replacement under the terms of the warranty does not provide right to extension or renewal of the warranty period. Repair or direct replacement of the product under the terms of this warranty may be fulfilled with functionally equivalent service exchange units.
This warranty is not transferable. This warranty will be the purchaser’s sole and exclusive remedy and neither Allen & Heath nor its approved service centres shall be liable for any incidental or consequential damages or breach of any express or implied warranty of this product.
Conditions Of Warranty
The equipment has not been subject to misuse either intended or accidental, neglect, or alteration other than as described in the User Guide or Service Manual, or approved by Allen & Heath. The warranty does not cover fader wear and tear.
Any necessary adjustment, alteration or repair has been carried out by an authorised Allen & Heath distributor or agent.
The defective unit is to be returned carriage prepaid to the place of purchase, an authorised Allen & Heath distributor or agent with proof of purchase. Please discuss this with the distributor or the agent before shipping. Units returned should be packed in the original carton to avoid transit damage.
DISCLAIMER: Allen & Heath shall not be liable for the loss of any saved/stored data in products that are either repaired or replaced.
Check with your Allen & Heath distributor or agent for any additional warranty information which may apply. If further assistance is required please contact Allen & Heath Ltd.
Avantis Getting Started Guide
Copyright © 2019 Allen & Heath. All rights reserved.
ALLEN&HEATH
Allen & Heath Limited, Kernick Industrial Estate, Penryn, Cornwall, TR10 9LU, UK www.allen-heath.com
|
Avantis Getting Started Guide |
2 |
AP11558 Issue 3 |

 IMPORTANT — Read before starting
 Safety instructions
Before starting, read the Important Safety Instructions printed on the sheet supplied with the equipment. For your own safety and that of the operator, technical crew and performers, follow all instructions and heed all warnings printed on the sheet and on the equipment panels.
 System operating firmware
The function of Avantis is determined by the firmware (operating software) that runs it. Firmware is updated regularly as new features are added and improvements made.
i Check www.allen-heath.com for the latest version of Avantis firmware.
 Software licence agreement
By using this Allen & Heath product and the software within it you agree to be bound by the terms of the relevant End User Licence Agreement (EULA), a copy of which can be found at www.allenheath.com/legal. You agree to be bound by the terms of the EULA by installing, copying, or using the software.
 Further information
Please refer to the Allen & Heath website for further information, knowledgebase and technical support. For more information on Avantis setup and mixing functions please refer to the Avantis Firmware Reference Guide available for download at www.allen-heath.com.
i Check for the latest version of this Getting Started Guide.
You can also join our Allen & Heath Digital Community to share knowledge and information with other Avantis users.
 General precautions
•Protect the equipment from damage through liquid or dust contamination. Cover the mixer when it is not being used for a long period.
•If the equipment has been stored in sub-zero temperatures allow time for it to reach normal operating temperature before use at the venue. Recommended operating temperature is 0 to 40 degrees Celsius.
•Avoid using the equipment in extreme heat and direct sunlight. Make sure the ventilation slots and fans underneath the unit are not obstructed and that there is adequate air movement around the equipment.
•Clean the equipment with a soft brush and dry lint-free cloth. Do not use chemicals, abrasives or solvents. Do not use lubricant or contact cleaner on the faders.
•It is recommended that servicing is carried out only by an authorised Allen & Heath agent. Contact details for your local distributor can be found on the Allen & Heath website. Allen & Heath do not accept liability for damage caused by maintenance, repair or modification by unauthorised personnel.
•To prevent damage to the controls and cosmetics, avoid placing heavy objects on the control surface, scratching the surface or touchscreen with sharp objects, or rough handling and vibration.
 Register your product
Register your product online at www.allen-heath.com/register.
|
Avantis Getting Started Guide |
3 |
AP11558 Issue 3 |

|
Packed items |
||
|
Check you have received the following: |
||
|
• Avantis Digital Mixing Console |
||
|
• Getting Started Guide AP11558 |
||
|
• |
Safety Sheet |
|
|
• |
IEC mains lead |
|
|
Contents |
||
|
IMPORTANT — Read before starting ……………………………………………………………………………………………….. |
3 |
|
|
Safety instructions …………………………………………………………………………………………………………………… |
3 |
|
|
System operating firmware ………………………………………………………………………………………………………. |
3 |
|
|
Software licence agreement……………………………………………………………………………………………………… |
3 |
|
|
Further information ………………………………………………………………………………………………………………….. |
3 |
|
|
General precautions ………………………………………………………………………………………………………………… |
3 |
|
|
Register your product………………………………………………………………………………………………………………. |
3 |
|
|
Packed items ………………………………………………………………………………………………………………………………… |
4 |
|
|
Contents……………………………………………………………………………………………………………………………………….. |
4 |
|
|
1. |
Introduction ………………………………………………………………………………………………………………………. |
5 |
|
2. |
Connect and power up……………………………………………………………………………………………………….. |
6 |
|
2.1 |
Power Up ………………………………………………………………………………………………………………….. |
6 |
|
2.2 |
Calibrate Touch Faders………………………………………………………………………………………………. |
6 |
|
2.3 |
Recall a Template Show……………………………………………………………………………………………… |
6 |
|
2.4 |
Expander Connection…………………………………………………………………………………………………. |
6 |
|
2.5 |
Power Down ……………………………………………………………………………………………………………… |
6 |
|
3. |
Rear Panel ………………………………………………………………………………………………………………………… |
7 |
|
4. |
Front Panel ……………………………………………………………………………………………………………………….. |
8 |
|
5. |
Top Panel …………………………………………………………………………………………………………………………. |
9 |
|
5.1 |
Fader strip……………………………………………………………………………………………………………….. |
10 |
|
5.2 |
Screens…………………………………………………………………………………………………………………… |
11 |
|
6. |
Mix Basics……………………………………………………………………………………………………………………….. |
12 |
|
6.1 |
Working with the Main Mix ………………………………………………………………………………………… |
12 |
|
6.2 |
Working with Sends – Master Mix Mode……………………………………………………………………… |
13 |
|
6.3 |
Working with Sends – Channel Mix Mode …………………………………………………………………… |
13 |
|
6.4 |
Assigning and un-assigning a channel to a Mix, Group or DCA…………………………………….. |
14 |
|
6.5 |
Changing between Sends on Faders and Sends on Rotaries ……………………………………….. |
14 |
|
6.6 |
Setting Pre/Post fader send status……………………………………………………………………………… |
14 |
|
7. |
Dimensions……………………………………………………………………………………………………………………… |
15 |
|
8. |
Flightcase Information………………………………………………………………………………………………………. |
16 |
|
9. |
Technical Specifications …………………………………………………………………………………………………… |
17 |
|
Avantis Getting Started Guide |
4 |
AP11558 Issue 3 |

 1. Introduction
Avantis is a 64 channel 96kHz digital mixing console providing a powerful solution for any live sound application. Pristine audio quality is delivered at ultra-low latency, and comprehensive signal routing and processing options are easily accessible via the dual 15.6” Full HD touchscreens.
Avantis is DEEP Processing ready, enabling the use of our world-class hardware emulations with no added latency or need for additional hardware. Visit allen-heath.com/avantis for more information.
The integrated SLink port offers Plug’n’Play operation with the GX, DX, AB and AR ranges of remote I/O expanders plus the DX Hub remote hub. Additionally, SLink can be used for digital split applications with a second Avantis mixer or a dLive/SQ system.
Compatibility with the ME Personal Monitoring System allows performers to take control of their own monitor mixes via the ME-1 and ME-500 personal mixers.
Digital audio networking cards are available to enable integration with other digital audio systems via protocols such as gigaACE, Dante, MADI and Waves SoundGrid.
Avantis features at a glance:
•XCVI FPGA core
•96kHz sample rate, 96bit accumulator
•Ultra-low latency (0.7ms)
•64 Input Channels with full processing (filter, gate, PEQ, compressor, inserts)
•42 configurable Mix outputs
•DEEP Processing — embedded channel plugins
•12 RackFX with dedicated returns
•16 DCAs
•Twin 15.6” Full HD capacitive touchscreens
•Fully assignable layout
•144 fader strips (24 faders, 6 layers) with optional dedicated master section
•SLink port for connection to Remote I/O Expanders and the ME Personal Monitoring System
•12 analogue XLR Inputs / 12 analogue XLR Outputs
•1 Stereo AES In / 2 Stereo AES Out
•2 I/O Ports, both capable of 128×128 operation at 96kHz
•Gesture control – pinch, swipe, drag ‘n drop
•User configurable rotary controls
•24 assignable SoftKeys
•Comprehensive multipoint metering with peak detection
•USB stereo recording and playback
•BNC Word Clock
Refer to the Allen & Heath website to learn more about Avantis.
|
Avantis Getting Started Guide |
5 |
AP11558 Issue 3 |

 2. Connect and power up
 2.1 Power Up
Ensure the rocker switch is in the off position. Plug in the IEC mains power lead supplied with the mixer. If required, secure the lead by hooking it into the plastic clip using a T20 Torx to remove the fixing screw. Power on the mixer using the rocker switch.
 2.2 Calibrate Touch Faders
To calibrate the fader touch sensitivity, go to Utility / Utility / Calibration and select Calibrate Fader Touch, select Left Bank and All and follow the onscreen instructions. Once completed, repeat this process for the
Right Bank.
 2.3 Recall a Template Show
Avantis has a fully configurable audio architecture, control layout, and socket patching. We have provided a set of Template Shows to give a choice of classic console formats to load as a quick starting point with a familiar architecture and logical layout.
To load a Template Show go to the Utility / Memory / Show Manager screen, select one of the available Template Shows, touch Recall and confirm.
iRecalling a Show overwrites all the system settings including the bus configuration, control layout, current parameters, all Scenes, and Library presets. If you want to save the current settings then first Store them as a User Show.
iFor more information please refer to the Avantis Firmware Reference Guide available for download at www.allen-heath.com.
 2.4 Expander Connection
Plug a touring grade CAT5e (or higher specification) cable up to 100m long between the Remote Expander and SLink port.
iRefer to www.allen-heath.com for cable requirements, recommendations, and a list of CAT5 cables available to order.
Switch on the Remote Expander. The SLink port Lnk/Err indicators flash at a steady rate when the link is established. The red error indicator lights if a communication error is detected. Check that the cables are the correct type, plugged in correctly, and are not faulty.
The following Remote Expanders are compatible with the Avantis SLink port:
|
Remote Expander |
Sample Rate |
Protocol |
|
GX4816 |
96kHz |
GX |
|
DX32, DX168, DX164-W, DX012, DX Hub |
96kHz |
DX |
|
AR2412, AR84 |
48kHz |
dSnake |
|
AB168 |
48kHz |
dSnake |
iFor more information on our range of I/O expanders please visit www.allen-heath.com/everything-io/
 2.5 Power Down
The system must be powered down correctly. Navigate to Utility / Utility / System and touch the Power Down button. Confirm the action and then turn the mixer and expanders off using their power switches.
iIf the system is not powered down correctly there is a possibility recent changes may be lost.
iIf the system was not powered down as described above, then a “Not Shut Down Correctly” screen appears the next time the system is turned on.
|
Avantis Getting Started Guide |
6 |
AP11558 Issue 3 |
 Loading…

Summary of Content for Allen & Heath Avantis Console Getting Started Guide PDF
Getting Started Guide
Avantis
Before starting please check www.allen-heath.com for the latest
Avantis firmware and documentation.
AP11558 Issue 5
Avantis Getting Started Guide 2 AP11558 Issue 5
Limited One Year Manufacturers Warranty
Allen & Heath warrants the Allen &Heath -branded hardware product and accessories contained in the
original packaging («Allen & Heath Product) against defects in materials and workmanship when used
in accordance with Allen & Heath’s user manuals, technical specifications and other Allen & Heath
product published guidelines for a period of ONE (1) YEAR from the date of original purchase by the
end-user purchaser («Warranty Period»).
This warranty does not apply to any non-Allen & Heath branded hardware products or any software,
even if packaged or sold with Allen & Heath hardware.
Please refer to the licensing agreement accompanying the software for details of your rights with respect
to the use of software/firmware (EULA).
Details of the EULA, warranty policy and other useful information can be found on the Allen & Heath
website: www.allen-heath.com/legal.
Repair or replacement under the terms of the warranty does not provide right to extension or renewal of
the warranty period. Repair or direct replacement of the product under the terms of this warranty may be
fulfilled with functionally equivalent service exchange units.
This warranty is not transferable. This warranty will be the purchasers sole and exclusive remedy and
neither Allen & Heath nor its approved service centres shall be liable for any incidental or consequential
damages or breach of any express or implied warranty of this product.
Conditions Of Warranty
The equipment has not been subject to misuse either intended or accidental, neglect, or alteration other
than as described in the User Guide or Service Manual, or approved by Allen & Heath. The warranty
does not cover fader wear and tear.
Any necessary adjustment, alteration or repair has been carried out by an authorised Allen & Heath
distributor or agent.
The defective unit is to be returned carriage prepaid to the place of purchase, an authorised Allen &
Heath distributor or agent with proof of purchase. Please discuss this with the distributor or the agent
before shipping. Units returned should be packed in the original carton to avoid transit damage.
DISCLAIMER: Allen & Heath shall not be liable for the loss of any saved/stored data in products that are
either repaired or replaced.
Check with your Allen & Heath distributor or agent for any additional warranty information which may
apply. If further assistance is required please contact Allen & Heath Ltd.
Avantis Getting Started Guide 3 AP11558 Issue 5
IMPORTANT — Read before starting
Safety instructions
Before starting, read the Important Safety Instructions printed on the sheet supplied with the equipment.
For your own safety and that of the operator, technical crew and performers, follow all instructions and heed
all warnings printed on the sheet and on the equipment panels.
System operating firmware
The function of Avantis is determined by the firmware (operating software) that runs it. Firmware is updated
regularly as new features are added and improvements made.
Check www.allen-heath.com for the latest version of Avantis firmware.
Software licence agreement
By using this Allen & Heath product and the software within it you agree to be bound by the terms of the
relevant End User Licence Agreement (EULA), a copy of which can be found at www.allen-
heath.com/legal. You agree to be bound by the terms of the EULA by installing, copying, or using the
software.
Further information
Please refer to the Allen & Heath website for further information, knowledgebase and technical support. For more information on Avantis setup and mixing functions please refer to the Avantis Firmware Reference
Guide available for download at www.allen-heath.com.
Check for the latest version of this Getting Started Guide.
You can also join our Allen & Heath Digital Community to share knowledge and information with other
Avantis users.
General precautions
Protect the equipment from damage through liquid or dust contamination. Cover the mixer when it
is not being used for a long period.
If the equipment has been stored in sub-zero temperatures allow time for it to reach normal
operating temperature before use at the venue. Recommended operating temperature is 0 to 40
degrees Celsius.
Avoid using the equipment in extreme heat and direct sunlight. Make sure the ventilation slots and
fans underneath the unit are not obstructed and that there is adequate air movement around the
equipment.
Clean the equipment with a soft brush and dry lint-free cloth. Do not use chemicals, abrasives or
solvents. Do not use lubricant or contact cleaner on the faders.
It is recommended that servicing is carried out only by an authorised Allen & Heath agent. Contact
details for your local distributor can be found on the Allen & Heath website. Allen & Heath do not
accept liability for damage caused by maintenance, repair or modification by unauthorised
personnel.
To prevent damage to the controls and cosmetics, avoid placing heavy objects on the mixer,
scratching the mixer or touchscreen with sharp objects, or rough handling and vibration.
Register your product
Register your product online at www.allen-heath.com/register.
Avantis Getting Started Guide 4 AP11558 Issue 5
Packed items
Check you have received the following:
Avantis Digital Mixing Console
Getting Started Guide AP11558
Safety Sheet
IEC mains lead
Contents
IMPORTANT — Read before starting ……………………………………………………………………………………………… 3
Safety instructions ………………………………………………………………………………………………………………… 3
System operating firmware …………………………………………………………………………………………………….. 3
Software licence agreement …………………………………………………………………………………………………… 3
Further information ……………………………………………………………………………………………………………….. 3
General precautions ……………………………………………………………………………………………………………… 3
Register your product ……………………………………………………………………………………………………………. 3
Packed items ……………………………………………………………………………………………………………………………… 4
Contents ……………………………………………………………………………………………………………………………………. 4
1. Introduction…………………………………………………………………………………………………………………….. 5
2. Connect and power up …………………………………………………………………………………………………….. 6
2.1 Power Up ……………………………………………………………………………………………………………….. 6
2.2 Calibrate Touch Faders …………………………………………………………………………………………….. 6
2.3 Recall a Template Show …………………………………………………………………………………………… 6
2.4 Expander Connection ………………………………………………………………………………………………. 6
2.5 Power Down ……………………………………………………………………………………………………………. 6
3. dPack Activation ……………………………………………………………………………………………………………… 7
4. Rear Panel ……………………………………………………………………………………………………………………… 8
5. Front Panel …………………………………………………………………………………………………………………….. 9
6. Top Panel …………………………………………………………………………………………………………………….. 10
6.1 Fader strip …………………………………………………………………………………………………………….. 11
6.2 Screens ………………………………………………………………………………………………………………… 12
7. Mix Basics …………………………………………………………………………………………………………………….. 13
7.1 Working with the Main Mix ………………………………………………………………………………………. 13
7.2 Working with Sends Master Mix Mode ……………………………………………………………………. 14
7.3 Working with Sends Channel Mix Mode …………………………………………………………………. 14
7.4 Assigning and un-assigning a channel to a Mix, Group or DCA ……………………………………. 15
7.5 Changing between Sends on Faders and Sends on Rotaries ………………………………………. 15
7.6 Setting Pre/Post fader send status ……………………………………………………………………………. 15
8. Dimensions …………………………………………………………………………………………………………………… 16
9. Flightcase Information ……………………………………………………………………………………………………. 17
10. Expanders, I/O Cards and Controllers ………………………………………………………………………………. 18
10.1 Expanders …………………………………………………………………………………………………………….. 18
10.2 I/O Cards ………………………………………………………………………………………………………………. 18
10.3 Remote Controllers ………………………………………………………………………………………………… 18
10.4 Personal Monitor Mixing …………………………………………………………………………………………. 18
11. Technical Specifications …………………………………………………………………………………………………. 19
Avantis Getting Started Guide 5 AP11558 Issue 5
1.Introduction
Avantis is a 64 channel 96kHz digital mixing console providing a powerful solution for any live sound
application. Pristine audio quality is delivered at ultra-low latency, and comprehensive signal routing and
processing options are easily accessible via the dual 15.6 Full HD touchscreens.
Avantis is DEEP Processing ready, enabling the use of our world-class hardware emulations with no added
latency or need for additional hardware. Visit allen-heath.com/avantis for more information.
The integrated SLink port offers PlugnPlay operation with the GX, DX, AB and AR ranges of remote I/O
expanders plus the DX Hub remote hub. Additionally, SLink can be used for digital split applications with a
second Avantis mixer or a dLive/SQ system.
Compatibility with the ME Personal Monitoring System allows performers to take control of their own
monitor mixes via the ME-1 and ME-500 personal mixers.
Digital audio networking cards are available to enable integration with other digital audio systems via
protocols such as gigaACE, Dante, MADI and Waves SoundGrid.
Avantis features at a glance:
XCVI FPGA core
96kHz sample rate, 96bit accumulator
Ultra-low latency (0.7ms)
64 Input Channels with full processing (filter, gate, PEQ, compressor, inserts)
42 configurable Mix outputs
DEEP Processing — embedded channel plugins
12 RackFX with dedicated returns
16 DCAs
Twin 15.6 Full HD capacitive touchscreens
Fully assignable layout
144 fader strips (24 faders, 6 layers) with optional dedicated master section
SLink port for connection to Remote I/O Expanders and the ME Personal Monitoring System
12 analogue XLR Inputs / 12 analogue XLR Outputs
1 Stereo AES In / 2 Stereo AES Out
2 I/O Ports, both capable of 128×128 operation at 96kHz
Gesture control pinch, swipe, drag n drop
User configurable rotary controls
24 assignable SoftKeys
Comprehensive multipoint metering with peak detection
USB stereo recording and playback
BNC Word Clock
Refer to the Allen & Heath website to learn more about Avantis.
Avantis Getting Started Guide 6 AP11558 Issue 5
2.Connect and power up
2.1Power Up
Ensure the rocker switch is in the off position. Plug in the IEC mains power lead supplied with the mixer. If required, secure the lead by hooking it into the plastic clip using a T20 Torx to remove the fixing screw.
Power on the mixer using the rocker switch.
2.2Calibrate Touch Faders
On first use, calibrate the fader touch sensitivity by going to Utility / Utility / Calibration and select
Calibrate Fader Touch, select Left Bank and All and follow the onscreen instructions ensuring you only
touch the first fader in the bank when instructed.
Once completed, repeat this process for the Right Bank, ensuring you only touch the first fader in the bank
when instructed.
2.3Recall a Template Show
Avantis has a fully configurable audio architecture, control layout, and socket patching. We have provided a set of Template Shows to give a choice of classic console formats to load as a quick starting point with a
familiar architecture and logical layout.
To load a Template Show go to the Utility / Memory / Show Manager screen, select one of the available
Template Shows, touch Recall and confirm.
Recalling a Show overwrites all the system settings including the bus configuration,
control layout, current parameters, all Scenes, and Library presets. If you want to
save the current settings then first Store them as a User Show.
For more information please refer to the Avantis Firmware Reference Guide available
for download at www.allen-heath.com.
2.4Expander Connection
Plug a touring grade CAT5e (or higher specification) cable up to 100m long between the Remote Expander
and SLink port.
Refer to www.allen-heath.com for cable requirements, recommendations, and a list
of CAT5 cables available to order.
Switch on the Remote Expander. The SLink port Lnk/Err indicators flash at a steady rate when the link is
established. The red error indicator lights if a communication error is detected. Check that the cables are
the correct type, plugged in correctly, and are not faulty.
The following Remote Expanders are compatible with the Avantis SLink port:
Remote Expander Sample Rate Protocol
GX4816 96kHz GX
DX32, DX168, DX164-W, DX012, DX Hub 96kHz DX
AR2412, AR84 48kHz dSnake
AB168 48kHz dSnake
For more information on our range of I/O expanders please visit
www.allen-heath.com/everything-io/
2.5Power Down
The system must be powered down correctly. Navigate to Utility / Status / Homescreen and touch the
Power Down button. Confirm the action and then turn the mixer and expanders off using their power
switches.
If the system is not powered down correctly there is a possibility recent changes may be lost.
If the system was not powered down as described above, then a Not Shut Down Correctly screen appears the next time the system is turned on.
Avantis Getting Started Guide 7 AP11558 Issue 5
3.dPack Activation
Upgrade your console with Avantis dPack to access additional dLive processing including Dyn8 (up to 16
instances), DEEP Compressors and the Dual Stage Valve Preamp, plus more models as theyre added.
If you purchased your Avantis with the dPack upgrade, you should have received a 12-character voucher
code. To redeem your dPack voucher code and activate your upgrade:
1. Visit allen-heath.com/avantis and ensure you have downloaded and installed the latest firmware
on your Avantis
2. Go to shop.allen-heath.com, select the Avantis dPack product and add it to your Shopping Cart.
3. Click on Shopping Cart in the top right menu bar
4. Click on Use Coupon Code and enter your code as supplied then click Apply Coupon
5. Click Checkout and complete the checkout process.
6. Once youve completed checkout, go to your Account Downloads page My Account >
Downloads
7. Follow the instructions on screen to generate your dPack upgrade key and enter it in to your
console.
If you did not purchase your Avantis with the dPack upgrade, but wish to purchase dPack for your mixer,
please visit shop.allen-heath.com
If you experience any difficulties, please contact Allen & Heath Shop Support by emailing
shopsupport@allen-heath.com
Avantis Getting Started Guide 8 AP11558 Issue 5
4.Rear Panel
1.Mic/Line Inputs 12x recallable preamps for balanced or unbalanced microphone and line level signals.
Gain, Pad and 48V are digitally controlled within the preamp. The PP indicator lights up when phantom power voltage is detected at the socket, whether internally or externally
sourced.
Any socket can be patched to any Input Channel using the I/O or Processing / Preamp
screen.
2.Digital Inputs Stereo AES3 input (32kHz 192kHz sampling rate). Sample Rate Conversion can be
bypassed.
Any socket can be patched to any Input Channel using the I/O or Processing / Preamp
screen.
3.USB 2.0 Socket Insert a compatible USB device to store and recall show files, update the firmware or to
perform USB playback and recording.
4.Power Supply Mains IEC socket, fuse and On/Off rocker switch. A plastic P-clip cable clamp is
provided to secure the mains cable. Slot the cable in, or lock it in place using a star Torx T20 screwdriver to refit the clamp around the cable.
Heed the safety warnings printed on the panel.
5.Kensington Lock A slot for fitting standard Kensington anti-theft security devices.
6.Digital Outputs Stereo AES3 outputs (44.1kHz, 48kHz or 96kHz switchable).
Signals can be patched to any output socket using the I/O screen.
7.Status Indicators Power ON indicator. The Ready indicator illuminates when the output sockets are ready
to pass audio after power up. The Audio Sync Locked indicator illuminates when a valid
clock source is present.
8.Word Clock I/O BNC connector for syncing from an external audio clock or providing a clock to other
devices. In and Out LEDs indicate the current mode.
2 3 4 1
10 12 11 9 8 7 6 5
Avantis Getting Started Guide 9 AP11558 Issue 5
9.Line Outputs 12x line level, balanced XLR outputs. Nominal level +4dBu. The outputs are relay
protected to prevent power on or off thumps. Signals can be patched to any output
socket using the I/O screen.
10.SLink For connection to remote I/O expanders and/or the ME Personal Monitoring System.
See the Expander Connection section of this document for more information on
supported devices.
11.Network 2 RJ45 Gigabit Ethernet ports. Connect a laptop or a wireless router to use with Avantis
Editor or iOS apps. All devices on the network must have compatible IP addresses.
The default settings are:
DHCP Enabled: Off
IP Address: 192.168.1.80
Subnet Mask: 255.255.255.0
Gateway: 192.168.1.254
12.I/O Ports 2 Audio interface ports, both capable of 128×128 channels. Fit one of the option cards
available for system expansion, digital mic splitting, recording or distributed audio
networking. Refer to www.allen-heath.com for a list of available option cards. Use the
I/O screen to patch signals from or to the I/O Ports.
5.Front Panel
1.USB 3.0 Socket Insert a compatible USB device to store and recall show files, update the firmware or to
perform USB playback and recording.
2.Headphone Sockets Standard 1/4 and 1/8 headphone jack sockets are located under the armrest.
2 1
Avantis Getting Started Guide 10 AP11558 Issue 5
6.Top Panel
1.Touchscreens 15.6 capacitive touchscreens. See the Screens section for more information.
2.Screen Controls Control of user-assignable parameters. See the Screens section for more information.
3.Pre / Safes / Freeze Toggle channel status:
Pre/Post — Hold down Pre, and touch a channel Name Block to toggle the
sends to the active Mix between pre or post fade. Toggle all channels pre/post
by touching a master mix Name Block. Assignments and pre/post settings for
the selected channel or Mix are also available in the Routing screen.
Safes — Hold down Safes and press a Name Block to make the channel safe
from Scene recall. To make only a selection of parameters safe, use the
Scenes / Global Safes screen.
Freeze in Layers — Hold down Freeze in Layers and press a Name Block to
lock a channel in place across all layers.
4.SoftKeys 24 user-assignable keys. Assign functions using the Setup / Control / SoftKeys screen.
5.Copy / Paste / Reset Copy Hold down Copy and press:
o A channel Name Block to copy the entire channel processing.
o Any highlighted area of the touchscreen to copy the settings of a
single Processing Block.
o A strip Mix key to copy the mix assignments and send levels.
Paste — Hold down Paste and press a Name Block, Mix key or a highlighted
area of the touchscreen to paste copied settings.
Reset — Hold down Reset and press a Name Block, Mix key or a highlighted
area of the touchscreen to reset the related parameters to factory default. Hold
down Reset and nudge a fader up or down to quickly set it to 0dB or off.
1
7
1
7
2
3
2
4
5
6
8
4
6
4
10
9
11
7a
Avantis Getting Started Guide 11 AP11558 Issue 5
6.Layers Navigate 6 layers of fader strips per bank. The red Pk (peak) indicators illuminate when
any channel in the associated layer is within 3dB of clipping, so you can monitor signal
activity across the layers. Banks can be linked using the Setup / Control / Surface
Prefs screen the Layer keys will affect both Banks when Link is active.
7.Fader Banks Two 12 channel fader banks provide control of Input channels, FX returns, Mix masters,
DCAs, engineers Wedge / IEM monitor, or MIDI. Read the Fader Strip section below for
further information. A dedicated master section (7a) can be enabled for persistent visibility of 4 channel strips. The strip layout is user assignable and stored in Scenes.
Use the Setup / Control / Strip Assign screen to edit the strip layout and enable the
master section.
8.Strip Rotary Mode Select the function of the fader strip rotary encoders. The fader strip rotaries can control
preamp Gain, Pan, Sends to the active Mix, and 3 assignable functions. Assign these
using the Setup / Control / Preferences screen. The colour of the rotary LED matches
the active function e.g. red for Gain, yellow for Pan; it follows the colour of the active
Mix when in Sends mode. The Sends function puts control of send levels to the active
Mix on the strip rotaries, while the faders control the channel levels to the main mix (i.e. it temporarily disables sends on faders)
9.Assign Hold down Assign, and press a strip Mix key to toggle routing assignment on or off.
See later in this guide for more information.
10.GEQ on Faders Touch and hold GEQ, and touch a mix channel Name Block to present the GEQ on the
faders. Frequency values are shown on the Name Blocks and the meters show RTA
activity of each frequency band and peak band indication. While active, touch GEQ again to toggle between high and low frequencies. The mix master fader is presented
on the right-hand strip while in this mode.
11.Armrest Illumination Change illumination settings in Setup / Control / Dimmer.
6.1Fader strip
Strip Rotaries Their function is selected using the strip rotary mode
keys described earlier in this chapter. The rotaries can control preamp
Gain/Trim, Pan, Sends to the active Mix, and 3 user-assignable
functions. The colour of the rotary LED matches the active function e.g.
red for Gain, yellow for Pan; it follows the colour of the active Mix when
in Sends mode. The value is displayed in the Name Block display
Mute Turns off the channel signal. Affects the main mix, pre-fade and
post-fade sends. The switch illuminates when the signal is muted.
Muted Illuminates when the channel is muted by a DCA or Mute
Group.
Mix Puts the send levels and assignments of the associated channel
or masters onto the fader strips (or strip rotaries when rotaries are in
Sends mode).
The currently active Mix is displayed in the top right corner of the
Processing screen. Press an active Mix key to return to the main mix.
PAFL Sends the channel signal PFL (pre-fade listen) or AFL (after-fade
listen) to the headphones and monitoring system. Preferences for the
PAFL system are set using the Setup / Audio / PAFL screen.
Avantis Getting Started Guide 12 AP11558 Issue 5
6.2Screens
Avantis has two screens, both showing channel processing, bank overview, system setup & status, memory
management menus and more.
Each touchscreen integrates with a trio of user-configurable soft rotaries in addition to a Touch & Turn rotary
control for quick and easy parameter modification.
Both screens operate independently of each other so, for example, two discrete channel processing
screens can be visible simultaneously, or processing can be visible on one screen with IO patching visible
on the other.
1.Screen Mode Select the Screen Mode:
Bank Overview of all channels assigned to the fader Bank and Layer. Bank
view can be used with the Copy, Paste, Reset, Freeze and Listen keys.
In Bank view, touching any processing block for example, a PEQ, Gate or
Comp curve opens the relevant Processing page.
Processing Access channel processing for the currently selected channel
Routing Access routing and assignments for the selected channel
I/O Patch system inputs and outputs by tapping on crosspoints
Ganging Create up to 16 gang groups to link selected parameters across
multiple channels
Meters Access to Input, FX and Mix meters, RTA spectrogram and 4 user-
customisable meter views.
FX Configure the 12 RackFX units.
Scenes Access to the Scene Manager, Global Safes and other scene tools
Setup Access to mixer strip layout, mixer bus configuration, softkey
configuration, stereo input configuration, network settings, audio settings, user
profiles, mixer preferences, illumination and more.
Utility Access the Show Manager, Library Manager, firmware update, system
diagnostics, fader, and screen calibration, and MIDI options.
2.Menu Tabs Menu options for the selected Screen Mode.
3.Status Bar Icons are visible when certain modes of operation are active (Virtual Soundcheck, Solo
In Place, Scene Update Auto Tracking, etc) or if a system error is logged.
4.Headphone Volume Rotary volume control for the headphone output (right-hand side only)
5.View Press to toggle between the configured views for the Soft Rotaries.
6.Soft Rotaries Three soft rotaries for the control of user-assignable parameters.
2 4
5
6
7
9
1
8
3
Main Screen Area
Avantis Getting Started Guide 13 AP11558 Issue 5
7.Touch & Turn Control Touch a parameter or setting in the main screen area and adjust its value with the rotary
control. The currently selected parameter is highlighted in orange.
8.Name Block Displays name, colour, channel type, number, metering information, and other channel
parameters.
Touch a channel Name Block to select a channel for use with the Processing and Routing screens. When selected, the channel strip
will be shaded green.
Each bank can have one channel selected. The currently selected
channel is displayed in the top left corner of the screen.
9.Swipe Menu / Meters Multi-page menu showing either PAFL meters or additional contextual options. Swipe
the menu, or touch the circular page indicators, to scroll between the pages.
Listen Hold down Listen and touch any highlighted area of the
screen to listen to that point in the signal path of the selected channel
Options Hold down Options and touch any highlighted area of
the screen to configure it.
Name / dB / IO Tap to toggle between Name Block modes to
display the user-defined channel Name, the fader position in dB,
or the I/O socket identifier of the patched source/destination.
Help Touch to display contextual help for the active screen
PAFL Meter
7.Mix Basics
7.1Working with the Main Mix
Press a Main Mix (e.g. LR) master strip Mix key.
This is the default mixing mode:
The Input strips present the channel faders.
The Master strips present the master mix faders.
IP
1
IP
2 IP
3 IP
4 LR
Channel levels
to LR Mix
Avantis Getting Started Guide 14 AP11558 Issue 5
7.2Working with Sends Master Mix Mode
7.3Working with Sends Channel Mix Mode
Press a Mix master strip Mix key (e.g. AUX 1)
Use this to work with Aux and FX sends.
The Input strips present all the send levels to
the active Mix.
The Master strips present the master mix
faders.
Press an Input Channel strip Mix key (e.g. IP 1)
Use this to work with Aux and FX sends.
The Input strips remain as Channel Faders.
The Master strips present all sends from the Input
channel.
IP
1
IP
2 IP
3 IP
4 AUX
1
Channel Sends
to AUX1
Send levels from IP 1
To LR
IP
1 AUX
1
AUX
2
FX
1
FX
2
Avantis Getting Started Guide 15 AP11558 Issue 5
7.4Assigning and un-assigning a channel to a Mix, Group or DCA
Press the Mix key on a Mix, Group or DCA
master strip (e.g. DCA 1)
Hold down the Assign key and press channel
Mix keys to assign or unassign them from the
active mix. Assignment status is displayed in
the Name Block.
You can quickly set all assignments to a Mix to On or Off by pressing the Mix button on a Mix Master, and
then pressing and holding the Assign button while pressing the Mix button the Mix Master.
7.5Changing between Sends on Faders and Sends on Rotaries
The default mixing mode is Sends on Faders.
To activate Sends on Rotaries, press the Sends button in the
Strip Rotary Mode section.
In Sends on Rotaries mode, Strip Rotaries are used to
control send levels to the active mix, with the channel
faders remaining as level controls to the Main Mix.
7.6Setting Pre/Post fader send status
Hold down the Pre key and touch channel
Name Blocks to toggle each source pre or
post fader. Current Pre/Post status is
displayed on the lower part of the Name
Block.
You can quickly set all assignments pre or post fader by touching the Mix Master Name Block while
holding Pre.
Send to AUX 1
To LR
DCA 1
IP 1
IP
1 LR AUX
1
Avantis Getting Started Guide 16 AP11558 Issue 5
8.Dimensions
917
2 5 4
750
6 2
7
2 6 9
2 4
7
Avantis Getting Started Guide 17 AP11558 Issue 5
9.Flightcase Information
Do not remove the 4 rubber feet
from the mixer.
Leave adequate space for
ventilation ( ) and connections
at the front, rear, and sides of the
mixer.
Leave adequate space for (1)
ventilation ( ) and (2) USB /
headphone connections at front
of mixer.
Leave adequate space for (1)
ventilation ( ) and (2) audio /
power connections at rear of
mixer.
1
2
2
1
Leave adequate space for
ventilation ( ) at the sides of the
mixer in the area indicated.
Avantis Getting Started Guide 18 AP11558 Issue 5
10.Expanders, I/O Cards and Controllers
Avantis is compatible with a wide range of expanders, I/O cards, personal monitor mixers and remote
controllers. Please visit the Allen & Heath website, or contact your local distributor, for more information.
10.1Expanders
Sample Rate Inputs Outputs Connection
GX4816 96kHz 48 16 SLink port, gigaACE card
DX32 96kHz Up to 32 SLink port, DX Link, DX Hub
DX168 96kHz 16 8 SLink port, DX Link, DX Hub
DX164-W 96kHz 16 4 SLink port, DX Link, DX Hub
DX012 96kHz 0 12 SLink port, DX Link, DX Hub
DT168 96kHz/48kHz 16 8 Dante card
DT164-W 96kHz/48kHz 16 4 Dante Card
DX Hub 96kHz 128 128 SLink port, gigaACE card
AR2412 48kHz 24 12 SLink port
AR84 48kHz 8 4 Slink port
AB168 48kHz 16 8 Slink port
Visit allen-heath.com/everything-io/ for more information on our range of expansion options.
10.2I/O Cards
Dante 64×64 64×64 96kHz/48kHz Dante audio networking card
Dante 128×128 128×128 96kHz/48kHz Dante audio networking card
gigaACE 128×128 96kHz dLive/Avantis point-to-point connections
fibreACE 128×128 96kHz gigaACE via multimode fibre optic
DX Link 128×128 96kHz DX expander interface
Waves3 128×128 96kHz/48kHz Waves SoundGrid audio networking card
superMADI 128×128 96kHz/48kHz Optical and coaxial MADI interfacing
AES 4i6o 4×6 96/88/48/44.1kHz 4 in, 6 out, AES3 audio interface
AES 10o 0x10 96/88/48/44.1kHz 0 in, 10 out, AES3 audio interface
AES 6i4o 6×4 96/88/48/44.1kHz 6 in, 4 out, AES3 audio interface
AES 2i8o 2×8 96/88/48/44.1kHz 2 in, 8 out, AES3 audio interface
10.3Remote Controllers
IP1 Wallmount remote controller with 1 dual-function rotary encoder
IP6 Remote controller with 6 push-and-turn rotary encoders
IP8 Remote controller with 8 motorised faders
GPIO General purpose I/O interface for remote control
10.4Personal Monitor Mixing
ME-500 16 Channel Personal Mixer
ME-1 40 Source Personal Mixer
ME-U Personal Monitor Mixer Hub
Visit allen-heath.com/me/ for more information.
Avantis Getting Started Guide 19 AP11558 Issue 5
11.Technical Specifications
Inputs System
Mic/Line XLR Inputs Balanced XLR, +48V phantom power Measured balanced XLR In to XLR Out, 22-40kHz, minimum Gain, Pad out
Mic/Line Preamp Fully recallable Dynamic Range 109dB
Input Sensitivity -60 to +15dBu System Signal to Noise -92dB
Analogue Gain +5 to +60dB, 1dB steps Frequency Response 20Hz — 30kHz (+0/-0.8dB)
Pad -20dB Active PAD THD+N (analogue in to out)
0.0015% @ +16dBu output, 1kHz 0dB gain
Maximum Input Level +30dBu (PAD in) Headroom +18dB
Input Impedance >4k (Pad out), >10k (Pad in) Internal operating Level 0dBu
Mic EIN -127dB with 150 source dBFS Alignment +18dBu = 0dBFS (+22dBu at XLR output)
Phantom Power indication
Per socket, internal or external phantom power sensing, triggered at +24V
Meter Calibration 0dB meter = -18dBFS (+4dBu at XLR out)
Meter Peak indication -3dBFS (+19dBu at XLR out)
Digital Inputs AES3 2 Ch XLR, 2.5Vpp balanced terminated 110
Sampling Rate 96kHz
SRC range 24 bit, 32k — 192kHz, with bypass option
Outputs
Analogue XLR Outputs Balanced, Relay protected
Output Impedance <75
Nominal Output +4dBu = 0dB meter reading
Maximum Output Level +22dBu
Residual Output Noise -95dBu (muted, 22-22kHz) Operating Temperature Range
0 deg C to 40 deg C 32 deg F to 104 deg F
-90dBu (muted, 0-80kHz) Mains Power 100-240V AC, 50-60Hz, 150W max
Digital Outputs AES3 2 Ch XLR, 2.5Vpp balanced terminated 110
96kHz sampling rate, globally switchable to 48kHz, 44.1kHz
USB Audio playback Mono/stereo .WAV files, (16/24bit, 44.1/48/96kHz) MP3 files FLAC files
USB Audio recording Stereo .WAV files, (24bit 96kHz)
Dimensions and Weights
Unboxed Boxed
Width x Depth x Height 917 x 627 x 269 mm 36.1″ x 24.7″ x 10.6″
Width x Depth x Height 1100 x 850 x 425 mm 43.3″ x 33.5″ x 16.7″
Weight 26kg 57.4lbs
Weight 34kg 75lbs
Avantis Getting Started Guide 20 AP11558 Issue 5
Manualsnet FAQs
If you want to find out how the Avantis Allen & Heath works, you can view and download the Allen & Heath Avantis Console Getting Started Guide on the Manualsnet website.
Yes, we have the Getting Started Guide for Allen & Heath Avantis as well as other Allen & Heath manuals. All you need to do is to use our search bar and find the user manual that you are looking for.
The Getting Started Guide should include all the details that are needed to use a Allen & Heath Avantis. Full manuals and user guide PDFs can be downloaded from Manualsnet.com.
The best way to navigate the Allen & Heath Avantis Console Getting Started Guide is by checking the Table of Contents at the top of the page where available. This allows you to navigate a manual by jumping to the section you are looking for.
This Allen & Heath Avantis Console Getting Started Guide consists of sections like Table of Contents, to name a few. For easier navigation, use the Table of Contents in the upper left corner.
You can download Allen & Heath Avantis Console Getting Started Guide free of charge simply by clicking the “download” button in the upper right corner of any manuals page. This feature allows you to download any manual in a couple of seconds and is generally in PDF format. You can also save a manual for later by adding it to your saved documents in the user profile.
To be able to print Allen & Heath Avantis Console Getting Started Guide, simply download the document to your computer. Once downloaded, open the PDF file and print the Allen & Heath Avantis Console Getting Started Guide as you would any other document. This can usually be achieved by clicking on “File” and then “Print” from the menu bar.