-
Contents
-
Table of Contents
-
Troubleshooting
-
Bookmarks
Quick Links
Related Manuals for Alesis Trigger iO
Summary of Contents for Alesis Trigger iO
-
Page 1
REFERENCE MANUAL… -
Page 3: Table Of Contents
RETURN TO DEFAULT VALUE … 18 FACTORY RESET … 18 MIDI SYSEX TRANSFERS … 18 USING THE TRIGGER IO WITH BFD LITE … 19 DEFAULT SETTINGS FOR THE TRIGGER IO… 20 ADJUSTING KIT PERFORMANCE IN BFD LITE… 20 CUSTOMIZING YOUR KIT IN BFD LITE… 21 OTHER APPLICATIONS OF THE TRIGGER IO…
-
Page 5: Introduction
Your feedback helps us, too. When you let us know the types of music products you use and dream about, you help us bring you cutting-edge products like the Trigger IO. The Trigger IO…
-
Page 6: Front Panel Overview
AC adapter to power the unit. USB Port – The USB port is used to transmit MIDI data between the Trigger IO and a computer. If you are using the USB port, there will be no need for the power adapter to be plugged in – The Trigger IO will be powered through the USB port.
-
Page 7: Hookup Diagram
TS cables to connect them to the Trigger IO. If using dual-zone triggers, please make sure that you are using TRS cables. Using TS cables to connect dual-zone triggers to the Trigger IO will only allow you to use the primary zone (tip) of the drum. NARROW…
-
Page 8: Computer Installation
USB device. How to connect and use the Trigger IO with a software application: Connect a USB cord from the USB port of the Trigger IO to the USB port of your computer. When the Trigger IO is connected to a computer using a USB cord, the computer’s USB bus will provide power to the unit.
-
Page 9
Please make sure that your soundcard’s latency (or buffer) is set to a low number so when you hit the pads on the Trigger IO, your computer will output the sound promptly. Latency and buffering is usually adjusted in your software’s Preferences menu. -
Page 10: Getting Started — Using Kits
When in Kit selection function, you can use the value up/down buttons to select different kits. The Trigger IO will automatically load the kits as you step through the values. There are 21 available kits that you can load, modify and store.
-
Page 11: Program Change Messages
For example, if your Trigger IO is controlling a rock drum kit in your DAW or on an external hardware device, using a Program Change command allows you to easily switch to an electronic kit.
-
Page 12: Editing Kits
EDITING KITS Editing kits is a powerful tool for customizing your Trigger IO. When you are editing a kit, the information displayed on the screen will always reflect the parameters of the last trigger in the current kit that was hit. To modify the parameters of a certain trigger, just strike it –…
-
Page 13: Trigger Midi Note
MIDI Note Numbers to trigger the desired sounds. Please note: When using a hi-hat pedal with the Trigger IO, Input 3 (labeled Hi-Hat) can transmit two different MIDI Note Numbers, depending on the position of the pedal.
-
Page 14: Setting Global Parameters
SETTING GLOBAL PARAMETERS Global parameters change how your connected triggers function in a general way. The following parameters will affect each trigger input on a global level, regardless of the specific kit that you are working with. So even if you change kits, the settings for each trigger input will remain in place as long as they are saved.
-
Page 15: Gain
GAIN The Gain parameter describes how a trigger will react when it is engaged. With a high gain setting, you don’t have to engage the trigger very hard to achieve a maximum velocity output. On the other hand, with a low gain setting it is harder to achieve a maximum velocity output when engaging the trigger hard.
-
Page 16: Velocity Curve
VELOCITY CURVE A Velocity Curve describes how a trigger’s velocity varies with the force applied. This is a useful feature when trying to customize how a trigger responds to your playing style. Different Velocity Curves will have different input/output ratios associated with them and will cause a different response, so take some time to get familiar will how the Velocity Curve setting corresponds to the way you like to play.
-
Page 17: Threshold
THRESHOLD False triggering occurs when a trigger is engaged accidentally, often due to stage vibrations. The Threshold setting helps prevent false triggering. The threshold value is the minimum velocity needed to be registered for the trigger to output data. This Threshold should be set based on your playing style.
-
Page 18: X-Talk (Crosstalk)
You may also wish to use the X-Talk function as well. The X-Talk feature describes the degree to which the Trigger IO will attempt to reject crosstalk. Positive X-Talk values attempt to intelligently suppress crosstalk. If a very loud and a very soft trigger arrive almost simultaneously, the X-Talk function will assume that the soft trigger is crosstalk and will suppress it from sounding.
-
Page 19: Retrigger
For example, if a trigger is engaged twice within a 50 ms time period and the Retrigger setting is 100ms, the Trigger IO will ignore the second sound and only output the first. On the other hand, if the Retrigger setting is set to 25ms, the Trigger IO will output both sounds, since the second sound occurs beyond the Retrigger boundary.
-
Page 20: Trigger Type
TRIGGER TYPE You can select the type of trigger you are using in the Trigger Type function. There are many different types of triggers available on the market today – too many to cover individually in this manual – but most triggers can be grouped into the categories outlined below.
-
Page 21: Using Hi-Hat Pedals
“CAL” displayed on the screen. You can adjust the calibration manually or you can let the Trigger IO adjust it automatically by leaving the pedal in the up position and pressing up value and down value buttons simultaneously. This will automatically calibrate the pedal.
-
Page 22: Sending Messages
Trigger IO. • To request a Data Dump from the Trigger IO, please make sure that the Trigger IO is connected via MIDI or USB to your SysEx application. Then press function up and value up simultaneously. This will transfer all the presets from the Trigger IO to your SysEx application.
-
Page 23: Using The Trigger Io With Bfd Lite
You can trigger these drum samples directly from the Trigger IO with the authentic feel and control of playing a real drum kit. Once you have installed the BFD Lite software, you can begin playing immediately.
-
Page 24: Default Settings For The Trigger Io
NOTE #38 *When using a hi-hat foot pedal connected to the Hi-hat footswitch input on the Trigger IO, the Hi-hat input will alternate between sending MIDI Note # 44 and MIDI Note # 42, depending on the position of the Hi-hat footswitch.
-
Page 25: Customizing Your Kit In Bfd Lite
CUSTOMIZING YOUR KIT IN BFD LITE You may wish to customize your kit to your desired playing style. You can quickly switch the sounds that the pads are triggering by changing the MIDI Note Number that the pad is assigned to. To do so, make sure that you are in Pad Note Number function by pressing the function button until the LED next to Pad Note Number is lit.
-
Page 26: Other Applications Of The Trigger Io
MIDI Note Numbers correspond to musical pitches (as shown on a piano keyboard). The musical pitches are followed by their corresponding MIDI Note Numbers in ( ). You can use this chart to help you quickly setup the Trigger IO for working with pitched content.
-
Page 27: Upgrading Software
UPGRADING SOFTWARE As we continue to improve the Trigger IO to provide you the best user experience, software upgrades may be released at www.alesis.com. Please check regularly for software upgrades and latest news from Alesis. UPGRADE PROCEDURE To see if your software version is the most current version available, you will need to compare it to the upgrade version, if one is available, on our website.
-
Page 28: Trigger Io Kit Presets
TRIGGER IO KIT PRESETS KIT#0 – BFD LITE CHANNEL MIDI NOTE # ZONE CHANNEL RING MIDI NOTE # KIT#1 – GM DRUMS CHANNEL MIDI NOTE # ZONE CHANNEL RING MIDI NOTE # KIT#2 – GM PERC CHANNEL MIDI NOTE #…
-
Page 29: Trigger Io Default Global Parameters
ZONE CHANNEL RING MIDI NOTE # TRIGGER IO DEFAULT GLOBAL PARAMETERS The following are the factory default global parameters for the Trigger IO: VEL CURVE THRESHOLD RETRIGGER TRIGGER TYPE HI HAT FOOT SWITCH – CHANNEL 1, MIDI NOTE # 35 (INPUT3) CLOSED HI HAT NOTE # 42 HI HAT FOOT SWITCH –…
-
Page 30: Troubleshooting
Threshold is too low. CAUSE If you are using USB power, check that the power switch on the back of the Trigger IO is in the OUT (USB) position. If you are using an AC adapter, check that the adapter is plugged into a live power outlet and that the power switch is in the IN (AC) position.
-
Page 31
When using MIDI-OX for MIDI-OX output buffer is not SysEx transfers, the set correctly. Trigger IO’s presets become messed up. My trigger isn’t sending The Trigger Type is set any Note On messages, incorrectly. even though I’m hitting it. -
Page 32
SYMPTOM Improper open and Variable-position pedal not closed hi-hat sounds calibrated properly. My hi-hat pedal is Pedal’s threshold is set too sending information even low. when I am not using it. CAUSE If your hardware or software program does not completely open or close your hi-hat sounds as it should as your foot moves through the range of your variable-position hi-hat pedal, the TriggerIO probably needs… -
Page 33: Midi Implementation
MIDI IMPLEMENTATION Function Basic Default Channel Changed Note Number: Note On Velocity Note Off After Touch Pitch Bend Control Ctrl # 4 Change Ctrl # 64 Program Change System Exclusive Song Pos System Song Sel Common Tune System Clock Realtime Commands Local On/Off All Notes Off…
-
Page 35
MANUAL REVISION B… -
Page 36
www.alesis.com…
Перед вами файл pdf, где представлена инструкция (руководство) на русском для ALESIS Trigger I O. Вы можете скачать ее либо изучить в онлайн режиме.
Подробные сведения об инструкции:
Устройство из раздела: MIDI интерфейс
Бренд-производитель: ALESIS
Наименование модели: ALESIS Trigger I O
Язык: Руководство на русском языке
Файл: pdf
Размер файла: 3,42 MB
Скачать инструкцию к HARPER HDT2-1110
ЗАГРУЗИТЬ
Просмотр инструкции онлайн
![]() …То, что мне удалось урвать из семейного бюджета приличную сумму денег и купить себе электронные барабаны, я до сих пор списываю на счастливое стечение обстоятельств — звезда моих очей, дражайшая супруга моя, в тот день пребывала в особенно благодушном настроении — ей удалось приобрести 3 пары туфель по 15 евро, 5 футболок по цене 4х, упаковку из 300 свечек с запахом персика за 3,5 (Боже, этот аромат преследовал меня на протяжении нескольких лет, пока я тайком не выкинул последние штук 30), комплект белья с Мумми-тролями, две чашки с ними же, коврик в ванну со скидкой 75%, овцу на колесиках, небольшой верстак (5 евро, не могла не взять) и еще примерно полвагона всяких подобных необходимых вещей. Шоппинг явно задался, супруга цвела улыбками и весело мурлыкала. Поэтому когда в музыкальном магазине славного финского города Миккели мы набрели на прекрасную в своей недосягаемости для меня барабанную установку с приличной скидкой, она неожиданно сказала: «А давай ее купим!». Не веря своему счастью, я дрожащими руками отсчитал деньги…
…То, что мне удалось урвать из семейного бюджета приличную сумму денег и купить себе электронные барабаны, я до сих пор списываю на счастливое стечение обстоятельств — звезда моих очей, дражайшая супруга моя, в тот день пребывала в особенно благодушном настроении — ей удалось приобрести 3 пары туфель по 15 евро, 5 футболок по цене 4х, упаковку из 300 свечек с запахом персика за 3,5 (Боже, этот аромат преследовал меня на протяжении нескольких лет, пока я тайком не выкинул последние штук 30), комплект белья с Мумми-тролями, две чашки с ними же, коврик в ванну со скидкой 75%, овцу на колесиках, небольшой верстак (5 евро, не могла не взять) и еще примерно полвагона всяких подобных необходимых вещей. Шоппинг явно задался, супруга цвела улыбками и весело мурлыкала. Поэтому когда в музыкальном магазине славного финского города Миккели мы набрели на прекрасную в своей недосягаемости для меня барабанную установку с приличной скидкой, она неожиданно сказала: «А давай ее купим!». Не веря своему счастью, я дрожащими руками отсчитал деньги…
…Если бы я сейчас, в данный момент, допустим, предложил бы купить электронные ударные, думаю, мне бы вручили молоток и гвозди — с призывом, если охота постучать, починить пару кухонных табуреток — «а то они так шатаются, что скоро вообще развалятся, и будут твои дети на полу сидеть, и простудятся, и не надо было семью заводить, если в игрушки не наигрался, а сапоги — это не игрушки, они для жизни нужны были, и юбка, и вторая тоже». И тут бы я развернулся, и прошагал бы к себе в комнату, и достал бы из самой тайной заначки 6000 рублей (да, всё, что осталось, сапоги нынче недешевы), и купил бы себе Alesis Trigger IO.
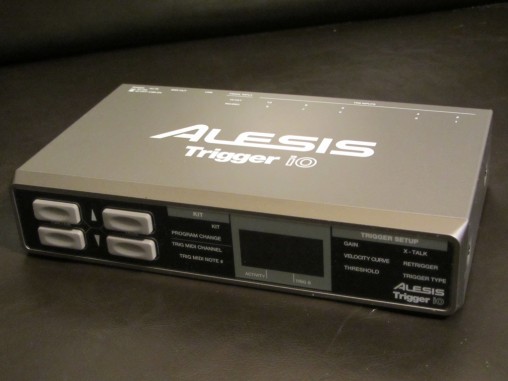
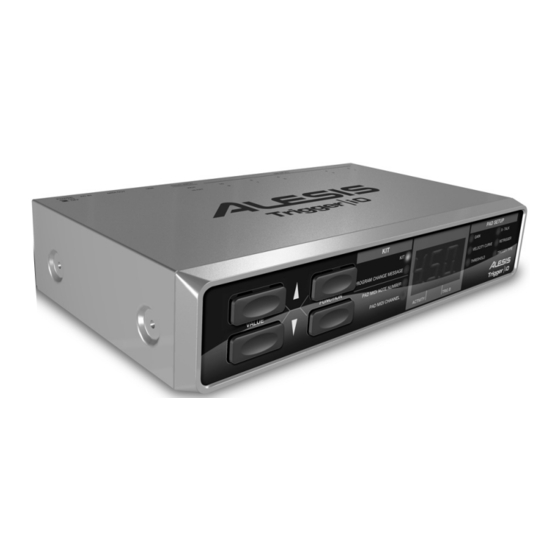
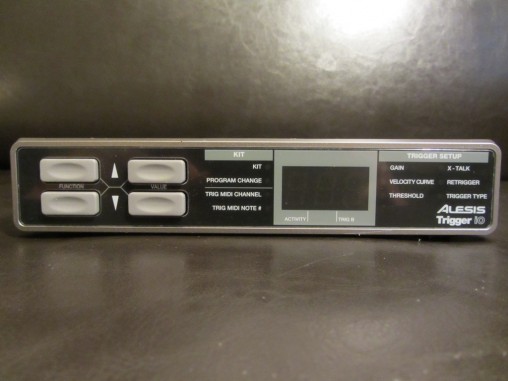
Вот так стильно выглядит Alesis Trigger IO
А потом, создав маскировочное ограждение из табуреток, я вооружился бы:
- компьютером (раз вы читаете эти строки, то он у вас наверняка тоже есть);
- электронными пэдами, которые, кстати, можно изготовить своими руками: вот так можно сделать барабан, а вот так можно сделать тарелку;
- барабанным MIDI контроллером Alesis Trigger IO, речь о котором как раз и пойдет ниже, и все равно сделал бы себе ударную установку
 .
.
Итак, я не призываю всех отказаться от фабричной продукции, но хочу поделиться тем, как можно заполучить электронные ударные, не растратив семейный бюджет.
Что такое Alesis Trigger IO?
Это барабанный модуль, который не имеет своего голоса (т.е. к нему нельзя подключить наушники). Он преобразует сигналы, полученные от барабанных пэдов, в MIDI-команды и передает их на компьютер. Компьютер, в свою очередь, принимает эти команды и играет каким-нибудь из программных синтезаторов (например, Addictive Drums).
О подключении барабанного модуля к компьютеру я рассказывал в этой статье.
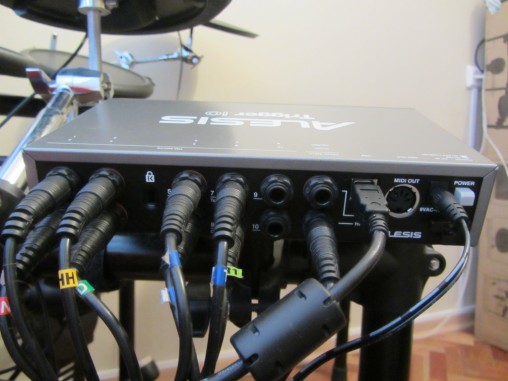
Alesis Trigger IO имеет на своем борту 12 двухзонных входов, что теоретически позволяет подключить 24 барабана и/или тарелки, что, согласитесь, весьма не мало. При этом цена 5-6 тыс. рублей (а б/у-шный можно найти вообще за 2-3 тыс.) позволяет назвать его самым дешевым на рынке полноценным модулем для электронных барабанов, пусть и немым. Ну, если не принимать в расчет китайские поделки с 6 входами и нулем настроек.
Давайте теперь посмотрим на этот бюджетный агрегат в деле. Тестировать, как обычно, будем на моем подопытном Roland TD-3.
Установка
Alesis Trigger IO поставляется вот в такой коробочке:
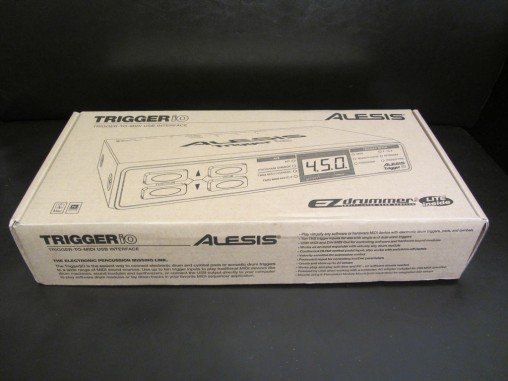
Вот в такой аккуратной коробке поставляется Alesis Trigger IO
В комплекте идет руководство по эксплуатации, лицензионный ключ для программы Easy Drummer, блок питания и USB-кабель для подключения к компьютеру.
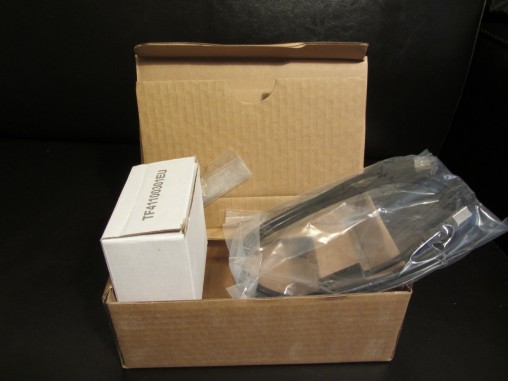
Открыв коробку, увидим: блок питания, USB-кабель, модуль, инструкцию и лицензионный ключ к Easy Drummer
Для крепления модуля к раме используется специальный держатель (маунтер). Обыскав коробку, я его не нашел.
Опросив всех домашних, я выяснил что они его не брали и не ели, и вообще потрясены таким подозрительным к себе отношением . Но что-то «такое маленькое железное, да?» само случайно упало за пианино. Отодвинуть пианино — достать из-под него носок, пятьдесят рублей мелочью, галстук, засохший кусок сыра (а сыр ли это?), 7-8 лего-деталей, 5 фантиков и кучу неидентифицируемых арт-объектов, в которые мои дети в итоге превращают любые игрушки, попавшиеся на их пути — заодно протереть пол под пианино — достать из ведра с водой заботливо помещенный туда галстук — повесить галстук на батарею — вытереть с пола разлитую из ведра воду — вывернуть мешок с мусором, чтобы найти «вот такую зеленую пластмассовую железячку, ты папа зачем ее выкинул, выыыыкииинууууул!!!» — собрать мусор — задвинуть пианино — быстро отодвинуть пианино — достать из-под него орущего младенца — подержать младенческий палец под холодной водой — утешить младенца шоколадом — задвинуть пианино на место — оттереть шоколад от ковра — на это ушло каких-то полчаса.
И вот я снова стою над коробкой. Импровизированная физзарядка помогла — взглянув в очередной раз на коробку, вижу:
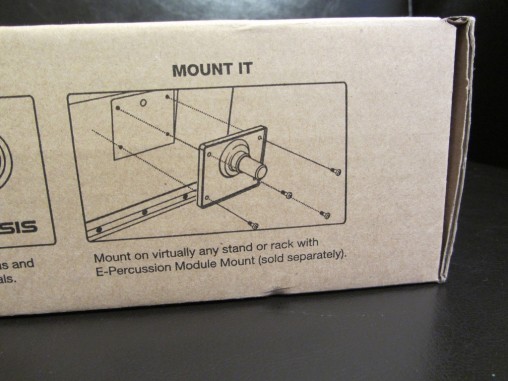
Держатель для модуля нужно покупать отдельно
Sold Separately, ну т.е., мол, спасибо за покупку, но за эту замечательную хреновину вам придется заплатить отдельно.. Ладно, откручиваю этот маунтер со своего Roland TD-3 и обнаруживаю, что он как раз подходит на Alesis Trigger IO. Ура, ну хоть какая-то унификация присутствует. Устанавливаю модуль на раму и подключаю все пэды.
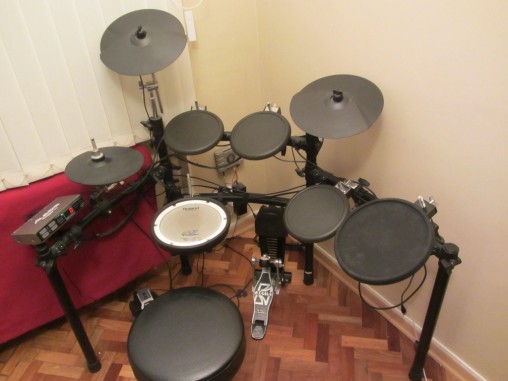
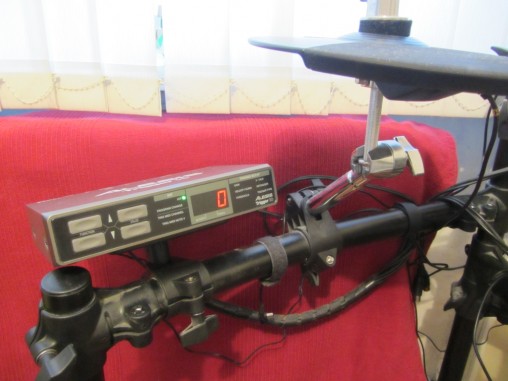
И вот Alesis Trigger IO занял своё место на раме и готов к работе
Кнопки и настройки
Управление модулем очень простое. Кнопками Function выбирается нужный параметр, а кнопками Value устанавливается его значение. Для сохранения настроек нужно перейти при помощи кнопок Function в параметр Kit.
Теперь можно испытать Alesis Trigger IO в деле
Основные настройки:
- Pad MIDI note number — MIDI нота, которая будет выдаваться модулем при ударе в определенный пэд;
- Pad MIDI channel — MIDI канал в который будет выдаться MIDI-нота (по умолчанию 10 канал);
- Gane — чувствительность;
- Velocity curve — громкость и кривая затухания;
- Threshold — порог срабатывания;
- Xtalk — влияние одного пэда на другие (для исключения ложных срабатываний/потерь ударов);
- Retrigger — насколько быстрые удары будет улавливать модуль (чтобы можно было играть дробь, но чтобы случайные касания пластика не воспринимались как удар);
- Trigger Type — какой тип пэда можно подключить.
Возможные типы триггеров:
- P — Пьезо (обычный датчик);
- S — swetch (кнопка).
Типы комбинаций триггеров:
- PS — Piezo/Swetch, например пэды барабанов Roland PD-8 или тарелок Roland CY-8;
- PP — Piezo/Piezo, например пэд барабана Roland PDX-8;
- SS — две кнопки, например, два фут-контроллера.
Подключение к компьютеру
Т.к. в комплекте прилагается USB-кабель для подключения, я не стал заморачиваться с MIDI, и сразу подключил Alesis Trigger IO по USB.
Для работы нам понадобится ASIO-драйвер, секвенсор (у меня Samplitude) и VST-плагин (у меня Addictive Drums). Устройство сразу определилось. Приятно то, что Alesis Trigger IO может работать без блока питания, питаясь по USB от компьютера.
В настойках MIDI я поставил Alesis Trigger IO как входное устройство, Addictive Drums как выходное, и можно играть! Kit 1 по умолчанию настроен на стандат GM (General MIDI), поэтому в настройках Addictive Drums (MIDI Map) нужно тоже выбрать «GM». Дополнительно придется настраивать глушение тарелок, положения педали хай-хэта и несколько других изначально неверно воспроизводимых звуков.
Загадочный вход №4
Как геймеры во времена ZX-Spectrum спорили о существовании планеты Raxxla в игре Elita, как безусые юнцы дрожащими пальцами пытаются нащупать в районе клитора подружки загадочную точку G, так на форумах Алесис народ ищет тот самый загадочный вход №4, который откроет все тайны мирозданья. В Элиту я до конца не доиграл, по поводу таинственной точки моя жена так и не пришла к однозначному мнению, но что касается входа номер 4, тут я полностью уверен — ОН ЕСТЬ! ![]() .
.
12 входов позволяют подключить до 24 однозонных пэдов
Увы, никакой тайны там НЕТ. Это единственный вход, который жестко запрограммирован на работу PS (изменить нельзя). Он способен полноценно работать с тарелками типа Roland CY-8, отрабатывая ОДНОВРЕМЕННО 2 звука: центр и край, центр и бэл, ну или любую другую комбинацию. Ключевое слово здесь ОДНОВРЕМЕННО! При этом модуль реагирует на силу удара по краю. Остальные входы могут лишь повесить на режим S функцию глушения (см. видео).
Работа с разными пэдами
В процессе испытания я протестировал все имеющиеся у меня пэды барабанов и тарелок. Все они так или иначе работали, кто-то лучше, кто-то хуже.
Видео:
Педаль хай-хэта
Я попробовал подключить 2 разных контроллера хайхэта:
- стандартный контроллер от Alesis (от модуля DM10),
- контроллер от Roland FD-8.
Оба работают хорошо. По умолчанию Alesis Trigger IO выдает 2 положения контроллера (две MIDI ноты) — открыт/закрыт, но работа через VST-плагин Addictive Drums позволяет получать промежуточные значения, а также эффект хэт-сплэш.
Общее впечатление
Модуль безголосый, соответственно, звучать ударная установка будет исключительно так, как будет звучать ваш VST-плагин. Скажу сразу: чтобы зазвучало более-менее прилично, я потратил 2 вечера на настройку и эксперименты. Результат вы можете наблюдать на видео.
Основная проблема, с которой я столкнулся — это то, что увеличение чувствительности сильно гасит динамику. Например, чтобы все 16ые в сбивке на хэте уверенно пробивались, пришлось задрать чувствительность, при этом слабые и сильные удары стали очень похожи друг на друга по громкости. Наверняка можно сделать лучше, поиграв еще настройками Retrigger, но потратить еще несколько вечеров на это я не решился. А в остальном — все неплохо. Проблем с xTalk (взаимное влияние пэдов друг на друга) я не обнаружил, модуль четко «угадывает», куда именно был удар.
На моем далеко не самом современном двухъядерном 2Гц компьютере с 4Гб ОЗУ на борту сильных тормозов не замечено. Управление простое, выглядит симпатично. Ну а что еще вы хотите от барабанного модуля за 120 евро?
Модуль Alesis Trigger IO стоит недорого, но повозиться с настройками придется
Выводы
Alesis Trigger IO выпускается достаточно давно, все детские болячки производителем устранены, и устройство не должно принести неприятных сюрпризов. Цена ~5000 рублей делает Alesis Trigger IO одним из самым бюджетных барабанных модулей на рынке.
Могу рекомендовать этот модуль:
- тем, кто хочет собрать электронную ударную установку своими руками;
- тем, кому нужен бюджетный модуль для стационарной/студийной работы;
- тем, кому нужно подключить пару пэдов и пару тарелок дома для тренировки;
- тем кто не боится настроек.
Я бы НЕ рекомендовал этот модуль для концертов (это лично мое мнение, но я считаю, что компьютер и концерт — плохо совместимые вещи). Не рекомендую новичкам, которые хотят «включить и играть». Так не получится, вам в любом случае придется разобраться с типами триггеров, MIDI-нотами/каналами, работой с секвенсером и VST-плагинами.
Андрей Громов /12.05.2013/
-
Страница 1
REFERENCE MANUAL[…]
-
Страница 2
[…]
-
Страница 3
TABLE OF CONTENTS INTRODUCTION ……………………………………………………………. 1 REGISTRATION …………………………………………………………….. 1 FRONT PANEL OVERVIEW ……………………………………………. 2 REAR PANEL OVERVIEW ……………………………………………… 2 HOOKUP[…]
-
Страница 4
[…]
-
Страница 5
1 INTRODUCTION Congratulations on your pu rchase of the Alesis Trigger IO USB/MIDI Percussion Interface. With the Alesis Trigger IO, you can connect your favorit e acoustic drum triggers or electronic percussion p ads and control sounds o n external drum machines, modules or softw are devices. Here at Al esis, we take pride in building electronic i[…]
-
Страница 6
2 FRONT PANEL OVERVIEW 1. FUNCTION UP/DOWN – These buttons are used to select thr ough different functions on the Trigger IO. 2. VALUE UP/DOWN – These buttons are used to cycle through kits and parameters for the different functions. 3. FUNCTION LEDs – Each function on the Trigger IO is paired with a corresponding LED on the panel. These LED […]
-
Страница 7
3 HOOKUP DIAGRAM Please study the following di agram to connect your Trigger IO. POWER ADAPTER (OPTIONAL) AT TACH 2 BUTTON FOOT SWITCH HERE AT TACH A DDITION AL TR IGGERS HERE TO EXTERNAL MIDI MODULE TO COMPUTER 1. Before tu rning on the T rigger IO, co nnect all trig gers, pads, foot switches, MID I devices and external modu les as show n above. I[…]
-
Страница 8
4 COMPUTER INSTALLATION The Trigger IO is a Plug-and-Play device s o there is no driver or speci al software installation required. When the Trigger I O is connected to a comp uter, it will automatically be recognized a s an available USB devic e. How to connect and use the T rigger IO with a software application: 1. Connect a USB cord from the USB[…]
-
Страница 9
5 ! A Note About Audio Latency Latency describes the time that it takes for your sound card to respond to a c ommand. In ot her words, this is the time that it takes for your computer to proces s incoming da ta (for example, MIDI Note events) and output a so und. The lower your lat ency is, the faster your computer will respon d to commands and out[…]
-
Страница 10
6 GETTING STARTED – USING KITS What is a Kit? A Kit, also known as a Preset, is a collection of parameters which describe different configurations of the Trigger IO. Thes e parameters include the MIDI Note Numbers assigne d to tr iggers, MIDI Channel s on which the triggers are sending informati on, as well as associated Program Cha nge messages.[…]
-
Страница 11
7 PROGRAM CHANGE MESSAGES A Program Change , often r eferred to as a P atch Change , i s a MIDI message use d for sending data to devices to ca use them to change to a new program. This allows you to tell a hardware or software dev ice which soun d to play. For example, if your Trigger IO is controlling a rock drum kit in your DAW or on an external[…]
-
Страница 12
8 EDITING KITS Editing kits is a powerful tool for customiz ing your Trigger IO. When you are editing a kit, the information displayed on the screen will always refl ect the parameters of the last trigger in the current kit that was hi t. To modify the parameters of a certain trigger, just strike it – this is often refe rred to as “chase m ode?[…]
-
Страница 13
9 TRIGGER MIDI NOTE This is the MIDI Note Number that the particular pad or trigger is sending. For example, if you are controlling a n exte rnal drum machine, there are unique MIDI Note Numbers associated wi th the kick drum, snare drum or h i-hat. If the initia l configuration does n ot trigger the sounds yo u want, change the MIDI Note Numb ers […]
-
Страница 14
10 SETTING GLOBAL PARAMETERS Global parameters change how your connected trigger s function in a gener al way. The following parameters wi ll affect each trigger input o n a global level, regardle ss of the specific kit that you are working with. So even if you change kits, the settings for each trigger input will remain in place as lo ng as they a[…]
-
Страница 15
11 GAIN The Gain parameter describes how a trigge r will react when it is engag ed. With a high gain setting, you don’t have to engage th e trigger very hard to achieve a maximum velocity output. On the other ha nd, with a lo w gain setting it is harder to achieve a maximum veloc ity output when engagin g the trigger hard. If you find it very eas[…]
-
Страница 16
12 VELOCITY CURVE A Velocity Curve describ es how a trigger’s veloci ty varies with the force applied. This is a useful feature when trying to customize how a trigger resp onds to your playing style. Different Velocity Curve s will have different input/output ratios associated with them and will cause a dif ferent response, so take some time to g[…]
-
Страница 17
13 THRESHOLD False triggering occurs when a trigger is engaged accide ntally, often due to stage vibrations. The Threshold setting helps pre v ent false triggering. The threshol d value is the minimum velocity needed to be regi ster ed for the trigger to output data. This Threshold should be set based on your pla ying style. Try different Thr eshol[…]
-
Страница 18
14 X-TALK (CROSSTALK) Crosstalk occurs when trigger s in close prox imity are falsely triggere d. For example, when using acoustic drum triggers mou nted on a drum kit, hitting a certain drum may cause the dru ms to vibrate and ot her triggers to trigger as well. There is no d efinitive way to deal with crosstalk. Setting a combinati on of Gain and[…]
-
Страница 19
15 RETRIGGER The Retrigger setting describes how the Trigger IO interpr ets and outputs successive triggers from the same input. The Retrigge r setting is the minimum amount of time between successive triggers need ed to generate a second s ound. For example, if a trigger is engage d t wice withi n a 50 ms time period and the Retrigger setting is 1[…]
-
Страница 20
16 TRIGGER TYPE You can select the type of trigger you are us in g in the Trigger Type function. There are many different types of triggers available on the market today – too many to cover individually in this manua l – but most tri ggers can be grouped into the categories outlined below. Please consult you trigger devices’ do cu mentation t[…]
-
Страница 21
17 USING HI-HAT PEDALS When using a hi-hat pedal connected to t he Hi-hat pedal input on the Trigger IO, the Hi-hat input (Input 3) c an send two differe nt MIDI Notes, depending o n the position o f the Hi-hat pedal. In effect, this allows you to assig n two different notes for the hi-hat input (Input 3) and with th e pedal toggl e between w hich […]
-
Страница 22
18 SENDING MESSAGES In addition to global p arameters, there are four special functio ns available on the Trigger IO: the All Notes Off message, the Return to Default Value message, and the Factory Reset message, as well as MIDI SysEx messages. You might rarely have to use these, but it is good to k eep in min d t hat they are available in c ase yo[…]
-
Страница 23
19 USING THE TRIGGER IO WITH BF D LITE The Trigger IO comes bundled with the BF D Lite software drum m odule, which includes high-qual ity drum samples. You can trigger these drum samp les directly from the Trigger IO with the authentic feel and control of playi ng a real drum kit. Once you have installe d the BFD Lite software, you can begin pl ay[…]
-
Страница 24
20 DEFAULT SETTINGS FOR THE TRIGGER IO The Trigger IO has been initialized with a pr eset which aut omatically map s the first 8 trigger inputs to drum sounds in the BFD Lite softwar e. You can access this configuration by selectin g preset 0 on the Trigger IO while in Kit function. The configuration of the kit is labe led on the back of the Tri gg[…]
-
Страница 25
21 CUSTOMIZING YOUR KIT IN BFD LITE You may wish to custom ize your kit to your desir ed playing styl e. You can qu ickly switch the sounds that the pads are trig gering by ch anging the MIDI No te Number that the pad is assigned to. To do so, make sure that you are in Pad Note Num ber function by pressing th e function button until the LED n ext t[…]
-
Страница 26
22 OTHER APPLICATIONS OF THE TRIGG ER IO The Trigger IO can be used for a variety of applications w hich use MIDI as their control protocol. For example, the Trigger IO can be used to trigger melodic s ounds on sound modul es or VST instruments. This means th at you can play pitch ed instruments, such as vibrapho nes, marimbas, xyl ophone, even a p[…]
-
Страница 27
23 UPGRADING SOFTWARE As we continue to im prove the Trigger IO t o provide you the best user experience, software upgrades may be r eleased at www.alesis.com . Please check regular ly for software upgrades and latest news from Ale sis. UPGRADE PROCEDURE To see if your software version is the most current version avail able, you will nee d to compa[…]
-
Страница 28
24 TRIGGER IO KIT PRESETS KIT#0 – BFD LITE INPUT 1 2 3 4 5 6 7 8 9 10 CHANNEL 10 10 10 10 10 10 10 10 10 10 ZONE TIP MIDI NOTE # 35 38 46 55 47 45 43 49 55 53 CHANNEL 10 10 10 10 10 10 10 10 10 10 RING MIDI NOTE # 35 40 48 54 35 35 35 58 35 35 HI HAT FOOT SWITCH – CHANNE L 10, MIDI NOTE # 44 (INPUT3) CLOSED HI HAT NOTE # 42 KIT#1 – GM DRUMS I[…]
-
Страница 29
25 KIT#3 – CHROMATIC 1 INPUT 1 2 3 4 5 6 7 8 9 10 CHANNEL 1 1 1 1 1 1 1 1 1 1 TIP MIDI NOTE # 60 62 64 66 68 70 72 74 76 78 CHANNEL 1 1 1 1 1 1 1 1 1 1 ZONE RING MIDI NOTE # 61 63 65 67 69 71 73 75 77 79 HI HAT FOOT SWITCH – CHANNE L 1, MIDI NOTE # 35 (INPUT3) CLOSED HI HAT NOTE # 42 KIT#4 – CHROMATIC 2 INPUT 1 2 3 4 5 6 7 8 9 10 CHANNEL 1 1 […]
-
Страница 30
26 TROUBLESHOOTING SYMPTOM CAUSE SOLUTION The display does not light up. No power. If you are using USB power, c heck that th e power switch on the back of t he Trigger IO is in the OUT (USB) position. If you are using an AC adapter, check that th e adapter is plugged into a live power outl et and that t he power switch is in the IN (AC) position. […]
-
Страница 31
27 SYMPTOM CAUSE SOLUTION Notes sustain continuously. Stuck notes due to incomplete MIDI d ata. Send an All Notes Off message by pressing function up and function down buttons simultaneously. Pad triggers when another pad is h it. Gain, X-Talk and Threshold not set correctly. Please refer to “Setting Global Parameters” sec tion to fine tune the[…]
-
Страница 32
28 SYMPTOM CAUSE SOLUTION Improper open and closed hi-hat sounds Variable-position pedal no t calibrated properly. If your hardware or software program does not completely open or close your hi-hat sounds as it should as your foot moves through the range of your v ariable-position hi-hat pedal, the Tri ggerIO probably needs to be calibra ted to m a[…]
-
Страница 33
29 MIDI IMPLEMENTATION Function Transmitted Recognized Remarks Basic Channel Default Changed 1-16 1-16 X X Memorized Adjustable by us er per pad Note Number: 0-127 X Velocity Note On Note Off 1-127 0 X X After Touch X X Pitch Bend X X Control Change Ctrl # 4 Ctrl # 64 0-127 0-127 X X Foot Pedal CC messa ge Sustain Pedal C C message Program Change 0[…]
-
Страница 34
[…]
-
Страница 35
MANUAL REVISION B[…]
-
Страница 36
www.alesis.com[…]

249 ₽
Инструкция (руководство пользователя) на Перкуссионный USB/MIDI интерфейс Alesis Trigger IO
Артикул: alesis-trigger-io
Категория: Alesis
-
Описание
-
Детали
Описание
Инструкцию по эксплуатации Alesis Trigger IO на русском языке можно будет скачать в личном кабинете после оформления и оплаты заказа.
Детали
| Формат файла |
|
|---|---|
| Размер инструкции в кб |
3583 |