-
Страница 1
Instruction Manual[…]
-
Страница 2
Dear Alesis Custon€r: You have. iust purchased a_ powedul rnusic.producliodcomprehensive eledronic percussion system. ll9″:9 l?k».?.Aoment to glancellrough this manual to gaiir a better undeFtanding of the ope;ation ot the HR-16, the MMT-8, and the HR-16:8. The operating systems of the Atesls HR-16 and the HR.16|B are tdentlcat wlth a f[…]
-
Страница 3
ALESIS HR.16 HIGH SAMPLE RATE DRUM MACHINE TABLEOFCONTENTS INTRODUCTION HR.16 QUICK PATTERN MODE RECOFIDINIGAPATTERN 16 BIT DIGITAL PACE 3 4 6 6 8 10 12 OUAITIZE… STEP EDIT MODE…….. schGh/bDE SONGEDrr. coPY……… zuTTON DYNAM|CS…………………………. START/STOP F@TSWITCH ……. …,…., z o[…]
-
Страница 4
L R OUT tN SM/ @r tN w rc ff/OFF oulrur2 tAE mP Lf,tot l __ @rt ttrr4t I rtr | E@@ @@@: @EE ::_) ldY,Ll l «-,’ I -w t,* | _E tMt IMI EEtIEtr] TIEEEE ll tr | | lt ll ll ttttttitlttttl t|||l ftft.[…]
-
Страница 5
INTRODUCTION The Alesis HR-16 (High sample Rate / 15 bit drum machine) iq a user {riendly,.yet exlremely powerful MlDl drum sequencer / sound goneralor. The sound. generation caoabiliti-es ot the HR-16 include 16 independent drum «voicss»‘ 6ach of which can bo assigned to any ons of 49 digital samples (47 in the HR-1 6:B) , and can b[…]
-
Страница 6
HR.16 QUICK BASIC SETUP ‘1. Connecl output 1 (either left , right or both) to a suitable monitorinq system. I outDut 2 is connscted, the desired drum pads must be assigned ro oup»i i rii»iltrl i,,rix;iffi». (See MlX.) ?: .9llg1ltt: YlDt tN iack of rhe.HR-16 ro the MtDl OUT jack of a sequencer, an external orum pao conlrolsr, or […]
-
Страница 7
PATTERN MODE When power is tirst turnsd on, the HR-l6 will be in SONG or PATT mode (SONG or PATT LED lii), depending on ths mode that was selectod before power was turned off. The song oi pattern number will also b€ the same as whsn power was turned oft. PATT (pattern) Button Press ttib PATT’button lo 6nter pattsrn mode. PATT LED will light.[…]
-
Страница 8
RECORDING A PATTern (Atso see LENGTH and QUANT|ZE) ]o-reco! ou.lg1teLll press and hold rhe RECORD button, and rhen prsss the pLAy button. Ihe HR-16 wirr immsdiat.ry bsgin praying back any existing drums in ths currontrv s9l99lgq pattsrn from rhe bsginning, and will iad any new drums piayed on rhe Uutton. o’, via MlDlto the pattern. The pLAy an[…]
-
Страница 9
When a new lenqth is ontsred (RECORD), any drum evsnts lhat were beyond lh€..new sel lenoth will be;rased. It the new length is bnger than ths prev’ous one’ tns aoolpnal ffiih «;iil 6elirf»J «ittr «ir»n»e. lf it is disired to iEmove or add lsngth 1o ihe beginning of i oitr»rn, first set the desired len[…]
-
Страница 10
01 01 TOM 1 is now complet^ely_eJased from pattern 1. When erasing a single drum, it is not nec€ssary to press RECORD. In SOI’IG mods, holding the ERASE button will cause tha following display: Pressing the RECORD button will erase the currently selected song number. When erasing a pattern or song, the erass is not executed until RECORD is o[…]
-
Страница 11
singls steps of the current quanlize value (you cannot movg backwards). lf quantize is set to i/16, each step will equal 24196 (lf swing is set to 50%). lf a drum existed on a slep in between the current quantize value, it will play as it is stepped pasl, but tho display will not stop on that drum. The lower.display shows the drum thai was triggere[…]
-
Страница 12
T-hE fhst lins ol.ths display. is now.showing the.current song number being played, and lhe curent bear number of the pattsrn being prayed. The iecond rine of ihe disoiau ii showing rh.e_ srep number and ihe patrern iisigneo ro ttre iief triid ptir»riiiiiri» momenr.. wh_en rhe song adv_al:i.s.io_rhe next sGp, rhe disprav ifli[ «no*lr[…]
-
Страница 13
To del€te a slep lrom a song, press and hold lhe DELETE button, and the display will read: STEP 01 PATT 27 To complete the del€tion, the RECORD button must be pressed while still holding the DELETE button. This shifts all patlerns after the bisplayed step down on6 step. After all steps have b€€n deleted, the display will show step 1 being E[…]
-
Страница 14
COPY Copylng a PATTern to ltsetf Tho copy button is used to- app€nd a patt€rn or song to anoth€r panern or song. lt only functions while th€ coPY button is held down. -lf the copy button is releised (eilher befor€ or afler the copy is execut€d), th€ previous mode will show up on the display, and copy mode is €xited. When in PATT mod[…]
-
Страница 15
Th€ display is now waiting for a second drum pad lo b€ Press€d (pressing RECORD at lhis point will .do nothing). lf for example, TOM 1 was pressed, lhe display would read: COPY FROM PATT CLS HAT > IOM 1 The display of th€ s€cond pad pressed remains underlined, indicaling that it can still be changed by selecting anolh€r drum pad. As […]
-
Страница 16
OFFSET The oFFSET button is used to add or subtract a number of crock purses (384th notes) to a drum or pattern. lf OFFSET is held down, th6 display wili show:’ The keypad can be used to enter a two-diglt number (OO_99), or the +/_ arrow buftons can be used lo increment or decrehent the amount. ‘The range oi the offset,is 199. Entoring a […]
-
Страница 17
shown beside it. O swing = 5A% = no swing. Tho range of the swing is determined by tho current quantize value. The swing amount will only effect newly recorded drum events, like in quantize. The swing amounls are shown below: OUANT SWING PERCENTAGE 1t6 1ts 1t12 1r24 1/32 1/48 1t64 OFF oo -24 oo-12 00-08 00-06 00-04 00-02 00-01 00 50.0 — 68.8 % 50.0[…]
-
Страница 18
MODE / DATA ENTRY BUTTONS All MoDE buttons function as on/off switch€s. This means that they are pressed once to ent€r lhe mode, and pressed again to exit the mode. When any of th6 modes hav€ b€en entered, the associat€d LED will b€ lit. For slmpli6ity, any lim€ PATTERN or SONG is pressed, any previously sel€cted mode will be urneO […]
-
Страница 19
The TUNE mode is used to sslect the desired pitch for each drum pad, and the click. When it is pressed, ils LED will llght, and the display will read: This display app€ars when TUNE is first pressed, and the display was not pr€viously in MIX or VOICE mode for a drum pad. lt is used to s€l€ct the pitch of the click (melronom€). The pitch a[…]
-
Страница 20
The +/- arrows and the SELECT slider can be used to selecr a new lempo, or a lTlL.:T_T-:lrer€d dir€crty wilh rhre€ digirs on -rh keypad. Tempo «hiig;, ;r; €TTecilv€ as soon as th€y are €ntered, and th€ REcoRD bunon does not hav; to be presssd. In SONG mod€, the t€mpo is displayed as a relative amount of change from th€ pr[…]
-
Страница 21
shown beside it. O swing = 5O’/o = no swing. The range ot lh€ swing is determined by the current quantize value. The swing amount will only eff€ct newly recorded drum events, liko in quantize. The swing amounts are shown below: OUANT SWING PERCENTAGE 1t8 00 — 16 1t6 1t12 1t16 1t24 1€,2 00 -24 00-12 00-08 00-06 00-04 00-02 00-01 00 50.0 -[…]
-
Страница 22
MODE / DATA ENTRY BUTTONS All MoDE bunons funcrion as on/otf swilches. This means that th6y are pressed once to enl€r the mode, and pr€ss€d again ro €xit rhe mod€. when any of th6 modes !ql1!g.n ent€red, lhe associared LED wiil b€ tir. For simpti6iry, an/ iir» PATTERN or SONG is pressed, any previousty selected mod€ will be tuh[…]
-
Страница 23
CLICK TUNE The TUNE mode ls used to select lhe desired pjtch for €ach drum pad, and th€ click. When it is pressed, its LED will light, and the display will read: This display app€ars wh6n TUNE is first pressed, and the display was nol pr€viously in MIX or VOICE mode for a drum pad. lt is used to sel€ct the pitch of the click (m6tronome). […]
-
Страница 24
Th€ +/- anows and the SELECT slider can be used to selecr a new rempo, or a lT?:..9T_T :lrered direcrty wirh rhr€€ digirs on th€ keypad. Tempo cna,ig€s-ar» enecflve as soon as th€y ar€ €ntered, and the REcoRD button does not hav; to be pressed. In SONG mod€, th€ t€mpo is disllayed as a relativ€ amount of change from lh?[…]
-
Страница 25
02 DRUMNOTES: The +/- buttons are used to turn this function on or off. The default is OFF. TRANSMIT MIDI DRUMS The TRANSMIT MlDl DRUMS tunction is used to delermine whether or not the HR- 16 drum events should be lransmitted out MlDl. The display looks like this: 03 TRANSMIT MIDI DRUM I{OTES: Th€ +/- arrow bultons are us€d to lurn this functio[…]
-
Страница 26
MIDI ECHO The MlDl EcHo function is used lo echo any MrDr information lhat is received at rh€ MlDl input to th€ MlDl output. The displiy looks lik€ this: The +/- arrow buttons are used to turn rhis function on or off. The defaurt is oN. The HB-l6 will not echo system exclusiv€ data. MIDI PROGRAM CHANGE Tho MlDl PROGRAM CHANGE function is us[…]
-
Страница 27
MIDI CLOCK OUT The MlDl CLOCK OUT function is usod to turn on or off the transmission of MlDl clocks. The display is as follows: 08 MtDl CLOCK OUTENABLE: The +/- arrow bultons are used to turn this function on or off. The default is ON. AUTO START Th€ AUTO START lunction is used to turn on or off th€ capability of starting a patt€rn or song a[…]
-
Страница 28
CLICK VALUE The click valu€ function is us6d to set ths metric value of the click (metronom€). The display looks like this: 1 The possible values are th€ sams as in quantize: 1/4, 116, 1tg, 1t12, 1/16, ‘1124, 1/32, 1/48, 1t64, and OFF. The keypad and +/- arrow buttons are used to change the value. The default is 1/8. lf the CLICK value i[…]
-
Страница 29
hit. Th€se curves will also €ffect MlDl input trigg€ring of lh6 drums. In addition, MlDl input velocity ssnsitivity allows 32 st€ps of volume control per drum when us€d wilh gxl6rnal controll€rs such as drum pads or sequencers. Nol€, howevsr, that recording MlDl input information on the HR-16 will only slore I steps of velocity inside[…]
-
Страница 30
MIDI ln all five ot th€se pag€s, pressing RECORD initiatos the oporation. The verify tunction is us€d lo insure that the data just recorded to tap€ is good. Load from tape. loads th€ enlire memory with lh6 data on lape. Load palt and load song allow a singlo paltern or song to be loaded from a tap€. The keypad can b€ used io select th[…]
-
Страница 31
STORING TO DISK USING MIDI SYSTEM EXCLUSIVE BULK DATA DUMP The HR.16 send to MlDl function is orovided so lhat lh€ data can b€ slored on a computer, a Yamaha MDF-1 (MlDl FileQ or a Yamaha DX-7llFD. The data is senl out as one block of system exclusive data, with the length being determined by the amount of memory b€ing us6d. No more than 507&[…]
-
Страница 32
TO B) Kgep the Sync signal at abut OVIJ in oder to avoid dtopouts. fi the HR-16 does not see the sync tone lor 1,/2 seand, it will assume that the sy;c tone has enAed ana iti go into STOP mode. p, tt m.s-shU, do tnt .use any noise reductbn , Ee, or signal processing on the sync tone. u) Avotd rccgrcilng h’gh eneryy, hoh-lrequency trad<s nex[…]
-
Страница 33
REMAINING MEMORY Holding RECORD and pressing LENGTH causes the following display: 1 This shows the amount of memory lhat has not b€en used. Note that some op€rations may not be possible even though it s€ems that th€re is still a small amounl of memory available. This is due to the tact that th€ HR-16 requires enough memory to duplicale a […]
-
Страница 34
HR-16 MIDI IMPLEMENTATION CHART :unctlon Transrnited Recognlzed Renrarks :HAIINEL Default Changed r-l 6 t-16 t-l 6 t-t 6 Memodzcd dODE Default M$sage3 Atered Mode 3 Mode I Honors modes 1,3 NOTE NUMBER True Yoice 0G127 00-t 27 3ee n0te I Notc on YELOCITY NotcOff o I o I roucH Keys Chan’s I r I x PITCH BENDER I x CONTROL CHA},IGE x I PROGRAvI CH[…]
-
Страница 35
SYMPTOM HR.1 6 TROUBLESHOOTING CHART WHAT’S PROBABLYWRONG WHATTO DO No pow€r. Power supply not properly connected. Power swilch not lurned on. Power supply malfunction. Check power supply connection. Push in oower switch. Check with dealer to test the powsr supply on a different unit. No sound- Audio cable shortsd. Outpul s€lgction. Volume[…]
-
Страница 36
ALESIS MMT.8 MULTI TFACK MIDI RECORDER ERASE …..’..’..,….’.’.’………… 9[…]
-
Страница 37
-sffiffiffiY-1 1-) n. O O O?T I _/ _./ (, u/ __/ —,/ __/ J M ffi/ @I IN THRU OT IN ryrc Q’ffi A.eel3 u s@ ffi L mJ 7lr=C|El :, : — l|ur’l 1il441 lAill E==_ l@,,ll»n I l-‘l — l’rdl lreel lr{l r-. ,= teA,ttm’ll,lfll I I l-@ r*,;-l — l-,,;l :@ I]!I!-J @ @ @ EETIEE tilEEEE ttE -€EE- *n, ll ,»‘., l l -.[…]
-
Страница 38
INTRODUCTION The Alesis MMT-g Mufti Track MlDl Recorder is a user fdsndlv sequencer. rr is abre io re6ia any.inrormaiion rele-ivJo;i,fi,id,il?iiFliffLr8y:jJJg,?j pressure and note olt vetmirv), arid.sro-re it inro non-*Lrii»‘riror’ d;,;;;A»i: fii; |$S,’$.»‘ji:f$?Jl»llje notdi, conrrorrers, ;i6[ dfi;ff;uch, p[…]
-
Страница 39
MMT.8 OUICK BASIC SETUP 1. connect the MlDl ouT of the keyboad to the MlDl lN of he MMT-8′ i. Connea itre MlDl lN of the keybirard to the MlDl OUT of the MMT-8′ g: Cffi;a ih; audio output ot tfre keyboard to the audio input of a suitable monitoring system (amplifier, mixer, stereo system). These are three basic setups. A single keyboard i[…]
-
Страница 40
MlDl OUT to other MlDl Instruments AUDIO OUT Et— AUDIOOUT Al€sis MMT-8 Instructlons ….,…. page 4[…]
-
Страница 41
FIG. 3 larrr —aLlo -o — E-EOO -L] fl — -J -r.r’ AUDIO OUT 1:’:::3 EaltlEs -!lor:- L MIDIOUT lDl THRU t0 other lllDl Instruments AUDIO OUT[…]
-
Страница 42
PART MODE Selectlng and Ptaytng a PART Wlrglpolq»r is fifst iurnod on, the sequencer will be in SONG or pART mode (SONG or PART LED lit),.depending..on the mode that was selected before power was ti.,rnea-ott. I he song or part numbsr will also be the samg as when Dower was trjrned olf. PART Button Press lhe PART bunon to enter PART mode if lh[…]
-
Страница 43
part ls reached, atler which ths new part will begin playing, and the display will reved back to PLAYING PART. Pressing STOP/CONTINUE will stop playing a part, and ths display will return to the select part display. Any notes lhat weresustaining will turn off. Pressing STOP/CONTINUE again will begin playing a part lrom the beginning ol the beat it […]
-
Страница 44
Enlerlng RECORD Afler rele_asing REcoRD, the REcoRD LED will remain lit to indicate that it is readv to record if.PLAY is plesssd, unless no track,was s€lecred (no track LED lit Jliai, ;h;h;;ui; cause lhe RECORD LED to turn ofl atter releaiing ihe BECORtj’button. -lt llgllggllrlltuE is pressed.white.the RECoBD LED is onine necono’lEo *i[…]
-
Страница 45
with the ksypad. In eilher RECORD button is or€ssed. case, the new leng’th is not entered into ths part until the Whsn RECORD is pressed the display changes to: This display romains until REC,oRD is released. lf LENGTH is released bstors RECORD is pressed, no change lo the length will be made, regardless of what was Pressed on lhe keypad. lf[…]
-
Страница 46
The.display will remain thb way until the RECORD button is released, after which the display will return to its previous itate. Eraslng ! rlngle TRACK Io erase a single track, pross andfiold the ERASE bu.on (all rrack LEDs will light), and :elqcl.tr9 d€sired rrack humber. The setea;d irack;iEb’-rniti’i»r»,n rn, and rhe orher t[…]
-
Страница 47
01 Pressing ths RECORD button will srase lhe currently selec-ted song number. The eight track buttons aro inac{ive when erasing songs. The page up and pags down buttons are also inactivs wh€n srasing songs. In all cas6s, the erase is not executsd unlil RECORD is pressed, and will be aborted if ERASE is released before pressing RECORD. The ERASE b[…]
-
Страница 48
Copylng r TRACK to another TRACK of the lemc PART To. copy a single trad( to another track of the same part number, press and hold COpy, and solsct the source track. The selocled track’s LED will remain lit, dnd all lhs other track LEDS sercq rne source rrafi. I ne seroded tracl(‘s LELI will remain lit, and alllhs other track LEDS will lu[…]
-
Страница 49
By scrolling through the list, any sslscted data can be copied lrom one track or part to another. For example, if a track contained notes on many MlDl channsls that had been prsviously combined together, copying only one MlDl channei to a new lrack would allow the parts to be separated out again. Also, copying NOTES ONLY Jrom a track to itself will[…]
-
Страница 50
01 1ne 991.nuq!er, indicating lhat ir can be changed with the keypad of th€ +/- buttons. To 1T:1:I_»_:tlg.t11Tl!1glhg pase up and-pase down buttins are ussd. nCy movt rne cursor as shown in lhe following displays: The cursor moves to the nexl parameter, and will’loop around» pasl the last pa€meter back lo the first. The MlDl chan[…]
-
Страница 51
127 0t For controllers, lhe display shows the beat, sub-beat, controller number. controller amount, and MlDl channel. The controller range is lrom O to j21. The conlroller amount range is from 0 to 127. The page up and page down disptays scroll as follows: CHAN 01 127 CHAN 1/Q0: :127 CHAN 01 00 :127 CHAN 0l 121:127 CHAN 01 121:127 CHAN CHAN 01 /00:[…]
-
Страница 52
to scroll the data through the display until the 6nd is reached. The display includes the beat, sub-bsat, and any system exclusivs data, as follows: 126 125 1 1/00: 125 124> 126 125 124> 126 125 <123 722 121> elc. Eraslng an ovent Any evsnt being displayed can be erasod by holding ERASE and pressing RECORD. Erasing an 6vsnt removes it t[…]
-
Страница 53
By scrolling through ths list, any selecled dala can bs copied lrom one track or part to another. For example, ff a track containsd notes on many MlDl channels that had been previously combined togethsr, copying only ona MlDl channel to a new track would allow ths pans to be soparated out again. Also, copying NOTES ONLY from a track to iisel{ will […]
-
Страница 54
lh€ b€al.number, indicaling thal h can be changed with the keypad or the +/- buttons. To 1T::_T_»_9tlpl p.r.aTdeJl: lhe page up and page down bui6ns are u3od. Th€y move rne cursor a3 shown in the tollouring displays: The cursor mov€s to the next parameter, and will «loop around’ past the last parameter back lo lhe first. The […]
-
Страница 55
127 CHAN01 127 CHAN0l CHAN 01 127 CHAN For controllers, the display shows the bsat, sub-beat, controller number, controller amount, and MlDl channel. The controllsr range is lrom O to 121 . The conlroller amounl range is trom o io 127. The pago up and page down displays scroll as iollows: ‘tl00: CHAN 01 1:127 CHAN 01 121:127 CHAN 01 121:127 CH[…]
-
Страница 56
to scroll. the data through the display until the end is reachsd. The display includes the bgat, sub-beat, and any systsm sxclusive data, as follows: /00: 126 125 ‘l 1/00: 125 124> 126 I25 124> ut/ou: s 126 125 122 121> <123122 121> EraslnE an event elc’ Any event being displayed can be erased by holding ERASE and prossing […]
-
Страница 57
AT In th6 above choices, prossing RECORD will insert the displayed ev€nt at the current beat and whh values of 0. While in part EDIT, the tast totward and rewind buttons are ussd to advance and retreat, respoc’tiv’ely, through ths list of MlDl evsnls on the sel€ctad lrack. When tho end oJ a track is rLached, or if a tirck is empty, th[…]
-
Страница 58
Selecling a SONG The 00 is underlined to indi€te that it will be changed if a new number is selected wirh the keypad or the +/- buttons. The second lin€ of ths display shows the name of tho currently sslected.song,(uptol4characters). lfthecunentsdng’numberisempty,thesecondlin6 will read EMPW SONG. Pressing the +/- buttons immediately selbi[…]
-
Страница 59
ths lasl displaygd beat. The fast torward and rewind button can be held down simullaneously to «frseze» the display on the curront boat. LOOP The LOOP button is a simole on/ofJ switch with an LED indicalor. Whsn LOOP is on, a part or song will loop back to its beginning when it has reached its end and continue playing indefinitely. lf LOO[…]
-
Страница 60
The sight track LEDs will be off. Prsss the first desired track (it will light solid), followed by the deslinalion track (it willflash),lollowed by BECORD. The display will read: This display remains uniil the RECORD button is reloasgd. The first track and the second track are now combinsd in the second track’s location. Th€ first track rema[…]
-
Страница 61
The 10 quanlize choices are 112, 114, 116, 1lg, 1112, 1/16, 1n4, 1132, 1148, 1164. The +/- buttons of ths keypad can be ussd to scroll through lho choicos. The keypad builons 0-9 can also be us6d lo select lhs quantize value dkeclly, with O=1/2 and 9=l/64. The track sslec{ buttons can be used to solect tho desirod track(s) to be quantizod. When qua[…]
-
Страница 62
TRANSPOSE The TRANSPoSE function alrox,-s.for_1!1ck or part to be rransposed by a user specified number of semitones. When TRANSPOSE is heid down in part rinode, th’e display leads: The keypag can be used to enter a twodigit numb€r of semitones lo transpose up trom the original pitch (00-99), or ths +/- buttons can be used to incremsnt or de[…]
-
Страница 63
This remains untilthe RECORD button is releassd. ln both song and part mode, the tempo can be changed while playing. MID] FILTER The MlDl FILTER button is used lo select what type ol MlDl in{ormation will bs r€corded by lhe MMT-8. Whilo holding down the MlDl FILTER button, the page up and page down buttons can be usad to scroll through the possib[…]
-
Страница 64
ONLY SYNC By using the keypad or +/- buttons, one of the three clocking sourc€s can be sslectsd. Ttte default llting-is lrllDl & INTERNAL (1), wirh rhe olher choiLs being TNTERNAL ONLi (2), and TAPE SYNC (g). The page up and page down buttons cai be used to scroil thrcugh the next lwo clock pagos: The + and — buttons can b€ ussd to turn eac[…]
-
Страница 65
Th6 1o cfick value choices arg 112, 114, 1/6,’llS, 1112, 1116, 1/24, 1132, 1148, 1/64. The +/- bunons of the keypad can be used to scroll through lhe choices. The ksypad buttons 0-9 can also be used to select the click value directly, with 0=112 and 9-t/64. Additional clic* pages can be accesssd with the page up and page down buttons. Pressing[…]
-
Страница 66
In all five of these pages, pressing RECORD initiates the operation. The verity function is used to insure thal the dala just record€d to tape is good. Load f rom taps loads the entire sequenc€ msmory with the data on tape. Load part and load song allow a single part or song to be loaded from a tape. The keypad can be used to seleit the desired[…]
-
Страница 67
data will be 1oo largs for the MlDl f iler’s buffer. No more than 257″ ot memory should be lull when saving lo a DX-7llFD or its buffsr will b€ lillsd as well. The MMT-8 will automatically receivs MlDl system exclusive sequence data trom any of these devices without having to select a spscif ic pags. lf the system exclusive data starts […]
-
Страница 68
2) Press and hold th6 CLOCK buton. The display will read: MIDI & 3) Use the keypad or + and — buttons to select TAPE SYNC lN. The display will read: 4) Put the tape machine into PLAY. The MMT-8 will automatically start as soon as il receives the ryngton9, causing any olher ssquencers connected lo it to play. Be careful to. rcturn to the b.eginn[…]
-
Страница 69
AUTO LOCATE The MMT€ has Aulo Lmte ability which a,bws you to go directly b a speifrc b€at of a part wihout playing through the beats prior to ths dssired beat number. PART MODE: A. When the MMT-8 is in PLAY — 1. PressandholdeithertheFast-FoMafd TFl orBewind f?l button. 2. Enter the number of the desired beat (3 digits) using the keypad buftons[…]
-
Страница 70
MMT-8 MIDI IMPLEMENTATION CHART Function Transmited Recognizad Remafts CHAI.INEL Default Chonge( l-t 6 t-l6 l-l 6 l- tD Userchangeable vIODE Default Messag es Atered x x NOTE NUMBER Tfue Voice 00-l 27 00-127 Note on YELOCITY Note Off o x o I roucH i’yl Lnon 3 I o I o PITCH BENDER o o CONTROL 0-63 cHAl{cE ff;lii; o o x o o x PROGRAIVI CHAI.IGE […]
-
Страница 71
MMT-8 TROUBLESHOOTING CHART SYMPTOM WHAT’S PROBABLY WBONG WHATTO DO No sound during playback of recorded Dans. Didn’t record. MlDl channels not properly corresponding with sound sources. Tracks are muted Check MlDl connection. Check MlDl channel assignments. Check track mute selection. Won’t record after touch or system exclusive dat[…]
-
Страница 72
ALES’S LIMITED WABRANTY ALESIS CORPORATION (‘ALESIS») warrants this producl to be lree ot delects in materiat and { workmanship for a period ol 90 days lrom the date of original retail purchase. This warranty is enforceable only by the original retart purchaser. ‘» t To be protecled by this warranty, the purchaser must comp[…]
-
Contents
-
Table of Contents
-
Troubleshooting
-
Bookmarks
Quick Links
Related Manuals for Alesis HR-16
Summary of Contents for Alesis HR-16
-
Page 1
Instruction Manual… -
Page 2
HR-16, the MMT-8, and the HR-16:8. The operating systems of the Atesls HR-16 and the HR.16|B are tdentlcat wlth a few exceptlons. All Instrucilons and descrlpilons ot HR-16 funcilons h thls manual wllt apply to the operatlon of the HR-16:g except for those exceptlons whlch ars noted throughout the manual. -
Page 3
ALESIS HR.16 HIGH SAMPLE RATE DRUM MACHINE TABLEOFCONTENTS INTRODUCTION H R . 1 6 Q U I C K PATTERN MODE RECOFIDINIGAPATTERN OUAITIZE… STEP EDIT MODE… schGh/bDE SONGEDrr. coPY… zuTTON DYNAM|CS… START/STOP F@TSWITCH … 1 6 B I T DIGITAL PACE . -
Page 4
oulrur2 @ r t t t r r 4 t I r t r | E @ @ @ @ @ : E E t I E t r ] @ E E T I E E E E ::_) ldY,Ll l «-,’ I w rc ff/OFF Lf,tot t , * |… -
Page 5
255 steps long. The 16 drum pads at the front of the HR-16 ar€ vslocity’sensitive’ How hard lho pad. is hit determines tlie volume ot the drum on 8 levels. 12 of the pads (all pads sxcept Closod Hat, Mid Hat, Open Hat, and Crash) aro €ach direcfly assigned to a voice. -
Page 6
1 (either left , right or both) to a suitable monitorinq system. I outDut 2 is connscted, the desired drum pads must be assigned ro oup»i i rii»iltrl (See MlX.) YlDt tN iack of rhe.HR-16 ro the MtDl OUT jack of a sequencer, an external ?: .9llg1ltt: orum pao conlrolsr, or a keyboard. -
Page 7
Pressing PLAY will always start a pattern trom lhe beginning. When a pattsrn reaches its snd, it will loop back and conlinue playing trom lh€ beginning. Alesis HR-15 Instruclions … -
Page 8
]o-reco! ou.lg1teLll press and hold rhe RECORD button, and rhen prsss the pLAy button. Ihe HR-16 wirr immsdiat.ry bsgin praying back any existing drums in ths currontrv s9l99lgq pattsrn from rhe bsginning, and will iad any new drums piayed on rhe Uutton. o’, via MlDlto the pattern. -
Page 9
When a new lenqth is ontsred (RECORD), any drum evsnts lhat were beyond lh€..new sel lenoth will be;rased. It the new length is bnger than ths prev’ous one’ tns aoolpnal «;iil 6elirf»J «ittr «ir»n»e. lf it is disired to iEmove or add lsngth 1o ihe beginning of ffiih i oitr»rn, first set the desired length (as described above), and then pross and reloase th;… -
Page 10
TOM 1 is now complet^ely_eJased nec€ssary to press RECORD. In SOI’IG mods, holding the ERASE button will cause tha following display: Pressing the RECORD button will erase the currently selected song number. When erasing a pattern or song, the erass is not executed until RECORD is oressed. and will be aborled if ERASE is released before pressing BECORD. -
Page 11
Pressing PLAY will start playing the selectsd song from its beginning, and the PLAY LED will light. The display will read, for example: Alesis HR-16 Instructims T O M 4 OPN HAT CLAPS… -
Page 12
PATT again. The programmable tempo range ot a step in a song is lrom 46 to 2O0 bsats psr minute. Dcletlng a slep / DELETE Button Alesis HR-’16 Instuctios …—. asai;witt ueqin olri,ini, ih» ptir»riiiiiri»… -
Page 13
While holding th€ ERASE button, if RECORD is pressed, tho song will bo erased, and the display will read: SONGERASED This display will remain until RECORD is released. In all of the above editing examples, no changes lo lhe song will occur until RECORD is pressed. Al€sis HR-16 lnslructims Page 11… -
Page 14
EqE I[E^tlR-1Q COPY COMPLETE. FOR THE HR-16:8 — At this point you may either enter the pattern’s two-digit number with the keypad or press the + br — key to set the copy assignment to-the same pattern number. Pressing RECORD completes the operation ahd the display reads COPY COMPLETE. -
Page 15
Th€ display is now waiting for a second drum pad lo b€ Press€d (pressing RECORD at lhis point will .do nothing). lf for example, TOM 1 was pressed, lhe display would read: COPY FROM PATT CLS HAT > IOM 1 The display of th€… -
Page 16
OFFSET The oFFSET button is used to add or subtract a number of crock purses (384th notes) to a drum or pattern. lf OFFSET is held down, th6 display wili show:’ The keypad can be used to enter a two-diglt number (OO_99), or the +/_ arrow buftons can be used lo increment or decrehent the amount. -
Page 17
shown beside it. O swing = 5A% = no swing. Tho range of the swing is determined by tho current quantize value. The swing amount will only effect newly recorded drum events, like in quantize. The swing amounls are shown below: SWING OUANT… -
Page 18
MODE / DATA ENTRY BUTTONS All MoDE buttons function as on/off switch€s. This means that they are pressed once to ent€r lhe mode, and pressed again to exit the mode. When any of th6 modes hav€ b€en entered, the associat€d LED will b€ lit. For slmpli6ity, any lim€ PATTERN or SONG is pressed, any previously sel€cted mode will be urneO 6tt. -
Page 19
€ach limo a t€mpo st€p is oncount€red within a song. While in patlern mode, pressing lhe TEMPO button caus€s the TEMPO LED to light, and results in the following display: TEMPO = 12 PER MINUTE Afesis HR-16 Instructims … Paqe 17… -
Page 20
The keypad and +/- buttons can be ussd to change tho MlDl channel from 01 to .16. This sets the MlDl channel that the HR-16 will transmit and receive on. lf Oo is selected, the display will r€ad OMNI. In OMNI mode, th€ HR-l6 will lransmit on channel 1, and will receive on all channels. -
Page 21
shown beside it. O swing = 5O’/o = no swing. The range ot lh€ swing is determined by the current quantize value. The swing amount will only eff€ct newly recorded drum events, liko in quantize. The swing amounts are shown below: SWING OUANT… -
Page 22
MODE / DATA ENTRY BUTTONS All MoDE bunons funcrion as on/otf swilches. This means that th6y are pressed once to enl€r the mode, and pr€ss€d again ro €xit rhe mod€. when any of th6 modes ent€red, lhe associared LED wiil b€ tir. For simpti6iry, an/ iir» !ql1!g.n PATTERN or SONG is pressed, any previousty selected mod€… -
Page 23
€ach timo a tompo step is encountered within a song. While in pattern mode, pressing lhe TEMPO button caus€s lhe TEMPO LED lo lighl, and results in th€ following display: Alesis HR-l 6 Instrucdons = L 2 P8ge… -
Page 24
This sets lhe MlDl channel that the HR-i6 will transmit and rEceive on. lf OO is s€lecl€d, lh€ display will read OMNI. ln OMNI mode, the HR-16 will lransmit on channel 1, and will receive on all channels. The default is OMNI. -
Page 25
+/- arrow buttons can b€ used to select lh€ desired nole. DFII.JM MIDIT.IOTE KEY VALUE cllo( KIf,( SMFE CLSHAT 042 MIDHAT O44 PEFICS TOf\,43 TOi,,l4 CRASH Alesis HR-16 Instructions … . P a g e 1 9… -
Page 26
Program changes will be ignored while a patGrn or song is playing. CLOCK SOURCE The clock source function is used to s€lect what clock will drive rhe HR-16. Th6 display will show one ol the three following choices: & INTERNAL… -
Page 27
I s€cond. lf auto start is nol on, th€ HR-16 will wait in play for more sync pulses. RECEIVE… -
Page 28
LOUD, MEDIUM, SOFT, and FIXED 1 rhrough FIXED 8. The first three choices are 3 differ€nt loudness curves. In the FIXED 1 through 8 settings, the pads will always play lhe same dynamics (1 through 8), regardless of how hard they afe Afesis HR-16 lnstruclions …—…- …—…-… pffi… -
Page 29
When ON, a song that roaches its end will loop back to lh€ b€ginning of that song. T A P E The TAPE button is us€d to access tho tap€ int€rface f€atures of the HR-16. This allows lhe us6r to save and rotrieve sequ€nce data with an ordinary casseil€… -
Page 30
TAPE: MIDI ln all five ot th€se pag€s, pressing RECORD initiatos the oporation. The verify tunction is us€d lo insure that the data just recorded to tap€ is good. Load from tape. loads th€ enlire memory with lh6 data on lape. Load palt and load song allow a singlo paltern or song to be loaded from a tap€. -
Page 31
2) Press PLAY on tho HB-16, then adjust lhs level of lhe track so that il reads approximatsly ‘0VU». 3l You must selort a tempo lot the song on the HR-16 at this time as it cannoa be changed later. -
Page 32
B) Kgep the Sync signal at abut OVIJ in oder to avoid dtopouts. fi the HR-16 does not see the sync tone lor 1,/2 seand, it will assume that the sy;c tone has enAed ana iti go into STOP mode. -
Page 33
This is due to the tact that th€ HR-16 requires enough memory to duplicale a pattern befor€ it can be record€d on, or length changed, or otfset, €tc. -
Page 34
HR-16 MIDI IMPLEMENTATION CHART :unctlon Transrnited :HAIINEL Default r-l 6 t-16 Changed dODE Default M o d e 3 M$sage3 Atered NOTE NUMBER True Yoice 0 G 1 2 7 Notc on YELOCITY NotcOff Keys roucH Chan’s PITCH BENDER CONTROL… -
Page 35
8ad connecliorc. Level on tape, lf problems aren’t solved atter troubloshooting and refering to the manual, consuh your Alosis deale’r for assistanca. Al€sls HR-16 ln3tucdon3 …,.. HR.1 6 TROUBLESHOOTING WHAT’S PROBABLYWRONG Power supply not properly connected. Power swilch not lurned on. -
Page 36
ALESIS MMT.8 MULTI TFACK MIDI RECORDER …’..’..,…’.’.’… ERASE… -
Page 37
-sffiffiffiY-1 1-) n.\ O O O?T I \_./ (, u/ \__/ \—,/ \__/ \J ffi/ A . e e l 3 7lr=C|El l | u r ‘ l 1 i l 4 4 1 l A i l l E = = _ l @ , , l l «… -
Page 38
I N T R O D U C T I O N The Alesis MMT-g Mufti Track MlDl Recorder sequencer. rr is abre io re6ia any.inrormaiion pressure and note olt vetmirv), arid.sro-re notdi, conrrorrers, |$S,’$.»‘ji:f$?Jl»llje The^MMT-8 can pray back 8 tracks_sinnrlraneolsry an 8lrack tape recorder. -
Page 39
Arso, ium-on MlDl ECHO (Red LED lit) so that MlDl information Urru ine MMT-g. nOO more’feyooards / sound gdnerators by.connecting the MlDl THRU lrom eitnei ine iepoarO or fie HR-16 to the MlDl lN on the keyboard / sound generator’ etc’ fllDl ouT N I D I FtG. -
Page 40
MlDl OUT to other MlDl Instruments AUDIO OUT E t — — AUDIOOUT Al€sis MMT-8 Instructlons …,… page 4… -
Page 41
1:’:::3 E a l t l E s — ! l o r : — l D l T H R U t 0 o t h e r l l l D l I n s t r u m e n t s M I D I O U T FIG. -
Page 42
PART MODE Selectlng and Ptaytng a PART Wlrglpolq»r is fifst iurnod on, the sequencer will be in SONG or pART mode (SONG or PART LED lit),.depending..on the mode that was selected before power was ti.,rnea-ott. I he song or part numbsr will also be the samg as when Dower was trjrned olf. PART Button Press lhe PART bunon to enter PART mode if lhe sequanc€r is not currentlv in this modo. -
Page 43
part ls reached, atler which ths new part will begin playing, and the display will reved back to PLAYING PART. Pressing STOP/CONTINUE will stop playing a part, and ths display will return to the select part display. Any notes lhat weresustaining will turn off. Pressing STOP/CONTINUE again will begin playing a part lrom the beginning ol the beat it was on when il was stopped, replaying all previously sustaining Aoles. -
Page 44
+/- buttons can be used to move the length up or down in single beat incremsnts (OOO minimum, 682 maximum), or a thrg€ digit numbor can be ent€r€d Alesis MMT€ lnstruclions … RECoBD LED is onine necono’lEo *iiii»li, «ri,… -
Page 45
ERASE button causes th€ following display: The number 01 would actually be lhe currently selected part number. All 8 track LEDS will be lit. To erase the selected part, press RECORD. The display will change to: Alesis MIVIT-8 lnstructions… -
Page 46
The.display will remain thb way until the RECORD display will return to its previous itate. Eraslng ! rlngle TRACK Io erase a single track, pross andfiold the ERASE bu.on (all :elqcl.tr9 d€sired rrack humber. The setea;d irack;iEb’-rniti’i»r»,n rn, and rhe orher track LED-s_wirr rurn ofr. -
Page 47
To copy a single track lo itsell (us€tul for erasing all but one type of MlDl inlormation, see below), press and hold the COPY b!fion, seleci the dssirod track (its LED will remain lit and lh€ others willturn otl), then press RECORD. Alesis MMT-8 lnslructions … Pags 1l… -
Page 48
Copylng r TRACK to another TRACK of the lemc PART To. copy a single trad( to another track of the same part number, press and hold COpy, and solsct the source track. The selocled track’s LED will remain lit, dnd all lhs other track LEDS sercq rne source rrafi. -
Page 49
The first lhree digits are ths beat number, followed by ths sub-beat counl (00″95), lollowed by the note value, followed by lhe note velocity (01-127), followed by lhe nole’s duration (in baats and sub-beats), followed by the note’s MlDl channel (1-16). The cursor is under Alesis MMT-8 Instructions turns EDIT … Pag€ 13… -
Page 50
1ne 991.nuq!er, indicating lhat ir can be changed with the keypad of th€ +/- buttons. To 1T:1:I_»_:tlg.t11Tl!1glhg pase up and-pase rne cursor as shown in lhe following displays: 002/00 Q l — z a # — 2 CHAN 01 002/00 CHAN The cursor moves to the nexl parameter, and will’loop around»… -
Page 51
1 2 7 CHAN 01 /00: 127 CHAN Forsyslem exclusive inlormation, ths numberol parameters could be any value. Sinc6 this could contain a large amount of intormation, the page up and page down buttons continue Alesis MMT€ Instructions -page down … pa€… -
Page 52
RECORD: 001/00 Alesis MMT€ Instruclions … elc. Page 16… -
Page 53
By scrolling through ths list, any selecled dala can bs copied lrom one track or part to another. For example, ff a track containsd notes on many MlDl channels that had been previously combined togethsr, copying only ona MlDl channel to a new track would allow ths pans to be soparated out again. -
Page 54
lh€ b€al.number, indicaling thal h can be changed with the keypad or the +/- buttons. To p.r.aTdeJl: lhe page up and page down bui6ns are u3od. Th€y move 1T::_T_»_9tlpl rne cursor a3 shown in the tollouring displays: I /00: C f — 2 I / 0 0 : CHAN 01 1 / 0 0 : C t… -
Page 55
CHAN O1 127 CHAN For system exclusiv€ information, tho number of parameters could be any valu€. Since this could conlain a large amount of information, the page up and page down butons continue Alesis MMT€ lngruclions -page down Page 15… -
Page 56
to scroll. the data through the display until the end is reachsd. The display includes the bgat, sub-beat, and any systsm sxclusive data, as follows: /00: 126 125 ‘l 1/00: 125 124> 126 I25 124> u t / o u : s 126 125 122 121>… -
Page 57
In th6 above choices, prossing RECORD will insert the displayed ev€nt at the current beat and whh values of 0. While in part EDIT, the tast totward and rewind buttons are ussd to advance and retreat, respoc’tiv’ely, through ths list of MlDl evsnls on the sel€ctad lrack. When tho end oJ a track is rLached, or if a tirck is empty, the display will read END OF TRACK. -
Page 58
STOP/CONTINUE Alesis MMT-g Instructions l f t h e c u n e n t s d n g ‘ n u m b e r i s e m p t y , t h e s e c o n d l i n 6… -
Page 59
Ths MERGE mode is provided so that two tracks can be merged together (overlapped) onto one lrack. In part mode, when MERGE is held down, the display reads: Alesis MMT-8 Instructions W h e n M l D l E C H o i s o n ,… -
Page 60
The sight track LEDs will be off. Prsss the first desired track (it will light solid), followed by the deslinalion track (it willflash),lollowed by BECORD. The display will read: This display remains uniil the RECORD button is reloasgd. The first track and the second track are now combinsd in the second track’s location. -
Page 61
The 10 quanlize choices are 112, 114, 116, 1lg, 1112, 1/16, 1n4, 1132, 1148, 1164. The +/- buttons of ths keypad can be ussd to scroll through lho choicos. The keypad builons 0-9 can also be us6d lo select lhs quantize value dkeclly, with O=1/2 and 9=l/64. sslec{ buttons can be used to solect tho desirod track(s) to be quantizod. -
Page 62
Oth€rwise, it is a temporary tempo change that will be torgottsn once a ditferent song is selected. lf REcoRD is prsssed, the display changes to: Alesis MMT-8 Instruclions . . . , ..P a g e 2 2… -
Page 63
This remains untilthe RECORD button is releassd. ln both song and part mode, the tempo can be changed while playing. M I D ] F I L T E R The MlDl FILTER button is used lo select what type ol MlDl in{ormation will bs r€corded by lhe MMT-8. -
Page 64
ONLY SYNC By using the keypad or +/- buttons, one of the three clocking sourc€s can be sslectsd. Ttte default llting-is lrllDl & INTERNAL (1), wirh rhe olher choiLs being TNTERNAL ONLi (2), and TAPE SYNC (g). The page up and page down buttons cai be used to scroil thrcugh the next lwo clock pagos: The + and — buttons can b€… -
Page 65
RECORD, the page up and page down bultons can be used to access the other five tape pages. They are as follows: FOR ERRORS FROM TAPE: Alesis MMT-S lnstructions 1 t 1 Both buttons can now be «» «» Page 25… -
Page 66
FROM TAPE In all five of these pages, pressing RECORD initiates the operation. The verity function is used to insure thal the dala just record€d to tape is good. Load f rom taps loads the entire sequenc€ msmory with the data on tape. Load part and load song allow a single part or song to be loaded from a tape. -
Page 67
1 ) Connecl the output of the track of the tape machine that has the sync tone to the TAPE lN iack ol the MMT-8. Alesis MMT-8 lnstructions lf the MMT-B does not it will assume that the sync tone has ended and will go on the sync tone. -
Page 68
To clear all ol the MMT-8’S memory and reinitialize all of its variables, turn power otl, press and hold ERASE, PAGE UP, and PAGE DOWN, and turn on the power while holding lhess bultons down lor 3 se@nds. Alesis MMT-8 Instructions aut6mhticaily begin… -
Page 69
AUTO LOCATE The MMT€ has Aulo Lmte ability which a,bws you to go directly b a speifrc b€at of a part wihout playing through the beats prior to ths dssired beat number. PART MODE: A. When the MMT-8 is in PLAY — 1. -
Page 70
M o d e l : O M N I O N , P O L Y M o d e 3 : O M N I O F F , P O L Y Alesis MMTS lnstrucllons Recognizad l — l 6… -
Page 71
Level of sync tone is too high or low. Errors in data. won’t sync to tape. Bad connections. Level on tape lf probl€ms aren’l solved after troubl€shooling and ref€ring to the manual, consull your Alesis dealer for assistanco. MMT-8 TROUBLESHOOTING WBONG with sound sources. -
Page 72
1 4 days of purchase. During the warranty period ALESIS shall, at its sole and absolute option, either repair or replace free of charge any product that proves to be detective on inspection by ALESIS or its authorized service representative.
- Главная
-
Alesis
-
Барабаны
-
HR-16
На этой странице вы найдёте полный список документов на Барабаны Alesis HR-16.
Выберите необходимый PDF файл.
-

Барабаны
Alesis HR-16 Инструкция по эксплуатацииТип файла
PDFРазмер
2.95 MbКол-во страниц
72Просмотров
4646Download / Read online

- 1
Другие Alesis Барабаны
-
Alesis DM6 Руководство пользователя
PDF файлов
2Просмотров
42562 -
Alesis DM10 STUDIO KIT Инструкции оператора
PDF файлов
1Просмотров
24237 -
Alesis SR-16 Инструкция по применению
PDF файлов
1Просмотров
23961 -
Alesis SR18 Инструкция по эксплуатации
PDF файлов
1Просмотров
16748 -
Alesis SR-18 Инструкция по эксплуатации
PDF файлов
1Просмотров
11561 -
Alesis PERFORMANCE PAD PRO Инструкция по эксплуатации
PDF файлов
1Просмотров
9555
Другие устройства Alesis
-
Музыкальные инструменты
Alesis 03D Руководство по эксплуатацииPDF файлов
1Просмотров
38258 -
Музыкальные инструменты
Alesis K2661 Руководство по началу работыPDF файлов
1Просмотров
37240 -
Музыкальные инструменты
Alesis QS8 Вспомогательное руководствоPDF файлов
1Просмотров
22143 -
Музыкальные инструменты
Alesis QS7 Вспомогательное руководствоPDF файлов
1Просмотров
21326 -
Музыкальные инструменты
Alesis DM5 Вспомогательное руководствоPDF файлов
1Просмотров
20319 -
Видеорегистраторы
Alesis M20 PROFESSIONAL 20-BIT DIGITALRECORDER Руководство по эксплуатацииPDF файлов
1Просмотров
18094
Вопросы
-
слабая батарея
Ноутбуки
Acer
1310
Alex 12.02.2016 17:26
Ранее вы смотрели
Производители
Acnodes
Ferguson
FMI
Great Dane
Holman
National Instruments
Optimus
Simrad
Yale
Типы устройств
Модели транспортных средств
Мясорубки
Круиз-контроли
Специальные аксессуары и монтажные приспособления
Подиумы с выдвижными ящиками
Домашнее оборудование для диализа
Механические термостаты
Оборудование для жарки
Часы-радио
Электронные кассовые аппараты
Устройства
American Power Conversion 600
ASUS X550JK RO7926
Carvin AE185-12
Cooper Lighting VFM Vision AVU050932
Graco 312064M — Reactor Hydraulic Proportioners
HP Laserjet,Color Laserjet P2035
LG LCRT1513SB
Magnavox CMWV405
Verilux VH10
freeuserguide.ru
About Us
Contacts
Disclamers
Privacy Policy
Эта страница полезна для вас? Поделитесь ссылкой:
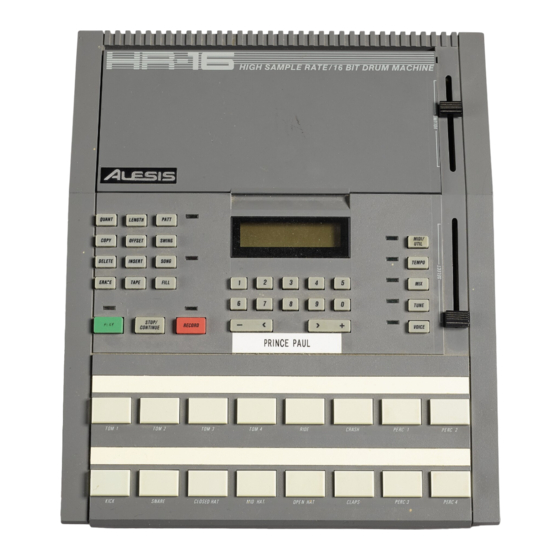
Alesis HR-16 Барабан
Производитель:
Модель:
HR-16
Дата:
1995
Категория:
Группа:
Описание:
Руководство по техническому обслуживанию
Hасто́льная кни́га тип:
Руководство по техническому обслуживанию

Страницы:
40
Размер:
916.58 Kbytes (938577 Bytes)
Язык:
english
Пересмотр:
1
Hасто́льная кни́га ID:
Дата:
1995 07 27
Качество:
Электронный документ, ни сканирование, очень хорошо читается.
Дата загрузки:
2017 09 26
MD5:
411563d2dc4a40e5cebf50b5c4747e77
Загрузки:
956
Информация
PREFACE …
ii
READ THIS!
…
ii
WARNINGS …
iii
SAFETY SUGGESTIONS
…
iv
General
Troubleshooting …
v
1.0 General Description
…
1
1.1 Main PC Board Revisions
… 1
2.0 Power Supply
…
1
2.1 Battery Backup
…
2
2.2 PUP Circuit
…
2
3.0 The 8031
…
3
3.1 Reset
…
3
3.2 Memory Mapped
I/O … 4
3.3 Keypad
I/O …
4
3.4 MIDI I/O
…
4
4.0 DM3AG ASIC
…
5
4.1 Mask
ROMs …
5
5.0 Analog Signal Paths
…
6
5.1 Drum Signal
Output …
6
5.2 Piezo/Data Slider
Input … 6
5.3 Tape
I/O …
6
5.4 Tape
Output …
7
5.5 Tape Input
…
7
6.0 Test Procedures
…
7
6.1 General Testing
…
8
6.2 Internal Diagnostics and Hidden Keys
… 8
6.3 DAC Adjustments
… 8
7.0 Updates and Corrections
…
9
7.1 New SRAM Supply
Circuit … 9
7.2 Glass Zener
(D15) …
9
7.3 Dirty Cliff
jacks …
10
7.4 Ground
CE …
10
7.5 RF resistor
…
10
7.6 10K MIDI Resistor (R5)
… 11
7.7 MIDI Pullup
…
11
7.8 RF Shields
…
11
7.9 LCD Contrast
Adjustments … 11
7.10 DAC Drift
…
12
7.11 Old Keypad PC Boards
… 12
7.12 Lifting R41
…
12
7.13 Reset
Capacitor …
12
7.14 Sram Capacitor
…
12
7.15 Tape Capacitors
…
13
7.16 RF chokes
…
13
7.17 AQ reset threshold
… 13
7.18 AQ
R116 …
13
7.19 Volume Slider
Wiring … 13
7.20 PUP
Capacitor …
14
8.0 Common Solutions
…
15
9.0 Service Parts List
…
18
10.0 Software History
…
20
11.0 MIDI Implementation
…
23
12.0 Service Manual History
…
31
INDEX …
32
показать больше
Есть такой хороший драм-машина. 
Когда-нибудь надеюсь соберусь и напишу статью, а пока кое-какую инфу выложу тут.
Ну, во первых, HR-16B от HR-16 отличается исключительно звуками и демо-сонгом.
Печатные платы выпускались (судя по сервис-мануалу, и лично виденными) трёх ревизий:
12-22-87 (REV.A)
REV CA (Four Layer)
REV. AQ Diagram 2
Я видел HR-16 только на первых двух ревизиях, а HR-16B только на ревизии AQ, в чёрном корпусе и с OS v2.00 и выше.
OS v1.xx демо-сонга не имеют.
Некоторые варианты ревизии 12-22-87 имели дурацкий разъём для питания (под mini-jack 1/8″).
Структура СисЕксов описана также в сервис-мануале.
Hidden Keys:
Default: Delete + Erase + Record
Test: Quant + MIDI/Util
Для запуска «Self test» необходимо, при выключенном питании, нажать клавиши «Quant» и «MIDI/Util» (вот где растяжка пальцев пригодиться), и включить питание (для сброса в Дефолтные настройки та же последовательность, но с другими кнопками, см. выше).
Начнётся последовательное выполнение тестов:
— ROM-памяти
— RAM-памяти (Внимание! Все данные будут сброшены в дефолтные настройки!!!)
— MIDI I/O (необходимо соединить МИДИ вход и выход соответствующим кабелем, иначе тест покажет, что всё испорчено)
— TAPE I/O (то же, что и для МИДИ)
— LED (в течении пары секунд будет зажигаться группа светодиодов)
— DAC (тест ЦАПа, переменным резистором настраивается по наименьшему количеству шумов на выходе). Рекомендуется делать, если только возникли серьёзные проблемы, и если понимаете, что делаете. Для выхода нажмите «Stop».
Разумеется, это всё будет работать, если девайс «не совсем труп».
Следующие сочетания (даны для OS v2.00, в других могут отличаться) работают в обычном рабочем режиме:
Memory: Record + Lenght
Version: Patt + Lenght
Info: Patt + Pads (Tom1, Kick, Snare, Closed Hat, Mid Hat, Perc4)
Отдельная тема про сэмплы.
Программа формирования дампов OS и сэмплов для сабжа.
Краткое содержание страницы № 1
Manual
Instruction
Краткое содержание страницы № 2
Dear Alesis Custon€r: You have. purchased powedul a_ rnusic.producliodcomprehensive percussion iust eledronic system. to glancellrough gaiir this manual to a better undeFtanding of the ope;ation ll9″:9 l?k».?.Aoment ot the HR-16, the MMT-8, and the HR-16:8. The operating systems of the Atesls HR-16 and the HR.16|B are tdentlcat wlth a few exceptlons. All Instrucilons and descrlpilons ot HR-16 funcilons h thls manual wllt apply to the operatlon of the HR-16:g except for those exceptlo
Краткое содержание страницы № 3
RATE16 BITDIGITAL ALESIS HR.16 HIGH SAMPLE DRUM MACHINE PACE TABLEOFCONTENTS 3 INTRODUCTION 4 HR.16 QUICK PATTERN MODE 6 RECOFIDINIGAPATTERN 6 OUAITIZE… 8 STEP EDIT MODE…….. schGh/bDE 10 SONGEDrr. coPY……… 12 zuTTON DYNAM|CS…………………………. ……. …,…., z o START/STOP F@TSWITCH
Краткое содержание страницы № 4
L R OUT tN SM/ @r tN w rc ff/OFF oulrur2 tAE mP Lf,tot l __ @rt rtr ttrr4t I | -w E@@ @@@: t,* | _E @EE EEtIEtr] TIEEEE tMt «-,’ ::_) ldY,Ll l I IMI ll tr | | lt ll ll ttttttitlttttl t|||l ftft.
Краткое содержание страницы № 5
INTRODUCTION drum machine) iq a user {riendly,.yet The Alesis HR-16 (High sample Rate / 15 bit generation / sound goneralor. The sound. exlremely powerful MlDl drum sequencer «voicss»‘ drum 6ach of which can bo ot the HR-16 include 16 independent caoabiliti-es and can be routed with a 7 to any ons of 49 digital samples (47 in the HR-1 6:B) , assigned voics can also bs tunsd position pan lo one of two iets of stereb outputs’ Each ovor an independentty in 32 oclave and a hal{. incremgnts
Краткое содержание страницы № 6
HR.16 QUICK BASIC SETUP ‘1. Connecl output (either 1 left right , or both) to a suitable monitorinq system. I outDut 2 is connscted, pads the desired drum must be assigned ro oup»i i rii»iltrl i,,rix;iffi». (See MlX.) tN of rhe.HR-16 jack iack ro the MtDl OUT of a sequencer, an external ?: .9llg1ltt: YlDt orum pao conlrolsr, or a keyboard. jack OUT of rhe HR-.t6 ro orher MtDt sound sources when daisey ll^?:g*lEIlDl cnarnrng MtUt devicos or lo an onernaldrum source. The MlDl j
Краткое содержание страницы № 7
PATTERN MODE (SONG or PATT power on, the HR-l6 will be in SONG or PATT mode When is tirst turnsd power turned off. The on ths mode that was selectod before was LED lii), depending power oft. pattern will also b€ the same as whsn was turned song oi number (pattern) Button PATT pattsrn Now, the display lo 6nter mode. PATT LED will light. Press ttib PATT’button Selectlng a PATTern if a new number is selected with the The 00 is underlined to indicate that it will be changed arrow buttons i
Краткое содержание страницы № 8
RECORDING A PATTern (Atso see LENGTH and QUANT|ZE) ou.lg1teLll press and hold rhe RECORD button, pLAy and rhen prsss the ]o-reco! button. Ihe HR-16 wirr immsdiat.ry bsgin praying back any existing drums in ths currontrv pattsrn s9l99lgq from rhe bsginning, and will iad any new drums piayed on rhe Uutton. o’, pLAy via MlDlto the pattern. The and RECoRD LEDs wiil b€ rit, a;d ihe dispray wirr read: T pattern Th€ number is noi underlined, indicaling pattern that a new cannot be sele
Краткое содержание страницы № 9
were beyond lh€..new (RECORD), any drum evsnts lhat is ontsred When a new lenqth prev’ous one’ tns aoolpnal is bnger than ths It the new length sel lenoth will be;rased. «;iil 1o ihe beginning of to iEmove or add lsngth «ittr «ir»n»e. lf it is disired ffiih 6elirf»J pross and reloase (as described above), and then set the desired length i oitr»rn, first to: The display will change th; PATT button. BEATS LENGTH PressinqthePATTbuttonagainwi||togg|ebackiotheoriginaldisp|ay.|l-RECoRD.
Краткое содержание страницы № 10
01 TOM 1 is now complet^ely_eJased pattern from 1. When erasing a single drum, it is not nec€ssary press to RECORD. In SOI’IG mods, holding the ERASE button will cause tha following display: 01 Pressing the RECORD button will erase the currently selected song number. When erasing pattern a or song, the erass is not executed until RECORD is oressed. and will be aborled if ERASE is released pressing before BECORD. Wtren erjsing a d’r;m, ths erase occurs as soon as the drum buttbn is
Краткое содержание страницы № 11
quantize is set quanlize value (you cannot movg backwards). lf singls steps of the current (lf is set to 50%). to i/16, each step will equal 24196 swing quantize value, it will play as it is lf a drum existed on a slep in between the current that drum. The lower.display shows the stepped pasl, but tho display will not stop on of that drum. Since only one drum can be drum thai was triggered lollowed by lhe volume samo beat, the + arrow button displayed at a time, if more than one drum occur
Краткое содержание страницы № 12
00 STEP 01 T-hE fhst lins ol.ths display. is now.showing the.current song number being played, and lhe curent bear number of the pattsrn prayed. being The iecond rine of ihe disoiau ii showing rh.e_ srep number and ihe patrern iisigneo ro ttre iief triid ptir»riiiiiri» momenr.. wh_en rhe song adv_al:i.s.io_rhe next sGp, rhe disprav ifli[ «no*lrtJfJn»inioi stsp 2, src. Pressing srop/coNTrNUE wiil stop praying the sons, and the ciisorav wirl pressing rerurn.ro the select song dis
Краткое содержание страницы № 13
press To del€te a slep lrom a song, and hold lhe DELETE button, and the display will read: STEP 01 PATT 27 To complete the del€tion, the RECORD button must be pressed still holding while the DELETE button. This shifts all patlerns after the bisplayed step down on6 step. After all steps have b€€n deleted, the display will show step 1 being END (empty song). The END step cannot be deleted (RECORD will be ignored). Replaclng a slep / OFFSET Button pattern The OFFSET button is used lo replace the
Краткое содержание страницы № 14
COPY Copylng a PATTern to ltsetf Tho copy button is used to- app€nd a patt€rn or song to anoth€r panern or song. -lf lt only functions while th€ coPY button is held down. the copy button is releised (eilher befor€ or afler the copy is previous execut€d), th€ mode will show up on the display, and copy mode is €xited. When in PATT mode, preised and COpy is and held: — Pressing RECORD completes the operation and the display reads EqE I[E^tlR-1Q COPY COMPLETE. — FOR THE HR-16:8 At poi
Краткое содержание страницы № 15
(pressing is now waiting for a second drum pad lo b€ RECORD Th€ display Press€d pressed, lhe display at lhis point will nothing). lf for example, TOM 1 was .do would read: COPY FROM PATT > CLS HAT IOM 1 can The display of th€ s€cond pad pressed remains underlined, indicaling that it pad. pallerns, once still be changed by selecting anolh€r drum As in copying ‘COPY pressed, be compl€te, and tho display will read RECORD is the copy will COMPLETE.» pad will not be changed, and the source
Краткое содержание страницы № 16
OFFSET The oFFSET button is used to add or subtract a number of crock purses (384th notes) to a drum or pattern. lf OFFSET is held down, th6 display wili show:’ o0/384rh The keypad can be used to enter a two-diglt number (OO_99), or the ‘The +/_ arrow buftons can be used lo increment or decrehent the amount. range oi the offset,is 199. Entoring a value with th€ keypad will remain th€ curre;l dispi;y -). or To change ,jasi {1. rhe sign, the +/- buttons must be used to :JSl th
Краткое содержание страницы № 17
= = no swing. Tho range of the swing is shown beside it. O swing 5A% effect quantize value. The swing amount will only determined by tho current shown drum events, like in quantize. The swing amounls are newly recorded below: SWING PERCENTAGE OUANT -24 — % 1t6 oo 50.0 68.8 — 50.0 66.7 % 1ts — 1t12 oo-12 50.0 68.8 % — 66.7 % 00-08 50.0 — 1r24 00-06 50.0 68.8 % — 50.0 66.7 % 1/32 00-04 — «/» 00-02 50.0 62.s 1/48 — 1t64 00-01 50.0 58.3 % 00 50.0 % OFF button doos not function while
Краткое содержание страницы № 18
MODE / DATA ENTRY BUTTONS All MoDE buttons function as on/off switch€s. This means that they are pressed once to ent€r lhe mode, and pressed again to exit the mode. When any of th6 modes hav€ b€en entered, the associat€d LED will b€ lit. For slmpli6ity, any lim€ PATTERN or SONG is pressed, any previously sel€cted mode will be urneO 6tt. The VOICE, TUNE, and MIX settings can bo stored with oach pattern by holding the RECORD pressing button and VOICE, TUNE, or MlX, respeitively. Any
Краткое содержание страницы № 19
pitch pad, The TUNE mode is used to sslect the desired for each drum and the click. When it is pressed, ils LED will llght, and the display will read: =0 This display app€ars when TUNE is first pressed, and the display was not pr€viously in MIX or VOICE mode pad. pitch for a drum lt is used to s€l€ct the of the click (melronom€). The pitch amount can be changed wilh th€ slider,or the -16 +l- anow buttons. The range is from to +15. As with the voice mode, pressing a drum pad will select lhat d
Краткое содержание страницы № 20
The +/- arrows and the SELECT slider can be used to selecr a new lempo, or a dir€crty wilh rhre€ digirs on keypad. Tempo «hiig;, ;r; lTlL.:T_T-:lrer€d -rh €TTecilv€ as soon as th€y are €ntered, and th€ REcoRD bunon does not hav; to be presssd. In SONG mod€, the t€mpo is displayed as a relative amount of change from th€ pr€- programm€d song t€mpo. The display reads: The. current t€mpo (thE one most recenlly recalled within a song) will be displayed in the lower display,.and.
Alesis HR-16 Барабан
Производитель:
Модель:
HR-16
Дата:
1995
Категория:
Группа:
Описание:
Руководство по техническому обслуживанию
Hасто́льная кни́га тип:
Руководство по техническому обслуживанию
Страницы:
40
Размер:
916.58 Kbytes (938577 Bytes)
Язык:
english
Пересмотр:
1
Hасто́льная кни́га ID:
Дата:
1995 07 27
Качество:
Электронный документ, ни сканирование, очень хорошо читается.
Дата загрузки:
2017 09 26
MD5:
411563d2dc4a40e5cebf50b5c4747e77
Загрузки:
847
Информация
PREFACE …
ii
READ THIS!
…
ii
WARNINGS …
iii
SAFETY SUGGESTIONS
…
iv
General
Troubleshooting …
v
1.0 General Description
…
1
1.1 Main PC Board Revisions
… 1
2.0 Power Supply
…
1
2.1 Battery Backup
…
2
2.2 PUP Circuit
…
2
3.0 The 8031
…
3
3.1 Reset
…
3
3.2 Memory Mapped
I/O … 4
3.3 Keypad
I/O …
4
3.4 MIDI I/O
…
4
4.0 DM3AG ASIC
…
5
4.1 Mask
ROMs …
5
5.0 Analog Signal Paths
…
6
5.1 Drum Signal
Output …
6
5.2 Piezo/Data Slider
Input … 6
5.3 Tape
I/O …
6
5.4 Tape
Output …
7
5.5 Tape Input
…
7
6.0 Test Procedures
…
7
6.1 General Testing
…
8
6.2 Internal Diagnostics and Hidden Keys
… 8
6.3 DAC Adjustments
… 8
7.0 Updates and Corrections
…
9
7.1 New SRAM Supply
Circuit … 9
7.2 Glass Zener
(D15) …
9
7.3 Dirty Cliff
jacks …
10
7.4 Ground
CE …
10
7.5 RF resistor
…
10
7.6 10K MIDI Resistor (R5)
… 11
7.7 MIDI Pullup
…
11
7.8 RF Shields
…
11
7.9 LCD Contrast
Adjustments … 11
7.10 DAC Drift
…
12
7.11 Old Keypad PC Boards
… 12
7.12 Lifting R41
…
12
7.13 Reset
Capacitor …
12
7.14 Sram Capacitor
…
12
7.15 Tape Capacitors
…
13
7.16 RF chokes
…
13
7.17 AQ reset threshold
… 13
7.18 AQ
R116 …
13
7.19 Volume Slider
Wiring … 13
7.20 PUP
Capacitor …
14
8.0 Common Solutions
…
15
9.0 Service Parts List
…
18
10.0 Software History
…
20
11.0 MIDI Implementation
…
23
12.0 Service Manual History
…
31
INDEX …
32
показать больше
-
Alesis HR-16 — page 1
Instruction Manual …
-
Alesis HR-16 — page 2
Dear Alesis Custon€r: You have. iust purchased a_ powedul rnusic.producliodcomprehensive eledronic percussion system. ll9″:9 l?k».?.Aoment to glancellrough this manual to gaiir a better undeFtanding of the ope;ation ot the HR-16, the MMT-8, and the HR-16:8. The operating systems of the Atesls HR-16 and the HR.16|B are tdentlcat wlth a f …
-
Alesis HR-16 — page 3
ALESIS HR.16 HIGH SAMPLE RATE DRUM MACHINE TABLEOFCONTENTS INTRODUCTION HR.16 QUICK PATTERN MODE RECOFIDINIGAPATTERN 16 BIT DIGITAL PACE 3 4 6 6 8 10 12 OUAITIZE… STEP EDIT MODE…….. schGh/bDE SONGEDrr. coPY……… zuTTON DYNAM|CS…………………………. START/STOP F@TSWITCH ……. …,…., z o …
-
Alesis HR-16 — page 4
L R OUT tN SM/ @r tN w rc ff/OFF oulrur2 tAE mP Lf,tot l __ @rt ttrr4t I rtr | E@@ @@@: @EE ::_) ldY,Ll l «-,’ I -w t,* | _E tMt IMI EEtIEtr] TIEEEE ll tr | | lt ll ll ttttttitlttttl t|||l ftft. …
-
Alesis HR-16 — page 5
INTRODUCTION The Alesis HR-16 (High sample Rate / 15 bit drum machine) iq a user {riendly,.yet exlremely powerful MlDl drum sequencer / sound goneralor. The sound. generation caoabiliti-es ot the HR-16 include 16 independent drum «voicss»‘ 6ach of which can bo assigned to any ons of 49 digital samples (47 in the HR-1 6:B) , and can b …
-
Alesis HR-16 — page 6
HR.16 QUICK BASIC SETUP ‘1. Connecl output 1 (either left , right or both) to a suitable monitorinq system. I outDut 2 is connscted, the desired drum pads must be assigned ro oup»i i rii»iltrl i,,rix;iffi». (See MlX.) ?: .9llg1ltt: YlDt tN iack of rhe.HR-16 ro the MtDl OUT jack of a sequencer, an external orum pao conlrolsr, or …
-
Alesis HR-16 — page 7
PATTERN MODE When power is tirst turnsd on, the HR-l6 will be in SONG or PATT mode (SONG or PATT LED lii), depending on ths mode that was selectod before power was turned off. The song oi pattern number will also b€ the same as whsn power was turned oft. PATT (pattern) Button Press ttib PATT’button lo 6nter pattsrn mode. PATT LED will light. …
-
Alesis HR-16 — page 8
RECORDING A PATTern (Atso see LENGTH and QUANT|ZE) ]o-reco! ou.lg1teLll press and hold rhe RECORD button, and rhen prsss the pLAy button. Ihe HR-16 wirr immsdiat.ry bsgin praying back any existing drums in ths currontrv s9l99lgq pattsrn from rhe bsginning, and will iad any new drums piayed on rhe Uutton. o’, via MlDlto the pattern. The pLAy an …
-
Alesis HR-16 — page 9
When a new lenqth is ontsred (RECORD), any drum evsnts lhat were beyond lh€..new sel lenoth will be;rased. It the new length is bnger than ths prev’ous one’ tns aoolpnal ffiih «;iil 6elirf»J «ittr «ir»n»e. lf it is disired to iEmove or add lsngth 1o ihe beginning of i oitr»rn, first set the desired len …
-
Alesis HR-16 — page 10
01 01 TOM 1 is now complet^ely_eJased from pattern 1. When erasing a single drum, it is not nec€ssary to press RECORD. In SOI’IG mods, holding the ERASE button will cause tha following display: Pressing the RECORD button will erase the currently selected song number. When erasing a pattern or song, the erass is not executed until RECORD is o …
-
Alesis HR-16 — page 11
singls steps of the current quanlize value (you cannot movg backwards). lf quantize is set to i/16, each step will equal 24196 (lf swing is set to 50%). lf a drum existed on a slep in between the current quantize value, it will play as it is stepped pasl, but tho display will not stop on that drum. The lower.display shows the drum thai was triggere …
-
Alesis HR-16 — page 12
T-hE fhst lins ol.ths display. is now.showing the.current song number being played, and lhe curent bear number of the pattsrn being prayed. The iecond rine of ihe disoiau ii showing rh.e_ srep number and ihe patrern iisigneo ro ttre iief triid ptir»riiiiiri» momenr.. wh_en rhe song adv_al:i.s.io_rhe next sGp, rhe disprav ifli[ «no*lr …
-
Alesis HR-16 — page 13
To del€te a slep lrom a song, press and hold lhe DELETE button, and the display will read: STEP 01 PATT 27 To complete the del€tion, the RECORD button must be pressed while still holding the DELETE button. This shifts all patlerns after the bisplayed step down on6 step. After all steps have b€€n deleted, the display will show step 1 being E …
-
Alesis HR-16 — page 14
COPY Copylng a PATTern to ltsetf Tho copy button is used to- app€nd a patt€rn or song to anoth€r panern or song. lt only functions while th€ coPY button is held down. -lf the copy button is releised (eilher befor€ or afler the copy is execut€d), th€ previous mode will show up on the display, and copy mode is €xited. When in PATT mod …
-
Alesis HR-16 — page 15
Th€ display is now waiting for a second drum pad lo b€ Press€d (pressing RECORD at lhis point will .do nothing). lf for example, TOM 1 was pressed, lhe display would read: COPY FROM PATT CLS HAT > IOM 1 The display of th€ s€cond pad pressed remains underlined, indicaling that it can still be changed by selecting anolh€r drum pad. As …
-
Alesis HR-16 — page 16
OFFSET The oFFSET button is used to add or subtract a number of crock purses (384th notes) to a drum or pattern. lf OFFSET is held down, th6 display wili show:’ The keypad can be used to enter a two-diglt number (OO_99), or the +/_ arrow buftons can be used lo increment or decrehent the amount. ‘The range oi the offset,is 199. Entoring a …
-
Alesis HR-16 — page 17
shown beside it. O swing = 5A% = no swing. Tho range of the swing is determined by tho current quantize value. The swing amount will only effect newly recorded drum events, like in quantize. The swing amounls are shown below: OUANT SWING PERCENTAGE 1t6 1ts 1t12 1r24 1/32 1/48 1t64 OFF oo -24 oo-12 00-08 00-06 00-04 00-02 00-01 00 50.0 — 68.8 % 50.0 …
-
Alesis HR-16 — page 18
MODE / DATA ENTRY BUTTONS All MoDE buttons function as on/off switch€s. This means that they are pressed once to ent€r lhe mode, and pressed again to exit the mode. When any of th6 modes hav€ b€en entered, the associat€d LED will b€ lit. For slmpli6ity, any lim€ PATTERN or SONG is pressed, any previously sel€cted mode will be urneO …
-
Alesis HR-16 — page 19
The TUNE mode is used to sslect the desired pitch for each drum pad, and the click. When it is pressed, ils LED will llght, and the display will read: This display app€ars when TUNE is first pressed, and the display was not pr€viously in MIX or VOICE mode for a drum pad. lt is used to s€l€ct the pitch of the click (melronom€). The pitch a …
-
Alesis HR-16 — page 20
The +/- arrows and the SELECT slider can be used to selecr a new lempo, or a lTlL.:T_T-:lrer€d dir€crty wilh rhre€ digirs on -rh keypad. Tempo «hiig;, ;r; €TTecilv€ as soon as th€y are €ntered, and th€ REcoRD bunon does not hav; to be presssd. In SONG mod€, the t€mpo is displayed as a relative amount of change from th€ pr …
-
Alesis HR-16 — page 21
shown beside it. O swing = 5O’/o = no swing. The range ot lh€ swing is determined by the current quantize value. The swing amount will only eff€ct newly recorded drum events, liko in quantize. The swing amounts are shown below: OUANT SWING PERCENTAGE 1t8 00 — 16 1t6 1t12 1t16 1t24 1€,2 00 -24 00-12 00-08 00-06 00-04 00-02 00-01 00 50.0 — …
-
Alesis HR-16 — page 22
MODE / DATA ENTRY BUTTONS All MoDE bunons funcrion as on/otf swilches. This means that th6y are pressed once to enl€r the mode, and pr€ss€d again ro €xit rhe mod€. when any of th6 modes !ql1!g.n ent€red, lhe associared LED wiil b€ tir. For simpti6iry, an/ iir» PATTERN or SONG is pressed, any previousty selected mod€ will be tuh …
-
Alesis HR-16 — page 23
CLICK TUNE The TUNE mode ls used to select lhe desired pjtch for €ach drum pad, and th€ click. When it is pressed, its LED will light, and the display will read: This display app€ars wh6n TUNE is first pressed, and the display was nol pr€viously in MIX or VOICE mode for a drum pad. lt is used to sel€ct the pitch of the click (m6tronome). …
-
Alesis HR-16 — page 24
Th€ +/- anows and the SELECT slider can be used to selecr a new rempo, or a lT?:..9T_T :lrered direcrty wirh rhr€€ digirs on th€ keypad. Tempo cna,ig€s-ar» enecflve as soon as th€y ar€ €ntered, and the REcoRD button does not hav; to be pressed. In SONG mod€, th€ t€mpo is disllayed as a relativ€ amount of change from lh? …
-
Alesis HR-16 — page 25
02 DRUMNOTES: The +/- buttons are used to turn this function on or off. The default is OFF. TRANSMIT MIDI DRUMS The TRANSMIT MlDl DRUMS tunction is used to delermine whether or not the HR- 16 drum events should be lransmitted out MlDl. The display looks like this: 03 TRANSMIT MIDI DRUM I{OTES: Th€ +/- arrow bultons are us€d to lurn this functio …
-
Alesis HR-16 — page 26
MIDI ECHO The MlDl EcHo function is used lo echo any MrDr information lhat is received at rh€ MlDl input to th€ MlDl output. The displiy looks lik€ this: The +/- arrow buttons are used to turn rhis function on or off. The defaurt is oN. The HB-l6 will not echo system exclusiv€ data. MIDI PROGRAM CHANGE Tho MlDl PROGRAM CHANGE function is us …
-
Alesis HR-16 — page 27
MIDI CLOCK OUT The MlDl CLOCK OUT function is usod to turn on or off the transmission of MlDl clocks. The display is as follows: 08 MtDl CLOCK OUTENABLE: The +/- arrow bultons are used to turn this function on or off. The default is ON. AUTO START Th€ AUTO START lunction is used to turn on or off th€ capability of starting a patt€rn or song a …
-
Alesis HR-16 — page 28
CLICK VALUE The click valu€ function is us6d to set ths metric value of the click (metronom€). The display looks like this: 1 The possible values are th€ sams as in quantize: 1/4, 116, 1tg, 1t12, 1/16, ‘1124, 1/32, 1/48, 1t64, and OFF. The keypad and +/- arrow buttons are used to change the value. The default is 1/8. lf the CLICK value i …
-
Alesis HR-16 — page 29
hit. Th€se curves will also €ffect MlDl input trigg€ring of lh6 drums. In addition, MlDl input velocity ssnsitivity allows 32 st€ps of volume control per drum when us€d wilh gxl6rnal controll€rs such as drum pads or sequencers. Nol€, howevsr, that recording MlDl input information on the HR-16 will only slore I steps of velocity inside …
-
Alesis HR-16 — page 30
MIDI ln all five ot th€se pag€s, pressing RECORD initiatos the oporation. The verify tunction is us€d lo insure that the data just recorded to tap€ is good. Load from tape. loads th€ enlire memory with lh6 data on lape. Load palt and load song allow a singlo paltern or song to be loaded from a tap€. The keypad can b€ used io select th …
-
Alesis HR-16 — page 31
STORING TO DISK USING MIDI SYSTEM EXCLUSIVE BULK DATA DUMP The HR.16 send to MlDl function is orovided so lhat lh€ data can b€ slored on a computer, a Yamaha MDF-1 (MlDl FileQ or a Yamaha DX-7llFD. The data is senl out as one block of system exclusive data, with the length being determined by the amount of memory b€ing us6d. No more than 507& …
-
Alesis HR-16 — page 32
TO B) Kgep the Sync signal at abut OVIJ in oder to avoid dtopouts. fi the HR-16 does not see the sync tone lor 1,/2 seand, it will assume that the sy;c tone has enAed ana iti go into STOP mode. p, tt m.s-shU, do tnt .use any noise reductbn , Ee, or signal processing on the sync tone. u) Avotd rccgrcilng h’gh eneryy, hoh-lrequency trad<s nex …
-
Alesis HR-16 — page 33
REMAINING MEMORY Holding RECORD and pressing LENGTH causes the following display: 1 This shows the amount of memory lhat has not b€en used. Note that some op€rations may not be possible even though it s€ems that th€re is still a small amounl of memory available. This is due to the tact that th€ HR-16 requires enough memory to duplicale a …
-
Alesis HR-16 — page 34
HR-16 MIDI IMPLEMENTATION CHART :unctlon Transrnited Recognlzed Renrarks :HAIINEL Default Changed r-l 6 t-16 t-l 6 t-t 6 Memodzcd dODE Default M$sage3 Atered Mode 3 Mode I Honors modes 1,3 NOTE NUMBER True Yoice 0G127 00-t 27 3ee n0te I Notc on YELOCITY NotcOff o I o I roucH Keys Chan’s I r I x PITCH BENDER I x CONTROL CHA},IGE x I PROGRAvI CH …
-
Alesis HR-16 — page 35
SYMPTOM HR.1 6 TROUBLESHOOTING CHART WHAT’S PROBABLYWRONG WHATTO DO No pow€r. Power supply not properly connected. Power swilch not lurned on. Power supply malfunction. Check power supply connection. Push in oower switch. Check with dealer to test the powsr supply on a different unit. No sound- Audio cable shortsd. Outpul s€lgction. Volume …
-
Alesis HR-16 — page 36
ALESIS MMT.8 MULTI TFACK MIDI RECORDER ERASE …..’..’..,….’.’.’………… 9 …
-
Alesis HR-16 — page 37
-sffiffiffiY-1 1-) n. O O O?T I _/ _./ (, u/ __/ —,/ __/ J M ffi/ @I IN THRU OT IN ryrc Q’ffi A.eel3 u s@ ffi L mJ 7lr=C|El :, : — l|ur’l 1il441 lAill E==_ l@,,ll»n I l-‘l — l’rdl lreel lr{l r-. ,= teA,ttm’ll,lfll I I l-@ r*,;-l — l-,,;l :@ I]!I!-J @ @ @ EETIEE tilEEEE ttE -€EE- *n, ll ,»‘., l l -. …
-
Alesis HR-16 — page 38
INTRODUCTION The Alesis MMT-g Mufti Track MlDl Recorder is a user fdsndlv sequencer. rr is abre io re6ia any.inrormaiion rele-ivJo;i,fi,id,il?iiFliffLr8y:jJJg,?j pressure and note olt vetmirv), arid.sro-re it inro non-*Lrii»‘riror’ d;,;;;A»i: fii; |$S,’$.»‘ji:f$?Jl»llje notdi, conrrorrers, ;i6[ dfi;ff;uch, p …
-
Alesis HR-16 — page 39
MMT.8 OUICK BASIC SETUP 1. connect the MlDl ouT of the keyboad to the MlDl lN of he MMT-8′ i. Connea itre MlDl lN of the keybirard to the MlDl OUT of the MMT-8′ g: Cffi;a ih; audio output ot tfre keyboard to the audio input of a suitable monitoring system (amplifier, mixer, stereo system). These are three basic setups. A single keyboard i …
-
Alesis HR-16 — page 40
MlDl OUT to other MlDl Instruments AUDIO OUT Et— AUDIOOUT Al€sis MMT-8 Instructlons ….,…. page 4 …
-
Alesis HR-16 — page 41
FIG. 3 larrr —aLlo -o — E-EOO -L] fl — -J -r.r’ AUDIO OUT 1:’:::3 EaltlEs -!lor:- L MIDIOUT lDl THRU t0 other lllDl Instruments AUDIO OUT …
-
Alesis HR-16 — page 42
PART MODE Selectlng and Ptaytng a PART Wlrglpolq»r is fifst iurnod on, the sequencer will be in SONG or pART mode (SONG or PART LED lit),.depending..on the mode that was selected before power was ti.,rnea-ott. I he song or part numbsr will also be the samg as when Dower was trjrned olf. PART Button Press lhe PART bunon to enter PART mode if lh …
-
Alesis HR-16 — page 43
part ls reached, atler which ths new part will begin playing, and the display will reved back to PLAYING PART. Pressing STOP/CONTINUE will stop playing a part, and ths display will return to the select part display. Any notes lhat weresustaining will turn off. Pressing STOP/CONTINUE again will begin playing a part lrom the beginning ol the beat it …
-
Alesis HR-16 — page 44
Enlerlng RECORD Afler rele_asing REcoRD, the REcoRD LED will remain lit to indicate that it is readv to record if.PLAY is plesssd, unless no track,was s€lecred (no track LED lit Jliai, ;h;h;;ui; cause lhe RECORD LED to turn ofl atter releaiing ihe BECORtj’button. -lt llgllggllrlltuE is pressed.white.the RECoBD LED is onine necono’lEo *i …
-
Alesis HR-16 — page 45
with the ksypad. In eilher RECORD button is or€ssed. case, the new leng’th is not entered into ths part until the Whsn RECORD is pressed the display changes to: This display romains until REC,oRD is released. lf LENGTH is released bstors RECORD is pressed, no change lo the length will be made, regardless of what was Pressed on lhe keypad. lf …
-
Alesis HR-16 — page 46
The.display will remain thb way until the RECORD button is released, after which the display will return to its previous itate. Eraslng ! rlngle TRACK Io erase a single track, pross andfiold the ERASE bu.on (all rrack LEDs will light), and :elqcl.tr9 d€sired rrack humber. The setea;d irack;iEb’-rniti’i»r»,n rn, and rhe orher t …
-
Alesis HR-16 — page 47
01 Pressing ths RECORD button will srase lhe currently selec-ted song number. The eight track buttons aro inac{ive when erasing songs. The page up and pags down buttons are also inactivs wh€n srasing songs. In all cas6s, the erase is not executsd unlil RECORD is pressed, and will be aborted if ERASE is released before pressing RECORD. The ERASE b …
-
Alesis HR-16 — page 48
Copylng r TRACK to another TRACK of the lemc PART To. copy a single trad( to another track of the same part number, press and hold COpy, and solsct the source track. The selocled track’s LED will remain lit, dnd all lhs other track LEDS sercq rne source rrafi. I ne seroded tracl(‘s LELI will remain lit, and alllhs other track LEDS will lu …
-
Alesis HR-16 — page 49
By scrolling through the list, any sslscted data can be copied lrom one track or part to another. For example, if a track contained notes on many MlDl channsls that had been prsviously combined together, copying only one MlDl channei to a new lrack would allow the parts to be separated out again. Also, copying NOTES ONLY Jrom a track to itself will …
-
Alesis HR-16 — page 50
01 1ne 991.nuq!er, indicating lhat ir can be changed with the keypad of th€ +/- buttons. To 1T:1:I_»_:tlg.t11Tl!1glhg pase up and-pase down buttins are ussd. nCy movt rne cursor as shown in lhe following displays: The cursor moves to the nexl parameter, and will’loop around» pasl the last pa€meter back lo the first. The MlDl chan …
-
Alesis HR-16 — page 51
127 0t For controllers, lhe display shows the beat, sub-beat, controller number. controller amount, and MlDl channel. The controller range is lrom O to j21. The conlroller amount range is from 0 to 127. The page up and page down disptays scroll as follows: CHAN 01 127 CHAN 1/Q0: :127 CHAN 01 00 :127 CHAN 0l 121:127 CHAN 01 121:127 CHAN CHAN 01 /00: …
-
Alesis HR-16 — page 52
to scroll the data through the display until the 6nd is reached. The display includes the beat, sub-bsat, and any system exclusivs data, as follows: 126 125 1 1/00: 125 124> 126 125 124> 126 125 <123 722 121> elc. Eraslng an ovent Any evsnt being displayed can be erasod by holding ERASE and pressing RECORD. Erasing an 6vsnt removes it t …
-
Alesis HR-16 — page 53
By scrolling through ths list, any selecled dala can bs copied lrom one track or part to another. For example, ff a track containsd notes on many MlDl channels that had been previously combined togethsr, copying only ona MlDl channel to a new track would allow ths pans to be soparated out again. Also, copying NOTES ONLY from a track to iisel{ will …
-
Alesis HR-16 — page 54
lh€ b€al.number, indicaling thal h can be changed with the keypad or the +/- buttons. To 1T::_T_»_9tlpl p.r.aTdeJl: lhe page up and page down bui6ns are u3od. Th€y move rne cursor a3 shown in the tollouring displays: The cursor mov€s to the next parameter, and will «loop around’ past the last parameter back lo lhe first. The …
-
Alesis HR-16 — page 55
127 CHAN01 127 CHAN0l CHAN 01 127 CHAN For controllers, the display shows the bsat, sub-beat, controller number, controller amount, and MlDl channel. The controllsr range is lrom O to 121 . The conlroller amounl range is trom o io 127. The pago up and page down displays scroll as iollows: ‘tl00: CHAN 01 1:127 CHAN 01 121:127 CHAN 01 121:127 CH …
-
Alesis HR-16 — page 56
to scroll. the data through the display until the end is reachsd. The display includes the bgat, sub-beat, and any systsm sxclusive data, as follows: /00: 126 125 ‘l 1/00: 125 124> 126 I25 124> ut/ou: s 126 125 122 121> <123122 121> EraslnE an event elc’ Any event being displayed can be erased by holding ERASE and prossing …
-
Alesis HR-16 — page 57
AT In th6 above choices, prossing RECORD will insert the displayed ev€nt at the current beat and whh values of 0. While in part EDIT, the tast totward and rewind buttons are ussd to advance and retreat, respoc’tiv’ely, through ths list of MlDl evsnls on the sel€ctad lrack. When tho end oJ a track is rLached, or if a tirck is empty, th …
-
Alesis HR-16 — page 58
Selecling a SONG The 00 is underlined to indi€te that it will be changed if a new number is selected wirh the keypad or the +/- buttons. The second lin€ of ths display shows the name of tho currently sslected.song,(uptol4characters). lfthecunentsdng’numberisempty,thesecondlin6 will read EMPW SONG. Pressing the +/- buttons immediately selbi …
-
Alesis HR-16 — page 59
ths lasl displaygd beat. The fast torward and rewind button can be held down simullaneously to «frseze» the display on the curront boat. LOOP The LOOP button is a simole on/ofJ switch with an LED indicalor. Whsn LOOP is on, a part or song will loop back to its beginning when it has reached its end and continue playing indefinitely. lf LOO …
-
Alesis HR-16 — page 60
The sight track LEDs will be off. Prsss the first desired track (it will light solid), followed by the deslinalion track (it willflash),lollowed by BECORD. The display will read: This display remains uniil the RECORD button is reloasgd. The first track and the second track are now combinsd in the second track’s location. Th€ first track rema …
-
Alesis HR-16 — page 61
The 10 quanlize choices are 112, 114, 116, 1lg, 1112, 1/16, 1n4, 1132, 1148, 1164. The +/- buttons of ths keypad can be ussd to scroll through lho choicos. The keypad builons 0-9 can also be us6d lo select lhs quantize value dkeclly, with O=1/2 and 9=l/64. The track sslec{ buttons can be used to solect tho desirod track(s) to be quantizod. When qua …
-
Alesis HR-16 — page 62
TRANSPOSE The TRANSPoSE function alrox,-s.for_1!1ck or part to be rransposed by a user specified number of semitones. When TRANSPOSE is heid down in part rinode, th’e display leads: The keypag can be used to enter a twodigit numb€r of semitones lo transpose up trom the original pitch (00-99), or ths +/- buttons can be used to incremsnt or de …
-
Alesis HR-16 — page 63
This remains untilthe RECORD button is releassd. ln both song and part mode, the tempo can be changed while playing. MID] FILTER The MlDl FILTER button is used lo select what type ol MlDl in{ormation will bs r€corded by lhe MMT-8. Whilo holding down the MlDl FILTER button, the page up and page down buttons can be usad to scroll through the possib …
-
Alesis HR-16 — page 64
ONLY SYNC By using the keypad or +/- buttons, one of the three clocking sourc€s can be sslectsd. Ttte default llting-is lrllDl & INTERNAL (1), wirh rhe olher choiLs being TNTERNAL ONLi (2), and TAPE SYNC (g). The page up and page down buttons cai be used to scroil thrcugh the next lwo clock pagos: The + and — buttons can b€ ussd to turn eac …
-
Alesis HR-16 — page 65
Th6 1o cfick value choices arg 112, 114, 1/6,’llS, 1112, 1116, 1/24, 1132, 1148, 1/64. The +/- bunons of the keypad can be used to scroll through lhe choices. The ksypad buttons 0-9 can also be used to select the click value directly, with 0=112 and 9-t/64. Additional clic* pages can be accesssd with the page up and page down buttons. Pressing …
-
Alesis HR-16 — page 66
In all five of these pages, pressing RECORD initiates the operation. The verity function is used to insure thal the dala just record€d to tape is good. Load f rom taps loads the entire sequenc€ msmory with the data on tape. Load part and load song allow a single part or song to be loaded from a tape. The keypad can be used to seleit the desired …
-
Alesis HR-16 — page 67
data will be 1oo largs for the MlDl f iler’s buffer. No more than 257″ ot memory should be lull when saving lo a DX-7llFD or its buffsr will b€ lillsd as well. The MMT-8 will automatically receivs MlDl system exclusive sequence data trom any of these devices without having to select a spscif ic pags. lf the system exclusive data starts …
-
Alesis HR-16 — page 68
2) Press and hold th6 CLOCK buton. The display will read: MIDI & 3) Use the keypad or + and — buttons to select TAPE SYNC lN. The display will read: 4) Put the tape machine into PLAY. The MMT-8 will automatically start as soon as il receives the ryngton9, causing any olher ssquencers connected lo it to play. Be careful to. rcturn to the b.eginn …
-
Alesis HR-16 — page 69
AUTO LOCATE The MMT€ has Aulo Lmte ability which a,bws you to go directly b a speifrc b€at of a part wihout playing through the beats prior to ths dssired beat number. PART MODE: A. When the MMT-8 is in PLAY — 1. PressandholdeithertheFast-FoMafd TFl orBewind f?l button. 2. Enter the number of the desired beat (3 digits) using the keypad buftons …
-
Alesis HR-16 — page 70
MMT-8 MIDI IMPLEMENTATION CHART Function Transmited Recognizad Remafts CHAI.INEL Default Chonge( l-t 6 t-l6 l-l 6 l- tD Userchangeable vIODE Default Messag es Atered x x NOTE NUMBER Tfue Voice 00-l 27 00-127 Note on YELOCITY Note Off o x o I roucH i’yl Lnon 3 I o I o PITCH BENDER o o CONTROL 0-63 cHAl{cE ff;lii; o o x o o x PROGRAIVI CHAI.IGE …
-
Alesis HR-16 — page 71
MMT-8 TROUBLESHOOTING CHART SYMPTOM WHAT’S PROBABLY WBONG WHATTO DO No sound during playback of recorded Dans. Didn’t record. MlDl channels not properly corresponding with sound sources. Tracks are muted Check MlDl connection. Check MlDl channel assignments. Check track mute selection. Won’t record after touch or system exclusive dat …
-
Alesis HR-16 — page 72
ALES’S LIMITED WABRANTY ALESIS CORPORATION (‘ALESIS») warrants this producl to be lree ot delects in materiat and { workmanship for a period ol 90 days lrom the date of original retail purchase. This warranty is enforceable only by the original retart purchaser. ‘» t To be protecled by this warranty, the purchaser must comp …