-
Contents
-
Table of Contents
-
Bookmarks
Quick Links
COMPACT DISC STEREO SYSTEM
SISTEMA ESTEREO CON REPRODUCTOR DE DISCOS
COMPACTOS
CHAINE STEREO AVEC LECTEUR DE DISQUES COMPACTS
NSX-V70
NSX-V72
(ilTi5i
DIGITALAUDIO
Related Manuals for Aiwa NSX-V70
Summary of Contents for Aiwa NSX-V70
-
Page 1
COMPACT DISC STEREO SYSTEM SISTEMA ESTEREO CON REPRODUCTOR DE DISCOS COMPACTOS CHAINE STEREO AVEC LECTEUR DE DISQUES COMPACTS NSX-V70 NSX-V72 (ilTi5i DIGITALAUDIO… -
Page 2
(you will find them on the rear of your set) in the space provided below. Please refer to them when you contact AIWA dealer in case of difficulty. Model No. CX-NV701CX-NV72 Serial No, Model No. SX-NV70 Serial (Lot) No. -
Page 3
Felicitations La lecture estereo Aiwa. I’utilisation tome el tiempo Au sujet de la cha~ne y familiarizarse Votre chalne @et @et est fournie avec Ies accessoires de Ias unidades… -
Page 5: Table Of Contents
INIIICIE PREPARATIVES PRECALICIONES … 7 CONEXIONES … 9 POSIClONAMIENTO DE LOS ALTAVOCES …11 ANTES DE LA OPERACION … 13 PIJESTA EN HORA DEL RELOJ … 15 SONIDO AJUSTE DEL SONIDO … 17 ECUALIZADOR GRAFICO … 17 SONIDO AMBIENTAL DSP … 19 RECEPCION DE LA RADIO SINTONIZACION MANUAL …
-
Page 6
Do not period of time, in, a small even when your dealer or an Aiwa or repair. the AC cord and contact a… -
Page 7: Precaliciones
* Si el cable de alimentacion de CA esta estropeado, en contacto con su concesionario o centro Aiwa para que se 10 cambien o reparen inmediatamente. Si se produce algun problems, desconecte alimentacion de CA y pongase en contacto de servicio cualificado.
-
Page 8
IMPORTANT Connect the AC cord after connecting speakers, all optional equipment. There are no differences between the front between the surround speakers. Both connected as L (left) or R (right). Connect the SX-NV70 right speaker to the unit. Connect the speaker cord to the SPEAKERS The cord with the white stripe should be connected terminal… -
Page 9: Conexiones
CONEXIONES IMPORTANTE Conecte el cable de alimentacion de CA despues conectado Ios altavoces, Ias antenas y todos Ios demas equipos opcionales. No existen diferencias entre Ios altavoces Ios altavoces de sonido ambiental. Ambos altavoces podran conectarse como altavoz (L) o como altavoz derecho (R).
-
Page 10
lr FM 75 c1 CONNECTIONS stand the AM antenna on a surface + Fix the claw to the slot. position the antennas AM loop antenna: Position to find the best direction and posikon for radio reception. FM feeder antenna: Extend this antenna horizontally in a T-shape and fix its the wall with cellophane tape, etc. -
Page 11: Posiclonamiento De Los Altavoces
Para poner la antena de AM en position una superficie + Fije el gancho en la ranura. Para colocar Ias antenas Antena de cuadro de AM: Pongala en la direccion y en la position que ofrezcan recepcion de la radio, Antena de FM: Extienda horizontalmente esta antena formando una T y fije sus extremes…
-
Page 12
POWER ._— _ —.. —. ——— ——.. —< BEFORE OPERATION turn the unit on Press one of the function CD). Playback of the inserted tuned station is received The POWER button is also available. The disc compartment DEMO (Demonstration) When the AC cord is connected window demonstrates is turned on, the DEMO display display. -
Page 13: Antes De La Operacion
ANTES DE LA OPERACION Para encenck?r la unidad Pulse uno de Ios botones de funcion (TAPE, TUNER, AUX, CD). La reproduction del disco o de la cinta insertada recibira la emisora previamente sintonizada reproduction directs). Tambien podra utilizarse el boton POWER, El compartimiento de discos puede…
-
Page 14
SETTING THE CLOCK When the AC cord is connected for the first time, the II SET button flashes. Set the time as follows while the power is off. Press the SET button. The hour flashes. Press DOWN or W designate the hour. Press the SET button to set the hour. -
Page 15: Pijesta En Hora Del Reloj
PUESTA EN HORA DEL RELOJ Cuando el cable de alimentacion de CA se conecte vez, el boton II SET parpadeara. Ponga la hors como se indica a continuation, alimentacion r?stedesconectada. Pulse el boton SET. La hors parpadeara. Pulse el boton W DOWN o W la hors.
-
Page 16
“ VOLUME MIN. CEEI—E5BE 1111 + 111111 +11111111 1111 + ‘EiEE1 ELECTRONIC GRAPHIG EQUALIZER “QEEiil ELECTRONIC GRAPHIG EQLIALIZER ADJUSTING THE SOUND VOLUME CONTROL -+ El Turn the VOLUME control @ on the main unit, or press the VOLUME buttons @on the remote control. BBE SYSTEM + H The BBE system It also enriches… -
Page 17: Ajuste Del Sonido
AJWl% DEL SONIDO CONTROL DE VOLUMEN + El Gire ISI control VOLUME @ de la unidad principal o pulse Ios botones VOLUME@ del control remoto. SISTEMA 13BE + H El sistema BBE realza la claridad del sonido de alta frecuencia. Tambien mejora la funcion…
-
Page 18
DSP SURROUND -+ E The DSP (Digital Signal Processor) surround circuits can recreate the effect of sounds reflected from walls or ceilings, sound presence of real environments. There are three modes with matching curves. Press one of the SURROUND button. + @ Equalization curves are selected… -
Page 19: Sonido Ambiental Dsp
SOW(I AMBIENTAL DSP + E Los circuitos de sonido ambiental DSP (procesador digital) pueden crear el efecto de Ios sonidos paredes o el techo, para obtener la presencia ambiente real. Existen tres modos sus correspondientes ecualizacion graficas. Pulse uno de Ios botones SURROUND. Las curvas de ecualizacion se seleccionan…
-
Page 20
TUNING uPWf DOWN MONO MANUAL TUNING Press the TUNEFUBAND button to select the band repeatedly. If the power is turned off, the previously played (Direct Play Function). Press the M DOWN or H UP button to select a station. Each time the button is pressed, the frequency When a station is received, ‘TUNE is displayed for 2 seconds. -
Page 21: Sintonizacion Manual
SINTONIZACION MANUAL Pulse repetidamente el boton TUNER/BAND seleccionar la banda. Si la alimentacion esta desconectada se recibira la emisora previamente sintonizada (funcion de reproduction directs). Pulse e! boton DOWN seleccionar una emisora. Cada vez que pulse el boton, la frecuencia cambiara. Cuando se reciba una emisora, “TUNE”…
-
Page 22
TUNER BAND ‘8 0000 0000 PRESETTING STATIONS + EI The unit can store a total of 32 preset stations. When a station is stored, a preset number is assigned to the station. preset number to tune in to a preset station directly. Press the TUNER/BAND button to select a band, and press the M… -
Page 23: Preajuste De Emisoras
PREAWSTE DE EMISORAS + Esta unidad puede almacenar un total de 32 emisoras. Cuando almacene una emisora, a esa emisora se Ie asignara un numero de preajuste. Utilice el numero de preajuste para sintonizar directamente una emisora preajustada. boton TUNER/BAND para seleccionar Pulse una banda, y pulse M…
-
Page 24
DIRECTION/PRESET DISCDIRECT PLAY BASIC OPERATIONS LOADING DISCS + El Press the CD button, then press the 4 OPEN/CLOSE button to open the disc compartment. with the label side up. To play one or two discs, place the discs on tray 1 and 2. To play three discs, press the DISC CHANGE button to rotate the trays after placing two discs. -
Page 25: Operacicines 13 Asicas
OPERAClONES BASICAS lNTROtNJCCION DE DISCOS -+ Pulse el bot6n CD, y Iuego pulse el boton 4 OPEN/ CLOSE para abrir el compartimiento Introduzca el(los) disco(s) con el Iado de la etiqueta hacia arriba. Para reproch.mir u no o dos discos, ponga Ios discos en Ias bandejas 1 y 2.
-
Page 26
DISC ~ DIRECT PLAY1 0000 0000 Selecting a track with the remote control — 1 Press one of the DISC DIRECT PLAY buttonsto select a disc. 2 Press the numeric buttons and the +10 button to select a track. Example: @To select the 25th track, press the +1O, +1Oand 5 buttons. -
Page 27
OPERACIONES Seleccion de una cancion con el control remoto + 1 Pulse uno de Ios botones DISC DIRECT seleccionar un disco. 2 Pulse Ios botones numericos y el boton +1Opara seleccionar una cancion. Ejemplo: @ Para seleccionar la cancion numero 25, pulse Ios botones +lo, +loy5. -
Page 28
0000 0000 DIRECTION < } PRESET BASIC OPERATIONS PROGRAMMED PLAY Up to 30 tracks can be programmed from any of the inserted discs. Use the remote control. Press the PRGM button twice in stop mode. The PRGM indicator flashes on the display. When the PRGM button is pressed once in step 1, the unit enters the KARAOKE PROGRAM (page 50). -
Page 29
OPERACIONES REPROIXJCCION PROGRAMADA Se podra programar un maximo de 30 canciones de cualquiera de Ios discos introducidos. Utilice el control remoto. dos veces el boton PRGNI estando en el 7 Pulse modo de parada. El indicador PRGM parpadeara en el visualizador. Cuando se pulse una vez el boton PRGM en el paso 1, la unidad se pondra en el modo KARAOKE PROGRAM (pagina 51). -
Page 30
EJECT BASIC OPERATIONS INSERTING TAPES On deck 1, tapes are always played back on both sides. On deck 2, you can select a reverse mode to play back one or both sides. Use normal (type I), CrOz (type 11)or metal (type lV) tapes for playback. -
Page 31: Operaciones Basicas
OPERACIONES BASICAS INSER(XON DE CINTAS En la platina 1, Ias cintas se reproduce caras, En la platina 2, podra seleccionar el modo de inversion para reproducer una o dos caras. * Utilice cintas normales (tipo I), de CrOz (tipo (tipo para la reproduction.
-
Page 32
/—. >1 MUSIC SENSOR If there is a 4-second or longer blank between each track, the search for the beginning of the current or next track during playback can be easily made. When the F of the 4- button to move to the next track or the 4 beginning of the current track. -
Page 33: Reproduction Continua
OPERA ClONES BASICAS SENSOR MUSICAL Si hay un espacio sin grabar de 4 segundos o mas entre cada cancion, la busqueda del principio de la cancion que este siendo reproducida o de”la siguiente cancion podra realizarse facilmente. Cuando el indicador F del boton +> este encendido, pulse el boton * para pasar a la siguiente cancion o el boton <…
-
Page 34
REV MODE UINR rEEpl RECIREC MUTE BASIC RECORDING This section explains how to record from the tuner, CDs, or external equipment. If you want to record from tapes, see pages 36 to 38. Preparation Wind up the tape to the point where recording will start. Use normal (type I) and Cr02 (type Insert the tape to be recorded on into deck 2. -
Page 35: Grabacion Basica
GRABACION BASICA Esta seccion explica como grabar del sintonizador, compactos o equipos exteriors. Si desea grabar de cintas, consulte Ias paginas 37 a 39. Preparation Bobine la cinta hasta el punto donde vaya a empezar la grabacion. Utilice cintas normales (tipo I) y cintas de CrOz (tipo hater la grabacion.
-
Page 36
DOLBY NR DUBBING THE TAPE MANUALLY Preparation Wind up the tape to the point where recording will start. Note that recording will be completed on one side of the tape only. Press the TAPE button. Insert the original tape into deck 1 and the tape to be recorded on into deck 2. -
Page 37: Copiadci Manual De Cintas
COPIADO MANUAL DE CINTAS Preparaci6n Bobine la cinta hasta el punto donde vaya a empezar la grabacion. c Tenga en cuenta que la grabacion se completara en una cara de la cinta solamente. TAPE. Pulse el boton hserte la cinta original en la platina 1 y la cinta que vaya a grabar en la platina 2.
-
Page 38
DUBBING THE WHOLE TAPE This function allows you to make exact copies of both sides of the original tape. The reverse side of both tapes will start simultaneously as soon as the longer tape has been reversed. Dubbing does not start from a point halfway in the tape. The reverse mode is automatically set to =1. -
Page 39: Copiado De Toda La Cinta
COPIADO DE TODA LA CINTA Esta funcion Ie permitira hater copias exactas de ambas caras de la cinta original. La cara de inversion de ambas cintas empezara a moverse al mismo tiempo, tan pronto como termine de invertirse la cinta mas Iarga, La copia no empezara desde un punto ubicado en medio de la cinta.
-
Page 40
DISC DIRECT PLAY-1 Al EDIT RECORDING The Al EDIT function enables CD recording without worrying about tape length and track length. When a CD is inserted, the unit automatically calculates track lengths. If necessary, the order of tracks is rearranged so that no track is cut short. Al EDIT recording will not start from a point halfway into the tape. -
Page 41: Grabacion Con Edicion Al
GRABACION CON EDICION Al La funcion Al EDIT (edition Al) permite grabar discos compactos sin preocuparse de la duration de la cinta y de Ias canciones. Cuando se inserte un disco compacto, automaticamente la duration de Ias canciones. necesario, el orden de Ias canciones podra cambiarse ninguna cancion quede cortada.
-
Page 42
Al EDIT RECORDING To check the order of the programmed Before recording, press the EDIT/CHECK and press the +4 or — button repeatedly. DISPLAY @ Tape side @ Program number @ Programmed track numbers @ Track number To add tracks from other discs to the edit program If there is any time remaining on the tape after step 5 of page 40, you can add tracks from other discs in the CD compartment… -
Page 43: Grabacion Con Edicion Programada
GRABACION CON EDICION Al Para comprobar el orden de Ios numeros canciones programadas Antes de grabar, pulse el boton EDIT/CHECK la cara A o la B, y pulse repetidamente el boton + VISUALIZATION @ Cara de la cinta @ Ntimero del programa @) Numeros de ias canciones…
-
Page 44
4 f!ib,% DISC DIRECT PLAY1 EDIT/CHECK REC/RECMUTE DIRECTION < } PRESET PROGRAMMED Press the numeric buttons to designate the tape length. 10 to 99 minutes Example: When using a 60-minute buttons. DISPLAY @ Tape length @ Tape side A (front side) @ Maximum Press one of the DISC DIRECT PLAY buttons to select a disc and press the numeric buttons to… -
Page 45
GRABACION CON PROGRAMADA Pulse los botones numericos durach5n de la cinta. Se puede especificar una duration de 10 a 99 minutes. Ejemplo: Cuando utilice cintas de 60 minutes, botones 6 y O. VISUALIZATION @ Duration de la cinta @ Cara A de la cinta (cara delantera) @ Tiempo maximo de grabacion para la cara A… -
Page 46
In this case, turn the MIC MIXING MIN. Recommended microphone The use of a unidirectional type microphone prevent howling. Contact your local Aiwa dealer for details. to this unit, with the MIC simultaneously. be used for mixing to MIN and a howling sound away… -
Page 47: Mezcla Microfonica
Le cas echeant, elcligner de l’enceinte ou baisser Ie niveau scmore a I’aide MIC MIXING. est extr6mement fort, il peut &re tourner la commande MIC MIXING microphone de type unidirectionnel pour eviter Ie hurlement, Pour plus de d6tails, Aiwa local, DSF) 4“7…
-
Page 48
VOCAL FADER/MULTIPLEX FUNCTION This unit can use discs or tapes as Karaoke VOCAL FADER/AUTO VOCAL FADER function The VOCAL FADER function makes the singer’s ordinary discs or tapes softer than the accompaniment. AUTO VOCAL FADER function, the VOCAL only while there is audio input through a microphone. -
Page 49: Funcion Vocal Fader/Multiplex
FUNCION VOCAL FADER/ MULTIPLEX Esta unidad puede utilizar discos o cintas karaoke. Funcion VOCAL FADER/AUTO VOCAL FADER La funcion VOCAL FADER hate que la voz del cantante discos cintas normales suene acompahamiento. En la funcion AUTO VOCAL FADER s610 funcionara mientras haya entrada de audio a traves de un microfono,…
-
Page 50
KARAOKE PROGRAM Before or during CD play, you can reserve played after the current track. Each reservation it finishes playing. Use the remote control. Press the PRGM button once. Press one of the DISC DIRECT PLAY buttons to select a disc, and the numeric buttons to select a track. -
Page 51: Programadekaraoke
PROGRAMADEKARAOKE Antes o durante la reproduction de un disco compacto, podra reservar un maximo de 15 canciones despues de la cancion que este siendo reserva se borrara cuando termine de reproducirse Utilice el control remoto. Pulse el boton PRGM una vez. Pulse uno de Ios botones DISC DIRECT PLAY para…
-
Page 52
TUNING DOWN TUNING a— SETTING THE TIMER The unit can be turned the built-in timer. Preparation Make sure the clock is set correctly. Press the TIMER button on the remote control once to display 0, and press the II SET button within 4 seconds, is displayed, and the hour flashes. -
Page 53: Ajuste Del Temporizador
AJUSTE DEL TEMPORIZADOR La unidad podra encenderse a la hors especificada alias gracias al temporizador incorporado. Preparacio,n Asegtirese de que la hors del reloj sea !a corrects. pagina 15). Pulse una vez el boton TIMER dei control remoto para visualizer 0, y pulse e! boton i! SET antes de uue pasen 4 segundos.
-
Page 54
SETTING THE TIMER To cancel timer standby mode temporarily Press the TIMER button on the remote control so that @ or disappears on the display. restore the timer standby mode, press again to display Using the unit while the timer is set You can use the unit normally after setting the timer. -
Page 55: Ajuste Del Temporizador Para Dormir
AJUSTE DEL TEMPORIZADOR Para cancelar temporalmente el modo de espera temporizador Pulse el boton TIMER del control remoto desaparezca del visualizador. Para reponer el modo de espera del temporizador, nuevo el boton para visualizer R?C. Utilizaci6n de la unidad mientras temporizador Podra utiiizar…
-
Page 56: Connecting Optional Equipment
Connect the red plug to the R jack, and the whilte plug to the L jack. When connecting a turntable Use an Aiwa turntable equipped with a built-in equalizer amplifier. LINE OUT JACKS This unit can output the sound signal through the jacks, Use a cable with RCA phono plugs to connect an audio equipment with the LINE IN (analog input) jacks.
-
Page 57: Conexion De Un Equipo Optional
Consulte el manual de instrucciones del equipo conectado para tener mas detalles. Los cables de conexion no estan suministrados. Obtenga Ios cables de conexion necesarios. * Consulte con su concesionario Aiwa local en cuanto al equipo optional adecuado. TOMAS DE VI DEO/EQUIPO…
-
Page 58
13 . CARE AND MAINTENANCE Occasional care and maintenance of the unit and the software are needed to optimize the performance To clean the cabinet Use a soft cloth lightly moistened with “mild detergent Do not use strong solvents, such as alcohol, To clean the heads and tape paths + After every 10 hours of use, clean the heads and tape paths with a head cleaning cassette or cotton swab moistened… -
Page 59: Cuidados Y Mantenimiento
CUIDADOS Y MANTENIMIENTO El mantenimiento y el cuidado ocasional software resultan necesarios para optimizar su unidad. Para Iimpiar la caja Utilice un pafio blando humedecido un POCOen una solution detergence suave. No utilice nunca disolventes alcohol, bencina o diluyente. Para Iimpiar Ias cabezas y Ios puntos por donde pasa la cinta + Ill Despues de cada 10 horas de funcionamiento, y Ios puntos por donde pasa la cinta con un cassette…
-
Page 60
SPECIFICATIONS Main unit CX-NV70/CX-NV72 FM tuner section Tuning range 87.5 MHz to 108 MHz 13.2 dBf Usable sensitivity(lHF) Antenna terminals 75 ohms (unbalanced) tuner section Tuning range kHz to 1710 kHz (10 kHz step) 531 kHz to 1602 kHz (9 kHz step) Usable sensitivity 350 vVlm Antenna… -
Page 61: Especificaciones
ESPECIFICACIONES Unidad principal CX-NV70/CX-NV72 Seccion del sintonizador de FM Gama de sintonizacion 87,5 MHz a 108 MHz Sensibilidad util (IHF) 13,2 dBf Terminals de antena 75 ohmios (desequilibrada) Seccion del sintonizador de AM Gama de sintonizacion 530 kHz a 1710 kHz (pasos de 10 kHz) 531 kHz a 1602 kHz (pasos de 9 kHz)
-
Page 62
SPECIFICATIONS SPEAKER SYSTEM SX-NV70 3 way, bass reflex Cabinet type (Magnetism WOOfer: 140 mm Speaker type Tweeter: 80 mm type Super tweeter: ceramic type 6 ohms Impedance 87 dBIWlm Output sound pressure level 206 x 302 x 265 mm (81/8 x 12 x Dimensions (W x H x D) 10’/2 in,) -
Page 63
ESPECIFICACIONES SISTEMA DE ALTAVOCES SX-NV70 Tipo de caja 3 vias, reflejo hermetico al magnetism) Altavoz para graves: Altavoces 140 mm, tipo conico Altavoz para agudos: 80 mm, tipo conico Superaltavoz 50 mm, tipo ceramico 6 ohmios Impedancia 87 dBIWlm Nivel de presion actistica de salida 206 x 302 x 265 mm Dimensioned (An x Al x Prof) -
Page 64
TROUBLESHOOTING GUIDE If the unit fails to perform as described instructions, check the following guide, GENERAL There is no sound. Is the AC cord connected properly? Is there a bad connection? (+ page Is there a short circuit in the speaker terminals? + Disconnect AC cord,…
 -
Page 65: Guiaparalasolucion Deaverias
GUIAPARALASOLUCION DEAVERIAS Si la unidad no funciona como se describe instrucciones, compruebe la guia siguiente: GENERAIJDADES No hay sonido. LEsta bien conectado el cable de alimentacion LHay alguna conexion mal hecha? (-+ pagina 9) cortocircuito en Ios terminals del altavoz? ~Hay + Desconecte el cable de alimentacion…
-
Page 66
PARTS INDEX Main instructions about each part are indicated,… -
Page 67: Indice De Las Partes
INDICE DE LAS PARTES Se indican Ias instrucciones principals de cada parte. :“ f TUNER/BAND TAPEIDECK ‘ $;, “% Disc compartment ,’ Compartimiento de discos Compartment a disques POWER DEMO @ ‘: Q RECIREC MUTE SYNCHRO DUBBING NORMALIHIGH ‘8 ~~ Ill SET ,’…
-
Page 68
Licensing Corporation. DOLBY et Ie symbole double-D DO sent des marques de Dolby Laboratories Licensing Corporation. AIWA CO.,LTDm LUM?.SY5TEM The word “BBE” and the “BBE symbol” Sound, Inc. of Dolby Under license from BBE sound, La sigla “BBE” y el simbolo BBE Sound, Inc.
 Is there a short circuit in the speaker terminals? + Disconnect AC cord,…
 This manual is also suitable for:
Nsx-v72
-
Страница 1
COMPACT DISC STEREO SYSTEM SISTEMA ESTEREO CON REPRODUCTOR DE DISCOS COMPACTOS CHAINE STEREO AVEC LECTEUR DE DISQUES COMPACTS NSX-V70 NSX-V72 (ilTi5i DIGITALAUDIO[…]
-
Страница 2
o 2 ? 1 Zi?&Wf3 & tze A%%@ %s%v70/ V72 Congratulations on your purchase of an Aiwa Stereo System. To optimize the performance of this system, please take the time to read through these Operating Instructions and become familiar with the operating procedures. About your system Your system NSX-V70/NSX-V72 is composed of the units ~-~ and supp[…]
-
Страница 3
a?wea!h “ & A%#4 %S%v?ol “72 Enhorabuena por haber adquirido un sistema estereo Aiwa. Para optimizar Ias prestaciones de este sistema, tome el tiempo necesario para leer este manual de instrucciones y familiarizarse con Ios procedimientos de funcionamiento. Acerca de su sistema Su sistema NSX-V701NSX-V72 esta compuesto de Ias unidades (~ y […]
-
Страница 4
4[…]
-
Страница 5
INIIICIE TABLE DES MATMRES PREPARATIVES PREPARATIONS PRECALICIONES ……… ……….. ………. ……….. ………. ………. … 7 CONEXIONES …….. ………. ……….. ……….. ……… ……….. ……… 9 POSIClONAMIENTO DE LOS ALTAVOCES …… ………. …11 ANTES DE LA OPERACION ………. ………. ………. ………[…]
-
Страница 6
PRECAUTIONS Follow the advice below for safe and correct operation. On AC voltage Before connecting the AC cord, check that the rated voltage shown on the rear panel matches your local voltage. On placement ● Do not use the system in places which are extremely hot, cold, dusty or humid. $, s,- , .- ‘.,.,,. ● Do not use the system in places wh[…]
-
Страница 7
PRECAUCIONES PRECAUTIONS Siga Ios consejos dados a continuation para que el funcionamiento sea seguro y correcto. Acerca de la tension de CA Antes de conectar el cable de alimentacion de CA, compruebe si la tension nominal mostrada en el panel trasero concuerda con la tension de su Iocalidad. Acerca del Iugar de instalacion ● No utilice el sistem[…]
-
Страница 8
IMPORTANT ● Connect the AC cord after connecting speakers, antennas, and all optional equipment. ● There are no differences between the front speakers, and between the surround speakers. Both speakers can be connected as L (left) or R (right). 1 2 3 4 5 Connect the SX-NV70 right speaker to the unit. Connect the speaker cord to the SPEAKERS R te[…]
-
Страница 9
CONEXIONES CONNEXIONS IMPORTANTE ● Conecte el cable de alimentacion de CA despues de haber conectado Ios altavoces, Ias antenas y todos Ios demas equipos opcionales. ● No existen diferencias entre Ios altavoces delanteros, ni entre Ios altavoces de sonido ambiental. Ambos altavoces podran conectarse como altavoz izquierdo (L) o como altavoz der[…]
-
Страница 10
❑ ✚ [ Jr lr FM [ 75 c1 CONNECTIONS To stand the AM antenna on a surface + ❑ Fix the claw to the slot. To position the antennas AM loop antenna: Position to find the best direction and posikon for radio reception. FM feeder antenna: Extend this antenna horizontally in a T-shape and fix its ends to the wall with cellophane tape, etc. m ● Do n[…]
-
Страница 11
CONEXIONES CONNEXIONS Para poner la antena de AM en position vertical sobre una superficie + ❑ Fije el gancho en la ranura. Para colocar Ias antenas Antena de cuadro de AM: Pongala en la direccion y en la position que ofrezcan la mejor recepcion de la radio, Antena de FM: Extienda horizontal mente esta antena formando una T y fije sus extremes a […]
-
Страница 12
POWER I I $ ._— _ —.. —. ——— ——.. — < . R6(AA) BEFORE OPERATION To turn the unit on Press one of the function buttons (TAPE, TUNER, VIDEO/AUX, CD). Playback of the inserted disc or tape begins, or the previously tuned station is received (Direct Play Function). The POWER button is also available. The disc compartment may open a[…]
-
Страница 13
ANTES DE LA OPERACION AVANT LWTILISATION Para encenck?r la unidad Pulse uno de Ios botones de funcion (TAPE, TUNER, VIDEO/ AUX, CD). La reproduction del disco o de la cinta insertada empezara o se recibira la emisora previamente sintonizada (funcion de reproduction directs). Tambien podra utilizarse el boton POWER, El compartimiento de discos puede[…]
-
Страница 14
SETTING THE CLOCK When the AC cord is connected for the first time, the II SET button flashes. Set the time as follows while the power is off. 1 2 3 4 5 Press the SET button. The hour flashes. Press the K DOWN or W UP button to designate the hour. Press the SET button to set the hour. The hour stops flashing and the minute starts flashing. Press th[…]
-
Страница 15
PUESTA EN HORA DEL RELOJ REGLAGE DE L’HORLOGE Cuando el cable de alimentacion de CA se conecte por primers vez, el boton II SET parpadeara. Ponga la hors como se indica a continuation, mientras la alimentacion r?ste desconectada. 1 2 3 4 5 Pulse el boton SET. La hors parpadeara. Pulse el boton W DOWN o W UP para designar la hors. Pulse el boton S[…]
-
Страница 16
cvn “ VOLUME o 0 DOWN UP a VA o VOLUME MIN. ● MAX ❑ ✎ CEEI—E5BE m II + 1111 + 111111 +11111111 -) ❑ ✝ m — T-BASS ~ II + 1111 + 111111 + 11111111 — ‘EiEE1 ELECTRONIC GRAPHIG EQUALIZER “QEEiil ELECTRONIC GRAPHIG EQLIALIZER ADJUSTING THE SOUND VOLUME CONTROL -+ El Turn the VOLUME control @ on the main unit, or press the VOLUME button[…]
-
Страница 17
AJWl% DEL SONIDO REGLAGE Dll SON CONTROL DE VOLUMEN + El Gire ISI control VOLUME @ de la unidad principal o pulse Ios botones VOLUME@ del control remoto. SISTEMA 13BE + H El sistema BBE realza la claridad del sonido de alta frecuencia. Tambien mejora la funcion KARAOKE para ofrecer un sonido de su voz claro y agradable. Pulse el bot6n BBE. Cada vez[…]
-
Страница 18
DSP SURROUND -+ E The DSP (Digital Signal Processor) surround circuits can recreate the effect of sounds reflected from walls or ceilings, to obtain the sound presence of real environments. There are three modes with matching graphic equalization curves. Press one of the SURROUND button. + @ Equalization curves are selected automatically to match t[…]
-
Страница 19
SOW(I AMBIENTAL DSP + E DSP SURROUND -+ E Los circuitos de sonido ambiental DSP (procesador de seiial digital) pueden crear el efecto de Ios sonidos refiejados por Ias paredes o el techo, para obtener la presencia de sonido de un ambiente real. Existen tres modos con sus correspondientes curvas de ecualizacion graficas. Pulse uno de Ios botones SUR[…]
-
Страница 20
2 TUNING W DOWN uPWf MONO MANUAL TUNING 1 2 Press the TUNEFUBAND button to select the band repeatedly. If the power is turned off, the previously tuned station will be played (Direct Play Function). n Press the M DOWN or H UP button to select a station. Each time the button is pressed, the frequency changes. When a station is received, ‘TUNE is d[…]
-
Страница 21
SINTONIZACION MANUAL ACCORD MANUEL 1 2 Pulse repetidamente el boton TUNER/BAND para seleccionar la banda. Si la alimentacion esta desconectada se recibira la emisora previamente sintonizada (funcion de reproduction directs). n Pulse e! boton W DOWN o FH UP para seleccionar una emisora. Cada vez que pulse el boton, la frecuencia cambiara. Cuando se […]
-
Страница 22
1 TUNER BAND ‘8 2 0000 0000 000 b PRESETTING STATIONS + EI The unit can store a total of 32 preset stations. When a station is stored, a preset number is assigned to the station. Use the preset number to tune in to a preset station directly. 1 2 3 Press the TUNER/BAND button to select a band, and press the M DOWN or Bt UP button to select a stati[…]
-
Страница 23
PREAWSTE DE EMISORAS + ❑ MEMORISATION DE STATIONS +~ Esta unidad puede almacenar un total de 32 emisoras. Cuando almacene una emisora, a esa emisora se Ie asignara un numero de preajuste. Utilice el numero de preajuste para sintonizar directamente una emisora preajustada. 1 2 3 Pulse el boton TUNER/BAND para seleccionar una banda, y pulse M DOWN […]
-
Страница 24
@ DIRECTION/PRESET [ dm ) b @ DISC DIRECT PLAY OQO b BASIC OPERATIONS LOADING DISCS + El Press the CD button, then press the 4 OPEN/CLOSE button to open the disc compartment. Load disc(s) with the label side up. To play one or two discs, place the discs on tray 1 and 2. To play three discs, press the DISC CHANGE button to rotate the trays after pla[…]
-
Страница 25
OPERAClONES BASICAS lNTROtNJCCION DE DISCOS -+ ❑ Pulse el bot6n CD, y Iuego pulse el boton 4 OPEN/ CLOSE para abrir el compartimiento del disco. Introduzca el(los) disco(s) con el Iado de la etiqueta hacia arriba. Para reproch.mir uno o dos discos, ponga Ios discos en Ias bandejas 1 y 2. Para reproducer tres discos, pulse el boton DISC CHANGE par[…]
-
Страница 26
1 2 1 DISC ~ DIRECT PLAY1 amm b 2 0000 0000 000 b BASIC OPERATIONS Selecting a track with the remote control — ❑ 1 Press one of the DISC DIRECT PLAY buttons to select a disc. 2 Press the numeric buttons and the +10 button to select a track. Example: @To select the 25th track, press the +1 O, +1 O and 5 buttons. @To select the 10th track, press th[…]
-
Страница 27
OPERACIONES BASICAS OPERATIONS DE BASE — Seleccion de una cancion con el control remoto + ❑ 1 Pulse uno de Ios botones DISC DIRECT PLAY para seleccionar un disco. 2 Pulse Ios botones numericos y el boton +1 O para seleccionar una cancion. Ejemplo: @ Para seleccionar la cancion numero 25, pulse Ios botones +lo, +loy5. @ Para seleccionar la canci[…]
-
Страница 28
3 0000 0000 000 b 5 Q DIRECTION < } PRESET b BASIC OPERATIONS PROGRAMMED PLAY Up to 30 tracks can be programmed from any of the inserted discs. Use the remote control. 1 2 3 4 5 Press the PRGM button twice in stop mode. The PRGM indicator flashes on the display. ● When the PRGM button is pressed once in step 1, the unit enters the KARAOKE PROG[…]
-
Страница 29
OPERACIONES BASICAS REPROIXJCCION PROGRAMADA Se podra programar un maximo de 30 canciones de cualquiera de Ios discos introducidos. Utilice el control remoto. 7 Pulse dos veces el boton PRGNI estando en el 2 3 4 5 modo de parada. El indicador PRGM parpadeara en el visualizador. ● Cuando se pulse una vez el boton PRGM en el paso 1, la unidad se po[…]
-
Страница 30
Q A EJECT 2 BASIC OPERATIONS INSERTING TAPES ● On deck 1, tapes are always played back on both sides. On deck 2, you can select a reverse mode to play back one or both sides. ● Use normal (type I), CrOz (type 11) or metal (type lV) tapes for playback. Press theTAPE button and press the A EJECT mark to open the cassette holder. + ❑ Insert a ta[…]
-
Страница 31
OPERACIONES BASICAS OPERATIONS DE BASE INSER(XON DE CINTAS ● En la platina 1, Ias cintas se reproduce siempre por ambas caras, En la platina 2, podra seleccionar el modo de inversion para reproducer una o dos caras. * Utilice cintas normales (tipo I), de CrOz (tipo II) o de metal (tipo IV) para la reproduction. Pulse el bot6n TAPE y la marca A EJ[…]
-
Страница 32
II d /—. >1 0 c o b ❑ ✎ m A BASIC OPERATIONS MUSIC SENSOR If there is a 4-second or longer blank between each track, the search for the beginning of the current or next track during playback can be easily made. When the F of the 4- button ie illuminated, press the PF button to move to the next track or the 4 button to move to the beginning[…]
-
Страница 33
OPERA ClONES BASICAS SENSOR MUSICAL Si hay un espacio sin grabar de 4 segundos o mas entre cada cancion, la busqueda del principio de la cancion que este siendo reproducida o de”la siguiente cancion podra realizarse facilmente. Cuando el indicador F del boton +> este encendido, pulse el boton * para pasar a la siguiente cancion o el boton <[…]
-
Страница 34
1 1 ’ J 2 REV MODE 3 ❑ UINR b 5 rEEpl RECIREC MUTE BASIC RECORDING This section explains how to record from the tuner, CDs, or external equipment. If you want to record from tapes, see pages 36 to 38. Preparation ● Wind up the tape to the point where recording will start. ● Use normal (type I) and Cr02 (type II) tapes for recording. Insert[…]
-
Страница 35
GRABACION BASICA ENREGISTREMENT DE BASE Esta seccion explica como grabar del sintonizador, discos compactos o equipos exteriors. Si desea grabar de cintas, consulte Ias paginas 37 a 39. Preparation ● Bobine la cinta hasta el punto donde vaya a empezar la grabacion. ● Utilice cintas normales (tipo I) y cintas de CrOz (tipo II) para hater la grab[…]
-
Страница 36
3 DOLBY NR 7!? DUBBING THE TAPE MANUALLY Preparation ● Wind up the tape to the point where recording will start. ● Note that recording will be completed on one side of the tape only. 1 2 3 4 5 Press the TAPE button. Insert the original tape into deck 1 and the tape to be recorded on into deck 2. Insert each tape with the side to be played back […]
-
Страница 37
COPIADO MANUAL DE CINTAS Preparaci6n ● Bobine la cinta hasta el punto donde vaya a empezar la grabacion. c Tenga en cuenta que la grabacion se completara en una cara de la cinta solamente. 1 2 3 4 5 Pulse el boton TAPE. hserte la cinta original en la platina 1 y la cinta que vaya a grabar en la platina 2. Inserte cada cinta con la cara que vaya a[…]
-
Страница 38
DUBBING THE WHOLE TAPE This function allows you to make exact copies of both sides of the original tape. The reverse side of both tapes will start simultaneously as soon as the longer tape has been reversed. m ● Dubbing does not start from a point halfway in the tape. ● The reverse mode is automatically set to =1. ● The Dolby NR does not affe[…]
-
Страница 39
COPIADO DE TODA LA CINTA Esta funcion Ie permitira hater copias exactas de ambas caras de la cinta original. La cara de inversion de ambas cintas empezara a moverse al mismo tiempo, tan pronto como termine de invertirse la cinta mas Iarga, m ● La copia no empezara desde un punto ubicado en medio de la cinta. ● El modo de inversion se ajustara a[…]
-
Страница 40
4 DISC ~ DIRECT PLAY-1 aam Al EDIT RECORDING The Al EDIT function enables CD recording without worrying about tape length and track length. When a CD is inserted, the unit automatically calculates track lengths. If necessary, the order of tracks is rearranged so that no track is cut short. m Al EDIT recording will not start from a point halfway int[…]
-
Страница 41
GRABACION CON EDICION Al ENREGISTREMENT AVEC MONTAGE ET CALCUL DU TEMPS La funcion Al EDIT (edition Al) permite grabar discos compactos sin preocuparse de la duration de la cinta y de Ias canciones. Cuando se inserte un disco compacto, la unidad calculara automaticamente la duration de Ias canciones. En caso de ser necesario, el orden de Ias cancio[…]
-
Страница 42
Al EDIT RECORDING To check the order of the programmed track numbers Before recording, press the EDIT/CHECK to select side A or B, and press the +4 or — button repeatedly. + ❑ DISPLAY @ Tape side @ Program number @ Programmed track numbers @ Track number To add tracks from other discs to the edit program If there is any time remaining on the tape[…]
-
Страница 43
GRABACION CON EDICION Al ENREGISTRHWENT AVEC MONTAGE ET CALCUL DU TEMPS Para comprobar el orden de Ios numeros de Ias canciones programadas Antes de grabar, pulse el boton EDIT/CHECK para seleccionar la cara A o la B, y pulse repetidamente el boton + o *. +n VISUALIZATION @ Cara de la cinta @ Ntimero del programa @) Numeros de ias canciones program[…]
-
Страница 44
4 f!ib,% 5 DISC ~ DIRECT PLAY1 +10 n u 7 EDIT/CHECK r BJ 8 REC/REC MUTE E i DIRECTION < } PRESET ● /o o PROGRAMMED EDIT RECORDING 4 5 6 7 8 Press the numeric buttons to designate the tape length. 10 to 99 minutes can be specified. Example: When using a 60-minute tape, press the 6 and O buttons. DISPLAY @ Tape length @ Tape side A (front side) […]
-
Страница 45
GRABACION CON EDICION PROGRAMADA 4 5 6 7 8 Pulse los botones numericos para designar la durach5n de la cinta. Se puede especificar una duration de 10 a 99 minutes. Ejemplo: Cuando utilice cintas de 60 minutes, pulse Ios botones 6 y O. VISUALIZATION @ Duration de la cinta @ Cara A de la cinta (cara delantera) @ Tiempo maximo de grabacion para la car[…]
-
Страница 46
1 4 MIC a’””’ Q MIN. . MAX 5 DIGITAL -’Ho @ MIN* ● MAX MICROPHONE MIXING Two microphones (not supplied) can be connected to this unit, allowing you to sing along to music sources. Use a microphone with a mini plug (a3.5 mm, l/E inch). Before connecting a microphone Set the MIC MIXING control to MIN. 1 2 3 4 5 Connect your microphone to […]
-
Страница 47
MEZCLA MICROFONICA MIXAGE AVEC MICROPHONE A esta unidad podran conectarse dos microfonos (no suministrados), permitiendole asi cantar con el acompariamiento de Ias fuentes musicales. Utilice un microfono con miniclavija (3,5 mm 0). Antes de conectar un microfono Ponga el control MIC MIXING en MIN. 1 2 3 4 5 Conecte su microfono a la toma MIC. Pulse[…]
-
Страница 48
VOCAL FADER/MULTIPLEX FUNCTION This unit can use discs or tapes as Karaoke sources. VOCAL FADER/AUTO VOCAL FADER function The VOCAL FADER function makes the singer’s voice on ordinary discs or tapes softer than the accompaniment. In the AUTO VOCAL FADER function, the VOCAL FADER operates only while there is audio input through a microphone. MULTI[…]
-
Страница 49
FUNCION VOCAL FADER/ MULTIPLEX FONCTION VOCAL FADER/ MULTIPLEX Esta unidad puede utilizar discos o cintas como fuentes de karaoke. Funcion VOCAL FADER/AUTO VOCAL FADER La funcion VOCAL FADER hate que la voz del cantante en discos o cintas normales suene menos que el acompahamiento. En la funcion AUTO VOCAL FADER, VOCAL FADER s610 funcionara mientra[…]
-
Страница 50
L/ KARAOKE PROGRAM Before or during CD play, you can reserve up to 15 tracks to be played after the current track. Each reservation is cleared when it finishes playing. Use the remote control. 1 2 3 4 5 Press the PRGM button once. Press one of the DISC DIRECT PLAY buttons to select a disc, and the numeric buttons to select a track. Press the KARAOK[…]
-
Страница 51
PROGRAMADEKARAOKE PROGRAMME DE KARAOKE Antes o durante la reproduction de un disco compacto, usted podra reservar un maximo de 15 canciones para reproducirlas despues de la cancion que este siendo reproducida, Cada reserva se borrara cuando termine de reproducirse la cancion. Utilice el control remoto. 1 2 3 4 5 Pulse el boton PRGM una vez. Pulse u[…]
-
Страница 52
u 2 TUNING w DOWN UP* SET — ~m b b 4 TUNING L/ a— SETTING THE TIMER The unit can be turned on at the specified time every day with the built-in timer. Preparation Make sure the clock is set correctly. (See page 14.) 1 2 3 4 5 6 Press the TIMER button on the remote control once to display 0, and press the II SET button within 4 seconds, O is displ[…]
-
Страница 53
AJUSTE DEL TEMPORIZADOR REGLAGE DE LA MINUTERIE La unidad podra encenderse a la hors especificada todos Ios alias gracias al temporizador incorporado. Preparacio,n Asegtirese de que la hors del reloj sea !a corrects. (Consuite la pagina 1 5). 1 2 3 4 5 6 Pulse una vez el boton TIMER dei control remoto para visualizer 0, y pulse e! boton i! SET ante[…]
-
Страница 54
SETTING THE TIMER To cancel timer standby mode temporarily Press the TIMER button on the remote control so that @ or R~C disappears on the display. ~ restore the timer standby mode, press again to display 0 or REC Using the unit while the timer is set You can use the unit normally after setting the timer. Before turning off the power, repeat step 5[…]
-
Страница 55
AJUSTE DEL TEMPORIZADOR REGLAGE DE LA MltWTERIE Para cancelar temporalmente el modo de espera del temporizador Pulse el boton TIMER del control remoto para que O 0 R~C desaparezca del visualizador. Para reponer el modo de espera del temporizador, pulse de nuevo el boton para visualizer Q o R?C. Utilizaci6n de la unidad mientras este ajustado el tem[…]
-
Страница 56
I I CONNECTING OPTIONAL EQUIPMENT -+ ❑ Refer to the operating instructions of the connected equipment for details. ● The connecting cords are not supplied. Obtain the necessary connecting cords. ● Consult your local Aiwa dealer for adequate optional equipment. VIDEO/AUX JACKS This unit can input the sound signal through the jacks, Use a cable[…]
-
Страница 57
CONEXION DE UN EQUIPO OPCIONAL + ❑ CONNEXION D’UN APPAREIIL OPTIONNEL + m Consulte el manual de instrucciones del equipo conectado para tener mas detalles. ● Los cables de conexion no estan suministrados. Obtenga Ios cables de conexion necesarios. * Consulte con su concesionario Aiwa local en cuanto al equipo optional adecuado. TOMAS DE VI DE[…]
-
Страница 58
13 . m CARE AND MAINTENANCE Occasional care and maintenance of the unit and the software are needed to optimize the performance of your unit. To clean the cabinet Use a soft cloth lightly moistened with “mild detergent solution. Do not use strong solvents, such as alcohol, benzine or thinner. To clean the heads and tape paths + ❑ After every 10[…]
-
Страница 59
CUIDADOS Y MANTENIMIENTO SOINS ET ENTRETIEN El mantenimiento y el cuidado ocasional de la unidad y del software resultan necesarios para optimizar Ias prestaciones de su unidad. Para Iimpiar la caja Utilice un pafio blando humedecido un POCO en una solution de detergence suave. No utilice nunca disolventes fuertes tales como alcohol, bencina o dilu[…]
-
Страница 60
SPECIFICATIONS Main unit CX-NV70/CX-NV72 FM tuner section Tuning range Usable sensitivity(lHF) Antenna terminals AM tuner section Tuning range Usable sensitivity Antenna Amplifier section Power output Total harmonic distortion Inputs outputs Cassette deck section Track format Frequency response Signal-to-noise ratio Recording system Heads 87.5 MHz […]
-
Страница 61
ESPECIFICACIONES SPECIFICATIONS Unidad principal CX-NV70/CX-NV72 Seccion del sintonizador de FM Gama de sintonizacion 87,5 MHz a 108 MHz Sensibilidad util (IHF) 13,2 dBf Terminals de antena 75 ohmios (desequilibrada) Seccion del sintonizador de AM Gama de sintonizacion Sensibilidad Gtil Antena Seccion dlel ampiificador Potencia de salida Distortion[…]
-
Страница 62
SPECIFICATIONS SPEAKER SYSTEM SX-NV70 Cabinet type Speaker Impedance Output sound pressure level Dimensions (W x H x D) Weight GENERAL Power requirements Power consumption Dimensions of main unit (W XHXD) Weight of main unit 3 way, bass reflex (Magnetism sealed type) WOOfer: 140 mm (55/8 h.) COne type Tweeter: 80 mm (3’/4 in.) cone type Super twe[…]
-
Страница 63
ESPECIFICACIONES SPECIFICATIONS SISTEMA DE ALTAVOCES SX-NV70 Tipo de caja Altavoces Impedancia Nivel de presion actistica de salida Dimensioned (An x Al x Prof) Peso GENERAILIDADES Alimentacion Consumo Dimensioned de la unidad principal (An x Al x Prof) Peso de la unidad principal 3 vias, reflejo de graves (tipo hermetico al magnetism) Altavoz para[…]
-
Страница 64
TROUBLESHOOTING GUIDE If the unit fails to perform as described in these operating instructions, check the following guide, GENERAL There is no sound. ● Is the AC cord connected properly? ● Is there a bad connection? (+ page
● Is there a short circuit in the speaker terminals? + Disconnect the AC cord, then correct the speaker connections.[…] -
Страница 65
GUIA PARALA SOLUCION DE AVERIAS EN CAS DE PROBLEME Si la unidad no funciona como se describe en este manual de instrucciones, compruebe la guia siguiente: GENERAIJDADES No hay sonido. ● LEsta bien conectado el cable de alimentacion de CA? ● LHay alguna conexion mal hecha? (-+ pagina 9) ● ~Hay Un cortocircuito en Ios terminals del altavoz? + D[…]
-
Страница 66
PARTS INDEX Main instructions about each part are indicated,[…]
-
Страница 67
INDICE DE LAS PARTES NOMENCLATURE —— Se indican Ias instrucciones principals de cada parte. Les principals instructions concernant chaque partie sent indiquees. :“ f TUNER/BAND TUNER BAND 20-21 ‘ $;, TAPEIDECK 1/2 TAPE DECK 1/2 30-31 “% Disc compartment — 24-25 Compartimiento de discos ,’ + ~ Compartment a disques 4 POWER POWER 12-13 […]
-
Страница 68
DOLBY NR LUM?.SY5TEM . . . Dolby noise reduction manufactured under license from Dolby . Laboratories Licensing Corporation. “DOLBY” and the double-D symbol DO are trademarks of Dolby Laboratories Licensing Corporation. ● Reduccion de ruido Dolby fabricado bajo Iicencia de Dolby Labo- ratories Licensing Corporation. DOLBY y el simbolo de la D[…]
-
Aiwa NSX-V70 — page 1
COMPACT DISC STEREO SYSTEM SISTEMA ESTEREO CON REPRODUCTOR DE DISCOS COMPACTOS CHAINE STEREO AVEC LECTEUR DE DISQUES COMPACTS NSX-V70 NSX-V72 (ilTi5i DIGITALAUDIO …
-
Aiwa NSX-V70 — page 2
o 2 ? 1 Zi?&Wf3 & tze A%%@ %s%v70/ V72 Congratulations on your purchase of an Aiwa Stereo System. To optimize the performance of this system, please take the time to read through these Operating Instructions and become familiar with the operating procedures. About your system Your system NSX-V70/NSX-V72 is composed of the units ~-~ and supp …
-
Aiwa NSX-V70 — page 3
a?wea!h “ & A%#4 %S%v?ol “72 Enhorabuena por haber adquirido un sistema estereo Aiwa. Para optimizar Ias prestaciones de este sistema, tome el tiempo necesario para leer este manual de instrucciones y familiarizarse con Ios procedimientos de funcionamiento. Acerca de su sistema Su sistema NSX-V701NSX-V72 esta compuesto de Ias unidades (~ y …
-
Aiwa NSX-V70 — page 4
4 …
-
Aiwa NSX-V70 — page 5
INIIICIE TABLE DES MATMRES PREPARATIVES PREPARATIONS PRECALICIONES ……… ……….. ………. ……….. ………. ………. … 7 CONEXIONES …….. ………. ……….. ……….. ……… ……….. ……… 9 POSIClONAMIENTO DE LOS ALTAVOCES …… ………. …11 ANTES DE LA OPERACION ………. ………. ………. ……… …
-
Aiwa NSX-V70 — page 6
PRECAUTIONS Follow the advice below for safe and correct operation. On AC voltage Before connecting the AC cord, check that the rated voltage shown on the rear panel matches your local voltage. On placement ● Do not use the system in places which are extremely hot, cold, dusty or humid. $, s,- , .- ‘.,.,,. ● Do not use the system in places wh …
-
Aiwa NSX-V70 — page 7
PRECAUCIONES PRECAUTIONS Siga Ios consejos dados a continuation para que el funcionamiento sea seguro y correcto. Acerca de la tension de CA Antes de conectar el cable de alimentacion de CA, compruebe si la tension nominal mostrada en el panel trasero concuerda con la tension de su Iocalidad. Acerca del Iugar de instalacion ● No utilice el sistem …
-
Aiwa NSX-V70 — page 8
IMPORTANT ● Connect the AC cord after connecting speakers, antennas, and all optional equipment. ● There are no differences between the front speakers, and between the surround speakers. Both speakers can be connected as L (left) or R (right). 1 2 3 4 5 Connect the SX-NV70 right speaker to the unit. Connect the speaker cord to the SPEAKERS R te …
-
Aiwa NSX-V70 — page 9
CONEXIONES CONNEXIONS IMPORTANTE ● Conecte el cable de alimentacion de CA despues de haber conectado Ios altavoces, Ias antenas y todos Ios demas equipos opcionales. ● No existen diferencias entre Ios altavoces delanteros, ni entre Ios altavoces de sonido ambiental. Ambos altavoces podran conectarse como altavoz izquierdo (L) o como altavoz der …
-
Aiwa NSX-V70 — page 10
❑ ✚ [ Jr lr FM [ 75 c1 CONNECTIONS To stand the AM antenna on a surface + ❑ Fix the claw to the slot. To position the antennas AM loop antenna: Position to find the best direction and posikon for radio reception. FM feeder antenna: Extend this antenna horizontally in a T-shape and fix its ends to the wall with cellophane tape, etc. m ● Do n …
-
Aiwa NSX-V70 — page 11
CONEXIONES CONNEXIONS Para poner la antena de AM en position vertical sobre una superficie + ❑ Fije el gancho en la ranura. Para colocar Ias antenas Antena de cuadro de AM: Pongala en la direccion y en la position que ofrezcan la mejor recepcion de la radio, Antena de FM: Extienda horizontal mente esta antena formando una T y fije sus extremes a …
-
Aiwa NSX-V70 — page 12
POWER I I $ ._— _ —.. —. ——— ——.. — < . R6(AA) BEFORE OPERATION To turn the unit on Press one of the function buttons (TAPE, TUNER, VIDEO/AUX, CD). Playback of the inserted disc or tape begins, or the previously tuned station is received (Direct Play Function). The POWER button is also available. The disc compartment may open a …
-
Aiwa NSX-V70 — page 13
ANTES DE LA OPERACION AVANT LWTILISATION Para encenck?r la unidad Pulse uno de Ios botones de funcion (TAPE, TUNER, VIDEO/ AUX, CD). La reproduction del disco o de la cinta insertada empezara o se recibira la emisora previamente sintonizada (funcion de reproduction directs). Tambien podra utilizarse el boton POWER, El compartimiento de discos puede …
-
Aiwa NSX-V70 — page 14
SETTING THE CLOCK When the AC cord is connected for the first time, the II SET button flashes. Set the time as follows while the power is off. 1 2 3 4 5 Press the SET button. The hour flashes. Press the K DOWN or W UP button to designate the hour. Press the SET button to set the hour. The hour stops flashing and the minute starts flashing. Press th …
-
Aiwa NSX-V70 — page 15
PUESTA EN HORA DEL RELOJ REGLAGE DE L’HORLOGE Cuando el cable de alimentacion de CA se conecte por primers vez, el boton II SET parpadeara. Ponga la hors como se indica a continuation, mientras la alimentacion r?ste desconectada. 1 2 3 4 5 Pulse el boton SET. La hors parpadeara. Pulse el boton W DOWN o W UP para designar la hors. Pulse el boton S …
-
Aiwa NSX-V70 — page 16
cvn “ VOLUME o 0 DOWN UP a VA o VOLUME MIN. ● MAX ❑ ✎ CEEI—E5BE m II + 1111 + 111111 +11111111 -) ❑ ✝ m — T-BASS ~ II + 1111 + 111111 + 11111111 — ‘EiEE1 ELECTRONIC GRAPHIG EQUALIZER “QEEiil ELECTRONIC GRAPHIG EQLIALIZER ADJUSTING THE SOUND VOLUME CONTROL -+ El Turn the VOLUME control @ on the main unit, or press the VOLUME button …
-
Aiwa NSX-V70 — page 17
AJWl% DEL SONIDO REGLAGE Dll SON CONTROL DE VOLUMEN + El Gire ISI control VOLUME @ de la unidad principal o pulse Ios botones VOLUME@ del control remoto. SISTEMA 13BE + H El sistema BBE realza la claridad del sonido de alta frecuencia. Tambien mejora la funcion KARAOKE para ofrecer un sonido de su voz claro y agradable. Pulse el bot6n BBE. Cada vez …
-
Aiwa NSX-V70 — page 18
DSP SURROUND -+ E The DSP (Digital Signal Processor) surround circuits can recreate the effect of sounds reflected from walls or ceilings, to obtain the sound presence of real environments. There are three modes with matching graphic equalization curves. Press one of the SURROUND button. + @ Equalization curves are selected automatically to match t …
-
Aiwa NSX-V70 — page 19
SOW(I AMBIENTAL DSP + E DSP SURROUND -+ E Los circuitos de sonido ambiental DSP (procesador de seiial digital) pueden crear el efecto de Ios sonidos refiejados por Ias paredes o el techo, para obtener la presencia de sonido de un ambiente real. Existen tres modos con sus correspondientes curvas de ecualizacion graficas. Pulse uno de Ios botones SUR …
-
Aiwa NSX-V70 — page 20
2 TUNING W DOWN uPWf MONO MANUAL TUNING 1 2 Press the TUNEFUBAND button to select the band repeatedly. If the power is turned off, the previously tuned station will be played (Direct Play Function). n Press the M DOWN or H UP button to select a station. Each time the button is pressed, the frequency changes. When a station is received, ‘TUNE is d …
-
Aiwa NSX-V70 — page 21
SINTONIZACION MANUAL ACCORD MANUEL 1 2 Pulse repetidamente el boton TUNER/BAND para seleccionar la banda. Si la alimentacion esta desconectada se recibira la emisora previamente sintonizada (funcion de reproduction directs). n Pulse e! boton W DOWN o FH UP para seleccionar una emisora. Cada vez que pulse el boton, la frecuencia cambiara. Cuando se …
-
Aiwa NSX-V70 — page 22
1 TUNER BAND ‘8 2 0000 0000 000 b PRESETTING STATIONS + EI The unit can store a total of 32 preset stations. When a station is stored, a preset number is assigned to the station. Use the preset number to tune in to a preset station directly. 1 2 3 Press the TUNER/BAND button to select a band, and press the M DOWN or Bt UP button to select a stati …
-
Aiwa NSX-V70 — page 23
PREAWSTE DE EMISORAS + ❑ MEMORISATION DE STATIONS +~ Esta unidad puede almacenar un total de 32 emisoras. Cuando almacene una emisora, a esa emisora se Ie asignara un numero de preajuste. Utilice el numero de preajuste para sintonizar directamente una emisora preajustada. 1 2 3 Pulse el boton TUNER/BAND para seleccionar una banda, y pulse M DOWN …
-
Aiwa NSX-V70 — page 24
@ DIRECTION/PRESET [ dm ) b @ DISC DIRECT PLAY OQO b BASIC OPERATIONS LOADING DISCS + El Press the CD button, then press the 4 OPEN/CLOSE button to open the disc compartment. Load disc(s) with the label side up. To play one or two discs, place the discs on tray 1 and 2. To play three discs, press the DISC CHANGE button to rotate the trays after pla …
-
Aiwa NSX-V70 — page 25
OPERAClONES BASICAS lNTROtNJCCION DE DISCOS -+ ❑ Pulse el bot6n CD, y Iuego pulse el boton 4 OPEN/ CLOSE para abrir el compartimiento del disco. Introduzca el(los) disco(s) con el Iado de la etiqueta hacia arriba. Para reproch.mir uno o dos discos, ponga Ios discos en Ias bandejas 1 y 2. Para reproducer tres discos, pulse el boton DISC CHANGE par …
-
Aiwa NSX-V70 — page 26
1 2 1 DISC ~ DIRECT PLAY1 amm b 2 0000 0000 000 b BASIC OPERATIONS Selecting a track with the remote control — ❑ 1 Press one of the DISC DIRECT PLAY buttons to select a disc. 2 Press the numeric buttons and the +10 button to select a track. Example: @To select the 25th track, press the +1 O, +1 O and 5 buttons. @To select the 10th track, press th …
-
Aiwa NSX-V70 — page 27
OPERACIONES BASICAS OPERATIONS DE BASE — Seleccion de una cancion con el control remoto + ❑ 1 Pulse uno de Ios botones DISC DIRECT PLAY para seleccionar un disco. 2 Pulse Ios botones numericos y el boton +1 O para seleccionar una cancion. Ejemplo: @ Para seleccionar la cancion numero 25, pulse Ios botones +lo, +loy5. @ Para seleccionar la canci …
-
Aiwa NSX-V70 — page 28
3 0000 0000 000 b 5 Q DIRECTION < } PRESET b BASIC OPERATIONS PROGRAMMED PLAY Up to 30 tracks can be programmed from any of the inserted discs. Use the remote control. 1 2 3 4 5 Press the PRGM button twice in stop mode. The PRGM indicator flashes on the display. ● When the PRGM button is pressed once in step 1, the unit enters the KARAOKE PROG …
-
Aiwa NSX-V70 — page 29
OPERACIONES BASICAS REPROIXJCCION PROGRAMADA Se podra programar un maximo de 30 canciones de cualquiera de Ios discos introducidos. Utilice el control remoto. 7 Pulse dos veces el boton PRGNI estando en el 2 3 4 5 modo de parada. El indicador PRGM parpadeara en el visualizador. ● Cuando se pulse una vez el boton PRGM en el paso 1, la unidad se po …
-
Aiwa NSX-V70 — page 30
Q A EJECT 2 BASIC OPERATIONS INSERTING TAPES ● On deck 1, tapes are always played back on both sides. On deck 2, you can select a reverse mode to play back one or both sides. ● Use normal (type I), CrOz (type 11) or metal (type lV) tapes for playback. Press theTAPE button and press the A EJECT mark to open the cassette holder. + ❑ Insert a ta …
-
Aiwa NSX-V70 — page 31
OPERACIONES BASICAS OPERATIONS DE BASE INSER(XON DE CINTAS ● En la platina 1, Ias cintas se reproduce siempre por ambas caras, En la platina 2, podra seleccionar el modo de inversion para reproducer una o dos caras. * Utilice cintas normales (tipo I), de CrOz (tipo II) o de metal (tipo IV) para la reproduction. Pulse el bot6n TAPE y la marca A EJ …
-
Aiwa NSX-V70 — page 32
II d /—. >1 0 c o b ❑ ✎ m A BASIC OPERATIONS MUSIC SENSOR If there is a 4-second or longer blank between each track, the search for the beginning of the current or next track during playback can be easily made. When the F of the 4- button ie illuminated, press the PF button to move to the next track or the 4 button to move to the beginning …
-
Aiwa NSX-V70 — page 33
OPERA ClONES BASICAS SENSOR MUSICAL Si hay un espacio sin grabar de 4 segundos o mas entre cada cancion, la busqueda del principio de la cancion que este siendo reproducida o de”la siguiente cancion podra realizarse facilmente. Cuando el indicador F del boton +> este encendido, pulse el boton * para pasar a la siguiente cancion o el boton < …
-
Aiwa NSX-V70 — page 34
1 1 ’ J 2 REV MODE 3 ❑ UINR b 5 rEEpl RECIREC MUTE BASIC RECORDING This section explains how to record from the tuner, CDs, or external equipment. If you want to record from tapes, see pages 36 to 38. Preparation ● Wind up the tape to the point where recording will start. ● Use normal (type I) and Cr02 (type II) tapes for recording. Insert …
-
Aiwa NSX-V70 — page 35
GRABACION BASICA ENREGISTREMENT DE BASE Esta seccion explica como grabar del sintonizador, discos compactos o equipos exteriors. Si desea grabar de cintas, consulte Ias paginas 37 a 39. Preparation ● Bobine la cinta hasta el punto donde vaya a empezar la grabacion. ● Utilice cintas normales (tipo I) y cintas de CrOz (tipo II) para hater la grab …
-
Aiwa NSX-V70 — page 36
3 DOLBY NR 7!? DUBBING THE TAPE MANUALLY Preparation ● Wind up the tape to the point where recording will start. ● Note that recording will be completed on one side of the tape only. 1 2 3 4 5 Press the TAPE button. Insert the original tape into deck 1 and the tape to be recorded on into deck 2. Insert each tape with the side to be played back …
-
Aiwa NSX-V70 — page 37
COPIADO MANUAL DE CINTAS Preparaci6n ● Bobine la cinta hasta el punto donde vaya a empezar la grabacion. c Tenga en cuenta que la grabacion se completara en una cara de la cinta solamente. 1 2 3 4 5 Pulse el boton TAPE. hserte la cinta original en la platina 1 y la cinta que vaya a grabar en la platina 2. Inserte cada cinta con la cara que vaya a …
-
Aiwa NSX-V70 — page 38
DUBBING THE WHOLE TAPE This function allows you to make exact copies of both sides of the original tape. The reverse side of both tapes will start simultaneously as soon as the longer tape has been reversed. m ● Dubbing does not start from a point halfway in the tape. ● The reverse mode is automatically set to =1. ● The Dolby NR does not affe …
-
Aiwa NSX-V70 — page 39
COPIADO DE TODA LA CINTA Esta funcion Ie permitira hater copias exactas de ambas caras de la cinta original. La cara de inversion de ambas cintas empezara a moverse al mismo tiempo, tan pronto como termine de invertirse la cinta mas Iarga, m ● La copia no empezara desde un punto ubicado en medio de la cinta. ● El modo de inversion se ajustara a …
-
Aiwa NSX-V70 — page 40
4 DISC ~ DIRECT PLAY-1 aam Al EDIT RECORDING The Al EDIT function enables CD recording without worrying about tape length and track length. When a CD is inserted, the unit automatically calculates track lengths. If necessary, the order of tracks is rearranged so that no track is cut short. m Al EDIT recording will not start from a point halfway int …
-
Aiwa NSX-V70 — page 41
GRABACION CON EDICION Al ENREGISTREMENT AVEC MONTAGE ET CALCUL DU TEMPS La funcion Al EDIT (edition Al) permite grabar discos compactos sin preocuparse de la duration de la cinta y de Ias canciones. Cuando se inserte un disco compacto, la unidad calculara automaticamente la duration de Ias canciones. En caso de ser necesario, el orden de Ias cancio …
-
Aiwa NSX-V70 — page 42
Al EDIT RECORDING To check the order of the programmed track numbers Before recording, press the EDIT/CHECK to select side A or B, and press the +4 or — button repeatedly. + ❑ DISPLAY @ Tape side @ Program number @ Programmed track numbers @ Track number To add tracks from other discs to the edit program If there is any time remaining on the tape …
-
Aiwa NSX-V70 — page 43
GRABACION CON EDICION Al ENREGISTRHWENT AVEC MONTAGE ET CALCUL DU TEMPS Para comprobar el orden de Ios numeros de Ias canciones programadas Antes de grabar, pulse el boton EDIT/CHECK para seleccionar la cara A o la B, y pulse repetidamente el boton + o *. +n VISUALIZATION @ Cara de la cinta @ Ntimero del programa @) Numeros de ias canciones program …
-
Aiwa NSX-V70 — page 44
4 f!ib,% 5 DISC ~ DIRECT PLAY1 +10 n u 7 EDIT/CHECK r BJ 8 REC/REC MUTE E i DIRECTION < } PRESET ● /o o PROGRAMMED EDIT RECORDING 4 5 6 7 8 Press the numeric buttons to designate the tape length. 10 to 99 minutes can be specified. Example: When using a 60-minute tape, press the 6 and O buttons. DISPLAY @ Tape length @ Tape side A (front side) …
-
Aiwa NSX-V70 — page 45
GRABACION CON EDICION PROGRAMADA 4 5 6 7 8 Pulse los botones numericos para designar la durach5n de la cinta. Se puede especificar una duration de 10 a 99 minutes. Ejemplo: Cuando utilice cintas de 60 minutes, pulse Ios botones 6 y O. VISUALIZATION @ Duration de la cinta @ Cara A de la cinta (cara delantera) @ Tiempo maximo de grabacion para la car …
-
Aiwa NSX-V70 — page 46
1 4 MIC a’””’ Q MIN. . MAX 5 DIGITAL -’Ho @ MIN* ● MAX MICROPHONE MIXING Two microphones (not supplied) can be connected to this unit, allowing you to sing along to music sources. Use a microphone with a mini plug (a3.5 mm, l/E inch). Before connecting a microphone Set the MIC MIXING control to MIN. 1 2 3 4 5 Connect your microphone to …
-
Aiwa NSX-V70 — page 47
MEZCLA MICROFONICA MIXAGE AVEC MICROPHONE A esta unidad podran conectarse dos microfonos (no suministrados), permitiendole asi cantar con el acompariamiento de Ias fuentes musicales. Utilice un microfono con miniclavija (3,5 mm 0). Antes de conectar un microfono Ponga el control MIC MIXING en MIN. 1 2 3 4 5 Conecte su microfono a la toma MIC. Pulse …
-
Aiwa NSX-V70 — page 48
VOCAL FADER/MULTIPLEX FUNCTION This unit can use discs or tapes as Karaoke sources. VOCAL FADER/AUTO VOCAL FADER function The VOCAL FADER function makes the singer’s voice on ordinary discs or tapes softer than the accompaniment. In the AUTO VOCAL FADER function, the VOCAL FADER operates only while there is audio input through a microphone. MULTI …
-
Aiwa NSX-V70 — page 49
FUNCION VOCAL FADER/ MULTIPLEX FONCTION VOCAL FADER/ MULTIPLEX Esta unidad puede utilizar discos o cintas como fuentes de karaoke. Funcion VOCAL FADER/AUTO VOCAL FADER La funcion VOCAL FADER hate que la voz del cantante en discos o cintas normales suene menos que el acompahamiento. En la funcion AUTO VOCAL FADER, VOCAL FADER s610 funcionara mientra …
-
Aiwa NSX-V70 — page 50
L/ KARAOKE PROGRAM Before or during CD play, you can reserve up to 15 tracks to be played after the current track. Each reservation is cleared when it finishes playing. Use the remote control. 1 2 3 4 5 Press the PRGM button once. Press one of the DISC DIRECT PLAY buttons to select a disc, and the numeric buttons to select a track. Press the KARAOK …
-
Aiwa NSX-V70 — page 51
PROGRAMADEKARAOKE PROGRAMME DE KARAOKE Antes o durante la reproduction de un disco compacto, usted podra reservar un maximo de 15 canciones para reproducirlas despues de la cancion que este siendo reproducida, Cada reserva se borrara cuando termine de reproducirse la cancion. Utilice el control remoto. 1 2 3 4 5 Pulse el boton PRGM una vez. Pulse u …
-
Aiwa NSX-V70 — page 52
u 2 TUNING w DOWN UP* SET — ~m b b 4 TUNING L/ a— SETTING THE TIMER The unit can be turned on at the specified time every day with the built-in timer. Preparation Make sure the clock is set correctly. (See page 14.) 1 2 3 4 5 6 Press the TIMER button on the remote control once to display 0, and press the II SET button within 4 seconds, O is displ …
-
Aiwa NSX-V70 — page 53
AJUSTE DEL TEMPORIZADOR REGLAGE DE LA MINUTERIE La unidad podra encenderse a la hors especificada todos Ios alias gracias al temporizador incorporado. Preparacio,n Asegtirese de que la hors del reloj sea !a corrects. (Consuite la pagina 1 5). 1 2 3 4 5 6 Pulse una vez el boton TIMER dei control remoto para visualizer 0, y pulse e! boton i! SET ante …
-
Aiwa NSX-V70 — page 54
SETTING THE TIMER To cancel timer standby mode temporarily Press the TIMER button on the remote control so that @ or R~C disappears on the display. ~ restore the timer standby mode, press again to display 0 or REC Using the unit while the timer is set You can use the unit normally after setting the timer. Before turning off the power, repeat step 5 …
-
Aiwa NSX-V70 — page 55
AJUSTE DEL TEMPORIZADOR REGLAGE DE LA MltWTERIE Para cancelar temporalmente el modo de espera del temporizador Pulse el boton TIMER del control remoto para que O 0 R~C desaparezca del visualizador. Para reponer el modo de espera del temporizador, pulse de nuevo el boton para visualizer Q o R?C. Utilizaci6n de la unidad mientras este ajustado el tem …
-
Aiwa NSX-V70 — page 56
I I CONNECTING OPTIONAL EQUIPMENT -+ ❑ Refer to the operating instructions of the connected equipment for details. ● The connecting cords are not supplied. Obtain the necessary connecting cords. ● Consult your local Aiwa dealer for adequate optional equipment. VIDEO/AUX JACKS This unit can input the sound signal through the jacks, Use a cable …
-
Aiwa NSX-V70 — page 57
CONEXION DE UN EQUIPO OPCIONAL + ❑ CONNEXION D’UN APPAREIIL OPTIONNEL + m Consulte el manual de instrucciones del equipo conectado para tener mas detalles. ● Los cables de conexion no estan suministrados. Obtenga Ios cables de conexion necesarios. * Consulte con su concesionario Aiwa local en cuanto al equipo optional adecuado. TOMAS DE VI DE …
-
Aiwa NSX-V70 — page 58
13 . m CARE AND MAINTENANCE Occasional care and maintenance of the unit and the software are needed to optimize the performance of your unit. To clean the cabinet Use a soft cloth lightly moistened with “mild detergent solution. Do not use strong solvents, such as alcohol, benzine or thinner. To clean the heads and tape paths + ❑ After every 10 …
-
Aiwa NSX-V70 — page 59
CUIDADOS Y MANTENIMIENTO SOINS ET ENTRETIEN El mantenimiento y el cuidado ocasional de la unidad y del software resultan necesarios para optimizar Ias prestaciones de su unidad. Para Iimpiar la caja Utilice un pafio blando humedecido un POCO en una solution de detergence suave. No utilice nunca disolventes fuertes tales como alcohol, bencina o dilu …
-
Aiwa NSX-V70 — page 60
SPECIFICATIONS Main unit CX-NV70/CX-NV72 FM tuner section Tuning range Usable sensitivity(lHF) Antenna terminals AM tuner section Tuning range Usable sensitivity Antenna Amplifier section Power output Total harmonic distortion Inputs outputs Cassette deck section Track format Frequency response Signal-to-noise ratio Recording system Heads 87.5 MHz …
-
Aiwa NSX-V70 — page 61
ESPECIFICACIONES SPECIFICATIONS Unidad principal CX-NV70/CX-NV72 Seccion del sintonizador de FM Gama de sintonizacion 87,5 MHz a 108 MHz Sensibilidad util (IHF) 13,2 dBf Terminals de antena 75 ohmios (desequilibrada) Seccion del sintonizador de AM Gama de sintonizacion Sensibilidad Gtil Antena Seccion dlel ampiificador Potencia de salida Distortion …
-
Aiwa NSX-V70 — page 62
SPECIFICATIONS SPEAKER SYSTEM SX-NV70 Cabinet type Speaker Impedance Output sound pressure level Dimensions (W x H x D) Weight GENERAL Power requirements Power consumption Dimensions of main unit (W XHXD) Weight of main unit 3 way, bass reflex (Magnetism sealed type) WOOfer: 140 mm (55/8 h.) COne type Tweeter: 80 mm (3’/4 in.) cone type Super twe …
-
Aiwa NSX-V70 — page 63
ESPECIFICACIONES SPECIFICATIONS SISTEMA DE ALTAVOCES SX-NV70 Tipo de caja Altavoces Impedancia Nivel de presion actistica de salida Dimensioned (An x Al x Prof) Peso GENERAILIDADES Alimentacion Consumo Dimensioned de la unidad principal (An x Al x Prof) Peso de la unidad principal 3 vias, reflejo de graves (tipo hermetico al magnetism) Altavoz para …
-
Aiwa NSX-V70 — page 64
TROUBLESHOOTING GUIDE If the unit fails to perform as described in these operating instructions, check the following guide, GENERAL There is no sound. ● Is the AC cord connected properly? ● Is there a bad connection? (+ page
● Is there a short circuit in the speaker terminals? + Disconnect the AC cord, then correct the speaker connections. … -
Aiwa NSX-V70 — page 65
GUIA PARALA SOLUCION DE AVERIAS EN CAS DE PROBLEME Si la unidad no funciona como se describe en este manual de instrucciones, compruebe la guia siguiente: GENERAIJDADES No hay sonido. ● LEsta bien conectado el cable de alimentacion de CA? ● LHay alguna conexion mal hecha? (-+ pagina 9) ● ~Hay Un cortocircuito en Ios terminals del altavoz? + D …
-
Aiwa NSX-V70 — page 66
PARTS INDEX Main instructions about each part are indicated, …
-
Aiwa NSX-V70 — page 67
INDICE DE LAS PARTES NOMENCLATURE —— Se indican Ias instrucciones principals de cada parte. Les principals instructions concernant chaque partie sent indiquees. :“ f TUNER/BAND TUNER BAND 20-21 ‘ $;, TAPEIDECK 1/2 TAPE DECK 1/2 30-31 “% Disc compartment — 24-25 Compartimiento de discos ,’ + ~ Compartment a disques 4 POWER POWER 12-13 …
-
Aiwa NSX-V70 — page 68
DOLBY NR LUM?.SY5TEM . . . Dolby noise reduction manufactured under license from Dolby . Laboratories Licensing Corporation. “DOLBY” and the double-D symbol DO are trademarks of Dolby Laboratories Licensing Corporation. ● Reduccion de ruido Dolby fabricado bajo Iicencia de Dolby Labo- ratories Licensing Corporation. DOLBY y el simbolo de la D …
-
Руководства по ремонту
1
-
Инструкции по эксплуатации
1

AIWA NSX-V70 инструкция по эксплуатации
(68 страниц)
- Языки:Английский
-
Тип:
PDF -
Размер:
22.62 MB
Просмотр
На NoDevice можно скачать инструкцию по эксплуатации для AIWA NSX-V70. Руководство пользователя необходимо для ознакомления с правилами установки и эксплуатации AIWA NSX-V70. Инструкции по использованию помогут правильно настроить AIWA NSX-V70, исправить ошибки и выявить неполадки.
-
Руководства по ремонту
1
-
Инструкции по эксплуатации
1
AIWA NSX-V70 инструкция по эксплуатации
(68 страниц)
- Языки:Английский
-
Тип:
PDF -
Размер:
22.62 MB
Просмотр
На NoDevice можно скачать инструкцию по эксплуатации для AIWA NSX-V70. Руководство пользователя необходимо для ознакомления с правилами установки и эксплуатации AIWA NSX-V70. Инструкции по использованию помогут правильно настроить AIWA NSX-V70, исправить ошибки и выявить неполадки.
инструкцияAiwa NSX-V70

COMPACT DISC STEREO SYSTEM
SISTEMA ESTEREO CON REPRODUCTOR DE DISCOS
COMPACTOS
CHAINE STEREO AVEC LECTEUR DE DISQUES COMPACTS
NSX-V72
(ilTi5i
DIGITALAUDIO
Посмотреть инструкция для Aiwa NSX-V70 бесплатно. Руководство относится к категории CD-проигрыватели, 9 человек(а) дали ему среднюю оценку 8.2. Руководство доступно на следующих языках: английский. У вас есть вопрос о Aiwa NSX-V70 или вам нужна помощь? Задайте свой вопрос здесь
![]()
Главная
Не можете найти ответ на свой вопрос в руководстве? Вы можете найти ответ на свой вопрос ниже, в разделе часто задаваемых вопросов о Aiwa NSX-V70.
Как лучше всего выполнять чистку CD-проигрыватель?
Инструкция Aiwa NSX-V70 доступно в русский?
Не нашли свой вопрос? Задайте свой вопрос здесь
-
Contents
-
Table of Contents
-
Bookmarks
Quick Links
COMPACT DISC STEREO SYSTEM
SISTEMA ESTEREO CON REPRODUCTOR DE DISCOS
COMPACTOS
CHAINE STEREO AVEC LECTEUR DE DISQUES COMPACTS
NSX-V70
NSX-V72
(ilTi5i
DIGITALAUDIO
Related Manuals for Aiwa NSX-V70
Summary of Contents for Aiwa NSX-V70
-
Page 1
COMPACT DISC STEREO SYSTEM SISTEMA ESTEREO CON REPRODUCTOR DE DISCOS COMPACTOS CHAINE STEREO AVEC LECTEUR DE DISQUES COMPACTS NSX-V70 NSX-V72 (ilTi5i DIGITALAUDIO… -
Page 2
(you will find them on the rear of your set) in the space provided below. Please refer to them when you contact AIWA dealer in case of difficulty. Model No. CX-NV701CX-NV72 Serial No, Model No. SX-NV70 Serial (Lot) No. -
Page 3
Felicitations La lecture estereo Aiwa. I’utilisation tome el tiempo Au sujet de la cha~ne y familiarizarse Votre chalne @et @et est fournie avec Ies accessoires de Ias unidades… -
Page 5: Table Of Contents
INIIICIE PREPARATIVES PRECALICIONES … 7 CONEXIONES … 9 POSIClONAMIENTO DE LOS ALTAVOCES …11 ANTES DE LA OPERACION … 13 PIJESTA EN HORA DEL RELOJ … 15 SONIDO AJUSTE DEL SONIDO … 17 ECUALIZADOR GRAFICO … 17 SONIDO AMBIENTAL DSP … 19 RECEPCION DE LA RADIO SINTONIZACION MANUAL …
-
Page 6
Do not period of time, in, a small even when your dealer or an Aiwa or repair. the AC cord and contact a… -
Page 7: Precaliciones
* Si el cable de alimentacion de CA esta estropeado, en contacto con su concesionario o centro Aiwa para que se 10 cambien o reparen inmediatamente. Si se produce algun problems, desconecte alimentacion de CA y pongase en contacto de servicio cualificado.
-
Page 8
IMPORTANT Connect the AC cord after connecting speakers, all optional equipment. There are no differences between the front between the surround speakers. Both connected as L (left) or R (right). Connect the SX-NV70 right speaker to the unit. Connect the speaker cord to the SPEAKERS The cord with the white stripe should be connected terminal… -
Page 9: Conexiones
CONEXIONES IMPORTANTE Conecte el cable de alimentacion de CA despues conectado Ios altavoces, Ias antenas y todos Ios demas equipos opcionales. No existen diferencias entre Ios altavoces Ios altavoces de sonido ambiental. Ambos altavoces podran conectarse como altavoz (L) o como altavoz derecho (R).
-
Page 10
lr FM 75 c1 CONNECTIONS stand the AM antenna on a surface + Fix the claw to the slot. position the antennas AM loop antenna: Position to find the best direction and posikon for radio reception. FM feeder antenna: Extend this antenna horizontally in a T-shape and fix its the wall with cellophane tape, etc. -
Page 11: Posiclonamiento De Los Altavoces
Para poner la antena de AM en position una superficie + Fije el gancho en la ranura. Para colocar Ias antenas Antena de cuadro de AM: Pongala en la direccion y en la position que ofrezcan recepcion de la radio, Antena de FM: Extienda horizontalmente esta antena formando una T y fije sus extremes…
-
Page 12
POWER ._— _ —.. —. ——— ——.. —< BEFORE OPERATION turn the unit on Press one of the function CD). Playback of the inserted tuned station is received The POWER button is also available. The disc compartment DEMO (Demonstration) When the AC cord is connected window demonstrates is turned on, the DEMO display display. -
Page 13: Antes De La Operacion
ANTES DE LA OPERACION Para encenck?r la unidad Pulse uno de Ios botones de funcion (TAPE, TUNER, AUX, CD). La reproduction del disco o de la cinta insertada recibira la emisora previamente sintonizada reproduction directs). Tambien podra utilizarse el boton POWER, El compartimiento de discos puede…
-
Page 14
SETTING THE CLOCK When the AC cord is connected for the first time, the II SET button flashes. Set the time as follows while the power is off. Press the SET button. The hour flashes. Press DOWN or W designate the hour. Press the SET button to set the hour. -
Page 15: Pijesta En Hora Del Reloj
PUESTA EN HORA DEL RELOJ Cuando el cable de alimentacion de CA se conecte vez, el boton II SET parpadeara. Ponga la hors como se indica a continuation, alimentacion r?stedesconectada. Pulse el boton SET. La hors parpadeara. Pulse el boton W DOWN o W la hors.
-
Page 16
“ VOLUME MIN. CEEI—E5BE 1111 + 111111 +11111111 1111 + ‘EiEE1 ELECTRONIC GRAPHIG EQUALIZER “QEEiil ELECTRONIC GRAPHIG EQLIALIZER ADJUSTING THE SOUND VOLUME CONTROL -+ El Turn the VOLUME control @ on the main unit, or press the VOLUME buttons @on the remote control. BBE SYSTEM + H The BBE system It also enriches… -
Page 17: Ajuste Del Sonido
AJWl% DEL SONIDO CONTROL DE VOLUMEN + El Gire ISI control VOLUME @ de la unidad principal o pulse Ios botones VOLUME@ del control remoto. SISTEMA 13BE + H El sistema BBE realza la claridad del sonido de alta frecuencia. Tambien mejora la funcion…
-
Page 18
DSP SURROUND -+ E The DSP (Digital Signal Processor) surround circuits can recreate the effect of sounds reflected from walls or ceilings, sound presence of real environments. There are three modes with matching curves. Press one of the SURROUND button. + @ Equalization curves are selected… -
Page 19: Sonido Ambiental Dsp
SOW(I AMBIENTAL DSP + E Los circuitos de sonido ambiental DSP (procesador digital) pueden crear el efecto de Ios sonidos paredes o el techo, para obtener la presencia ambiente real. Existen tres modos sus correspondientes ecualizacion graficas. Pulse uno de Ios botones SURROUND. Las curvas de ecualizacion se seleccionan…
-
Page 20
TUNING uPWf DOWN MONO MANUAL TUNING Press the TUNEFUBAND button to select the band repeatedly. If the power is turned off, the previously played (Direct Play Function). Press the M DOWN or H UP button to select a station. Each time the button is pressed, the frequency When a station is received, ‘TUNE is displayed for 2 seconds. -
Page 21: Sintonizacion Manual
SINTONIZACION MANUAL Pulse repetidamente el boton TUNER/BAND seleccionar la banda. Si la alimentacion esta desconectada se recibira la emisora previamente sintonizada (funcion de reproduction directs). Pulse e! boton DOWN seleccionar una emisora. Cada vez que pulse el boton, la frecuencia cambiara. Cuando se reciba una emisora, “TUNE”…
-
Page 22
TUNER BAND ‘8 0000 0000 PRESETTING STATIONS + EI The unit can store a total of 32 preset stations. When a station is stored, a preset number is assigned to the station. preset number to tune in to a preset station directly. Press the TUNER/BAND button to select a band, and press the M… -
Page 23: Preajuste De Emisoras
PREAWSTE DE EMISORAS + Esta unidad puede almacenar un total de 32 emisoras. Cuando almacene una emisora, a esa emisora se Ie asignara un numero de preajuste. Utilice el numero de preajuste para sintonizar directamente una emisora preajustada. boton TUNER/BAND para seleccionar Pulse una banda, y pulse M…
-
Page 24
DIRECTION/PRESET DISCDIRECT PLAY BASIC OPERATIONS LOADING DISCS + El Press the CD button, then press the 4 OPEN/CLOSE button to open the disc compartment. with the label side up. To play one or two discs, place the discs on tray 1 and 2. To play three discs, press the DISC CHANGE button to rotate the trays after placing two discs. -
Page 25: Operacicines 13 Asicas
OPERAClONES BASICAS lNTROtNJCCION DE DISCOS -+ Pulse el bot6n CD, y Iuego pulse el boton 4 OPEN/ CLOSE para abrir el compartimiento Introduzca el(los) disco(s) con el Iado de la etiqueta hacia arriba. Para reproch.mir u no o dos discos, ponga Ios discos en Ias bandejas 1 y 2.
-
Page 26
DISC ~ DIRECT PLAY1 0000 0000 Selecting a track with the remote control — 1 Press one of the DISC DIRECT PLAY buttonsto select a disc. 2 Press the numeric buttons and the +10 button to select a track. Example: @To select the 25th track, press the +1O, +1Oand 5 buttons. -
Page 27
OPERACIONES Seleccion de una cancion con el control remoto + 1 Pulse uno de Ios botones DISC DIRECT seleccionar un disco. 2 Pulse Ios botones numericos y el boton +1Opara seleccionar una cancion. Ejemplo: @ Para seleccionar la cancion numero 25, pulse Ios botones +lo, +loy5. -
Page 28
0000 0000 DIRECTION < } PRESET BASIC OPERATIONS PROGRAMMED PLAY Up to 30 tracks can be programmed from any of the inserted discs. Use the remote control. Press the PRGM button twice in stop mode. The PRGM indicator flashes on the display. When the PRGM button is pressed once in step 1, the unit enters the KARAOKE PROGRAM (page 50). -
Page 29
OPERACIONES REPROIXJCCION PROGRAMADA Se podra programar un maximo de 30 canciones de cualquiera de Ios discos introducidos. Utilice el control remoto. dos veces el boton PRGNI estando en el 7 Pulse modo de parada. El indicador PRGM parpadeara en el visualizador. Cuando se pulse una vez el boton PRGM en el paso 1, la unidad se pondra en el modo KARAOKE PROGRAM (pagina 51). -
Page 30
EJECT BASIC OPERATIONS INSERTING TAPES On deck 1, tapes are always played back on both sides. On deck 2, you can select a reverse mode to play back one or both sides. Use normal (type I), CrOz (type 11)or metal (type lV) tapes for playback. -
Page 31: Operaciones Basicas
OPERACIONES BASICAS INSER(XON DE CINTAS En la platina 1, Ias cintas se reproduce caras, En la platina 2, podra seleccionar el modo de inversion para reproducer una o dos caras. * Utilice cintas normales (tipo I), de CrOz (tipo (tipo para la reproduction.
-
Page 32
/—. >1 MUSIC SENSOR If there is a 4-second or longer blank between each track, the search for the beginning of the current or next track during playback can be easily made. When the F of the 4- button to move to the next track or the 4 beginning of the current track. -
Page 33: Reproduction Continua
OPERA ClONES BASICAS SENSOR MUSICAL Si hay un espacio sin grabar de 4 segundos o mas entre cada cancion, la busqueda del principio de la cancion que este siendo reproducida o de”la siguiente cancion podra realizarse facilmente. Cuando el indicador F del boton +> este encendido, pulse el boton * para pasar a la siguiente cancion o el boton <…
-
Page 34
REV MODE UINR rEEpl RECIREC MUTE BASIC RECORDING This section explains how to record from the tuner, CDs, or external equipment. If you want to record from tapes, see pages 36 to 38. Preparation Wind up the tape to the point where recording will start. Use normal (type I) and Cr02 (type Insert the tape to be recorded on into deck 2. -
Page 35: Grabacion Basica
GRABACION BASICA Esta seccion explica como grabar del sintonizador, compactos o equipos exteriors. Si desea grabar de cintas, consulte Ias paginas 37 a 39. Preparation Bobine la cinta hasta el punto donde vaya a empezar la grabacion. Utilice cintas normales (tipo I) y cintas de CrOz (tipo hater la grabacion.
-
Page 36
DOLBY NR DUBBING THE TAPE MANUALLY Preparation Wind up the tape to the point where recording will start. Note that recording will be completed on one side of the tape only. Press the TAPE button. Insert the original tape into deck 1 and the tape to be recorded on into deck 2. -
Page 37: Copiadci Manual De Cintas
COPIADO MANUAL DE CINTAS Preparaci6n Bobine la cinta hasta el punto donde vaya a empezar la grabacion. c Tenga en cuenta que la grabacion se completara en una cara de la cinta solamente. TAPE. Pulse el boton hserte la cinta original en la platina 1 y la cinta que vaya a grabar en la platina 2.
-
Page 38
DUBBING THE WHOLE TAPE This function allows you to make exact copies of both sides of the original tape. The reverse side of both tapes will start simultaneously as soon as the longer tape has been reversed. Dubbing does not start from a point halfway in the tape. The reverse mode is automatically set to =1. -
Page 39: Copiado De Toda La Cinta
COPIADO DE TODA LA CINTA Esta funcion Ie permitira hater copias exactas de ambas caras de la cinta original. La cara de inversion de ambas cintas empezara a moverse al mismo tiempo, tan pronto como termine de invertirse la cinta mas Iarga, La copia no empezara desde un punto ubicado en medio de la cinta.
-
Page 40
DISC DIRECT PLAY-1 Al EDIT RECORDING The Al EDIT function enables CD recording without worrying about tape length and track length. When a CD is inserted, the unit automatically calculates track lengths. If necessary, the order of tracks is rearranged so that no track is cut short. Al EDIT recording will not start from a point halfway into the tape. -
Page 41: Grabacion Con Edicion Al
GRABACION CON EDICION Al La funcion Al EDIT (edition Al) permite grabar discos compactos sin preocuparse de la duration de la cinta y de Ias canciones. Cuando se inserte un disco compacto, automaticamente la duration de Ias canciones. necesario, el orden de Ias canciones podra cambiarse ninguna cancion quede cortada.
-
Page 42
Al EDIT RECORDING To check the order of the programmed Before recording, press the EDIT/CHECK and press the +4 or — button repeatedly. DISPLAY @ Tape side @ Program number @ Programmed track numbers @ Track number To add tracks from other discs to the edit program If there is any time remaining on the tape after step 5 of page 40, you can add tracks from other discs in the CD compartment… -
Page 43: Grabacion Con Edicion Programada
GRABACION CON EDICION Al Para comprobar el orden de Ios numeros canciones programadas Antes de grabar, pulse el boton EDIT/CHECK la cara A o la B, y pulse repetidamente el boton + VISUALIZATION @ Cara de la cinta @ Ntimero del programa @) Numeros de ias canciones…
-
Page 44
4 f!ib,% DISC DIRECT PLAY1 EDIT/CHECK REC/RECMUTE DIRECTION < } PRESET PROGRAMMED Press the numeric buttons to designate the tape length. 10 to 99 minutes Example: When using a 60-minute buttons. DISPLAY @ Tape length @ Tape side A (front side) @ Maximum Press one of the DISC DIRECT PLAY buttons to select a disc and press the numeric buttons to… -
Page 45
GRABACION CON PROGRAMADA Pulse los botones numericos durach5n de la cinta. Se puede especificar una duration de 10 a 99 minutes. Ejemplo: Cuando utilice cintas de 60 minutes, botones 6 y O. VISUALIZATION @ Duration de la cinta @ Cara A de la cinta (cara delantera) @ Tiempo maximo de grabacion para la cara A… -
Page 46
In this case, turn the MIC MIXING MIN. Recommended microphone The use of a unidirectional type microphone prevent howling. Contact your local Aiwa dealer for details. to this unit, with the MIC simultaneously. be used for mixing to MIN and a howling sound away… -
Page 47: Mezcla Microfonica
Le cas echeant, elcligner de l’enceinte ou baisser Ie niveau scmore a I’aide MIC MIXING. est extr6mement fort, il peut &re tourner la commande MIC MIXING microphone de type unidirectionnel pour eviter Ie hurlement, Pour plus de d6tails, Aiwa local, DSF) 4“7…
-
Page 48
VOCAL FADER/MULTIPLEX FUNCTION This unit can use discs or tapes as Karaoke VOCAL FADER/AUTO VOCAL FADER function The VOCAL FADER function makes the singer’s ordinary discs or tapes softer than the accompaniment. AUTO VOCAL FADER function, the VOCAL only while there is audio input through a microphone. -
Page 49: Funcion Vocal Fader/Multiplex
FUNCION VOCAL FADER/ MULTIPLEX Esta unidad puede utilizar discos o cintas karaoke. Funcion VOCAL FADER/AUTO VOCAL FADER La funcion VOCAL FADER hate que la voz del cantante discos cintas normales suene acompahamiento. En la funcion AUTO VOCAL FADER s610 funcionara mientras haya entrada de audio a traves de un microfono,…
-
Page 50
KARAOKE PROGRAM Before or during CD play, you can reserve played after the current track. Each reservation it finishes playing. Use the remote control. Press the PRGM button once. Press one of the DISC DIRECT PLAY buttons to select a disc, and the numeric buttons to select a track. -
Page 51: Programadekaraoke
PROGRAMADEKARAOKE Antes o durante la reproduction de un disco compacto, podra reservar un maximo de 15 canciones despues de la cancion que este siendo reserva se borrara cuando termine de reproducirse Utilice el control remoto. Pulse el boton PRGM una vez. Pulse uno de Ios botones DISC DIRECT PLAY para…
-
Page 52
TUNING DOWN TUNING a— SETTING THE TIMER The unit can be turned the built-in timer. Preparation Make sure the clock is set correctly. Press the TIMER button on the remote control once to display 0, and press the II SET button within 4 seconds, is displayed, and the hour flashes. -
Page 53: Ajuste Del Temporizador
AJUSTE DEL TEMPORIZADOR La unidad podra encenderse a la hors especificada alias gracias al temporizador incorporado. Preparacio,n Asegtirese de que la hors del reloj sea !a corrects. pagina 15). Pulse una vez el boton TIMER dei control remoto para visualizer 0, y pulse e! boton i! SET antes de uue pasen 4 segundos.
-
Page 54
SETTING THE TIMER To cancel timer standby mode temporarily Press the TIMER button on the remote control so that @ or disappears on the display. restore the timer standby mode, press again to display Using the unit while the timer is set You can use the unit normally after setting the timer. -
Page 55: Ajuste Del Temporizador Para Dormir
AJUSTE DEL TEMPORIZADOR Para cancelar temporalmente el modo de espera temporizador Pulse el boton TIMER del control remoto desaparezca del visualizador. Para reponer el modo de espera del temporizador, nuevo el boton para visualizer R?C. Utilizaci6n de la unidad mientras temporizador Podra utiiizar…
-
Page 56: Connecting Optional Equipment
Connect the red plug to the R jack, and the whilte plug to the L jack. When connecting a turntable Use an Aiwa turntable equipped with a built-in equalizer amplifier. LINE OUT JACKS This unit can output the sound signal through the jacks, Use a cable with RCA phono plugs to connect an audio equipment with the LINE IN (analog input) jacks.
-
Page 57: Conexion De Un Equipo Optional
Consulte el manual de instrucciones del equipo conectado para tener mas detalles. Los cables de conexion no estan suministrados. Obtenga Ios cables de conexion necesarios. * Consulte con su concesionario Aiwa local en cuanto al equipo optional adecuado. TOMAS DE VI DEO/EQUIPO…
-
Page 58
13 . CARE AND MAINTENANCE Occasional care and maintenance of the unit and the software are needed to optimize the performance To clean the cabinet Use a soft cloth lightly moistened with “mild detergent Do not use strong solvents, such as alcohol, To clean the heads and tape paths + After every 10 hours of use, clean the heads and tape paths with a head cleaning cassette or cotton swab moistened… -
Page 59: Cuidados Y Mantenimiento
CUIDADOS Y MANTENIMIENTO El mantenimiento y el cuidado ocasional software resultan necesarios para optimizar su unidad. Para Iimpiar la caja Utilice un pafio blando humedecido un POCOen una solution detergence suave. No utilice nunca disolventes alcohol, bencina o diluyente. Para Iimpiar Ias cabezas y Ios puntos por donde pasa la cinta + Ill Despues de cada 10 horas de funcionamiento, y Ios puntos por donde pasa la cinta con un cassette…
-
Page 60
SPECIFICATIONS Main unit CX-NV70/CX-NV72 FM tuner section Tuning range 87.5 MHz to 108 MHz 13.2 dBf Usable sensitivity(lHF) Antenna terminals 75 ohms (unbalanced) tuner section Tuning range kHz to 1710 kHz (10 kHz step) 531 kHz to 1602 kHz (9 kHz step) Usable sensitivity 350 vVlm Antenna… -
Page 61: Especificaciones
ESPECIFICACIONES Unidad principal CX-NV70/CX-NV72 Seccion del sintonizador de FM Gama de sintonizacion 87,5 MHz a 108 MHz Sensibilidad util (IHF) 13,2 dBf Terminals de antena 75 ohmios (desequilibrada) Seccion del sintonizador de AM Gama de sintonizacion 530 kHz a 1710 kHz (pasos de 10 kHz) 531 kHz a 1602 kHz (pasos de 9 kHz)
-
Page 62
SPECIFICATIONS SPEAKER SYSTEM SX-NV70 3 way, bass reflex Cabinet type (Magnetism WOOfer: 140 mm Speaker type Tweeter: 80 mm type Super tweeter: ceramic type 6 ohms Impedance 87 dBIWlm Output sound pressure level 206 x 302 x 265 mm (81/8 x 12 x Dimensions (W x H x D) 10’/2 in,) -
Page 63
ESPECIFICACIONES SISTEMA DE ALTAVOCES SX-NV70 Tipo de caja 3 vias, reflejo hermetico al magnetism) Altavoz para graves: Altavoces 140 mm, tipo conico Altavoz para agudos: 80 mm, tipo conico Superaltavoz 50 mm, tipo ceramico 6 ohmios Impedancia 87 dBIWlm Nivel de presion actistica de salida 206 x 302 x 265 mm Dimensioned (An x Al x Prof) -
Page 64
TROUBLESHOOTING GUIDE If the unit fails to perform as described instructions, check the following guide, GENERAL There is no sound. Is the AC cord connected properly? Is there a bad connection? (+ pageIs there a short circuit in the speaker terminals? + Disconnect AC cord,…
-
Page 65: Guiaparalasolucion Deaverias
GUIAPARALASOLUCION DEAVERIAS Si la unidad no funciona como se describe instrucciones, compruebe la guia siguiente: GENERAIJDADES No hay sonido. LEsta bien conectado el cable de alimentacion LHay alguna conexion mal hecha? (-+ pagina 9) cortocircuito en Ios terminals del altavoz? ~Hay + Desconecte el cable de alimentacion…
-
Page 66
PARTS INDEX Main instructions about each part are indicated,… -
Page 67: Indice De Las Partes
INDICE DE LAS PARTES Se indican Ias instrucciones principals de cada parte. :“ f TUNER/BAND TAPEIDECK ‘ $;, “% Disc compartment ,’ Compartimiento de discos Compartment a disques POWER DEMO @ ‘: Q RECIREC MUTE SYNCHRO DUBBING NORMALIHIGH ‘8 ~~ Ill SET ,’…
-
Page 68
Licensing Corporation. DOLBY et Ie symbole double-D DO sent des marques de Dolby Laboratories Licensing Corporation. AIWA CO.,LTDm LUM?.SY5TEM The word “BBE” and the “BBE symbol” Sound, Inc. of Dolby Under license from BBE sound, La sigla “BBE” y el simbolo BBE Sound, Inc.
This manual is also suitable for:
Nsx-v72
 Краткий обзор на музыкальный центр Aiwa nsx v70, характеристики, видео, фото, достоинства и недостатки. Его составляющие (колонки, пульт, головной блок) данные взяты из инструкции по эксплуатации (user manual) и при пользовании.
Музыкальный центр Aiwa nsx v70 выпускался в 1995-1996 годах. Он является одним из наиболее качественных по звучанию музыкальных центров — мини систем формата 2.0. Очень хорошее воспроизведение родными колонками низких частот. Если подключить еще активный сабвуфер, звук станет еще мощнее и насыщенней. Динамики окружающего звучания, которые расположены в колонках под углом, создают эффект объемного звучания за счет отражения звука от стен. Оборудован стандартным CD чейнджером на 3 диска. 2 микрофонных входа для функции караоке. На фото модель? изготовленная в Великобритании, с потребляемой мощностью 400 Ватт от сети (см. фото маркировки на задней панели). Из-за того, что моторизированный регулятор громкости имеет фиксированное положение со светодиодом, уровень звука на дисплее не отображается. Ориентироваться нужно по положению ручки.
Содержание:
Фото.
Достоинства и недостатки.
Видео.
Технические характеристики.
Колонки.
Внутренности.
Достоинства и недостатки музыкального центра Aiwa nsx v70:
Достоинства:
- Качество звука (отличные низкие частоты — проводилось сравнение с музыкальным центром Philips fw 630 Hi-FI),
- Эффект объемного звучания с помощью специально расположенных для этого динамиков (см. фото),
- Подсветка (см. фото),
- Громкость,
- Моторизированный регулятор громкости,
- Регулировка входного сигнала (см. фото).
- Возможность подключения активного сабвуфера (см. фото).
- Линейный выход.
Недостатки:
- Яркость дисплея со временем уменьшается,
- Хлипкие разъемы подключения динамиков объемного звука. При усиленной эксплуатации разъемов проводов, могут повредится дорожки на плате (см. фото).
- Родные колонки не вытягивают без искажений полную громкость усилителя. Если поставить боле мощные, (например S90) будет то что надо.
Aiwa nsx v70 фото

Пульт Aiwa RC-T501 подходит, в определенной мере, и к другим моделям.
Aiwa nsx-v70 видео
Пояснения к видео. Колонки данного музыкального центра Aiwa SX FNV70L имеют по 2 входа. Один кабель для подключения басового динамика и пищалки, второй кабель для подключения динамиков объемного звука. При включении на головном устройстве режима объемного звучания, на колонках загорается красный светодиод.
Краткая демонстрация переключения настроек эквалайзера и режимов окружающего звучания.
Колонки Aiwa SX FNV70L. Что внутри?

Внутренности головного блока: микросхема усиления STK 4192II. Привод CD одинаковый как в младших, так и в других моделях.
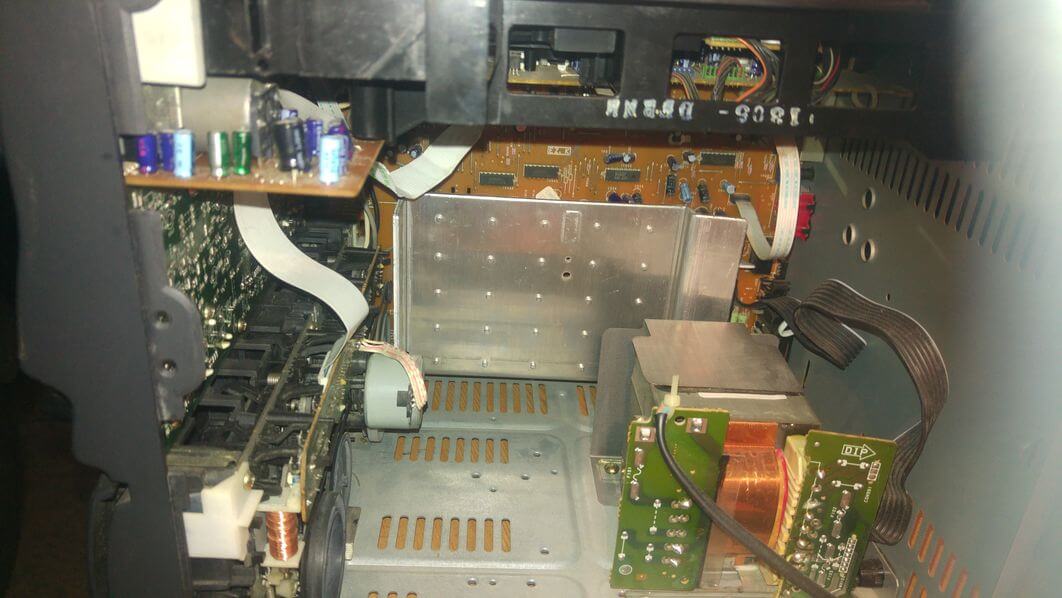
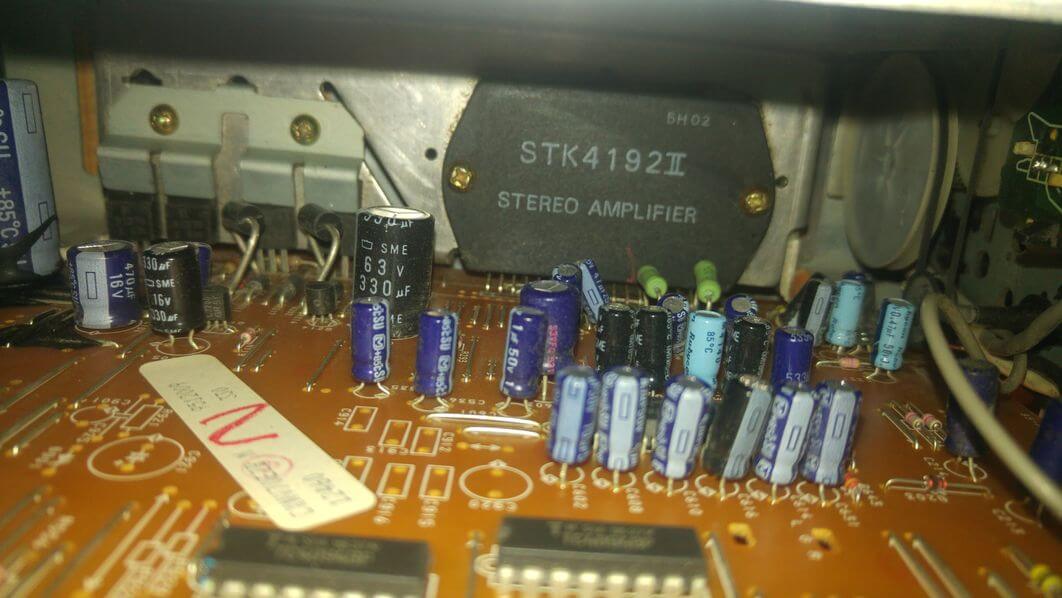
Aiwa nsx-v70 характеристики
Данные характеристики взяты из инструкции по эксплуатации (user manual).
Main unit CX-NV70/CX-NV72
FM tuner section
Tuning range
Usable sensitivity(IHF)
Antenna terminals
87.5 MHz to 108 MHz 13.2 dBf
75 ohms (unbalanced)
AM tuner section Tuning range
530 kHz to 1710 kHz (10 kHz step)
531 kHz to 1602 kHz (9 kHz step)
Usable sensitivity Antenna
350 pV/m Loop antenna
Amplifier section
ower output
FTC RULE
100 watts per channel, Min.
RMS at 6 ohms, from 65 Hz to 12 kHz,
with no more than 1 % Total Harmonic Distortion
Total harmonic distortion 0.1 % (50 W, 1 kHz, 6 ohms, DIN- AUDIO)
Inputs
VIDEO/AUX: 150 mV adjustable MIC 1, MIC 2: 1 mV (10 kohms)
Outputs
LINE OUT:
200 mV SUPER WOOFER: 2.45 V SPEAKERS: accepts speakers of 6 ohms or more SURROUND SPEAKERS: accepts speakers of 16 ohms or more
PHONES (stereo jack):
accepts headphones of 32 ohms or more
Cassette deck section
Track format Frequency response
4 tracks, 2 channels stereo
СгO2 tape: 50 Hz — 16000 Hz
Normal tape: 50 Hz — 15000 Hz
Signal-to-noise ratio 60 dB (Dolby В NR ON, CrO2 tape peak level)
Recording system Heads AC bias
DECK 1: Playback head x 1 DECK 2: Recording/playback/ erase head x 1
Compact disc player section
Laser Semiconductor laser (X = 780 nm)
D-A converter Signal-to-noise ratio Harmonic distortion Wow and flutter
1 bit dual
85 dB (1 kHz, OdB) 0.03 % (1 kHz, 0 dB) Unmeasurable
SPEAKER SYSTEM SX-NV70
Cabinet type 3 way, bass reflex (Magnetism sealed type)
Speaker
Woofer: 140 mm (56/s in.) cone type
Tweeter: 80 mm (31A in.) cone type
Super tweeter: 50 mm (2 in.) ceramic type
Impedance 6 ohms
Output sound pressure level 87 dB/W/m
Dimensions (WxHxD) 206 x 302 x 265 mm
Weight 2.9 kg
GENERAL
Power requirements 120 V 60 Hz, fixed
Power consumption 110W
Dimensions of main unit (W x H x D) 260 x 307.8 x 337 mm
Weight of main unit 7.8 kg (17 lbs. 3 oz)
- Manuals
- Brands
- Aiwa Manuals
- Stereo System
- NSX-V70
Manuals and User Guides for Aiwa NSX-V70. We have 2 Aiwa NSX-V70 manuals available for free PDF download: Operating Instructions Manual, Service Manual
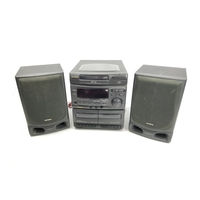
Aiwa NSX-V70 Operating Instructions Manual (68 pages)
Aiwa COMPACT DISC STEREO SYSTEM OPERATING INSTRUCTIONS Models NSX-V70 NSX-V7
Brand: Aiwa
|
Category: Stereo System
|
Size: 23.82 MB
Table of Contents
-
-
Posiclonamiento de LOS ALTAVOCES
11
-
Pijesta en Hora del Reloj
15
-
Copiadci Manual de Cintas
37
-
Copiado de toda la Cinta
39
-
GRABACION con EDICION al
41
-
Grabacion con Edicion Programada
43
-
Conexion de un Equipo Optional
57
-
Escucha de Fuentes de Sonido Externas
57
-
Cuidados y Mantenimiento
59
-
Guiaparalasolucion Deaverias
65
-
-
Positionnement des Enceintes
11
-
Memorisation de Stations
23
-
Accord Sur Une Station Memorisee
23
-
Enregistrement de Base
35
-
Duplication Manuelle D’une Cassette
37
-
Duplication de la Totalite D’une Cassette
39
-
Enregistrement Avec Montage Et Calcul du Temps
41
-
Enregistrement Avec Montage Programme
43
-
Mixage Avec Microphone
47
-
Funcion Vocal Fader/Multiplex
49
-
Fonction Vocal Fader/Multiplex
49
-
Connexion D’un Appareil Optionnel
57
-
Ecoute de Sources Externes
57
-
-
Sintonizacion Mediante Numero de Preajuste
23
-
Operacicines 13 Asicas
25
-
Lecture de Disques Compacts
25
-
-
Ajuste del Temporizador
53
-
Reglage de la Minuterie
53
-
Ajuste del Temporizador para Dormir
55
-
Reglage de la Minuterie D’arret
55
-
Connecting Optional Equipment
56
-
Listening to External Sources
56
-
Advertisement
Aiwa NSX-V70 Service Manual (44 pages)
Brand: Aiwa
|
Category: Stereo System
|
Size: 22.12 MB
Table of Contents
-
Electrical Main Parts List
6
-
Transistor Illustration
10
-
Grid Assignment/Anode Connection
13
-
Practical Service Figure
31
-
Mechanical Exploded View
35
-
Spring Application Position
37
-
Tape Mechanism Exploded View
38
-
Tape Mechanism Parts List
40
-
Accessories/Package List
42
Advertisement
Related Products
-
Aiwa NSX-V72
-
Aiwa NSX-V71G
-
Aiwa NSX-V2100
-
Aiwa NSX-V20
-
Aiwa NSX-V51G
-
Aiwa NSX-V9090
-
Aiwa NSX-V90
-
Aiwa NSX-V3000
-
Aiwa NSX-VC87
-
Aiwa NSX-VC38
Aiwa Categories
![]()
Stereo System
Cassette Player
![]()
CD Player
Car Receiver
Stereo Receiver
More Aiwa Manuals